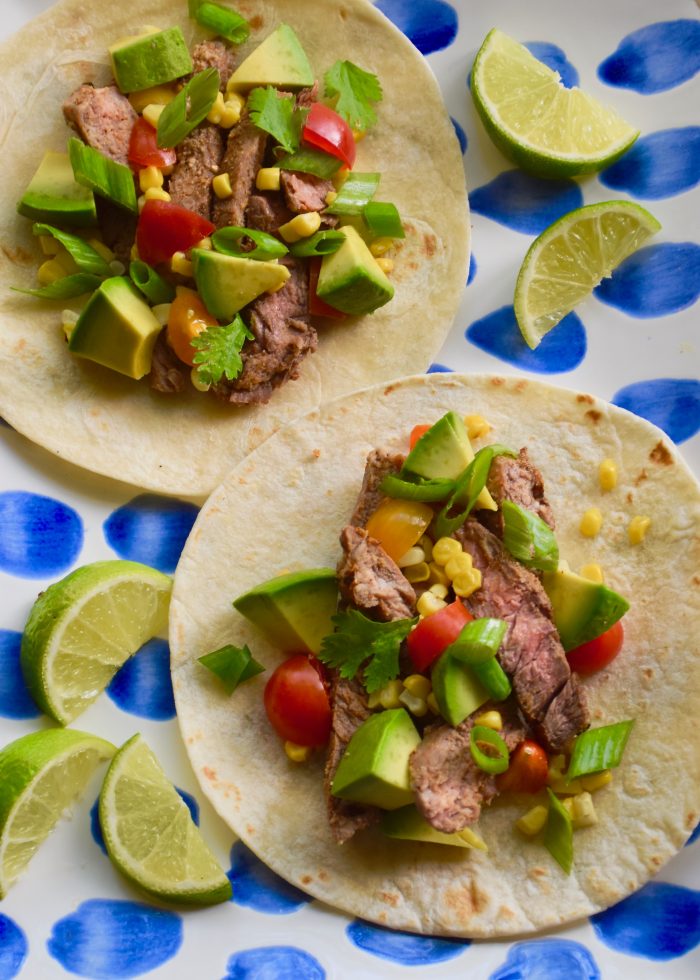
Steak Tacos with Roasted Corn Salsa

Grilled Steak Tacos

Grilling is one of my favorite ways to cook because it brings everyone together. Head outside to grill and company follows. My husband, my girls and even the dog love to be apart of making dinner when grilling is involved.  The sizzle, the smoke and the smells are exciting. It makes dinner an event that everyone gets to experience and be a part of. So I thought I would share a late summer meal where everything is cooked on the grill. These steak tacos with roasted corn salsa are a quick and flavorful dinner that our family loves.

Steak Tacos with Roasted Corn Salsa -Serves 4

  • 1½ to 2 lbs thinly sliced strip steaks
  • 1 tablespoon olive oil
  • Spice rub (recipe follows)
  • 3 ears of corns
  • 1 tablespoon butter
  • 1 teaspoon kosher salt
  • 2 green onions
  • 1/4 cup cilantro, chopped
  • 1 ripe avocado, chopped
  • 1 medium tomato or 1 cup of cherry tomatoes, chopped
  • 2 tablespoons fresh lime juice
  • ½ teaspoon garlic powder
  • ½ teaspoon kosher salt
  • 12 flour or corn tortillas, warmed

Preheat the grill for direct medium high heat.

Steak Spice Rub

  • 2 teaspoons garlic powder
  • 2 teaspoons kosher salt
  • 1 teaspoon cumin
  • 1 teaspoon chili powder
  • 1 teaspoon brown sugar
  • 1/4 teaspoon pepper

Create the spice rub and season the steaks. Mix ingredients in a small cup or bowl. Rub the steaks with the olive oil. Then generously season the steaks with the spice rub on each side.

Prepare the corn for the grill.  Rub the corn ears with butter and then sprinkle them with 1 teaspoon of kosher salt.

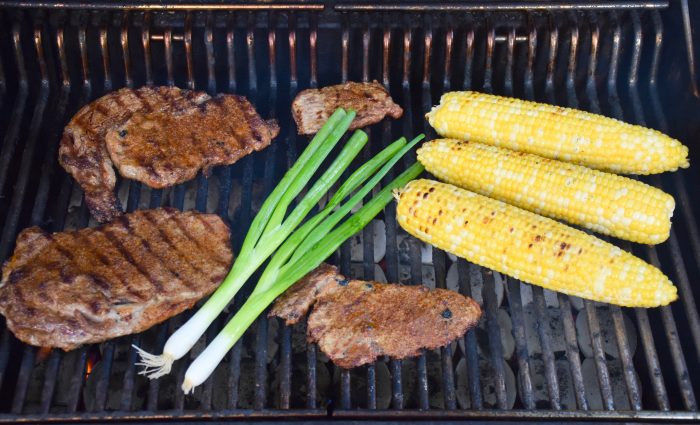
Next get the corn and steaks grilling. Place the corn ears on the grill first because they need to cook for 8 to 10 minutes. Rotate the ears of corn so they cook evenly and turn a bright yellow. Then add the steaks to the grill. Cook the steak for 3 to 4 minutes a side for medium doneness. Finally, open the grill and cook the green onions with the top open until just charred about 2 minutes. Let the steak rest for 5 minutes.

The other thing I loved about dinner on the grill is no pots and pans are needed so clean up is quick.

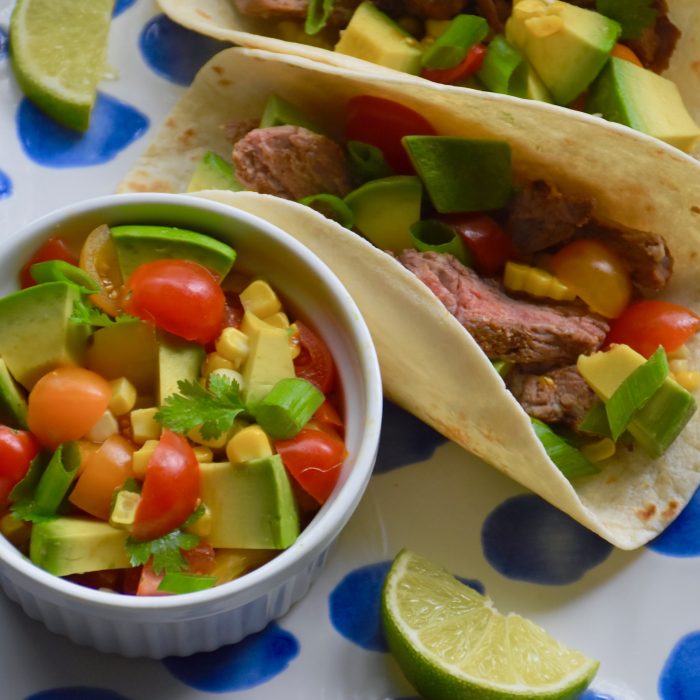
Prepare the corn salsa. Cut the corn kernels off the cob and slice the green onions thinly. Next in a medium sized bowl mix together the corn, green onions, avocados, tomatoes, cilantro, lime juice, kosher salt and garlic powder.

Finally, assemble the tacos. Slice the steak across the grain into thin strips. Place the steak in the warm tortillas and top them with the roasted corn salsa. Add a side of black beans and dinner is served.

On a side note: if you happen to have any leftover steak it makes wonderful steak and egg breakfast tacos the next morning.

So fire up the grill and make cooking dinner fun! These steak tacos with roasted corn salsa are filled with the fresh delicious flavors of summer.

Chocolate Fudge Cupcakes

Chocolate Fudge Frosting

Sometimes running out of an ingredient like cocoa powder makes room for the serendipity of something even better like chocolate fudge frosting. This week I was well into baking chocolate cupcakes with my daughters when I discovered that there wasn’t enough cocoa powder left for my traditional chocolate buttercream. The thought of a last minute store run these days comes with so many other worries that I decided to check my baking stash. As luck would have it I found two chocolate bars. I improvised and added the melted the chocolate to my frosting, which created a delicious fudge like flavor. The results of my substitution were so good that it just might be my new go to chocolate frosting.

So I smiled when I read The Wall Street Journal’s Saturday food column by Bee Wilson. She too had been improvising from her pantry trying to avoid an unexpected trip to the store. As she was reflecting on her own off the cuff cooking, she made an interesting observation about how these pandemic inspired substitutions just might change how people cook. Maybe she muses it will cause us to experiment more. Maybe we will all become slightly more adventurous cooks who add more of our own personality to the recipes we make. As I found this week, sometimes an unscripted substitution can inspire some surprisingly delicious results like outrageously good chocolate fudge cupcakes.

 Chocolate Fudge Cupcakes – Makes 16 standard sized cupcakes

  • 8 tablespoons (1 stick) butter
  • 1 cup water
  • 1/2 cup canola oil
  • 2 cups sugar
  • 1/2 cup unsweetened cocoa powder
  • 2 cups of flour
  • 2 large eggs
  • 1/2 cup buttermilk (Since I am talking about substitutions, if you don’t have buttermilk then don’t worry add 1/2 teaspoon of white vinegar to the milk and let it sit for a minute or two.)
  • 2 teaspoons baking soda
  • 1/4 TSP salt
  • 2 teaspoons vanilla extract

Preheat to oven to 350 degrees. Prepare your cupcake pans by lining the cups with cupcake papers and lightly spraying the cups with cooking spray.

Then in a saucepan combine the butter, water and canola oil and set over medium heat until the butter is just melted.

Meanwhile in a large bowl of your mixer add together the sugar, cocoa and flour. Then pour the butter mixture into the sugar and flour mixture and beat until smooth. Whisk in the eggs one at a time then whisk in the buttermilk. Next add the baking soda, salt and vanilla all at once and mix until fully incorporated.

Finally fill the cupcake liners about three quarters of the way full. Use a large cookie  dough scoop to make filling the cups easier.

Bake the cupcakes for 20 minutes and let them cool before frosting them.

Fudge Frosting

  • 3 oz semisweet dark chocolate (My favorite is Scharffen Berger chocolate)
  • 3oz bittersweet dark chocolate
  • 8 tablespoons (1 stick) unsalted butter, well softened
  • 1/4 teaspoon kosher salt
  • 6 cups powdered sugar
  • 1/2 cup milk
  • 2 teaspoons vanilla extract

First break your chocolate in small pieces and place them in medium sized microwave safe bowl. Heat your chocolate for one minute then stir. Then continue heating it at 30 second intervals stirring well in-between until the chocolate is fully melted and shiny. It takes 2 minutes total in my microwave, but microwave strength can vary so keep a close eye on it.

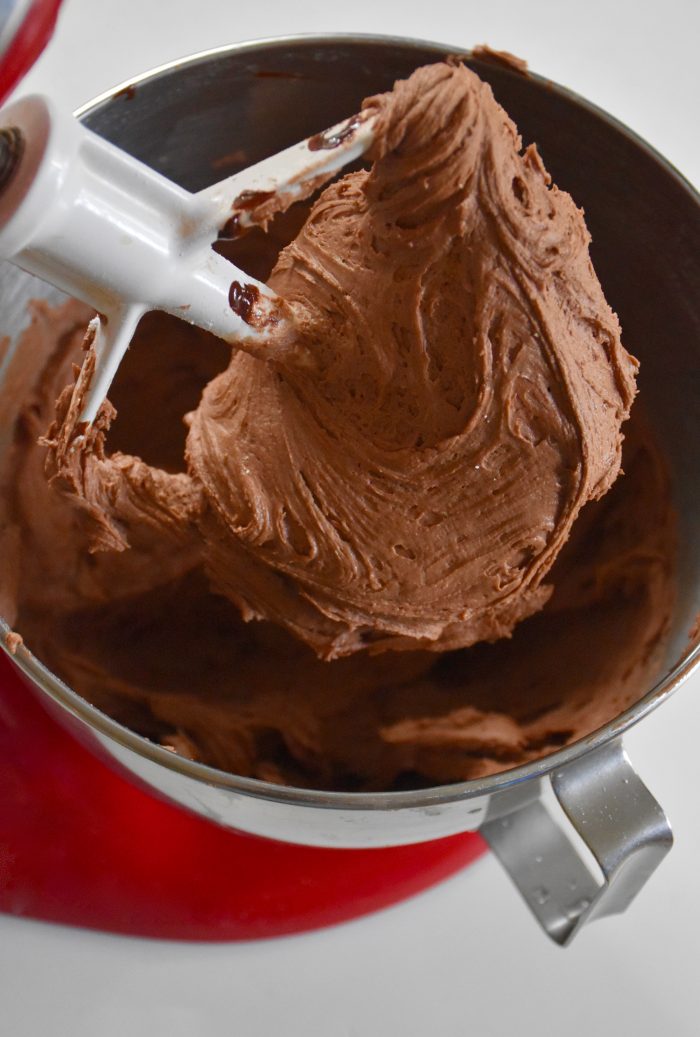
Then in the bowl of a stand mixer or in a large mixing bowl using a hand mixer beat your butter and salt until creamy about one minute. Add in the vanilla, milk and powdered sugar and beat on high speed until light and fluffy. Finally drizzle in the melted chocolate and beat on med high speed taking care to scrape the sides of the bowl a few times to make sure that the chocolate is fully incorporated.

The melted chocolate makes this fudge frosting irresistibly good.

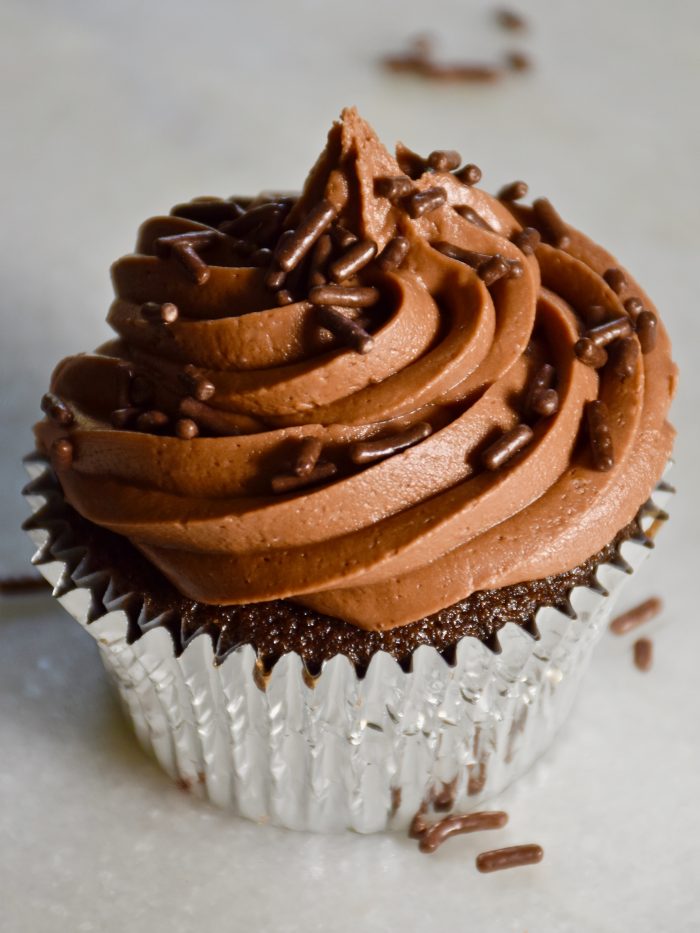
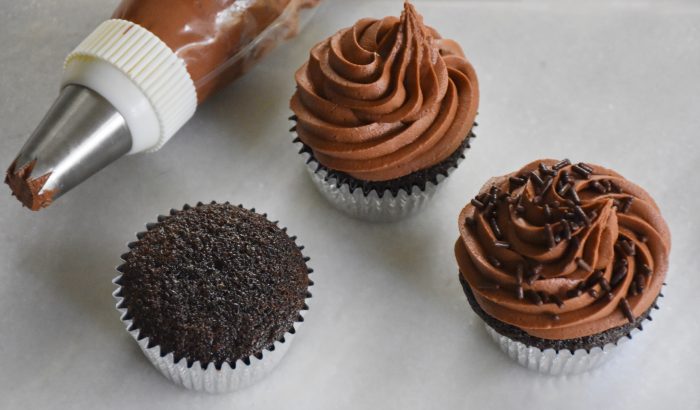
Finally using a pastry bag with a large star tip pipe a circle around the outside edge then create a second swirl in the center.

Now the fun part decorating them. Top them off with some chocolate sprinkles or for a festive touch add a mint sprig and a raspberry.

Over the years, I have found that the best kind of kitchen creativity is often inspired by necessity. These chocolate fudge cupcakes are so irresistibly good that they just might eclipse my old standby recipe. The cake is light and moist and the chocolate frosting melts in your mouth.

So have you found yourself cooking a little more off the cuff? I would love to hear how in these uncertain times perhaps cooking has changed for you? Cooking has always been a source of great comfort to me, especially in times of change. Because there is a certain soulfulness in creating and sharing something that is deeply delicious.

Wasabi Beef Rice Bowls

https://www.pinterest.com/pin/837951074410355884/

I have been fighting the late summer blahs. We’ve been staying safe and close to home, but as time goes on, I miss the all those small things that added a little spice to the everyday. I know I am not the only one. Maybe you are feeling it too?

I was surprised to read that even people with autobiographic memories, those who can recall what they ate for breakfast on a random Tuesday ten years ago, have found their memories of quarantine life a bit fuzzy. It turns out that our minds thrive with a little variety. So lately our family has been trying to create a little magic of our own.I have been reading the Harry Potter series to my girls. They have been outside on our brooms playing quidditch and turning sticks into magic wands.

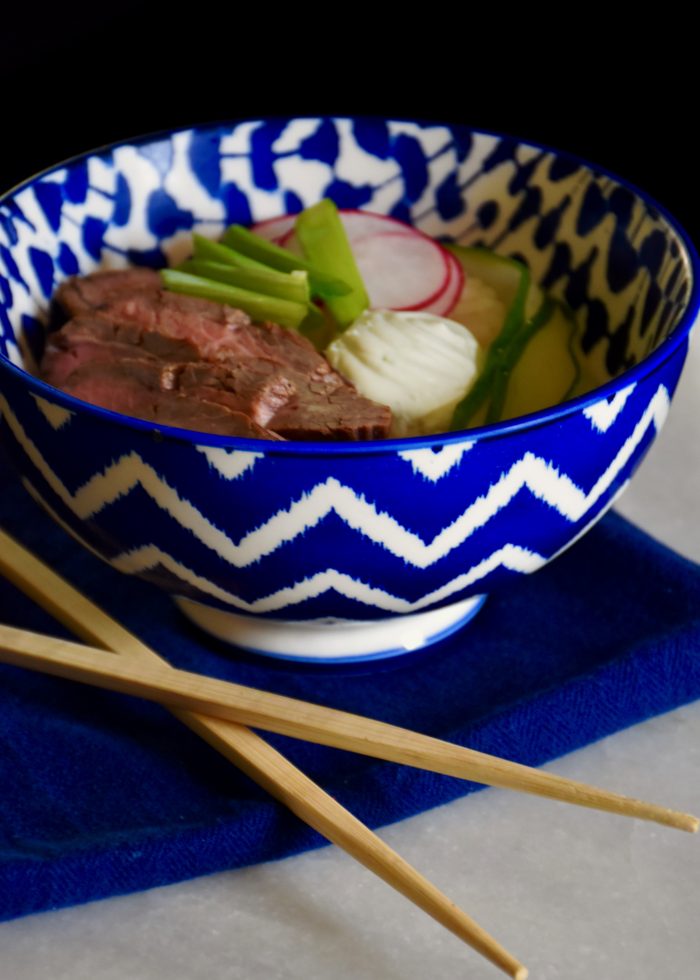
I have also been trying to make dinner more of a destination or an adventure. Take out is good, but longing for the days of restaurant dining and travel I have been letting dinner take us places. This week I was inspired by some of my favorite Japanese steak houses. These wasabi beef rice bowls are topped with grilled steak, crisp veggies and a delicious wasabi sauce.

Wasabi Beef Rice Bowls- Serves 4

  • 1 to 1½ pounds of flank steak
  • Flank steak marinade (recipe follows)
  • 3 cups cooked white or brown jasmine rice
  • Sesame dressing (recipe follows below)
  • 4 radishes, thinly sliced
  • 1 medium cucumber, thinly sliced or julienned into thin matchsticks
  • 3 green onions thinly sliced
  • Wasabi sauce (recipe follows)

1. First prepare the steak and marinade.

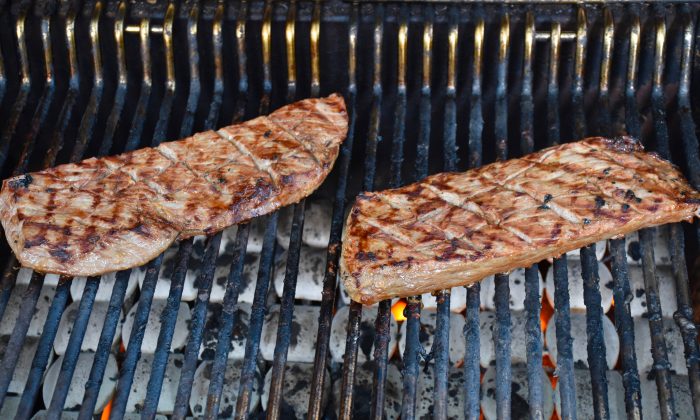
Using the tip of a sharp knife, lightly score the top of the steak diagonally in a crisscross diamond like pattern. This will allow the marinade to fully infuse the steak with flavor.

Flank Steak Marinade

  • 3 tablespoons soy sauce
  • 2 tablespoons rice vinegar
  • 1 teaspoon Worcestershire sauce
  • 1 clove garlic, grated
  • 1 tablespoon canola or vegetable oil
  • 1 teaspoon sesame oil

Whisk together the ingredients for the marinade. Place the flank steak in a large zip top bag and pour the marinade in. Seal the bag pressing any air out and let the steak marinate in the fridge for at least an hour, but it is especially good if you let it marinate all day or overnight.

2. Preheat the grill and cook the jasmine rice.

Heat your grill to a medium high heat. Then cook the jasmine rice following the package instructions. Place your steak on the grill to cook for 7 to 8 minutes a side for medium grilled steak. I like to cook mine to 140 degrees. Take the steak off the grill and allow it to rest on a plate for 5 to 10 minutes. Then once it has rested, slice the steak thinly on the diagonal.
I cooked two flank steaks so I would have extra for sandwiches too. Just thinly slice the beef and place it on some French bread or a sandwich rolls with some sliced cucumbers, radishes and any left over wasabi sauce and you have one incredible sandwich.

3. Prepare the sesame dressing for the rice and the wasabi sauce.

Sesame Rice Dressing

  • 1/4 cup rice vinegar
  • 1 teaspoon sugar
  • 3 tablespoons canola or vegetable oil
  • 2 tablespoons soy sauce
  • 1 teaspoon sesame oil

Whisk together the rice vinegar and sugar until the sugar dissolves. Add in the soy sauce and oils. Then mix the sesame dressing into the cooked rice.

Wasabi Sauce

  • 1/2 cup sour cream
  • 2 tablespoons mayonaise
  • 2 teaspoons Wasabi Sauce (my favorite brand is Kikkoman)
  • 1 teaspoon soy sauce
  • 1 to 2 tablespoons reserved steak juices

In a small bowl, mix together the sour cream, mayonnaise, wasabi and soy sauce along with approximately a tablespoon or two of the steak juices from your steak plate.

5. Assemble the rice bowls.

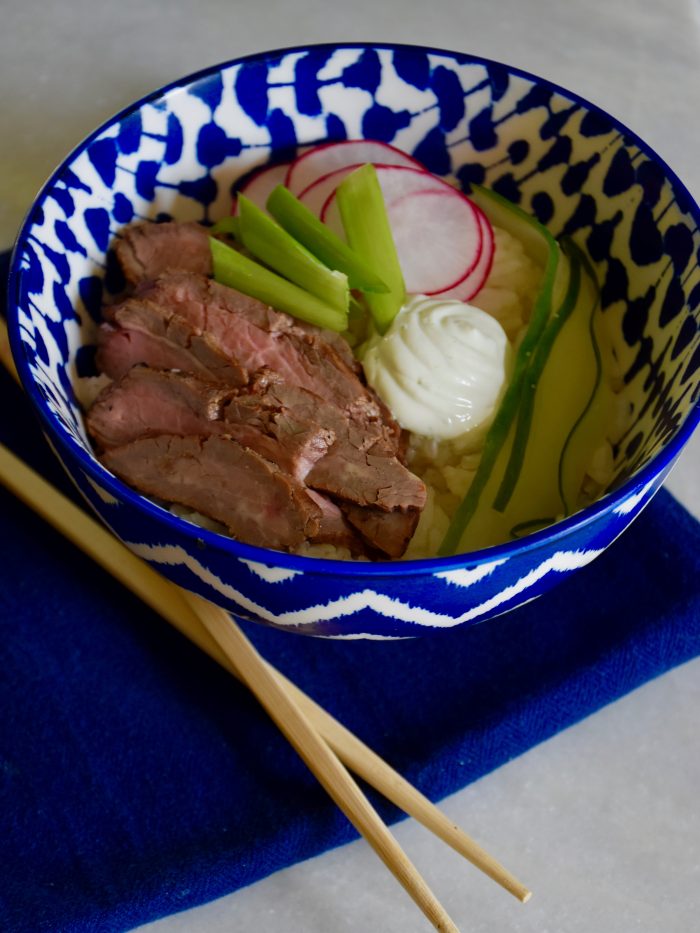
Finally, Place a cup of rice in each bowl and top it with the sliced steak, radishes, green onions and cucumbers. Then add generous dollop of the wasabi sauce.

This wasabi beef rice bowl has layers of textures and tastes that make it a one bowl dinner favorite. So if you too have had a case of the 2020 summer blahs then add a little spice or wasabi to your menu.

Want other Maison McCauley destination dinner ideas?

Then let your dinner take you places with New Orleans Shrimp Rolls, Chicago’s Chicken Vesuvio, Greek Lamb Burgers, or Italian Caprese and Prosciutto Sandwiches.

Homegrown Happiness

“Happiness held is the seed; happiness shared is the flower.”

John Harrigan

I marvel as I hold tiny seeds because they are filled with wonder. Oh, the promise and possibility they hold. This spring, finding myself more home based I was searching for a hopeful project. So, looking forward to my summer garden, I turned my basement office into a mini greenhouse. I tired more varies of plants and I grew more seeds that ever. However, our mini greenhouse winner is the zinnias.

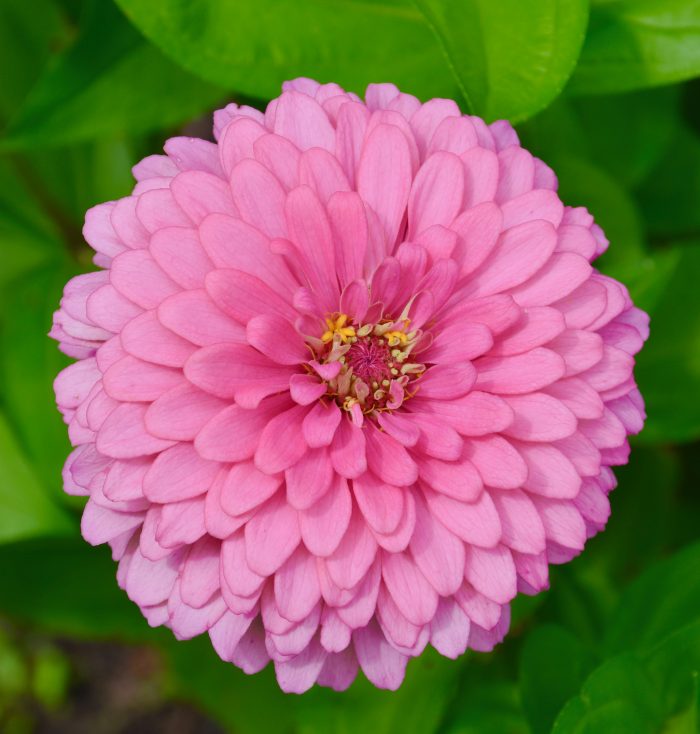
In the past I have tried smaller varieties I found from  the nursery, but the blooms from these larger varieties are spectacular. I can see them out my living room windows. Their tall wavy stems and bright, pink, purple and red blooms give my garden a the happiest pop of color.

Their blooms start small and then explode with color like little fireworks.

I planted two seed mixes from Park Seeds. Parks Picks which had these gorgeous purple and red flowers and a pink mix called Siesta. Both of these varieties are double bloom zinnias so over time the blooms become these beautiful full petaled flowers.

The bold blossoms are fun to watch because they invite the happiest garden visitors: humming birds, bees and butterflies. They all come to delight and share in their dazzling beauty.

I planted three large grouping. However, heavy spring rain washed away a group of seeds that I sewed directly in the ground. So I started most of my seeds in egg cartons filled with potting soil. This made it easier to plant them at a shallow depth and the cartons sides could be cut to allow me to get all the roots when I transferred them to the flower beds. They didn’t look like much at first. The wavy seedlings looked so small, I wondered what would become of them. Then slowly with lots of watering and sun, their steams grew stronger and taller. Buds began to appear and those tiny seeds blossomed into beautiful flowers.
Sometimes the best kind of happiness is homegrown. Often the moments and things that bring me the most joy are like small seeds that have been thoughtfully tended. All this quarantine gardening is good for the soul, because it’s in the tough times that we need to believe in the wonder and possibility of new seeds.

Cooking Up Some Pineapple Party Fun

Pineapple Birthday Cake

She leaves a little bit of sparkle wherever she goes.

Kate Spade

It was six thirty in the morning and my husband woke up singing my now six year old daughter’s song, “Alyssa Sparkles.” It’s a little song that she sings to herself when she is happy. The birthday girl was still in bed, but thoughts about her sweet laughter and joy had us all singing her song.

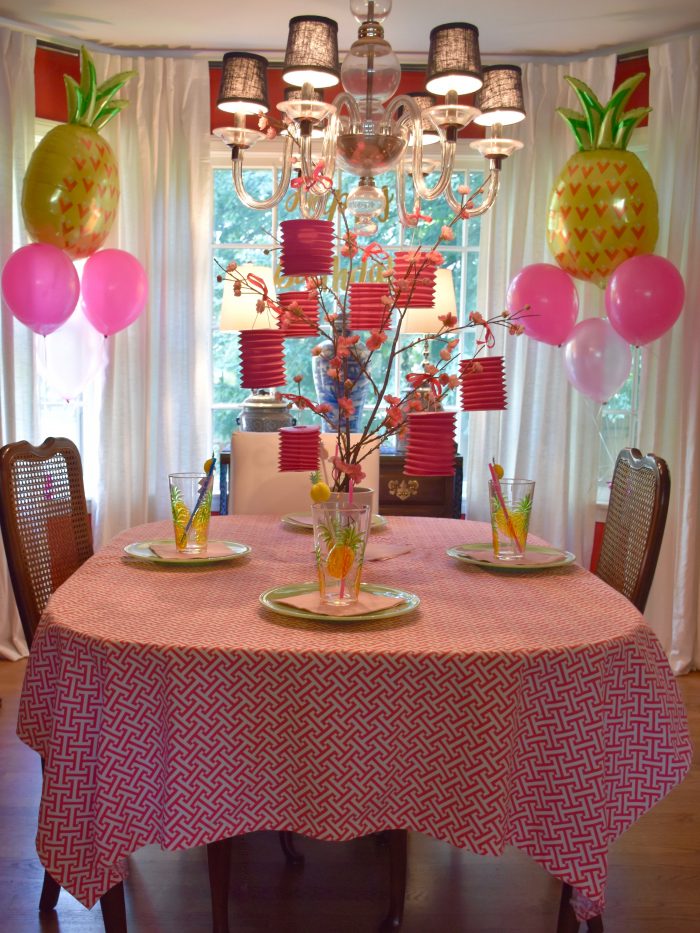
Having a summer birthday during the middle of a pandemic could put a snag in the birthday party plans, but we aren’t ones to let that stop us from cooking up a little birthday fun. This year the birthday girl dreamed up her own party ideas and what she came up with is better that what I could have planned. She wanted a pineapple party, straight from the pages of one of her favorite book series about Princess Penelope Pineapple.

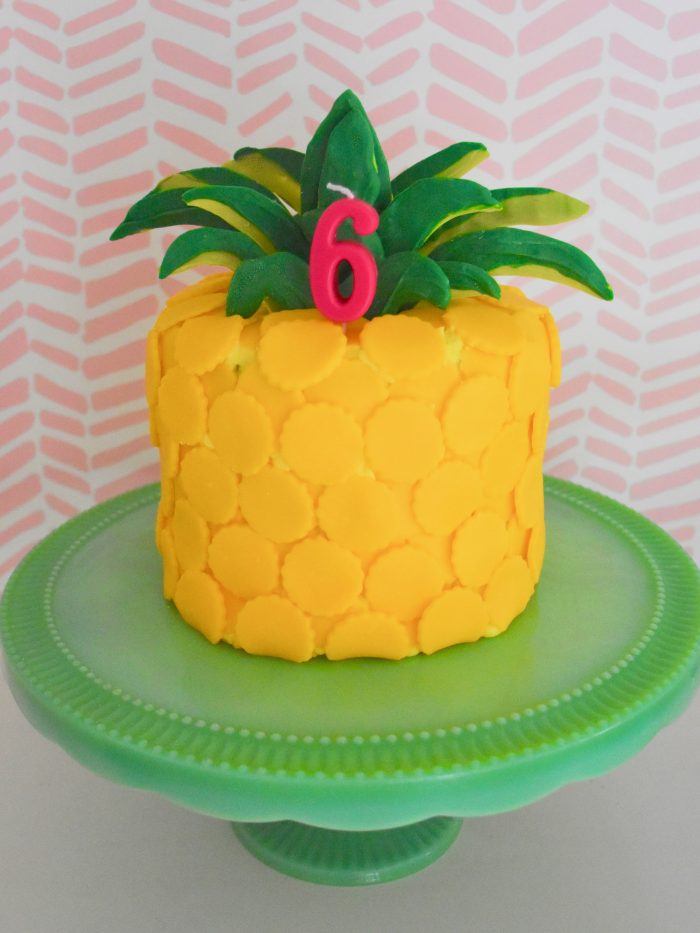
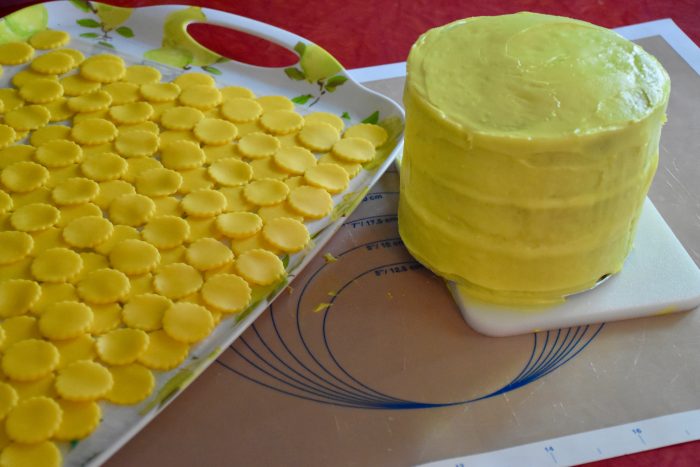
We ordered some pineapple balloons and party supplies from Party City and Paper Source. Then we decided to make a pineapple cake that the birthday girl could help decorate herself.  We baked a small three layer cake which we decorated with lots of yellow fondant circles. This made it easy for my helpers to decorate the cake.

Then as a topper I made some chocolate pineapple leaves using some candy melts which are easy to find at the craft store. White chocolate can be temperamental and it requires special oil based food coloring so pre-colored candy melts are the way to go. I melted the candy melts in the microwave for about a minute and then I piped some leaves of various sizes on some parchment paper. When the chocolate set I placed them around the center of the cake to create a pineapple top.

One of my all time favorite books on chocolate work for cakes is The Whimsical Bakehouse it’s an older book but it is still available online it has all sorts of ideas for creating colorful cakes that are filled with personality.


We decorated the table with pink paper lanterns that we tied to a set of faux pink cherry branches. Then for dinner we had virgin pina coladas and homemade pineapple and prosciutto pizza.

Here is the birthday girl with the gold glitter pineapple sunglasses that she adored. These sunglasses were so sparkly and fun that the birthday girl wore them for most of the day.

We took time to Zoom with family and have a Pictionary game night.

It’s good to have an older sister who loves to celebrate and help with all those candles.

So sparkle on my six year old because your sunshine, kindness and laughter are what the world needs more of. Your joy and inner light shine so brightly that those around you can’t help but sparkle too.

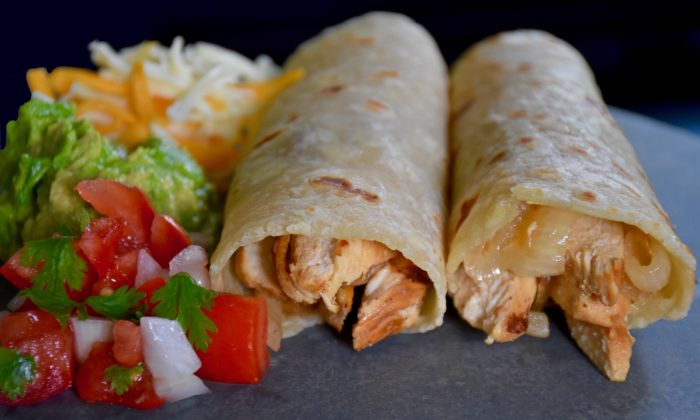
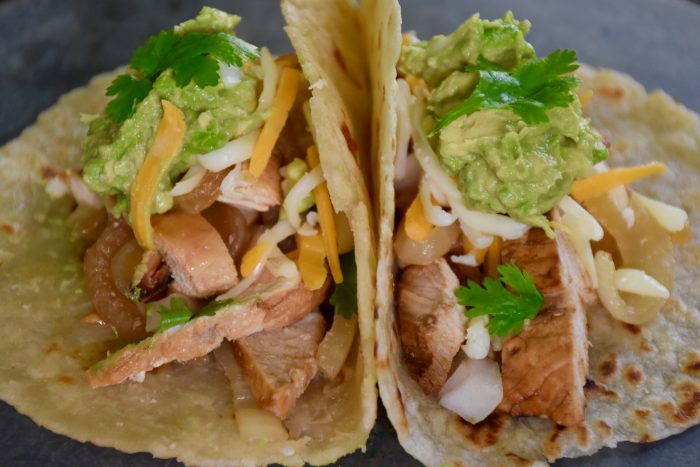
Chicken Tacos al Carbon

Chicken Fajitas

“Tacos-can we ever have enough tacos in our lives? I didn’t think so. Because when the taco is right, the birds start to sing and the stars shine more brightly and you have the impression that everything is right with the world…A perfect taco is a gift to the universe.”

Jonathan Gold

As a Texas girl I dream of tacos. They are the food I crave and sometimes long for. So, in our house tacos are on the menu at least once or twice I week. Breakfast egg and cheese tacos, fish tacos with a crispy cabbage slaw, brisket tacos and this Tex-Mex classic chicken tacos al carbon.

One of my favorite kinds of tacos are tacos al carbon. In Spanish “al carbon” means cooking over coals so usually tacos al carbon are meats like beef or chicken that have been grilled with onions and sometimes peppers. I like to make mine on cast iron grill indoors, but you could also use a large cast iron or nonstick skillet. These tacos were the ones I always loved to order as a kid and my girls love eating them too!

Chicken Tacos al Carbon- Serves 6

  • 3 boneless skinless chicken breasts, butterflied
  • 1/4 cup fresh lime juice (2 limes)
  • 1/4 cup fresh orange juice
  • 1 clove of garlic minced
  • 1 teaspoon cumin
  • 1 teaspoon kosher salt
  • 2 tablespoons olive oil
  • 1 sweet yellow onion, sliced into thin half rounds
  • 12 to 15 flour tortillas

First, slice the chicken breasts in half horizontally so there are six pieces of thinly sliced chicken.

Next, make the marinade whisk together the lime juice, orange juice, garlic, cumin, kosher salt and olive oil. Pour the marinade in a gallon sized plastic zip top bag and add in the chicken breast slices. Let the chicken marinade in the fridge for 30 minutes to an hour. Before cooking take the chicken out of the marinade and pat it dry with a paper towel so the chicken will brown well and the sweet citrus juices won’t stick to the grill.

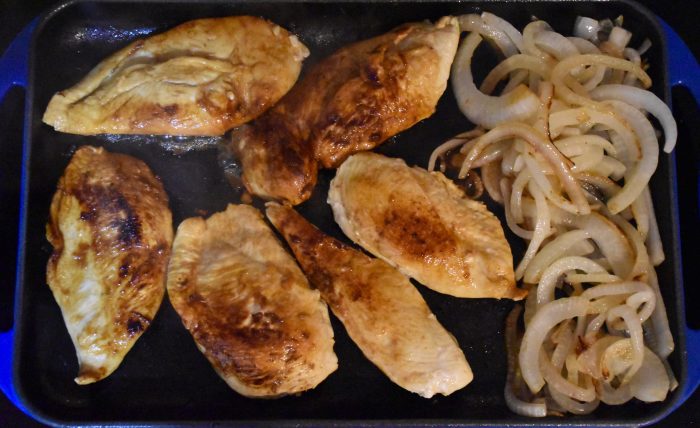
Heat a cast-iron grill pan or a large skillet over medium heat for about 5 minutes then add 2 tablespoons of canola or olive oil. Add the onions first and cook then until they turn translucent and caramelize a bit. Once the onions have cooked down move them to the side of the grill or pan.

Add the chicken breasts. Cook the chicken for 5 to 6 minutes a side until the chicken has browned and cooked through.


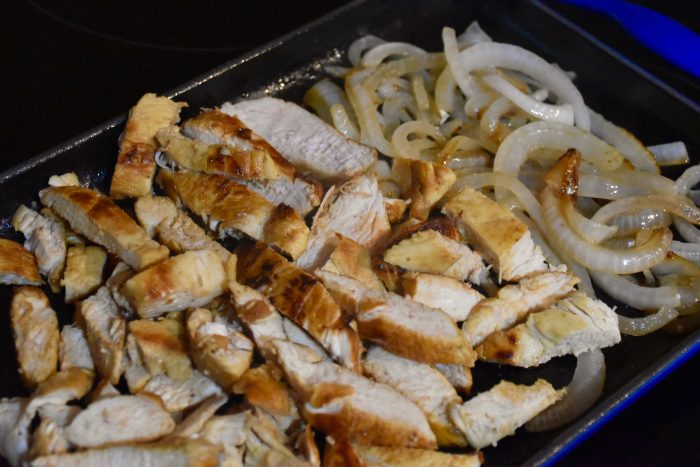
Slice the grilled chicken on the diagonal into thin strips.

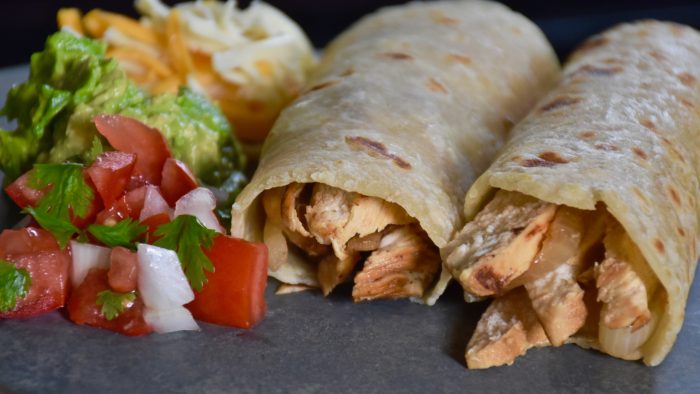
Roll the meat and onions in fluffy flour tortillas and serve them with a sides of pico de gallo, guacamole, sour cream and cheese.

Then layer on the toppings and create your own perfect taco. Add a side of black beans or some skillet roasted corn and you have a delicious taco night. Want to make it a party? Then make a side of El Tiempo’s Green Sauce and some Key Lime Ice Cream Pie for dessert!

You can get lost for a moment in a bite of these tacos. Because there are never enough tacos for those who dream of them.

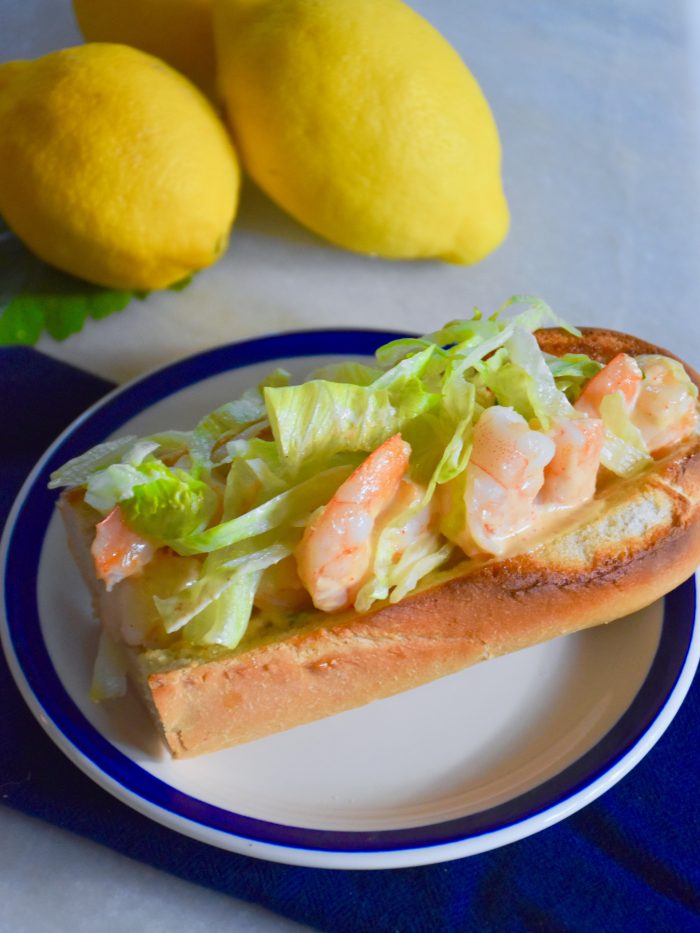
New Orleans Shrimp Rolls

Shrimp Rolls with Remoulade Sauce

I am always looking for delicious and simple recipes that make getting dinner on the table a snap. These New Orleans Shrimp Rolls take about 15 minutes to make which makes them perfect for nights were you need something easy. The garlic French bread and remoulade sauce add layers of flavor that make these sandwiches mouthwateringly good.

New Orleans Shrimp Rolls -serves 4

This recipe can easily be doubled to serve more by cooking two batches of shrimp.

  • 4 (6 inch) pieces of good quality French baguette
  • 2 tablespoons unsalted butter
  • 1/2 teaspoon garlic powder
  • 1/8 teaspoon kosher salt
  • 20 medium sized fresh shrimp, shells removed and deveined
  • 1/4 teaspoon kosher salt
  • 1/4 teaspoon paprika
  • 1/8 teaspoon pepper
  • 1 teaspoon chopped parsley
  • zest of one lemon
  • 2 tablespoons olive oil
  • 1 tablespoon lemon juice (half a lemon)
  • 2 cups shredded iceberg lettuce

Remoulade Sauce

  • 1/3 cup mayonnaise
  • 1 teaspoon horseradish
  • 2 teaspoons dijon mustard
  • 1/8 teaspoon cayenne pepper
  • 1/8 teaspoon paprika
  • 1 teaspoon lemon juice
  • 2 green onions, sliced thinly
  • 1 teaspoon parsley, chopped

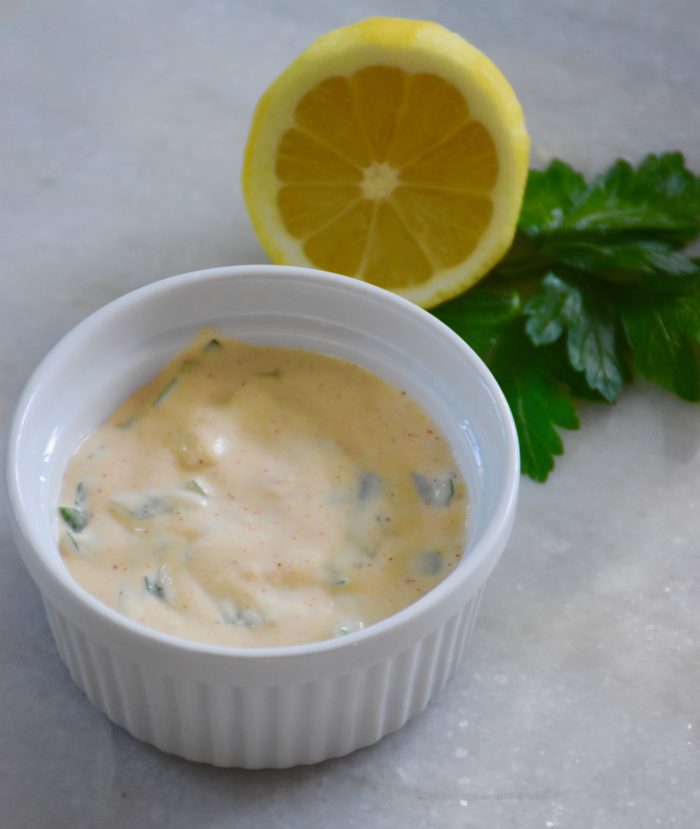
First prepare the remoulade sauce. In a small bowl or glass measuring cup mix together the mayonnaise, horseradish, mustard, cayenne pepper, paprika, lemon juice, green onion and parsley.

Next, get your garlic bread baguette prepared. Using a serrated knife cut a shallow V-shaped wedge out of the top of each baguette piece to make room for your shrimp. This top cut will make it easier to fill and hold the sandwich. Melt two tablespoons of butter and stir in 1/2 teaspoon of garlic powder and 1/8 teaspoon kosher salt. Brush the cut insides of your bread with the garlic butter. Toast the bread in a toasted oven or briefly toast them on a sheet pan under a broiler.

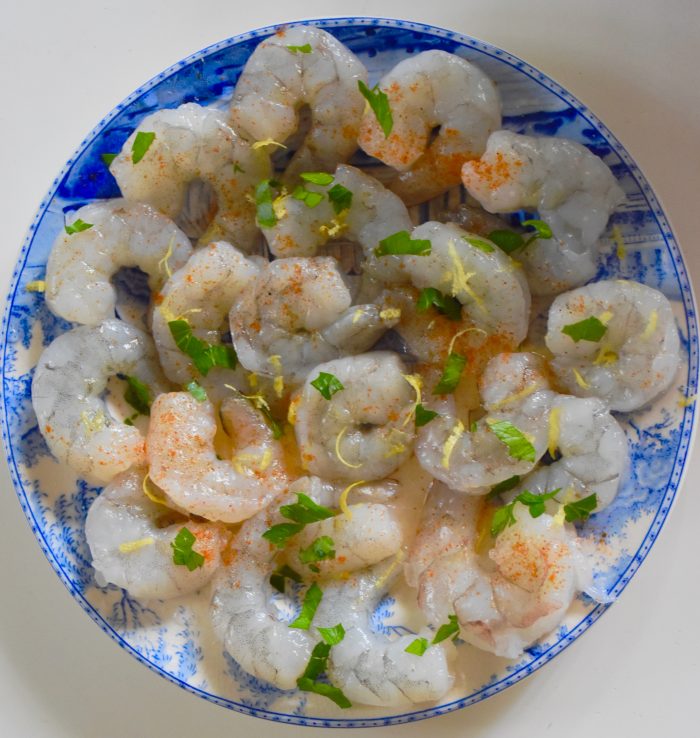
Finally prepare and cook the shrimp. Lay your shrimp out on a plate and sprinkle them with with the salt, paprika, pepper, parsley and lemon zest. Then heat a medium sized skillet and add the olive oil. When the oil is hot add the shrimp. Cook for about 2 to 3 minutes a side until they turn a reddish pink on each side. Finish them by squeezing lemon juice on top of the shrimp.

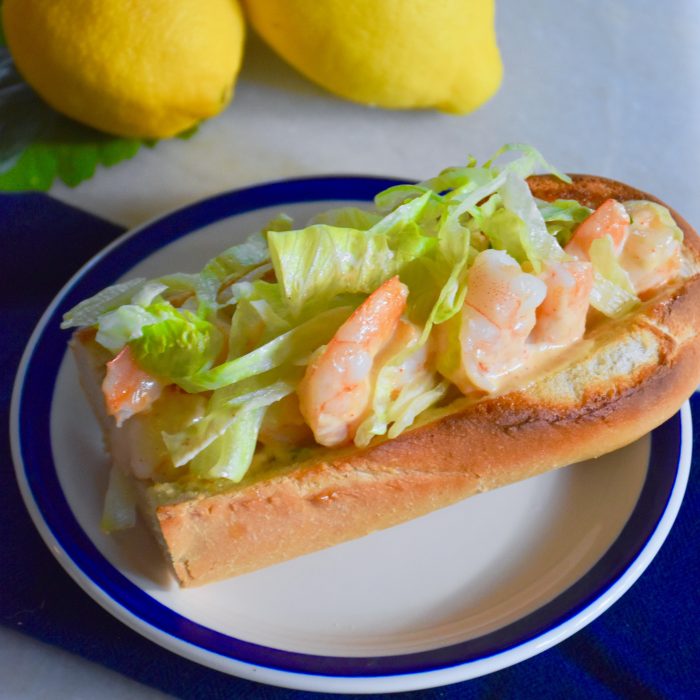
To assemble your shrimp rolls spread about a tablespoon of sauce on the roll. Add the shrimp then drizzle with additional remoulade sauce to taste. Then add shredded lettuce on top.

I like to serve mine with salt and vinegar chips or Terra vegetable chips for a quick side.

The tangy remoulade sauce makes this sandwich so delicious. Traveling great distances is a little harder these days, so for now our kitchen is taking us places. This New Orleans shrimp roll will make you feel like you are out at a cafe or celebrated sandwich shop savoring the flavors of the Big Easy. Where has cooking taken you lately?

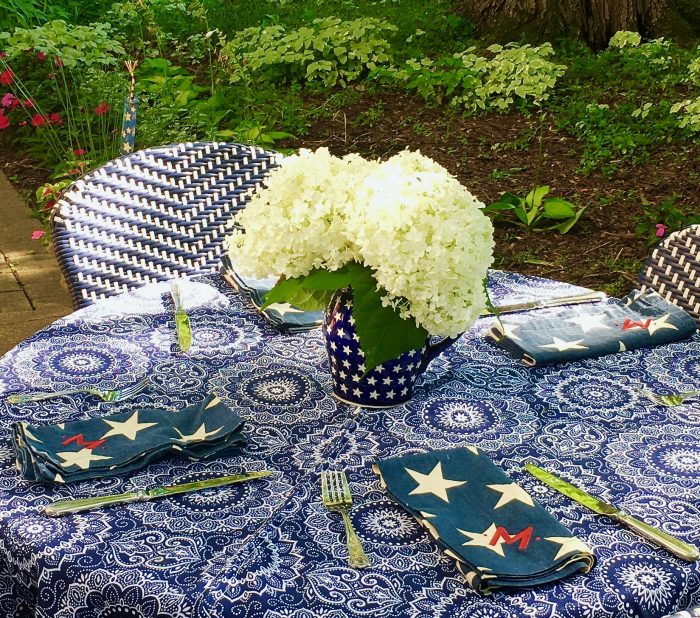
Our version of “eating out” this summer.  So grateful for the sunshine and time outdoors with family.

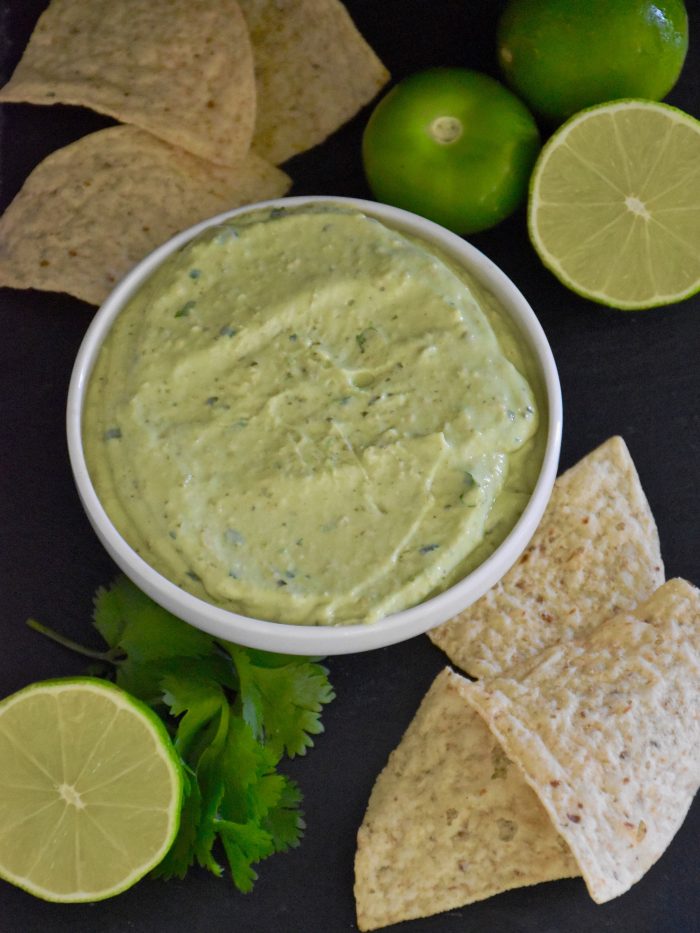
El Tiempo’s Green Sauce

If there is one dish that defines the beloved Tex-Mex cuisine from my hometown of Houston then it’s El Tiempo’s salsa verde or “green sauce” as Houstonians call it. This distinctive dip was created by restaurateur Ninfa Laurenzo. Laurenzo’s tortillas, fajitas, salsas and queso dip are the ultimate comfort and party food of my childhood.

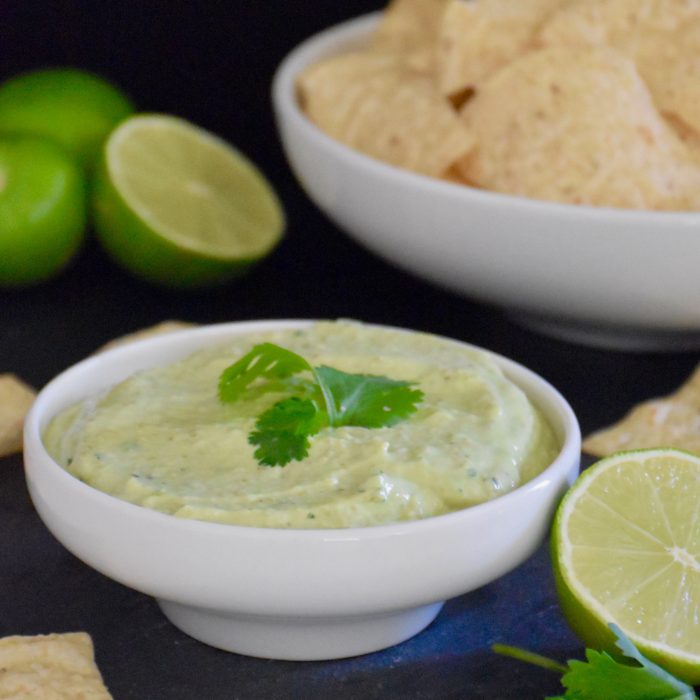
Laurenzo family is still keeping her legacy alive in their El Tiempo Cantinas. The Laurenzo family still serves Mama Ninfa’s best recipes along with their own unique dishes. El Tiempo is the restaurant that I get most homesick for. Its salsa verde has a creamy avocado base with roasted green tomatillos. It’s unbelievably delicious on chips or tacos. It’s like guacamole extraordinaire.

The Houston Chronicle reports that El Tiempo or Ninfa’s green sauce is one of their  most requested recipes. Over the years they have released several different versions, but none of the ones that I tried quite got it right. So desperate to get my green sauce fix and unable to travel home this summer, I decided to make my own. After working my way through all the various ingredients and versions, I finally created a recipe that captures all the magic of this amazing salsa verde.

El Tiempo Salsa Verde or Green Sauce -makes 6 cups

  • 8 to 10 tomatillos (1 pound), husks peeled
  • 1 poblano pepper
  • 2 garlic cloves, peeled
  • 2 tablespoons fresh lime juice (1 large lime)
  • 2 large Haas avocados, halved, peeled and pitted
  • 1 cup sour cream
  • 1/4 cup cream cheese
  • 3 tablespoons fresh cilantro sprigs
  • 2 teaspoons kosher salt

Preheat the oven broiler.

Meanwhile peel the husks off the tomatillos and rinse them in water and dry them

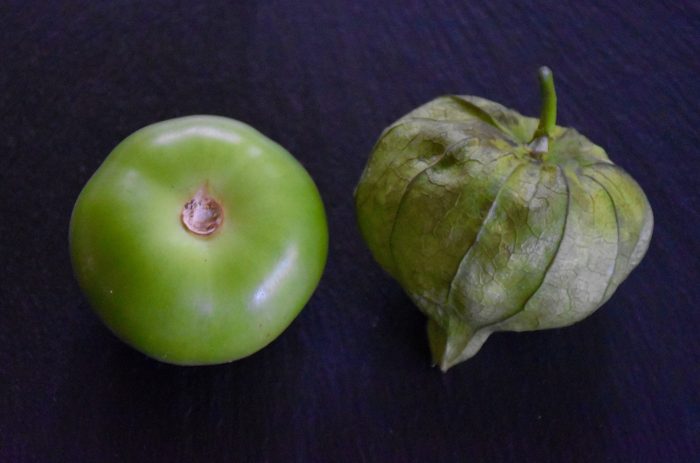
Tomatillos look like small green tomatoes but they have a brighter and slightly citrus flavor. They have a paper like husk that you need to remove before roasting them.

Place the tomatillos, poblano pepper and garlic cloves on a sheet pan and roast them on the second highest oven rack until the skin is charred on all sides. After the skin begins to char on one side (about 4 to 5 minutes) flip them over to finish.

Take your tomatillos and poblano pepper out. Then you want to sweat them so they are easy to peel. You can do this by putting them in a bowl and covering it with plastic wrap or  placing them in a plastic or paper bag and sealing it to trap the steam in. After five minutes they will be ready to peel.

A step by step picture of how this salsa or green sauce comes together. Roasting the tomatillos is what really makes this salsa. It gives the tomatillos a slightly sweet but earthy flavor that I prefer when it comes to making homemade salsa. The poblano pepper adds just a touch of heat but it isn’t overpowering or spicy.

Remove the stem and seeds from the poblano pepper. Place the peeled tomatillos and poblano pepper in a food processor and pulse until they are chopped like a chunky salsa. Add in the lime juice, avocado halves, sour cream, cream cheese, cilantro and salt. Blend the salsa until it is smooth and creamy.

If you are not serving it immediately then cover the top surface with plastic wrap to keep the air out and refrigerate it. It will keep up to two days in the fridge.

Now if I could only give you a taste, you would understand why this green sauce is my all time hometown favorite.

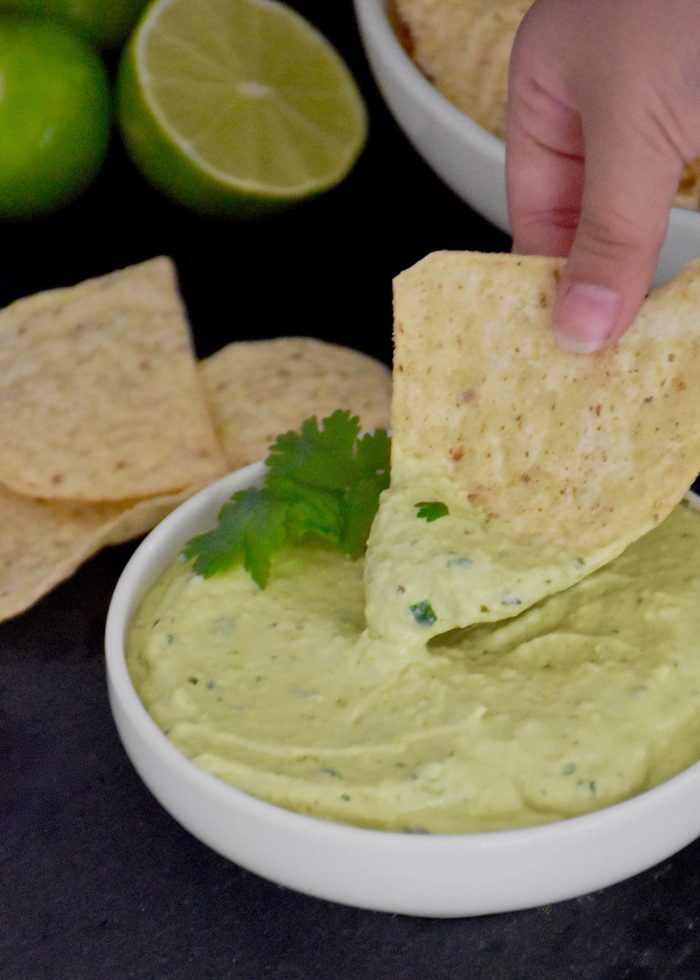
There are few things that make me happier than eating green sauce and tortilla chips. If you are looking for something delicious to make this holiday weekend then you need to try this avocado tomatillo salsa. El Tiempo’s green sauce is summer party food at its best.

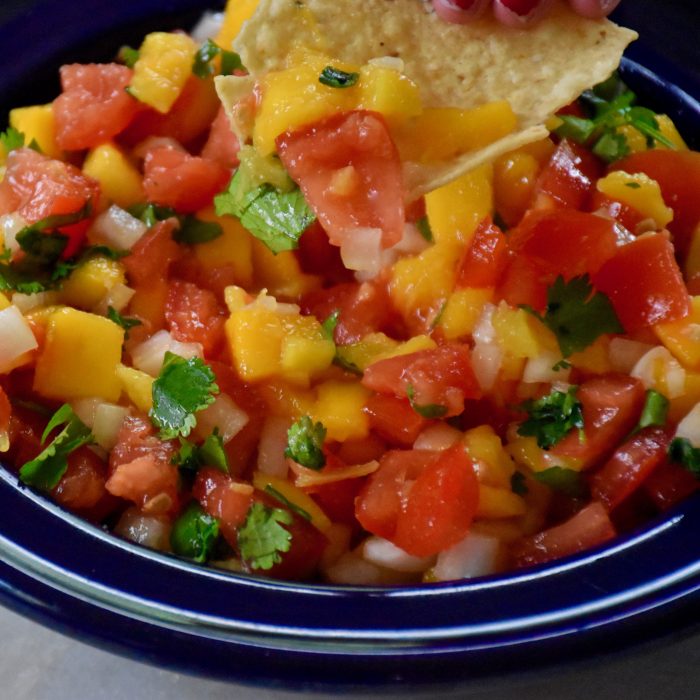
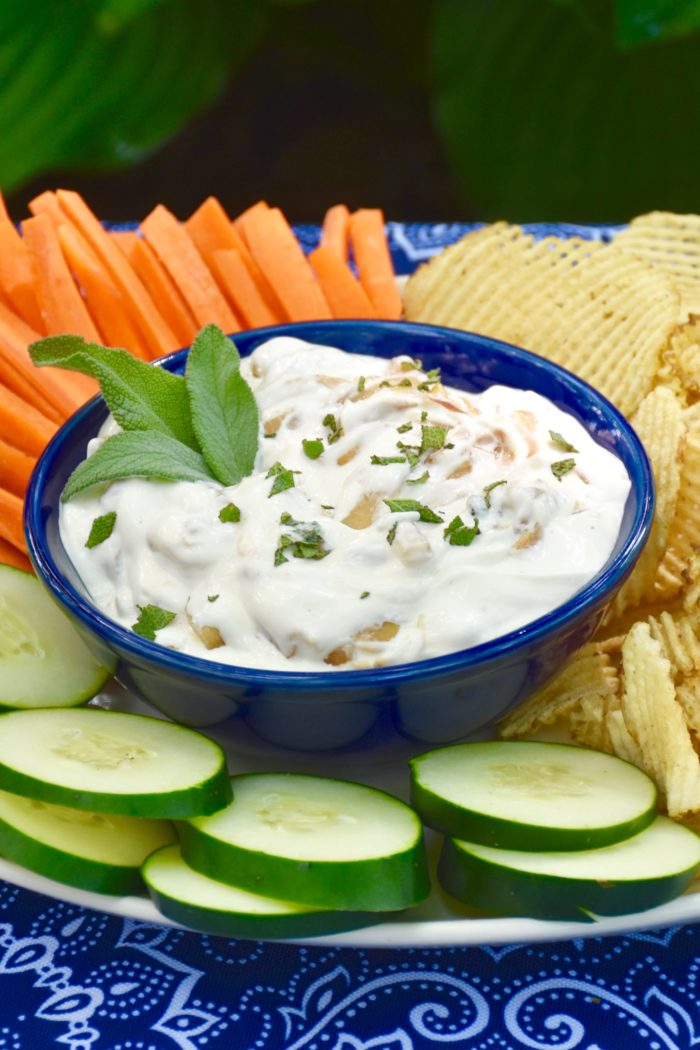
Looking for other salsas and dip recipes then try Maison McCauley’s Mango SalsaOr try this caramelized onion dip which is great with burgers or anything on the grill.

Caramelized Onion Dip Recipe

Wishing you all a happy and safe Fourth of July!

Gardens in the Pink

“Anything is possible with sunshine and a little pink.”  

Lilly Pulitzer

This year my summer garden has gone pink. Looking for a pop of cheerful color, I decided to go all in with a happy mix of fuchsia, flamingo, coral and blush. Pink in every shade imaginable. I have lots of pink perennials like peonies and hydrangeas. However this is the first year that I have used so many pink annuals.

The front flowerbeds are filled with a mix of hot pink impatiens, white new guinea impatiens, true blue pansies, and blue lobelia.

Even my front doors a got a touch pink with some new magnolia wreaths and bows. My large blue pots have cypress bushes with trailing English ivy and a pink impatiens. This year I mixed up the varieties of impatiens that I used. The new guinea impatiens typically last deeper into the fall than my traditional impatiens, but the smaller impatiens have more consistent blooms.

The front walkway pots have blue salvia in the center. Then I added some flamingo pink petunias, wizard rose coleus and coral impatiens. An admittedly, crazy mix of colors, but they make me smile.

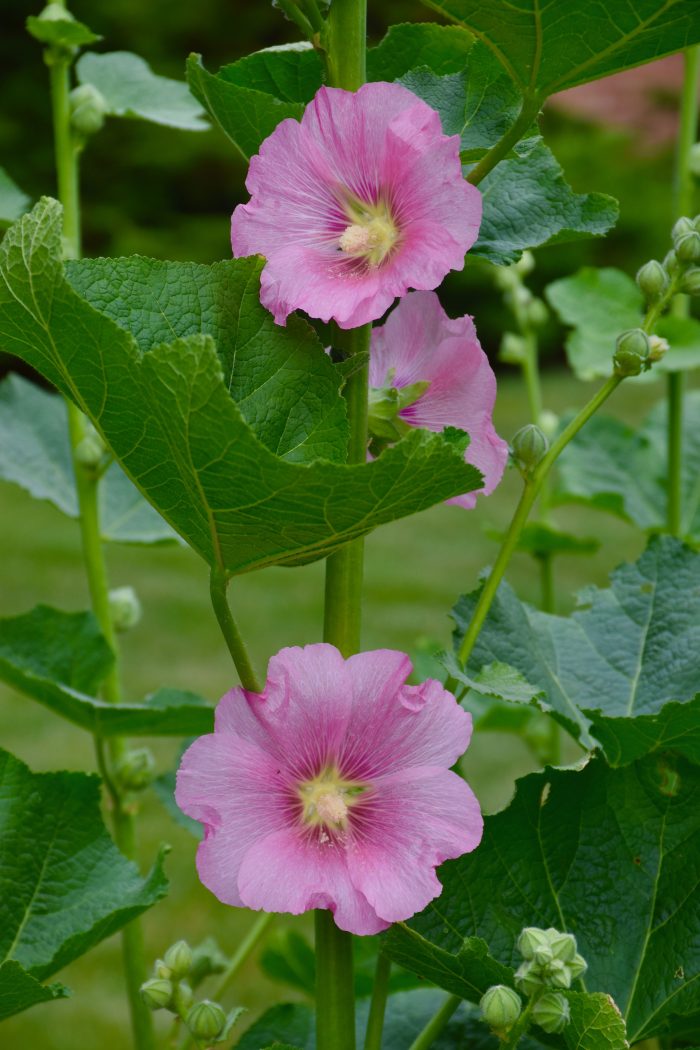
The newest blooms to my garden are the pink hollyhocks. I planted them in a sunnier spot on my side yard. Their tall stalks are filled with buds so I am looking forward to watching their show enfold.

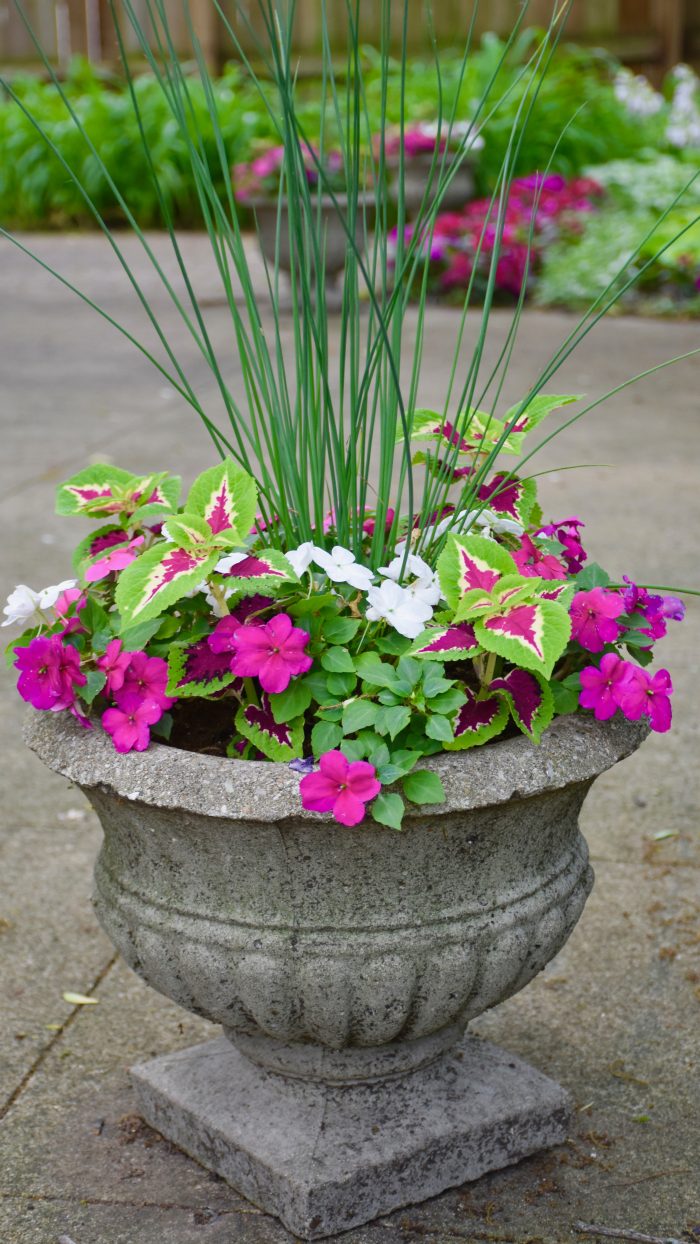
The back patio has a bright pink and green mix. The little spike plant adds some height to these small planters. I love the chartreuse green and hot pink on these coleuses leaves.

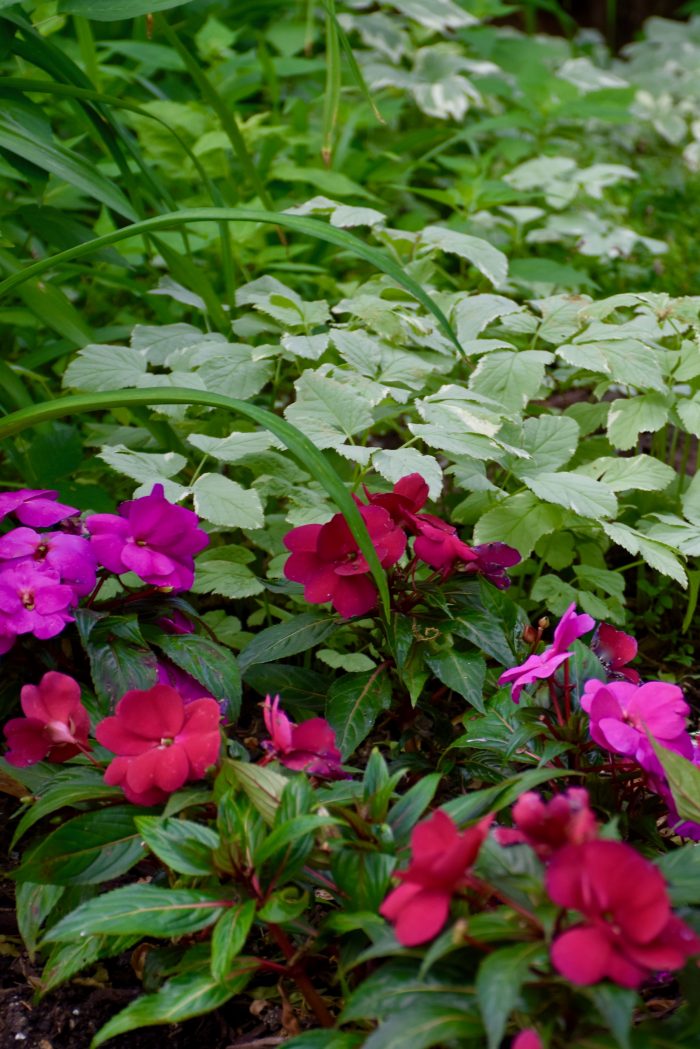
The new guinea impatiens in a deep rose and violet add some much needed color to my heavily shaded back yard.

When I was planting all of these pink flowers I wondered if  I had taken this whole pink thing too far. However now that everything is blooming, all those pink flowers are so contagiously bright and optimistic that I just might have to do it again. Gardening brings me such joy. I love watching glorious summer show. My girls and I have been spending lots of time outdoors enjoying the view and savoring the sunshine.

Want a little more pink inspiration? Then here are a few summer gardens with pretty pops of pink.

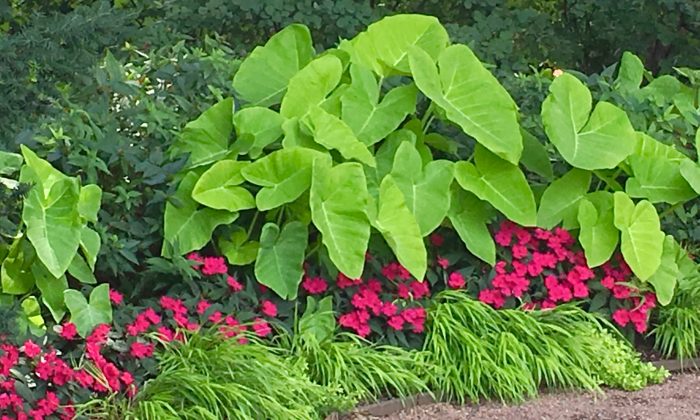
I love this flower bed at the Morton Arboretum lime green elephant ears and the Japanese forest grass are perfectly offset with the fabulous fuchsia impatiens.

The pink New Guinea Sun Patiens are the stars of this striking pink and purple combination. I like how they look against the taller purple bachelor buttons.

A planter at the Chicago Botanical Gardens overflowing with gorgeous summer flowers. Pink zinnias, purple salvia, orange rudbeckia and red canna leaves make for a stunning design.

I love getting ideas from large gardens, but sometimes a few colorful plants is all you need. This is such a cute little black and white house I saw on a trip to Michigan. All the pink petunias spilling over the edge of the topiaries brightens this front door. It gives this house such a cheerful and welcoming feeling.

The saying “in the pink” means to be in good health. The summer sunshine, gardening and all these pink flowers are definitely lifting our spirits. So I hope that you are finding ways to stay in the pink too.

Key Lime Ice Cream Pie

Key Lime Ice Cream Pie

Father’s Day is coming this weekend. So this week I am sharing a new recipe for a key lime pie. It’s a favorite of both my dad and my husband. My recipe puts a summer twist on this classic pie, because the filling is made with ice cream. Its easy to assemble and if making homemade lime curd sounds like too much then you can take a little help from the store. My local grocery store carries Stonewall Kitchen’s key lime curd, but Williams Sonoma and other gourmet stores have it as well.

The crispy graham cracker crust with the creamy key lime filling is so delicious! Its a wonderful treat to make and share.

Key Lime Ice Cream Pie- Makes 1 (9 inch) Pie 

  • 2 pints (4 cups) Creamy Vanilla Ice Cream, softened
  • 1/2 cup key lime curd (see recipe below or use store bought)
  • 1 graham cracker crust
  • Whipped cream topping
  • 2 limes sliced in thin rounds

Homemade Lime Curd -makes 1½ cups

  • 4 tablespoons butter, softened
  • 1 cup sugar
  • 2 eggs
  • 1 egg yolk
  • 2 teaspoons lime zest
  • 1/2 cup fresh key lime or regular lime juice (Key limes can be hard to find so regular limes will work too!)

Graham Cracker Crust

  • 1 sleeve (9 whole) graham crackers, crushed into fine crumbs
  • 1/4 cup sugar
  • 6 tablespoons butter, melted

Whipped Cream Topping

  • 1 cup whipping cream, cold
  • 3 tablespoons powdered sugar
  • 1 teaspoon vanilla extract

For the homemade lime curd, cream the butter and sugar with a mixer on medium speed until light and fluffy. Add the eggs and one egg yolk one at a time and mix until incorporated. Then with the mixer on low speed slowly pour or stream in the lime juice and mix until just incorporated. Now place the curd mixture in a small sauce pan over medium low heat. Whisk the lime curd until it thickens about 10 to 12 minutes. Pour the curd into a small jar or bowl. Cover and refrigerate the lime curd. The key lime curd will keep in the fridge for two weeks. This recipe makes more than you need for this pie, but the sauce is so yummy that it would be great to swirl a little extra on the dessert plates.

*Note: The whipping of the eggs and slowly adding the lime juice to the mixture is key because it tempers the egg mixture. This method is an easy way to keep your sauce from breaking or curdling.

For the crust, preheat your oven to 350 degrees. Then in a medium sized bowl mix together your graham cracker crumbs, sugar and melted butter. Evenly press the crumb mixture into a pie plate that is sprayed with butter flavored cooking spray. Use a small cup to help press the crumbs along the sides. Bake for 10 minutes and let it cool before filling it with your key lime ice cream.

For the pie filling, in a large bowl mix together your softened ice cream and lime curd. Then pour it into the prepared graham cracker crust and freeze. Don’t worry about any tiny air bubbles they can be smoothed out after your pie has set and frozen in the freezer.  Use a butter knife or separated spatula that has been warmed by dipping it into some hot water and then smooth away any tiny imperfections on the top.

For the decorative topping, beat the whipping cream with the powdered sugar and vanilla using a mixer on high speed. Beat until you get firm peaks (about 2 minutes). Then spoon or decoratively pipe it onto your frozen pie and decorate with fresh lime twists or wedges. This pie needs to be kept in the freezer until it is time to serve it.

Key Lime Pie

This key lime ice cream pie is so good that the day after I made it my husband even had a slice for breakfast! It’s all kinds of wonderful. It’s the perfect summer dessert to share with the dads in your family.

Contact Us