Reading and Eating: Ginger Soy Salmon

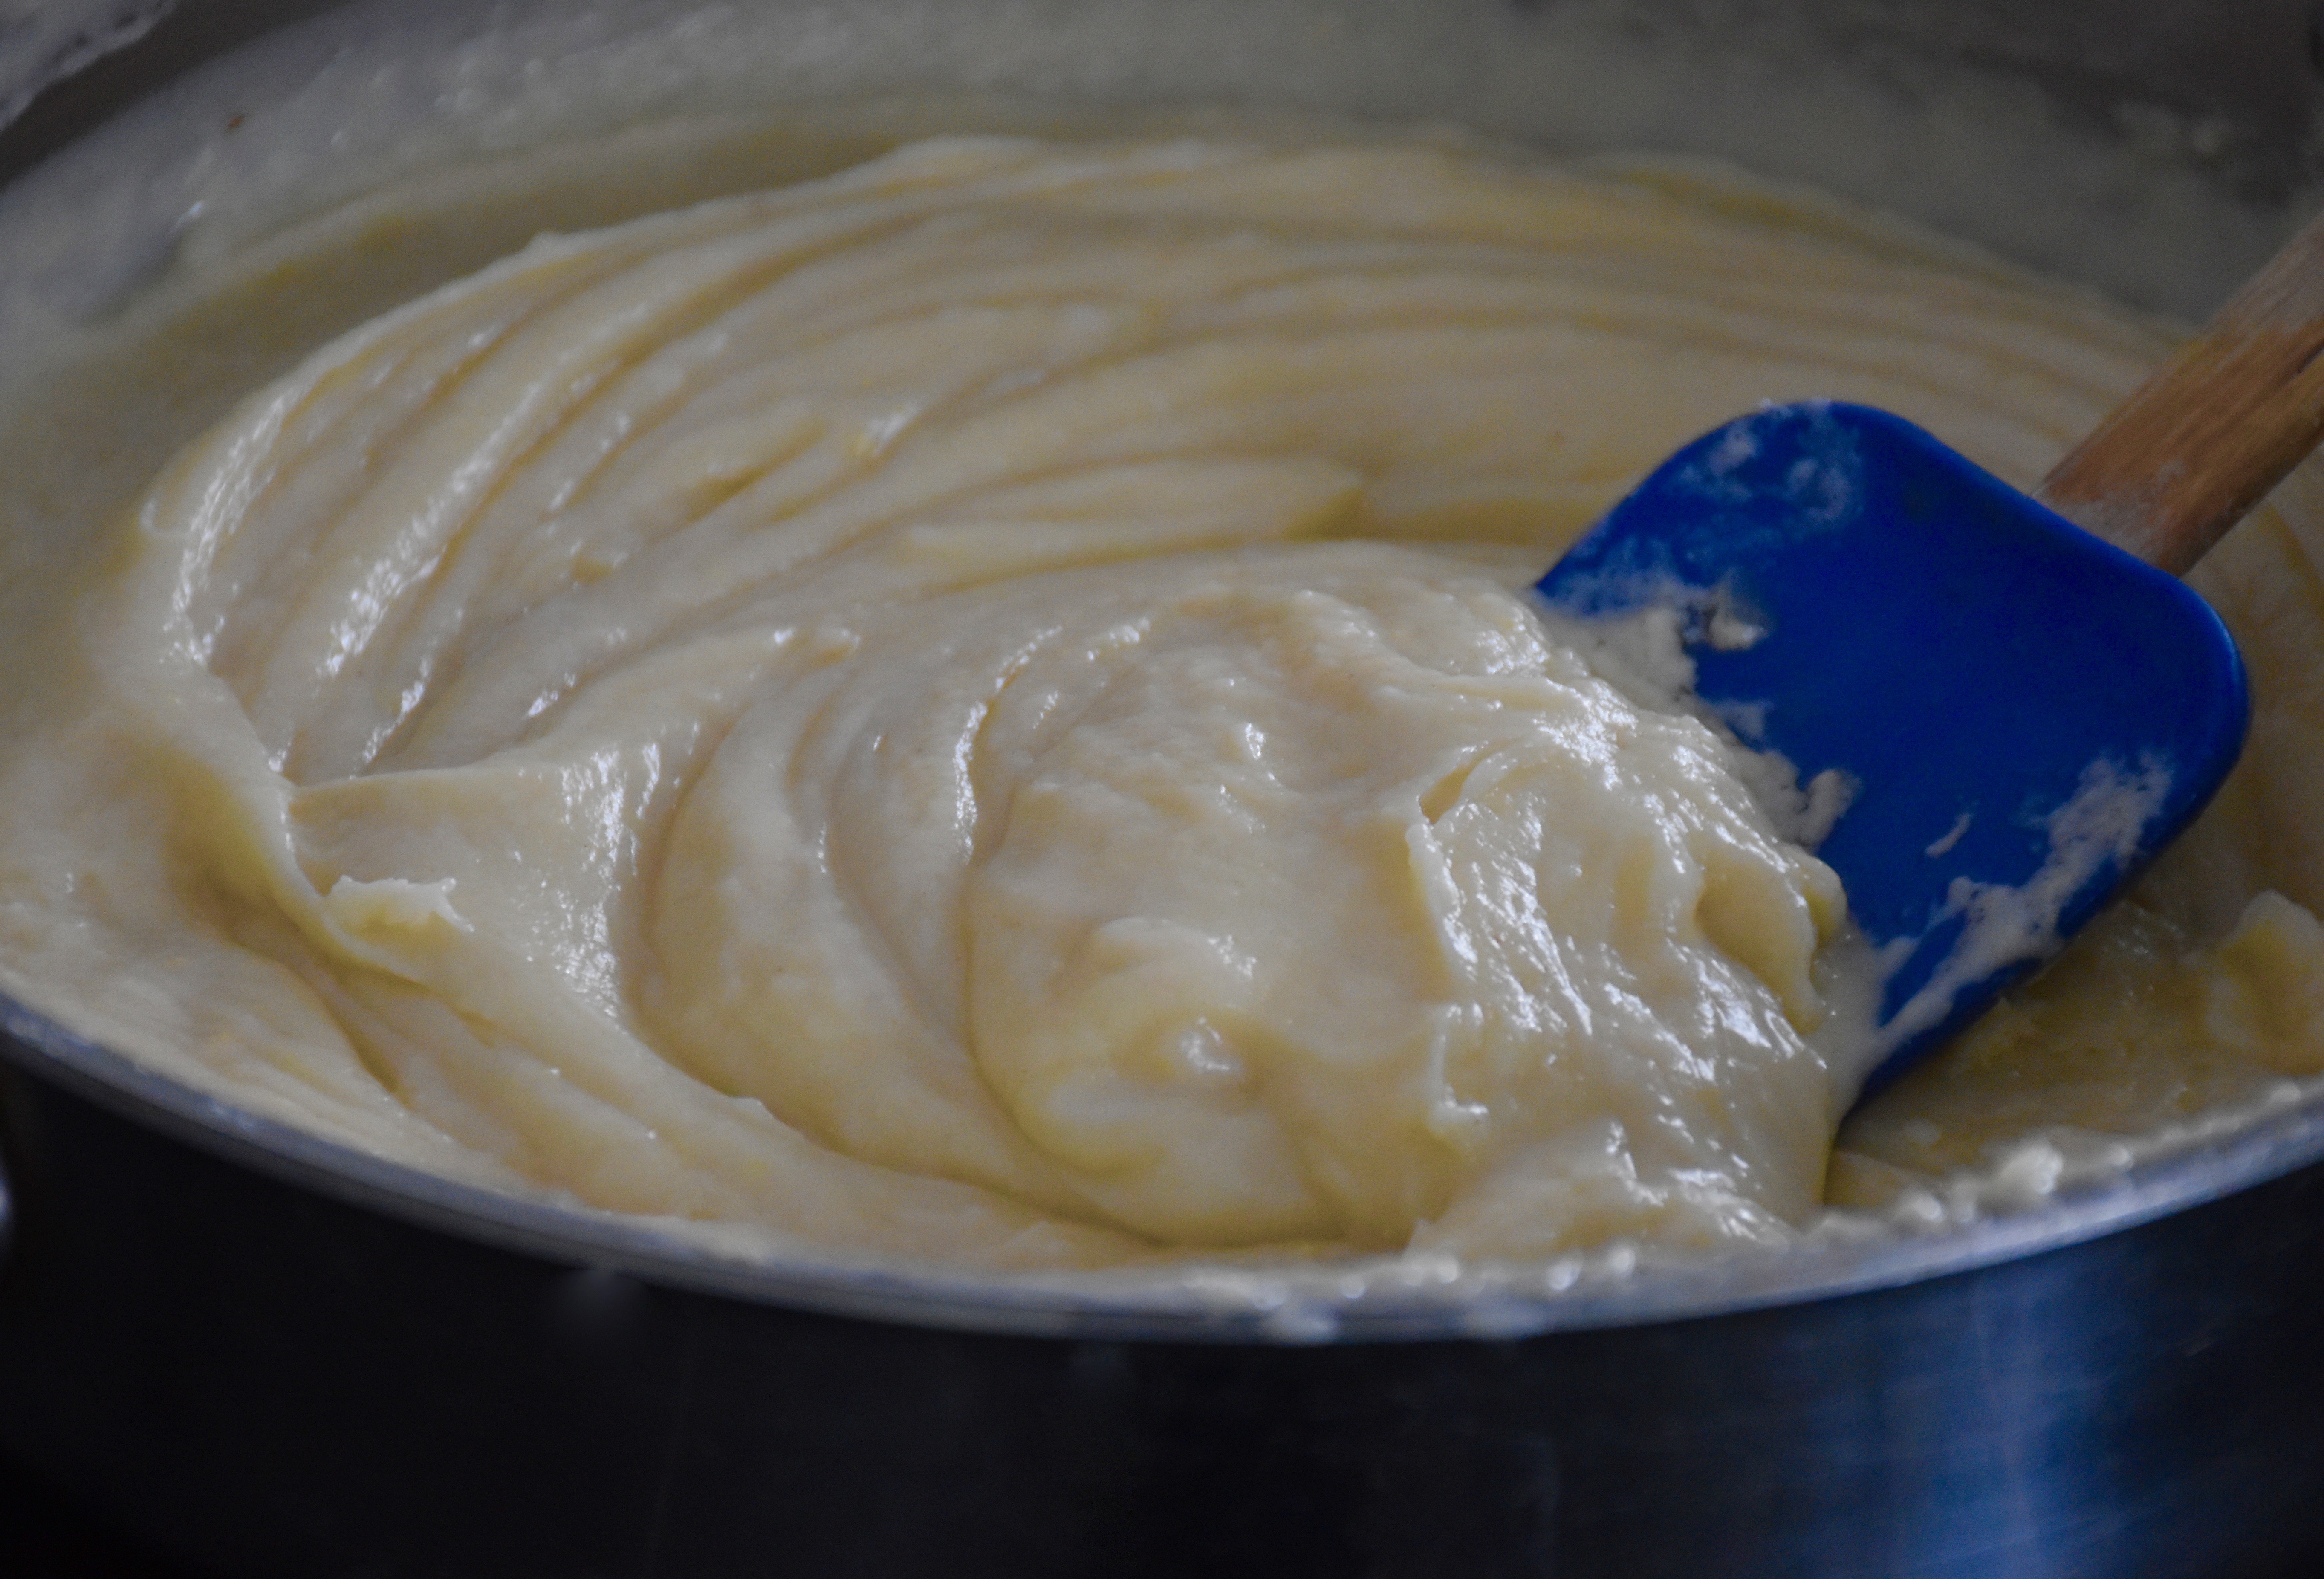
I have never cooked so many dinners and meals in a row! I love cooking but, I have been in the kitchen more than usual. Grocery store ingredients have been hit or miss this past month.  Although I am grateful, grocery shopping  just isn’t quite the same. My carefully planned ingredient lists have needed to give a bit so I have been getting creative to keep cooking  fun and delicious.

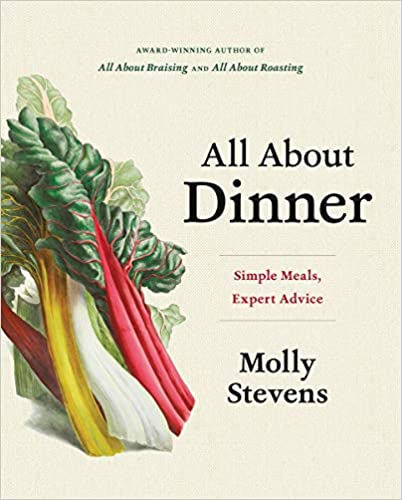
I enjoy trying new recipes because I want dinner to be exciting. Something to look forward to and savor. So I love this new cookbook I found called All About Dinner by Molly Stevens. Stevens worked at the New England Culinary Institute and now is a freelance cooking instructor and writer. She was named best cooking instructor by Bon Appetit magazine and her previous two cookbooks All About Roasting and All About Braising each won a James Beard cookbook award.

I enjoyed reading her thoughts about cooking at home. “Cooking is not about perfection,” she writes, “it’s about making the time to care for ourselves and for others.”  So as we all find ourselves at home and in the kitchen more than ever, I think it’s important to have some simple and flavorful meals that make the most of your time in the kitchen.

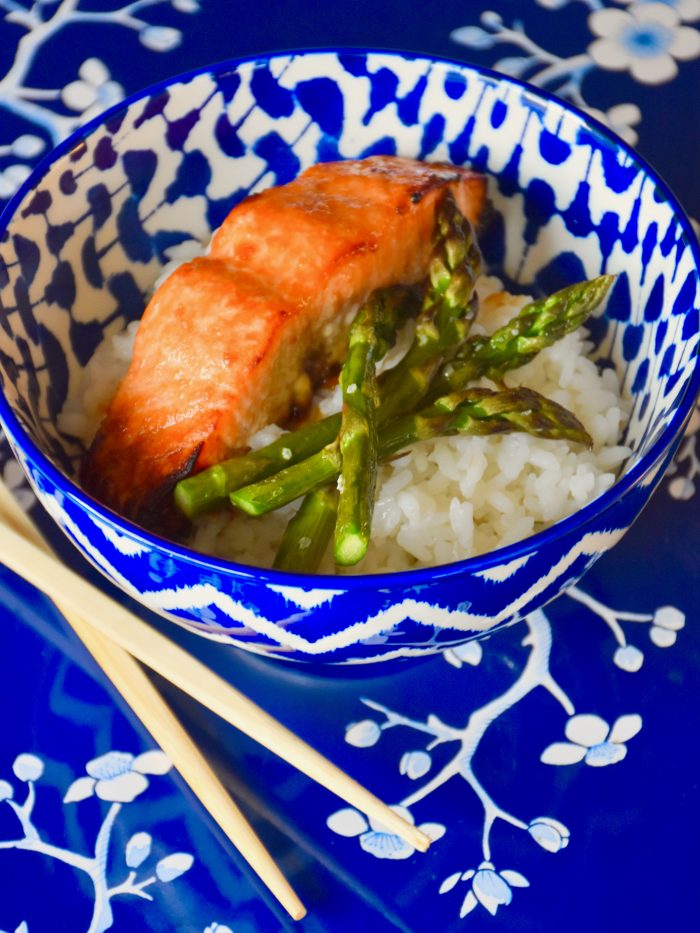
One of my favorite recipes from the book is her Ginger Soy Roasted Salmon. It’s a one sheet pan dinner. It’s quick to prepare, but the flavors are fantastic. Stevens uses broccoli, but I have a family member who has some strong feelings about that particular vegetable. Therefore my version of this dish uses asparagus which is also delicious.

Ginger Soy Salmon and Asparagus – Serves 4 to 5

  • 2 tablespoons soy sauce
  • 2 tablespoons rice wine vinegar
  • 1 tablespoons, neutral flavor oil like canola oil, grapeseed or sunflower
  • 1 tablespoon honey
  • 2 teaspoon grated peeled ginger
  • 1 to 2 teaspoons Sriracha
  • 1 teaspoon toasted sesame oil
  • salt and freshly ground pepper
  • 1 1/2 pounds center cut salmon into 4 to 5 portions
  • 1 bunch of asparagus
  • 2 tablespoons neutral flavor oil

Preheat your oven to 400 degrees

Next make your marinade. In a small bowl whisk together the soy sauce, vinegar, oil, honey, ginger, Sriracha, sesame oil, a pinch of salt and pepper.

Reserve half of your marinade as a sauce at the end and place the other half in a ziplock bag to use as a marinade for your fish.

Let your fish marinate for 30 minutes and prepare the asparagus. Trim off the ends and cut the asparagus into small bite sized spears. Then place the spears into a medium sized bowl and coat them with 2 tablespoons of oil and a pinch of kosher salt and pepper.

Roast your salmon. Lift your fish from the marinade letting any excess drain away. Then place you salmon fillets skin side down on a rimmed sheet pan lined with parchment paper or foil for easy clean up. Put them in the oven to roast. I like my salmon cooked through so I roasted mine to 135 degrees which was about 22 minutes in my oven. If you like your salmon less firm then you will want to start checking it’s doneness at about 15 minutes. You want salmon to be anywhere between 120 degrees to 140 degrees on an instant read thermometer.

When your salmon has 10 minutes left to roast add your asparagus.  Asparagus cooks quickly so you don’t want to add them at the beginning.

I like to serve this dish with Jasmine Rice which cooks in just 20 minutes. So I start my rice just before I place my salmon in the oven, but you could serve it with any cooked rice or grain that you like.

Then as you serve the salmon drizzle the reserved ginger soy sauce on top.

This recipe can be easily halved if you are serving just two or doubled if you have more. But if you double the recipe I recommend using two sheet pans so everything cooks evenly.

If you too are looking for a few new dinner ideas then I highly recommend Molly Steven’s new book. I made her Swedish Meatballs, which we liked and I am eyeing a few more recipes too, like her Roasted Halibut with Chile Lime Butter. She even has a section of her book dedicated to snacks and substantial dinner sandwiches. Cooking dinner as Steven writes can be the “ultimate expression of love” so in these tough times take care of yourself. We can all get tired from time to time, but I have found that that making something simple is often what I need to just keep cooking.

Groundhog Day

These days I find myself waking up to what sometimes feels like one long day on repeat. As our routines have changed the days have a way of blending together a bit. Occasionally I have to remind myself what day of the week it actually is. I watched the movie Groundhog Day recently which in light of the COVID 19 quarantine has taken on a slightly new meaning to me.

This classic old movie imagines a moment where a cynical local weatherman Phil Connors gets caught in a time loop. Connors, played by Bill Murray, is forced to repeatedly relive the same winter day. Along the way Connor’s soul begins to evolve as his perspective changes. He even picks up a few new hobbies like piano and ice sculpting.

On a Zoom call a friend asked a good question that has had me thinking. “Is there any one thing that is saving you these days?” Personally, I am not sure that there is one consistent thing, instead I have found it to be more of a mindset. This quarantine certainly has its Punxsutawney moments. Sometimes I have to remind myself no matter how cold the winter is, spring will eventually come.

So, what has saved me this week is that Chicago is finally turning a bright spring green. The trees are beginning to bud and the daffodils are freshly in bloom. We had a light snow this week, but I have had a taste of spring. So, this week’s winter shadows won’t keep me from looking forward to warmer and more social days.

Unless homeschooling counts, I haven’t picked up any new hobbies yet. Instead I have been focusing on a few of the things I love and keeping my house from being completely overrun by dishes and art projects. I have also managed to turn my basement office into a mini greenhouse. A few of my favorite online gardener’s supply stores have helped me get a head start on spring. I now have few trays of seedlings that I am looking forward to planting soon. I have also ordered some summer zinnia seeds and dahlia tubers too.

My tulips will hopefully be blooming soon

I loved seeing other gardeners on Instagram growing some seedlings as well. Proof to my husband that I am not the only one longing for a few flowers. I have also enjoyed hearing talented friends host concerts at home and seeing the colorful sidewalk and window art in our neighborhood. So, as these quarantine days stretch on, I am trying to learn how make the most of each one.

Spring in the garden is my very favorite time of year

A Few of Our Favorite Quarantine Things:

  • The drawing videos that my daughters absolutely love
  • Storyline Online featuring some wonderful videos of children’s books
  • My favorite instagram gardener Linda Vader her videos and daily garden photos always make me smile
  • Finally if you are wanting to do a little gardening then I like ordering seeds from Park Seed and if starting from seeds is a little too much then I like ordering plants from Bluestone Perennials or if you are looking for gardening supplies I have had good luck with Gardeners Supply Company

The Peach Tree Homemade French Bread

Have you had a bite of something that was so deeply satisfying that you could just taste the love? In times of change and uncertainty cooking and baking have a way of bringing us comfort. During this pandemic, people are now cooking and baking at home more than ever. Searches for recipes are now at record numbers. Google search trends show that searches for bread and baking have hit an all-time high in the U.S. So why are so many people baking?

Baking builds connection to our families, to our past and to happy memories. The Journal of Palliative Medicine found that baking can have a therapeutic effect that calms the central nervous system. Baking, especially bread baking, requires you to use repetitive motions. All that kneading has a way of smoothing the rough edges of one’s thoughts. A welcome distraction from reading too many worrisome news reports. It’s reassuring to shape a loaf, watch it rise and smell the aroma as it bakes.

I still remember the joy of tasting homemade bread. Commercial grocery store bread can’t come close to the soft sweet taste of home baked. When I was in high school and learning to bake on my own, I remember tasting the homemade French bread a  little Texas hill country tea room called The Peach Tree.

Picture from the Peach Tree’s Facebook page

The tea room was set in a beautifully restored German limestone home from 1895. The Peach Tree, which was open for 49 years has now closed. But it was is known for its fabulous soups, breads and desserts. Recipes from the Chef and owner Cynthia Collins Pedragon won acclaim from Gourmet Magazine, The Dallas Morning News, and The San Antonio Express-News. Pedragon’s food was so well-made and beautifully presented. You could taste the love in her cooking and especially in her homemade breads.

As the bakery shelves were looking a little bare this week, I pulled out an old recipe for the Peach Tree’s Homemade French bread. I had some trouble finding specialty flours these days so I tested and adapted this recipe so it would work well with all purpose flour. This bread is made from simple ingredients, but when you bring them together it makes these delicious loaves. As we gather around our table to break the bread, I am grateful. Maybe this bread baking boom shouldn’t be such a surprise because in times like these we need the joy and connection that baking brings.

The Peach Tree Homemade French Bread– makes two large loaves

  • 1 1/2 cups lukewarm water
  • 1 1/2 teaspoons sugar
  • 1 package of active dry yeast
  • 4 cups of all purpose flour, plus 1/2 cup for dusting when kneading
  • 1 1/2 teaspoon kosher salt
  • 1 egg
  • 1 tablespoon water

In a glass mixing cup or a small bowl mix together the water and sugar until dissolved. Add the yeast and gently stir it in. Then let the yeast mixture rest and bloom for 5 minutes.

Happy Yeast that has bloomed for 5 minutes.

Then in a large bowl mix together the yeast mixture, the salt and 4 cups of the flour. String well with a wooden spoon or alternatively this step could be done with a stand mixer using a dough hook. The dough will look a little shaggy but the kneading will incorporate any little bits.

Next knead the dough on a lightly floured baking mat or a large cutting board. Gradually add some of the reserved 1/2 of flour as you need it. Continue to knead the dough for about 10 minutes until it is no longer sticky.

My baking assistant loves to help me knead the dough.

The dough will be smooth and elastic. Place the dough into a large bowl bowl that is coated in cooking spray or oil, turn to coat the top of the dough ball.

The dough before covering it to rise

Cover the bowl with plastic wrap or a clean kitchen towel and let it rise until doubled in size, 1 hour.

The dough after it has risen for an hour.

After the dough has doubled, punch it down and turn it out on your floured mat or board.

Divide the dough into two equal parts. Then pull and roll your dough till it is about 14 inches long.  If you prefer a thinner loaf then you can roll and pull it slightly thinner and longer. Make sure that the ends are smooth and that the seam sides are down.

The top loaf is seam side down and the bottom loaf is flipped over so you can see how I pulled and shaped the bottom and sides of the loaf.

Place your loaves on a greased and cornmeal dusted cookie sheet or line your pan with parchment paper to prevent sticking. Then using a serrated knife gently make some shallow diagonal slices on top of each loaf. Then cover and let your loaves rise for about 30 minutes. Preheat your oven to 400 degrees.

Then after your loaves have risen, in a small bowl whisk together the egg and 1 tablespoon of water. Brush the loaves with the egg wash making sure you cover the tops and sides evenly.

If you have a spray bottle then you can lightly mist the top of the bread as you put it in the oven.

Bake your loaves at 400 degrees. Then you can mist the bread again 1 to 2 times more in the first 5 minutes of baking to give you a crispier crust. (Don’t worry if you don’t have a spray bottle on hand it will still be good.)

Bake for 20 to 25 minutes or until golden.

If you want more recipes from The Peach Tree, then Cynthia has several cookbooks including her last book With Love, From Cynthia.

Easter Lamb Cake

Easter is coming soon and its message of hope and etneral love couldn’t come at a better time. Although many of our traditional Easter plans will need to change, we are still making plans to celebrate. I love holiday meals and one of our family’s traditions is this lamb cake. I made one for my youngest daughters baptism and my family loved it. So, it has now become a part of our Easter celebrations. I adapted a vanilla pound cake recipe from Ina Garten so the cake is delicious. Pound cake makes a wonderful molded cake because it’s tight crumb stands up well.

Talking to friends, I know that an Easter lamb cake is a tradition for other families too. Some people even have their mother or grandmother’s old cake pan which is especially meaningful. My cake pan is newer. Its from Nordic Ware, but I liked it because it has a more nostalgic feel to it. Looking into the history of these cakes I found that one of Nordic Ware’s original 1950s lamb cake pan molds is actually in the Smithsonian’s collection.

This lamb cake is fun to make. Although it takes a little patience it’s easier to frost than your traditional layer lake where you have to worry about the sides. My girls love to help me bake so I know this cake would make a great family baking project.

Honey Vanilla Pound Cake– Makes one lamb cake or 1 standard loaf ( 8 1/2 x 4 1/2 inch pan) if you just want to make a traditional pound cake

  • 2 sticks of butter, cool room temperature (let it sit out for 1 hour)
  • 1 1/4 cups sugar
  • 4 large eggs, at room temperature
  • 2 tablespoons honey
  • 2 teaspoons vanilla extract
  • 1 teaspoon grated lemon zest
  • 2 cups cake flour, sifted
  • 1 teaspoon kosher salt
  • 1/2 teaspoon baking powder

Preheat your oven to 350 degrees Grease both sides of your lamb pan well, using Baker’s Joy. This flour baking spray is the very best when it comes to bundt cakes and molded pans.

In the large bowl of your stand mixer fitted with your battle attachment beat your butter and sugar at medium speed for 3 to 4 minutes.

Then add in your honey, vanilla and lemon zest and blend until incorporated. Next with your mixer on medium low speed add in your eggs one at a time.

Scrape down the sides of your bowl and add in your salt and baking powder. Finally on low speed slowly add your flour mixing until it is just combined.

Then spoon your batter into the front of your lamb cake mold (the side without the cake testing hole.) When smoothing the top make sure to press the cake batter in well so you don’t have air pockets.

Make sure that you place your batter in the front pan.

Place the front cake pan on a cookie sheet. Then place the back on top and place it in the oven to bake.

The cake will rise and fill the back side of the mold as it bakes.

Bake for 50 to 55 minutes. Check the doneness at 50 minutes by using a toothpick in the testing hole to make sure the cake is cooked through.

Let the cake cool in the pan for 5 to 10 minutes before you remove it.

Vanilla Buttercream

  • 12 tablespoons butter (1 1/2 sticks) at room temperature
  • 1/4 teaspoon kosher salt
  • 1/4 cup plus 3 tablespoon of milk
  • 1 teaspoon vanilla
  • 6 cups powdered sugar

In a large bowl of your stand mixer add your butter and salt and beat your butter on medium high speed for a minute. Scrape down the bowl sides and add in your vanilla, and half of your milk and powdered sugar. Blend on medium speed until blended and then add the last of your milk and powdered sugar. Continue to beat at medium high speed until it is light and fluffy.

How to Decorate Your Lamb

  • 1 small container of white fondant
  • Pink gel food coloring
  • 1 small container of black fondant or black gel food coloring to color some of your white fondant
  • 1 piping bag with a medium sized star tip
  • 1 piece of ribbon (optional)

First roll out a small piece of white fondant and cut it in an almond like shape to fit the lamb’s face. I like to use clean kitchen scissors to cut out my fondant.

Then mix together a tiny drop of pink food coloring and a small amount of white fondant. Shape a small set of ears and a little nose. Use a toothpick to add little nostrils to the nose.

Once your cake has completely cooled then crumb coat the entire cake with a thin layer of icing. Then add your fondant face by gently pressing it on, letting the heat of your hands smooth it to fit. Add your ears and then attach your nose with a small drop of icing.

Roll your black fondant into a thin rope like piece to create your eyes and eyelashes. Put a tiny bit of water on your finger to wet the back of the eyelashes so they will stick.

Finally, use a pastry bag with a star tip to pipe your lamb’s wool. Use a smaller star around the face and ears. Then on the body you can make larger rosettes.

Once your lamb’s wool has been piped on you can add other small details like a ribbon collar and sugar gum paste flowers.

Other ideas include edible flowers like violas or pansies. You could also add jelly beans or small chocolate eggs on a bed of green icing or coconut grass.

Easter Lamb Cake how to

Every year our lamb has a new look, which is part of the fun. So get creative and add your own special decorations. Most importantly my girls want you to know that  this cake is “so good” to eat and share together!

Southwestern Chopped Chicken Salad

After these past two weeks I will not take a simple thing like going to the grocery store for granted. I have been shopping as little as possible and when I do go, I try and go earlier that I ever have. Six AM grocery store trips are generally not my style. My carefully planned lists are now a thing of the past as I look for what I can find that is fresh. I am in a good way more deliberate about not wasting anything.

Like so many of you I am cooking more than ever. As I do, am trying to cook simple things. Foods that bring us comfort burgers, tacos, waffles, potato soup, red beans and rice. I am someone who expresses myself through food. So, family dinners are a moment of graced goodness.

Being together at the table has taken on a new meaning. In our house dinner is about more than eating it has become a love story. It began sixteen years ago when my husband and I started dating. We were both graduate students at the time, so our first date was dinner at my husband’s apartment. He wasn’t a gourmet but, we had fun cooking together in the kitchen. Those early years were filled with lots of studying, but cooking dinner together became a part of who we were. Now years later, we are sharing the love of cooking with our daughters.

Cooking for me has always been about love. Love for my husband and my family. So, in this time of uncertainty and waiting. I thought I would share a simple one dish dinner that my family loves, a Southwestern chopped chicken salad.

Southwestern Chopped Chicken Salad– Serves 4

  • 4 thinly sliced boneless skinless chicken breasts
  • 1 teaspoon kosher salt
  • 1 teaspoon garlic powder
  • 1/8 teaspoon ground pepper
  • 1 tablespoon olive or canola oil
  • 1/2 cup barbecue sauce
  • 3 ears of fresh corn, sliced off the cob
  • 2 tablespoons butter
  • 2 cups grape tomatoes, sliced in half
  • 1 large avocado, diced
  •  1/2 of a lime, juiced
  • 1 (15 oz) can black beans rinsed and drained
  • 1 cup shredded Monterey Jack cheese
  • 6 cups romaine or your favorite artisan lettuce chopped
  • 1 package tortilla strips (you can find them on the croutons aisle)
  • Ranch dressing (if you are not a fan of ranch then it is also good with Catalina dressing)

First in a small cup mix together your kosher salt, garlic powder and pepper. Then pat your thinly sliced chicken breast dry with a paper towel and season both sides with your garlic salt mixture.

Over medium heat in a nonstick skillet add your oil then cook your chicken for about 4 minutes on each side until they are cooked through. As chicken breast cutlets can differ slightly in thickness you may need to adjust your cooking time.

Then slice your chicken breast on the diagonal into thin strips or pieces. In a small bowl mix together your chopped chicken and barbecue sauce.

Wipe out your skillet and add 2 tablespoons of butter heat it over medium heat until the butter melts. Then add in your corn kernels and cook them until they turn bright yellow and tender about 5 minutes. Season with a small pinch of salt. Then set aside.

Chop your grape tomatoes in half and set aside. Rinse and drain your black beans. Then slice your avocado and squeeze half of a lime’s juice on top of it to keep it green.

Now time to assemble your salads evenly divide the chopped lettuce between 4 bowls or plates. Then assemble your chicken, corn, tomatoes, black beans, avocado, cheese and tortilla strips.

Finally drizzle a little ranch dressing on top.

A quick dinner that has so many flavors and textures. This salad is substantial enough for dinner and it’s something that can be pulled together easily. Sometimes recipes like this are what we all need. Because dinner in our house is all about spending time with the ones we love.

While I Am Waiting

Where are we going today? my two young daughters asked. I struggle to explain social distancing to my five year old. As the days stretch on, I yearn for a meaningful answer. One that they will understand. Can we at least go to school? The park? Can we play with the neighbors? My daughters wave through the window as neighbors walk by. So much about our lives has suddenly changed. It’s habit. We tend to define our days by what we have going on and where we are going. So, what happens when our nation and world must stay in place.

As we fight the battle against this pandemic and terrible disease, how do we define our days? Waiting even in the best of circumstances is difficult. As my husband heads out to work at the hospital the uncertainty rattles my nerves. I try to push those fears aside determined to find some meaning and purpose with our time at home. We take frequent walks to get out. The sunshine and crisp air give me hope. As I walk my thoughts drift to a trip I took years ago to Walden pond. I think of the small cabin and the waters shore.

Henry David Thoreau retreated to the woods to meditate and feel a greater closeness to nature. In Walden, Thoreau asks us to open our eyes to see the truths of life hidden by all of our daily business. He said “I went to the woods because I wished to live deliberately, to front only the essential facts of life, and see if I could not learn what it had to teach, and not, when I came to die, discover that I had not lived.”

Walden Pond
Walden Pond on my trip and time there in 1994.

Those seemingly urgent matters and appointments I once had, have now been postponed or canceled making room for my thoughts. All this waiting has caused me to think deeply about what really matters. Waiting for the unknown takes a deep faith. As I have grown older, I have come to know that faith is more of an attitude. It’s actively hoping and believing in the things we cannot see and control. As I look within, I am determined to seek the good. When I look, I see it in the faces of all those who are helping. I see it in the small things too, like text messages, phone calls and prayers.

 I want this time to be meaningful. What will I do and learn? What stories will I write with my life? Like Walden, my hope is that this time allows me to reflect on the things that really matter. So that when the waiting is over, I might live more fully with a renewed sense of gratitude, love and purpose.

Stay safe and take care of each other my friends!

Lemon Cupcakes With Blackberry Buttercream

Lemon Cakes Recipe and Blackberry Buttercream Recipe

It’s 100s day here at Maison McCauley and to celebrate the occasion of my 100th recipe. I am baking and sharing one of my best cakes, lemon cupcakes with a blackberry buttercream. I believe that one of the best measures of a baker is to taste their white sponge cake. Sponge cake although ubiquitous and available at every local grocery store has a texture that is tricky to get right.

Chocolate and flavored cakes lend themselves to being moister and more tender, while the standard butter based white cakes can sometimes be dry and heavy. So the challenge for me was was to create a lighter and moister cake. When baking sponge cakes I prefer oil based cakes because they generally have a superior texture and crumb. They also tend to be moister then butter based cakes. But even oil based white cakes can be heavy if make with all purpose or cake flour alone.

So after baking hundreds of cakes over the years and trying all sorts of methods, I have found that the way to create a better sponge cake is to use a little potato starch. This one ingredient makes an extraordinary game changing difference when it comes to texture. You can find it with the specialty flours in the baking aisle or possibly in the kosher section of your grocery store. However, make sure it says starch and NOT potato flour because they are not the same.

This featherlight cake is not your ordinary sponge cake. When I was creating and testing this recipe the cake was so good that my daughters were trying to eat the cupcakes before I could even get them frosted. Usually cupcakes for them are just a vehicle for frosting, but these little cakes are different. One of the gifts of blogging is that it has pushed me to be an even better cook and baker. If I am going to put my name on something and share it with you, then I really want it to be delicious. I want to create and share recipes that are truly worth the time and effort it takes to make them. So thank you my dear friends for reading, cooking and eating with me. It’s been quite an adventure.

Maison McCauley’s Lemon Sponge Cupcakes– Makes 12 Cupcakes

  • 1 cup sugar
  • 2 eggs
  • 1 1/2 teaspoons lemon zest
  • 1 teaspoon vanilla
  • 1 cup all purpose flour
  • 1/4 cup potato starch
  • 1/8 teaspoon kosher salt
  • 1 1/4 teaspoon baking powder
  •  6 tablespoons canola or vegetable oil
  • 1/4 cup milk

Preheat your oven to 350 degrees

In a large bowl or the bowl to your standing mixer add your sugar, eggs, lemon zest and vanilla. Mix about a minute on medium speed.

Add in the potato starch, salt, baking powder and half of your flour with your milk and oil. Mix on low speed until just blended then add in the last part of your flour and mix until the flour is incorporated.

Line your muffin tins with the paper liner of your choice and very lightly spray with Pam or Baker’s Joy

Then evenly fill your muffin cups to about 3/4 of the way full.

Bake your cupcakes for 20 minutes until the tops are golden and the cake is cooked through. Let them cool completely before you frost them.

Blackberry Syrup- makes approximately 1/4 cup

  • 2 cups blackberries
  • 1 tablespoon lemon juice
  • 1/4 cup water
  • 1/4 cup sugar

In a small food processor, blender or using an immersion blender, mix and puree your blackberries, lemon juice and water. Then strain the berry mixture through a fine sieve into a small saucepan. Strain out all the seeds and fruit pulp. Once you have pushed all the juice through add 1/4 cup of sugar and heat your berry mixture over medium high heat.


Stir the berry juice frequency as it reduces down to a thicker berry syrup. You want it to reduce down to about 1/4 cup.

A close up of the saucepan and spoon. The reduced berries add a richer purple color and deeper flavor to the buttercream.

You will know it’s ready when you can pull a line down the pan with your spoon or spatula and it will hold for a few seconds. This syrup will need to cool before you add it to your buttercream.

Blackberry Buttercream

This may seem like a lot of frosting for a dozen cupcakes, but I like to use a very generous swirl of icing which requires a little more buttercream.

  • 1 stick unsalted butter, room temperature
  •  1/8 teaspoon kosher salt
  • 1 teaspoon vanilla extract
  • 1 teaspoon lemon juice
  • 1/4 cup of the cooled blackberry syrup
  • 1/3  cup plus 3 tablespoons of milk
  • 8 cups powdered sugar

Using a stand or hand mixer beat together the butter and salt. Add in your vanilla, lemon juice, blackberry syrup, milk and gradually add in your powdered sugar a few cups at a time. Beat your butter cream well over medium speed until the powdered sugar is well incorporated and your icing is light and fluffy.

Then to give your cupcakes a bakery styled finish use a pastry bag with a large star tip. Pipe a swirl starting around the outside edge of the cupcake and  finish your swirl with a second circular motion in the middle. Add a sprig of mint and a blackberry or two on top for a finishing touch.

A close up so you can see how light and tender this lemon sponge cake is. The potato starch and oil makes these cupcakes outrageously good.

So move over Betty Crocker, these cupcakes are so much better than any box cake mix. I love topping them with blackberry butter cream, but I also think it would be great topped with this lemon whipped cream or with your favorite vanilla frosting. Happy 100s Day!

You can find a printer friendly version of my blackberry cupcake recipe at Tasty Kitchen.

Comforting Homemade Chicken Pot Pie

There are all sorts of difficult food fads these days. So, what is the modern cook to do?  When it comes to cooking for others I put all those trends out. Instead, I try to focus on making something comforting that my guests will love. Menus in our house usually aren’t filled with over the top recipes. Instead, there is something about serving simple crave worthy classic dishes. The kinds of recipes that have your taste buds singing.

One of my personal favorites is homemade chicken pot pie. This is a kind of retro dish these days. Something that not everybody makes anymore, but when done right this classic is so good. Roasted chicken and vegetables in a creamy sauce topped with an irresistible buttery crust.

What I like about this dish is that it’s versatile. You can make one family styled pie or if you are making it for friends you can make mini pies in individual dishes. You can even make an all-vegetable version by making a couple of easy substitutions.  This is also something that you can make ahead and have in your fridge. Then when your guests arrive pop it into the oven. I have learned that when you are sharing food with friends, the more you can make ahead the better. Add a large salad like this apple salad and you have a delicious dinner that can all be assemble ahead of time. As Ina Garten would say “how easy is that.”

Homemade Chicken Pot Pie– Serves 6 (makes one deep dish pie or 6 small pies)

  • 1 medium sized yellow onion
  • 3 carrots pealed and chopped
  • 1 garlic clove, minced
  • 1 cup frozen green peas
  • 3 tablespoons butter
  • 1 rotisserie chicken, shredded into bite sized pieces
  • If making an all vegetable pie then instead of adding the chicken you can include 1 large russet potato peeled and diced into small bite sized pieces

Melt your butter in your skillet over medium heat. Add your carrot, onions (if making the all vegetable version then add your potatoes to the pan too).

Sauce them until the onions are translucent and the carrots have begun to soften. Then add in your garlic and cook an additional minute. Finally add in your frozen peas and continue to cook it until the peas are warmed through and bright green.

Set your veggies aside in a bowl while you create the cream sauce.

Cream Sauce

  • 1/2 cup (1 stick) butter
  • 1 cup flour
  • 2 1/2 cup chicken or vegetable stock, warm
  • 1/2 cup cream, room temperature
  • 1/2 teaspoon kosher salt
  • 1/8 teaspoon pepper

In a medium sized deep sided skillet melt your butter over medium heat. Then sprinkle in your flour to make a thick paste.

Next add your warm chicken or vegetable stock in slowly, about 1/2 cup at a time whisking to make a smooth creamy sauce.  Having your stock warm will ensure that your sauce comes together easily and without any lumps.

Next add the cream and whisk it. Then season your sauce with salt and pepper.

Finally add in your cooked vegetables and shredded rotisserie chicken and remove your filling from the heat.

A spoonful of creamy chicken goodness.

Then spoon your pot pie filling into a large deep dish pie dish or 6 large ramekins (I used a 13 oz size). Then top with pie crust.

*Note if you are pressed for time you could also use pre-made pie dough like Pillsbury or puff pastry like Pepperidge Farm

Pie Crust (This recipe makes enough for the 6 mini pies. There will be a little dough left over if you are making one large 10 inch pie with a single crust top)

  • 2  1/2 cups all purpose flour
  • 1 teaspoon salt
  • 1 tablespoon sugar
  • 1  cup (2 sticks) butter cut into chunks
  • 1/4 cup cold water

First cut your cold butter into small squares or cubes.

Then in a food processor mix together your flour, salt and sugar. If you don’t have a food processor you can use a pastry blender or your electric stand mixer with a paddle attachment, but these methods will take longer and I definitely prefer the food processor. Next pulse your butter and dry ingredients together until your butter is cut into small peas sized pieces. If you are using a stand mixer then blend your butter in at a low speed.

Then add in your cold water and blend it until your crust starts to just starts to come together in a ball.

Now you are ready to roll out your dough. I have a large silicone mat that I absolutely love when it comes to pastry, but if you don’t have a non-stick mat then you can use a large piece of parchment paper. Lightly dust your mat or paper with flour as well as your rolling pin.

If making a single 10 inch pie then take a little over half of the dough and roll your crust out to make a large circle that is 14 inches in diameter. You want to roll your crust out larger than you pie plate so you have extra to make your crimped edges.

If making individual mini pies then cut circles out that are close to 2 inches wider than your ramekin. My ramekins from Sur La Table have a 4 inch diameter. I used a bread plate as a template.

To make the smaller sized pies I used a bread plate that was a little wider around as a template. Then take the excess dough and fold it under to create your edge. Then add a few slits with a knife to allow the steam to escape as it bakes. I like to add a festive touch with a leaf cut out. You could also easily add a star, a flower or a heart. The small details add a nice touch when entertaining.

Once you get your pies topped with the crust add some small air vents with a knife to allow the steam to escape as they bake. If making these ahead of time then you can place them in your fridge until you are ready to bake them.

Right before baking them, brush the pie crust with an egg wash which gives it a golden color when baked. To make the egg wash, in a small bowl beat together one egg and 1 tablespoon of water. Then lightly brush it on your pie dough.

I like to protect the edges of my pie crust for the first half of the baking so I use a pie shield or make my own by folding a long piece of foil in half and wrapping it around the edge of my pie or pies so it protects just the crimped edge. I also like to bake the pies on a baking pan just in case any filling bubbles over the side.

Bake at 375 degrees for 25 to 30 minutes. If you are baking it from the fridge it will take 30 minutes for the individual mini pies.

Making a mini version is fun. Here they are all baked.

I believe that food is a gift something that should be shared and enjoyed. So here is one of my personal favorites. Homemade chicken pot pie-the kind of dish that feeds the soul.

Maison McCauley’s 3rd Anniversary

“People who love to eat are always the best people.”

Julia Child

I began blogging here at Maison McCauley a little over three years ago. When I started writing I was overwhelmed by a sudden cross-country move and I was feeling a bit lost. What I didn’t know when I nervously hit publish on my first post was what a joy writing would become and how sharing my stories, recipes and photography would change me. All of these posts gave me the confidence to write even more and this year I began writing for a local newspaper and I have a monthly food and garden column in a neighborhood magazine.

I have to agree with Julia Child when she said “people who love to eat are always the best people.” I love talking and writing about food. So, as I celebrate three years of blogging my hope is that you enjoy reading and eating these recipes as much as I love sharing them with you. I have heard from some of you who are wonderful cooks and I always like your comments and ideas on how to make changes to fit your family and friends needs. I also love my friends who just read each week to savor the pictures and stories.

I named my blog Maison McCauley in honor of my grandfather who was a Frenchman. He loved food and truly knew the importance of celebrating a meal. He wasn’t much of a cook, but he appreciated great food. When you dined with him, dinner was something to be anticipated, savored and talked about. I remember going out to a fancy hotel dinner with my family and before there was any ordering, he took the grandkids to see the desserts. Our eyes widened taking in the beautiful layered cakes, glistening fruit tarts and whip cream topped chocolate mousse. “Know what you are saving room for” he told us.

Like my grandfather, I love sharing a great food and fabulous desserts. This year as
I was looking back I decided to begin counting all those recipes and to my surprise I have now shared nearly 100 recipes, 98 to be exact. Blogging has been a gift because I have gotten the opportunity to write about food and share my own recipes.

There are 34 dinner recipes.

There are now 12 salads and 10 side dishes.

And my personal favorite 32 desserts with 15 cakes 13 cookies 7 breads 3 breakfast breads.

Are you hungry yet? In an effort to make it a bit easier to search for your favorites, I have made a few changes to my site and created a new side tab with readers’ favorites. I tried  to include my most popular food posts, but if I have missed a recipe you love then leave me a comment I will add it to the list.

This is my little red dinette set where most of the food and writing happens. Just me, my girls and my favorite cup of coffee. So, here’s to new beginnings, bravery and gift of being able to share all that I am saving room for.

I am already writing and photographing numbers 99 and 100 and they are especially delicious. So, I can’t wait to share them with you soon. Until then happy reading and eating my friends!

Hope Blooms Eternal

“Where flowers bloom so does hope.”

Lady Bird Johnson

Midwestern winters require more than just the recommended fur-trimmed puffy coat. Dressing in warm layers is helpful. But, sometimes it’s simply not enough. I have learned over the last few years that it takes a certain amount of outrageous optimistic thinking to face a particularly cold and gray forecast.

I used to think news reports of people wearing flip flops while Christmas shopping in the snow and nearly naked people running into Lake Michigan for the polar bear plunge were crazy. However, now that I have lived here for a few years, I have come to realize that it’s precisely that type of thinking that is necessary to fully appreciate the mid-winter season.

There is a festiveness when it snows. The Christmas season in Chicago is magical. I love the twinkling lights and watching the snowflakes swirl in the air. My daughters and I enjoy making snow angels and creating little snowmen. The icy trees that line our street look serene as they shimmer in the light. But my personal enthusiasm towards the cold’s fragile beauty tends to wane a bit after January.

Last year when temperatures started to plunge towards record breaking lows, my young daughters were determined to take matters into their own hands. After several days of feeling trapped indoors by negative temperatures, they decided that we needed a change. Inspired by their favorite Disney snowman, they dressed up in sunglasses, sandals and Hawaiian leis. My husband and I loved every zany minute of their “In Summer” concert. Our daughters thawed our winter blues by singing their hearts out around their tiny toy microphone. Looking back, their impromptu concert is still one of our favorite winter memories.

Each year when late February comes, I look out at my snow covered lawn and long for green flower filled days. Every fall I begin planning for spring. So, after this year’s early Halloween snow I was out in my yard. I shoveled the snow and leaves aside. I dug and measured deep trenches in my flower beds. Then my daughters and I planted hundreds of bulbs with hopes of creating a gorgeous spring garden.

Robins are always an early sign of spring. I haven’t seen one quite yet, but this little bird made a nest on my neighbors front porch light last spring.

In the last few weeks I have found myself engaging in some nonsensical, but highly necessary optimistic thinking. I dream of summer gardens in the snow. I look out my window and think about the beauty of our yard dressed in its full colorful glory.

Crabapple blooms in spring. Oh how I love their blossom covered branches.

Perhaps spring is even more spectacular when it’s been months since something green has sprouted. As much as I lament the cold, I know the frozen ground is necessary for a whole host of beautiful bulbs and flowers. These plants would never thrive in the subtropical climate that I was formerly accustomed to. So now I am dreaming of snowdrops, tulips, hyacinths, daffodils, pansies and peonies.

Pretty in pink tulips. I have been buying tulips from the grocery store to tide me over until my garden looks a bit more like spring.

It may be February, but my mind is already planning and eagerly awaiting the garden to come. I am looking forward to planting again, savoring the sunshine and enjoying the blossom filled splendor of spring.

A star magnolia tree in bloom last May.

Contact Us