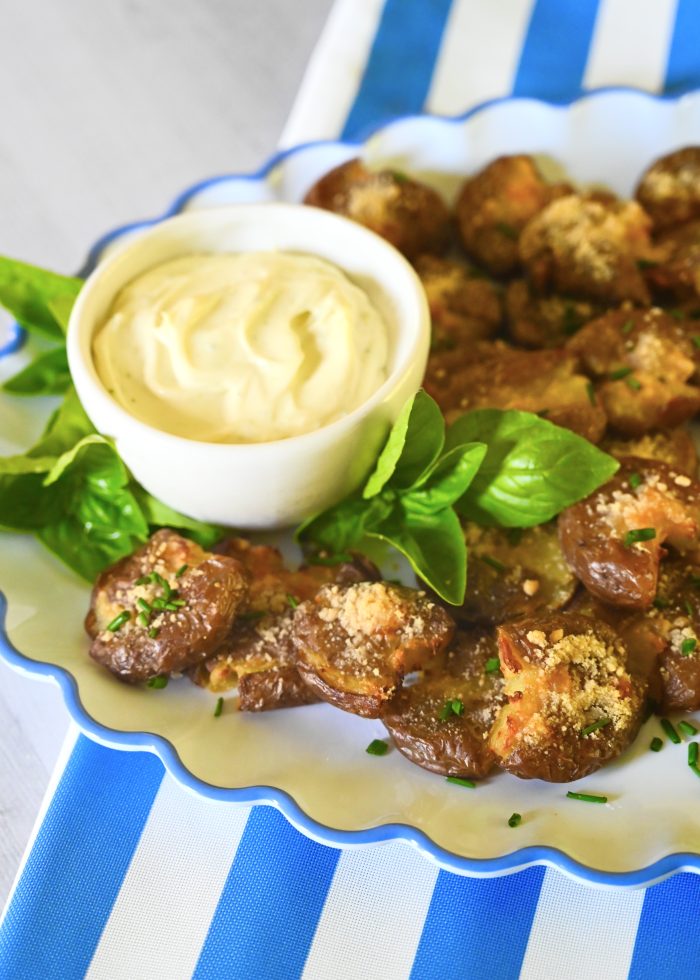
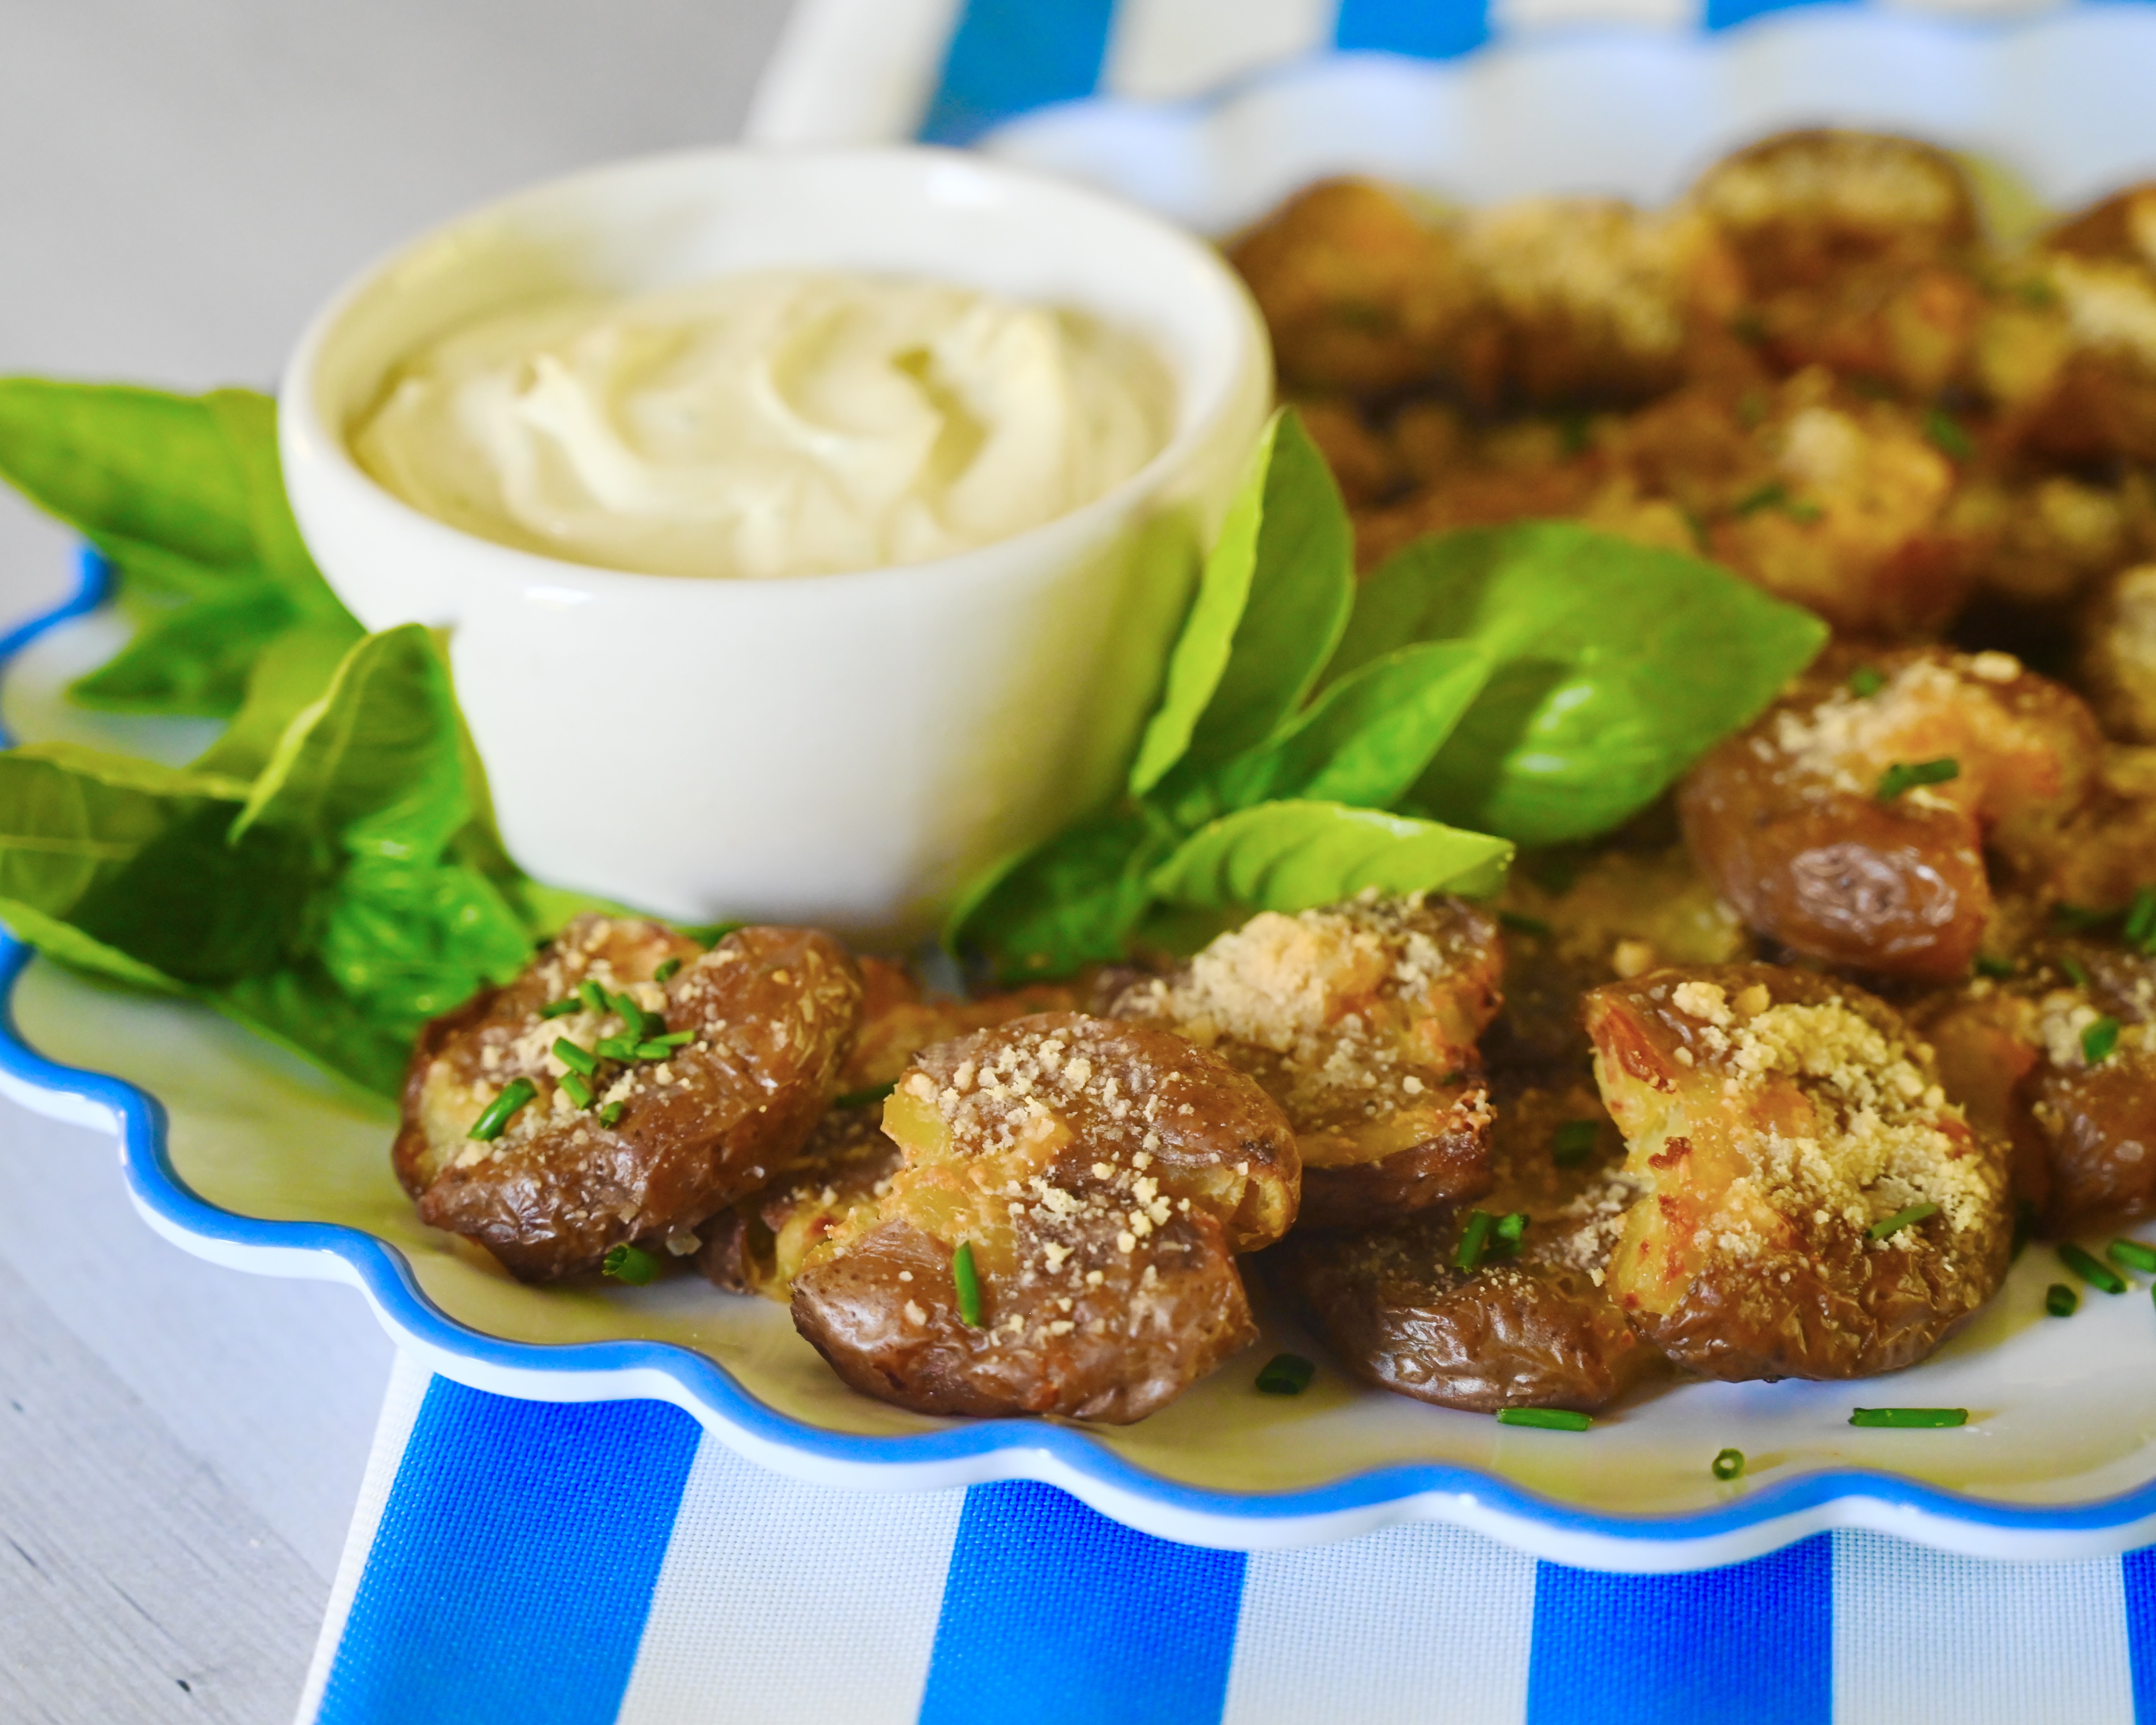
The summer grilling season is here and the side that I love to serve again and again are these smashed potatoes with a pesto aioli dipping sauce. They pair well with grilled tuna, steak or my favorite a Caprese style burger with a slice of fresh mozzarella, tomato and a little of this pesto aioli.
These smashed potatoes take a little time, but they are easy to make and fun to eat. When it comes to summer cooking I like to keep it simple. Using store bought pesto makes this aioli quick. I like the bright flavor of basil and the lemon. It makes a great summer dinner. If you are entertaining you can boil and smash the potatoes ahead of time and then put them in the oven with the parmesan when your guests arrive.
Then place the potatoes in a large stock pot and cover with water. Bring to a boil and cook for 20 minutes. Drain and then place the potatoes in a large mixing bowl and coat the potatoes in the olive oil and salt.
Prepare a sheet pan with parchment paper and then lightly smash or press each potato with the bottom of a metal measuring cup or the bottom of a glass. Then generously sprinkle the tops of the potatoes with the parmesan. Bake for 25 to 30 minutes until golden and crispy. While the potatoes are roasting make the pesto aioli. Serves four to six.
Pesto Aioli
1 cup good mayonnaise
1 teaspoon pesto (like Giovanni Rana)
1 teaspoon fresh lemon juice
In a small bowl or ramekin mix together the mayo, pesto and lemon juice. Keep refrigerated until serving.
These crispy potatoes are smashingly good and more special than your ordinary fries or chips. So serve up a delicious Italian inspired dinner with my smashed parmesan potatoes with pesto aioli. Buona cena!
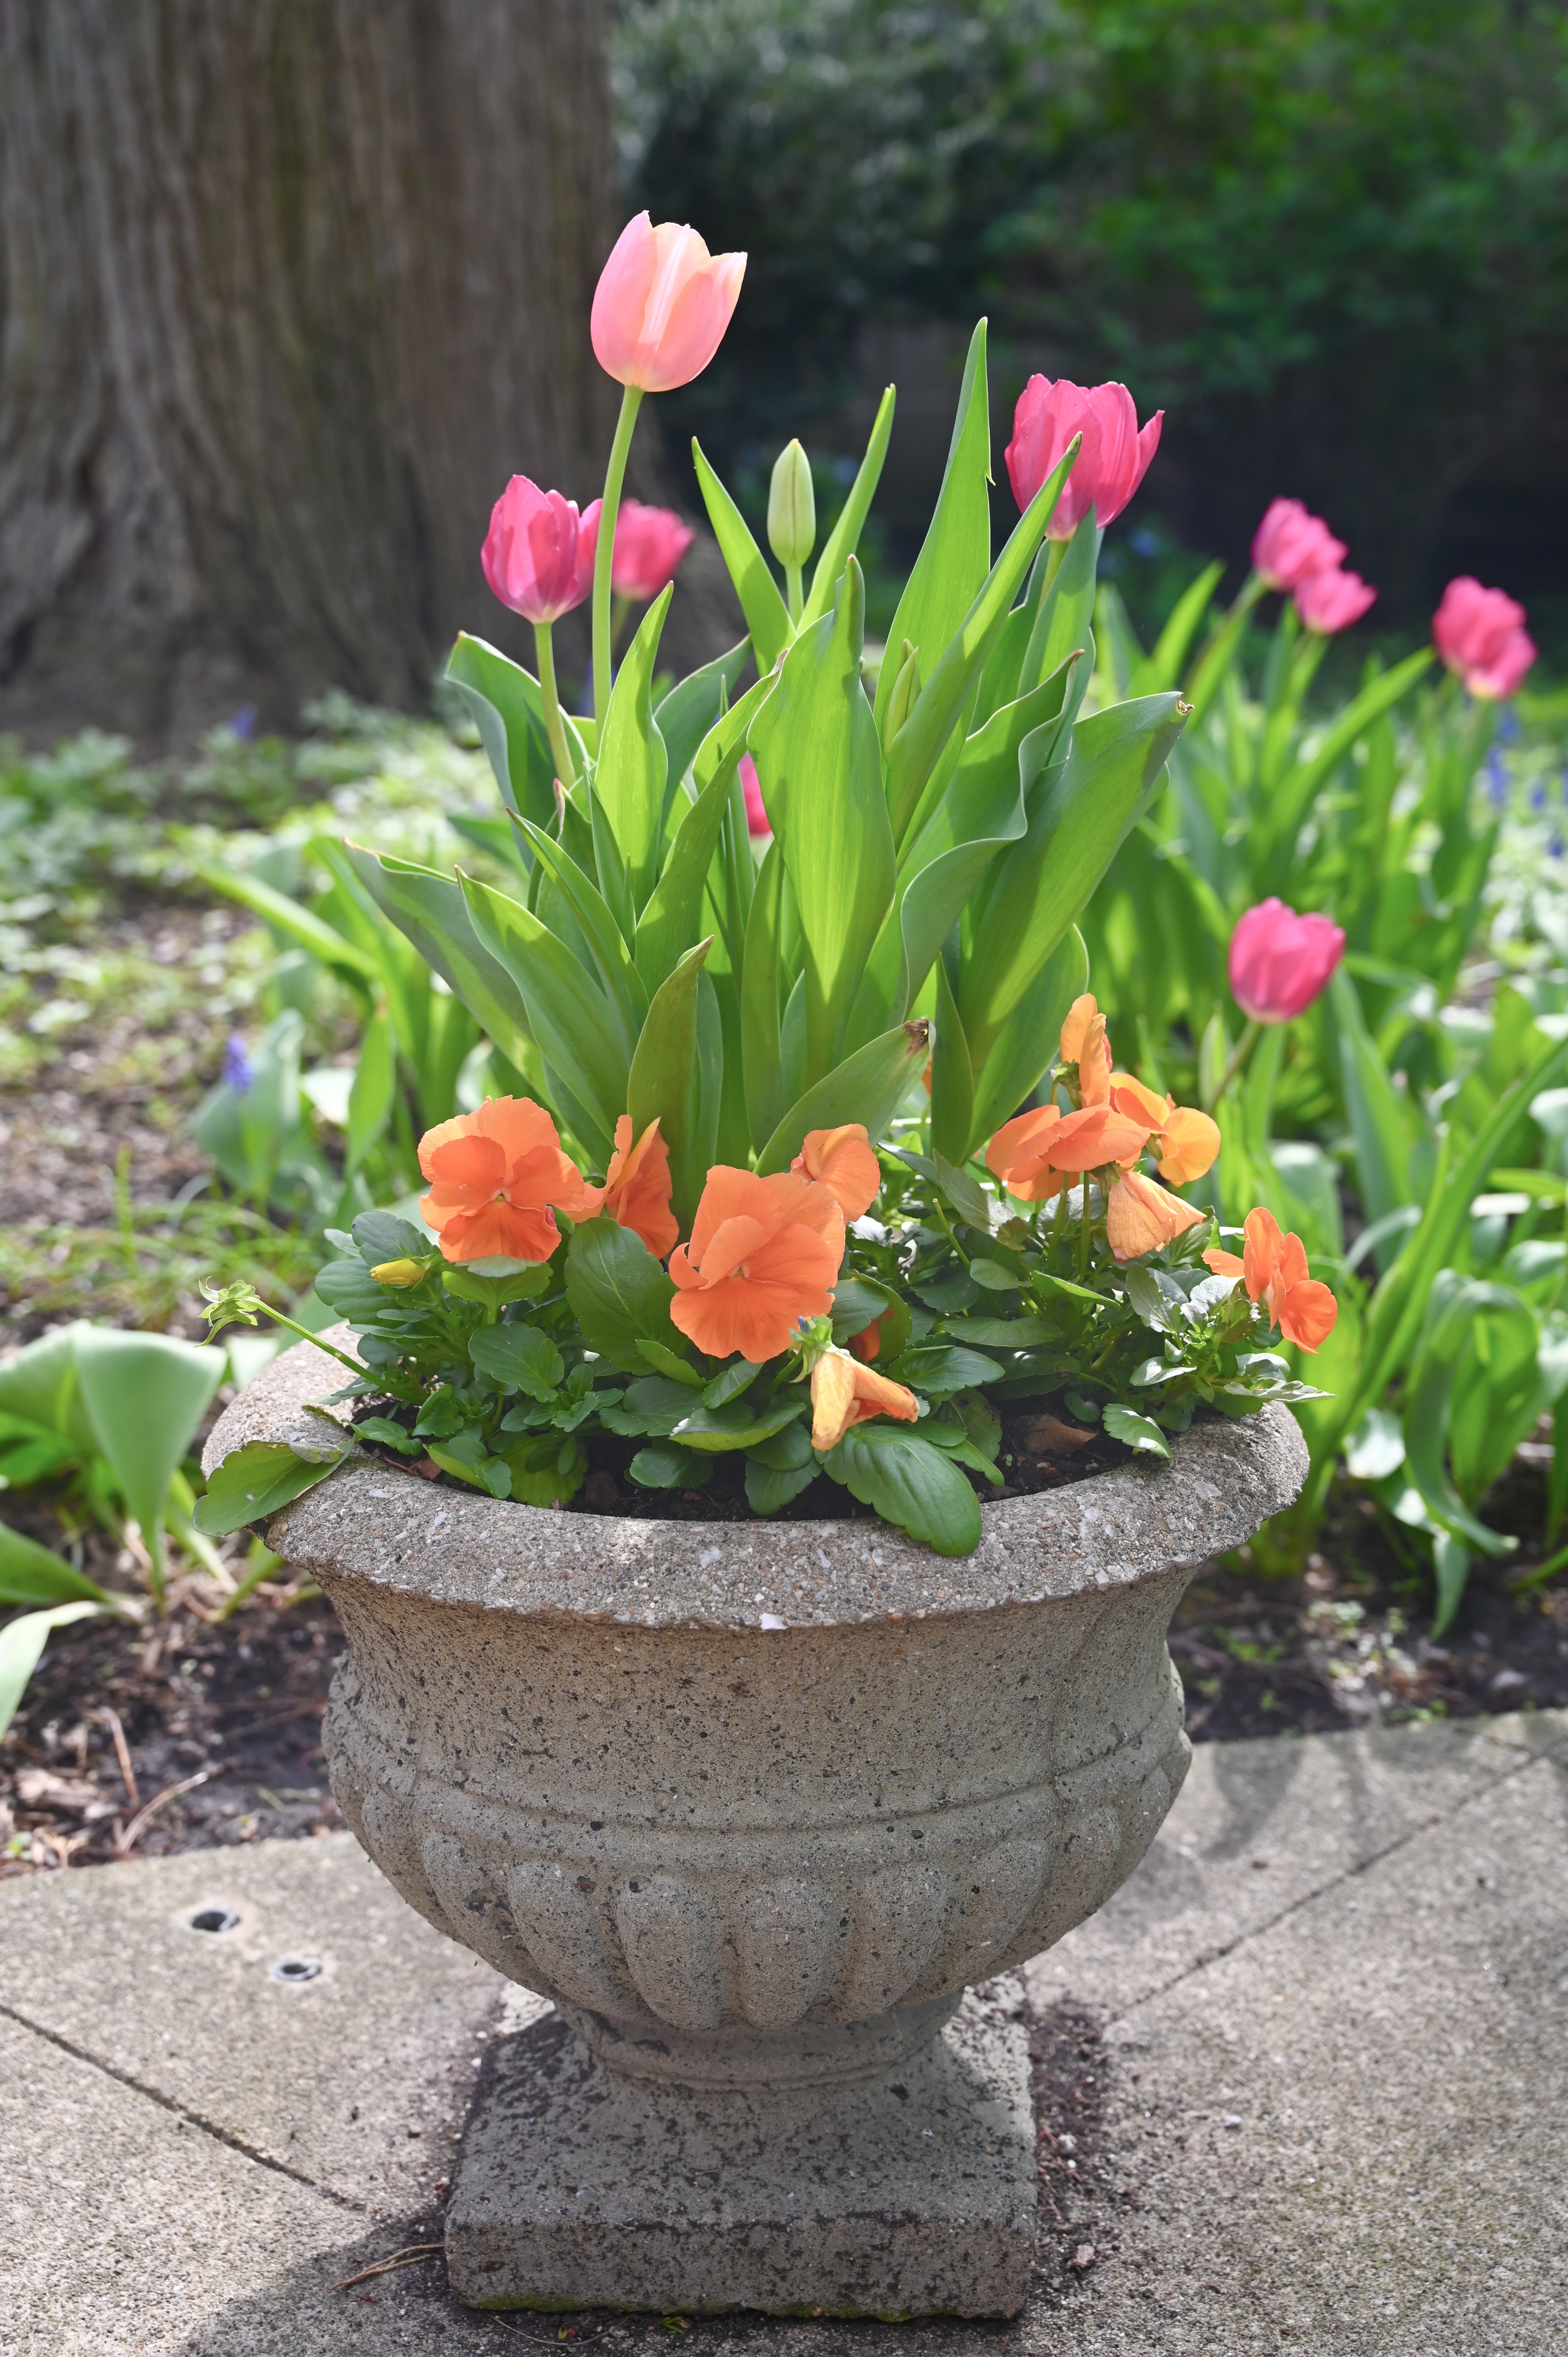
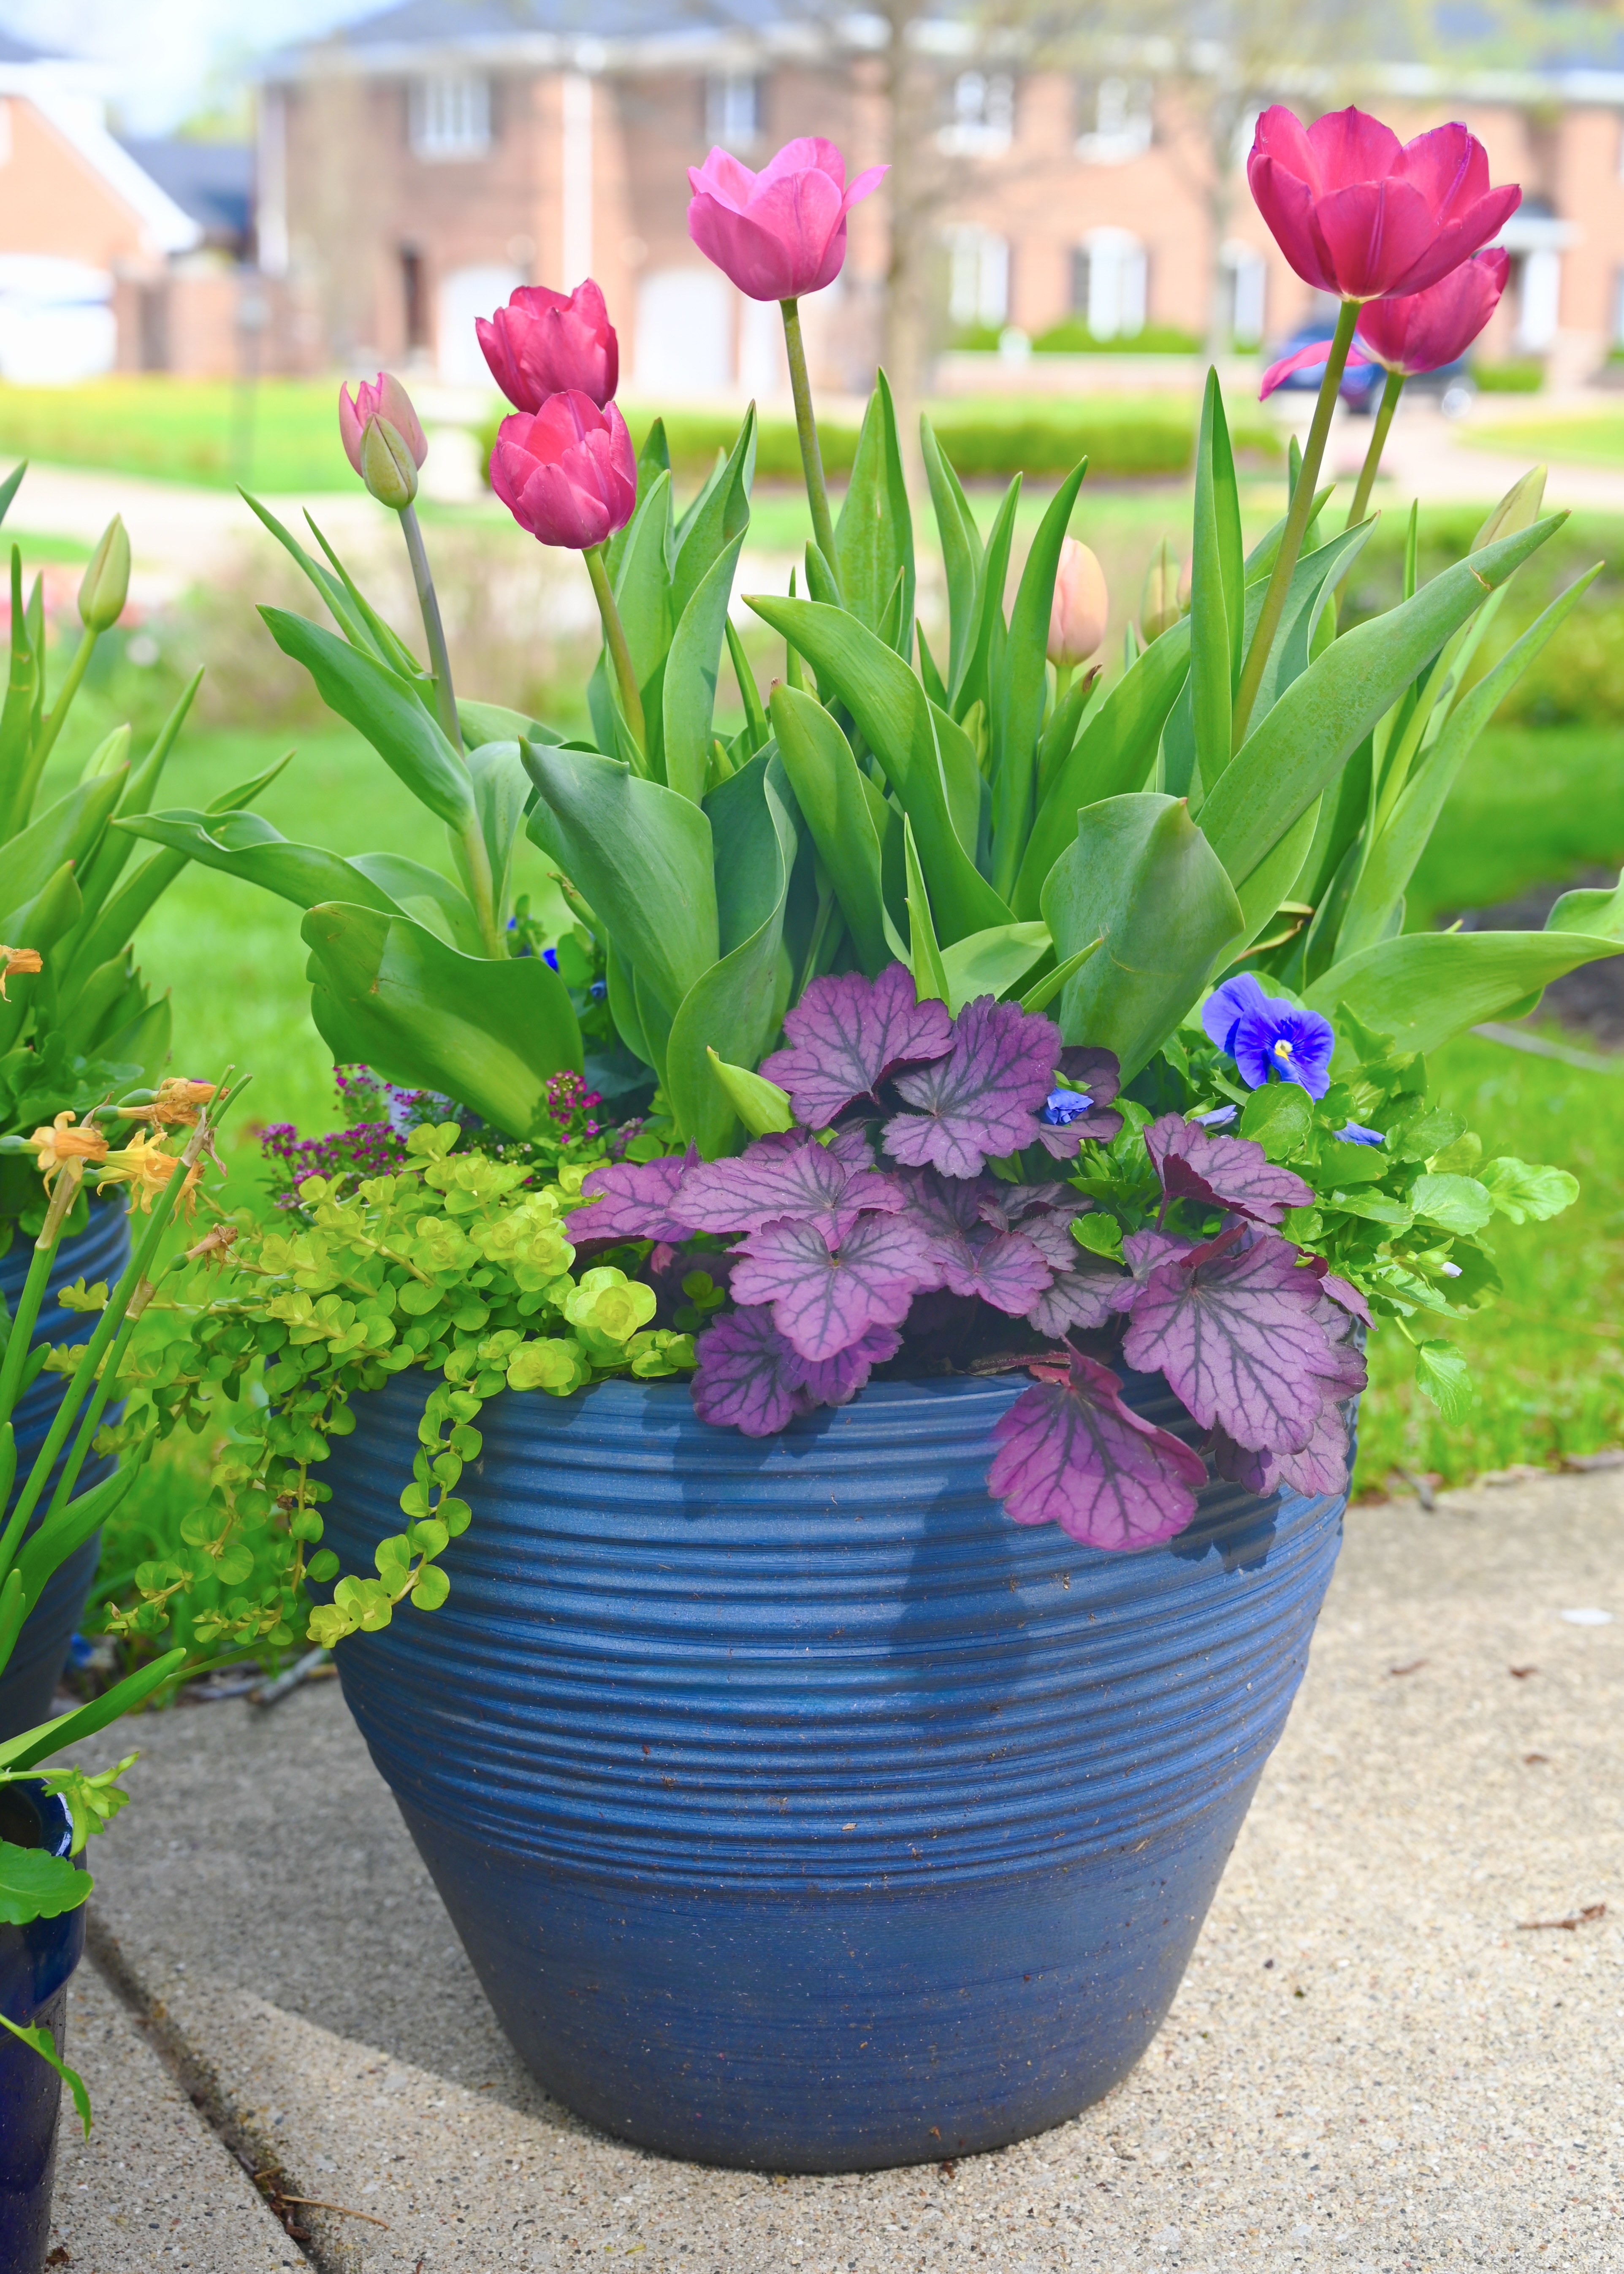
Every fall I spend two days planting a thousand tulips bulbs in my garden. I can’t image spring in Chicago without pink tulips. Over the years I have grown other colors but I have found that nothing brings me joy quite like pink. Because I adore all of its shades – fuchsia, flamingo, blush, rose, peach and coral.
As Matthew Green once wrote “In a world that often lacks compassion, pink stands as a reminder to be kind.” Pink has a warm and gentle glow. I find it nearly impossible to see pink flowers and not smile.
After all, pink is the happiest of spring’s colors. A sun kissed reminder of nature’s astounding beauty.
Wanting the spring tulip party to continue for weeks, I carefully plant mixes of mid and late season tulips. So that that once the fuchsia “pink ardor” tulips fade I have a new set of “French rose” blooms in even more shades of rose, coral and apricot.
I have them tucked into every corner of my yard because a gardener can never get enough pink tulips.
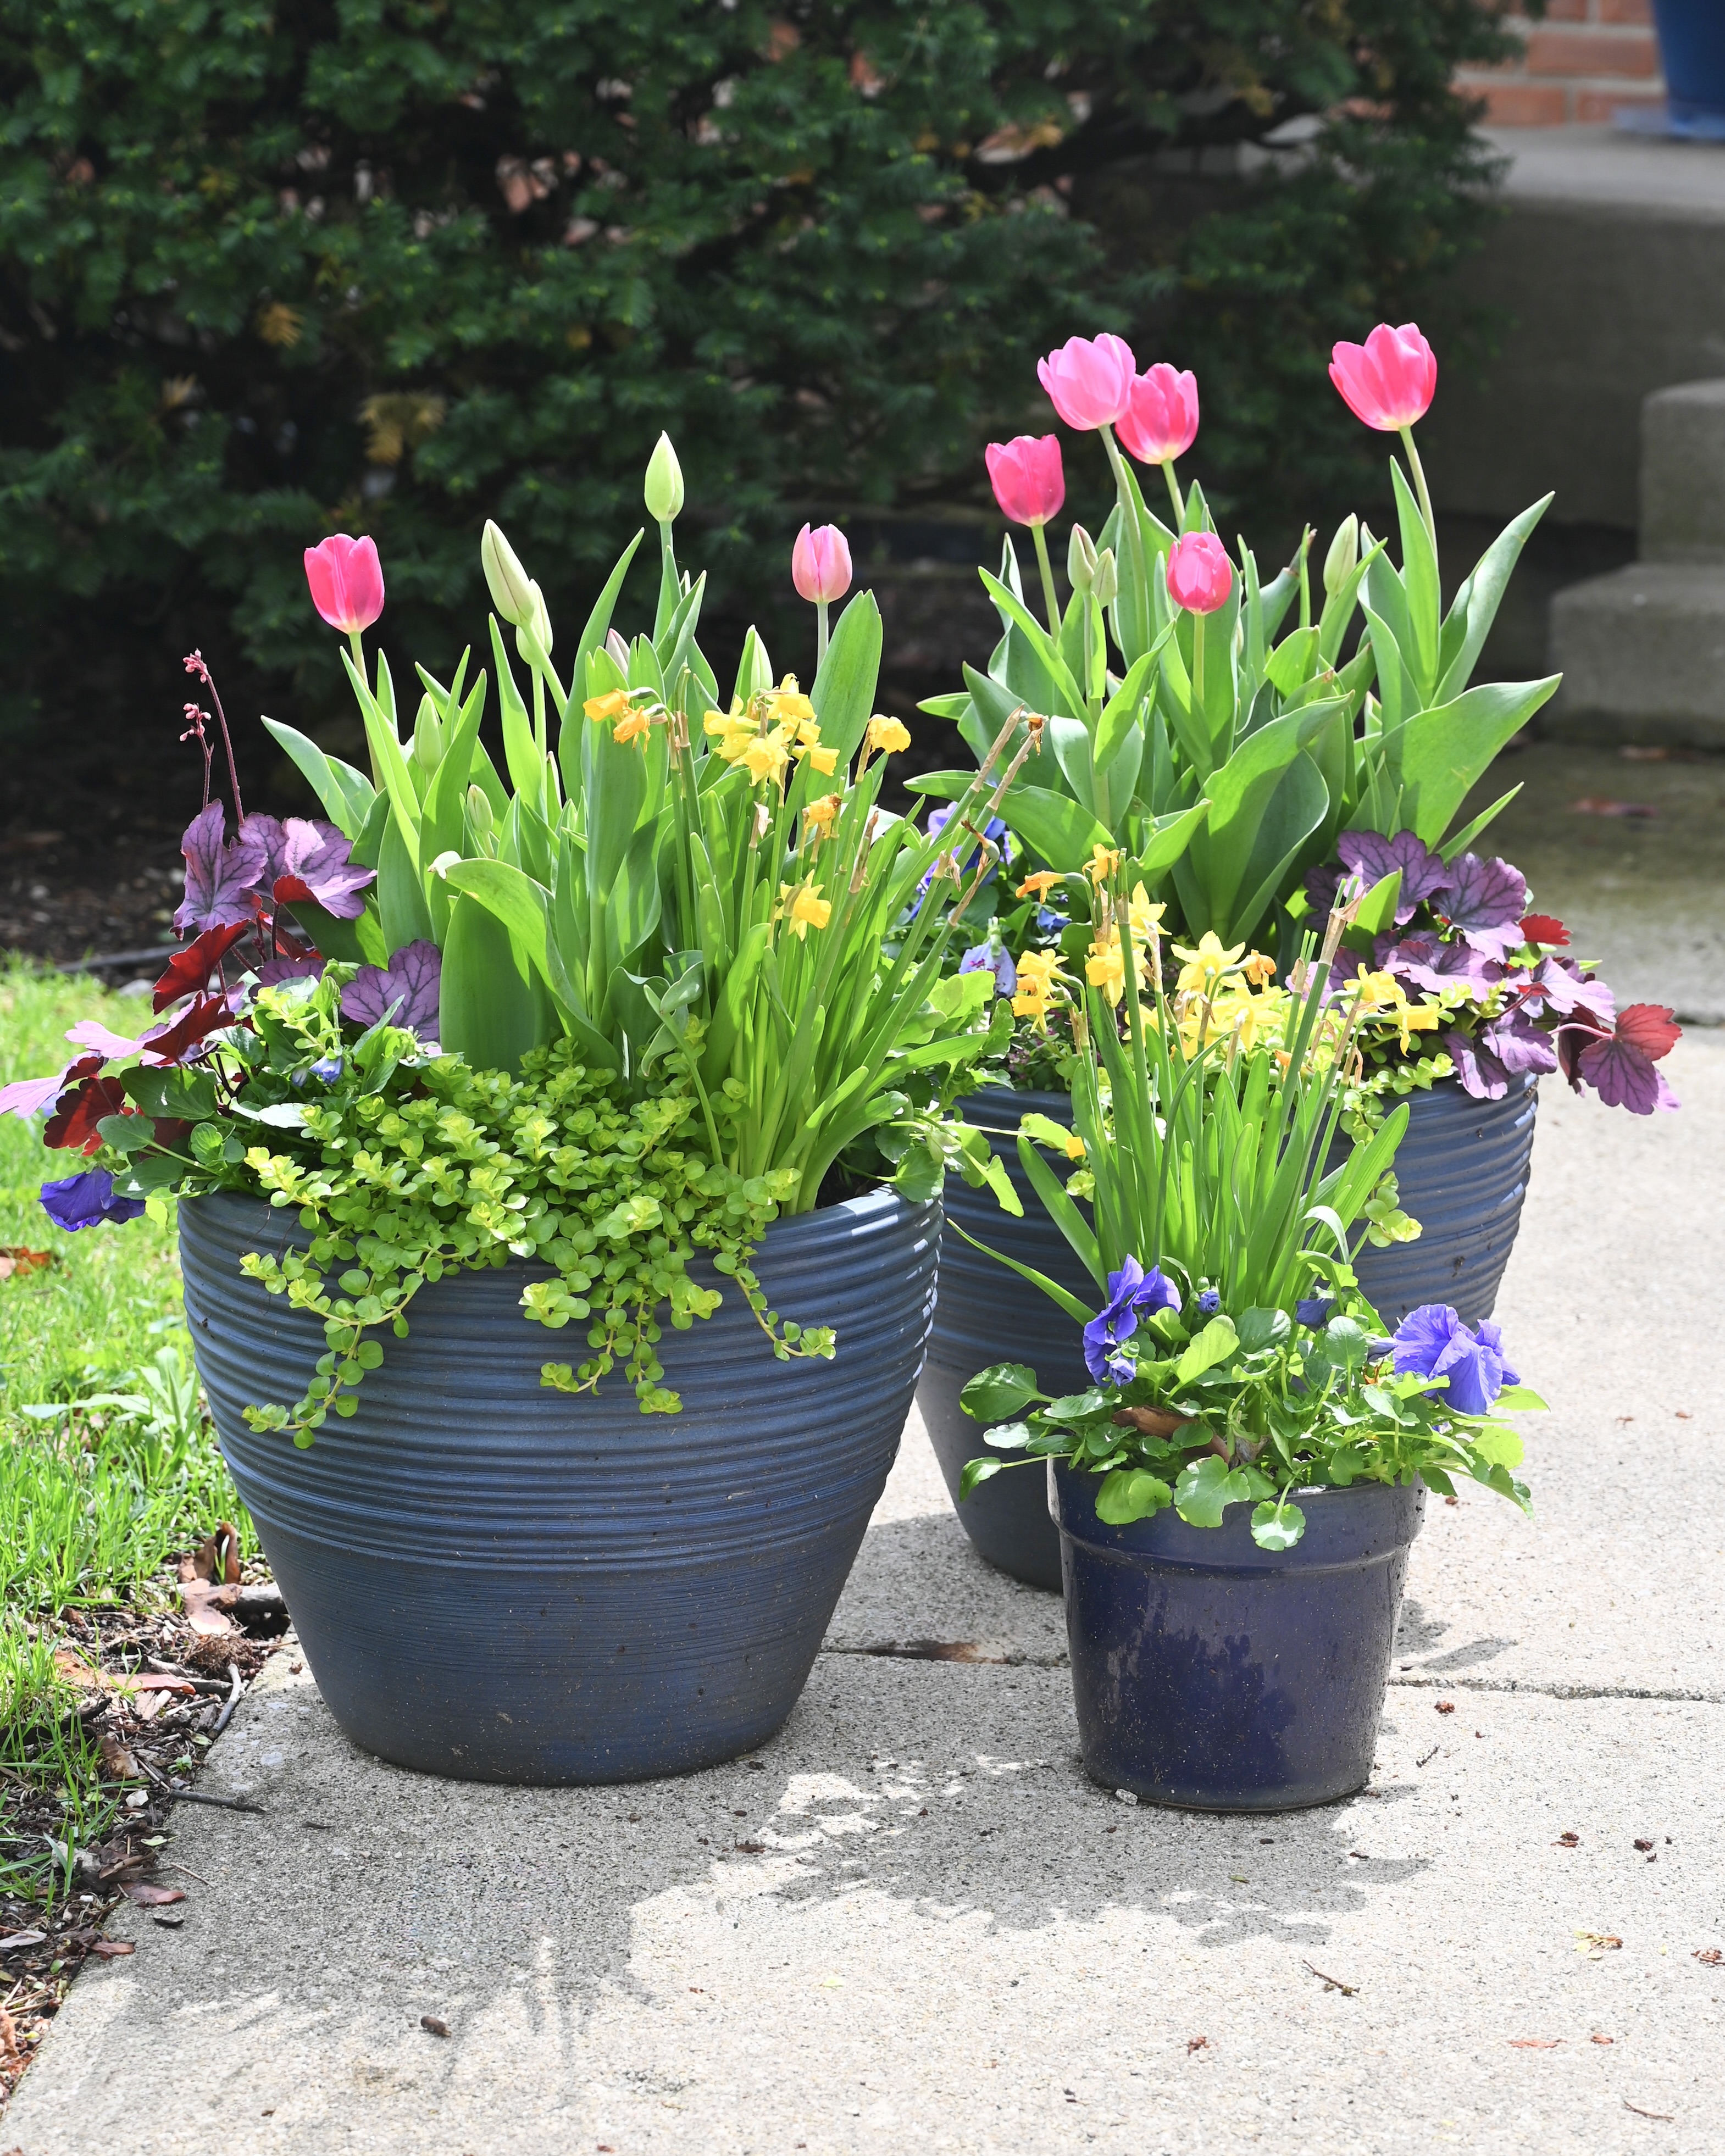
I plant extra bulbs in nursery pots that I bury in the ground and then when spring arrives I plant them in pots with pansies.
There are daffodils, violas and other flowering friends as well. Because I love pink tulips in flower pots too.
Then as the daffodils finish more tulips begin to bloom with wild berry coral bells and chartreuse creeping Jenny.
A large drift of pink ardor and sherbert blend tulips make for a spectacular show in with a row of grape hyacinths.
Perhaps the best part of gardening is getting to paint with all of these beautiful shades of pink.
So now that spring’s blossoms are here I am seeing the world through a kinder shade of pink.
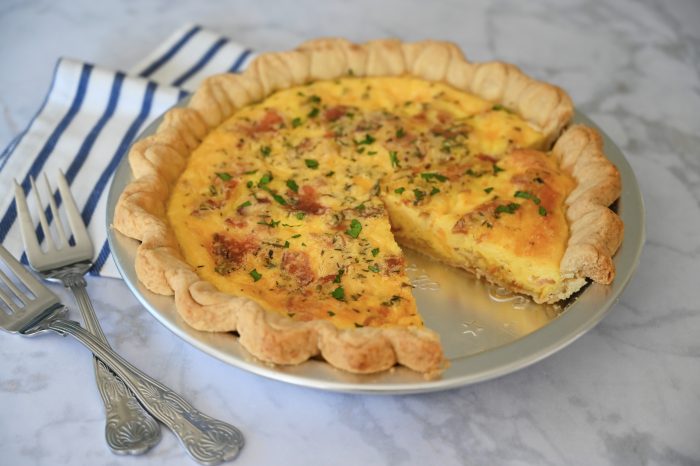
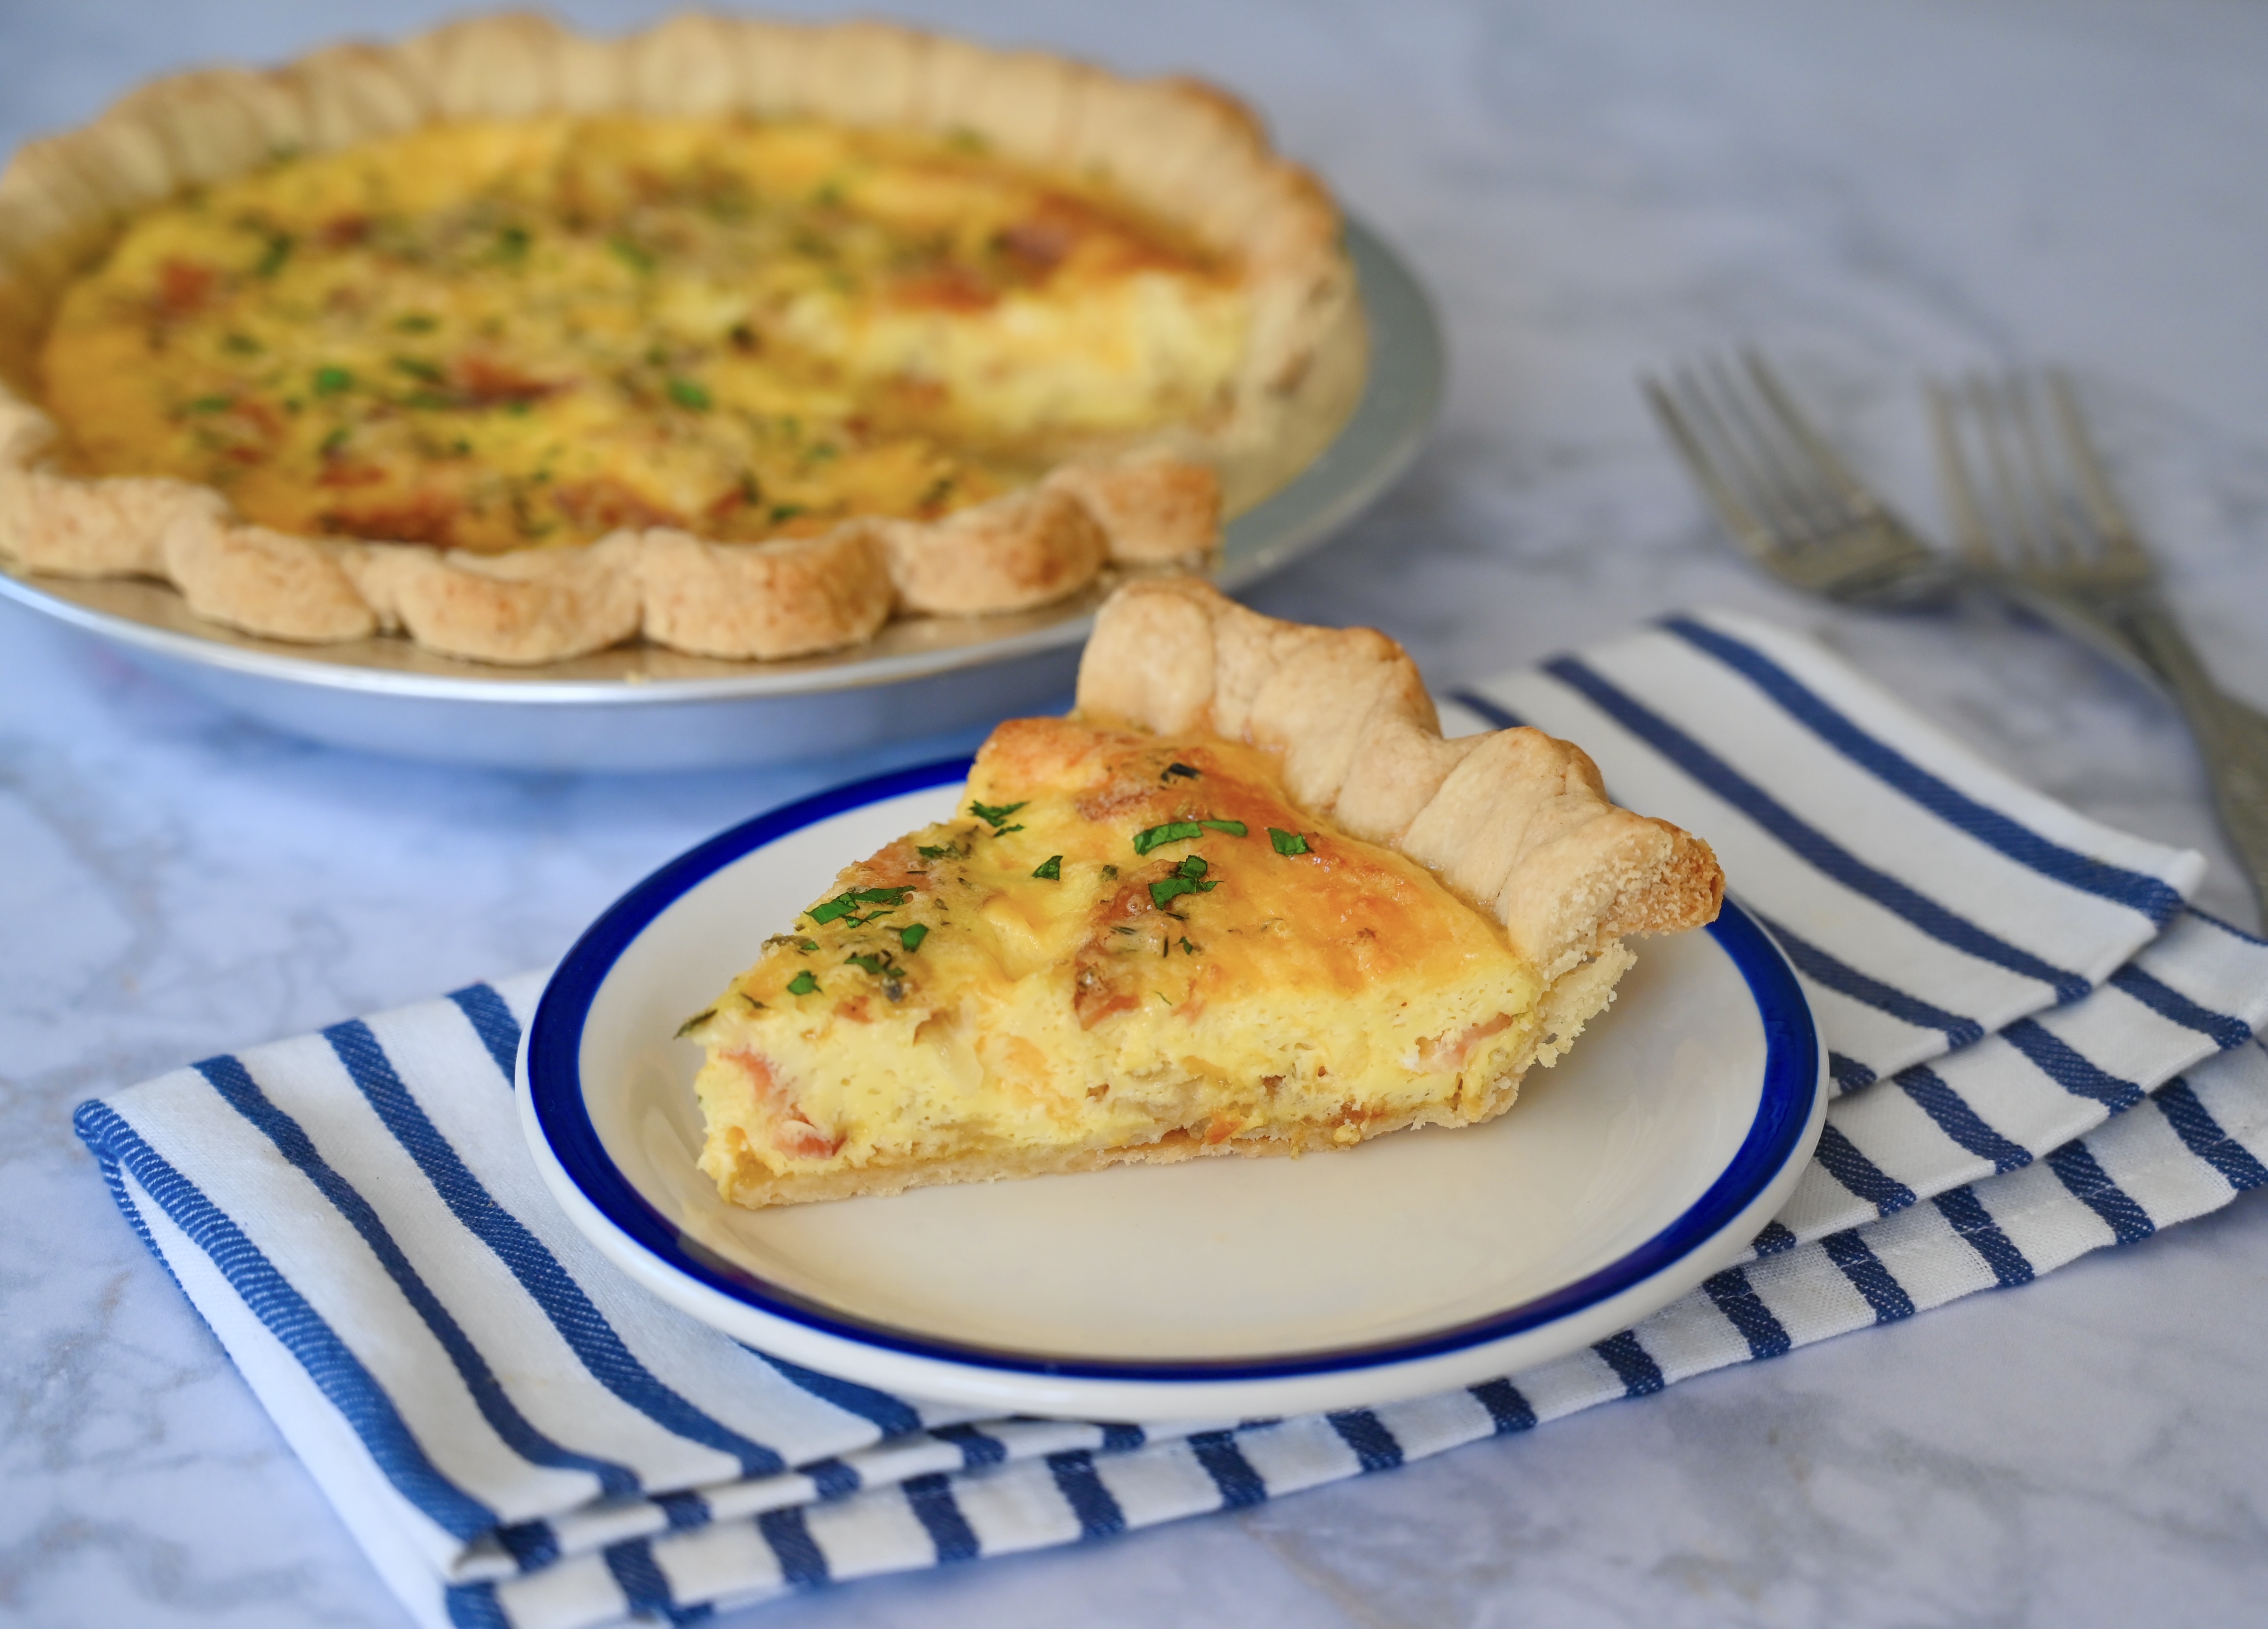
Quiche in my mind is the perfect bite. The combination of the flakey pastry with a creamy egg custard, crisp bacon, caramelized onion and cheese leaves me swooning. It’s a glorious celebration of eggs. As a result, I love serving quiche for brunch or as a delicious spring dinner.
According to Tasting Table this classic tart has both French and German origins. It originated in a region of France called Lorraine that had previously been under German rule. So, quiche as we know it is a French version of a German egg dish called spekkuchen. However, quiche did not become well known dish in America until Julia Child made it on her television show The French Chef in 1963.
Child featured several Quiche recipes on her show. However, as I watched an old episode, I smiled as she instructed her audience to choose their own level of pie crust. She explained that if time in the kitchen was an issue, then she would suggest a store-bought crust. In order to prove her point she made two quiches one with a premade crust and one with a homemade crust. More than ever, I appreciate that Julia was looking after the home cook.
I have written about this quiche before, but I have not included a recipe for my homemade crust. So this is recipe has been updated to include the pastry crust. Because if you have the time for a little cooking adventure there is nothing quite like a homemade pie crust.
However, regardless of what kind of crust you are using the key to a good quiche is to blind bake it before adding the filling. This will create a crisp bottom pastry which is the hallmark of a wonderful quiche. This recipe can be adapted to add your own favorite fillings. If you want to make it vegetarian, then leave out the bacon. Then finish with a salad to make it a wonderful dinner. Thus, as Julia would say “Bon appétit!”
Pastry Crust
1½ cups all purpose flour, plus more for rolling the dough
½ teaspoon salt
2 teaspoons sugar
3/4 cup cold butter, cut into small cubes
3 tablespoons of cold water
In the bowl of the food processor pulse together the flour, salt and sugar.
Add in the cubed butter and pulse until the butter is cut in and the texture looks like breadcrumbs.
Add the water in the shoot while running the processor on medium speed and mix until the dough comes together in a ball.
Take the dough out and place it on a well floured work surface or silicone baking mat. If the dough feels warm you can refrigerate it first, but I like to roll it out immediately while it is easier to work with and then refrigerate the dough once it is in the pie plate.
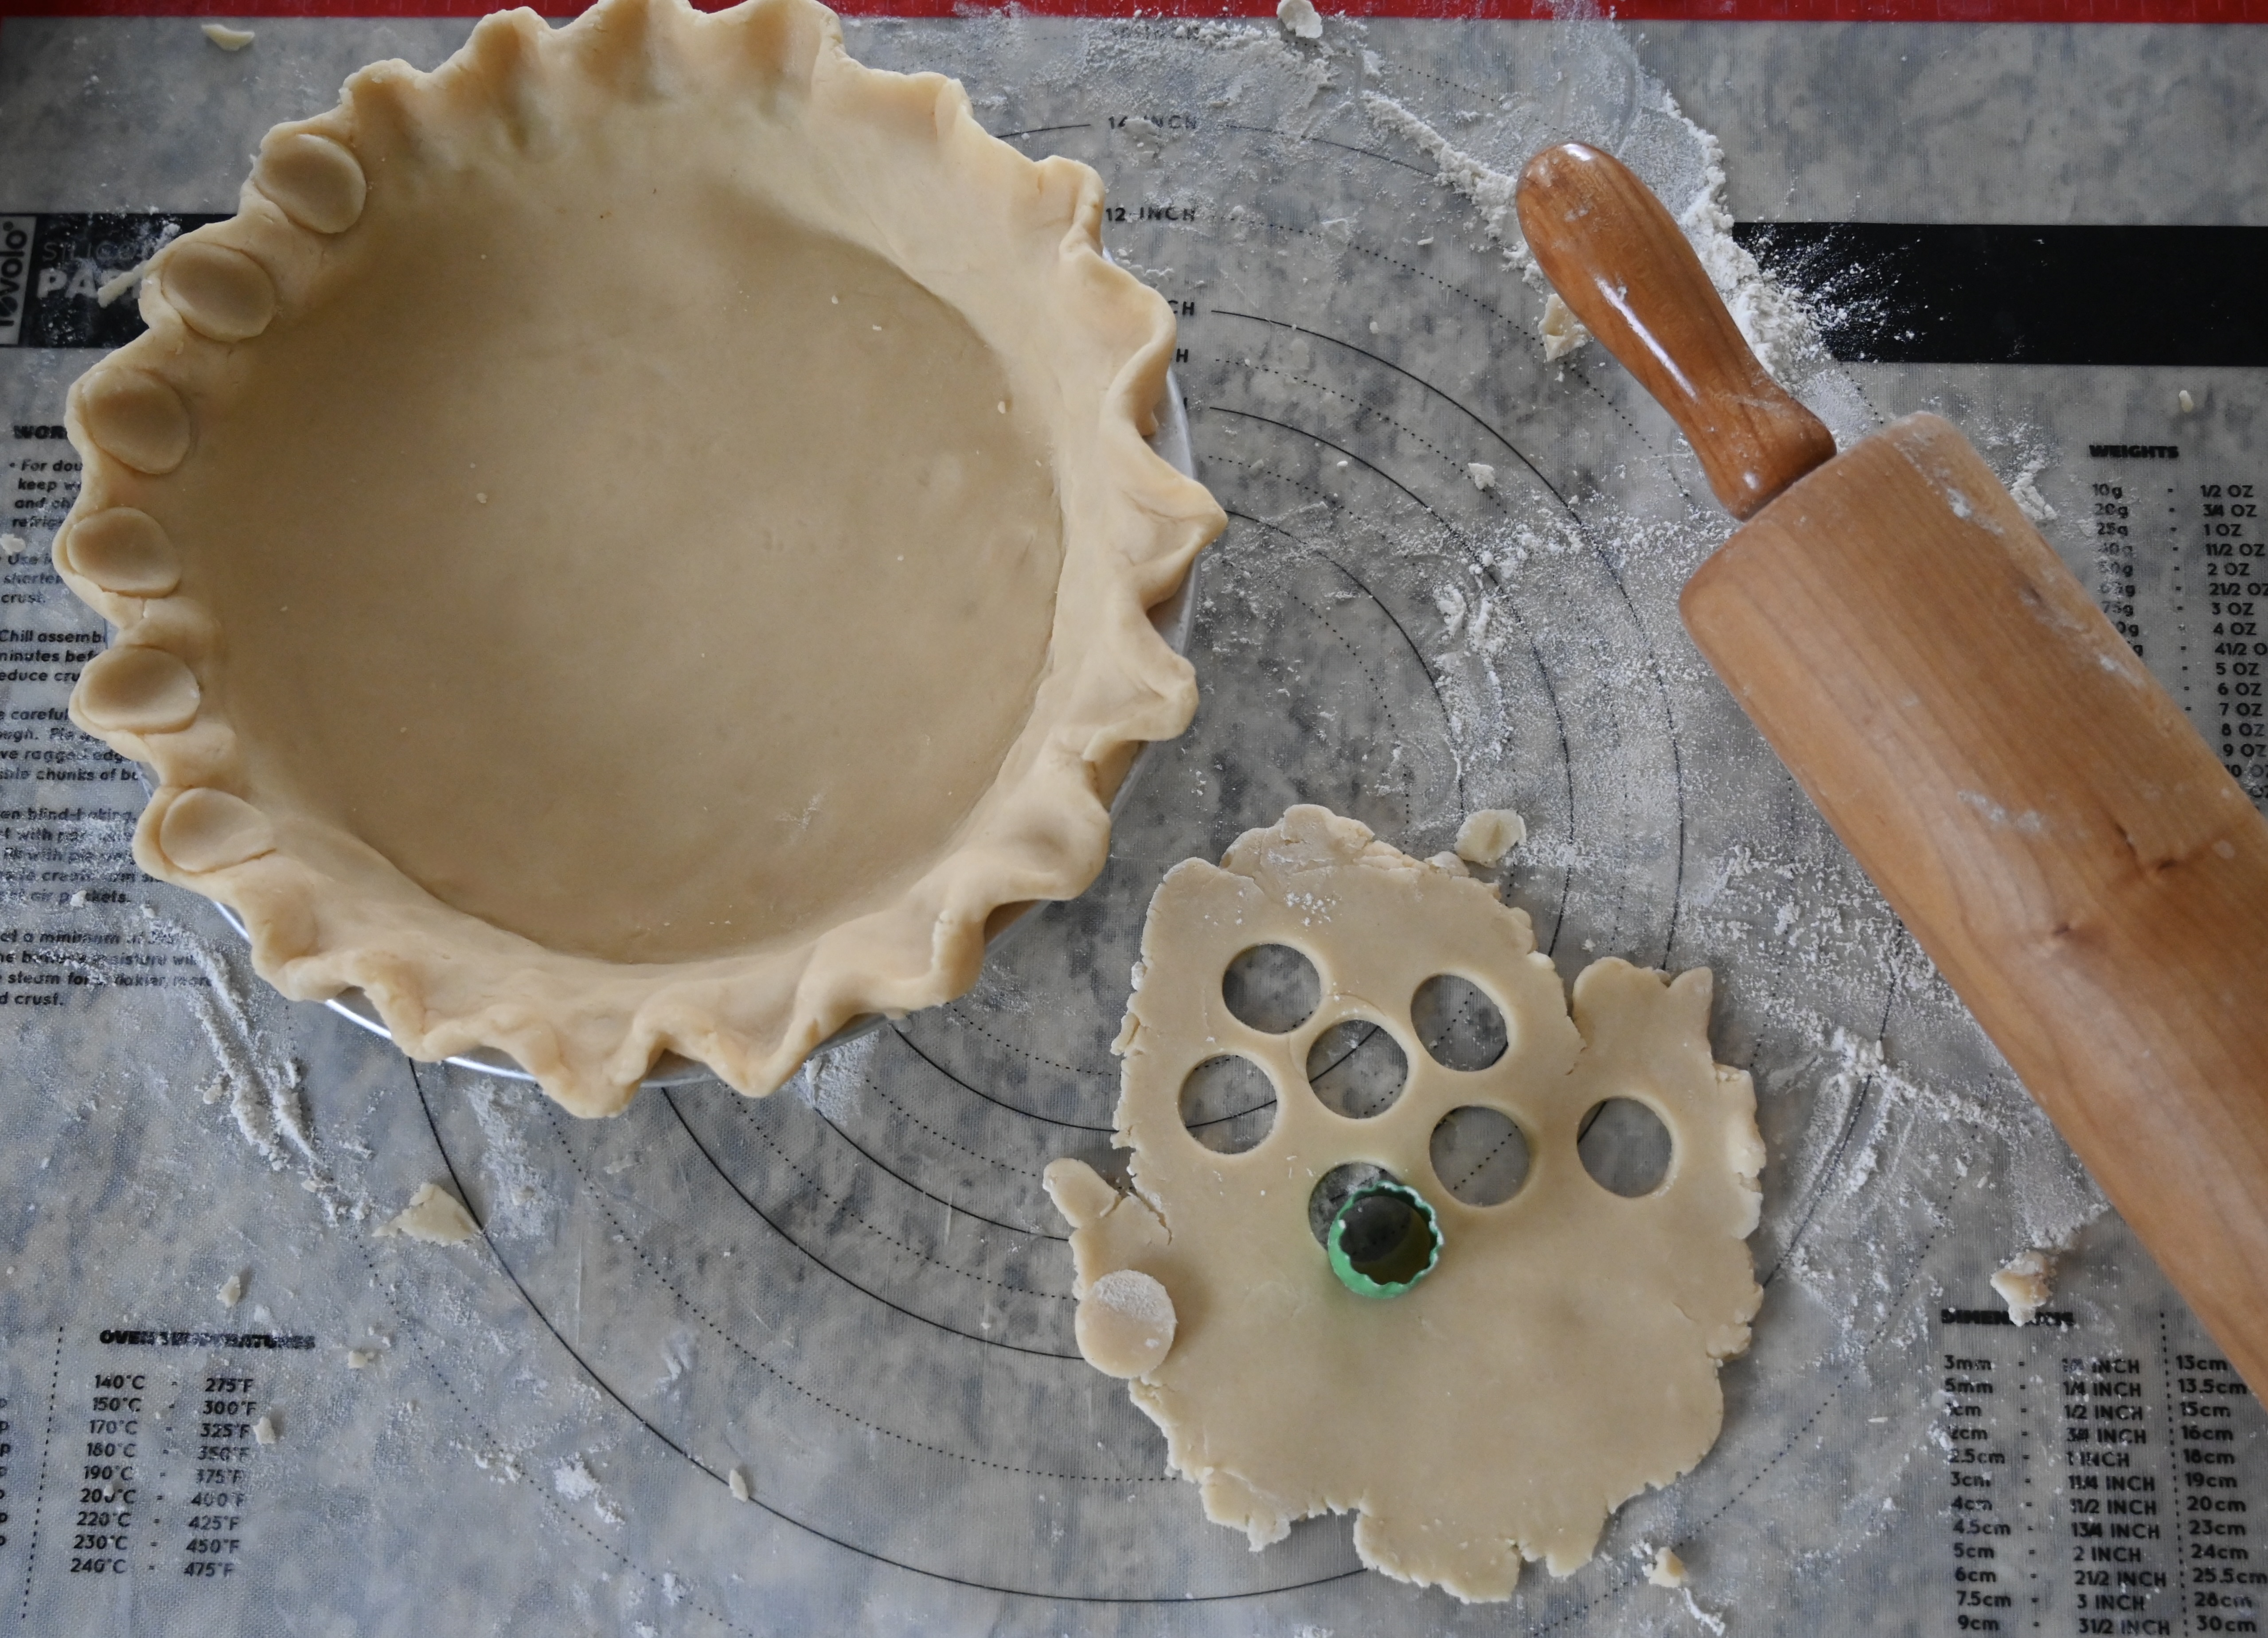
Shape the dough into a disk and sprinkle more flour on top and using a rolling pin roll it out to create a 12 to 13 inch circle. Then use the rolling pin to help transfer the dough over the 8 inch pie plate by rolling it half way on the pin and then sliding the pie plate underneath so the rolling pin is in the middle of the pie plate. Gently unroll the dough on top and make sure the dough falls into bottom and sides of the pan.
This recipe makes a generous amount of dough. It’s a pie crust and a half so there is plenty of dough to make the crimped edges. You could have a small amount left once you trim the circle out.
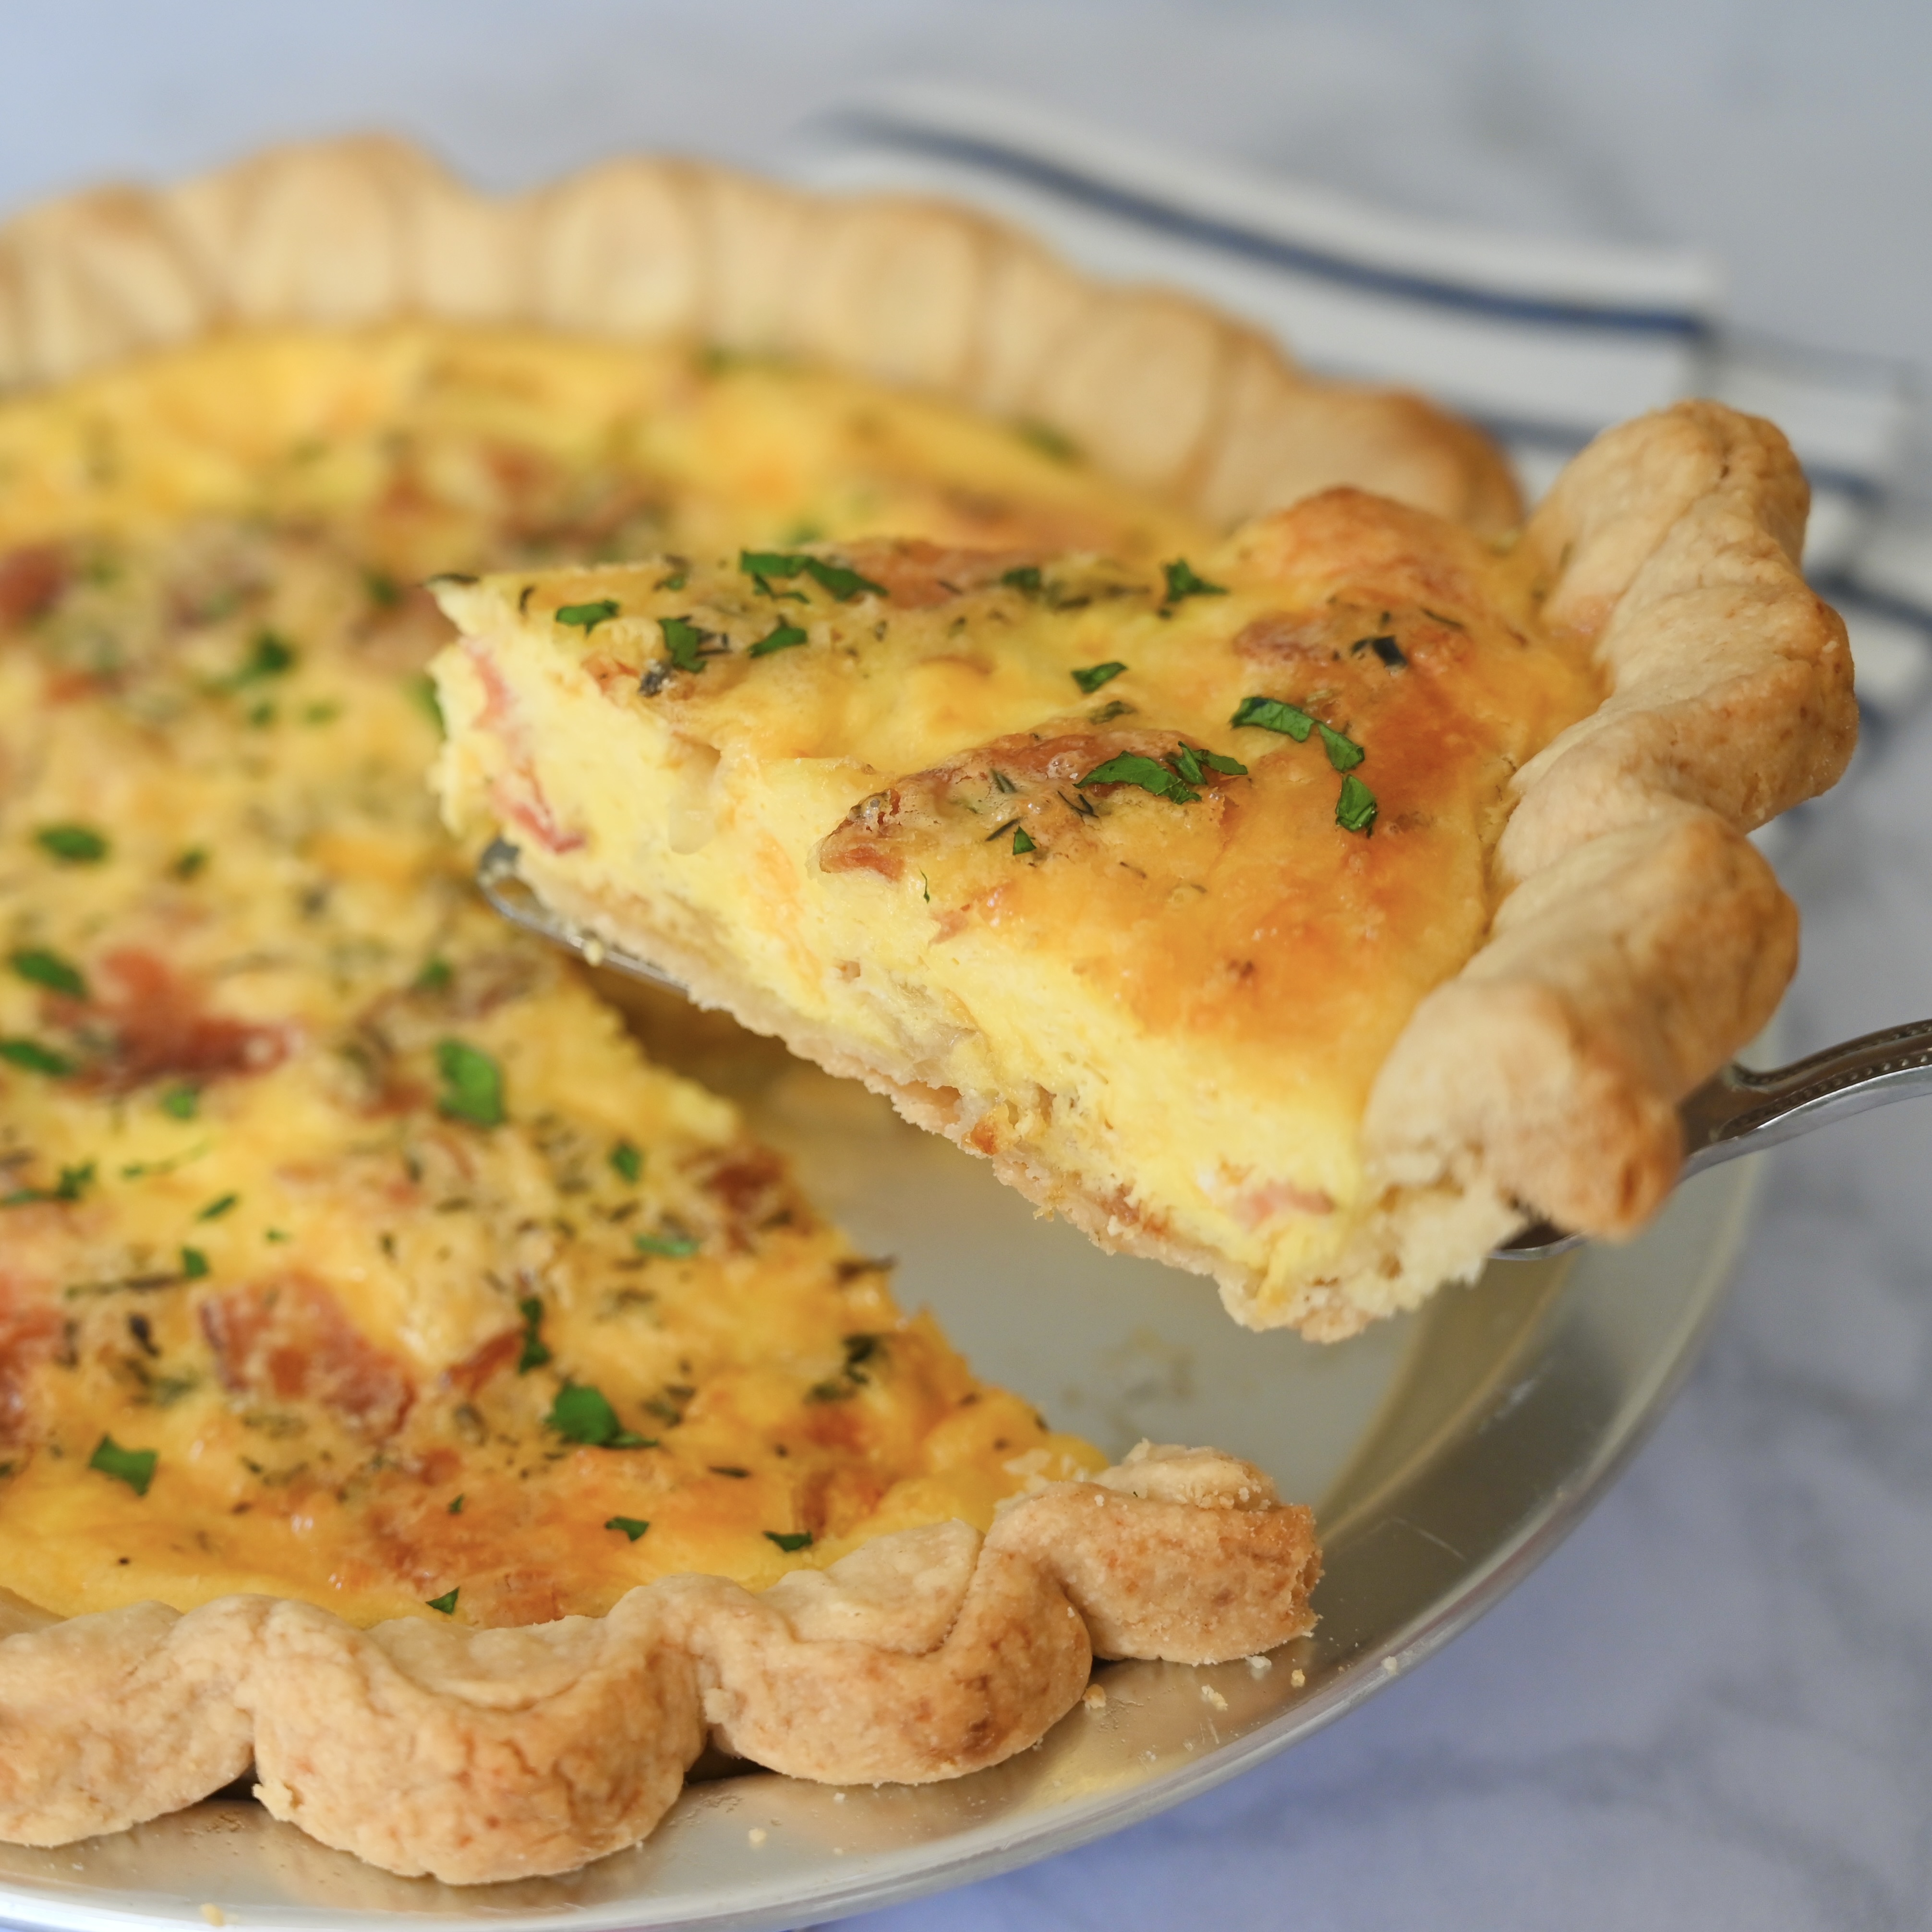
Flute the edges by folding the edge of the dough under and crimping it. I like to use two hands by placing my pointer and the index finger from one hand to create a V on the outside and use my other thumb to push in the middle of the crimp. I added an optional extra decorative touch with small circles of dough from the scraps and place those circles in the center of each crimp. This makes the outside crust thicker and sturdier when you blind bake it. I like adding this decorative detail because it looks like flower petals. However, this is completely optional.
I like adding the small circle cut out to the edge because it makes the finished crust look like a beautiful sunflower.
Once the crust is ready place it in the fridge to chill.
Caramelized Onion and Bacon Quiche
1 unbaked 8 to 9 inch pie crust, homemade or store bought
1 cup yellow onion sliced into thin half-moon slices
2 tablespoons butter
4 slices bacon, cooked and crumbled
1 cup shredded cheddar or white cheddar cheese
6 eggs (I like the Little Farm eggs at Kramers and Pete’s)
¾ cup cream
¼ tsp kosher salt
¼ teaspoon Herbs de Provance
1 tablespoon finely chopped parsley or chives
Preheat the oven to 375 degrees. Roll out the pie dough and place it in an 8-inch pie plate.Make sure that you press the crust to the sides of the pie plate to keep it from sliding down. If using a prepared crust already in a pan, then make sure it is defrosted. Dock or pick the bottom of the pie with a fork about 16 times. Chill the unbaked crust in the fridge for at least 30 minutes. This will prevent shrinkage when baked.
While the pie dough is chilling caramelized the onions. Melt 2 tablespoons of butter in a medium sized skillet. Cook the onions over medium to medium-low heat stirring occasionally until golden brown.
Cut a large 16-inch parchment paper circle and crumple it so it will be flexible. Line the inside of the pie dough with the parchment paper and fill it with pie weights or dried beans.
Bake the crust for 15 minutes. Remove the parchment paper and weights. Return the pie to the oven to bake for an additional 7 minutes.
Sprinkle the caramelized onions, cheese and bacon evenly over the bottom of the pie crust. In a medium sized bowl whisk together six eggs, 3/4 cup of cream, salt and Herbs de Provance. Pour the egg mixture in the pie crust.
Lightly spray a large sheet of aluminum foil with cooking spray. Tent and cover the quiche in the foil. Bake covered for 45 minutes.You will know the quiche is done when the eggs puff and the center is firm. Finally, garnish the top with finely chopped parsley and chives.
On a day when we are covered in a blanket of snow and the temperatures are frightfully low I am reminded of the power of sunshine. I have been working on some writing projects with my daughters as winter has kept us in. This weekend my youngest Alyssa was writing a short story while my oldest daughter Gabriella has been working on a poetry project. She had to write a metaphor poem and chose to write about the sun and happiness. Her thoughts about the sunshine and how its light touches everything are beautiful. I added a couple of lines here along with some of my photography. I wanted to share her poem because after a week of troubling headlines the world could use some of her light.
The Sun
Happiness is the Sun
As it rises its smile grows brighter
Its pink and orange warmth fills the sky
The dewy green grass glows in its early light
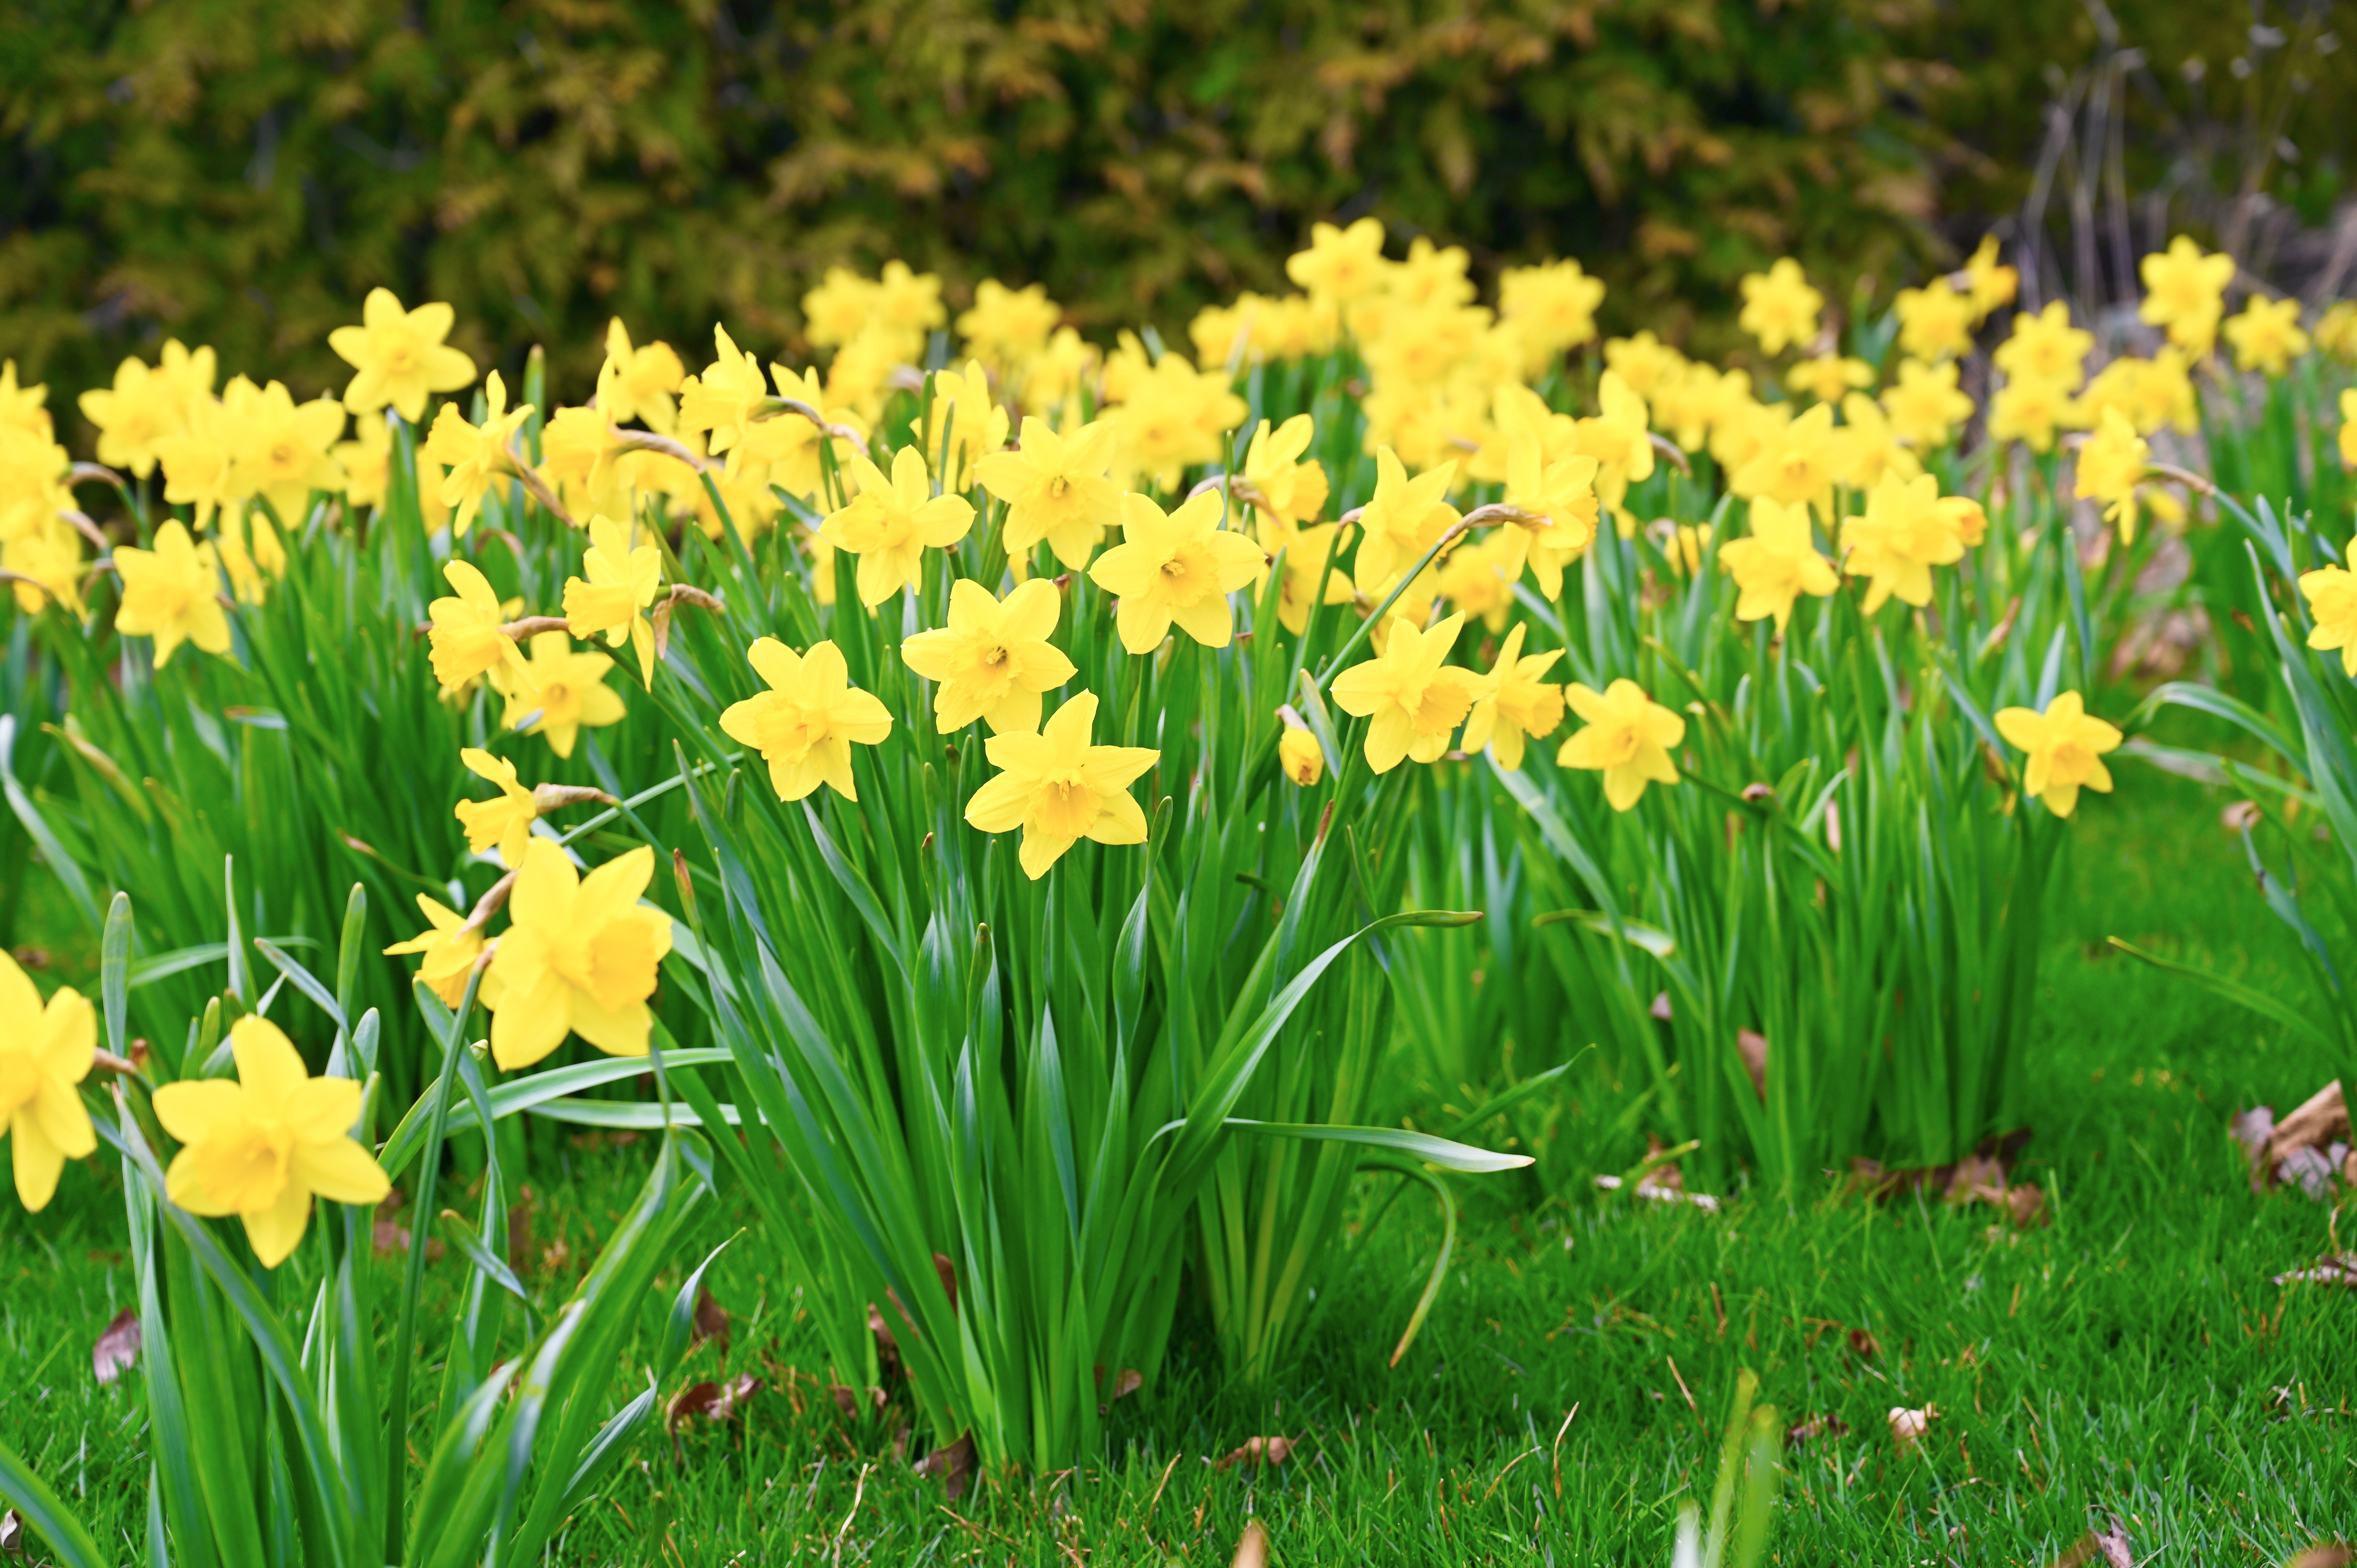
While golden daffodils rise to greet it
The tulips begin their vibrant color parade
Birds sing sweet songs to celebrate the dawn
The beginning of a bright new day
Its light brings comfort like a warm blanket to creatures great and small
Every January, when the cold settles in, I find myself longing to be in the kitchen. Because nothing lessens the chill like having something warm simmering on the stove. I like to look out my kitchen window and watch the snowflakes swirl. On days like this I like to cook while listening to one of my favorite food podcasts.
There is something wonderful about the freedom that a snowy day brings. It lets you live in the moment with nothing to rush off to. So, I happily escape to my kitchen. I love the rhythm of chopping vegetables and hearing the sizzle of the olive oil as I slide them off the cutting board and into the skillet.
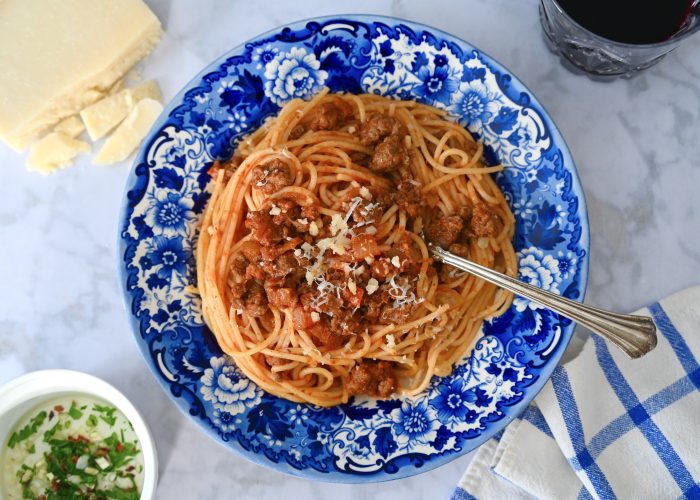
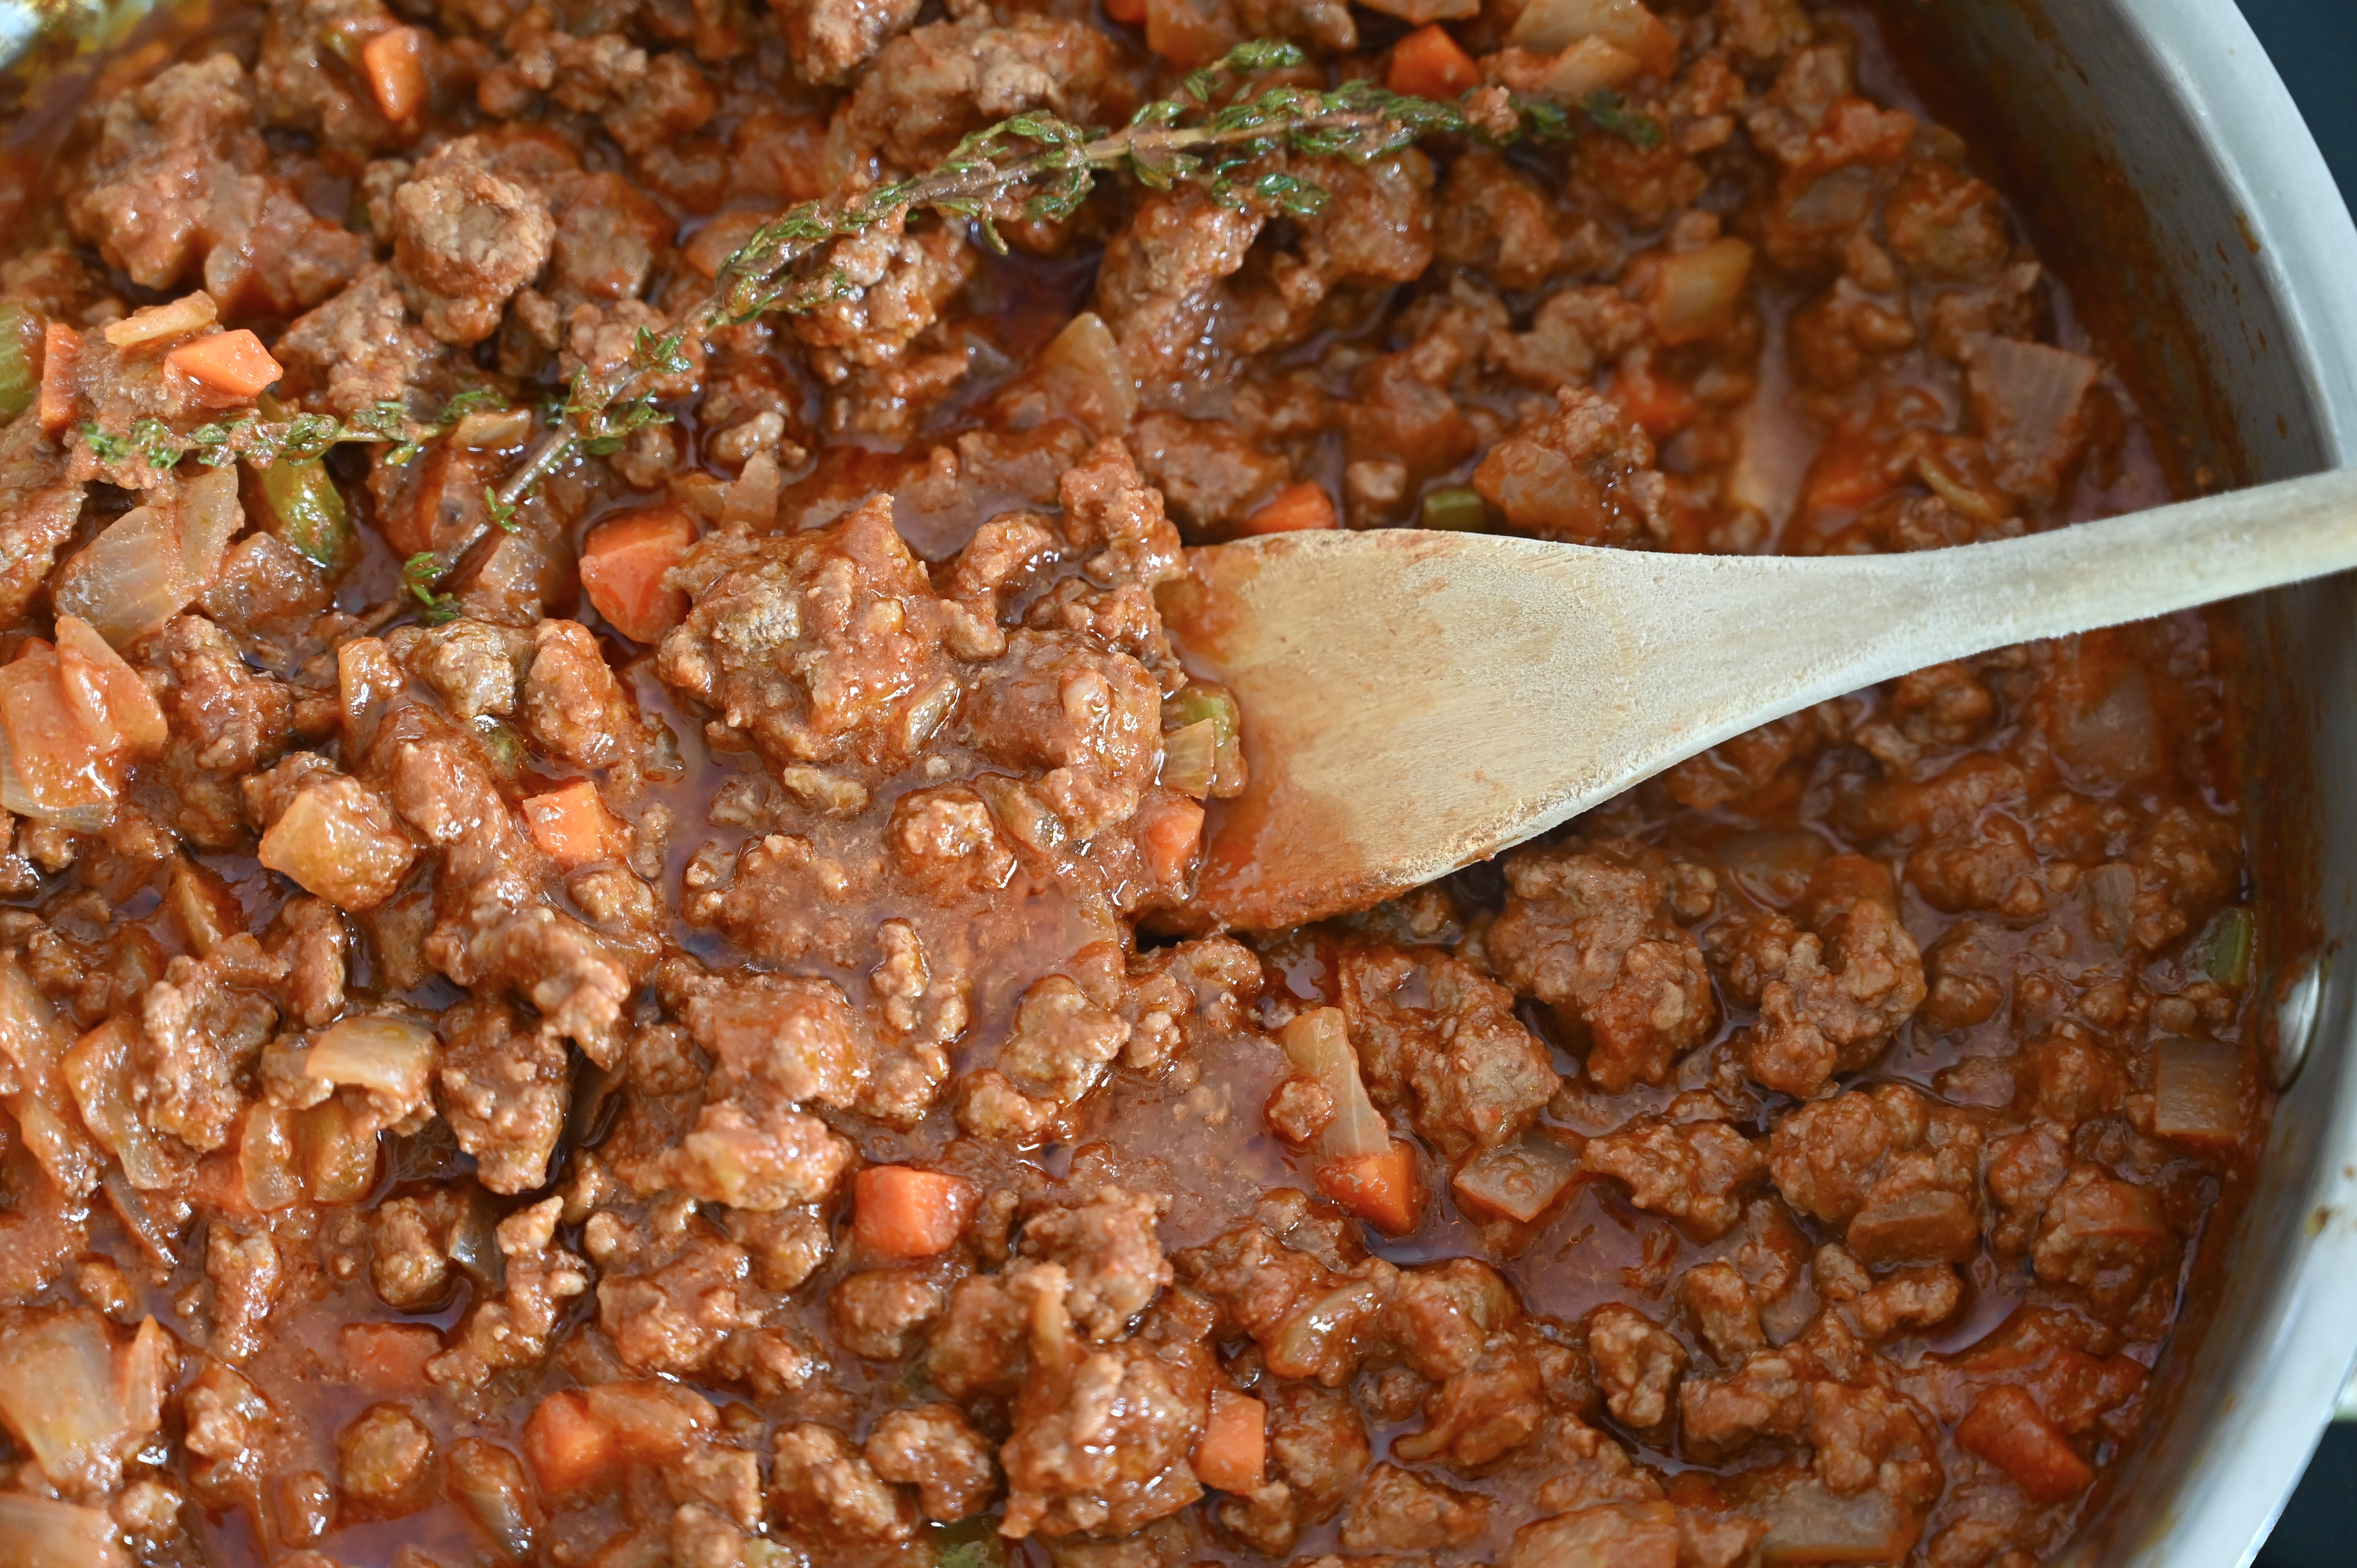
Homemade bolognese sauce has a way of melting away the worries of the day. Soon the kitchen is filled with the aroma of the Italian soffritto, beef and tomatoes. I use tomato paste instead of sauce. A tip I learned from listening to Angela Hartnett and her podcast The Dish. Tomato paste has all the flavor of the sauce with less acidity, so I like using it in my bolognese recipe.
If you love to eat or cook, then I highly recommend listening to The Dish. Harnett, a Michelin star chef and broadcaster Nick Grimshaw host a weekly on-air dinner party. They cook and chat with guests like Gordon Ramsay, Oliva Coleman, Mary Berry and Natalie Portman.
The best part of the show is their quick-witted fast-food quizzes. Where they ask their guest all the questions a foodie would wants know. “How do you like to eat your eat eggs? What’s your favorite sandwich filling? And what herb do you love to cook with?” Their show is lighthearted, laugh out loud fun. The ideal podcast for kitchen listening on a gray winter day.
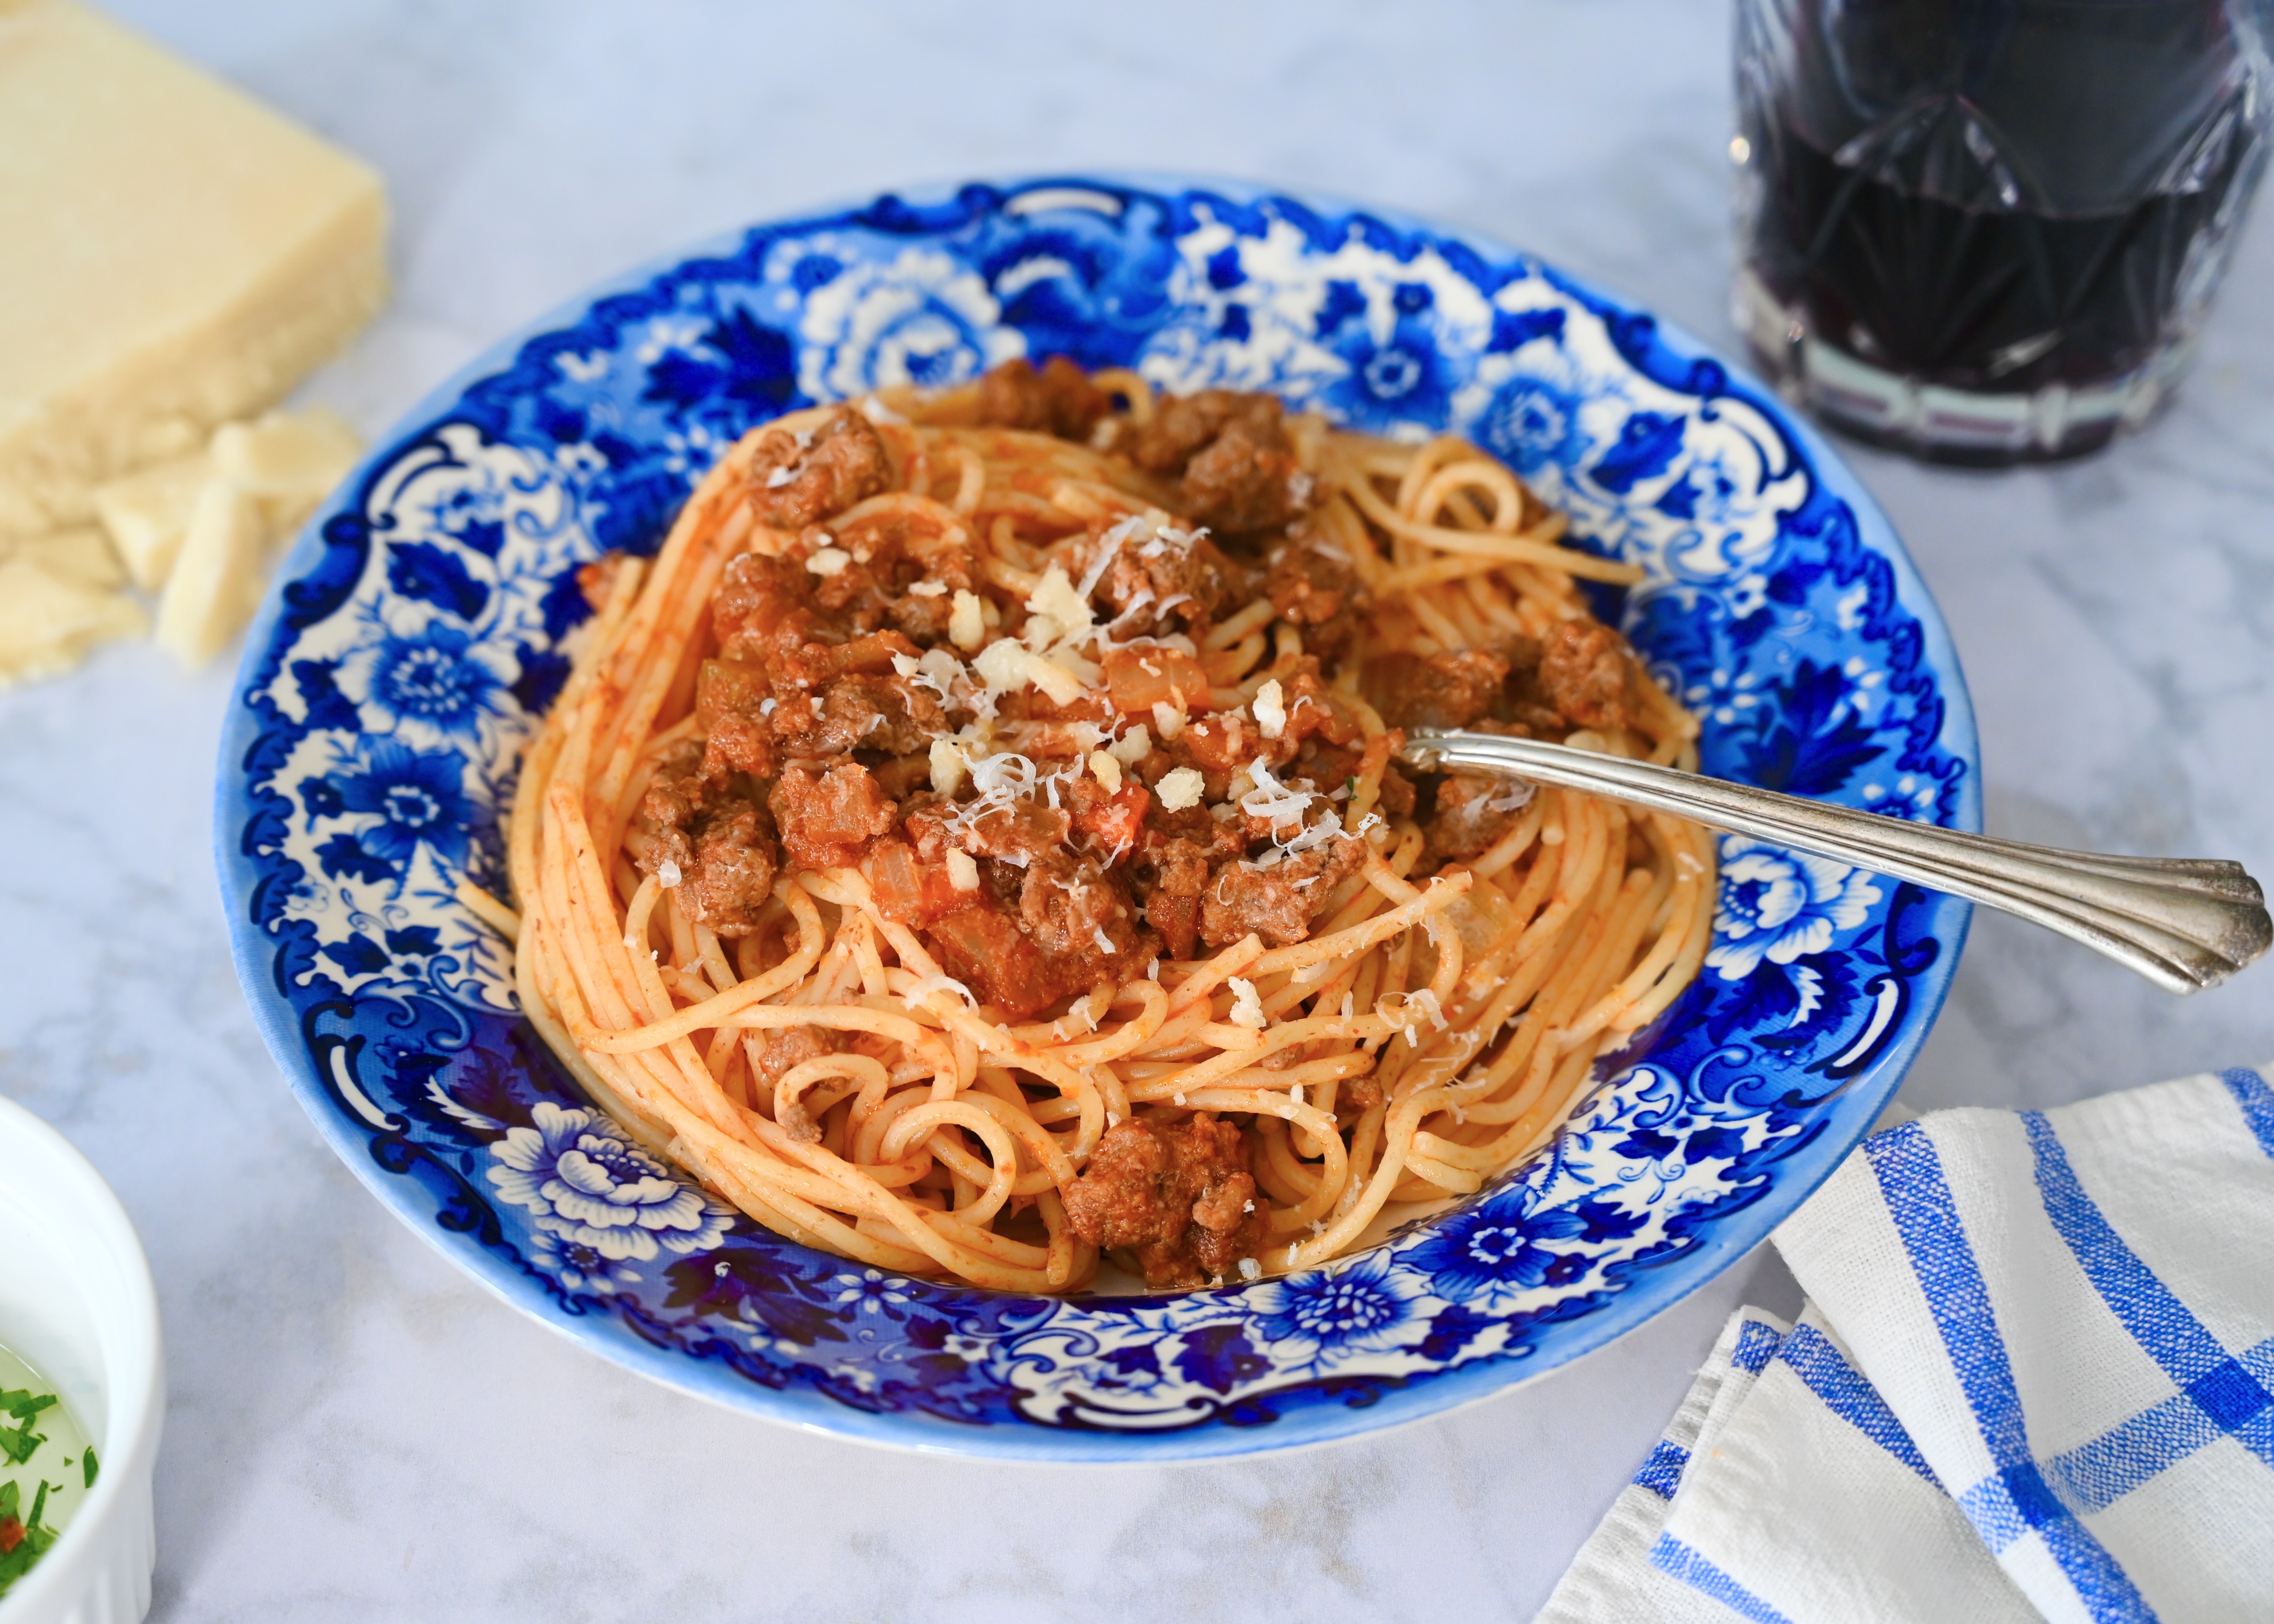
As the sauce simmers I have visitors who make their way to the kitchen. Smiles follow as my daughters see the spaghetti. My beef bolognese is a comforting classic that chases away the cold and makes everyone in my house happy.
Beef Bolognese
1 medium yellow onion, finely diced
1 celery stalk, finely diced
1 carrot, peeled and finely diced
2 garlic cloves minced
1 tablespoon olive oil
1 ¼ pounds ground sirloin
1 (6oz) can tomato paste
2 teaspoons Worcestershire sauce
1 ¼ cup beef broth
1 teaspoon salt
½ teaspoon garlic powder
1 bay leaf
2 sprigs of fresh thyme
8oz of spaghetti, cooked
Grated Parmigiano Reggiano cheese to taste
First, finely chop the onions, celery, carrot and garlic. Next place a large skillet over medium heat and warm 1 tablespoon of olive oil. Once the oil is hot, add the onions, celery and carrot to the pan and sauté for about 10 minutes or until softened. Add the garlic and the ground beef and cook until the meat is browned and nearly cooked through.
Add in the tomato paste and Worcestershire sauce and stir to break up the tomato paste. Then slowly pour in the beef broth while stirring. Season the sauce with salt and garlic powder. Place a bay leaf and the thyme spring in the sauce and let it simmer over low heat for 25 to 30 minutes.
Meanwhile cook the spaghetti or your favorite pasta according to the package directions and drain it well.
Once the sauce has simmered remove the bay leaf and herb stems. Add the pasta to the sauce. Stir or toss the pasta to coat it in the bolognese sauce. Serve the spaghetti bolognese with a generous amount of freshly grated Parmigiano Reggiano cheese on top. This recipe serves 4 to 6 people.
You can also find this recipe on my free substack account.
In our house the holiday season officially begins when I bake my first batch of holiday cookies. And in Chicago my favorite Christmas cookies are the amazing Italian cookies. So this year I decided to take inspiration from my hometown favorite because no one does Christmas quite like Chicago.
There are lots of wonderful Italian cookie varieties, but my families favorite are the Italian lemon cookies. The texture of these cookies and the bright lemon flavor is what sets them apart. They are soft, crumbly and delicious. The secret is using powdered sugar and mascarpone cheese (a soft Italian cream cheese). Look for the mascarpone cheese in a round container in the Italian cheese section of your grocery store. These cookies are so irresistibly good that they have a habit of disappearing quickly. So, if you are baking cookies for Santa you might want to make an extra plateful.
Italian Lemon Cookies – Makes about 36 cookies
½ cup (1 stick) butter, softened
¼ tsp salt
1 cup powdered sugar
½ cup mascarpone cheese, softened
1tsp lemon zest
1 egg
1 tsp vanilla
½ tsp baking soda
2 ½ cups flour
Preheat the oven to 350 degrees
In the bowl of a stand mixer or in a large mixing bowl with a hand mixer mix add in the butter, salt, powdered sugar and lemon zest. Cream or beat the mixture on medium speed for 4 minutes.
Add in the mascarpone cheese, vanilla and egg and beat on low speed until just incorporated. You don’t want to over mix the mascarpone. Then add in the flour and baking powder and mix until the cookie dough comes together.
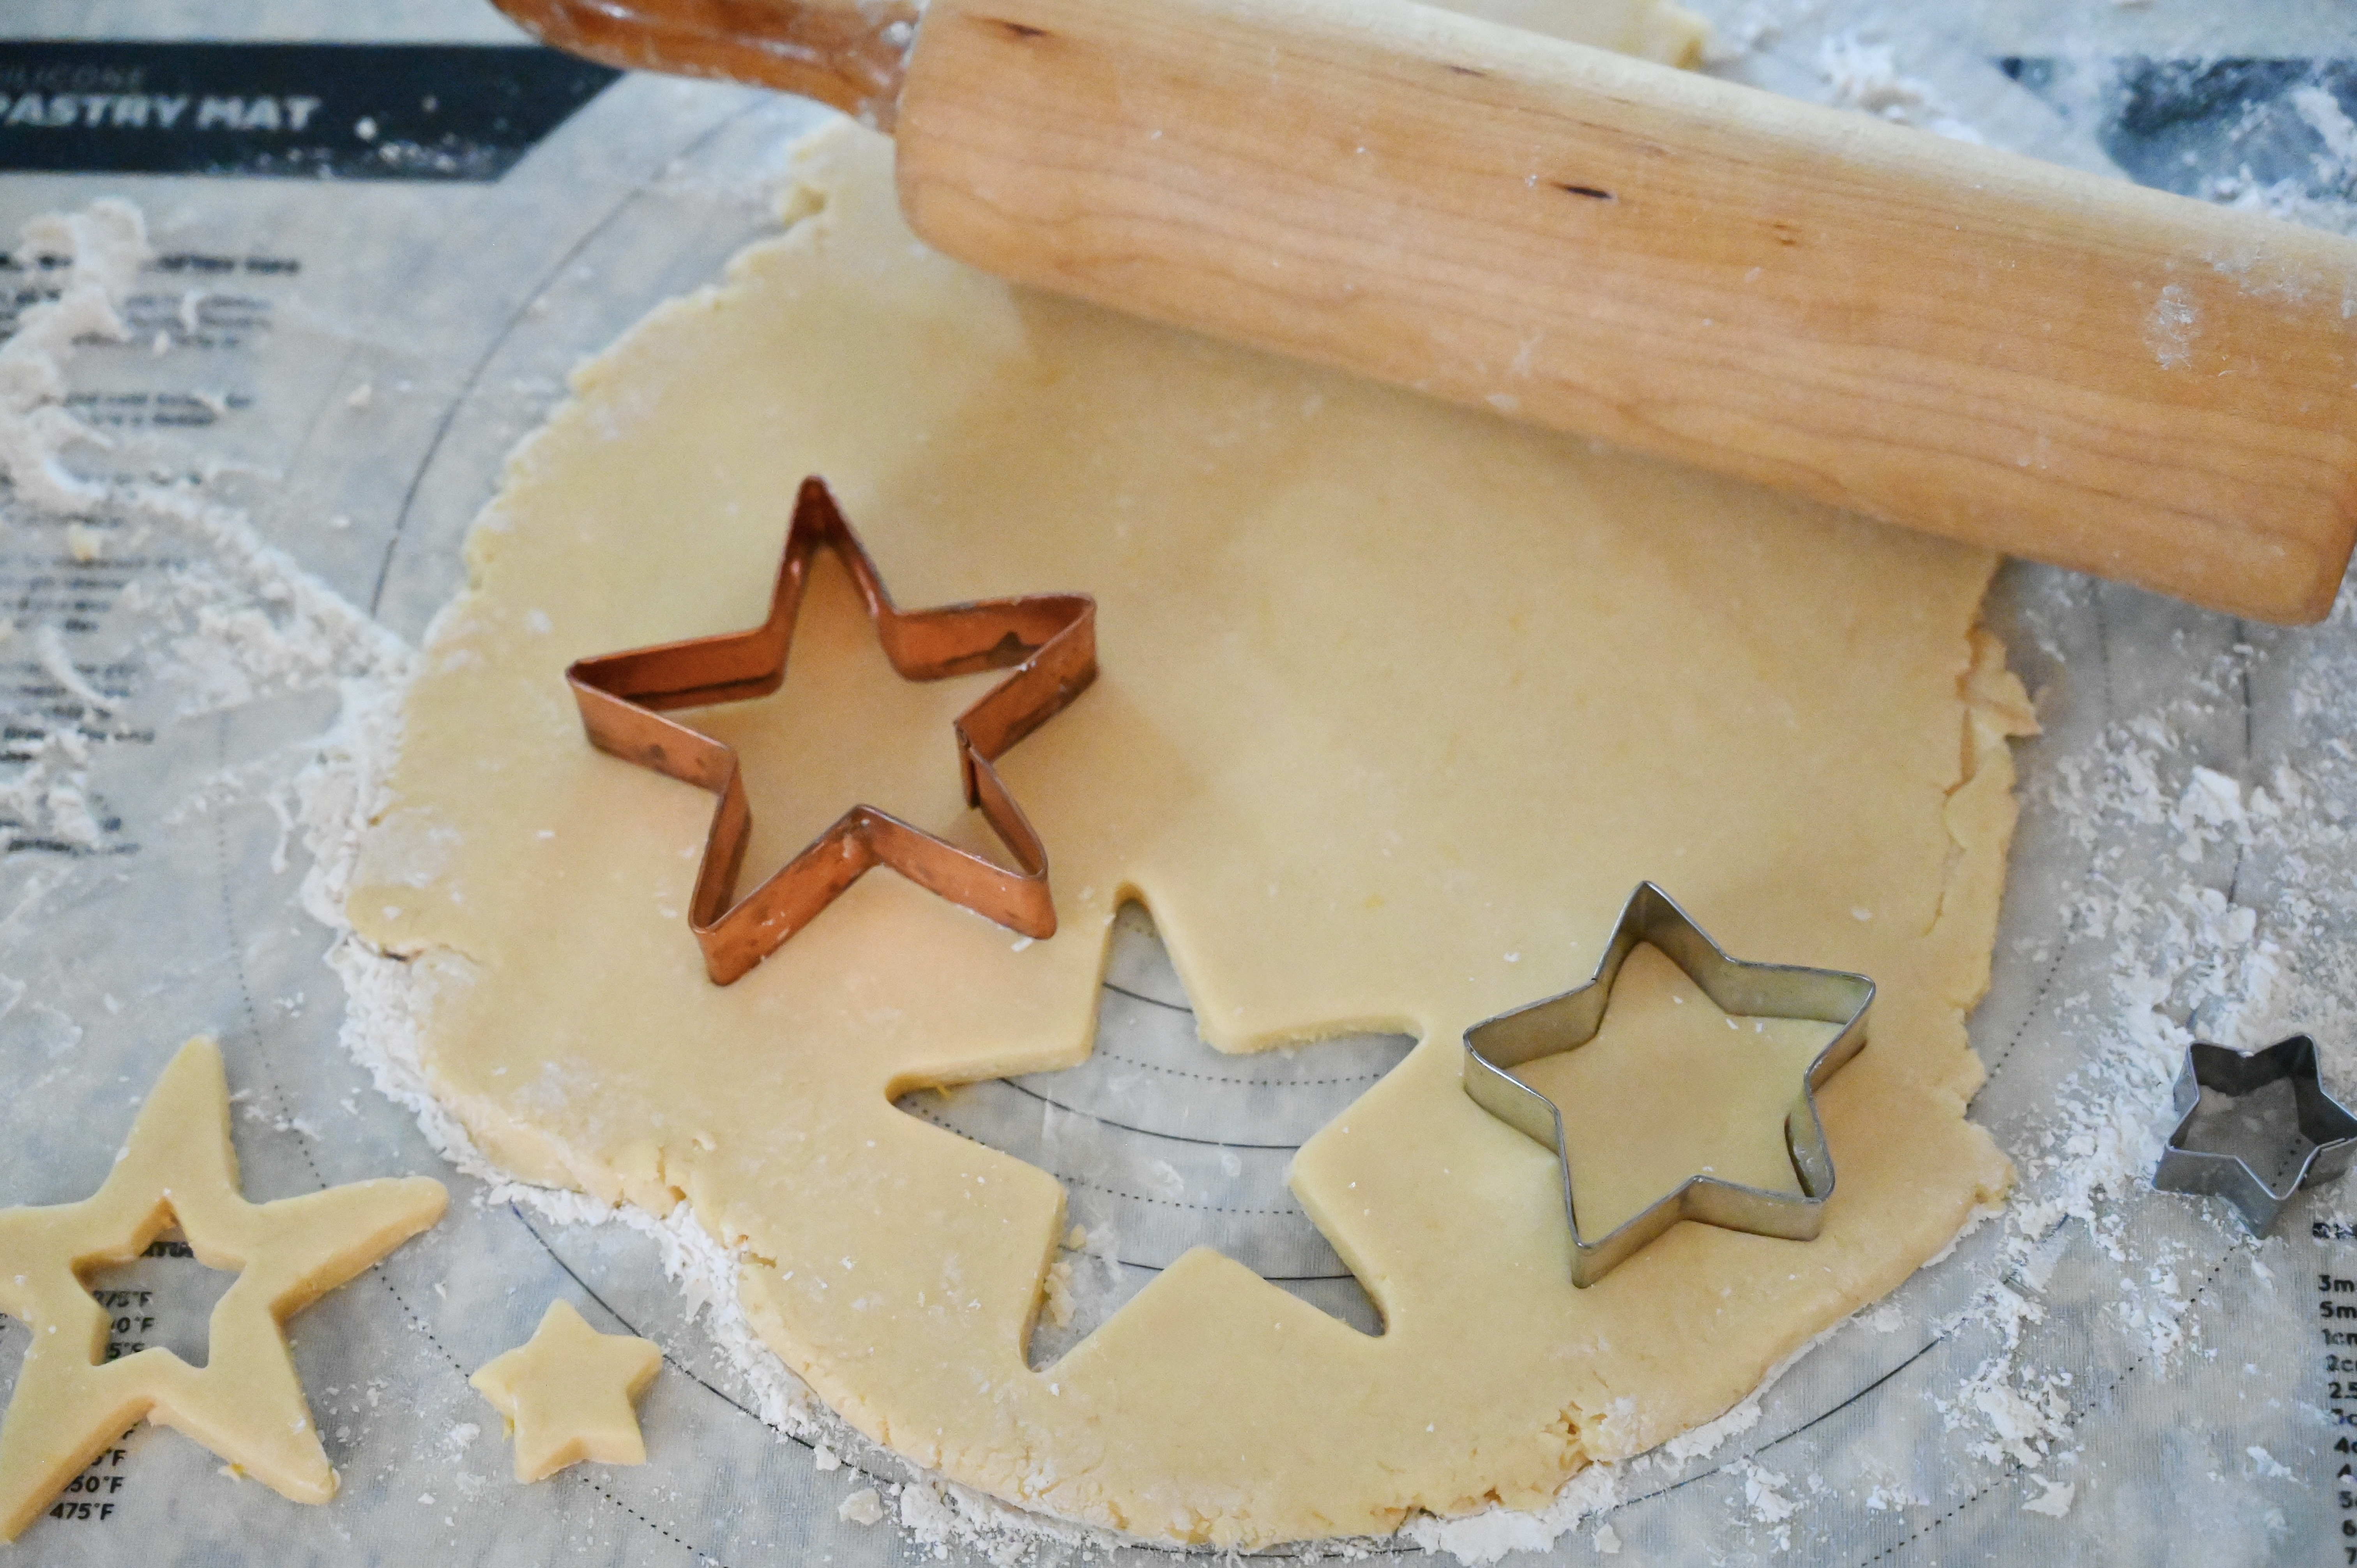
Roll the dough out until it is about 1/4 to 1/3 of an inch thick on a lightly floured surface or silicone baking mat. Use cookie cutters to cut the dough into circles or holiday stars. Reroll the dough again until it is all cut into cookies.
I had fun using different sized star shapes. I even cut a smaller star out of a larger one.
Place the in batches cookies on a sheet pan lined with parchment paper or a baking stone.
Bake at 350 degrees for 8 to 10 minutes. Allow the cookies to cool before decorating them with the glaze.
Lemon Glaze
1 ½ cup powdered sugar
1 ½ tsp vanilla
6 tsp fresh lemon juice
In a small bowl whisk together the powdered sugar, vanilla and lemon juice. Place the glaze in a 12-inch disposable pastry bag and cut the tip to create a small opening. Then outline the cookie or drizzle the glaze on. Add sparkling sugar or sprinkles for a festive look.
I hope your holidays are filled with twinkling light, snowflakes, chocolates, Italian cookies and lots of love! Merry Christmas!
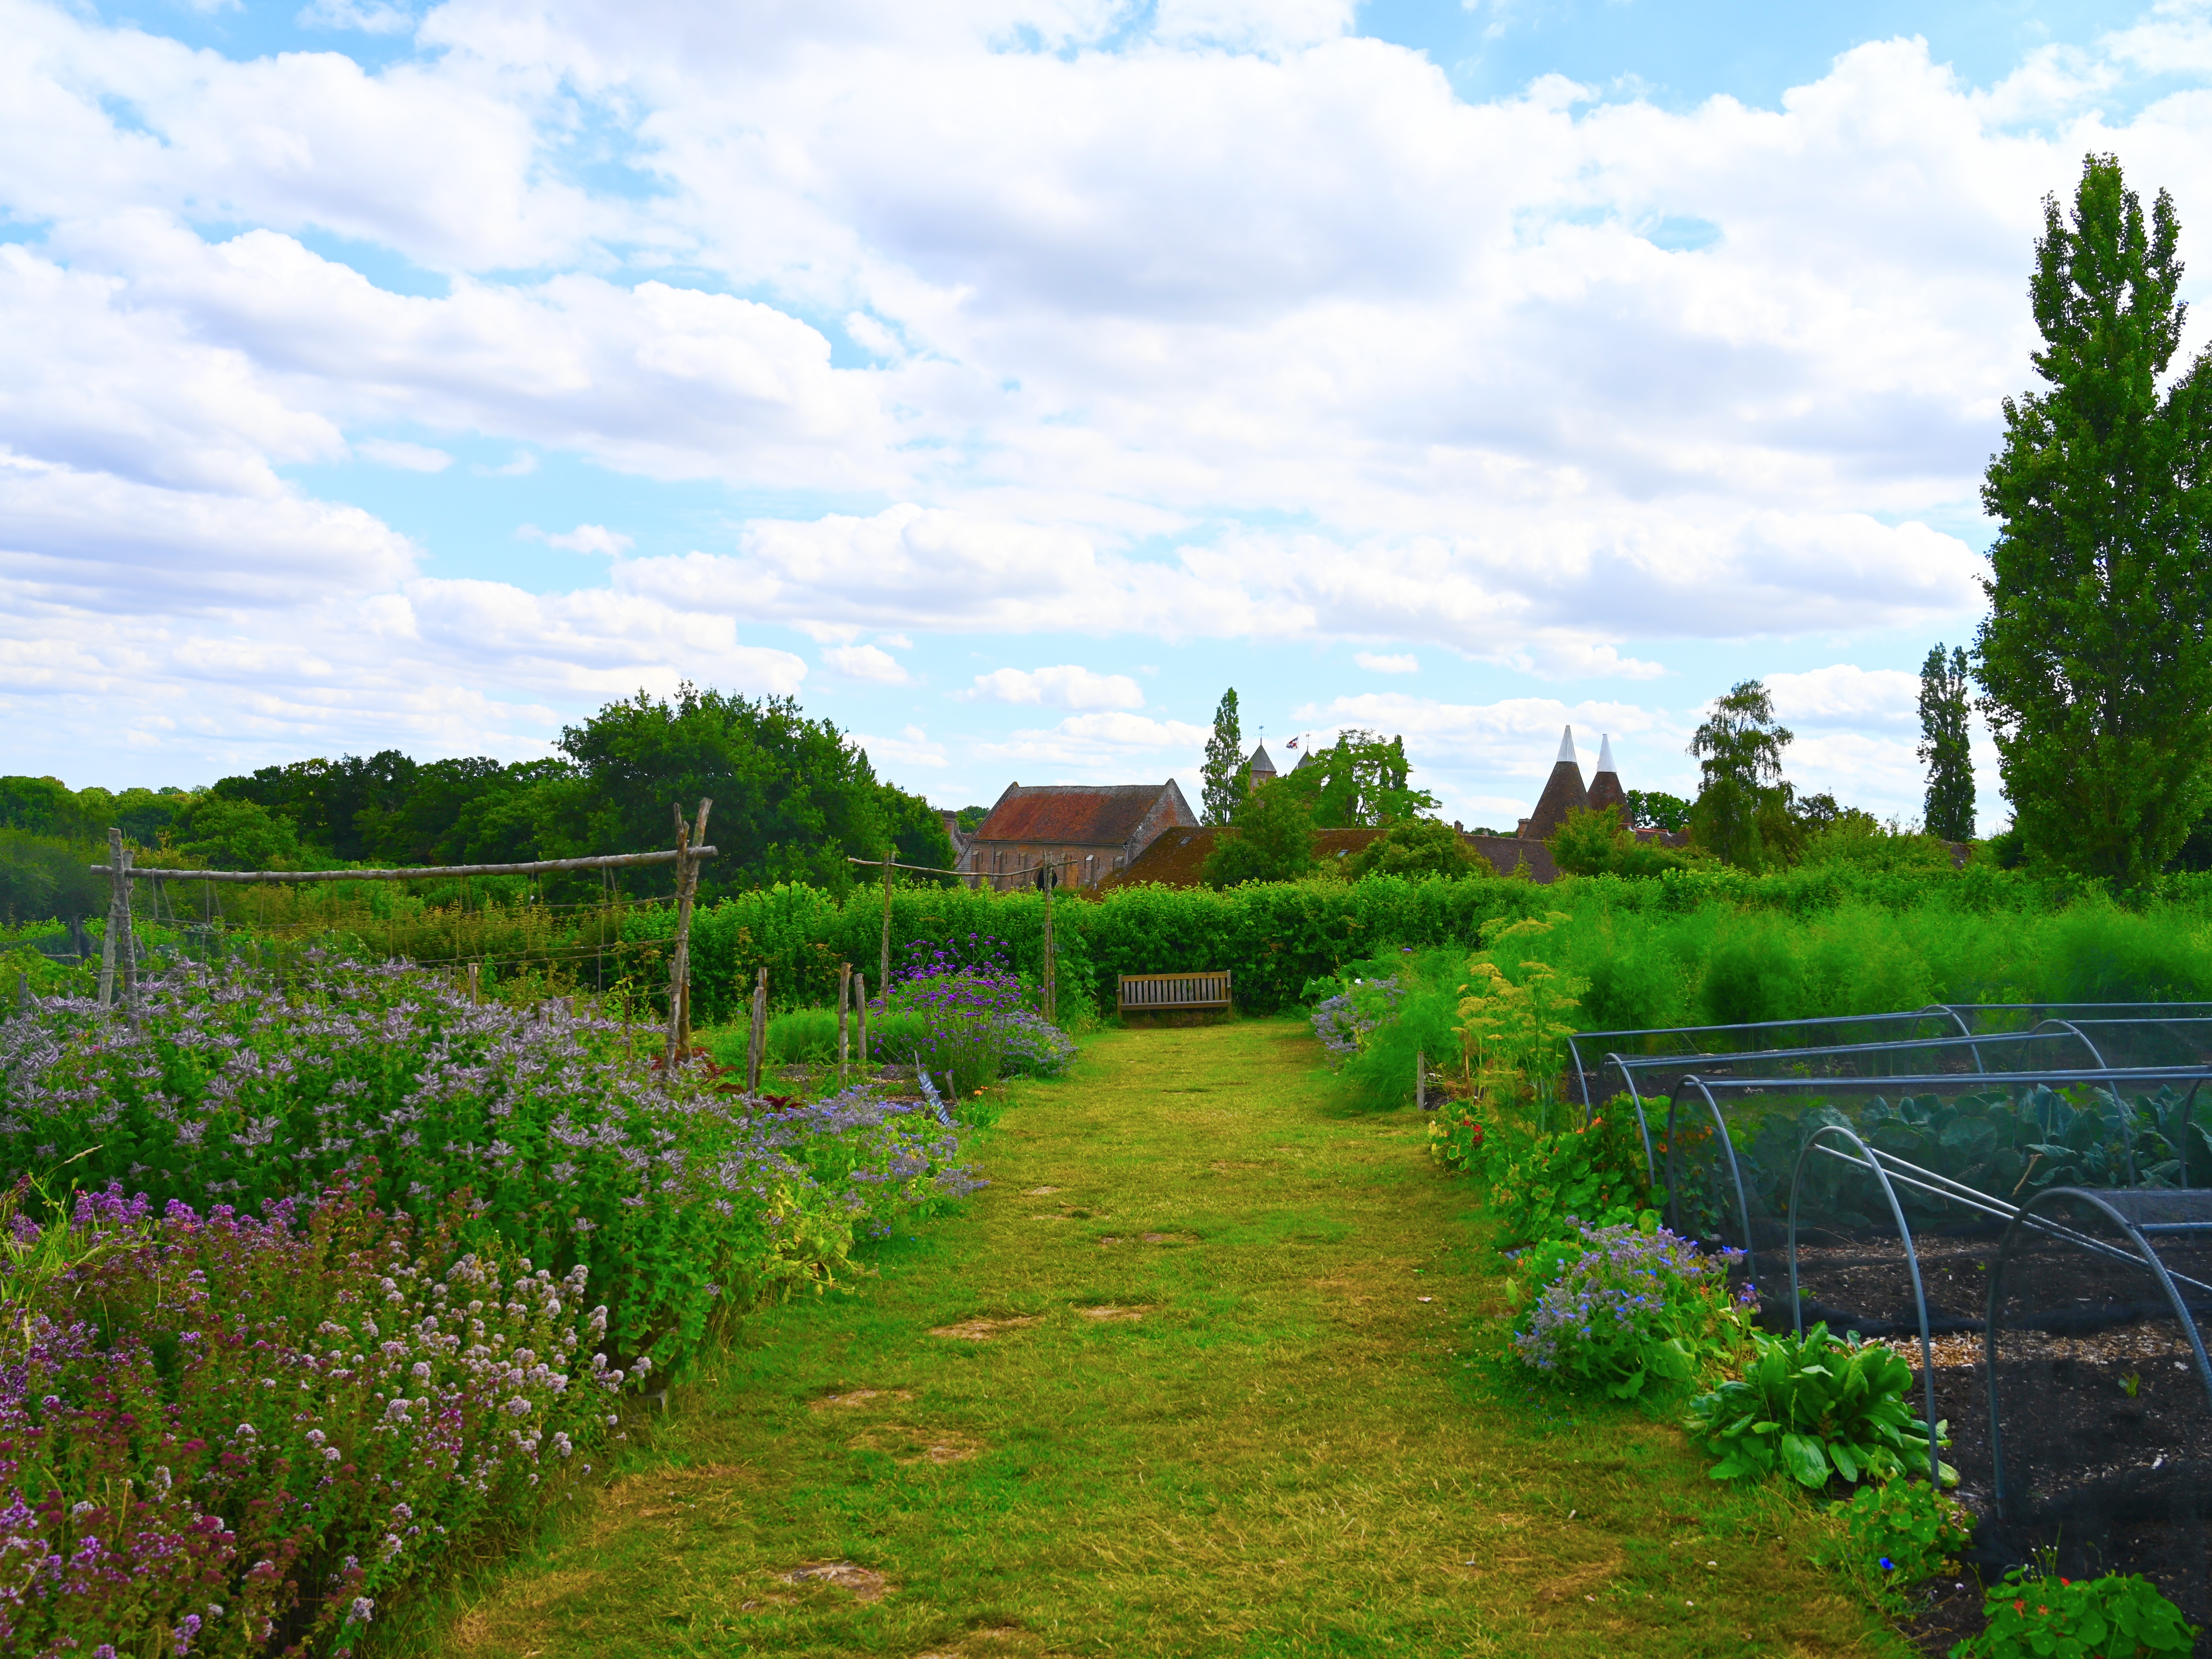
Tucked away off the southeast coast of England is one of the most enchanting gardens I have ever visited. Sissinghurst Castle and Garden was the home of famous gardener and writer Vita Sackville-West and her husband Harold Nicholson a British politician and writer. When they purchased this country estate in the 1930s they began to restore the castle and create the now famous gardens.
As I entered garden room after room I was immediately taken with lush planting and vibrant colors.
However, the my favorite was the vegetable garden. We visited late this summer when the two acre garden was bursting with fruits, vegetables and flowers.
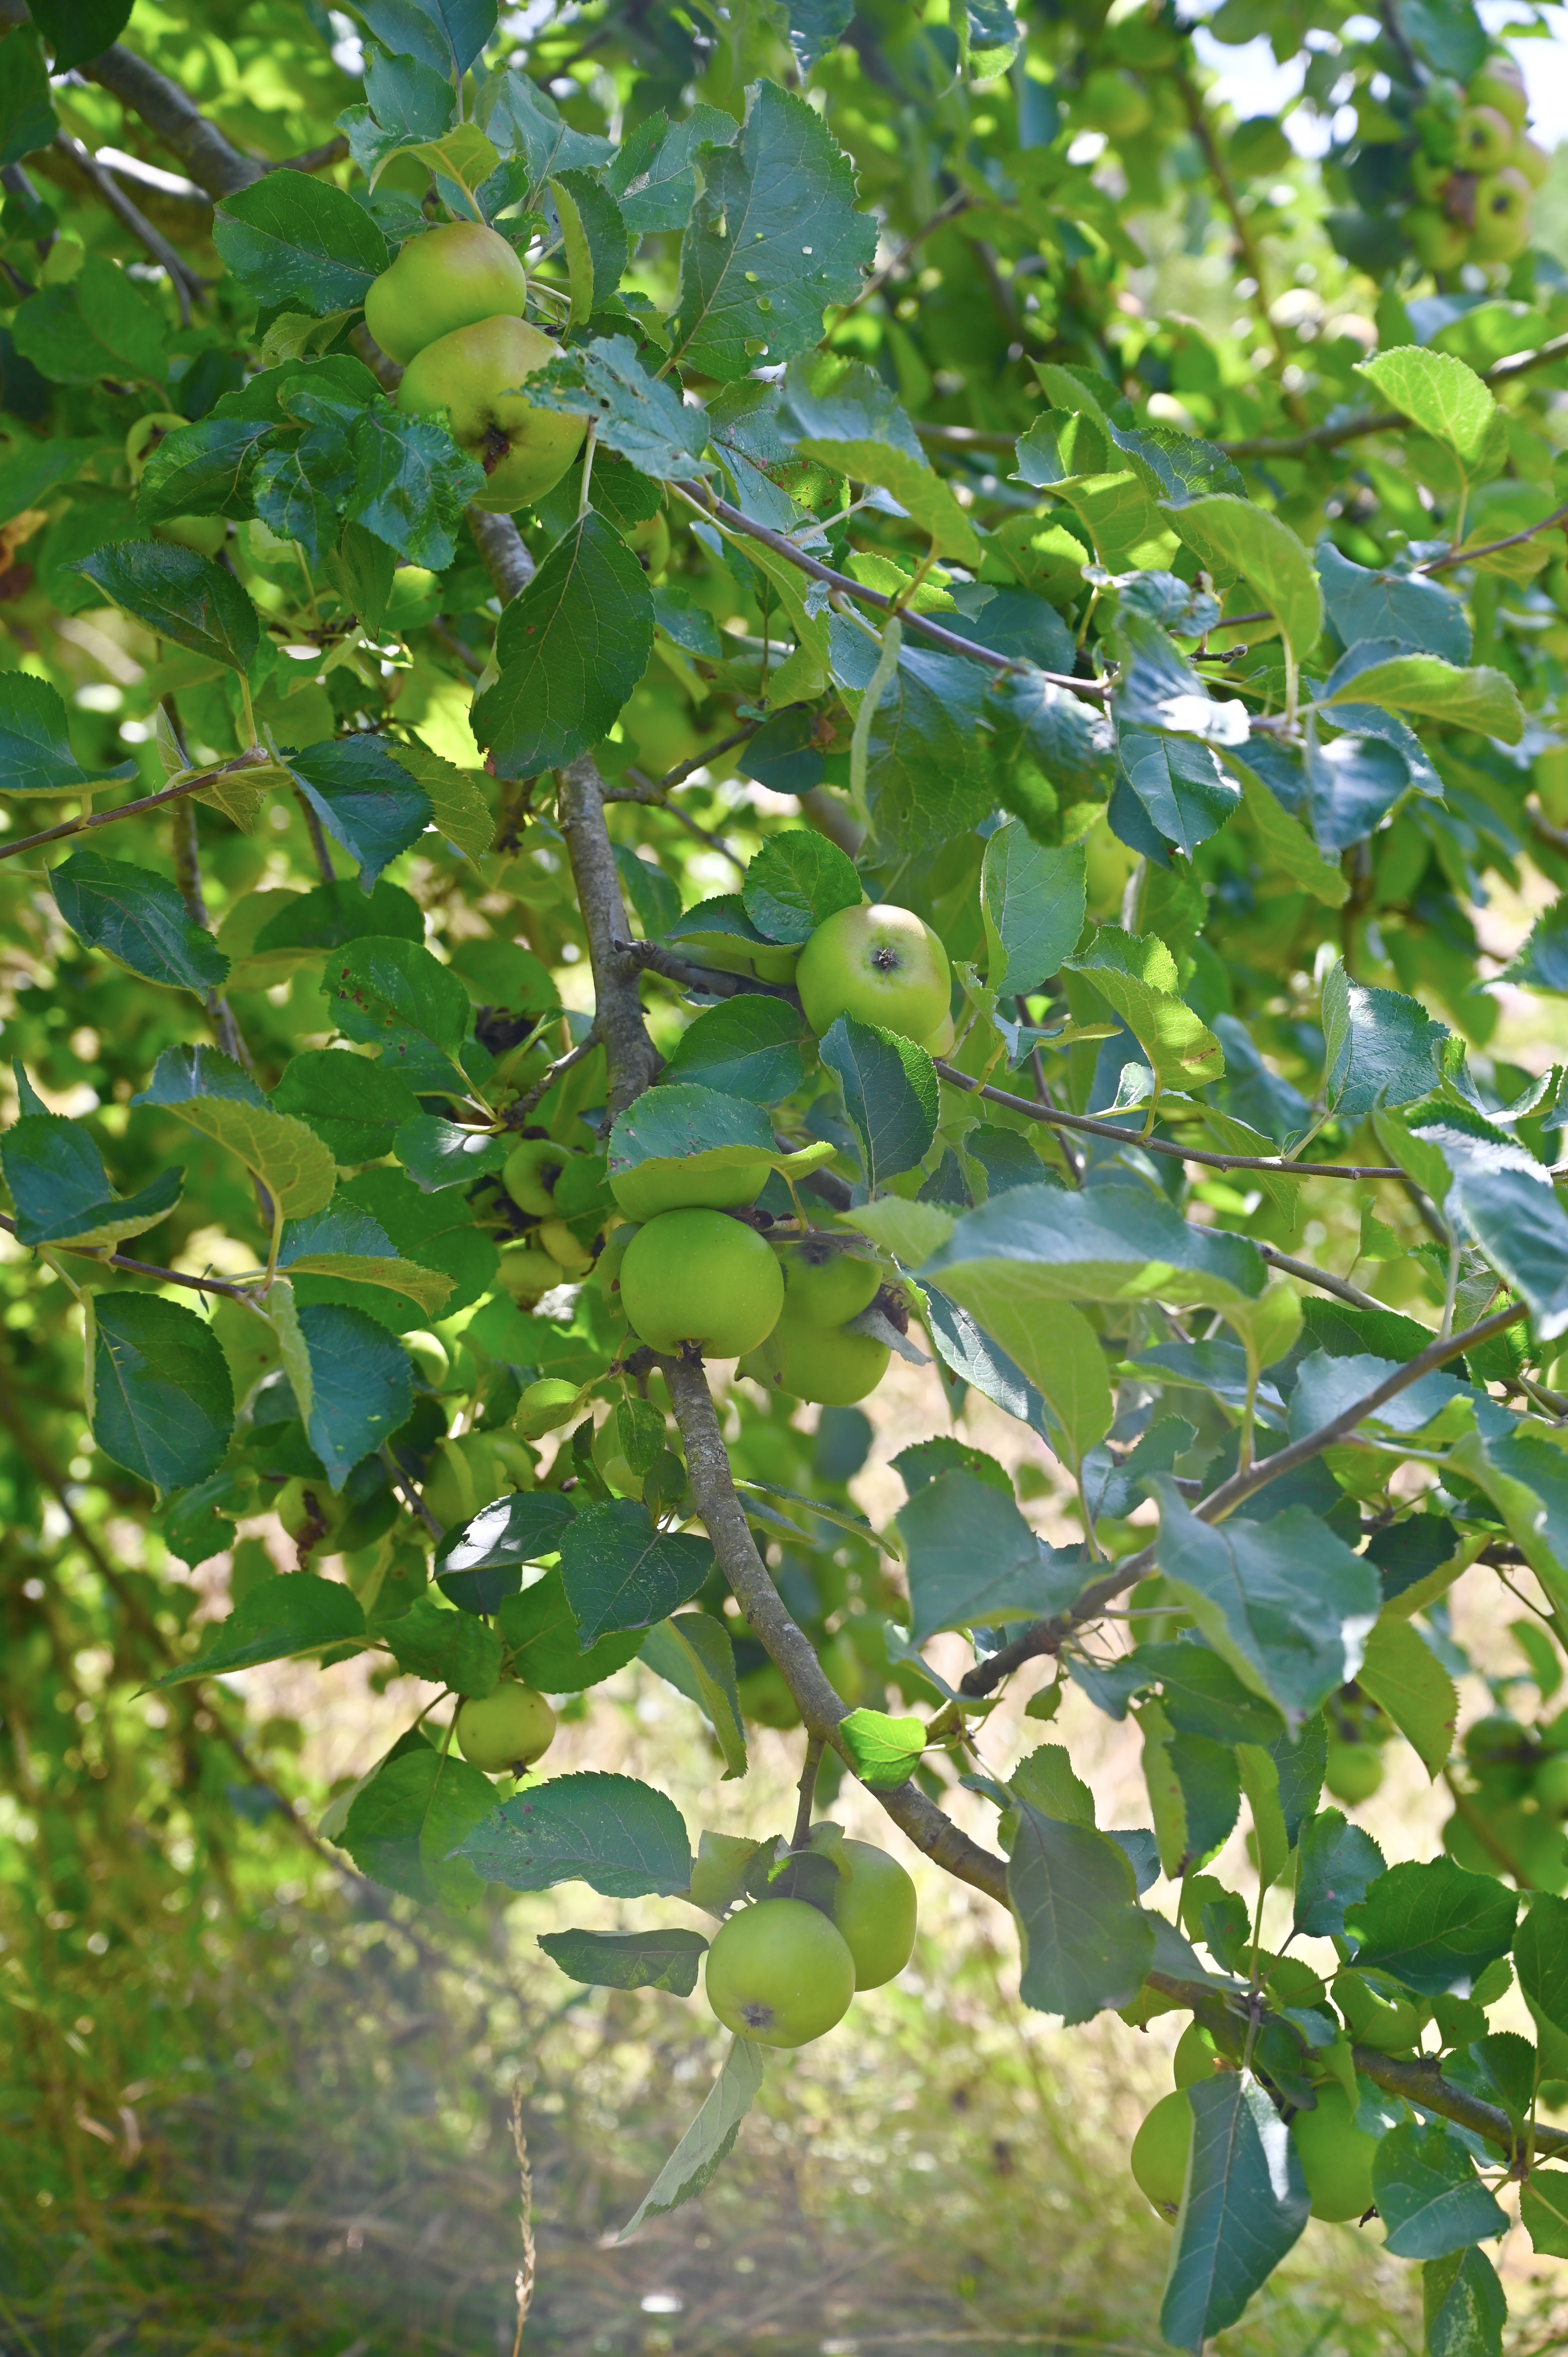
Every corner held new surprises and plantings. There were berries, grapes, pumpkins, squash, corn and more. This storybook garden also had orchards with apples and pears.
Our family spent an entire day exploring all of the beautiful gardens. While we were there I picked up a copy the National Trust’s Book of Crumbles in their small gift shop. I was intrigued because I love a good crumble or crisp as we call it on this side of the pond. Crisps are one of the sweetest and easiest ways to bake with fresh fruit. Once I was back home I began trying recipe after recipe.
Inspired by a plumb crumble that used almond cookies as its base, I began dreaming of a gingersnap and apple crisp. I have long loved gingersnaps and pairing them with apples sounded like a cozy of fall recipe. So with two overflowing bowls of apples from our family’s trip to the orchard I began baking.
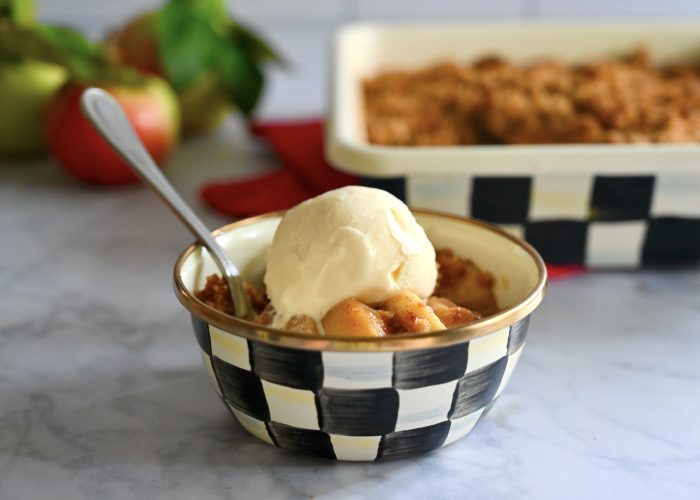
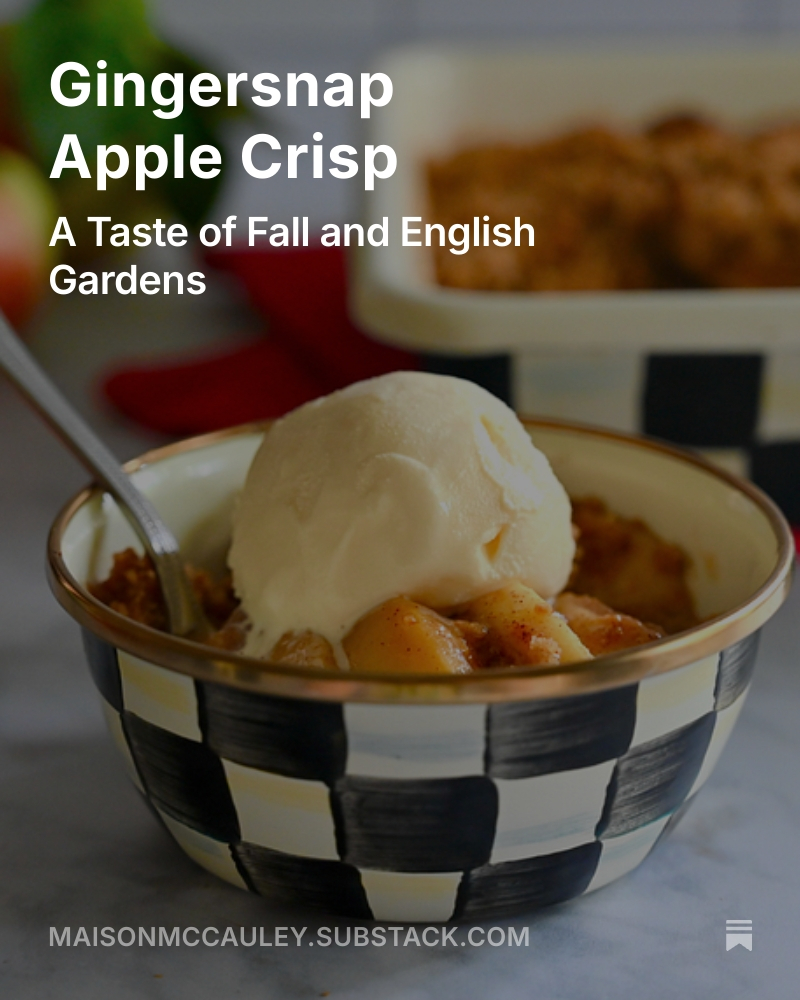
This crisp was every bit is good as I had hoped it would be. The cinnamon apples with the crisp ginger and brown sugar cookie topping was divinely good with a scoop of ice cream. So as the nights get cooler and fall sets in I have a recipe for you gingersnap apple crisp.
Gingersnap Apple Crisp
Apple Filling
7 cups or 3 pounds of apples, peeled and cut into slices
1/2 cup sugar
1 tsp cinnamon
1/2 tsp ground ginger
1/4 tsp ground cloves
1 tbsp fresh lemon juice
2 tbsp flour
Gingersnap Topping
1 cup gingersnaps, crushed (I used the traditional gingersnap cookies and not the thin ones)
3/4 cup flour
1/2 cup brown sugar
1 tsp cinnamon
6 tbsps butter, melted
Preheat the oven to 350 degrees.
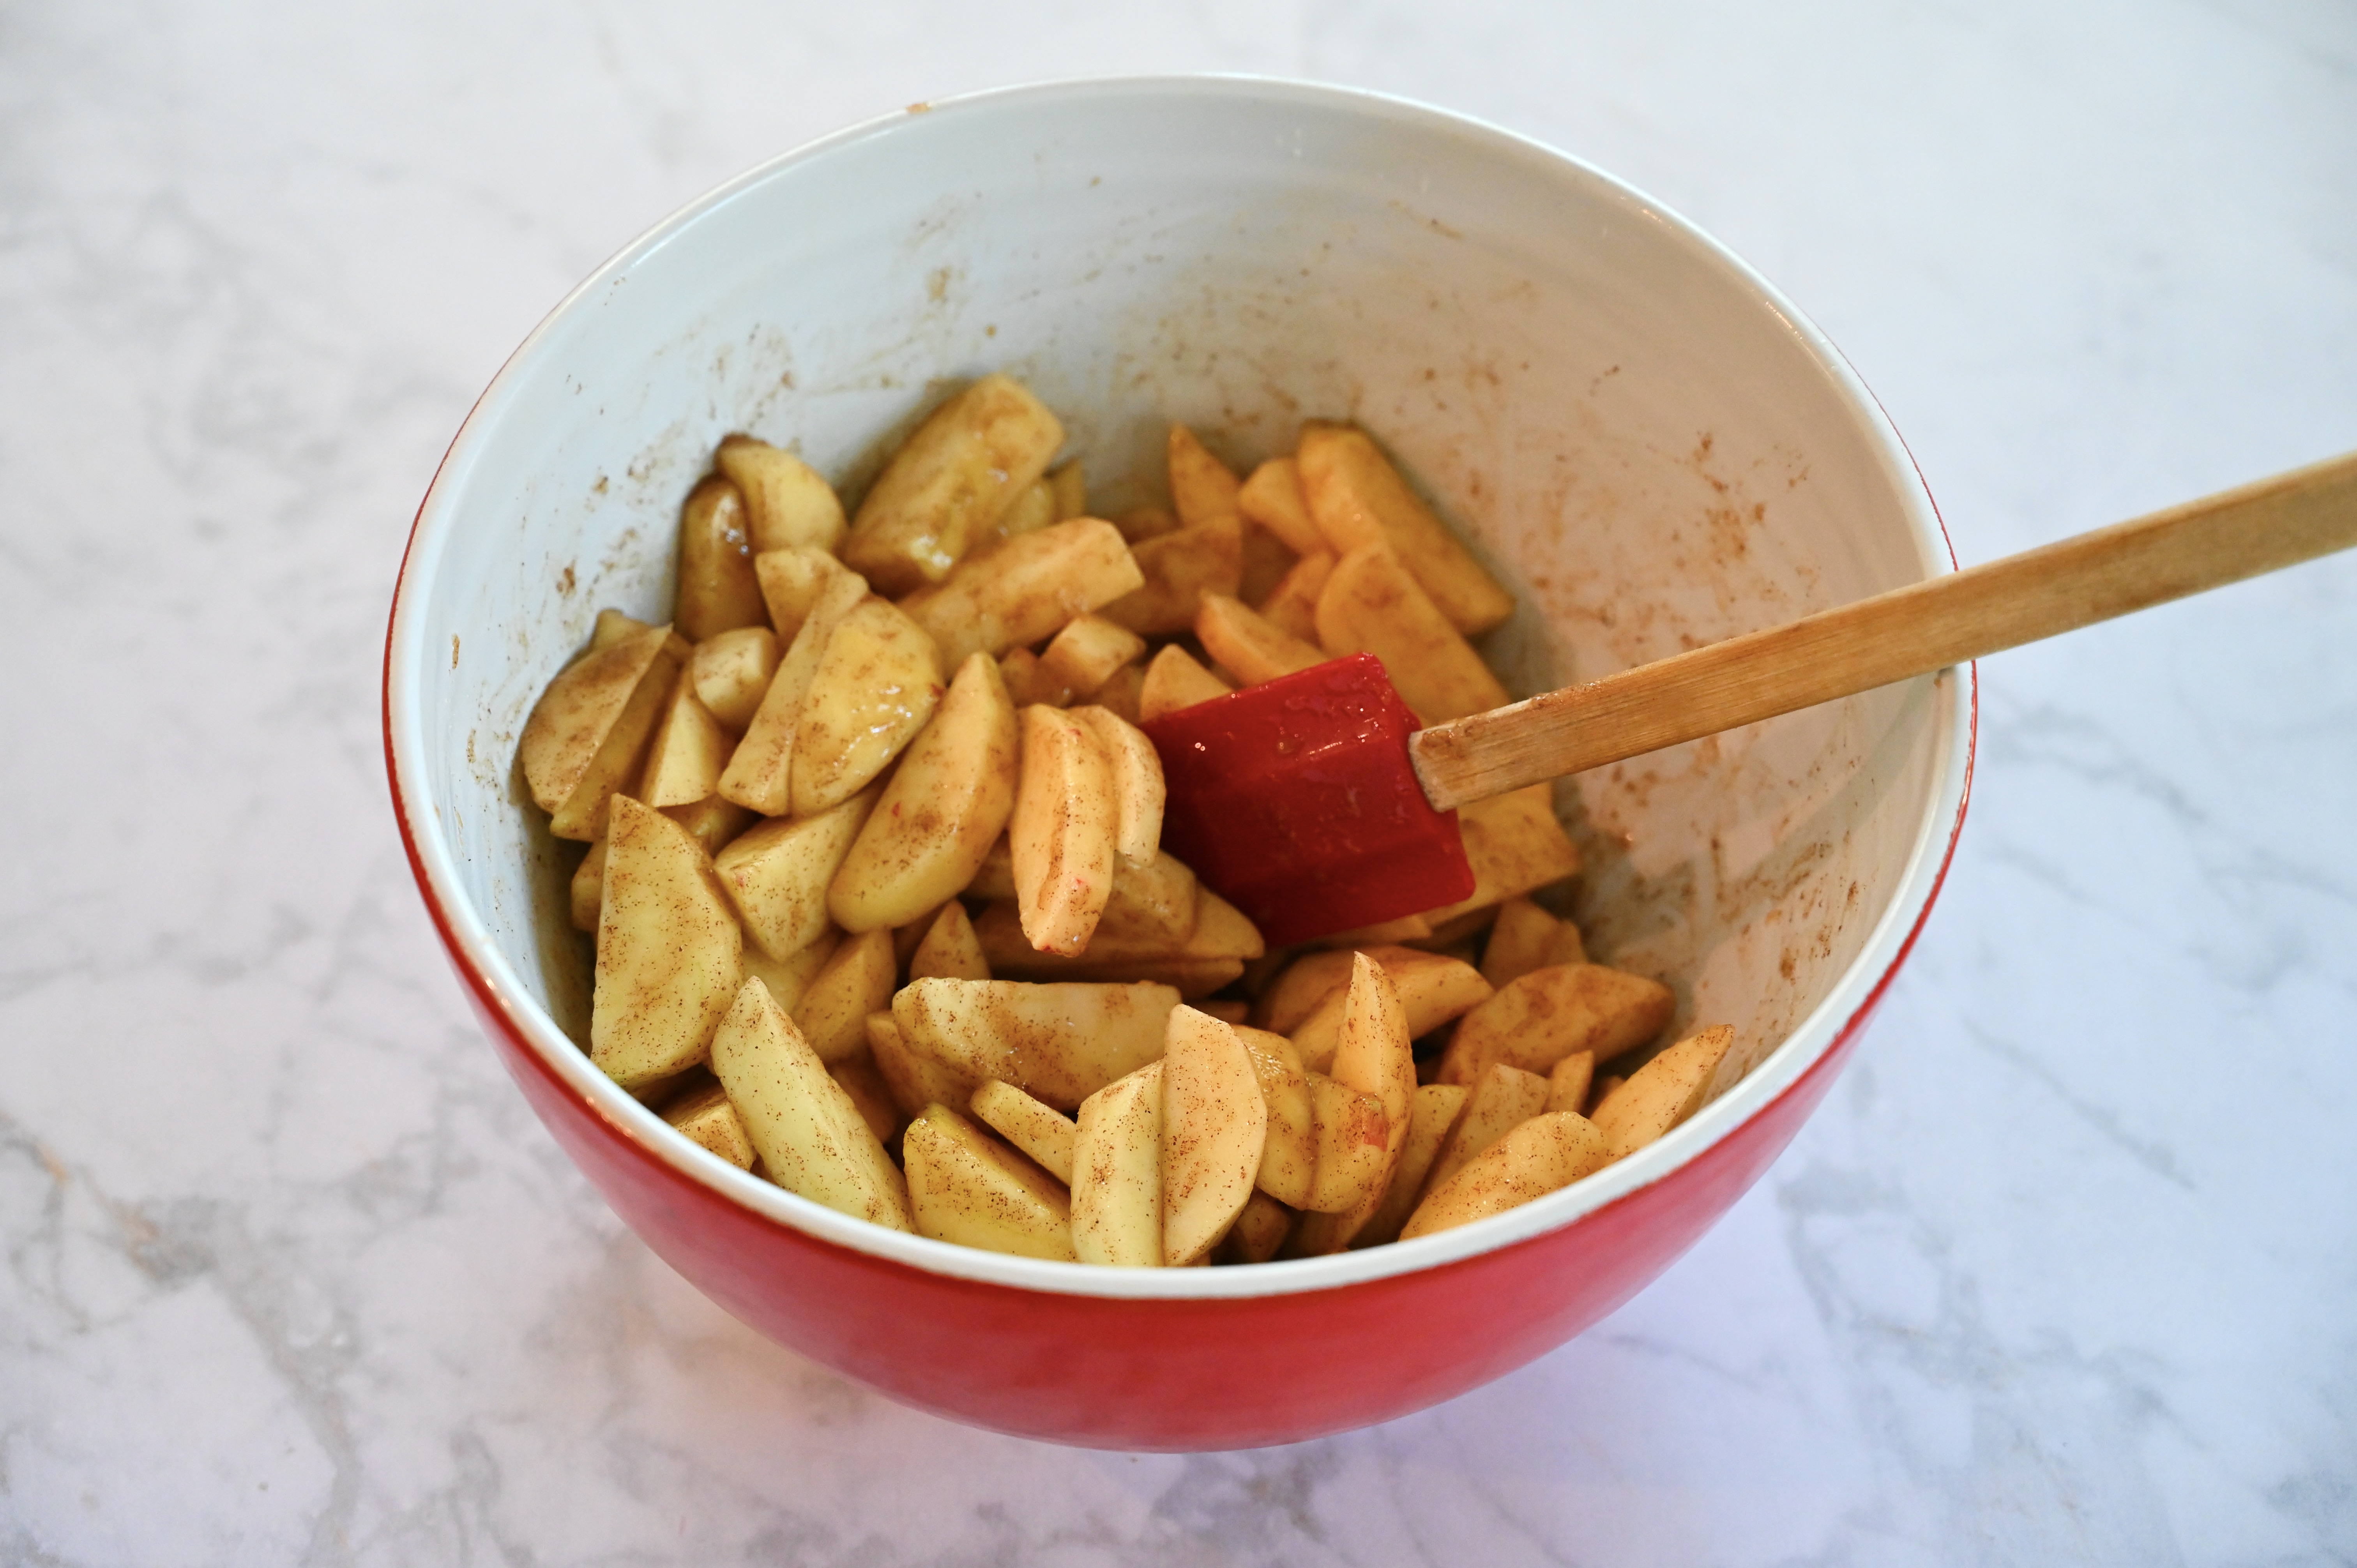
First, peel and cut the apples into slices. Place the apples in a large bowl and stir in the sugar, cinnamon, ginger, cloves, lemon juice and flour. Continue to stir until the apples are evenly coated in the flour and sugar mixture.
Next, prepare the crisp topping. Crush the gingersnaps in the food processor or in a ziplock bag with a rolling pin until finely crumbled. Place them in a medium bowl. Stir in the flour, brown sugar, cinnamon. Drizzle in the melted butter and stir to create a crumbly texture.
Lightly grease an 8×8 inch baking pan with butter flavored cooking spray. Pour the apples and their juices into the baking dish and then evenly spread the gingersnap topping on top. Bake for 45 minutes till golden brown and bubbly.
Serve while warm with a scoop of vanilla ice cream. This gingersnap apple crisp has got all the flavors of an apple pie, but it’s much easier to make. The combination of the sweetly spiced gingersnap and the cinnamon apples makes this one of my favorite fall recipes.
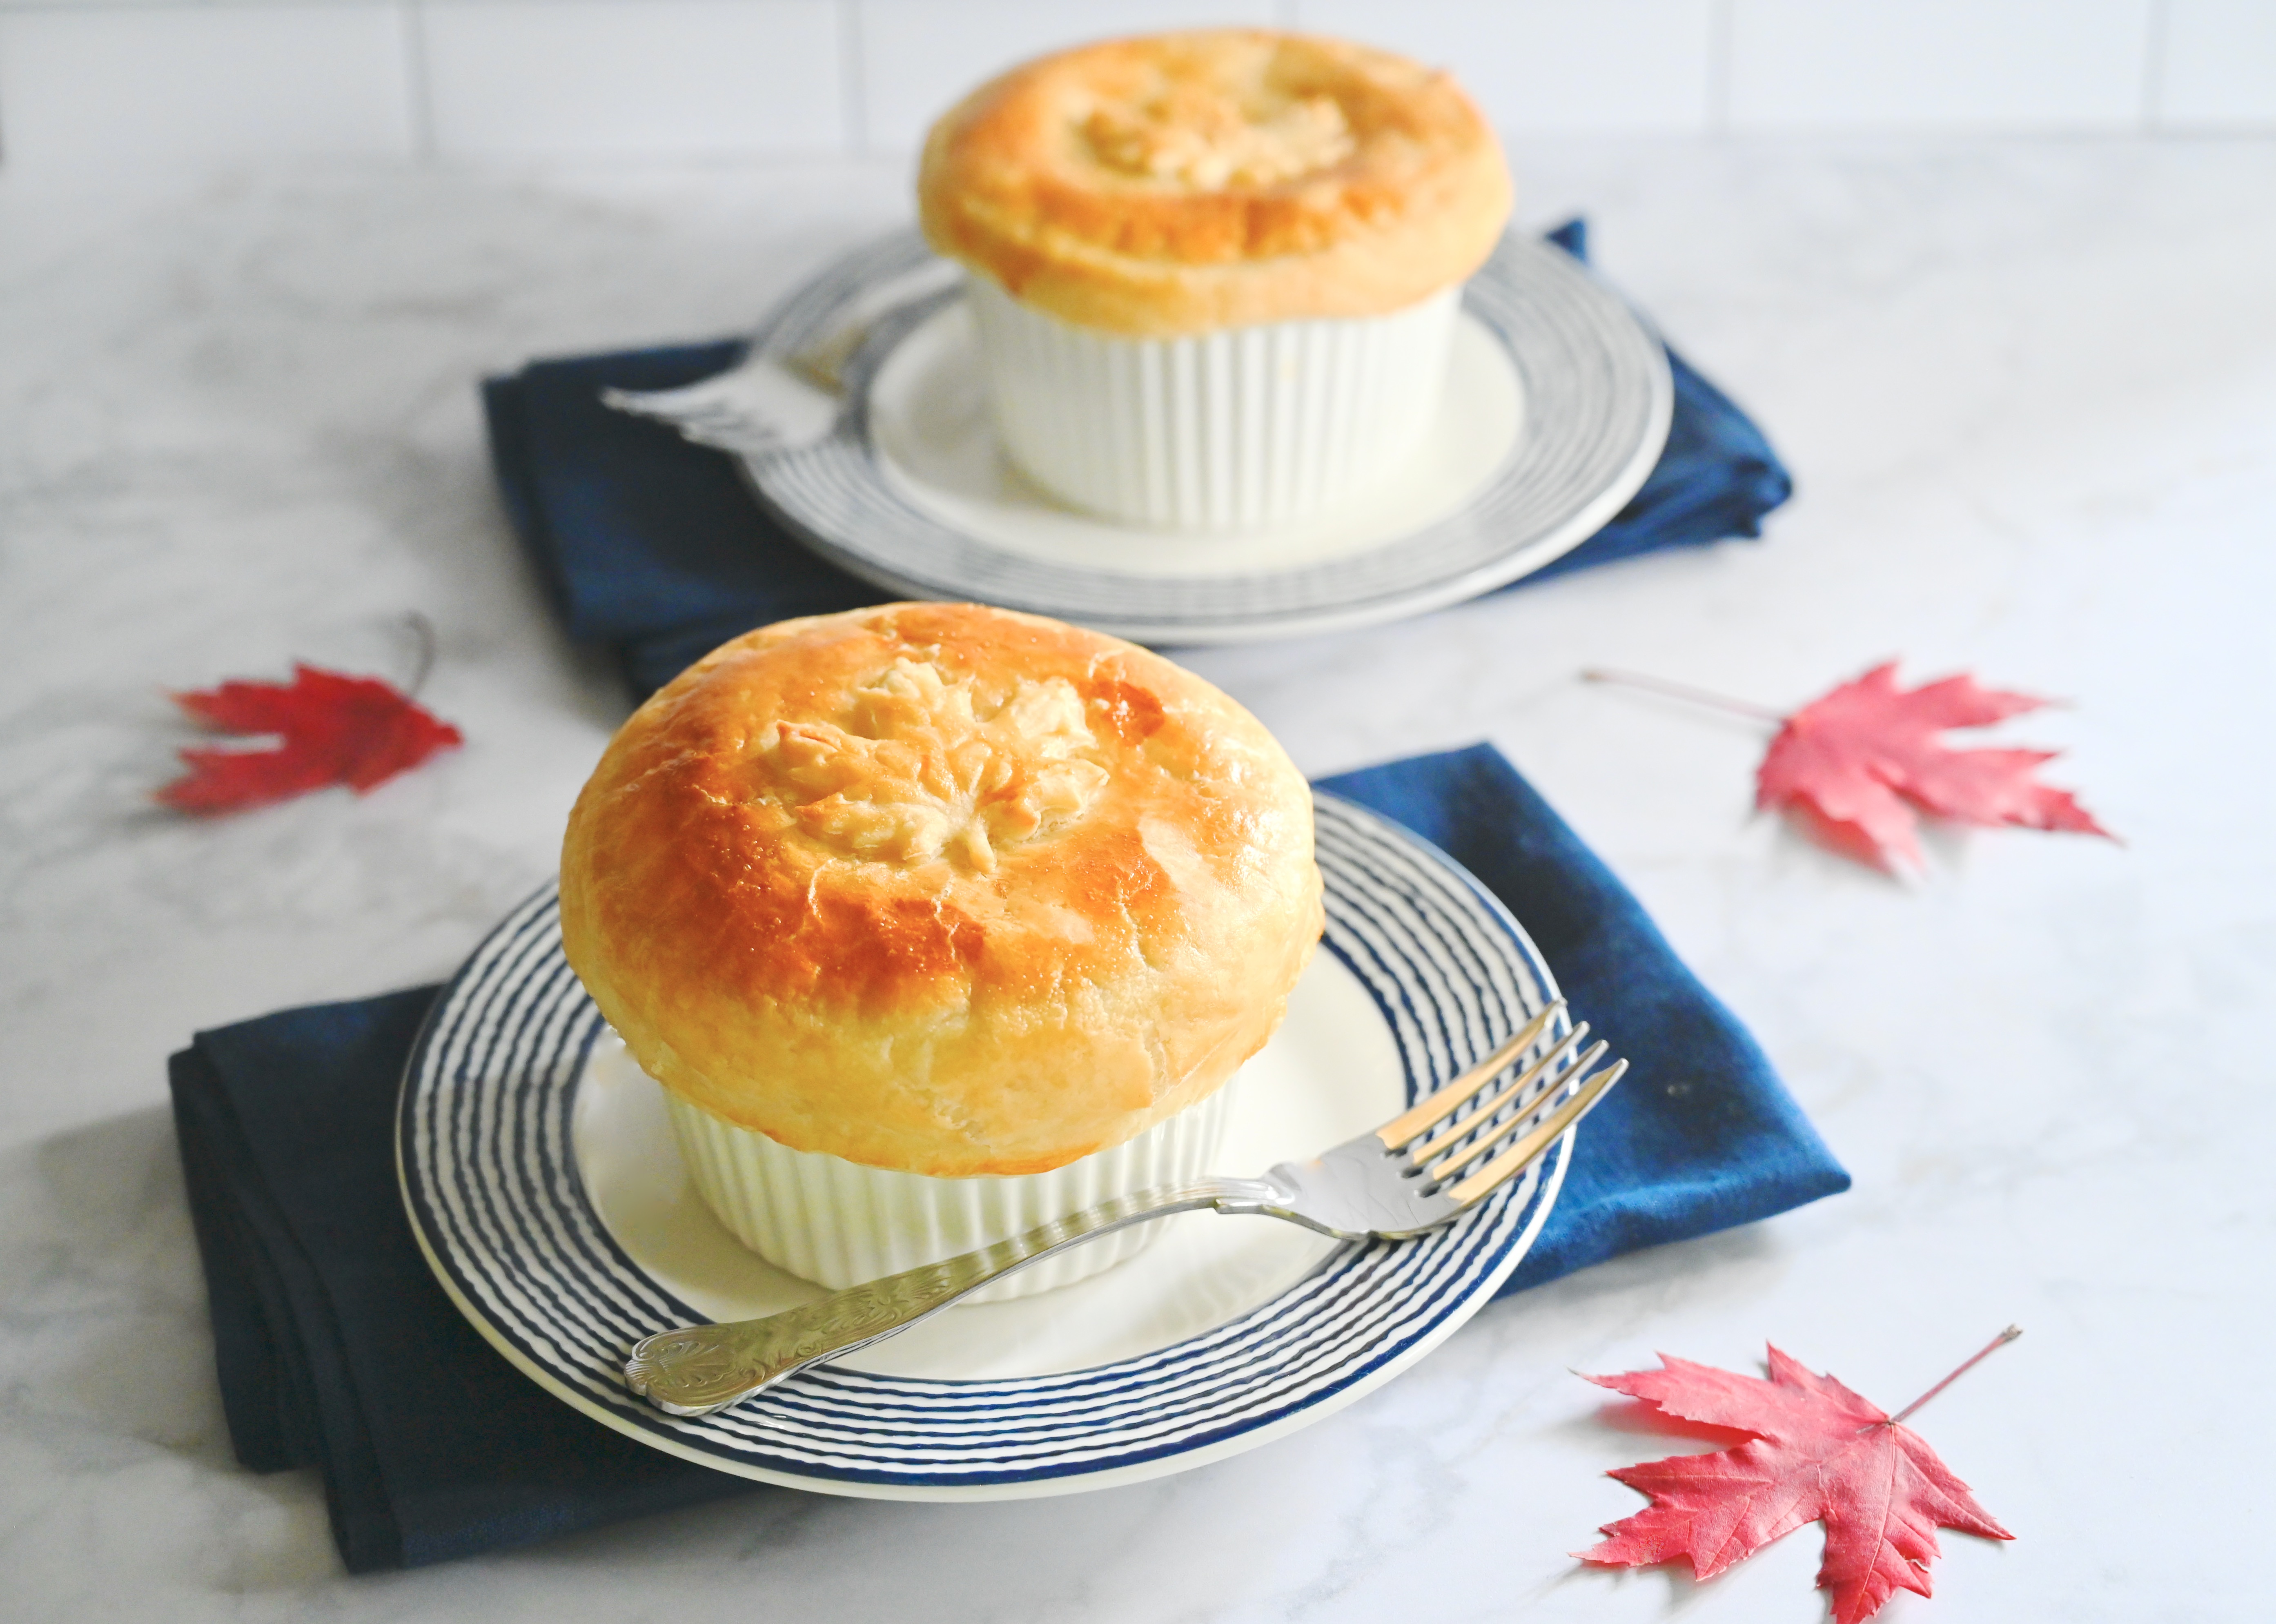
When the autumn air turns crisp and the leaves begin to change, I find myself longing for warm and savory meals. Food that makes me want to linger at the table and savor every bite.
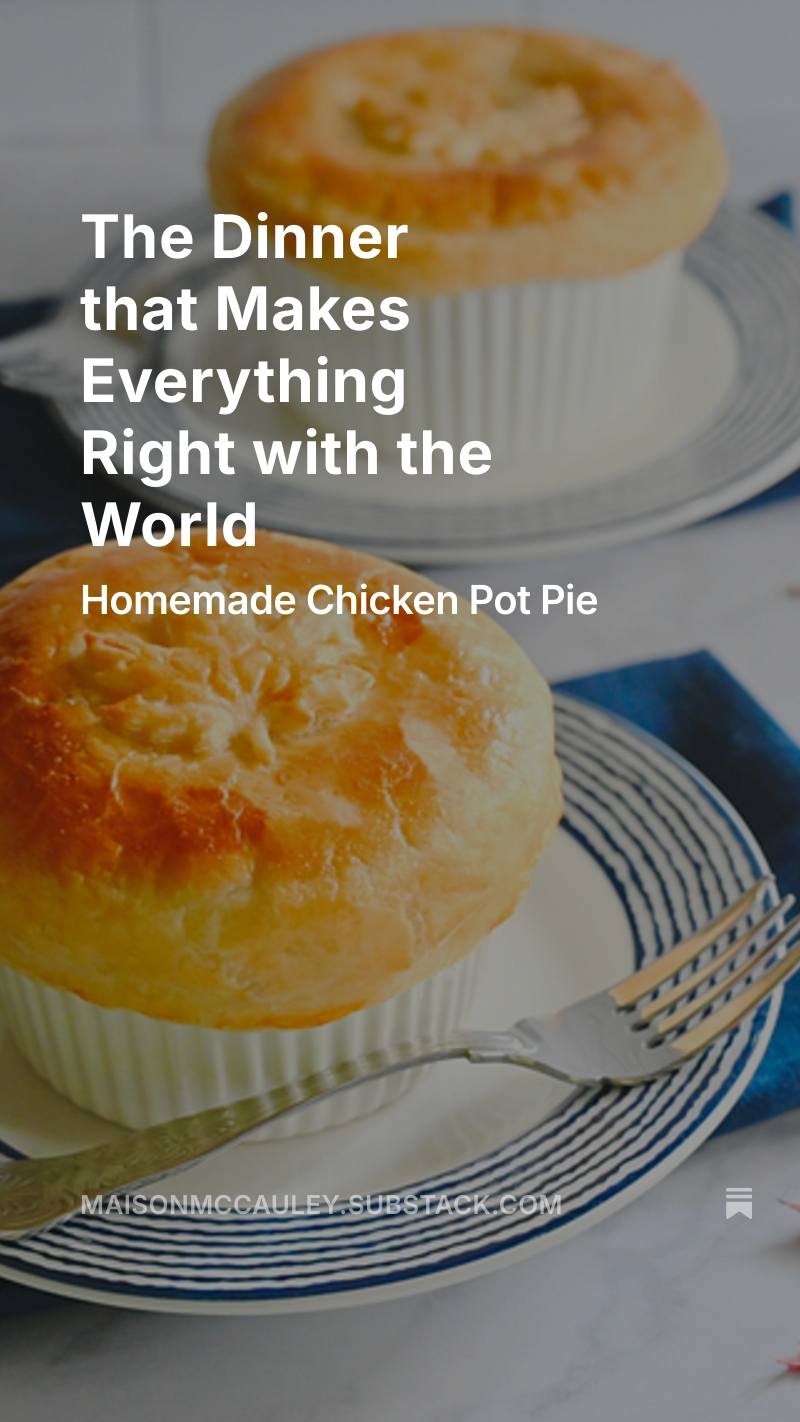
Years ago, when my husband was a cardiology fellow, he had an Italian co-worker named Angelo. At the end of a long and grueling call day Angelo used say that “a good dinner makes everything right in the world.” I have found that there is a deep truth in those words. Good food has the power to feed our souls and bring us together.
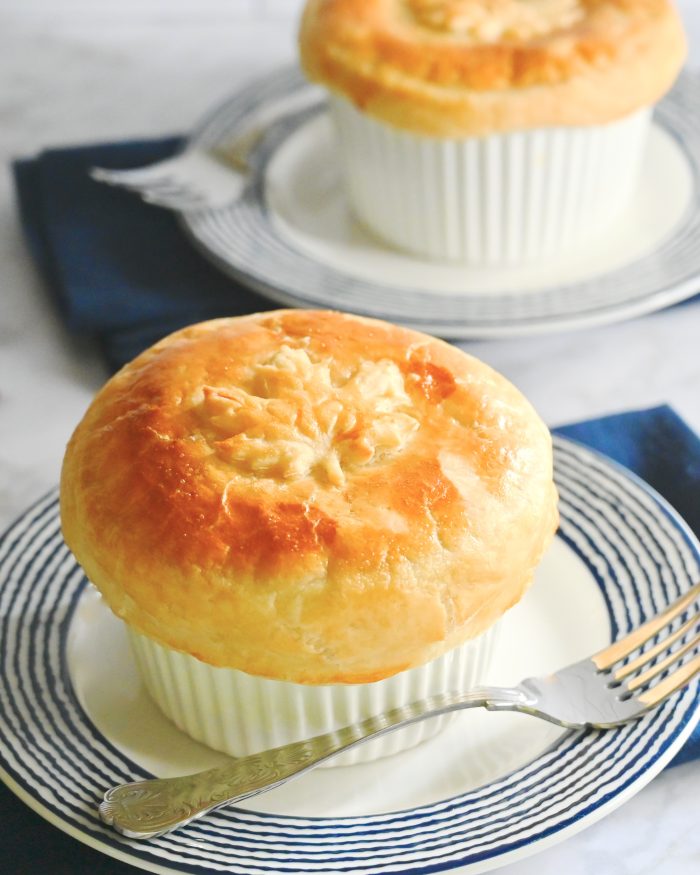
In our house fall comfort food means chicken pot pie. One bite of this flakey and tender pie makes everyone’s face light up. The base of my recipe is homemade cream sauce that comes together quickly. I use a store-bought rotisserie chicken and ready-made puff pastry to make this dish easier. The cream sauce is what makes this pie. So, it’s worth the extra effort.
I have another chicken pot pie recipe on my blog from years ago but I have made a few changes to the recipe over the years to make it easier to make. This is the updated version. This pot pie really lends itself to variations. Thus, if you want to turn this recipe into a vegetable pie you can use vegetable stock and instead of chicken add a peeled and diced russet potato. Just cook the potato with the carrots until tender.
So, when the world gives us reasons to worry, I am reminded that the simple act of sharing at meal together is more important than ever. Time together at the table has power to comfort us and lift our spirits. Chicken pot pie won’t solve every problem, but it’s the kind of dinner that makes you feel loved. And that makes all the difference.
I love making individual pies. I think they are easier to serve and they have real wow factor if you are having guests.
Homemade Chicken Pot Pie
3 tablespoons butter
1 medium yellow onion, diced
3 large carrots, peeled and diced
1 garlic clove, minced
1 cup frozen green peas
1 rotisserie chicken
1 box of puff pastry sheets, thawed
1 egg
1 tablespoon of water
Preheat the oven to 375 degrees.
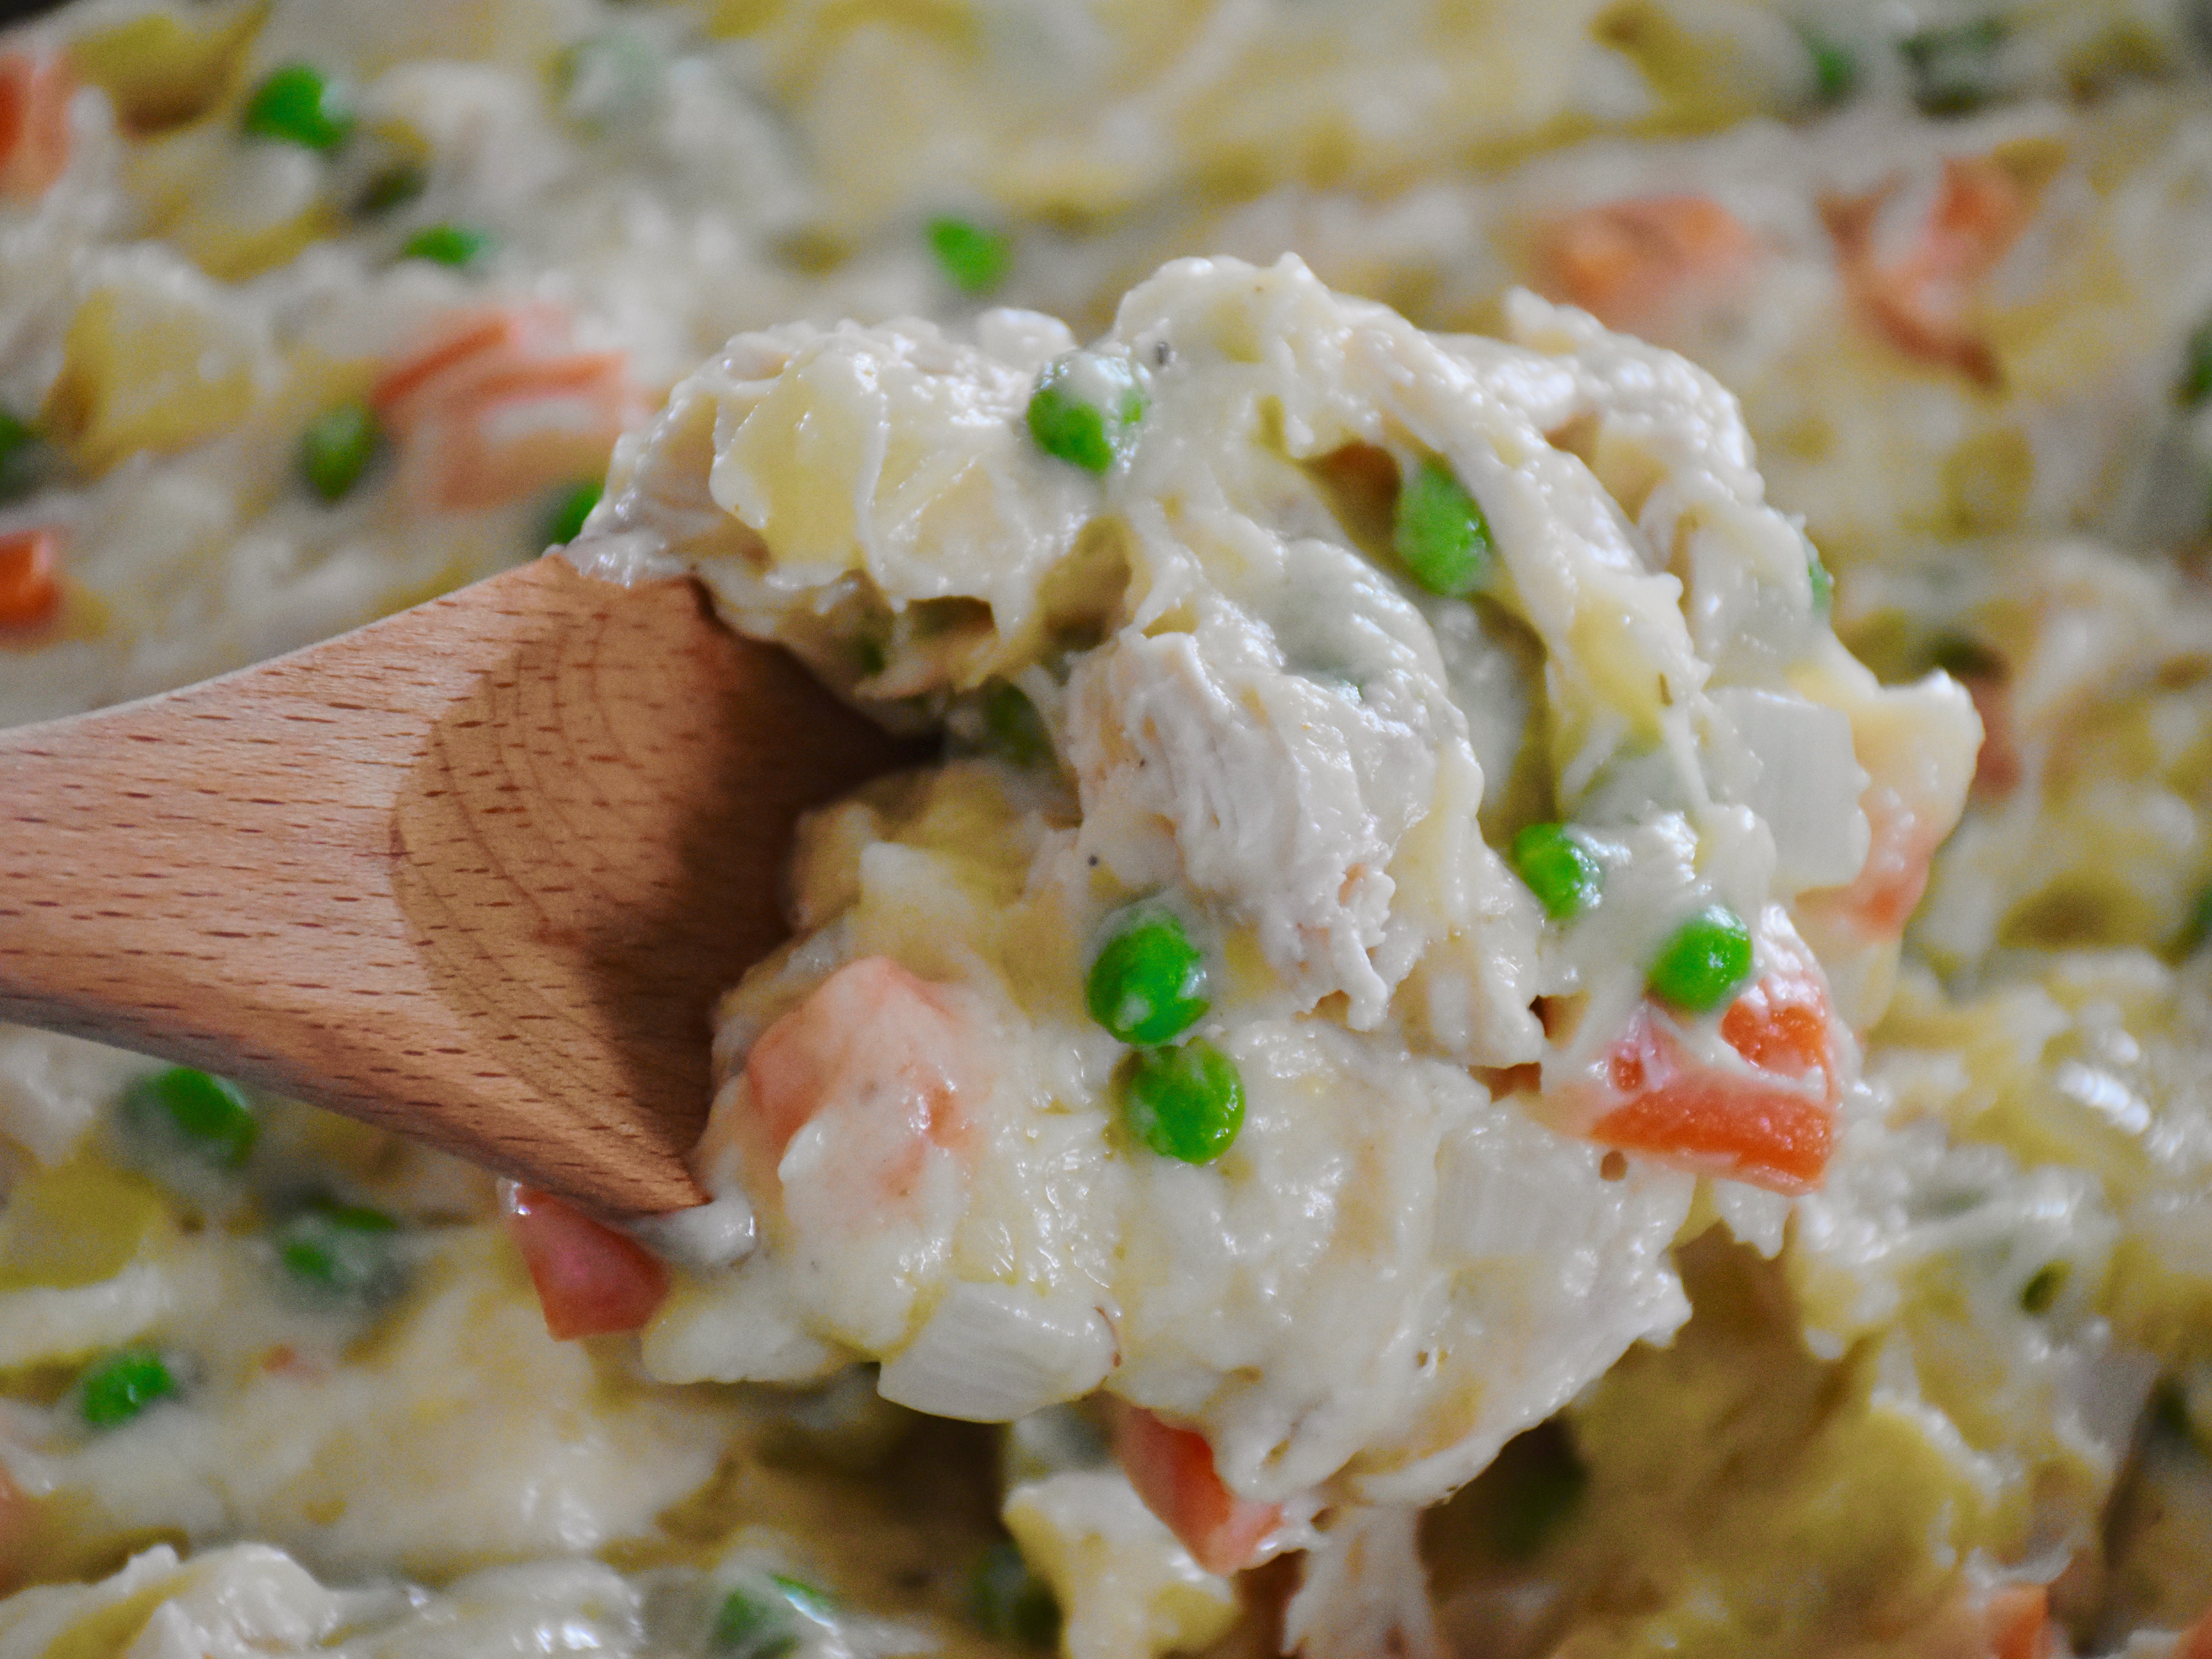
To make the vegetables, melt the butter in your skillet over medium heat. Add the onion and carrot and sauté them until the onions and the carrots have begun to soften. Add the garlic and cook an additional minute. Finally stir in the frozen peas and continue to cook until warmed. Set the vegetables aside in a bowl.
Cream Sauce
½ cup butter
1 cup flour
3 cups chicken broth, warmed
½ cup cream, warmed
½ teaspoon salt
½ teaspoon pepper
To make the filling, melt the butter in the skillet over medium heat. Sprinkle in the flour and stir to make a thick paste.
Next, slowly add the chicken stock, a ½ cup at a time while whisking. Add the cream and continue whisking until the sauce is smooth. Season with salt and pepper. Remove the filling from the heat and stir in the vegetables. Prepare the rotisserie chicken by pulling the meat off the bones and shredding it into bite-sized pieces and stir it into the sauce.
Spoon the pot pie filling into 4 large (13oz) ramekins.
Finally, prepare the puff pastry crust. Roll out one puff pastry sheet on a lightly floured surface using a lightly floured rolling pin until it’s a 12x 12 inch square. Cut the pastry into two 6-inch circles. Then repeat with the second pastry sheet. Cut decorative leaves from the remaining scrap pieces using pie punch cutters. Lay the pastry circles evenly over the dishes and the leaf on top. Brush the pastry with an egg wash made from 1 egg beaten with 1 tablespoon of water. Cut 4 small steam vents in the top of each pie.
Place the pies on a baking sheet and bake for 15 to 20 minutes until the top is golden brown. Serves four.
I recently joined Substack so you subscribe can find this recipe and future recipes in an easier to print newsletter format.
I have been trying for years to make great pizza at home. However, all the recipes I tried left me continually underwhelmed. I was beginning to believe that making crispy pizza wasn’t something I could easily make without a professional pizza oven.
That was until I was watched a BBC cooking show that featured an interview with two British brothers who had studied pizza making in Naples. Although they declined to share their exact dough recipe, they did share a great tip- Italian pizza uses much less yeast than other bread doughs. So I quit using the standard yeast packet that many recipes call for and began testing smaller amounts of yeast to create an Italian style dough recipe.
Thus further determined to crack the code on creating a crispy and chewy pizza crust I realized that I needed to solve another problem. How was I going to recreate the heat of a large pizza oven at home? Now I love the idea of having a pizza oven, but I don’t have the space for one. So I decided to turn my outdoor grill into a pizza oven using a clever pizza stone insert from a company called Kettle Pizza. This insert finally gave me the higher temperatures that I need to create a better crust.
So I fired up my gas grill and began testing recipe variations to see what worked best. My goal was to create a dough that wouldn’t require a lengthy overnight rise and I wanted it to be easy to make. The end result was a versatile pizza dough that can be baked with a grill insert, in a pizza oven or even a conventional oven. All you have to do is adjust the cooking times.
Our family’s summer cooking project became a great grilling adventure as we tried all the pizza dough recipe variations. My daughters and I had fun creating our own ultimate pizzas loaded with our favorite toppings. So here are all of my tips and tricks for making irresistibly crispy pizza at home.
Homemade Pizza Dough
2 cups warm water, about 105 to 110 degrees
1/2 teaspoon sugar
1/2 teaspoon active dry yeast
4 cups Farina “00” (Italian pasta and pizza flour), plus more for dusting the pizza peel
1 teaspoon salt
1 teaspoon olive oil, for greasing the bowl
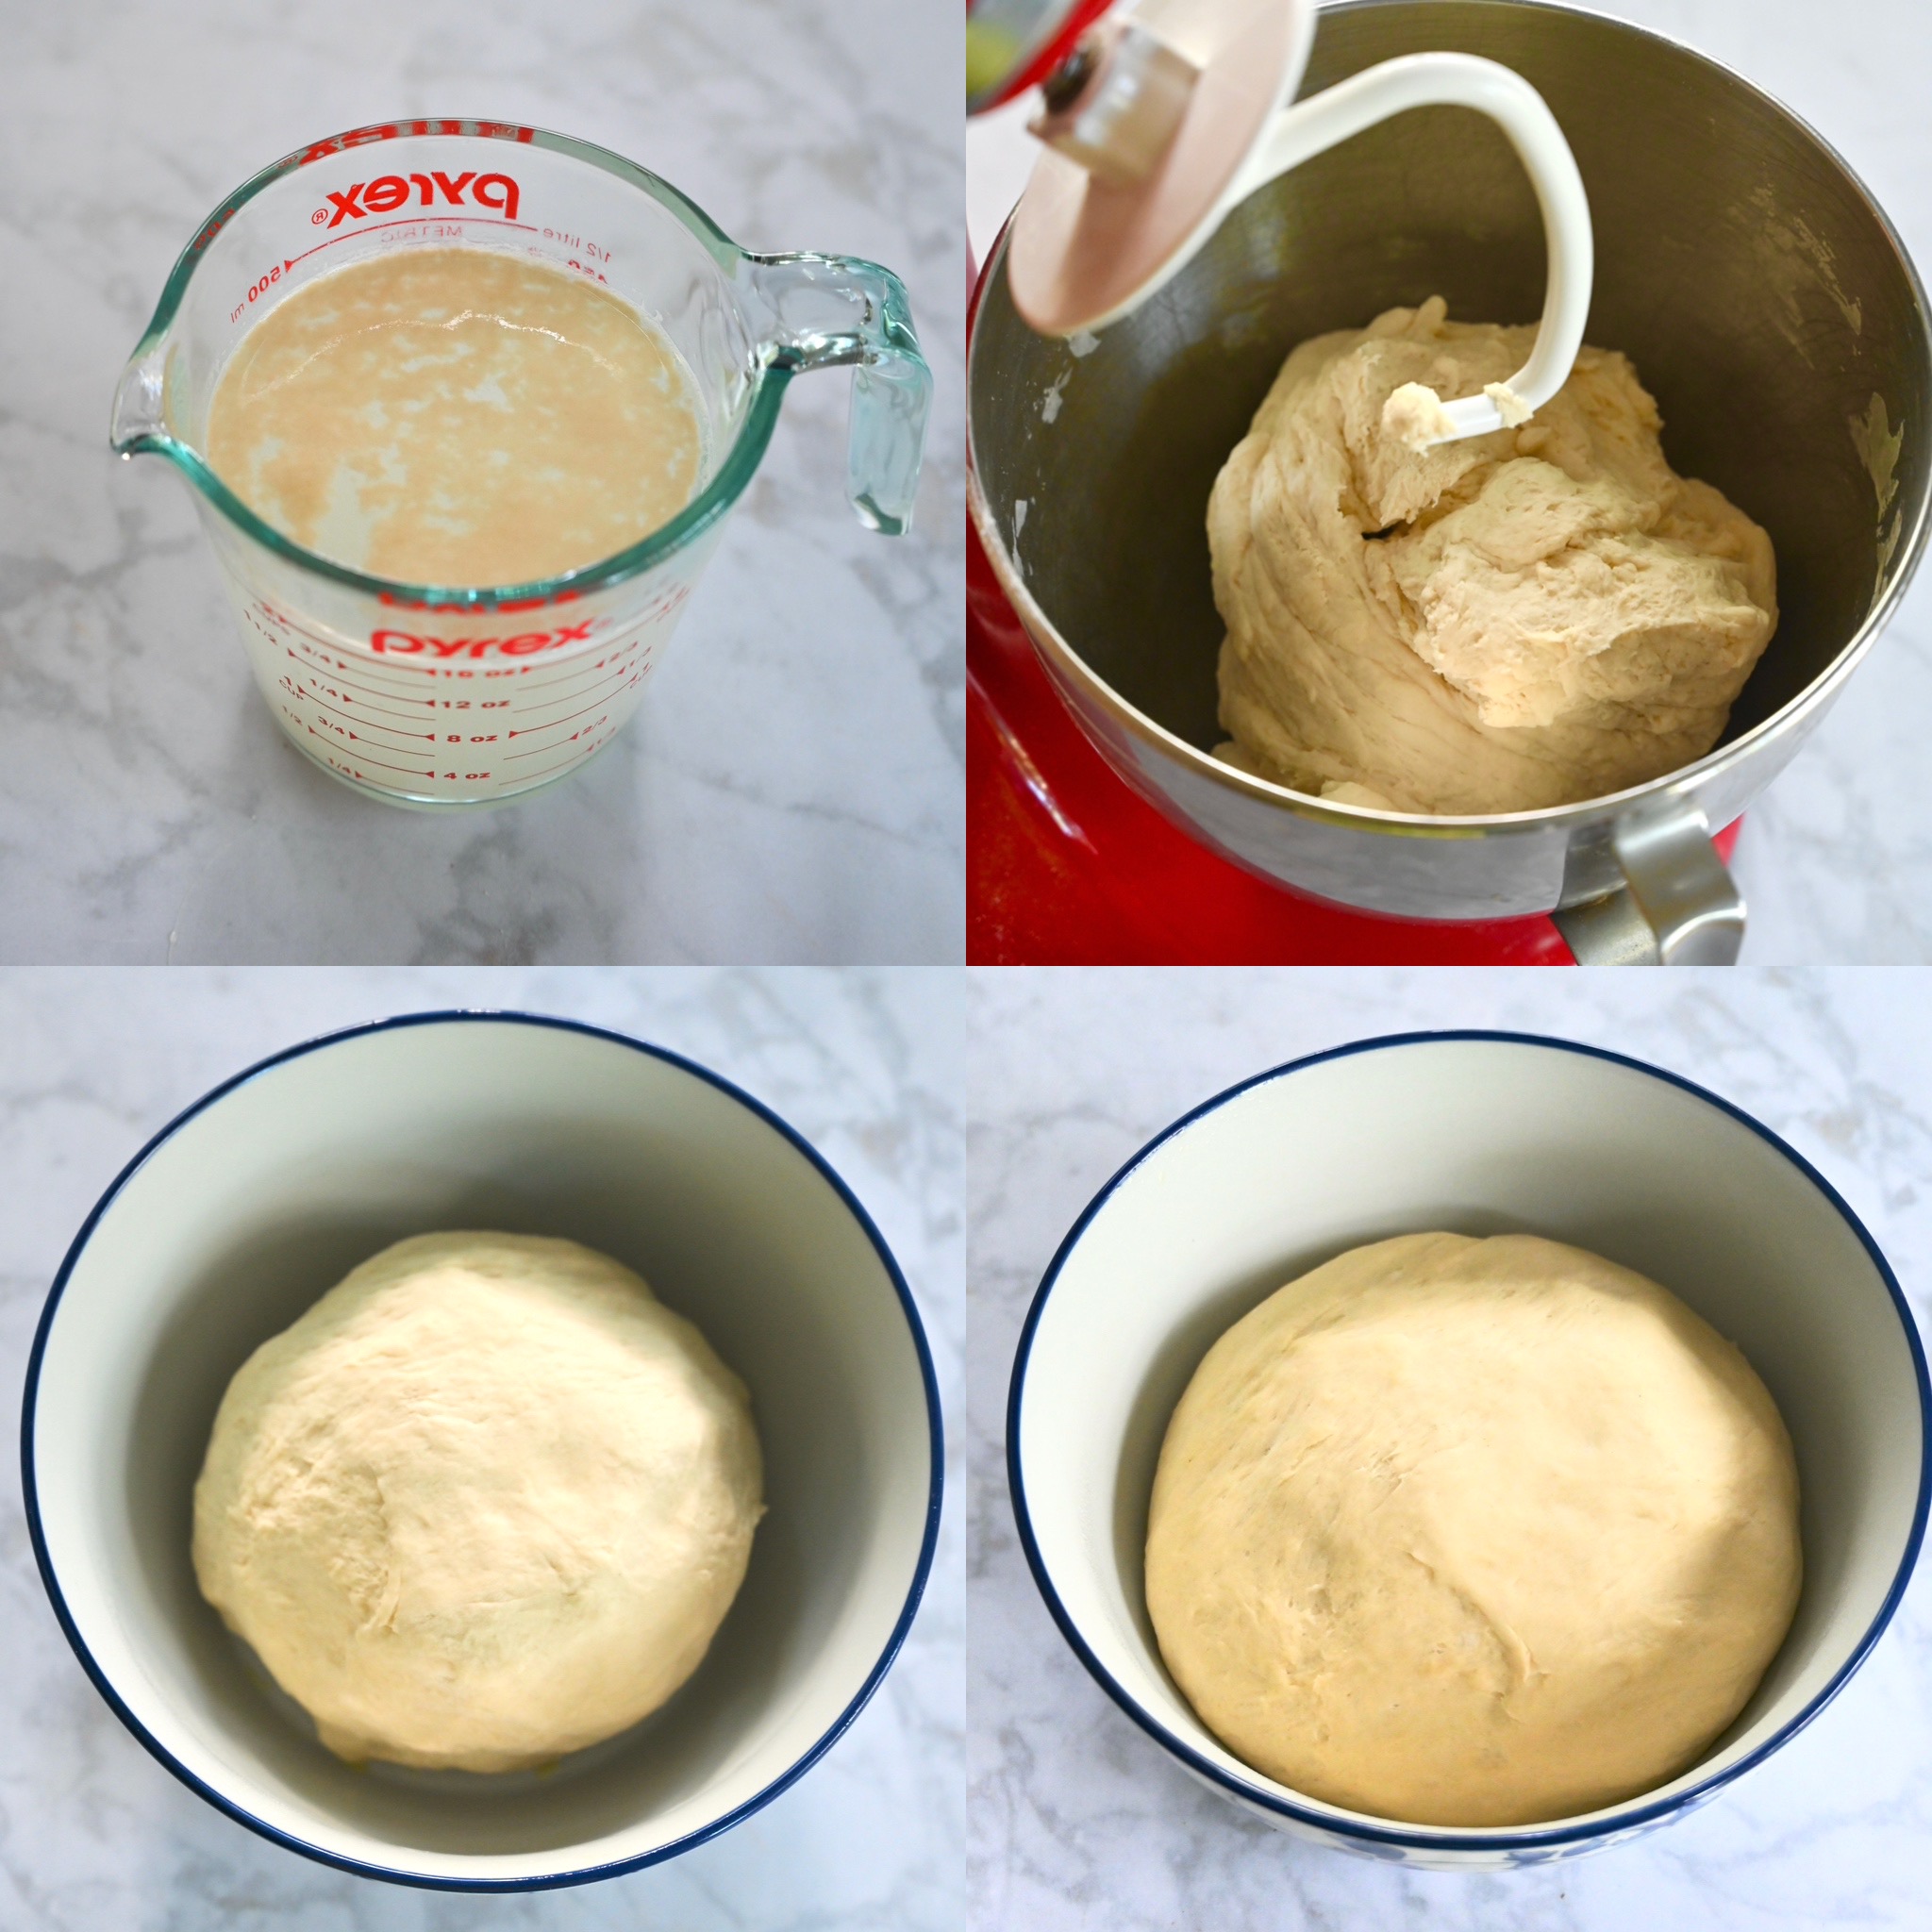
To make the dough, prepare the yeast by stirring the sugar into the warm water. Then add the yeast on top and let it sit for five minutes.
Meanwhile, in the large bowl of a stand mixer add the Italian Farina “00” flour and salt. Attach the dough hook to the mixer and mix it low speed while slowly pouring in the yeast and water mixture. Allow the dough to knead with the hook on low speed for about 5 minutes.
Next, lightly grease the bottom and sides of a large bowl with the olive oil. Shape the dough into a ball and place it in the bowl. Cover the dough with plastic wrap or a tea towel and allow it to rise for 60 to 90 minutes. The dough will not fully double in size, because this recipe uses less yeast than a traditional bread recipe. However the dough will still rise and spread in size.
Here is a look at the four steps to making this dough. First, make sure the water is warm but not too hot or it will harm the yeast. Let the yeast bloom in the water for five minute. Second, let the mixer do all the hard work by using the dough hook to knead the dough. Finally, let the dough rise for 60 to 90 minutes. Here you can see the difference in the dough.
Second, preheat the grill to high heat with the pizza insert in place or if cooking indoors heat the oven to 500 degrees and place a large round baking stone on the second from the bottom rack of the of the oven so it heats with the oven. (This will help ensure that the crust is crisper.)
Here is my Weber gas grill pizza oven set up. The Kettle Pizza Company has different sized inserts to fit round grills as well. Note with this model I close the grill lid while it is cooking to increase the heat. This grill option works great for me because I have a small back patio and I can easily store the insert when I am not using it.
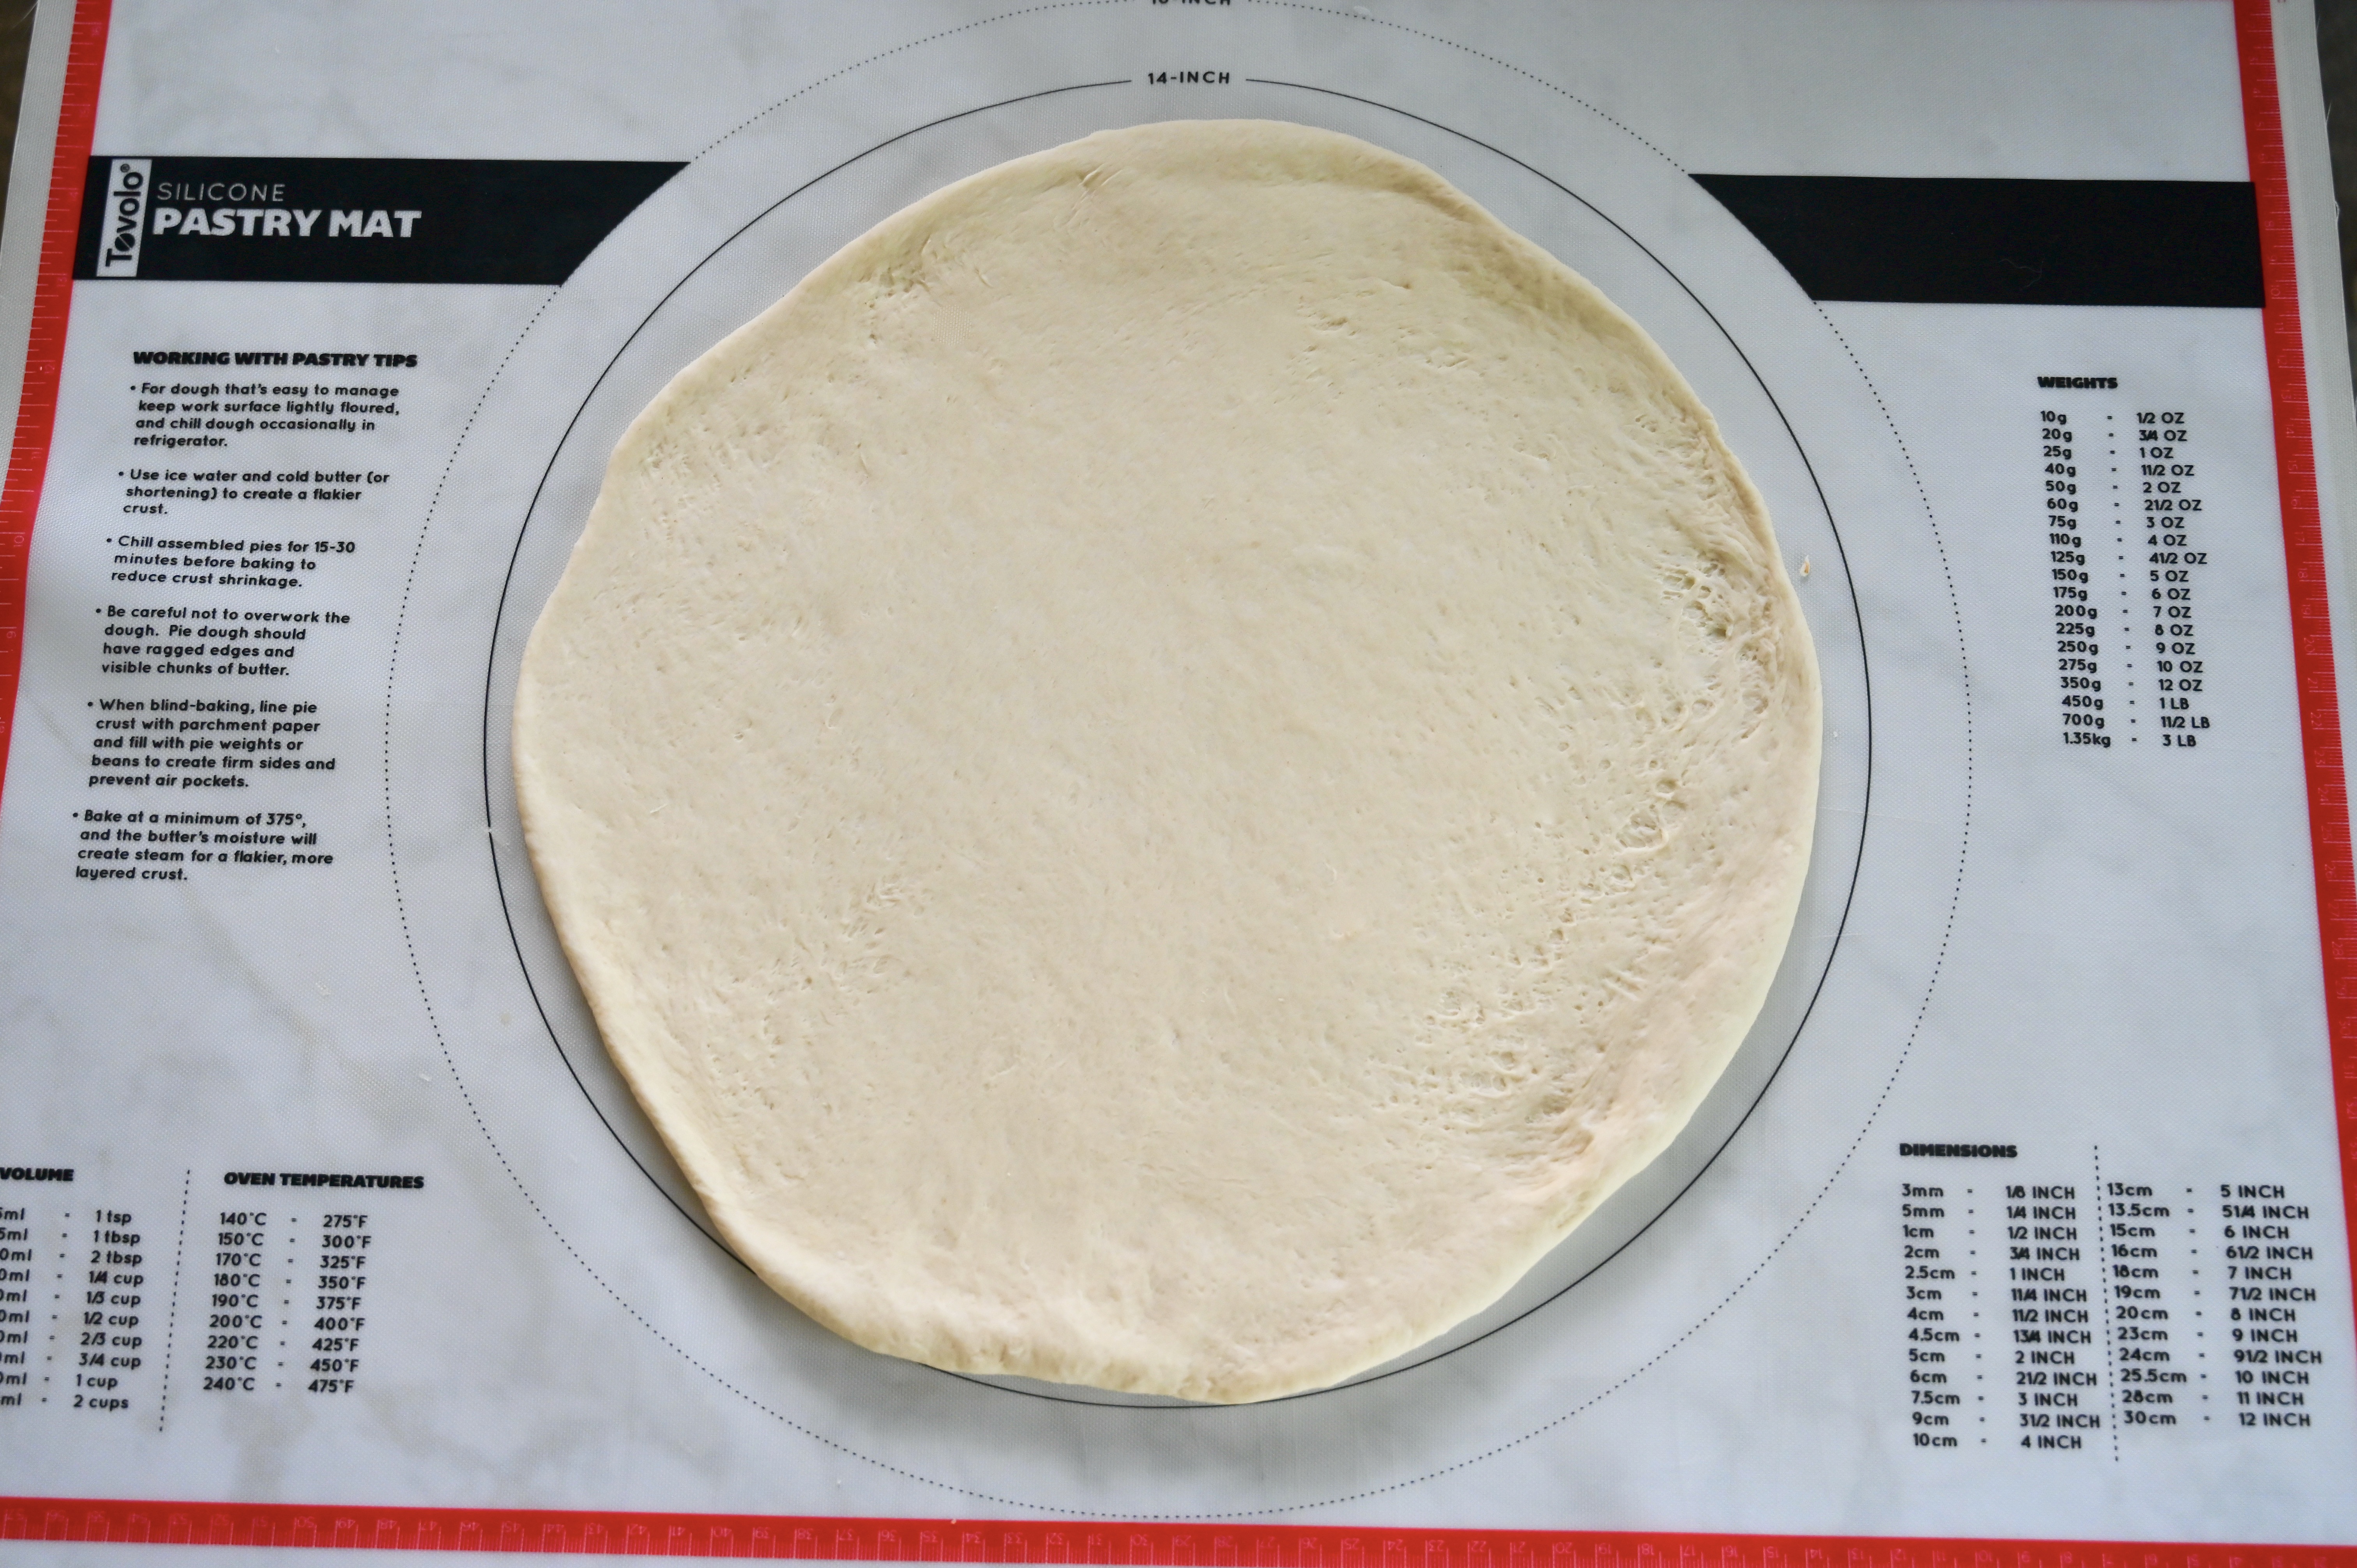
Third, roll the dough and create the pizzas. Punch down the dough and divide it in two to make two 12 inch pizzas.
Roll the first dough half out on a silicone baking mat into a 12 inch circle. I have found that I get a better roll from the dough when I use a small amount of flour on the mat. It stretches the dough better.
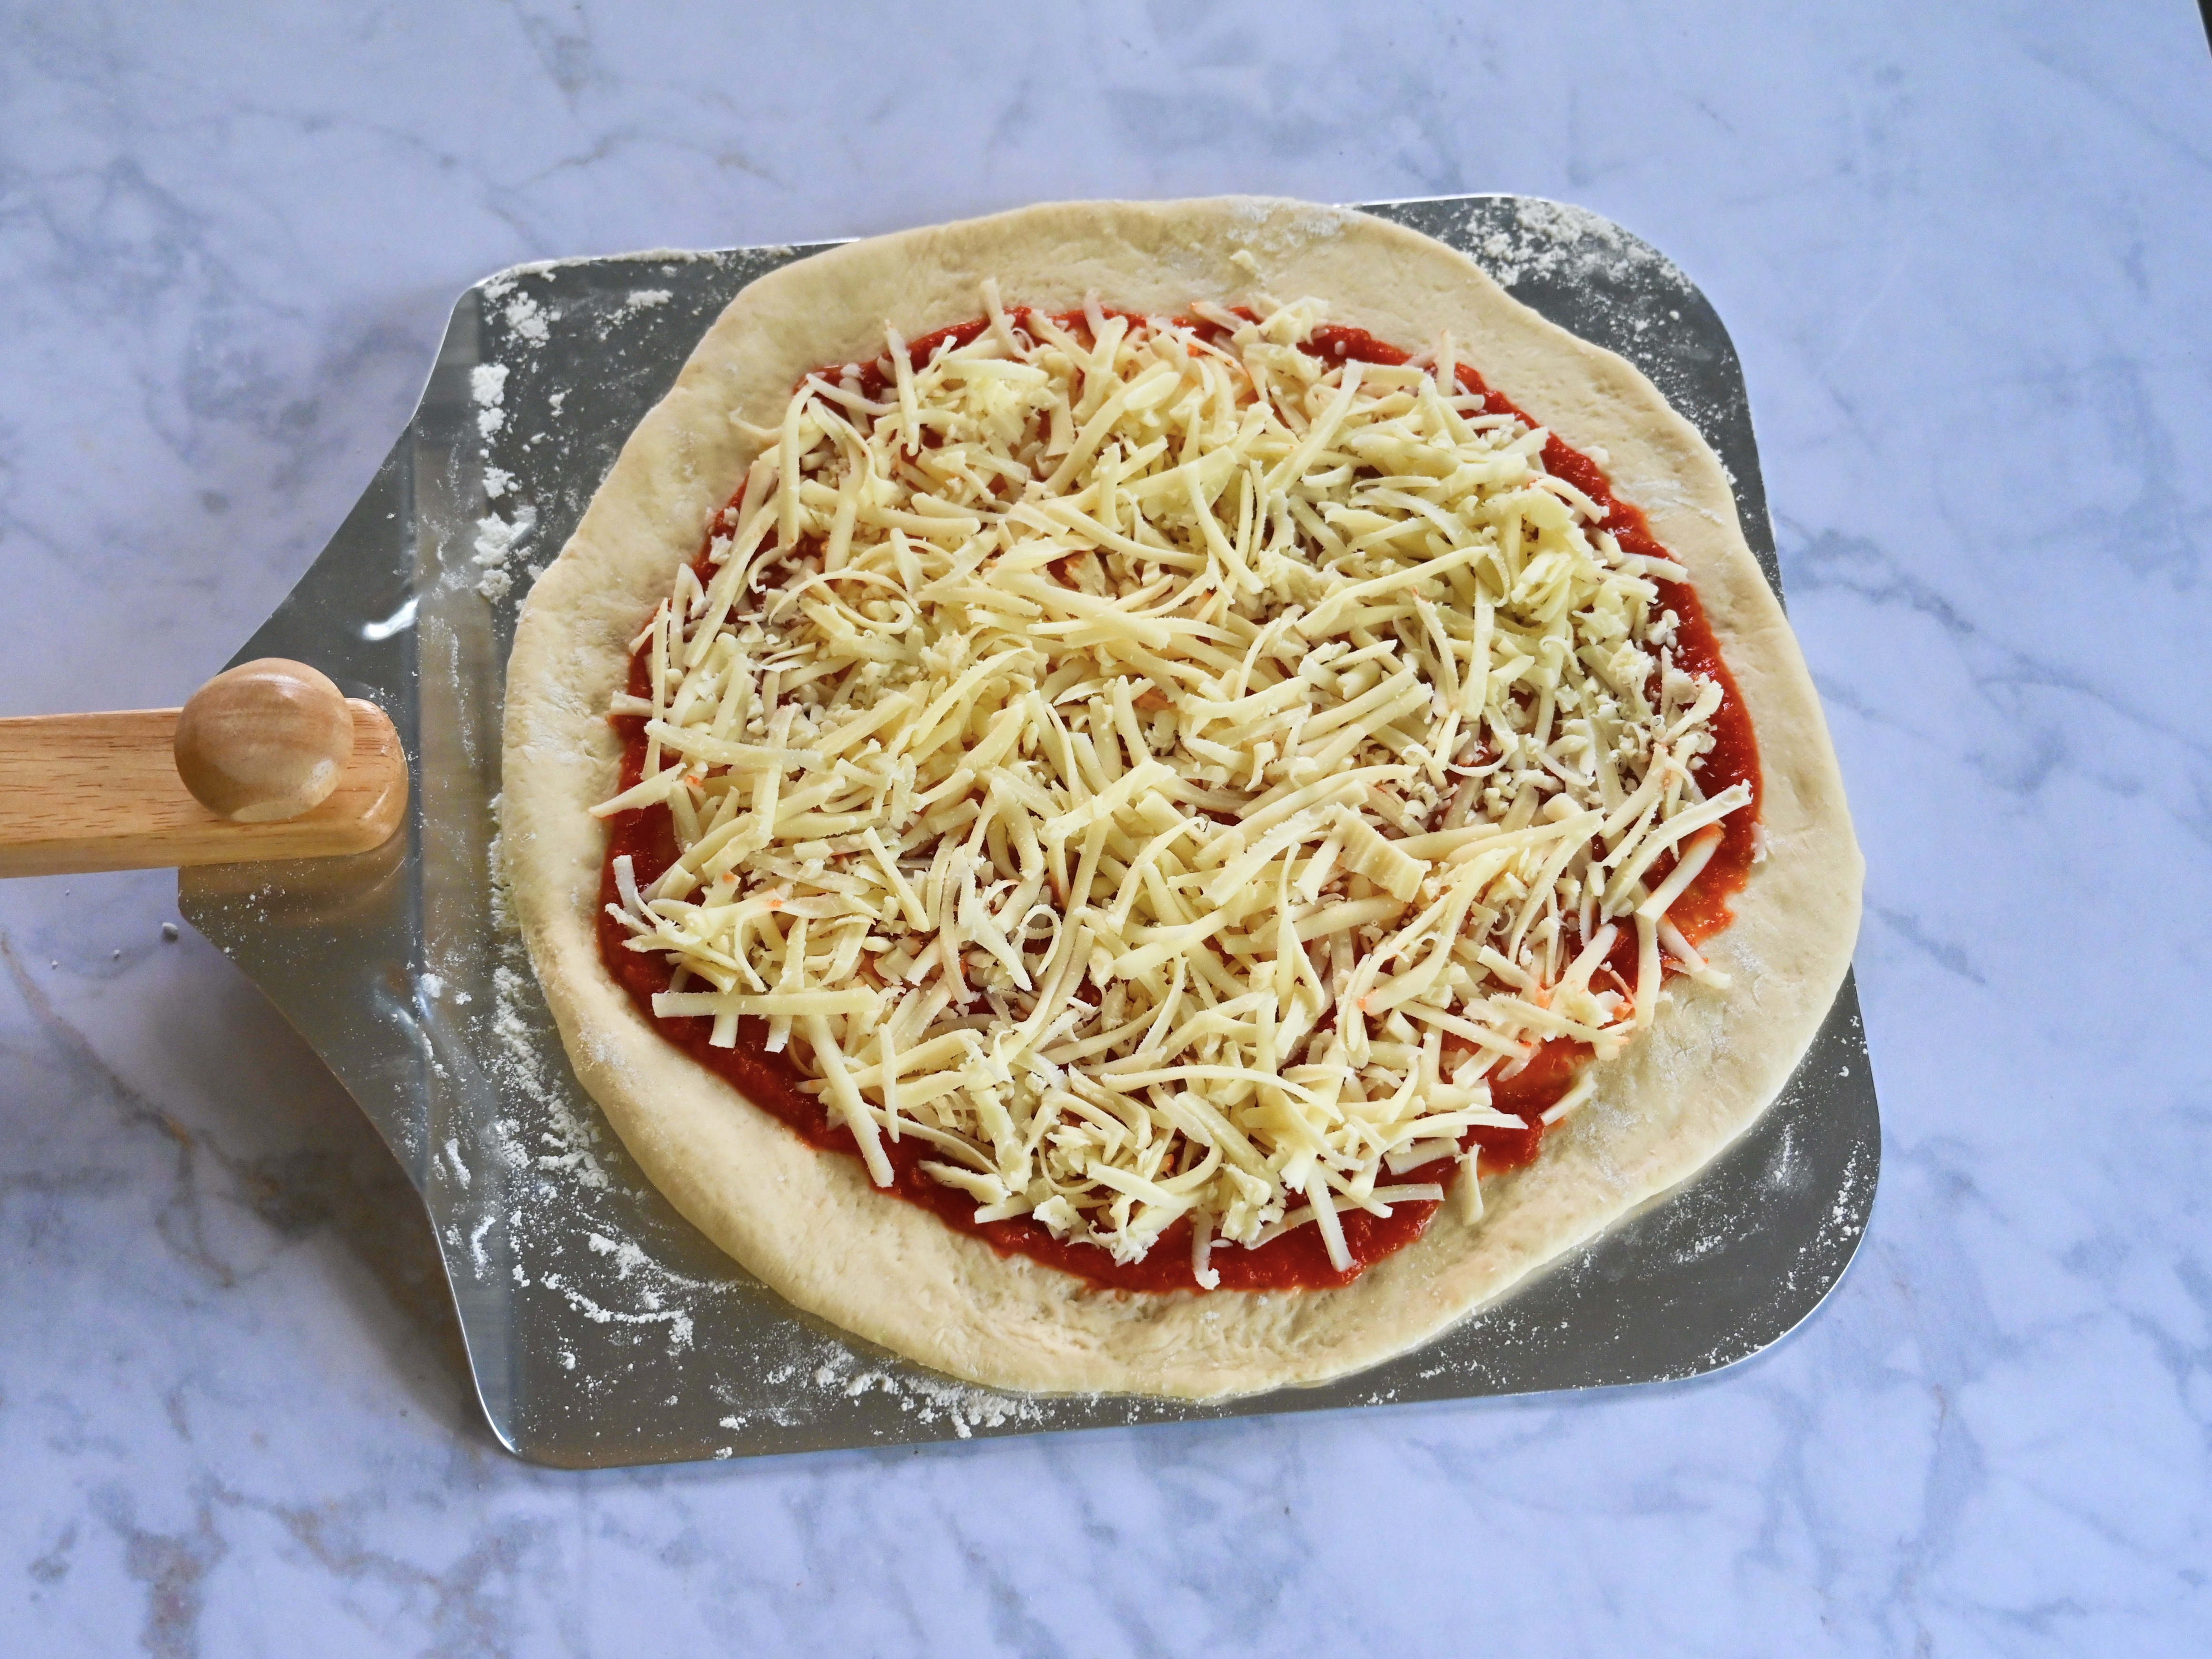
Then roll the dough halfway on the rolling pin to lift it up and place it on a well floured metal pizza peel. Check the dough to make sure it slides freely before adding the sauce and toppings. If there are any sticky spots add a little flour underneath the dough in that area. This step will allow you make a better transfer to the pizza stone. Repeat these steps for the second crust.
Now, add the sauce, my favorite is the Italian Cento Naples Style Pizza Sauce. Then top with grated whole milk low moisture mozzarella (like Tillamook or Galbani) and any toppings you want to add. I don’t use pre-shredded cheese when making pizza because they have anti caking agents in them that don’t allow cheese to melt as well.
Although pizza peels are helpful, if you don’t have one you can use a flat cookie sheet without sides.
Finally grill or bake the pizza. Carefully lift up any grill inset cover and slide the pizza on the pizza stone. Bake until golden brown about 5 to 8 minutes depending the heat of the grill. Turn the pizza about halfway through to ensure even cooking and remove it from the stone with the peel. If using a traditional pizza oven the cooking time will be much shorter so keep an eye on the pizza as it cooks.
If using a regular oven the pizza can take a little longer to bake because it’s not quite as hot as the grill so adjust the cooking time to 7 to 10 minutes.
This pizza dough is crispy on the outside with a soft and chewy inside. I finally created a dough that tastes like the gourmet Chicago pizzas that I love. So add all of your favorite toppings and start creating our own delicious pizza at home.
My coffee table was covered with travel books as I was lost in a moment of food centric wanderlust. I was on my laptop reading Edinburgh restaurant reviews when my husband came strolling in the living room wondering what I was doing spending so much time researching places to eat.
I believe that great food takes planning. Thus, I was determined to find out about the best pubs and cafes. I wanted to know all the details like who makes the best sticky toffee pudding? Or what makes a great fish and chips? I love looking for restaurants that have menus that change with the season. I also look for places with new dishes that I haven’t tried. Once I made lists of all the delicious possibilities, I began making reservations.
A view of Big Ben and the Houses of Parliament in London.
Then with our plans made, our family embarked on a summer adventure to Scotland and England. We traveled to see the remains of the MacAulay clan’s castle in Glasgow, Edinburgh Castle, Oxford, Stonehenge, Big Ben and Kew Gardens. While we were there, we enjoyed many wonderful meals. However, the most extraordinary dining experience was tea at the Balmoral Hotel in Edinburgh.
A view of the Balmoral Hotel and its famous clock which is traditionally kept three minutes fast to ensure that passengers make their train on time.
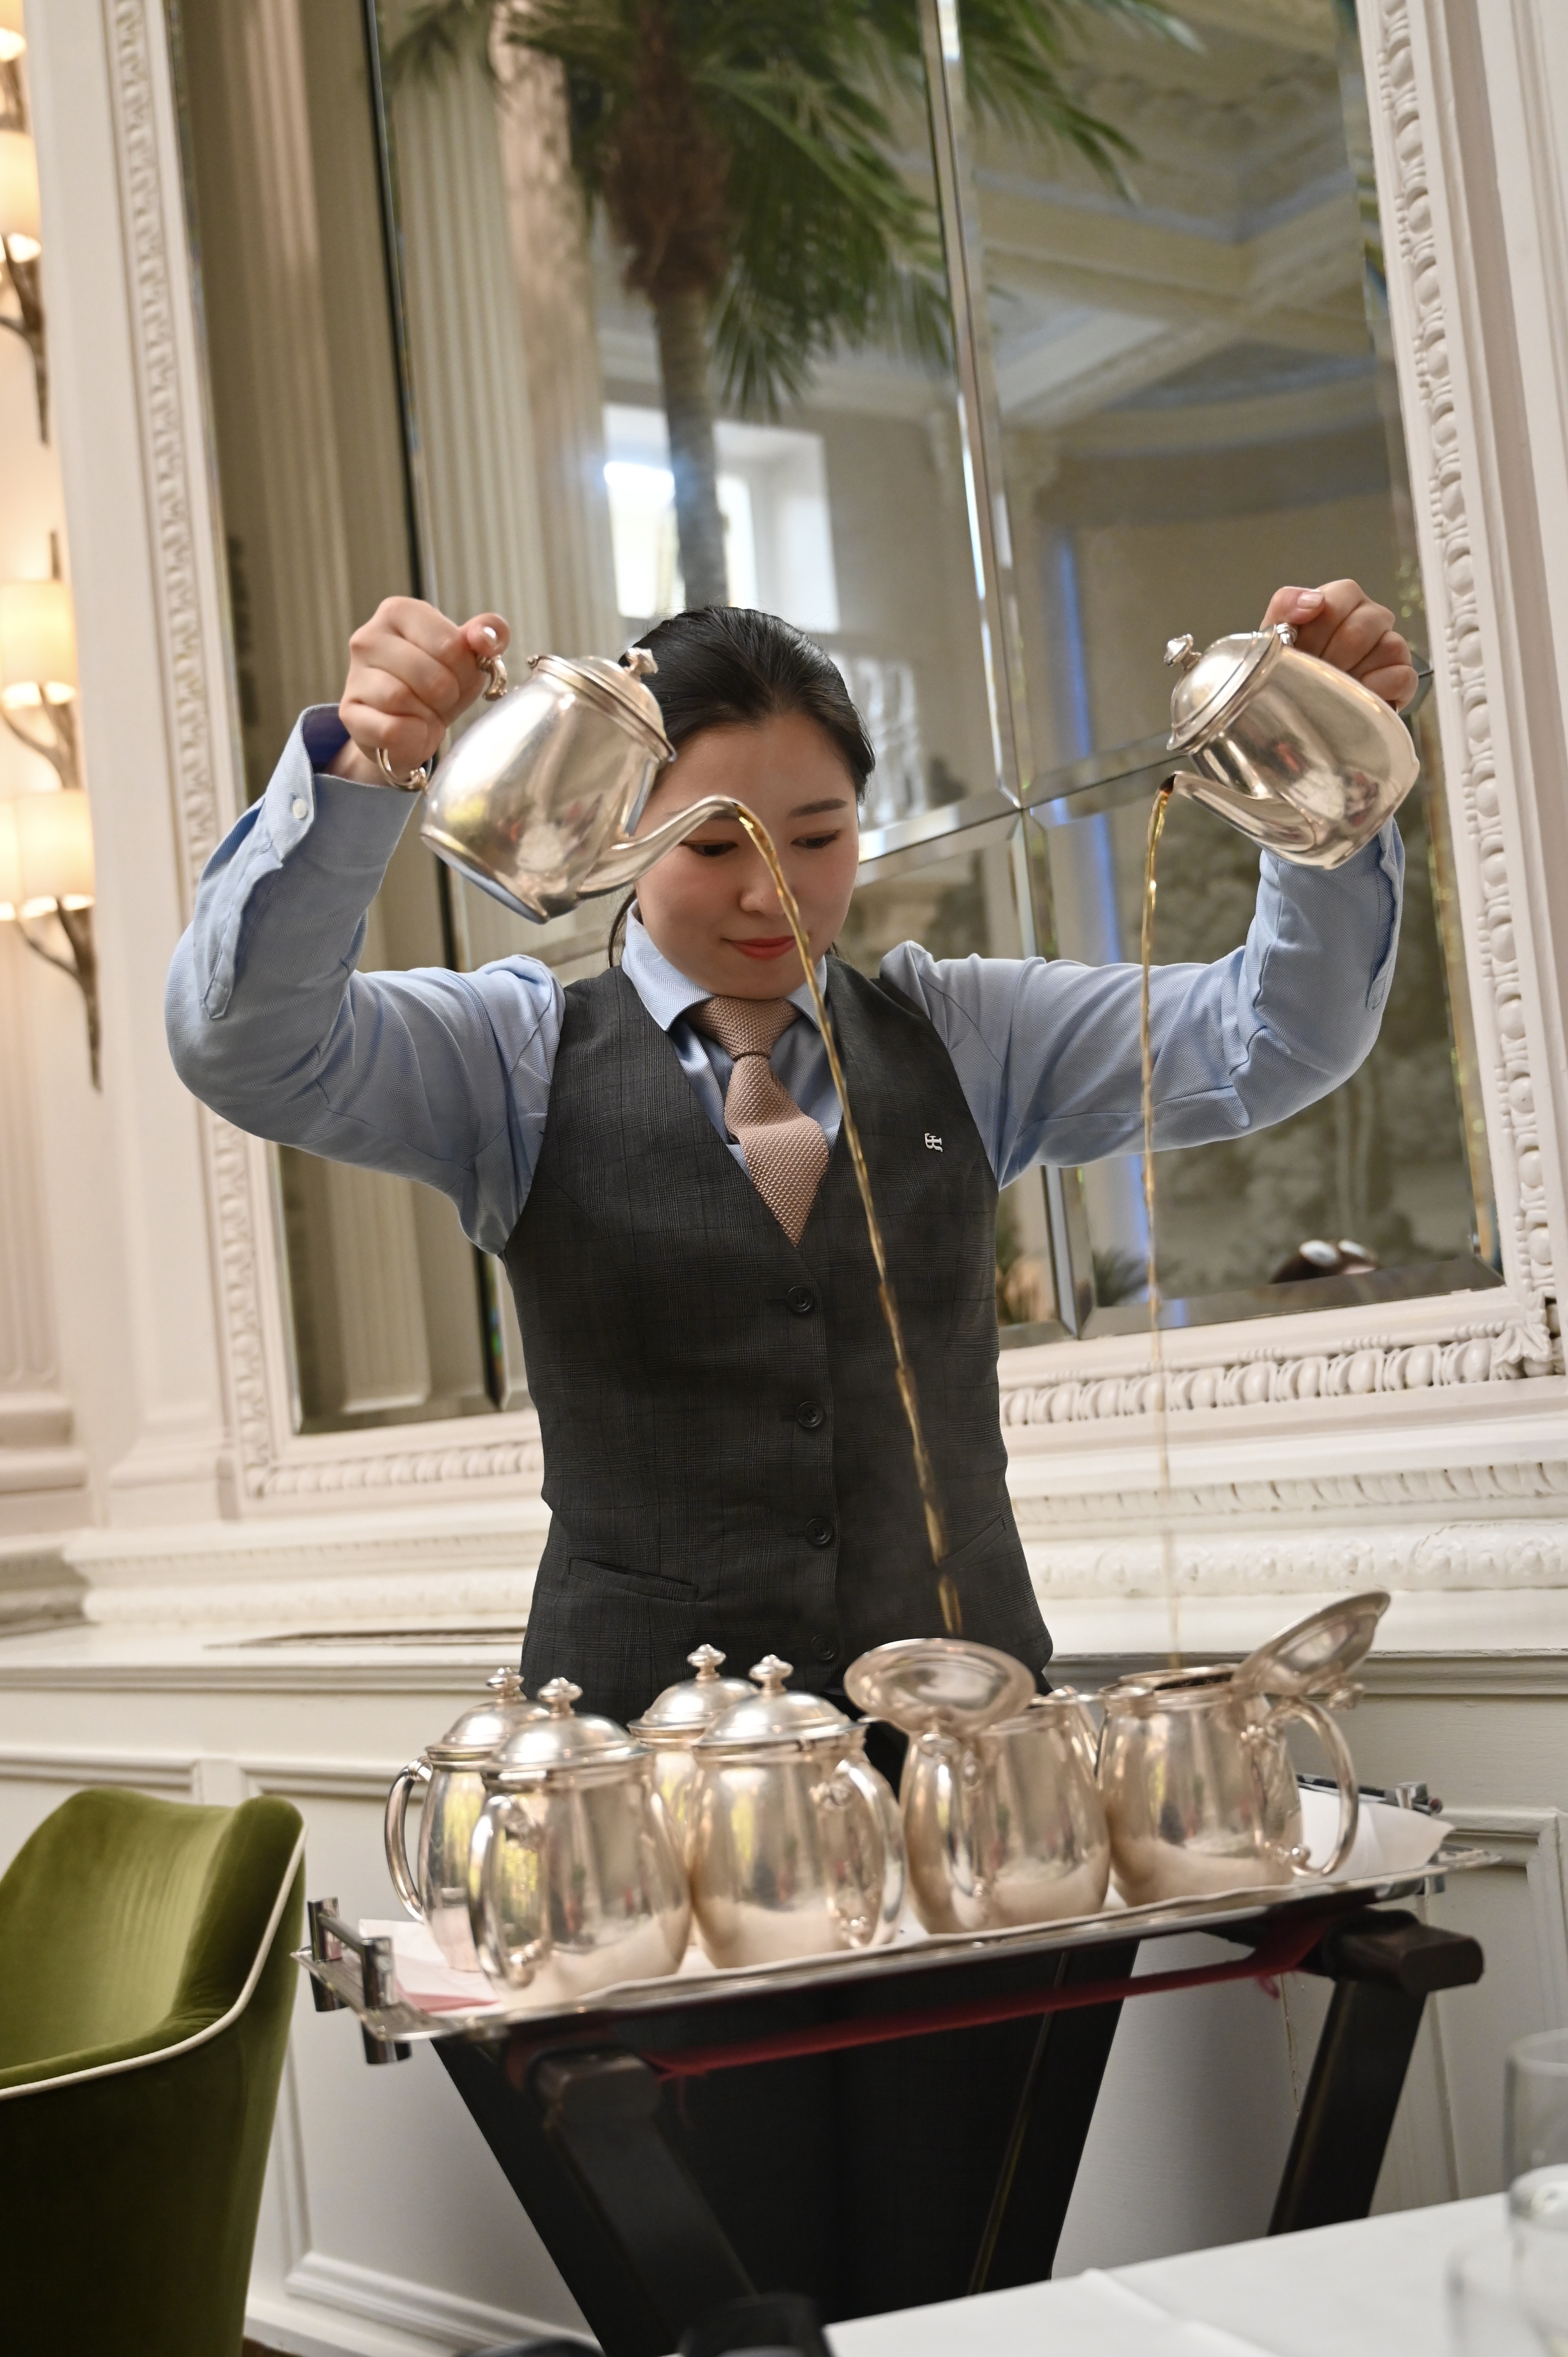
As we walked into the Balmoral, we were seated under the branches of two large cherry trees whose pink blossoms twinkled with fairy lights. It felt like we had entered the pages of a storybook. As we settled into our green velvet armchairs, we studied the lengthy book of teas. Once we ordered, the dance began. There were carts with teapots being poured from lofty heights and several tiered trays with elegant soups, pastries and sandwiches
Nevertheless, the piece de resistance were the scones. They were feather light, flakey and filled a lovely spoonful of strawberry jam and clotted cream. Afternoon tea is British tradition at its best. Thus, not wanting our holiday to end I have been making tea and scones at home.
British Scones
2 cups all-purpose flour
1 tablespoon baking powder
½ teaspoon salt
2 tablespoons sugar
1 ½ sticks of cold butter
2 eggs, lightly beaten
½ cup whipping cream
1 egg
1 teaspoon of water
Preheat the oven to 375 degrees
In the bowl of a large food processor mix together the flour, baking powder, salt and sugar. Next, cut the butter into small pieces and add it to the flour mixture. Then on a high-speed pulse your food processor until the butter is cut into tiny crumbs about 30 seconds.
Whisk together the eggs and cream and slowly pour them through the chute of the food processor while the processor is running. Continue to mix until the dough until forms a loose ball.
Turn the dough out on a lightly floured surface, and roll it out till it’s ½ of an inch thick. Then flour a 2 ½ in circle cutter and gently press it down and lift with out twisting. This will ensure that the scones keep their shape and rise evenly. Keep rolling the dough out and cutting until you have eight scones. If you want extra flakey scones then chill them in the fridge for 30 minutes before baking.
Finally in a small bowl whisk together one egg and one teaspoon of water to make an egg wash. Brush the tops of your scones with the egg wash and place them on a parchment paper lined baking sheet. Bake for 15 minutes or until golden brown. Makes 8 scones.
If you want to serve them like the Balmoral split them in half and fill them with strawberry jam and clotted cream. Clotted Cream tastes like a cross between butter and whipped cream. You can find it here at Whole Foods.