Butter Cake

Buttermilk cake with vanilla drizzle

“I’d like the world to slow down and eat cake together- the slowing down bit is less important.” – Charlie Mackesy

Oh, how I love British illustrator and artist Charlie Mackesy’s book The Boy, the Mole the Fox and the Horse. His book is filled with thoughtful wisdom and the delightful adventures of four unlikely friends. One of the friends is a sweet mole whose enthusiasm for cake seems to match my own. Like mole, I believe that there is power in the immeasurable joy of cake.

It’s been a while but I am back to share the cake of the summer in our house. The story of this butter cake began the first week of summer break my youngest daughter wanted to bake something together. So, I pulled out an old recipe for a buttermilk cake that I hadn’t made in years. The original recipe called for shortening but I wondered what it might be like with butter instead.

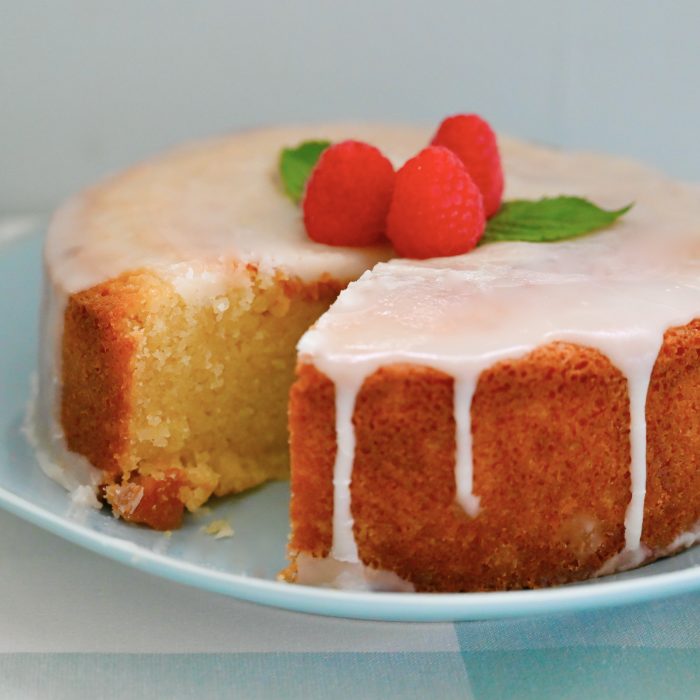
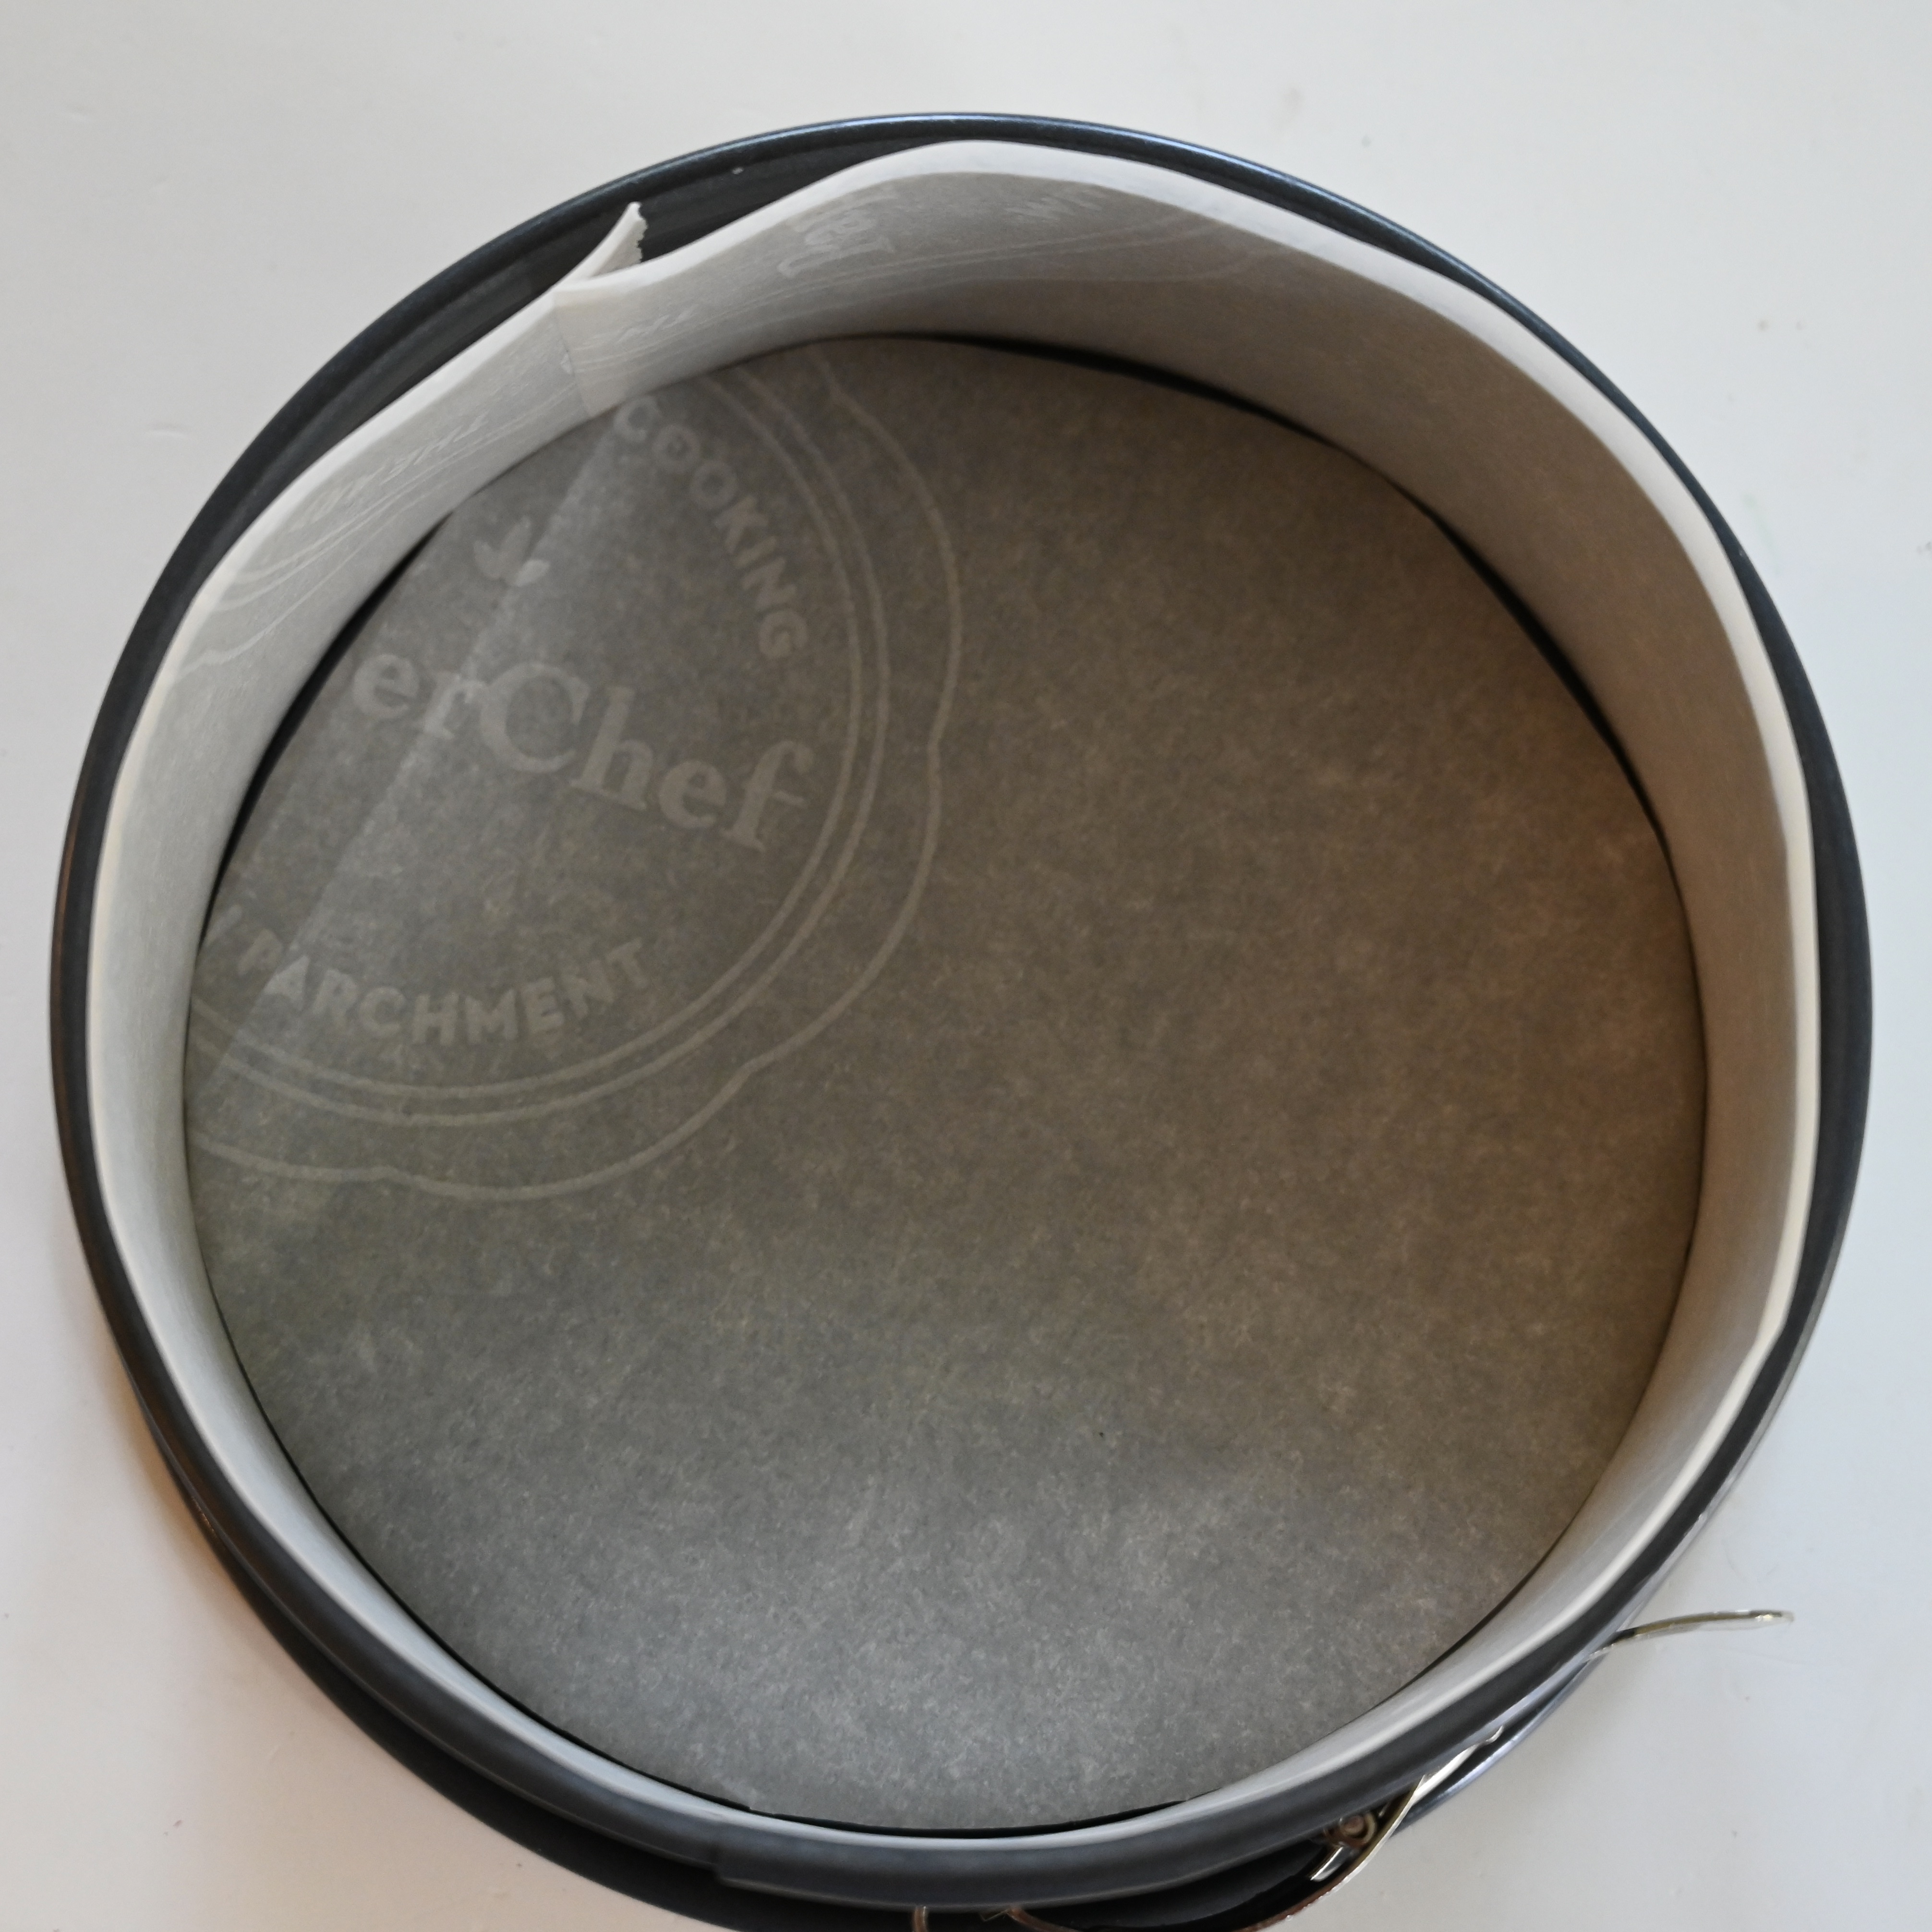
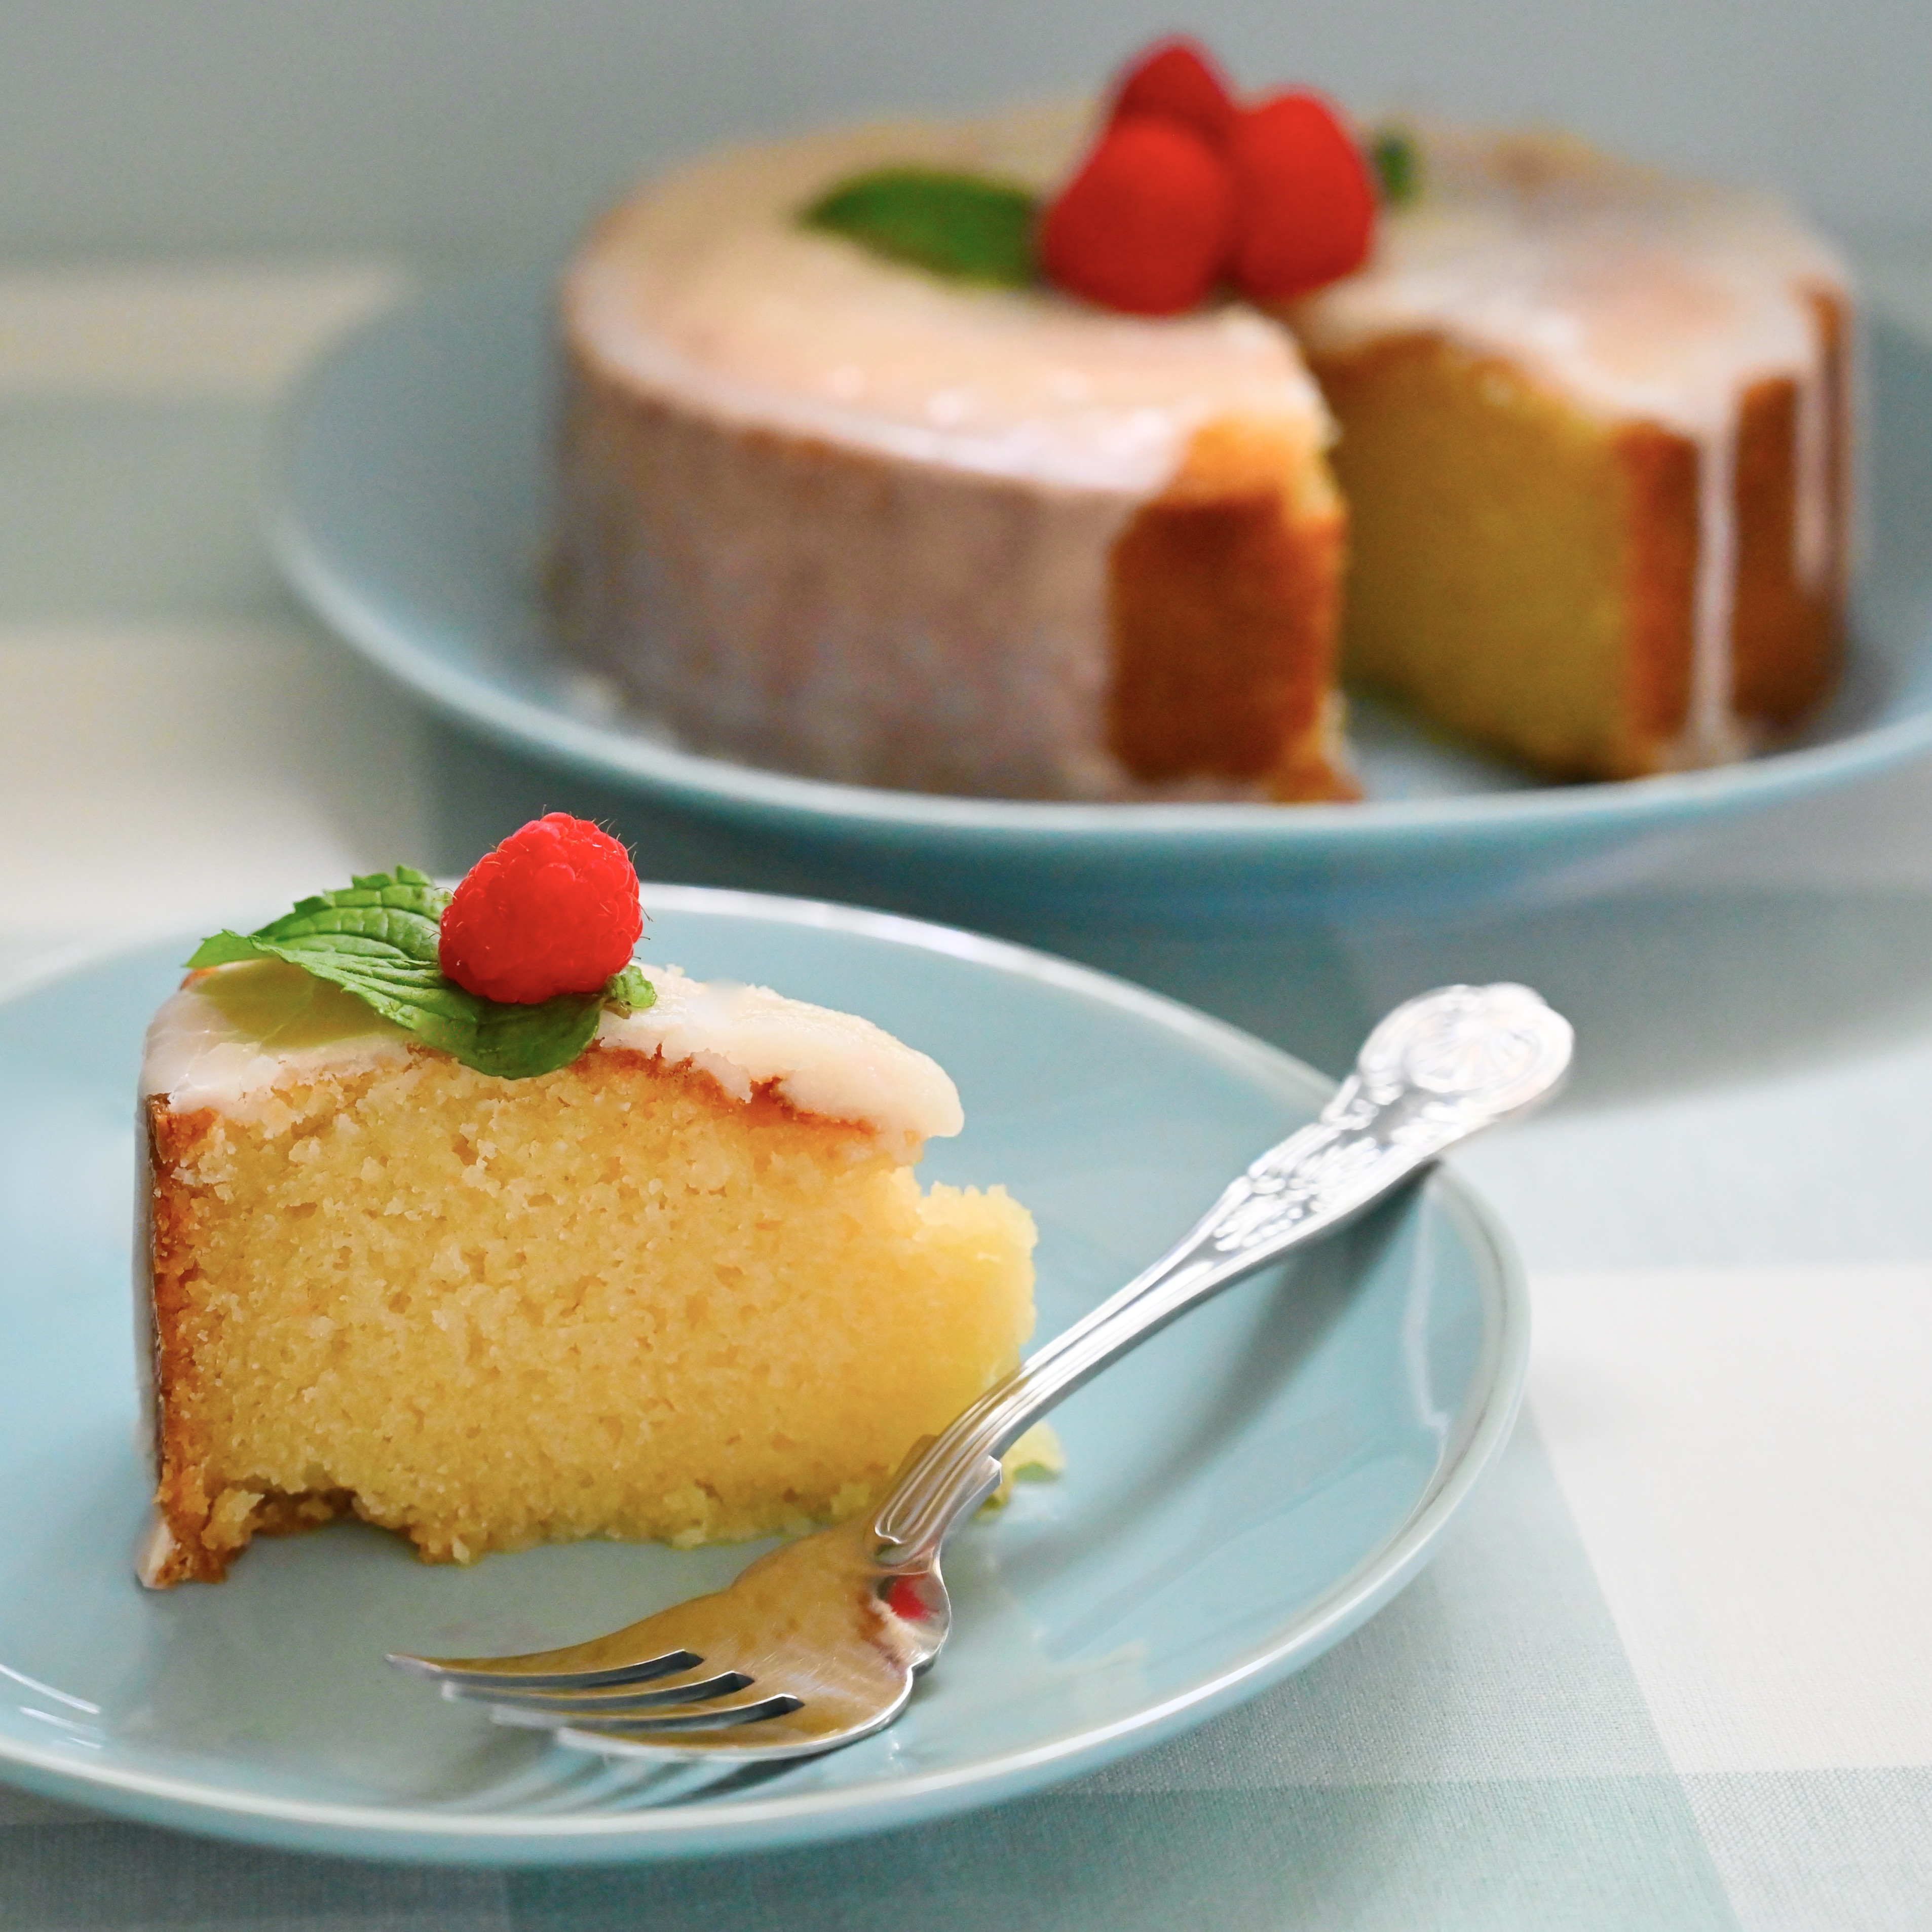
The result was an irresistibly buttery cake, but the cake was so soft that it stuck to the bundt pan no matter how well greased the pan was. This led us to try baking it in a parchment paper lined springform pan. The springform pan worked perfectly for this soft cake. It’s a simple cake that shines without elaborate fillings or frostings. It has a poured icing that adds just the right touch. Add a berry or two or a few sprinkles for a festive finish.

Butter Cake

  • 1 cup (2 sticks) butter, softened to room temperature
  • 2 cups granulated sugar
  • 3 eggs
  • 2 cups flours
  • 1/2 tsp salt
  • 1/2 tsp baking powder
  • 1/2 tsp baking soda
  • 1 cup buttermilk
  • 1 tsp vanilla

Preheat the oven to 350 degrees.

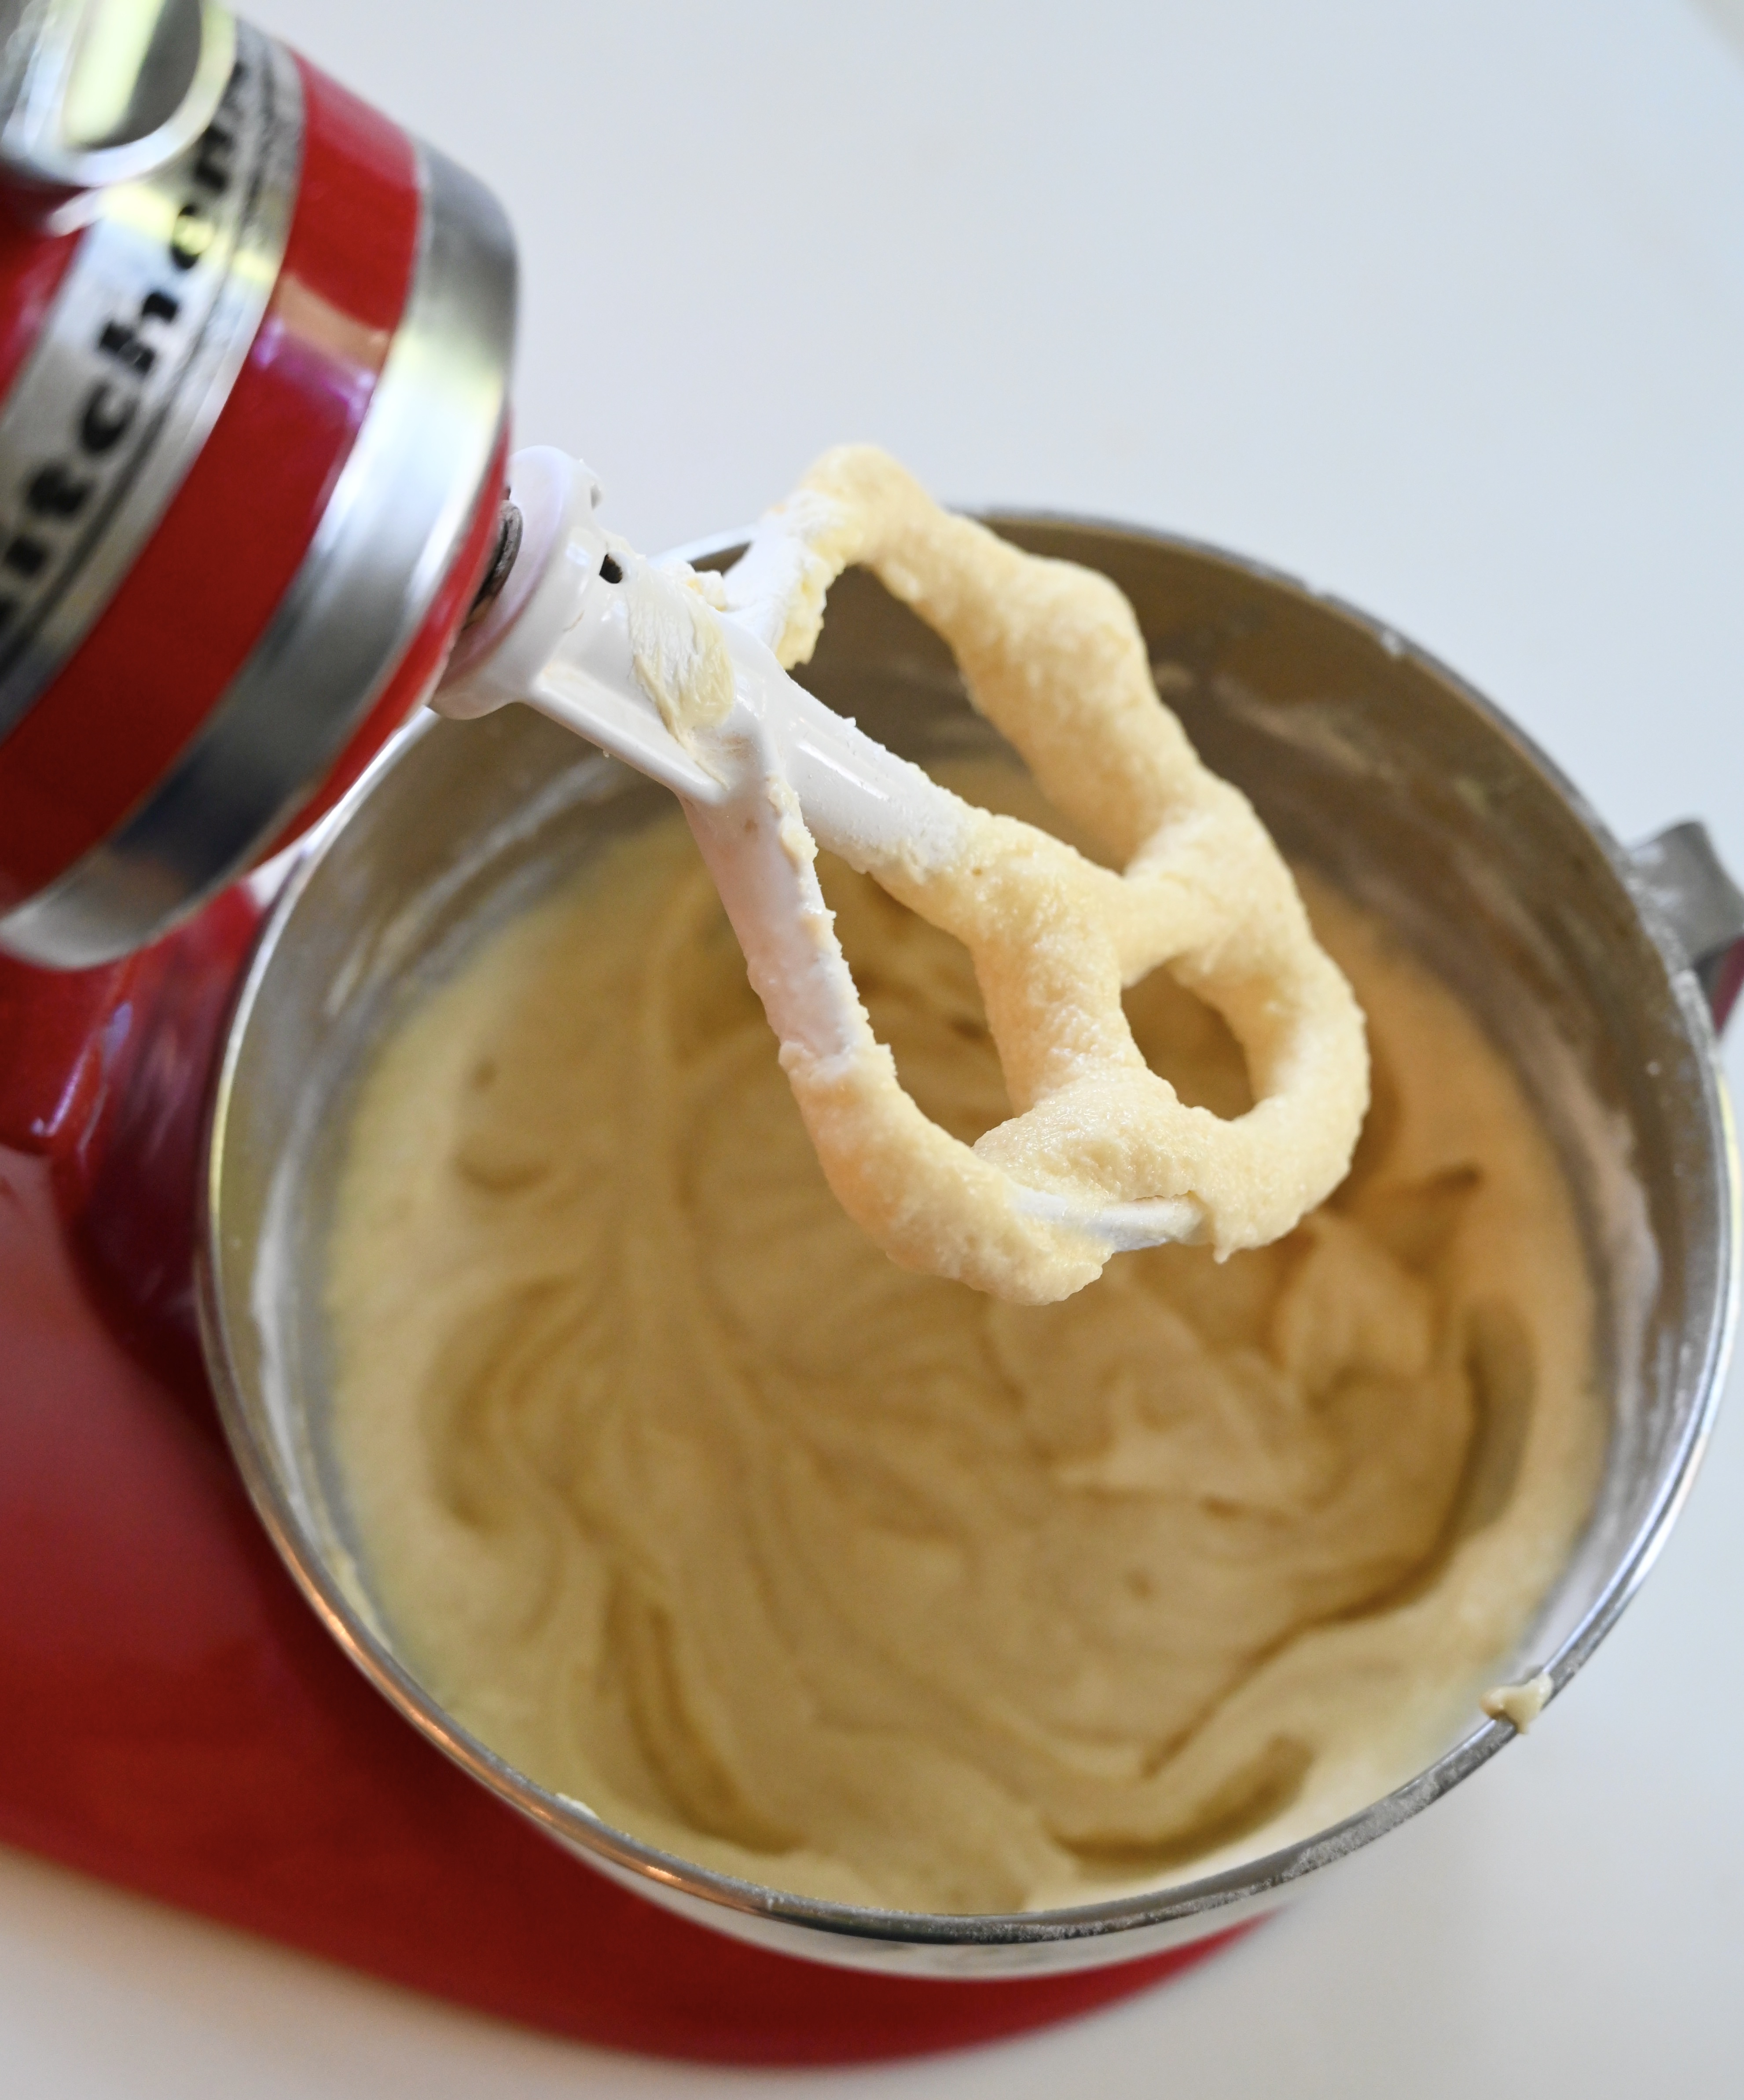
Cream together the butter and sugar in a mixer on medium for about 4 minutes. Then beat in the eggs one at a time on low speed. Then in a large measuring cup or small bowl mix together theory ingredients: flour, salt, baking powder and soda. Add half the dry ingredients and half of the buttermilk mix together on low speed. then scrape down the sides of the bowl and add the remaining dry ingredients, buttermilk and vanilla. Mix until well incorporated.

Pour the batter into an 8 inch springform pan that has been sprayed with cooking spray and lined with parchment paper. Cut one circle for the bottom and a strip for the side.

Bake for 1 hour. Cover the top of the cake with aluminum foil 30 minutes into baking to ensure a golden colored top and prevent browning.

Let the cake cool 10 minutes before loosening the sides of cake.

While the cake is still warm make the vanilla drizzle.

Vanilla Drizzle

  • 1 tablespoon butter
  • 2 cups powdered sugar
  • 1/4 cup buttermilk
  • 1 tsp vanilla

In a small sauce pan mix together all the ingredients. Heat and whisk the mixture together over medium heat as the sugar melts. Continue to stir until the mixture comes to a boil.

Slowly pour or spoon the drizzle over the cake. Decorate with fresh berries or sprinkles.

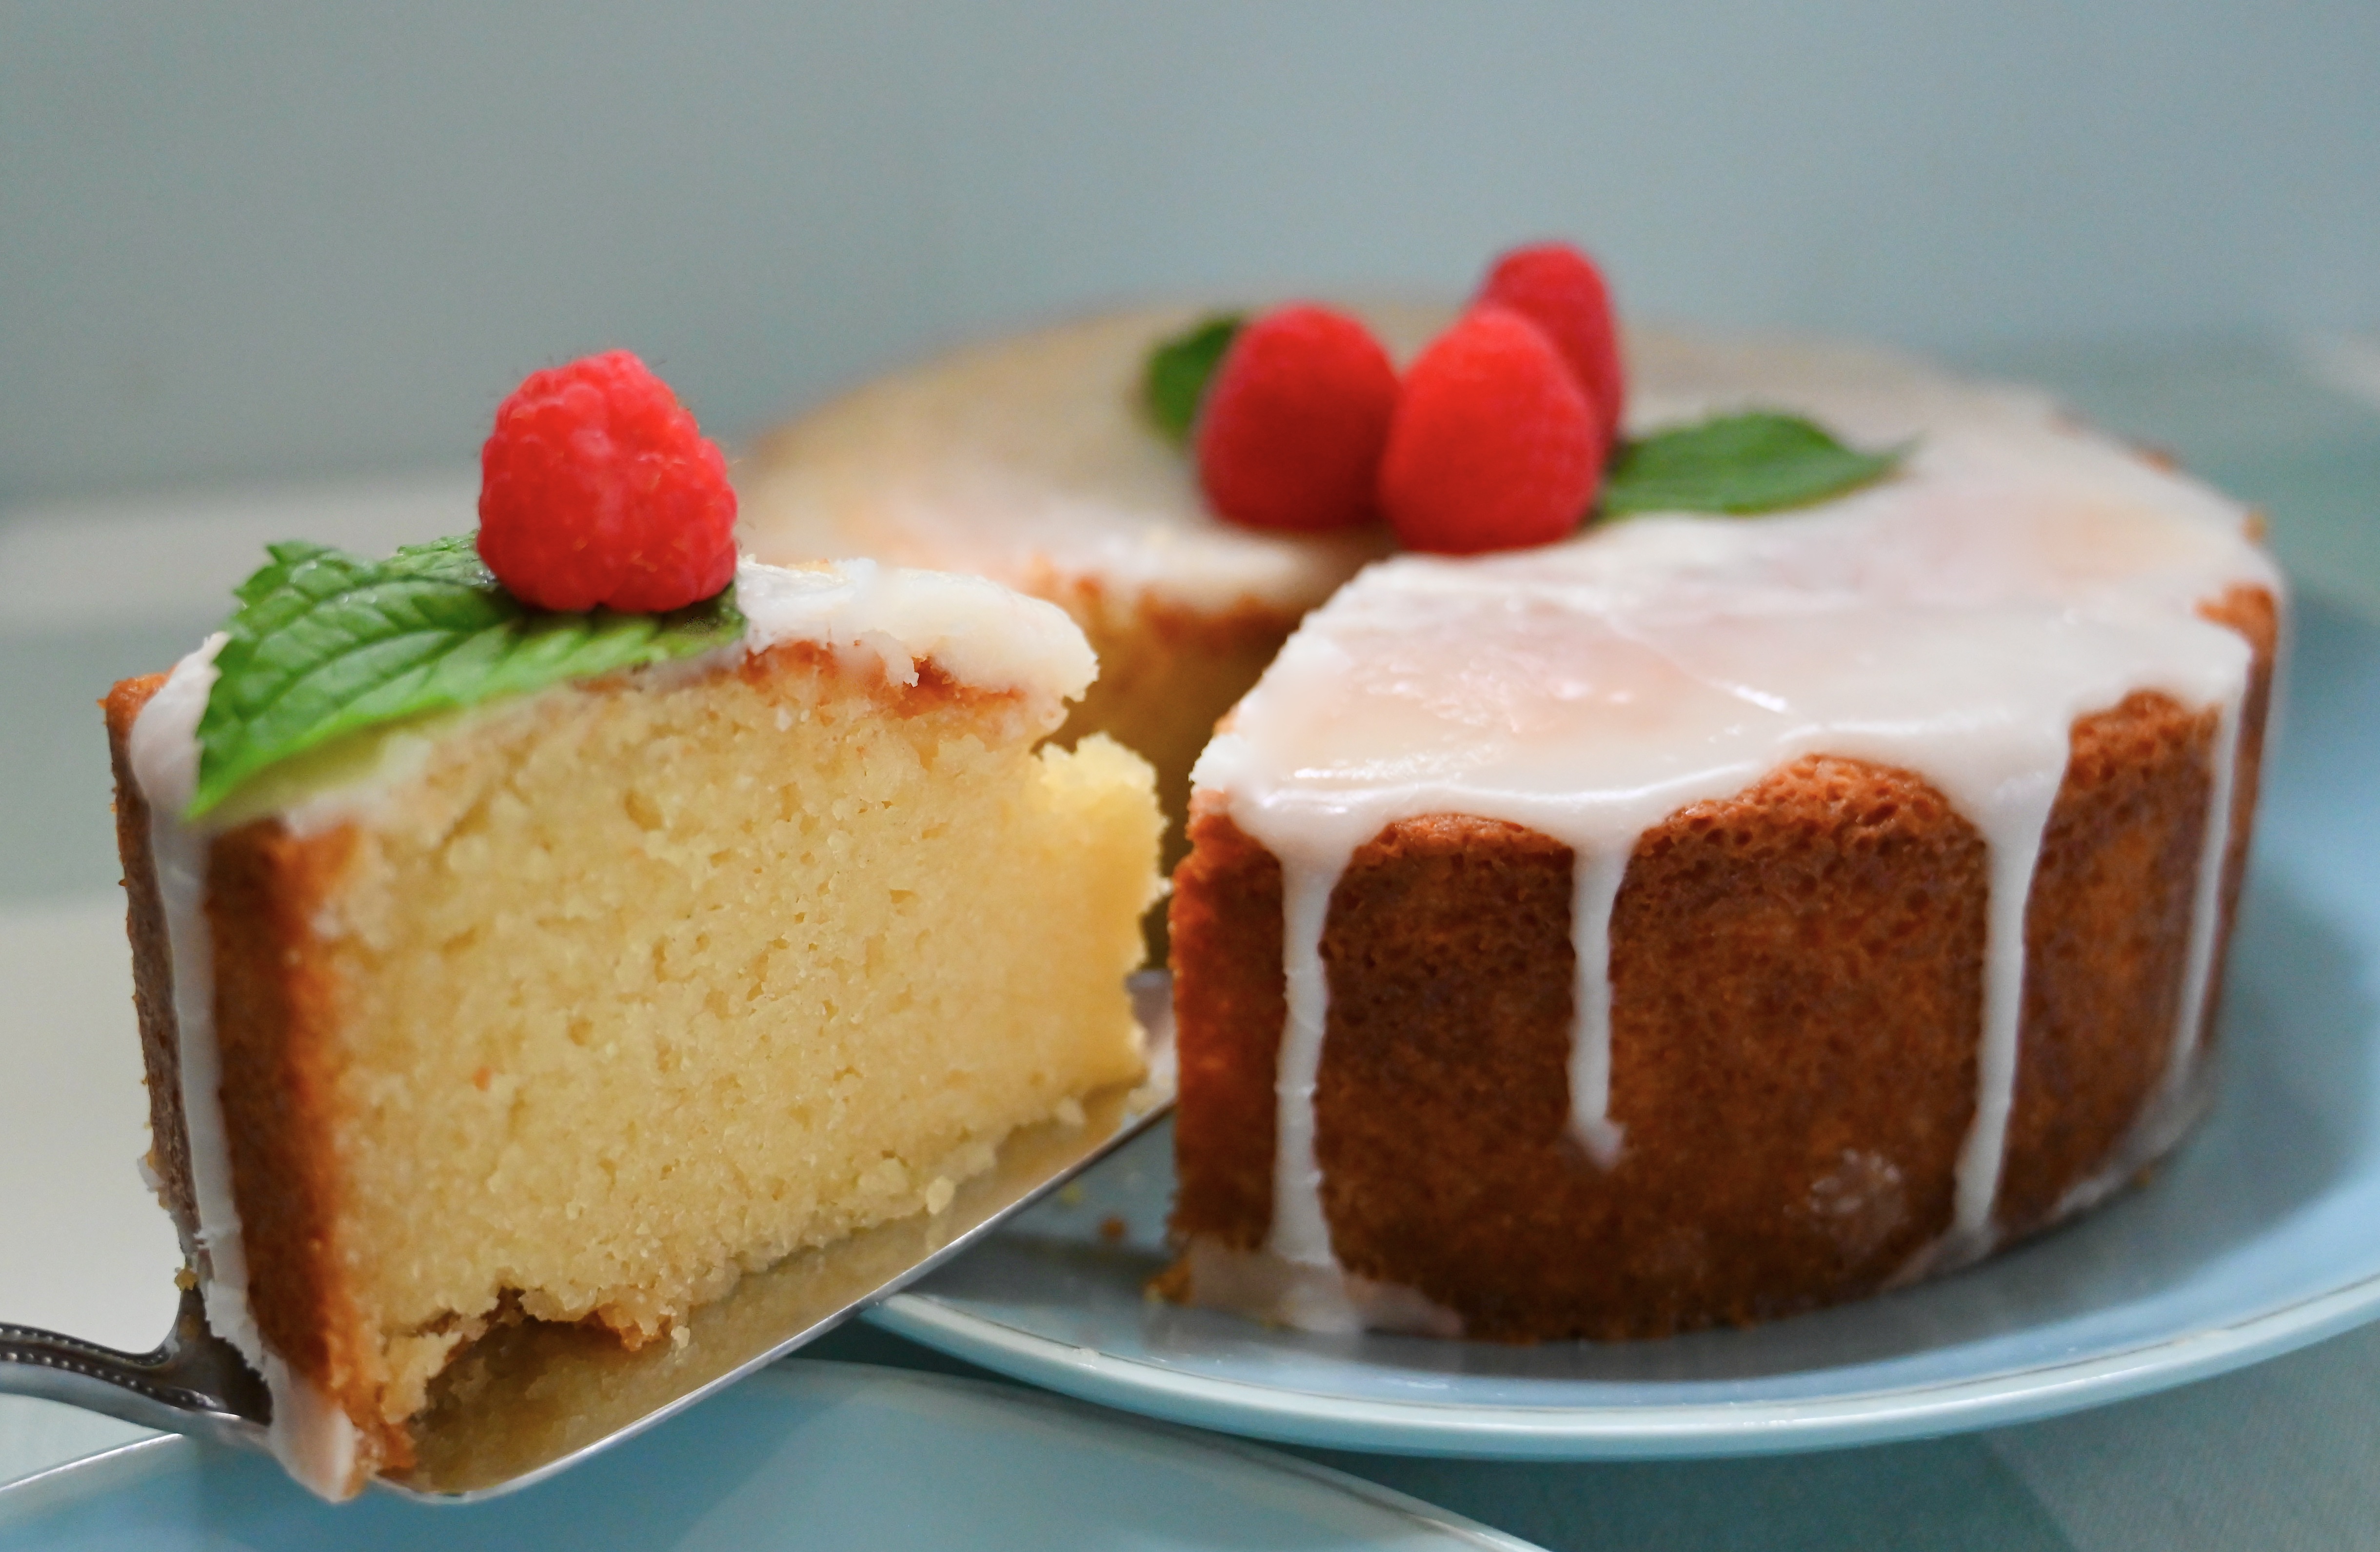
This velvety butter cake is just right for an afternoon where you want to bake something simple.

Vanilla Butter Cake

I think mole would agree, there’s no kindness quite like sharing a homemade cake.

Reading and Eating: Stanley Tucci’s Taste and Pasta e Fagioli

White Pasta Fagioli

Every memorable meal has a story to tell. For those who truly love food, cooking and eating become a lens through which they see the world. It’s this unique perspective that makes Stanley Tucci’s new food memoir Taste a delicious page turning adventure.

Simon and Schuster Books

He shares stories about his mother’s incredible Italian cooking and the year his father took the family on his teaching sabbatical in Italy. There are tales of movie sets and all the meals he has shared around the world as an actor. However, what I loved most were the personal stories about his family and how food has played an important part in all of his relationships. He talks about falling in love with his wife Felicity while cooking together and the English roasted potatoes that nearly burned the house down. All along the way he shares recipes for these amazing dishes.

As a young man he was a bartender in New York City so there are so many wonderful cocktail recipes from the perfect martini to Negronis and Christmas cocktails. I am looking forward to trying a few of them myself. There are also holiday recipes and recipes for weeknight meals like his garlic and white wine lamb chops that sound delicious.

However, the most heartfelt moment came when he was reflecting on his cancer treatment and the renewed appreciation it gave him for how wonderful it is to taste it all. Food he found “is nothing more than everything. Cook. Smell. Taste. Eat. Drink. Share. Repeat as necessary.”

So for this addition of reading and eating I am sharing my pasta e fagioli that was inspired by Tucci’s. It was the dish that he says sustained him as he healed and is still a favorite today.

Pasta e Fagioli -Serves 4 to 6

  • 4 ounces pancetta, diced
  • 3 tablespoons extra virgin olive oil, plus extra for drizzling
  • 1 leek (white and light green parts only), chopped
  • 1 yellow onion, diced
  • 3 garlic cloves diced
  • 3 (15 oz) cans cannellini beans, rinsed and drained
  • 2 bay leaves
  • 3 cups chicken stock
  • 1 cup ditalini pasta, cooked
  • 1 cup reserved pasta water
  • Freshly grated Parmigiano cheese, for serving
  • Fresh oregano leaves or sprigs, for serving

Heat 3 tablespoons of olive oil in a large stock pot or dutch oven. Add the diced pancetta and cook for about 4 minutes so it begins to release some fat and flavor in the pan. Next add the chopped leeks and onions. Allow them to cook over medium heat until they become tender about 8 to 10 minutes.

Add in the garlic and cook for an additional minute. Pour in the beans and chicken stock and add in the bay leaves.

Allow the bean soup to simmer with the a lid slightly askew for 15 minutes. Meanwhile, cook the pasta in salted water according to the package directions.

When the pasta is cooked drain it, reserving 1 cup of the pasta water. Pour the cup of pasta water and the pasta into the soup. Then taste and season with kosher salt and pepper. Remove the bay leaves before serving.

Serve the soup with a drizzle of olive oil, some fresh oregano leaves and a generous sprinkling of parmesan cheese. I find it also pairs well with a slice of crusty Italian bread.

Note: My recipe differs a bit from Tucci’s. It’s a white pasta e fagioli because it doesn’t have marinara sauce. Tomatoes are something that I love but I have to cook with sparingly for my family.

Tucci’s Taste My Life Through Food is the best book that I have read this year. It’s such a fun read filled with so many wonderful recipes that I know I will be trying soon. So, make a pot of my flavorful pasta e fagioli and curl up with this great book.

Creamy Avocado Dip

Vegetable Dip

Millions of people watch the Super Bowl each year each year, but some of us aren’t watching for the game alone. There are the commercials, the halftime show and all the social events that surround it. However in my mind the best part is the food. What other event elevates snacking to a whole new gourmet level?

Hands down, my favorite part of the whole snacking celebration is the array of dips that people serve from hummus, guacamole, artichoke, onion, queso…. It’s all so delicious. I know I am not the only one who from time to time would love nothing more than to make a meal out of dip.

This is why I instantly loved Martin Short’s character, in Only Murder’s in the Building. Oliver Putnam is a true crime pod cast obsessed; out of work theater director who proclaims he is on the “dip diet.” Oliver’s love of dips eventually gets him in a bit of trouble when he discovers the owner of his favorite restaurant is suspect in the case he is investigating. It’s a great show and I can’t wait for season three. But until then I like Oliver would love nothing more than to have a good excuse to eat dip for dinner.

Image From IMBd  Only Murders in the Building

Fortunately this creamy avocado dip is on the healthier side. It’s great paired with veggies and sweet potato chips. So if you are looking for a dip to share for the big game or really any night then I have a good recipe for you.

Creamy Avocado Dip

  • 2 small Hass avocados, peeled, pitted and cut into quarters
  • 1/4 cup plus 2 tablespoons buttermilk
  • 1 tablespoon white wine vinegar
  • 1 tablespoon shallot, minced
  • 2 teaspoons flat leaf parsley, chopped
  • 2 small garlic clove, minced
  • 2 tablespoons vegetable oil
  • 1 teaspoon kosher salt
  • 1/8 teaspoon cracked pepper
  • Serve with a bag of baby carrots, a sliced cucumber, and sweet potato chips or your favorite combination of veggies

In the large bowl of a food processor add in the avocados, the white wine vinegar, buttermilk, shallots, parsley, garlic and oil. Blend the ingredients together on high speed until creamy. Then season the dip to taste with salt and pepper.

Assemble a platter with all of the veggies and chips. Because this dip is made with avocados it is best when made no more than two hours before serving. If making ahead of time cover it tightly with plastic wrap and refrigerate.

Creamy avocado dip would make a delicious addition to any party or dinner. The avocado blended with the shallot and garlic has a great zip to it that would pair well with your favorite vegetables and chips.

British Braised Beef

“Winter is the time for comfort, for good food and warmth, for the touch of a friendly hand and for a talk beside the fire: it is the time for home ” – Edith Sitwell

It’s been snowing all week. Perfect weather for staying in by the fire, while something delicious is cooking in the kitchen. The heavenly smell of this British braised beef the oven makes it a wonderful winter dish.

The pretty snow covered view outside my window.

This white wine braised beef is like one that I saw Mary Berry make on a Christmas cooking program I watched on Brit Box. She was making it for her family on Christmas Eve. It looked so fantastic that I tried to get the recipe online or in one of her books, but alas I couldn’t find it. So, I took good notes and decided that her directions made it simple enough to recreate it on my own.

This is similar to a French boeuf bourguignon, but it uses white wine and it has a distinctly British sauce. The mustard and horseradish give it a little kick that is really delicious. I found it be a little easier to prepare, which I also appreciate.

This is one of those dishes that could easily be made ahead if you are serving guests, but I liked it so much that I created a smaller portion size that is just the right size for a cozy night in with just the four of us.

British Braised Beef – Serves 6 to 8

For a smaller batch that serves 4, I have adjusted the recipe just use the italicized measurements 

  •  3 lbs (1 ½ to 2lbs) stewing steak meat, cut into pieces and patted dry with paper towels
  • (1) yellow onions, diced
  • 6 (3) cloves of garlic, sliced into quarters
  • 3 (2) slices of bacon
  • 3 (2) tablespoons canola or vegetable oil
  • 1/3 (3 tablespoons) cup of flour
  • 1 ¼ (1) cup white wine, chardonnay or another dry white wine
  • 1 ¼ (1) cup beef stock
    3 (2) tablespoons Worchester sauce
  • 2 (1) tablespoons Dijon mustard
  • 2 (1) tablespoons horseradish
  • 2 tablespoons butter
  • 1 (1/2) cup mini bella or cremini mushrooms, sliced
  • Chopped parsley or chives to garnish (optional)

Preheat the oven to 325 degrees

Place a large Dutch oven or stock pot heat on the stove stop over medium heat. Add one to two tablespoons of vegetable oil. Then add the bacon and let it cook turning occasionally for about 4 to 5 minutes until it cooks and renders some fat in the pan. Then set the bacon aside.

Turn the heat up to medium high add the meat and brown it on all sides in two batches. Remove it to a side dish.

Turn the heat down to medium and add the onions and garlic and cook until soft. Add the flour and stir for a minute to brown the flour. Then add the white wine slowly as you stir it in. Slowly pour in the beef broth continuing to stir so a sauce begins to form. Stir in the Worchester sauce and the bay leaves. Add the beef and bacon back to the pan.

Place the lid on the pot and put it in the oven. Let it simmer in the oven for 2 hours.

Once the beef has cooked take it out of the oven, remove the lid and place it on a burner over medium low heat. Stir in the Dijon mustard and horseradish. Meanwhile in a medium sized skillet melt 2 tablespoons of butter. The sauté the mushrooms stirring so the they brown on both sides. Add the mushrooms to the braised beef.

Serve over mashed potatoes. Add a side of sautéed French green beans and shallots or green peas.

This dish can made ahead of time. Just allow it to cool and place the pan in your fridge. To reheat place it back on the stove top and simmer over medium heat for 10 to 15 minutes until it is warmed through. Add a little beef broth if needed.

Mashed Potatoes – Serves 4, double if serving more

  • 3 medium russet potatoes, peeled and diced
  • 4 tablespoons butter
  • ½ cup cream or milk
  • 1 teaspoon kosher salt

First, place the potatoes in a large pot and cover them with cold water about one inch higher than the potatoes. Then bring the potatoes to a boil over medium high heat. Cook the potatoes for 25 minutes until they are soft and break apart with a fork.

Drain the cooked potatoes and then rice them with a potato ricer or mash them in the pot. Add the butter, cream and salt. Then mix them together with a rubber spatula until they are light and creamy.

Wine Braised Beef Beef and mushrooms

This is the is the kind of dinner that makes you happy you stayed in for the evening. So plan a winter movie or game night and enjoy something wonderful at home.

The Sweet Smell of Christmas

The sweet smell of ginger, cinnamon and cloves fills the air as I open our back door. My girls quickly drop their school bags and coats as they scramble in the house. Joyful grins light up their faces as they catch a whiff. The familiar spicy fragrance means something wonderful is coming, gingerbread.

Baking gingerbread cookies with my daughters is one our family’s most beloved holiday traditions. It doesn’t matter how many things I have left to do on my holiday list or how messy my kitchen looks when it’s covered in powdered sugar, when I sit down to decorate cookies it all fades away.

Gathered around our little kitchen table, what would have been an ordinary afternoon is suddenly a cookie party. There is so much excitement as the mixer whirs and whips up the frosting. I spoon the icing into pastry bags as fast as I can. We talk and laugh as we pipe little dots, dashes and swirls of icing. Fueled by secret “quality assurance” taste tests, my cookie artists soon create a trayful of masterpieces.

The story of this gingerbread cookie tradition began when I was in high school. However, now that my daughters love it as much as I do, it has become even more meaningful. Over the years they have helped me bake, taste and create our own ultimate gingerbread cookies recipe. The key I have found is rolling the dough out thick and then being careful to pull them out the oven the moment they begin to show signs of a crinkle on top.

Gingerbread Cookies- Makes about 2 dozen

  • 1 stick butter, softened
  • 1 cup light brown sugar
  • ¼ cup unsulphured molasses
  • 2 tablespoons orange blossom honey
  • 1 teaspoon vanilla
  • 2 eggs
  • 1 teaspoon baking soda
  • ¼ teaspoon kosher salt
  • 2 teaspoons ground ginger
  • 1 ½ teaspoons ground cinnamon
  • ¼ teaspoon cloves
  • 3 cups all-purpose flour, plus extra for rolling dough

Preheat the oven to 350 degrees

First, in the bowl of a stand mixer, using a paddle attachment, cream together the butter and brown sugar. Next, add in the molasses, honey, vanilla and eggs and beat on medium speed for a minute. Then add in the baking soda, salt, ginger, cinnamon, cloves and flour. Mix on low speed until the dough comes together.

Place half of the dough on a lightly floured surface or silicone baking mat, and using a floured rolling pin roll the dough out till it is 1/3 of an inch thick. Cut with holiday cookie cutters and place on a parchment paper-lined baking sheet. Continue until all the dough is used.

Bake for 6 to 7 minutes. Allow cookies to cool before decorating.

Royal Icing

  • 4 cups powdered sugar
  • 2 tablespoons meringue powder
  • 7 tablespoons water

In the bowl of the electric mixer mix add in the powdered sugar, meringue powder and water. Mix on medium low for about 3 to 4 minutes.

Place icing into pastry bags fitted with writing tips. Have a small cup of water to dip your finger in to smooth any pointy icing dots or seams. Another tip is when baking with kids, use a rubber band to secure the back of the pastry bag so the icing stays inside.

Note meringue powder can be found online at the King Arthur Baking Company or at a craft store like Michaels or Hobby Lobby.

So, share a little happiness this holiday season with our family’s gingerbread cookies. Baking Christmas cookies makes the world a little sweeter and brighter. One chewy gingery bite and these cookies will have you signing a holiday tune and wanting to host your own cookie party.

My two bakers making cookies for Santa last Christmas.

Happy holiday baking!

Chicken and Wild Rice Casserole

Southern Living Chicken and Wild Rice Casserole

The holiday season is right around the corner and this time of year, everyone needs a good seasonal casserole. Something that you can make ahead and then all you have to do is put it in the oven to bake. Toss together a quick salad and dinner is ready to go. My favorite is a chicken and wild rice recipe that I clipped from an older reader’s recipe column from Southern Living years ago.

Now I know that canned soup has a reputation that sometimes precedes it, but in this dish I happen to like it. Some nights making a sauce from scratch just isn’t in the cards. No matter how much you like to cook, there are times when you just need something easy. Chicken and wild rice casserole is a crowd pleasing favorite. It’s perfect for a weeknight meal, family gatherings or sharing a meal with a friend in need.

Chicken and Wild Rice Casserole (adapted from Southern Living/ Leslie Flemister) Serves 6

  • 1 box of Ben’s quick cooking wild rice
  • 1/4 cup butter, divided
  • 2 celery ribs, diced
  • 1 sweet yellow onion, diced
  • 1 rotisserie chicken shredded into bite sized pieces (about 2 cups)
  • 1 (8oz) container of sour cream
  • 1 (10oz) cream of chicken and mushroom soup
  • 1/4 tsp salt
  • 1/8 tsp pepper
  • 3 cups grated cheddar cheese
  • 1/2 cup of panko bread crumbs

Preheat the oven to 350 degrees

Prepare the wild rice according to the package instruction using the seasoning packet.

Next, in a medium sized skillet melt 2 tablespoons of the butter. Add the celery and the onion and cook until tender.

In a large mixing bowl stir together the rice, the cooked celery and onions, the cream of chicken and mushroom soup, sour cream, salt and pepper. Then fold in 1½ cups of the cheddar cheese.

Meanwhile, in a medium skillet melt the remaining 2 tablespoons of butter. Add the panko breadcrumbs and stir to coat them in the butter toast them slightly for about 2 minutes.

Now assemble the casserole. Evenly spread the rice mixture into a 2 quart casserole dish lightly sprayed with cooking spray. Next, sprinkle the top with the remaining 1½ cup cheddar cheese and the bread crumbs.

If serving immediately, bake for 20 to 25 minutes until the cheese has melted and the bread crumbs are a golden brown.

You can refrigerate the casserole and bake it later. Just cover the top with aluminum foil lightly sprayed with cooking spray to keep the cheese from sticking and bake for 40 to 45 minutes removing the foil after the first 20 minutes so the bread crumb topping turns a golden brown.

A delicious dinner made easy with the help of some rotisserie chicken and wild rice. Flexibility is key when it comes to getting dinner on the table. I like that I can make it that same night or make it ahead and bake it the next day.

Call me sentimental, but sometimes there is nothing like the comfort of a creamy rice and cheese casserole. This one just seems to hit all the right notes.

Beef and Spinach Spanakopita

Greek Spanakopita

Every year by the end of August it feels like there is an urgency to get to fall. Everyone is decorating and talking about it. However, I for one happen to love late summer and I have no intention of cutting its celebration short. August and early September is when summer produce is at its peak. It’s this magical time in cooking when summer corn, tomatoes, squash, okra and berries are at their sweetest. My garden is currently bursting with tomatoes, cucumbers, and fresh herbs. I have now taken to sharing them with friends. We can’t possibly eat it all but that hasn’t stopped me from trying.

Large Greek salads are a mainstay at my house this time of year. So, I thought I would share my recipe for beef and spinach spanakopita. It’s delicious any time of year, but it happens to be a wonderful main dish to serve with all those fabulous late summer salads.

Beef and Spinach Spanakopita -makes 14

  • 1 (10 ounce) container or two small (5oz) bags baby spinach
  • 2 tablespoons butter
  • 1½ teaspoons kosher salt, divided
  • 1 cup yellow onion, finely diced
  • 2 cloves garlic, finely diced
  • 1 tablespoon olive oil
  • 1 ¼ pounds ground beef or lamb
  • 4 tablespoons Parmesan cheese
  • 1 teaspoon nutmeg
  • 1 (8oz) block of feta cheese, diced
  • 1 large egg
  • 1 package of phyllo dough (12×17 sized), defrosted
  • 10 tablespoons of butter, melted
  • 1/3 cup plain dried breadcrumbs

Preheat the oven to 375 degrees

First sauté the fresh spinach. Melt 2 tablespoons of butter over medium heat in a large skillet. Add about half of the spinach to the pan and then stir and allow it to cook down for a minute or so before adding the rest of the spinach. Cook the spinach for and additional 2 minutes and add in ½ teaspoon of kosher salt. Then remove the spinach from the pan and allow it to cool while cooking the meat filling.

Using the same skillet add 1 tablespoon of olive oil to the pan. Then add the onion and cook it until it just begins to turn translucent. Then add in the garlic and the ground beef. Season with 1 teaspoon of salt. Stir and continue to cook until the meat is browned and cooked through. Pour off any grease from the meat filling mixture and place it in a large mixing bowl.

Next, drain the cooled spinach. Place the cooked spinach in a metal strainer and layer several paper towels on top. Press the paper towels down to help squeezed the moisture out of the spinach.

Then add the spinach to the meat filling. Complete the filling by mixing in the Parmesan, feta, nutmeg, and the egg. Mix well to makes sure it is evenly combined.

Now assemble the spanakopita. Place one sheet of phyllo dough on a baking mat or clean work surface with the long side facing towards you. Then lightly brush the sheet with butter and sprinkle a pinch of bread crumbs over the top. Then add a second layer and repeat the process of brushing on the butter and crumbs.

Place a final third layer of phyllo on top and the cut the sheet in half lengthwise. Add a rounded 1/3 of a cup of the filling mixture to the top of the two short sides and roll the phyllo over at a diagonal to form a triangle.

Continue to fold back and forth at a diagonal creating a triangle that completely covers the filling inside. Once you reach the bottom brush a little more butter on the last triangle to seal up the pastry.

Place the finished spanakopita on a parchment paper lined baking pan with the seam side down. And brush the top with butter. Then continue this process until all of the filing is used. Bake for 25 minutes until the phyllo is golden brown.

Fourteen pastries may sound like at lot but they are so tasty that they have a way of disappearing quickly. I find that depending on how hungry you are, I would plan for about 2 to 3 spanakopitas per person for a dinner sized portion. These pastries reheat well in the toaster oven. They can also be made in advance. Just skip the final brushing of the melted butter on top until you are ready to bake them and wrap the unbaked pasties in plastic wrap before freezing them.

One bite of these flakey beef and spinach spanakopita and a big greek salad will surly have you hanging on to every last delicious moment of this late summer season.

The Gift of Gardening

Spring Flower Pot

“Plant so that your own heart will grow.” – Hafiz

Gardening at its heart is all about finding beauty in change. Seasons come and go. Some more quickly than others. Unpredictable rain, snow, ice and relentless heat can test even the most experienced gardener. Yet, I have found that there is something about the challenge and those fleeting moments of beauty that keep me planting.

Mid season pink Big Eartha tulips in my back yard. If you look closely you can see the second set of blooms that ensures a longer spring tulip season.

The art of gardening is using that change for good. Every spring I find myself waiting with great anticipation as my yard comes to life with hundreds of tulips blooms. I plant mid and late season tulips in an effort to extend the pink and orange blooms as long as possible.

The same flowerbed two weeks later with a late season French Rose blend in orange pink and apricot.

Then as May comes to a close, I am hard at work again pulling them all out and preparing for summer. My boots and gloves are covered in mud as I pause to reflect and plan. Spring was beautiful but summer has its own sundrenched charm.

The same back patio flowerbed in early summer after the tulips are gone.

The canopy of trees that covers my backyard is beginning to fill in. Now there will be rainbow of hostas, hucheras, and impatients.

Hostas and hucheras fill the shady beds under my trees.

The dahlia tubers are growing in pots and anxiously awaiting their turn. There are tiny wavy zinnia seedlings that will soon be growing to towering heights. One might wonder about my front garden when you see it in late May. However, the end of July brings an abundance of flowers hummingbirds and butterflies.

My dahlias and double zinnias are just beginning to bloom.

All those intricate petals and dazzling layers leave me memorized. Surely there is a touch of the divine in all of those details.

Milena Fleur dahlias on of my favorite summer flowers.

Nestled behind my day lilies lies a small vegetable garden. The cucumbers that my daughter and I planted from seeds are now overflowing with fruit.

The green tomatoes are sunbathing and turning a brilliant red. Our herbs are beginning to overflow their little blue box. August brings an abundance of garden gifts to share as I begin to think ahead and order bulbs for the fall.

No day, season or year is ever the same, but that I have found that is the gift. Because gardening has a way of growing wisdom with time.

Its practice has taught me to give thanks for small joys, to use change for good and to find a peace in the power and rhythm of nature.

Breakfast Grilled Cheese

Just in time time for Father’s Day, I have the ultimate breakfast grilled cheese sandwich. I discovered this delicious diner style breakfast sandwich by serendipity. My favorite local breakfast spot ran out of what I had originally ordered. So, I had to make a quick new order from the specials board.

As luck would have it my second order was even better than my usual. One bite had me smitten. I was in grilled cheese heaven. Crisp and buttery Texas toast, melted cheese, bacon and then if that wasn’t enough, a fried egg which really put it over the top.

I shared a bite with my husband who I believe had an instant case of order envy because the whole way home he was talking about how I needed to make this one at home. So in honor of my husband, I give you the breakfast grilled cheese sandwich.

Breakfast Grilled Cheese- makes 2 sandwiches

  • 3 slices of thick cut bacon, cooked
  • 4 to 5 tablespoons of butter
  • 4 slices of Texas toast bread (I like the Lewis Bread company)
  • 4 slices of Kraft singles cheddar cheese (for a diner style) or your favorite cheddar cheese
  • 2 eggs

First, cook the bacon and then split each piece in half.

Next, heat a medium sized skillet over medium heat. Melt 3 tablespoons of butter in the pan and then evenly coat one side of each slice of bread in the melted butter and remove them from the pan.

Now my trick for perfectly golden grilled cheese is the toaster oven. Place your toast pieces buttered side down in the toaster oven then put one slice of cheese on the top of each piece. Toast for a medium setting about 3 minutes until the cheese is melted. This will get the cheese melting ahead of time so you can get the perfect golden crust without having to worry about the cheese.

Meanwhile fry your eggs one at a time. Crack and the egg in the pan and then let it cook until the egg white begins to set and cook through about 2 to 3 minutes. Then flip the egg over with a spatula and cook for another minute or so more. Repeat with the second egg. Move the eggs to a separate plate. Now melt the remaining butter in the pan.

Place a base layer of the toasted bread with cheese in the pan. Then build the sandwich by layering on three bacon pieces, the fried egg and the last slice of bread with the cheese side down.

Finally, grill the sandwiches on both sides until golden brown.

A one skillet breakfast that is as fun to make as it is to eat.

One sandwich is quite the meal, but for a great Father’s Day breakfast I would serve it with a side of fresh summer berries or if want the full diner experience hash browns would wonderful too.

This recipe is fun, quick and most importantly so delicious! As my husband said “It’s everything you want for breakfast in one sandwich.”

A Fiesta for Any Night: Beef Fajitas

Fajitas make any night a celebration. They are hand held happiness. One bite and the world seems like a brighter and better place.

I must admit for most of my life I took for granted the deliciousness that is beef fajitas, because in Texas, where I am from, fajitas are the signature party food. Great fajitas and tacos were easy to find. In the Chicago suburbs there are some good taco spots, but when it comes to fajitas, no one tops my home grilled steak and onions. Add some avocado pico de gallo, shredded cheese and sour cream and you have yourself one amazing bite.

So, with Cinco de Mayo just days away I thought I would share with you my favorite Tex-Mex dish, beef fajitas.

Beef Fajitas- Serves 4 to 6

  • 3 tablespoons brown sugar
  • 1/4 cup soy sauce
  • 3 garlic cloves, minced
  • 1 cup red wine
  • 2 tablespoons Worcestershire sauce
  • 3 tablespoons fresh lime juice
  • 3 tablespoons vegetable oil
  • 1½ to 2 lbs skirt steak
  • 2 yellow onions, sliced
  • 3 tablespoons butter
  • 12 flour or corn tortillas
  • Shredded cheddar or monetary jack cheese, for accompaniment
  • Sour cream, for accompaniment
  • Avocado Pico de Gallo, for accompaniment

Avocado Pico de Gallo

  • 1 large avocado, chopped into bite sized pieces
  • 1 large tomato, chopped
  • 1/4 cup yellow onion, finely chopped
  • 3 tablespoons cilantro, chopped
  • 1 tablespoon lime juice
  • 1/2 tsp kosher salt
  • 1/4 tsp garlic powder

Make the fajita marinade. In a small mixing bowl combine the brown sugar, soy sauce, garlic, red wine, Worcestershire, lime juice and vegetable oil. Then place the skirt steak in a large zip top bag. Pour the marinade over the meat and seal the bag. Refrigerate the steak to allow it to marinate for an hour or if you have the time up to eight hours.

Preheat your outdoor grill or indoor grill pan.

Meanwhile slice your onions in half and then into half moon slices.  In a medium skillet melt the butter over medium low heat. Add the onion slices and cook stirring occasionally until they just begin to get a hint of caramelization.

Grill the steaks. Once the grill or grill pan is hot, take the steaks out of the marinade and grill for 3 to 4 minutes per side or to your preference.

Once it has rested for a few minutes, slice the steak thinly on the diagonal against the grain. Place on a platter or skillet with the onions.

Finally, make the avocado pico de gallo. Mix together the avocado, tomato, onion, cilantro lime juice, kosher salt and garlic powder. Then get the tortillas warmed and the topping of cheese, sour cream and pico de gallo ready.

To serve place the platter of beef fajitas out along with small bowls or plates with cheese sour cream and pico de gallo. Then make your own tacos to taste.

The combination of the grilled beef with just a hint of salt, the sweet onions and fresh avocados pico de gallo is sure to make you happy. So cook up a cinco de mayo party in your own kitchen with my beef fajitas.

Contact Us