A Few of My Favorite Things: Chocolate Cake Truffles

Cinnamon Chocolate Cake Ball

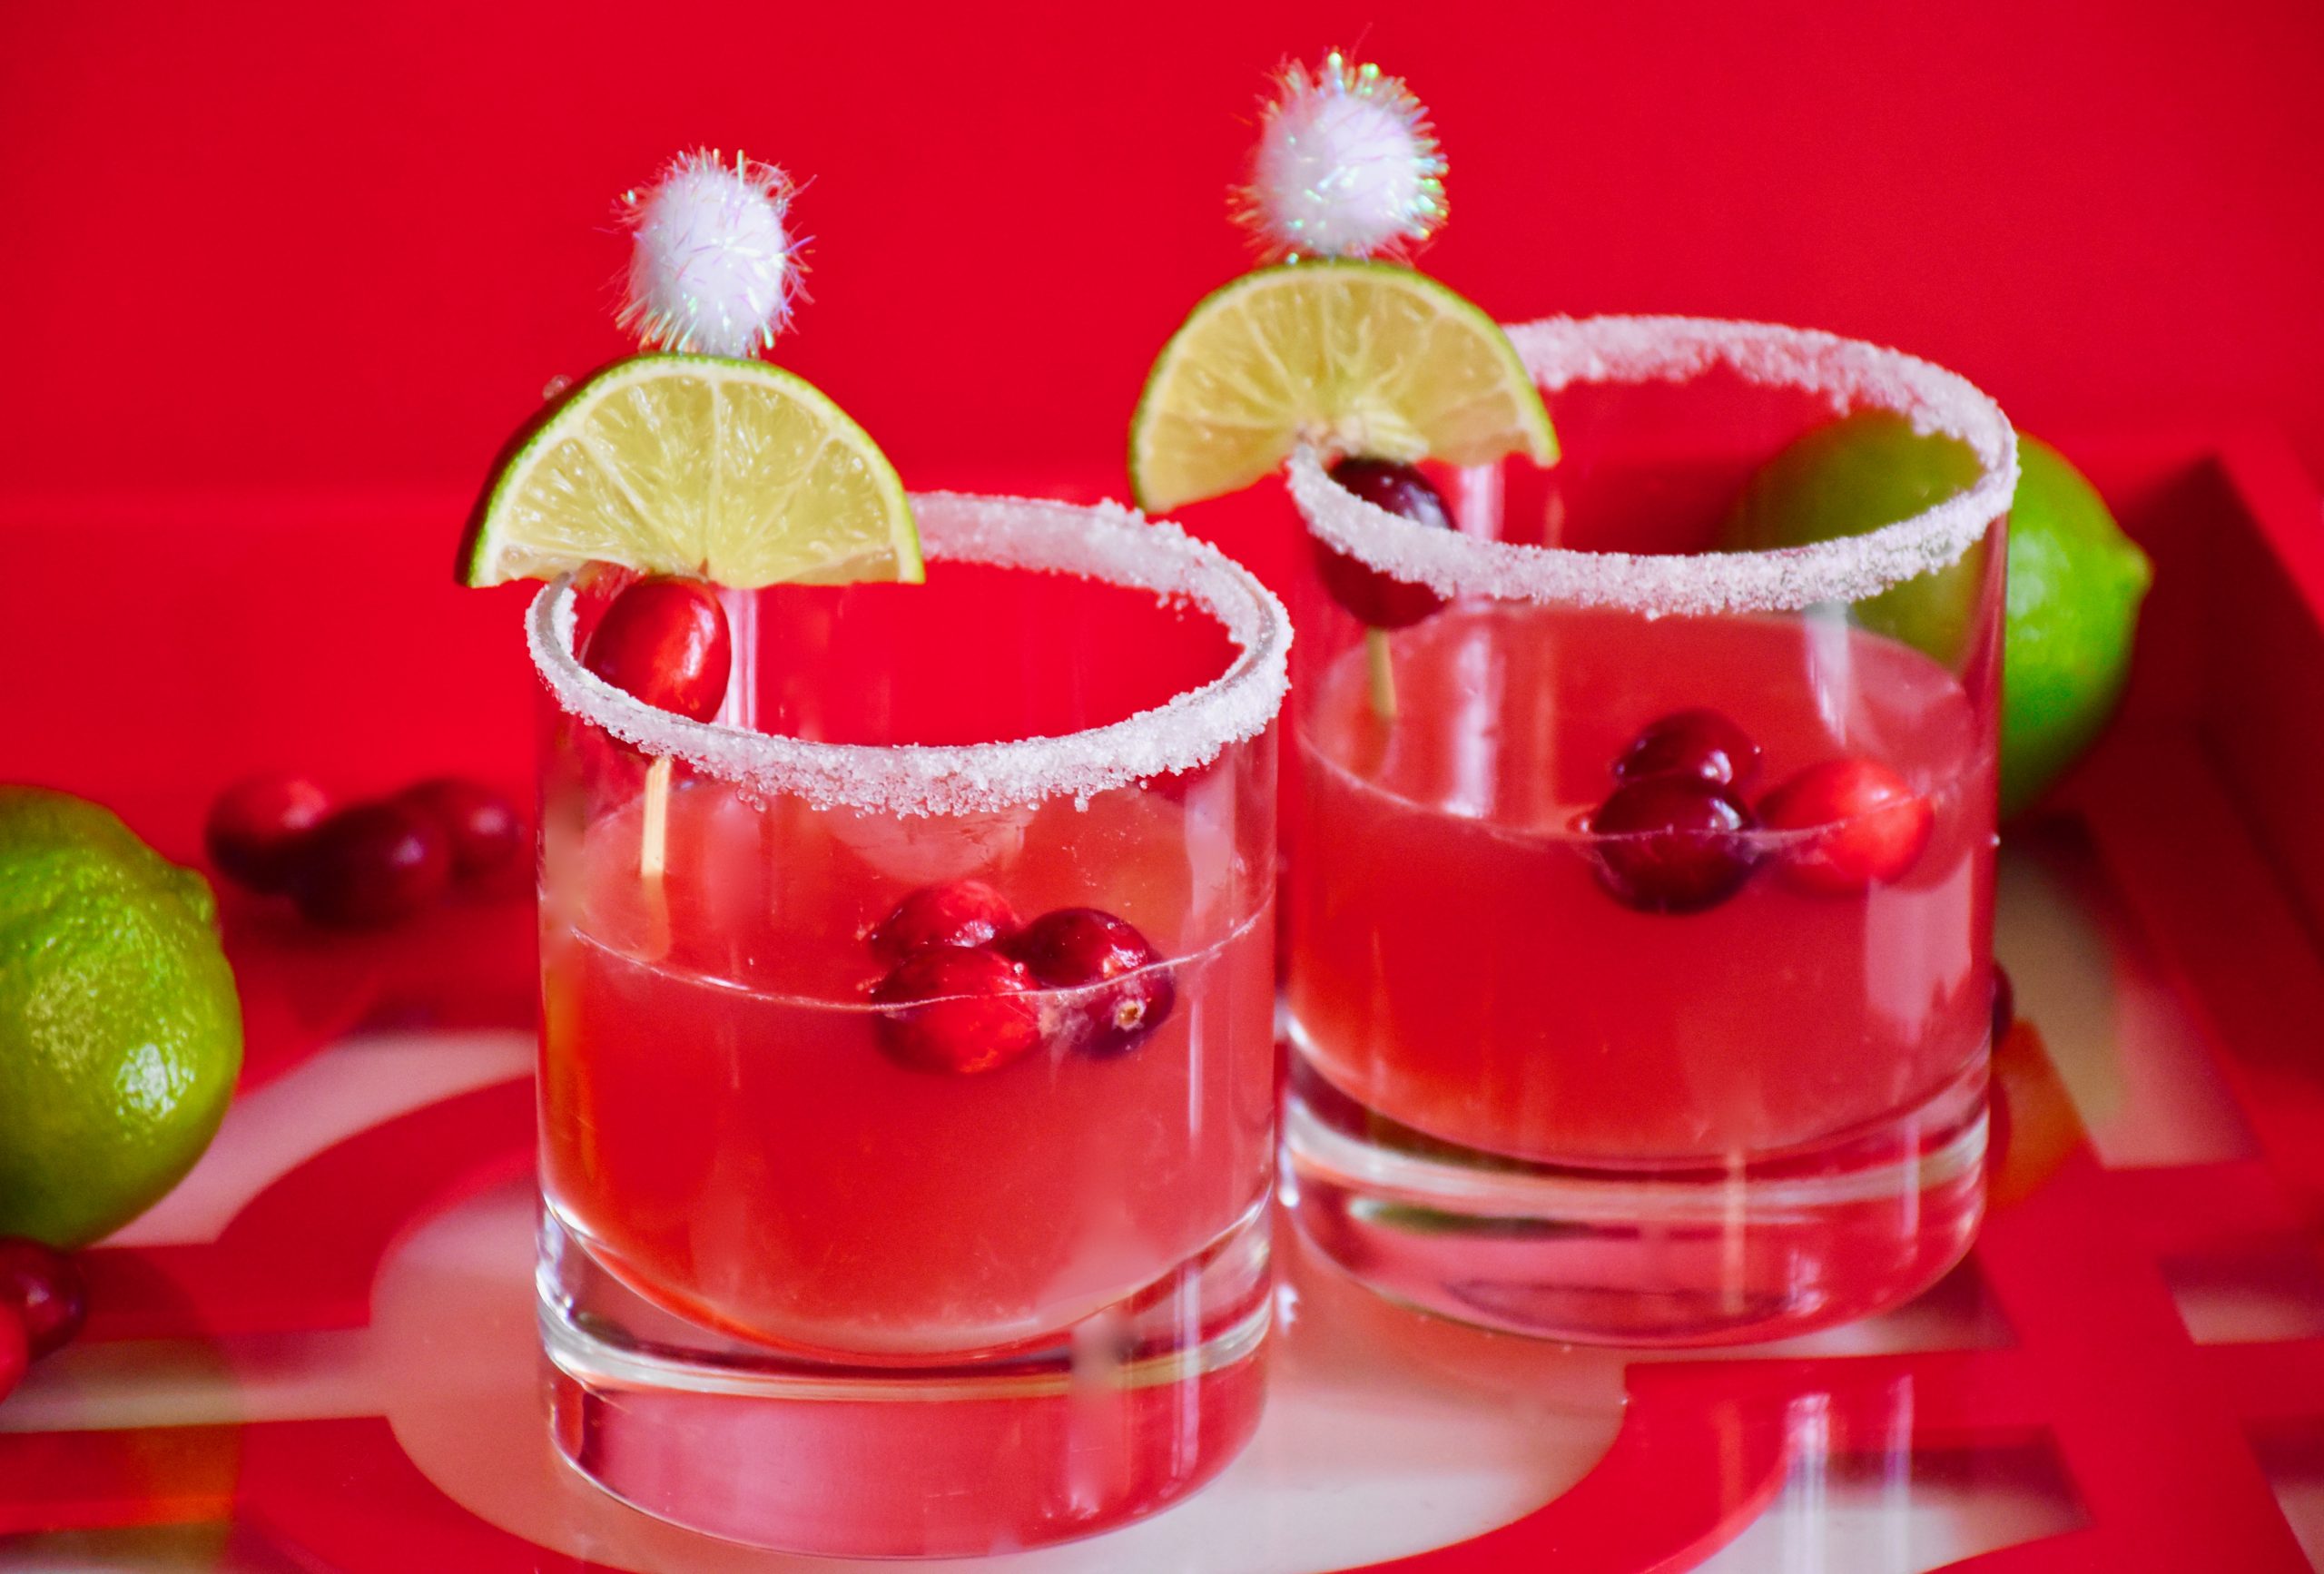
It’s my favorite time of year so I wanted to share the recipes and traditions that my family loves most. This year more than ever I have been looking forward to seeing all the twinkly lights and enjoying the small things that make this season so special.

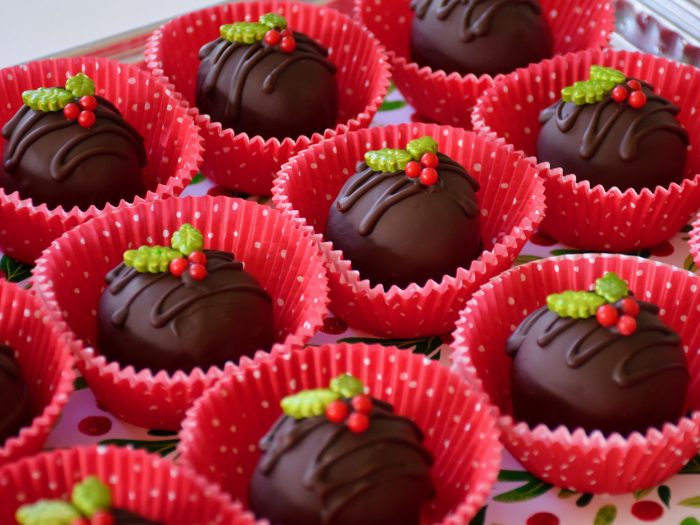
So let the holiday baking season begin. This week my daughters and I decided to turn on some holiday music and have a little fun in the kitchen. We made a batch of our favorite holiday treat-chocolate cake truffles. These gorgeous bite sized chocolates are filled with cinnamon chocolate cake and a touch of buttercream. They are so irresistibly good that they make wonderful gift make to share.

Chocolate Cake Truffles -makes 40

  • 1 9×13 chocolate sheet cake (recipe follows)
  • chocolate icing (recipe follows)
  • 4 (12oz) bags dark or milk chocolate candy melts (I use Wilton brand)
  • 1 (12oz) bag of chocolate for the piped chocolate zigzags on top
  • 1 bag or bottle of holiday sprinkles
  • 40 colorful cupcake liners (optional)

Chocolate Sheet Cake

  • 1 stick of butter
  • 1 cup water
  • 1/2 cup canola oil
  • 2 cups sugar
  • 1/2 cup cocoa powder
  • 1 teaspoon cinnamon
  • 2 cups flour
  • 2 eggs
  • 1/2 cup buttermilk
  • 1 1/2 teaspoons baking soda
  • 1/4 teaspoon salt
  • 1 1/2 teaspoons vanilla

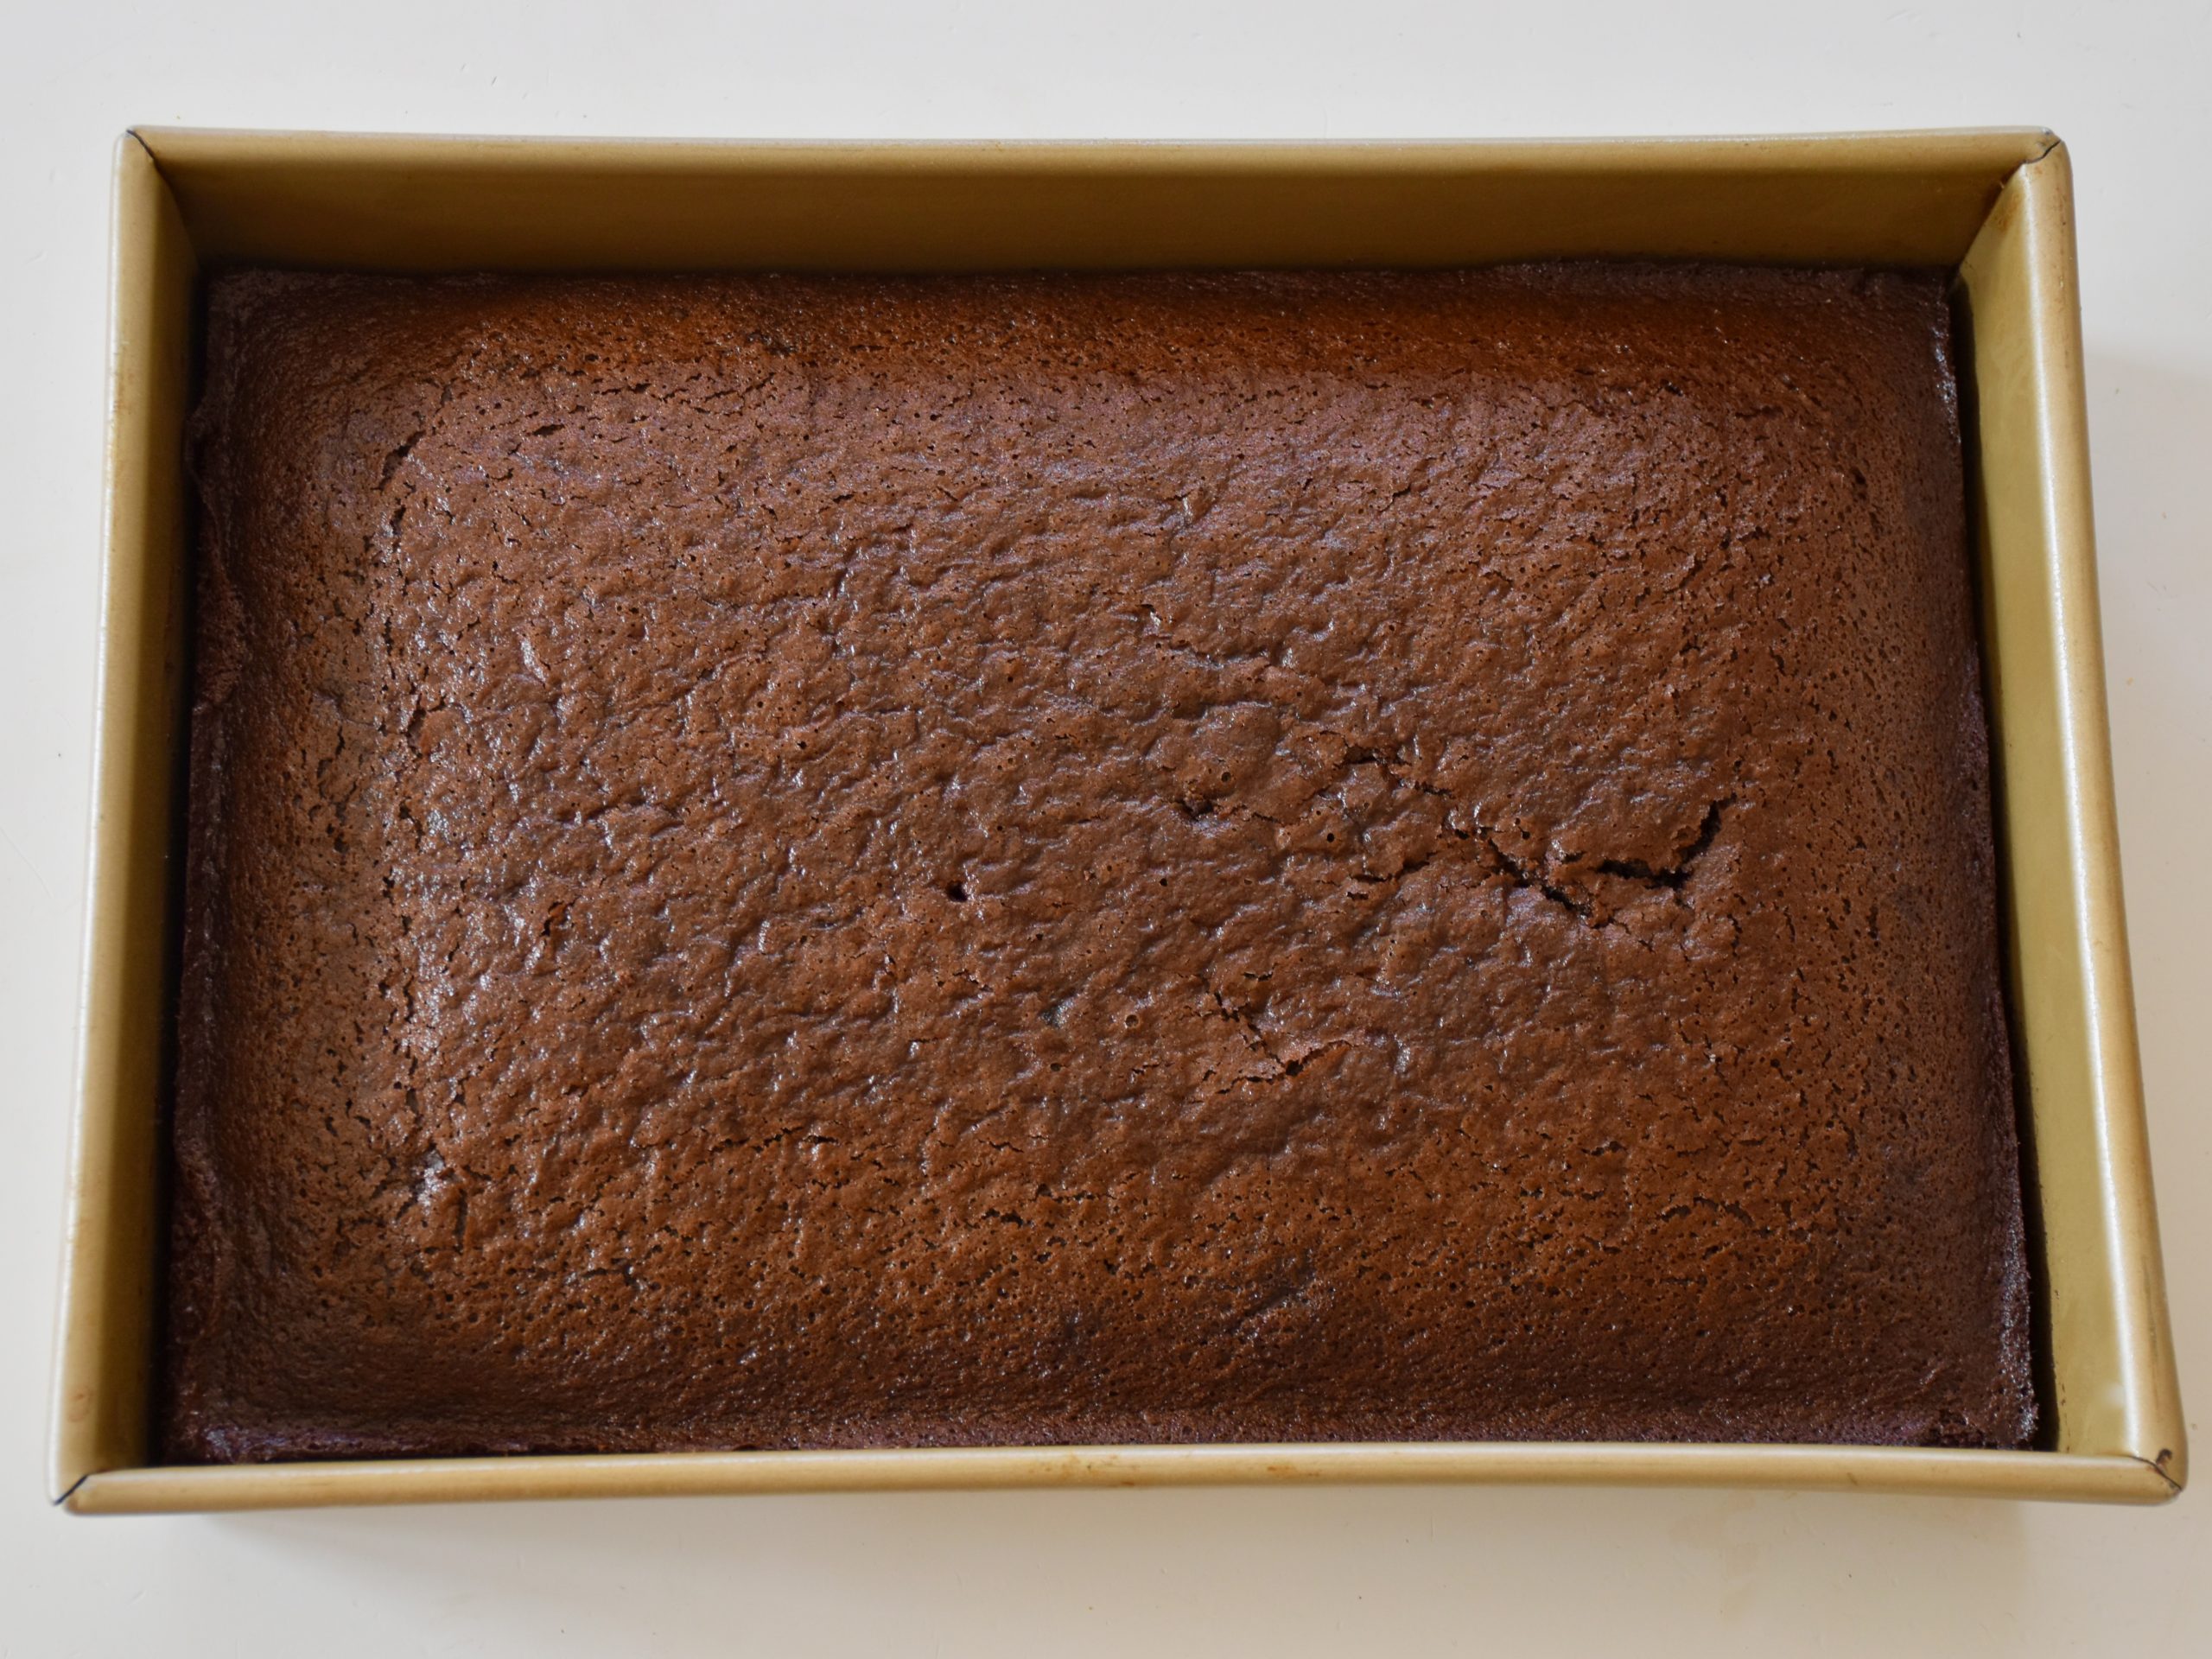
Preheat the oven to 350 degrees. Prepare your cake pan by lining it in parchment paper and greasing and flouring the sides or spraying them with Baker’s Joy.

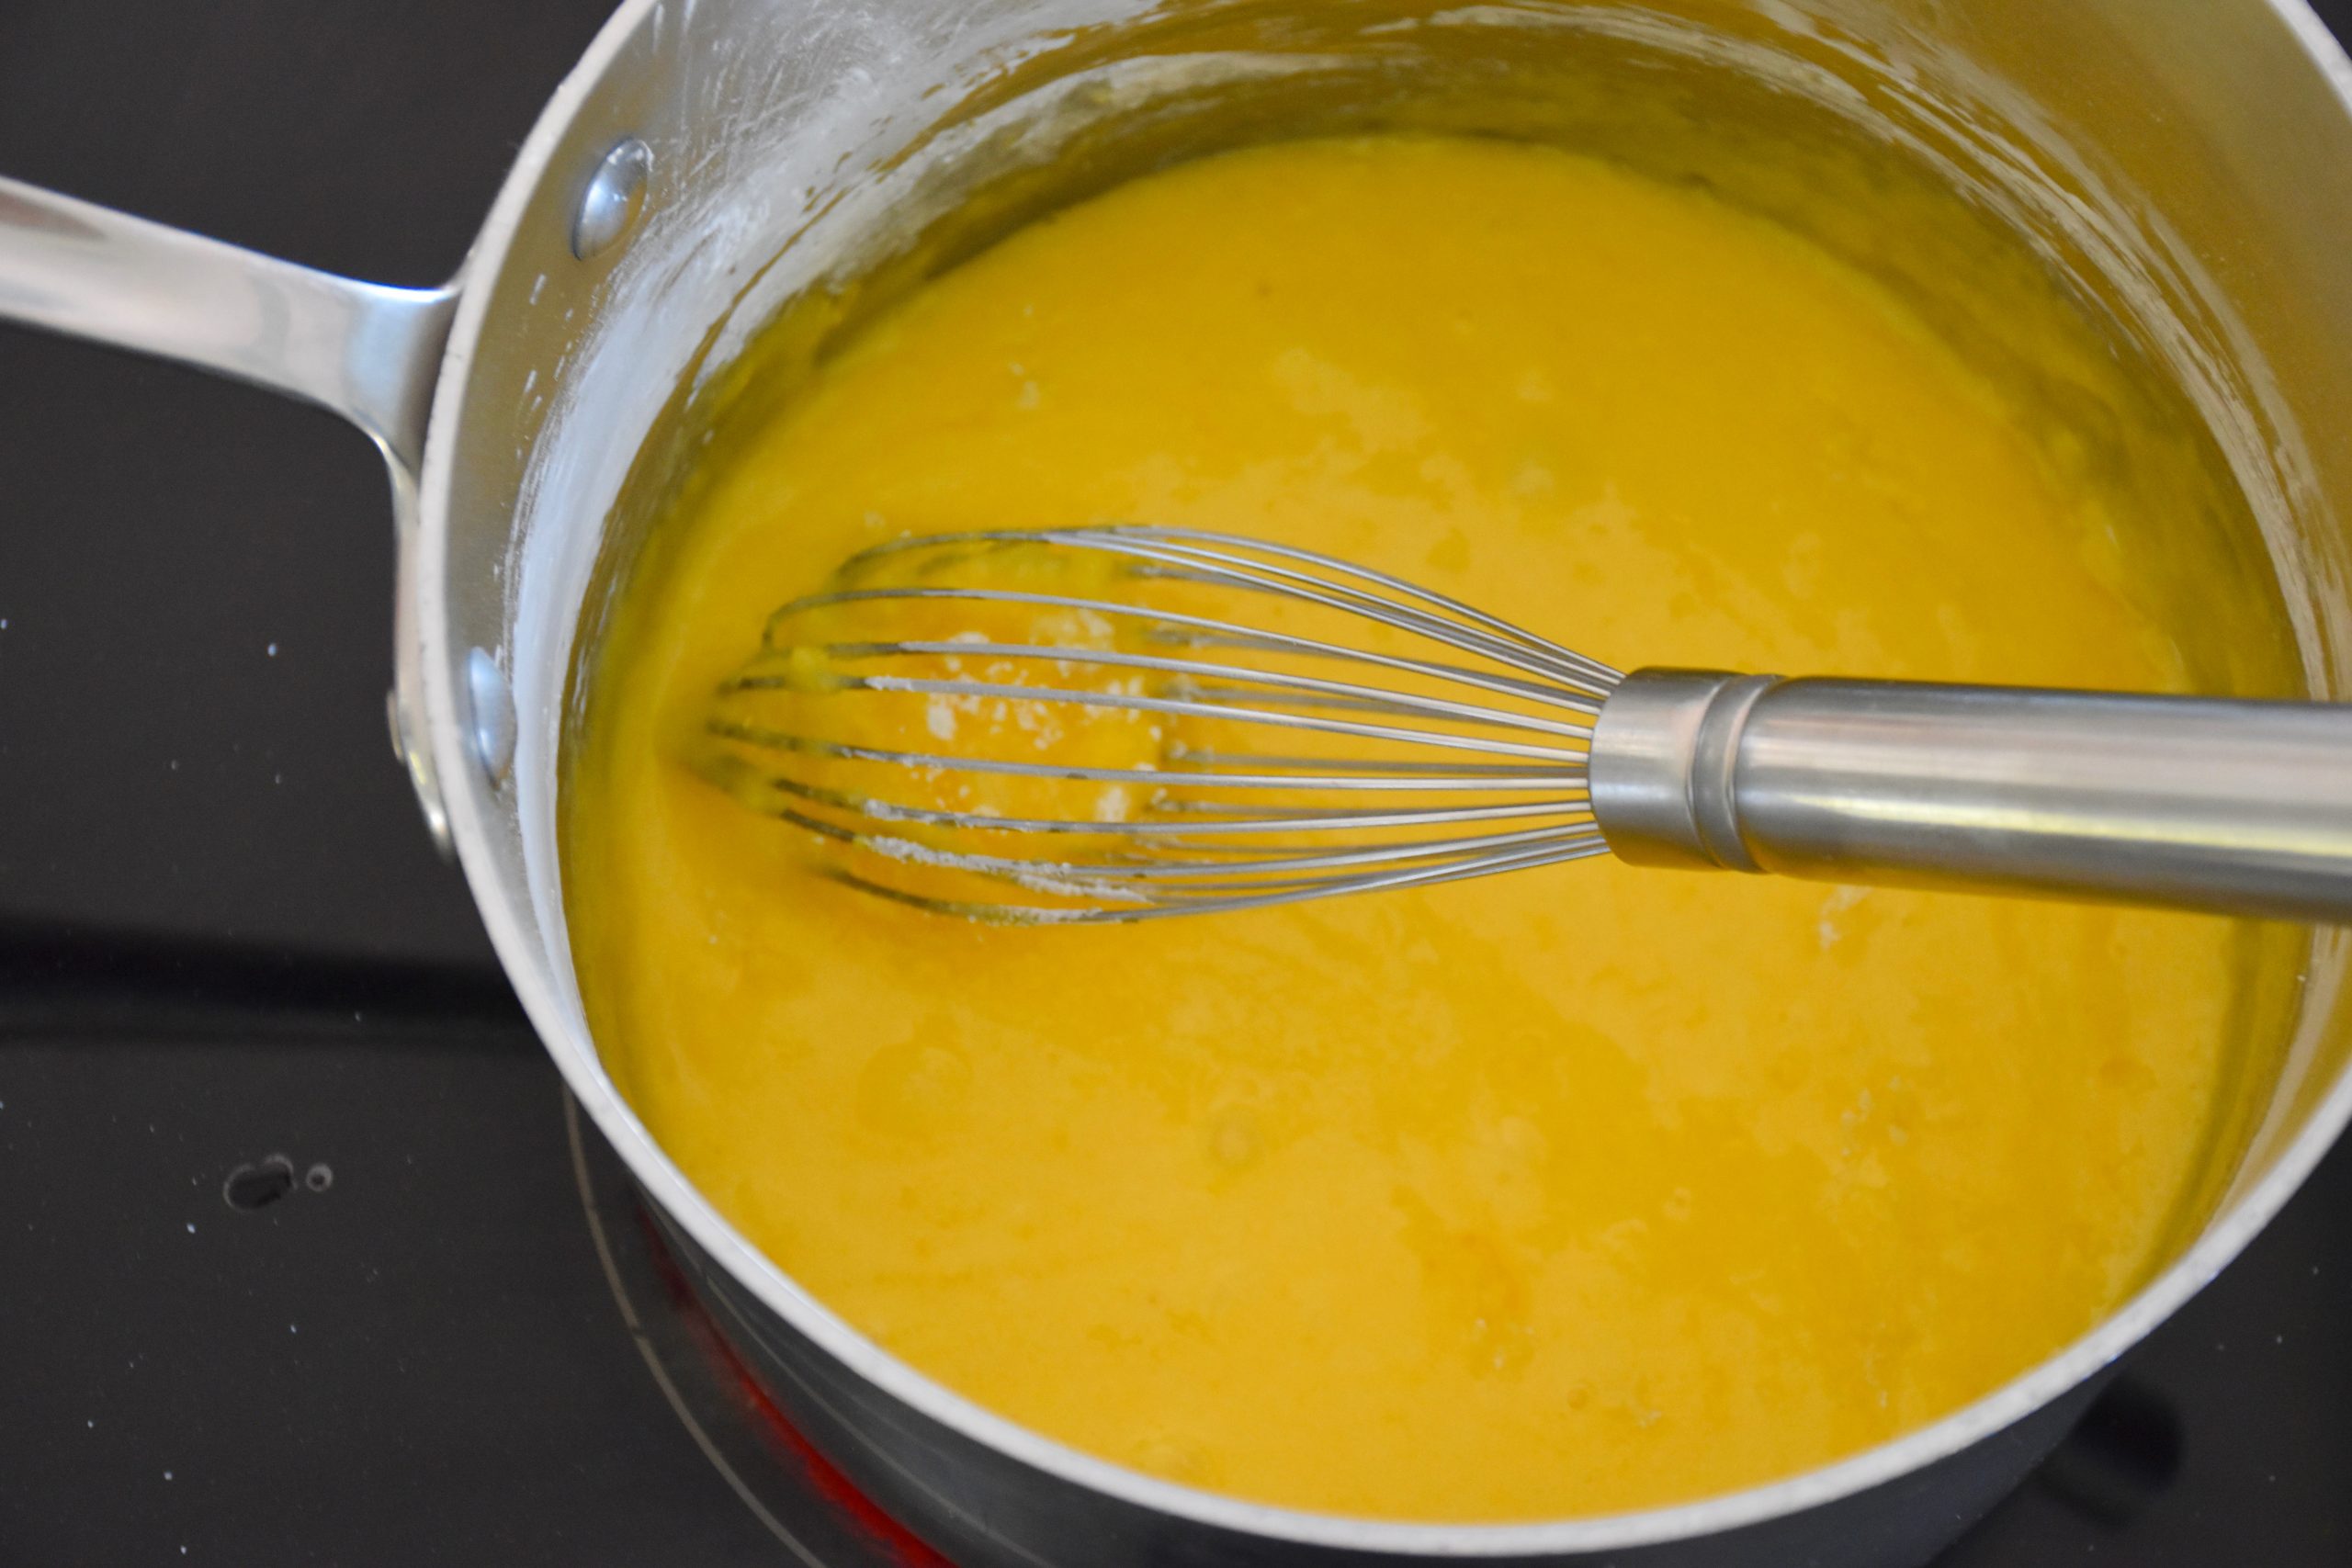
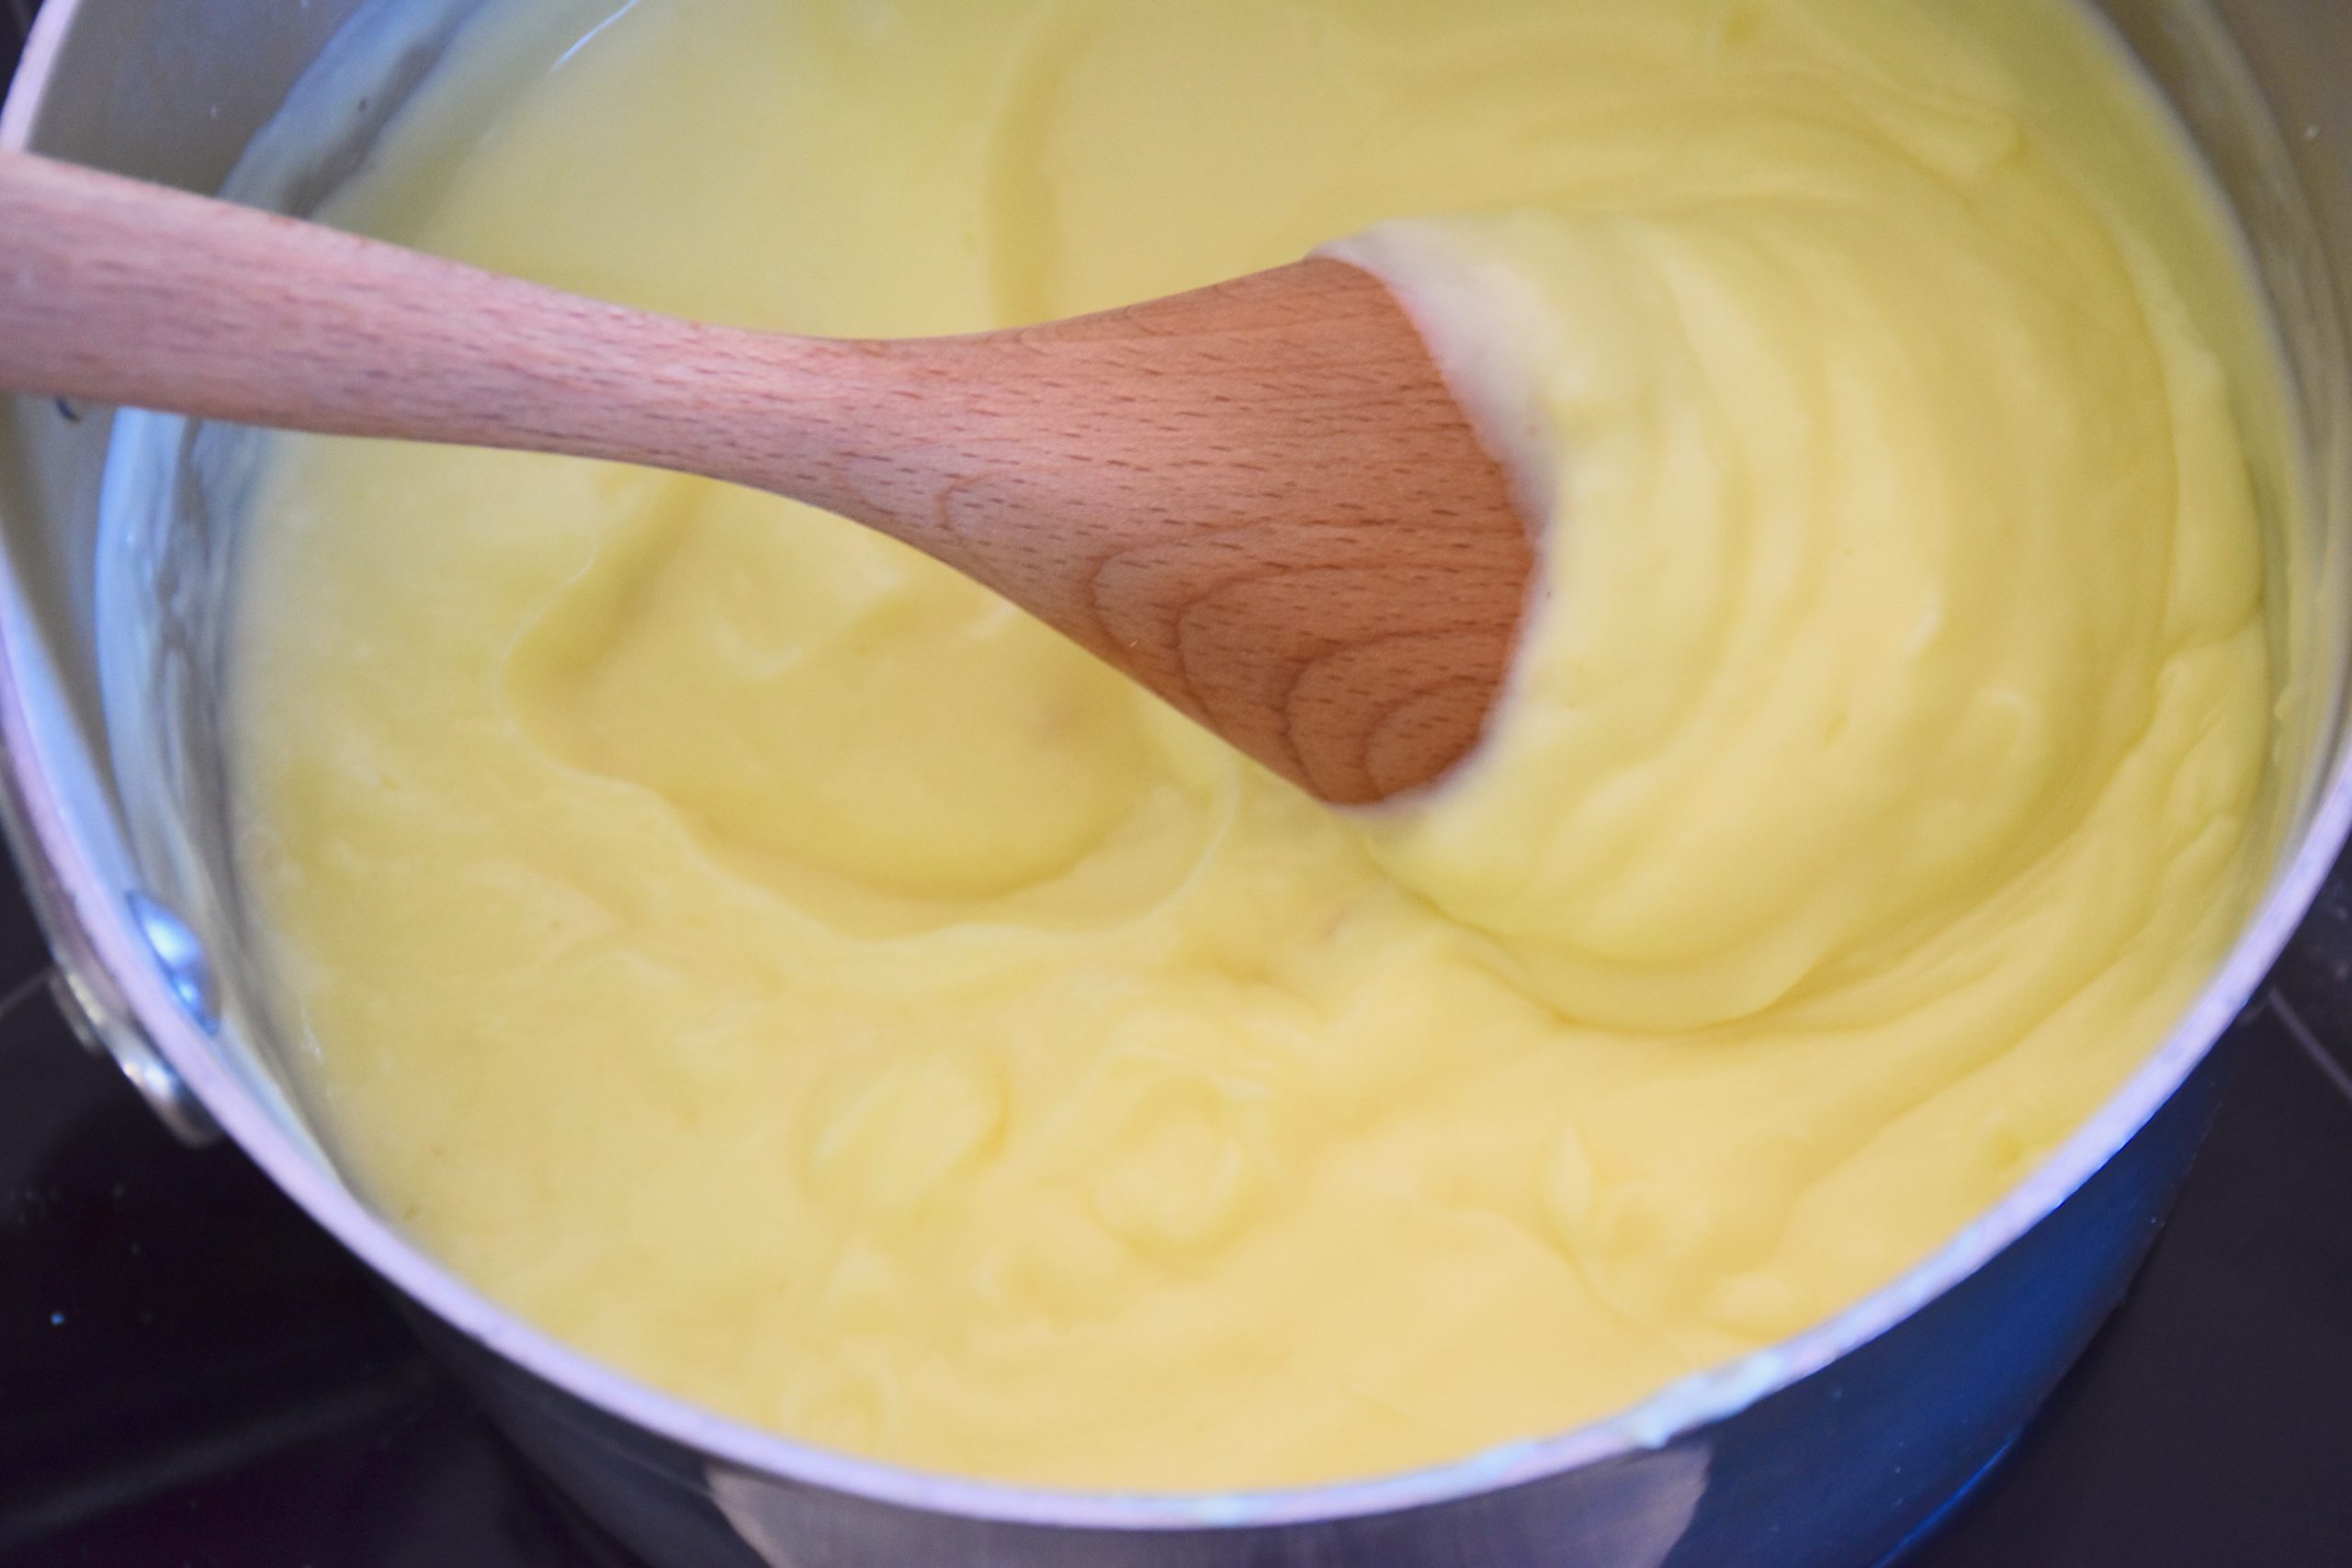
Then in a heavy saucepan combine the butter, water and canola oil and set over medium heat until the butter is just melted. Meanwhile in a large bowl of your mixer add together the sugar, cocoa and flour. Then pour the butter mixture into the sugar and flour mixture and beat until smooth. Mix in the eggs one at a time then mix in the buttermilk. Next add the baking soda, salt and vanilla all at once and mix one final time.

Pour your cake batter into your prepared pan and bake for approximately 30 to 35 minutes. Let the cake cool and prepare the chocolate frosting.

Chocolate Icing

  • 4 tablespoons butter, softened
  • 3 cups powdered sugar
  • 1/4 cup plus 2 tablespoons cocoa powder
  • 1/4 cup plus 1 tablespoon milk
  • 1 teaspoon vanilla

Place the softened butter in the bowl of a mixer. Beat it for 30 seconds on medium speed. Then add in the cocoa powder, powdered sugar, salt, milk, vanilla. Continue to beat on medium speed until light and well mixed.

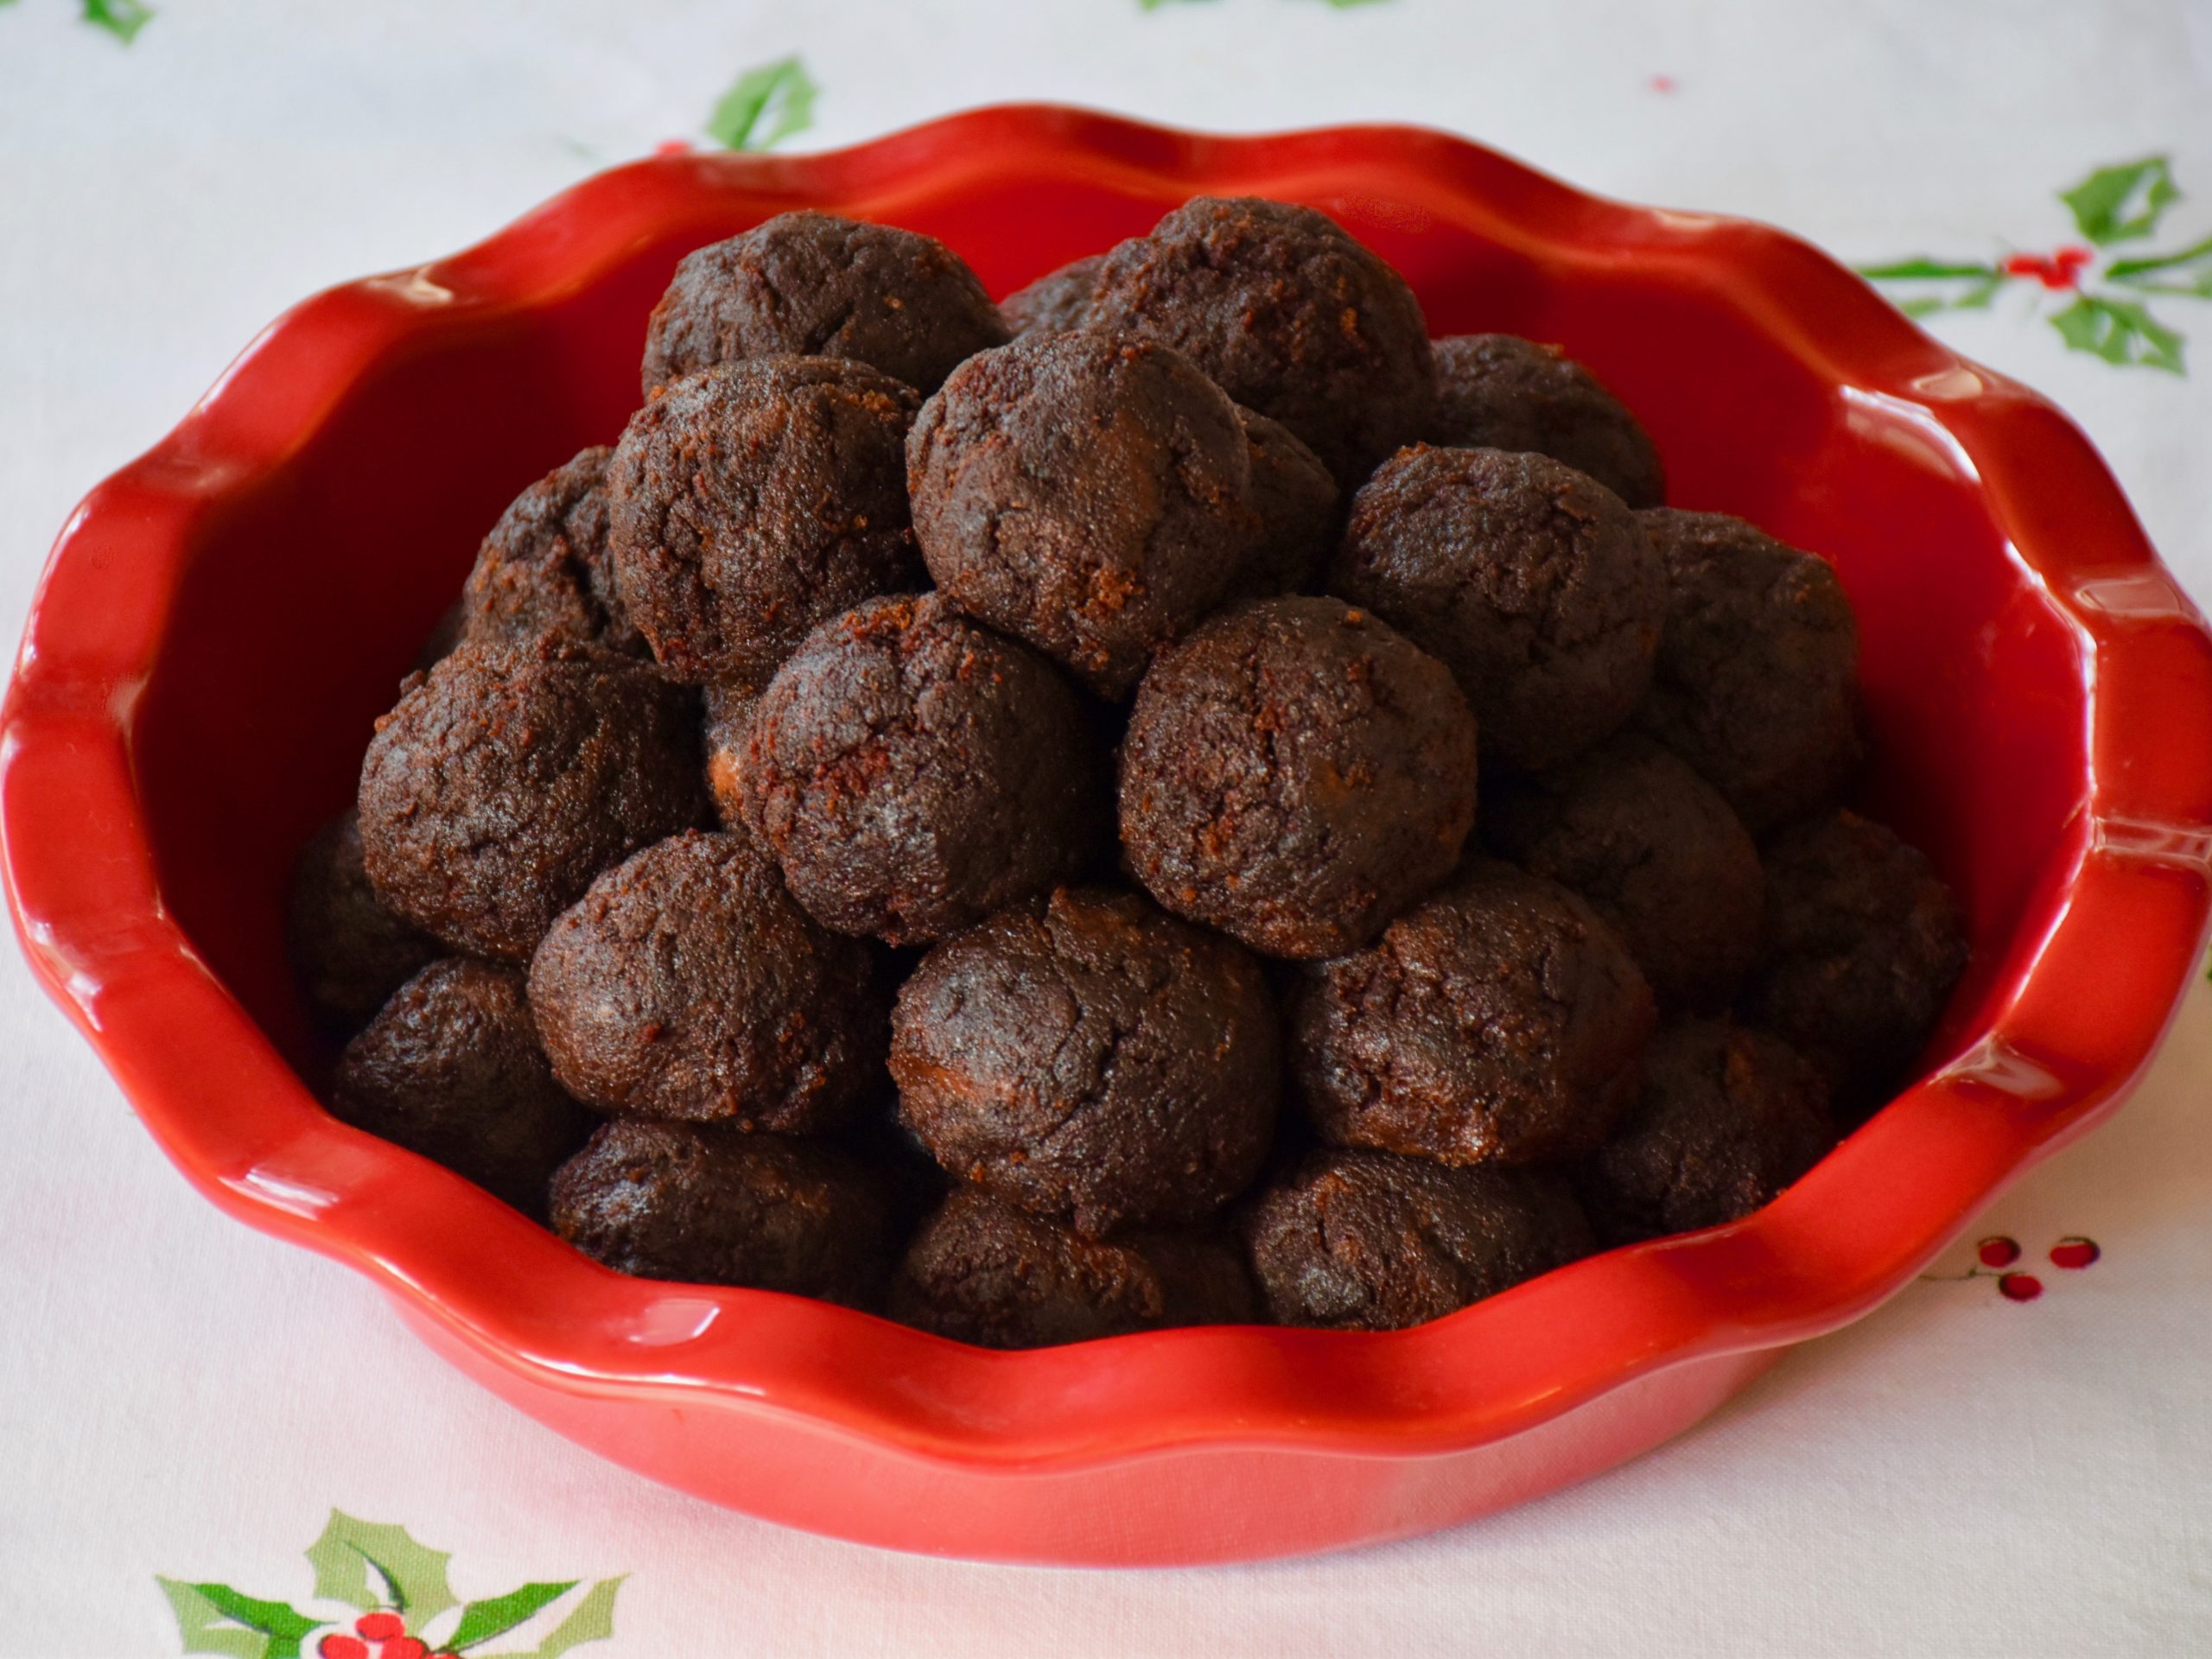
Next create the chocolate cake ball center.

In a large mixing bowl crumble the chocolate cake. Then mix in all of the chocolate icing until the icing is evenly incorporated and it sticks together well.

Then use a small cookie scoop (1¾ inch diameter or 2 tablespoon size) to make even sized balls. Roll the scoop in your hands to make sure that it is smooth and round. Then chill the cake balls in the fridge for a least an hour or if you are in a hurry you can also chill them in the freezer for 30 minutes.

Next it’s time to cover the cake truffles in chocolate.

I find it is easier to work in small batches of 10. One 12 oz bag of chocolate candy melts is enough to cover about 10 cake truffles. So take one bag of the chocolate melts and microwave them in a a medium sized bowl for 1 minute. Then stir well. Microwave them for 30 seconds more stirring again until the chocolate is melted and smooth.

If you would like to add a drizzle of chocolate on top then you can melt 3 oz of  additional chocolate in a small bowl and then pour that melted chocolate into a small pastry bag and have it ready to decorate the truffle.

Now it’s time to create and decorate the truffles. Carefully place one cake ball at a time into to chocolate bowl and spoon the melted chocolate over it until the cake ball is evenly coated. Place the chocolate cake truffle on a silicone mat or a piece of parchment paper.

Finally, before the chocolate hardens decorate the cake truffle with a drizzle of chocolate and some holiday sprinkles.

Then once you make the first batch repeat the same processes with a second bag of chocolate candy melts. Working in smaller batches ensures that the chocolate stays warm and easy to work with.

Want to see how to make these chocolate cake truffles? I had my daughters help me make a short video clip that gives you easy step by step instructions.

Note: these cake balls freeze well so if you don’t want to make all 40 of these chocolate truffles at once you can store the cake balls without the chocolate coating in the freezer for up to three weeks. Just seal them well in a freezer safe zip top bag and pull them out to make small batches to share with family and friends this holiday season.

Chocolate cake truffles are a delightfully delicious holiday treat. So let the sprinkles fly and have a little fun in your kitchen.

Chocolate Cream Pie Saves the Day

Gourmet Magazine Chocolate Cream Pie

“I love that after a day when nothing is sure, and when I say ‘nothing’ I mean nothing, you can come home and absolutely know that if you add egg yolks to chocolate and sugar and milk, it will get thick. It’s such a comfort.”

Julie and Julia

The happy frenzy of the holiday cooking season is here. It would seem that Thanksgiving is all about the traditional turkey, but in our house I know better. Everything I make is just a lead-in to arguably the best part of our holiday meal… pie! Every year I make multiple pies for just four people, because choosing one pie is far too difficult. It’s a delicious dilemma because there are so many wonderful possibilities: pumpkin, pecan, apple, berry, cherry and chocolate.

Last year, our usual holiday plans were suddenly upended by a pre-Thanksgiving windstorm. The wind knocked over a tree near our house which caused the electricity to go out for the day. I had just begun the marathon of holiday cooking when it happened. Thankfully, I had started making dessert first so in my mind Thanksgiving was saved. Sometimes a slice of pie and a good laugh are all you really need to celebrate.

This year as luck would have it, I am facing a new kitchen challenge, my two large stovetop burners suddenly went out this week. Unfortunately, the repair service can’t get to me until December. So I am planning ahead and making a few changes to my holiday meal. However, my husband’s beloved chocolate cream pie will still get the top spot on my list.

Chocolate Cream Pie (adapted from Gourmet Magazine)

Chocolate Filling

  • 9 ounces good quality unsweetened chocolate, chopped (I like to use Scharffen Berger or Ghirardelli)
  • 1 cup sugar
  • 1/2 cup cornstarch
  • 3/4 teaspoon salt
  • 6 large egg yolks
  • 4 1/2 cups whole milk, room temperature or slightly warmed
  • 3 tablespoons of butter, cut in small pieces
  • 1 ½ teaspoons vanilla

Topping

  • 1 cup well chilled heavy cream
  • 2 tablespoons powdered sugar, or to taste
  • 1 teaspoon vanilla extract
  • 1 pint raspberries
  • 1 pint blackberries
  • fresh mint sprigs

Preheat the oven to 375 degrees

Then make and blind bake the crust.

The key to blind baking a crust is to make the outside edge of your crust thick so it sticks well to the side of the pie plate.

Cut a large circle out of parchment paper. Then place it inside of the pie plate and fill it with pie weights or dried beans. Bake the crust for 15 minutes.

Take it out of the oven and remove the parchment paper and pie weights. Dock or prick the bottom of the pie crust with a fork to keep it from puffing up.

Finally put the crust back in the oven for about 15 minutes or until the crust is golden and cooked through. Set the pie crust aside to cool.

Now make the chocolate filling.

Place the chopped chocolate pieces in a medium sized glass or microwave safe bowl. Heat the chocolate for 1 minute then stir and continue to microwave it for 20 second intervals stirring in-between, until the chocolate is just melted. Set the melted chocolate aside.

Next in a heavy medium sized sauce pan whisk together the sugar, cornstarch, salt, and egg yolks.

Heat the mixture over medium heat and slowly stream in the milk while whisking. Then bring the mixture to a boil over moderate heat. Keep whisking until the mixture in thick enough to coat the back of the spoon and has a custard or pastry cream like consistency.

It took me about 6 minutes of whisking between the time when I poured in the last of the milk and when it thickened.

Then take the custard off the heat and force it through a fine metal sieve into a medium sized bowl.

The sieve will give it a smooth consistency so don’t skip this step.

Whisk in the melted chocolate, butter pieces and vanilla. The chocolate pastry cream filling is divinely good! Put plastic wrap over the top of filling surface to keep the top from from setting and refrigerate it for about 30 minutes to let it cool down. Then pour your cooled chocolate cream into the baked pie crust. Let your pie set and chill for at least 4 hours or overnight

Finally, time to decorate the pie.

Make the sweetened whipped cream. In a bowl with an electric mixer beat the cream on high speed till it just begins to form soft peaks then add in the powdered sugar and vanilla and beat until it forms stiff peaks. Pipe or spoon on the whipped cream on top. Then for a pretty finish, decorate it with clusters of raspberries, blackberries and mint springs.

“I love that after a day when nothing is sure, and when I say “nothing” I mean nothing, you can come home and absolutely know that if you add egg yolks to chocolate and sugar and milk, it will get thick. It’s such a comfort.” This bit of brilliant dialog by Nora Ephron in the movie Julie and Julia describes it perfectly.

Chocolate cream pie is so unbelievably delicious that making and sharing it is such a joy. In a season where the world feels a bit upside down there is nothing like chocolate cream pie to save the day.

Christmas Cranberry Margaritas

Christmas Cocktail

“Haul out the holly. Put up the tree before my spirit falls again….For we need a little Christmas right this very minute.”

This year more than ever I am channeling the classic song from the musical Mame. Tired of the stuck at home blahs, our family decided  that we all needed a little Christmas. So this weekend we decorated our Christmas tree and began hanging up the garlands and twinkly lights. I also decided amongst all the decorating zaniness that it might be time for a holiday cocktail too. So I whipped up a round of  my favorite holiday drink, cranberry margaritas.

Cranberry Margaritas – makes 2 margaritas

  • 3/4 cup good quality limeade
  • 1 cup cranberry juice
  • 1/3 cup silver tequila
  • 3 tablespoons triple sec or another orange liquor like cintronage or grand marnier 
  • fresh lime wedges
  • 1/4 granulated sugar or coarse salt if you prefer for rimming the glasses
  • fresh cranberry as a garnish

First mix the drinks. In a small pitcher or large glass measuring cup mix together the limeade, cranberry juice, tequila and triple sec.

Next for a festive touch rim your glasses. Take a lime wedge and run in across the top of the glasses so the juice sticks to the rim. Then have a shallow dish or plate with the sugar or salt. Turn the glass over and dip it in the sugar or salt until the rim is well coated. The cranberry juice makes the margaritas a little sweet so I used sugar, but I could also see how the traditional salt rim would be good too.

Then it’s time to serve them. Pour your drinks and add a lime wedge and a fresh cranberry or two.

Note: for a mocktail version leave out the tequila and increase the limeade amount to 1 cup. Then replace the orange liquor with 3 tablespoons fresh squeezed orange juice. 

These cranberry margaritas are a fun holiday cocktail. The combination of the cranberry, lime and tequila is always a hit. It may be a bit early but sometimes there is just nothing like a little holiday cheer!

Tortellini and Sun-dried Tomato Salad

Tortellini Pasta Salad

“Nothing is better than a picnic.” – Zooey Deschanel

Picnics have have become quite a frequent event in our house this year. A moment to get outdoors for a lunch date together or dinner with our family beneath the trees.  Dining at park or just a pretty spot on the lawn makes me forget about the worries of the world.

This fall my husband and I have enjoyed getting out together for a picnic lunch date when my girls are at afternoon school. We love to pick up lunch and at a local restaurant then find a beautiful spot. There is a local family owned cafe called The Village Gourmet that makes the best sandwiches and salads that are perfect for a picnic. One of the dishes on their menu that caught my eye was a colorful tortellini and sun-dried tomato salad. So, I decided to create my own version of this pasta salad.

My tortellini and sun-dried tomato salad is a quick lunch or dinner that takes just ten minutes to pull together. The flavors in the sun-dried tomato pesto are delicious and it can be made ahead of time. It’s wonderful served either hot or cold which makes it a great picnic dish. It is hearty enough to make a quick weeknight meal. But it also wonderful as a side dish with a parmesan breaded chicken, a grilled fish or even burgers. Everyone needs a quick and delicious pasta salad recipe like this one.

Tortellini and Sun-dried Tomato Salad

Serves 4 as dinner or 6 as a side 

  • 1 large (20 oz) container of fresh cheese tortellini (I like Giovani Rana pasta)
  • 1 1/2 cups cherry or heirloom tomatoes chopped
  • 1 cup (8oz) fresh mozzarella pearls
  • 1/4 cup freshly grated parmesan cheese
  • 8 basil leaves, julienned

Sun-dried Tomato Pesto

  • 6 sun-dried tomatoes in oil, drained
  • 1 clove garlic, roughly chopped
  • 2 tablespoons balsamic vinegar
  • 6 tablespoons olive oil
  • 1 teaspoons capers, drained
  • 1 teaspoons kosher salt
  • 1/4 teaspoon ground pepper

Bring a large pot of water to a boil. Cook the cheese tortellini according to the pasta’s instructions, about 3 to 4 minutes. Then drain the pasta and place in a large mixing bowl.

Next make the sun-dried tomato pesto. In the bowl of a food processor combine the sun-dried tomatoes, balsamic vinegar, olive oil, garlic, capers, salt and pepper. Blend them together until almost smooth.

Finally, chop the tomatoes and cut the basil into thin ribbon like strips. Then add the tomatoes and mozzarella pearls to the tortellini. Next pour on the sun-dried tomato pesto to taste and then sprinkle on the parmesan cheese and the basil.

Serve it immediately or refrigerate it and have it ready for your picnic or dinner.

It has been an extraordinarily beautiful fall week here in Chicago. So as I was outside planting tulip bulbs my daughters were busy setting up their own picnic snack. It seems like we just can’t get enough picnics in our house. We are taking in all the sunshine and good weather while we can. However, as the saying goes sometimes picnicking is a state of mind. So even as the air turns chilly next week, I know we will continue to picnic indoors with all of our favorite dishes like my tortellini and sun-dried tomato salad.

Planting Tulips and Hope for Spring

I have always found gardening to be an act of great hope, because planting requires a gardener to believe that in time beautiful things will grow.

Every gardener has their favorite plants and seasons. I happen love spring and tulips. I think one of the keys to gardening is knowing your yard’s best seasons and then investing and planting around them. The truth is spring is my garden’s small chance to shine. My yard has lots of mature trees and spring gives me an opportunity to plant flowers in parts of my garden that normally get heavy shade. So when fall comes I look forward to planning for spring.

This past April, I was especially grateful to see all the beautiful flowers begin to appear. There is something so hopeful about all those bright green leaves and colorful blooms. May in Chicago is an amazing time. The parks and the downtown streets are overflowing with tulips and spring plantings. This year since the gardens and parks were all closed I really loved and appreciated all the homegrown flowers in my neighbors’ gardens.

Late October and early November is bulb planting season in the Midwest. We have already had a couple of snow flurries, so I have been clearing out my flowerbeds and getting ready for spring. This year one of my plans is to create more bulb planters. I love how a flowerpot or two can brighten my front door or back porch.  The thing I like about container planting is that it doesn’t take many bulbs to create something beautiful. Three bulbs in a small pot and five to seven bulbs in a medium sized pot are enough to make a statement.

Chicago winters get cold, so winter container gardening can have its challenges. A few years ago I was determined to find a way to create my own spring planters without a greenhouse. So I began planting some of my bulbs in recycled plastic nursery pots that I bury in the ground. The ground keeps my bulbs insulated from the cold and safe from squirrels. It also takes very little maintenance once you get them planted and covered with soil and mulch. Mother Nature keeps them protected so I don’t have to worry about them. Then in spring when they grow and flower buds appear I dig the containers up and transfer them to my more decorative pots.

The key thing when planting bulbs is to make sure that they are planted to the correct depth. Generally speaking tulips and daffodils can be grouped close together in a pot but the depth is what keeps them happy. They need to be planted six to eight inches deep depending on the bulb size. I plant to the deeper end of the range here in Chicago so that when the temperature plunges my bulbs will be safe.

In warmer climates, garden zones 7 to 10, you may need to refrigerate your bulbs before planting them in December or early January. Colorblends, a bulb wholesaler that I like has lots specific information about planting times for each part of the country.

I love looking to other gardens for ideas. This cluster of light pink tulips with a few pansies and violas is a simple but pretty spring flowerpot. Add some willow branches to a similar arrangement and you have what looks like a beautiful spring basket.

This blue flowerpot is from my front walk this past spring. I loved the botanical gardens tulip pots so much that I created by own using a blend of pink and red tulips. Bedding plants were hard to find this past spring due to all the pandemic shutdowns so I was happy to have a few extra pots that I had grown.

This gorgeous planter at a historic home in my neighborhood is overflowing with spring bulbs. I love their mix of daffodils, early blooming tulips and hyacinths. It’s like a whole miniature spring garden in a flowerpot.

Eight months into this pandemic I think I understand why so many people have begun to garden: planting a garden is an act of great hope. Hope and believing that beautiful things will grow again is more important than ever. It may be fall, but I am already thinking about spring. This year I have big garden plans I am planting bulbs in both my yard and at my daughters’ school so I have a busy week or two ahead of me. Even if you don’t have time to plant an entire flower bed of tulips or daffodils, planting a few bulbs in pots is a simple way to add some flowers to your garden this spring. So here’s to a more hopeful and colorful spring! Happy planting!

Pretty Pumpkins, Porches and Planters

There’s a chill in the air, the fall gardening season is in its full glory here in the Midwest. As the summer leaves and plants are starting to fade, the trees are putting on quite a show. I love seeing the vibrant ochre, orange, crimson and gold leaves. Porches and gardens are overflowing with pretty pumpkins, mums, cabbages and kale. So this week I am sharing a few of my favorite fall garden ideas.

Grouping Small Pots Can Make a Dramatic Statement

This house is one of my fall favorites. Look at those urns overflowing with color and trailing grasses. I love how the clusters of small terra-cotta pots and pumpkins below create such a dramatic impact and the small pots make it easy to plant and arrange. This reminds me of a beautiful European styled potted garden.

A large grouping of mum and kale create a colorful border that adds a pretty accent to this front stoop. The staggered stages of chrysanthemum blooms will make this fall color last longer.

Think About Adding Texture

Bittersweet branches, ruffled cabbages, feathery grasses and red missile peppers add layers of texture and interest in this autumn planter.

A trio of purple, red and orange mums brighten a perennial bed of peonies and ornamental grasses.

Asymmetrical Arrangements and Trailing Vines Add Interest

This garden gate planter creates quite the impact. I like how the asymmetrical planter arrangement has trailing ivy and creeping Jenny. The planter draws you into garden and the boxwood hedge.

A Few Fall Plants Can Anchor and Add Color to Your Garden Beds

A cluster of fall flowers mixed in with some vibrant summer flowers creates a pretty mix for the short midwest fall season.

This garden arbor is simply stunningly the fall colors and overflowing beds welcome you inside.

Pumpkins and Gourds Are Pretty in Pots and Planters Too

This small pumpkin adds a pop of pretty orange color to this arrangement.

This window box has a few of my personal fall favorites, pumpkins, purple heuchera and pansies which add lasting color.

A quick pumpkin tip: I have found that the squirrels tend to leave my orange pumpkins alone when I spray them well with acrylic spray. Then before the spray fully drys I sprinkle on some chili powder on so it sticks. However, if your squirrels and chipmunks are especially cheeky then stick with white pumpkins they have a bitter taste that keeps them away.

Add Height and Interest With Branches and Berries

The English styled home above has one of my favorite planters. This year I happened to be passing by when the gardener was out planting. Although dried bittersweet is pretty it can be brittle. So in this planters they cleverly used very realistic faux branches. The wired branches allowed them to get his curved crown like shape.

The willow branches and small pumpkins become the stars of these planters adding fall color and interest.

As my gardening year in Chicago comes to a close, I am savoring this blissful, but short autumn season. I love seeing all the pumpkins and planters. I particularly like all the fall flower pots and container gardens. They are like gorgeous little fall bouquets for your garden and front door.

Creamy Avocado and Romaine Salad

Endive and Avocado Salad

Have you ever searched for a lost recipe? One you used to love until suddenly it went missing?

I had a pear and blue cheese salad recipe that I adored. It was a little too gourmet to be an everyday recipe, so I used to make it for special occasions. It came from a cooking class I took with the chefs at a long gone, but much celebrated Houston restaurant called Aries. Then when I moved to Chicago, I suddenly couldn’t find the recipe. I looked through all of my files, I called my mother and I searched online but no luck. The recipe was gone and although I could remember parts of it I just couldn’t recreate it.

Southern Living had a story about a woman who had gone on her own recipe search. She had lost her mother’s prized apple pie recipe. Her mother had passed away and somehow the recipe had couldn’t be found. Her recipe search lead her to call old family friends. She even made signs looking for the recipe which she posted all over her hometown. She had hoped that her mother had shared the recipe with someone. Although she never found her mother’s exact recipe, she received so many great responses that she created her own version.

I too found a few good things on my missing recipe search. While I was looking online I found another avocado salad from Aries chef Scott Tycer. This creamy avocado and romaine salad has become a new favorite. My recipe is an adaptation of his salad, but I love his creamy and tangy avocado salad dressing. This salad is great for a simple dinner at home, but the salad dressing flavors are so good that it would make a great veggie dip too.

Creamy Avocado and Romaine Salad- serves 4

Homemade Croutons

  • 2 cups French bread or sourdough bread, cubed into bite sized pieces
  • 2 tablespoons butter
  • 1 tablespoon olive oil
  • 1/4 teaspoon garlic powder
  • 1/4 teaspoon kosher salt
  • 1/8 teaspoon ground pepper

Note: If you are running short on time you can substitute store bought croutons my favorite brand is Rothbury Farms

Creamy Avocado Salad Dressing

  • 1/2 Hass avocado
  • 1/4 cup plus 2 tablespoons buttermilk
  • 1 tablespoon white wine vinegar
  • 1 tablespoon shallot, minced
  • 2 teaspoons flat leaf parsley, chopped
  • 1 small garlic clove, minced
  • 1/4 cup canola or vegetable oil
  • 1/4 teaspoon kosher salt
  • 1/8 teaspoon cracked pepper

Avocado and Romaine Salad

  • 1 Hass avocado, sliced into thin bite sized pieces
  • 2 small heads of baby romaine lettuce, chopped
  • 2 endives or radicchio, chopped (optional)
  • 1/4 cup sliced chives or thin green onions
  • 4 slices of applewood smoked bacon, cooked and crumbled (optional)

First make the croutons. Melt 2 tablespoons of butter in a medium skillet on medium heat. Add in 1 tablespoon of olive oil. Stir in the garlic powder, salt and pepper and then add in the bread cubes. Stir them well to make sure they are evenly coated in the seasoned butter and olive oil mixture.

Toast the croutons over medium low heat until they turn golden brown and crispy on both sides. Then set aside to cool.

Next make the salad dressing. In the large bowl of a food processor add in the avocado half, the white wine vinegar, buttermilk, shallots, parsley and garlic.

Blend the ingredients together on high speed until creamy. Then through the top shoot of the food processor slowly drizzle in the oil while blending. Then season the salad dressing to taste with salt and pepper.

Finally assemble and toss the salad ingredients together in a large bowl or platter. Mix together the lettuce, endive or radicchio, chives, bacon and croutons. Then before adding the avocados mix in or drizzle on the creamy avocado salad dressing. Then add the avocado pieces so they hold their shape.

This side salad is a real scene stealer. It’s the kind of salad that has you wanting seconds from the first bite. The creamy avocado dressing is a mix between a really good ranch dressing and a tangy Caeser salad. The homemade croutons and bacon make it irresistibly good.

I am happy to report that four years after it went missing, I finally found that missing salad recipe. It was wedged inside another cooking magazine. Truthfully, I am kind of grateful that my original recipe went missing. Because the recipe search lead me to find other dishes, like this delicious creamy avocado and romaine salad.

Homemade Soft Pretzels

Homemade Pretzel Recipe

It was a gray cloudy Saturday and my girls were complaining in chorus that they were bored. So I decided that it might be good time to do a little fall baking. I had been cleaning my office a bit this week and I found a recipe for homemade soft pretzels that one of my daughters had brought home from preschool a couple of years ago. So I did a little quick research on pretzel making and then we began creating our own. The end results where so good and fun to make that I thought I would share them with you.

Homemade Soft Pretzels- makes 12

  • 1 package of yeast
  • 1½ cups warm water (about 110 degrees)
  • 1 tablespoon sugar
  • 1 teaspoon salt
  • 3 to 4 cups of flour
  • 2 tablespoons butter, melted
  • 1 to 2 tablespoon rock or coarse salt, for sprinkling on top

First, preheat the oven to 400 degrees.

Next, in a glass measuring cup or small bowl dissolve the sugar into the warm water. Stir in the yeast and then let it sit until it blooms, about 5 minutes.

Then mix together the dough. In the bowl of a stand mixer or in a large bowl. Mix together 3 cups of flour and the salt.  When the yeast is ready for it in and add the melted butter. Blend at a low speed or stir and knead the dough until it comes together. If it is sticky add about 1/4 of a cup of flour at a time until the dough is less sticky and slightly shaggy. I found that I only needed to add an additional 1/4 of a cup of flour.

Cover the bowl with a bowl or plastic wrap and let it rise for 10 minutes.

While the dough is rising make a water bath for the pretzel dough. Pretzels need to be briefly boiled in an alkaline water mixture to give them their signature chewy crust. The baking soda and water mixture controls the pretzels rise and it gives them their signature brown color and texture.

Boiling Water

  • 8 cups water
  • 1/3 cup baking soda

Pour the water in a large sauce pot and mix in the baking soda. Then bring the water to a boil.

Prepare a baking sheet by lining it with a silicone baking mat or parchment paper.

After the dough has risen for 10 minutes knead and divide it into four equal portions. Take each quarter of the dough and then divide it further into three smaller balls of dough. Take the smaller dough portions and roll them into long rope like pieces. Keep rolling and stretching them until they are about 18 inches long.

My baking assistant helps me roll and twist the pretzels. This recipe was easy to make with kids because the dough doesn’t require a long rise. My girls really enjoyed rolling and shaping the pretzels.

Shape the pretzels by taking the ends and draw them together so the bend of the dough forms a circle. Then twist the ends and flip them over to create a traditional pretzel shape. I found it was easier to use half of the dough at a time and make them in two batches of six. Form all of the pretzel shapes for one batch.

Then using a slotted spatula or spider strainer individually dip each pretzel in the boiling water for 20 to 30 seconds. Hold the pretzel up over the water to make sure that it is dry before placing it on the baking pan. Then sprinkle them with the rock salt.

Sometimes a picture is worth a thousand words. So here is a step by step picture guide to shaping your pretzels.

Continue boiling, drying and sprinkling each pretzel with salt. Bake the pretzels for 12 minutes until golden brown.

These homemade soft pretzels are easy and fun to bake. They have a golden crispy crust with a soft and chewy center. Pretzels are a Midwest favorite, however my favorite way to eat them is with a Southern twist. I like to serve my pretzels with a side dip of pimento cheese. So as soon as we made a batch I ran out to store to pick some up. They would also be good as a side with soup or as an appetizer for fall dinner. But, no matter how you serve them homemade pretzels are a delicious treat to share with family and friends.

The Dream House

“A house is made with walls and beams; a home is built with love and dreams.”

Ralph Waldo Emerson

Every home has a story to tell. We live in an orange brick 1960’s colonial revival. Our Relator affectionately called it the “Leave It to Beaver House.” Our house was well loved, but it took time it to really feel like it was ours. A few months after we moved in, I realized that I had severely underestimated how long my painting projects would take with two preschoolers in tow. My house dreams were beginning feel a bit deflated. I was worried that my daughters might never nap enough to allow me to fully unpack and finish.

Then one day, I was pulling out of the carpool line when I heard a small voice from the back seat. “Mom are we going somewhere?” It was my youngest daughter Alyssa who is perpetually hoping that we will go somewhere new. However, before I could answer her question my oldest daughter Gabby chimed in, “We are going somewhere. We are going to the dream house, right mom?”

Her response surprised me. Perhaps my girls have seen a few too many Barbie episodes on Netflix. However, the idea that they consider our house the “dream house” gave me pause for thought. Before that moment, although I liked our house, I had never pulled in my driveway and thought “dream house.” As I reflected on our conversation, I realized that my daughter was right. Great houses come in all shapes and sizes.

I still fondly remember the 1930s home where I grew up and the converted attic bedroom that my sister and I shared. Childhood homes have a way of shaping us like few other places do. Maybe that’s why they are often remembered with such love and nostalgia.

A picture of my childhood home. When I was writing this column I looked our old house up online. It was interesting to see that although much has been remodeled small things like the old 1930’s black and white tile bathroom are still there.

Now in the craziness of 2020, our house has become more than just a home. I find myself cherishing our house more as I watch it take on so many new and unexpected roles. The kitchen doubles as a school room and the basement has become the office, a greenhouse and a gymnasium. The back yard has been transformed into a camping site, a fashion show runway, a waterpark and a sports field.

On any given day there are papers, markers, art projects, pillow forts and Lego creations happening everywhere. One week this summer I even let my daughters turn the dining room into Harry Potter’s Hogwarts School of Witchcraft and Wizardry. The costumes and paper decorations made quite a creative mess, but our dining room looked more magical than ever.

Sometimes I wonder what stories my daughters will tell about this time. Spending so much time at home certainly has its challenging moments. Then in the middle of this stuck-at-home craziness, I remember that moment of carpool line wisdom. What I learned from my little back seat drivers is: sometimes a “dream house” is more of a perspective. Now, more than ever I am grateful for our home and the all dreams it inspires.

In addition to writing this blog I also write as a contributing columnist for The Hinsdalean, who this week was named the number one midsized newspaper in the state of  Illinois. The editor, Pamela Lannom and the staff writers are certainly deserving of this wonderful award. My piece “Dream house” is in the eye of the beholder was for my column this week.

Mini Apple Cinnamon Donuts

Apple Cider Donut Recipe

There is nothing like a warm apple cinnamon donut and the heavenly smell that fills my kitchen. I have been getting ready for fall. Half day school started back for my girls, so I wanted to make something fun for a back to school Saturday family breakfast. These sweet mini apple cake donuts are tender and topped with a sprinkle of cinnamon sugar. The mini size makes them easy to make and quick to bake. They are perfect for a weekend breakfast treat. Serve them with a big cup of coffee, if you are a coffee lover like me or a cup of hot chocolate or warm apple cider. These cake donuts are so tender and delicious that I think they would also make a delicious dessert too.

Mini Apple Cinnamon Donuts- makes 18 small donuts

  • 2 cups flour
  • 1½ cups sugar
  • 2 teaspoons baking powder
  • 1 teaspoon cinnamon
  • 1/2 teaspoon ground ginger
  • 1/4 teaspoon all spice
  • 1/2 teaspoon kosher salt
  • 1 large egg
  • 1¼ cup apple cider (Martinelli’s or another good all juice based cider)
  • 2 tablespoons butter, melted
  • 2 teaspoons vanilla extract

Preheat the oven to 350 degrees.

In a large bowl whisk together the dry ingredients: flour, sugar, baking powder, cinnamon, ground ginger, allspice and salt. Then add in your apple cider, melted butter and egg. Stir until the batter is well combined.

Next prepare the donut pans by spraying them with a flour based baking spray like Baker’s Joy.

Then once your pans are ready pour or spoon the donut batter into a 1 gallon zip top bag. Then snip a small hole in the bottom corner of the bag. The plastic bag will work like a large pastry bag which makes filling the donut pans much easier. Fill the donut tins about three quarters of the way full, which is about two quick turns or circles of batter for each donut.

The key thing with mini donuts is to not overfill the tins. This is why I love using a plastic bag or pastry bag to pipe in my batter. It helps you make the cute little donut shapes every time.

Bake the donuts for 15 minutes. Then while they are baking make your cinnamon sugar topping.

Cinnamon Sugar Topping

  • 5 tablespoons butter melted
  • 1/2 cup sugar
  • 1 teaspoon cinnamon

In a shallow bowl or plate mix together the cinnamon and sugar. Then melt the butter in a bowl or small skillet. Once the donuts have cooled for about five minutes quickly dip one side of the donut in the butter and then the cinnamon sugar.

These mini apple cinnamon donuts were a hit in our house. I got these mini donut pans for my birthday this year and I have had so much fun baking with them. The batter for this recipe doesn’t require a mixer so it’s perfect for little ones who love to help. I think my six year old said it best as she was dancing around the kitchen, “These donuts are so yummy!”  So if you are looking to do a little fall baking then try these mini apple cinnamon donuts.

Contact Us