
Years ago Southern Living had a clever monthly article called Mama’s Way or Your Way. The column featured classic Southern dishes with a traditional family recipe and then an updated version with a slightly different spin on that treasured dish. So as Thanksgiving approaches and the season for pies has arrived, I thought I would share a simple Fudge Pie that is one of my mother’s signature desserts. However, being the creative baker that I am, I am going to show you a few of my own secrets on how to make your Thanksgiving pie a show stopping dessert.
I know that for some of you the thought of making your own pie dough is scary, but have no fear I have an easy and full proof recipe and some step by step photographs to talk you through it. When it comes to pie dough there is nothing like a crust made with butter. Butter based crusts are flakier and more tender then those made with Crisco or Lard. I have tried many a pie crust recipe over the years, but my hands down favorite is Pioneer Woman’s pie crust that comes from her friend and baker Pam Regentin.
Pam’s Pie Crust (Makes One 9 inch, Two Crust Pie) You can half this recipe if you want since you will only need a single crust or if you are feeding a crowd make two pies.
- 2 1/2 cups all purpose flour
- 1 teaspoon salt
- 1 tablespoon sugar
- 1 cup (2 sticks) butter cut into chunks
- 1/4 cup cold water
First cut your cold butter into small squares. This makes it easier to cut them into your flour. As you can see I cut each stick into quarters and then made smaller cubes.

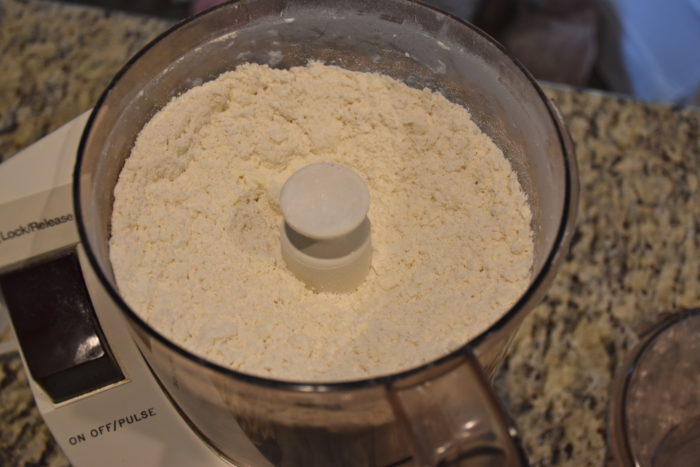
Then in a food processor mix together your flour, salt and sugar. If you don’t have a food processor you can use a pastry blender or your electric stand mixer with a paddle attachment, but these methods will take longer and I definitely prefer the food processor. Next pulse your butter and dry ingredients together until your butter is cut into small peas sized pieces. If you are using a stand mixer then blend your butter in at a low speed.
 Then add in your cold water and blend it until your crust starts to ball up and just come together. You don’t want to over work your dough.
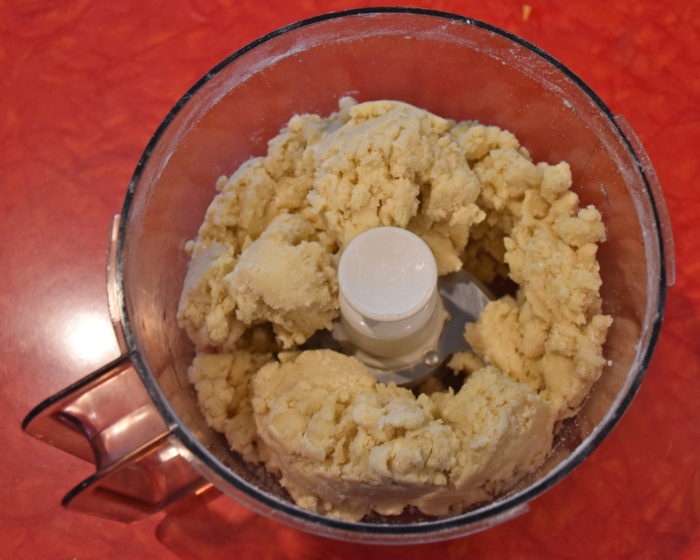
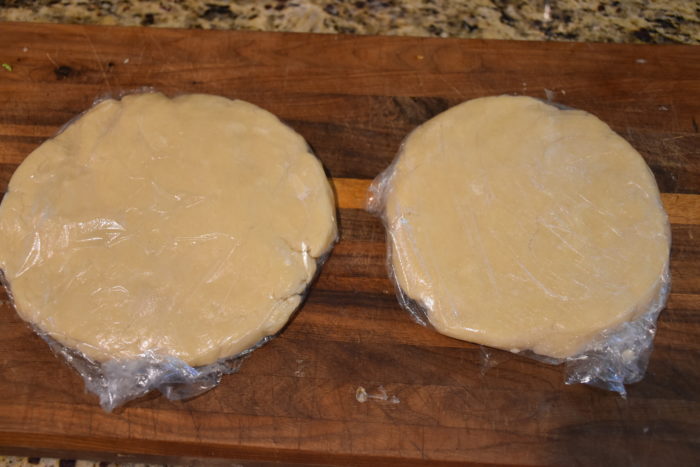
Then take your dough and cut it in half and form it into two small bread plate sized discs. Then wrap your discs in plastic wrap and refrigerate it for 30 minutes to an hour or if you are planning to make your pie immediately. Chilling your dough will firm your butter up a bit and give you a flakier crust. If you are planning ahead then you can make and refrigerate your pie dough a day or two before you need it. I like making my dough in discs and not balls because cold pie dough is tougher to roll out so the discs will make your job much easier.
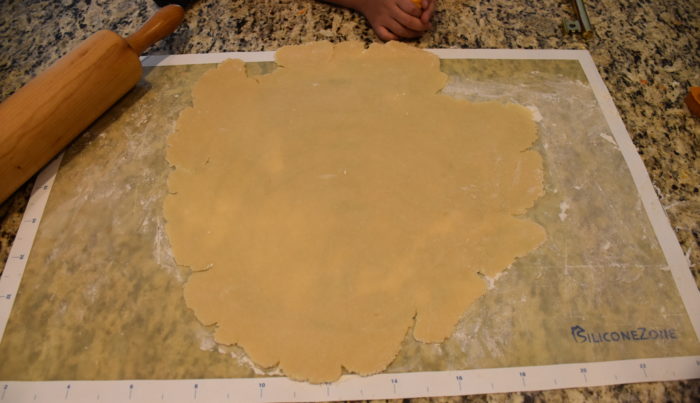
Now you are ready to roll out your dough. I have a large silicone mat that I absolutely love when it comes to pastry, but if you don’t have a non-stick mat like this then you can use a large piece of parchment paper. Lightly dust your mat or paper with flour as well as your rolling pin. Then roll your crust out to make a large thin circle that is 12 to 13 inches in diameter. You want to roll your crust out larger than you pie plate so you have extra to make your crimped edges. As you can see the very edge does not have to be perfect.
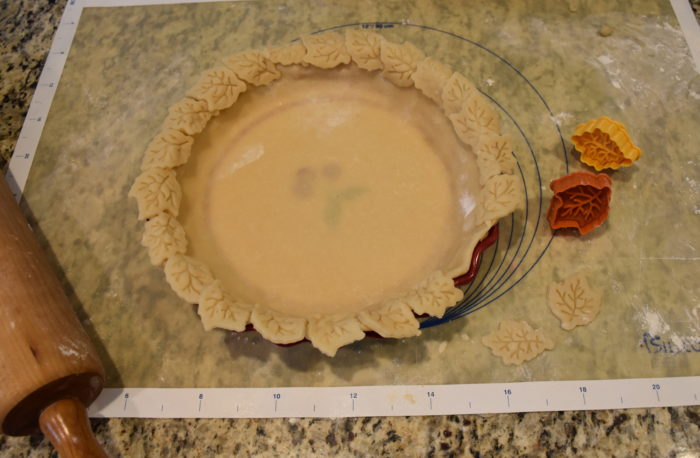
Then comes the tricky part, but if you have your parchment paper or silicone mat it will be much easier. Carefully lift up your rolled crust and flip it over over your lightly greased pie plate and gently pull back the paper or mat. Then trim any rough edges with some clean kitchen scissors. Your pie crust edges don’t have to be perfect because the cut out leaves will cover it. I lightly fluted my edged by holding the outside of my crust with my index and middle fingers and then pushing my thumb in inside to make the middle indentation. If you are worried about fluting it then just roll the edge of your crust under and use the tines of a fork to press the edges to the rim of your pie plate.

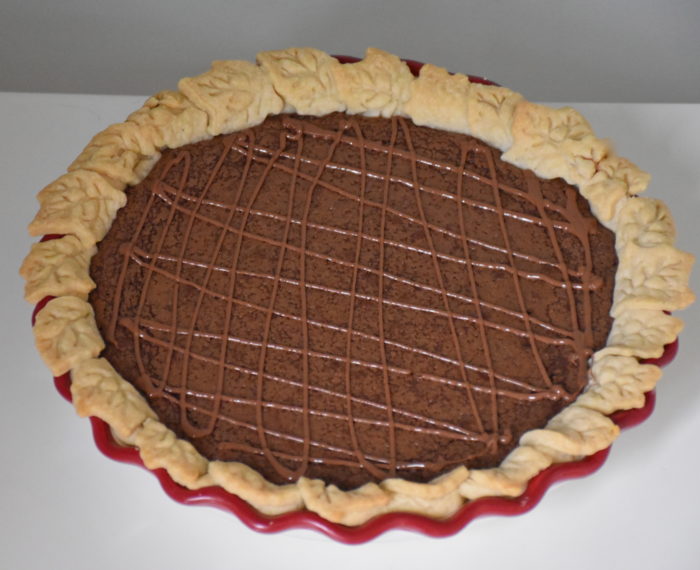
Next comes the fun part, cutting the decorative leaves. I got a set of leaf shaped pie crust cutters from Michaels for under five dollars, but they are on Amazon and in lots of stores that sell baking supplies this time of year. I took the extra scraps of dough I cut off the edges and rolled them out then I used the cutter to cut out the shapes and make the vein like indentions on the leaves. Then to attach them to the edge of my crust I put a tiny bit of water on my finger and rubbed it on the back of the leaf so it would stick to the edge. I used three different leaf shapes to make my edge look a little more interesting.
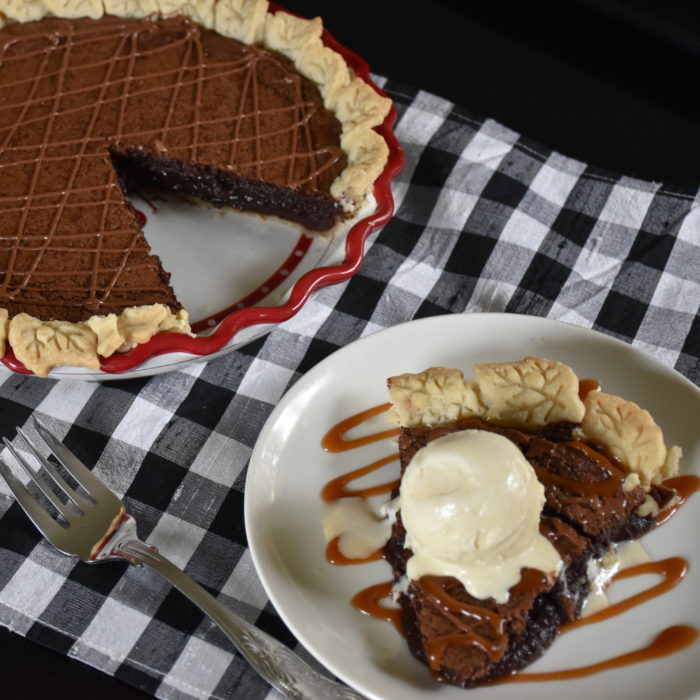
There you have it one pretty pie crust ready for some delicious filling chocolate or pumpkin filling.
My Way: Caramel Fudge Pie (Makes one standard non-deep dish 9 inch pie)
- One prepared 9 inch pie crust
- 6 Tablespoons unsweetened cocoa powder
- 6 Tablespoons flour
- 1 teaspoon ground cinnamon
- 1 1/2 cups sugar
- 3 eggs, well beaten
- 1 1/2 teaspoons vanilla extract
- 3/4 cup (1 1/2 sticks) butter melted
- 1 jar of good quality caramel sauce
- 2 oz melted milk chocolate or if you prefer dark chocolate
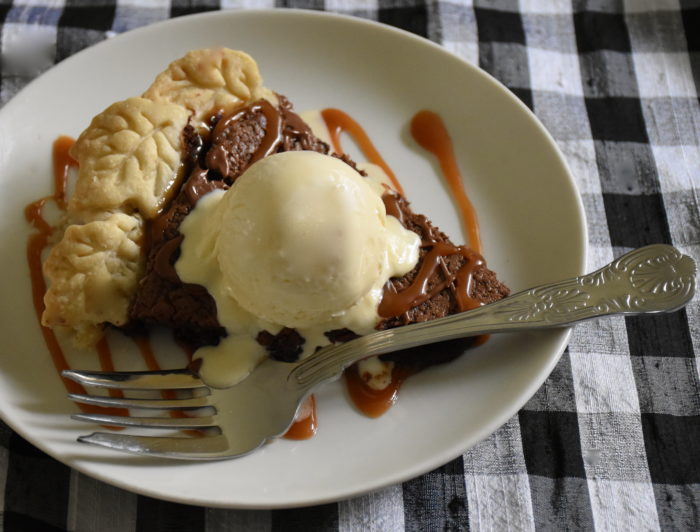
- Vanilla Ice Cream makes a great topping for this creamy molten chocolate like pie. If you ask my husband its the only way to serve it.
First preheat your oven to 350 degrees.
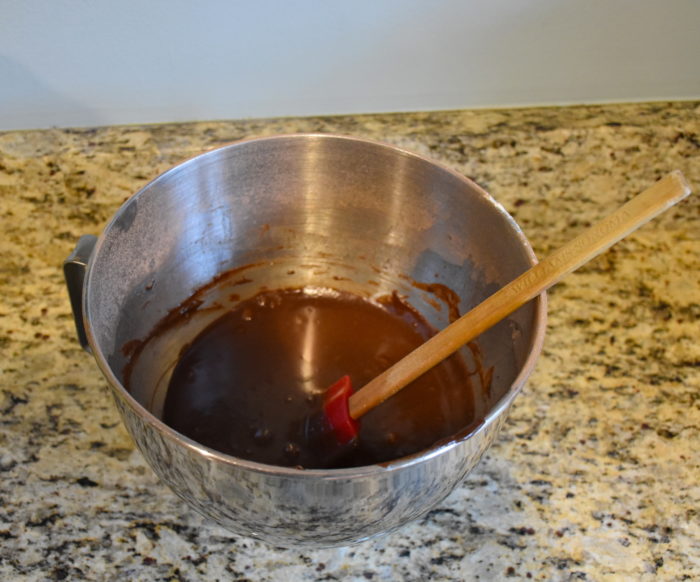
Then mix together your dry ingredients including the cocoa powder, flour, cinnamon and sugar. Then using your stand or electric mixer mix in your eggs and vanilla on a low speed. Then blend in your melted butter. Make sure you scrape down your sides so everything gets fully incorporated.
Then you are ready to pour your chocolate filling in your pie. Use a separated or rubber spatula to even out your filling. As you can see your filling will not come all the way up to the top of your sides. Don’t worry about this because it will rise up as it bakes.

When you have a more delicate pie crust edge, like these leaves, then I like to make an aluminum foil shield to protect them during the initial baking of my pie. I just cut an extra long piece of foil that is cut a bit longer than the circumference of my pie plate. Then I fold it over into thirds to make it narrower. Then I take that long strip and fold it around so it covers the leaf edge.
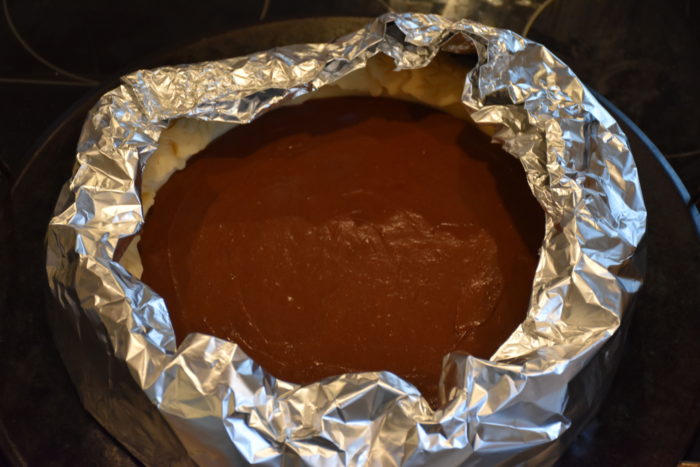 Now my pie is ready to bake. Place it in your oven in the middle rack and bake it for 30 to 35 minutes. The pie will have crusty brownie like top with a creamy fudge center. I remove the foil edge after the first 15 minutes of baking.
Then after your pie cools a bit you can add a decorative chocolate design on top. Melt your chocolate in the microwave for 30 seconds and then stir it and heat it for an additional 20 seconds until it is just melted through. Put your melted chocolate in a pastry bag and cut of the very tip to make a small hole. Then make a zigzag pattern going one direction and then turn your pie at an angle and make another set of zig zags marks going the opposite direction.
Then when serving your pie drizzle a little caramel sauce on the plate. The cinnamon and carmel really add something special to this pie.
Now one more tip on making this pie my Mom’s way. She turns this pie into a Christmas dessert by leaving out the cinnamon (I added) and she uses fudge sauce instead of carmel. Then she tops her pie slices off with a scoop of peppermint ice cream, preferably Blue Bell if you can get it. So no matter how you serve it my way or Mama’s way, this is a simple and delicious fudge pie you can dress up and serve for any occasion.