Key Lime Ice Cream Pie

Key Lime Ice Cream Pie

Father’s Day is coming this weekend. So this week I am sharing a new recipe for a key lime pie. It’s a favorite of both my dad and my husband. My recipe puts a summer twist on this classic pie, because the filling is made with ice cream. Its easy to assemble and if making homemade lime curd sounds like too much then you can take a little help from the store. My local grocery store carries Stonewall Kitchen’s key lime curd, but Williams Sonoma and other gourmet stores have it as well.

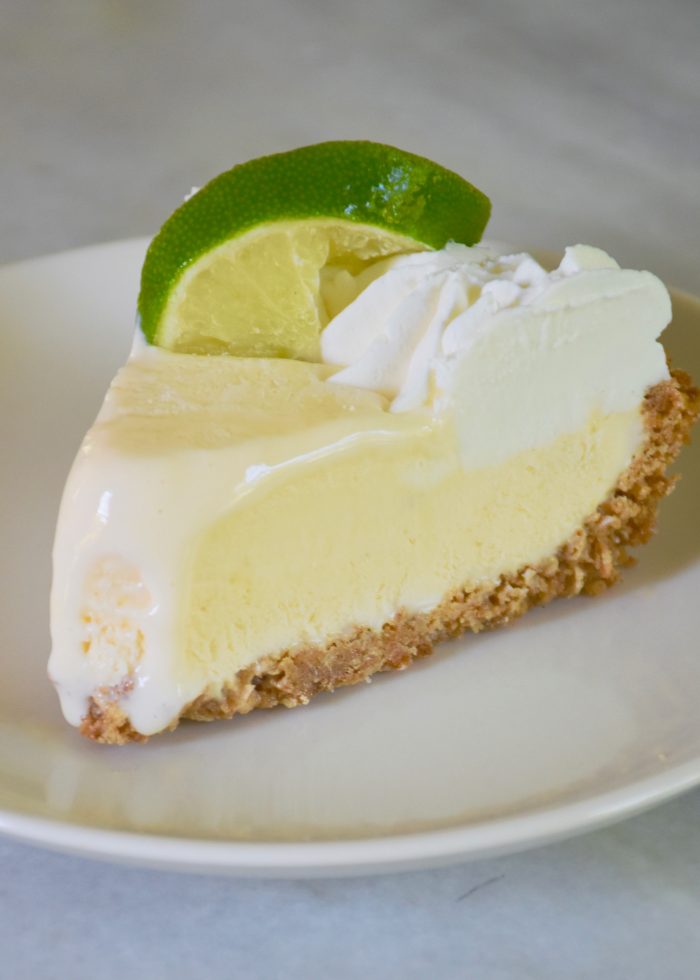
The crispy graham cracker crust with the creamy key lime filling is so delicious! Its a wonderful treat to make and share.

Key Lime Ice Cream Pie- Makes 1 (9 inch) Pie 

  • 2 pints (4 cups) Creamy Vanilla Ice Cream, softened
  • 1/2 cup key lime curd (see recipe below or use store bought)
  • 1 graham cracker crust
  • Whipped cream topping
  • 2 limes sliced in thin rounds

Homemade Lime Curd -makes 1½ cups

  • 4 tablespoons butter, softened
  • 1 cup sugar
  • 2 eggs
  • 1 egg yolk
  • 2 teaspoons lime zest
  • 1/2 cup fresh key lime or regular lime juice (Key limes can be hard to find so regular limes will work too!)

Graham Cracker Crust

  • 1 sleeve (9 whole) graham crackers, crushed into fine crumbs
  • 1/4 cup sugar
  • 6 tablespoons butter, melted

Whipped Cream Topping

  • 1 cup whipping cream, cold
  • 3 tablespoons powdered sugar
  • 1 teaspoon vanilla extract

For the homemade lime curd, cream the butter and sugar with a mixer on medium speed until light and fluffy. Add the eggs and one egg yolk one at a time and mix until incorporated. Then with the mixer on low speed slowly pour or stream in the lime juice and mix until just incorporated. Now place the curd mixture in a small sauce pan over medium low heat. Whisk the lime curd until it thickens about 10 to 12 minutes. Pour the curd into a small jar or bowl. Cover and refrigerate the lime curd. The key lime curd will keep in the fridge for two weeks. This recipe makes more than you need for this pie, but the sauce is so yummy that it would be great to swirl a little extra on the dessert plates.

*Note: The whipping of the eggs and slowly adding the lime juice to the mixture is key because it tempers the egg mixture. This method is an easy way to keep your sauce from breaking or curdling.

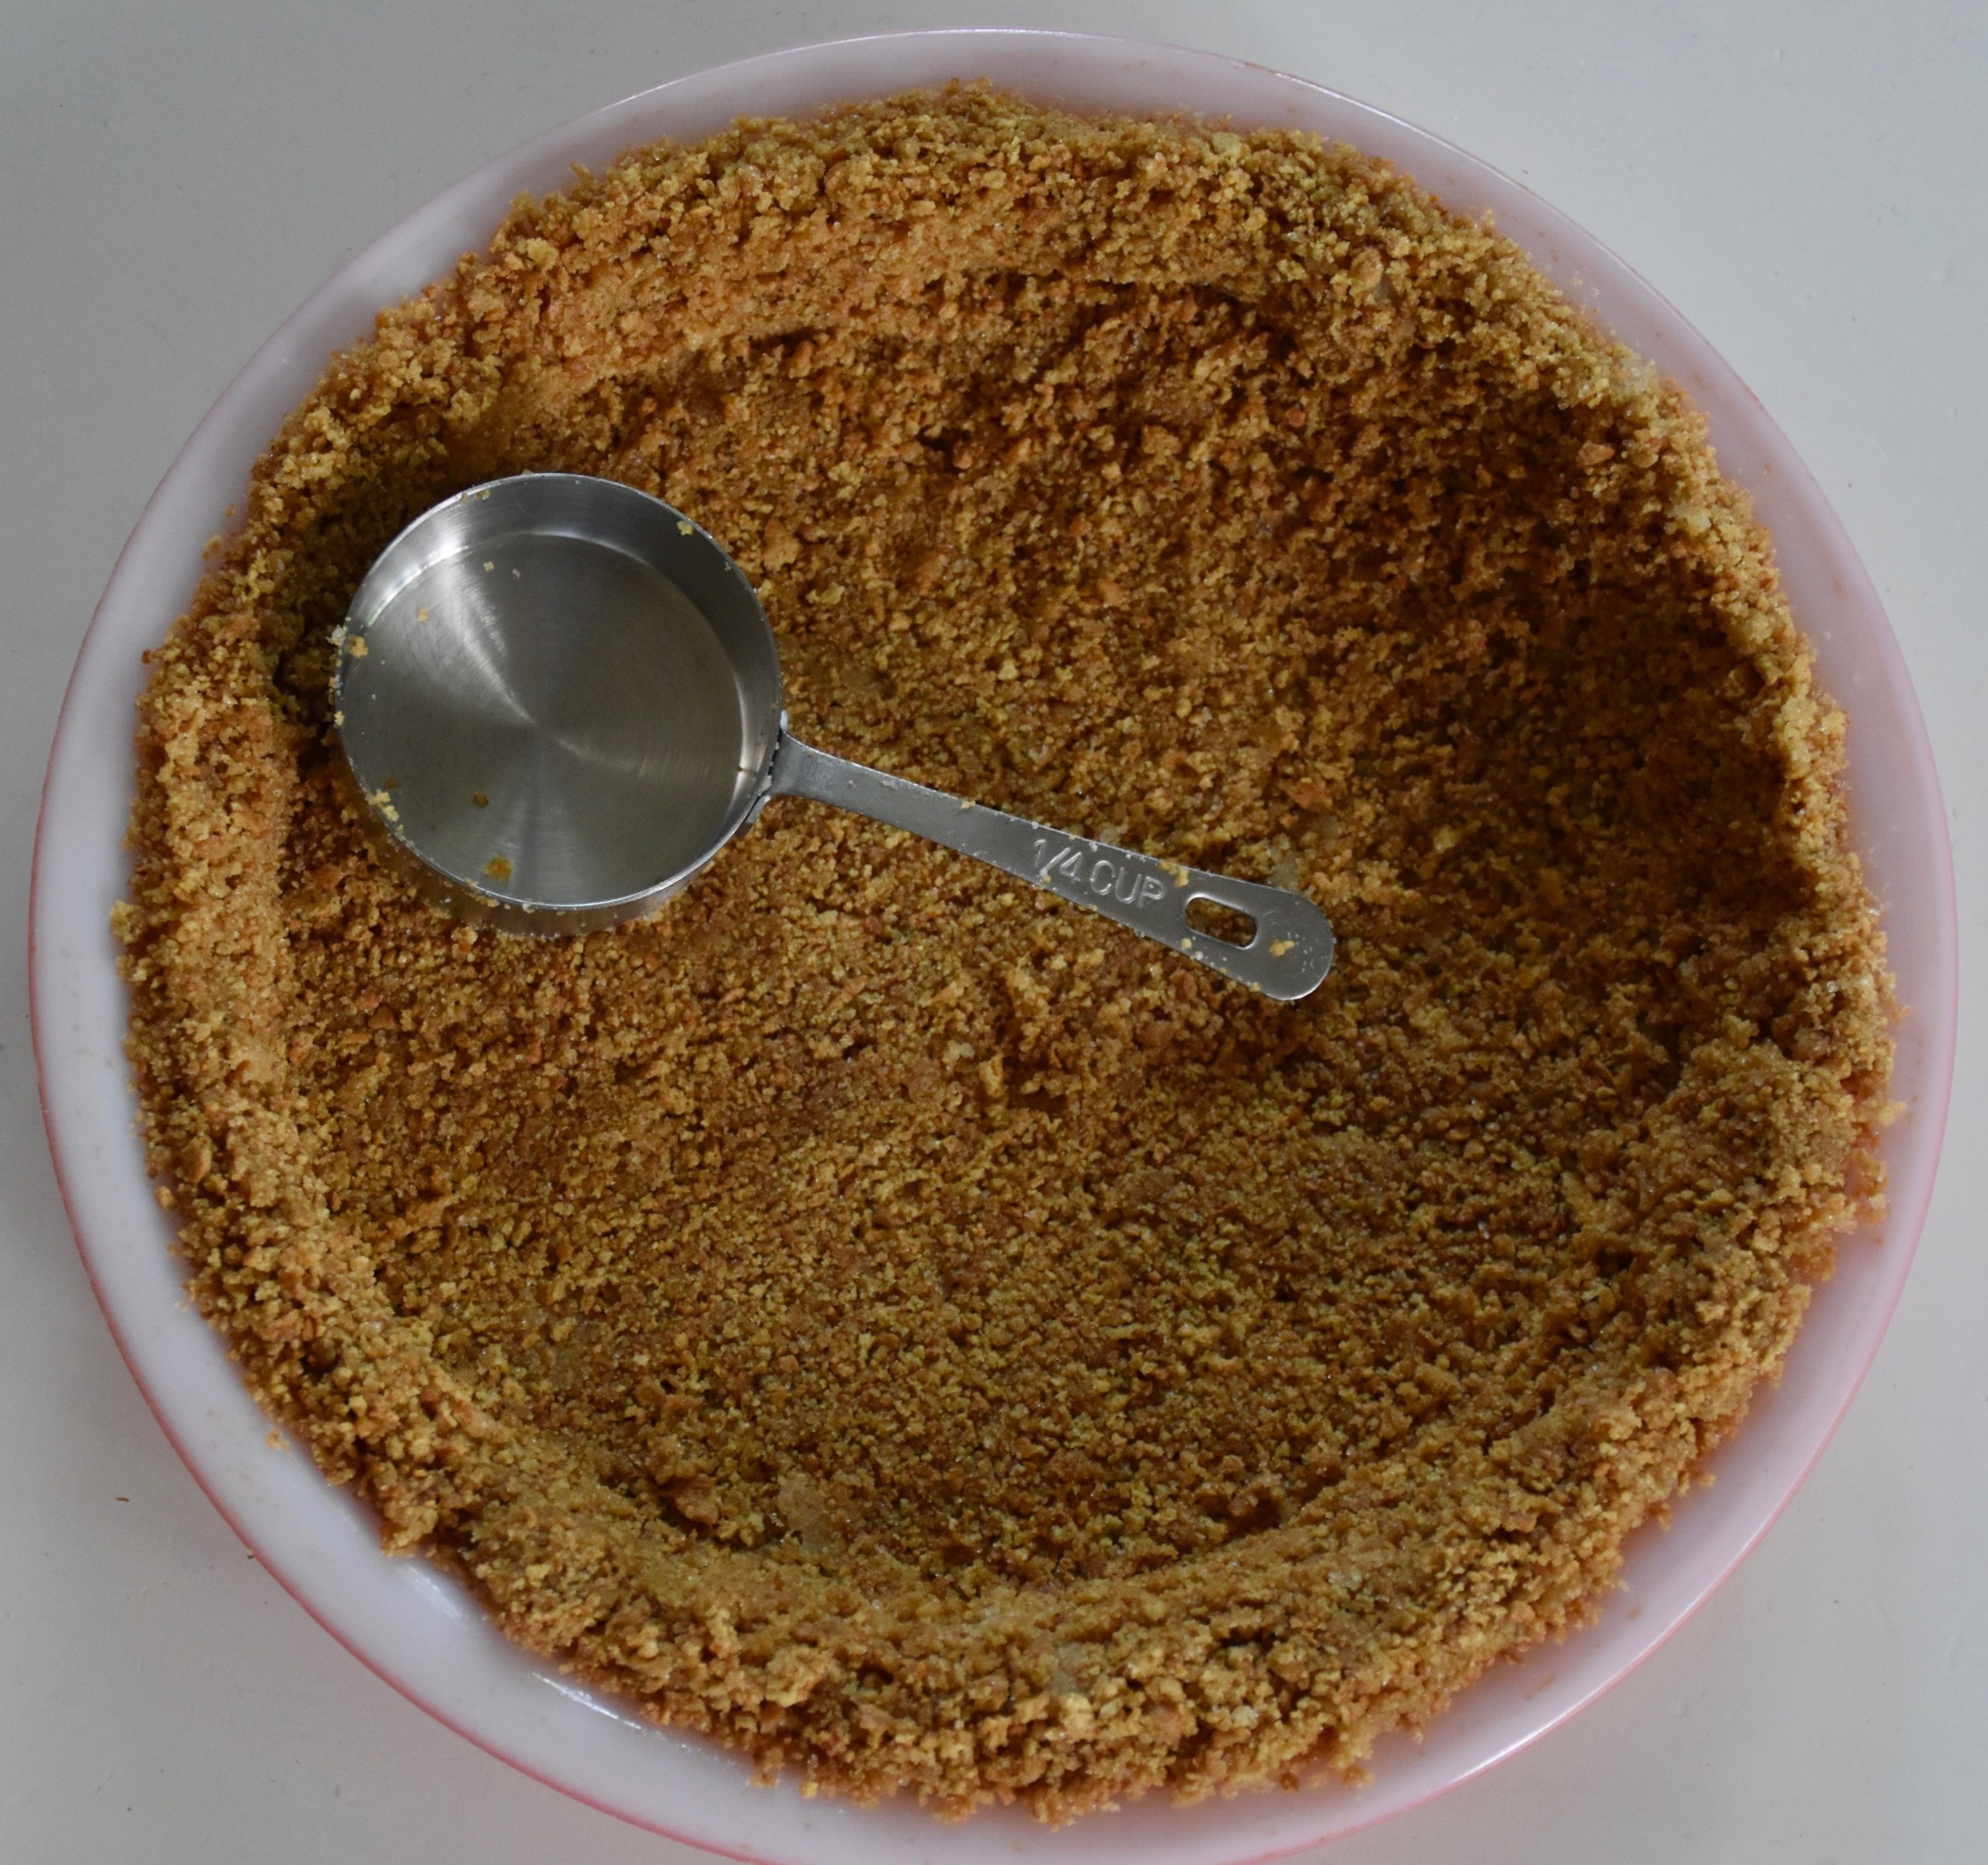
For the crust, preheat your oven to 350 degrees. Then in a medium sized bowl mix together your graham cracker crumbs, sugar and melted butter. Evenly press the crumb mixture into a pie plate that is sprayed with butter flavored cooking spray. Use a small cup to help press the crumbs along the sides. Bake for 10 minutes and let it cool before filling it with your key lime ice cream.

For the pie filling, in a large bowl mix together your softened ice cream and lime curd. Then pour it into the prepared graham cracker crust and freeze. Don’t worry about any tiny air bubbles they can be smoothed out after your pie has set and frozen in the freezer.  Use a butter knife or separated spatula that has been warmed by dipping it into some hot water and then smooth away any tiny imperfections on the top.

For the decorative topping, beat the whipping cream with the powdered sugar and vanilla using a mixer on high speed. Beat until you get firm peaks (about 2 minutes). Then spoon or decoratively pipe it onto your frozen pie and decorate with fresh lime twists or wedges. This pie needs to be kept in the freezer until it is time to serve it.

Key Lime Pie

This key lime ice cream pie is so good that the day after I made it my husband even had a slice for breakfast! It’s all kinds of wonderful. It’s the perfect summer dessert to share with the dads in your family.

Grilled Tuscan Tuna with Cannellini Bean Pasta Salad

Tuscan Tuna Steak

Growing up on the Gulf Coast meant I ate lots of fish. I love it and my family loves fish too. It’s on the menu at our house at least two to three times a week. I like a salmon, sole, snapper and swordfish. My daughters who can be picky eaters happen to like fish, too. Especially grilled tuna which has a nice mild flavor.

The Mayo Clinic suggests that one or two servings of fish each week, can significantly reduce your risk of heart disease. So the health benefits are good too. Although fish can sometimes be a little more expensive I think it’s worth it.

A sign that says it all!  An amazing fish store at Reading Terminal Market in Philadelphia.

Fish also tends to be quick cooking so it’s a great way to get dinner on the table. My grilled Tuscan tuna happens to be one of my husbands favorite meals. Anytime I can get outside and grill it makes cooking dinner fun. The pasta salad uses fresh tomatoes and cucumbers which are wonderful this time of year.

Grilled Tuscan Tuna with Cannellini Bean Pasta Salad – Serves 4

  • 3 to 4 Tuna Steaks cut 1 ½ to 2 inches thick (sometimes if the steaks are large then one steak might be enough for 2 people)
  • 1 (15 oz) can cannellini beans, rinsed and drained
  • 1 medium sized cucumber, quartered lengthwise and cut into bit sized pieces
  • 1 cup heirloom or on the vine tomatoes diced into small pieces
  • ½ pound fusilli or any short curly pasta
  • 2 cups fresh baby spinach leaves
  • 2 tablespoons of capers
  • 4 small rosemary springs for garnish (optional)

Salad Dressing and Marinade

  • 2 garlic cloves
  • 1 teaspoon kosher salt
  • 1 tablespoon fresh rosemary leaves
  • ½ teaspoon oregano
  • Zest from one lemon
  • ¼ cup fresh lemon juice
  • ½ cup extra-virgin olive oil

Prepare your grill and marinade

Preheat the grill for direct high heat grilling.  Alternatively you could use an indoor grill pan as well.

Rinse the tuna steaks with cold water and then pat them dry with paper towels. Place the steaks in a large gallon sized zip top bag.

Next, make your salad dressing and marinade. Press the garlic cloves or alternatively mash them with the salt to make a paste. Place the garlic in a bowl or glass measuring cup. Add in the rosemary, oregano, lemon zest and juice. Whisk to combine. Then add your olive oil in a slow stream while whisking. Keep whisking until the dressing emulsifies and comes together.

Pour half of the dressing over the tuna in the bag and place them in the fridge to marinate for 15 to 20 minutes. Reserve the rest of the dressing for the pasta salad.

Make the warm pasta salad

While the tuna is marinating, cook the pasta in a large pot of boiling salted water for about 10 minutes. Get the tomatoes and cucumber chopped. Then drain your pasta.

In a large bowl mix together your pasta, cannellini beans, cucumber, tomato and the remaining half of the salad dressing.

Grilling the Tuna

Now grill the tuna steaks. The olive oil in the marinade will keep your tuna from sticking to the grill. Grill your tuna steaks until cooked to taste, 2 to 3 minutes a side for rare and 5 to 6 minutes per side for medium. Want to look like a grilling expert? Then rotate the the steaks 45 degrees after the first 2 minutes of grilling to create crosshatch of grill marks.

I wish I could let you smell the lemon and rosemary as these tuna steaks cook. They are so good!

Take the tuna off the grill and let it rest on a plate or platter for 2 to 3 minutes. Finally, add in your baby spinach and capers to the pasta salad and mix.

My favorite way to create fast summer meals is to use fresh, quick cooking ingredients. This grilled Tuscan tuna with cannellini bean pasta salad is simple, flavorful and delicious. So fire up the grill and enjoy one of our favorites.

Strawberries and Cream Cake

Naked Cake

Good cooking is all about love. Food has a unique ability to bring people together. It’s an important part of our lives that is often enriched by the experiences we have shared with others. What I love about the cooking community is its generosity. I believe that good cooks are always learning from others.

Food and recipes are better when they are shared. Cooking at its best is a great act of generosity and soulfulness. This week I have been watching the new episodes of Somebody Feed Phil on Netflix. Phil Rosenthal the writer and creator of the sitcom Everybody Loves Raymond, created this new show where he travels to cities across the world to taste and share what makes these places so wonderful. I particularly wanted to see this new season because he had an episode on Chicago.

Chicago has amazing food and chefs. But what inspired me most was Rosenthal’s connection to the people and the stories behind this city’s unique melting pot of cuisines. It was an especially good reminder of the power of food and its ability to bring us together.

I have been amazed at how many new readers have found my blog over that past three months. People from all over the United States and the world which speaks to the power of food and its ability to connect and comfort us in hard times.

Nothing lifts my spirits like making and sharing something sweet. So this week I am sharing my recipe for a summer inspired strawberries and cream cake. A delicious cake that brings together some of my baking favorites .

This cake has light layers of lemon cake filled with a sweet cream cheese icing and fresh strawberries. It’s a simple summer cake that’s fun to bake and share.

Strawberries and Cream Cake- makes one 10-inch cake

  • 1 1/2 cups sugar
  • 3 eggs
  • 2 teaspoon lemon zest
  • 1 1/2 teaspoon vanilla extract
  • 1 3/4 cups cake flour (if you can’t find it in the stores at the moment then all purpose flour will work)
  • 1/4 cup potato starch
  • 1/8 teaspoon kosher salt
  • 1/2 cup canola or vegetable oil
  • 2 teaspoons baking powder
  • 1/4 cup milk
  • 1/4 sour cream
  • 1 pint of strawberries
  • 1 bunch of fresh mint or strawberry blossoms (optional)

Cream Cheese Icing

  • 1 Stick of Softened Butter (I usually let it sit out of the fridge for at least an hour)
  • 1 (8oz) Softened Brick of Cream Cheese (I let it sit out with the butter)
  • 1 Tsp Vanilla
  • 5 Cups of Powdered Sugar
  • 2 Tablespoons of Milk

Preheat your oven to 350 degrees

In a large bowl or the bowl to your standing mixer add your sugar, eggs, lemon zest and vanilla. Mix about a minute on medium speed.

Add in the potato starch, salt, baking powder and half of your flour with your milk and oil. Mix on low speed until just blended then add in the last part of your flour and mix until the flour is incorporated.

Line the bottom of your your 10 inch round cake pans with parchment paper and then spray your pans with baker’s joy or alternatively butter and flour the pans

Pour your cake batter evenly between the two pans.

These are thin cakes so bake them for 20 to 25 minutes until the tops are golden and the cake is just cooked through. Let them cool completely before you frost them.

Cream cheese icing is light fluffy and irresistibly good!

Now make the frosting. In the bowl of a mixer cream the cream cheese and butter. Add the powdered sugar vanilla and milk. Mix on high-speed until the icing is smooth and fluffy.

To assemble your cake place a small spoonful of icing on the base of the plate and spread it slightly. This will hold the bottom layer of the cake and keep it from sliding.

Then place the first cake layer flat or bottom side up and then pipe or spread half of the cream cheese frosting over the top. I like to use a large star shaped tip to pipe small dots of frosting. This gives the center layer a pretty finish.

Add a thin layer of cut strawberries on top.  If you are using a piping bag then pipe and extra swirl or dot of frosting between the strawberries on the outside edge.

Place the second cake layer on top. Then pipe swirl of icing to cover the top or spread enough icing on top to fully cover the top layer. Use a separated spatula or butter knife evenly cover the top of the cake.

My trick for an extra smooth top frosting layer is to use a Viva paper towel (this brand is particularly smooth so it needs to be a Viva). Place the frosted cake in the fridge for 5 to 10 minutes. Then take it out of the fridge and lay a Viva paper towel on top and lightly smooth the top of the cake by lightly pressing your hand against the paper towel. Reposition the paper towel if needed to smooth away any knife or spatula marks.

Finally top the outside edge of the top of the cake with some extra swirls of icing with a mint spring and some whole strawberries to add pretty finish.

The cake is light and tender. The slight tanginess of the cream cheese icing pairs well with the sweet strawberries. It’s a great way to celebrate the flavors of Chicago’s most glorious summer season.

Tortilla Chip Fried Green Tomato BLT

Fried Green Tomato BLT

Fresh tomatoes are one of summer’s great gifts. One of my favorite ways to eat them is in a sandwich. This past weekend I set out to create the ultimate BLT sandwich. This fried green tomato BLT is crusted in crispy corn tortilla chips and served with a tangy sriracha lime mayonnaise. It’s absolutely scrumptious and substantial enough to make a wonderful summer supper.

These fried green tomatoes cook in just minutes. So, it’s a good meal to serve on a night when you want a delicious dinner, but you don’t want to be in the kitchen for too long. The flavors and textures on this sandwich make this anything but your ordinary BLT.

Tortilla Chip Fried Green Tomato BLT Serves 4

  • 2 medium sized green tomatoes (If you are in the Chicago area where green tomatoes can sometimes be a little trickier to find then try Pete’s Fresh Market)
  • 1/2 cup flour
  • 1/2 cup corn tortilla chips finely crushed (about 2 cups whole)
  • 2/3 cup fine yellow cornmeal
  • 2 eggs
  • 2 tablespoons of milk
  • canola or vegetable oil
  • 8 slices of good quality French or Italian bread, toasted
  • 1 small head of butter lettuce
  • 8 slices of bacon, cooked

Sriracha Lime Mayonaise

  • 1/3 cup mayonnaise
  • 1/4 teaspoon of sriracha
  • 1/4 teaspoon honey
  • zest of 1/2 of a lime
  • 1 teaspoon of fresh lime juice

First slice your tomatoes into about 1/3 inch slices. I got about 5 slices from each medium sized tomato.

Next crush your tortilla chips in a food processor or alternatively you could crush them in a large zip top baggie.

Then prepare your three breading bowls for the tomatoes. In one bowl add 1/2 cup of flour. In the second whisk together your eggs and milk. Then in the third bowl combine your cornmeal and crushed tortilla chips.

My breading bowls all ready to make my tomatoes.

Dredge the sliced tomatoes in the flour making sure that they are evenly coated. Then dip them in the egg mixture. Finally make sure they are well coated in the cornmeal-chip mixture.

Here you can see the different textures of the corn meal and the tortilla chips. This gives the tomatoes an extra crispy crust.

Over place a sauté pan or a cast iron skillet over medium to medium high heat fill it with about 1/4 inch of canola or vegetable oil so it fully covers the pan. Allow the oil to heat until it just begins to sizzle. You will know it is ready when place a wooden spoon or spatula handle in and it begins to form bubbles around it.

Now fry your tomatoes in batches cooking them for 2 minutes a side until they turn a golden brown color.

There is nothing like the sound of a good tomato sizzling in the skillet.

Then let your cooked tomatoes drain on paper towel while you finish the rest of your tomatoes.

Next you want to mix together the sriracha lime mayonnaise. In a small bowl mix together the mayonnaise, sriracha, honey, lime zest and lime juice.

Now assemble the sandwiches, by spreading the sriracha lime mayonnaise to taste on each side of the bread. Place several lettuce leaves on the bottom piece of bread then top it with your fried tomatoes, bacon and the remaining piece of bread. The sandwiches are wonderful when served warm, but they are also surprisingly good as leftovers the next day too. I like to serve my sandwiches with a side of fresh fruit.

The the crispy texture of the tomatoes with a touch of saltiness form the bacon and the crunch of the lettuce make this one outrageously good bite. So if you are looking for something new for dinner then try my tortilla chip fried green tomato BLT.

The French 40 Cocktail

I had a big birthday this week. Although I may have been on what felt like “plan G” for birthday party plans. I wasn’t about to let the COVID 19 quarantine, days of rain and flash flood warnings stand in the way of celebrating. My husband had to pick up an extra ICU shift at the hospital so I had my girls up early and working on their home schooling assignments hoping that we could finish a bit earlier. I got the cake baked and I was working on icing it. I was feeling like things were generally going well for the plan G birthday dinner until the dog disappeared from the backyard.

All the rain had washed a hole under our fence. Suddenly our dog decided to take out on an adventure. I dropped everything, grabbed his leash, a bag of treats and a jar of peanut butter. I spotted him in on the far edge of the yard behind us. However when my daughters and I got close he dashed. When I called his name he gave me a look, as if there was no treat that could possibly be worth his new found freedom. Then he made a mad dash across the street and the chase was on.

It was like the scene from Ferris Buller’s Day Off where he is running through peoples’ backyards and over fences trying to make it home before his parents discovered that he was missing. I was racing over decks, back porches, rocks, and water features. Screaming “peanut butter” (his favorite treat) at the top of my lungs. I was whizzing by peoples back doors and windows. I lost the treat box along the way. Meanwhile I was trying to look back and make sure that my daughters who were trying to follow along were safe. “Look before you cross the street or better yet just stay there.”

Finally I thought I had caught a break when I got him to run towards my oldest daughter. She put her hand on him and then screamed “EEEWWW!!! He’s dirty!”  Then I watched in horror as her hand let go. “This is not the time to worry about being dirty” I shouted.

After another 10 minutes he finally got tired enough to think about stopping for some peanut butter and I got a good grip on his collar. My little white fur ball was wet and covered in mud, but he was safe. I got everyone cleaned off and the dog secured.

Then I looked over at the cake on the counter. I had left it out and now the strawberries and cream cake was melted strawberry goo. I for a second thought about just throwing the cake in the trash. But then I thought about that episode from The Great British Bake Off where the baker throws his melted ice cream cake in the bin and decided that the trash just wasn’t the answer. I scraped off the icing  and found just enough fondant to cover the sides of the cake.  It may not be my prettiest cake ever, but it was delicious.

Then I set out to make seafood gumbo and just about then my husband made it home. He helped me make these champagne cocktails called French 75s however in honor of my birthday I am renaming them French 40s. A great cocktail for any party especially the ones the kind that feel like a frazzled plan G.

My husband put on some Zydeco music, to go along with our New Orleans styled meal and he began dancing with my girls. They were twirling across the dining room and beaming with joy. We all took turns dancing and we lingered at the table together. Savoring our gumbo and garlic bread. Sometimes the best moments are the ones you don’t plan. In the end the evening was so wonderful that my youngest daughter now wants a dance party for her birthday too.

So this week I thought I would share the recipe for a French 40 a recipe I adapted from the Queen of New Orleans Miss Julia Reed.

French 40 Cocktail 

  • 2 tablespoons plus 1 teaspoon Cognac
  • 1 teaspoon freshly squeezed lemon juice
  • 2 teaspoons lemon simple syrup (see recipe below)
  • 1/4 cup plus 2 teaspoons champagne, chilled
  • lemon peel twists, for garnishing the glasses

Combine the cognac, lemon juice and simple syrup in a cocktail shaker filled with ice and shake. Strain into a Champagne glass and top with the champagne. Then garnish with a lemon peel twist.

Lemon Simple Syrup (makes 1 cup enough for several rounds of cocktails)

  • 1 cup water
  • 1 cup granulated sugar
  • 2 inch piece of lemon peel

In a small saucepan over medium high heat bring your water to a simmer and then add your sugar and stir your sugar until it dissolves. Then add in your lemon peel to infuse it with a hint of lemon flavor. Cover and refrigerate the syrup. It will keep for up to two weeks in the fridge and makes a great base for other cocktails too.

Here is the strawberries and cream cake and the last of the tulips that I rescued from all the rain. A little New Orleans styled garden party fun.

This was definitely a memorable birthday. One to toast and remember. So if you are looking for a festive cocktail or moment of fun in all this quarantine craziness then I highly recommend our French 40 cocktails.

Summer Berry Crisp

Summer is coming and I am already seeing so many beautiful strawberries, blackberries and blueberries berries in the stores. This weekend I was talking with family about different berry salad recipes and all that berry talk had me thinking about creating a new berry recipe. My summer berry crisp has a crunchy oat topping with a sweet mixed berry filling. I love it because it’s an easy dessert that comes together quicker than your traditional pie or tart. The mix of berries with just a hint of lemon creates a bright, sweet, and delicious bite.

Summer Berry Crisp- Serves 6

Crumble Topping

  • 3/4 cup flour
  • 1/2 cup light brown sugar
  • 1 teaspoon cinnamon
  • 1/4 teaspoon salt
  • 8 tablespoons (1 stick) cold unsalted butter, cut in pieces
  • 3/4 cup old fashioned rolled oats

Berry Filling

  • 1 cup blackberries
  • 1 cup raspberries
  • 1 cup strawberries, halved or quartered if your berries are large
  • 2 cups blueberries
  • Zest of 1 lemon
  • 1 tablespoon lemon juice
  • 1 tablespoon water
  • 1/4 cup flour
  • 1/4 cup sugar, but if your berries are not super sweet then up the sugar to 1/3 cup

Preheat your oven to 350 degrees

In a food processor pulse together your flour, brown sugar, cinnamon and salt. Next add in the butter pieces and pulse until you get pea sized crumbs of butter and flour. Alternatively, if you don’t have a food processor you could also use a pastry blender or a fork to work the butter into the flour mixture.

Place your blended flour and butter mixture in a medium bowl and mix in your oats. Now set the crumble mixture aside while you prepare your berry filling.

In a medium sized bowl mix together the zest, lemon juice, water, sugar and flour. Then add in your berries and carefully stir to coat them with the lemon sugar mixture.

Spray an 8×8 inch baking pan with cooking spray. Next, pour your berries in the base of your pan and spread them evenly.

Finally, take your crumble topping and sprinkle it evenly over the berries.

Bake for 40 minutes until golden and bubbly. Serve your summer berry crisp warm with a scoop of vanilla ice cream.

Warm berry crisp a sweet crunchy bite that only gets better with a scoop of ice cream. So if you too have been thinking about berries or looking for a simple dessert, then give this berry crisp a try.

Small Seeds of Beauty

Home schooling hit a speed bump in our house this week. Studying for a Zoom spelling test caused my first grader to declare that she was getting a substitute teacher. It was hard not to chuckle as she told me that, but schooling and even spelling tests go on. However, on the brighter side, home schooling has given me the opportunity to share more of the books I loved as a kid with my daughters.

One of this weeks’ better loved assignments was a book report. My suggestion of  Miss. Rumphius, one of my childhood favorites, went even better than I thought it would. It turns out that my flower loving daughter liked this one too. Barbara Cooney’s award-winning book, Miss Rumphius, is based on the true story of a woman named Hilda Edwards. Edwards lived in Christmas Cove Maine where she is still remembered and celebrated for covering the shores of Maine with beautiful blue, purple and rose-colored lupine flowers.

Miss Rumphius tells the story of how she was inspired to “do something to make the world more beautiful.” Seed by seed her love of lupines still brightens the countryside each summer.


Reading this story again years later, has me thinking about how important it is to cherish the beauty around us. Creativity and a love of beauty can be taught and passed on. I learned about art and the wonder of nature from my mother. There is something important about appreciating the beauty that surrounds us and sharing that with others. In this time of uncertainty, I am inspired by all the beauty around me. Colorful sidewalk chalk art, gorgeous gardens and online concerts. Everyone sharing something to reach out to each other and make the world more beautiful. These are the things that I want to remember about this time.

Like Miss Rumphius, we are drawing, writing, cooking and planting small seeds of beauty together. In hopes that my girls might know the importance of giving something of themselves to others. This Mother’s Day may look a little different, but I am grateful for my mother who’s love always encourages me to make the world around me more beautiful.

Gorgeous Tulip Gardens

Spring is here in Chicago. I am so grateful this year to get outdoors and take in the gorgeous tulip gardens. The sun is shining and I am enjoying the views from my garden and my neighbors too. The botanical gardens and arboretum maybe closed this spring, but as the artist Henri Matisse once said, “there are always flowers for those who want to see them.”

More than ever I have enjoyed the seeing all the spring blooms and tulips gardens. The bright green leaves and shoots suddenly sprouting everywhere. The trees are covered in blossoms and for a moment it takes you to a more optimistic time. Nature has a way of lifting my spirits and reminding me of God’s great beauty.

Delightful Spring Daffodils

This garden is one that had me smiling and lingering as I walked by. The yellow and white daffodils were planted with purple hyacinths and double tulips. The tulips blooms were so full that they almost looked like roses.

These cheerful yellow daffodils looked so beautiful along the fence line of the house.

Tulips Around Town

These pretty pink tulips covered the lawn in this traditional garden. I love this English styled boxwood hedge.

This vibrant mix of pinks, yellows, oranges and reds caught my eye. I love how they spaced these little grouping in a rhythmic swirling pattern.

I also happen to love the happy bright blue green door and the garden lanterns that were scattered in the garden beds.

These lovely lavender and cream tulips looked so elegant in between the boxwood topiaries.

My Garden

I love color, so I a went with bright mix of tulips. This fall I planted a little over three hundred tulip bulbs in anticipation of spring. I got this colorful mix from a bulb wholesaler called Colorblends. It’s a mix of seven different pink, purple, red, and apricots bulbs called  Well Spring Mix. I also added in some white emperor bulbs as well.

I love the fuchsia rhododendron with the bright jewel toned tulips and muscaris.

We have lots of shady trees so spring is a special season in our yard because before the new leaves sprout I can plant a few more colorful flowers.

The long front flower bed extends to the side where I planted another large drift of tulips.

The front is pretty, but my favorite spot is on my back patio where I have my largest tulip bed. I love spending time here. It one of my favorite places in our home.

Here they are when the late afternoon sun comes pouring in. I love the vibrant mix and the different texture of the petals.

This year I extended my planting to another smaller flower bed around the corner.

I decided to plant a mix of white tulips in this smaller spot.

We are spending lots of time on our patio where we have loved watching these little house wrens. They have moved into the colorful bird houses my daughters painted. My girls were thrilled! They sing the most cheerful little tunes as they flit and fly about.

So for now I plan to be outside enjoying the view as much as possible. I have always loved flowers, but tulips are one of my absolute favorites.

Tulips are the most hopeful flowers because they can take the cold dark winter and turn it into something that is breathtakingly beautiful. So in this time of uncertainty I am looking for the beauty around me and I am finding so much joy and peace in the garden.

Reading and Eating: Ginger Soy Salmon

I have never cooked so many dinners and meals in a row! I love cooking but, I have been in the kitchen more than usual. Grocery store ingredients have been hit or miss this past month.  Although I am grateful, grocery shopping  just isn’t quite the same. My carefully planned ingredient lists have needed to give a bit so I have been getting creative to keep cooking  fun and delicious.

I enjoy trying new recipes because I want dinner to be exciting. Something to look forward to and savor. So I love this new cookbook I found called All About Dinner by Molly Stevens. Stevens worked at the New England Culinary Institute and now is a freelance cooking instructor and writer. She was named best cooking instructor by Bon Appetit magazine and her previous two cookbooks All About Roasting and All About Braising each won a James Beard cookbook award.

I enjoyed reading her thoughts about cooking at home. “Cooking is not about perfection,” she writes, “it’s about making the time to care for ourselves and for others.”  So as we all find ourselves at home and in the kitchen more than ever, I think it’s important to have some simple and flavorful meals that make the most of your time in the kitchen.

One of my favorite recipes from the book is her Ginger Soy Roasted Salmon. It’s a one sheet pan dinner. It’s quick to prepare, but the flavors are fantastic. Stevens uses broccoli, but I have a family member who has some strong feelings about that particular vegetable. Therefore my version of this dish uses asparagus which is also delicious.

Ginger Soy Salmon and Asparagus – Serves 4 to 5

  • 2 tablespoons soy sauce
  • 2 tablespoons rice wine vinegar
  • 1 tablespoons, neutral flavor oil like canola oil, grapeseed or sunflower
  • 1 tablespoon honey
  • 2 teaspoon grated peeled ginger
  • 1 to 2 teaspoons Sriracha
  • 1 teaspoon toasted sesame oil
  • salt and freshly ground pepper
  • 1 1/2 pounds center cut salmon into 4 to 5 portions
  • 1 bunch of asparagus
  • 2 tablespoons neutral flavor oil

Preheat your oven to 400 degrees

Next make your marinade. In a small bowl whisk together the soy sauce, vinegar, oil, honey, ginger, Sriracha, sesame oil, a pinch of salt and pepper.

Reserve half of your marinade as a sauce at the end and place the other half in a ziplock bag to use as a marinade for your fish.

Let your fish marinate for 30 minutes and prepare the asparagus. Trim off the ends and cut the asparagus into small bite sized spears. Then place the spears into a medium sized bowl and coat them with 2 tablespoons of oil and a pinch of kosher salt and pepper.

Roast your salmon. Lift your fish from the marinade letting any excess drain away. Then place you salmon fillets skin side down on a rimmed sheet pan lined with parchment paper or foil for easy clean up. Put them in the oven to roast. I like my salmon cooked through so I roasted mine to 135 degrees which was about 22 minutes in my oven. If you like your salmon less firm then you will want to start checking it’s doneness at about 15 minutes. You want salmon to be anywhere between 120 degrees to 140 degrees on an instant read thermometer.

When your salmon has 10 minutes left to roast add your asparagus.  Asparagus cooks quickly so you don’t want to add them at the beginning.

I like to serve this dish with Jasmine Rice which cooks in just 20 minutes. So I start my rice just before I place my salmon in the oven, but you could serve it with any cooked rice or grain that you like.

Then as you serve the salmon drizzle the reserved ginger soy sauce on top.

This recipe can be easily halved if you are serving just two or doubled if you have more. But if you double the recipe I recommend using two sheet pans so everything cooks evenly.

If you too are looking for a few new dinner ideas then I highly recommend Molly Steven’s new book. I made her Swedish Meatballs, which we liked and I am eyeing a few more recipes too, like her Roasted Halibut with Chile Lime Butter. She even has a section of her book dedicated to snacks and substantial dinner sandwiches. Cooking dinner as Steven writes can be the “ultimate expression of love” so in these tough times take care of yourself. We can all get tired from time to time, but I have found that that making something simple is often what I need to just keep cooking.

Groundhog Day

These days I find myself waking up to what sometimes feels like one long day on repeat. As our routines have changed the days have a way of blending together a bit. Occasionally I have to remind myself what day of the week it actually is. I watched the movie Groundhog Day recently which in light of the COVID 19 quarantine has taken on a slightly new meaning to me.

This classic old movie imagines a moment where a cynical local weatherman Phil Connors gets caught in a time loop. Connors, played by Bill Murray, is forced to repeatedly relive the same winter day. Along the way Connor’s soul begins to evolve as his perspective changes. He even picks up a few new hobbies like piano and ice sculpting.

On a Zoom call a friend asked a good question that has had me thinking. “Is there any one thing that is saving you these days?” Personally, I am not sure that there is one consistent thing, instead I have found it to be more of a mindset. This quarantine certainly has its Punxsutawney moments. Sometimes I have to remind myself no matter how cold the winter is, spring will eventually come.

So, what has saved me this week is that Chicago is finally turning a bright spring green. The trees are beginning to bud and the daffodils are freshly in bloom. We had a light snow this week, but I have had a taste of spring. So, this week’s winter shadows won’t keep me from looking forward to warmer and more social days.

Unless homeschooling counts, I haven’t picked up any new hobbies yet. Instead I have been focusing on a few of the things I love and keeping my house from being completely overrun by dishes and art projects. I have also managed to turn my basement office into a mini greenhouse. A few of my favorite online gardener’s supply stores have helped me get a head start on spring. I now have few trays of seedlings that I am looking forward to planting soon. I have also ordered some summer zinnia seeds and dahlia tubers too.

My tulips will hopefully be blooming soon

I loved seeing other gardeners on Instagram growing some seedlings as well. Proof to my husband that I am not the only one longing for a few flowers. I have also enjoyed hearing talented friends host concerts at home and seeing the colorful sidewalk and window art in our neighborhood. So, as these quarantine days stretch on, I am trying to learn how make the most of each one.

Spring in the garden is my very favorite time of year

A Few of Our Favorite Quarantine Things:

  • The drawing videos that my daughters absolutely love
  • Storyline Online featuring some wonderful videos of children’s books
  • My favorite instagram gardener Linda Vader her videos and daily garden photos always make me smile
  • Finally if you are wanting to do a little gardening then I like ordering seeds from Park Seed and if starting from seeds is a little too much then I like ordering plants from Bluestone Perennials or if you are looking for gardening supplies I have had good luck with Gardeners Supply Company

Contact Us