Shortbread Sweeties

Sometimes I daydream about ingredients and these cookies were something I had been dreaming about for a little while. I wanted to use a pretty poured fondant icing, like you use on petit fours, but I wanted it to be simpler. Something that would be much easier to make and share, so then cookies came to mind. However, not any cookie would do. I needed something that would pair well with this sweet icing.  So then shortbread cookies came to mind because they are light, buttery and flakey, but not too sweet. So I set out researching shortbread recipes and then began to pen one of my own.

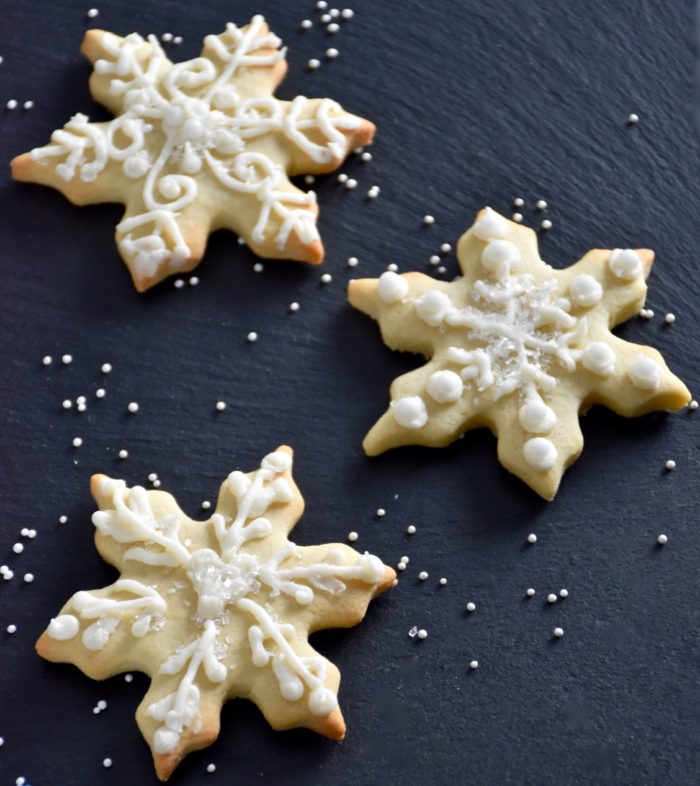
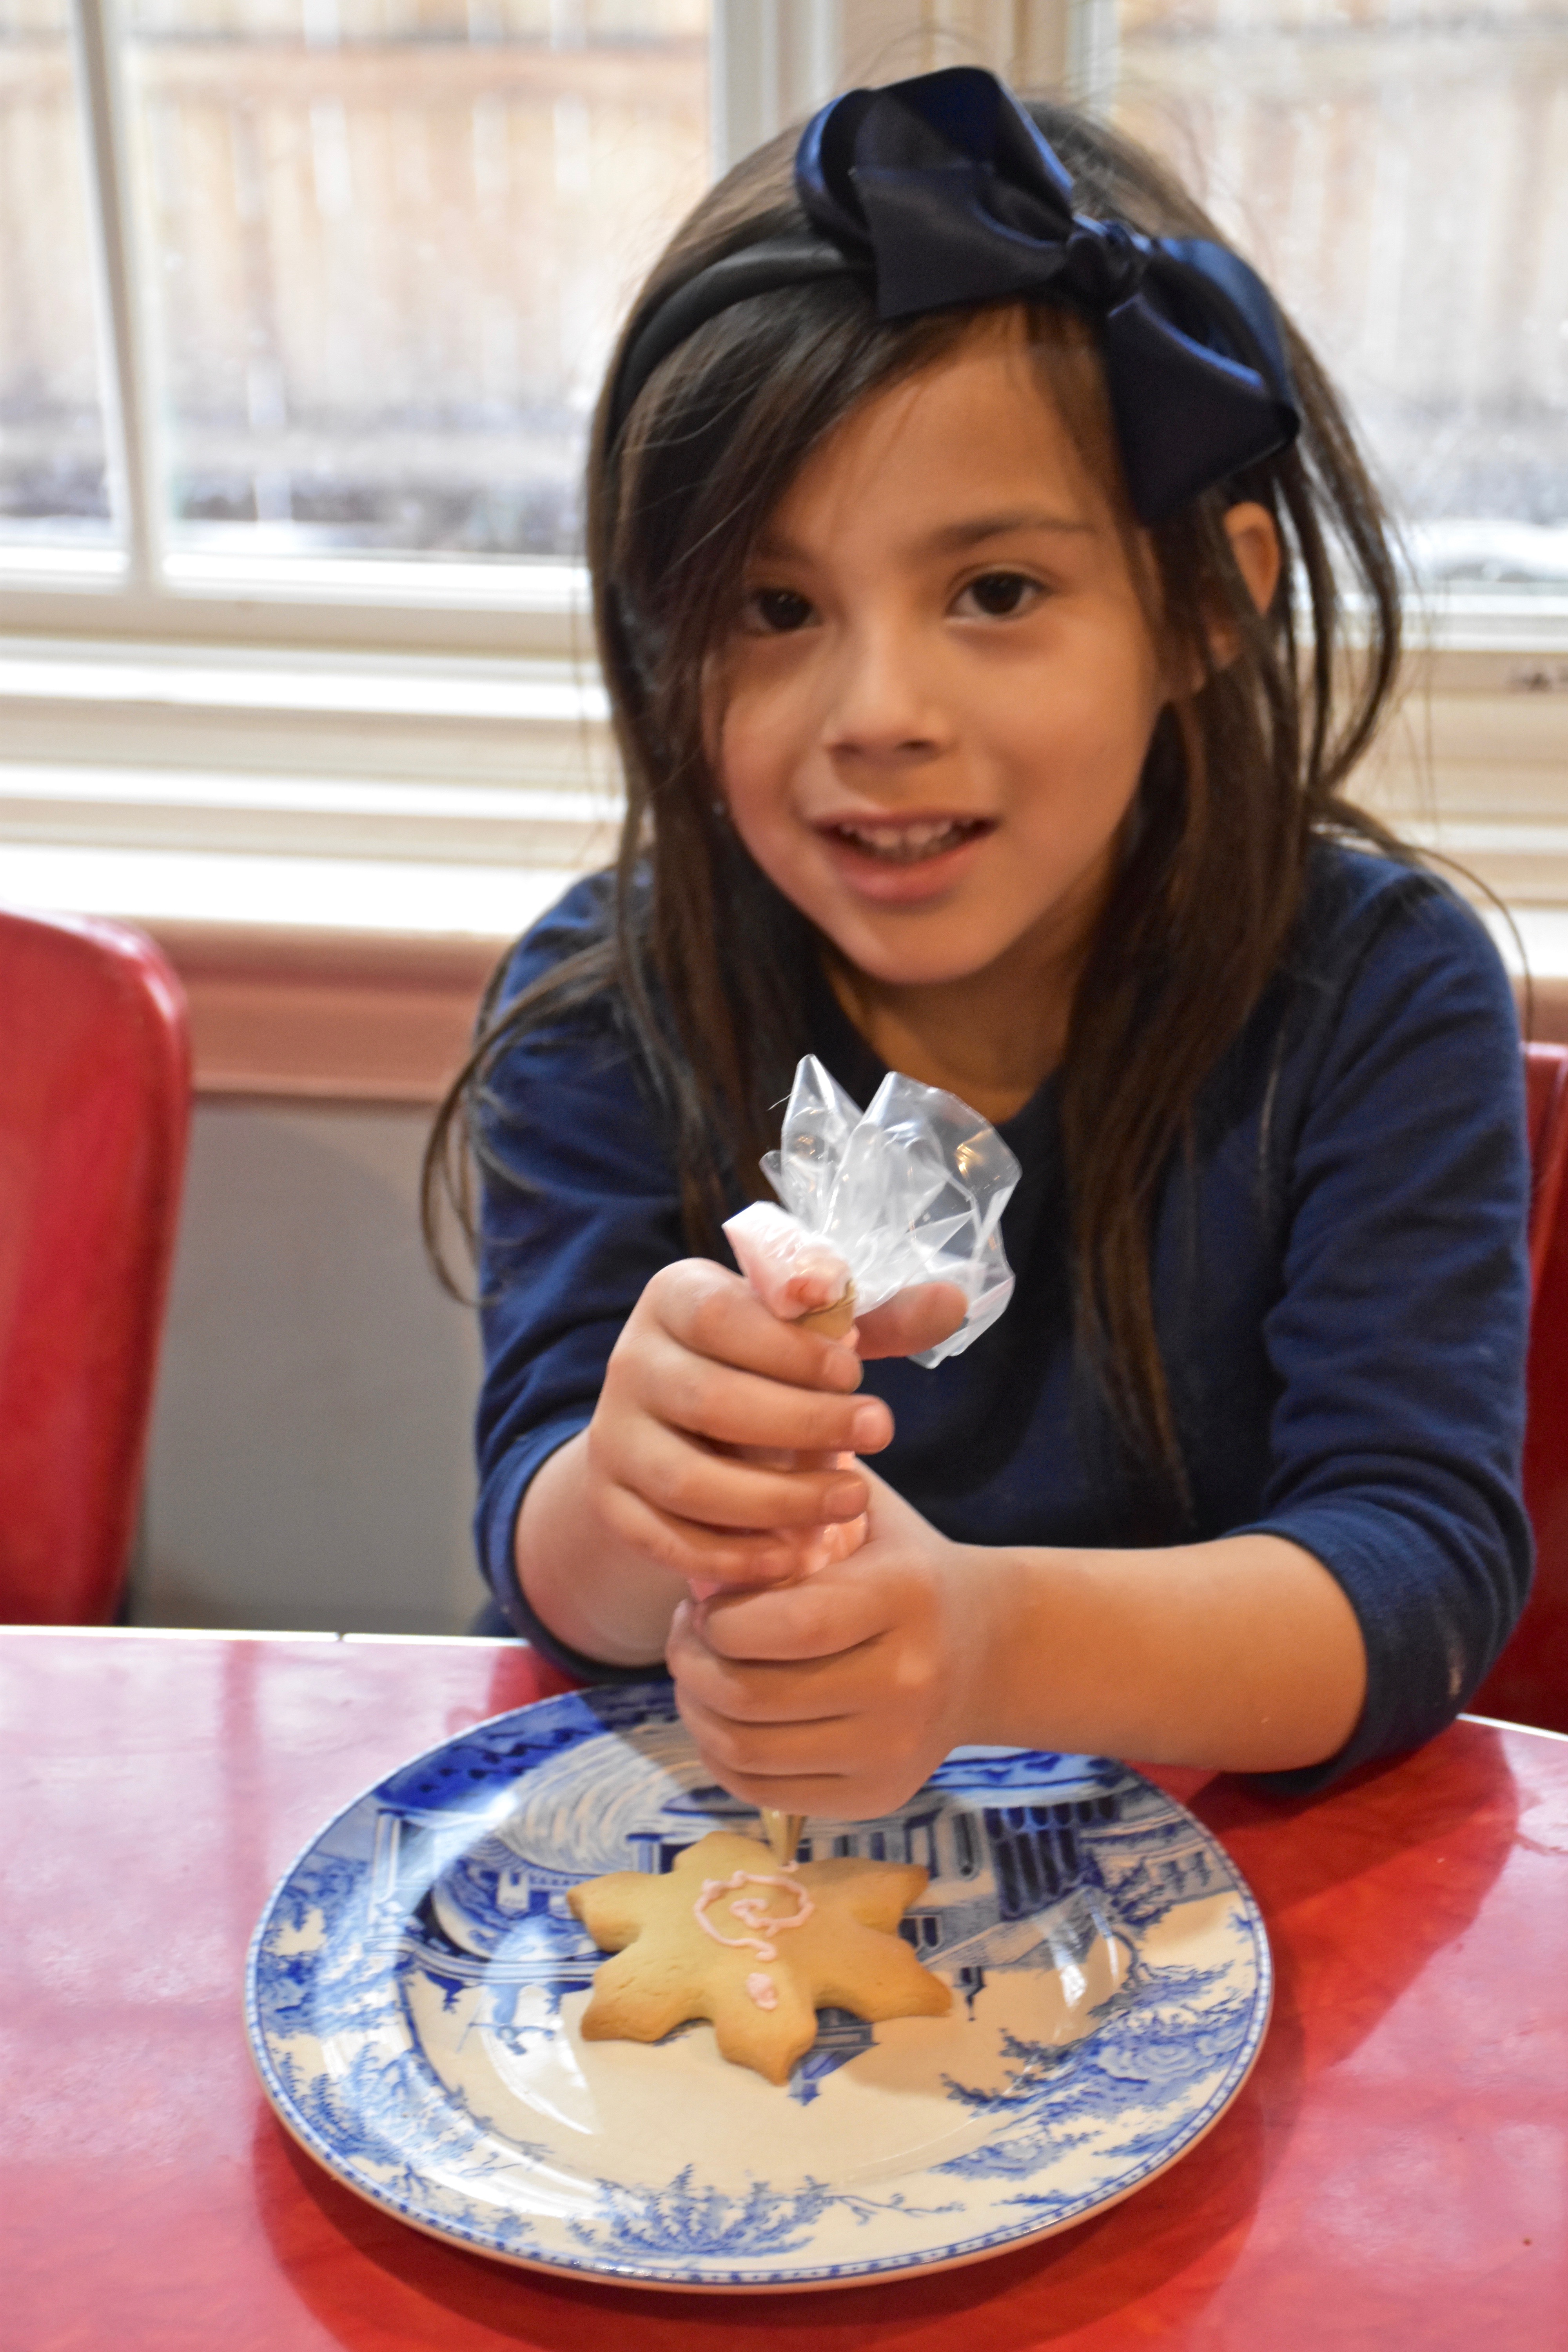
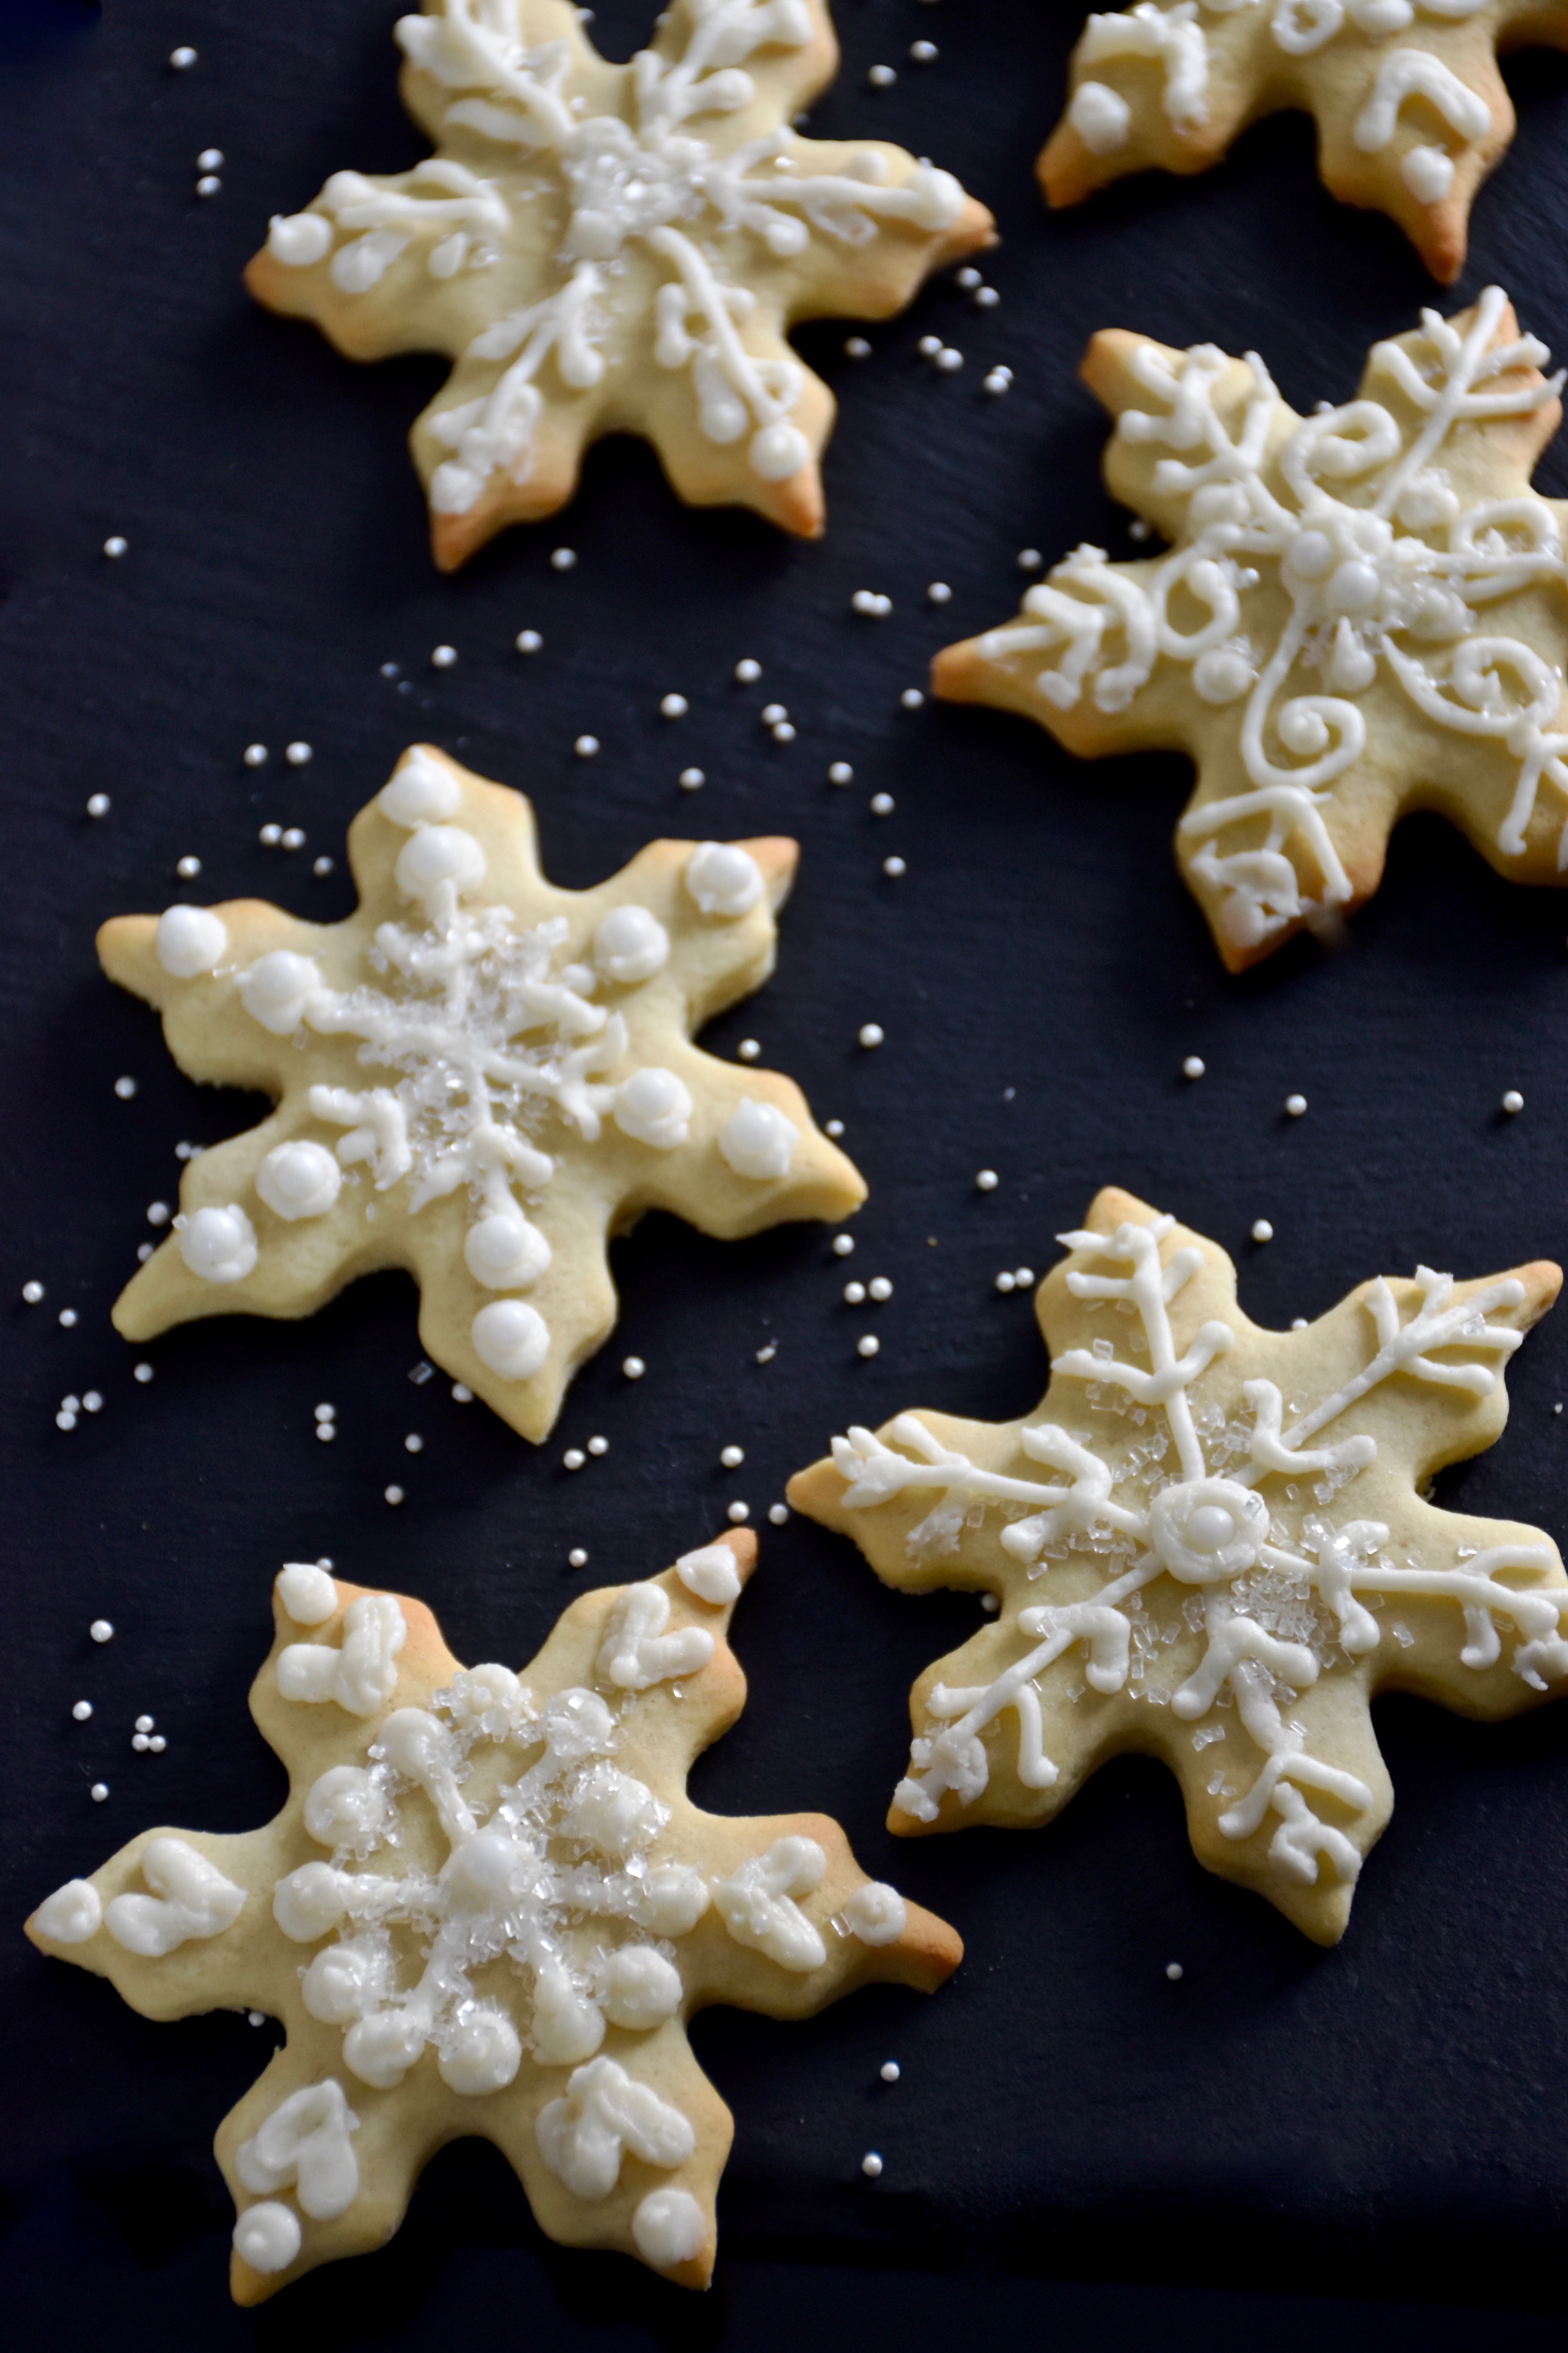
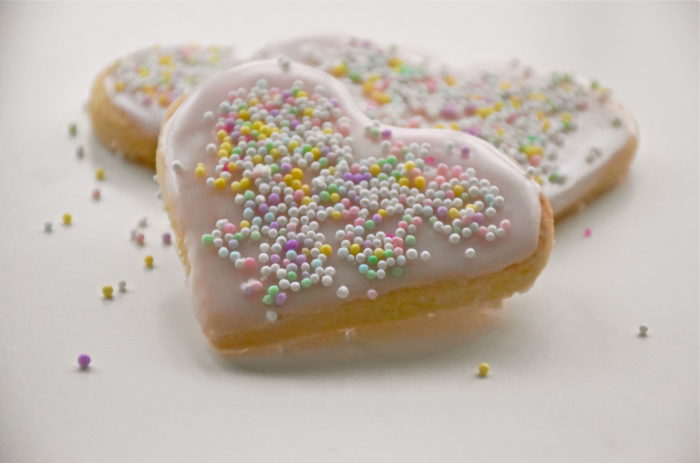
Then the moment of truth; it was time to get in the kitchen and bake. Sometimes it can take a few rounds before I get everything just right, but these cookies were as amazing as I had imagined. The shortbread was divinely crisp and the pretty pink frosting set beautifully. My girls were in the kitchen with me as we were baking these and they squealed with delight over the pink frosting. They instantly loved them too. Sprinkles were flying everywhere and we were having fun together. They are quick to decorate and you don’t need a pastry bag or any special frosting skills. This poured fondant icing was easy to spread and it creates a beautiful shiny finish that will make you feel like a frosting genius. So as Valentine’s Day nears I thought I would take a quick break from weeknight meals to share this now favorite cookie recipe.

Shortbread Sweeties– Makes approximately 36 three inch heart cookies

  • 2 1/4 cups flour
  • 1/2 cup sugar
  • 1/4 teaspoon kosher salt
  • 1 cup (2 sticks) butter, at room temperature for at least 1 hour
  • 1 teaspoons vanilla extract

Poured Fondant Icing

  • 3 1/2 cups powdered sugar
  • 1/4 cup plus 1 tablespoon water
  • 1 teaspoon vanilla extract
  • 2 tablespoons corn syrup
  • 2 drops gel food coloring
  • Sprinkles or colored sanding sugar

First preheat your oven to 375 degrees.

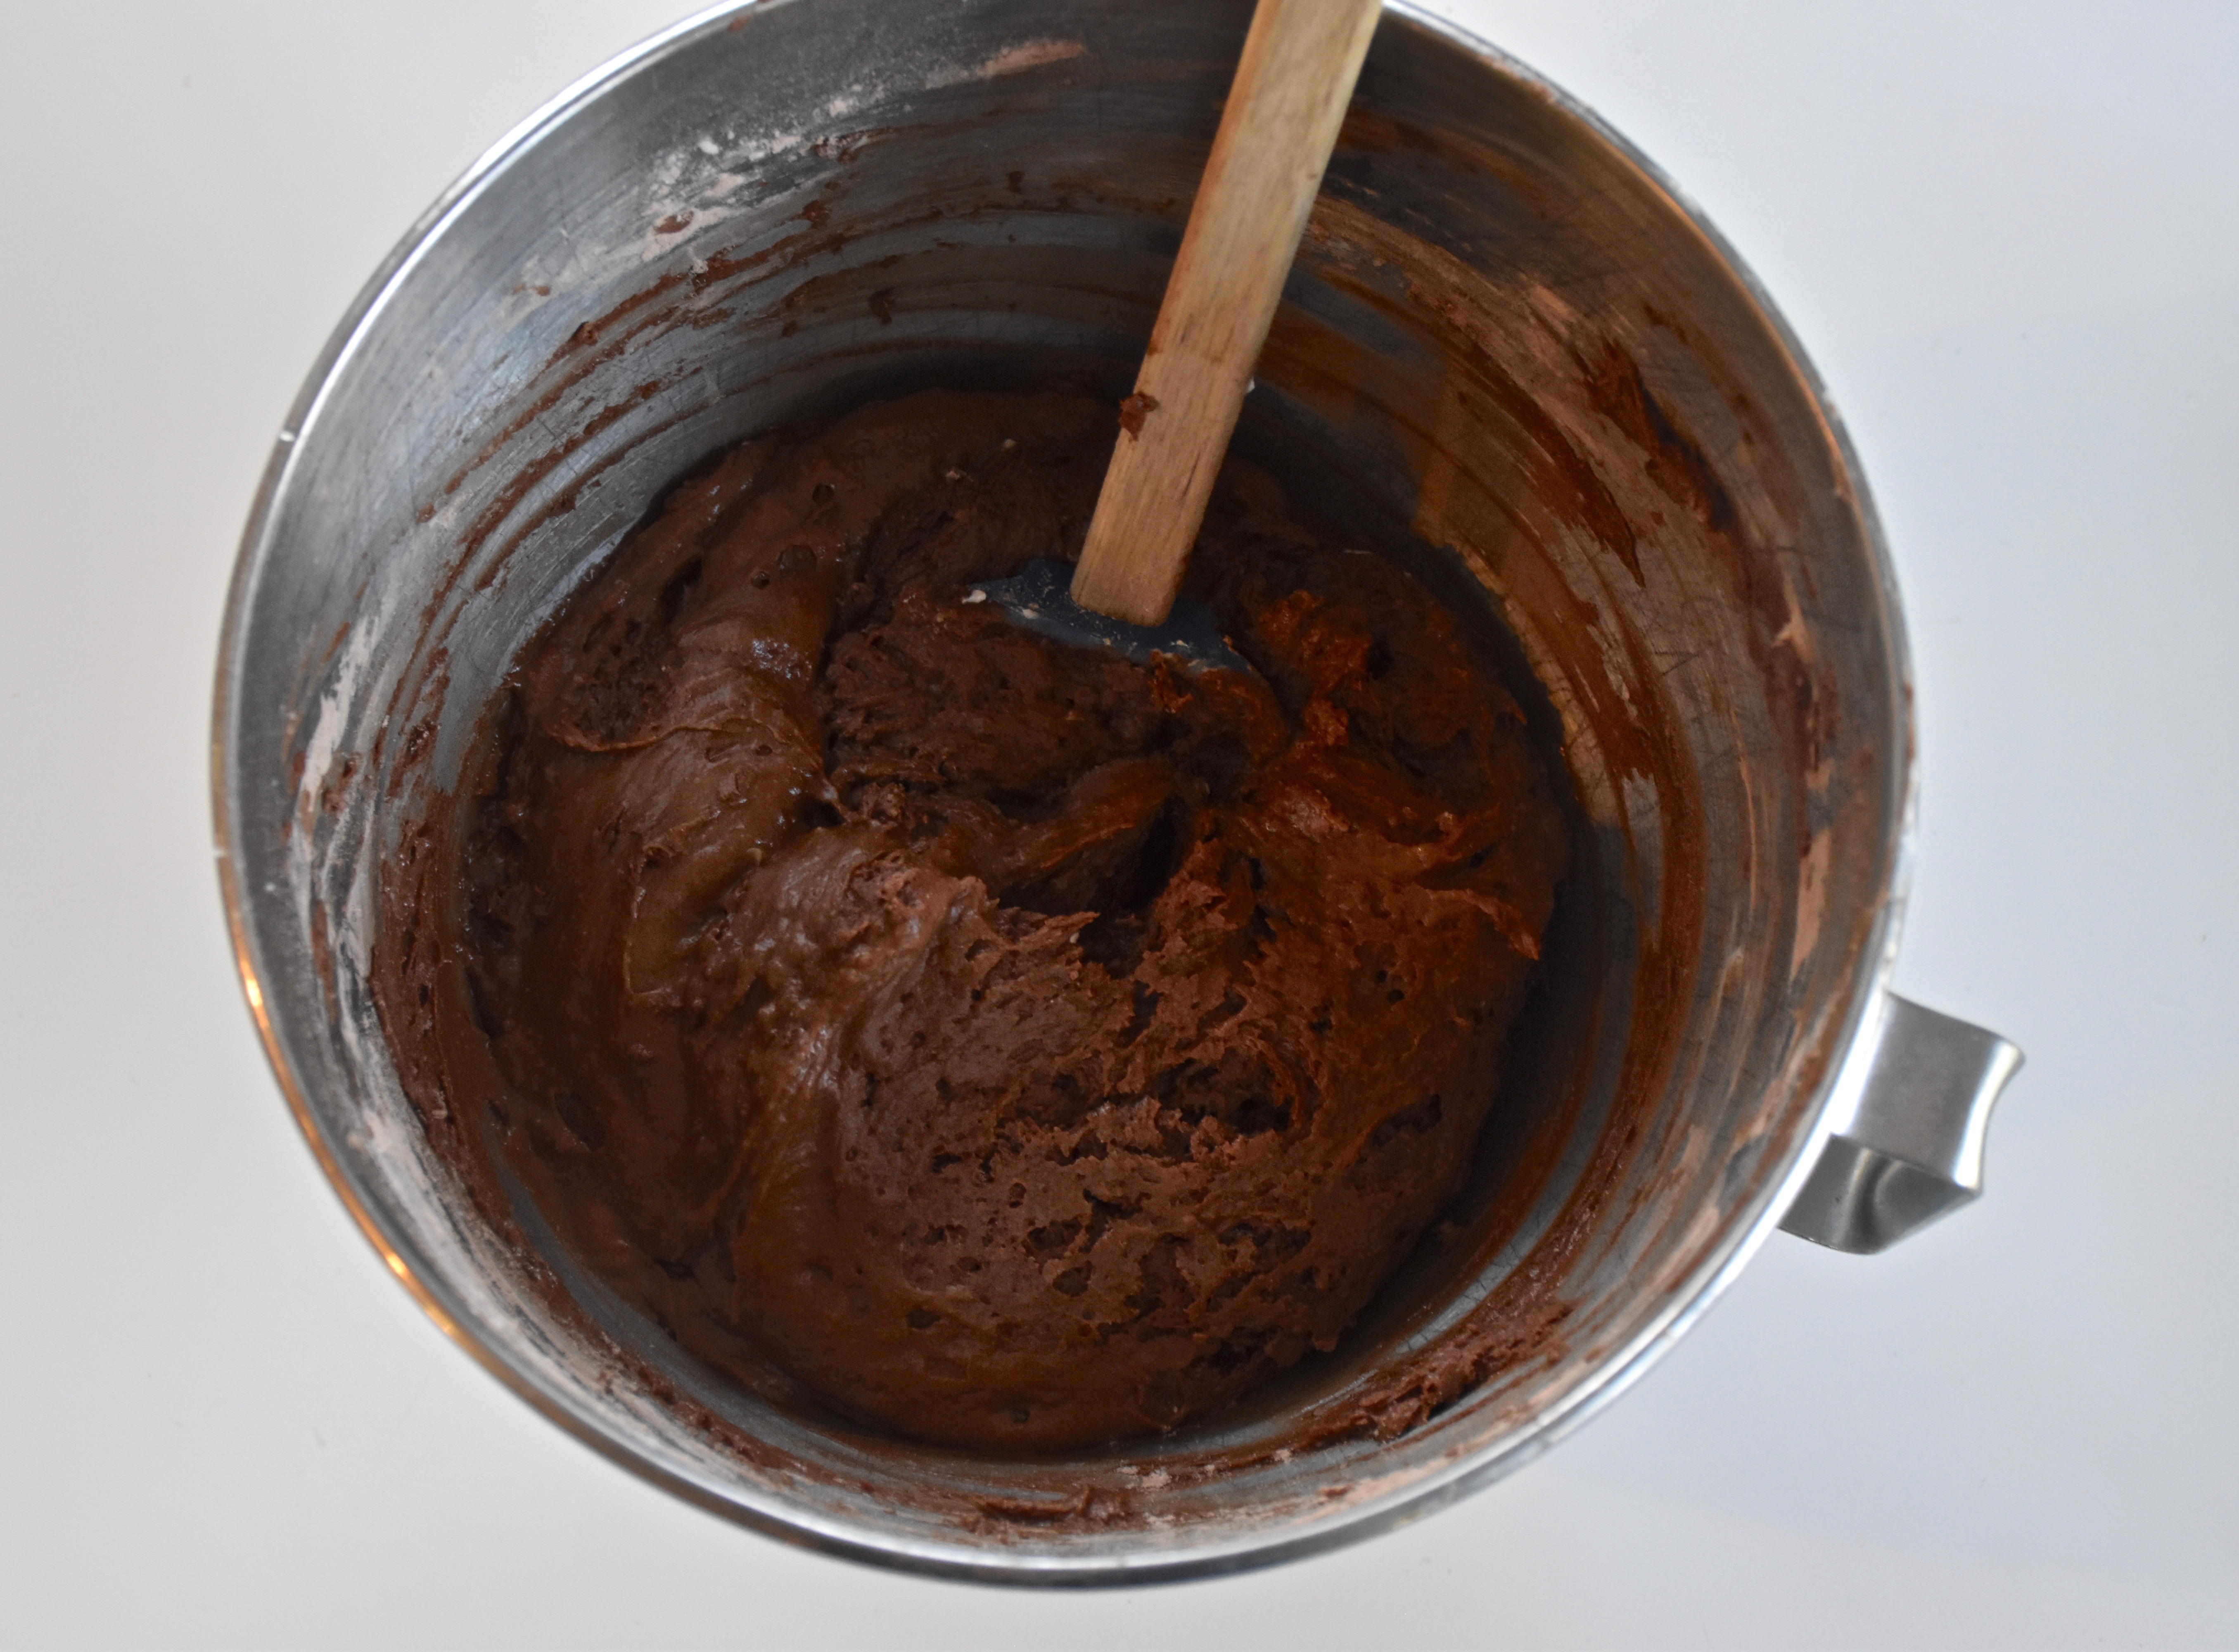
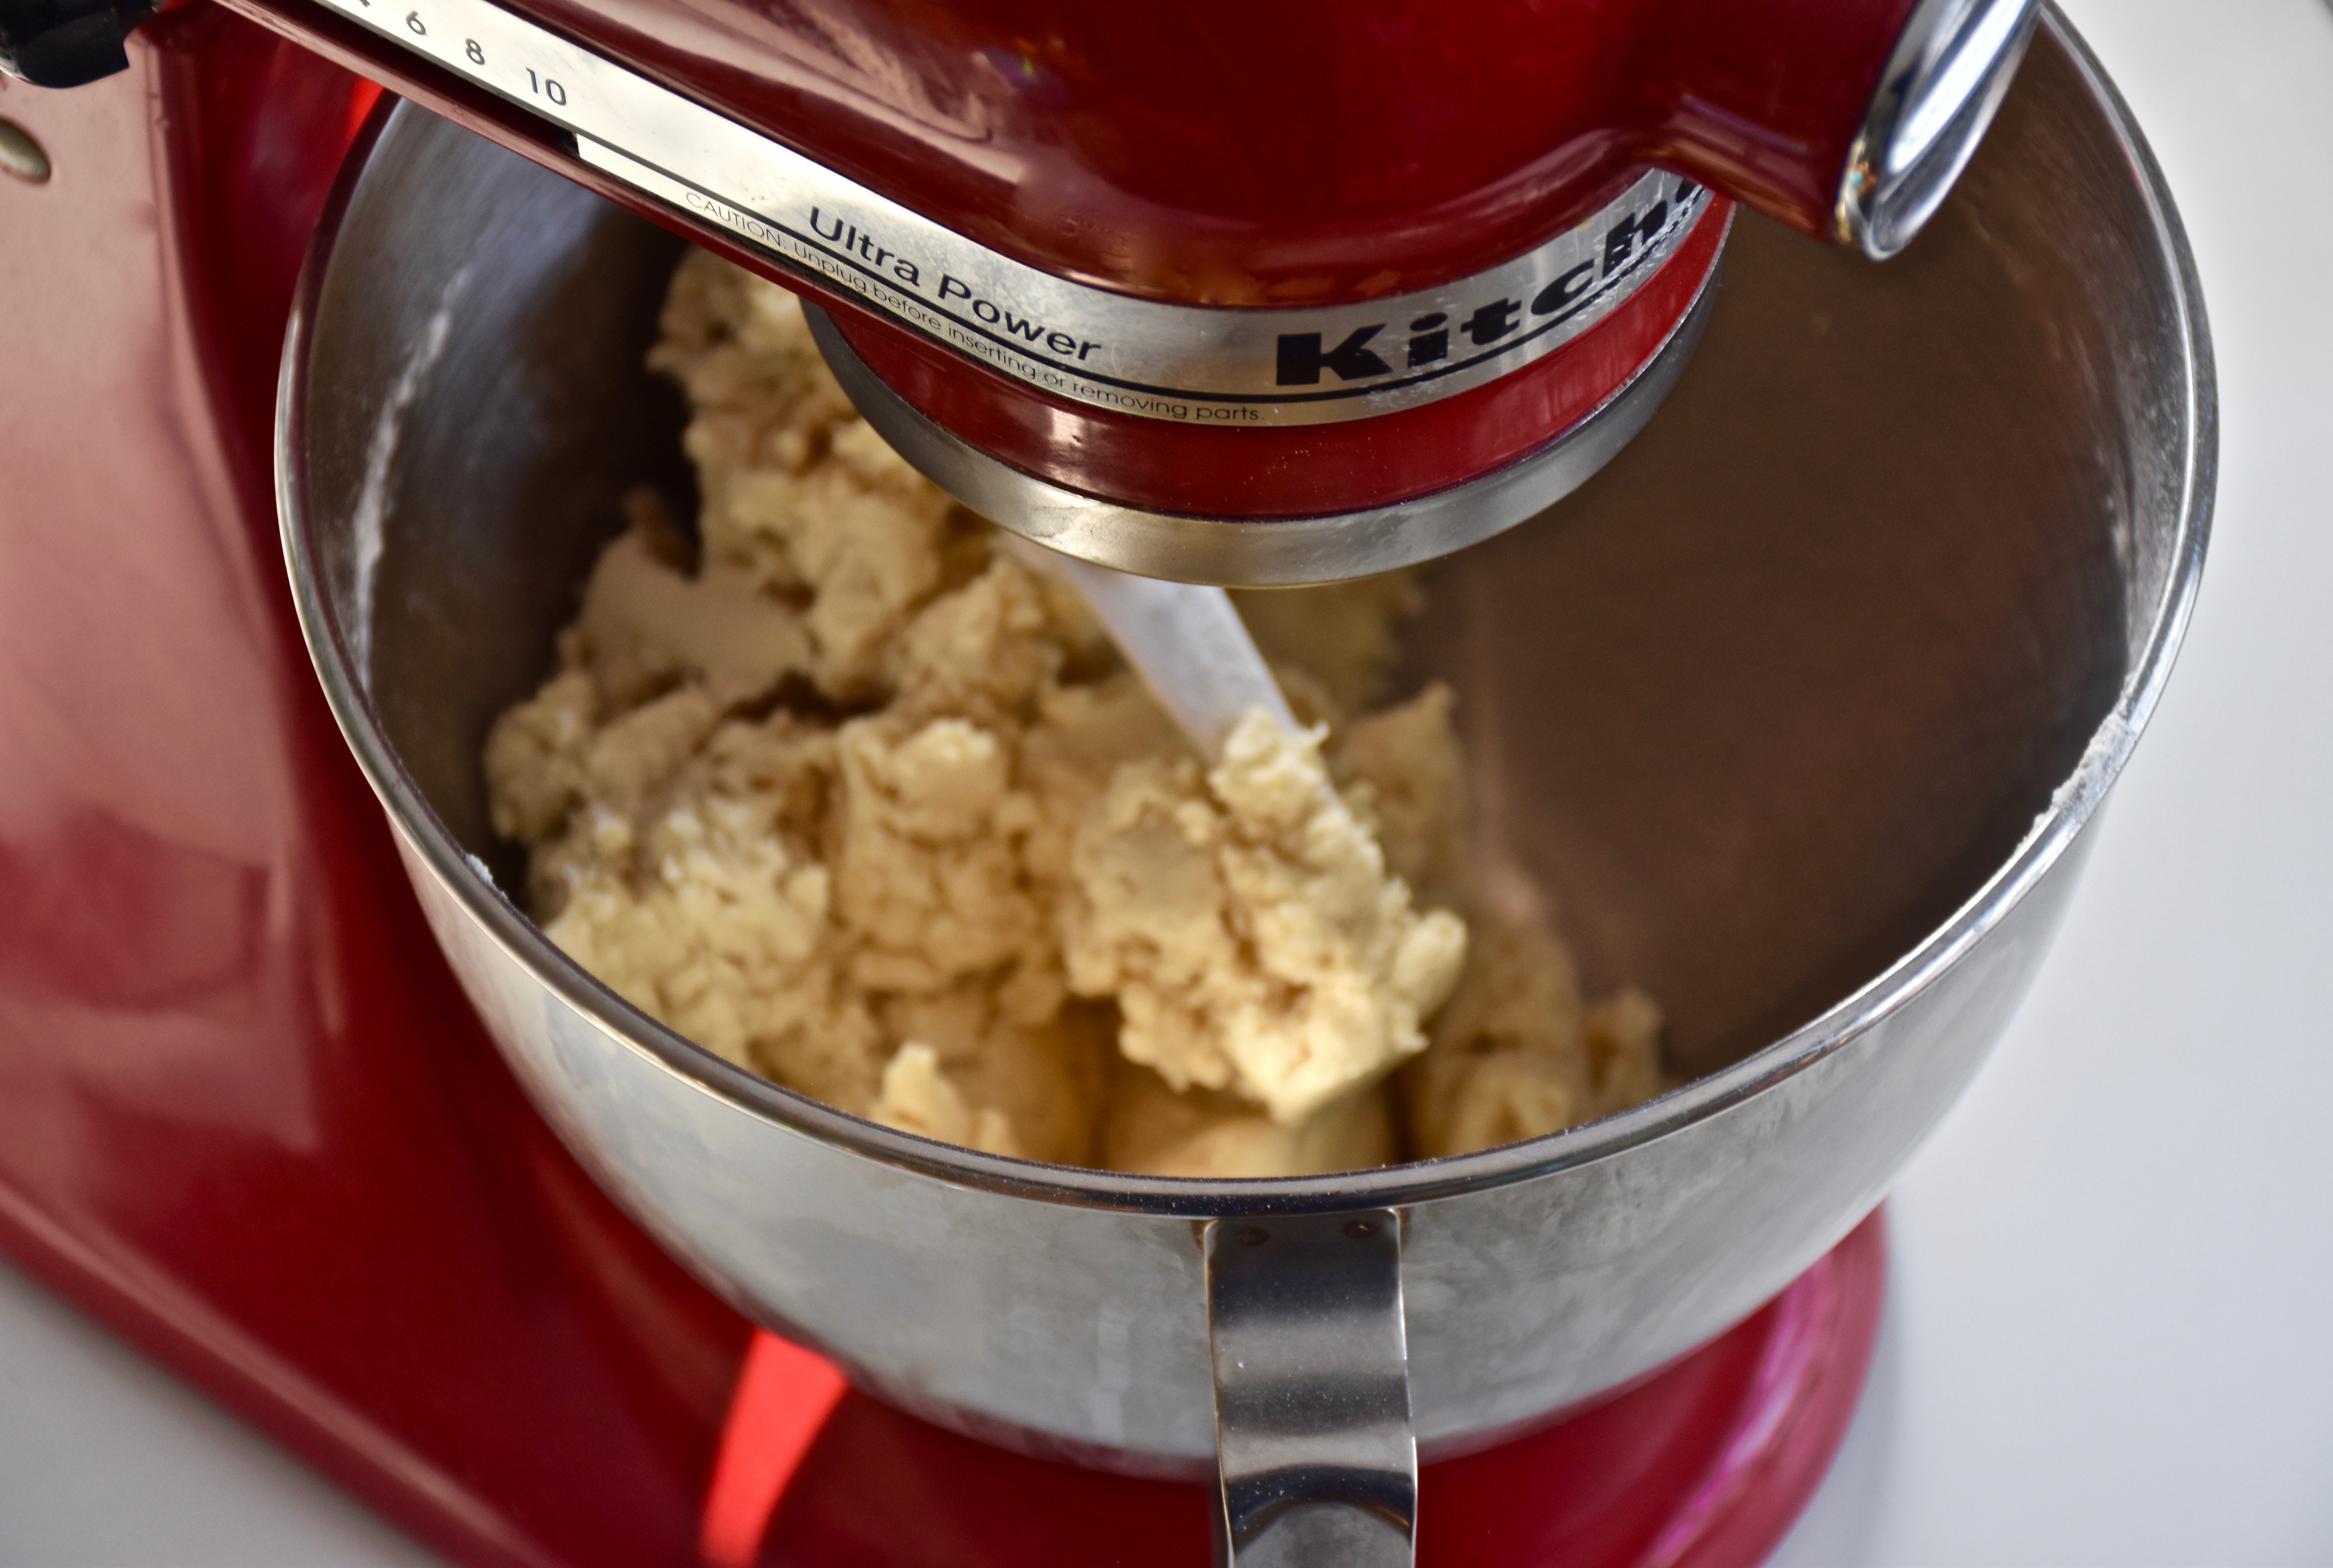
In the large bowl of you mixer combine your flour, sugar and salt. Then cut your butter into small pieces, like you would for pie dough or biscuits. Then add your butter pieces  into your flour mixture and blend on low to start so the flour doesn’t come spilling out.

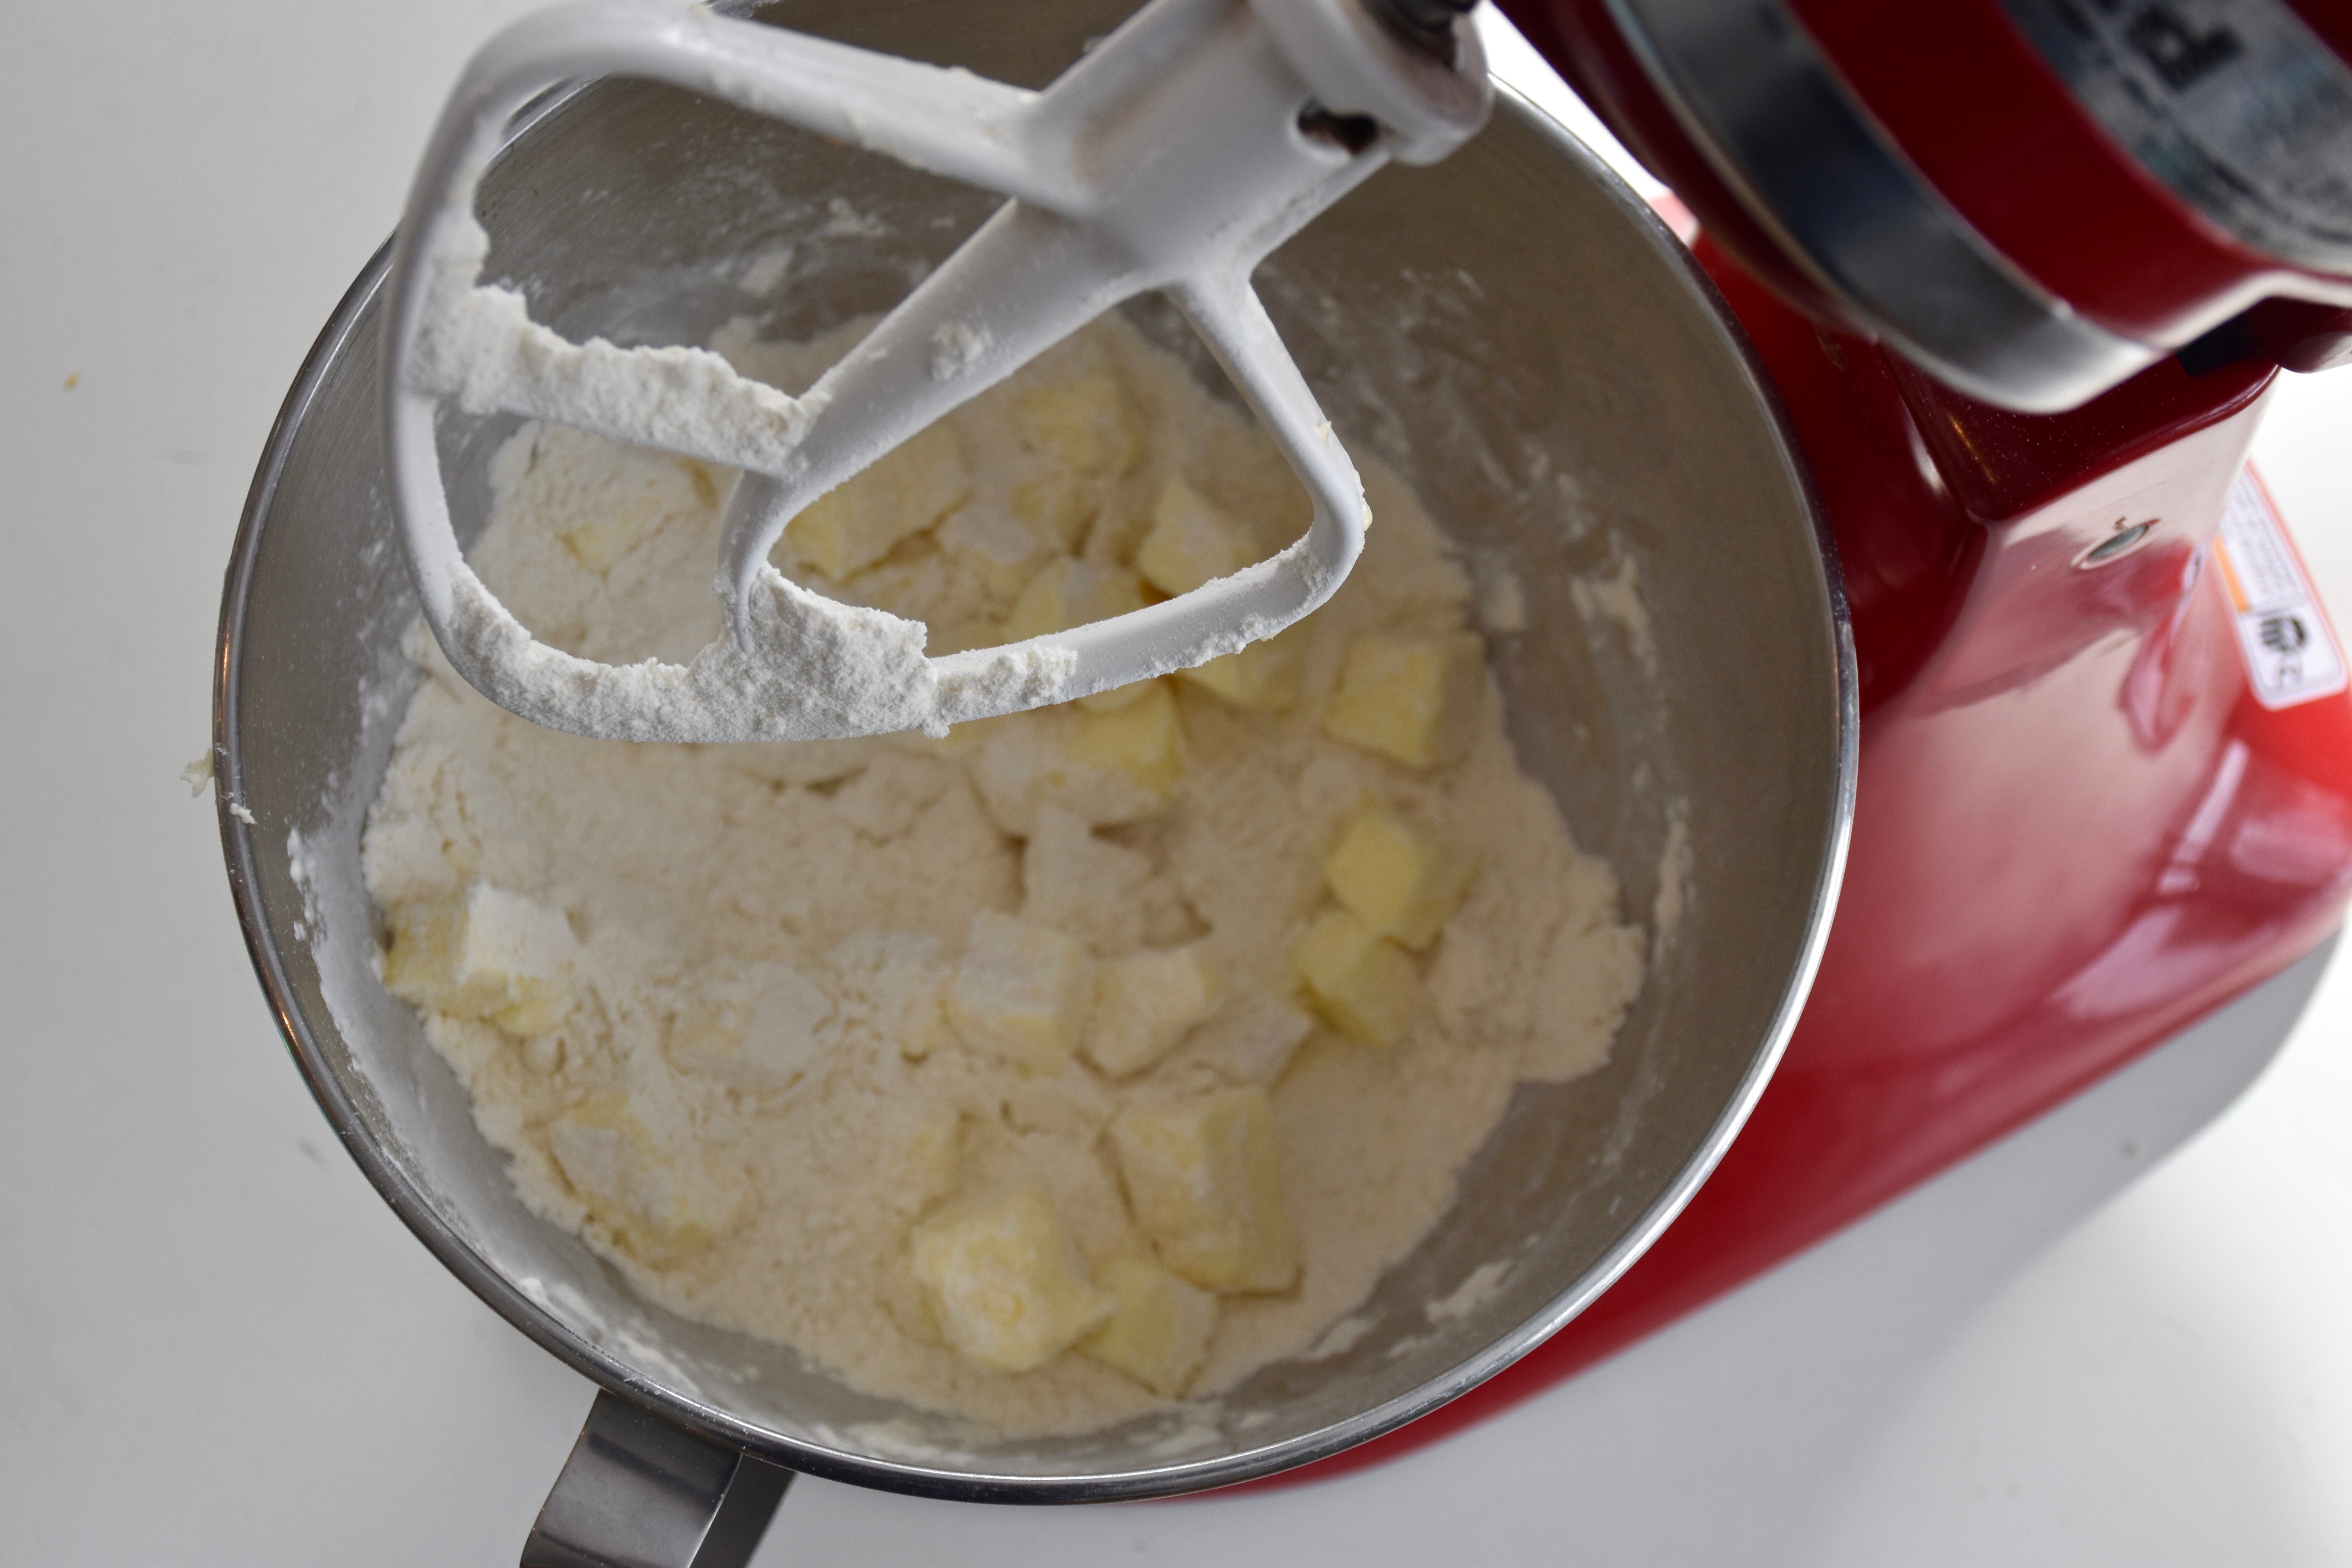
Then as your butter begins to get cut in your flour increase your mixer speed to medium and add in your vanilla. Continue mixing your dough until it just comes together.

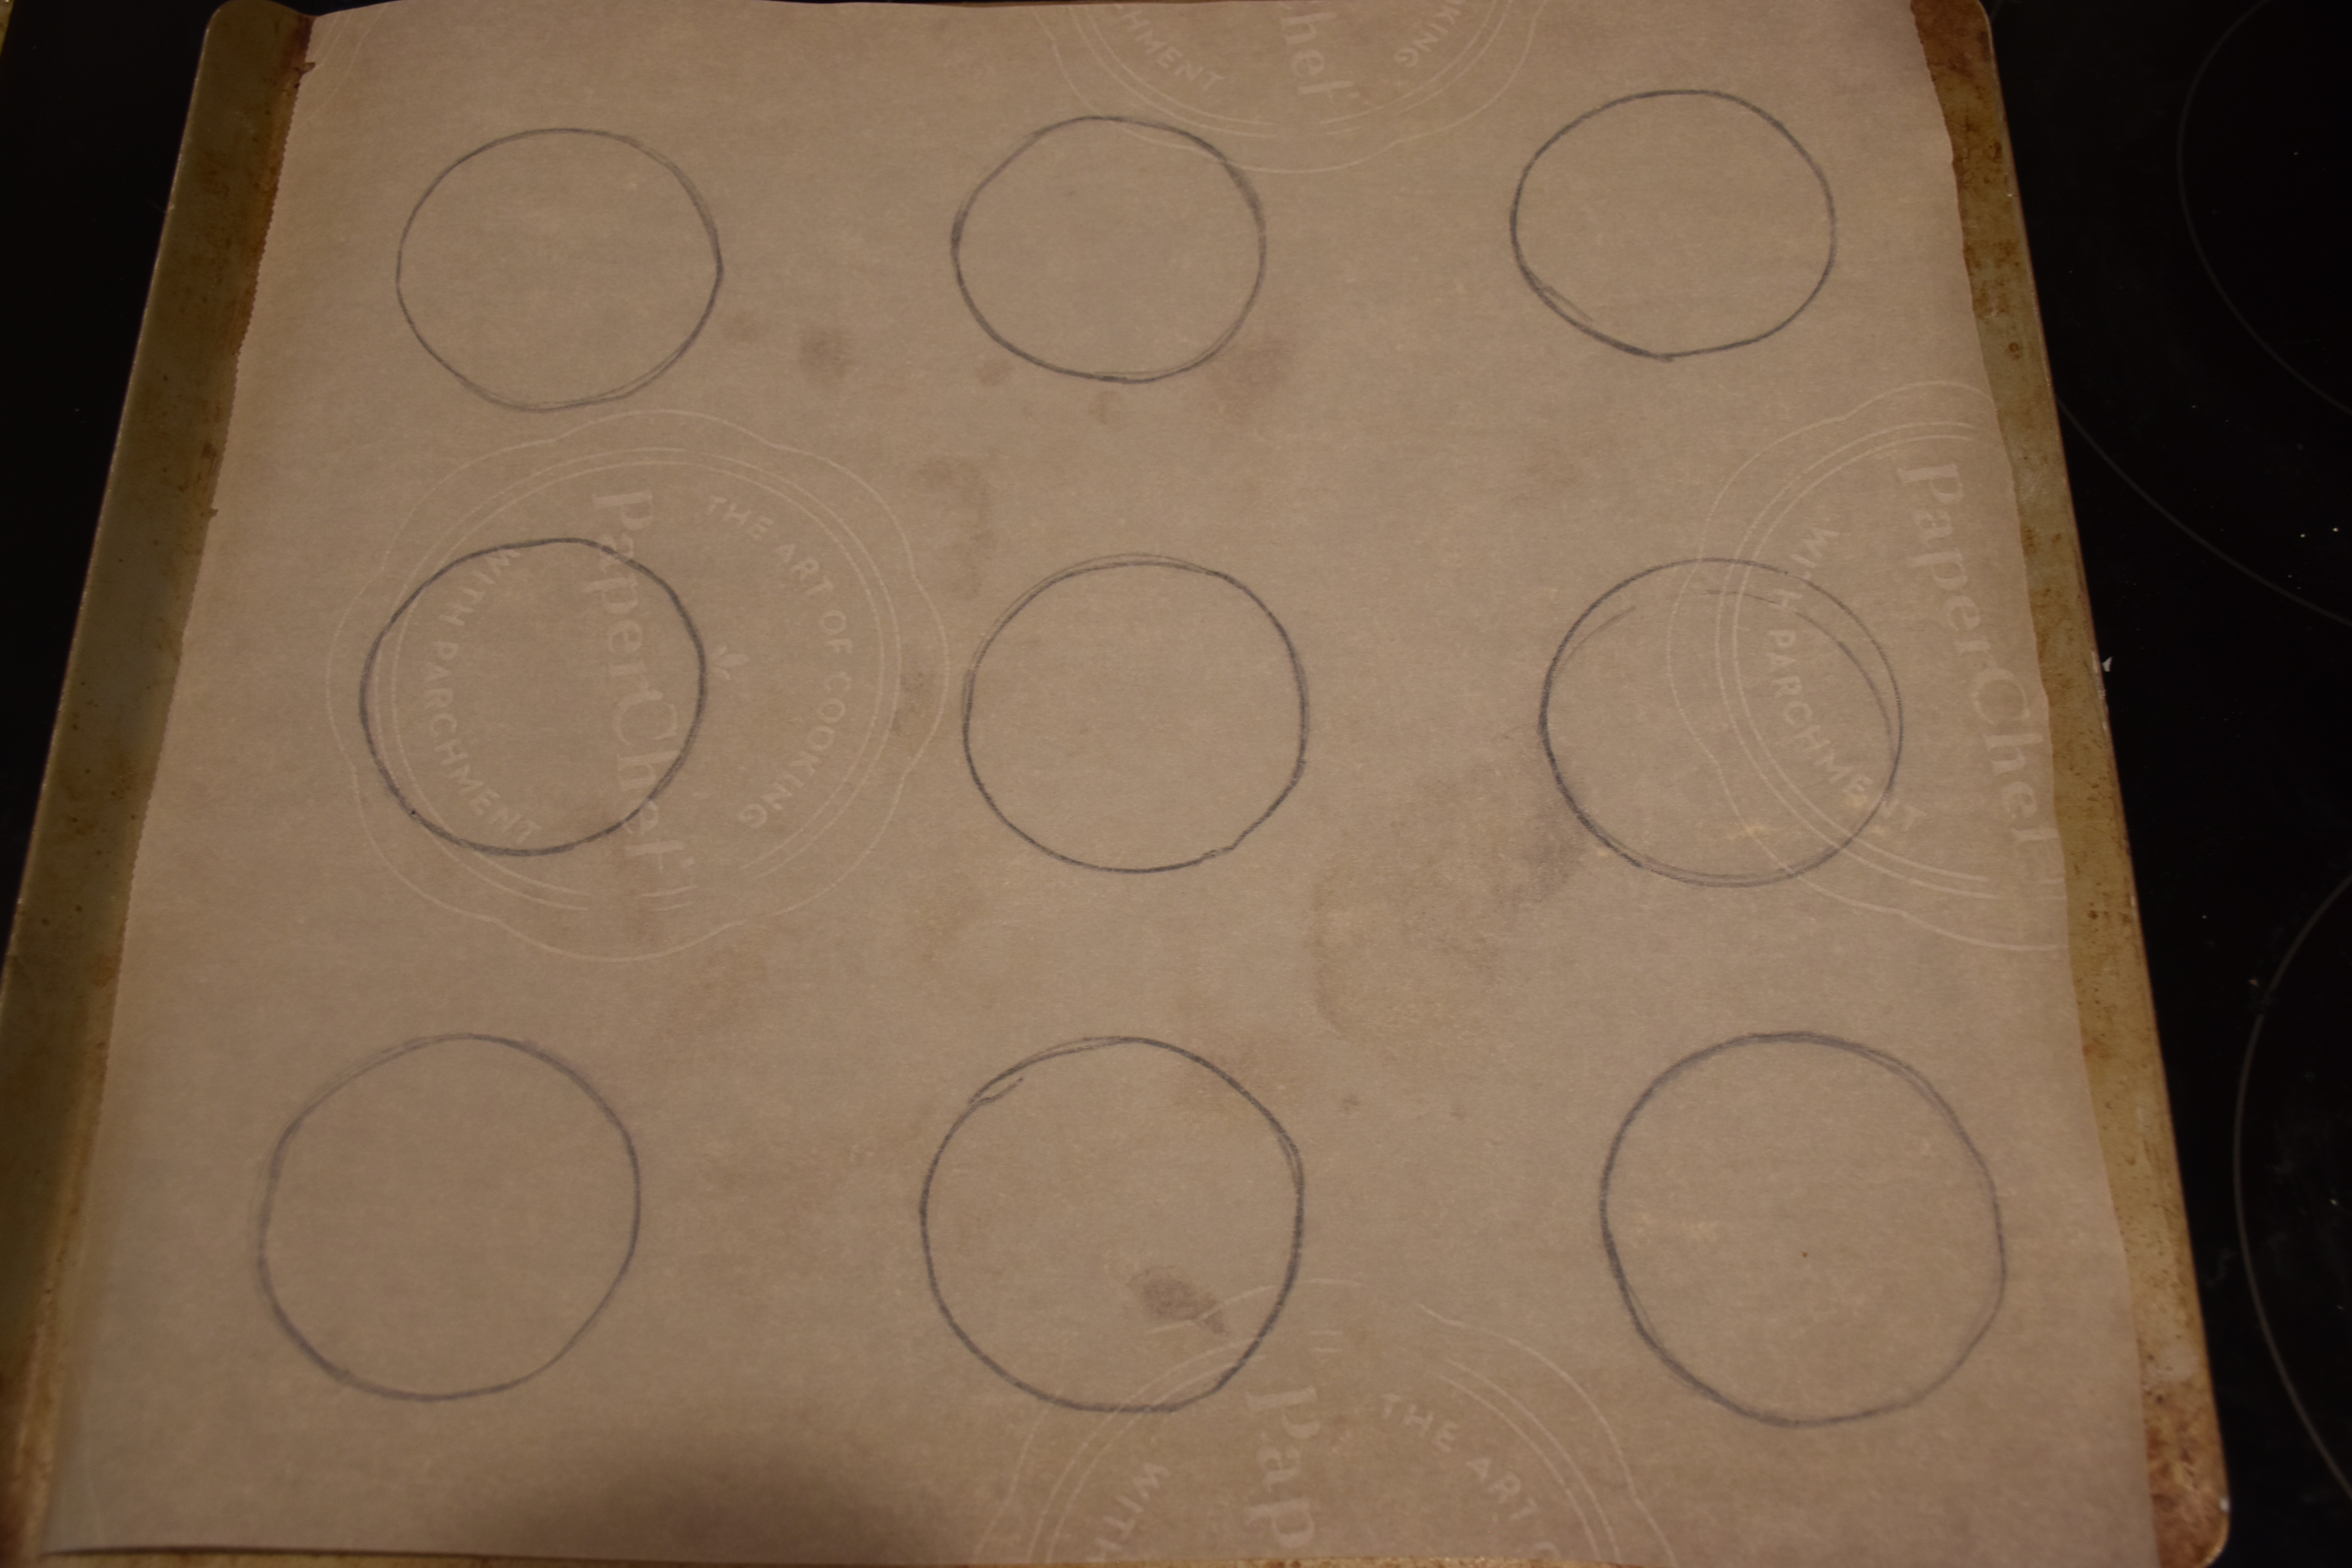
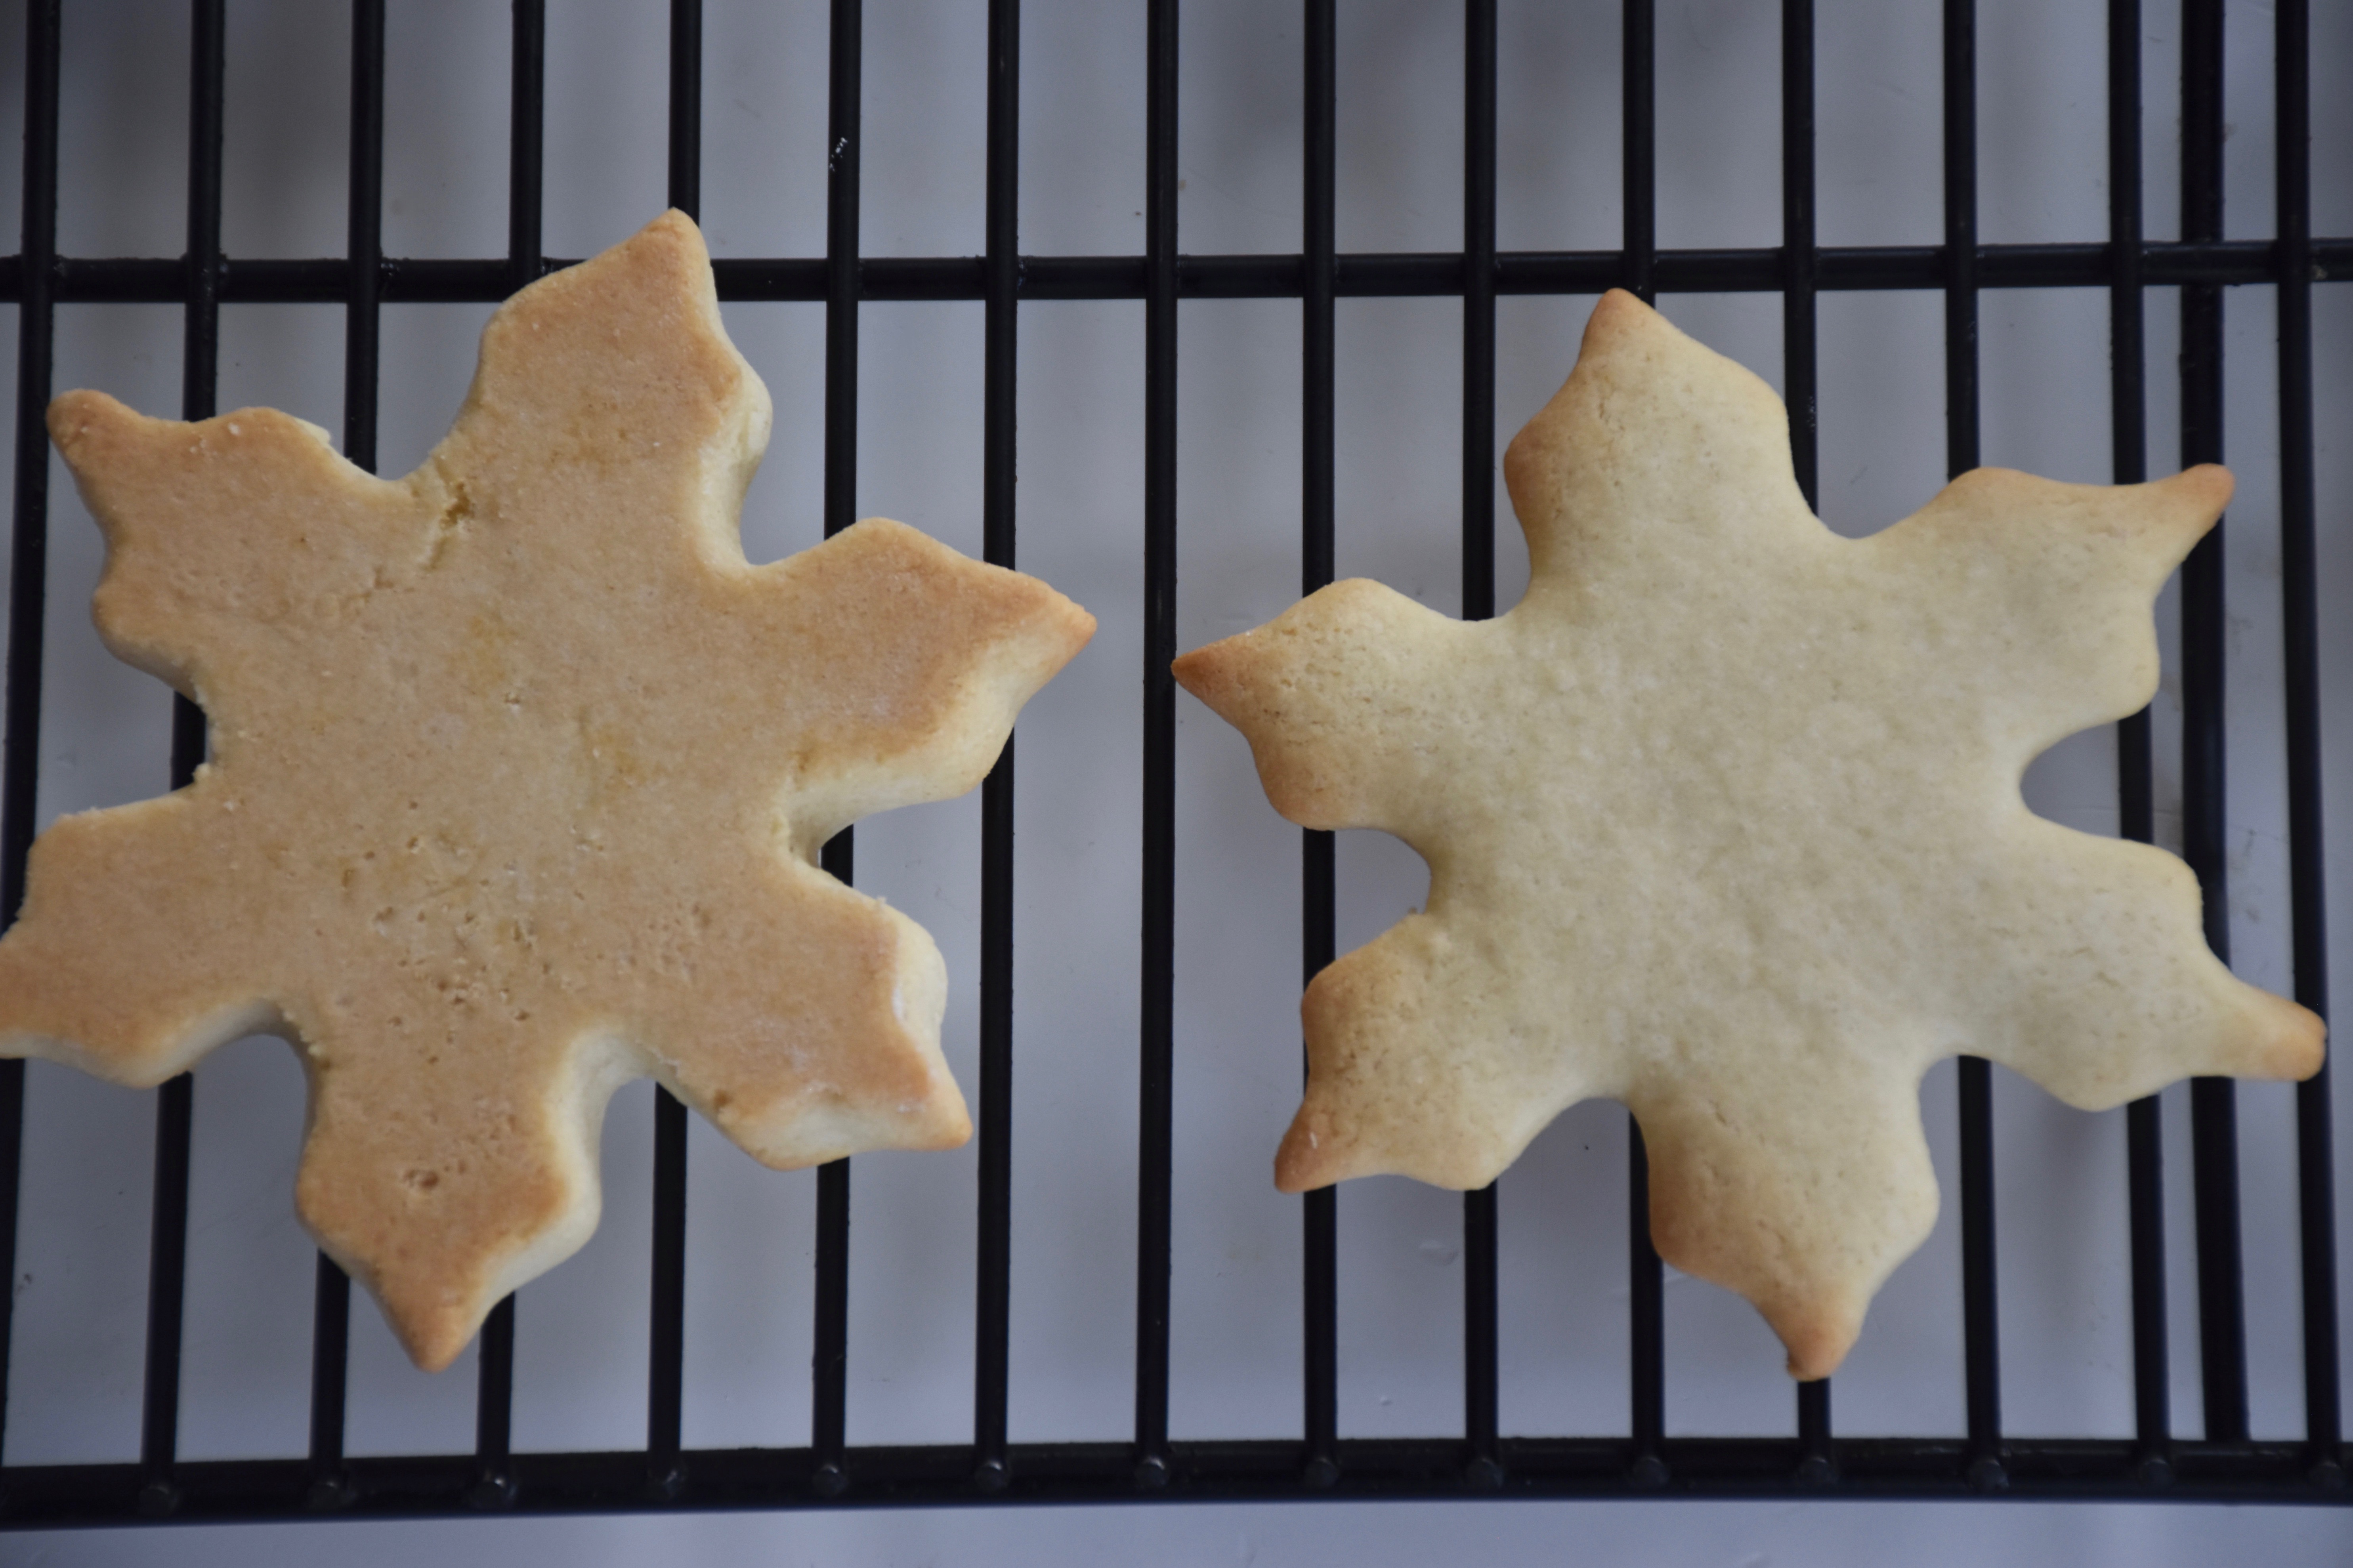
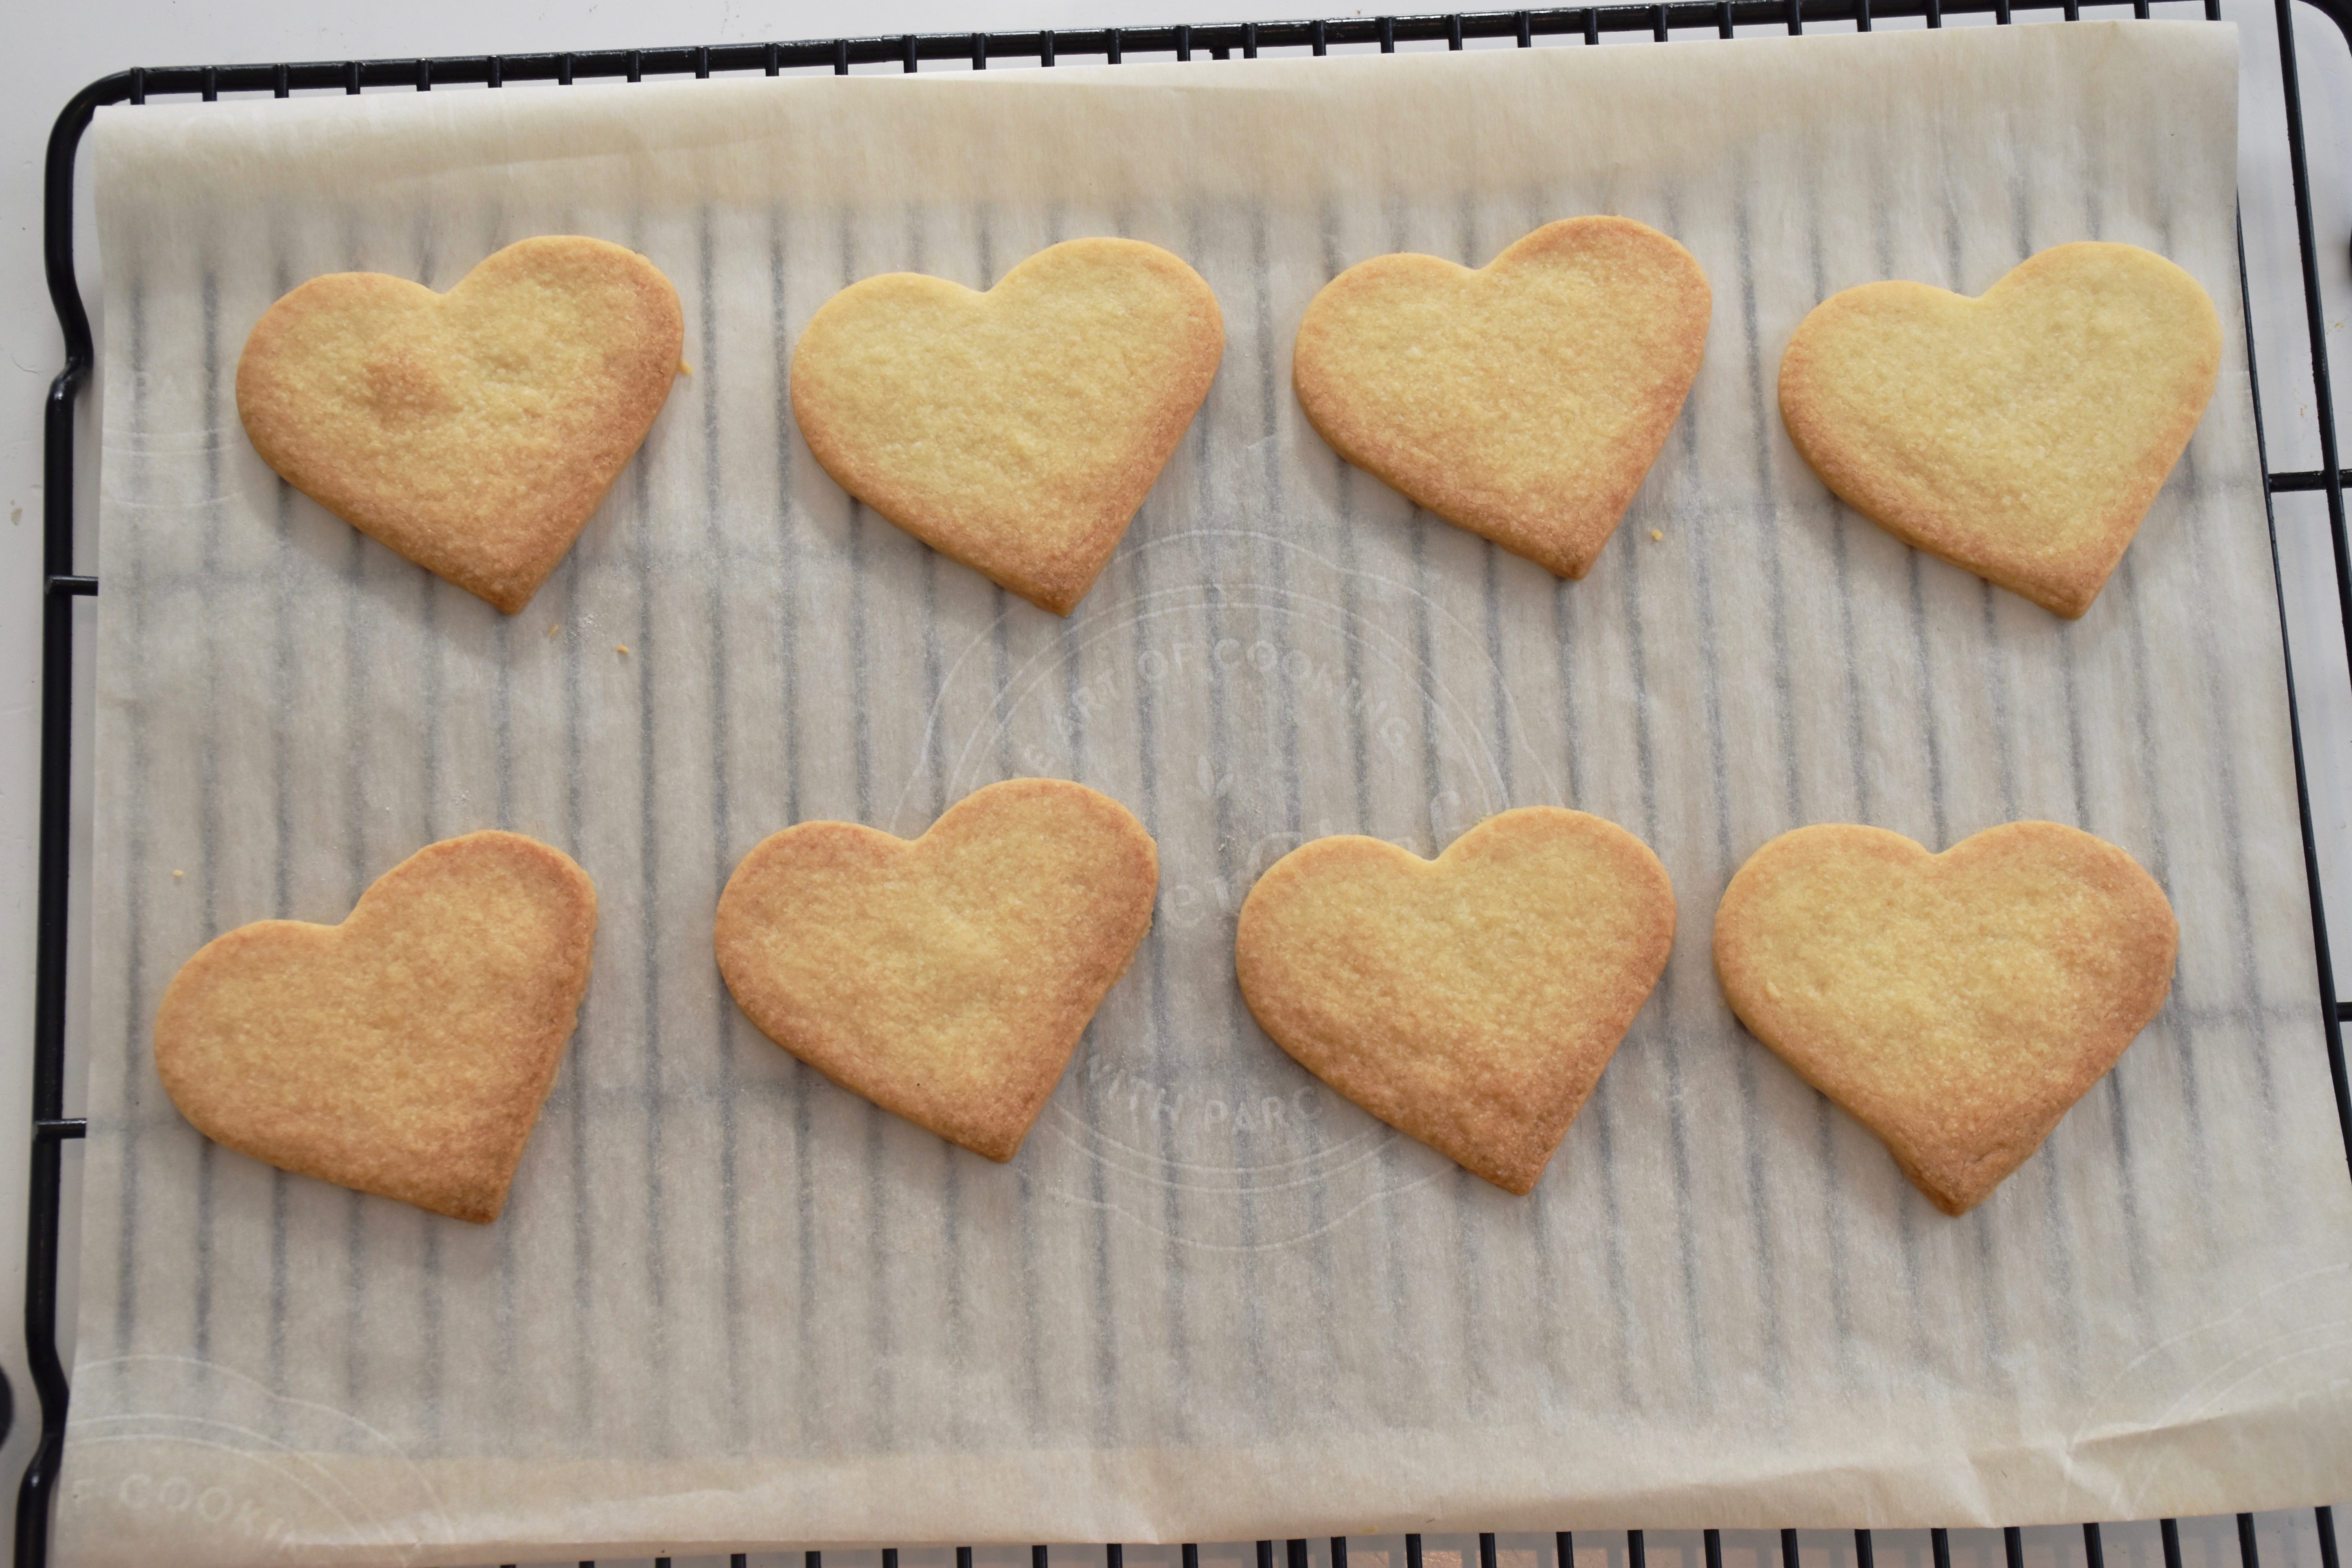
Now roll your dough out on a floured silicone baking mat or use a lightly floured piece of parchment paper. I rolled mine out to 1/4 inch thickness and cut them into three inch heart shapes.

Then I placed them on my baking pans, which I lined with parchment paper. These cookies are flakey and slightly delicate so the parchment paper makes them very easy to handle. It will keep them from sticking to your pan and make them easy to lift up to cool. Bake your cookies for 8 to 10 minutes until the edges begin to turn golden.

Then once your cookies are cool it is time to make your frosting. In a medium sized sauce pan combine your powdered sugar, water, corn syrup and vanilla. Heat them over medium low heat whisking the sugar mixture until it melts and comes together. Then remove your frosting from the heat. Next add in your food coloring. I find it’t easier to control the color if you take a few tablespoons of the white icing out and place them in a small bowl. Then add a drop or two of your desired food coloring.  Once you get this concentrated color add a little of that concentrated icing back to your main mixture until you get the shade you want. Gel food coloring is wonderful but it’s very concentrated so I find it easier to see the true color if I mix it into icings this way.

I hold my cookie over the pan so any excess frosting falls back in the pan.

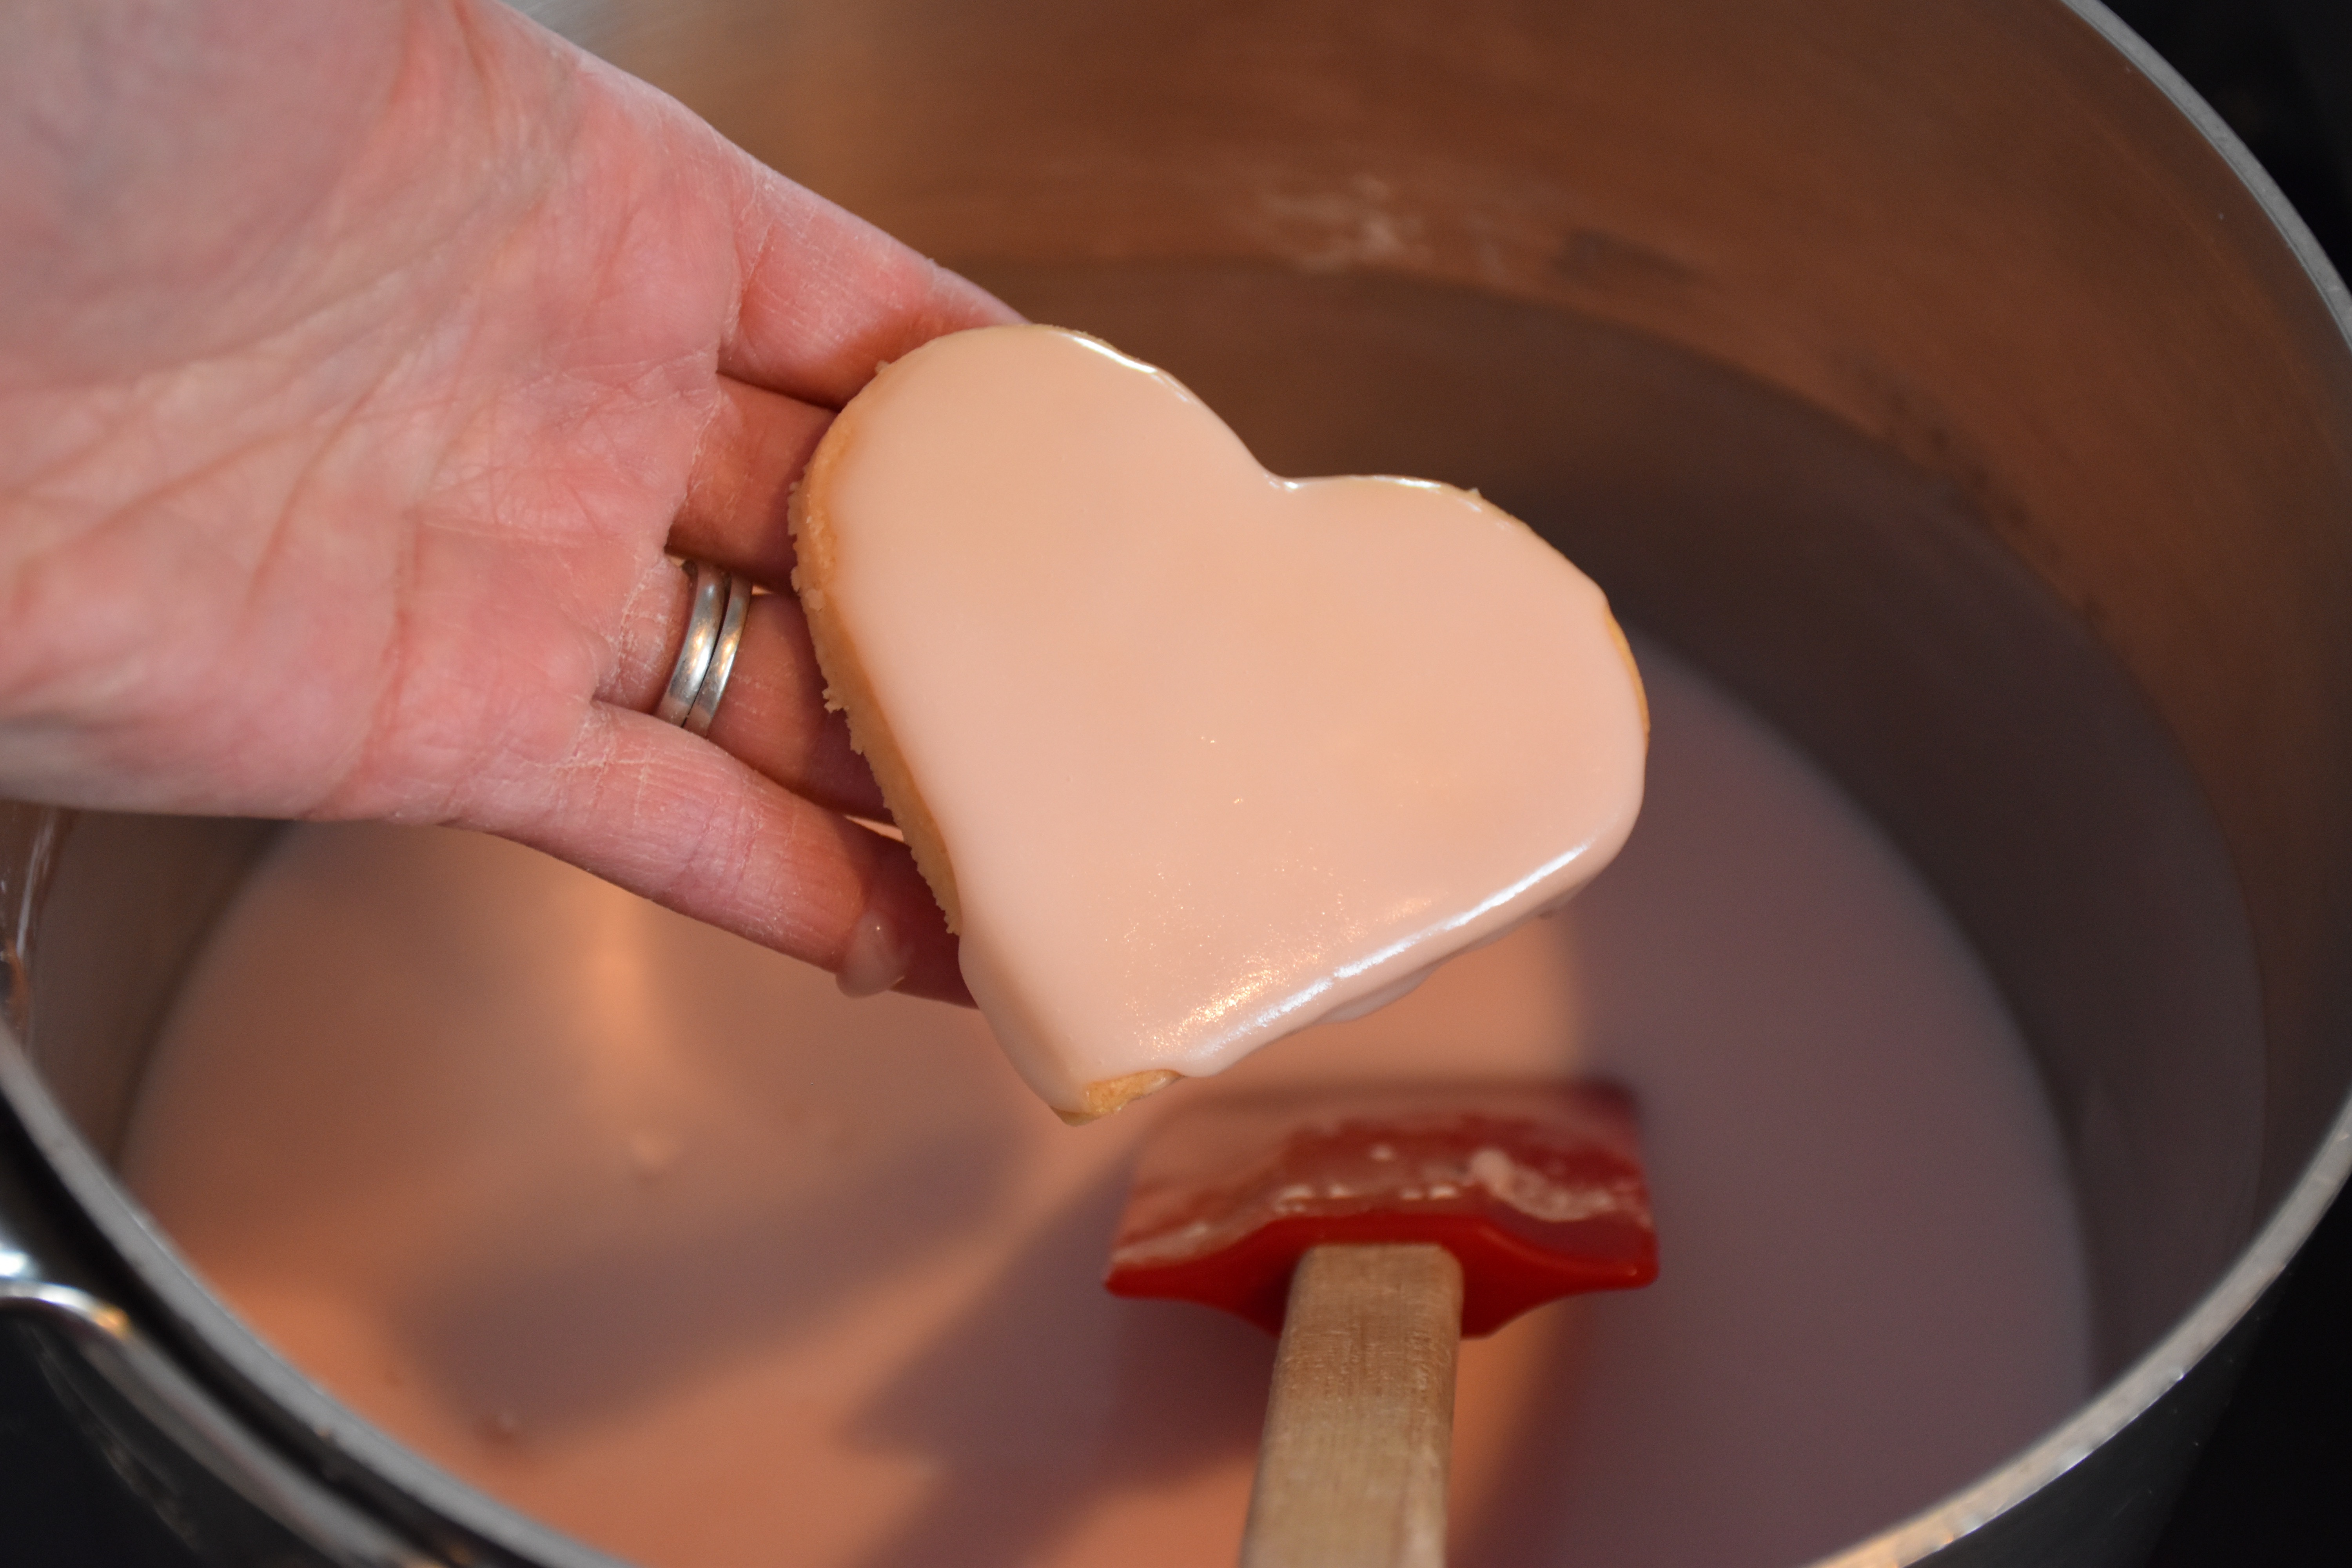
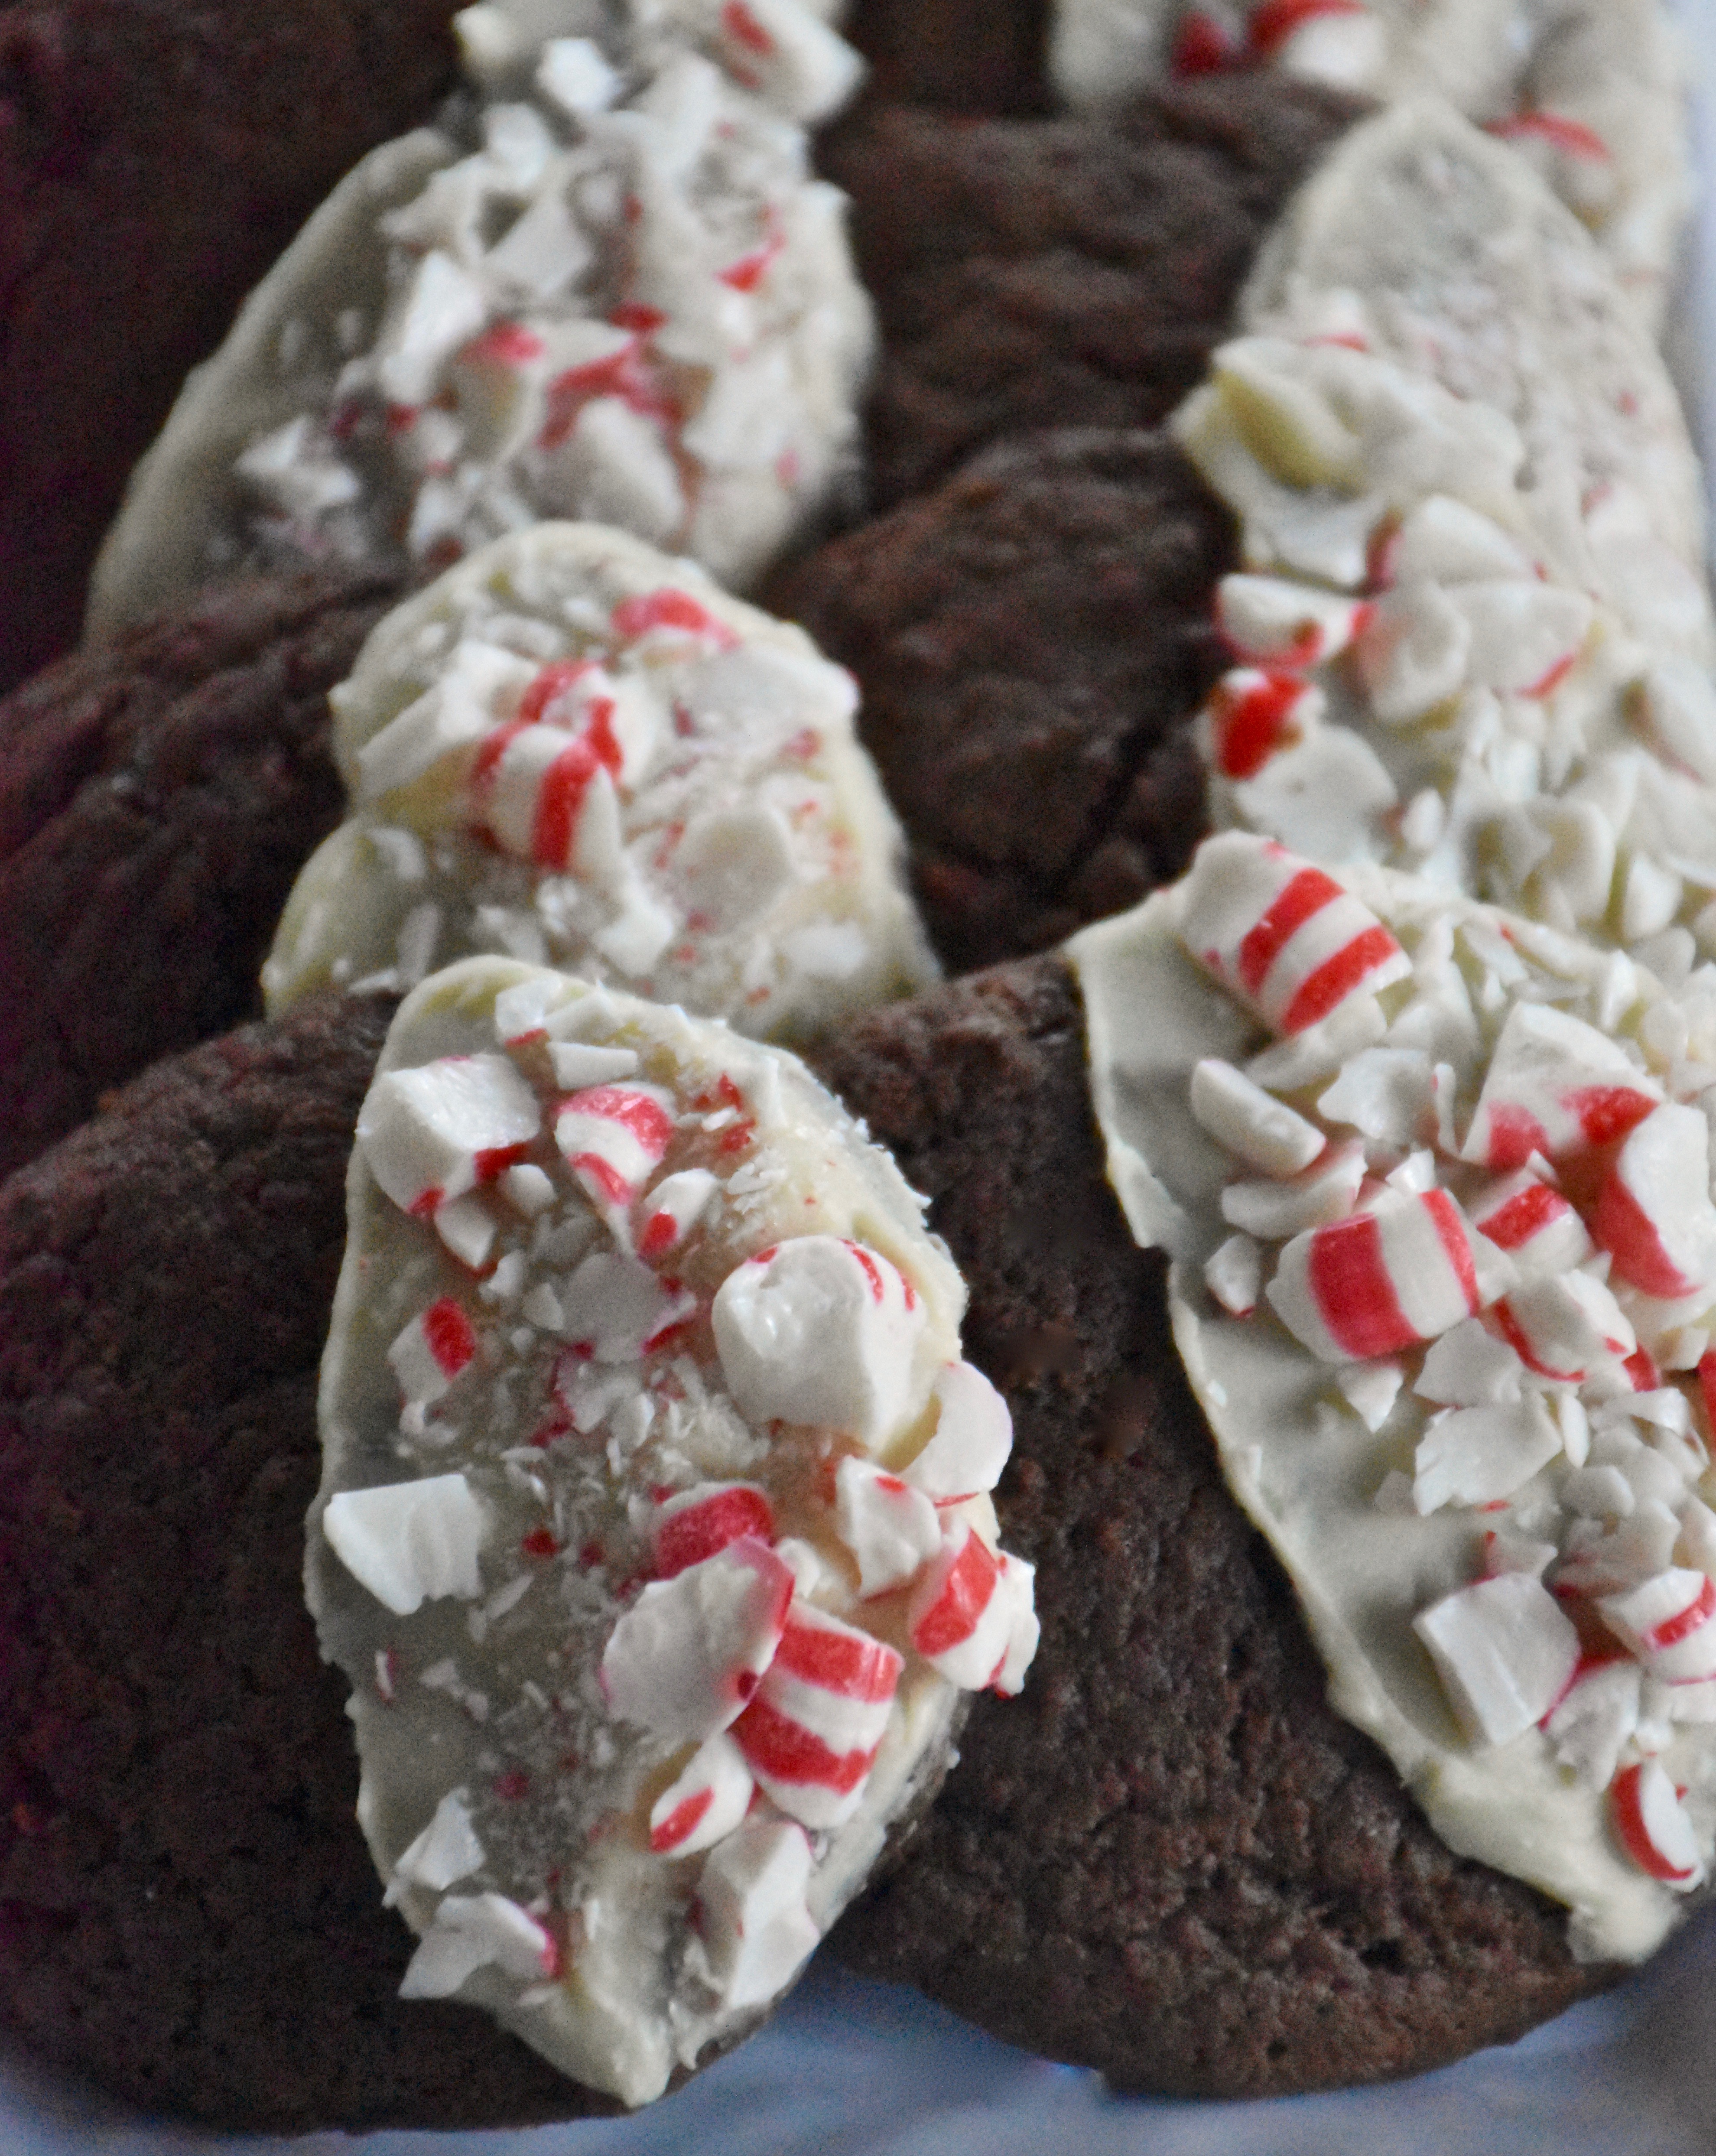
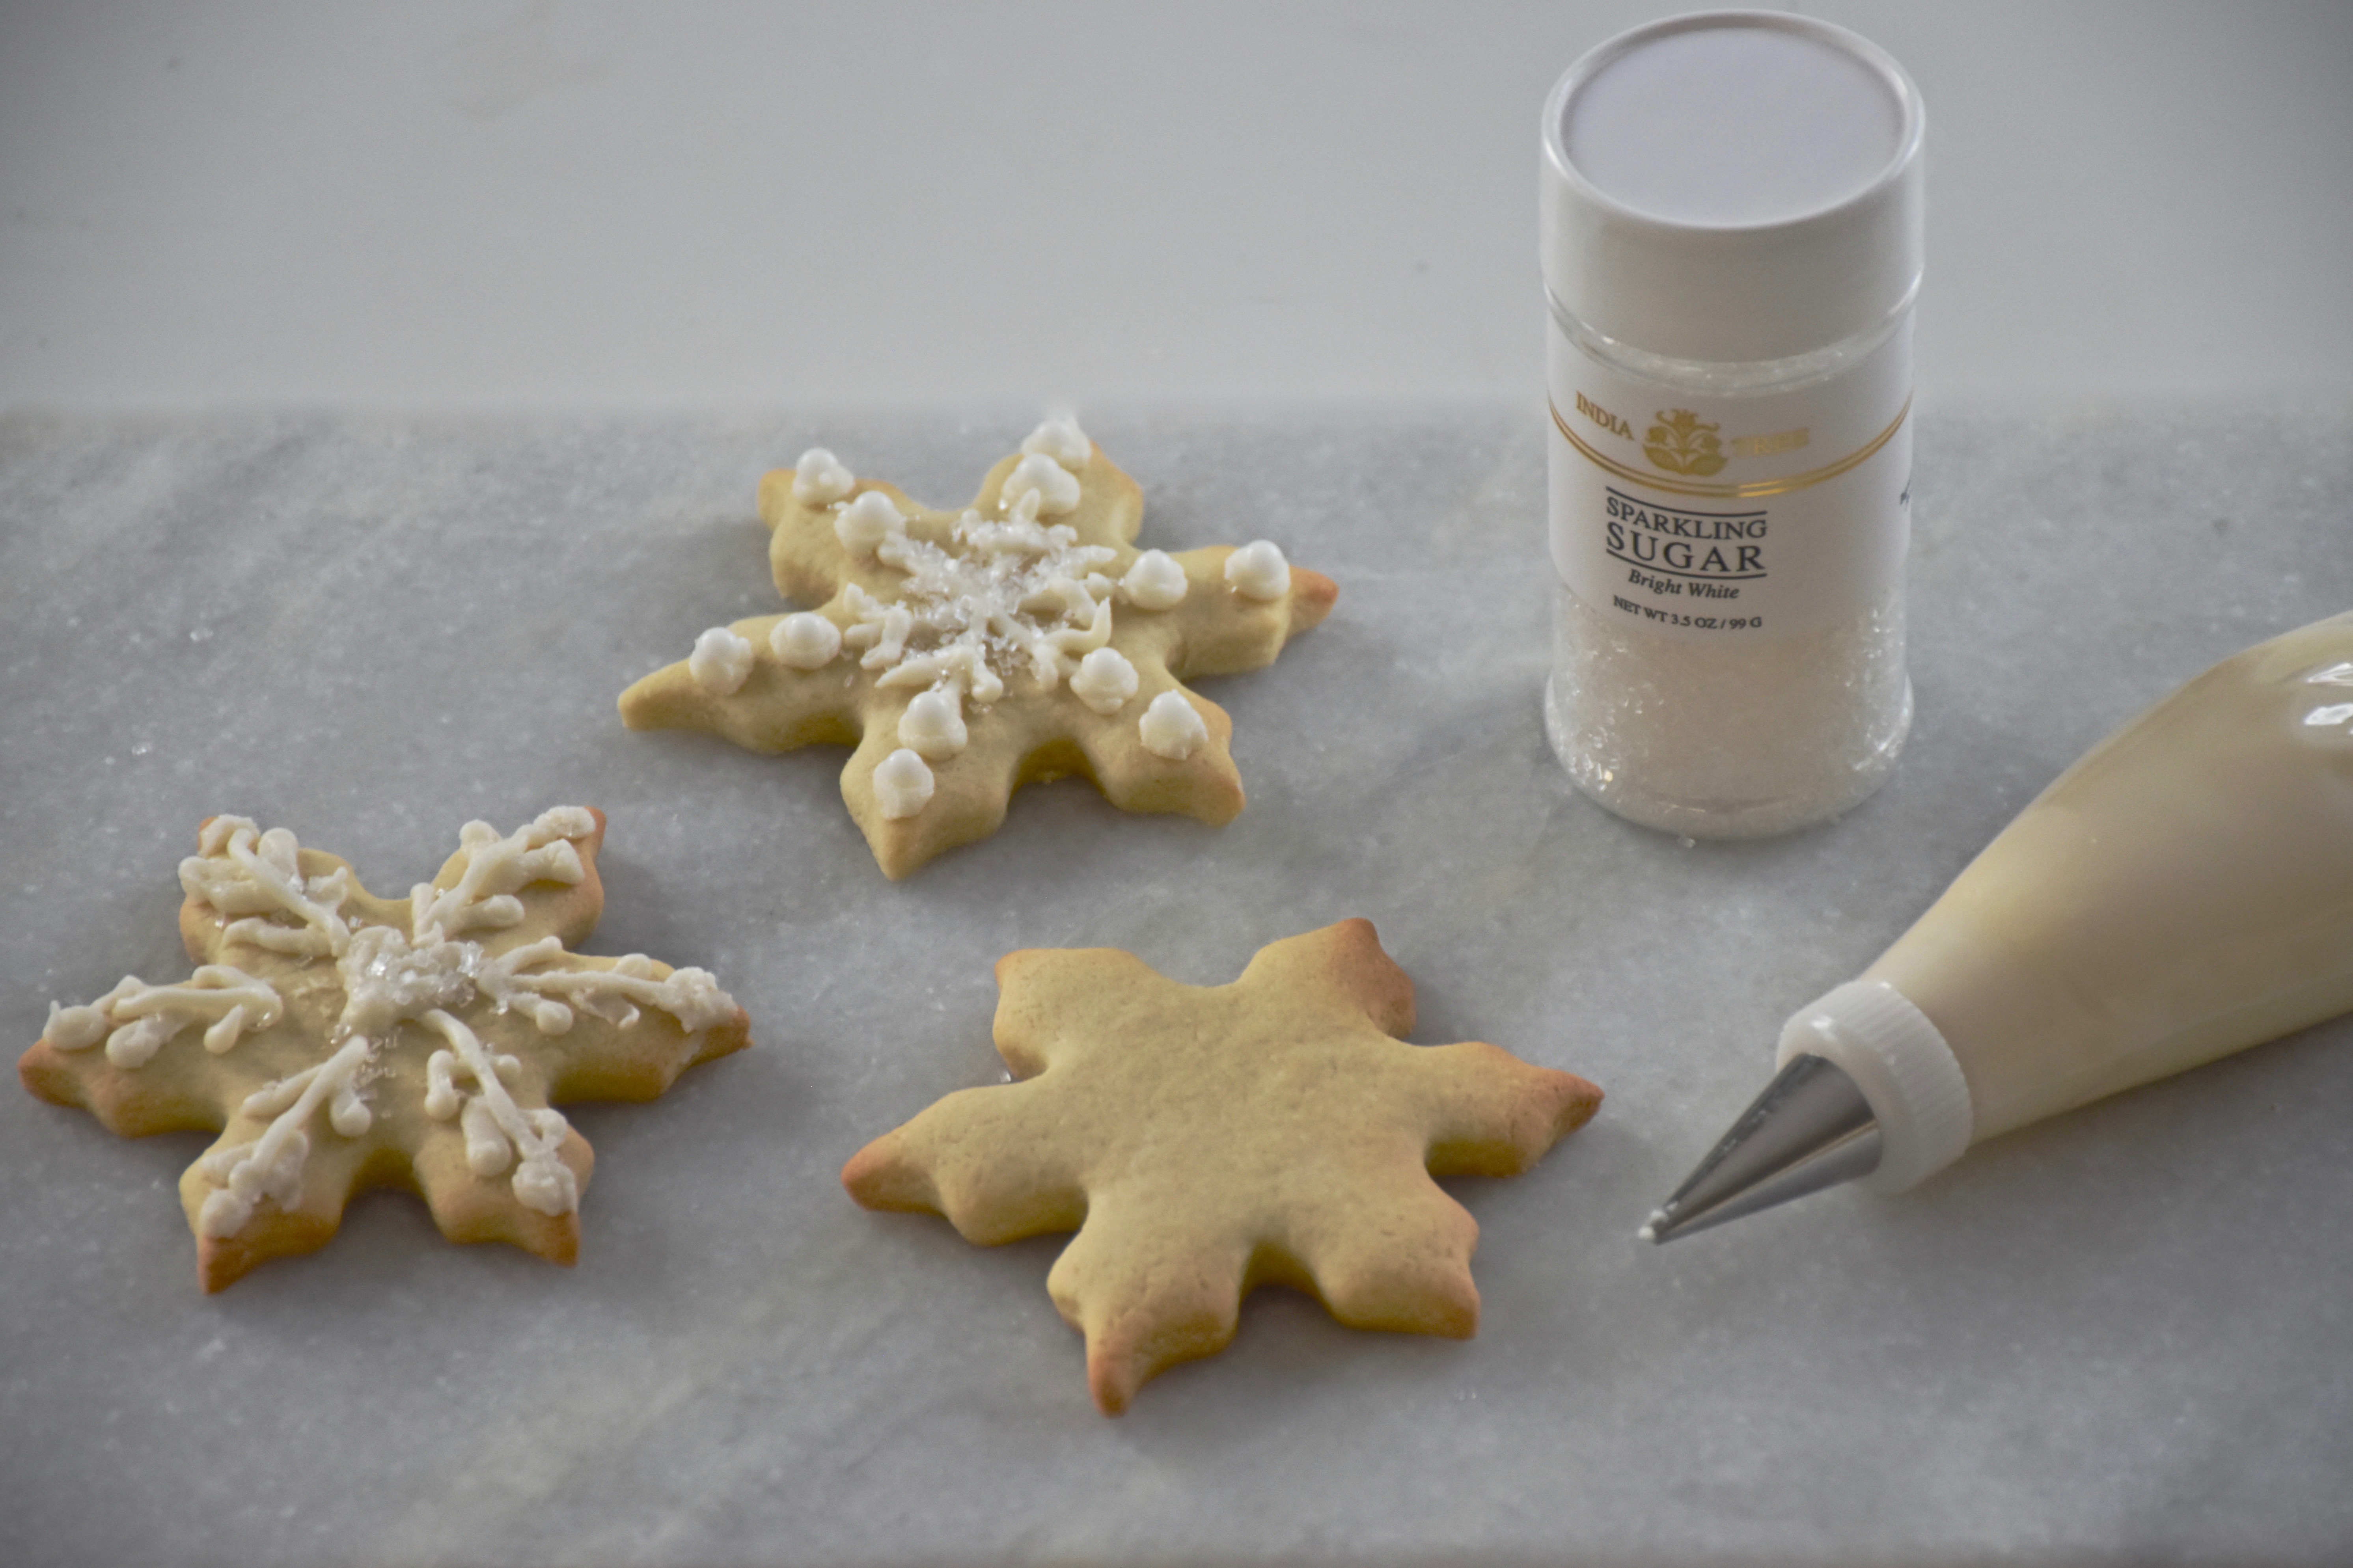
Then once you get your icing mixed it’s time to frost your cookies. Take your cookie and hold it over your pan and spoon a little icing on top. Then tilt your cookie slightly to allow the icing to evenly cover the top. Once it is covered well the take the edge of a rubber spatula or table knife and push any drips or excess icing off the sides for a smooth finish.

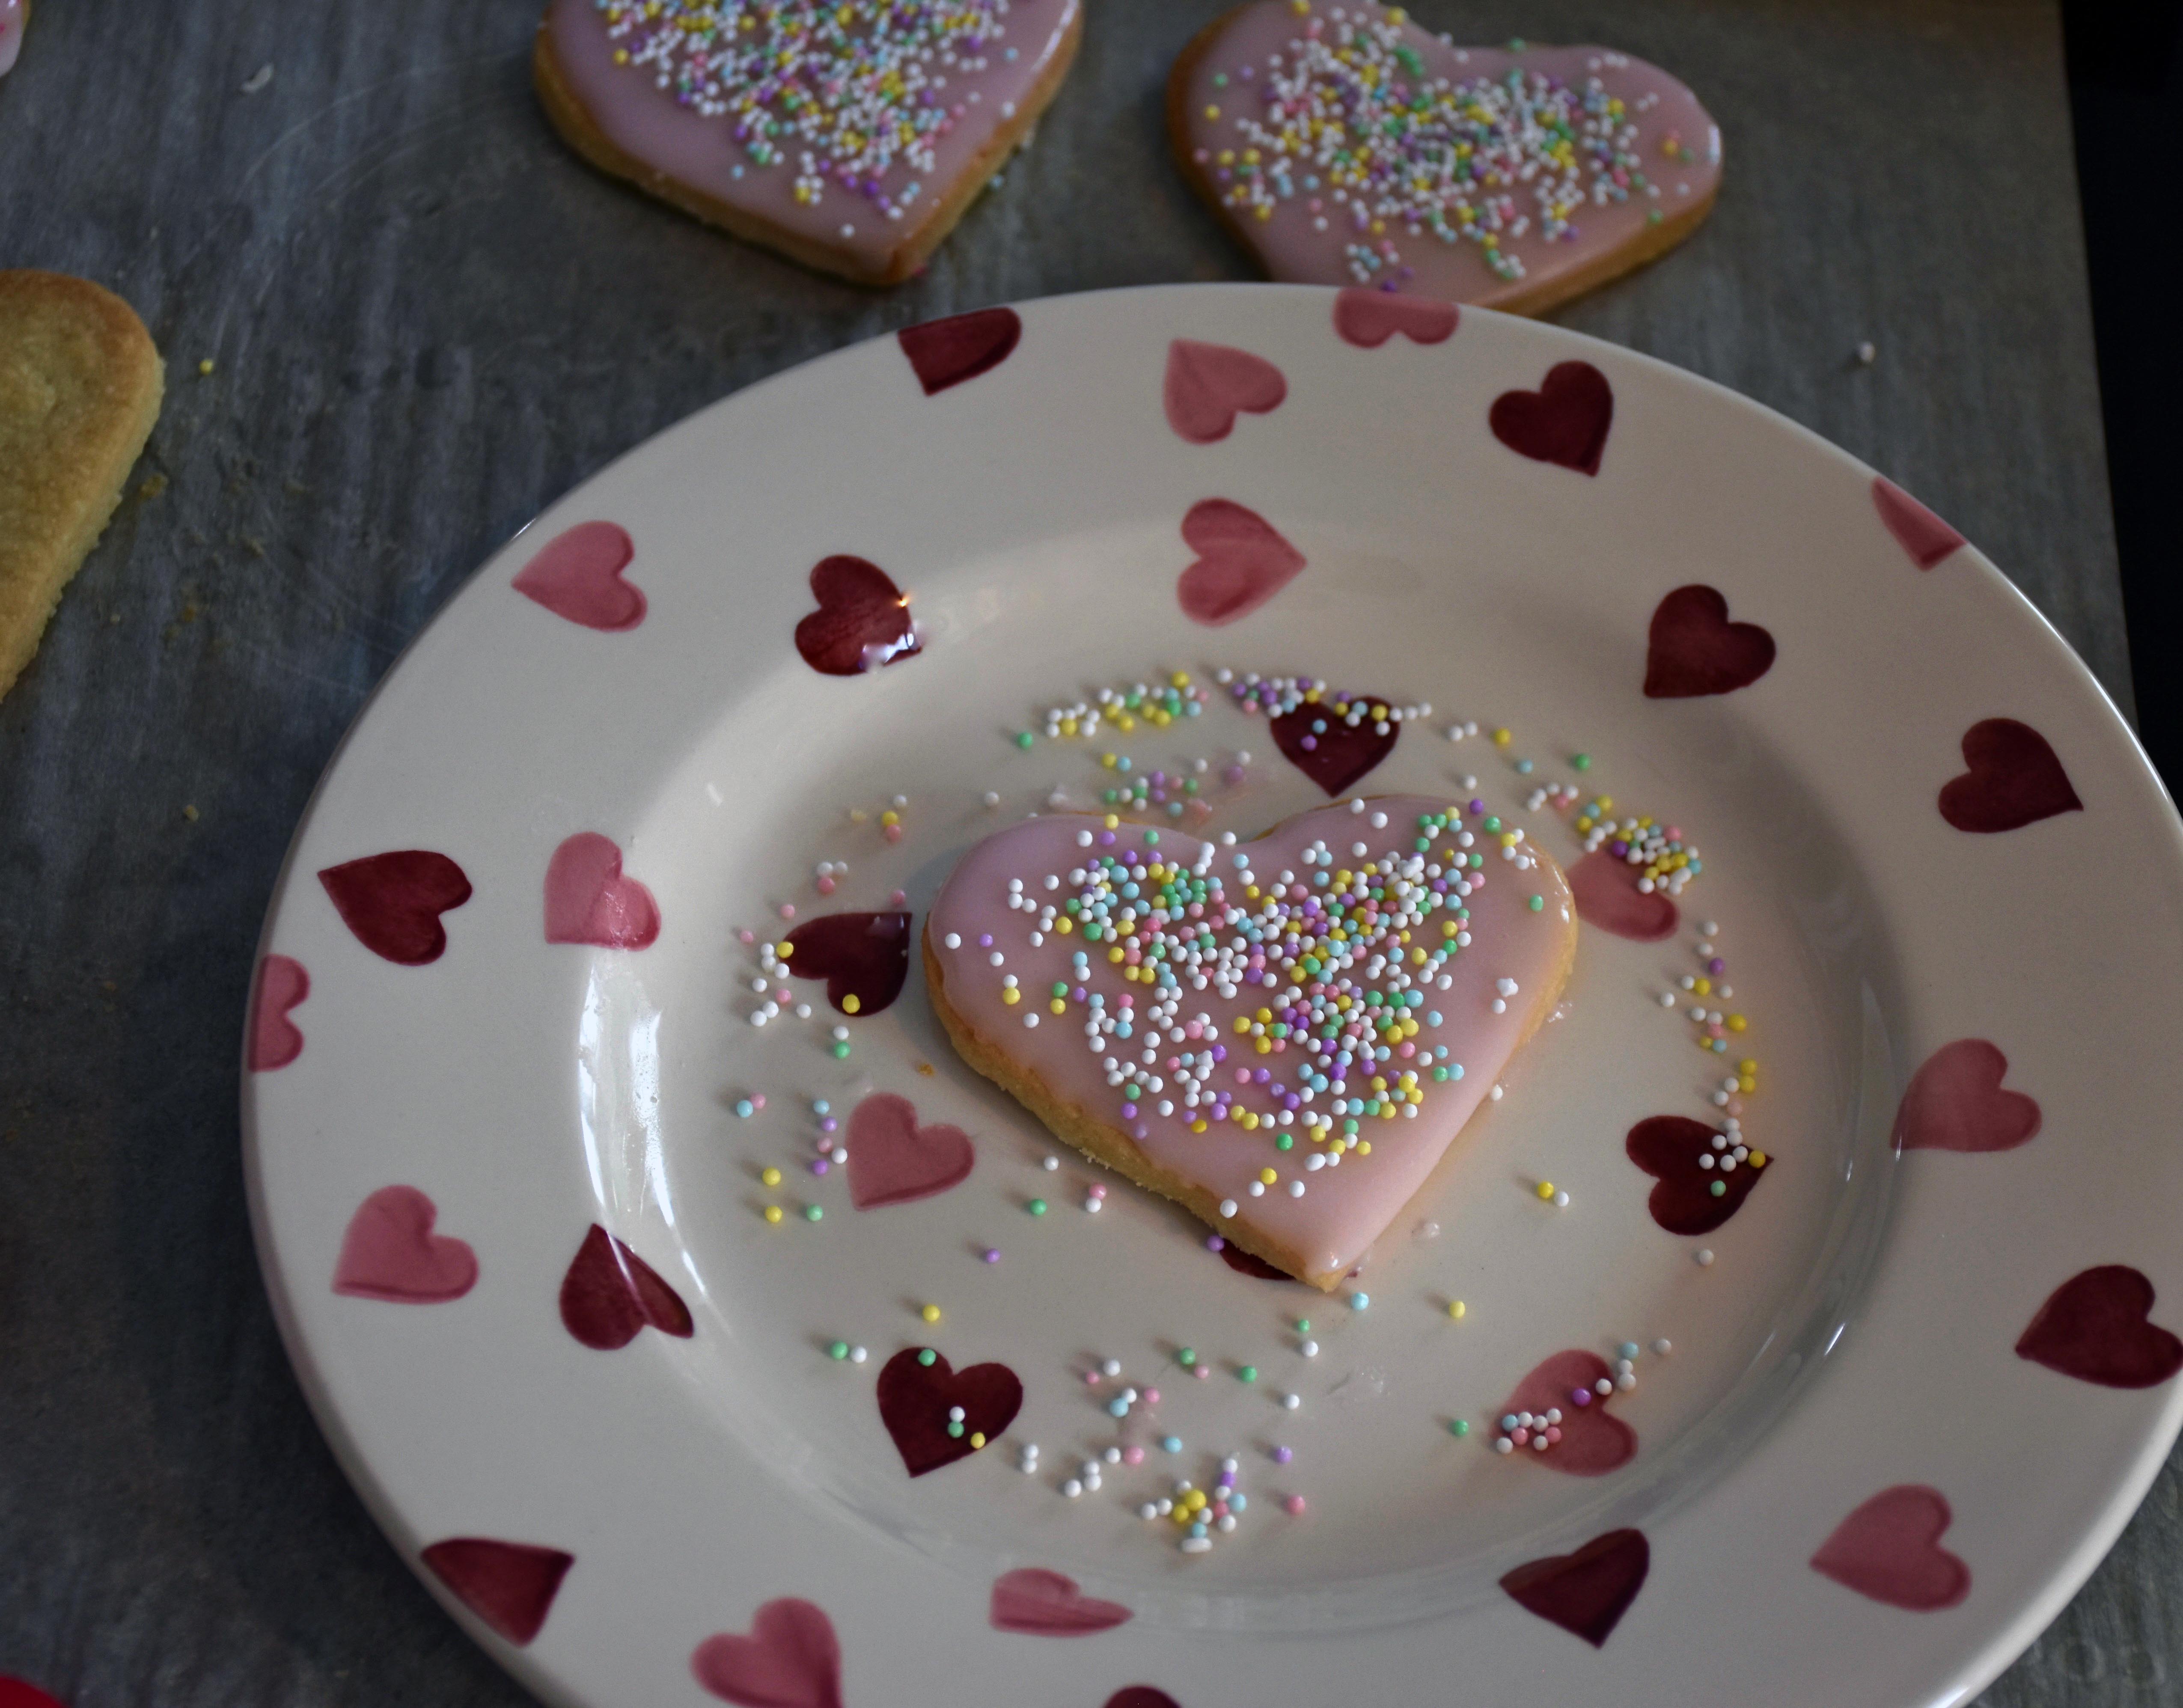
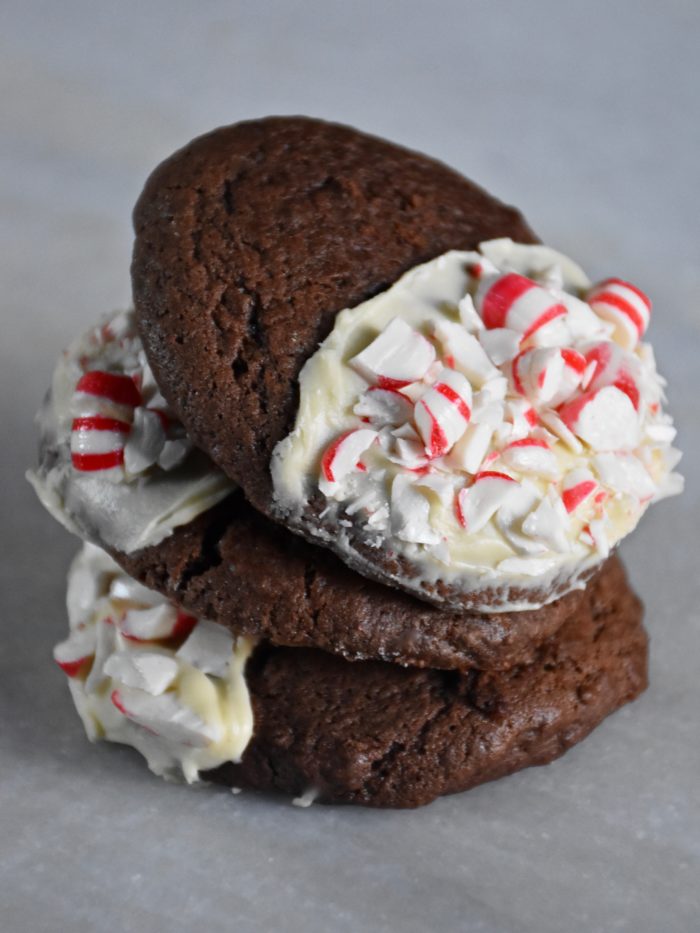
Then immediately add your sprinkles or sanding sugar on top. If you wait then the icing will set and the sprinkles won’t stick. So frost and sprinkle one cookie at a time. Stir your icing from time to time and if it starts to cool in the pan you can heat it slightly on low. I used sprinkles on some and hot pink sanding sugar on others. So get creative with your own decorations. The icing will cool and set on your cookies in about 20 to 30 minutes. Once they are set you can stack them and they keep well at room temperature, which makes them great for sharing.

These dreamy cookies are so delicious that they didn’t last long in our house. The flakey shortbread will melt in your mouth. So if you are looking for something fun to bake this Valentine’s Day these cookies would be wonderful.

Panko and Herb Crusted Salmon

Salmon is full of flavor and it makes a wonderful meal because it cooks so quickly. So for my second recipe in my series on weeknight dinners, I am serving up a panko and herb crusted salmon with a French twist. The salmon is covered in a Dijon mustard and sour cream base. I like the touch of heat from the mustard, but a little sour cream adds a lighter tangy taste that you find in French recipes for creme fraiche baked fish. Then I layered on more flavor and texture by adding garlic butter and herb seasoned bread crumbs. I love adding Herbs de Provence to flavor fish. It is a mix of chervil, basil, rosemary, tarragon, thyme, lavender and marjoram and it complements the Dijon and fish perfectly.

Panko and Herb Crusted Salmon – Serves 4

  • 1 to 1 1/4 pounds of fresh salmon cut into 4 portions
  • 1 cup panko breadcrumbs
  • 3 tablespoons of butter
  • 1/4 teaspoon fresh garlic either pressed or grated on a microplane (about 1 clove)
  • 1 teaspoon sea salt
  • 1/1/2 teaspoons Herbs de Provence (a spice blend you can find at most grocery stores)
  • 1 tablespoon Dijon mustard
  • 1 tablespoon sour cream
  • l lemon for a lemon slice garnish (optional)
  • 1/4 cup fresh flat leaf parsley minced (optional)

First preheat your oven to 375 degrees.

Next in a medium-sized skillet melt your butter and add in your grated or pressed garlic. Sauté your garlic for about a minute using a spoon or rubber spatula to break it up and evenly stir it into your butter. Then add in 1 cup of panko bread crumbs. These Japanese styled bread crumbs have a large irregular texture, which means they stay crispy when baked, but the trick to getting a great golden color when adding them to fish is to sauté them in a little butter before you bake them.

Once you add your bread crumbs in stir them well to coat them in the garlic butter then add in your herbs de Provence and sea salt and toast them just slightly for about 2 minutes till they just ever so slightly pick up a bit of color.

Then in a small bowl or cup mix together your Dijon mustard and sour cream. Cover the tops and sides of your fish portions with mustard mixture keeping the skin side down. Then once they are covered in the mustard mixture take your bread crumbs and sprinkle and press the seasoned crumbs onto the top and sides of the fish.

Then take your salmon portions and place them on a baking sheet lined with parchment paper or foil.

Bake your fish on the center rack so the bread crumbs stay golden. My family likes baked fish to be slightly firm and just baked through which for salmon, that is 1 1/2 inches thick, is about 20 minutes. If you like your fish to be slightly rare and pink in the center then adjust your cooking time to 12 to 15 minutes depending on the thickness of your fish. Then once baked you can sprinkle on some minced parsley and serve with a twist of lemon.

While you fish is cooking you can make a quick cooking side of wild rice (Uncle Ben’s happens to be my favorite).  Then add in a green vegetable like my roasted green beans and shallots which can cook on the top rack of your oven at the same temperature and time or try a salad like my pear and cranberry salad. There you have it a quick cooking weeknight meal that is healthy and full of flavor. Salmon’s smooth and lighter taste makes it a favorite with my daughters and the French flavors keep this dish delicious. Bon appetit!

Parmesan Crusted Chicken Piccata

Dinner is more than a meal in our house. It’s a moment to slow down and connect. It also happens to be my favorite time of the day. Gathered around our little cherry red kitchen dinette set we have shared some amazing tales and meals. Some of my most loved dinners are not always fancy, but they are delicious. So to start off the new year I thought I would share a new series of our family’s favorite weeknight dinner recipes.

I try to plan my meals for the week, but sometimes when I get a little “what’s for dinner?” mind block I start asking for suggestions. My husband’s request is usually chicken piccata. My version of this classic dish has a twist with a crispy parmesan crust. It’s a quick cooking meal that even my little picky eaters like.

Parmesan Crusted Chicken Piccata – Serves 4 to 6

  • 4 to 6 thinly sliced chicken breast cutlets (I buy mine pre-sliced which saves time and I happen to like the Purdue brand)
  • 1 1/2 cups all-purpose flour, divided
  • 1/2 teaspoon salt
  • 1/4 teaspoon pepper
  • 1/2 cup finely grated fresh parmesan cheese
  • 2 eggs
  • 1/2 cup milk
  • 4 tablespoons olive oil, divided
  • 4 tablespoons butter, divided

Lemon Wine Sauce

  • 1 cup white wine (I like to use a chardonnay)
  • 1/4 cup lemon juice (about 2 lemons squeezed)
  • 3 tablespoons butter
  • 2 tablespoons capers
  • 1/4 cup of flat leaf parsley finely chopped
  • lemon slices (optional)

First prepare your breading for your chicken in three separate bowls. In one shallow dish or bowl mixed together 1 cup of flour and the salt and pepper.

Then in a second dish whisk together your eggs and milk until well combined.

Then in your last dish mix together 1 cup of finely grated parmesan cheese and your remaining 1/2 cup of flour.

Now you are ready to bread your chicken. I like to use a double breading technique because it ensures that your chicken is going to be crispy and well coated.

My breading bowls all set up. I also like to have a plate ready for my finished pieces of chicken.

Next individually dip your thinly sliced chicken breasts in the flour, then in the egg mixture holding it up to let the excess drip off. Then pat your chicken in the final parmesan breading making sure it is well coated on both sides.

Then let your breaded cutlets rest about five before you pan fry them. This allows the breading to adhere better and makes for a crispier chicken.

In the meanwhile get a large skillet prepared by melting 2 tablespoons of butter with 2 tablespoons of olive oil on medium heat. When your butter is melted add your chicken in two batches and cook on medium to medium high heat for about 2 to 3 minutes on each side until your chicken is golden brown. Use a fork to turn your chicken because tongs can be tough on breading. Before you add your second batch of chicken add another 2 tablespoons of butter and olive oil to your pan.

The thinly sliced chicken is great because it cooks quickly. So keep a close eye on it when the chicken turns golden brown it’s time to flip it.

Then remove your chicken from the pan and add in your white wine. Let it reduce down by half and then add in your lemon juice. Next turn down your heat to medium low and whisk in your butter one tablespoon at a time. Finally stir in your capers and your sauce is done.

The lemon white wine pan sauce. Make sure you scrape up all the good little bits in the pan when you add the wine, because they make a great sauce.

Now you are ready to serve your chicken simply spoon a generous amount of the lemon wine sauce onto each piece of chicken and sprinkle with chopped parsley. I like to serve my chicken piccata with a side of pasta and a side salad or some quick cooking parmesan roasted asparagus.

So if you too have ever had the what’s for dinner mind freeze, then I have just the recipe for you. These chicken cutlets cook quickly so this whole meal takes less than thirty minutes to make. The crispy parmesan chicken piccata tastes like gourmet chicken nuggets, which is great because my girls will happily eat it. So now you know why this chicken piccata is such a favorite in our house.

Celebrating Maison McCauley’s Second Anniversary

“One day you will look back and see all along you were blooming.”

Morgan Harper Nichols

This week, I am celebrating the second anniversary of my blog Maison McCauley. Writing this blog began as a way for me to find meaning and joy in the sea of change that followed my family’s unexpected move to Chicago. Even good changes can have hard moments because in order to move on you have to say goodbye to the way things were. I had to leave my job of nearly nine years as an assistant district attorney. Most days I loved my job, but years of long hours and tough cases began to take their toll on my family, so deep down I knew this move meant I needed to step back and slow down.

When I was a new attorney working hard to make my way up in the felony courts I had an older attorney friend pull me aside one day. She said, “Don’t take this the wrong way, but you know if you left your job tomorrow the office would still run and there would be a new person to take your place. So don’t forget to take care of yourself.” I understood what she meant because in those words was an even more important and nagging question: what were the things that really mattered? Was I sharing the best of my talents and what I had to give or was I somehow just settling? Could I be brave and do something different?

When we moved I talked about finding good in this change by spending more time with my daughters and doing what I loved most: writing, cooking and creating. So I decided I would start writing to share with others. Starting something new and sharing my work on a blog felt a little scary at first. Doubt would creep in and keep me from starting with questions like: What would other people think? Would they even like it? My husband was the one who finally challenged me to sit down and just write. The words began to come and a small seed was planted. Good things take time to grow and I had to begin somewhere.

Now two years into this adventure I am grateful for this opportunity to see life differently. Who knew how much joy there could be getting a great photograph of a cupcake or a bowl of Texas chili? So thank you my dear readers for following along with me. Thank you for your encouraging words, your comments and text messages and for allowing me to share what I truly love with you.

So in looking back and celebrating the past year I am sharing  the top recipes from the blog this year:

The all time top recipe on my site are these Carrot Cake Cupcakes. They have a little more spice than your traditional carrot cake but it makes all the difference. Top them off with cream cheese icing and some candied carrot curls and you have one amazing cupcake.

The second most popular recipe this years was for Jo Jo’s biscuits. They have been a favorite recipe on the blog this year bring new readers to Maison McCauley.

The third most popular recipe is a crockpot recipe I created for a Rosemary Braised Beef With Parmesan Polenta. It’s easy to assemble but the depth of flavor makes it a standout dish.

My personal favorite from this year was this Heavenly Angel Food Cake. It’s light sweet and absolutely delicious.

And because a girl cannot survive on cake alone my favorite savory dish is for this Herbed Goat Cheese Chicken. It’s one of my all time most loved recipes for entertaining because you can have it all assembled ahead of time and pop it in the oven just before your guests arrive.

Thanks for helping me bloom and for being a part of the growth of my blog this past year. I am looking forward to the coming year and all the creative possibilities it holds.

A Buttercream Butterfly Garden

We are not ones to let a little thing called January get in the way of celebrating and imagining some summer birthday fun. Each year when the first frost comes the flowers in our garden seem to fade and disappear overnight. This always makes my oldest daughter a little sad because she loves being outside. So in honor of my flower loving girl’s birthday we decided to turn our dining room into a colorful butterfly garden. I started by adding some bright flowers to add to our table. The vibrant orange roses, pink carnations and purple freesia looked like a happy summer garden. In keeping with the garden theme I used a ceramic pot as the base for this pretty arrangment.

We had just returned home from traveling so I had picked up some paper butterflies I had gotten earlier from paper source and my girls and I had fun decorating our dining room. My daughter’s birthday is so close to Christmas that I changed up our our existing holiday decorations just a bit. Even the garlands and chandelier got a touch of summer with these pretty patterened butterflies.

Then one of the best parts about birthdays in our house is the cake. Since I was a little short on time to bake and I wanted to have some fun outside of the kitchen too, we decided to go with cupcakes.

My daughter loves chocolate cake and if you want to make your own you can find the recipe for our favorite cupcakes here. This year the birthday girl herself wanted to decorate the cupcakes. So we tried out a new set of icing tips I had gotten for making buttercream flowers. I helped get the icing ready, but then my now six year old had fun pipping some flowers. These new tips were surprisingly easy to use and my daughter was quite pleased that she could make her own. Now that we are six I am finding that she wants to do everything herself. Then as a final touch I added some edible paper butterflies from a company called Sugar Robot. I love these butterflies and I have used them on other cakes. They are an easy way to add a little color and whimsy to any cake.

Then we placed them in a scalloped window box (really a wooden shelf turned upside down) and our buttercream garden was complete. We had breakfast for dinner, my daughter’s favorite followed by cupcakes with lots of frosting, which is defiantly the best part of baking.

At each celebration and milestone my husband and I always give each other a knowing look and think how truly lucky and blessed we are to have such wonderful daughters. We had a long journey to build a family, but moments like this make us grateful. What fun we had celebrating the day and we are looking forward to all the the great things that being six brings.

Peppermint Black and White Cookies

You never know where baking inspiration will come from. My family was doing some Christmas shopping this weekend and my daughter and I were waiting in a long line at Williams Sonoma. A cheerful employee was apologizing for the wait and handing out peppermint bark to keep spirits high. Once the chocolate arrived everyone was smiling. As I was watching this, I was thinking about my to do list, when an idea came to me for a new “peppermint bark” cookie. It’s a holiday spin on your traditional black and white cookie that my girls love. I took a favorite chocolate cookie and dipped it white chocolate and then sprinkled it with crushed peppermint for a festive and delicious new holiday recipe. The cookies are light and soft like a chocolate Madeline, but the white chocolate and peppermint add a crisp sweet twist.

My girls and I love to bake cookies as gifts so this week we had a holiday chocolate cookie bake-a-thon with these new chocolate peppermint cookies along with our favorite chocolate chip cookies. We turned up the Christmas music and made dozens of cookies. It was lots of fun to bake together and the girls were so excited to share their cookies. So I thought I would share one last holiday recipe in case you find yourself in a holiday baking mood.

Peppermint Black and White Cookies (makes about 2 dozen cookies)

  • 2 cups flour
  • 2/3 cup natural unsweetened cocoa powder
  • 1 teaspoon baking powder
  • 1/2 teaspoon baking soda
  • 1/2 teaspoon kosher salt
  • 12 tablespoons of butter at room temp
  • 1  1/2 cup granulated sugar
  • 2 eggs
  • 1 teaspoon vanilla
  • 1/2 cup sour cream
  • 2/3 cup hot (but not boiling) water
  • 2 bars (8 oz) good quality white chocolate (I used Ghirardelli brand but I also like Lindt)
  • 4.5 oz (1/2 a bag) starlights round peppermints crushed in pieces

Preheat your oven to 375 degrees.

Next get you baking pans ready by creating parchment paper liners which will make it easy to remove your cookies from the baking sheet. I also traced some 2 1/2 inch circles on my baking sheet using the bottom of a standard baking powder tin as a guide. You don’t have to trace circles but I found it helpful so all my cookies were the same size. Then flip the side with your markings towards the baking sheet so the writing doesn’t touch the cookies.

Now you are ready to make your cookie batter. In medium bowl mix together your dry ingredients including your flour, cocoa, baking powder, baking soda and salt. Then in the bowl of your mixer fitted with a paddle attachment mix together your butter on medium speed until smooth. Then scrape down the sides of your bowl and add in your granulated sugar and beat on medium speed until it is light and fluffy.Then add in your eggs one at a time beating after each addition. Then add in your vanilla and sour cream. Then add half of your flour mixture and mix it until it is just incorporated and then mix in the rest of the flour. Finally add in your hot water and mix until just blended.

Then make your cookies by dropping the batter onto each circle. I used an ice cream or cookie scoop that holds two tablespoons of batter, but you could use a spoon. Once your batter in on the parchment paper lined baking sheet use a separated spatula or table knife to spread you batter to fill the 2 1/2 inch circle you drew.

Then you are ready to bake your cookies. I like to bake one sheet at a time on the middle rack to make sure the heat is evenly distributed in my oven. Bake for about 10 to 12 minutes. I found that my metal baking sheet baked in exactly 10 minutes. Your cookies will have a nice raised dome but the bottoms will be smooth. Let them cool a bit before you frost them.

In a microwave safe bowl break your white chocolate into small pieces then microwave for 30 seconds and stir then microwave it for another 30 seconds and stir. Then heat it for additional 15 second intervals until your chocolate is just melted stirring in-between. You want to be careful that you do not over heat it, as chocolate can burn easily. So go slow and stir well in-between.

Once your chocolate is melted you need to decorate your cookies. I crushed my peppermint ahead of time by placing my unwrapped mints in a ziplock back and then lightly pounding them with my meat tenderizing mallet. The mallet method is a fun way to relieve a little holiday stress. If you prefer you could also use the food processor too.

Next, spread a spoonful of melted white chocolate over 1/2 of your cookie and then sprinkle on your crushed peppermint. Then let your chocolate and peppermint set by setting your cookies out to cool on parchment or wax paper.

Chocolate cookies all dressed up in holiday style. Now the only accessory this stack of cookies needs is a cold glass of milk. I hope you love making and sharing these cookies as much as we did. This is going to be my last post for this holiday season, because I am going to be taking a short break from blogging to enjoy time with my family. There are school holiday party crafts, gifts to wrap and so much fun to be had this week. I wish you all the happiest holidays and I will be back writing and sharing more in the New Year.

The Joy of Gingerbread

Put a pastry bag with icing in my hand and there is a deep sense of joy that comes over me. It doesn’t matter how crazy messy my kitchen looks or how many things I have left to do on my holiday list. When I sit down to pipe and decorate it all just fades away. This is the reason that for nearly two decades I have continued the crazy tradition of baking gingerbread houses. There have certainly been years where I took on a little more than I should; usually my struggles have been with the architecture of a structure. One year in college I decided to make the Texas A&M football stadium and I had trouble with the steep sides sliding down onto my green coconut field. Since then I try to right size my projects so I can focus more on the fun of decorating it.

When I first started the tradition I was in high school and the Food Network was not in full swing yet and there wasn’t Pinterest or food blogs. So I had to teach myself everything from cookbooks. Looking back my early gingerbread houses are what made my truly fall in love with baking. Each year I would learn more and create something different. This year since I now have kitchen helpers, I decided to create a project we could each work on. This year I made little house fronts for my girls and I pieced together a series of facades to create my own gingerbread centerpiece. Usually, I create a full house, but this project was fun and left me with more time to focus on the piping details that I love.

All of my projects start with a little planning and some basic math to make sure that I have a structure that is going to fit together.

I took a cardboard gift box and cut it apart to create a square base and templates for my houses. Then once I had the structural details sorted out I began baking. To see my recipe and tips on baking your own gingerbread then see my recipe post here.

I made two basic groups of houses. The houses you see above were for one of the sets of sides.

This is the front side with extra pieces for doors and tree details.

This year I sculpted a few extra pieces with a moon and some tiny stars. So even if you don’t have a cookie cutter for the shape you want you can still sculpt your own details.

Then the joy of decorating. I had sketched out a few ideas on an extra envelope I had. This years inspiration was to create Wedgwood ornament like details on my houses with starry sky details.

I piped my house fronts before I assembled my centerpiece box, because it’s easier to get these crisp piping details when you can work on a flat surface. I was careful as I put my houses together to make sure the sides were each seven inches wide.

Then once I was done decorating the sides I put my box together using my royal icing and I added small vases (empty votive candle holders) to the center that I put some fresh greenery in to give it a finished look.

The little gingerbread village makes a fun holiday centerpiece and an added benefit is that my dining room smells amazing. I enjoyed this centerpiece project because it left more time for me to focus on the pretty little details that I love.

Want a smaller project then take a look at my girls’ houses. They both decided they wanted to create pink houses. So we went with a vintage look with a pretty pastel pink and mint green.

My four year old need a little help with the piping the windows, but she had fun designing the rest. She even came up with the idea of adding little bushes.

These house fronts were just the right size for my girls to work on. I cut milk cartons down to create some supports to hold up their houses and we have them displayed in our kitchen and back playroom area where we can all see and enjoy them.

My five year old had an easier time pipping her own details. I love her little village complete with a little person by the Christmas tree if you look closely.
These are the little cardboard supports that I attached to the back with some royal icing. Just decorating house shaped cookies made this a simpler project for little hands.

So if a full gingerbread house sounds like too much then try a smaller house front. It’s makes a festive centerpiece and holiday project to share with your family.

My bookcase has never looked so cute. My girls were right pink houses are so much fun!

The Queen of Christmas

For as long as I can remember my mom has been the queen of Christmas. Before the Internet and all those pictures on Pinterest and Instagram, she had her own swoon worthy sense of style. Growing up our house was always dressed in elegant ribbons, wreaths, garlands, Christmas villages and trees. Her bows and displays are so pretty that over the years she has tied holiday ribbons for neighbors and friends too. Her joy for the season extends far beyond December. Each year she spends countless hours needlepointing stockings for the latest grandchild and making hand stitched ornaments as presents for everyone in our family. Over the years, she has even stitched an elaborate nativity scene with the most exquisite details and beading I have ever seen.

Needlepoint ornaments created by my mom.

This year Christmas started a bit early in our house because a local magazine wanted to feature my mom’s beautiful needlepoint decorations. They wanted pictures of her ornaments so the day before Halloween. I turned on the Christmas music and pulled out our Christmas tree. This for the record, this is the earliest I have ever opened the Christmas boxes. I wondered as I began unwrap the ornaments how I could capture in a photograph or two what all these decorations mean to our family. How do you share the unbridled joy and twinkle in my mom’s eye that comes each Christmas season? Because the tradition of ornaments is only one small part of the magic and love at my parent’s house each Christmas.

Christmas together at my parent’s house a few years ago.

When my mom was visiting us the week before Thanksgiving, she watched my girls for a day while my husband and I took a short road trip. While we were out they were already thinking about Christmas. I got cell phone calls reassuring me that everything at home was fine, but they needed to know where I kept the paint and glue. Our kitchen table was quickly transformed into a mini Christmas workshop. Over the course of a day, they made nearly a trees worth of handmade angels, Christmas trees, penguins and stars and still my daughters were begging to make more. In the days that followed we made paper chains and still more ornaments and then we decided that all these ornaments needed their own tree. So we created a new kids tree for our back room decorated with ornaments made by my daughters.

My Girls’ Christmas Tree with a weighted and raised metal base to keep it safe from our curious puppy.

Even after my mom returned home my oldest daughter has been asking to make more ornaments like Abuela. There is a certain familiar twinkle in my daughter’s eye as she has been creating her own new decorations.

It seems we may have two new Christmas queens this year, because one of the best traditions shared by my mom is her ability to inspire creativity. Over the years my Mom was generous about letting us help her decorate. I know there were times when we were little that a little redecorating was needed after we had gone to bed, but she would still happily let us help.

It’s not always easy to have patience and juggle it all during the holidays, but her Christmas joy runs deep. Now as a mother I look back and I am grateful for her wisdom to include us in all the Christmas fun. So the spark has been lit and a new generation of Christmas decorators begins.

Santa’s Favorite Frosted Sugar Cookies

It’s just not officially Christmas time in our house without making a batch or two of these classic buttercream frosted sugar cookies. These cookies make delicious holiday gifts and they happen to be Santa’s favorite in our house. The sugar cookie recipe is something I found in a farmhouse our family rented one time in the Fredericksburg, Texas. On a little corner table there was this book filled with handwritten family recipes. These traditional German sugar cookies sounded like fun so I copied the recipe down. I have added my own icing and made just a few tweaks to the recipe over the years. These cookies have remained one of my all time favorites.

I have been making these cookies since I was in high school and now it’s fun to share the recipe and holiday baking with my girls. I like to make snowflake shapes because it makes the frosting a little simpler when baking with young kids, however with a little food coloring you could bake and decorate any holiday design. I could see pipped candy canes, Christmas trees, stars or angels. These nostalgic and classic cookies are have crisp flakey edges with a soft chewy centers and the icing adds just the right amount of buttery sweetness. No matter what shape you make these cookies are just delicious.

Christmas Cookies (Weihnachts Plätzchen)- Makes two dozen cookies

  • 1/2 cup (1 stick) butter at room temperature
  • 1 cup granulated sugar
  • 1 egg
  • 1/2 teaspoon vanilla
  • 4 tablespoons milk
  • 1 teaspoon baking soda
  • 3 cups all-purpose flour

First preheat your oven to 350 degrees

Next in the large bowl of your mixer beat your butter and sugar together at medium speed for about 2 minutes. Then add in your egg at low-speed mix until it is incorporated.

Then add in your vanilla and milk and beat a low-speed until they are mixed in and finally add in your baking soda and flour mixing on low-speed until your cookie dough just comes together.

This is what my cookie dough looked like when it just came together.

Then using a silicone pastry mat or a clean floured work surface roll out your cookie dough. I like slightly thicker cookies so I roll my dough to 1/4 inch thickness.

Then place your cookie dough on your baking stone or a baking pan liked with parchment paper or a silicone liner, like a Silpat. When I am not baking with my seasoned baking stones, I like using parchment paper because it keeps your cookies from sticking.

Then bake at 350 degrees for about 8 minutes.

This is the front and back of my cookies so you can see what my cookies looked liked after baking.

All ovens are a little different so keep a close eye on your cookies I like mine to just barely have crisp golden edges. If you want a softer all white cookie then I would bake them for close to 7 minutes. Let your cookies cool and then you are ready to frost them.

Butter Cream Cookie Icing

  • 1/2 cup (1 stick) butter, room temperature
  • 3 1/2 cup powdered sugar
  •  1 teaspoon vanilla extract
  • 3 tablespoons of milk
  • 1/8 teaspoon salt
  • White sanding sugar, dragees or sprinkles for decoration (optional)

The key to this icing is to let your butter sit out of the fridge for at least a couple of hours to get soft. Once your butter is softened  place it in the bowl of your mixer and add in your powdered sugar, vanilla and milk. Mix it on medium speed until your icing is fluffy and spreadable. I like the slightly thicker consistency of this icing in a piping bag, but if your want to spread it with a knife you may want to add a teaspoon or two more of milk to thin your icing a bit. But a little milk goes a long way when you are making icing so go slow on adding any additional milk.

Now you are ready to decorate your cookies. Place you icing in a piping bag and then using a small round tip pipe on your snowflake designs. (You can get a small piping kit and easy to use disposable plastic piping bags at any craft store.) If the thought of using a piping back sounds scary then just use a small butter knife and spread your icing on that way.

Then once you have piped on your icing you can add a few decorations like sanding sugar or white dragees or sprinkles. Have fun coming up with your own unique patterns and designs. These cookies taste best at room temperature and can sit out on your counter for a while, but they will need to be stored in your fridge because they have uncooked milk and butter in the icing.

When baking with young kids I like to use a rubber band on the end of my piping bag, so that even if they grab it from the middle the icing doesn’t come flying out the back-end. This little trick has made it easy for my daughters to decorate their own cookies.

Let the holiday baking fun begin! This recipe maybe titled Christmas Cookies, but we love these cookies so much that we make it for other holidays too. Valentines Day hearts, four leafed clovers, Easter eggs or spring flowers. These frosted sugar cookies are wonderful all year round.

This holiday season I am doing what I love most: baking. Come back soon because I am going to be sharing more baking ideas and recipes. So whether you are baking for Santa or just want to share a sweet treat with family and friends, then give these frosted sugar cookies a try.

A Bespoke Blue and White Christmas Tree

I love how the twinkling lights of our Christmas tree can brighten my home and spirits almost instantly. It’s the first decoration I pull out from storage and the final to be put away each year. Last year I had to take down our tree in secret, in the wee hours of the night, to keep my daughters from crying. Our Christmas tree is so close to our hearts not because it’s department store perfect; instead it’s the memories and many handmade ornaments that make it ours. When I had my first place on my own I decided I would decorate my Christmas tree with stars. I love the shape and the symbolic meaning. In the Christmas story the star stands for hope and the promise of Jesus. Over the years my collection has grown. I have stars that have been given to me by friends and family that always make me think of them. I have stars I have found while traveling that remind me of great times and places. Then there are homemade ornaments, not all of them stars, that are my favorites because they remind me of the love that went into each stitch, painting, or drop of glitter glue.

This year we have double the tree excitement in our house because we decided to get a new larger tree for our living room, which had me creating a new look for our traditionally star studded tree. So with this new tree came a need for more ornaments.  So I decided to create some bespoke fabric stars that give our new tree a custom blue and white touch. I took some decorative fabrics remnants I had from other projects and I got some Pellon double-sided fusible interfacing from my fabric store.

Fabrics from previous projects made for some beautiful and inexpensive ornaments.

This stiff interfacing was easy to use and it allowed me to make double-sided stars without having to sew a stitch. All you need is an iron and some sharp scissors.

Here you can see the layers. I decided to use a different fabric on the front and back so each star has two different looks.

I just sandwiched my interfacing between two pieces of fabric that were cut into squares that were about the length and width of the stars I wanted to make. Then once my fabric was well ironed and attached on both sides, I used a cardboard star as a template and I cut out my star shape.

The finished star. I ironed it once more after I cut my shape just to make sure that all the edges were secure so they won’t peel or fray.

Here is a close up of a blue and white fabric stars on my tree. I used a needle and thread to add a simple thread loop on the top so I could hang them.

These stars were simple to make and I loved the look so I created some smaller stars for my mantle garland as well.

I change up my Christmas decor a little bit each year so no year is exactly the same. This Christmas I am loving our new tree and all the blue and white details.

I completed our tree with a new vintage inspired tree topper I created as well.

Then I got further carried away and even made some tartan terrier shaped ornaments for another garland in my dining room.

We have a Westie puppy we are very fond of, so it was fun to add a little bit of whimsy and Christmas fun on this garland.

Any basic cookie cutter like silhouette would work so you can customize and create your own one of a kind garland or ornament. The possibilities are as endless as your imagination. Choose your own favorite colors or patterns. You could do something more traditional like a cross or a snowflake, but I also think the silhouette of a flying bird or a butterfly would be pretty as well. I am still decorating and getting our house ready for the season so I will have to show you my girls’ tree and more decorating ideas and in the weeks to come. However, right now I am enjoying the view of our family’s tree and the warm fireplace as we defrost from all the winter snow and ice.

Want more greenery and garlands? Then here is a link to a previous post with more ideas.

Do you have a special collection of ornaments or a family tradition on how you decorate your tree? I would love to hear all about it.


Contact Us