
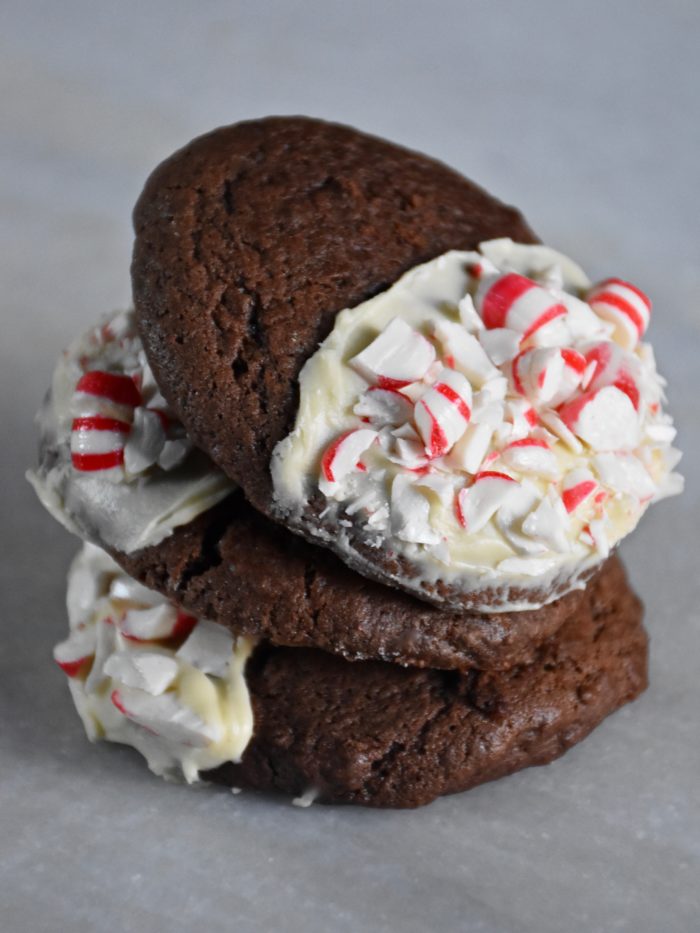
You never know where baking inspiration will come from. My family was doing some Christmas shopping this weekend and my daughter and I were waiting in a long line at Williams Sonoma. A cheerful employee was apologizing for the wait and handing out peppermint bark to keep spirits high. Once the chocolate arrived everyone was smiling. As I was watching this, I was thinking about my to do list, when an idea came to me for a new “peppermint bark” cookie. It’s a holiday spin on your traditional black and white cookie that my girls love. I took a favorite chocolate cookie and dipped it white chocolate and then sprinkled it with crushed peppermint for a festive and delicious new holiday recipe. The cookies are light and soft like a chocolate Madeline, but the white chocolate and peppermint add a crisp sweet twist.
My girls and I love to bake cookies as gifts so this week we had a holiday chocolate cookie bake-a-thon with these new chocolate peppermint cookies along with our favorite chocolate chip cookies. We turned up the Christmas music and made dozens of cookies. It was lots of fun to bake together and the girls were so excited to share their cookies. So I thought I would share one last holiday recipe in case you find yourself in a holiday baking mood.
Peppermint Black and White Cookies (makes about 2 dozen cookies)
- 2 cups flour
- 2/3 cup natural unsweetened cocoa powder
- 1 teaspoon baking powder
- 1/2 teaspoon baking soda
- 1/2 teaspoon kosher salt
- 12 tablespoons of butter at room temp
- 1 1/2 cup granulated sugar
- 2 eggs
- 1 teaspoon vanilla
- 1/2 cup sour cream
- 2/3 cup hot (but not boiling) water
- 2 bars (8 oz) good quality white chocolate (I used Ghirardelli brand but I also like Lindt)
- 4.5 oz (1/2 a bag) starlights round peppermints crushed in pieces
Preheat your oven to 375 degrees.
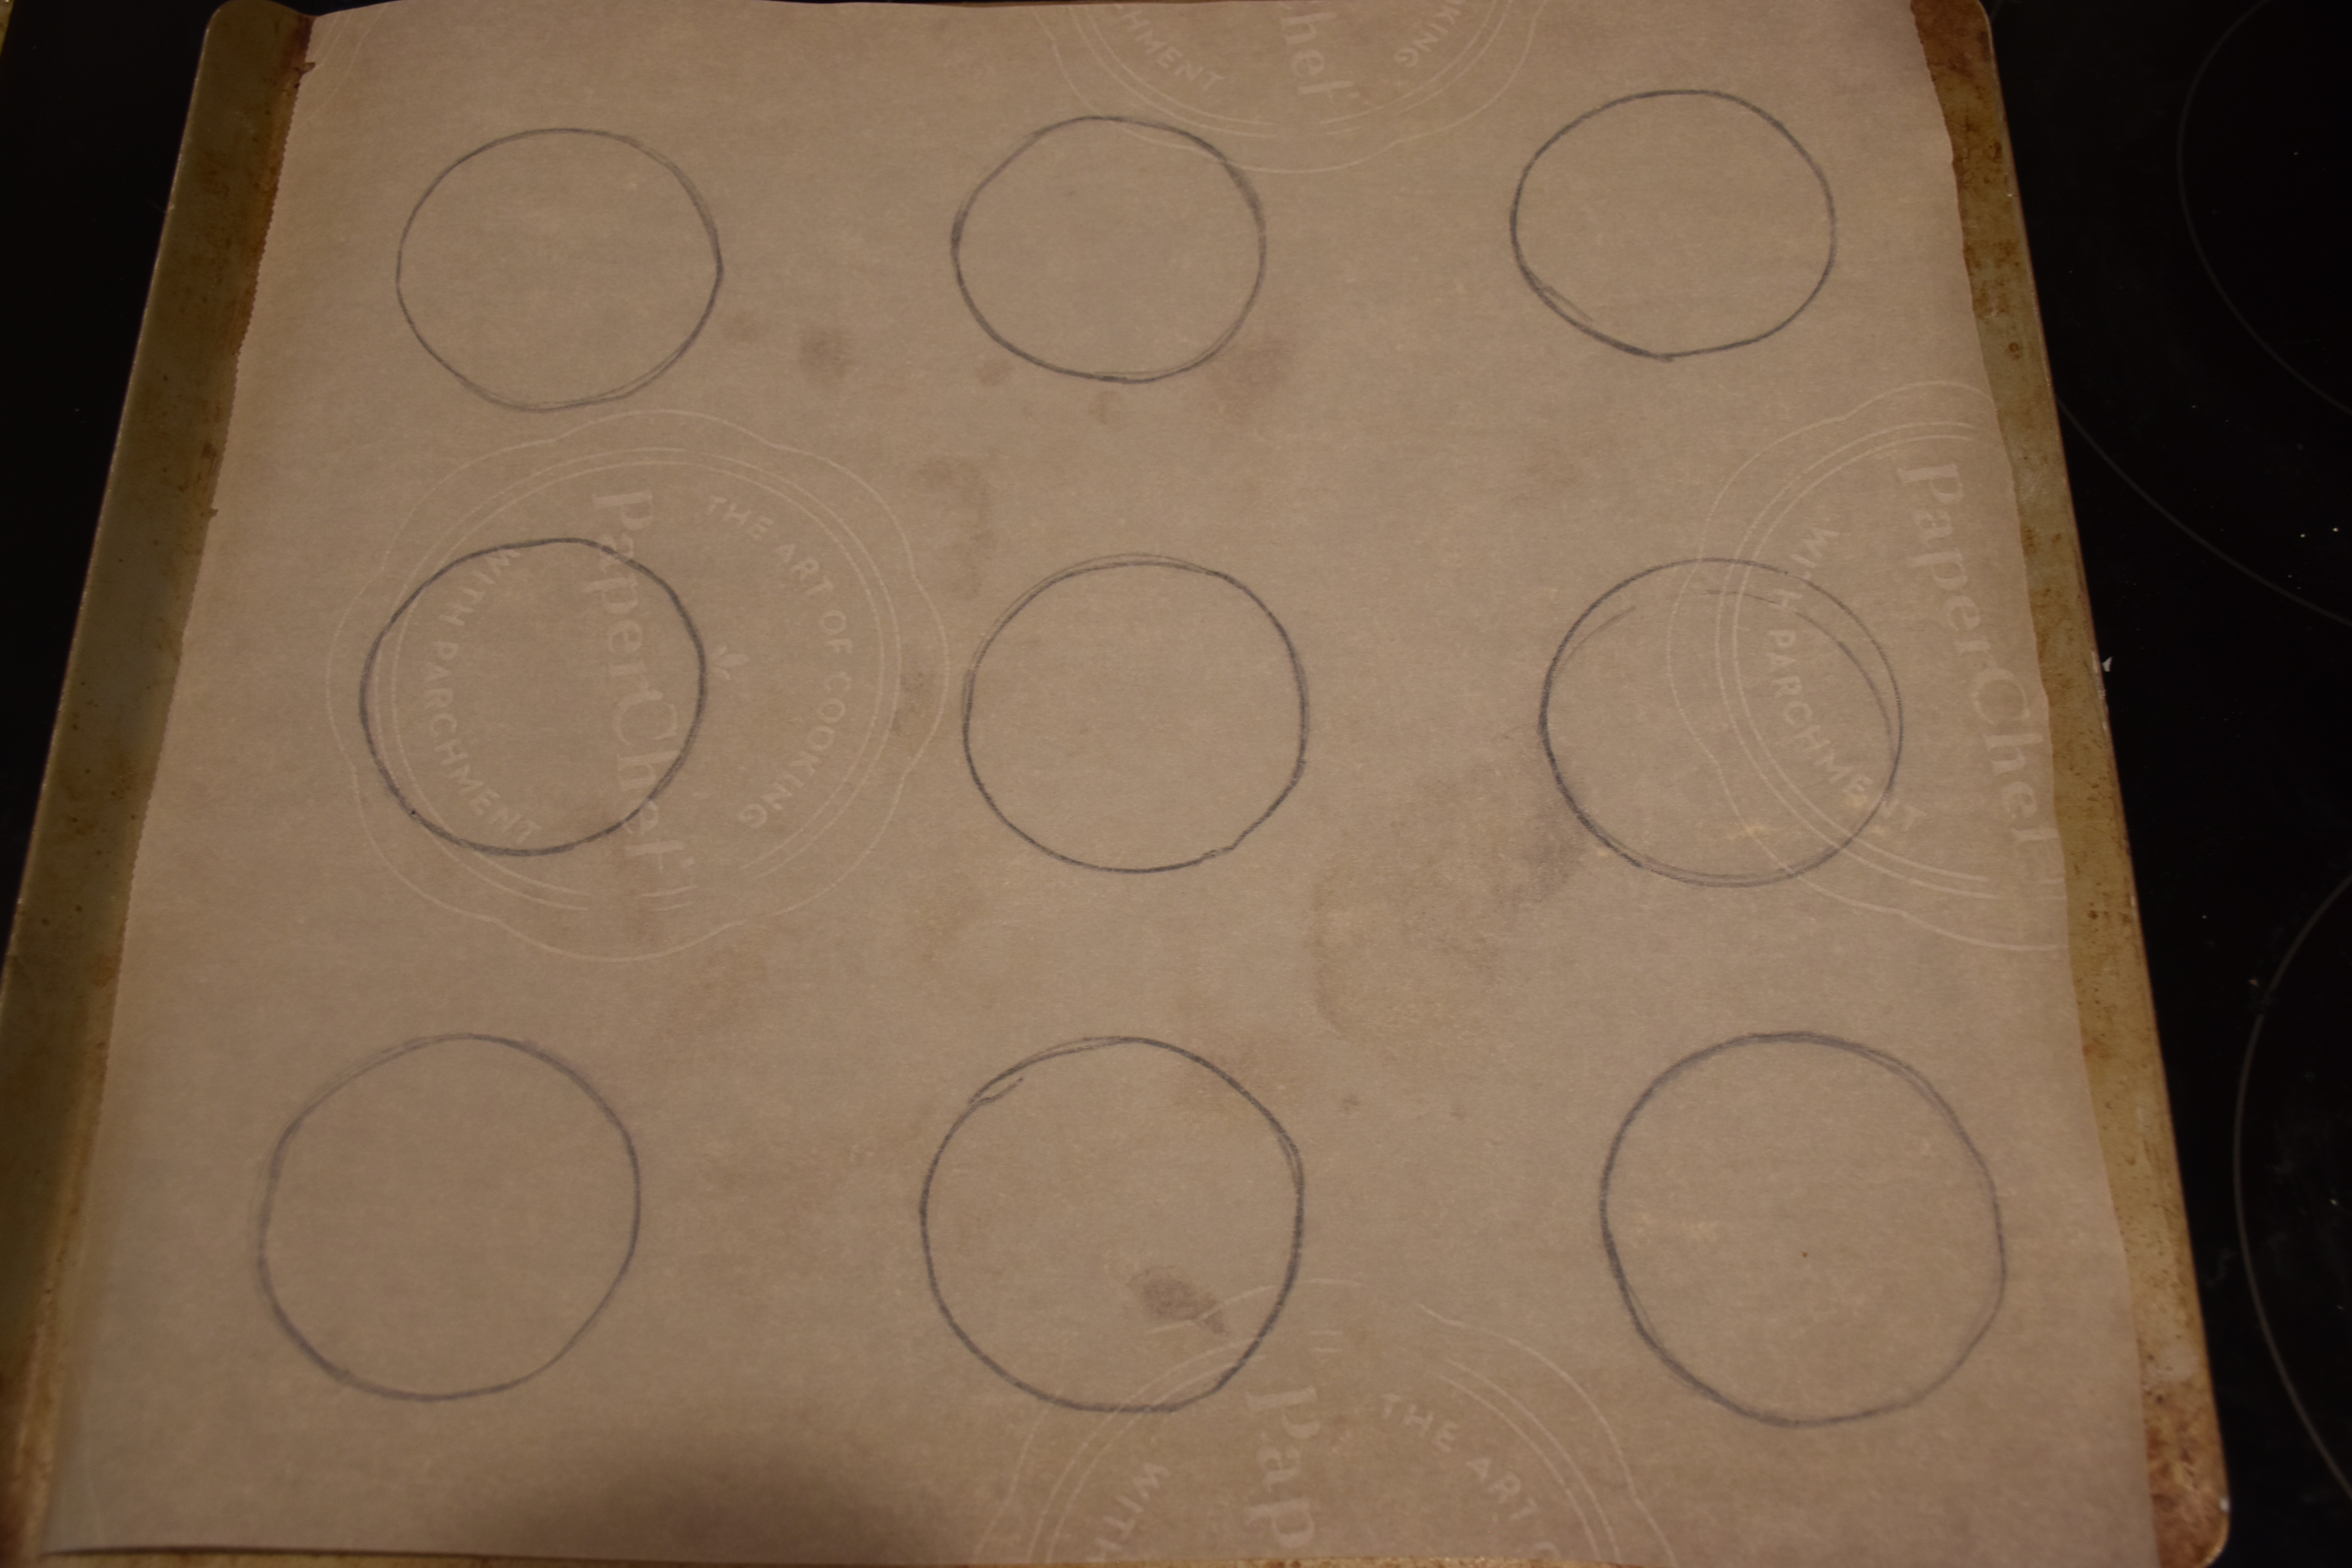
Next get you baking pans ready by creating parchment paper liners which will make it easy to remove your cookies from the baking sheet. I also traced some 2 1/2 inch circles on my baking sheet using the bottom of a standard baking powder tin as a guide. You don’t have to trace circles but I found it helpful so all my cookies were the same size. Then flip the side with your markings towards the baking sheet so the writing doesn’t touch the cookies.
Now you are ready to make your cookie batter. In medium bowl mix together your dry ingredients including your flour, cocoa, baking powder, baking soda and salt. Then in the bowl of your mixer fitted with a paddle attachment mix together your butter on medium speed until smooth. Then scrape down the sides of your bowl and add in your granulated sugar and beat on medium speed until it is light and fluffy.Then add in your eggs one at a time beating after each addition. Then add in your vanilla and sour cream. Then add half of your flour mixture and mix it until it is just incorporated and then mix in the rest of the flour. Finally add in your hot water and mix until just blended.
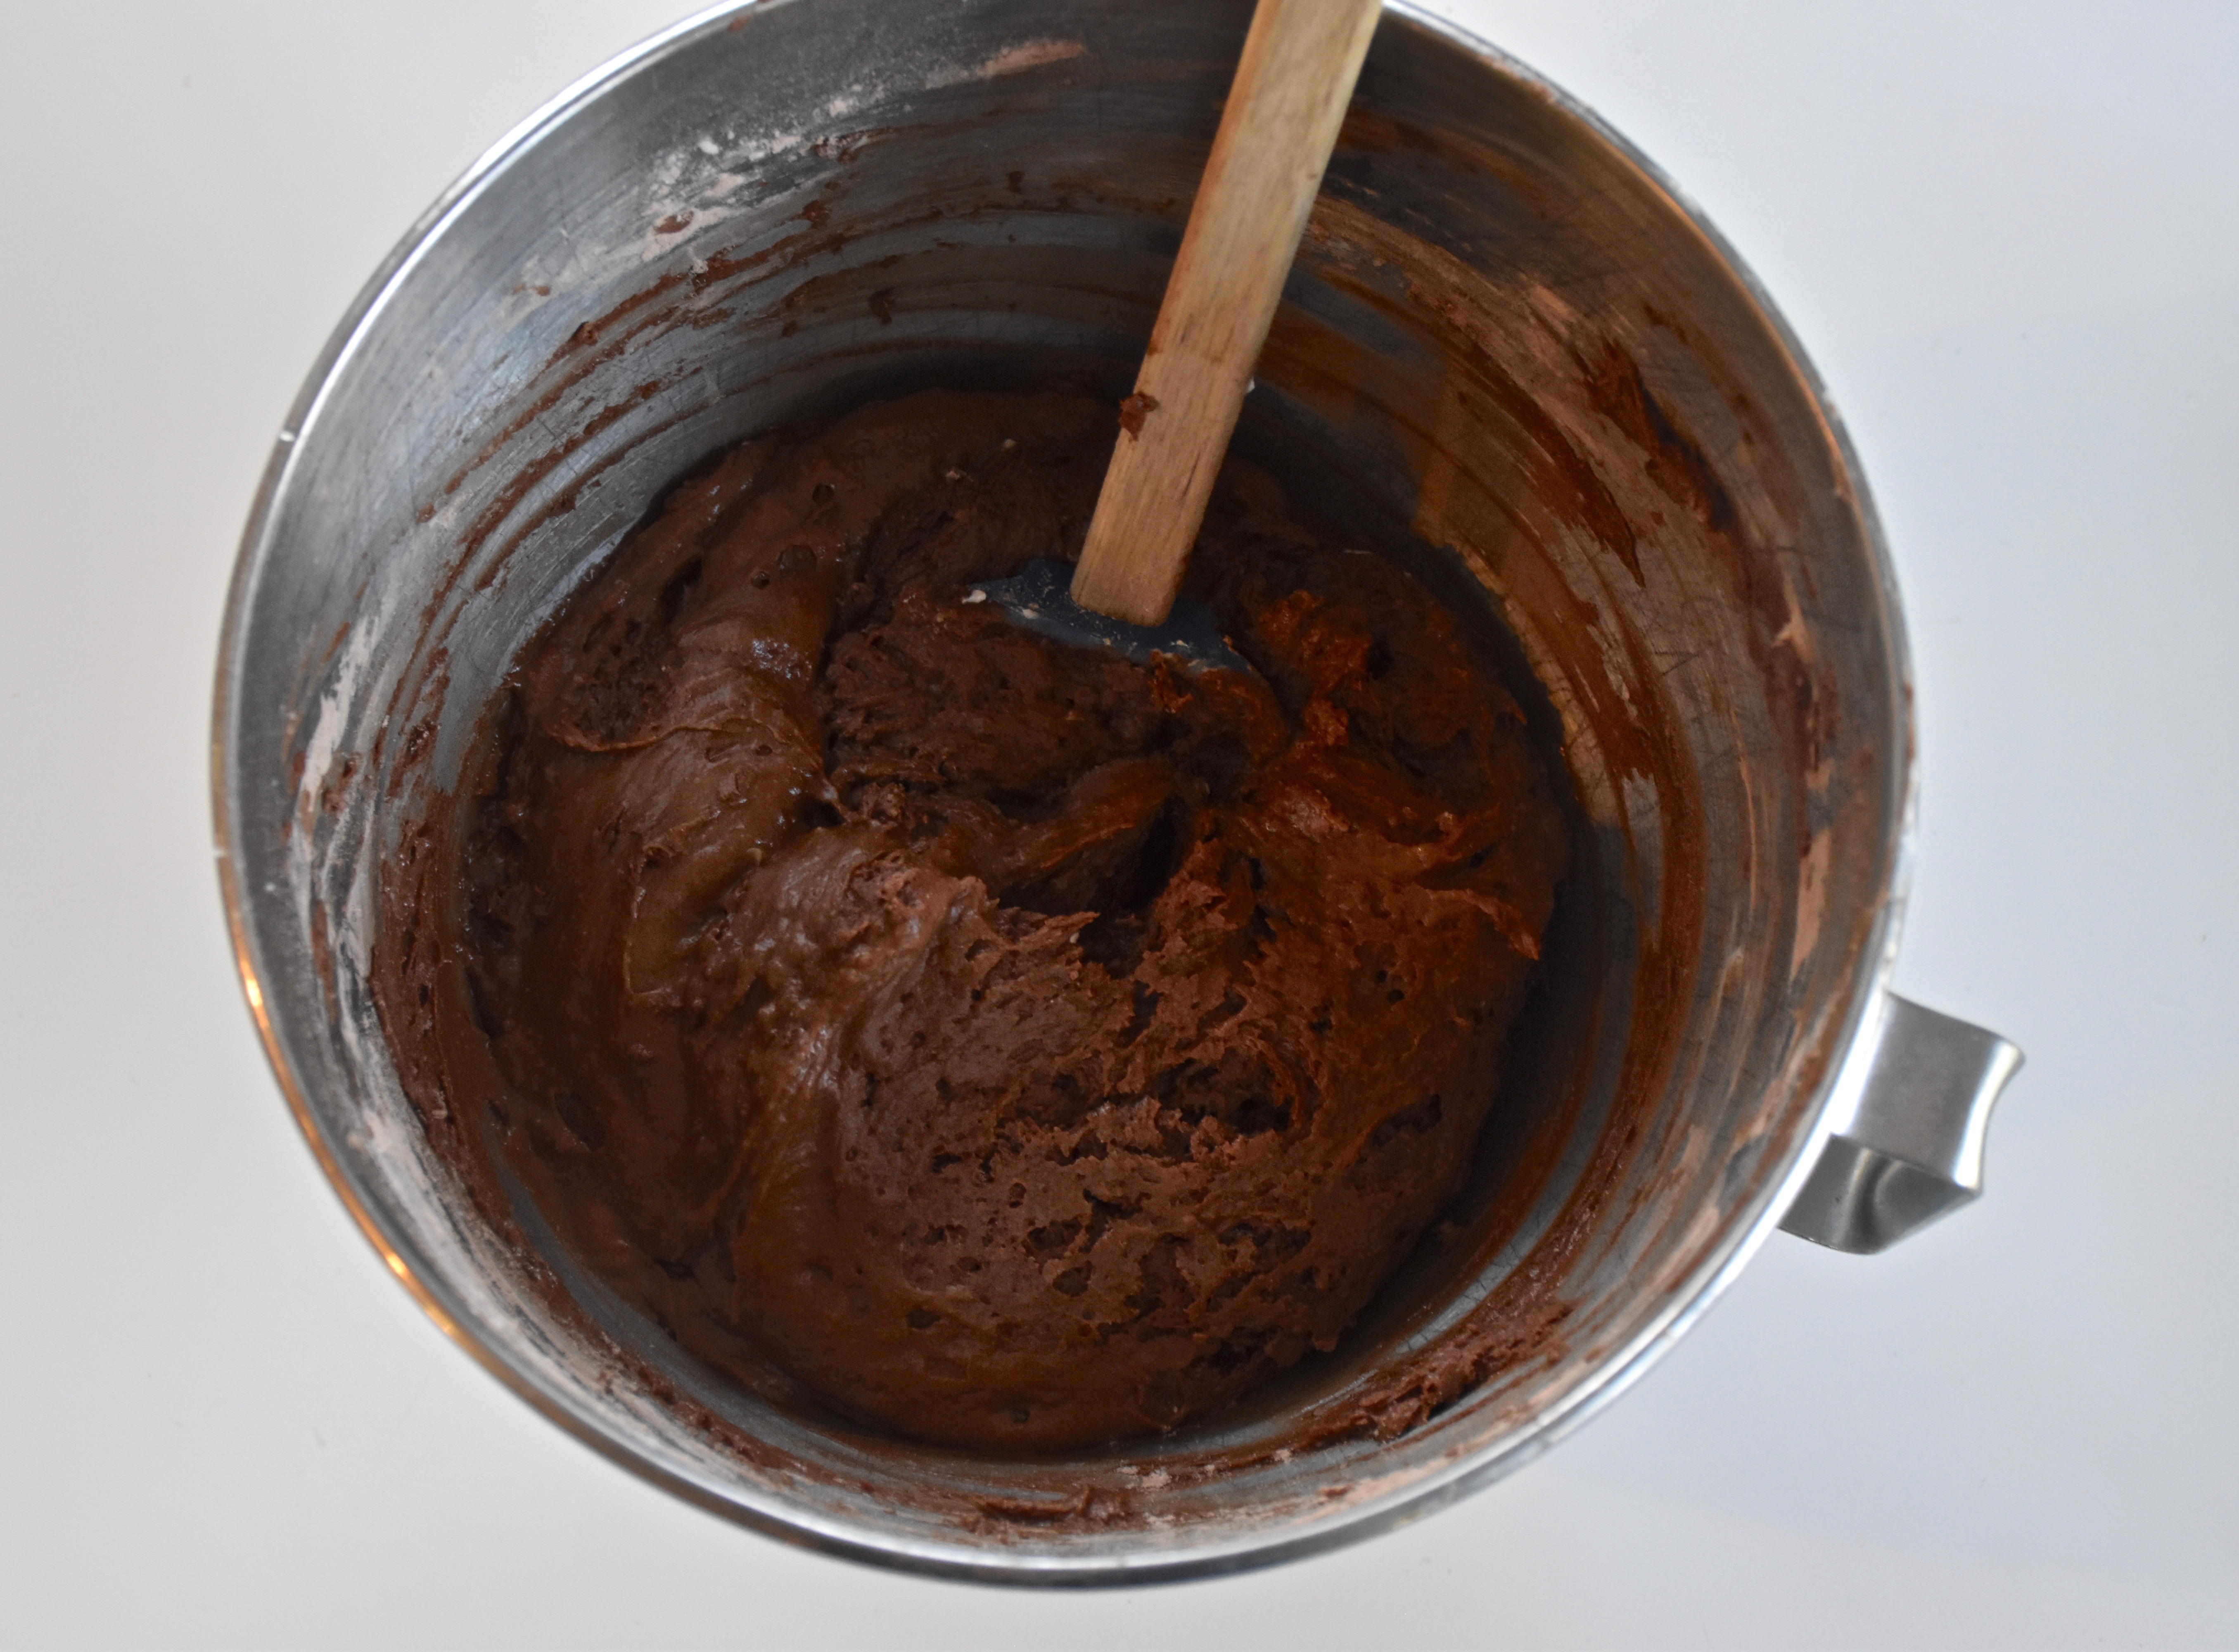
Then make your cookies by dropping the batter onto each circle. I used an ice cream or cookie scoop that holds two tablespoons of batter, but you could use a spoon. Once your batter in on the parchment paper lined baking sheet use a separated spatula or table knife to spread you batter to fill the 2 1/2 inch circle you drew.

Then you are ready to bake your cookies. I like to bake one sheet at a time on the middle rack to make sure the heat is evenly distributed in my oven. Bake for about 10 to 12 minutes. I found that my metal baking sheet baked in exactly 10 minutes. Your cookies will have a nice raised dome but the bottoms will be smooth. Let them cool a bit before you frost them.
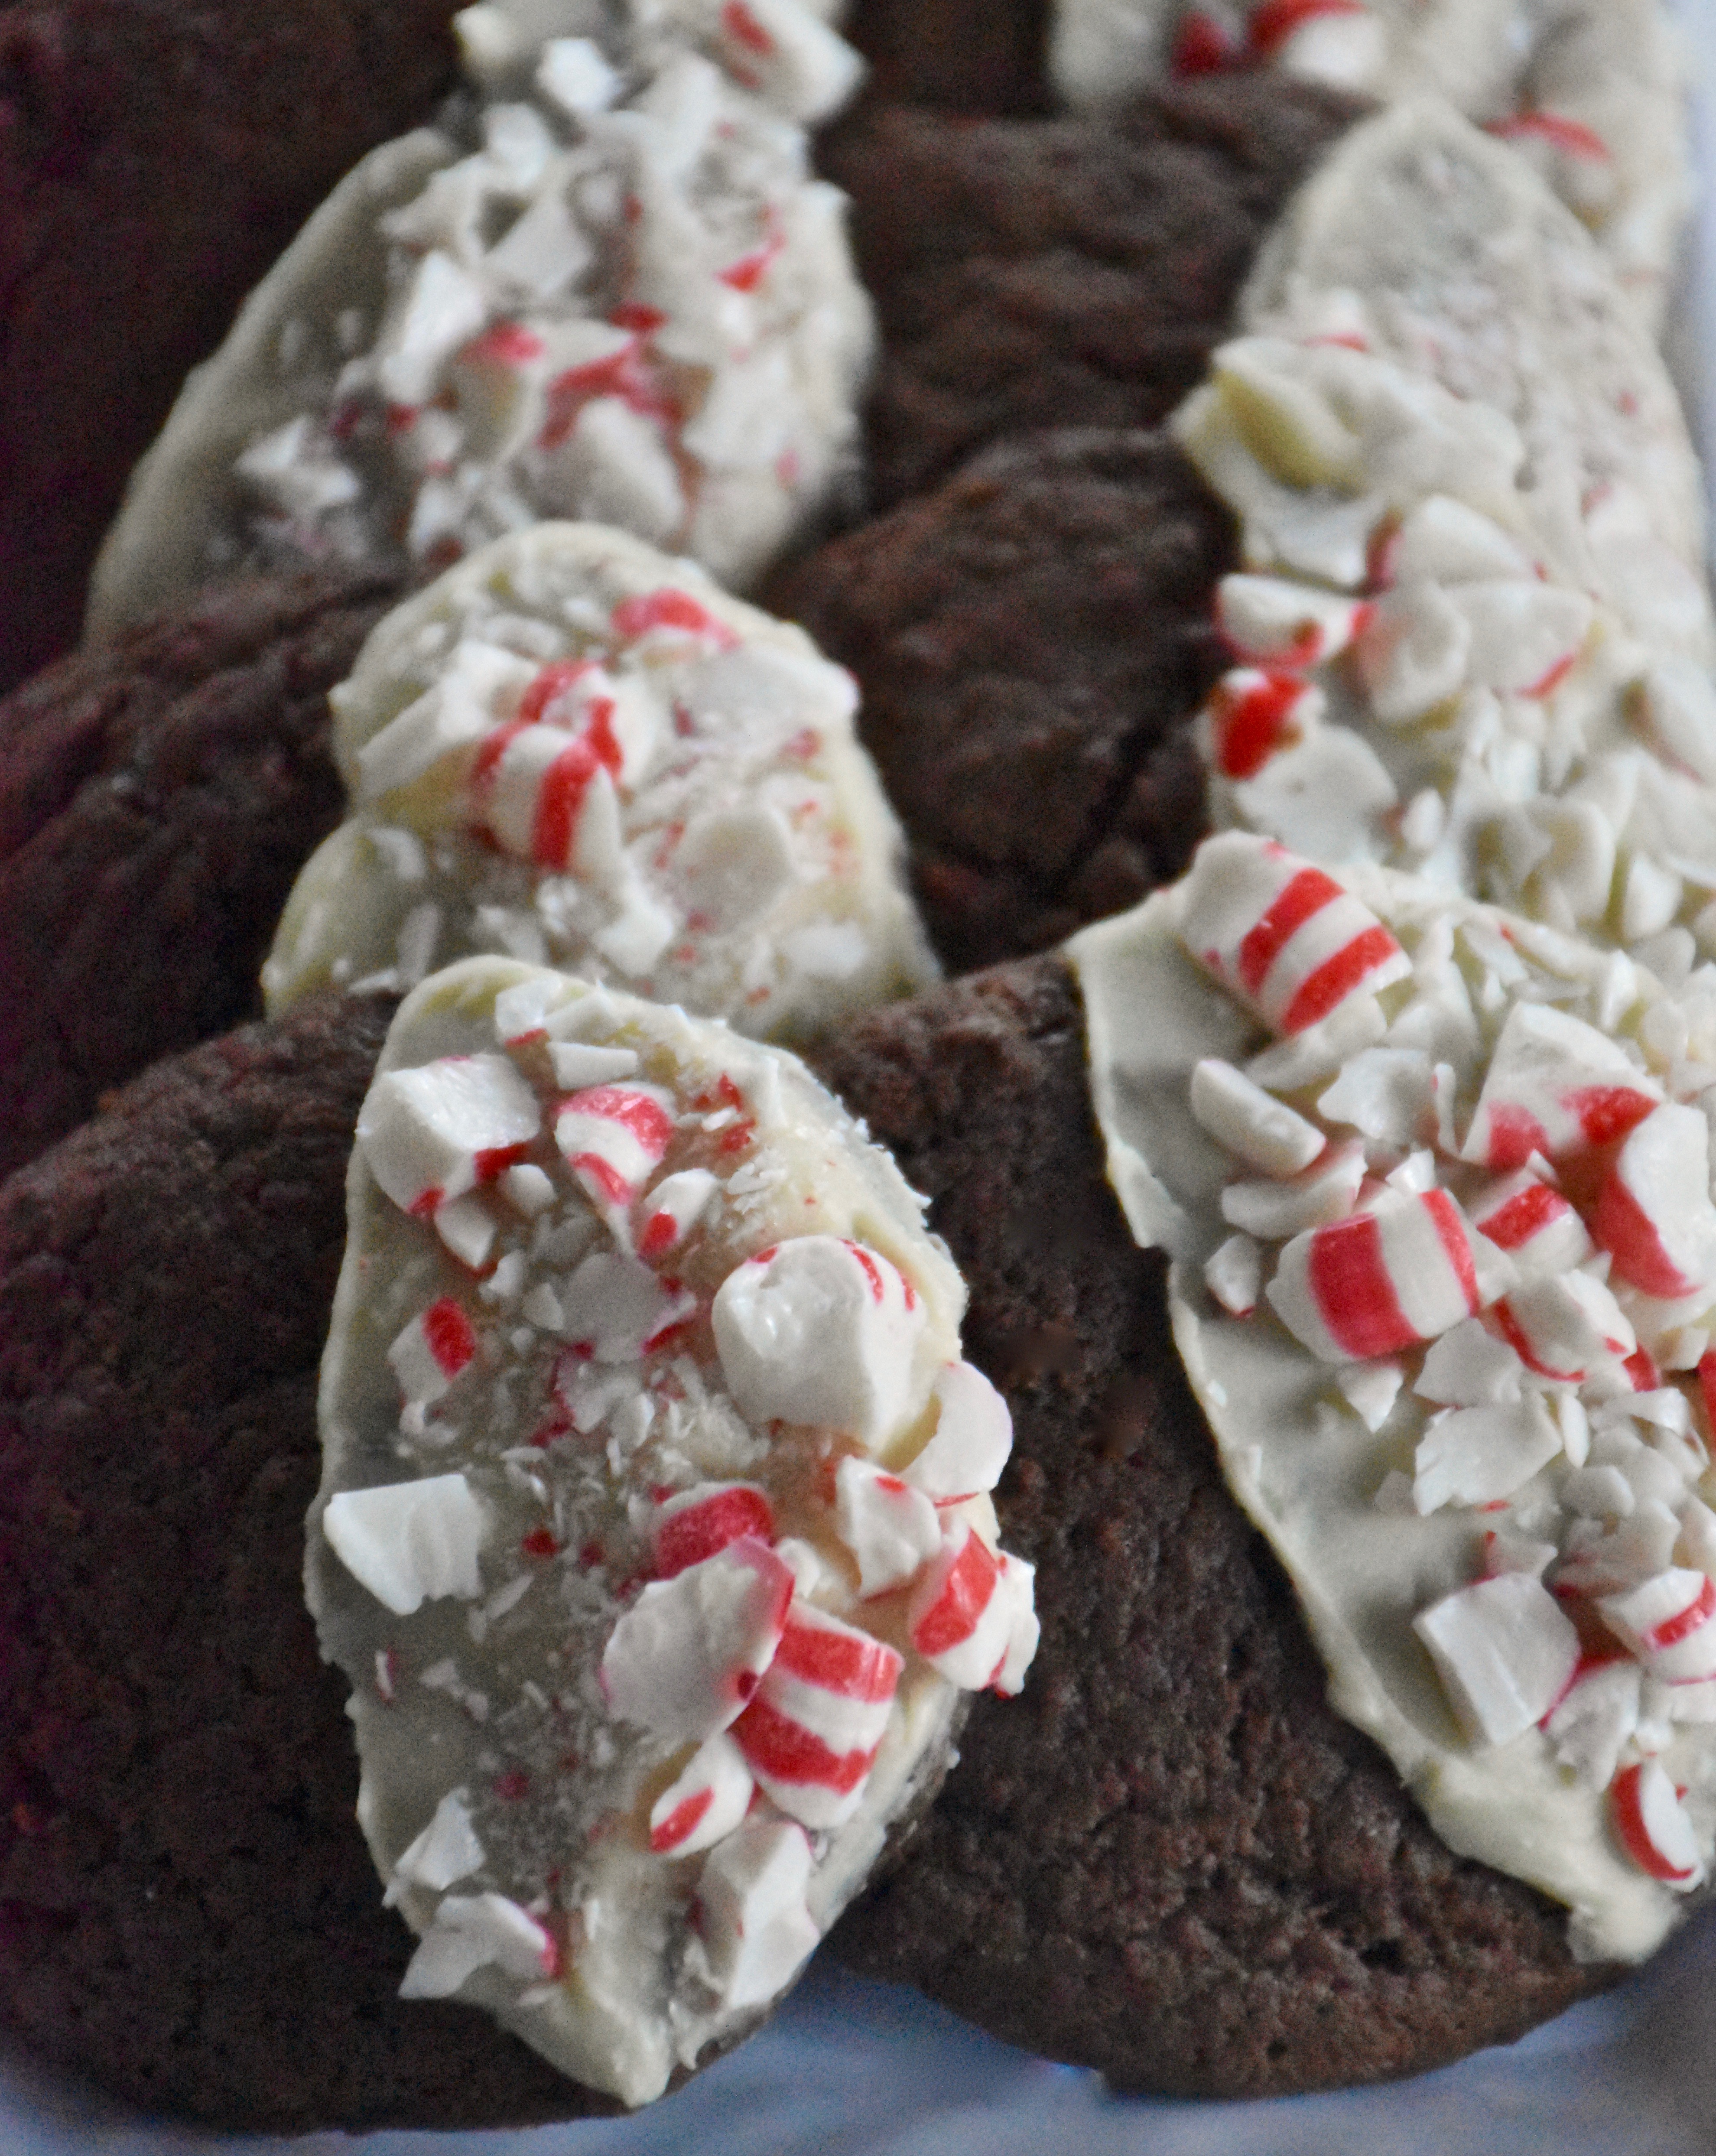
In a microwave safe bowl break your white chocolate into small pieces then microwave for 30 seconds and stir then microwave it for another 30 seconds and stir. Then heat it for additional 15 second intervals until your chocolate is just melted stirring in-between. You want to be careful that you do not over heat it, as chocolate can burn easily. So go slow and stir well in-between.
Once your chocolate is melted you need to decorate your cookies. I crushed my peppermint ahead of time by placing my unwrapped mints in a ziplock back and then lightly pounding them with my meat tenderizing mallet. The mallet method is a fun way to relieve a little holiday stress. If you prefer you could also use the food processor too.
Next, spread a spoonful of melted white chocolate over 1/2 of your cookie and then sprinkle on your crushed peppermint. Then let your chocolate and peppermint set by setting your cookies out to cool on parchment or wax paper.
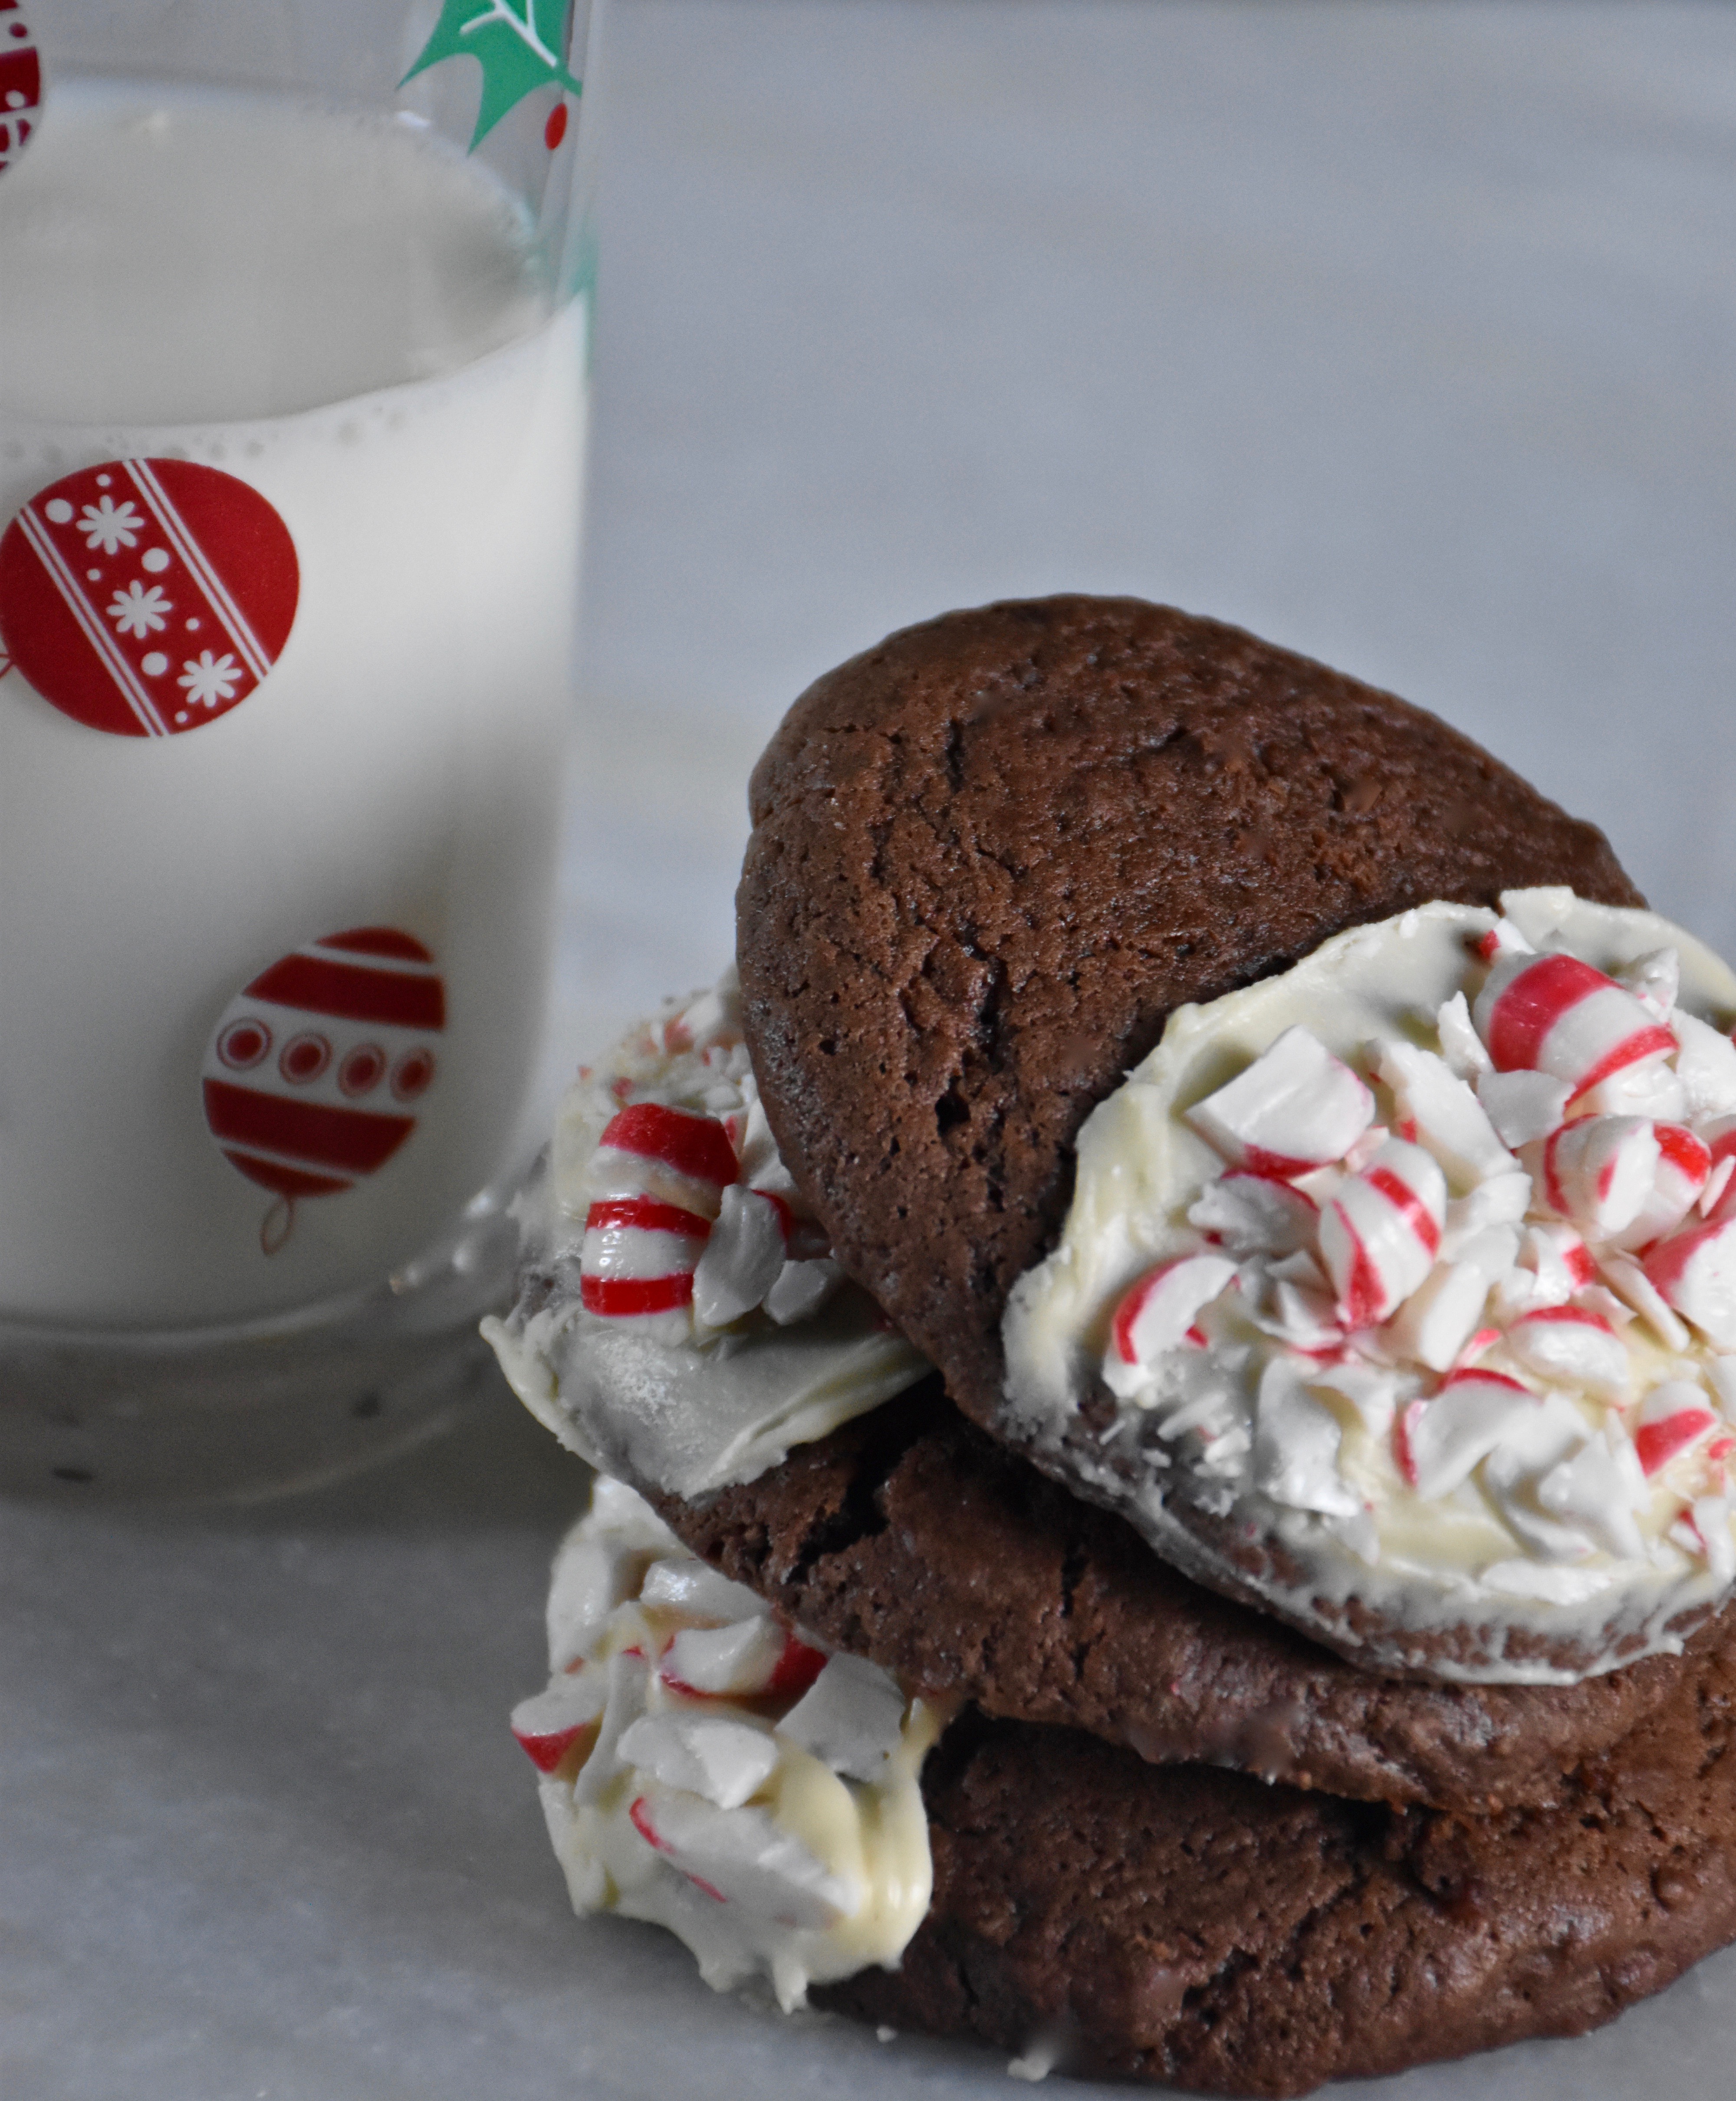
Chocolate cookies all dressed up in holiday style. Now the only accessory this stack of cookies needs is a cold glass of milk. I hope you love making and sharing these cookies as much as we did. This is going to be my last post for this holiday season, because I am going to be taking a short break from blogging to enjoy time with my family. There are school holiday party crafts, gifts to wrap and so much fun to be had this week. I wish you all the happiest holidays and I will be back writing and sharing more in the New Year.