Apricot Thyme Chicken

Creativity is a bit like a muscle, the more you use it the stronger you become. I have always been the creative thinker. I was a really imaginative kid and sometimes growing up it was a good thing and sometimes if I am honest, it made me feel a bit different. Over time, I have grown more confident in my “out of the box” thinking and I have found ways the channel all of that creative energy. One of my favorite things to do is to develop new recipes, and I think the discipline of having a blog has been good for my cooking. It grounds me and helps me focus and think more about important practical matters like measurements and instructions.

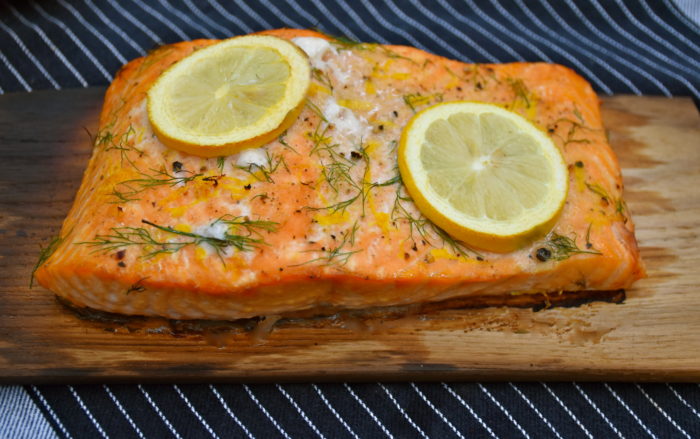
This chicken dish was something that I began cooking up in my mind when I read an article about a roasted leg of lamb with apricots and thyme. Roasting takes time and let’s face it lamb can be expensive. I liked the idea of the flavor combination of apricots and thyme, and I wanted to make a dish that was easy enough to serve on a weeknight.  So I began thinking about doing a French style sauce with chicken, apricots and thyme. When am working on a new recipe I usually make it at least three times before I will share the recipe on the blog. I like to test different ingredients and make sure that I have all the measurements correct. When I was making this dish I tried it with fresh apricots, but I found that I liked it better with the slightly sweeter dried apricots. Sometimes it just takes time and really working through an idea to get all the details right. So here is my latest creation chicken with apricots and thyme in a delicious white wine pan sauce.

Chicken with Apricots and Thyme

  • 4 boneless skinless chicken breasts
  • 3 TBSP of butter (divided)
  • 3 TBSP of olive oil (divided)
  • 1/3 cup finely chopped shallot (about 1 medium sized shallot)
  • 2 Tsp of fresh thyme
  • 1/4 Tsp dijon mustard
  • 1/2 cup cream
  • 3/4 cup white wine
  • 1 cup of dried apricots sliced in half lengthwise
  • 1/4 tsp salt
  • 1/8 tsp pepper

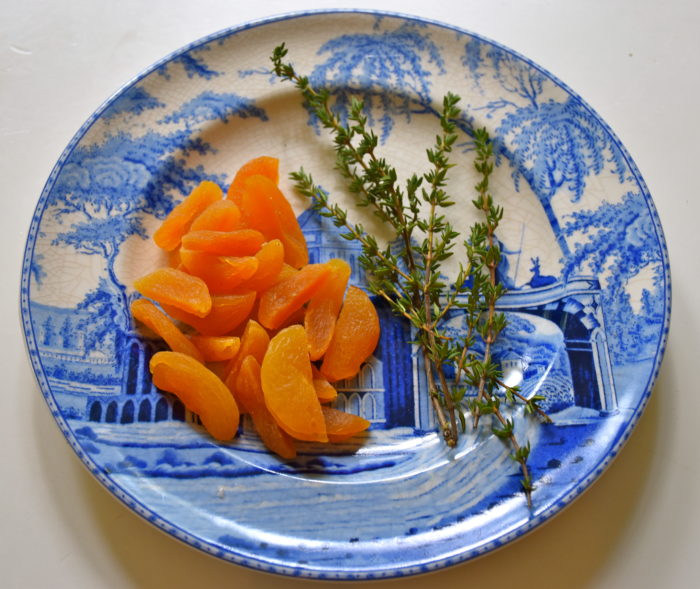
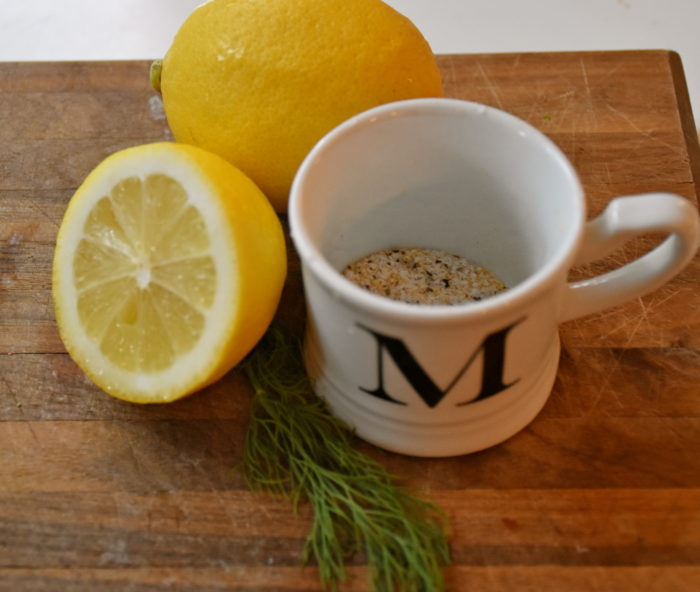
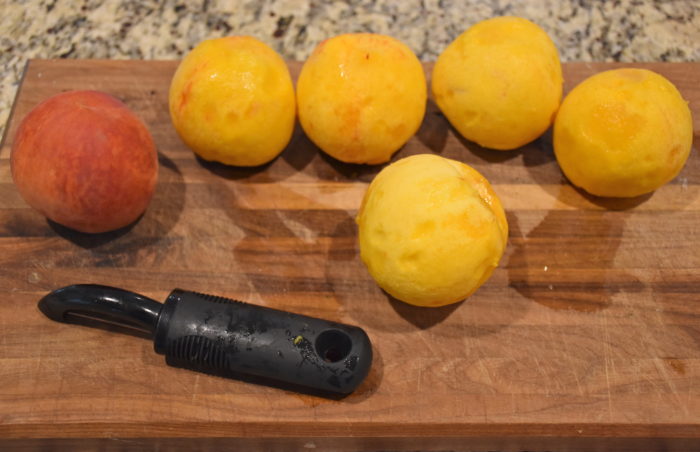
First, get your ingredients prepped because when you begin putting the sauce together the cooking goes quickly so you will want to have everything on hand. Start by finely chopping your shallots. Shallots have a lighter and slightly sweeter flavor than onions so they work well in this dish. Next, slice your dried apricots in half. I like to slice mine lengthwise so that when they cook in the pan, they puff up a bit in the sauce, and then they look like fresh apricot slices. The trick with fresh thyme is to run two pinched fingers down the sprig (top down). The leaves will fall right off and you don’t have to chop a thing.

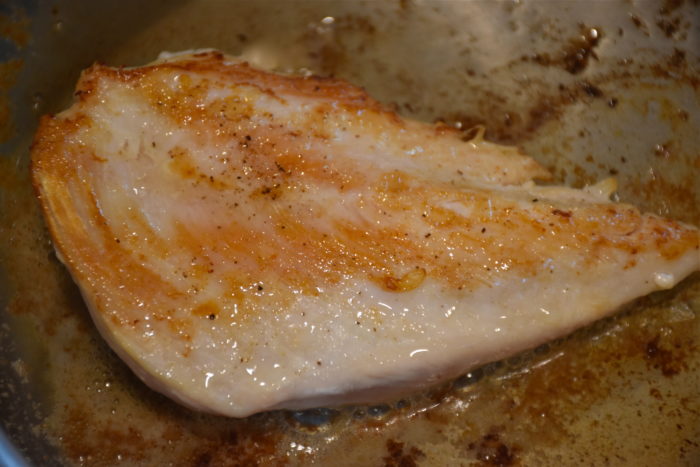
Next, season your chicken on both sides with salt and pepper. Then get a large skillet ready by melting 2 TBSP of butter and add in 2 TBSP of oil over medium heat. Then once the pan is hot and the butter is melted, add your chicken to the pan to brown it on each side. I cook my chicken for about 3 to 4 minutes on each side till it is golden brown. Don’t worry about cooking it through at this point because you are going to return the chicken to the pan to finish cooking it in the sauce.

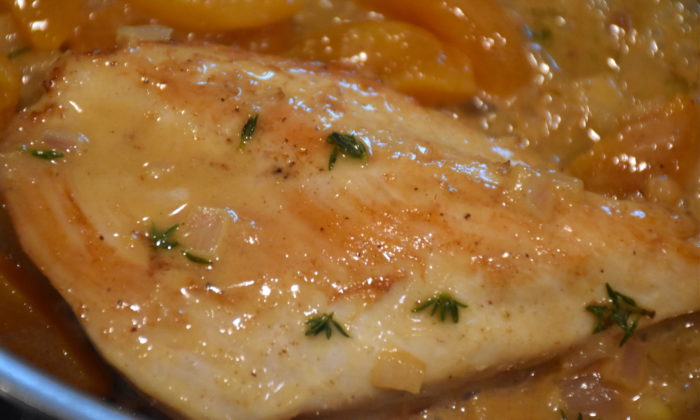
Once the chicken is browned on each side remove it to a plate and then add in your remaining 1 TBSP of butter and oil. Next, add in your shallots and cook them on medium low heat till they are slightly translucent (about a minute or so). Then deglaze your pan with the shallots in it by pouring in 3/4 cup of white wine. Cook the wine a minute being sure to get all of the delicious brown bits on the bottom of the pan mixed in. Then whisk in your dijon mustard and when the mustard is fully whisked in, add your apricots, cream and thyme and season with a pinch of salt and pepper. Then return your chicken breasts to the pan and cover your skillet part way with a lid. Then let your chicken cook all the way through on medium low heat flipping them once or twice. I had medium sized chicken breasts and they took 8 minutes to cook all the way. While the chicken is cooking the sauce will thicken and the apricots with plump up in the sauce.

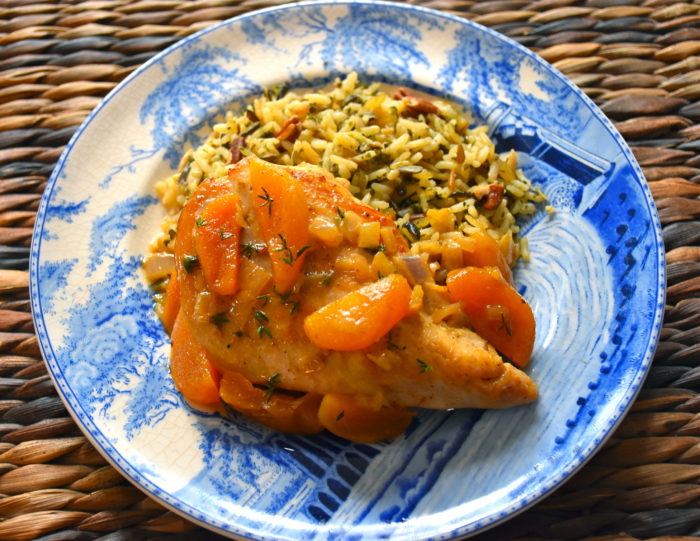
I like to serve this dish with Uncle Ben’s wild rice. Alternatively, it would also go well with mashed potatoes. The sauce is particularly delicious so it is good to serve it with something that you can pour a bit of the sauce on as well. This recipe serves four but you could easily double it and brown the chicken in two batches if you are serving it for more.

Decorating with Inherited Or Vintage Furniture

My dining room is still not finished. It needs another layer of pattern with a rug and possibly some shades for the chandelier, but sometimes decorating takes time. My dining room is one of the most sentimental rooms in the house because it is filled with furniture I have inherited. Decorating with inherited furniture can be meaningful, but sometimes using an older piece takes some creativity. Our dining room set belonged to my paternal grandmother who purchased her furniture in the early eighties when she was decorating her home. The dining room table and matching cabinets are over thirty years old, so they are not fine antiques but they have a soul and memories that you just can’t buy.

The dining room is one of the nicest spaces in our home because it has a large bay window and it faces the double door entry of our home. This gives the room lots of natural light from both sides. Here is a picture I took of the dining room when we where on the real estate tour.

The previous owner had a lovely dining room but I decided that I wanted the space to feel a bit more modern. One of the things I have done when I have older furniture pieces  is to juxtapose the traditional shape and style with something more contemporary. So with this room I chose a modern paint color and accessories. My favorite color happens to be red so I wanted a red dining room, but I didn’t want it to be a safer cranberry color. I knew I wanted something brighter, so I went with a bold red from Benjamin Moore called Exotic Red. As the name implies, it is definitely a gutsy color but that’s why it works. Here is the room shortly after I painted it.

The next thing we did was to change out the chandelier. I wanted a more modern chandelier that still fit with the traditional furniture, so I went with a clear blown glass fixture that still had a traditional shape to it.

Then I worked on was the furniture arrangement. I think the key to using older family pieces is to allow yourself the freedom to make them your own. It has taken me some time to reinvent these pieces a bit. One of the things I have done is to reupholster my inherited pieces in a more modern fabric. The bench you see in the photo at the top of this post was is my maternal grandparents front entry. I had it recovered in a woven white fabric and I used it in the entry of my old home, but when we moved to this house I decided it fit better in my dining room.

Sometimes I like to move furniture around until I find the right spot for it. The starburst mirror is an antique and it is one of my favorite pieces in the house. It was a gift from my mom’s godfather. It had originally been made for a church in Mexico, so the scale of the mirror is quite large. As I worked with the furniture arrangement, I decided that it needed a wall of its own. As you can see in the picture above, I had originally placed my buffet cabinet under the mirror but I decided to move the cabinet to the bay window so I could give the room a stronger focal point from the front entry.

I added some height and interest to my buffet cabinet by sewing a patterned fabric runner and then layering on some larger scale blue and white ginger jars.

Once I decided to add in some blue and white I needed to update the fabric on my dining chairs. Here is a picture of a chair in its original pastel 1982 upholstery.

I will admit that I would not have chosen a cane backed chair, but with a series of upholstery changes the chairs have evolved to fit our home. This time I decide to go with an indigo microfiber fabric from Ballard Designs. I wanted our dining room to be a room we actually use so I went with a solid fabric that could easily be cleaned. I love patterned fabric, but this time I didn’t want to be worried about chocolate pie or any other favorites getting spilled on the chairs. The latest update we have made to the room is the add some different end chairs. I wanted to break up the cane back chairs a bit so I got some slipcovered white Parsons chairs from Ballard Designs. In any room I like to have some fully upholstered pieces so you have a mix of wooden chair legs and fabric. I wanted removable slipcovers because spills happen and I need the chairs to be easy to wash.

It might take time to incorporate some inherited pieces in your home, but I must admit I love sitting down to a family meal or celebration and thinking about my grandmother. I know she would love to see that her table is still being used and enjoyed and that makes this room just a bit more special.

So to end this piece I though I would leave you with a few tips I have learned about making inherited or vintage pieces your own:

  • First, don’t be afraid to make some changes.  An older piece can look completely different in a new fabric or painted a new color.
  • Second, give yourself time to decide what to do with a piece. Sometimes when you wait the right idea will come to you.
  • When you have a room full of older furniture think about making the entire room feel more current by choosing a bolder paint color or more modern wallpaper.
  • Add interest to your room by adding layers of accessories and mixing up the scale of the accessories. Experiment and don’t be afraid to change things till you get the right look.
  • Finally, add in some new pieces to mix up the furniture. I added some new end chairs it instantly gave the room a more updated feel.

If you want to see more vintage dining room inspiration check out this link to fabric designer Caitlin Wilson’s home. She gave a traditional estate sale dining room set a modern look with fabric.

Lemon Dill Cedar Plank Salmon

Grilled salmon makes a quick and delicious dinner. We eat salmon frequently in our house because its healthy and even my little picky preschoolers love it. I am always trying to create new recipes for salmon and this is one of our favorites. This grilled salmon is easy to assemble and it takes just twenty minutes to grill. The salmon stays moist while grilling thanks to the lemon slices and the lemon zest and dill add a bright flavor that pairs well with the garlic salt seasoning.

  Lemon Dill Cedar Plank Salmon

  • 1 (1 lb to 1.5 lb) salmon fillet
  • 1 cedar plank you can usually find them near your seafood counter at the grocery store
  • 1/2 teaspoon garlic powder
  • 1/2 teaspoon kosher salt
  • 1/8 teaspoon ground pepper
  • 1/2 teaspoon fresh lemon zest
  • 1 teaspoon fresh dill sprigs torn into small pieces
  • 2 to 3 lemon slices

First, soak your cedar plank in water for 1 to 2 hours following the instructions for the brand of plank you have. Preheat your grill on high heat. Then in a small bowl or cup mix together your garlic powder, salt and pepper. Then put your salmon on a plate so you can add your seasonings and get it prepared for the grill. When I am shopping for salmon at the store I try to get a center cut that has an even thickness all the way through. This will allow your fish to cook evenly.

Place your fish skin side down on a large dinner plate or dish. Then take your seasoning mix and sprinkle it evenly on top of your fish. You might have a little extra. It depends on how big your fillet fish is. Then sprinkle on your lemon juice and the lemon zest and dill. Finally, place your lemon slices on top.

Take your cedar plank out to the grill and turn your grill down just a bit to a medium high setting. You want a hot grill, but you don’t want flames that might set your plank on fire. Place just the plank on the grill and grill it for 5 minutes.

Then flip your plank over and bring your salmon out to the grill and place it skin side down on the now slightly charred plank. Cooking the plank first will enhance the smokey cedar flavor. Close your grill lid and allow your fish to cook for 15 to 25 minutes. Salmon can come in a variety of thicknesses so I have a wider cooking time.

The key to getting your fish just right is to use a meat thermometer. We have a digital one made by Redi Fork that we really like. These grilling thermometers are inexpensive and they take all the guess work out of grilling. I generally check my fish at 15 minutes. You want an internal temperature between 125 to 140 degrees.

I like to cook mine in the range of 132 to 135 degrees which is medium well. This thinner salmon fillet took 18 minutes to grill to an internal temperature of 135 degrees. Don’t let all this talk about temperatures scare you off from trying this fish. You can also use the less high tech method of cutting a small vent to check the color and doneness.

I like to serve my salmon with oven roasted potatoes or wild rice and a simple salad.

The Wonder Of A Summer Garden

“If you love nature you will find beauty everywhere.”

Vincent Van Gogh

What is so enchanting about a garden? Certainly the blooms are lovely, but what I think is particularly wonderful is how the the view can change in a moment. The light can hit a leaf or a petal differently or a butterfly can land and suddenly a bush changes. Summer in Chicago is glorious because now everywhere you look it’s green and the flowers are in full bloom.

One of my absolute favorite places is the Chicago Botanical Garden, because each time I go the garden changes. Mid-Summer is an especially beautiful time because the roses and dahlias are blooming.

Walking through the rose garden, there was bloom and after beautiful bloom and I was  amazed at the delicate beauty, fragrance and color of each one. My mom was with me this time and she is a talented photographer so we had a wonderful afternoon photographing the garden.

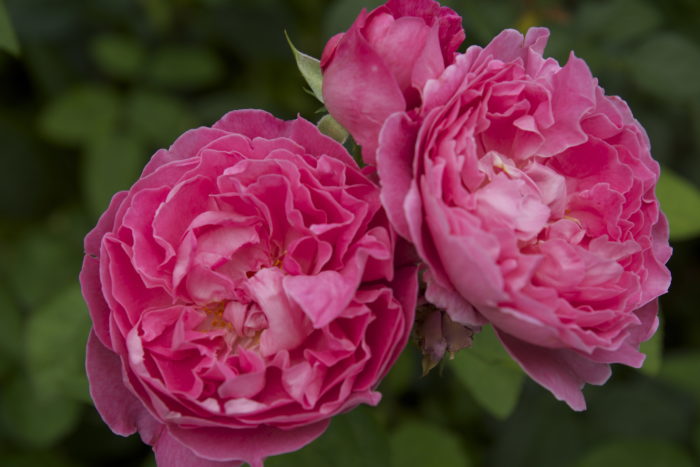
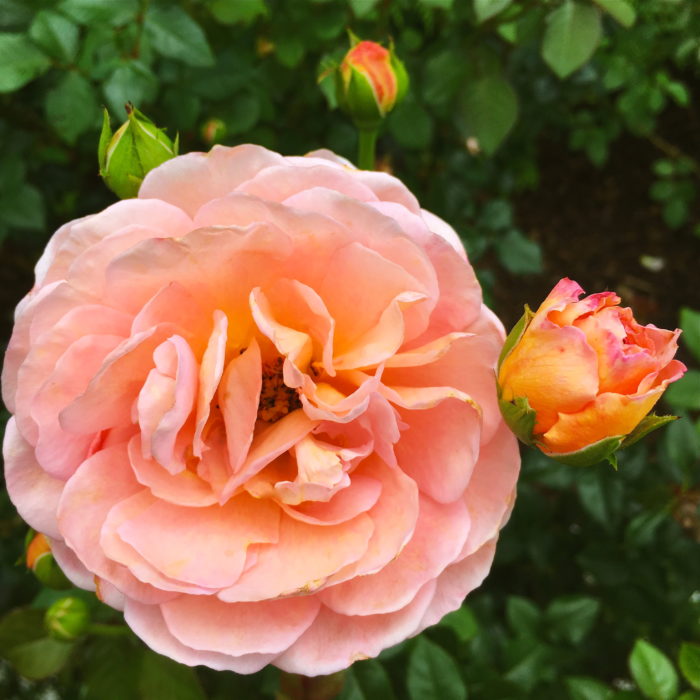
Sometimes words fail to accurately describe just how lovely something is so I thought I would share a few photos that capture some of the beauty.

Dahlias were something I didn’t see growing up in southern Texas so I find them especially beautiful. Their thinner layered petals and vibrant colors make them particularly gorgeous.

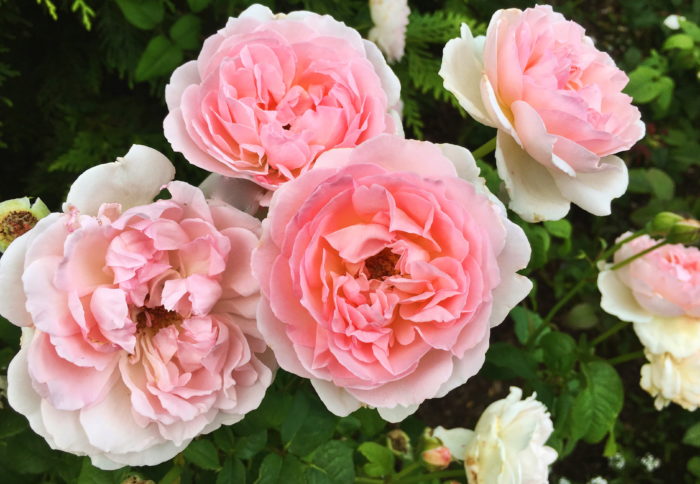
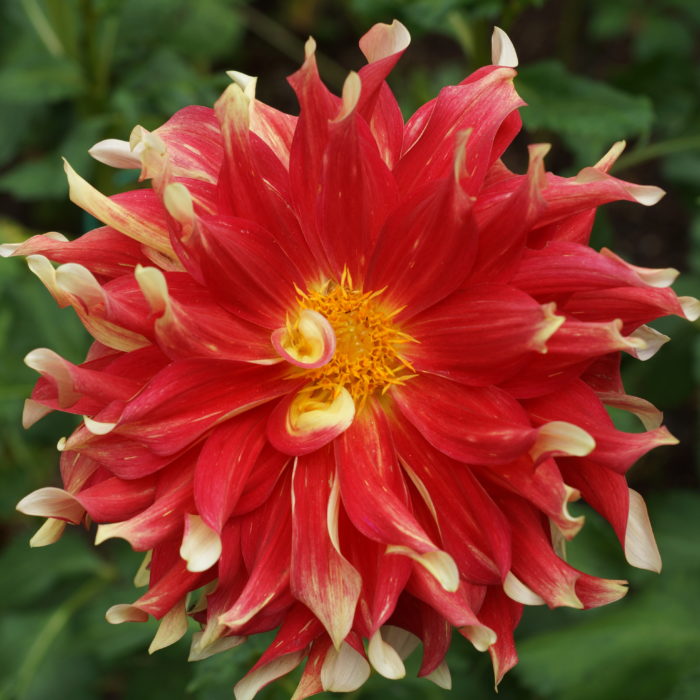
I love these curly two toned petals against the fiery yellow center.

Then I was standing still a moment when this monarch butterfly landed by me and opened his beautiful wings just long enough for me to get a photograph.

Every time I visit I am continually amazed and inspired by its beauty. My daughters were with us and my oldest had fun making me close my eyes each time we entered a new part of the garden. As soon as I opened my eyes she would tell me “look I found this just for us.” It was a great gift to see her to see her sense of wonder as she explored and took in the glorious Summer day.


Strawberry Cake With Cream Cheese Icing

Every family has their favorite traditions, in our house one our favorites is homemade birthday cakes. I love to bake so one of the things I do is try and come up with a unique cake to suit the tastes of the birthday girl or boy. Sometimes I get a request for a certain type of cake, other times I try and make something that I think they will like. My youngest daughter loves strawberries and the color pink so I thought I would create a strawberry cake with cream cheese icing. The only recipe I had was one that called for a box cake mix, but I prefer to bake cakes from scratch because they tend to be more flavorful and moist. So for this recipe I worked to create my own recipe for strawberry cake. I love the traditional pink color so I kept the strawberry jello because it gives the cake its truly signature color.

This recipe makes two nine inch round cakes. I made two batches of the cake because I decided I wanted a taller three layer cake for the birthday party.

Strawberry Cake

  • 2 cups of sugar
  • 4 eggs
  • 2  1/2 cups flour
  • 3/4 cup milk
  • 2  1/4 tsp baking powder
  • 1 tsp vanilla
  • 3/4 cup vegetable oil
  • 1/4 cup sour cream
  • 1 (3oz) box of strawberry jello
  • 1 cup of fresh strawberries pureed

Preheat your oven to 350 degrees

First, I like to prepare my strawberries by removing the stems and then chopping the berries in half. Then I put my berries in my mini food processor, but you could also use a blender. I then pulsed the berries till they were like a thick jam with some tiny even bits of berry. Then set the berries aside to mix in the batter later

Next using your mixer beat together the sugar and eggs on medium speed for about a minute. Then add the flour, milk, oil, baking powder, sour cream and vanilla and mix until just incorporated.

Next add in your strawberry gelatin and strawberries and mix on medium low until the batter turns pink and the ingredients are evenly incorporated.

Next prepare your pans by cutting parchment paper rounds to fit inside the bottom of your pans. Then grease you pans using baker’s joy or grease and then flour them. The parchment paper will ensure that your cake comes out of the pan smoothly. Then pour the batter in evenly between the two pans.

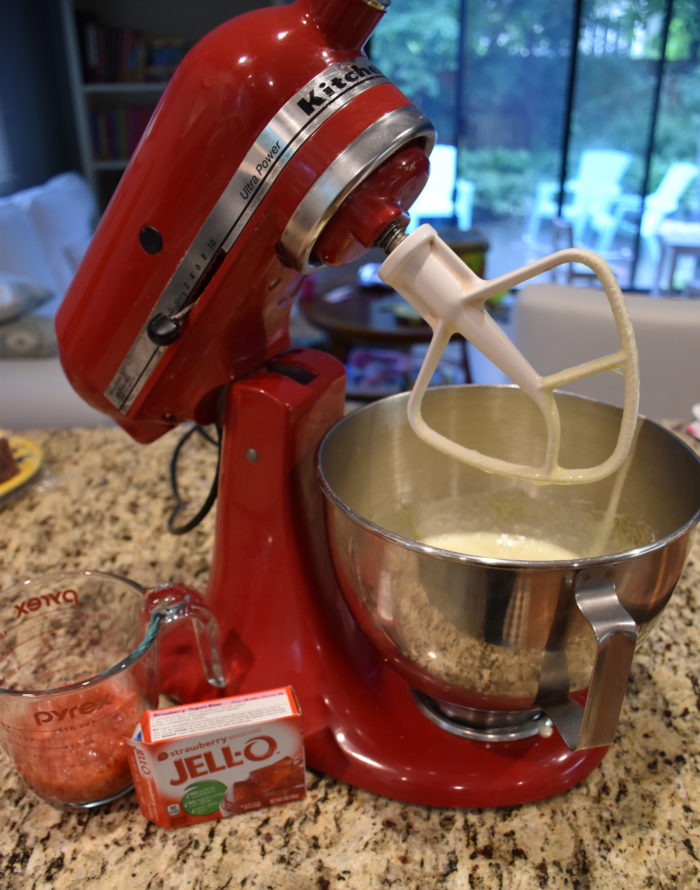
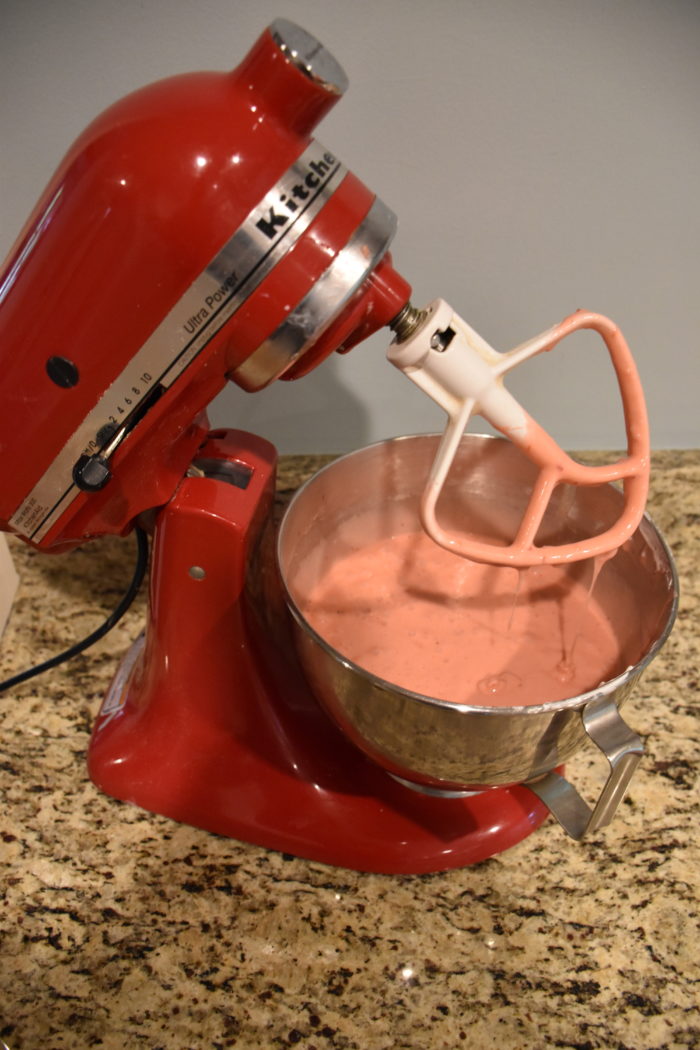
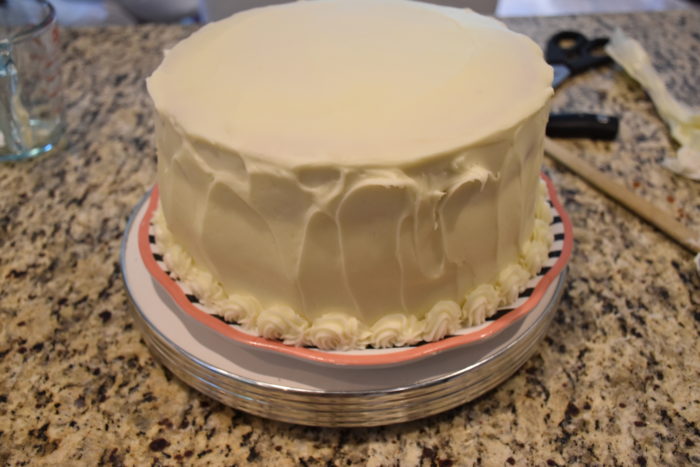
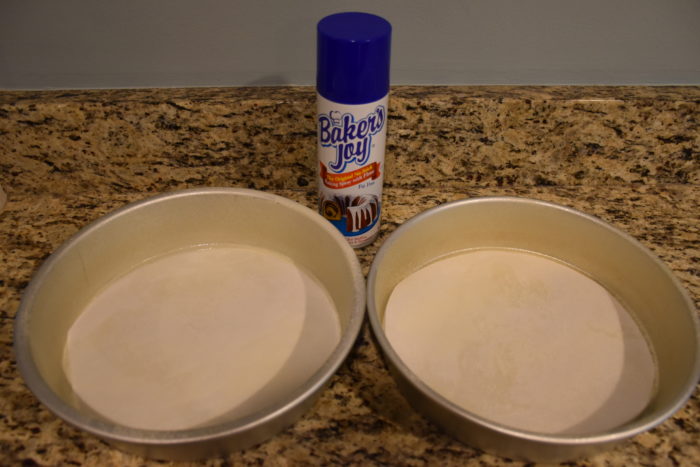
Then bake the cakes for 30 to 35 minutes. Keep a close eye on the cakes because you don’t want to over bake your cake. You can check the doneness by testing the cake with a toothpick. If the toothpick comes out clean the cakes are done. Let your cakes cool in the pans for 10 minutes then turn them out of the pans to finish cooling on a wire rack. You want your cakes to be completely cool before you frost them.

Cream Cheese Icing

  • 2 Sticks of Softened Butter (I usually let it sit out of the fridge for an hour)
  • 2 (8oz) Softened Bricks of Cream Cheese (I let it sit out with the butter)
  • 2 Tsp Vanilla
  • 8 Cups of Powdered Sugar
  • 1 TBSP of Milk

In the bowl of a mixer cream the cream cheese and butter. Add the powdered sugar vanilla and milk. Mix on high speed until the icing is smooth and fluffy.

To frost a cake I put a small dollop of icing on the plate or cake round to keep the cake from sliding. Put the bottom layer on top and then spread icing as a filling.

Then put the top layer on or if you want to make a three layer cake like I did then fill and stack your middle layer and then place on the top layer. Frost the cake by putting several large spoonfuls of icing on the top of the cake and use a separated spatula to spread the icing from the top and around the sides. I want to make sure the sides are covered so there are no gaps between the layers. This initial crumb coat does not need to be perfect. It just needs to seal in to crumbs and fill in any gaps in the layers.

Once I get the cake frosted with a base layer (crumb coat), I place it in the fridge to firm up for about 30 minutes.

Then for my final layer I decided to give the sides a more textured look by taking my separated spatula and giving it a up and down motion. You can see that I have my cake on a lazy susan that I have which makes it quicker for me to frost a cake.  Then I smoothed the top.

If you want to go for a simpler decoration you could decorate the top with some fresh strawberries or you could make some fondant strawberries using the tutorial I have on this post here.

I wanted a more whimsical look for my decorations since this was for my young daughter. I like the taste of frosting better than fondant, but I still like the look of fondant decorations. I tend to decorate my cakes with some fondant cut outs and sugar gum flowers. So for this cake I decided to try out a new technique for making a chalkboard like cake topper.

To make the happy birthday topper I rolled black fondant to on a piece of parchment paper that I lightly dusted with powdered sugar. Then I cut out a circle using the lid of a jar. I painted on the lettering using white food coloring thinned with a tiny amount of lemon extract.

I like to plan out the spacing before I place it on the cake so I used my cake pan turned upside down to plan the decorations.

I plan to post more on gum paste flowers, but they really need a post of their own.

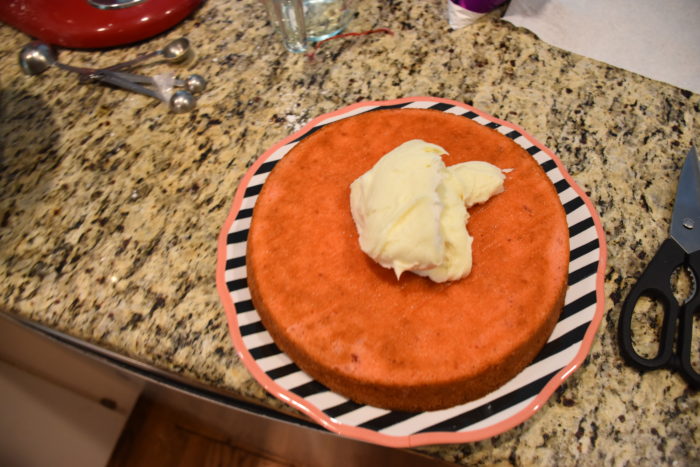
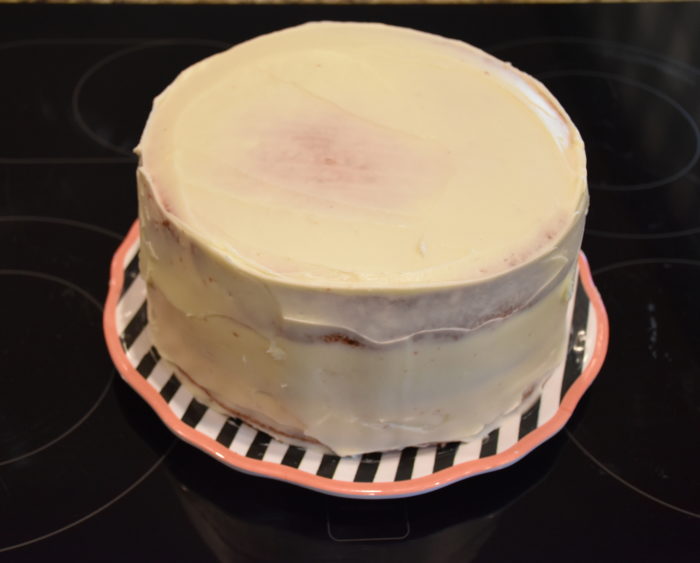
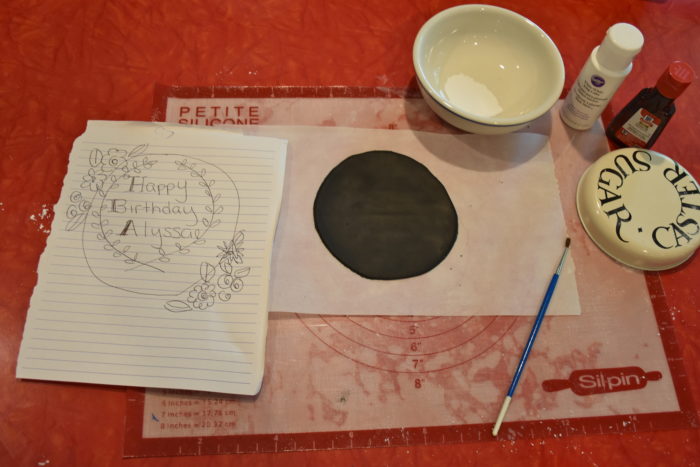
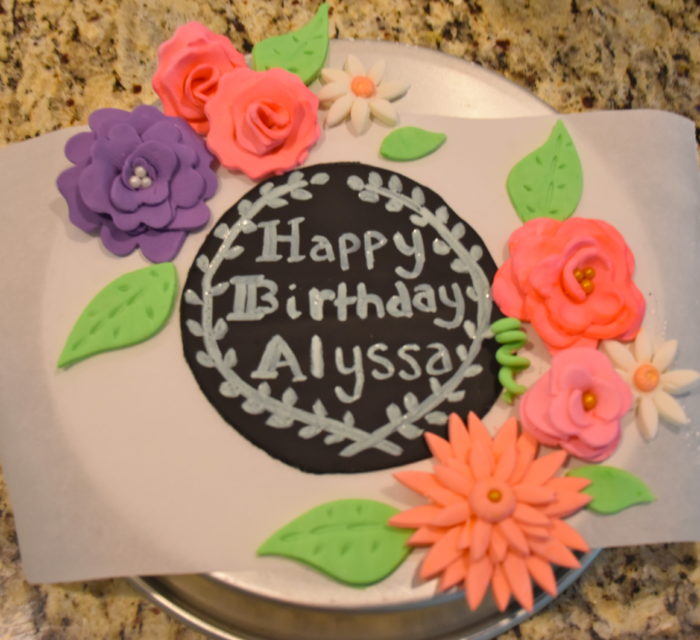
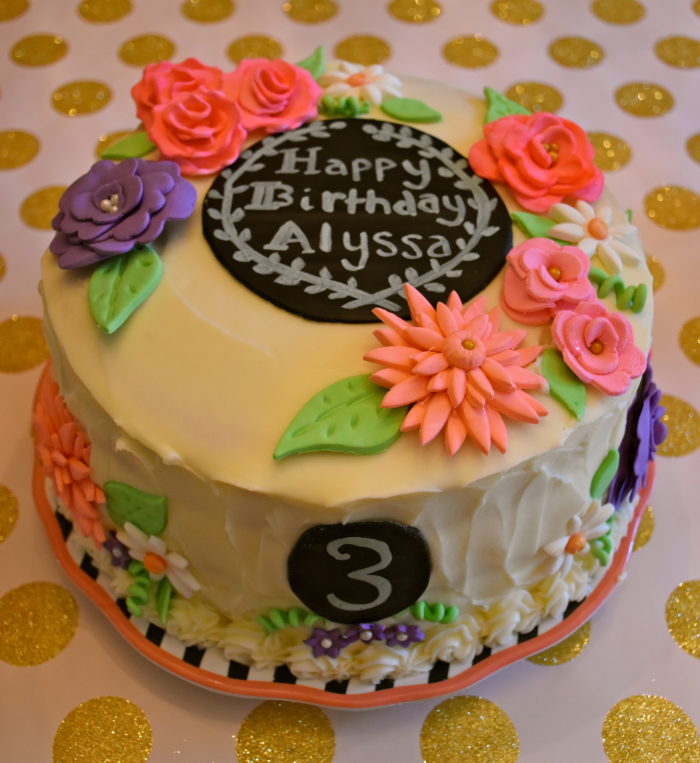
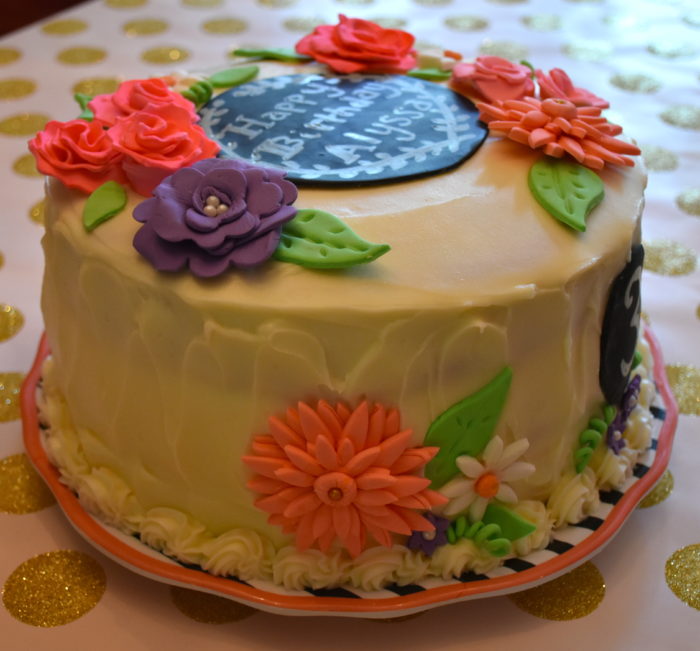
I like to decorate the sides of a cake as well.

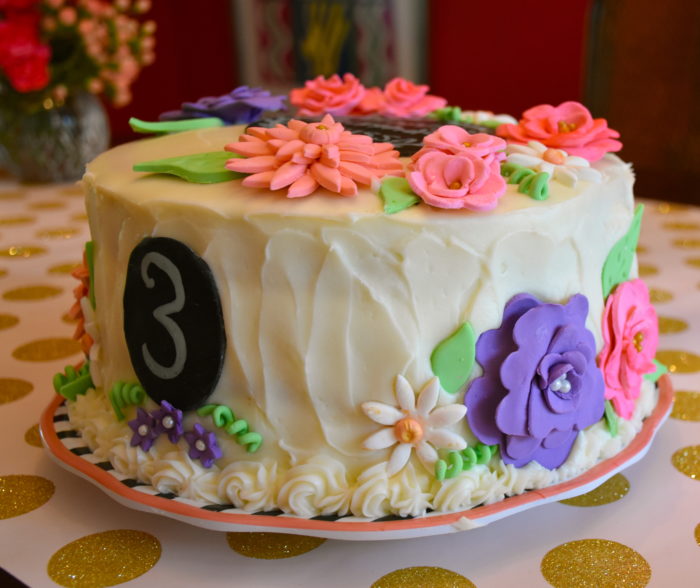
I thought the number three with the three purple flowers was a nice finishing touch for the front of the cake.

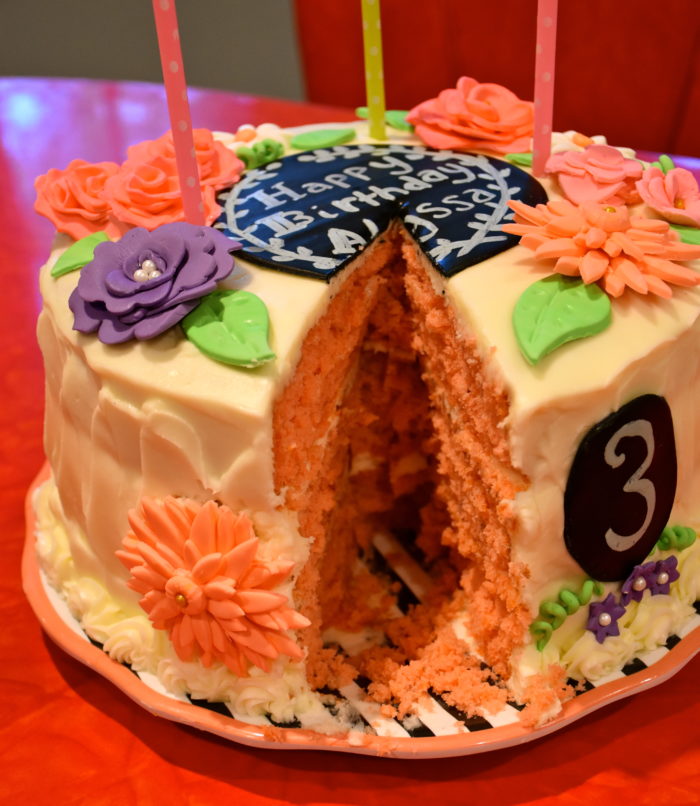
Here is the a view of the inside of the cake so you can see the festive bright pink layers.

Pretty In Pink Dinner Party

My now three year old began thinking about her birthday a couple of months ago. She had watched how we made dinner for my birthday and then within a few days she began asking when we were going to “make her party.” I thought it was interesting that she kept using the phrase “make a party” because it was clear that to her a party was more than just an event you attend. She had enjoyed helping me put all the details together and wanted to be able to make her own “pink” birthday dinner.

My youngest daughter absolutely adores the color pink. She loves dressing up and her favorite is jewlery.  She reminds me a bit of the classic children’s book character, Fancy Nancy. Anything that comes with glitter and jewels is always better. So when I walked into Paper Source and saw this pale pink wrapping paper with gold glitter polka dots I thought it would make the perfect inspiration for her pink birthday dinner. So from there I found tiny gold glitter crowns and I thought my daughter would just love. Wrapping paper can make a really beautiful table runner for a festive occasion. In the past I have found some great paper patterns at Hobby Lobby, the Container Store and Paper Source. Then I found some paper napkins from Meri Meri with scalloped edges that worked as both placemats and napkins and some gold hearts that would make pretty place cards.

Then for the some pretty pink details I put together some two toned coral and pink tissue paper peonies.

Then I decided to let my girls decorate their crowns with stick on jewels from the craft store. The birthday girl decorated hers in all pink. This little project was easy enough for preschoolers to do themselves and they were thrilled with the colored jewels. This would be a fun party favor. I could also see using the same kind of jewels to decorate wands as well. Here is a link to an example of some star wands that I think would also make a fun kids party favor.

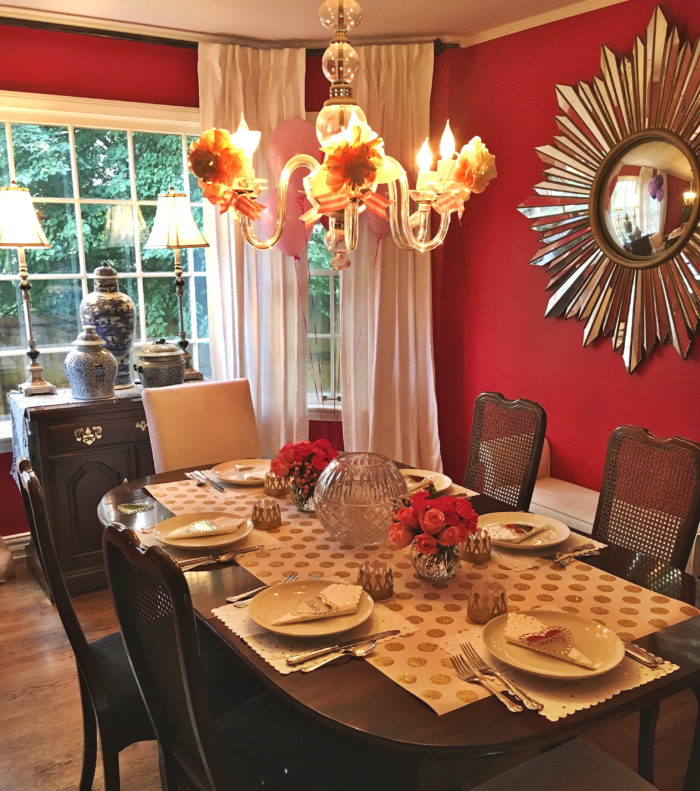
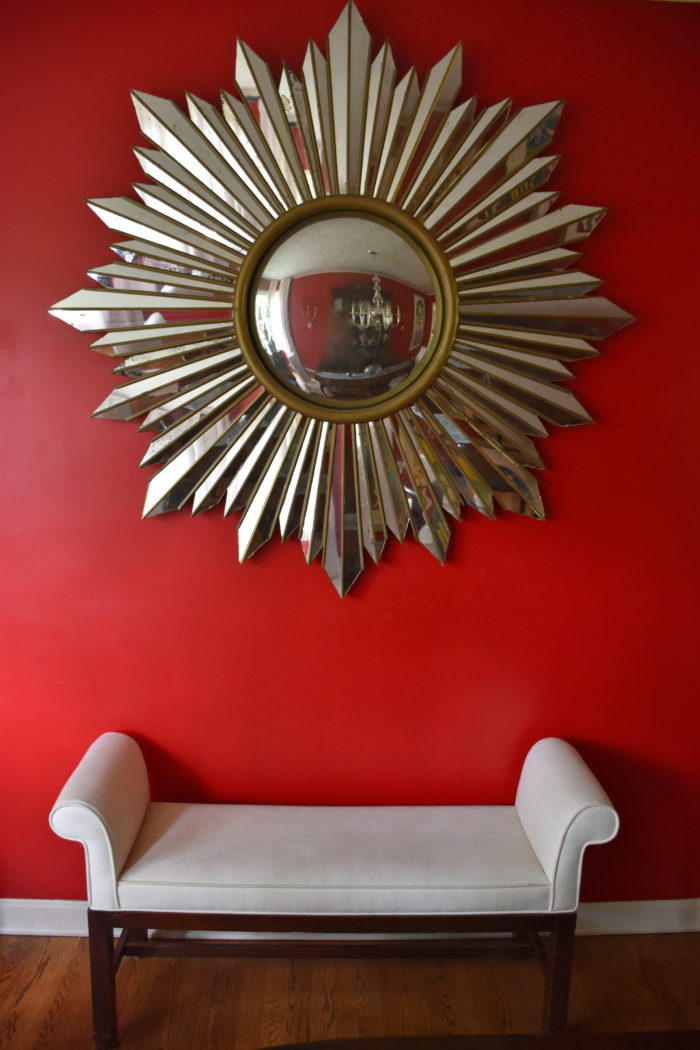
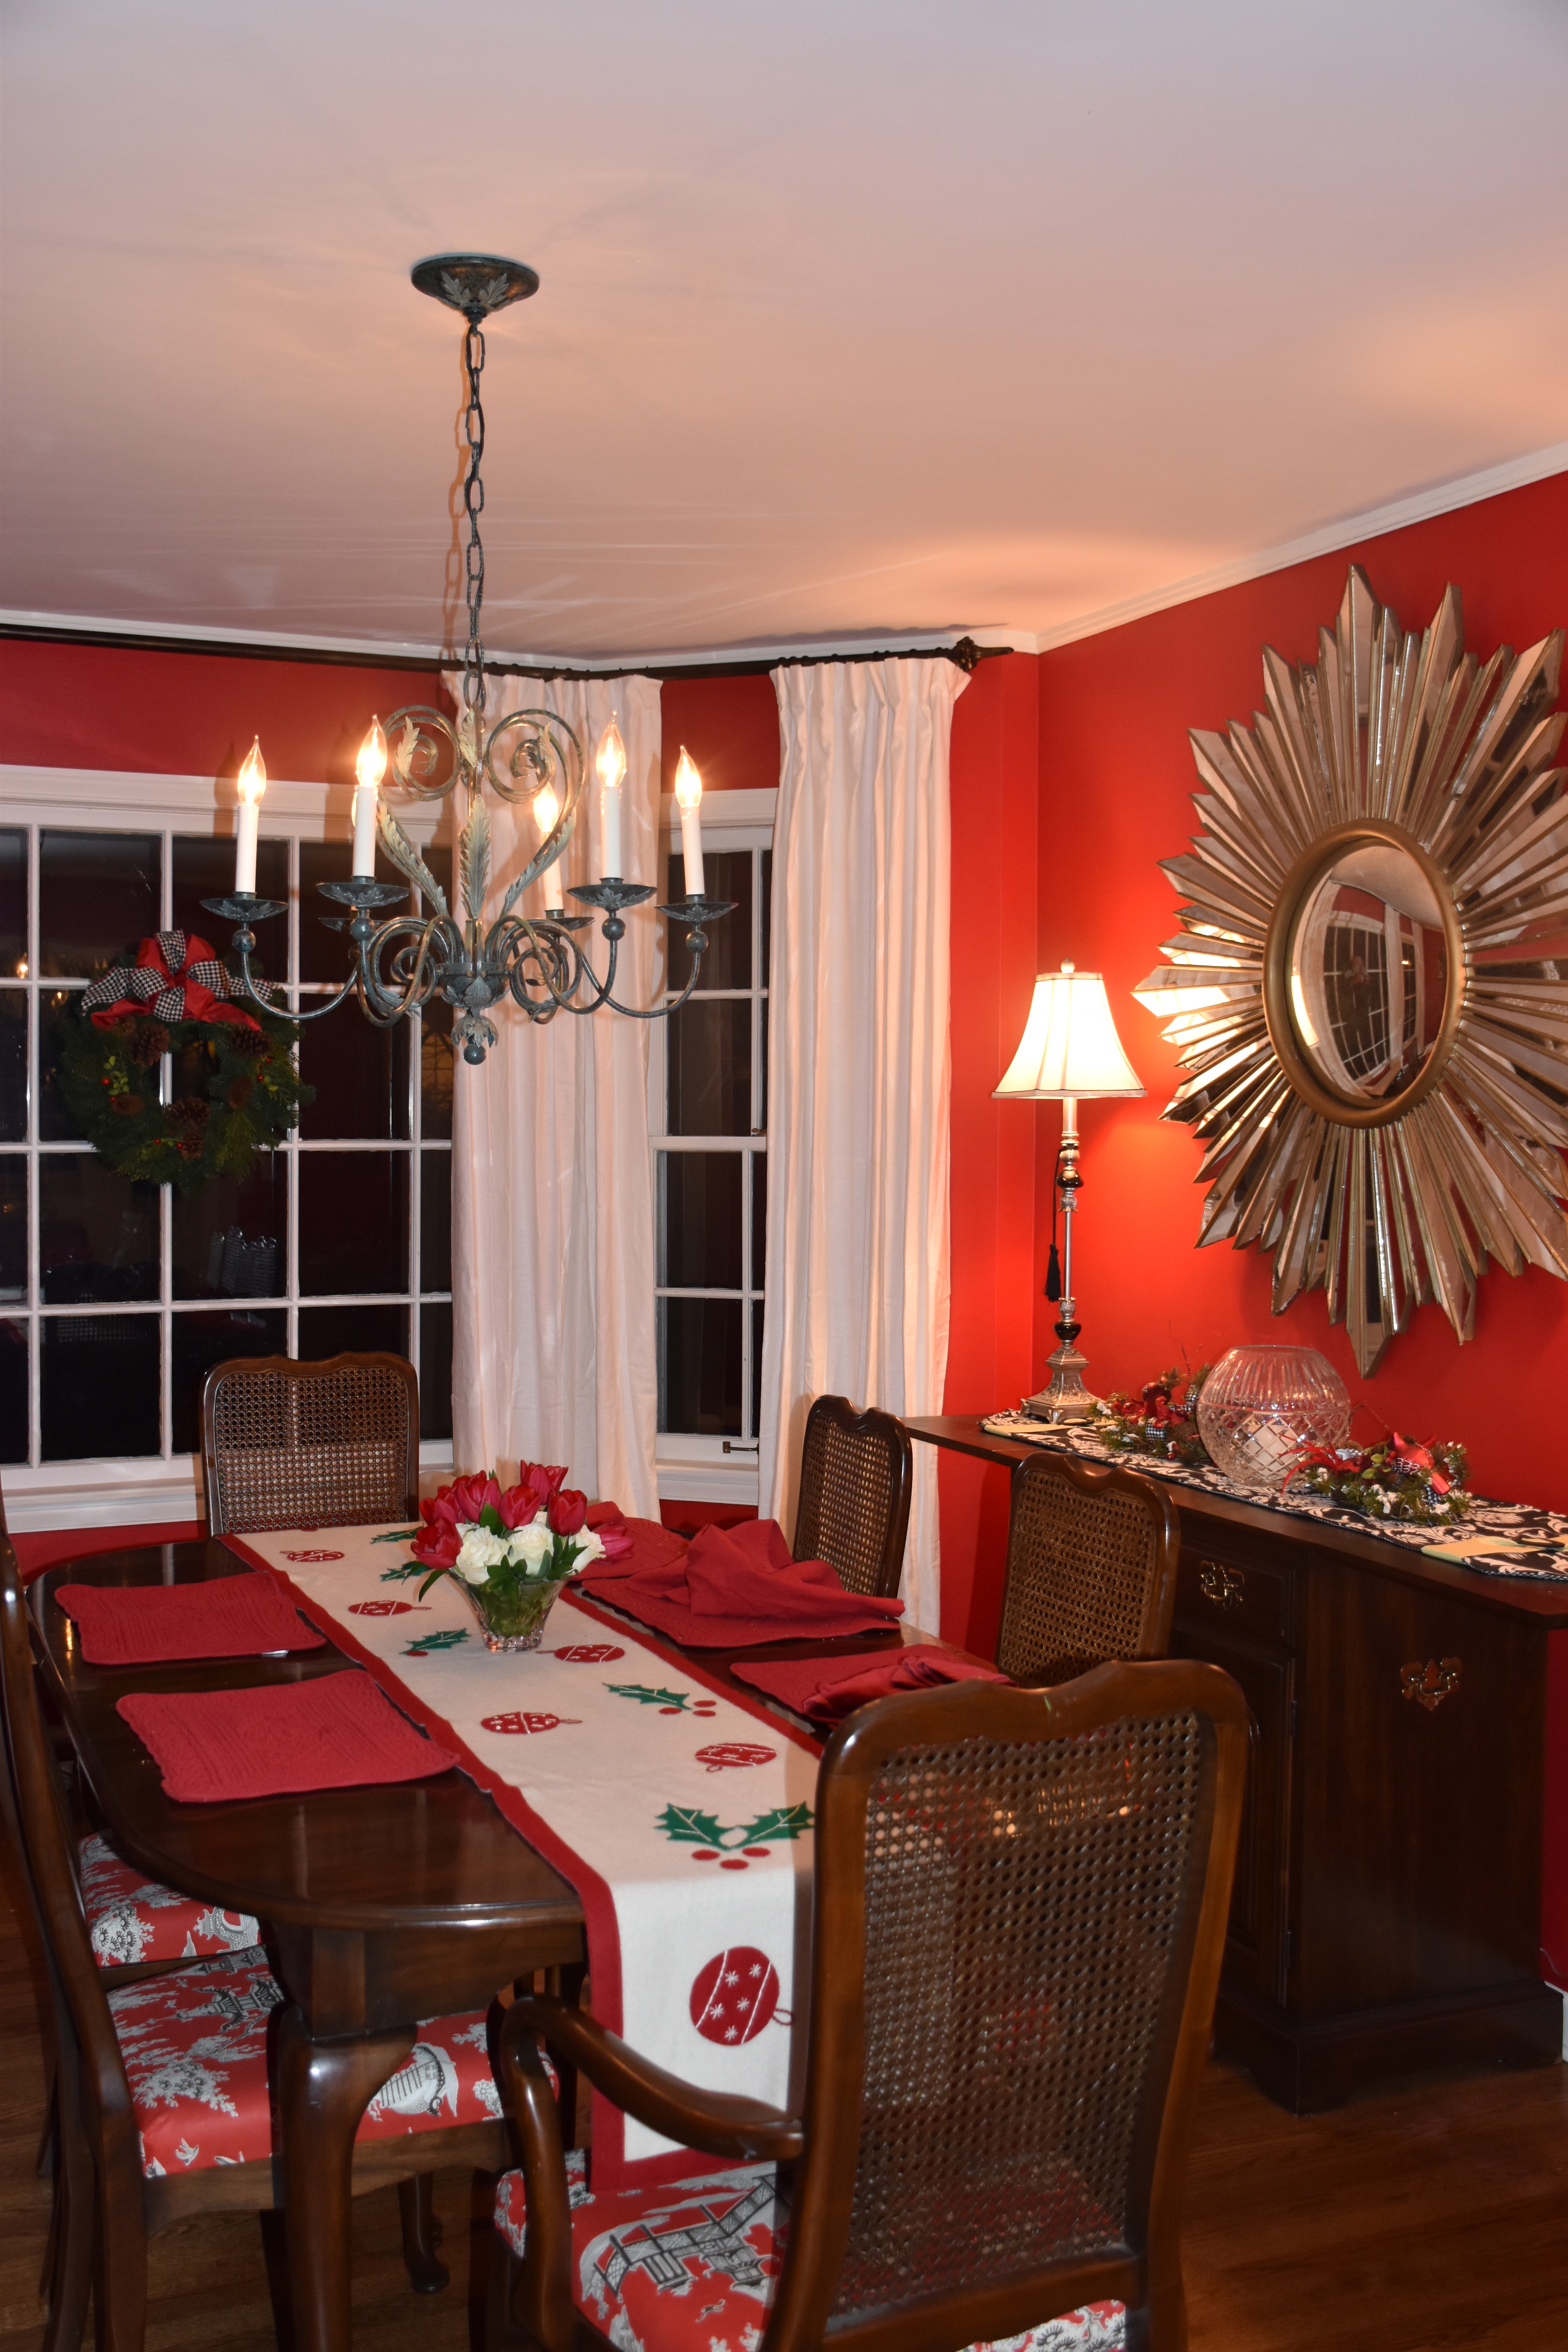
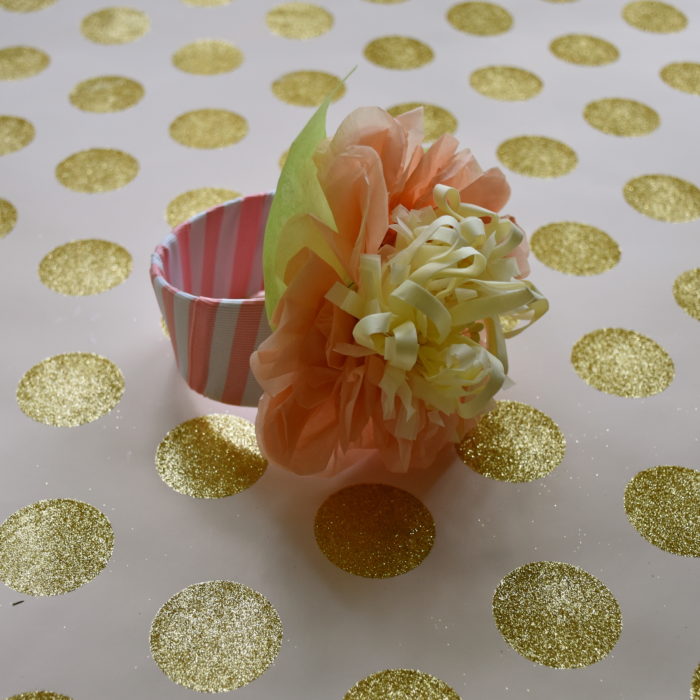
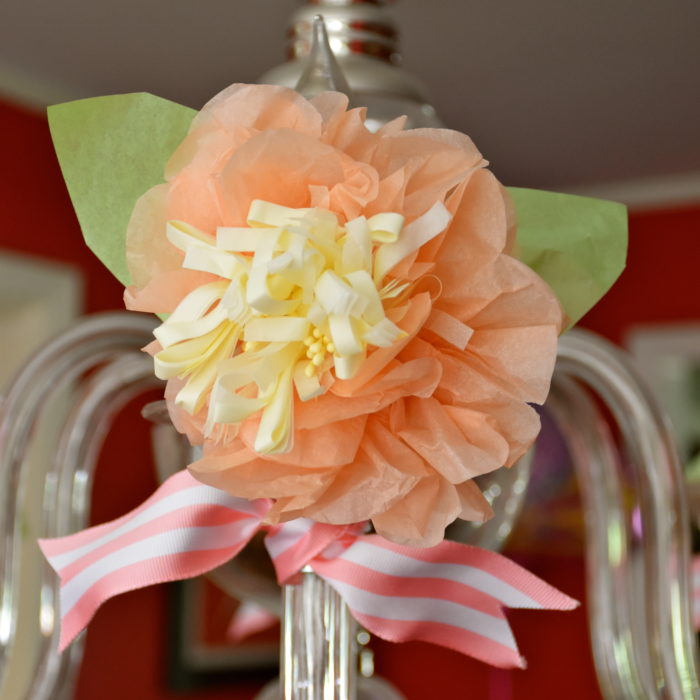
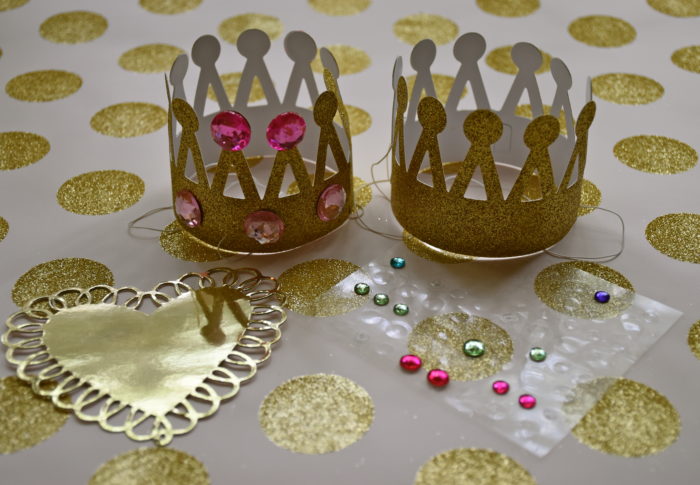
Sometimes I like to decorate my chandelier to make the dining room feel festive so I made some smaller pink peonies to hang above the table.

I wanted the flowers to fit over the candles on my chandelier without damaging them so I took some cardboard rolls I had left over from vacation bible school stickers and I wrapped then in ribbon and hot glued the flowers to them.

Then for an extra touch of pink I tied some ribbons below the flowers.

Finally, the last details were some balloons and pink roses and carnations for the table. My daughter loved helping me set up and decorate everything. She definitely enjoyed every minute of her birthday. It was so fun to watch her face as she sat in the dining room taking it all in with a huge smile on her face. The best part was that her grandmothers came to celebrate with us. It was definitely a fun evening filled with all the pink glittery details my little party planner loves.

Peach and Tomato Salad

Peach and Tomato Salad Recipe

Just one bite of a sweet peach makes me think is there anything as divinely delicious? Peaches are one of Summer’s great gifts and so when July comes and ripe peaches are filling the produce end-caps and the local farmer’s markets I happily commence the summer tradition of eating and cooking with as many peaches as possible. The July issue of Better Homes and Gardens featured an article and recipes from Case and Deanna  Fischer of Das Peach Haus in Fredericksburg Texas. The Fischer’s and their business partner Mark Wieser have a specialty food company that makes gourmet jams and sauces. Here is a link to their  company’s website here.

One of the recipes the Fischer’s shared was this Peach and Tomato Salad. The flavor combination of the tangy balsamic vinegar and the sweet honey with fresh peaches and tomatoes is wonderful. This is one of those recipes I know I will be making for years to come so I thought I would share it with you.

Peach and Tomato Salad

  • 1/2 cup balsamic vinegar
  • 1/4 cup olive oil
  • 1 tablespoon of honey
  • 1/2 teaspoon of salt
  • 1/4 teaspoon ground pepper
  • 6 medium peaches (about 2 pounds) pitted and cut into wedges
  • 2 pounds of vine ripened tomatoes cut into wedges
  • 1 cup thinly sliced red onion
  • 1 cup crumbled feta cheese
  • 1 cup of pecan pieces (the pecans can be left out if you have an allergy)
  • 1/2 cup of fresh basil cut into thin strips

First in a medium sized bowl whisk together the balsamic vinegar, honey, salt and pepper. Then slowly drizzle in the oil while whisking and continue whisking the dressing until the oil is fully incorporated.

Next slice your peaches and tomatoes. Since fresh vine tomatoes can be soft I like to slice my tomatoes using a serrated knife. It makes cleaner and better tomato slices. Then slice your red onion into thin bite sized slices.

Next take your basil leaves and stack them on top of each other and roll them longways into a chiffonade.

The slice the rolled leaves into thin even ribbons like strips.

Finally in a large salad bowl toss together the peaches, tomatoes, red onion, basil and add in your feta cheese and pecans. Drizzle on the balsamic dressing and carefully mix in the dressing so it coats all the peaches and tomatoes.

This is a great side salad that I have served with steak and grilled chicken sandwiches but it would be good with all kinds of dishes.

Happy Houses

When we were looking at homes in Chicago there was one that we named the “happy house.” It was a 1929 red colonial with black shutters, white trim and a bright kelly green front door. There was just something about that door that made you smile and want to look inside. The house was colorful and thoughtfully decorated, but alas it had just one garage and absolutely no room for a second. As Southerners, we were not so sure about having to de-ice one of our cars each winter morning. Sadly, we had to walk away from that one, but I still think about that painted door.

One of the keys to great curb appeal is to work with your home’s unique features. Every house has its own personality shaped by its architecture, location and how it is built. However, sometimes it’s the paint and finishes on a home that really set a house apart and give it a destintive style. Front doors are usually one of the biggest focal points on the exterior of your home. So choosing a color or finish that works with the personality of your house can make a big difference.

If you have what I would call an “ordinary” front door. A wooden door without a lot of detail or glass art then painting your door can really give your curb appeal a boost and add some personality to your house. When it is done right a painted door always makes me smile. So today I thought I would share of my photographs of pretty painted doors.

I absolutely love a good red door. Red happens to be my favorite color, but I have yet to own a home where I thought a red door would look right. A very popular and pretty shade of red is Benjamin Moore’s Heritage Red. It’s not too orange and not too blue, its just the perfect shade. I love a classic white home with black shutters. Just look at the details on the house above. The black window boxes and the pretty brass door number and mail box.

Here is a classic older home with a gorgeous red door. I love the painted details and lettered address.

This is a small and fairly simple home, but the the red door and matching mail box really make it stand out.

This spring green door is gorgeous. I love the energetic green against the gray and white shingled home. This isn’t a fancy or ornate door so the green is what makes this house special. It’s what the eye goes to when you see it from the street.

Here is another softer apple green. I like the look of this green against the light blue grey exterior and the stone steps.

This traditional shingled house has a very modern paint scheme. I like the edgy dark grey exterior and black trim, but it definitely needed a brighter door. The lime green on this more modern door really pulls this look together and it keeps the house from feeling too dark.

There is something about the combination of yellow and grey that I like. Here this happy marigold yellow makes the french door stand out and it gives it some presence, which this house needs since there is a uniform row of windows across the front. I like the white trim, but I wish they had painted the area around the door and windows grey as well.

Here is a newer construction with a deep charcoal grey and a bright yellow door. I like that they kept the sidelights white but I wish they had matched the metals on the door numbers and the hardware.

This is another one of my favorite door colors. The beautiful blue green door looks similar to Benjamin Moore’s Wythe Blue. I love the creamy white paint with the light grey trim and this blue door. It creates this tranquil and beautiful look.

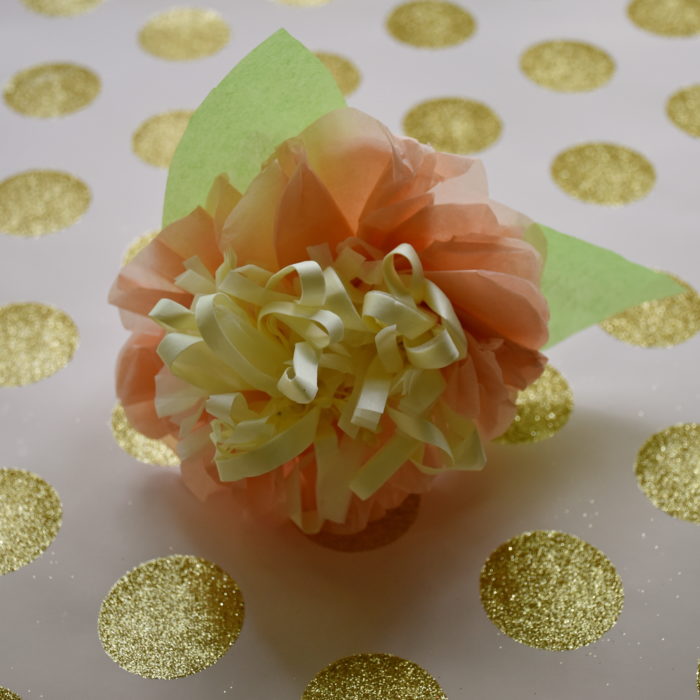
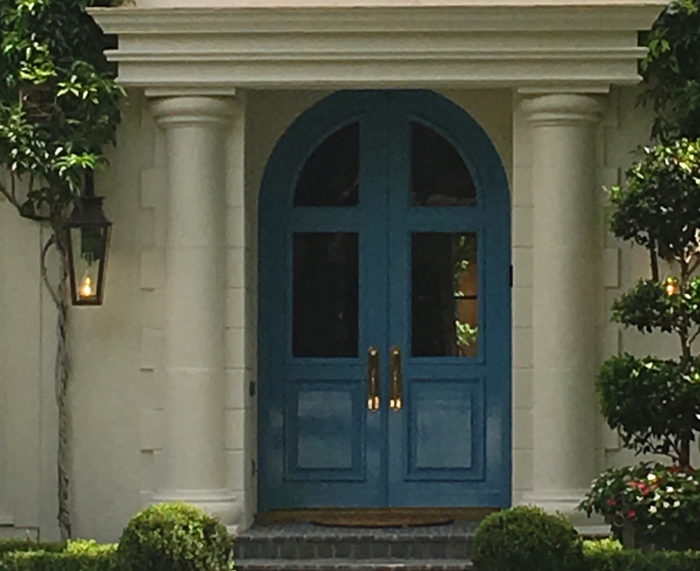
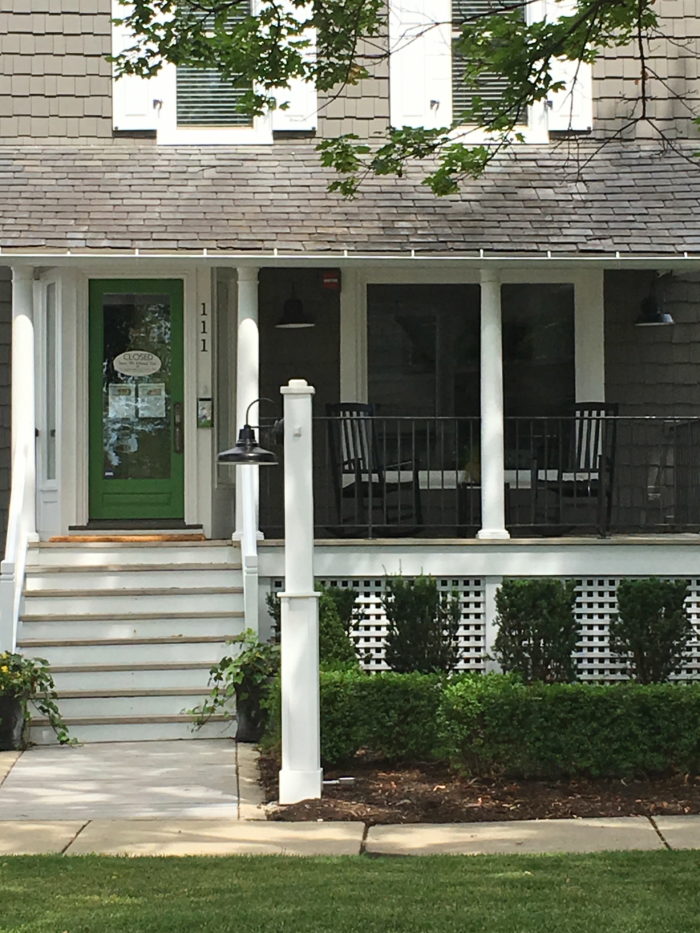
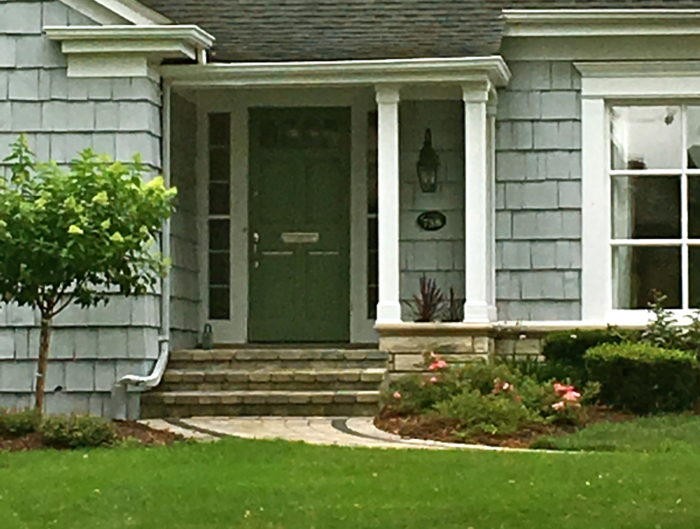
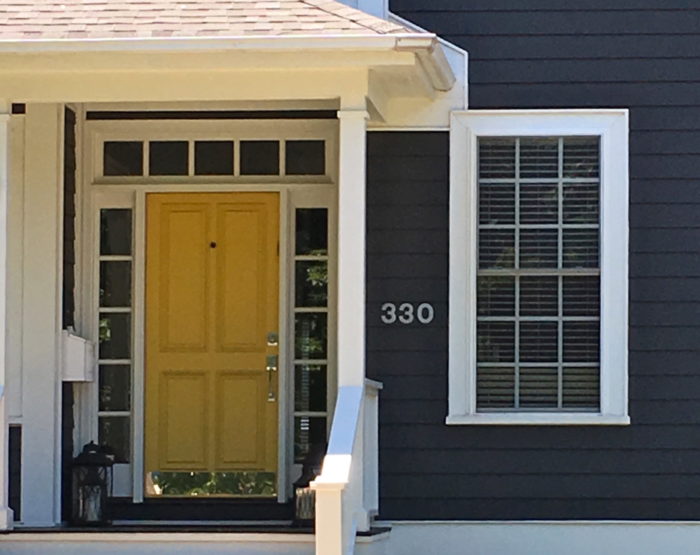
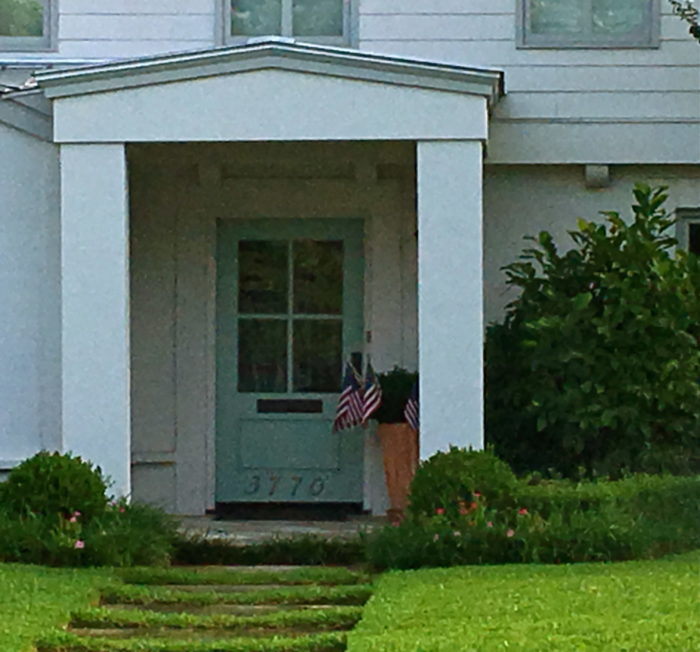
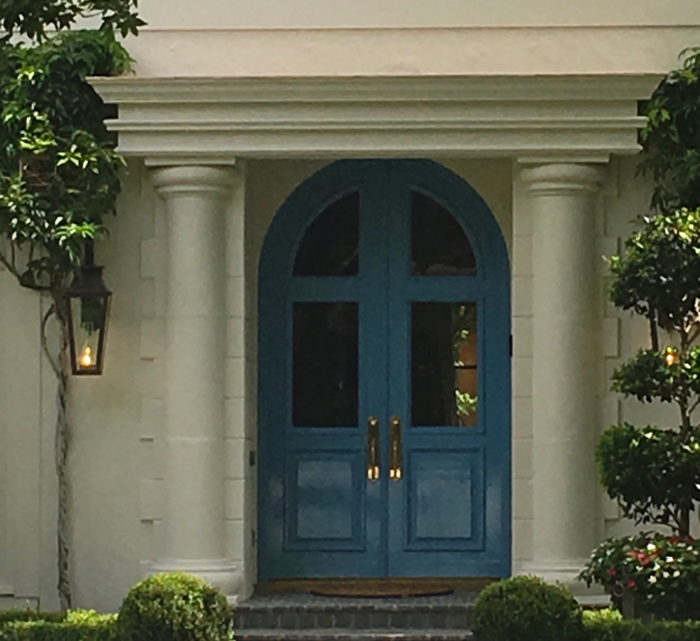
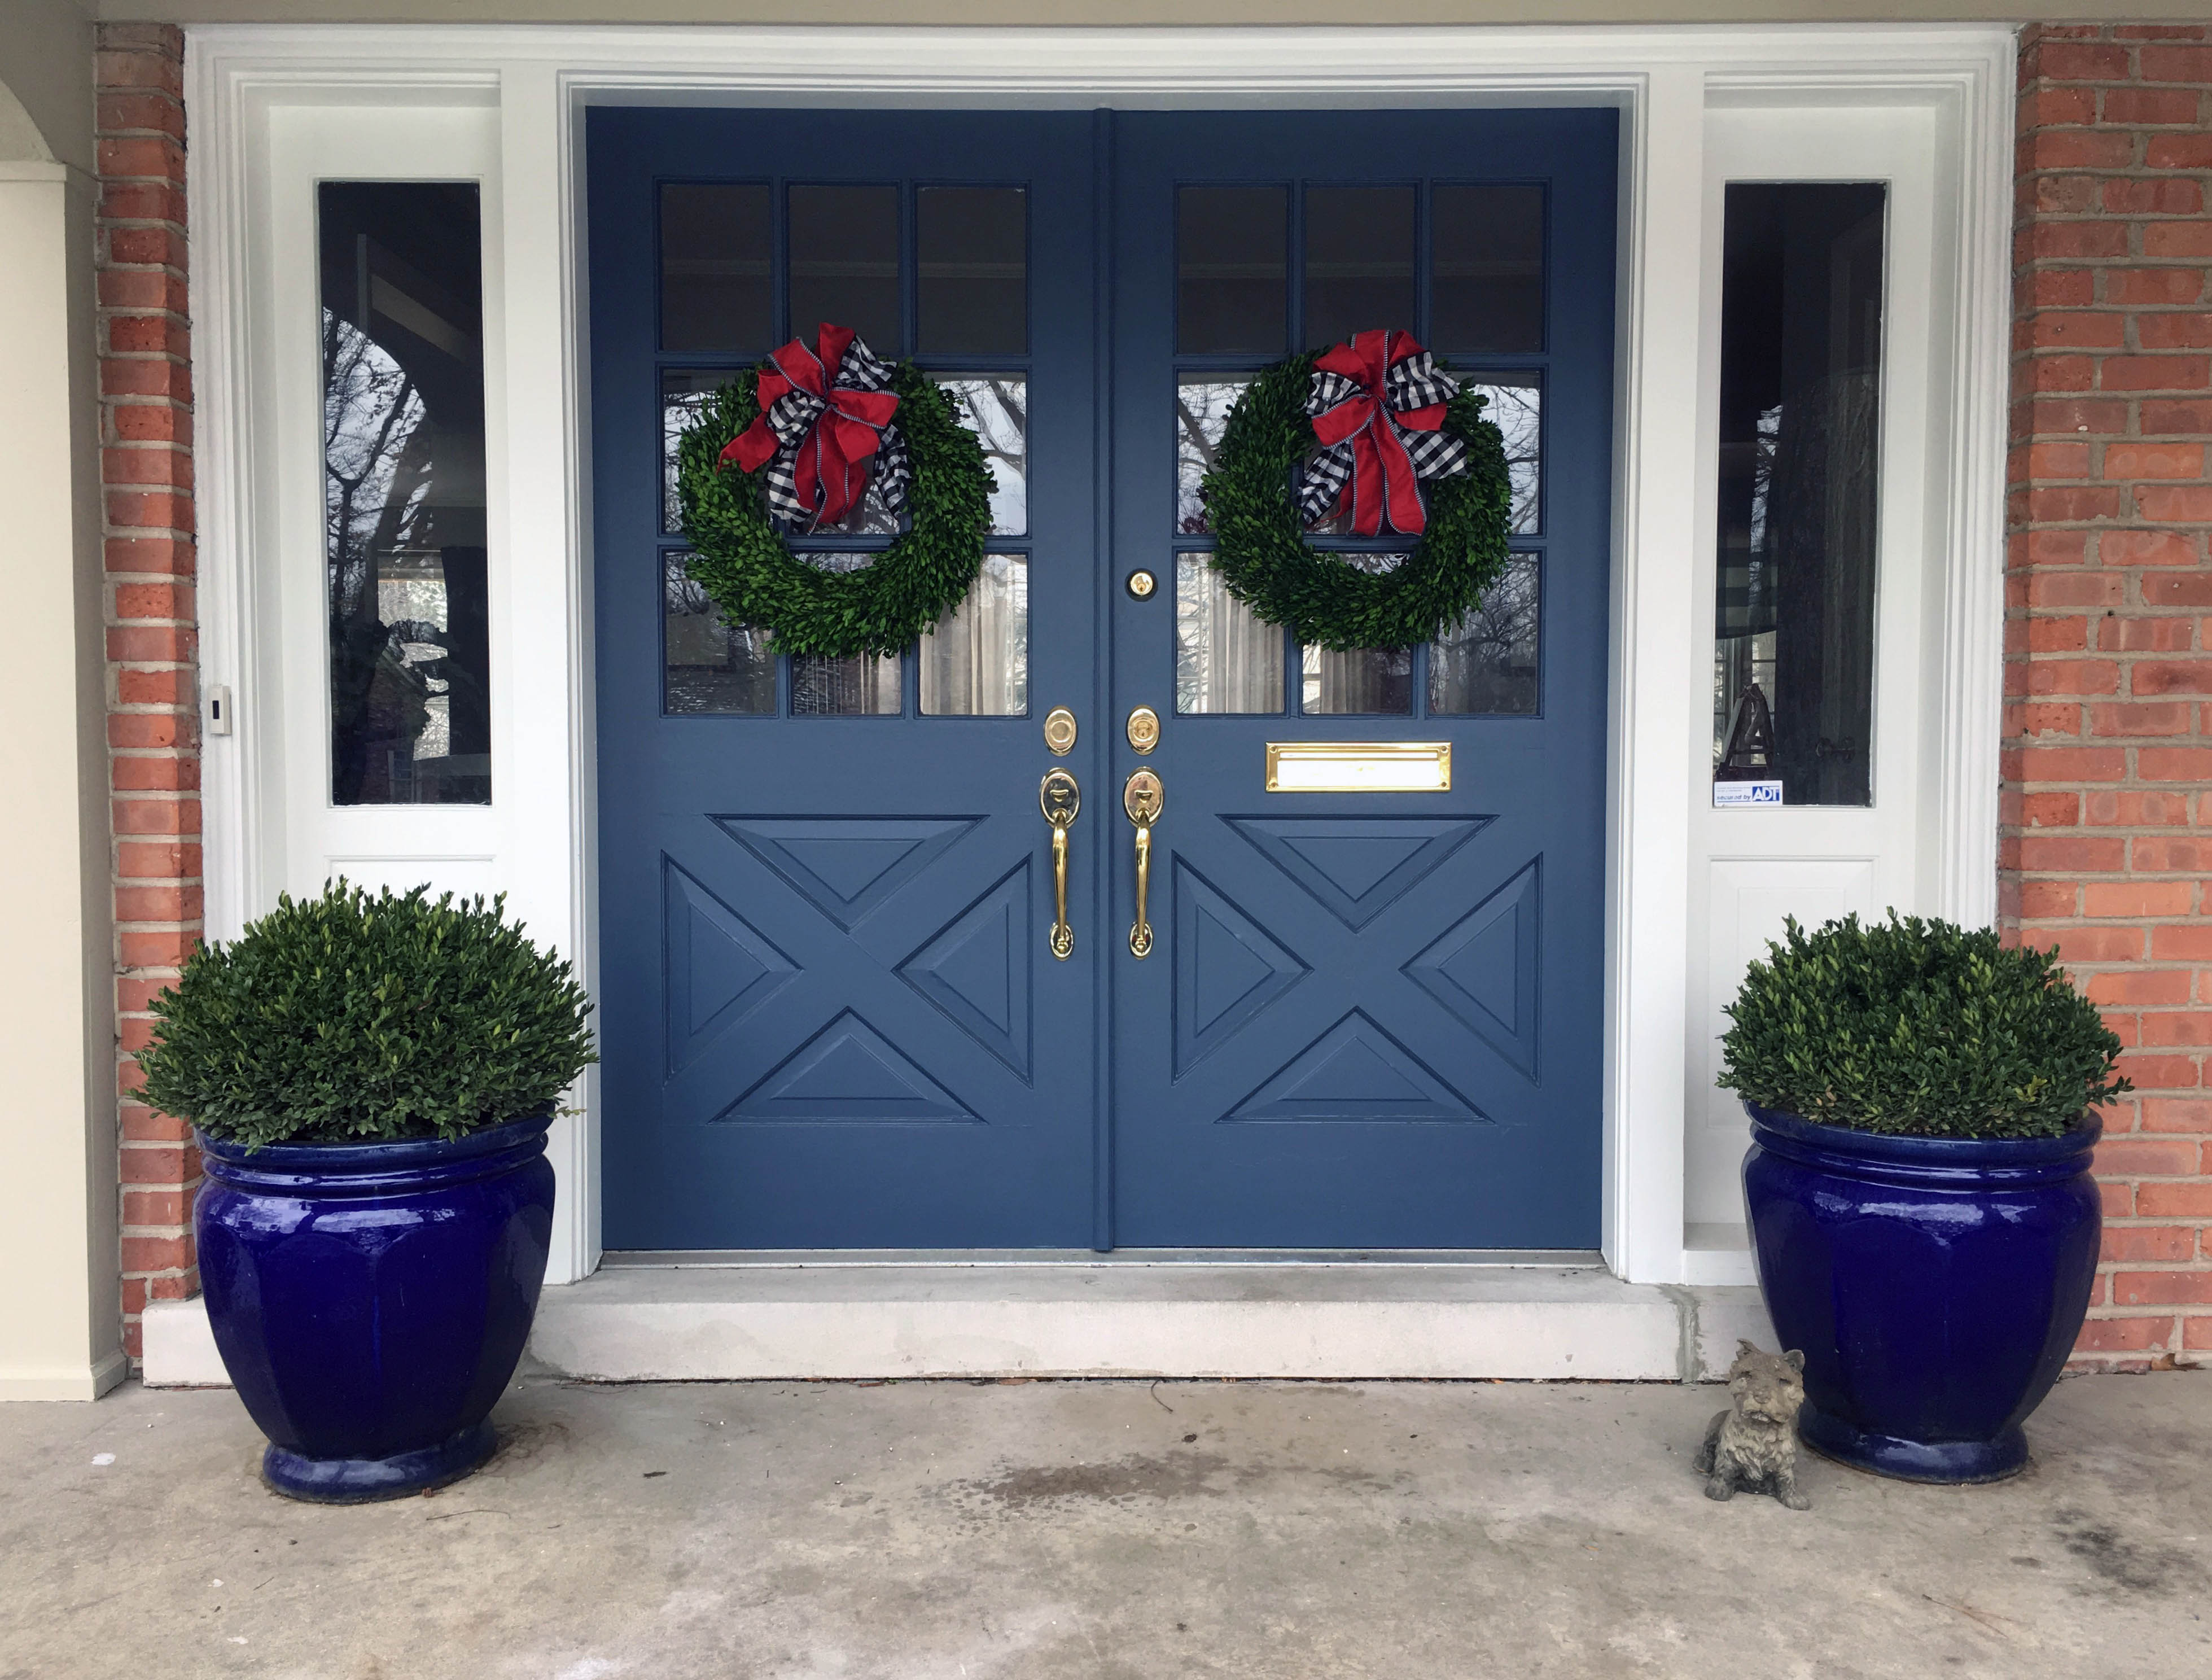
Here is another blue green door. The light color is a bit more subtle against the grey siding, but it still brightens the look of this house.
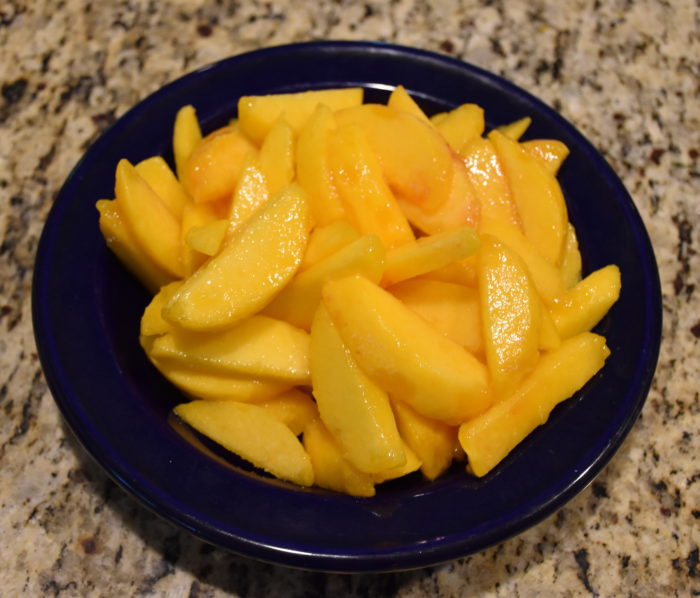
This French blue door has a bit of grey in it which makes it work with the grey stucco exterior and the brick detailing on the front walk and porch.

Then there is this brilliant blue lacquered door that is just perfection. The deeper blue makes you notice the arch of the doors and the the carved details. I love the blue with the weighty brass handles and the hanging gas lantern. This door really has a presence.

Since I love a painted door, I decided to paint my front doors a steely blue. Even when it gets a bit gray in winter the blue doors add a bright spot to our home. You can read more about my travels and what inspired me to chose this color here.

This has been a fun post to photograph and put together, but I know I am not the only one who loves painted doors. The Wall Street Journal reported that painted front doors were some of the most searched for images on major home websites like HGTV and Houzz. People are looking to make their homes feel personal and a bright painted door is wonderful way to give your home some style. I believe a great door says something about a house. When I see a painted door it makes me stop and wonder what a home is like, because color is deeply personal. It’s one of those things that catches your attention and creates an immediate emotional response and it’s why a beautiful painted door just makes me happy.

Fredericksburg Peach Cobbler

Can you really be both a pie and cake person? Some people say you can’t really love them both equally, but I think the answer to this great debate is cobbler. Especially this peach cobbler which has juicy sliced peaches baked into a tender buttery cake like batter with a crispy sugar crust. Serve it warm with ice cream and you will see it really is the best of both and to top it all off it much easier to make. It may not be as showy as a pie pastry or a frosted cake, but once you take a bite this recipe will win you over.

When I was in high school my family loved to go to Fredericksburg, Texas to get away for a long weekend or for spring break. It was about a four hour drive from my home and you could rent these cute little farm houses and we used to love to get outdoors and enjoy the hill country. One time we stayed at a place where the homeowners had an old book of family recipes. The baking recipes looked interesting so I wrote out many of them by hand. Once I tried making them I realized what I had found was wonderful. These recipes are some of my absolute favorites. Fredericksburg is known for its peach farms and one the recipes in that family’s cookbook was this peach cobbler.

Fredericksburg Peach Cobbler

  • 3 cups peeled sliced peaches (about 4 peaches)
  • 6 tablespoons butter melted
  • 3/4 cup flour
  • 1 cup of sugar
  • 1  1/2 teaspoon baking powder
  • pinch of salt
  • 3/4 cup milk
  • 1/2 cup sugar for sprinkling on top before you bake it

First preheat your oven to 350 degrees.

Next, get you peaches peeled. If your peaches are ripe it is easier. I used a vegetable peeler to pull up a piece of skin and then I pulled the skin off in long strips. If your peaches are a bit firmer you might need to use some boiling water to help you. Bring a saucepan filled halfway with water to a boil then with a small knife cut an X shape through the skin on the bottom of your peach. Then when the water is boiling add you peach and boil it for 30 or 45 seconds and then remove your peach from the water with a slotted spoon. The boiling water will help loosen the skin. You can begin to pull the skin off from the cuts you made on the bottom of the peach.

Once your peaches are peeled I slice them off the pit into even slices.

Next take your melted butter and pour it in the bottom of an 8×8 square baking pan.

Then in a medium sized bowl mix together your batter. Using a whisk mix together the flour sugar, baking powder, salt and milk. Then when the batter is well mixed pour it onto of the melted butter. You can spread out the batter a bit by using a rubber spatula, but DO NOT STIR. You are going to layer the ingredients on top of each other.

Then arrange or place your peaches evenly on top of the batter some of my peaches are a double layer think. Don’t worry about exact placement because the batter will rise and cover the peaches as it bakes. Then before you put it in the oven evenly sprinkle the top with 1/2 cup of sugar.

Then bake it in the oven for 40 to 45 minutes or until you see the top turn a golden brown. I like to serve mine warm with a scoop of vanilla ice cream.

My recipe for Peach Cobbler is featured on The Pioneer Woman’s site, Tasty Kitchen, click on the link above for a printer friendly recipe.


Remixing Your Bathroom With Art

Can you really change the look of a bathroom without renovating and starting all over again? I have been working on the older bathrooms in my home and I have featured two of them on the blog. When you have an older home there are always projects, but just because you can’t fix everything right away doesn’t mean you should live with a room you really don’t like. I have been working on several projects and searching for for some new art pieces and that inspired me to put together several ideas for remixing your bathroom. People don’t always think about art in a bathroom, but for me I find art so enlivening that a great photograph or painting can really change how I feel about a room. I decided to create a four art driven looks that could transform your bathroom with just a few key accessories.

This first look is a traditional look inspired by a photograph of Chinese pottery. These towels from Pottery Barn have a shape to them that look like the leaves on the painted flower. The shower curtain repeats the same pattern in the reverse so it adds some visual interest. Then for the mirror I liked this quatrefoil shaped mirror from Wisteria. This mirror comes in two sizes and in several different finishes. I like the lighter royal blue because it picks up the lighter blue from the painting, but it also comes in white and silver. The sources are listed below.

Pottery Barn Marlo Towel 

Pottery Barn Marlo Shower Curtain

Wisteria Blue China Art

Wisteria Mughal Mirror

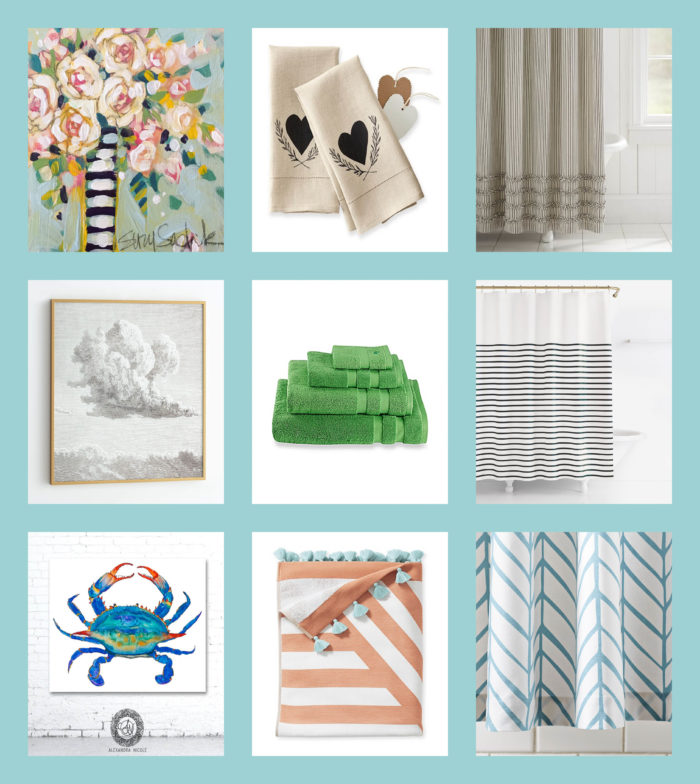
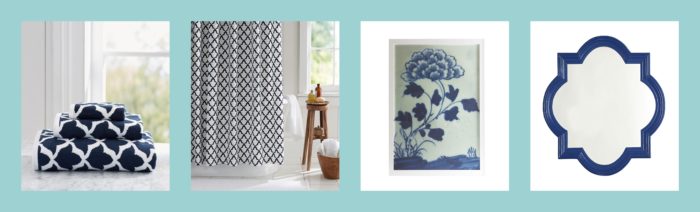
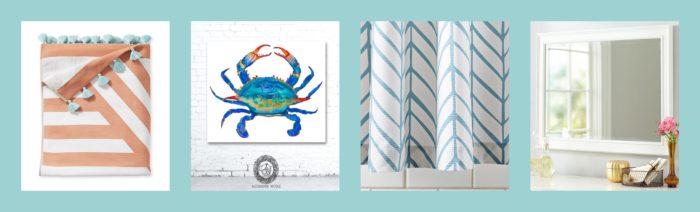
I love a coastal styled bathroom.This crab is from an artist named Alexandra Nicole who lives of the coast in St. Simons, Georgia. I found her work on Etsy and I have ordered a couple of pieces from her and I was impressed. I love the colors in this crab painting so I decided to pick up on the orange and turquoise colors that you see in the crab shell. Serena and Lily had these great striped towels with the turquoise trim and I like their modern pattern on their feather shower curtain. I went with a white mirror white goes with the coastal style. I could see this as a great kids bathroom because of the bright colors and playful patterns. The sources for these items are featured below.

Serena and Lily Sydney Towel

Maryland Blue Crab Painting

Serena and Lily Feather Shower Curtain

Serena and Lilly Sydney Beach Towel

This bathroom was inspired by this great little painting by artist Stacy Sadack. I liked the black and white details on the vase and I decided to repeat that pattern in the black ticking stripe shower curtain with a ruffle detail. I also like the hand drawn look of Mark and Graham’s linen guest towels. I finished this more romantic styled room with a French gilt mirror. These ruffles and roses would be great of a girl of any age and I could also see it working as a guest bathroom as well. Here are the links below.

Roses in a Black and White Vase

Calligraphy Hand Towels

Black and White Ticking Stripe Shower Curtain

French Gilt Mirror

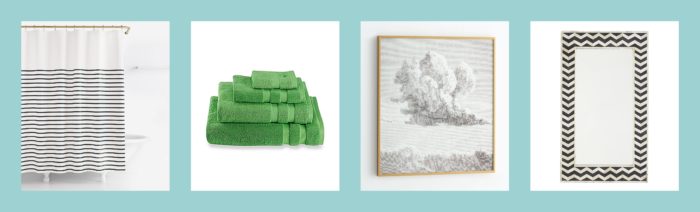
Now for a more modern look, there is something about the combination of black and white with a bright green that really catches the eye. I have seen it used in several rooms with anthropology’s black and white Zuber styled wall paper. Marian of the Miss Mustard Seed blog used it in her hall bathroom. Here is a link to the bathroom here. I really love how it turned out, but my experience has been that wall paper can see some wear in a bathroom that has a shower or gets lots of use. So I found I decided to base this look around an engraved painting of a cloud which is reminiscent of the panaramic landscape scenes that you see in Zuber paper with out the expense and commitment of using wallpaper. I added some pattern with the striped Kate Spade shower curtain and the black and white Chevron Mirror. Then to add a touch of green I would add Kate Spade’s towels. I think this color scheme would work well with a bathroom that has white, black or gray tiles. This look puts a colorful and modern twist on a classic. For my sources see the links below.

Kate Spade Black Stripe Curtain

Kate Spade Green Towels

Cloud Engraving Art

Chevron Wisteria Mirror

Decorating can’t solve every issue, but it can help you tackle an ordinary or even slightly dated room. Bathrooms are generally smaller rooms so adding just one piece of art or a small pair of prints can give the room a new focal point. Then if you intentionally layer in accessories that pull that style into the room, you can really begin to change how the space feels. So when you are styling your bathroom don’t overlook what you have hanging on your walls. Adding a new mirror, shower curtain and towels that you love can help you transform a room. I have seen some older, tiled bathrooms look completely different when the rest of the room is given a style remix. So the next time you are looking at decorating a room think about starting with art.

Contact Us