Panzanella Salad

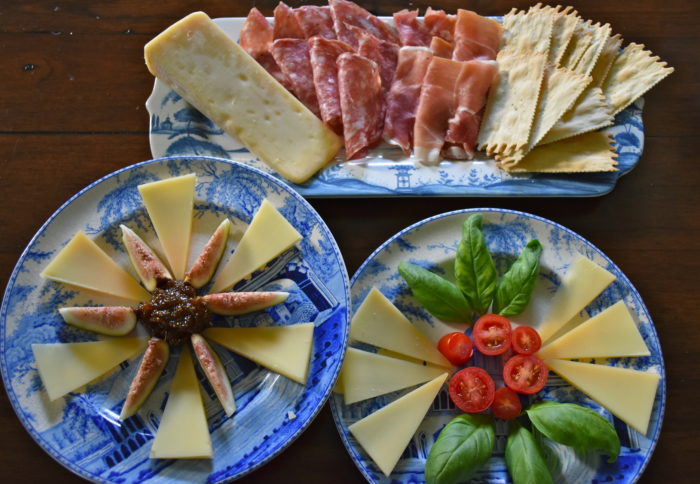
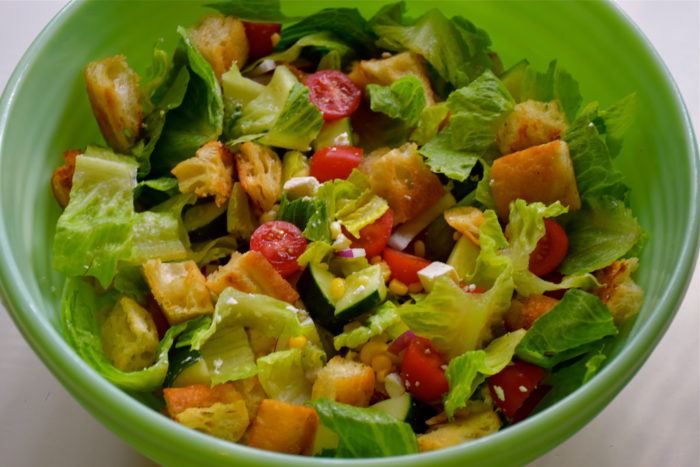
Any recipe whose star ingredient is french bread is a winner if you ask me. Maybe that is why I just absolutely adore this salad. It’s the dish I love to make for dinner. It’s July so fresh tomatoes, cucumber and corn are here and they make this a very colorful and flavorful salad. My husband likes a little protein with his vegetables so sometimes I serve it with salmon or grilled chicken. Recently, I served it with my Italian inspired charcuterie plate and it was a great combination. My version of this classic salad has a bit of a Greek twist to it because I add feta cheese and romaine lettuce. So if you are looking for something a bit lighter to serve this Summer then give this salad a try.

Panzanella Salad

  • 1 head of romaine lettuce
  • 2 ears of fresh corn kernels cut off the cob
  • 1 medium sized cucumber chopped into bite sized pieces
  • 1 pint of cherry tomatoes halved or 2 vine ripe tomatoes chopped
  • 1/2 cup red onion sliced thinly and cut into bite sized pieces
  • 1 1/4 cups of feta cheese crumbled

Croutons

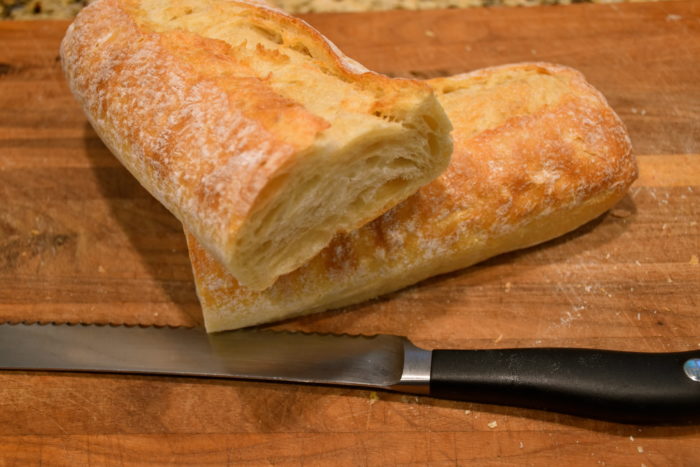
  • 1 loaf of rustic french bread or ciabatta bread cut into cubes (about 6 cups of bread cubes)
  • 2 tablespoons of butter
  • 2 tablespoons of olive oil
  • 1/4 tsp garlic powder
  • 1/4 tsp salt

Salad Dressing

  • 1/2 teaspoon dijon mustard
  • 1 teaspoon salt
  • 1 teaspoon garlic powder
  • 1/8 teaspoon pepper
  • 1/2 teaspoon dried oregano
  • 3 tablespoons red wine vinegar
  • 1/2 cup canola oil

I start by cutting by bread into bite sized cubes. I do this by slicing my loaf in half horizontally and then I take each half and slice it open like you were making a sandwich. Then take each half of bread and cut it into three of four strips depending on how thick your bread is. Then cut those strips into even sized cubes.

Once you get your bread prepared place a large skillet on medium low heat and melt the 2 tablespoons of butter and add the 2 tablespoons of oil. Then stir in the garlic powder and salt. Once you have the butter and oil seasoned add in your bread crumbs and stir them well so they are evenly covered in the butter.

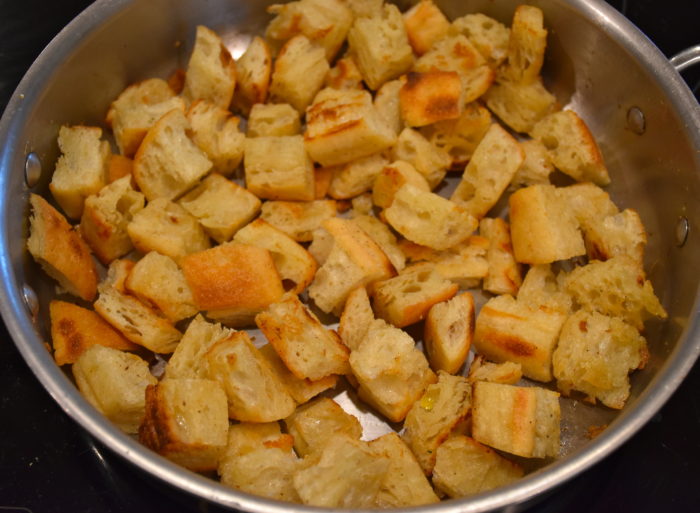
Then continue to cook your breadcrumbs on the stove top on medium low heat stirring occasionally to make sure they cook and get evenly toasted. It’s a low and slow cooking process that takes about 30 minutes, but you can work on chopping your vegetables while your bread toasts.

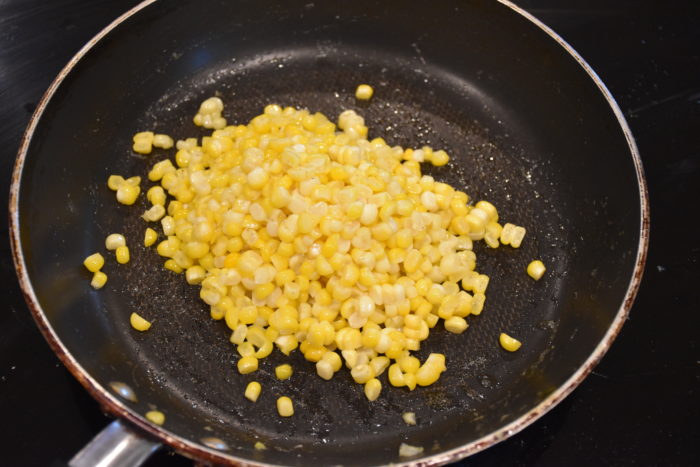
In another pan melt 1 tablespoon of butter on medium heat and then add in your fresh corn kernels. Cook the corn until it turns a brighter yellow (about 4 minutes). Then set the corn aside to cool. Then chop your other vegetables.

Next, make your salad dressing by whisking together the 1/2 teaspoon dijon mustard and the 3 tablespoons of red wine vinegar. Then add in your garlic powder, salt pepper, oregano. Then final slowly drizzle in your oil while whisking the mixture together and keep whisking until the salad dressing gets thicker and the oil is fully incorporated.

Finally, when you are ready to serve your salad toss together your chopped romaine, tomatoes, cucumber, red onion and corn. Then add the french bread croutons and sprinkle on the feta cheese. Then toss the salad with the dressing and there you have it one of my personal favorites, panzanella salad.

Transforming Our Tiny Master Bathroom With Color

On the brief real estate tour I took of our home, the master bathroom stood out as one  of the rooms I wanted to update. The room was small and the colors felt dark. I took some photos and then I began thinking about what I could do to lighten up this bathroom.

The Before: here I am taking a photo of the bathroom on the tour we took of our home.

In the future, we would love to do a larger renovation to retile the bathroom and turn our tiny bath into a large walk in shower. However, with a small budget and careful plan, we have made some meaningful changes that have made a big difference in this tiny space.

The first thing I did was I began to think about adding a cooler color that would tone down the orange granite which in this small bathroom really stood out as the major focal point. Since changing the counter top was out, my mind immediately went to turquoise. I knew a blue green color would compliment the orange tones and help lessen its impact in the room. Once I had a color direction I began looking for a shower curtain. In our small bathroom the curtain takes up a lot of visual space, so I wanted to choose something that I really liked that brought in this new color scheme.

Then the second project was to find a way to create more storage. The bathroom had a large frameless mirror which covered the whole back wall. So if we removed the mirror and replaced it with a smaller framed mirror then would would have room for a much needed cabinet. I also wanted to remove a small medicine cabinet that had a dated shutter door. It may have added a tiny bit of storage but it was just not cute and it stuck out a bit. We hired a contractor who removed the cabinet and mirror and repaired the sheetrock.

This is a funny little photo but its the only one I have to show you the old medicine cabinet that was on the left side.

Our bathroom at our old home had a full sized cabinet above the toilet which created great storage.  I decided to add a similar cabinet to our new bathroom since we had very limited storage and no place to put our towels. I also like having a higher cabinet that keeps little ones out of any medicines or toiletries.

We replaced the mirror with the Henry mirror from Birch Lane and the cabinet was a kitchen cabinet from Home Depot which was a close match to the existing vanity. I then replaced the door pulls so they would all look the same. I found these knobs by Cynthia Rowley at Home Goods, but Hobby Lobby has some similar looking knobs.


I painted the walls Wythe Blue by Benjamin Moore and I got it in their spa finish which has held up well with all the steam that a small bathroom can create. The cool toned blue green color works well with the counter tops and makes the bathroom feel a little brighter. The art was a lucky find at Home Goods years ago. They are printed on a plastic canvas so the pictures work well in a bathroom.

This shower curtain from Serena and Lily really makes this room. I so was excited when I found it because it had the beautiful aqua color stripes with a smaller bark colored accent, which worked to tie in the floor tile as well as the accent tile in the shower.

I had some trouble finding a small bathmat that would fit in the very tiny space between the toilet and the wall. After looking a lot of different places with no luck, I finally looked back a Serena and Lily and I found that they had a tiny mat. So if you are looking for a mat for an unusually small space you might have luck there as well. I like using white towels and mats because they can be bleached if they get dirty.

The final touch is the cornice valance that I recently made for the window. There is a story behind this window valance. I had been looking for fabrics but hadn’t found the right one. Then there came the day when my husband was showering and out of nowhere our old shower rod broke and in the struggle to try and get the shower curtain back up again the woven fabric was ripped along the edge in such a way that it just couldn’t be repaired. In the end, it was kind of a serendipity because I was able to order a new shower curtain and I used the old one to upholster this custom cornice board. I decided to flip the pattern so it was the opposite of the shower curtain. I love the final look. It adds just the right finishing touch.

This bathroom was one of our least favorite rooms in the house and now thanks to a new color scheme and a few changes it feels lighter and it functions better. So don’t underestimate the big difference that color can make. Changing the paint to a cooler color made the room feel brighter and the shower curtain gave it an updated graphic pattern. The colors in the fabric were perfect, because it looks like it was custom made for our bathroom. I also love the look of our new mirror. The beveled glass frame is easy to keep clean and its classic lines updated our vanity, while giving us room for more storage. So if you have an older home with a quirky bathroom you would love to change, think about a new color scheme. The right color can really transform a room.

Bringing Italy Home To Your Table

Buonasera (good evening), if you were out for dinner in Italy this is how they would welcome you. I thought I would share some about the food in Sardinia, Italy, where I traveled recently.  While we were in the town of Alghero, we had the opportunity to eat at a particularly delightful restaurant called Sa Mandra. Sa Mandra is located on a farm just a short distance from town and it specializes in traditional Sardinian food.

Once you step out on the farm and see the olive and pear trees and the pink bougainvillea covered arches you know that this place is special. The stone buildings and the traditional decor make you feel like you are dining in different time.

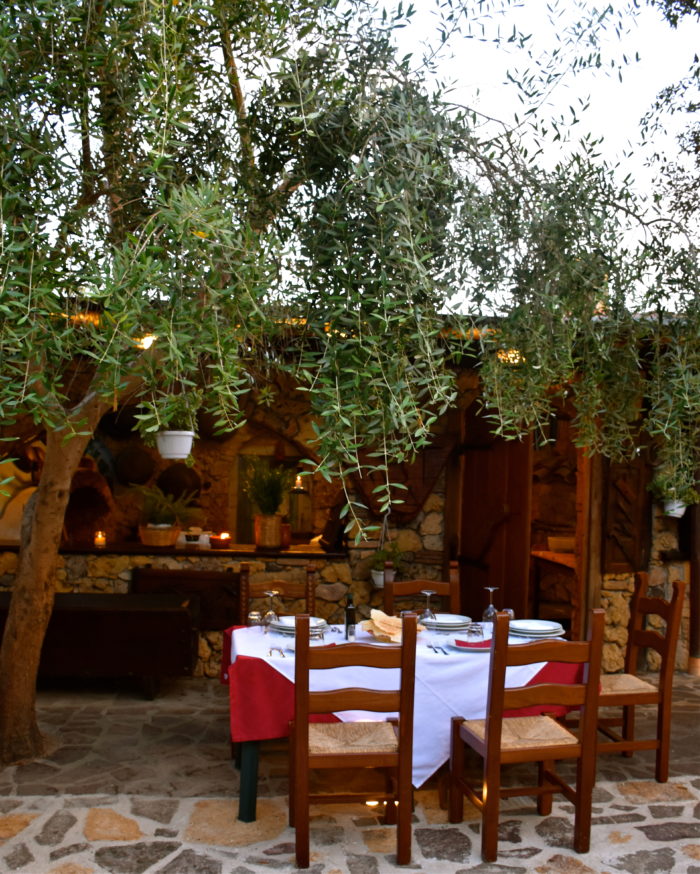
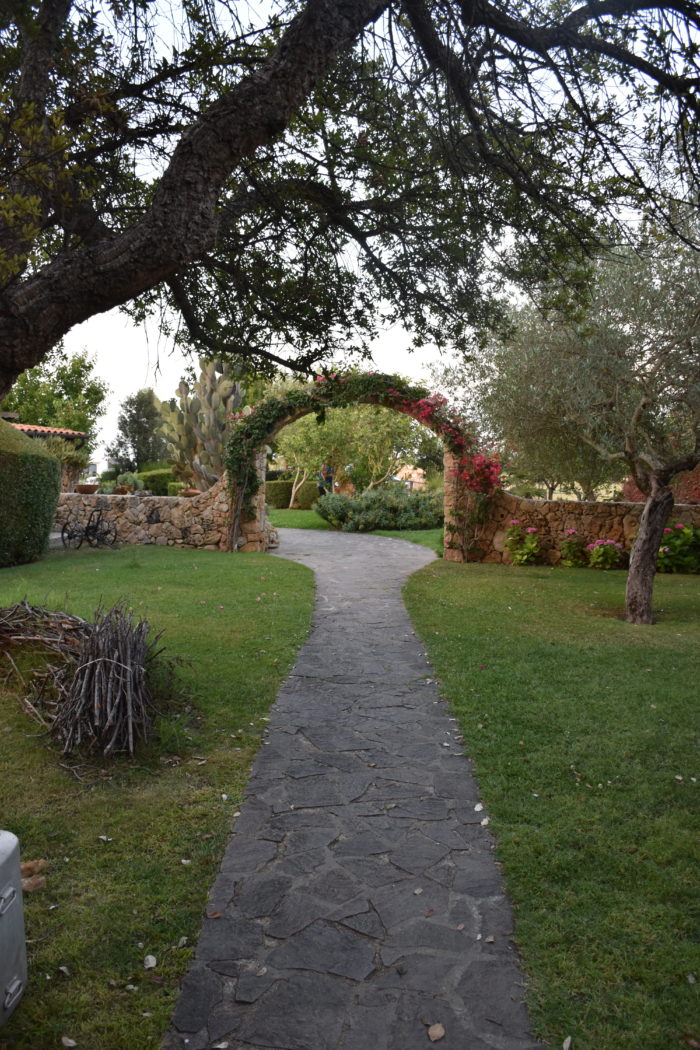
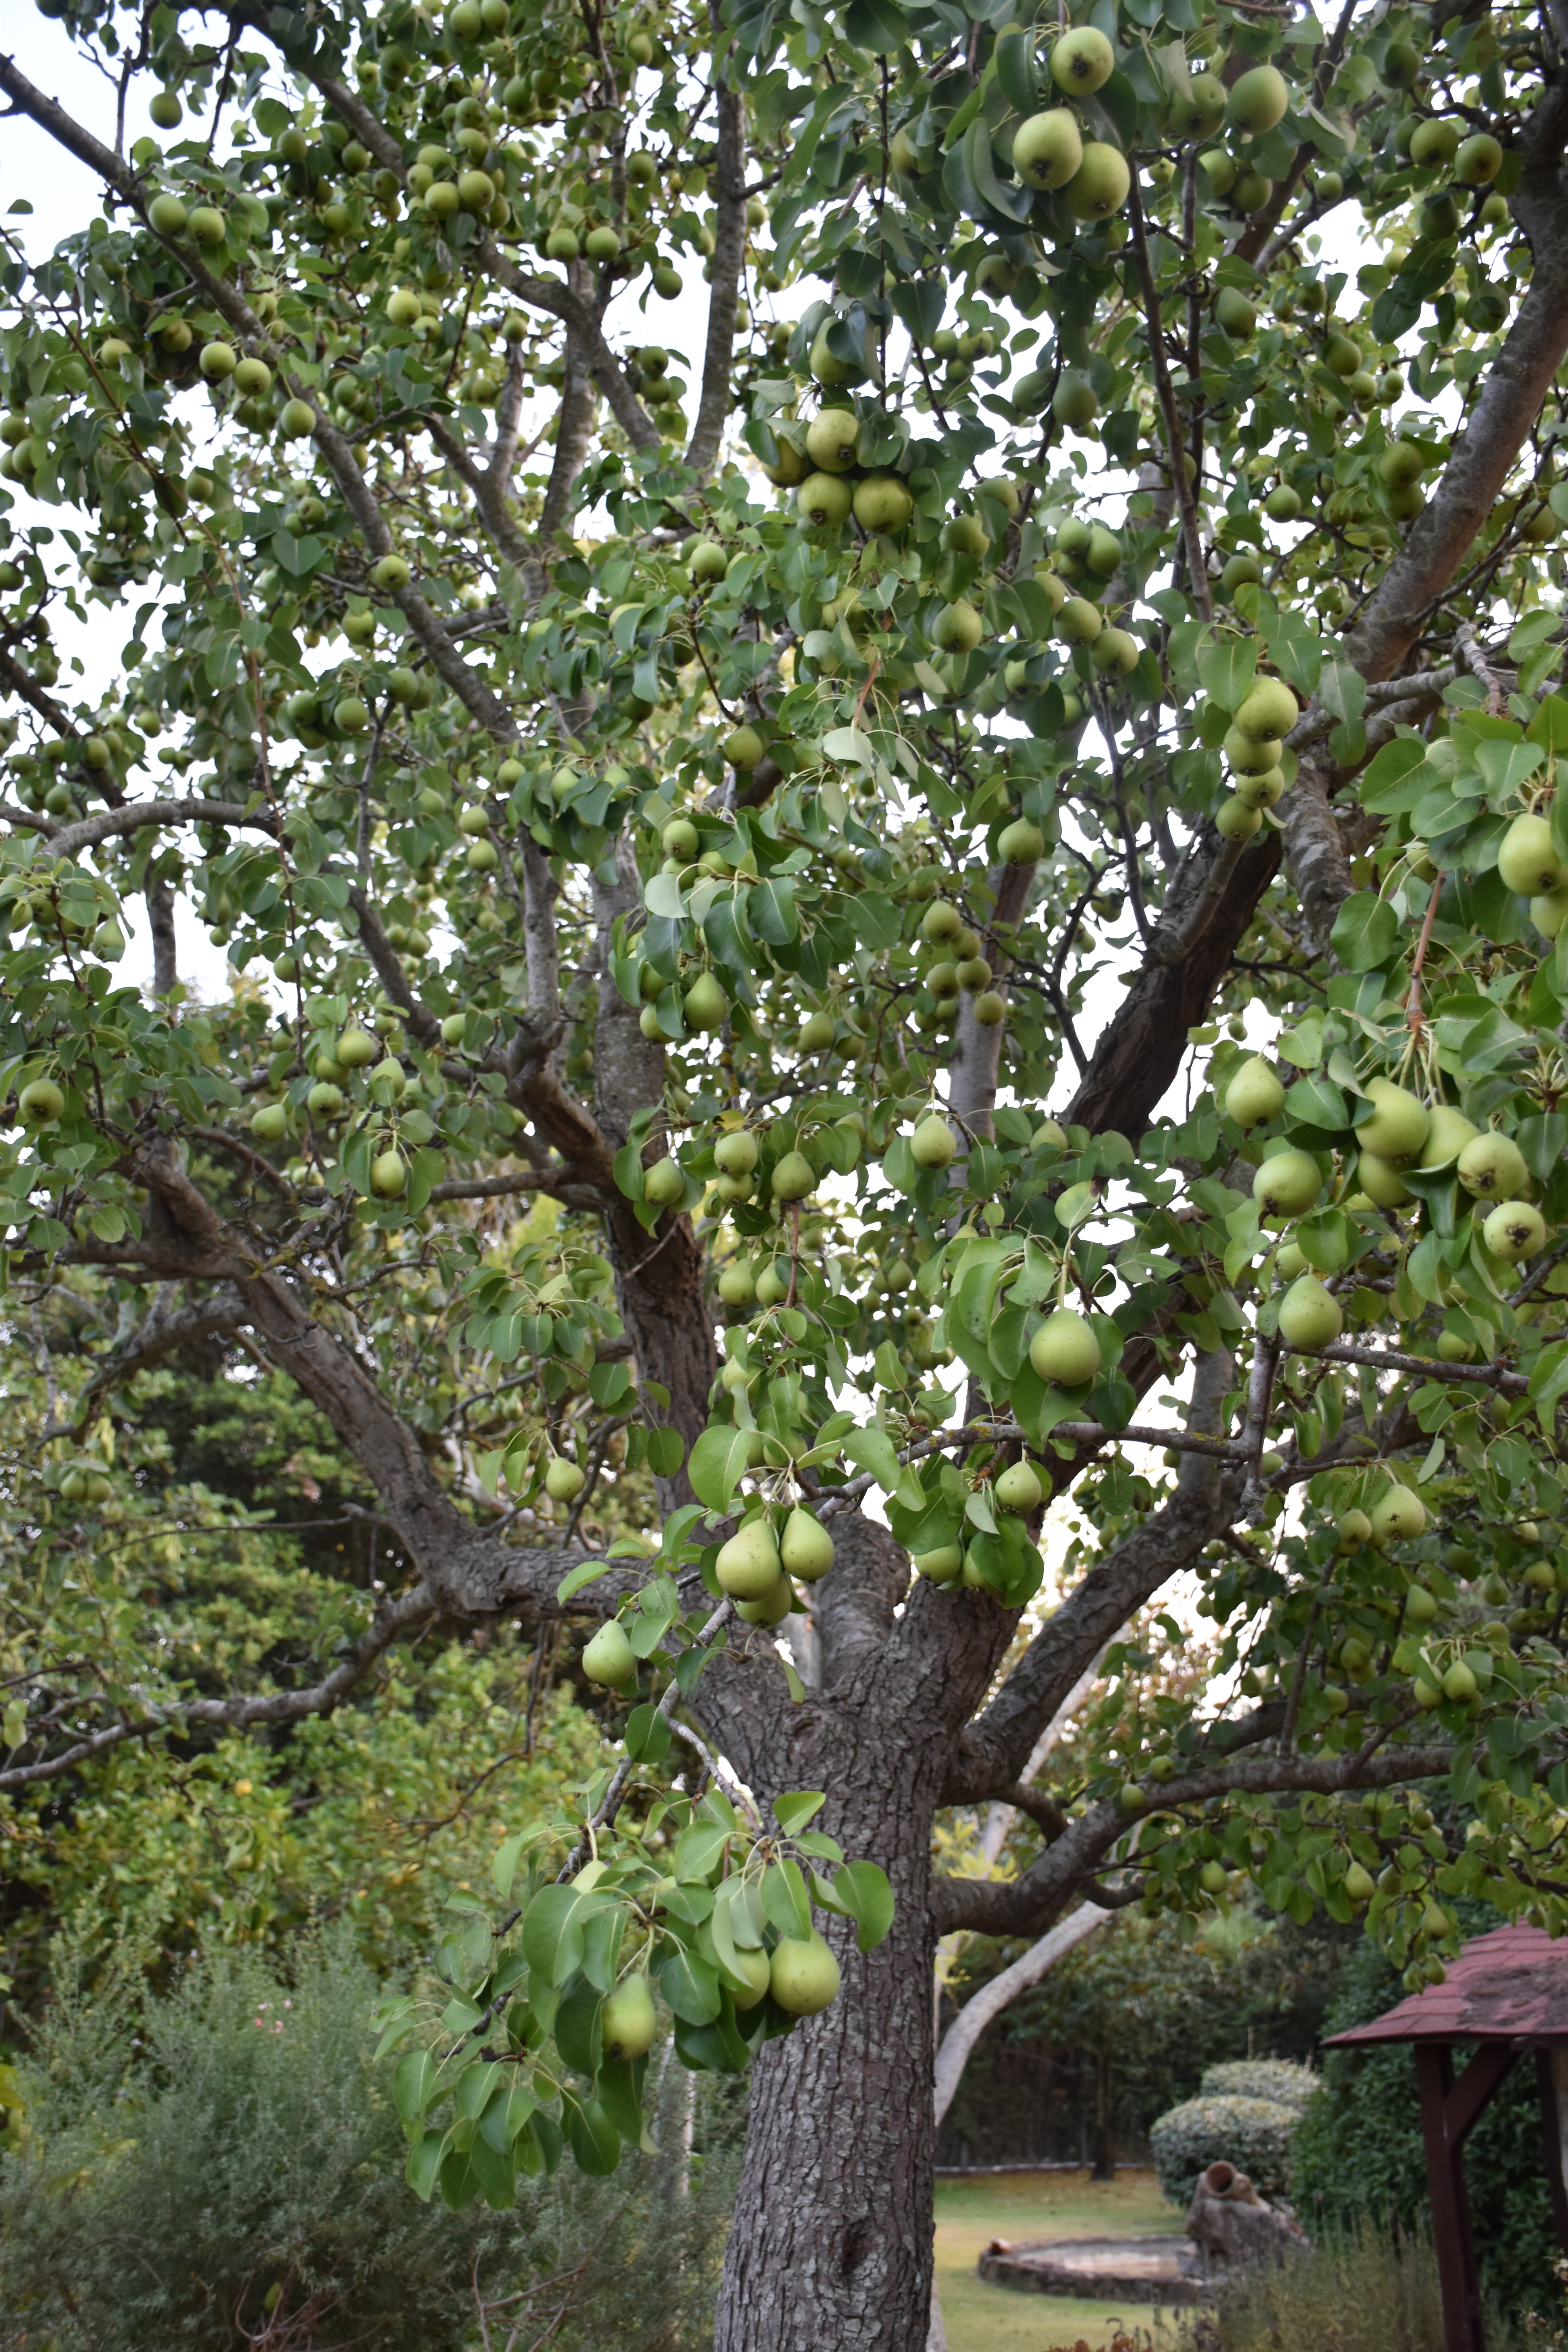
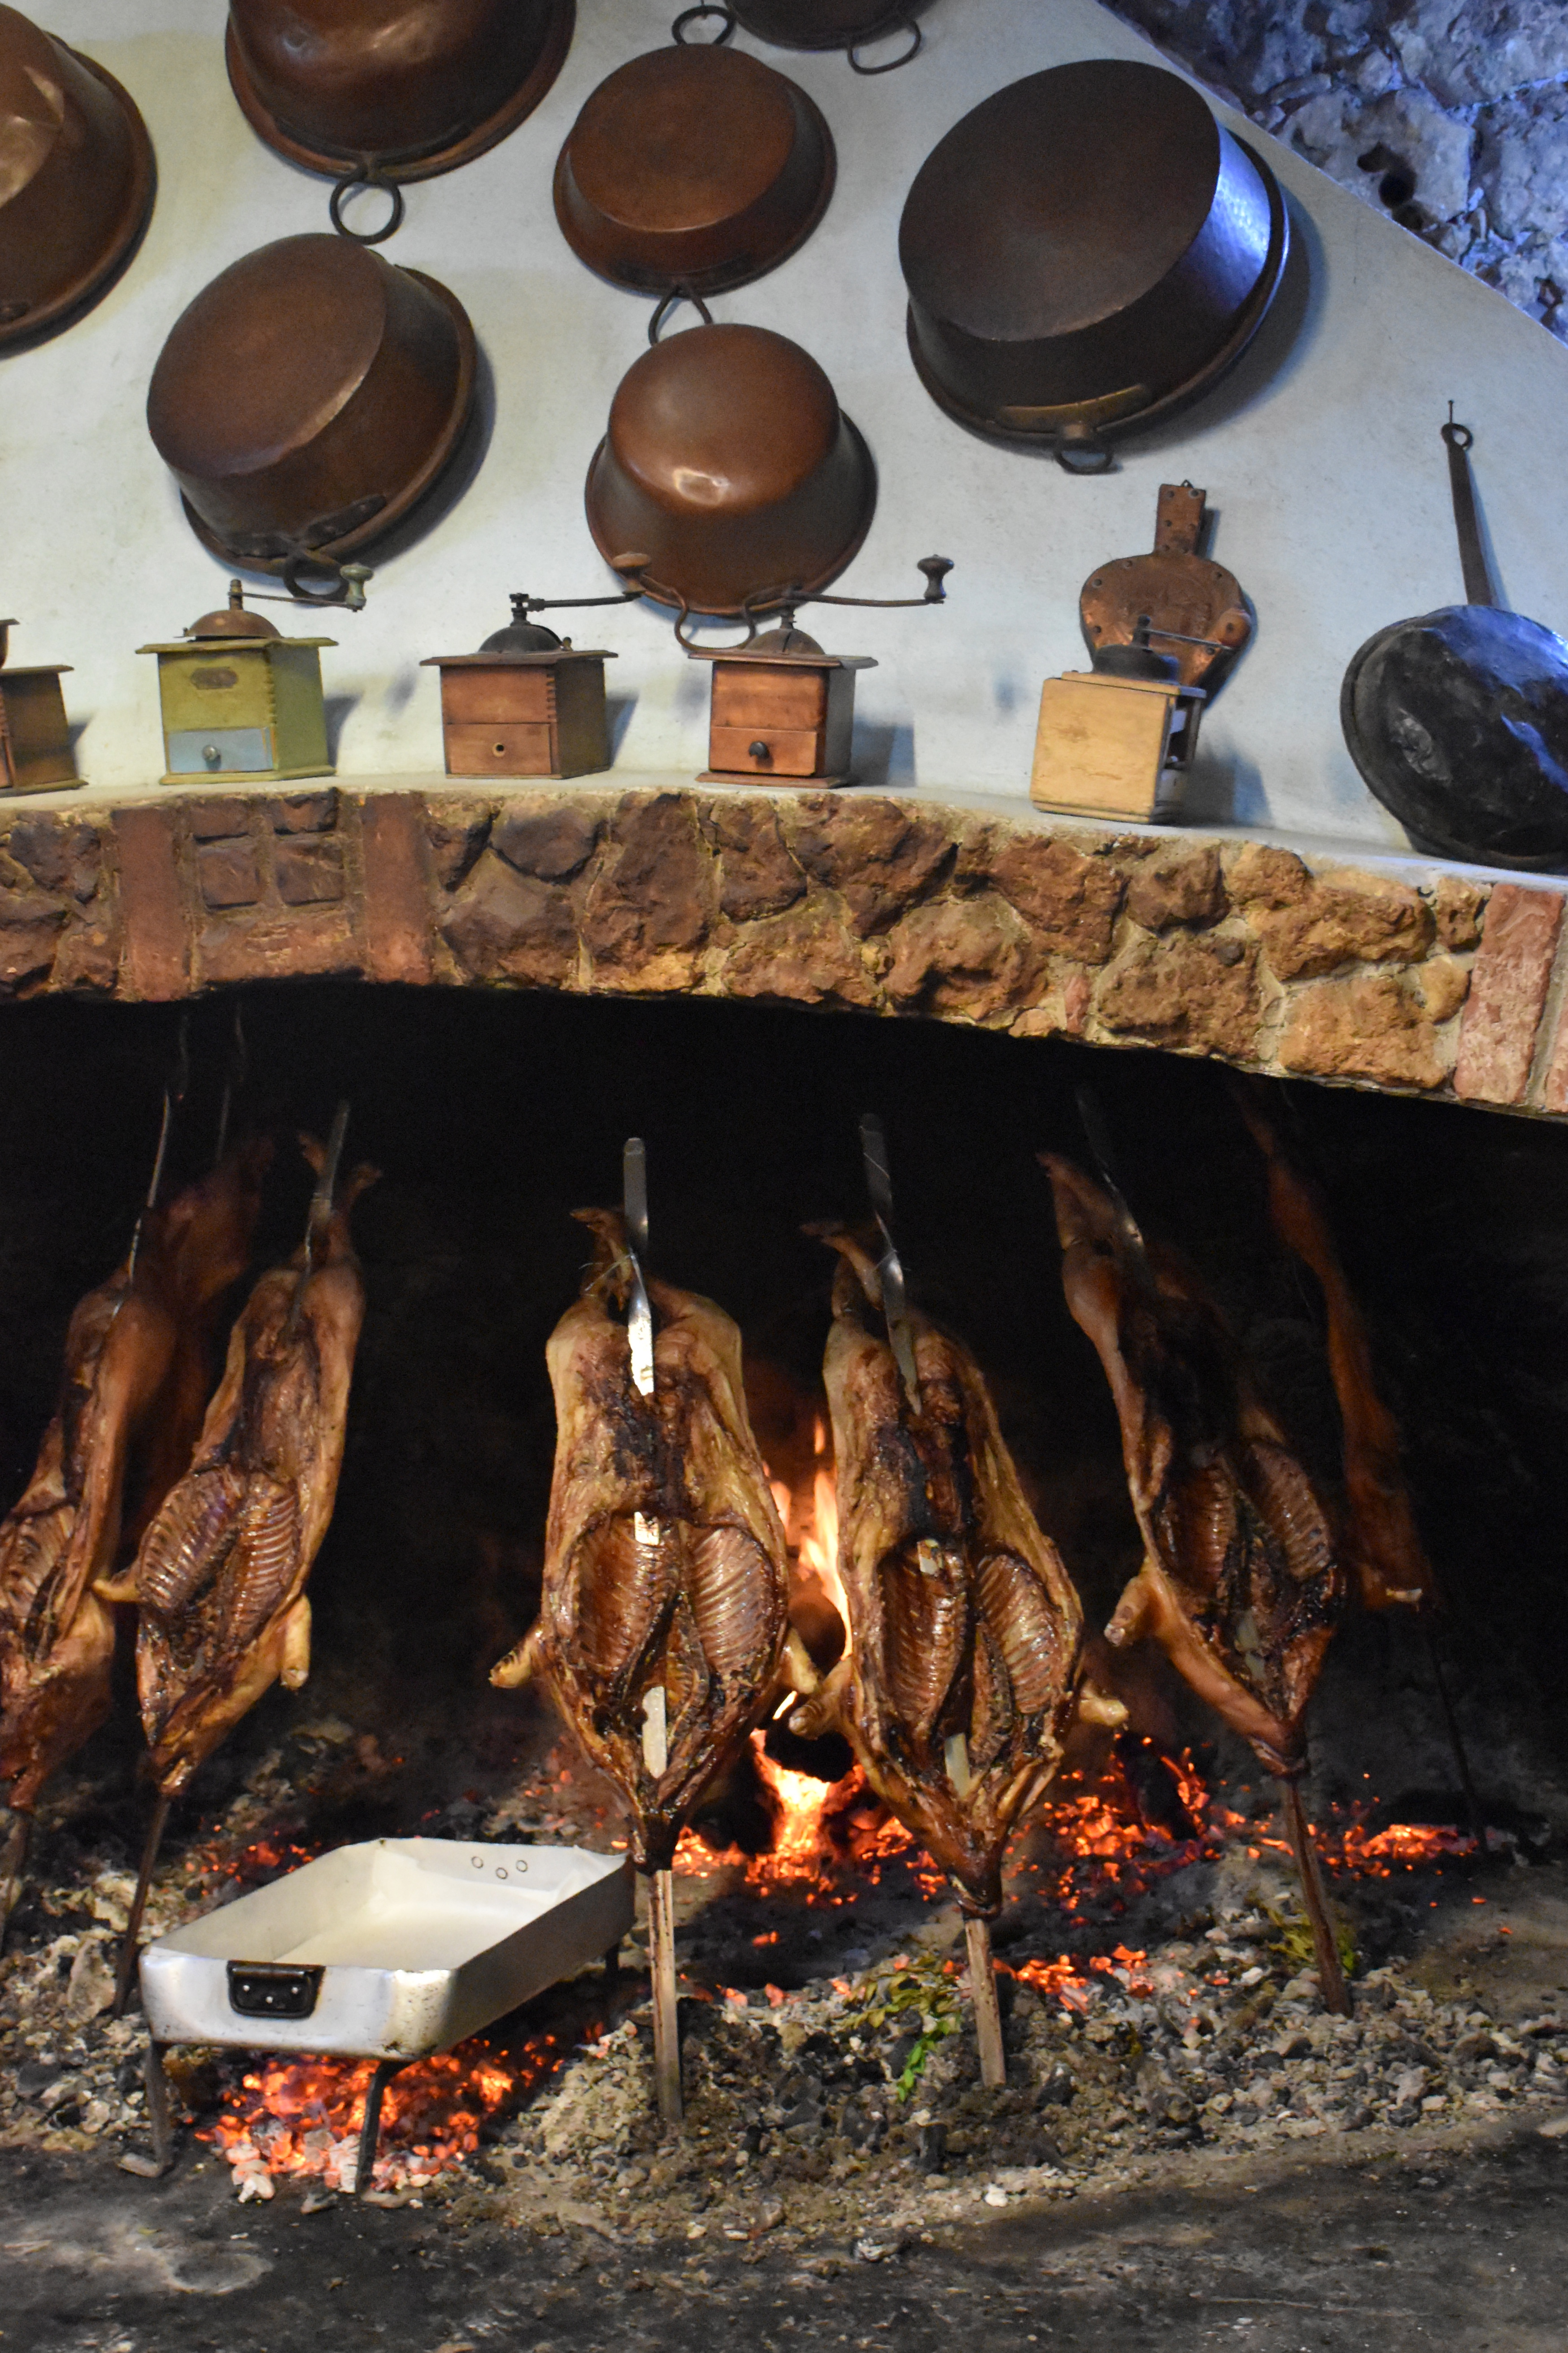
As I walked along the path and explored the property I began to see that this was more that just a restaurant it was a beautiful garden and a bit of a museum. There were buildings on the property that were filled with 200 year old wine presses and cooking tools with explanations about how they had been used.Then we walked in another building and saw this large fireplace where they were roasting suckling pigs in the traditional way. Taking in the sights and smells made you appreciate the great care and detail that Sa Mandra takes in preparing their food.


We sat at table under a covered patio. It was a warm summer night, but the cool coastal breeze made it pleasant. As the sun began to set there were lanterns and candles that lit up the porch and the candle light gave you such an amazing view. Then the parade of these delicious small dishes began and you knew it was going to be a memorable meal. I was taken with the simplicity and the artful presentation of these cheeses, figs, prosciutto, tomatoes, basil and flat bread. The dishes were small, but each one had a different flavor combination for you to try. All night there were new dishes coming from the kitchen: mezza luna pasta filled with a delicate ricotta, gnocchi with a traditional red sauce and tender suckling pig.  Then for dessert out comes a host of tiny Italian cookies:  heavenly citrus flavored meringues, Amaretti cookies and almond flavored pabassini cookies. Food is more than a meal here it is an event.

This was such a wonderful meal that I wanted to take a bit of it home with me. I decided to recreate some of the small plates at home and I thought I would share a few with you. These are some simple plates that you could put together as a first course or for for hors d’ouevers. Serve it with some wine or a glass of sparkling water and you have a delicious and simple set of dishes.

The first plate I made has paresano-reggiano cheese, prosciutto, sopressa or an Italian sausage and crispy flat bread. When it comes to the cheese get a good quality imported cheese. Although I like Wisconsin produced Bella Vitano, it is still not the same as the imported Italian cheese. I had to settle for these thin panzanella crackers because I didn’t have time to try multiple grocery stores this week. My European friends tell me that Trader Joe’s comes the closest to Sardinian flat breads, so when I have a little more time I will have to try them.

The second plate has figs and some fig jelly along with some paresano-reggiano cheese. Figs have two seasons the early season is in June and then there is a second season from August to October. So this is a great dish to make in the Summer, when figs are in season.  When you are looking to buy a fig, make sure it is not too mushy or shriveled and plan to use it within a day or two of purchasing it. The sweet honey-like flavor of the fig is wonderful when paired with the cheese’s sharp nutty flavor.

Finally, my final plate has fresh grape tomatoes and basil with paresano-reggiano cheese. If you wanted to substitute fresh mozzarella it would still be good. The key to Sa Mandra’s small plates was the flavor combinations.

So even if you can’t get away to Sardinia you can still bring home some of the flavors with these easy to assemble small dishes. I served this as a first course with a Panzanella salad for dinner and it was a delicious reminder of a wonder evening.

Getting Away For A Little While

Have you ever vacationed somewhere far away where the customs and rhythm of life were very different? Taking a vacation is not always rhythm changing. I have definitely planned many a trip where I had so many places to see that vacationing meant racing off to the next activity. I tend to be a quick tempo traveler who comes with a long list of things to do. However, this trip with my husband to Sardinia, Italy might be the first vacation I have taken without a plan. Some people are great at this. I have a sister-in-law who has a great sense of wanderlust, which has lead her to travel and explore some amazing places. I happen to be a fast-paced planner, it’s just my nature… but living life this way can leave you a bit frayed. There is something good about getting away.

I must admit that I had not thought about vacationing on the island of Sardinia. My husband was invited to speak at an conference and I decided travel with him. It was an opportunity to see the Mediterranean and take a little time to get away. We stayed at a beachside hotel called La Punta Negra in the town of Alghero.

This town is harder to access than other Italian cities, so while we were there we did not meet any other Americans. Alghero is more of a local Italian vacation destination. There were a few British and German families, but the majority the tourists were Italian. The Italians were very friendly and the pace of life was more relaxed. Many of the local restaurants do not open for dinner until 7 or 8 PM. They all have large patios where you can take in the ocean breeze. My husband’s Italian friend, who was at the conference, explained to us that since Alghero caters to local tourists the quality of the food is excellent. I will have to share a little more about the food next week.

Our hotel had its own small but private beach. The coastline is rocky immediately by the shore, but once you wade out a little ways there is smooth sand. The water is a beautiful clear blue. It is warm and everyone was out swimming. There is something so peaceful about hearing the water and looking out and seeing nothing but blue across the horizon.

The hotel had breakfast every morning and you could eat and sip your coffee out on the porch overlooking the water. It was the most amazing view. This trip was a departure from my busy plans, a chance to think and just sit a moment. Traveling here was a reminder that it is good to check out, slow down and explore a new place. Getting away somewhere little outside of my comfort zone allowed me to see things from and different perspective and it gave me a moment to truly take all the beauty in.

Happy 4th of July

When you live somewhere for a long time you tend to just take for granted all of the local saying and the traditions that just come with residing in a certain part of the country. Moving to the Midwest has been a big change for our family and my husband and I are still trying to understand all those things that the locals know. We had to try out all the local pizza places to find our favorite deep dish. Like many Chicagoans, we stayed up late watching the World Series rooting for the Cubs to break the curse. We had to laugh the day my oldest came home from preschool and said “Hey Dee-ahh-d.” We just looked at each other and smiled. Our daughter has a Chicago accent. How did that happen?

If you ask a Midwesterner what they think it’s like to be from this part of the country you often don’t get much of a response. It a “oh well, you know…” The truth is that the Midwest is a real mix of different cultures, but the thing that has stood out to me more than anything is the great sense of national pride that Midwesterners have. The Fourth of July in Chicago is huge. Summers here are glorious and by the time July rolls around every one is out and celebrating, working in their yards, and soaking in the sun. We moved to Chicago at the start of winter so for months after our move we questioned whether our neighbors were really home, but come summer everyone is out and the community comes alive.

We live in the western suburbs and last year we though we would go check out the local parade. We were blown away because this was not the kiddy trike and bike parade we expected. It was big deal with floats, marching bands, Uncle Sam on silts, classic cars and tributes to our troops. Watching it made you stand just a bit taller and feel a little  prouder. Children and families stood on the street curbs waving American flags as people saluted and cheered for our veterans. Taking it all in, it made my eyes water just a bit. It is a wonderful thing to watch a community come together like that. In year where there has been so much turmoil and hate its great to be reminded of the people and attitude that make our country great.

So although Midwesterners may be a little shy to tell you this, what I have come to feel and know is their deep love for family and their country are what make living here good. The Fourth of July is a great time to slow down a bit and treasure time with family and friends. So as I look forward to the parade, the fireworks and the apple pie I love so much, I am grateful. It is easy to get caught up in headlines and national politics, but now more than ever it is important to come together and celebrate the good. Happy Fourth of July!

Adding Curb Appeal To Your Door With A Summer Wreath

Wreaths are a great way to add some color and curb appeal to the entry to your home. There is nothing like a wreath to add a welcoming feel and a pop of color to your door. I like to customize mine to fit the season. Our old home had a a single door so the wreaths I had in the past no longer work because I now have two doors. I created new wreaths for our double doors this summer. I decided to switch my boxwood wreaths out for something that can stand up to the summer heat and humidity.

Custom wreaths can get expensive, especially if you have double doors like I do. So I like to make my own. For the base of the wreaths I an using a 17 inch grapevine wreath that you can find in the floral department of any craft store. I like using grapevine because it is inexpensive, holds up well outdoors, and its woven base makes it ideal for adding greenery or silk flowers.

A key element in making a wreath is making sure the scale of the wreath is large enough for your door. You don’t want a tiny wreath because it will get lost on a big door and if the scale is off it just looks silly.

Once I get my base, I start thinking about what colors I want to use. I like using a bow on my wreaths and generally I let the color and pattern of the ribbon dictate the style and colors I choose. Since this was a Summer wreath I decided to go with a crisp navy and white. When I am choosing ribbon for a wreath, I like using wired ribbon. It holds up well and the wire allows you to shape a pretty bow. You can find wired ribbon at your craft store, fabric store or you can even find it online. Some Etsy stores even specialize in ribbon.

The ribbon I chose for this project is made by Sunbrella, so it is treated to stand up to the sun and moisture. I like to mix ribbons together, so for this one I used a wider stripe with a slightly narrower navy solid. I made my bow using five loops since odd numbers tend to look good when you are mixing ribbons. Each bow took a little over a yard of each ribbon to make. So if I am making two bows like I did for this project, then I like to make sure I have about 3 yards of each ribbon. My loops are made from about 8 inches of ribbon. Looking at the front of the bow each loop is 4 inches from the center to the fold. I use a pipe cleaner or floral wire to wrap around the center and hold the bow together. Make sure you leave some extra on the end so you have enough to secure your bow to the wreath.

Once I get my bow I set it down on the wreath to begin deciding how to add my greenery. I decided to make an asymmetrical wreath with the greenery making a C-shape. If I am making a single wreath I tend to to put the bow and greenery on the right side. Since I was making two wreaths for double doors, I made mine mirror images of each other. One wreath had the bow on the left and the other had it on the right so the bows and greenery faced into each other.

Here is the bow and some initial greenery I placed to set the the length of the C shape. I cut my greenery using heavy duty scissors or wire cutters. When I cut my pieces I make the end long enough so I can tuck it securely in the weave of the grapevine. This keeps the greenery in place without having to use glue.

Next I added some berries. Since it is summer and I have a blue front door, I used these faux blueberries. I then cut and tucked their wire bases in the grapevine just like I did with the leaves.

Finally I added these silk spirea branches I had from Pottery Barn several years ago. I used to have them in a vase in the old house. I didn’t have a place for that vignette in this house so I decided to use them in this wreath. These flowers worked well because they are smaller in scale so they go well with the small blueberries.

Here is the wreath without the bow so you can see how I layered on the greenery, berries and flowers. When you are finished you want to attach your bow with the pipe cleaner or wire and trim the ends of the ribbon. I cut the ends of my ribbon on the diagonal and made sure the ribbon in the center of the bow covered the wire that was holding it together. Then you are ready to hang it on your door and shape the ribbon loops so they look just right.

This is my new Summer look with my new vintage vinyl rug that I blogged about here. So far I really like it. It cleans easily and its low profile, non-slip surface make it a great mat for a covered doorway or patio.

Here are the finished wreaths so you can see what it looks like to make two wreaths that are mirror images of each other. I was happy with the finished look and best of all, because I took apart some old wreaths and used some flowers I already had this project cost me nothing but a little time. Hopefully this project will inspire you to make a custom wreath for your front door.

Lemon Icebox Pie

Lemon Icebox Pie Recipe

A few weeks ago I looking through my old Southern Living magazines wanting some inspiration for an icebox pie. The summer heat is here and it always makes me want to serve some lighter and colder desserts. The cover recipe from August 2011 was a Lemon Meringue Icebox Pie and it caught my attention. Lemon ice cream sounded good, but my husband really isn’t a fan of meringue. So I set out to create my own ice cream based pie using a whipped cream topping instead.

The first time I made this I tried Southern Living’s homemade lemon curd but it took 30 minutes to make and another 30 minutes to cool. So when I tested this recipe again I decided to use store bought lemon curd since it would significantly cut down on the preparation time. I am generally all for making things from scratch when you have time but sometimes you don’t have an extra hour on your hands. So for my pie I decided to make it simple and take a little help from the store.

Lemon curd is popular in British desserts so sometimes you can find it in the British import section of your store or in the jelly aisle. The brand that I can usually find in Chicago Stores is Dickinson’s, but my favorite is Stonewall Kitchen. If you live in the Chicago area Pete’s Fresh Market carries this brand. In my opinion, its about as close to homemade as you can get. After making this pie a few times now I think it is well tested and ready to share. It’s a simple pie that is delicious and pretty enough to share with friends and family. It can also be made in advance which makes it perfect for Summer entertaining.

Lemon Ice Box Pie

Nilla Wafer Crust

  • 2 cups of crushed Nilla wafers which is about 50 Cookies (1 box will be enough for this recipe)
  • 1/4 cup powdered sugar
  • 1 /2 cup butter melted

Lemon Pie Filling

  • 1 jar of lemon curd (make sure it is at least 10oz in size)
  • 2 pints of vanilla ice cream (I prefer the homestyle variety over the split vanilla bean or french style flavor for this recipe)
  • 16 to 18 whole Nilla wafers to line the pie dish edge

Whipped Cream Topping

  • 1 cup whipping cream
  • 1 tsp vanilla extract
  • 3 tablespoons powdered sugar
  • Optional garnishes for the top include lemon slices, mint leaves and/or blueberries or your favorite berry,

First you need to prepare the cookie crumb crust.

Get your oven preheated to 350 degrees. Next make your cookie crumbs. I like to crush my cookies in my food processor so they are nice and even. You can see mine still have just a few course crumbs in them. Next mix in the powder sugar and the melted butter and stir until they are well mixed.

Then grease your pie plate with cooking spray and pour in your crumb mixture. I like to use my hands to begin to spread the crumbs out evenly. Then to set the sides I use a cup like this metal measuring cup you see below to help push the crumbs up the side.

Then place your Nilla Wafer crust in the center of your oven and bake it for 10 to 15 minutes. Keep an eye on it towards the end. You want the crumbs to be golden color. Then let you crust cool for at least 30 minutes before you fill it.

Then while your crust is cooling set your ice cream out to soften on the counter for 20 to 30 minutes depending on how hot your kitchen is. Once your ice cream is soft then scoop one pint of it in a bowl and using a spoon or rubber spatula stir in 1/2 cup of lemon curd. Then pour in this first layer of ice cream and place your pie in the freezer for 5 minutes so the first layer sets a bit. Then pull it out of the freezer and drizzle 1 tablespoon of the lemon curd on top and use a spoon or separated spatula to spread it out a bit and then put it back in the freezer while you work on the top layer,

Here you can see the swirled lemon curd in the center layer.

Then take your remaining pint of ice cream and stir in 1/2 cup of lemon curd until it is well mixed and pour it on top of your pie. Use a separated spatula or the back of a large spoon to smooth out the top layer and once it is even and smooth take your remaining Nilla wafer and use them to line the outside of the pie dish. Then put the pie in the freezer to set for 6 to 8 hours so it freezes well.

Then before I serve it I make the whipped cream topping. The whipped cream can be made a few hours ahead and frozen. If you are taking this dish to a party then I would definitely recommend doing the whipped cream ahead and letting it freeze just a bit so it won’t run or slide on you when you transport it.

To whip the cream use your whisk attachment and on high speed beat together the 1 cup of whipping cream, 1 teaspoon of vanilla and 3 tablespoons of powdered sugar. You want to whip it until it is firm and will stay on your whisk when help upside down or forms what they call stiff peaks. Using my stand mixer it took just under two minutes.

Here you can see the whipped creme is firmly staying on my whisk when pulled up from the mixing bowl.

You could just spoon the whip cream on top, but for a neater look I like to pipe mine on using a large star tip and a pastry bag. Below is a picture I took for my post on frosting cupcakes where I use the same tip (Ateco #828). I found mine at Sur La Table. To fill my pastry bag I place it in glass and spoon in the whipping cream in the pastry bag. I fill it about 3/4 of the way full so it doesn’t overflow out the top.

Then I made two rows of simple stars shapes. To make the stars place the tip of your bag about 1/4 inch away from your pie and squeeze your pastry bag at the top to apply pressure and then gently pull up. Whipped Cream is fairly easy to pipe since it is soft. You can practice a few stars on a paper towel if you want till you get the hang of it. Then add any lemon or berry garnishes. Wait to add any mint until its close to serving time since it doesn’t do well in the freezer. Let your pie sit out for 20 minutes or so before you serve it so it will be easier to cut.

I made this pie to share with some friends and I decorated it slightly differently so I thought I would share a picture of that with you as well.

For this pie I covered the entire top with whipped cream and then I piped some additional stars on the edge and I put a twisted lemon slice in the center.

So as you can see there are all kinds of ways that you could choose to decorate this pie but no matter how you serve it lemon ice box pie is still delicious.

Barclay Butera Past Present Inspired

Would you let someone redesign a room in your home without being involved in the process and if you would then who would you chose? I must admit I am a little type A when it come to home decoration and I definitely would not let just anyone in my home. My mind wanders thinking about all of those crazy episodes of Trading Spaces. I would’t want to come home to find hay stuck on my walls or my furniture attached to the ceiling like a modern art installation. Design television shows are fun to watch, but if it’s your home would you take that chance?

Even the talented Sara Richardson when interviewed on the Marilyn Dennis Show talked about a living room she and her team designed for a show where the color of the walls was a pale mint green. It was a beautiful room, but it turns out the homeowner was really not a fan of green. So I wonder did that homeowner repaint? The rest of the space was lovely so maybe they just kept the green. If you notice most of the shows on HGTV involve a key element: the homeowners have to agree to give up any control over the process.

My home is so personal to me and I love the design process so much that I would have a hard time giving someone that much control. However, If had to choose one designer I would trust it would be Barclay Butera. He is known for his love of blue and white and his California costal style. Although he has done some gorgeous modern and even rustic projects his classic beach homes are still the ones I am most drawn to. Butera has several design books, but my favorite is his Barclay Butera: Past Present Inspired which features all of the various homes he has personally owned over the last twenty years. I received this book as a present a year ago and I still love to flip through it and read about his homes. This picture below is from Butera’s first home in Laguna Beach. It reminds me of some of the things I loved and used in decorating my first home. Although this project was done nearly twenty years ago there are still many elements that I like and it was fun to see the evolution and changes in his style.

Image from Pintrest This was Butera’s first home on Jasmine Way.

Another one of my very favorites rooms featured in this book his living room in his West Hollywood home. Red happens to be my favorite color but getting the right shade and balance when using it in a room is important. Some designers fear red because of its power, but Butera uses it masterfully. I just love the classic English styled tufted sofa juxtaposed with the modern Andy Warhol picture and the hollywood regency mirrored details. The gutsy purple accent chair adds just the right touch of color. The room sparkles with light making the red walls feel warm and inviting. The rest of the house is gorgeous and filled with so many pretty vignettes and details.

Image from Barclay Butera Interior Design

Finally, I thought I would show you his primary residence in Newport Beach. In his book Butera talks about finding this forever home and what he was looking for in his ideal house. This picture below is the entry to his home. Its a classic 1950s mid-century home but what he did with it is amazing.

Image from Ciao Newport blog

These pictures below are from Traditional Home Magazine who has a great article featuring his beautiful home when he first designed it. His house reflects its coastal location with a sophisticated twist. The classic English style chairs and the dark mahogany furniture add a nice balance to the blue and white fabrics and seashells. Click on the links to see the full article and additional pictures of his home.

Image from Traditional Home Magazine  Butera is a master at layering patterns is a room and he is know for his love of adding just a touch of animal print like this leopard spotted carpet.
Image from Traditional Home Magazine The layered patterns in different shades of blue make this bedroom feeling like a calm and charming getaway.
Image from Traditional Home Magazine I like the different textures Butera incorporated in his den. The raffia wallpaper and the seagrass chair and ottoman keep the simple color scheme interesting.

The book later features Butera’s remodeling of this same home which he redecorates with a more modern feel. Butera uses some of these pieces you see in the photos above in a new way and it was fascinating to see and read about the changes he made. Design blogger Fabianna of Ciao! Newport featured pictures of Butera’s  updated home, which she saw in a local home tour. Click on the link to her blog and you can see Butera’s new design. You can also see and read more about Butera’s renovation in this wonderful book.

So if you could choose any designer to make over a room in your house who would it be?  Leave me a comment because I would love to know.

Crockpot Barbecue Brisket

Summer to me means barbecue. Texas is known for its barbecue beef so I grew up loving brisket. Making a good smoked brisket takes more equipment and time than I have. Even the oven version keeps you stuck in the house for hours, so using the crockpot is perfect. You can let the brisket cook low and slow without having to worry about it. This recipe makes great chopped beef sandwiches, brisket tacos or my favorite brisket baked potatoes. In creating this recipe I used my homemade spice rub. I coat the brisket in the spices and then sear the brisket on the stove top to seal in the flavor before putting it in the crockpot. This keeps the meat flavorful and tender. This recipe would be great if you are hanging out with friends and family because it takes just a short bit of time to get it prepped. Leaving you free enjoy your day with friends and family.

BBQ Spice Rub

This spice mix is something I also use when making burgers. Just add a couple of tablespoons and mix it into your ground beef when you are making your patties.

  • 2 Tablespoons brown sugar
  • 1 Teaspoon kosher salt
  • 1 Teaspoon of garlic powder
  • 1 Teaspoon cumin
  • 1/2 Teaspoon pepper
  • 1 Teaspoon chili powder

Mix the brown sugar and spices in a small bowl.

Brisket

Serves 4 if making a 2 pound brisket

  • 1  (2 lb) brisket (this is the size that fits in my smaller crockpot but you could easily use a larger brisket if you have a larger crockpot)
  • 1 large sweet yellow onion sliced into long strips (about 2 cups)
  • 2 tablespoons canola oil
  • 2 (12 oz) bottles of beer (I like to use Shiner Bock or Samuel Adams)
  • 1 bottle of your favorite BBQ sauce (I tend to use a Kansas style sweet sauce like KC Masterpiece or Rufus Teague) and then I buy an extra bottle of sauce to top the brisket when I serve it
  • 2 Tablespoons worcestershire sauce

First take your brisket and pat it dry with a paper towel. Dry meat sears better. Then coat all sides of the brisket in the spice rub. Press the rub on the surface of the meat to help it adhere well. Then in a large skillet heat 2 tablespoons of oil on medium high heat. When the oil is hot add the brisket and sear it until each side gets golden brown about 2 to 3 minutes a side.

Then pour the 2 bottles of beer, 1 bottle of the BBQ sauce and the worcestershire sauce in the crock pot and mix them together. Next add in your brisket making sure it is fully covered by the liquid. Then finally add in your onions. Place your crock pot in a safe area. Put the lid on it and turn it on to the low setting. Let it cook on low for eight hours.

As you can see the meat is fully covered by the liquid. If you are making a larger brisket then you may need to add some extra sauce and beer.

Chicago stores carry some different BBQ sauce brands then Texas, but so far my favorite sauce that I can find at our local Jewel Osco grocery store is this Rufus Teague Made Some Sauce. It’s thick and sweet with just a little spice.

When your brisket is done you can slice it, chop it or shred it depending on how you plan to eat it. Then coat it with your favorite BBQ sauce to serve.

I made baked potatoes with our brisket. Just bake your potatoes and top them with a little salt and pepper, cheddar cheese, sour cream, shredded brisket and chives or add your own favorite toppings. These potatoes and so delicious and filling that one is a meal.

A Happy Summer Table With Sunflowers

Keep your face to the sunshine and you cannot see the shadow. It’s what sunflowers do.

-Helen Keller

Sunflowers have always been one of my very favorite flowers. There is just something about their bright sunny shape that never fails to brings a smile to my face. Pair them with some cobalt blue and white and you have everything you need for a pretty Summer table.

I was walking into the grocery store when I saw a woman with a bunch of sunflowers in her cart and when I saw them I knew exactly how I wanted to set my table for a small dinner party we were having with friends. Sunflowers are great because they are long lasting flowers that are generally easy to arrange. While I was at the store I also picked up some green hypericum coco berries and some white carnations. When I am making arranging flowers I often like to make arrangements with three different bunches of different flowers. It’s a classic arrangement that works well with lots of different types of blooms.

The first thing I did was cut three sunflowers to fit the mason jar I was using. Then I trimmed three stalks of hypericum berries where two were slight shorter and the middle one was about a half an inch taller. Then I placed the berries in the center of the arrangement.

Next I added a group of four white carnations and I cut them where one was taller, then two were the same size and one was a little shorter to fill out the bottom.

I decided to add some blue and white wired ribbon I found at Michaels. I cut the ribbon on the diagonal and I tied the ribbon around the base of the jar in a simple knot.

When I was setting my table I decided to make two identical arrangements and change the vase from the ball jars to use two ginger jars I had. Although the ginger jars had very different patterns they were about the same size. I liked the collected look of using two different jars. I placed the flowers on either side of my rose bowl with a cobalt blue candle inside. When I am entertaining at night I like to add some candles to my table. They add a nice glow to the table.

When I set a table I want to keep my flowers fairly low so guests can easily see each other. The blue and white salad dishes were a birthday gift. They are from the Sophia collection at Pottery Barn. These plates make my grandmother’s white pottery plates look a little more special. The cobalt blue glasses are actually plastic which makes them great for summer entertaining. They add just the right bit of color and finishing touch to my table.

This was a fairly quick and simple table to put together. Sunflowers and blue and white make for a very happy and welcoming table. Happy entertaining!

Contact Us