Our Living Room Remix: The Before and After

Have you ever heard that adage that if you only collect things that you really love then everything will work together? I believe that is for the most part true. Sometimes a little editing can be a good thing, but if you have classic pieces that you love they can be rearranged in a new space. New rooms are a bit like puzzles. Your furniture and accessories have a place, but sometimes it takes a little time to find the right home for everything.

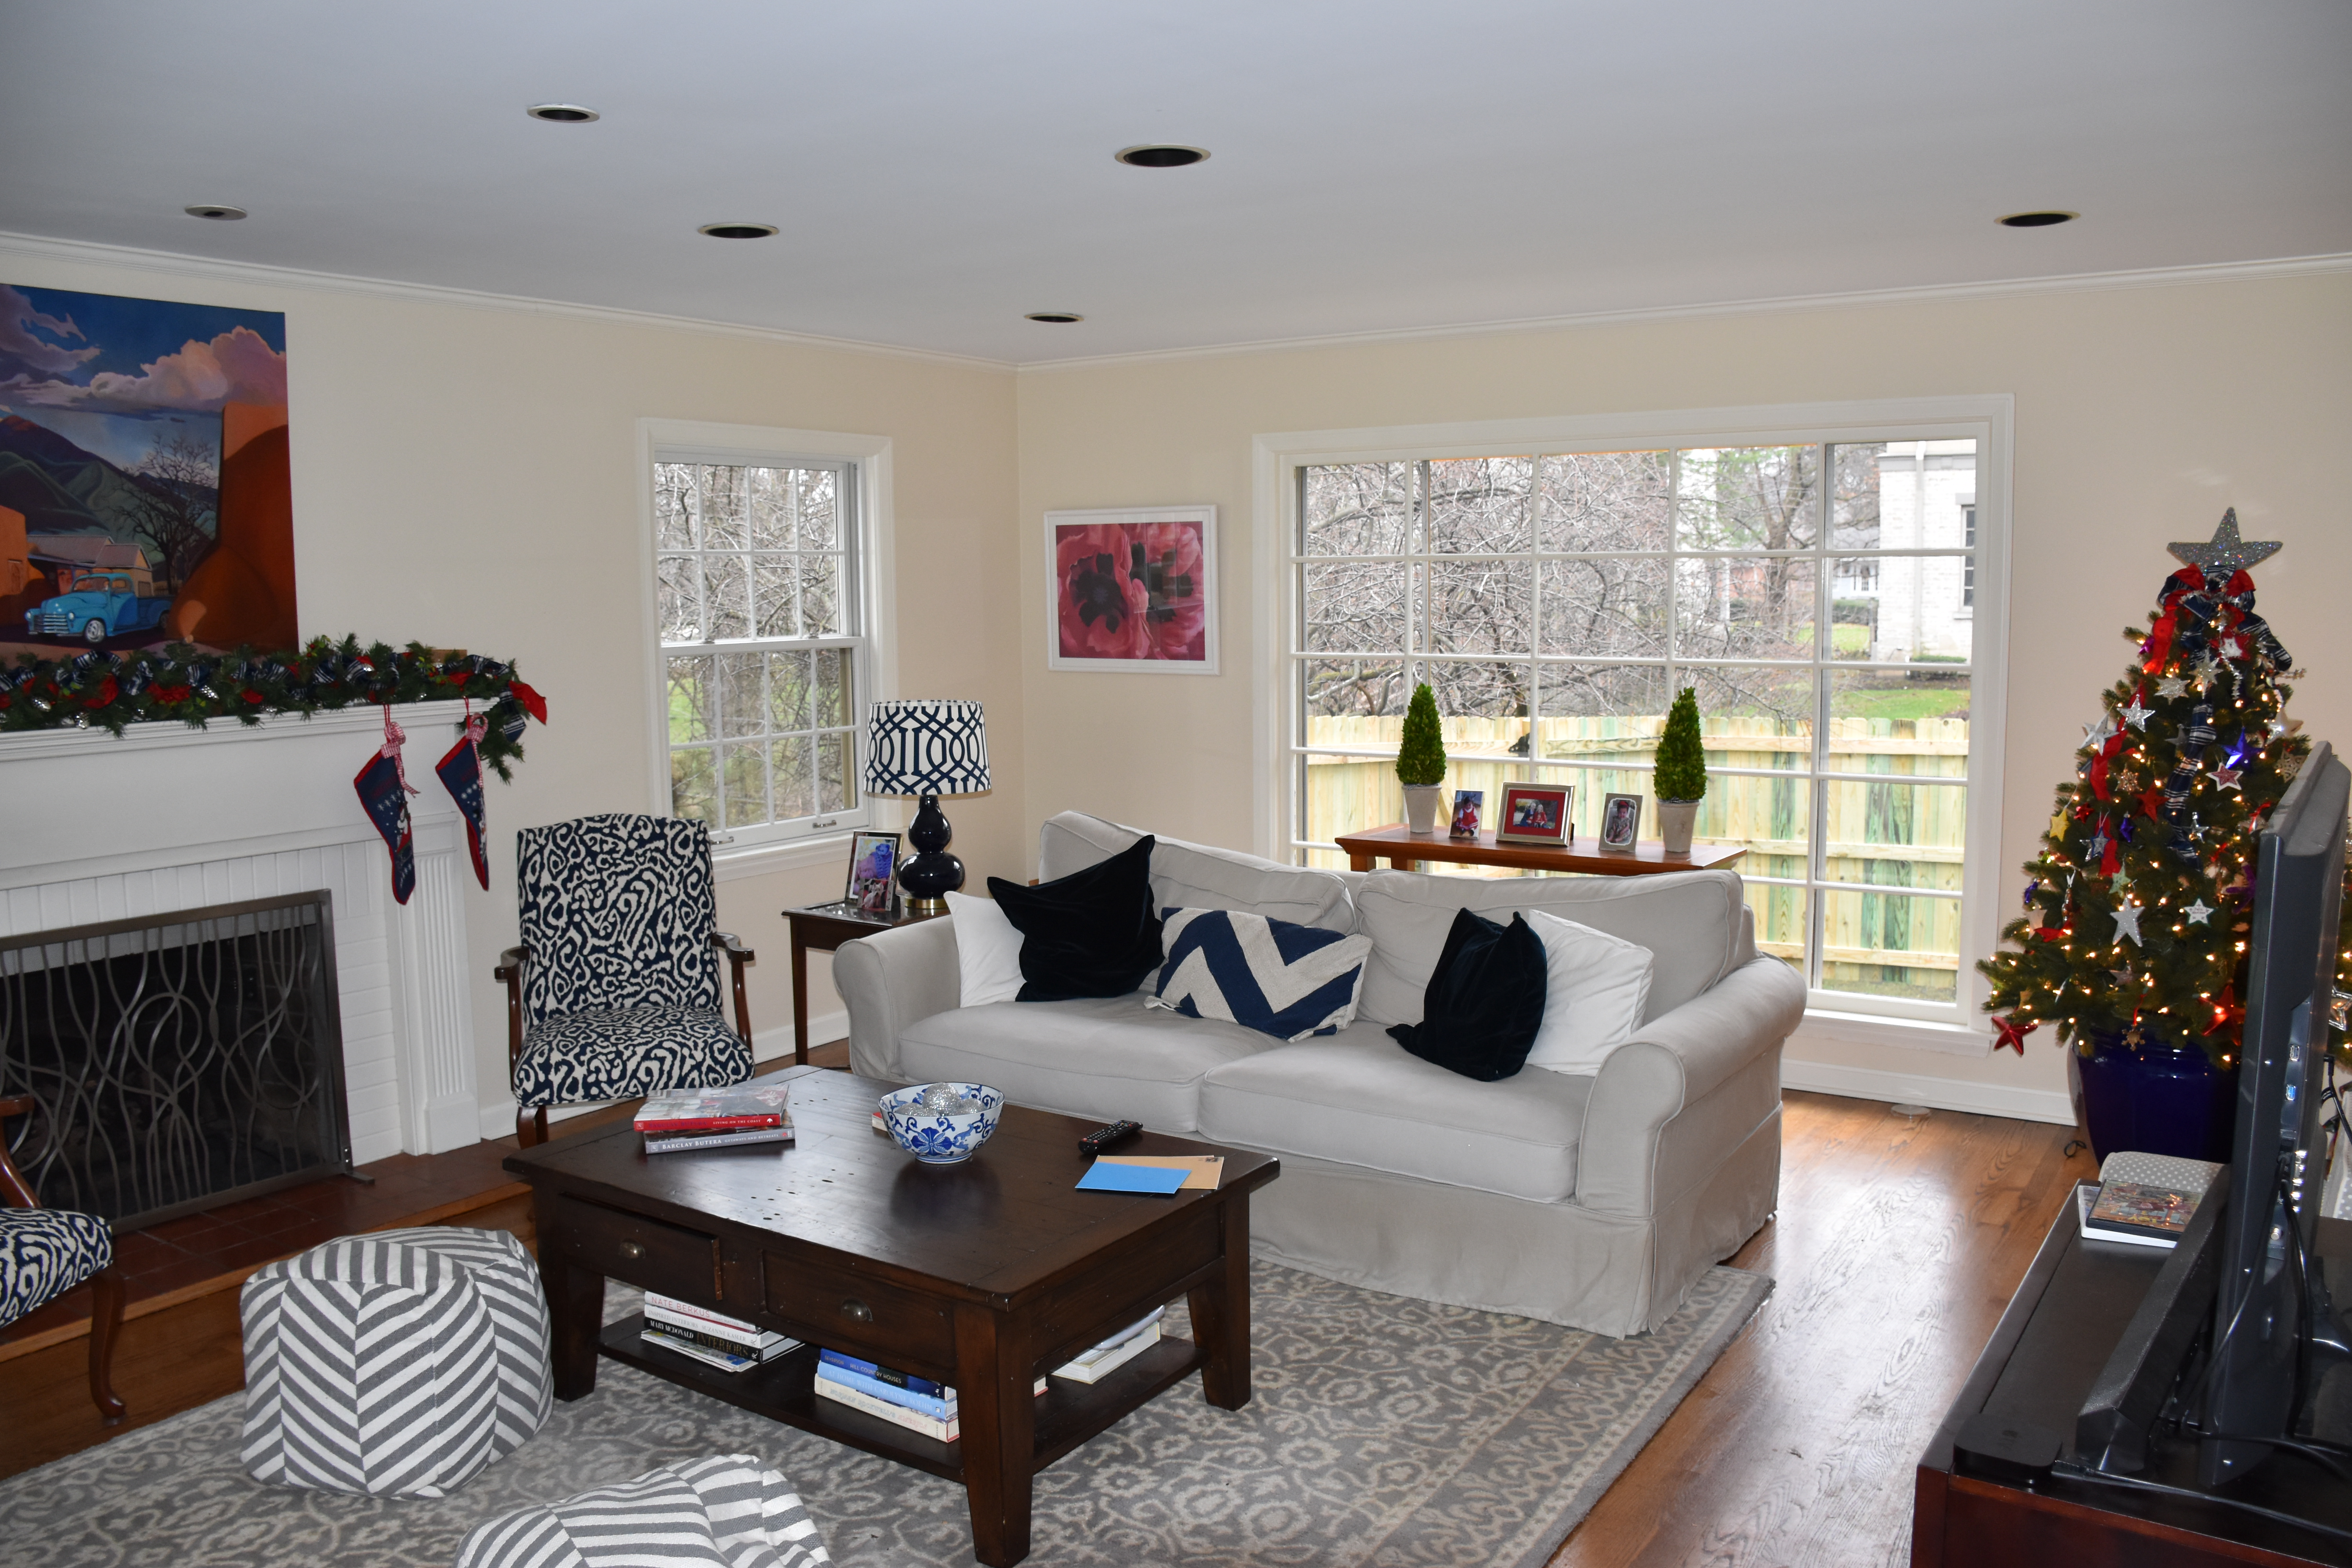
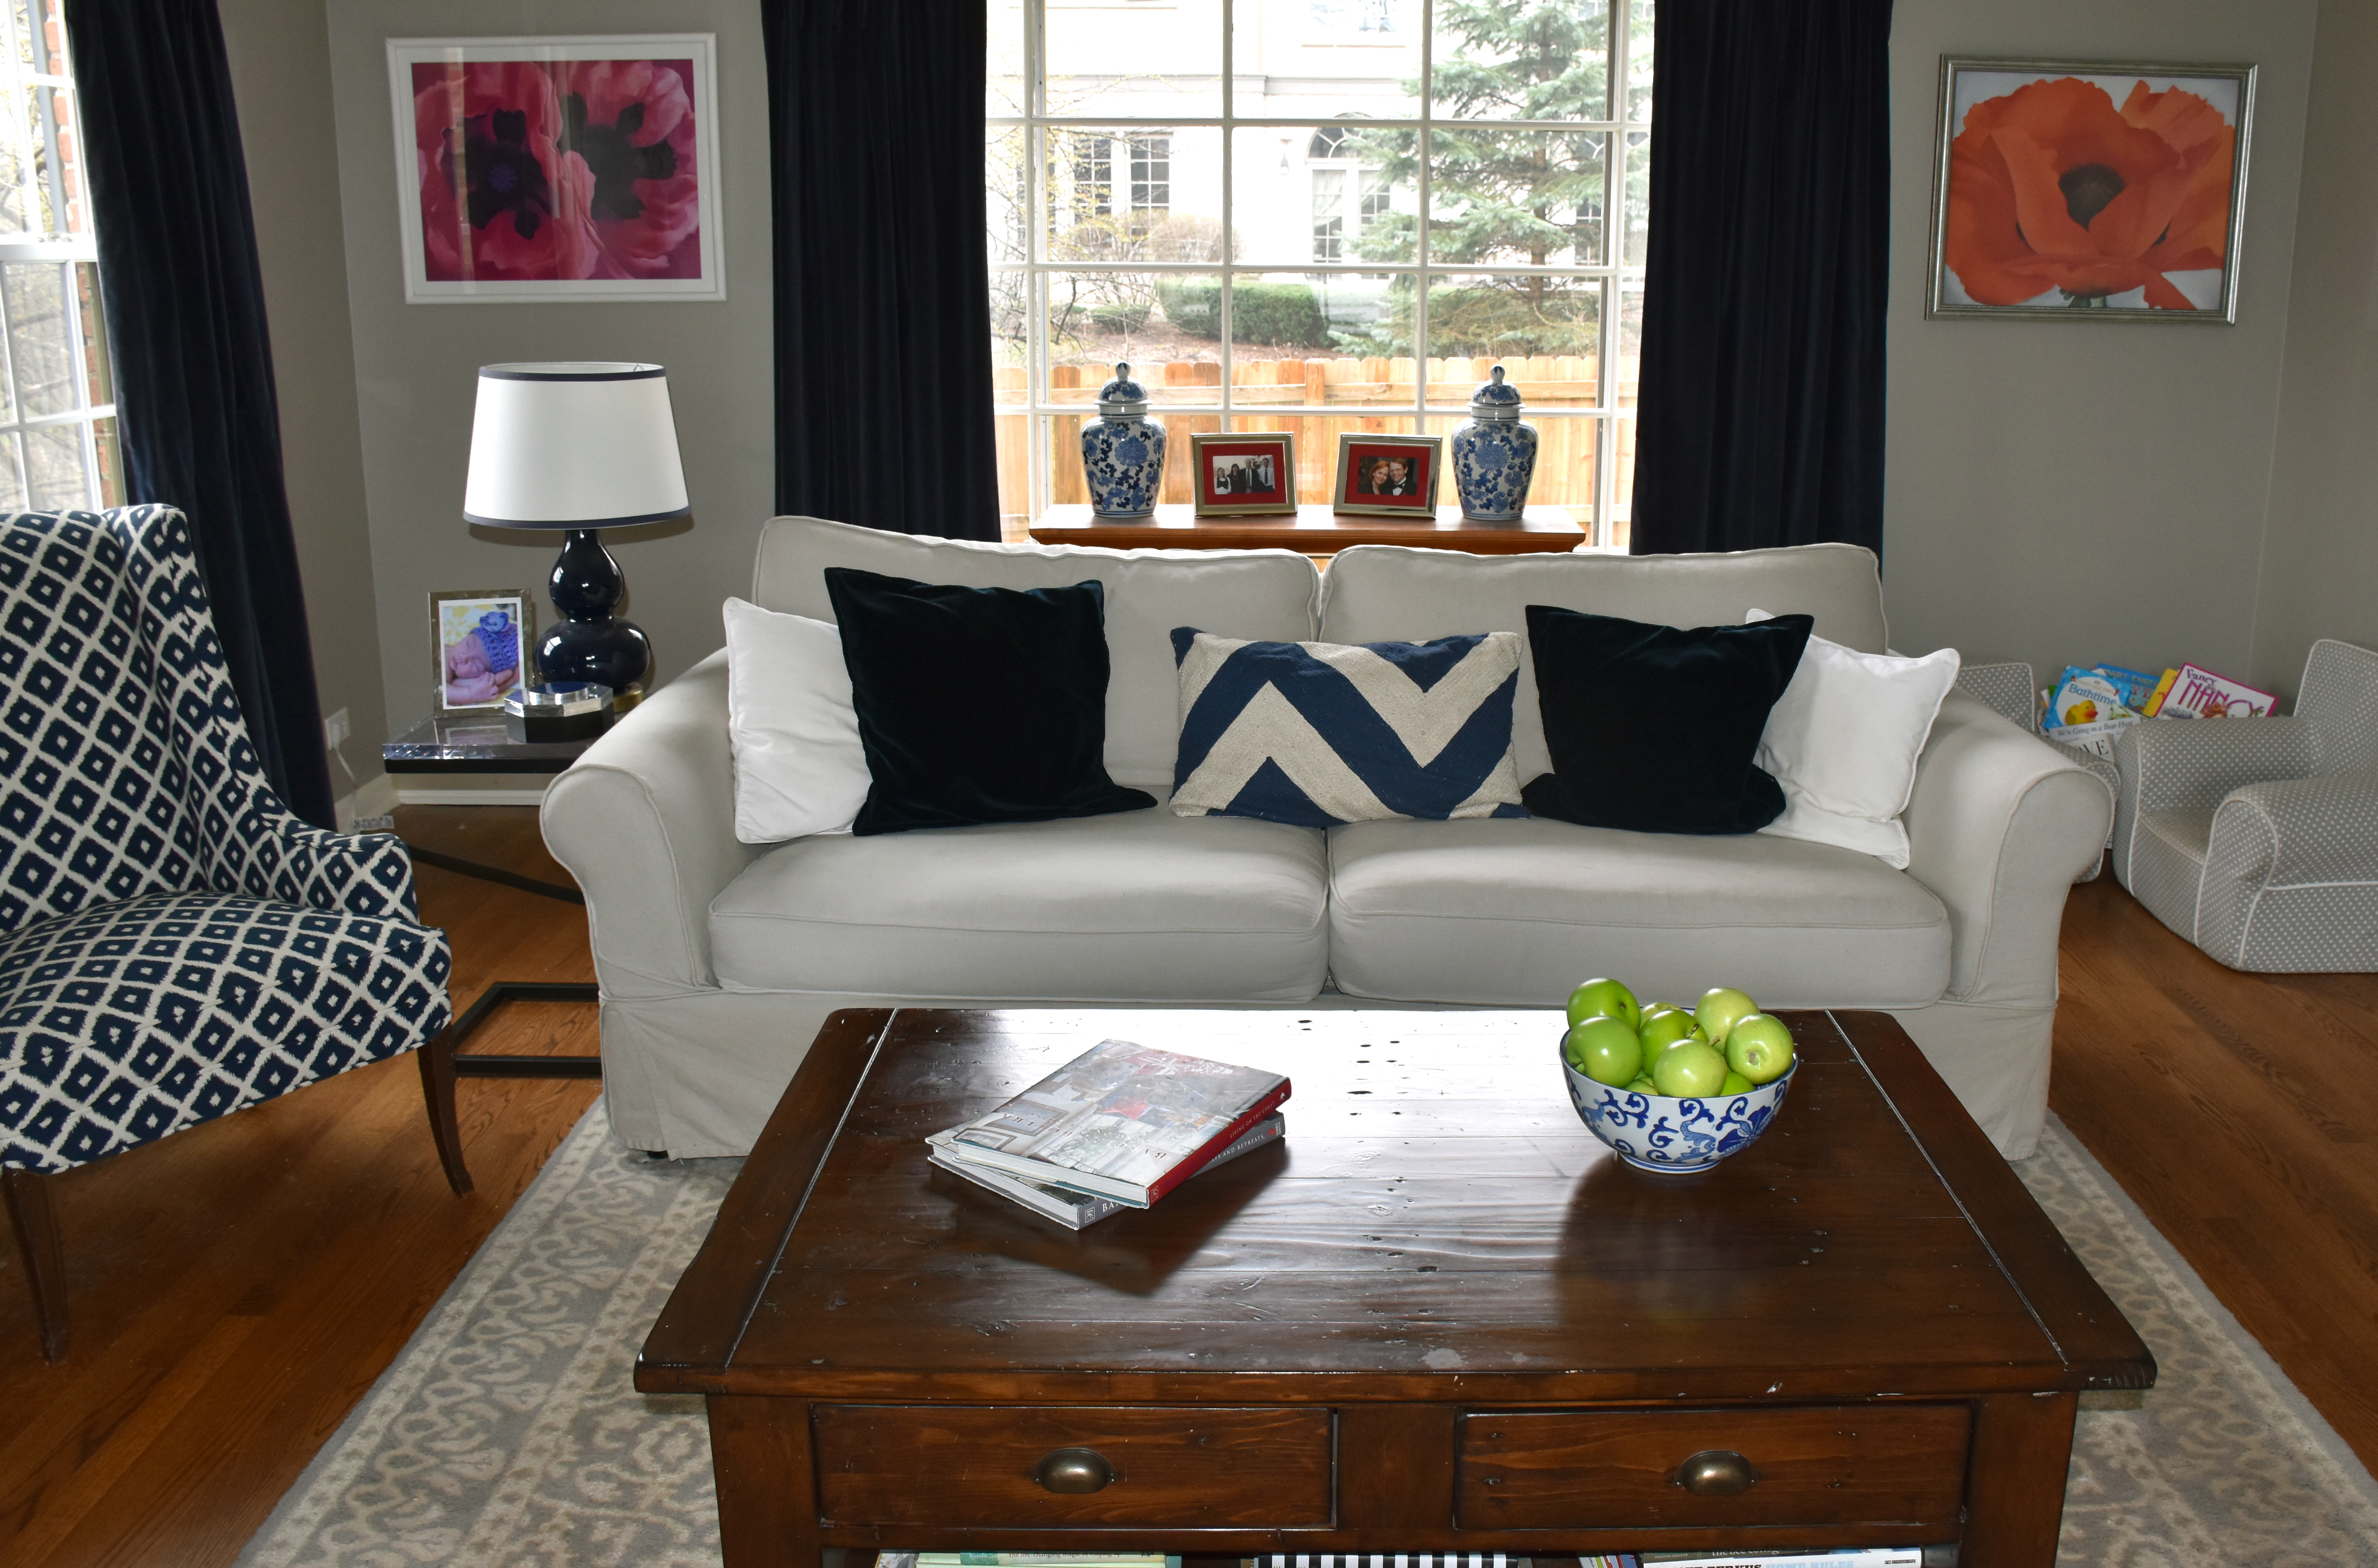
I have spent the last year painting and slowly decorating our home. So I thought I would share a few photos of our living room. I had updated our living room at our old home about a year before we moved. I had purchased and tailored things to fit that space. At the time we had no plans to move, but when we did I needed to find a way to use the furniture we had in a very different space. It is certainly lots of fun to see a before and after with all new furniture and acessories, but the reality is that long distance moves have challenges. New furniture wasn’t in the budget, so I chose to remix what I had in a way that fit the new space.

My former living room was a larger space so I had two seating areas.

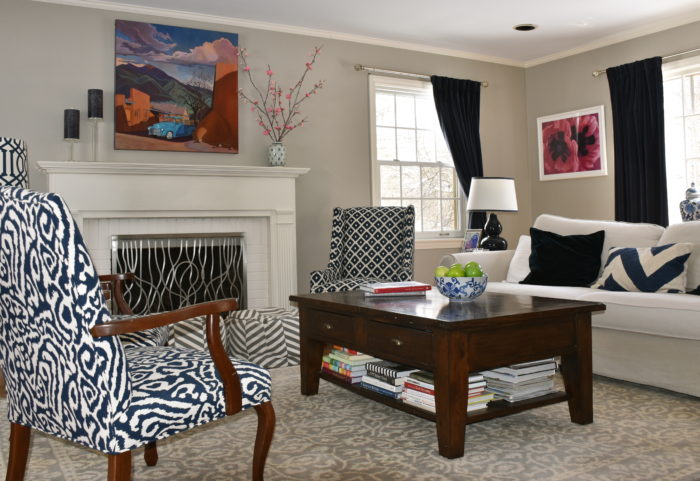
Our living room is my favorite room in our home. Looking back it was the reason we chose this home. It has lots of light and a great fireplace that we use all the time. Our old home didn’t have a fireplace so it is a nice feature. Chicago has so many chilly nights that we love just sitting by the fire. The previous owners had used the space in a more formal way. We knew we wanted to room to be a place we used everyday.

The before: a photo of our living room from the real estate listing.
A view looking towards the back of the room.
This is the front of the room. The previous owners also had a piano which I thought went well in the front of the room.

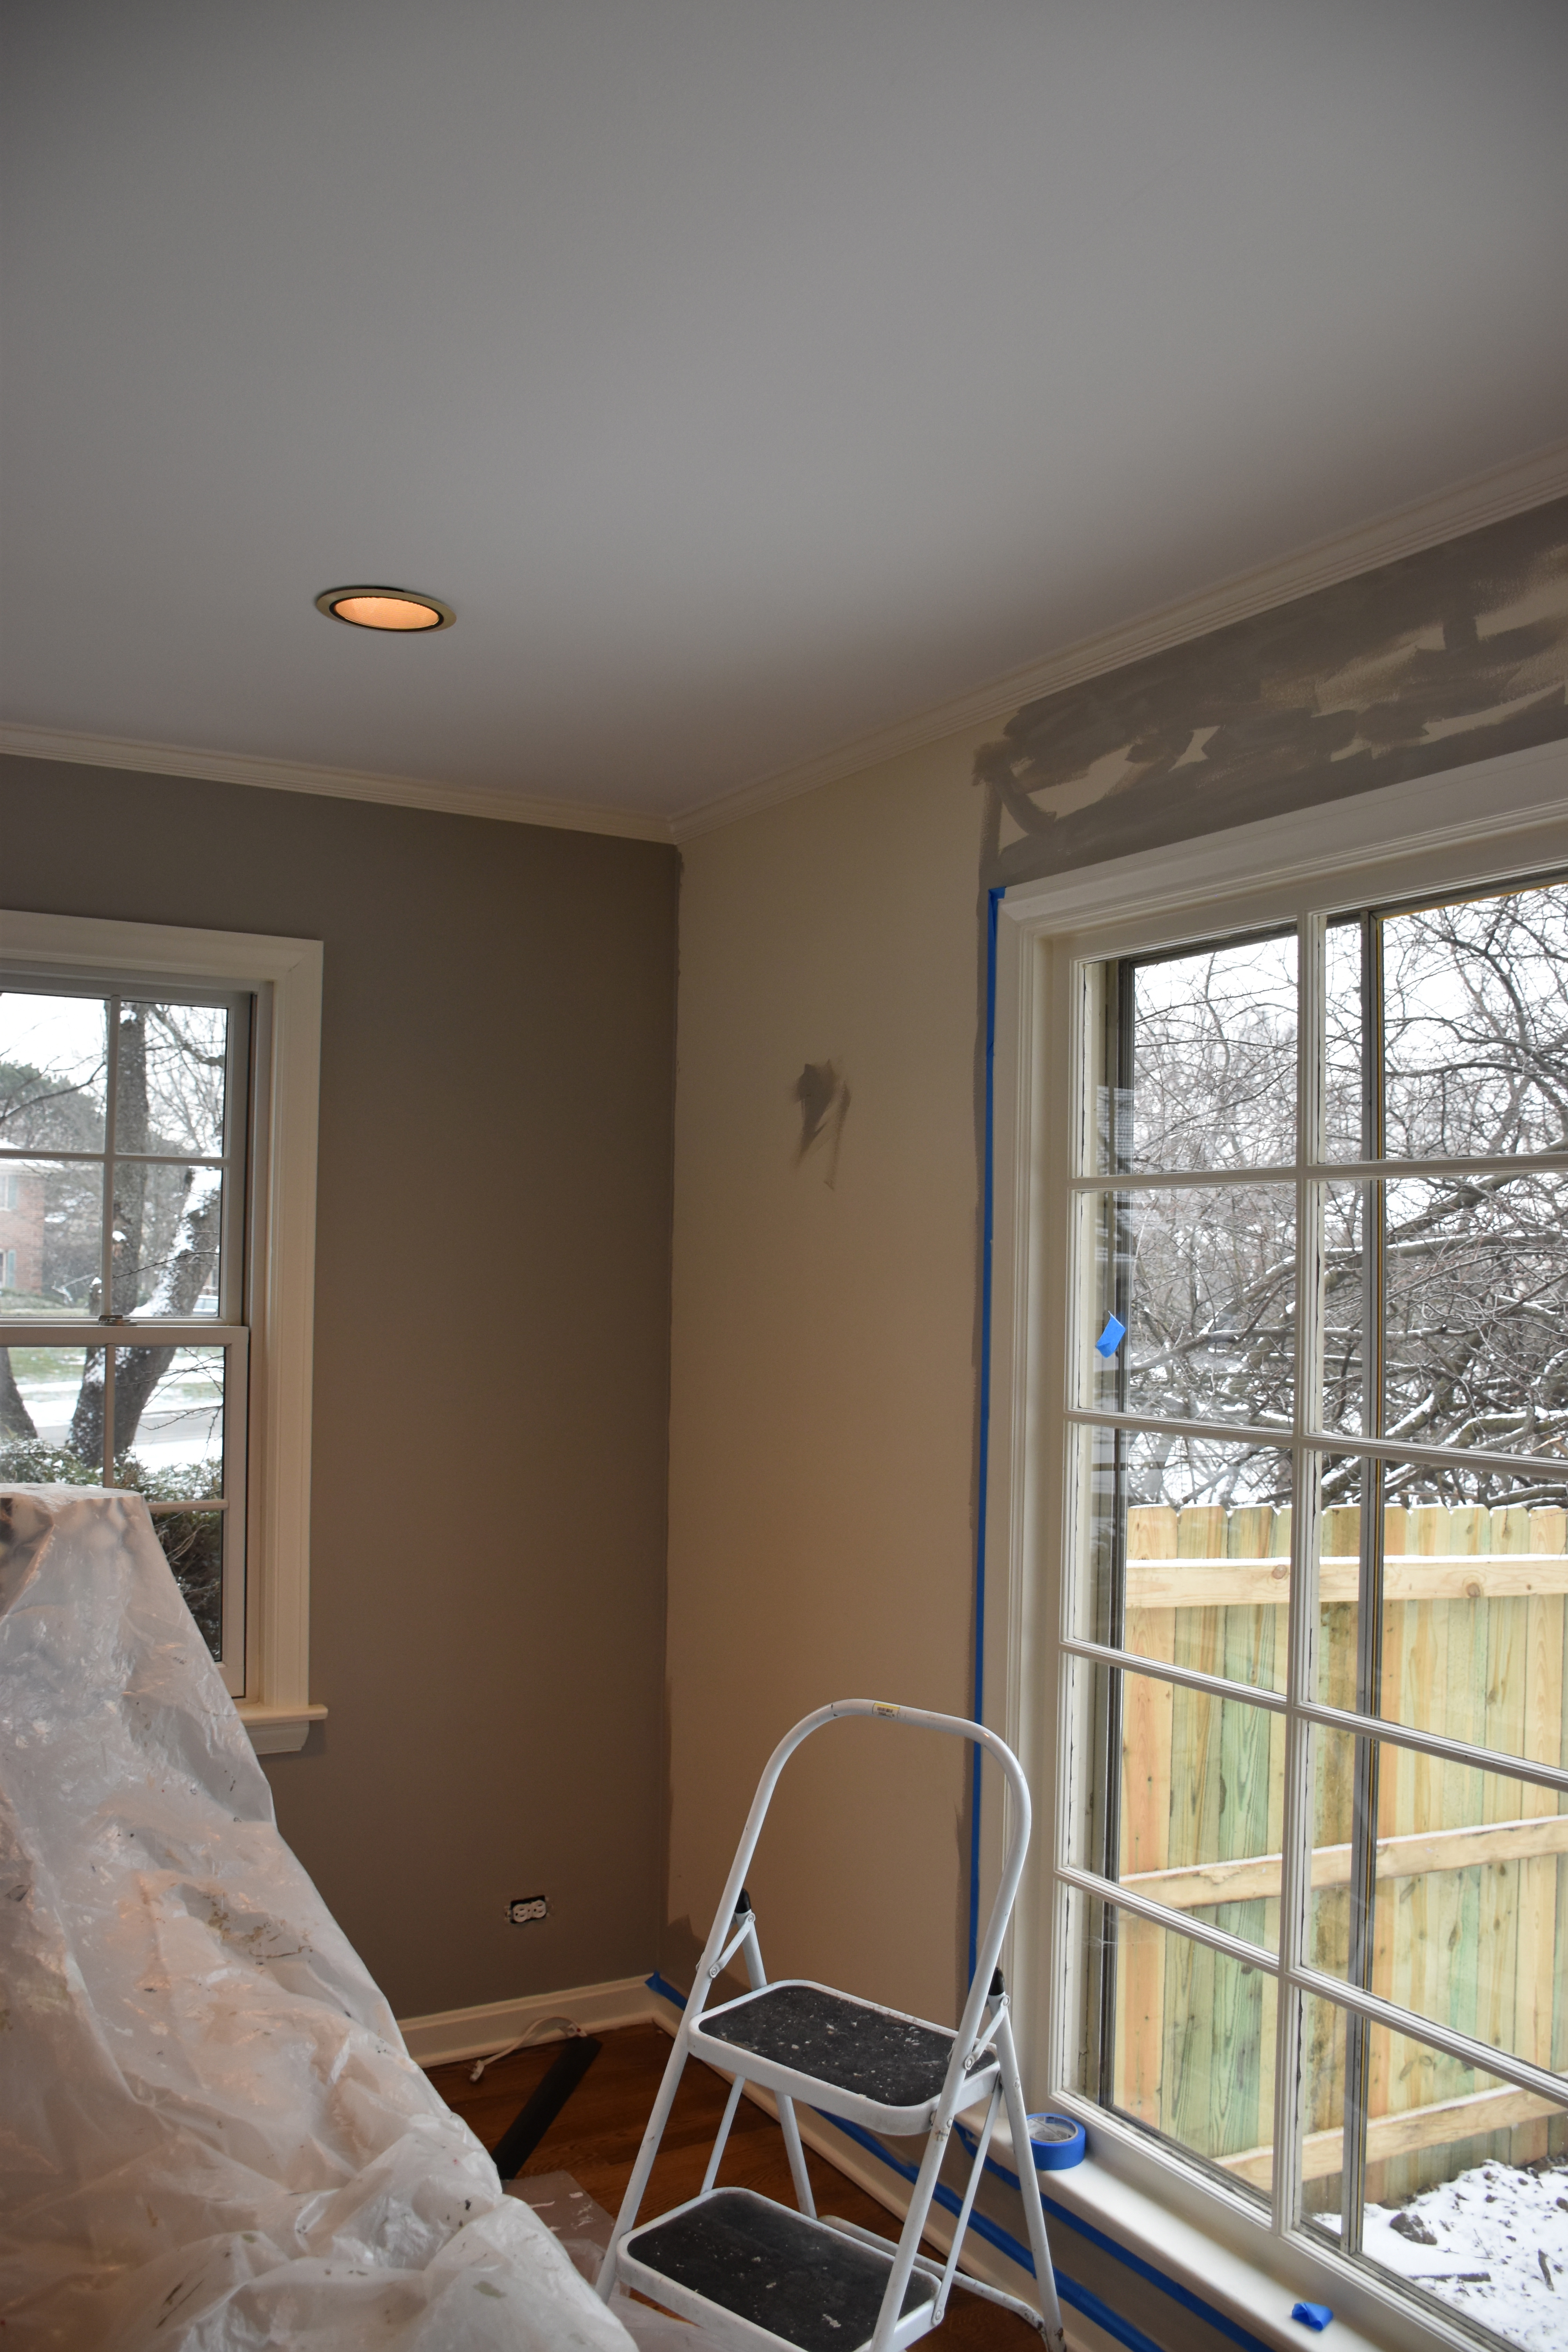
The room had been painted a neutral cream just before it was placed on the market. The color went with the previous owners furniture, but it didn’t have the warmth I wanted for the room. I had a lot of projects to tackle so we lived with it for a bit until I could get it painted.

The during: here is the room shortly after we moved in. I centered my furniture around the fireplace and put the television on a less prominent wall so we could enjoy both without making the television the major focal point of the room. Over time I shifted the chairs and accessories till I got the right mix.

I painted the room Benjamin Moore’s Plymouth Rock. It’s a warm and well balanced gray. The room gets lots of natural light so the gray added a nice contrast to the formerly all cream room.

Here is a picture while I was painting the room. When you are in the middle of a painting project there is nothing like taking a minute to admire the difference that a new paint color can make.

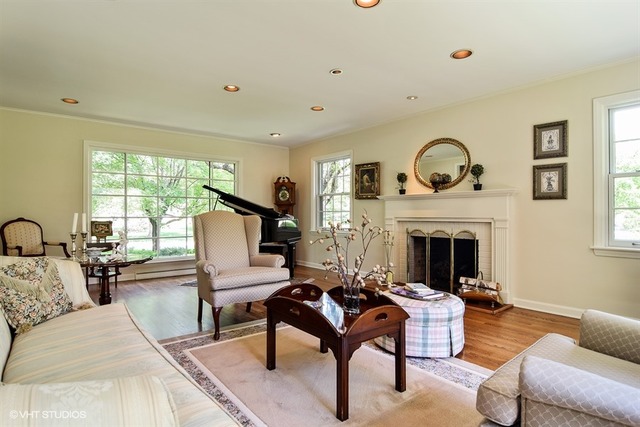
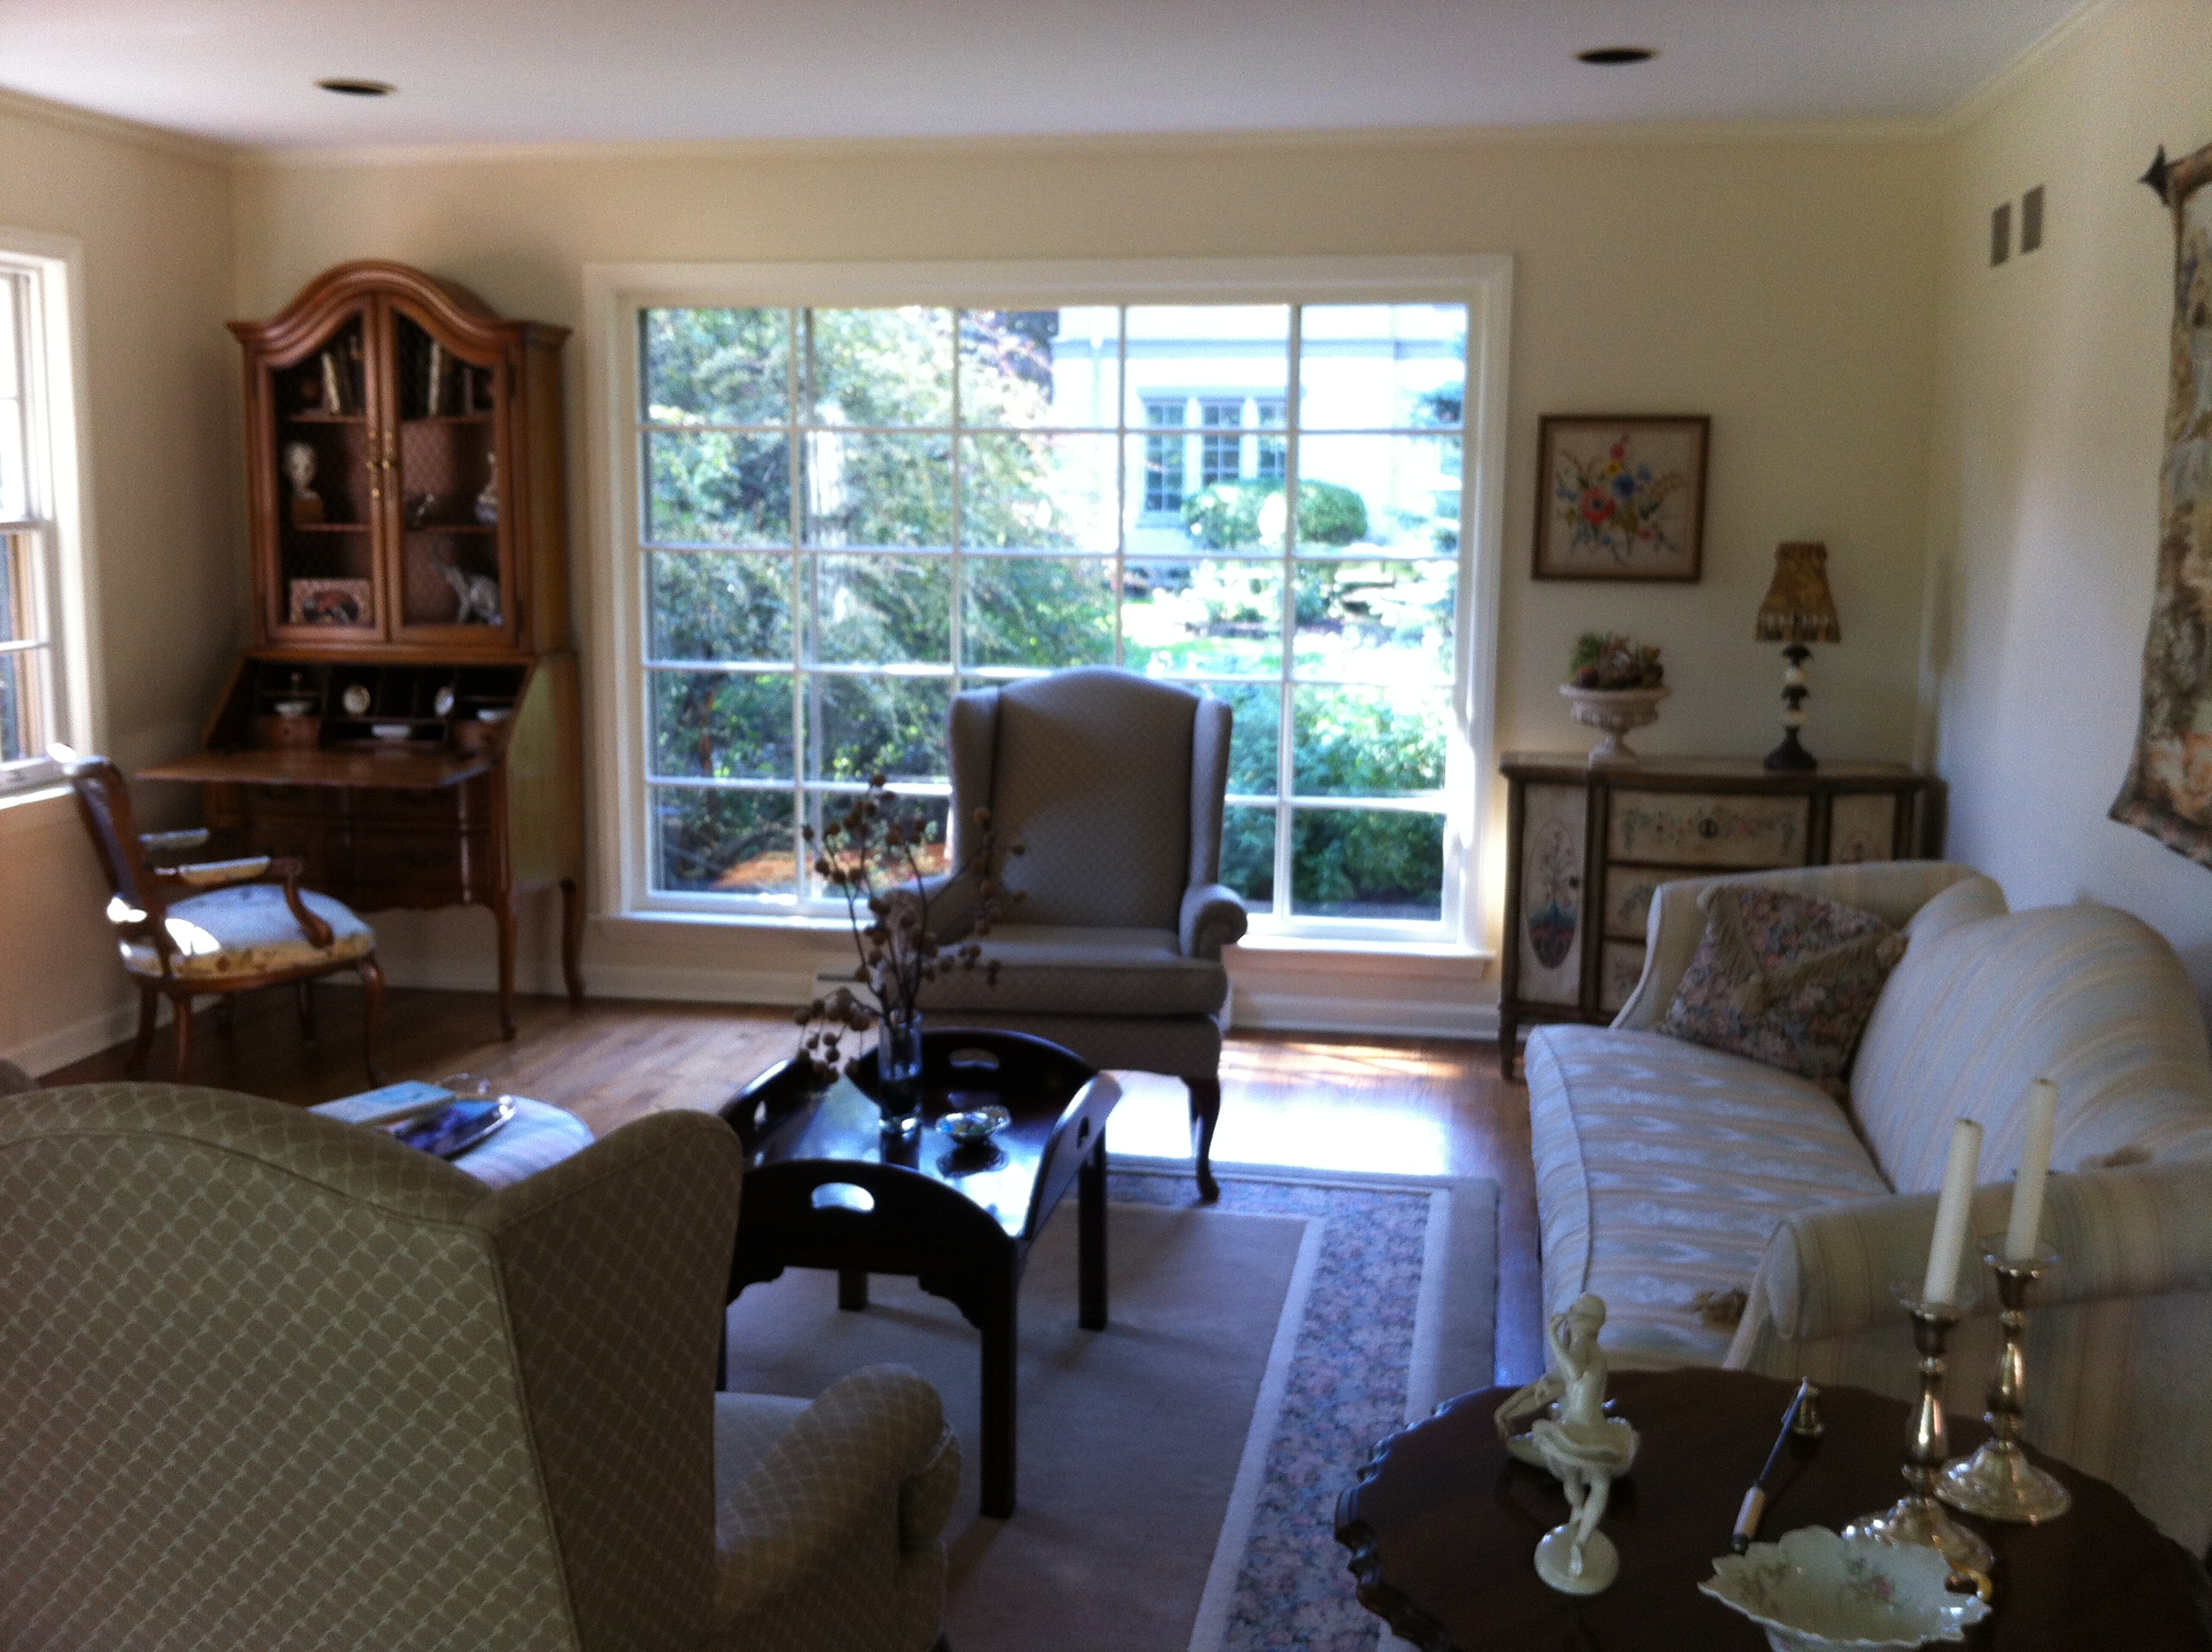
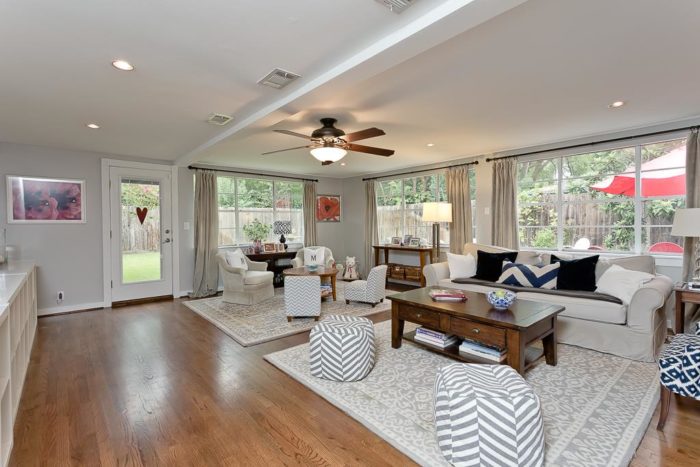
Our new living room has room for just one seating area, but the room is wider than our former living room so I took two armchairs from our old office and used them here to add additional seating. I also added new indigo velvet drapes from Pottery Barn. The drapes frame the windows and add texture and warmth to the room.

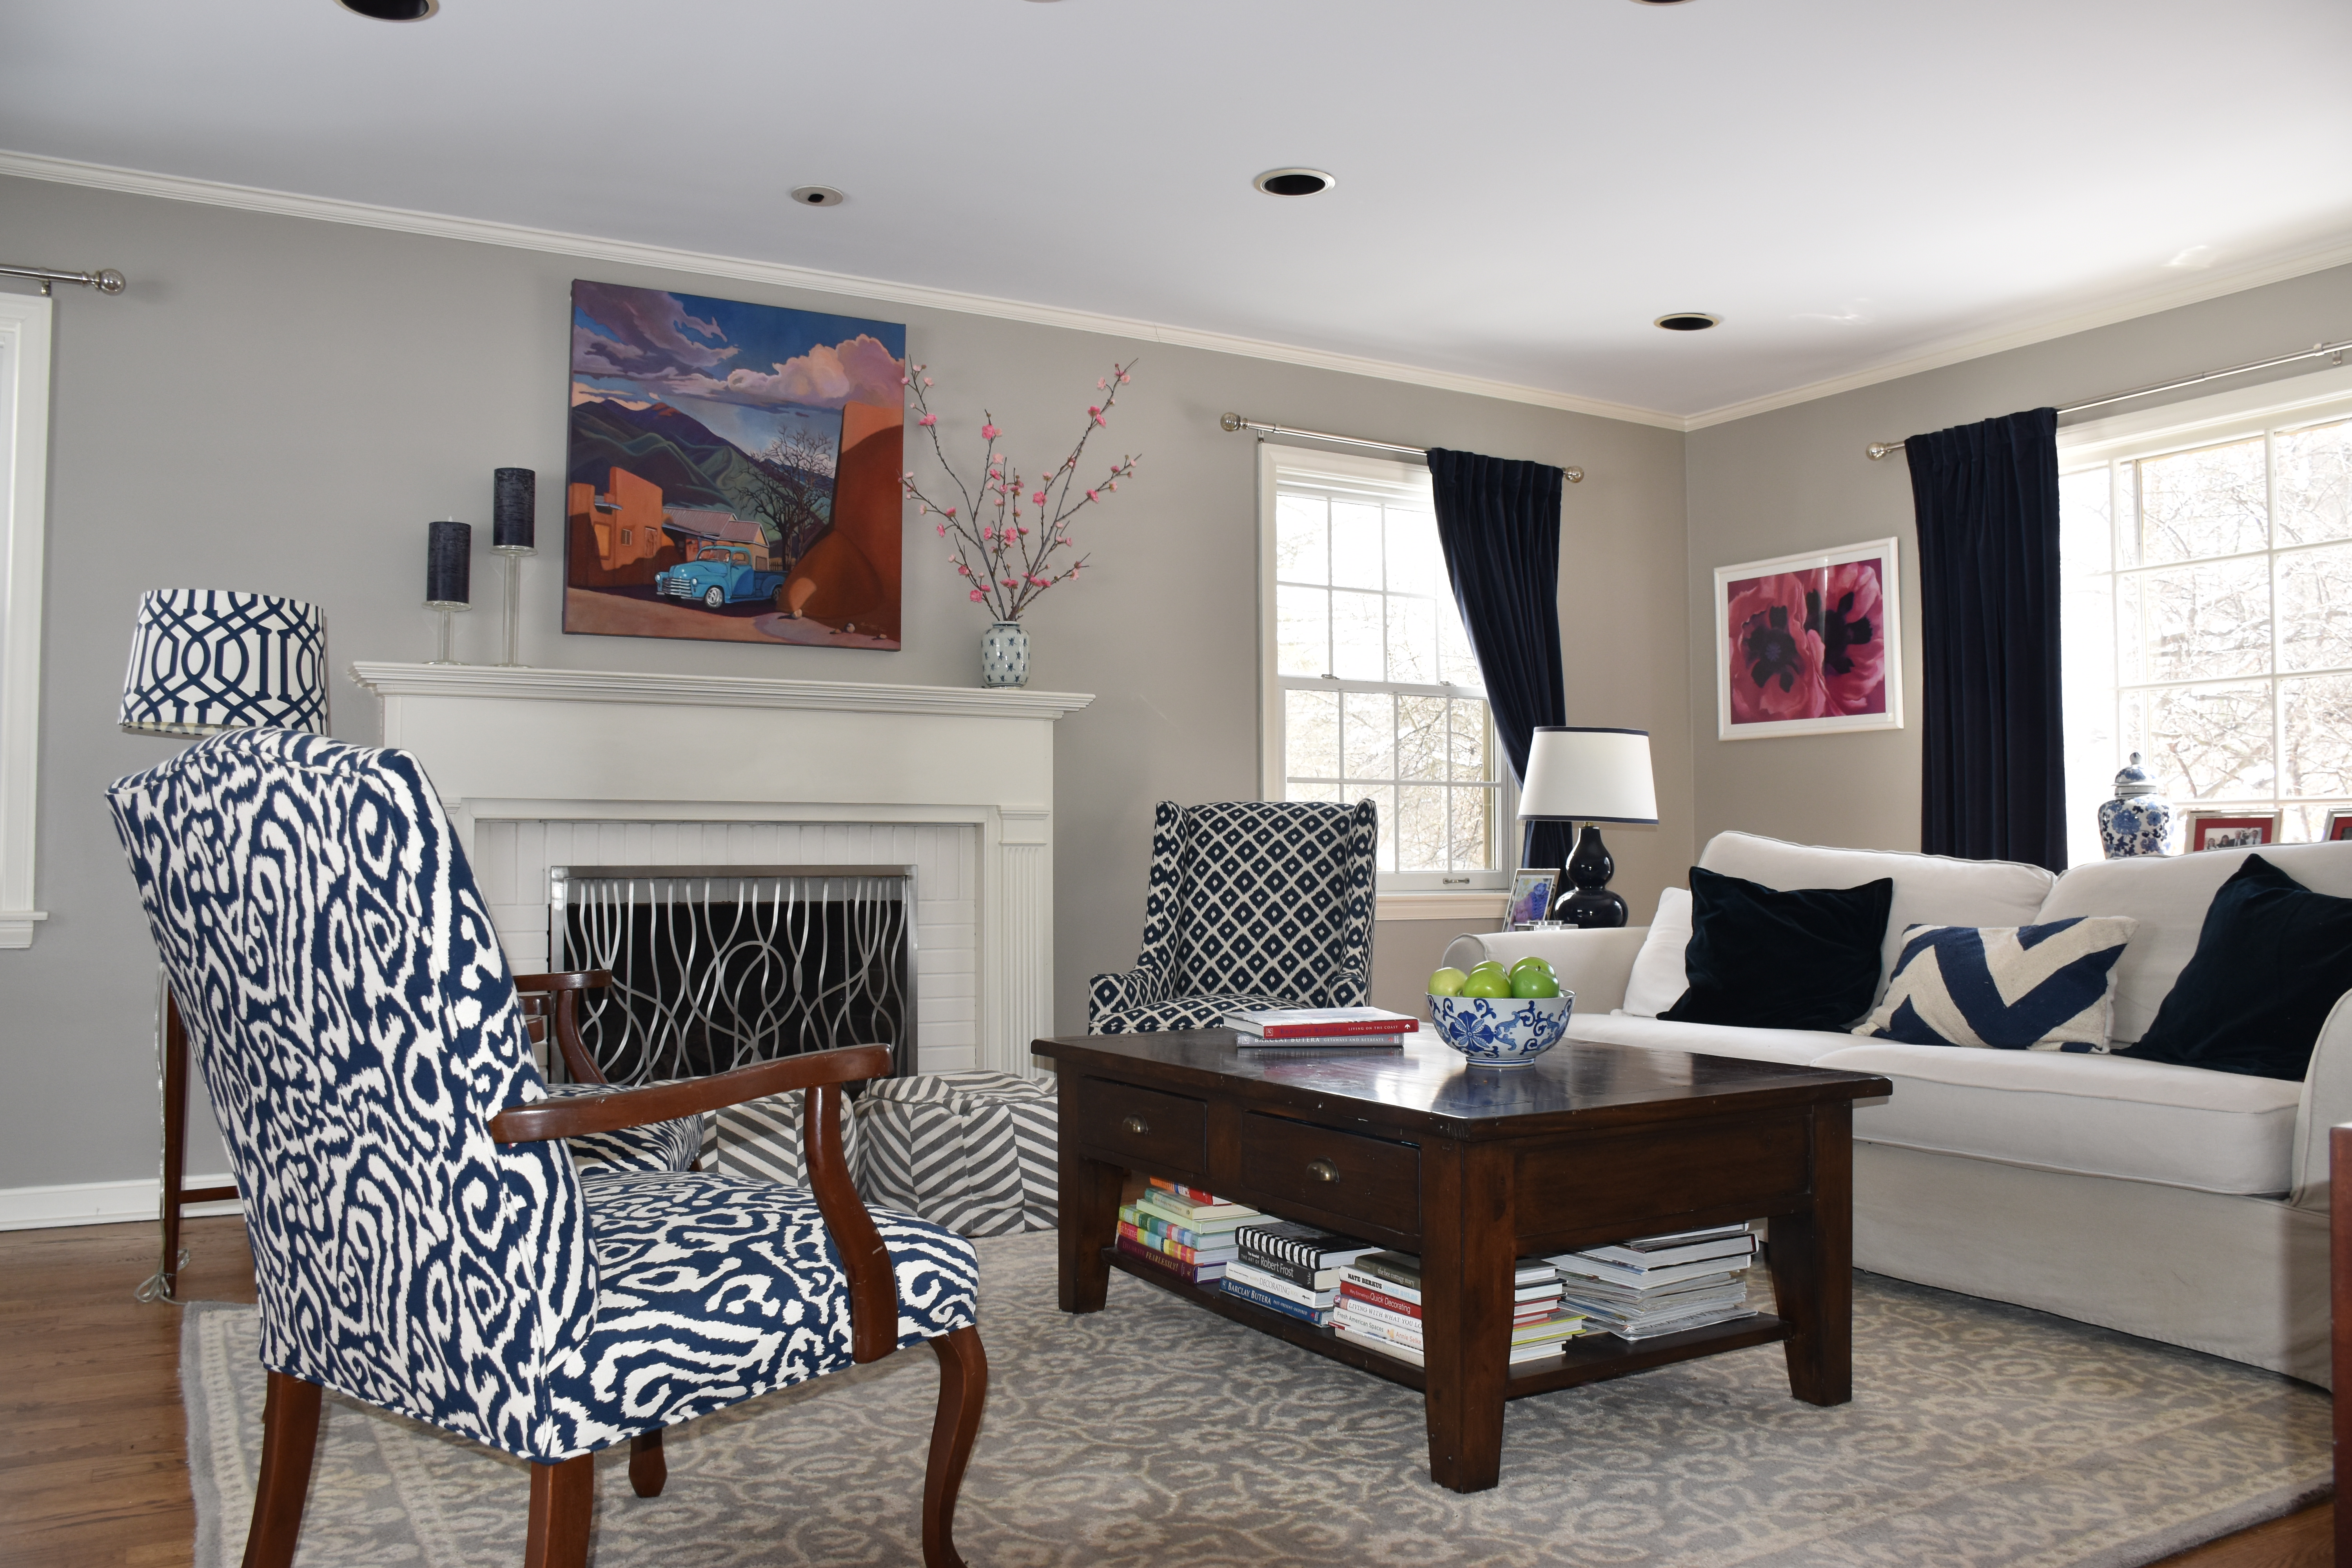
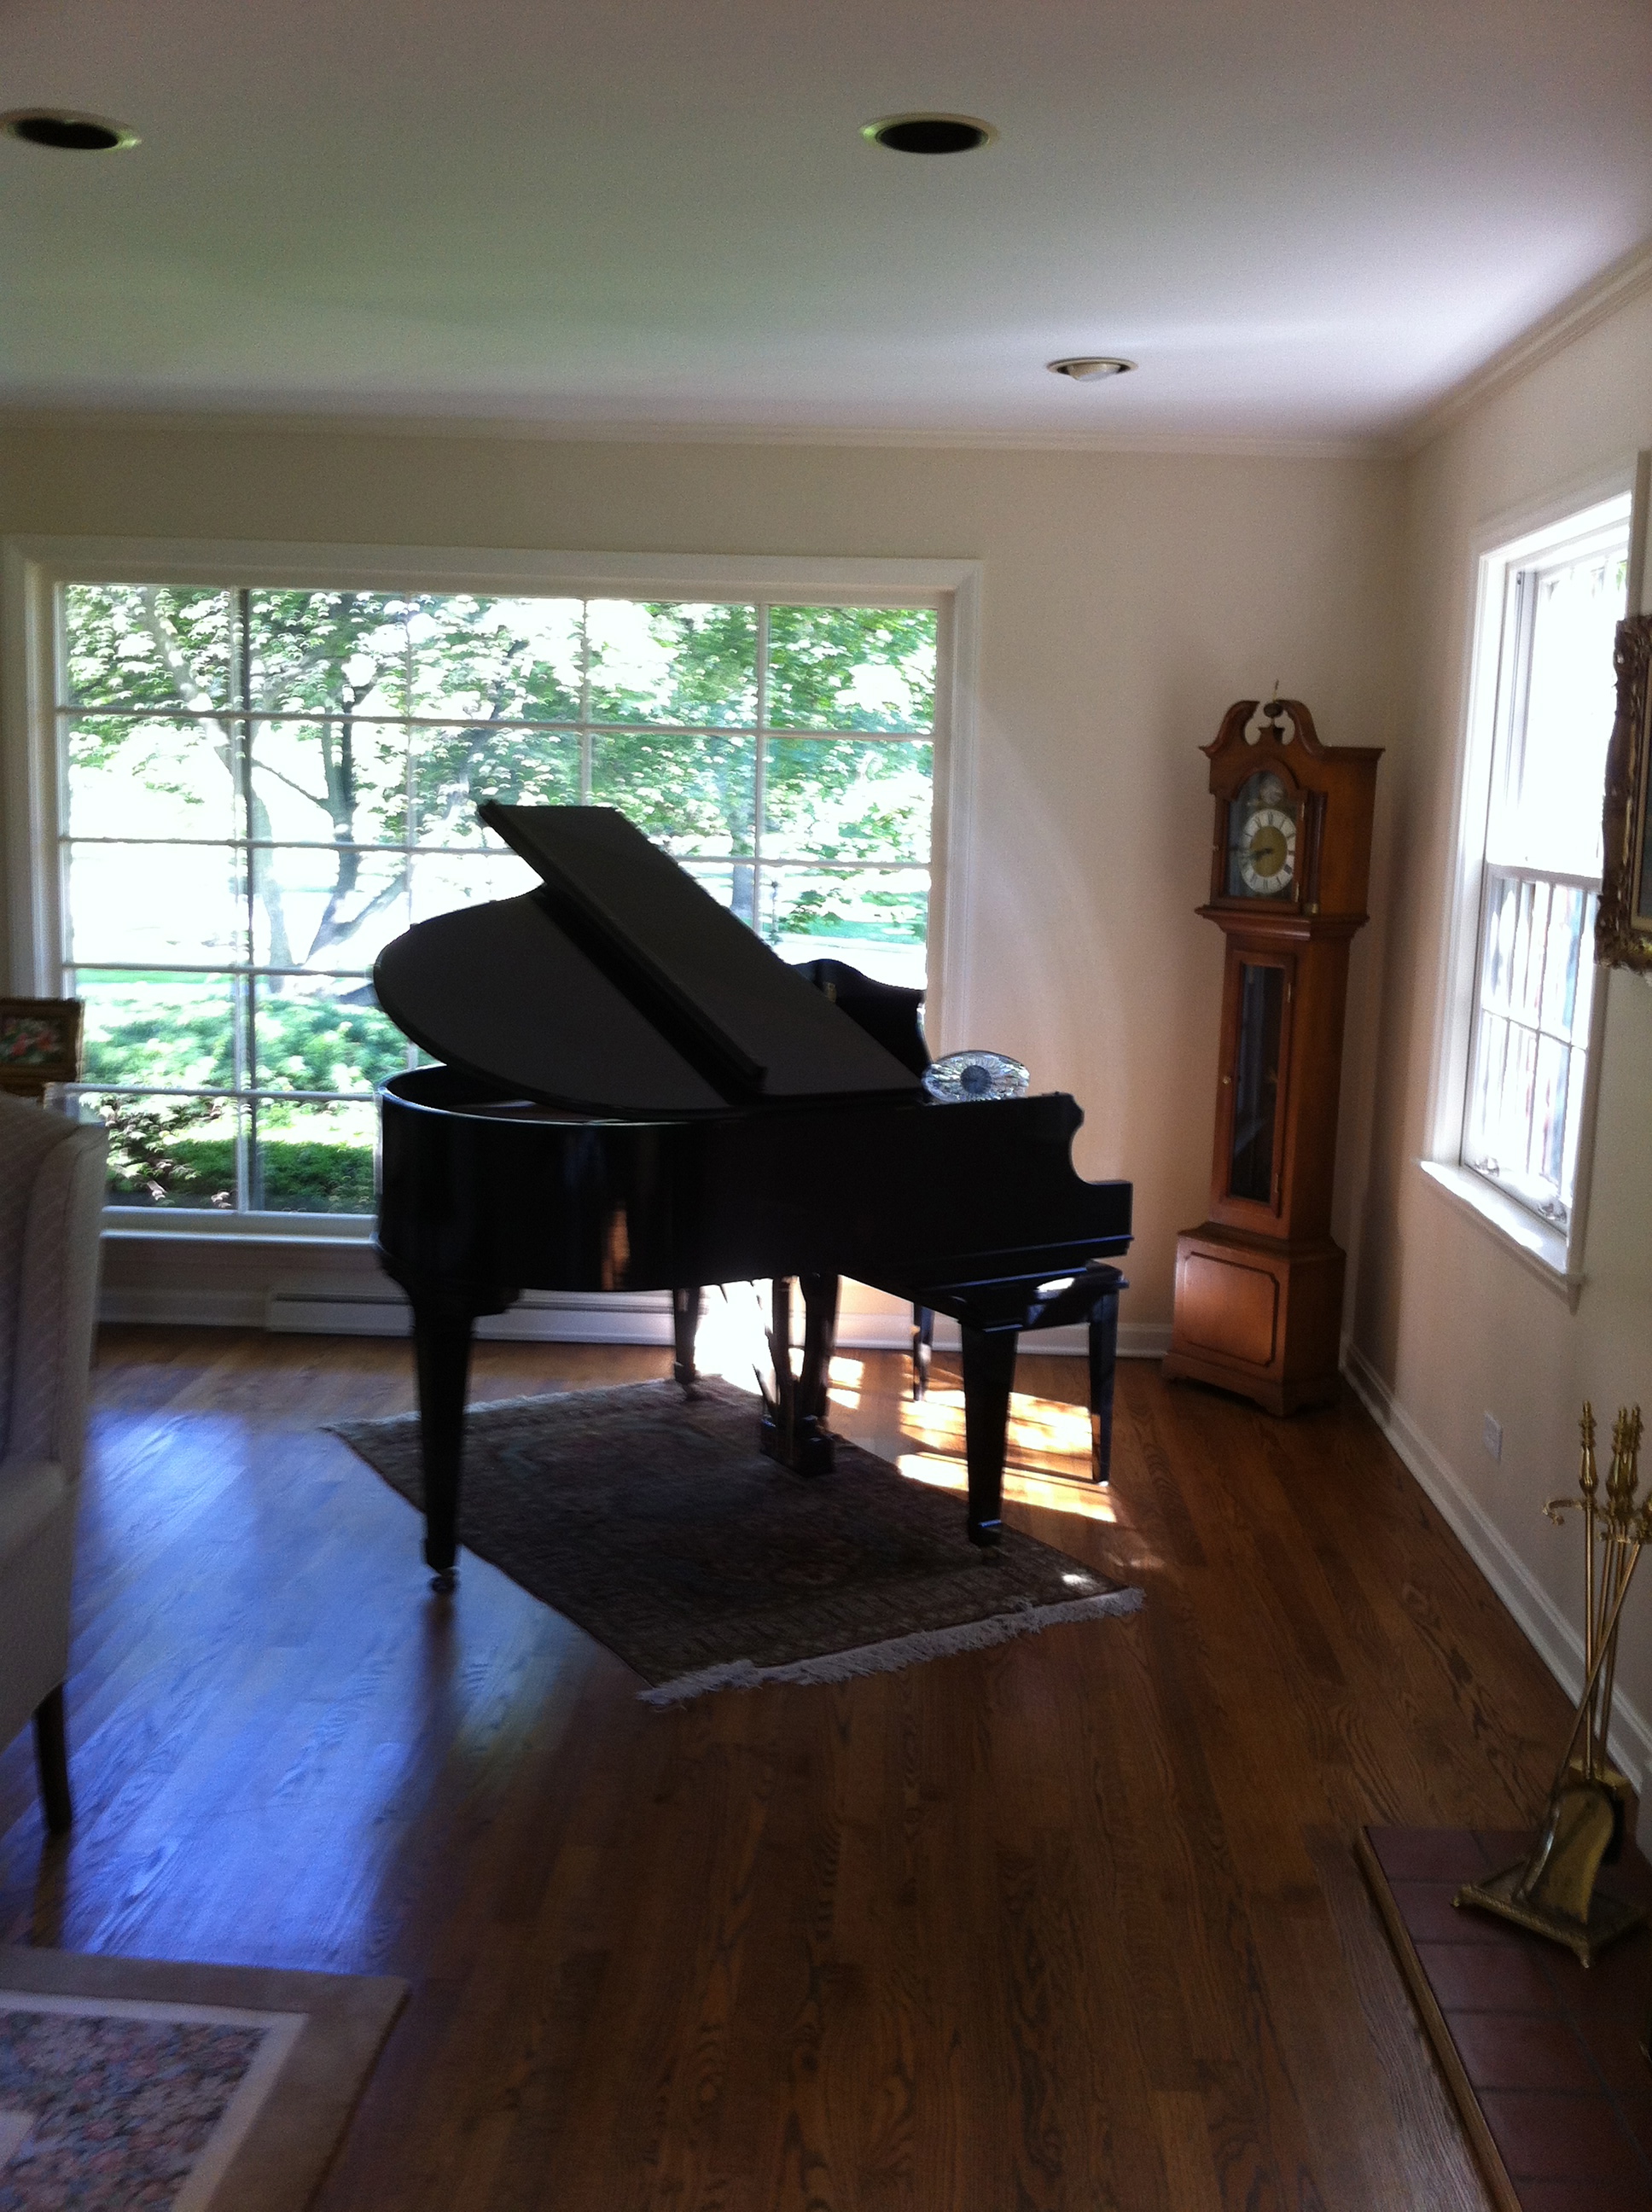
I centered the piano in the front of the room since my husband plays often and we enjoy listening to the music. The piano also provides a little privacy from the window facing the street without having to cover the view to the garden in front.

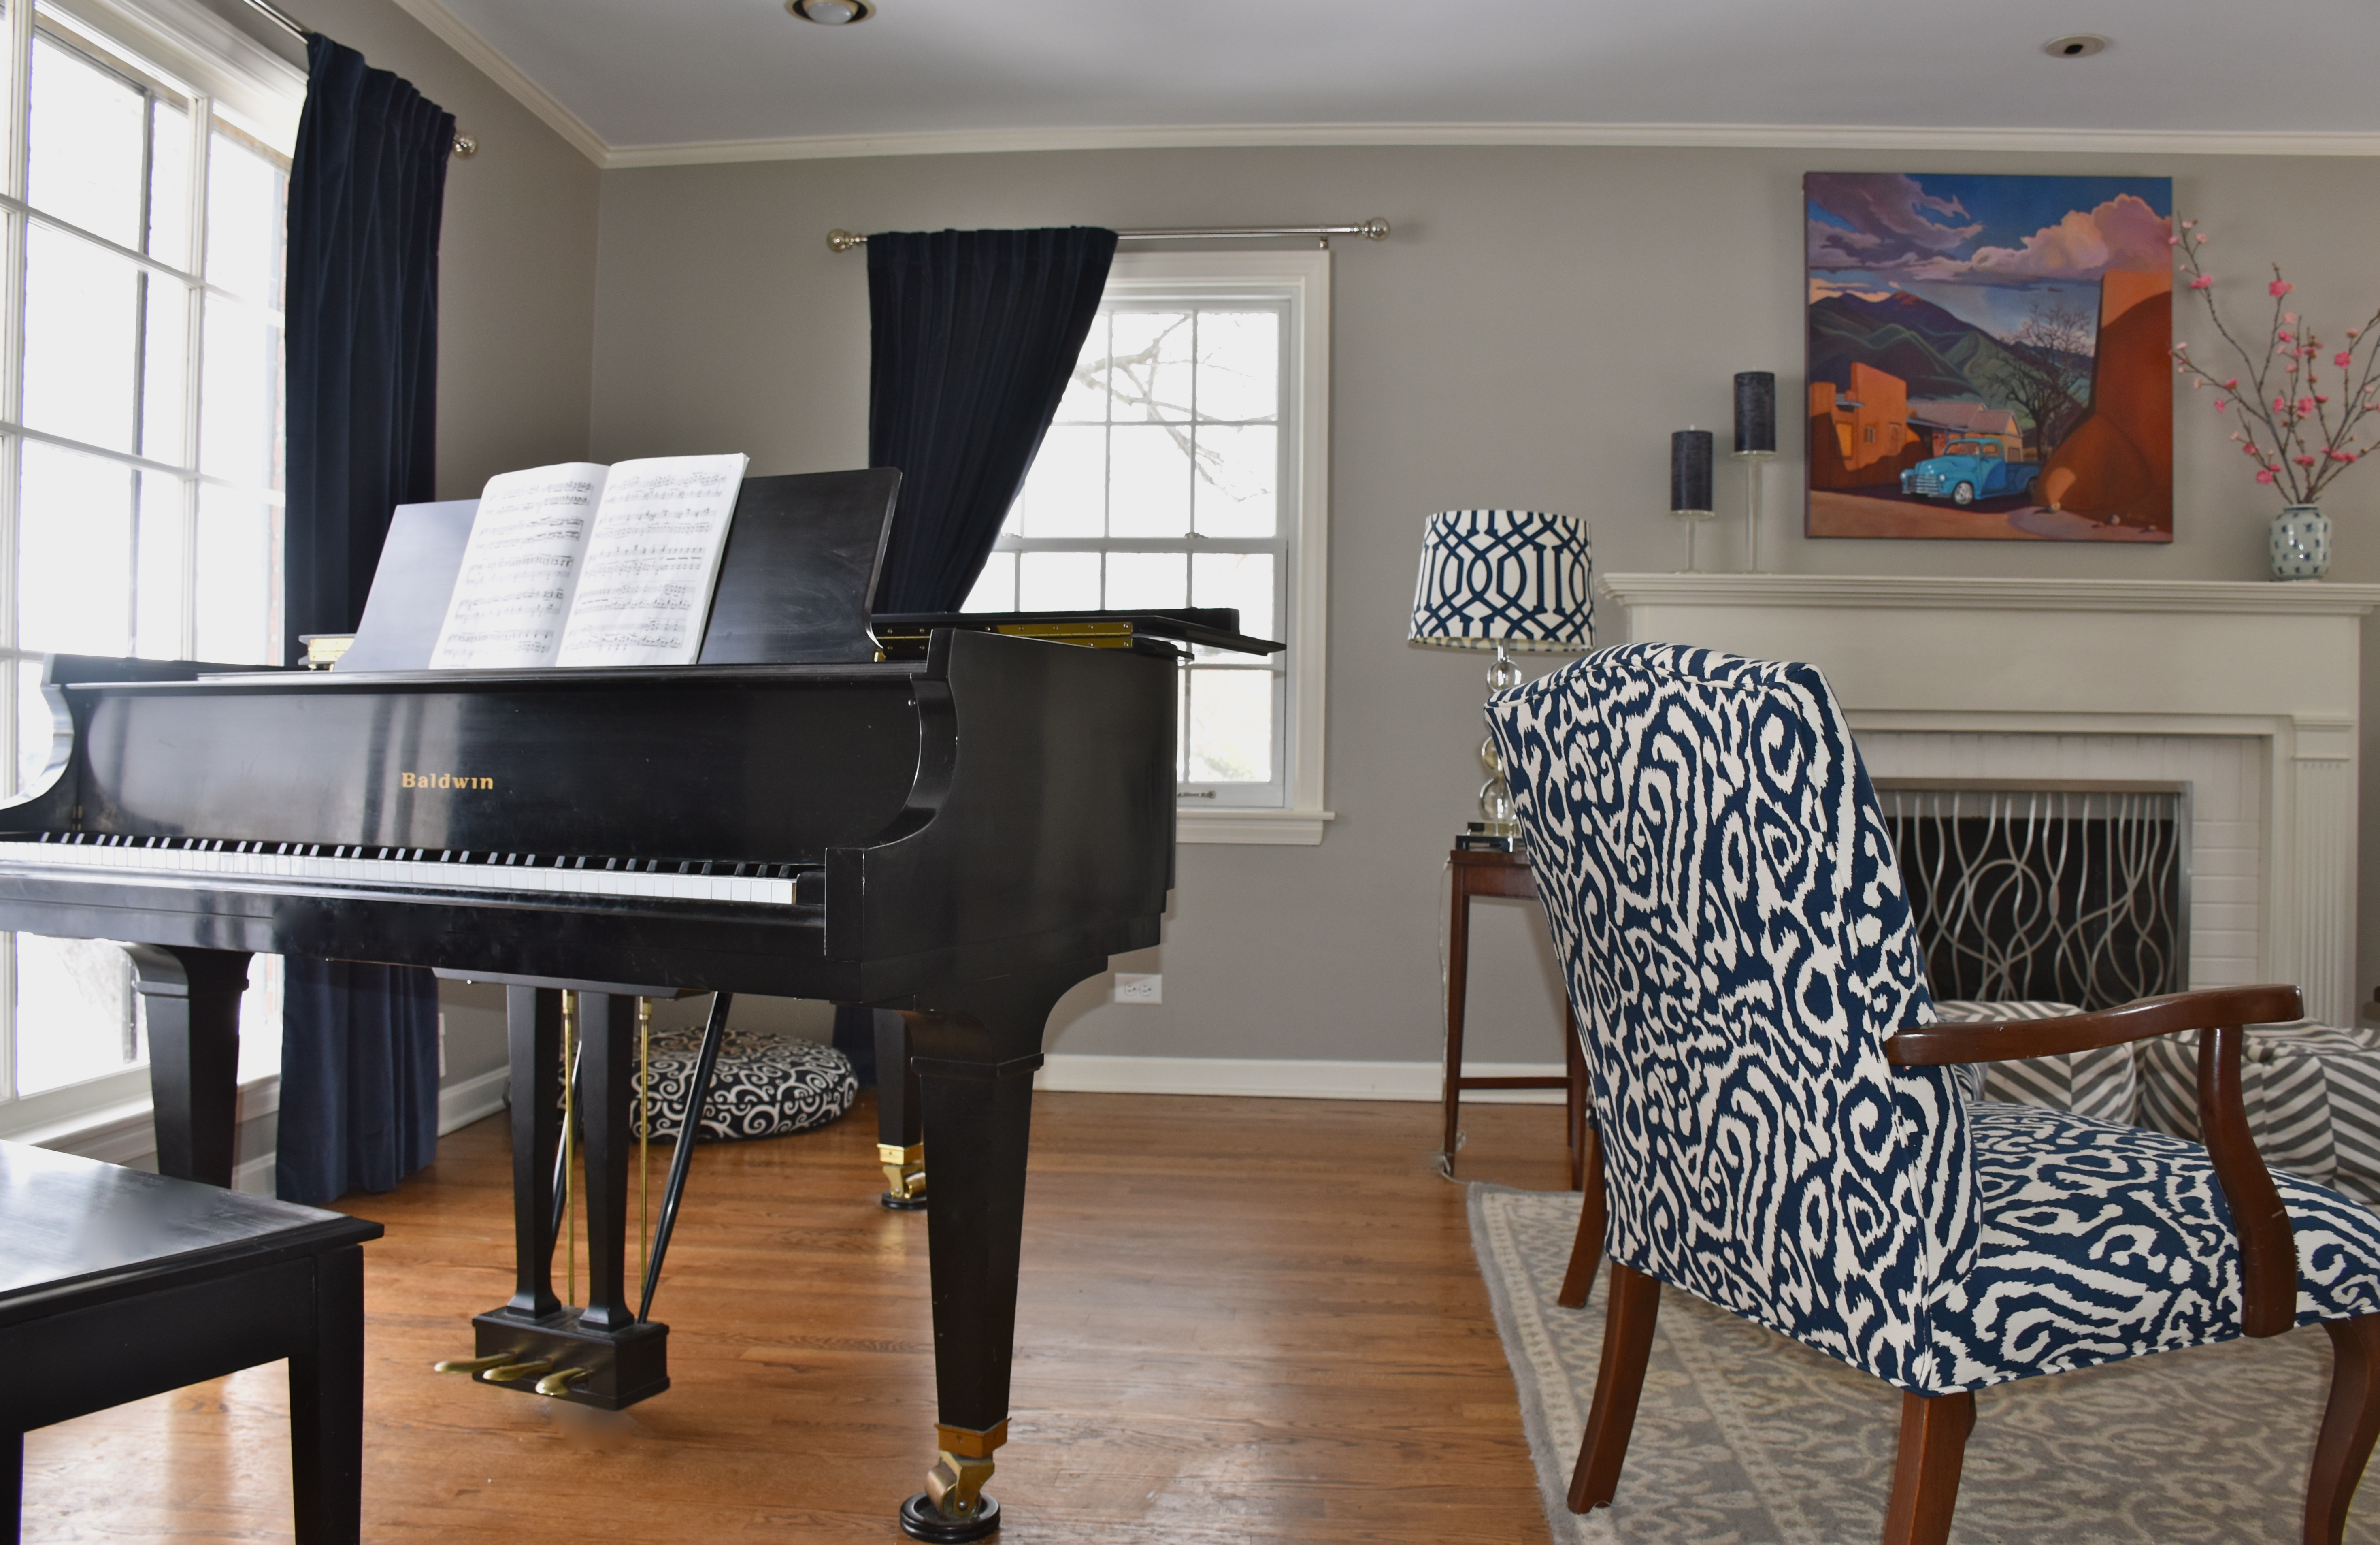
The modern fireplace screen was something I found at Bering’s Hardware in Houston. I knew I needed a screen to keep curious toddlers out so I found this one right before we moved. I love the sculptural element that it adds to the room. The painting is a favorite that my husband and I got from a local artist in New Mexico. It used to be in our breakfast room, but the size and colors worked well in our new living room. We have a collection of southwest art so we were able to mix in pieces we had in other rooms in our old house. I added an asymmetrical touch to mantel with some navy candles on modern glass candle sticks. Then I used a vase I had in our old office to add some greenery and height. I switch out the branches in the vase to fit the season.

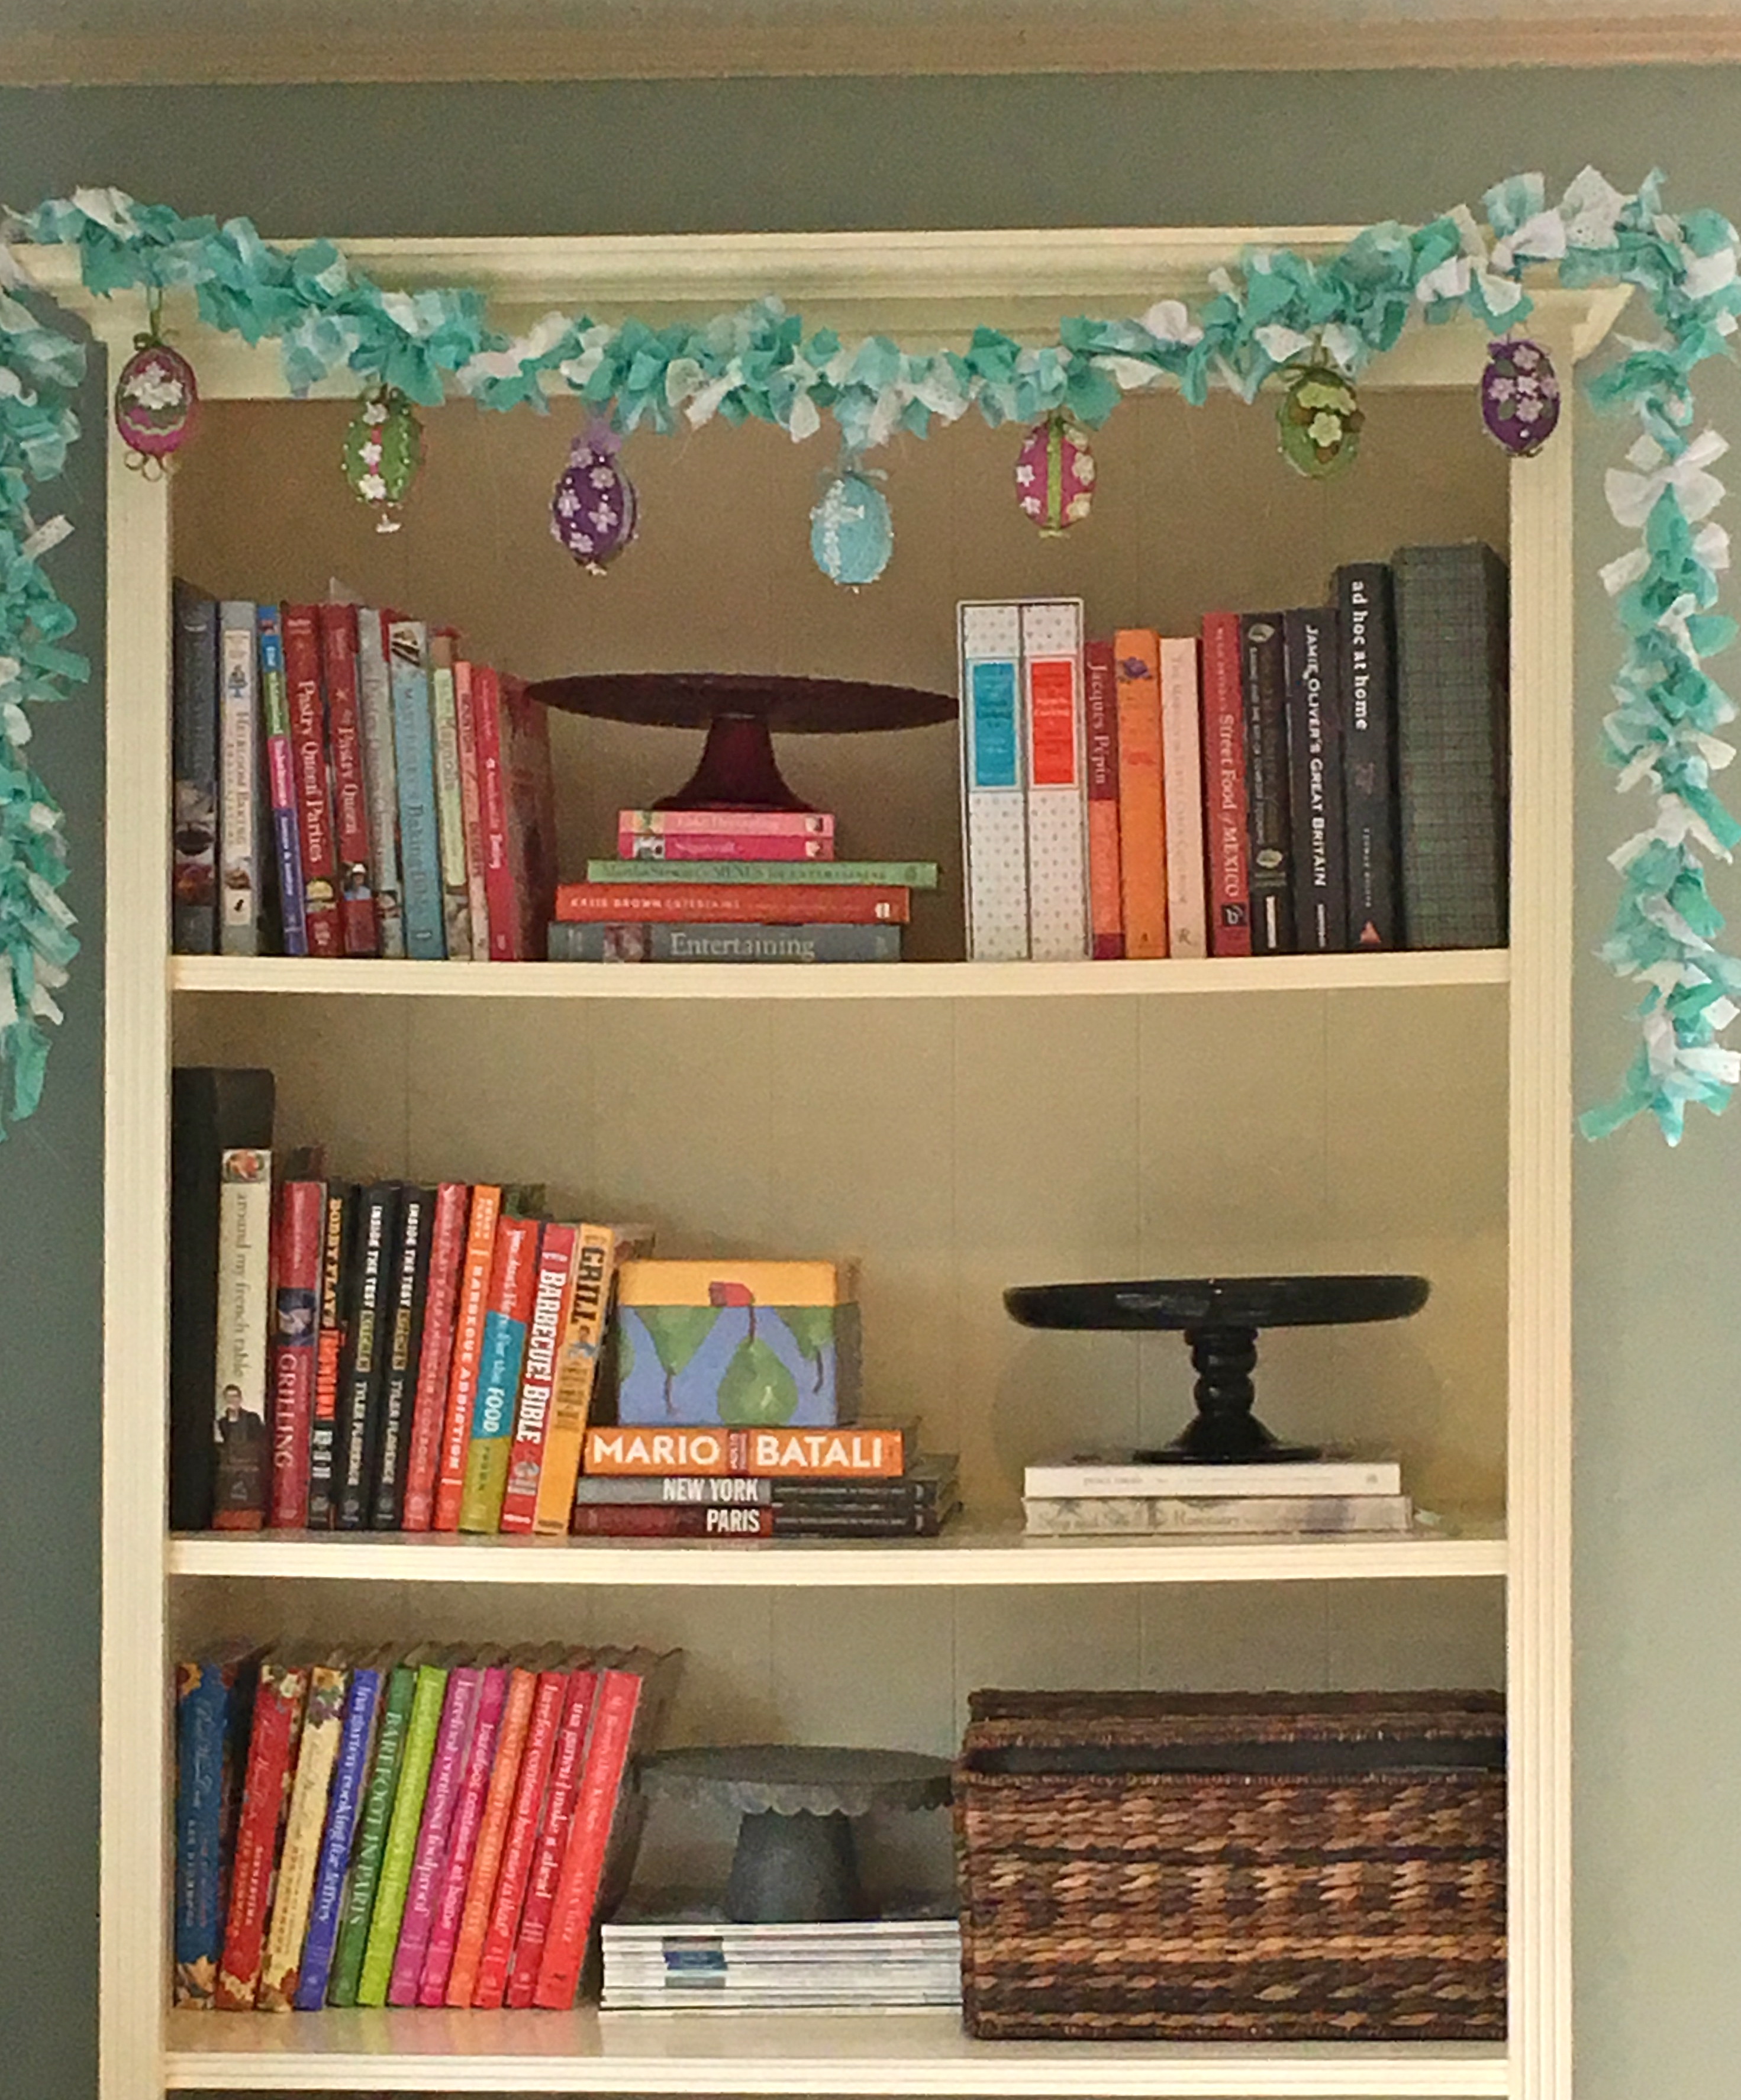
I have a small reading area for my girls tucked in the back corner. The armchairs can be moved if they want to watch television and the basket makes for a quick clean up of their books.

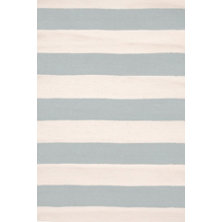
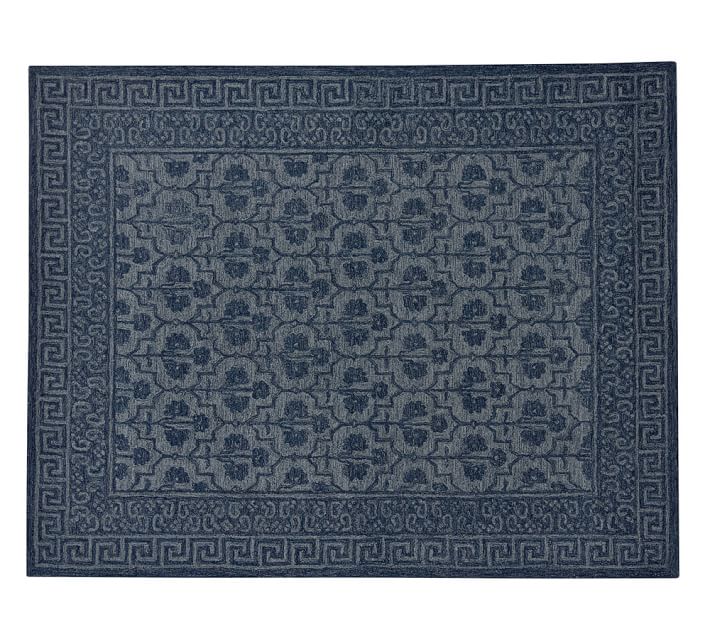
The new room has a few more patterns than I had originally designed for our living room, but the simple blue and gray color scheme helps keep it balanced. I was able to remix our furniture in a new way to give our living room a finished look without breaking the budget. I think the key when you are moving, is to be open to shifting things around and to give yourself so time to see where your furniture and art fit best. If you really love a piece you will find a way to incorporate it in your new home. I plan to make a few changes in the future, but for now we are loving the new look.

For more blue and white inspiration see this link to designer, photographer and entertainer extraordinaire, Carolyne Roehm’s library and see how she remixes her room to fit the seasons. Even if you haven’t moved recently, it will have you thinking about how a little remix can give your living room a completely new look.

Best Ever Beef Bacon and Noodle Bake

They say say that comfort food at its best are the dishes that transport you back to your childhood. The food that reminds you of family dinners and the people you love. If I had to pick one meal that reminds me most of my childhood, it would be this casserole. This dish comes from my grandmother, Nona. She was an excellent cook and an ever stylish and gracious host. She would sometimes help my mother when things were busy by making food and when she did, I would always hope that this casserole was in the stack of pyrex dishes.

My Grandmother Nona

This recipe falls under the category of “an oldie but a goodie.” I shared the recipe with my sister-in-law, who had friends that had just had a baby. She and her boyfriend (who was quite the foodie) decided to have a casserole contest. The rules were that each of them would submit one dish to their friends without revealing who made the dish and then they would see which casserole the friends liked best. When the couple revealed the winner they said they picked her dish, which was this casserole. The funny thing was that they thought for sure that the boyfriend had made it since it had bacon and beef in it. This just goes to show that this simple and classic recipe is still a winner and that my sister-in-law is a good cook with excellent taste.

Nona’s Beef Bacon and Noodle Bake

  • 1 (1 pound) Box of Rotini or Fusilli Spiral Pasta (get the plain kind and not the one with tri-colored spinach and tomato flavored pasta)
  • 5 Slices of Thick Cut Bacon
  • 1 TBSP Olive Oil
  • 1 Cup Diced Yellow Onion
  • 1 Pound of Ground Beef
  • 1 (14.5oz) Can of Plain Diced Tomatoes (drained)
  • 1 Tsp Oregano
  • 1/2 Tsp Garlic Powder
  • Salt and Pepper to taste
  • 3  1/2 Cups of Grated Cheddar Cheese
  • Parsley Garnish (optional)

First, fill a large pot with water and boil the noodles until cooked following the cooking time on the box of the pasta. Meanwhile, place one piece of bacon in a large skillet with deep sides. Let the bacon cook for 2 minutes so it renders some fat in the pan. Then remove the piece of  bacon and discard it. Add one tablespoon of olive oil. Then, put the onions in the pan and when they begin to get translucent add the the ground beef and cook it until it is brown and cooked through. Season the beef with the oregano, garlic powder, salt and pepper. I drain a bit of the fat from the cooked beef and then I add the tomatoes until they are mixed in and warmed through.

Cook the remaining 4 slices of bacon and then dice it into small pieces. I tend to cook my bacon in the microwave. I put a double layer of paper towels on a microwave safe plate and then lay my pieces on top. In my microwave it usually takes 4 to 5 minutes but since microwave strengths can vary, be sure to keep a close eye on it. I also flip my bacon halfway through to make sure that it cooks evenly. America’s Test Kitchen did a taste test on multiple brands of bacon and they found that the thickness and not the brand contributed most to a better tasting piece of bacon, so I always buy thick cut.

In a large mixing bowl mix or pot mix together the drained pasta, the beef and tomato mixture, bacon, and 1 cup of the cheddar cheese. Pour the casserole in a 9 x 13 inch baking dish sprayed with pam cooking spray. Then cover the top with the remaining 2 1/2 cups of cheddar cheese.

Bake at 350 degrees for 20 to 25 minutes until the cheese is melted and bubbly.

This casserole can be assembled and then baked later. If baking later, you will want to increase the cooking time to make sure it is warmed through, about 30 to 35 minutes. The casserole can also be baked and then frozen so it can be reheated at a later date.


If you want to serve this dish like my grandmother, then make a side salad with lettuce tomato, avocado and red onion. Toss with your favorite vinaigrette and there you have it: my favorite childhood meal.

After I posted this recipe, the Wall Street Journal started a new series in the Off Duty section on classic American dishes. They featured a similar but slightly different version of this casserole which they call the Johnny Marzetti.  It looks like I am not the only one who grew up loving this dish. They believe the dish was first served in the restaurant called Marzetti’s which opened in Ohio in 1896. It’s always fun to learn about this history of a classic, but looking at their recipe I think my grandmother got it right with her addition of bacon.


Carrot Cake

Easter and spring time make me think about carrot cake. However, I think it is great any time of the year. Carrot cake is one of my husband’s favorites. It is often his requested birthday cake. My great aunt Winnie has a good recipe that I have changed a bit over the years. I am not always good about writing out the changes and recipes I create so blogging has been good for me. This week I decided to make carrot cake and take detailed notes, so I could share this great recipe with you.

Carrot Cake

  • 2 Cups of Sugar
  • 2 Cups of Flour
  • 1 TBSP Cinnamon
  • 1/2 Tsp Nutmeg
  • 1/2 Tsp Ginger
  • 1 Tsp Salt
  • 2 Tsp Baking Soda
  • 1 Cup Canola Oil
  • 4 Eggs
  • 3 Cups Grated Carrots

Preheat oven to 350 degrees. Prepare two nine inch cake pans by cutting parchment paper rounds for the bottom and then place the parchment paper in the bottom of the pan. Spray the pans with cooking spray and flour the pans.

Next peal and grate the carrots. I use a food processor with a grating blade to make it faster.

Then in the large bowl of a mixer mix together the dry ingredients: the sugar, flour, cinnamon, nutmeg, ginger, salt and baking soda. Then mix in the oil and egg one egg at a time mixing between till they are fully incorporated. Then add the carrots and mix. Place an even amount of the batter in each pan.

Bake for 35 minutes. When the cake is baked allow it to cool in the pan for 10 minutes, then take the cakes out of the pan to cool.

When the cake is completely cooled they are ready to frost.

Cream Cheese Icing

  • 2 Sticks of Softened Butter (I usually let it sit out of the fridge for an hour)
  • 2 (8oz) Softened Bricks of Cream Cheese (I let it sit out with the butter)
  • 2 Tsp Vanilla
  • 8 Cups of Powdered Sugar
  • 1 TBSP of Milk

In the bowl of a mixer cream the cream cheese and butter. Add the powdered sugar vanilla and milk. Mix on high speed until the icing is smooth and fluffy.

To frost a cake I put a small dollop of icing on the plate or cake round to keep the cake from sliding. Put the bottom layer on top and then spread icing as a filling.

Then put the top layer on the cake and frost the cake by putting several large spoonfuls of icing on the top of the cake and use a separated spatula to spread the icing from the top and around the sides.

Once I get the cake frosted with a base layer (crumb coat), I place it in the fridge to firm up for about 30 minutes. This seals in the crumbs and allows you to make a smooth final coat.

Then if you are decorating it further you can use pecan or walnut pieces the cover the sides. Then use a large star frosting tip to add a decorative touch to the top. I have used carrot-shaped candies or if it’s fall candy corns to decorate the top.

For a special occasion, I like to make the candied carrot curls that were featured in Southern Living several years ago.

Candied Carrot Curls

  • 1 cup sugar
  • 1 cup water
  • 2 to 3 carrots
  • Extra granulated sugar for sprinkling on carrots

Preheat the oven to 225 degrees

To make the carrot peel curls take a vegetable peeler and peel 15 to 20 carrot strips.

Then bring the sugar and water to a boil in a sauce pan. Add the carrots and turn the heat down to medium low and cook for 15 minutes. Remove the peels from the pan with a slotted spoon. Let the carrot peels cool on a wire rack for 5 minutes.

Then place the carrots ribbons out straight on a parchment paper lined pan. Bake for 30 minutes. The carrots will begin to look translucent.

While the carrots are still warm work quickly to curl the carrot ribbons around a wooden spoon handle. You can adjust how tight you want the curls  and then sprinkle with granulated sugar.

The peels will harden in about 20 to 30 minutes and be ready to place on the cake.

Celebrating Spring With Vintage Inspired Easter Eggs

“Despite the forecast live like it is spring.” – Lilly Pulitzer

I truly believe that when you look for the beauty and good in life you will find that there are so many wonderful reasons to celebrate everyday. I think this is the reason I love holiday decorating. It’s the small details that make everything feel festive. Holiday decorations not only give your house a special feel, they often have roots in family traditions. Usually Christmas is when you see everyone decorate their whole home, but then there is that sad after-Christmas feeling… when the decorations come down and the house that seemed just fine in November, suddenly feels empty and plain. This is why I like to decorate for the seasons because there’s always something to look forward to celebrate. One of my favorite seasons to decorate for is Easter and Spring. Anyone who knows me well, knows that I am always changing certain details around my home to fit the time of year. Spring is beautiful with bright colored bulbs and bits of Spring green leaves beginning to dot the landscape. So with Spring here, I thought I would give you a peek at the traditions and decorations that make Easter one of my favorite seasons.

I usually start with the front door. It is still too early to add flower pots to the front, so I like to add a new bow with bright colors to fit the season. These green and navy bows add a spring feel to the front of the house.


In my kitchen I got some new bunny plates from Amazon to add a little fun while I am cooking. It’s a small detail but sometimes its the little things that can make you smile. My youngest was so excited about the plates that she told her grandfather that we got new bunnies (I had to clarify that they were decorations and not the real thing.)

Then in the den off the kitchen I hung a set of my favorite eggs.

These Easter eggs were something my grandmother, Latrell created. My grandmother was very creative and talented. She made so many beautiful decorations over the years, but my absolute favorite idea was her Easter eggs. I just love the bright colors, the ribbons, the flowers and sequence.


My Grandmother Latrell

They are so pretty that they top any christmas ornament I have. My mom has the original eggs my grandmother gave us and she always has them out on a beautiful Easter tree.  When beginning my own traditions I decided I loved those eggs, so one year I made my own Easter eggs ornaments like my grandmother’s.


Over the years, I have displayed them in lots of different ways. I have hung them from my chandelier to set a pretty Easter table. I have also hung them on an Easter tree with butterflies. This year I was a little worried that my very curious preschoolers would want to play with them, so I made a turquoise ribbon garland and hung them from a tall bookcase just off my kitchen. This way I can display and enjoy them without any worrying about someone eating part of the decoration.

This year my girls are beginning to really notice and participate in the decorating and seasonal fun around the house. So the tradition continues and hopefully they too will see the joy in celebrating and decorating for every season.

While I am thinking about spring, come back this Thursday when I am sharing one of my very favorite cakes that is sure to make the perfect addition to your Easter dinner or brunch.

Curating a Kid Friendly Coffee Table

There are all kinds of formulas for how to achieve the right balance on you coffee table, but most of these equations don’t take into account tiny tots who love to redecorate and play with any coffee table decor. Coffee tables inhabit prime real estate in most living rooms. They are often the centerpiece of furniture grouping, so well-placed accessories can create a focal point and help you add color and interest to your room. So, as the third and last part of this series on decorating with children and pets, I thought I would style five different coffee table groupings that have a sophisticated look with kid friendly accessories.

Classic Casual/Traditional Decor

This look is versatile; you could easily change it to fit your home’s color scheme. The first thing I added to this grouping is a tray. Trays can make a great base for your coffee table. If you have a large table, a tray can help anchor your accessories to keep them from getting visually lost. The other added benefit is that if you need to clear the table or make some room, all you have to do is pick up the tray. I like to put a few favorite books or magazines in the tray and then add a box to store things like remotes. As a finishing touch, I like to add something with height and balance to the other side of the table. Often times people use vases or candles, but to avoid any danger or issues with glass or broken candle sticks, I like to use potted silk flowers because they tend to be hardier and less messy. There are some very realistic silk plants that can add some height and color to your table without worrying about dirt, water or leaves getting everywhere. I also included two box options to show that you can customize the look to match your decor. If you have a more traditional look then the brass box might be right, or if you want to add a little color something like this orange box might add the some interest.

Sources

  1. Tray- Crate and Barrel
  2. Flowers/Daffodils- Pottery Barn
  3. Brass Box- Pottery Barn
  4. Orange Bone Box- Wisteria


The Casual Country Look

The great thing about a country or vintage look is that distressed items usually only get better with time and use. Here, I have two different tray options. The vintage soda crate is a fun conversation item, but if you want something a little less distressed you could use a solid painted tray. I usually like to use something to top any stack of any books or magazines I place in a tray or on a table. Sometimes I use a decorative box to do this, but other times I like to add a decorative or sculptural item. I like these wooden hearts because they add interest and texture. They aren’t breakable so little ones can play with them without worries. Finally, I could see adding some silk tulips in a pot on the other side of the table. It adds color and height to the table and pulls the whole look together.

Sources

  1. Tray- Crate and Barrel
  2. Tray- Pottery Barn
  3. Wooden Hearts- Sundance
  4. Red Tulips- Birch Lane


The Glamorous Table 

Glamour and small children don’t have to be mutually exclusive. This lacquered gray tray is a nice base for books. Then add a metal sculptural piece for interest. On the other side of the table you can balance the look with a gold metal bowl filled with faux pears or green apples. This adds color and a organic touch, which complements all the metallic finishes.

Sources

  1. Tray- West Elm
  2. Geometric Sculptures- Z Gallerie
  3. Gold Bowl- Z Gallerie


Coastal Inspired 


This blue tray has a woven rattan lined base which gives it a costal look. Pair it with a blue bone box which resembles shells and a coral inspired bowl and you have a classic pairing. I happen to like costal decor but some accessories like coral and shells can be a bit fragile for children, so by using a bowl that looks like coral (but is made of metal) you can have a coastal look with less worries. I would fill this bowl with apples, pears or lemons to add a bit of color to your table. Target and Home Goods both have a good section of realistic faux fruit and reasonable prices.

Sources

  1. Tray- Serena and Lily
  2. Blue Bone Box- Wisteria
  3. Silver Coral Bowl- Z Gallerie


Modern/Eclectic Mix

If you want a more modern look, then check out these sculptural looking succulents. The plants look realistic, but you don’t have to worry about anyone eating or picking at your plants. Add a lacquered tray for a little glamour. This tray also comes in an indigo blue or a turquoise so you could change the color to fit your decor. The geometric sculptures add a graphic interest to the table.

Sources

  1. Potted Succulents- Crate and Barrel
  2. Tray- West Elm
  3. Geometric Sculptures- Z Gallerie


Coffee tables are a wonderful place to add a little personality to a room. You can easily customize or curate a look that can make your table a focal point in your room. Pick a theme for the books or magazines you display like: travel, gardening, design, architecture or photography.  Then top those books with a box or sculptural item that matches that theme or brings out a color in your room. Finally, add a bowl of fruit, a potted plant or flowers to add height. It was fun it put together all of these different styles. So hopefully this inspires you to create a custom look of your own.

Chimichurri Beef Kebobs

While I have had some great meals in Chicago there are certain Houston specialties that I miss. I love latin American food and I miss Michael Cordua’s restaurants. If you are a Houstonian you know how great Amazon, Churrascos and Americas are and if you are visiting Houston one of these restaurants should definitely be on you list of places to visit. I have been a bit homesick for some South American beef, so I decided to grill and create my own. One of the keys to Cordua’s amazing food is his chimichurri sauce. This versatile sauce makes a great marinade, condiment and even a dip. I am still on the hunt for a grocery store in my area that sells plantain banana chips, because they are wonderful to eat with this sauce. This recipe got a “you definitely need to make this again” vote from my family which means its a good one to share. The kebabs are easy to make. The grill time is quick so it makes a good weeknight meal, but it is showy and delicious enough to share with friends.

Chimichurri Sauce

This recipe make a cup and a half of sauce which is enough to make the marinade and still have some left to make a side of herbed rice.

  • 1 Cup of Finely Chopped Parsley (which is about 1 bunch of parsley)
  • 2 TBSP of Finely Minced Garlic (which was 6 cloves of garlic)
  • 1/3 Cup of White Vinegar
  • 2/3 Cup  of Olive Oil
  • 1/2 Tsp of Kosher Salt
  • 1/8 tsp of Pepper

In a medium sized bowl mix all ingredients together. The sauce tastes best when it is allowed to sit in the fridge for a couple of hours to let all the flavors infuse in the oil. You will need one cup of this sauce to use as a marinade for the beef recipe below.

Chimichurri Beef Kebabs

  • 1 Pound of Steak Cut into 1 Inch Cubes (I used New York strip steaks since that was what looked best at the store. I purchased 2 pounds of meat which when I trimmed the fat left me with 1 pound of steak. You could use another cut of beef as well, but make sure it is a good quality beef because it’s the star of the dish)
  • 1 Sweet Yellow Onion cut into one inch chunks to thread between the beef
  • 1 Cup of Chimichurri Sauce (see recipe above)

Measure out one cup of the chimichurri sauce and put it in a large ziplock bag. Then put the steak cubes in the bag and seal it to marinate in the fridge. I marinated mine for about 5 hours but this is something you could do in the morning and then leave it to marinate in the fridge all day. If you are making it right before grilling I would make sure the beef marinates for at least an hour.

Once the beef has marinated prepare your skewers by alternately threading on the beef and onion wedges.

Grill the kebobs on medium high heat for 5 minutes each side. The beef will be medium with just a little pink in the center.

I served my beef kebobs with herbed rice and seasoned black beans.

Herbed Rice

I cooked 6 cups of Basmati rice according to the direction on the package and then I added and mixed in the remaining 1/2 cup of the chimichurri sauce and a pinch of salt.

Seasoned Black Beans

For another quick side, I took one (15oz) can of black beans and I mixed in 1/2 Tsp of cumin, 1/2 Tsp of garlic powder and 1/2 Tsp of kosher salt and I heated it for three minutes in a covered microwave safe dish.

So if you are looking for a new dish to serve try these South American beef kebabs for a taste of something just a little different and delicious.

Snowflakes

As a southern Texas girl snow is still very much a novelty to me. The handful of times it snowed at home it melted so quickly that I really didn’t see snowflakes. One of the first times it snowed after we moved to Chicago I watched a flake fall on my daughter’s dark hair and for the first time, I saw an actual six sided snowflake. The shape I had really only seen in Christmas ornaments and school crafts. Real snowflakes are beautiful, and it is amazing how their size and shape tell their story. The temperature and wind give each flake its shape and structure and no two snowflakes are the same.

It snowed this week and as I watched the snowflakes fall from my living room I thought about how life can shape you and your home.

The reason I never tire of reading about and seeing peoples’ homes is because I love a good story. I think the best designs are the ones that show who lives there. Their collections, how they live and who they love. I believe that there is no one right way to decorate a home. The only real mistake is being afraid to start or try something new. So as I blog and continue to show pictures of my home and of others, know that I don’t believe I have it all figured out. I just with age have gotten brave enough to share. My favorite spaces aren’t the glossy magazine photos, but tales of well lived in and loved homes. I have had fun recently viewing short videos of the personal homes of many famous designers on the blog Quintessence. So I thought I would share a link, because seeing these designers homes as they really are and hearing them talk about what they love is inspiring. It’s the quirky fun details that will have you laughing and remind you that the best homes are like snowflakes; they all have a unique story.

At Home with Susanna Salk on You Tube (If you haven’t watched any of these episodes yet beware they are so fun its hard just to watch one.)

Greek Lamb Burgers

Lamb Burger

My family and I have enjoyed the spring like weather we had before the snow and cold came again last night. The warmer Chicago temperatures had us wanting to grill. I like a good burger but sometimes I want something a little different. A few Sundays ago I was thinking about Mediterranean food. My husband suggested lamb burgers, so I began putting together some seasonings and ideas for creating a Greek lamb burger. The end result was too delicious not to share. I served ours with a simple tomato, cucumber and feta salad but it would also be great with some oven fries.

Greek Lamb Burgers- Serves 4

  • 1 Pound Ground Lamb
  • 1 Tsp Cumin
  • 1/2 Tsp Coriander
  • 1/2 Tsp Cinnamon
  • 1/2 Tsp dried Oregano
  • 3 TBSP Finely Minced Shallot
  • 1 Tsp Salt
  • 1/2 Tsp Pepper
  • 4 Good Quality Burger Buns ( I like using Potato or Brioche Rolls)
  • Butter lettuce leaves or your favorite lettuce
  • 4 Swiss Cheese Slices or your favorite (optional)
  • Tzatziki Mayonnaise (see Recipe Below)

Prepare your grill by preheating it on high heat. Next, mix the spices, shallot and ground lamb together in a medium sized bowl. Shape in to four burger patties. You can easily double the recipe if you are serving more. Grill for six minutes on the first side and five minutes on the second side for a medium done burger.

Toast your burger buns and then place a lettuce leaf on the bottom bun. Top that with a slice of cheese and then the burger. Then add a dollop of the Tzatziki Mayonnaise. The Tzatziki sauce really takes this burger to another level.

Tzatziki Mayonaise

  • 1/2 cup Mayonaise
  • 3 TBSP Sour Cream
  • 2 TBSP Chopped Fresh Dill
  • 1/4 Cup Finely Chopped Cucumber
  • 1/2 Tsp Garlic Powder
  • 1/4 Tsp Dried Oregano
  • 1 TBSP Lemon Juice
  • Salt and Pepper to Taste (about 1/8 tsp of both salt and pepper)

In a small mixing bowl mix together the mayonnaise, sour cream, cucumbers and all of the herbs and seasonings. Keep refrigerated until serving. This will make extra sauce, but any extra is also wonderful the next day on salmon. I made a pecan crusted salmon and served this sauce with it and it was a fantastic combination.

For a printer friendly version of my recipe for Lamb Burgers go to Tasty Kitchen where my recipe is featured on the site.

Rugs That Can Anchor A Room And Weather A Storm

Rugs can be the anchor of a room. They can help you ground or define a space. My old home had a very open floor plan, so some of the first things I purchased for that house were rugs. They helped me define seating areas, and in a house with hardwood floors they added some warmth. The picture above is my old living/family room. I loved the light and size of that room, but the long length made just one seating area feel too small to really fill the room. When I updated the room, I added two rugs to help unify the space while creating more intimate seating areas.

One thing I have learned over time is that if you have a pet or children (or both), your rugs need to be durable enough to withstand any spills and accidents that come your way. Rugs are generally a big investment so having to replace them the first time someone accidentally spills juice or wine on it is just crazy.  The grey rugs in our living room have lots of pattern to them which helps keep them from showing dirt or stains. About a month after we got the new rugs my oldest daughter, who was recovering from a stomach bug, spilled her red gatorade on the rug. When I saw the mess my heart sank a bit but the Spot Bot rug cleaner worked, and the pattern hid any further evidence of the spill. I am still working on our new home and I have been doing some research on some new durable rugs that look great and can be easily cleaned when disaster strikes. So I thought I would follow up on my post about decorating with kids and pets and share some of the great options I have found.

I was flipping through a Garnet Hill catalogue the other day when I saw these vinyl floor mats. I was so taken with the variety of colors and styles that I did a little research and found that they are made by Spicher and Company. The rugs are a printed on a non slip vinyl material so they can be used in high traffic areas. They are indoor/outdoor rugs so they can withstand water and spills. The reviews I have read online have all been five stars. Having a rug that can be cleaned so easily makes it perfect for kitchens, laundry room, porches and entry ways: places where a traditional rug might not work as well. I was so impressed with them that I ordered one from Rugs Direct. I should mention that I don’t have any kind of deal with this company. They just had a great selection of these rugs at a good price. So when I get my new rug in I will have to tell you all about it. The great thing is that each pattern comes in a wide variety of shapes and sizes. I have a set of double front doors so finding an entry way rug has been a challenge since, but I found one in an odd length. So, if you have a small or unusual sized space they might have an option that works for you.  Now without further ado, here are some of their great patterns.

Spicher and Company Pattern 9

I could see this classic black and white pattern in a kitchen or entry way.

Spicher and Company Pattern 62

They have such a variety that they even have some southwestern inspired rugs in multiple different colors.

Spicher and Company Pattern 5

They also have a large selection of mats inspired by vintage tiles. These floor mats remind me of the very popular and pretty cement tiles that I have seen in many kitchens and bathrooms. If you want to give your kitchen or bathroom an update without investing in all new flooring these mats can give you that feel and if you ever get tired of the look it can be easily changed.

Another Company I love is Dash and Albert. The owner and designer Annie Selke named her company after her dogs. She is such a dog lover that you can clearly see how that helped influence her company’s large line of pet friendly indoor/outdoor rugs. I have these rugs in several bedrooms in my home. They work well over carpet and I have put mine in the washing machine when it has gotten dirty and it cleaned so easily that I just love these rugs.

Dash and Albert Catamaran Stripe

Dash and Albert’s rugs come in a wide variety of colors and patterns. I really like their classic stripes.

Dash and Albert Catamaran Stripe

I also like their versitile diamond pattern which comes in a many colors. I have used the rug in a smaller size in my daughter’s bedroom, but I have also seen this rug used in a large mid-century modern living room. Annie Selke’s home was featured in  House Beautiful. In the link you can see how she used it in a modern spring green. I have also seen the rug used in brown in a formal dining room done by designer Mary McDonald (see link from Bing) and I loved how she used it to add texture and pattern to a sophisticated and traditional room.

Dash and Albert Diamond

I have also purchased outdoor rugs from Ballard Designs. I used one under my breakfast room table at my old home. It is very durable. It takes spills like a champ and is easy to clean. I love the colors in the rug so much that it is now in our new den/playroom.

Here are some other options from Ballard Designs.

Ballard Designs Marina Rug

Or for a more modern feel here is a black and white stripe.

Ballard Designs Savile Stripe

Sometimes it’s nice to get the feel and texture of a wool carpet. Outdoor rugs are great, but I will admit that they don’t have that soft feeling on your feet like a wool carpet does. I have liked the gray rugs I have in my living room pictured at the top of this post. They have a great texture and they just feel good if you are walking barefoot in the house. They came from Pottery Barn and I think the key to finding a durable wool rug is to get one with dark colors or with enough pattern to keep any stains from showing. I was looking at Pottery Barn’s selection and I really liked this Braylin pattern. I could see it working well in a dining room or living room. The dark navy color and the pretty pattern makes it a durable and stylish choice.

Pottery Barn Braylin Wool Rug

My girls and especially my dog have put our rugs to the test. I have definitely had a moment when I questioned the compatibly of rugs and dogs. When I discovered our dog had ruined the hardwood floor below her favorite spot on our dining room rug I was ready to just give up on rugs. However, I have come to the conclusion that with some better research and a good quality rug pad with a seperate plastic lining, dogs and rugs can coexist. Rugs do so much to enhance and define your space that its worth taking the time to find the right option that can anchor your room without succumbing the inevitable waves, splashes and spills that life brings.

Chicken and Cornbread Salad

Have you ever suffered from what I call salad regret? It happens to me sometimes when I am out to eat and thinking that a salad might be good. Then one of two things happens:  either I order a salad and what everyone everyone else is having suddenly looks so much better or I like the salad and then an hour or two later I am hungry all over again and thinking “why did I order that salad?” I actually love salads and I serve them as a side dish all the time, but in order for me to love a salad as a main dish it has to be on the heartier side.

This cornbread salad is a great main dish meal that I promise will not leave you with a case of salad regret. Years ago my mom mentioned  a recipe she had seen that had cornbread and leftover Thanksgiving turkey in it. I liked the idea and so I decided to try it with roasted chicken. So since I have just shared my favorite roasted chicken with you I thought I would also share this great salad. When I roast chicken I like to cook extra chicken breasts and then use them in other dishes the following nights. If things are busy then you can also pick up a rotisserie chicken. I happen to love honey mustard salad dressing and I was recently working on a new recipe for it so I decided try it with this salad. It was a great pairing. I like how the honey mustard complements the flavors of the chicken and cornbread without overpowering it, but I have also served it with ranch salad dressing in case you are not a mustard fan.

Salad Ingredients:

  • 1 head of romaine lettuce chopped into bite size pieces
  • 2 cups tomatoes chopped (approximately 3 smaller vine or plum tomatoes)
  • 1/3 cup chopped red onion
  • 2 cups of cucumber chopped (approximately 1 medium sized cucumber)
  • 1 cup shredded cheddar cheese
  • 1 can of pinto beans (15 oz) drained and rinsed
  • 2 cups chopped chicken (approximately 2 chicken breasts)
  • 4 cornbread muffins or 4 cups of corn bread cut into bite size chunks ( I usually make 1 box of Jiffy cornbread mix which makes 6 muffins but use your favorite cornbread or get some pre-made from the bakery)

In a large bowl toss together the salad ingredients. You can use either warm or cold chopped chicken. It tastes great both ways, but if your chicken is warm wait to add it till the end so it doesn’t wilt your salad.

Amy’s Honey Dijon Salad Dressing:

  • 2 TBSP Dijon Mustard (I like using Grey Poupon)
  • 2 TBSP Honey
  • 3 TBSP White Wine Vinegar
  • 1/4 Tsp Salt
  • 1/8 Tsp Pepper
  • 1/2 Cup Canola Oil

In a small mixing bowl whisk together the dijon mustard, honey, vinegar, salt and pepper. Then slowly drizzle in the canola oil while you are whisking and continue to whisk the dressing at a fast speed until the dressing comes together and the oil is fully incorporated.

Contact Us