It Isn’t Easy Being Green

It’s not easy being green

Having to spend each day the color of the leaves…

It seems you blend in with so many ordinary things

And people tend to pass you over cause you’re not standing out like flashy sparkles in the water or stars in the sky …

[but] its beautiful and I think it’s what I want to be.

Kermit the Frog

So Kermit the Frog wasn’t singing about vegetables, but let’s face it certain vegetables can get a bad reputation at the dinner table because they are green. As a mom and cook I try to serve well-balanced meals for dinner and usually that means I am going to serve one green vegetable. I want my girls to grow up eating and developing a taste for vegetables, but some nights I am more successful than others. When it comes to vegetable sides one of my absolute all time favorites is roasted asparagus. Pair it with parmesan cheese and you have a delicious green vegetable that will keep your family from singing the blues.

Roasted Aspragus

  • 1 Bunch of Asparagus (for this recipe I use the asparagus with thinner stalks)
  • 2 Tablespoons of Chopped Shallot or If I Don’t Have a Shallot Then I Use 1/4 Teaspoon of Garlic Powder
  • 2 Tablespoons of Olive Oil
  • 1/2 Teaspoon of Kosher Salt
  • 1/8 Teaspoon Ground Pepper
  • 2 Tablespoons Grated Parmigiano Reggiano Cheese (Go with a better cheese here because it will make a big difference)

Preheat your oven to 400 degrees

First, rinse and dry your asparagus. Then cut it into thirds discarding the bottom third because it isn’t as tender and delicious to eat.

Next place the top two thirds of asparagus in a bowl and drizzle in the olive oil and mix in the shallots, salt and pepper.

Then place the asparagus on a baking sheet. I like to line my pan with aluminum foil to make clean up easier.

Roast the asparagus for 8 minutes then take the pan out and sprinkle on the Parmesan Cheese. Put the pan back in the oven for an additional two minutes till the cheese is melted and crispy.

I love this dish because its easy to make and asparagus’ light flavor pairs well with many dishes. Green asparagus is as Kermit would say a “beautiful thing.”

Years ago before we moved here, my husband and I went on a trip to Chicago. We saw an amazing exhibit at the Science and Industry Museum about Jim Henson and his Muppets. Here is one of the Kermit puppets up close. Being a kid from the eighties who grew up on Sesame Street and the Muppet movies I just loved getting to see Kermit in person.


Pattern Play With Pillows From Etsy

I can spend hours mulling over fabrics. The colors and patterns can make a room. If there is one place in the budget for a room where I am likely to splurge, it is fabric. Sometimes it doesn’t take a much of a great pattern to completely change the feel of a room. Pillows are a great way to add a designer fabric because it doesn’t take many of them to make an impact. Etsy is a great resource for pillows and fabrics. I don’t have any deals with Etsy. I have just been impressed with the quality of some of the pillows I have ordered recently. You can get custom to the trade fabric pillows for often less than it costs to buy a yard of the fabric and sometimes they have fabric that you cannot get unless you are trade. I was researching some fabrics for another project and I decided to have a bit of fun putting together some looks that would transform any room.

The first pillow is a fabric called Bowood. It is a classic chintz pattern by Colfax and Fowler. The pattern was originally discovered by John Fowler when he was working  to restore the Bowood Estate in Wiltshire, England. If you want to read a bit more about this fabric and the beautiful English estate, Joni Webb of Cote de Texas has a great piece about the history of the Bowood. Chintz is definitely back and this classic pattern is a designer favorite. Its green and gray colors and the smaller three flower bouquets make this fabric something that can even work in a slightly more modern room. I have paired it with another classic pattern Les Touché by Brunschwig Et Fil. The finishing touch is a gray linen pillow by Suzanne Kasler which picks up the gray details in the roses. If you wanted a touch more color I could also see this working well with Kasler’s lavender linen. If you like the look then here links to the sources for these pillows:

  1. Bowood Pillow- Accent Marks
  2. Brunswick Et Fil Pillow- The Pillow Studio
  3. Gray Linen Pillow- Ballard Designs

Celerie Kemble has impeccable taste. There isn’t a project of hers that I haven’t loved. Her fabric line with Schumacher is amazing. This first pillow is a pattern called Hot House Flowers. The brilliant colors in this one fabric could inspire an entire room. The second pillow is the one that started this whole blog post. I was looking at this woven navy pattern also by Kimble called Betwixt and I just love it. This small scale graphic pattern comes in many other very pretty color ways. It’s a popular accent pillow that shows up in many designers’ homes. The final pillow for this mix is a larger graphic orange called Bleecker Spark which picks up the orange from the floral pattern and plays with the cross pattern on a slightly larger scale. You can find the links to these gorgeous pillows below.

  1. Hot House Flowers Pillow- Lily on the Blue
  2. Navy Betwixt Pillow- Sew Susie Design
  3. Bleecker Spark Pillow- Pop O Color

Blue and white is a classic color combination, but the mix of pattern and textures gives these pillows a well traveled look. The paisley block pattern and the stripes coordinate without feeling too forced or like a matched set. The striped lumbar pillow is a pattern called Tangiers by John Robshaw the Esty shop that carries it makes it in a variety of sizes. Sometimes I like to use a large lumbar pillow in the center of a sofa to break up the pillows sizes a bit. The paisley print is by designer Petter Dunham. This look makes me think of summer, but its classic enough to look good all year round. Here are the sources:

  1. Blue Grain Sack Pillow – Linen and Oak
  2. Tangiers Lumbar Pillow- Spark Modern
  3. Blue Paisley- The Pillow Studio


The pillow in the middle of this set is what inspired me with this look. The vine pattern is by John Robshaw. Robshaw is an artist who traveled to India to study indigodye for his painting. While traveling he fell in love with the tradition of Indian fabric and printing. This love of printed fabric and his travels inspired him to create a textile company. This vine pattern comes in several different color ways including a two toned blue and a yellow and gray. I like the rust color here so I decided to pick some coordinating pillows that would complement that color, but you could also go with blue and it would still look stunning.

  1. Terracotta Medallion Pillow- Indigo Bliss Boutique
  2. Prasana American Beauty Pillow- 3B Mod Living
  3.  Kashmir Red and Tea stained Linen-Accent Marks

This pillow collection takes its inspiration from the rich colors of a Persian Rug. The print in the center of this grouping is by Eric Cohler and his fabric line for Lee Jofa. The inky black background with the reds, golds and a touch of aqua make this an eye-catching and sophisticated pattern for a room. This is a bold pattern so I didn’t want it to compete with another fabric so I think it would work with a textured neutral accent pillow. Two options to pair it with might include this first pillow Celerie Kimble’s Betwixt in Biscuit Brown or a textured camel leopard print

  1. Betwixt in Biscuit Brown- Accent Marks
  2. Persian Tribal Print Pillow- Accent Marks
  3. Camel Animal Print-Accent Marks

At first glance you might think that three busy patterns would be too much in a room, but because the prints are all small scale and linked together by color and style they work. The Indian block pattern in the center has the colors of all three fabrics in it. This center pillow works by setting the theme and then the coordinating fabrics take a bit of the colors from this center pillow and have there own variation of that theme. Several small scale prints can work together to create a very coherent and layered look. One small pattern might get lost in a room but together they make a statement.

  1. Green Anya Paisley- 3B Mod Living
  2. Kashmir Green Moroccan Print Pillow- Shop Block Print
  3. Busun Aqua Green Pillow- Pillow Time Girls

Hopefully these pillows and patterns have inspired you. Whether you love to look at fabrics and discover new ones like me or whether you feel a bit lost trying to put together a custom look, either way the fabrics and sources here would be a great starting point for a new design or just a seasonal refresh for your sofa.

Blueberry Waffles

One summer back in the early nineties my sister and I got into making Belgian waffles. After early morning swim practice we would come home a make ourselves a batch for breakfast. My mom had a collection of the Cooking Light cookbooks and one of those books had these waffles on the cover. I liked the basic recipe so much that it is still my favorite waffle. My girls love to make waffles like my sister and I, so sometimes as a treat when my husband is out of town we will have Belgian waffles for dinner. One night I had some blueberries in the fridge and I decided that I wanted to make a blueberry syrup. I have worked on the syrup recipe to get it where the flavor is bright with a little citrus and spice. I thought I would share this recipe because it would be a great dish for a mother’s day breakfast or if you are like us for a girls night in.

Blueberry Syrup

  • 1 rounded or generous cup of blueberries plus an additional 1/2 cup of blueberries to add to the syrup at the end
  • 1/4 cup of granulated sugar
  • 1 Tbsp of lemon juice
  • 1/2 tsp ground cinnamon
  • 1 tsp of grated lemon zest
  • 1/2 cup maple syrup
  • lemon slices for garnish

In a small sauce pan heat 1 cup of the blueberries and 1/4 cup sugar, 1 Tbsp lemon juice and 1/2 Tsp cinnamon on medium heat. The berries will begin to break down and the sugar will melt. Keep an eye on the mixture and stir it to help break down the berries and keep it from burning the bottom.

You want to cook the mixture for about 12 minutes until it forms a thick jam that will allow you to draw a line in it using a spatula.

Then turn the heat down to low and stir in the lemon zest, maple syrup and the remaining 1/2 cup of blueberries. Keep the syrup warm until you are ready to serve it on your waffles.

Belgian Waffles

  • 2 Cups Flour
  • 1 Tbsp Plus 1 Tsp Baking Powder
  • 1 Tbsp Sugar
  • 1/2 Tsp Salt
  • 2 Eggs Beaten
  • 1  1/2 Cup Milk
  • 1/4 Cup Butter Melted

Plug in your Belgian waffle maker and let it heat up while you are mixing up the waffle batter.

Then in a medium size mixing bowl mix together the flour, baking powder, sugar, and salt. Next add the wet ingredients including the eggs, milk and melted butter. Mix well until most of the lumps are gone.

Then when the waffle iron is hot add the batter. My waffle iron takes 1/2 cup of batter per each individual waffle.


Since waffle irons can vary you may need to adjust the amount of batter. Then I close the lid and set my waffle iron to the number 5 setting which is about a 4 1/2 minute time setting. You will know the waffles are done when you see less steam coming out of the waffle iron and the top looks golden brown. This recipe makes 6 to 7 waffles depending on the size of your waffle maker.

Top the waffles you are serving with the blueberry syrup and a thin slice of twisted lemon.

A tip I learned from Alton Brown is that extra waffles can be saved and quickly reheated in your waffle iron. It works even better than the toaster.

[the_ad id=”1338″]

The Joy of Spring

“Look deep into nature and you will understand everything better.”

Albert Einstein

Over the past two weeks the cold and brown landscape has begun to change here in Chicago and suddenly everywhere you look there is Spring. The bulbs and trees have awoken from their winter slumber and their gorgeous blooms are everywhere.  Their vibrant colors, their fragrance, their delicate petals: words fail to accurately describe their beauty. When I stop and really look and take it all in I feel the corners of my mouth begin to rise. I cannot help but smile. The blue sky and the crisp spring air wash over me and suddenly I have a peace and a deeper appreciation of God’s beauty and love. Einstein was right there is a new sense of clarity and in the moment thinking that happen when you stop and look deeply into the beauty of nature. Inspired by all of the blooms I have been out photographing all the flowers around me, so here are a few of my favorites snapshots of spring.

The daffodils in our yard this spring.

This year I was able to get daffodil bulbs from the Morton Arboretum bulb sale and I loved watching the bulbs bloom this spring. I look forward to adding a few more bulbs this fall.

The daffodils in bloom at the Chicago Botanical Gardens.

In her book At Home Sara Style, Designer Sara Richardson says she was so inspired by the daffodils at her country home that it influenced the design of her guest room. The previous owner’s late wife had loved the property and spent years planting all of these fields of daffodils. Richardson said that she hadn’t initially thought about using yellow, but the flowers inspired her choices for this light and bright guest room. Here is a link so you can see her home at Starlight Farm. Love homes inspired by nature here is another link to Richardson’s sunny yellow kitchen from her previous country home and orchard called Paisley Acres.

Pink bleeding heart flowers from our garden

The shape of these bleeding heart flowers is beautiful. I love how these blooms cascade down and hang like little pink garden lanterns.

Pink and yellow tulips and periwinkle muscari blooms at the Chicago Botanical Gardens

I love the blended colors with the fuchsia, yellow and periwinkle blooms.

A beautiful garden I saw while taking a walk in my neighborhood.

This home in my neighborhood as a very pretty English inspired garden. The boxwood lined flowerbed and the white tulips with the urn of blue hydrangeas is gorgeous.

Another lovely garden in my neighborhood with a boxwood border and bed of red tulips.

I like how this home had pansies mixed in with the tulips. If you love tulips like me you should see Serena and Lily’s new bedding inspired by a field of tulips. Here is a link to their Cortina Quilt.

Violas at Morton Arboretum

The vibrant purple violas against the bright chartreuse lettuce is pretty contrast.

Finally beautiful planter from a home in my area that looks like a spring basket overflowing with pink hydrangeas, purple pansies and ivy.

May nature and the beauty of spring inspire you to get outside, feel the sun, hear the birds and take time to ponder the glorious details. The great wisdom, perspective and joy that nature brings is such a gift.

Black Bean Soup

Black Bean Soup Recipe

When it comes to cooking five years ago I felt guilty “just adding water.” Now I want to bang the food against the counter and have a five course meal pop out. If it comes with plastic silverware and a plate that self destructs all the better.

Erma Bombeck

Even if you like to cook, let’s face it there are nights when cooking a big or fancy meal is just not in the cards. I have always been a planner when it comes to weekly meals. I like to cook, but I must confess that I don’t always love to grocery shop. So I make one big run for the week, but I have found that the key to my plan is to be realistic about what I am actually going to cook each night. If I know it’s a busy day or if I am cooking on Friday after a long week, then I need to plan something a little easier. An ambitious plan on Monday doesn’t always sound as good when you are trying to get out the door to choir practice on Wednesday.

Over the years I have planned and made countless dinners. There are some recipes that were once a favorite years ago and now for whatever reason I don’t like as much so they have fallen out of the mix, but there are a few recipes that I can say have been so good that I have been regularly making them for the last fifteen years. Although this recipe for black bean soup has changed some over time, I have been making this soup for years. It has remained an all time favorite, because it a great weeknight meal. This quick and flavorful soup has gotten me through many a crazy evening. Serve it with some quesadillas and guacamole and you have dinner in fifteen minutes. Now this soup may not come with a self destructing bowl, but the taste you get for such a quick and healthy meal is wonderful. Let’s face it we all need a few of these simple recipes to make it through the weekly dinner rush.

Black Bean Soup – Serves four as a main course and six as a side

  • 3 (15.5 oz) cans of black beans
  • 2 Tbsp of tomatillo salsa
  • 1 Tsp ground cumin
  • 1/4 Tsp coriander
  • 1/4 Tsp garlic powder
  • 1/2 Tsp kosher salt
  • 1/4 cup sour cream (plus extra for garnish on top)
  • Grated Monterey jack cheese or cheddar for the top of the soup
  • Fresh Avocado Salsa or Mango Salsa for garnish on top

Place two undrained cans (entire can) of the black beans in a large sauce pot and heat over medium heat. Meanwhile take the third undrained can and put it in a food processor or blender and blend it until thick with some chunks of beans still left.

Pour the pureed beans into the sauce pot and stir. Next add in the salsa, cumin coriander, garlic powder and salt. Then turn the heat down to low and whisk in 1/4 cup of sour cream.

Top the soup with cheese, a dollop of sour cream and chopped green onions or cilantro. If you are feeling fancy or have a little time add some fresh mango salsa on top as well.

Show-Stopping Side Chairs

I wrote a piece about my living room so I thought I would follow that with a post about one of my favorite classic design elements: bold accent chairs. It’s a fundamental that can be personalized and adapted to fit any style.

Accent chairs usually play a supporting role in a living room, but some of my favorite designers have created amazing rooms with a very memorable side chair. They offer a great way to add a little color and pattern in a room. A couch covered in a bright fabric or bold pattern might be too much to commit to or less flexible long term. However, a chair could add just the right touch, and its smaller scale means it takes less fabric to make a statement.

Accent chairs come in a variety of sizes and styles from wingback chairs, slipper chairs, club chairs, and side chairs.  If you look at many major furniture companies like Pottery Barn, Crate and Barrel, or Restoration Hardware, just to name a few, you will notice that they often don’t offer a lot of fabric options for these chairs beyond neutral solids or leather.  Accent chairs often complement the rugs, draperies and throw pillows which tend to get all the exciting patterns and attention. An accent chair may take up less real estate in a room, but that doesn’t mean it can’t steal the show. A great accent chair can give your room a truly unique and designer look.

One way to strike the right balance in a room is to use a bold fabric on a traditional chair.   A classic wing chair can look great cover it in a graphic pattern. One of my favorite designers Tobi Fairley decorated her living room in a green and white color scheme. The traditional design elements become exciting because of the green trellis fabric she chose for her chairs. The room just wouldn’t be the same without them. See this link below to Fairley’s blog where she shows off her room design.

Designer Tobi Fairley

Another great example is from Designer Tommy Smythe’s living room were he has a set of scene stealing wing chairs. Covered in a classic Brunschwig et Fils fabric called “Les Touches.” Apartment Therapy featured a tour of his home including these great chairs.

Image Via Apartment Therapy Designer Tommy Smythe

If graphic patterns are not your style or if you have a bold pattern somewhere else, you could use a bright colored chair to create interest. Designer Barclay Butera designed a gorgeous California living room which is featured on the Home Bunch blog. In this room Butera uses a bold blue and white pattern on his drapes and pillows so to add interest without making the room feel too busy he adds this brilliant orange side chair. I love how the busier patterns in the drapes and pillows are balanced and complemented by the tangerine colored chair. See the link below to take a tour of the whole room.

Image via Home Bunch Blog Designer Barclay Butera

A talented master of the accent chair is designer Suellen Gregory. If you look at her gorgeous portfolio and blog  you will see time and time again she uses side chairs to add a punch of color or pattern to a room.  Gregory has a traditional decorating style, but often use uses accent chairs to make a statement and add a little whimsy. Veranda Magazine featured a home where she used a pop of pink to give a classic and formal chair a more modern feel. Click on the link below to see the article.

Veranda Designer Suellen Gregory

When decorating my own home I really like the look of using a a bold graphic pattern, but I didn’t want to pay for yards and yards of fabric to make custom draperies and I wanted a bigger statement then just using the pattern on an accent pillow.  So when I was reworking my living room I recovered an armchair that had belonged to my grandmother in a navy ikat fabric from Kasmir.  I have a simple navy and gray color scheme in my living room so this accent chair adds a little pattern and interest. It gave the room a more custom look.

If you love this look too, you can incorporate it in your home by reupholstering an existing chair or I have also found some great chairs at estate sales. Buying a vintage chair can help keep the total cost of reupholstering down.

One Kings Lane Here are a pair of vintage Martha Washington chairs recovered in Barclay Butera’s Assante Fabric from Kravet. The color of the fabric shown is ink but it also comes in a beautiful chocolate brown.

However, if getting a chair recovered is more than you want to take on there are lots of great choices online. Companies like Ballard Designs have lots of fabric options and will let you send in your own fabric. They will even cover a chair in more than one fabric or add custom trim.

Ballard Designs
Get a similar look to Tommy Smythe’s wing chairs with this Nelson Wing Chair from Ballard Designs or cover the Thurston Armchair in a green trellis fabric like Tobi Fairley.
Ballard Designs Thurston Chair

I even found a chair like Barclay Butera’s armchair at Cost Plus World Market who is now offering more upholstery options.

Cost Plus World Market Stellan Chair in Saffron

Want a classic piece like Suellen Gregory’s pink chair? Another option is a store like Wisteria which sells classic French reproductions with lots of upholstery options.

Wisteria.com

So add a custom look or a little bit of fun with a chair. Do you have a favorite chair or a wonderful place to find one? I’d love to hear.

Cinnamon Chocolate Cake The Cure For No Good Very Bad Days

Cinnamon Chocolate Cake Recipe

Last Thursday was just one of those days. Thankfully it wasn’t an awful day. It was one where nothing went quite to plan and no matter what I did I couldn’t fix everything. I was reminded of that classic children’s book, Alexander And The No Good Very Bad Day.  It all started when the girls and I went out to play, there it was in the middle of the yard, the dead squirrel. The dog and my girls were circling the squirrel. My oldest daughter is an animal lover, who was instantly in tears concerned about the sick squirrel. She is four so explaining squirrel heaven and what mommy was doing suiting up with garden gloves and plastic bags was difficult. No matter how I explained it, there were all kinds of questions about how the squirrel was doing in the garage and when he was getting better.

Then in the middle of the squirrel crisis my youngest’s balloon, her current favorite, managed to fly right out the door. I turned around just in time to see the green balloon fly higher and higher until it was out of sight. My two year old had a plan. She knew that if only we could get ropes we could rescue her balloon. There were tears and a sad talk about the balloon taking an adventure and being gone.

The day had been busy because we were getting ready for my sister and brother-in-law’s visit the next day.  The girls and I had baked a cake. It was sitting out to cool and I was cleaning in another room. When I walk back in the kitchen there is the chocolate cake with one handful missing. I looked at my girls and the little one blurted out that her sister did it. I knew it was my oldest because she adores chocolate and she was the one who had chocolate on her fingers. I was a little tired and now I was going to have to bake a second cake. There is a part of me that wanted to be mad, but sometimes you just have to take a minute and laugh. It was definitely one of those days and my oldest daughter just couldn’t help herself. She loves chocolate and this cake is so good that it’s worth making a second. So I stopped cleaning and we made another cake.

A week later there are still lingering questions about the fate of squirrel and the balloon in our house, but I think my girls understood the lesson about chocolate cake. I have learned that in life attitude is everything. Sometimes even when you can’t make it all better, a little chocolate and a good laugh go a long way.

This cake is an absolute favorite sure to brighten any bad day from Rebecca Rather and her cookbook The Pastry Queen.

Cinnamon Chocolate Cake

  • 1 cup (2 sticks) of butter
  • 1/2 cup unsweetened cocoa powder
  • 3/4 cup water
  • 2 cups sugar
  • 2 large eggs
  • 1 cup buttermilk (or if you don’t happen to have buttermilk add 1 tsp of white vinegar to the milk and stir)
  • 2 Tsp vanilla extract
  • 2 cups of all purpose flour
  • 1 tsp baking soda
  • 1 1/2 tsp ground cinnamon
  • 1/4 tsp salt

Chocolate Ganache Glaze

  • 1/2 cup (1 stick butter)
  • 1/4 cup milk, warmed
  • 1/2 cup cocoa powder
  • 2 cups of sifted powdered sugar
  • 1 tsp vanilla extract
  • 1/4 tsp salt

Preheat your oven to 350 degrees

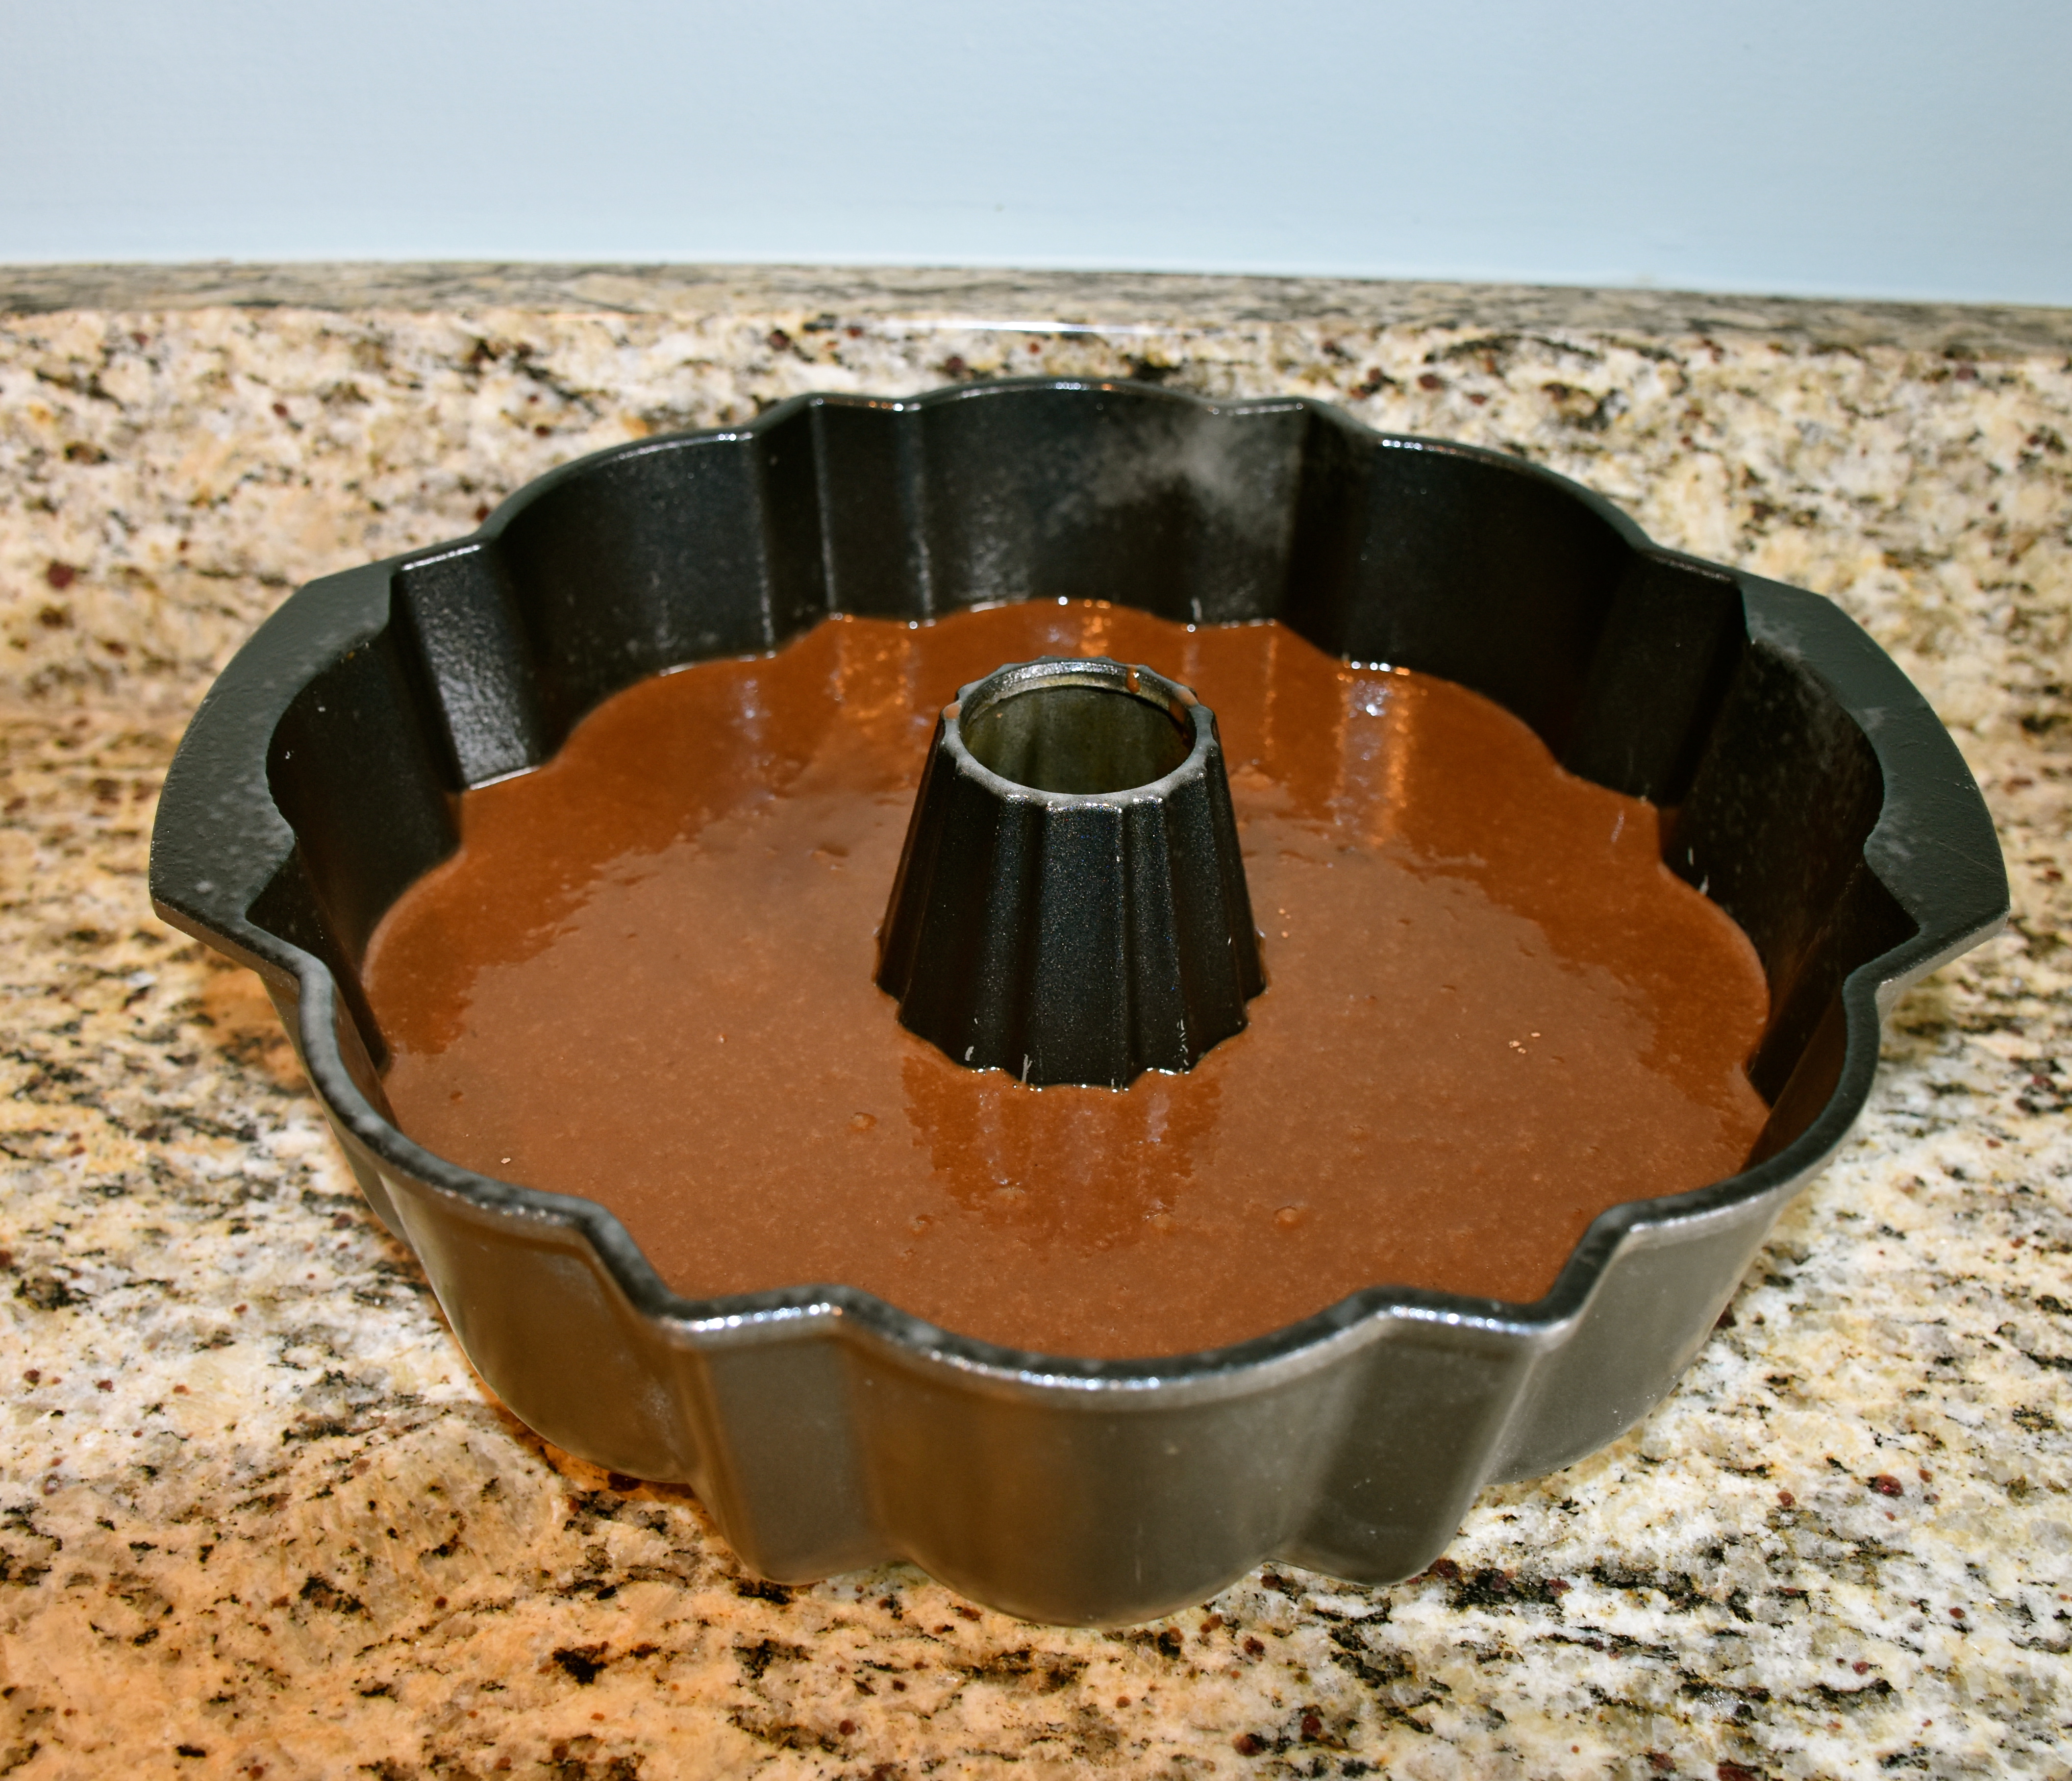
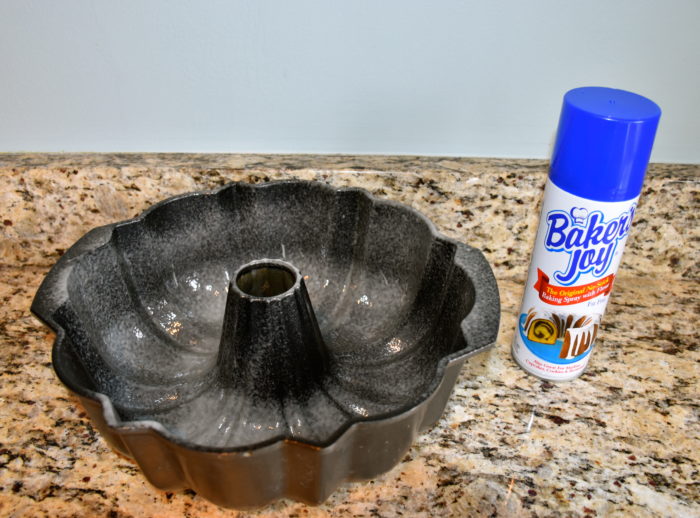
Then grease a 10 to 12 cup Bundt pan with Baker’s Joy. You can find it next to the other cooking sprays in the grocery store. It is absolutely the best for bunt cakes since it greases all of the small bends in the pan better an anything else. There is nothing worse than making a cake and then when you go to turn it out having part of it still stuck to the pan.

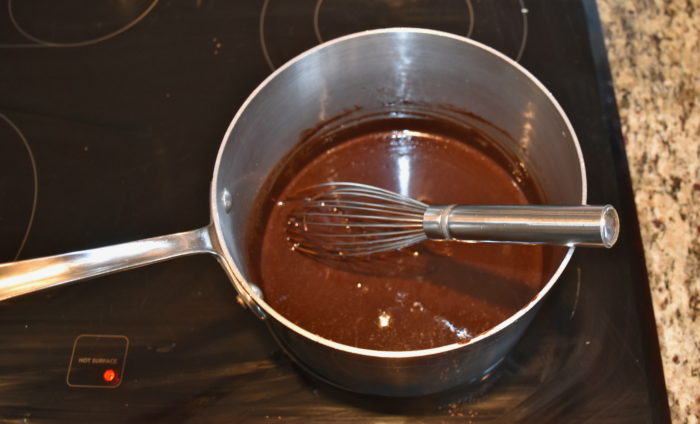
Next in a saucepan melt the butter over medium low heat. Then add your water and the cocoa powder and whisk until it is smooth. Then remove the pan from the heat because you don’t want it to boil. Next whisk in the water until smooth. Then add 2 cups of sugar and continue to whisk until it is smooth and fully incorperated.

Next pour the chocolate mixture into the bowl of your mixer. Then add all at once the eggs, buttermilk and vanilla. (this keeps the eggs from getting to hot and causing an issue). Add the flour, baking soda, cinnamon, and salt and mix until the dry ingredients are fully incorporated. Then pour the batter in your greased pan.

Bake for 40 to 45 minutes. You will see that the sides of the cake will pull slightly away from the pan and the cake will be firm with springy touch. Allow the cake to cool in the pan for 20 minutes then turn it out on a large plate.

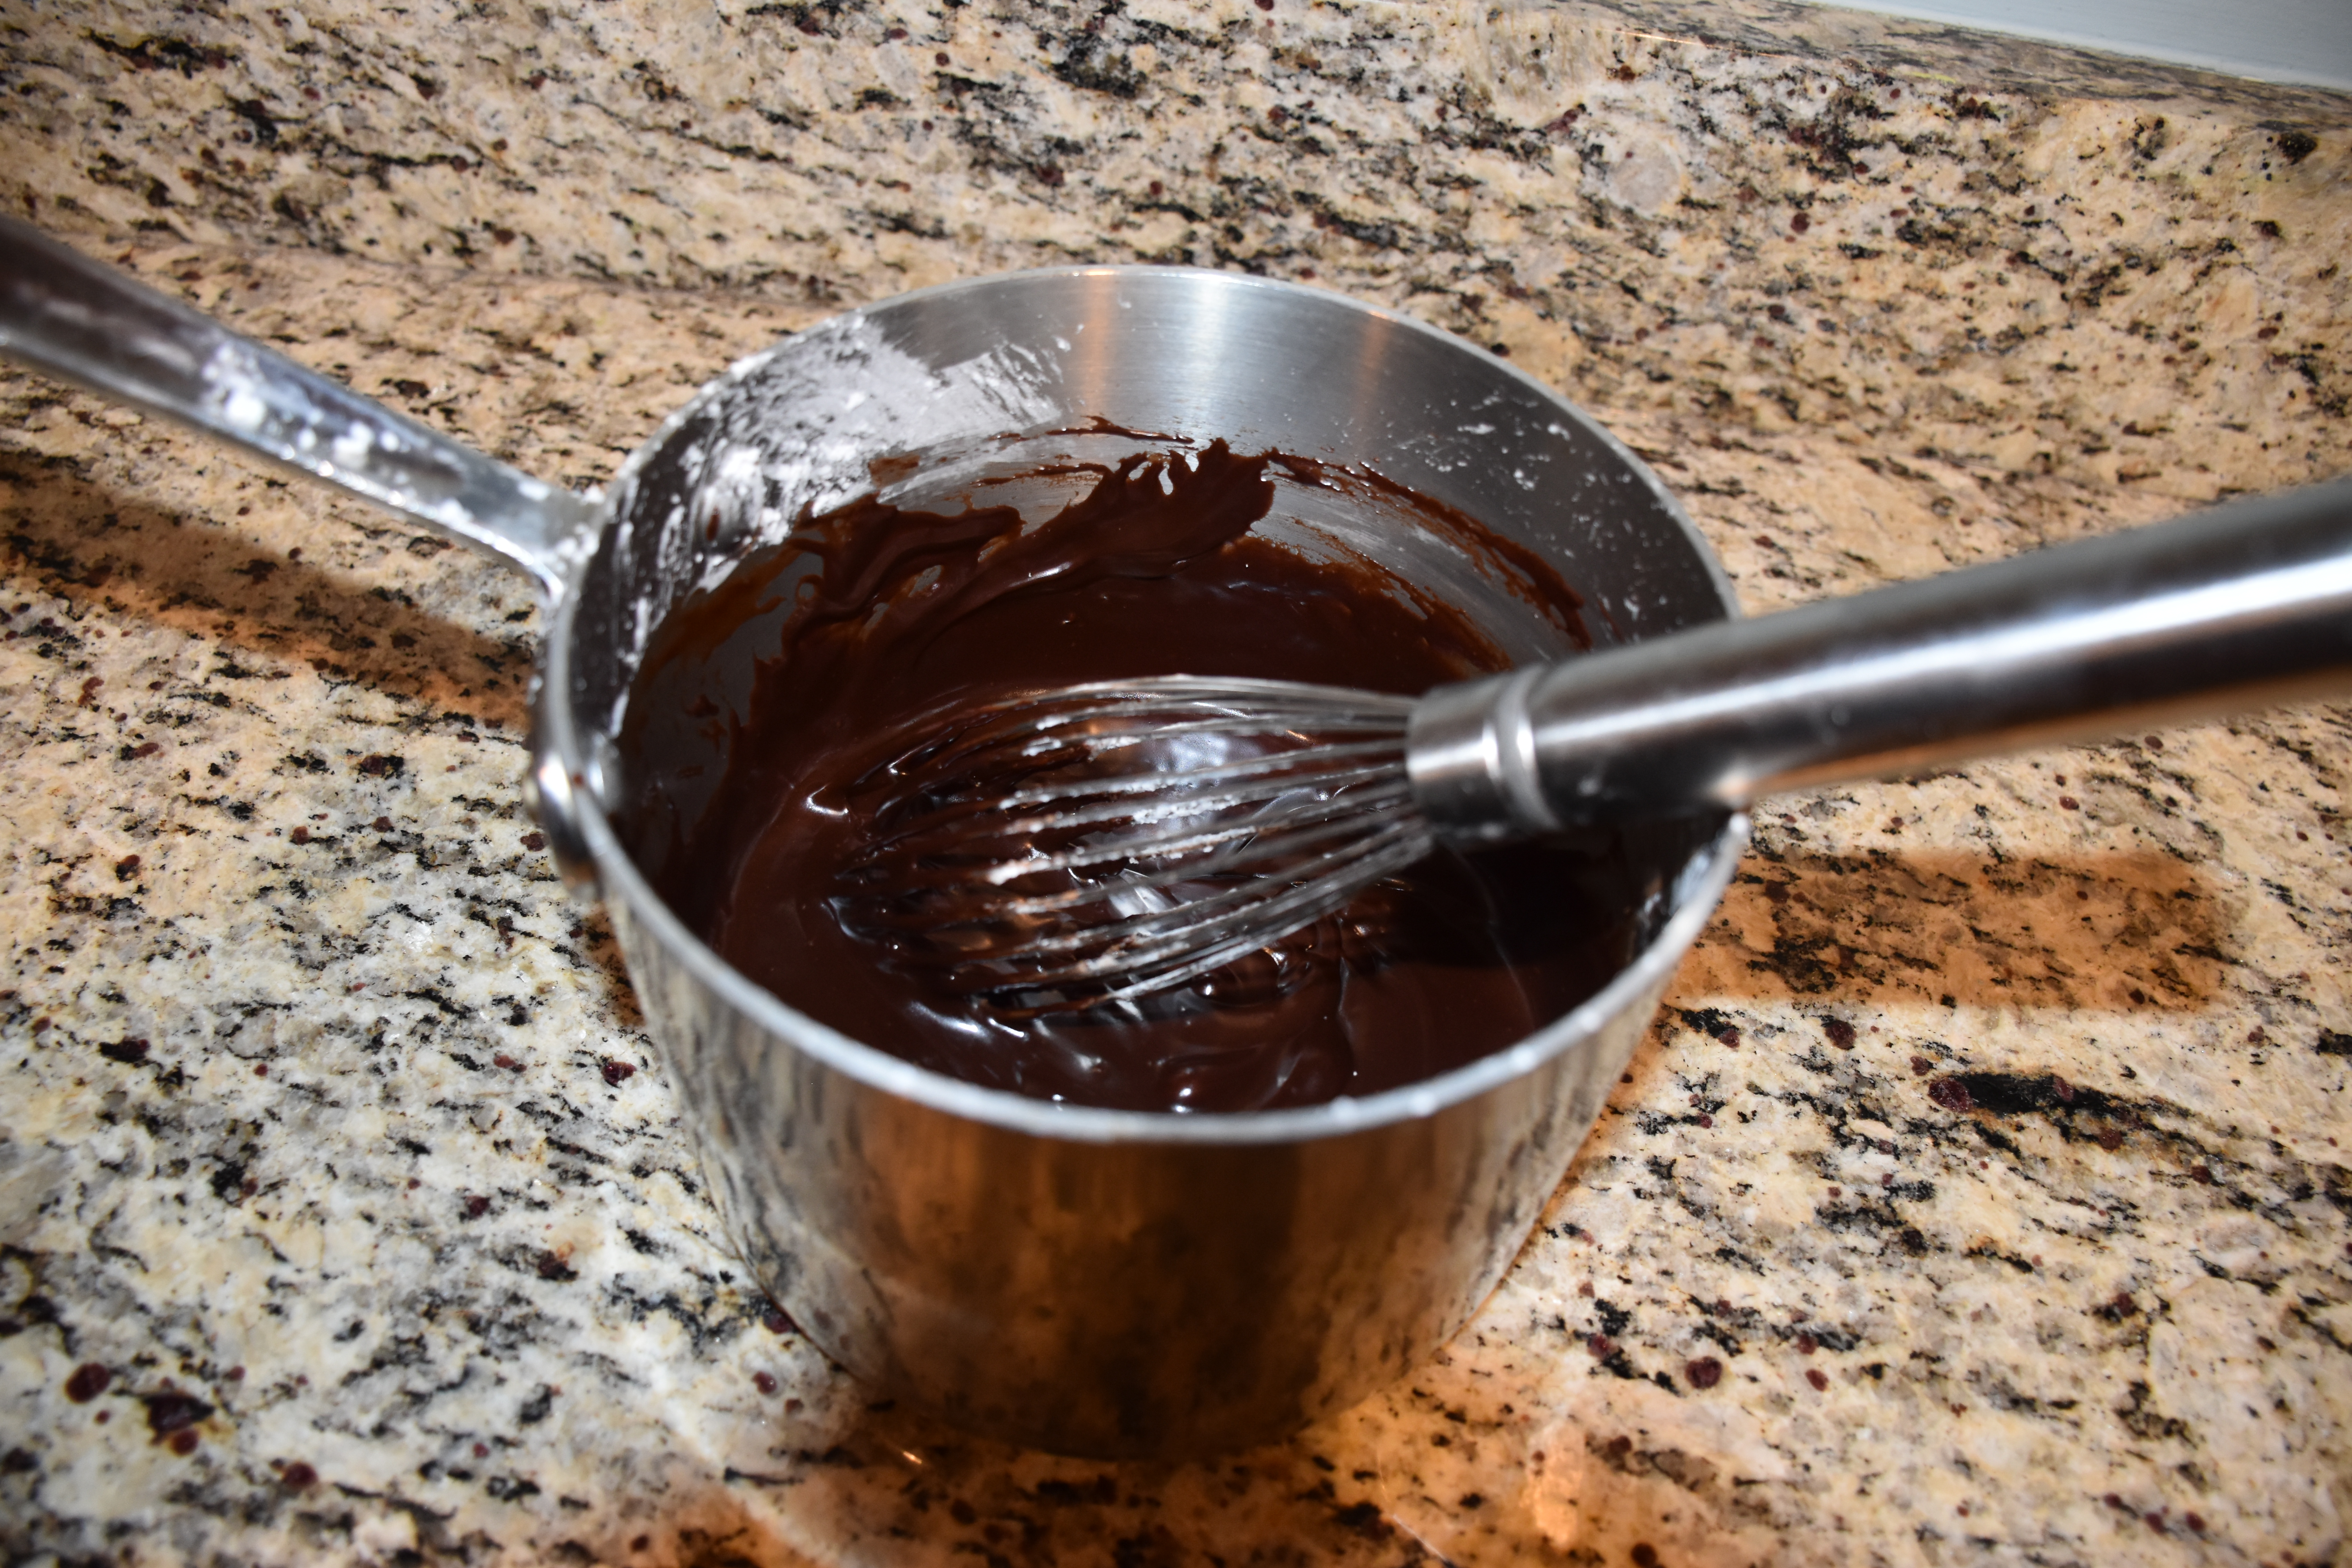
To make the chocolate ganache melt the butter in a saucepan over medium low heat. Add milk, cocoa powder and powdered sugar and whisk. Remove the pan from the heat then whisk in the vanilla and salt. The chocolate should look smooth and glossy.

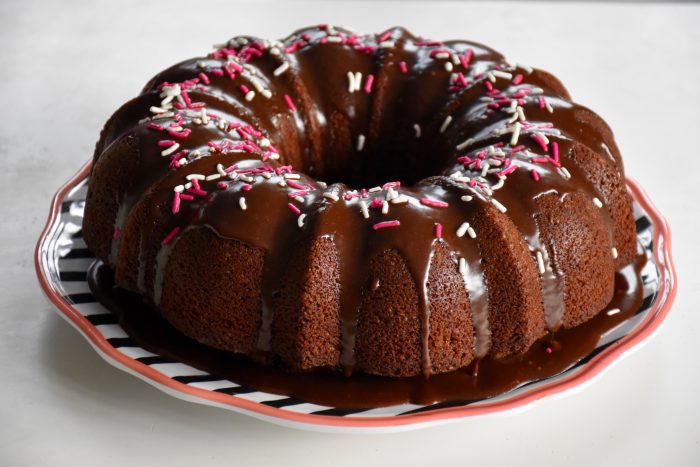
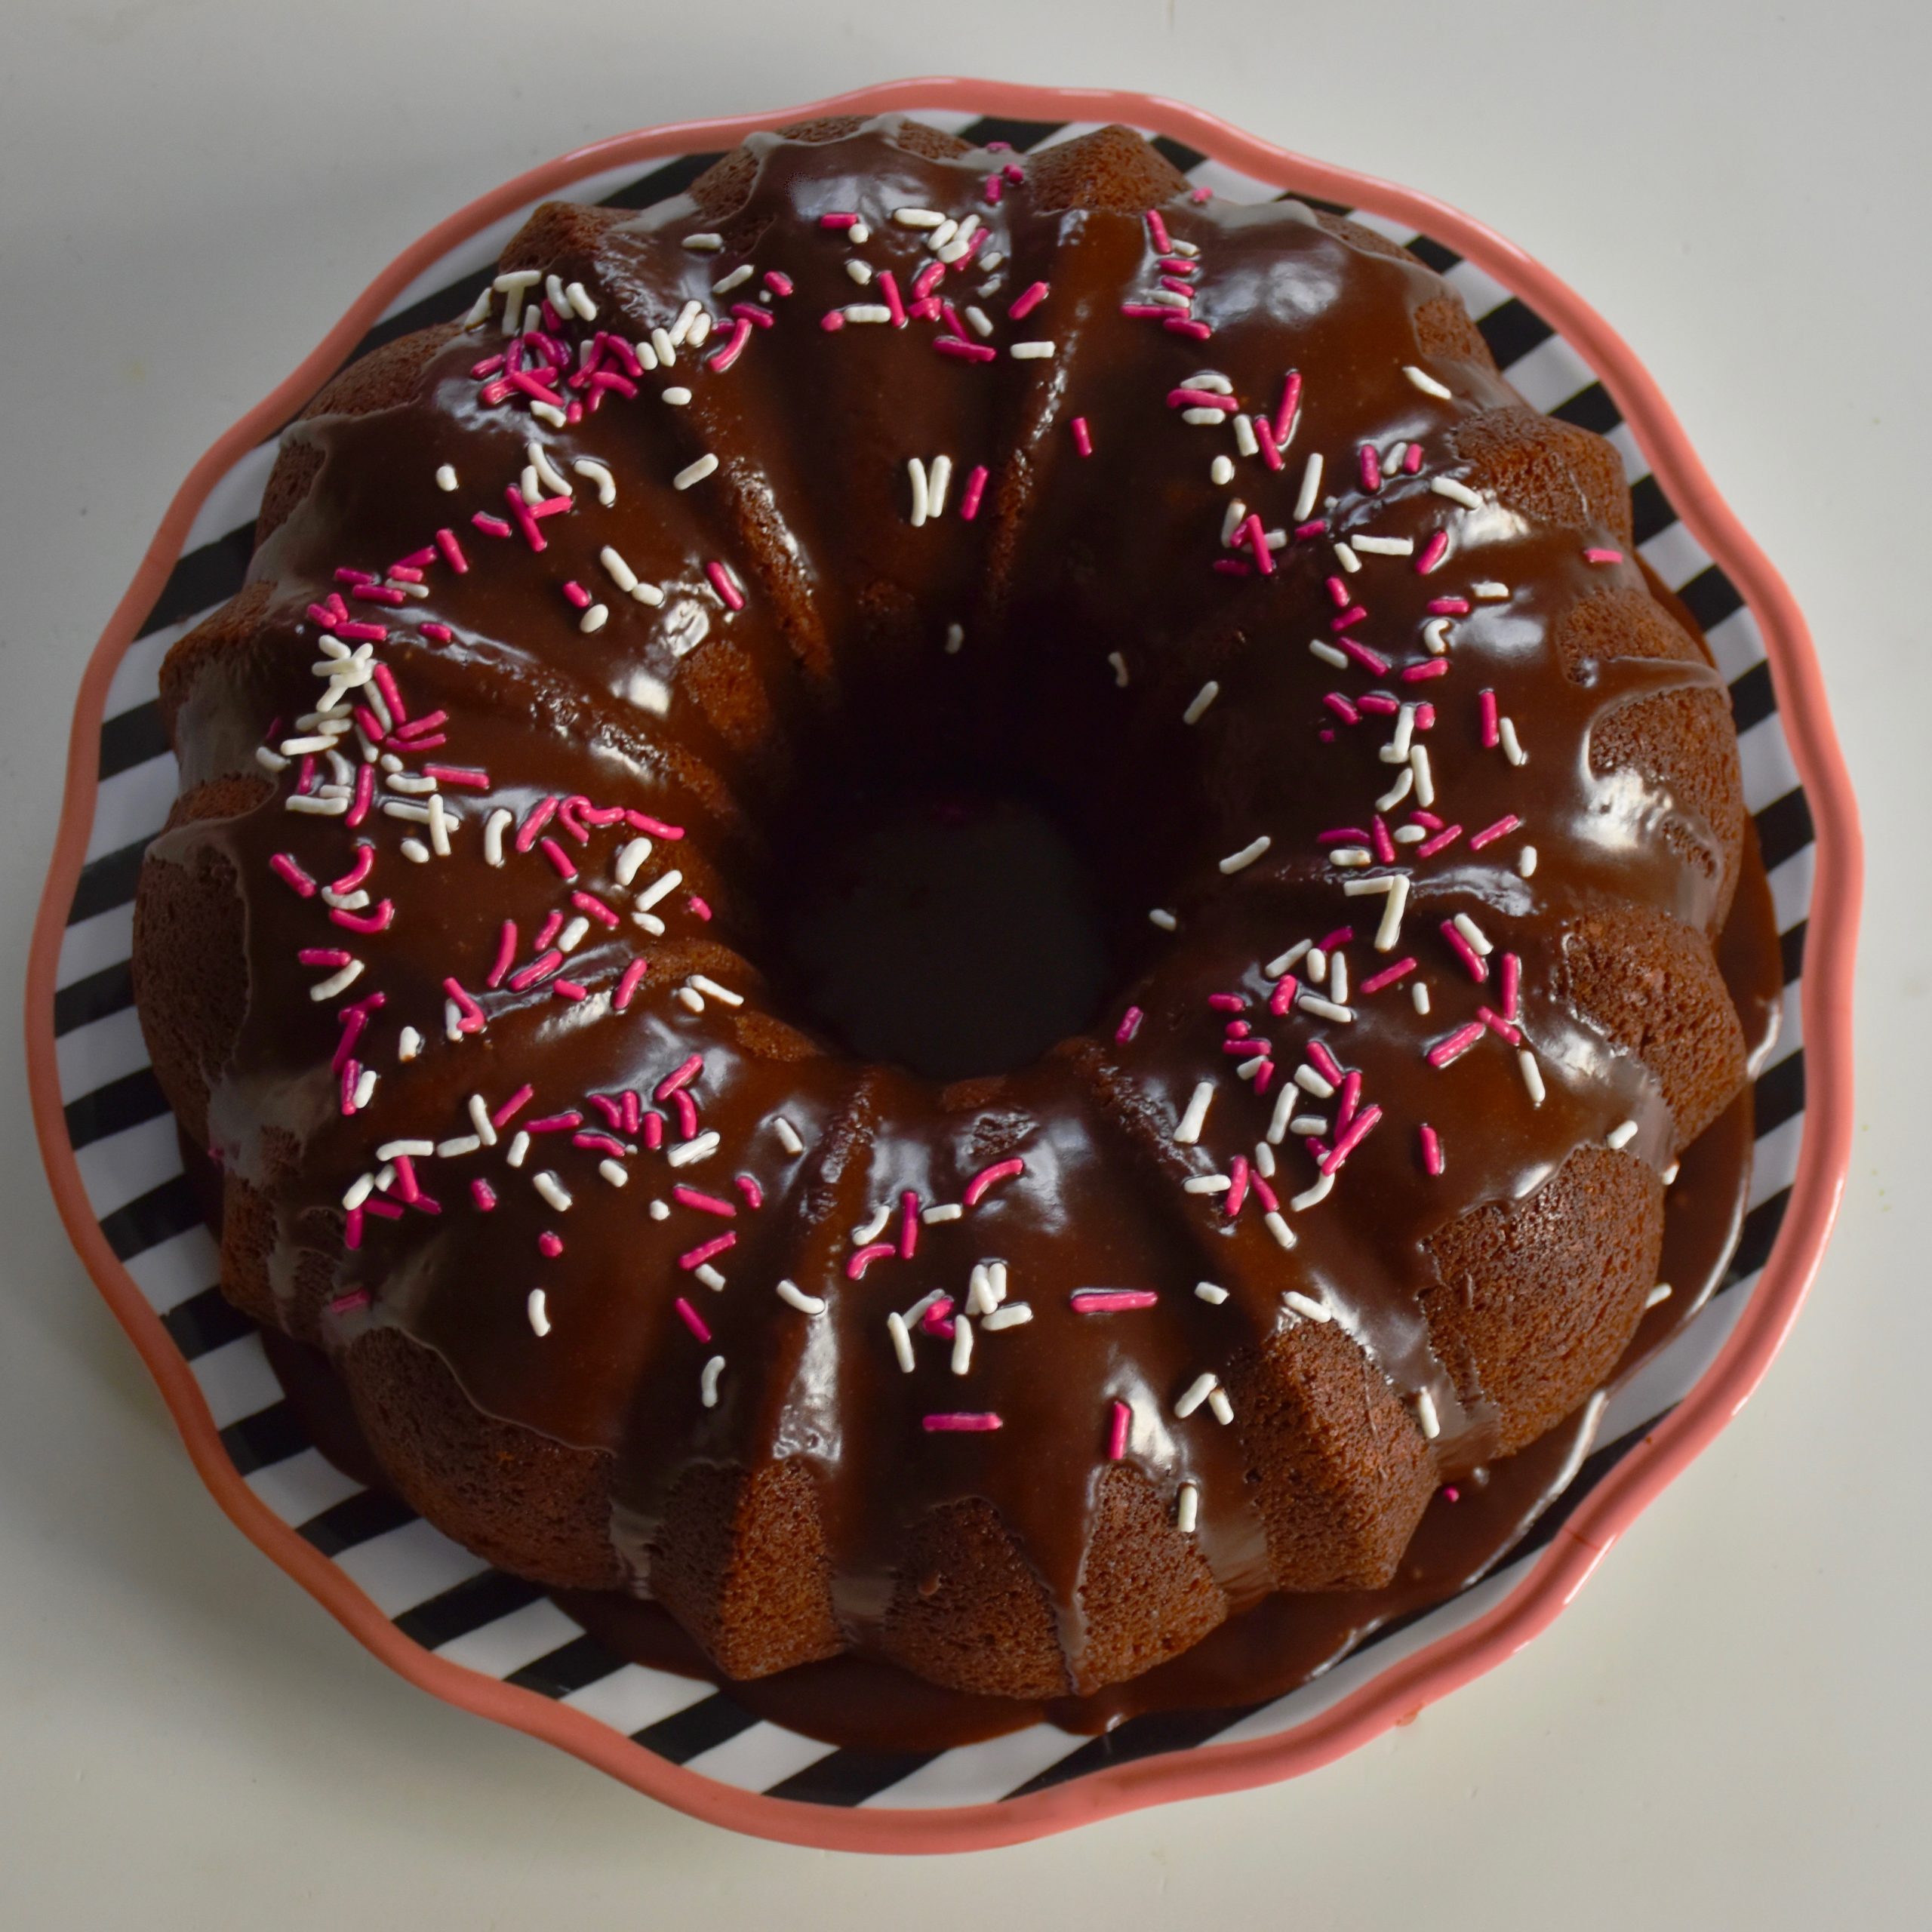
Next drizzle the chocolate ganache over the cake using a large spoon. If you want a thicker and more controlled look then wait for the cake to cool completely before you make the chocolate ganache. If you want more of a glaze then make the ganache and spoon it on while the cake is still warm. The heat of the cake will make the chocolate thinner. The cake keeps best covered at room temprature.

If I am making this cake for company, then I like to add some decorations to the top. This cake looks great topped with colored sprinkles or with edible flowers like pansies

A Tisket, A Tasket, Ideas To Get Your Easter Table Set

If you are working on last minute Easter dinner plans like me, then I have a few simple and stylish ideas for your table. When it comes to setting a pretty table the small details count, but they don’t have to be difficult or expensive. I have three different place setting ideas that you could put together using small items from Target or your favorite craft store. I used flowers from my yard and a small bunch of four dollar flowers (purple stock) from the grocery store. When it come to flowers think about the rule of three. I used three different flowers in each setting to add interest. I keep the color scheme simple with purple and yellow flowers and I kept the scale of the flowers small since they were going to be used at individual place settings.

Next, think about what you want to use to hold your flowers. I have three ideas that could be used individually for a whole table or be mixed and matched if you are serving a larger party or have two tables.

My first table setting uses these fun art deco shot glasses that I have. I have always thought they looked a little like egg holders so I decided to hollow out an egg and use it as a small vase for flowers. To make the egg vase use a sewing needle or a small ice pick to make a dime sized opening in the top of the egg. Then carefully pour the egg out and rinse out the egg shell. You may have your own egg cups, but if you don’t I have seen some at Michaels and Home Goods. You could also use a decorative glass votive holder. My shot glass was a little deeper than your standard egg cup so I  put a small piece of folded paper towel inside to hold the egg steady and make it rest a little higher. Next put a little water in your egg vase and a mix of three small flowers that coordinate with your dishes and table linens. The whole place setting is pictured above. The placemats are from Ballard Designs and the navy napkins are from the dollar bins at Target. I love how the flowers add a little color to each plate.

Some other egg cup options that I thought would be cute as small vases.

Emma Bridgewater Pottery
More whimsical egg cups from Emma Bridgewater
These egg cups are at Cost Plus World Market. They remind me of depression glass.

The next look uses white ceramic bunny place card holders that I found at Target. These sweet little bunnies come in packages of two and at just three dollars they are a budget friendly way to add something special to your table. The bunnies have a slit for a place card, but I thought they looked better with small flowers in the slot instead. Since the flowers won’t be in water these are arrangement you need to finish an hour or two before your guests arrive. They are easy to put together and you could have your flowers trimmed and in water ready to go the day before. If you want to use the place card you could place it in front of the bunny.

Here is what they look like at the place setting. I folded my napkin long ways and folded the ends underneath. Then I topped the napkin with a salad plate. I thought the solid blue napkin added some color to contrast with the white bunny and dishes.

The last look uses non-breakable items so it would work well if you have younger guests or if you plan on setting a kids table. I got grapevine napkin rings from Michael’s and I added green moss inside to create a birds nest. Next, I added some candy coated chocolate eggs. Then a hour before your guests arrive add a few fresh flowers to dress your nest up for Easter.

I placed the nest on top of my napkin to keep any tiny pieces of moss from falling on the plate. I used blue candy eggs so that they would look like robin’s eggs, but you could use another color to custom coordinate it to you linens or dishes.

I just love setting tables, so hopefully these ideas will inspire you to set your own beautiful table for family and friends. Happy Easter Friends!

Not Your Usual Suspect Sweet Potato and Spinach Enchiladas

I think most cooks have a list of usual suspects that their family members aren’t so sure about. Most often in our house those suspect dishes are vegetables. It’s the dish I mention to my husband that gets a questioning “Really?” or a chorus of “Ooh gross” from my little ones. Nevertheless, I still love and cook vegetables. I have come to view this as a challenge to make vegetables so delicious that they forget they are eating something that might otherwise be considered questionable.

I love Tex-Mex food and enchiladas are a staple. Our family has a favorite local restaurant at home in Texas called the Raven. They have these sweet potato and spinach enchiladas that are so delicious that I tend to order them every time I eat there. I loved them so much that I decided to create my own. The result was so good that I can make these as a main course without any raised eyebrows or funny looks. There is something about a layer of crisp golden cheese that makes enchiladas, even the vegetarian ones, delicious.

Sweet Potato and Spinach Enchilada Filling

  • 1 (5oz) bag of baby spinach
  • 1 Tbsp butter
  • 1 Tbsp of olive oil
  • 2 large sweet potatoes (mine were a little over a pound and a half)
  • 1/4 tsp cumin
  • 1/4 tsp salt
  • 1 pinch pepper
  • 1 Tbsp cream
  • 2 Tbsp butter
  • 8 flour tortillas or corn if you prefer (if using corn tortillas warm them first so they are easier to roll and work with)
  • 2 cups of grated monterey jack cheese

Sour Cream Sauce

  • 1  1/2 cups sour cream
  • 1 Tbsp cream
  • 1/2 tsp cumin
  • 1/4 tsp coriander
  • 2 Tbsp tomatillo salsa (My favorite in Chicago stores is Jardines which is a Texas brand they carry at Jewel Osco.)

First peel and dice your sweet potatoes. Place the sweet potatoes in a large stock or sauce pan and cover them with enough water to were they are fully covered and bring the potatoes to a boil. Boil the sweet potatoes till they are tender and can be easily pierced with a fork.

When the potatoes are tender drain them and then return them to the pan and mash them with a potato masher. Add in the two tablespoons of butter and the tablespoon of cream and continue to mash till the potatoes are smooth and creamy. Mix in the cumin, salt and pepper to season them.

While your sweet potatoes are cooking take a large skillet and heat a tablespoon of butter and a tablespoon of olive oil on medium heat. When the butter is melted and the pan is hot add in the spinach.

Keep stirring the spinach as it wilts down and begins to cook. Once the spinach turns bright green and wilts it is cooked. Take the cooked spinach and lay it on a double layer of paper towels. Allow the spinach to cool and then use the paper towels to squeeze the moisture from the spinach. You don’t have to go over board but spinach is watery and you don’t want it to add too much extra moisture to the dish.

Once the vegetable fillings are prepared, make the sour cream sauce. In a skillet over low heat add the sour cream, cream, cumin, coriander and tomatillo salsa. Mix until it is warmed through and smooth and then remove it from the heat. You don’t want it to boil or get too hot.

Although I like to make my own sometimes. I still use bottled salsa to make this a simpler weeknight meal. This is my favorite brand.

The next step is to begin filling and rolling you enchiladas. Take a tortilla and place two rounded tablespoons of sweet potato and spread it on the tortilla then place a small spoon full of spinach on top then sprinkle a bit of the monterey jack cheese on top. Roll the tortilla and place it seam side down in a medium sized casserole dish which has been sprayed with cooking spray. Continue rolling the enchiladas until they are all filled and placed side by side in the pan.

Then cover the rolled tortillas with the sour cream sauce. Spread the sauce over the enchiladas evenly so that it covers them all. Then sprinkle the remaining monterey jack cheese on top.

Bake at 350 degrees until the cheese is melted and beginning to turn golden.

This recipe makes eight enchiladas, which serves four people. I like to serve my enchiladas with a black bean salad. I will share that recipe soon, but you could also serve it with a traditional mexican rice and beans.

Our Living Room Remix: The Before and After

Have you ever heard that adage that if you only collect things that you really love then everything will work together? I believe that is for the most part true. Sometimes a little editing can be a good thing, but if you have classic pieces that you love they can be rearranged in a new space. New rooms are a bit like puzzles. Your furniture and accessories have a place, but sometimes it takes a little time to find the right home for everything.

I have spent the last year painting and slowly decorating our home. So I thought I would share a few photos of our living room. I had updated our living room at our old home about a year before we moved. I had purchased and tailored things to fit that space. At the time we had no plans to move, but when we did I needed to find a way to use the furniture we had in a very different space. It is certainly lots of fun to see a before and after with all new furniture and acessories, but the reality is that long distance moves have challenges. New furniture wasn’t in the budget, so I chose to remix what I had in a way that fit the new space.

My former living room was a larger space so I had two seating areas.

Our living room is my favorite room in our home. Looking back it was the reason we chose this home. It has lots of light and a great fireplace that we use all the time. Our old home didn’t have a fireplace so it is a nice feature. Chicago has so many chilly nights that we love just sitting by the fire. The previous owners had used the space in a more formal way. We knew we wanted to room to be a place we used everyday.

The before: a photo of our living room from the real estate listing.
A view looking towards the back of the room.
This is the front of the room. The previous owners also had a piano which I thought went well in the front of the room.

The room had been painted a neutral cream just before it was placed on the market. The color went with the previous owners furniture, but it didn’t have the warmth I wanted for the room. I had a lot of projects to tackle so we lived with it for a bit until I could get it painted.

The during: here is the room shortly after we moved in. I centered my furniture around the fireplace and put the television on a less prominent wall so we could enjoy both without making the television the major focal point of the room. Over time I shifted the chairs and accessories till I got the right mix.

I painted the room Benjamin Moore’s Plymouth Rock. It’s a warm and well balanced gray. The room gets lots of natural light so the gray added a nice contrast to the formerly all cream room.

Here is a picture while I was painting the room. When you are in the middle of a painting project there is nothing like taking a minute to admire the difference that a new paint color can make.

Our new living room has room for just one seating area, but the room is wider than our former living room so I took two armchairs from our old office and used them here to add additional seating. I also added new indigo velvet drapes from Pottery Barn. The drapes frame the windows and add texture and warmth to the room.

I centered the piano in the front of the room since my husband plays often and we enjoy listening to the music. The piano also provides a little privacy from the window facing the street without having to cover the view to the garden in front.

The modern fireplace screen was something I found at Bering’s Hardware in Houston. I knew I needed a screen to keep curious toddlers out so I found this one right before we moved. I love the sculptural element that it adds to the room. The painting is a favorite that my husband and I got from a local artist in New Mexico. It used to be in our breakfast room, but the size and colors worked well in our new living room. We have a collection of southwest art so we were able to mix in pieces we had in other rooms in our old house. I added an asymmetrical touch to mantel with some navy candles on modern glass candle sticks. Then I used a vase I had in our old office to add some greenery and height. I switch out the branches in the vase to fit the season.

I have a small reading area for my girls tucked in the back corner. The armchairs can be moved if they want to watch television and the basket makes for a quick clean up of their books.

The new room has a few more patterns than I had originally designed for our living room, but the simple blue and gray color scheme helps keep it balanced. I was able to remix our furniture in a new way to give our living room a finished look without breaking the budget. I think the key when you are moving, is to be open to shifting things around and to give yourself so time to see where your furniture and art fit best. If you really love a piece you will find a way to incorporate it in your new home. I plan to make a few changes in the future, but for now we are loving the new look.

For more blue and white inspiration see this link to designer, photographer and entertainer extraordinaire, Carolyne Roehm’s library and see how she remixes her room to fit the seasons. Even if you haven’t moved recently, it will have you thinking about how a little remix can give your living room a completely new look.

Contact Us