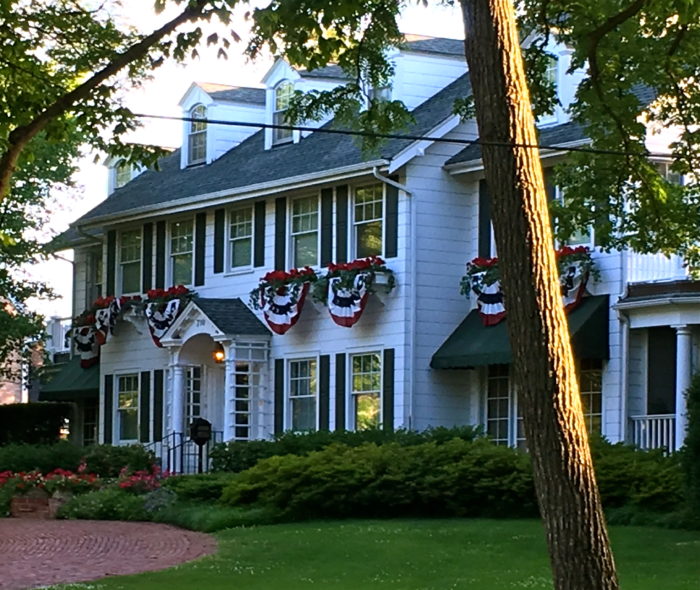
Happy 4th of July

When you live somewhere for a long time you tend to just take for granted all of the local saying and the traditions that just come with residing in a certain part of the country. Moving to the Midwest has been a big change for our family and my husband and I are still trying to understand all those things that the locals know. We had to try out all the local pizza places to find our favorite deep dish. Like many Chicagoans, we stayed up late watching the World Series rooting for the Cubs to break the curse. We had to laugh the day my oldest came home from preschool and said “Hey Dee-ahh-d.” We just looked at each other and smiled. Our daughter has a Chicago accent. How did that happen?
If you ask a Midwesterner what they think it’s like to be from this part of the country you often don’t get much of a response. It a “oh well, you know…” The truth is that the Midwest is a real mix of different cultures, but the thing that has stood out to me more than anything is the great sense of national pride that Midwesterners have. The Fourth of July in Chicago is huge. Summers here are glorious and by the time July rolls around every one is out and celebrating, working in their yards, and soaking in the sun. We moved to Chicago at the start of winter so for months after our move we questioned whether our neighbors were really home, but come summer everyone is out and the community comes alive.

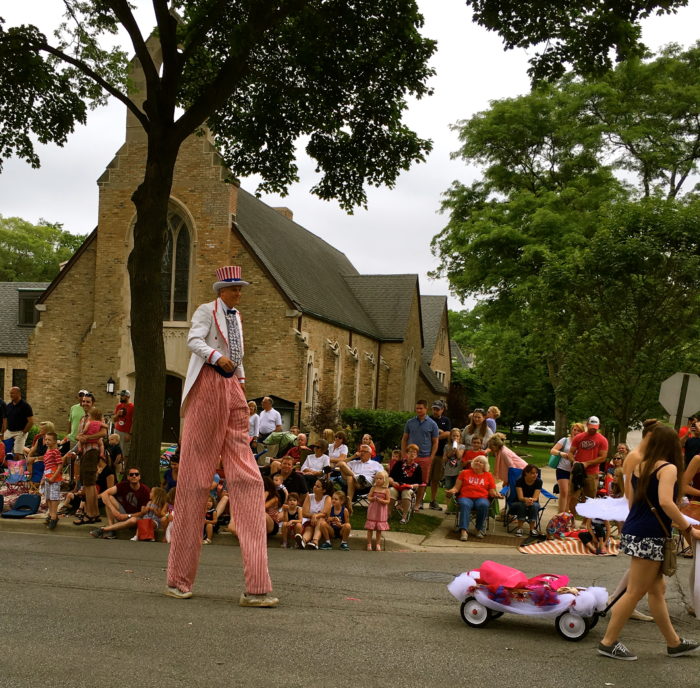
We live in the western suburbs and last year we though we would go check out the local parade. We were blown away because this was not the kiddy trike and bike parade we expected. It was big deal with floats, marching bands, Uncle Sam on silts, classic cars and tributes to our troops. Watching it made you stand just a bit taller and feel a little  prouder. Children and families stood on the street curbs waving American flags as people saluted and cheered for our veterans. Taking it all in, it made my eyes water just a bit. It is a wonderful thing to watch a community come together like that. In year where there has been so much turmoil and hate its great to be reminded of the people and attitude that make our country great.
So although Midwesterners may be a little shy to tell you this, what I have come to feel and know is their deep love for family and their country are what make living here good. The Fourth of July is a great time to slow down a bit and treasure time with family and friends. So as I look forward to the parade, the fireworks and the apple pie I love so much, I am grateful. It is easy to get caught up in headlines and national politics, but now more than ever it is important to come together and celebrate the good. Happy Fourth of July!

Adding Curb Appeal To Your Door With A Summer Wreath

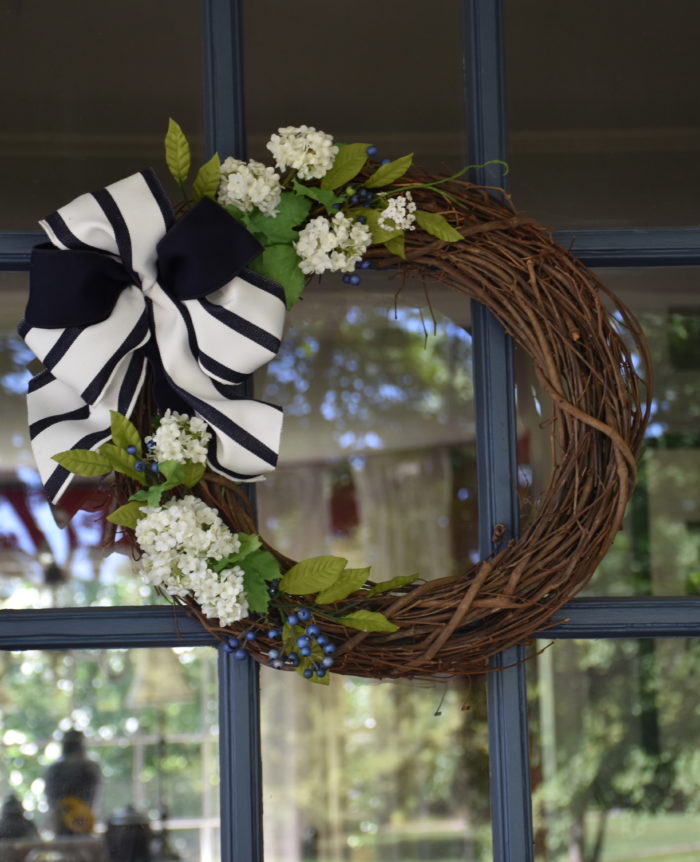
Wreaths are a great way to add some color and curb appeal to the entry to your home. There is nothing like a wreath to add a welcoming feel and a pop of color to your door. I like to customize mine to fit the season. Our old home had a a single door so the wreaths I had in the past no longer work because I now have two doors. I created new wreaths for our double doors this summer. I decided to switch my boxwood wreaths out for something that can stand up to the summer heat and humidity.

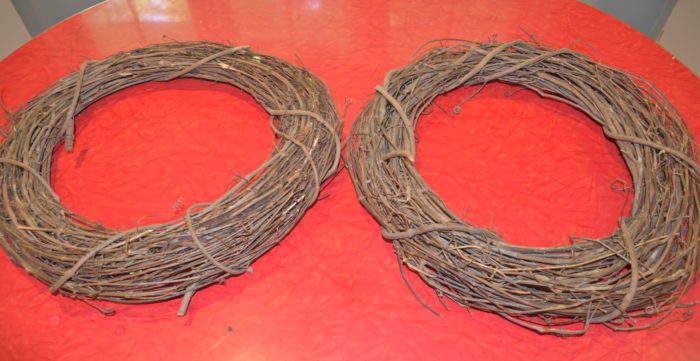
Custom wreaths can get expensive, especially if you have double doors like I do. So I like to make my own. For the base of the wreaths I an using a 17 inch grapevine wreath that you can find in the floral department of any craft store. I like using grapevine because it is inexpensive, holds up well outdoors, and its woven base makes it ideal for adding greenery or silk flowers.

A key element in making a wreath is making sure the scale of the wreath is large enough for your door. You don’t want a tiny wreath because it will get lost on a big door and if the scale is off it just looks silly.

Once I get my base, I start thinking about what colors I want to use. I like using a bow on my wreaths and generally I let the color and pattern of the ribbon dictate the style and colors I choose. Since this was a Summer wreath I decided to go with a crisp navy and white. When I am choosing ribbon for a wreath, I like using wired ribbon. It holds up well and the wire allows you to shape a pretty bow. You can find wired ribbon at your craft store, fabric store or you can even find it online. Some Etsy stores even specialize in ribbon.

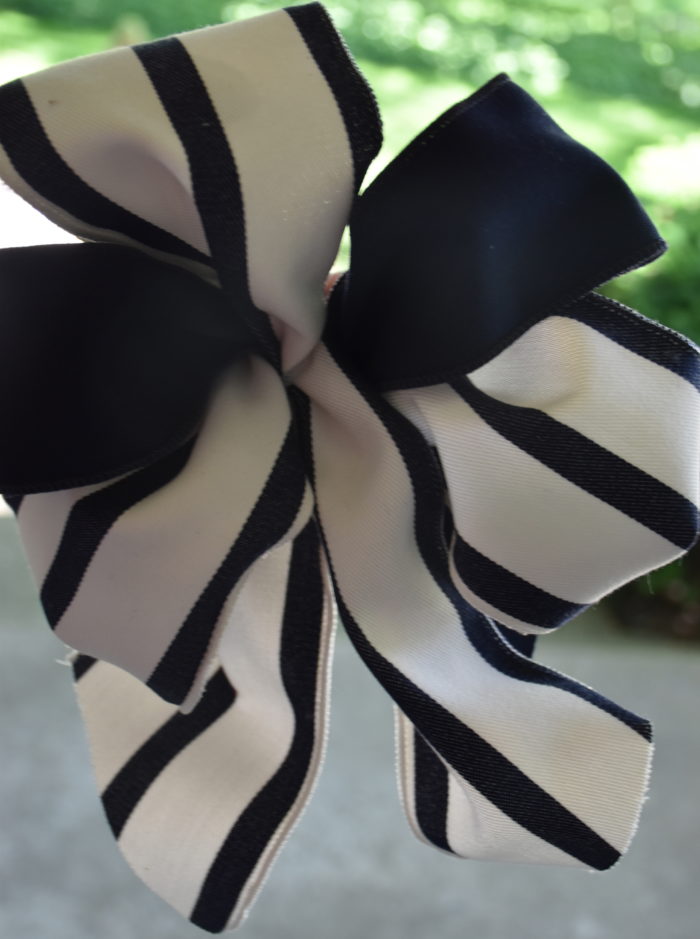
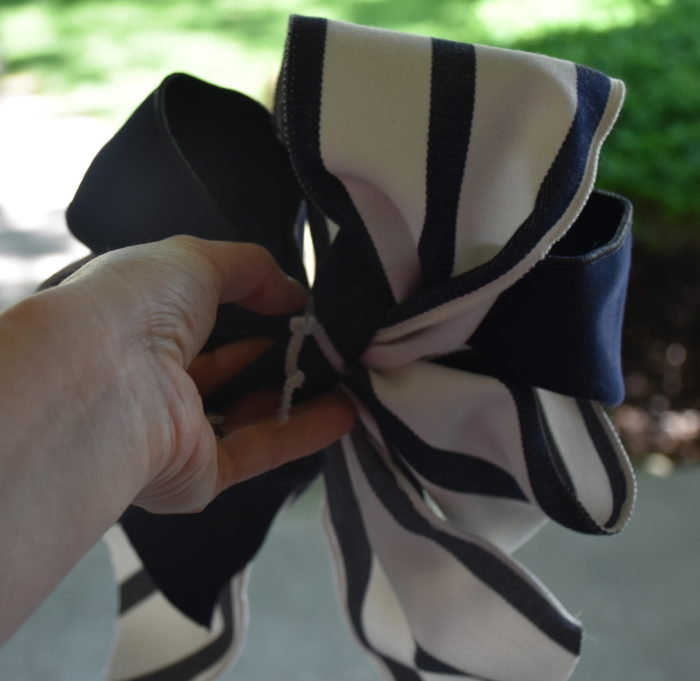
The ribbon I chose for this project is made by Sunbrella, so it is treated to stand up to the sun and moisture. I like to mix ribbons together, so for this one I used a wider stripe with a slightly narrower navy solid. I made my bow using five loops since odd numbers tend to look good when you are mixing ribbons. Each bow took a little over a yard of each ribbon to make. So if I am making two bows like I did for this project, then I like to make sure I have about 3 yards of each ribbon. My loops are made from about 8 inches of ribbon. Looking at the front of the bow each loop is 4 inches from the center to the fold. I use a pipe cleaner or floral wire to wrap around the center and hold the bow together. Make sure you leave some extra on the end so you have enough to secure your bow to the wreath.

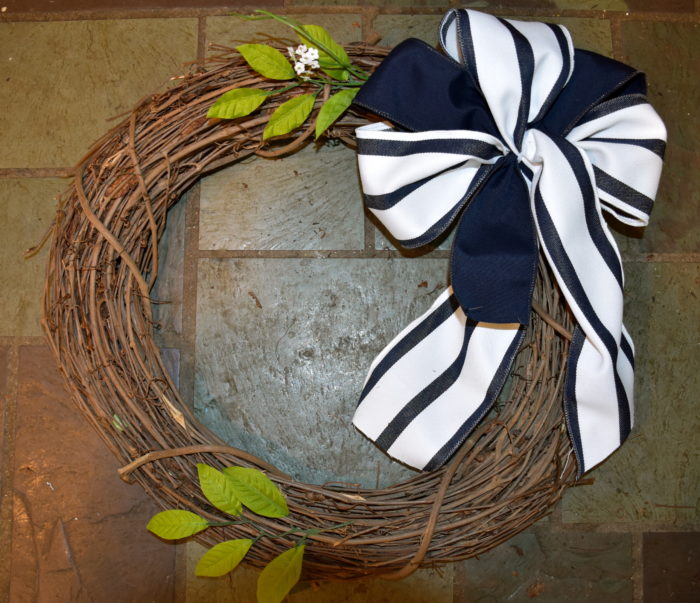
Once I get my bow I set it down on the wreath to begin deciding how to add my greenery. I decided to make an asymmetrical wreath with the greenery making a C-shape. If I am making a single wreath I tend to to put the bow and greenery on the right side. Since I was making two wreaths for double doors, I made mine mirror images of each other. One wreath had the bow on the left and the other had it on the right so the bows and greenery faced into each other.

Here is the bow and some initial greenery I placed to set the the length of the C shape. I cut my greenery using heavy duty scissors or wire cutters. When I cut my pieces I make the end long enough so I can tuck it securely in the weave of the grapevine. This keeps the greenery in place without having to use glue.

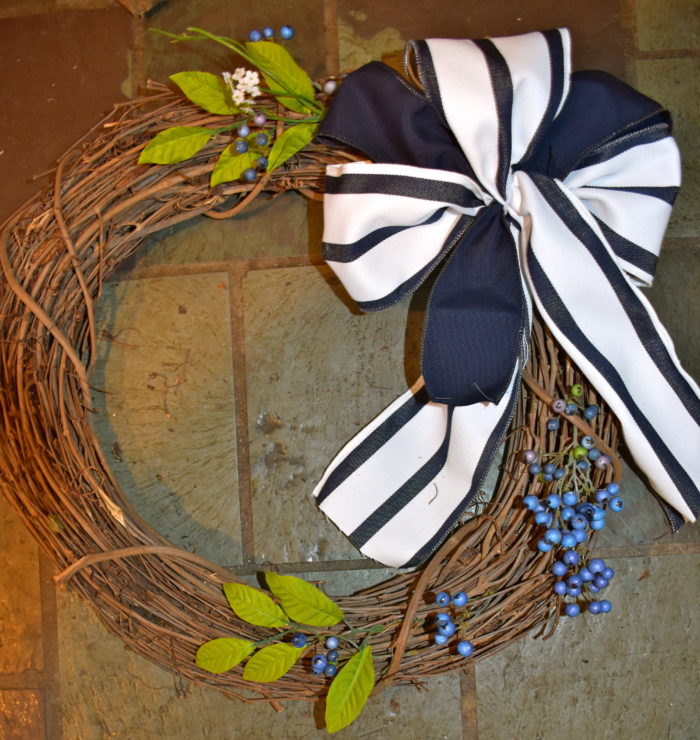
Next I added some berries. Since it is summer and I have a blue front door, I used these faux blueberries. I then cut and tucked their wire bases in the grapevine just like I did with the leaves.

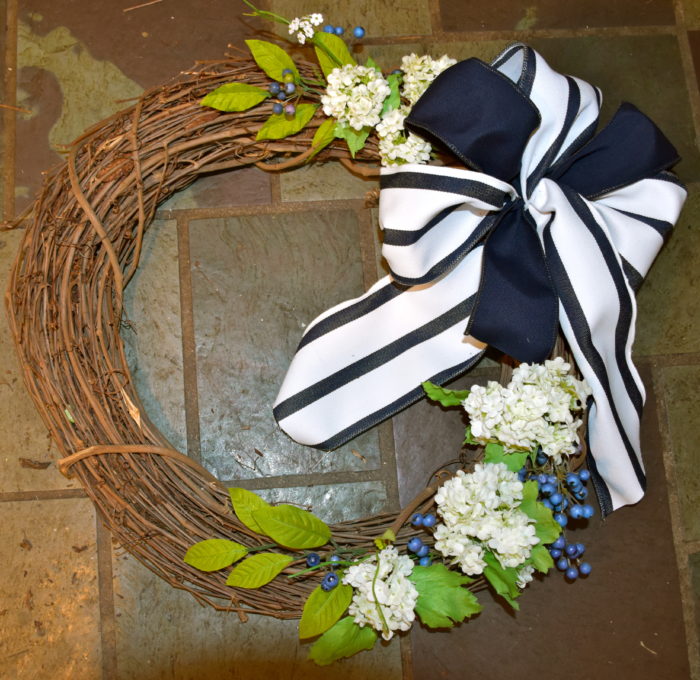
Finally I added these silk spirea branches I had from Pottery Barn several years ago. I used to have them in a vase in the old house. I didn’t have a place for that vignette in this house so I decided to use them in this wreath. These flowers worked well because they are smaller in scale so they go well with the small blueberries.

Here is the wreath without the bow so you can see how I layered on the greenery, berries and flowers. When you are finished you want to attach your bow with the pipe cleaner or wire and trim the ends of the ribbon. I cut the ends of my ribbon on the diagonal and made sure the ribbon in the center of the bow covered the wire that was holding it together. Then you are ready to hang it on your door and shape the ribbon loops so they look just right.

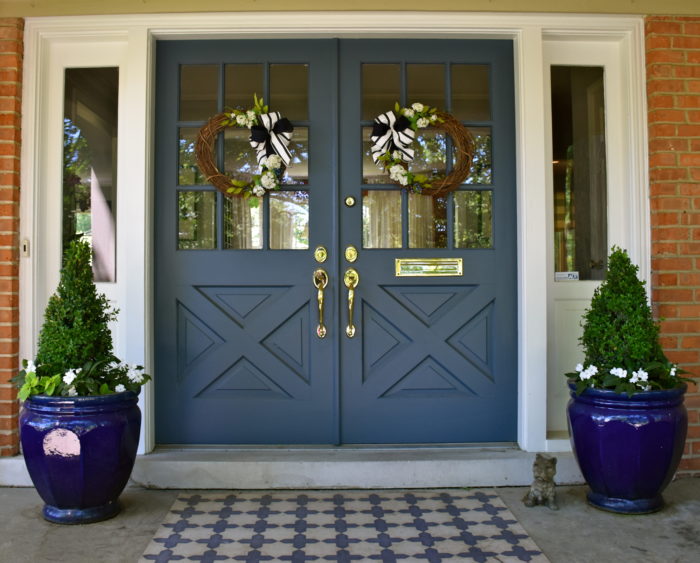
This is my new Summer look with my new vintage vinyl rug that I blogged about here. So far I really like it. It cleans easily and its low profile, non-slip surface make it a great mat for a covered doorway or patio.

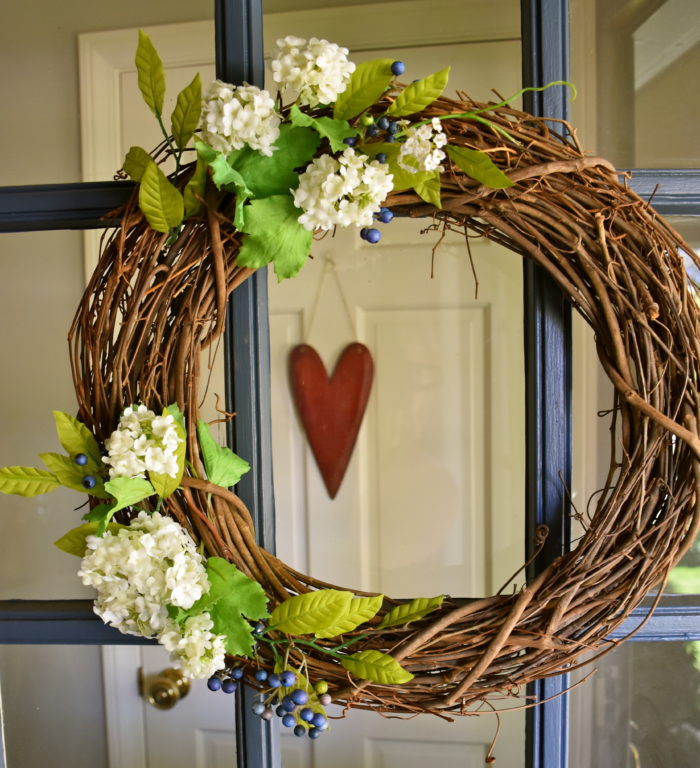
Here are the finished wreaths so you can see what it looks like to make two wreaths that are mirror images of each other. I was happy with the finished look and best of all, because I took apart some old wreaths and used some flowers I already had this project cost me nothing but a little time. Hopefully this project will inspire you to make a custom wreath for your front door.

Lemon Icebox Pie

Lemon Icebox Pie Recipe

A few weeks ago I looking through my old Southern Living magazines wanting some inspiration for an icebox pie. The summer heat is here and it always makes me want to serve some lighter and colder desserts. The cover recipe from August 2011 was a Lemon Meringue Icebox Pie and it caught my attention. Lemon ice cream sounded good, but my husband really isn’t a fan of meringue. So I set out to create my own ice cream based pie using a whipped cream topping instead.

The first time I made this I tried Southern Living’s homemade lemon curd but it took 30 minutes to make and another 30 minutes to cool. So when I tested this recipe again I decided to use store bought lemon curd since it would significantly cut down on the preparation time. I am generally all for making things from scratch when you have time but sometimes you don’t have an extra hour on your hands. So for my pie I decided to make it simple and take a little help from the store.

Lemon curd is popular in British desserts so sometimes you can find it in the British import section of your store or in the jelly aisle. The brand that I can usually find in Chicago Stores is Dickinson’s, but my favorite is Stonewall Kitchen. If you live in the Chicago area Pete’s Fresh Market carries this brand. In my opinion, its about as close to homemade as you can get. After making this pie a few times now I think it is well tested and ready to share. It’s a simple pie that is delicious and pretty enough to share with friends and family. It can also be made in advance which makes it perfect for Summer entertaining.

Lemon Ice Box Pie

Nilla Wafer Crust

  • 2 cups of crushed Nilla wafers which is about 50 Cookies (1 box will be enough for this recipe)
  • 1/4 cup powdered sugar
  • 1 /2 cup butter melted

Lemon Pie Filling

  • 1 jar of lemon curd (make sure it is at least 10oz in size)
  • 2 pints of vanilla ice cream (I prefer the homestyle variety over the split vanilla bean or french style flavor for this recipe)
  • 16 to 18 whole Nilla wafers to line the pie dish edge

Whipped Cream Topping

  • 1 cup whipping cream
  • 1 tsp vanilla extract
  • 3 tablespoons powdered sugar
  • Optional garnishes for the top include lemon slices, mint leaves and/or blueberries or your favorite berry,

First you need to prepare the cookie crumb crust.

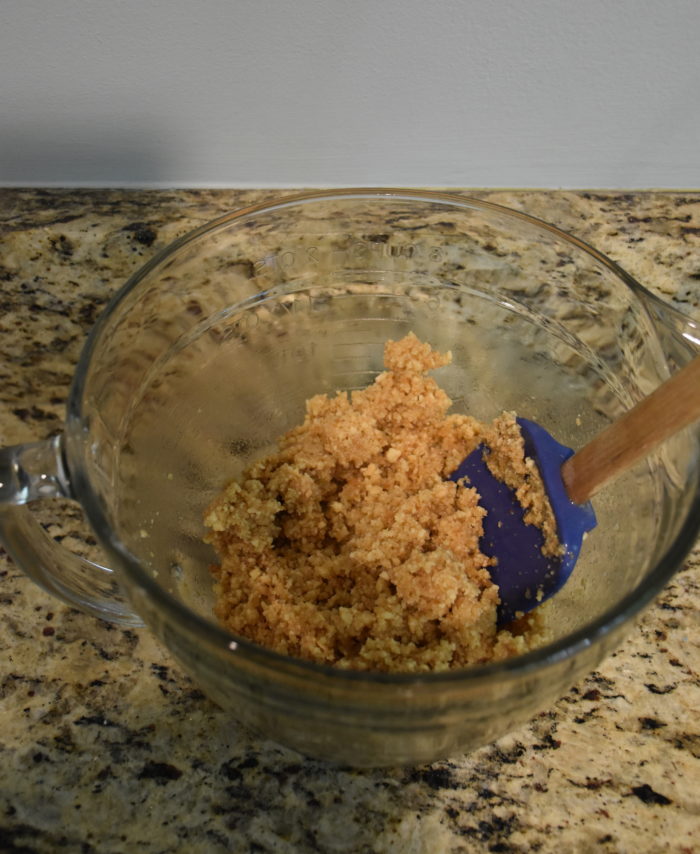
Get your oven preheated to 350 degrees. Next make your cookie crumbs. I like to crush my cookies in my food processor so they are nice and even. You can see mine still have just a few course crumbs in them. Next mix in the powder sugar and the melted butter and stir until they are well mixed.

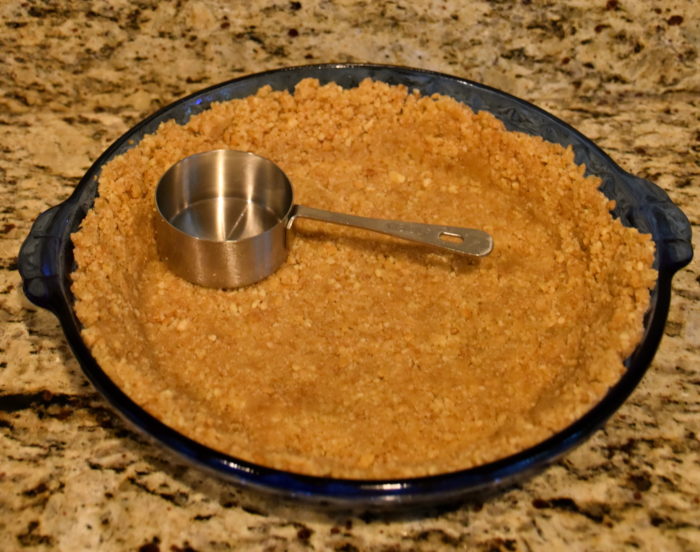
Then grease your pie plate with cooking spray and pour in your crumb mixture. I like to use my hands to begin to spread the crumbs out evenly. Then to set the sides I use a cup like this metal measuring cup you see below to help push the crumbs up the side.

Then place your Nilla Wafer crust in the center of your oven and bake it for 10 to 15 minutes. Keep an eye on it towards the end. You want the crumbs to be golden color. Then let you crust cool for at least 30 minutes before you fill it.

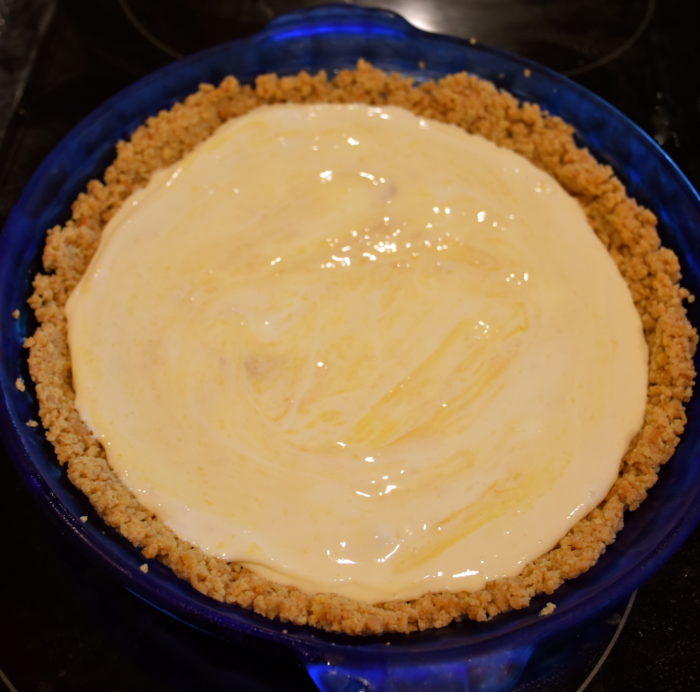
Then while your crust is cooling set your ice cream out to soften on the counter for 20 to 30 minutes depending on how hot your kitchen is. Once your ice cream is soft then scoop one pint of it in a bowl and using a spoon or rubber spatula stir in 1/2 cup of lemon curd. Then pour in this first layer of ice cream and place your pie in the freezer for 5 minutes so the first layer sets a bit. Then pull it out of the freezer and drizzle 1 tablespoon of the lemon curd on top and use a spoon or separated spatula to spread it out a bit and then put it back in the freezer while you work on the top layer,

Here you can see the swirled lemon curd in the center layer.

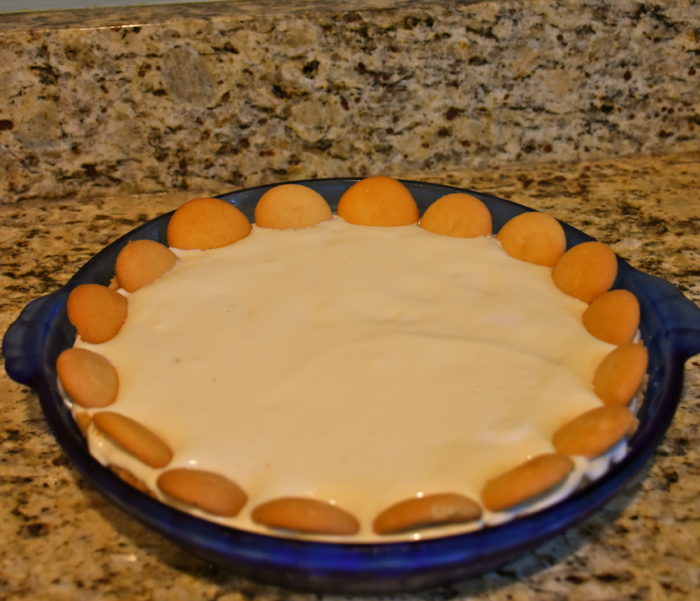
Then take your remaining pint of ice cream and stir in 1/2 cup of lemon curd until it is well mixed and pour it on top of your pie. Use a separated spatula or the back of a large spoon to smooth out the top layer and once it is even and smooth take your remaining Nilla wafer and use them to line the outside of the pie dish. Then put the pie in the freezer to set for 6 to 8 hours so it freezes well.

Then before I serve it I make the whipped cream topping. The whipped cream can be made a few hours ahead and frozen. If you are taking this dish to a party then I would definitely recommend doing the whipped cream ahead and letting it freeze just a bit so it won’t run or slide on you when you transport it.

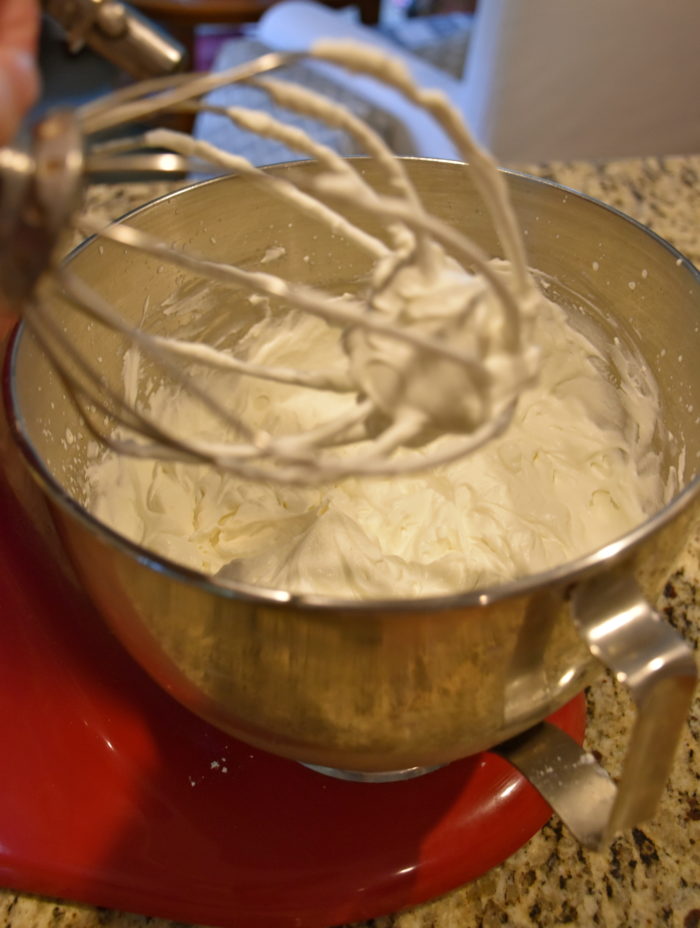
To whip the cream use your whisk attachment and on high speed beat together the 1 cup of whipping cream, 1 teaspoon of vanilla and 3 tablespoons of powdered sugar. You want to whip it until it is firm and will stay on your whisk when help upside down or forms what they call stiff peaks. Using my stand mixer it took just under two minutes.

Here you can see the whipped creme is firmly staying on my whisk when pulled up from the mixing bowl.

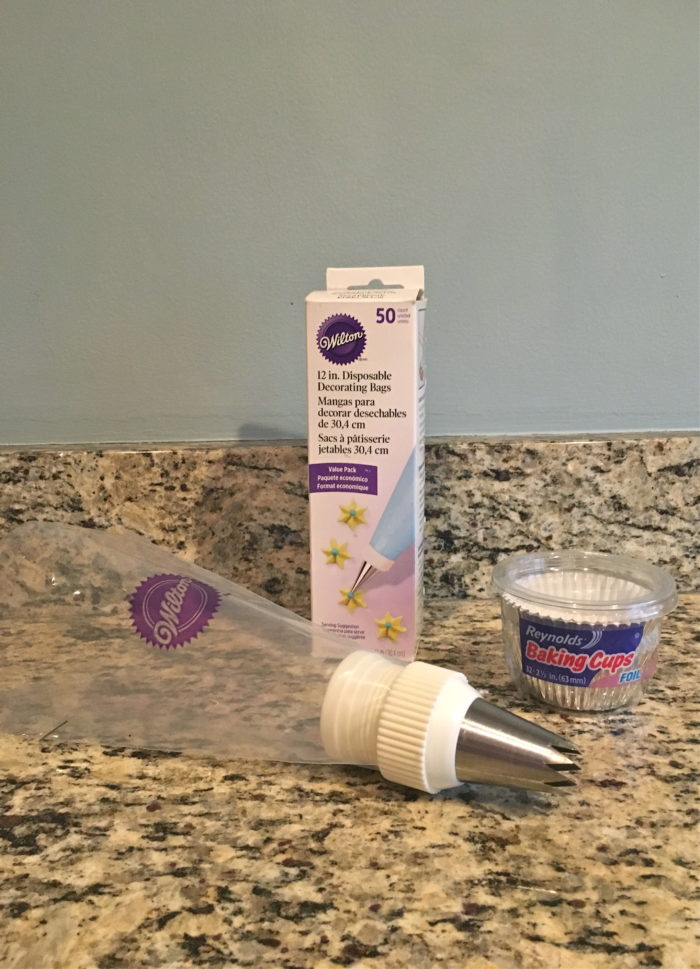
You could just spoon the whip cream on top, but for a neater look I like to pipe mine on using a large star tip and a pastry bag. Below is a picture I took for my post on frosting cupcakes where I use the same tip (Ateco #828). I found mine at Sur La Table. To fill my pastry bag I place it in glass and spoon in the whipping cream in the pastry bag. I fill it about 3/4 of the way full so it doesn’t overflow out the top.

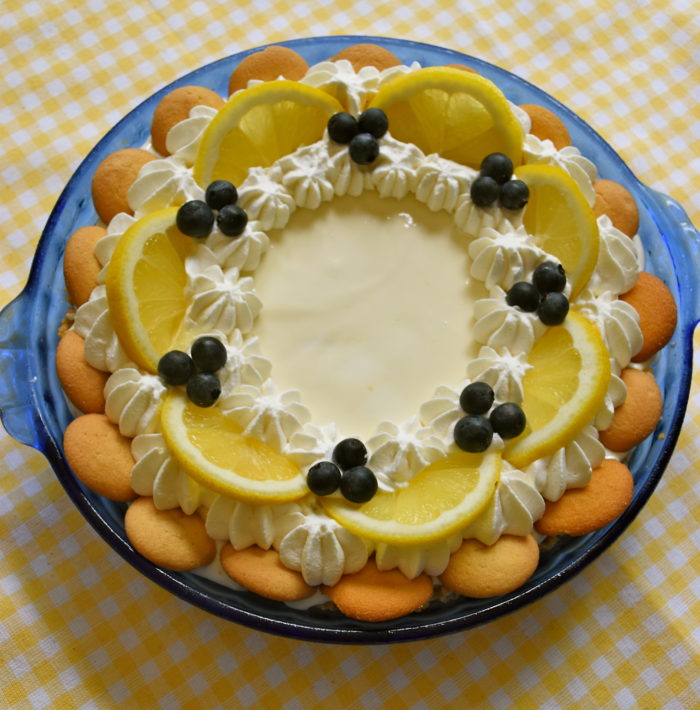
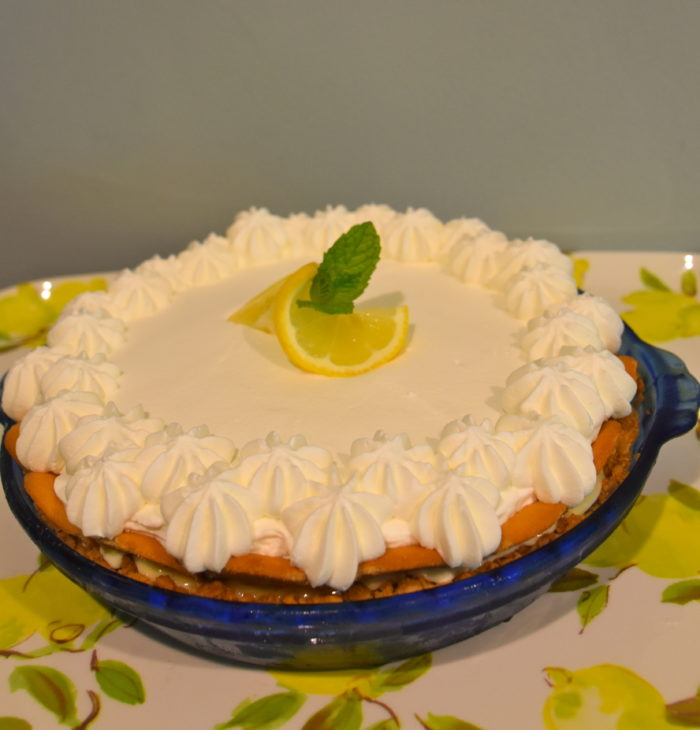
Then I made two rows of simple stars shapes. To make the stars place the tip of your bag about 1/4 inch away from your pie and squeeze your pastry bag at the top to apply pressure and then gently pull up. Whipped Cream is fairly easy to pipe since it is soft. You can practice a few stars on a paper towel if you want till you get the hang of it. Then add any lemon or berry garnishes. Wait to add any mint until its close to serving time since it doesn’t do well in the freezer. Let your pie sit out for 20 minutes or so before you serve it so it will be easier to cut.

I made this pie to share with some friends and I decorated it slightly differently so I thought I would share a picture of that with you as well.

For this pie I covered the entire top with whipped cream and then I piped some additional stars on the edge and I put a twisted lemon slice in the center.

So as you can see there are all kinds of ways that you could choose to decorate this pie but no matter how you serve it lemon ice box pie is still delicious.

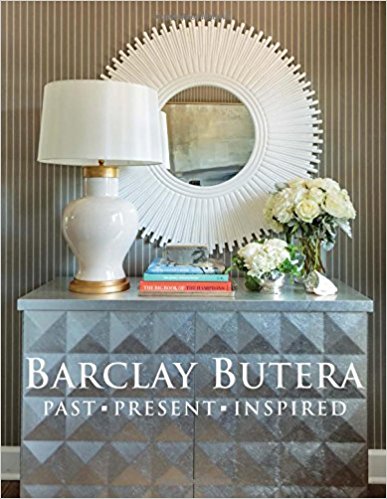
Barclay Butera Past Present Inspired

Would you let someone redesign a room in your home without being involved in the process and if you would then who would you chose? I must admit I am a little type A when it come to home decoration and I definitely would not let just anyone in my home. My mind wanders thinking about all of those crazy episodes of Trading Spaces. I would’t want to come home to find hay stuck on my walls or my furniture attached to the ceiling like a modern art installation. Design television shows are fun to watch, but if it’s your home would you take that chance?

Even the talented Sara Richardson when interviewed on the Marilyn Dennis Show talked about a living room she and her team designed for a show where the color of the walls was a pale mint green. It was a beautiful room, but it turns out the homeowner was really not a fan of green. So I wonder did that homeowner repaint? The rest of the space was lovely so maybe they just kept the green. If you notice most of the shows on HGTV involve a key element: the homeowners have to agree to give up any control over the process.

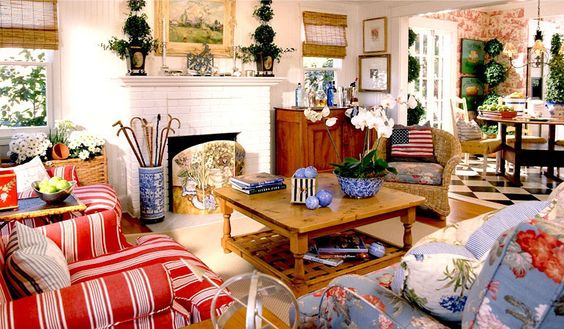
My home is so personal to me and I love the design process so much that I would have a hard time giving someone that much control. However, If had to choose one designer I would trust it would be Barclay Butera. He is known for his love of blue and white and his California costal style. Although he has done some gorgeous modern and even rustic projects his classic beach homes are still the ones I am most drawn to. Butera has several design books, but my favorite is his Barclay Butera: Past Present Inspired which features all of the various homes he has personally owned over the last twenty years. I received this book as a present a year ago and I still love to flip through it and read about his homes. This picture below is from Butera’s first home in Laguna Beach. It reminds me of some of the things I loved and used in decorating my first home. Although this project was done nearly twenty years ago there are still many elements that I like and it was fun to see the evolution and changes in his style.

Image from Pintrest This was Butera’s first home on Jasmine Way.

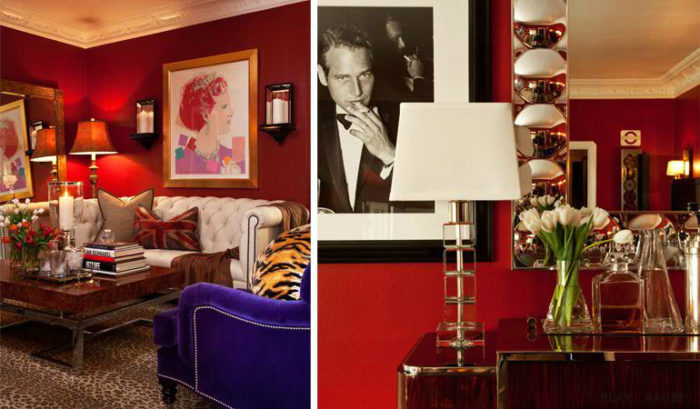
Another one of my very favorites rooms featured in this book his living room in his West Hollywood home. Red happens to be my favorite color but getting the right shade and balance when using it in a room is important. Some designers fear red because of its power, but Butera uses it masterfully. I just love the classic English styled tufted sofa juxtaposed with the modern Andy Warhol picture and the hollywood regency mirrored details. The gutsy purple accent chair adds just the right touch of color. The room sparkles with light making the red walls feel warm and inviting. The rest of the house is gorgeous and filled with so many pretty vignettes and details.

Image from Barclay Butera Interior Design

Finally, I thought I would show you his primary residence in Newport Beach. In his book Butera talks about finding this forever home and what he was looking for in his ideal house. This picture below is the entry to his home. Its a classic 1950s mid-century home but what he did with it is amazing.

Image from Ciao Newport blog

These pictures below are from Traditional Home Magazine who has a great article featuring his beautiful home when he first designed it. His house reflects its coastal location with a sophisticated twist. The classic English style chairs and the dark mahogany furniture add a nice balance to the blue and white fabrics and seashells. Click on the links to see the full article and additional pictures of his home.

Image from Traditional Home Magazine  Butera is a master at layering patterns is a room and he is know for his love of adding just a touch of animal print like this leopard spotted carpet.
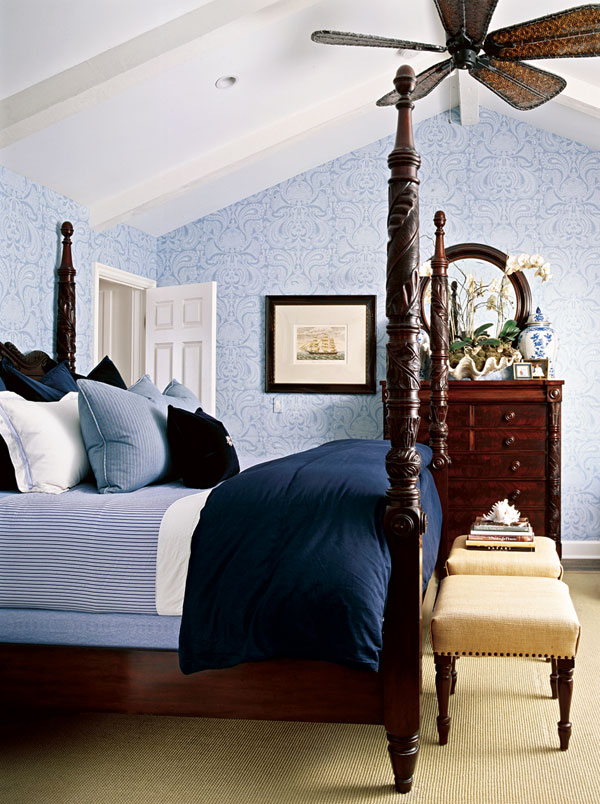
Image from Traditional Home Magazine The layered patterns in different shades of blue make this bedroom feeling like a calm and charming getaway.
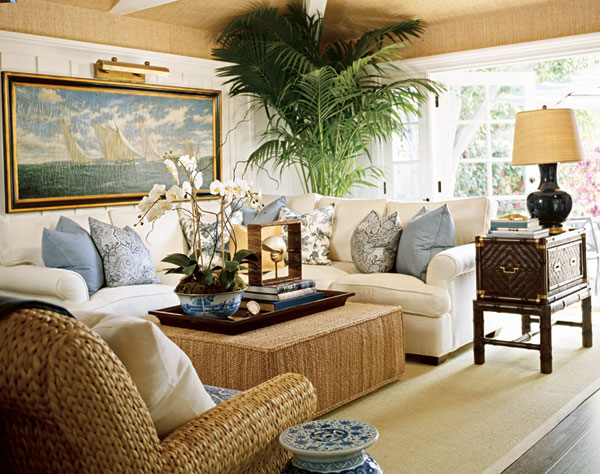
Image from Traditional Home Magazine I like the different textures Butera incorporated in his den. The raffia wallpaper and the seagrass chair and ottoman keep the simple color scheme interesting.

The book later features Butera’s remodeling of this same home which he redecorates with a more modern feel. Butera uses some of these pieces you see in the photos above in a new way and it was fascinating to see and read about the changes he made. Design blogger Fabianna of Ciao! Newport featured pictures of Butera’s  updated home, which she saw in a local home tour. Click on the link to her blog and you can see Butera’s new design. You can also see and read more about Butera’s renovation in this wonderful book.

So if you could choose any designer to make over a room in your house who would it be?  Leave me a comment because I would love to know.

Crockpot Barbecue Brisket

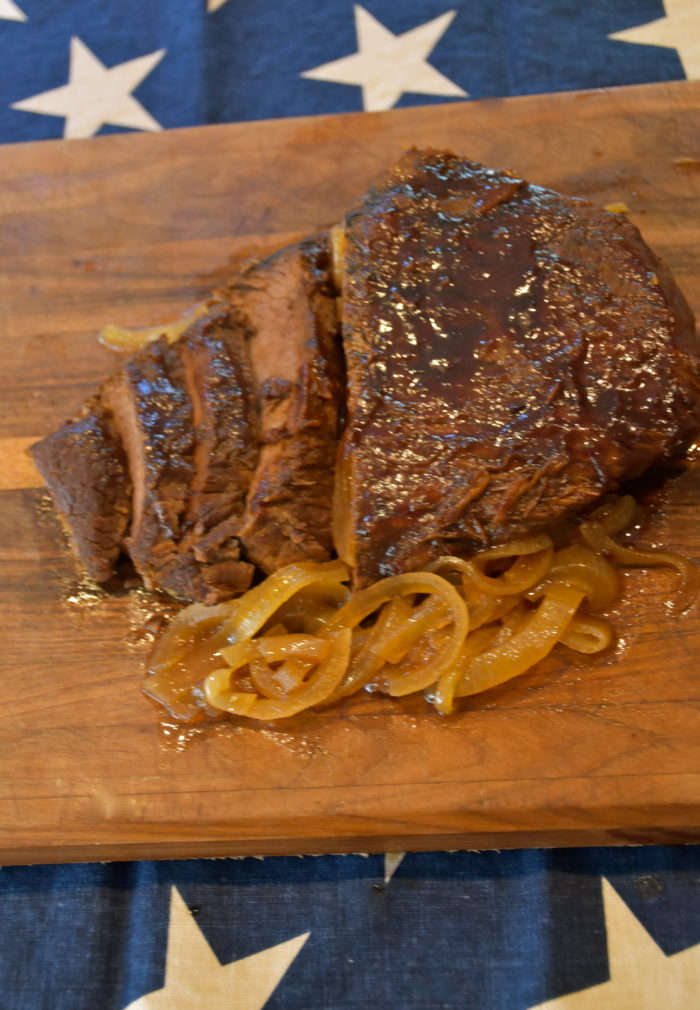
Summer to me means barbecue. Texas is known for its barbecue beef so I grew up loving brisket. Making a good smoked brisket takes more equipment and time than I have. Even the oven version keeps you stuck in the house for hours, so using the crockpot is perfect. You can let the brisket cook low and slow without having to worry about it. This recipe makes great chopped beef sandwiches, brisket tacos or my favorite brisket baked potatoes. In creating this recipe I used my homemade spice rub. I coat the brisket in the spices and then sear the brisket on the stove top to seal in the flavor before putting it in the crockpot. This keeps the meat flavorful and tender. This recipe would be great if you are hanging out with friends and family because it takes just a short bit of time to get it prepped. Leaving you free enjoy your day with friends and family.

BBQ Spice Rub

This spice mix is something I also use when making burgers. Just add a couple of tablespoons and mix it into your ground beef when you are making your patties.

  • 2 Tablespoons brown sugar
  • 1 Teaspoon kosher salt
  • 1 Teaspoon of garlic powder
  • 1 Teaspoon cumin
  • 1/2 Teaspoon pepper
  • 1 Teaspoon chili powder

Mix the brown sugar and spices in a small bowl.

Brisket

Serves 4 if making a 2 pound brisket

  • 1  (2 lb) brisket (this is the size that fits in my smaller crockpot but you could easily use a larger brisket if you have a larger crockpot)
  • 1 large sweet yellow onion sliced into long strips (about 2 cups)
  • 2 tablespoons canola oil
  • 2 (12 oz) bottles of beer (I like to use Shiner Bock or Samuel Adams)
  • 1 bottle of your favorite BBQ sauce (I tend to use a Kansas style sweet sauce like KC Masterpiece or Rufus Teague) and then I buy an extra bottle of sauce to top the brisket when I serve it
  • 2 Tablespoons worcestershire sauce

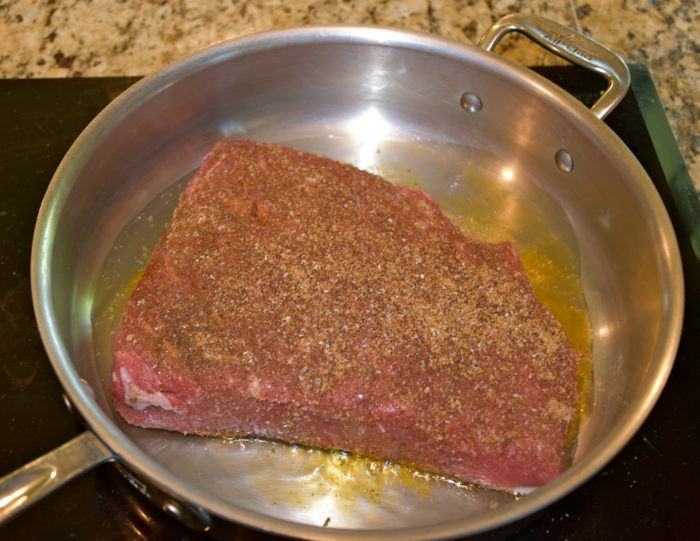
First take your brisket and pat it dry with a paper towel. Dry meat sears better. Then coat all sides of the brisket in the spice rub. Press the rub on the surface of the meat to help it adhere well. Then in a large skillet heat 2 tablespoons of oil on medium high heat. When the oil is hot add the brisket and sear it until each side gets golden brown about 2 to 3 minutes a side.

Then pour the 2 bottles of beer, 1 bottle of the BBQ sauce and the worcestershire sauce in the crock pot and mix them together. Next add in your brisket making sure it is fully covered by the liquid. Then finally add in your onions. Place your crock pot in a safe area. Put the lid on it and turn it on to the low setting. Let it cook on low for eight hours.

As you can see the meat is fully covered by the liquid. If you are making a larger brisket then you may need to add some extra sauce and beer.

Chicago stores carry some different BBQ sauce brands then Texas, but so far my favorite sauce that I can find at our local Jewel Osco grocery store is this Rufus Teague Made Some Sauce. It’s thick and sweet with just a little spice.

When your brisket is done you can slice it, chop it or shred it depending on how you plan to eat it. Then coat it with your favorite BBQ sauce to serve.

I made baked potatoes with our brisket. Just bake your potatoes and top them with a little salt and pepper, cheddar cheese, sour cream, shredded brisket and chives or add your own favorite toppings. These potatoes and so delicious and filling that one is a meal.

A Happy Summer Table With Sunflowers

Keep your face to the sunshine and you cannot see the shadow. It’s what sunflowers do.

-Helen Keller

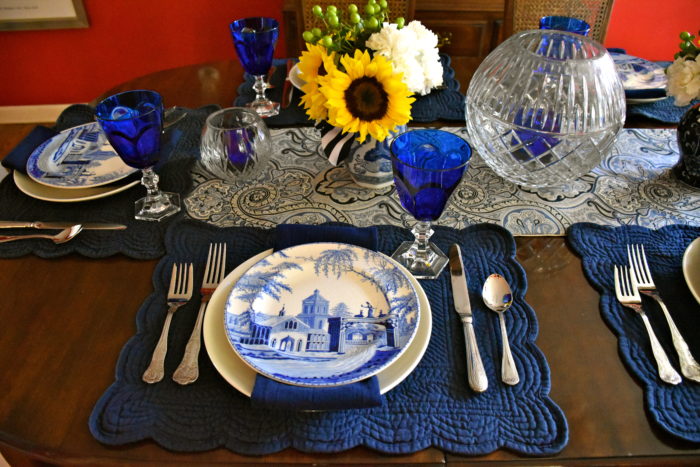
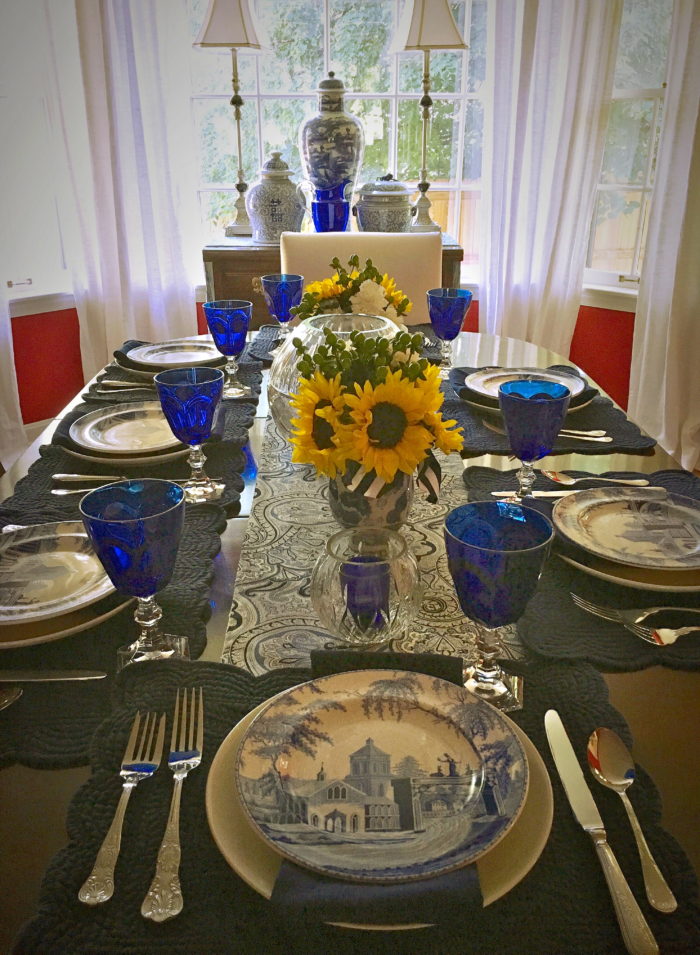
Sunflowers have always been one of my very favorite flowers. There is just something about their bright sunny shape that never fails to brings a smile to my face. Pair them with some cobalt blue and white and you have everything you need for a pretty Summer table.

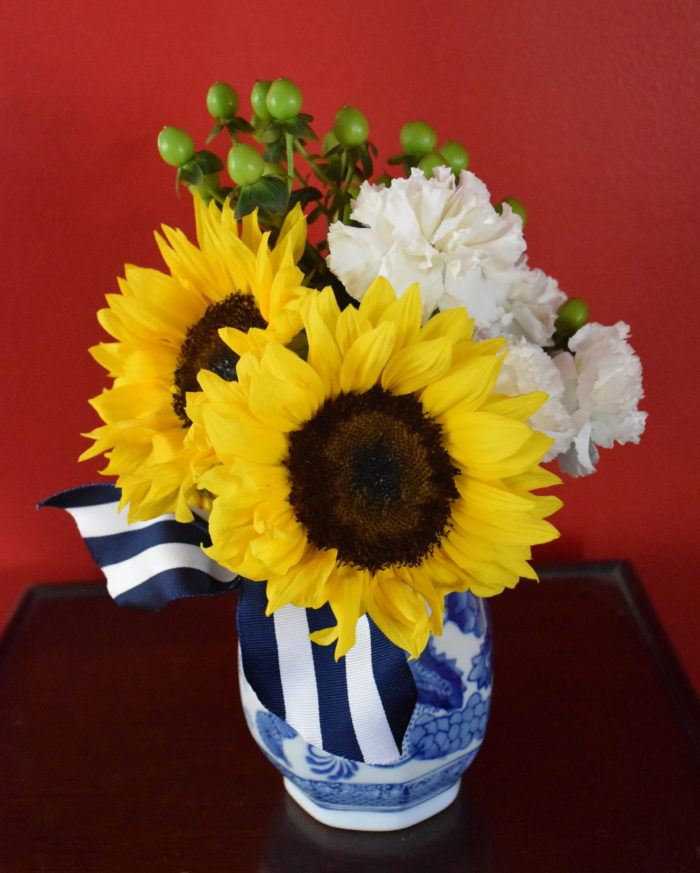
I was walking into the grocery store when I saw a woman with a bunch of sunflowers in her cart and when I saw them I knew exactly how I wanted to set my table for a small dinner party we were having with friends. Sunflowers are great because they are long lasting flowers that are generally easy to arrange. While I was at the store I also picked up some green hypericum coco berries and some white carnations. When I am making arranging flowers I often like to make arrangements with three different bunches of different flowers. It’s a classic arrangement that works well with lots of different types of blooms.

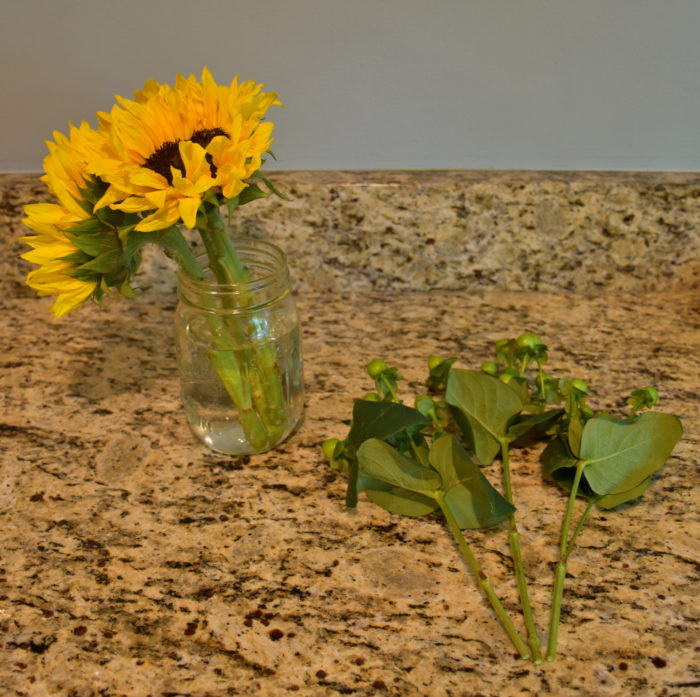
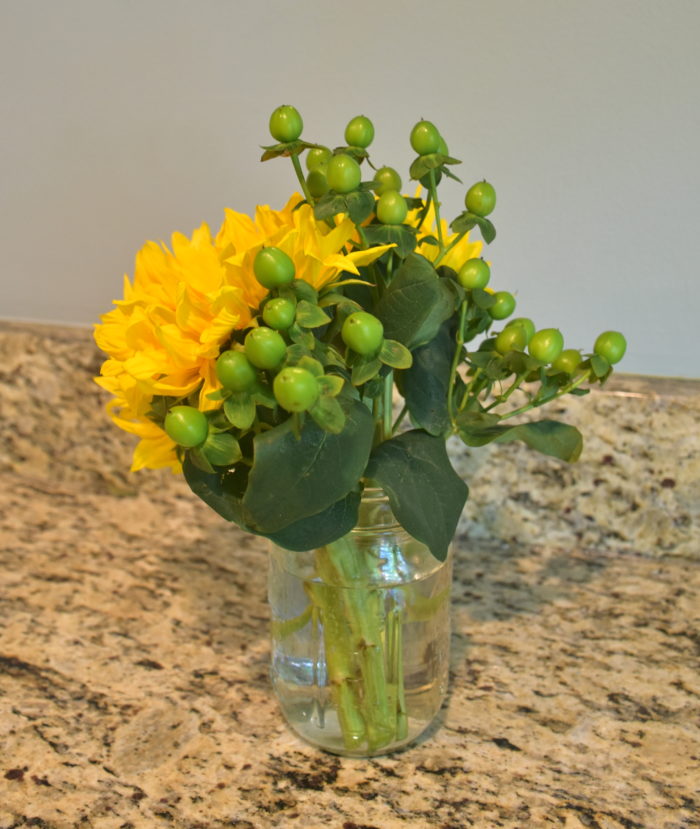
The first thing I did was cut three sunflowers to fit the mason jar I was using. Then I trimmed three stalks of hypericum berries where two were slight shorter and the middle one was about a half an inch taller. Then I placed the berries in the center of the arrangement.

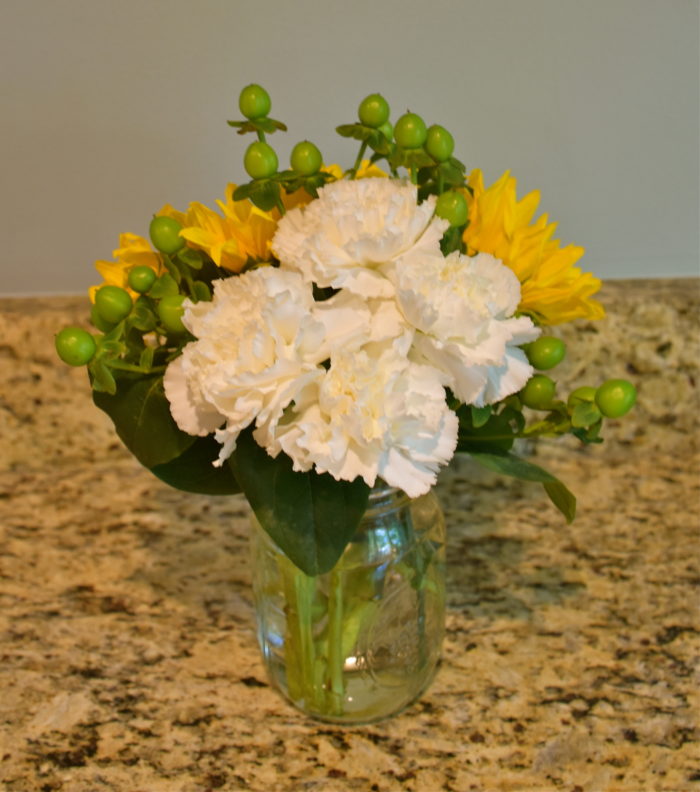
Next I added a group of four white carnations and I cut them where one was taller, then two were the same size and one was a little shorter to fill out the bottom.

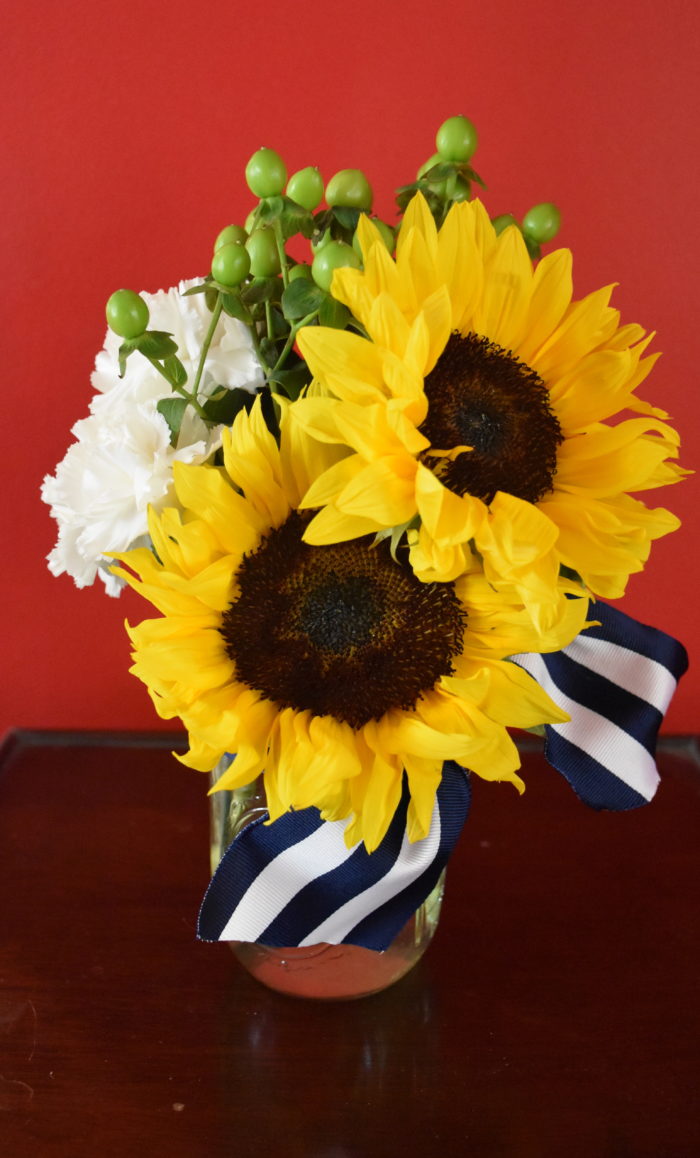
I decided to add some blue and white wired ribbon I found at Michaels. I cut the ribbon on the diagonal and I tied the ribbon around the base of the jar in a simple knot.

When I was setting my table I decided to make two identical arrangements and change the vase from the ball jars to use two ginger jars I had. Although the ginger jars had very different patterns they were about the same size. I liked the collected look of using two different jars. I placed the flowers on either side of my rose bowl with a cobalt blue candle inside. When I am entertaining at night I like to add some candles to my table. They add a nice glow to the table.

When I set a table I want to keep my flowers fairly low so guests can easily see each other. The blue and white salad dishes were a birthday gift. They are from the Sophia collection at Pottery Barn. These plates make my grandmother’s white pottery plates look a little more special. The cobalt blue glasses are actually plastic which makes them great for summer entertaining. They add just the right bit of color and finishing touch to my table.

This was a fairly quick and simple table to put together. Sunflowers and blue and white make for a very happy and welcoming table. Happy entertaining!

Art With Kids: Leaves with Crayon and Watercolor Resist

It is art that makes life, makes interest, makes importance… and I know of no substitute whatever for the force and beauty of its process.
-Henry James

Since Father’s Day is coming soon I thought I would share a fun art project my girls made for their dad last year. I believe that art and creativity are important to learning, so I try to come up with new projects we can do together. My girls love to paint and work on art projects. This leaf project was something I came up with on a whim and it was a favorite. It is fairly easy to do and it would work for a wide variety of ages.

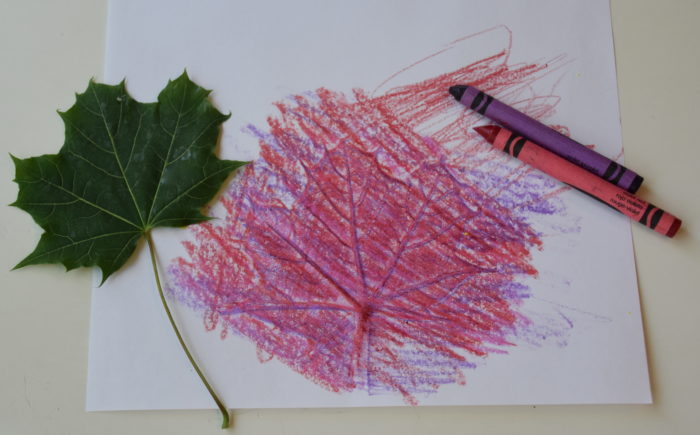
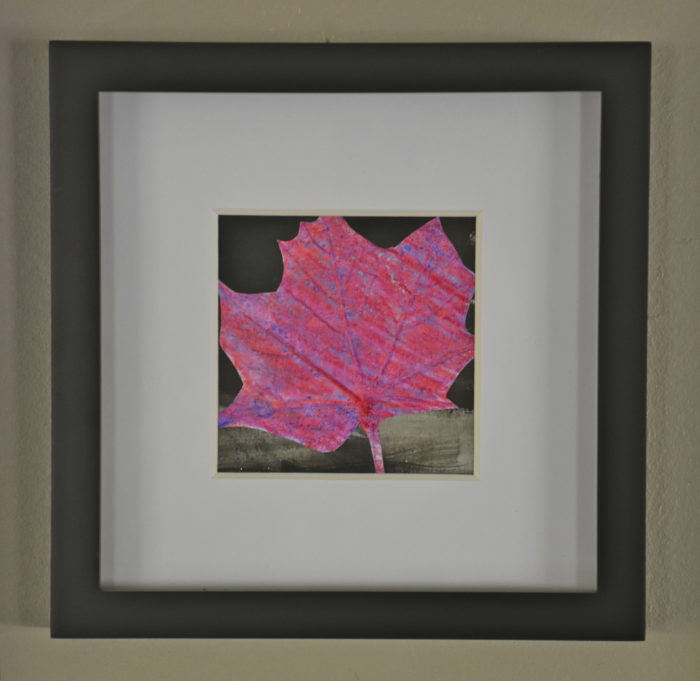
The first thing we did we head outside to collect some interesting shaped leaves. More medium sized leaves tend to work better if you are planning of framing or displaying their art later. Then I took some regular weight computer paper and helped the girls place the paper over the leaf. My preschoolers needed help keeping the leaf and paper still so I held it down for them while they did the tracing. I found that they looked best when we used a couple of different colors. My two and a half year old made this tracing with just a little help. She chose the purple and red colors herself and I like how it turned out. The first time we did this the girls were trilled to watch the shape of the leaf come through the paper.

After my girls made the crayon tracings I helped them cut their leaves out. Their scissor skills are not quite controlled enough yet to get them cut out, but older kids could definitely do all of these steps themselves.

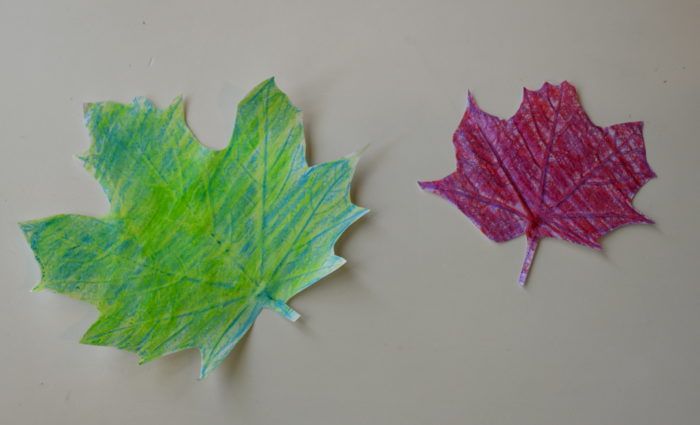
Here are two different leaves we did so you can see the difference it makes when you layer different colors of crayons.

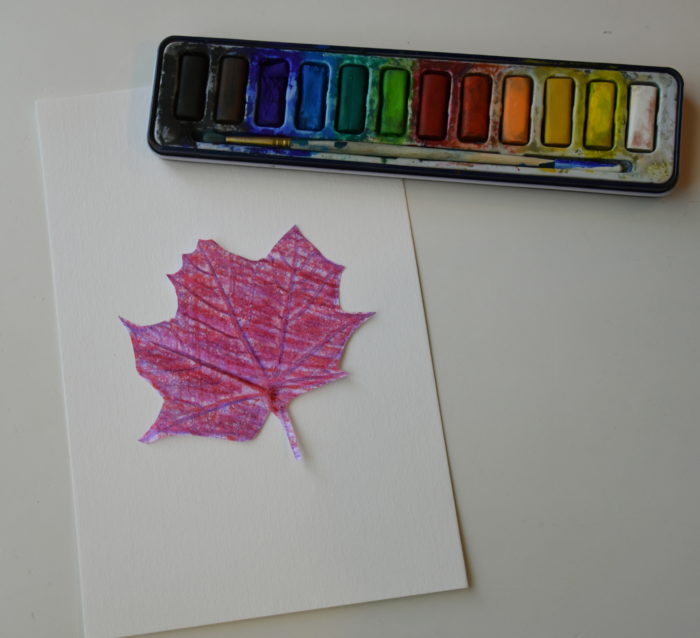
Next for the resist part we used some basic watercolors. My girls absolutely love to paint and watercolors have been the best. They are not super messy so we paint with them all the time. I still love to pull out the tempura paint but that can get a little crazy so we don’t paint with that quite as often.

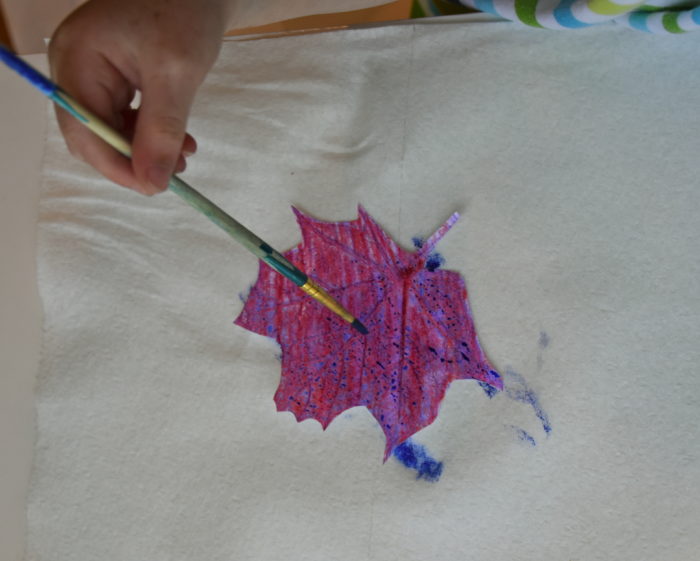
The watercoloring is the really fun part. The wax from the crayons will create a resist, but the watercolor will fill in any empty spaces and it adds a real dimension to the leaf. Here is my daughter painting it. You can see the small beads of watercolor. Once she was done I turned it over onto a paper towel a gently patted it once to remove the excess paint and then I turned it over to dry.

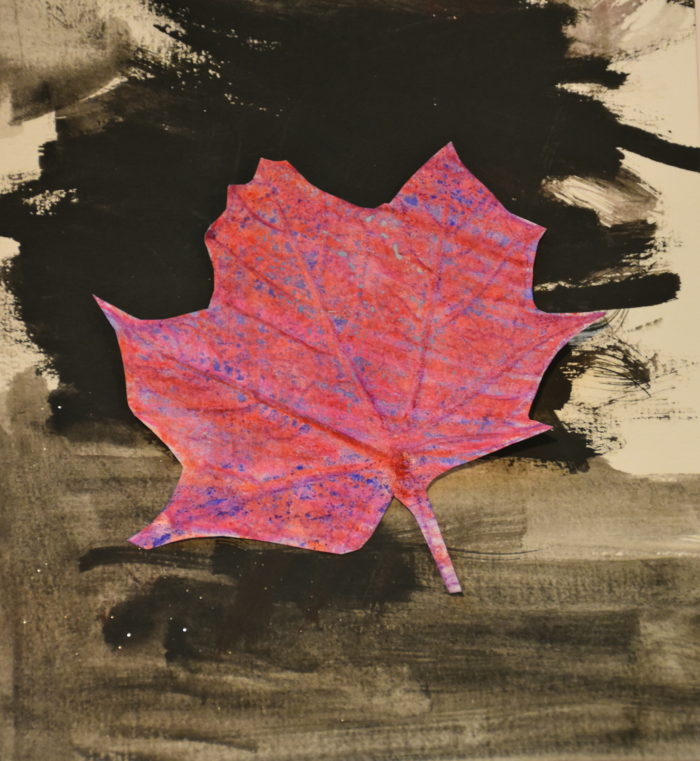
Then I gave my daughter a blank piece of watercolor paper. It is heavier and makes a great background for your leaf. I had her chose one color for a background and she decided on black. It works best to use a wider and bigger brush when making the background. When the leaf and background were both dry we used a glue stick to glue the leaf to the watercolor paper.

The framed maple leaf my two year old made.

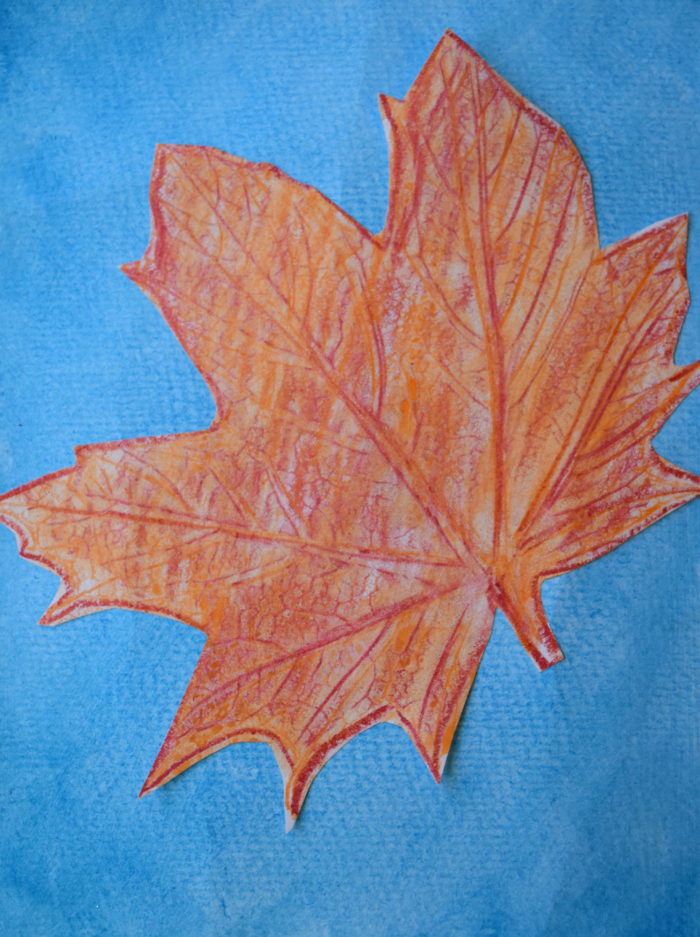
I must admit that I really liked helping my girls with this project. The picture at the top of the post is a leaf I made for fun. I think these would make a pretty print set if you used several different color combinations and types of leaves.  On the original ones we made for my husband I helped the girls finish their backgrounds to make sure they were solid, but I also like the artsy and edgy look of the black one that my two year old did herself.

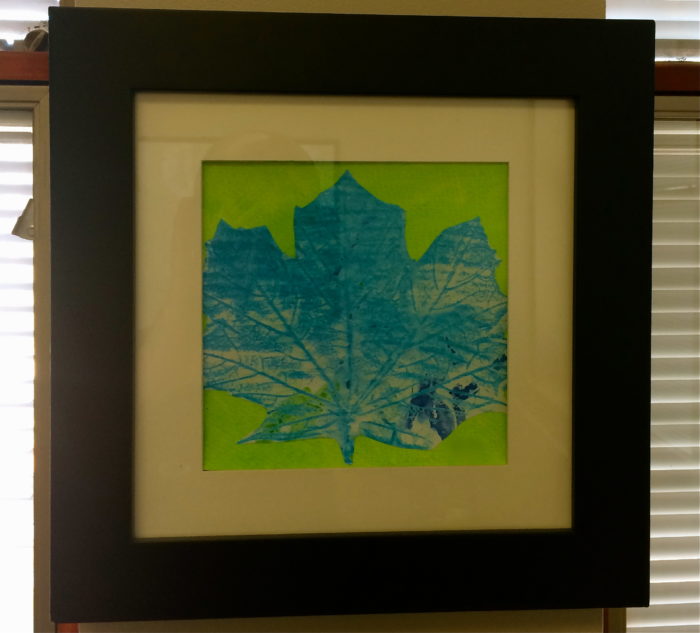
You can see how fun it is to play with the color scheme. This is one my now four year old made last year. Her favorite color is blue so she wanted to make a blue leaf.

Finally, if this is a gift or you want to display it get a simple frame with a mat from your local art supply or framing store. If your kids can write their own name, then have your artist sign their work. My daughters were really proud of their leaves and loved being able to give their dad something they made.

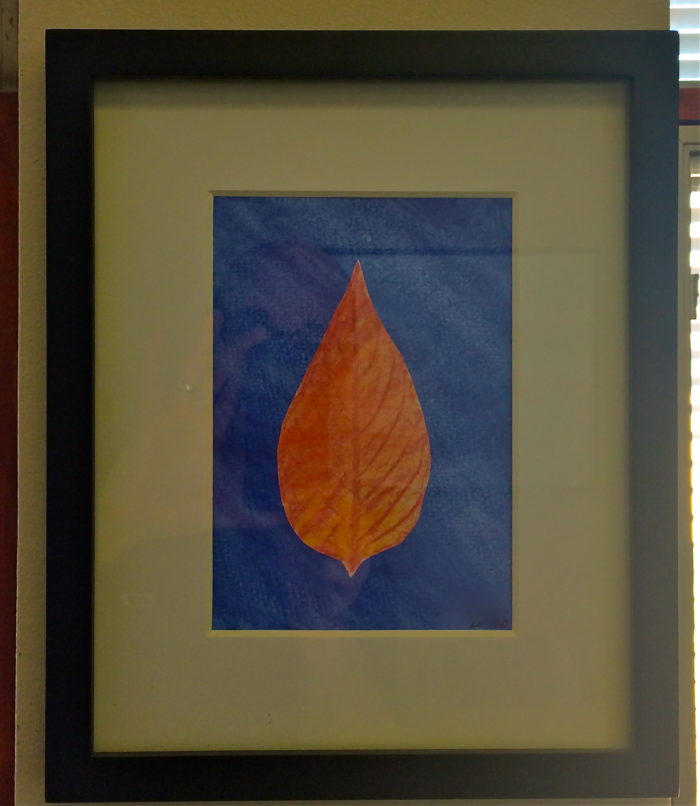
I like the combination of the royal blue and the orange and red leaf. If you look closely you can see my husband’s reflection on the glass frame. I had him send me a picture so you could see it hanging in his office.

The finished pieces turned out so great that my husband has them hanging in his office at work. So whether you have kids or you are young at heart and love a good art project give these leaves a try.

Lessons From Loving Emmy

Every family has their own unique traditions. One of ours was watching the Westminster Dog Show. Growing up in our house my mom did a good job of making sure we all sat down to a family dinner. One of the important rules of family dinner was there was no television. However, there was an exception that was was made for the two days out of the year when the Westminster Dog Show was on. We all looked forward to it and we loved it. As kids my brother, sister and I were glued to the television watching and learning about all of the categories and types of the dogs. We would all pick favorites and predict who we thought would win best in show.

When you are a kid and something is a big deal in your house, you naturally believe that everybody else is doing the same thing. The dog show in our house was bigger than the Super Bowl or the Oscars. So when my sister was a college freshman and the Westminster Dog Show began, she called me and laughed about how almost no one else in school knew about it. It just one of those family traditions. We all grew up loving dogs and my siblings and I are all dog owners. My parents have a labrador named Allie, my sister has a French bulldog named Eloise, My brother has two dachshunds named Beau and Olivia and I have a West Highland terrier “Westie” named Emmy.

Here are Eloise and Emmy hanging out and soaking in some sun.

If you too have had a special animal then you understand how somewhere along the way they become more like a family member than a pet. Emmy has been with me since I graduated from college fifteen years ago. Once I had a place of my own, I knew I wanted a dog. I had done some looking into different types of dogs and I thought a Westie would be a great fit. My mom happened to know someone who was head of a local Westie club and when I called her she had a nine month old puppy who was looking for a home. Emmy was playful, sweet and all kinds of fun. Like a good terrier, she has an independent and tenacious spirit, which made her a perfect match for me.

I had Emmy for a few months before I started dating my husband. The first time he came over to my place for dinner Emmy was not so sure about him. After we ate we went to watch television together and Emmy let it be known that he was taking her spot  on the couch. She looked at him and gave a little growl. Then when he tried to move her, she peed on him I was a little embarrassed, but he took it in stride. My husband has a good sense of humor and it turns out that his family had a beloved Westie as well, so he wasn’t too bothered about it. My husband quickly won Emmy over and they became good friends.

Here is Emmy at a birthday celebration for my husband.

People say that dogs or pets in general are lots of work, but the truth is that I have never really seen it as work. Emmy is an easygoing dog. As long as she isn’t getting groomed, she is generally up for whatever adventure or project I am into. Taking care of her is just part of loving her. Over the years Emmy has given me so much joy and loving her has taught me more than I could have imagined.

First, Emmy knows how to live in the moment. She can happily clear a low lying coffee table spread of appetizers in seconds. Her short stature is the only thing that keeps food safe in our house. Emmy can find joy in small things like a great meal, sunbathing on a pretty day or just making the rounds to get petted. Sometimes these things might seem small but when you add them all up they become something bigger. It’s that attitude of finding happiness in the small things that is important and Emmy is a master at finding joy.

Second, Emmy has never met a stranger, in fact because of her I have met more neighbors than I would have otherwise. Although she has slowed down a bit with age, Emmy is a master escape artist. At our old house we had to make multiple revisions to our gates and fence to keep her from getting out. Every escape and trip around the neighborhood caused us to meet more people. I remember one Thanksgiving when Emmy got out and we were looking for her. My husband and I split up to canvas the neighborhood. I was beginning to get worried and I was talking to a neighbor a few blocks away when up pulls my husband with Emmy sitting in the front seat of his car. Her head was out the window and she looked happy as could be. Her tongue was still panting from her tour of the neighborhood. Emmy was just making the rounds to wish everyone a Happy Thanksgiving, while taking in the glorious smell of the neighborhood turkey fryers. No one is ever a stranger to Emmy just a new friend.

Here is my oldest daughter when she was a baby. Emmy has always been great with kids.

However, the most important thing I have learned from Emmy is the power of presence. One of my shortcomings as a human is that sometimes I feel like I have to have the right words or know just what to do when something sad or hard happens. The truth is sometimes there isn’t anything good to say and just being there is the most important thing. When we moved my oldest daughter had a hard time adjusting to all the change. Starting a new preschool was difficult and somewhere along the way Emmy became a good friend to her. If you ask her she will tell you Emmy is one of her best friends.  When your with Emmy you don’t have to worry about what she thinks or about impressing her. She wags her tail and looks up at you with her kind eyes and you know you’re loved.  There is just something about being with her that always smooths the edges of a tough day. That’s the gift of being loyal and present for someone and that’s the great thing I have learned from Emmy.

Here she is with her trademark look. The one that melts my heart and could make you forgive anything.

Emmy suddenly became very ill two weeks ago which caused her to go into advanced kidney failure. So for the first time I have had to begin to think about saying goodbye to her. As I write this Emmy is back home with me in our living room. She is weak and her days are numbered but you can tell that she is happy to be home. When we were on our way to the animal hospital to care for Emmy, my four year old was in the back seat and suddenly out of the blue she says “Mommy, I know you are sad but I wish we could be happy.” Oh the wisdom in those words, she is right even now there is much to be happy about. Emmy has given us so much love and so many stories to share and laugh about. So as I try to teach my girls about saying bye for now my heart is a little lighter writing about all of the fun and joy we have had along the way. The truth about great dogs is they never really leave you because their story becomes a part of yours and in that way they live on.

Grilled Cedar Plank Salmon Tacos

I love a good fish taco, but usually when I eat one they are made with a beer battered fried white fish, so when I came across a recipe for salmon fish tacos I had to try it. My sister in law gave me Ina Garten’s new cookbook Cooking for Jeffery for Christmas this yearWhen I flipped through the book, this recipe caught my eye so it was one of the first I tried. Ina calls for roasting her salmon in the oven, but I really love to grill and I thought this recipe could be adapted for a healthy grilled taco. My husband is the expert on cedar plank salmon in our house so we teamed up to work on this one together. Being a Texan I have cooked and eaten quite a few tacos in my day so I made a few changes to the seasonings in the recipe to suit my taste. So this is my version of salmon tacos. Now that the Summer grilling season is here, these delicious tacos are definitely going to be one of our favorites.

Grilled Salmon Tacos

Serves 6

Red Cabbage Slaw

  • 2 cups of finely shredded red cabbage
  • 1 medium sized cucumber sliced into matchstick slices
  • 1/4 cup apple cider vinegar
  • 3 tablespoons of chopped fresh dill
  • 1 teaspoon of kosher salt
  • 1/2 teaspoon of black pepper

Salmon

  • 1  3/4 pounds of fresh salmon (if I am making this for my husband and I then I use 1 pound of salmon)
  • 2 teaspoons of Chili Powder
  • The zest of one lime
  • 1 tablespoon of lime juice
  • 1  1/2teaspoon kosher salt
  • 12  corn tortillas warmed (I happen to like the white corn tortillas with this recipe)

Guacamole

  • 4 ripe avocados
  • 2 tablespoons of lime juice
  • 1 teaspoon cumin
  • 1/2 teaspoon kosher salt
  • 1/4 teaspoon coriander
  • 1 teaspoon Siracha (a Thai chili garlic sauce you can find in the International food section of your grocery store. If you are hunting for it in the store it usually has a rooster on the front with a bright green lid)

First soak your cedar plank in water for two hours to prevent it from burning when you put it on the grill.

Then get your grill ready to go. We have a gas grill so I like to preheat mine by turning it on a least 30 minutes before I am going to grill. This recipe would also work with charcoal you just need to get your briquettes going so you have a nice even medium high temperature without any flames.

Meanwhile in the kitchen begin getting your red cabbage slaw put together. I start by quartering a cucumber and then cutting off the seeds. Then I chop the cucumber into thin matchsticks slices because I want them to roughly match the side of the cabbage I am going to chop next.

Then chop about 2 cups of red cabbage (about 1/3 of a large head of cabbage). Take your cabbage and slice it into thin even circles or rings. Then chop those thin slices into skinny strips. Place them in a mixing bowl with the cucumber and mix in 1/4 cup of apple cider vinegar, 3 tablespoons of chopped dill and 1 teaspoon of salt and 1/2 teaspoon of black pepper. Then cover the slaw and place it in the fridge to marinate for 30 minutes to an hour.

Next in a small bowl mix together two teaspoons of chili powder and 1 1/2 teaspoon of salt. Then in a separate small bowl I use a rasp or microplane to get the zest of one lime. Then cut that lime in half and so you can use the juice to coat the salmon so the seasonings will stick to the fish.

A note from my husband the grill master:  to enhance the smokey flavor of your fish, you can place your cedar plank on the grill for a minute before you put your fish on it to char the wood a bit (if you are short on time you can skip that step and the fish will still cook well with a little less smokiness). Next put your salmon skin side down on the soaked cedar plank. Then squeeze the juice from half of a lime about a tablespoon over the fish and make sure the juice covers the surface of the salmon. Then evenly sprinkle on the chili power and salt mixture. Finally sprinkle on the lime zest and you are ready to grill.

Place your cedar plank and fish on the grill and grill it for 20 to 30 minutes depending on the size and thickness of your salmon. This smaller piece of fish took 20 minutes. If you have a digital thermometer the temperature should be about 140 degrees. We have a   digital fork thermometer which makes it easy to check grilled meats. If you like to grill often its a really helpful tool. Otherwise your fish should feel firmer to the touch and you can prick a tiny hole in it to make sure it is not too pink.

While your fish is cooking make the guacamole. Take 4 avocados (If I am making this just for my husband and I use two and cut the guacamole recipe in half) then remove the avacado seed and scoop the avocados out of their skin using a spoon. Roughly mash the avocados using a fork or a potato masher. I like mine to have a few chunks, but you want it to be smooth enough to spread on your tortillas. Then add in 2 tablespoons of lime juice, 1 teaspoon of cumin, 1/2 teaspoon of salt, 1/4 tsp of coriander and 1 tsp of Siracha.

Before serving, I flake the salmon into smaller chunks using a fork and I remove the skin from the bottom.

Then take your warm corn tortillas and layer on some guacamole, salmon and red cabbage slaw. If you are serving this for guests you could put out the toppings and let everyone make their own tacos. Happy grilling!


Outdoor Entertaining

It was my birthday a few weeks ago and the weather was beautiful so I decided it would be fun to eat outdoors. We have a concrete patio but we don’t have lots of outdoor furniture because our girls love to ride their trikes out there and color with sidewalk chalk. We decided that for now that we were going to give them some space to play. I have a folding table that I pull out when we want to dine alfresco. I believe in celebrating even if things aren’t all perfect. We don’t have amazing patio furniture (our chairs are plastic from Home Depot) but it was still a very fun and festive evening.

We had a next door neighbor at our old home named Sally. She was in her eighties although she was very active, she had suffered through some illness. That same year her two daughters who lived out of town couldn’t make it to celebrate her birthday, so she decided to throw a party and invite her neighbors. We didn’t know her well at the time, but I thought the idea was wonderful. Lots of neighbors came and she made food and  her famous homemade ginger ale. It was a great evening and a reminder that celebrating  the small things is important.

So remembering that story I went down to the basement to find the christmas boxes. At the bottom of the pile I found the outdoor light box and got out a couple of long strings of lights. My two year old was there with me and when she saw me pull out the lights a huge smile lit up her face. “Mommy, Christmas is a good idea.” That’s exactly what I was thinking. So I pulled out the ladder and we strung the lights up to the trees and the patio light. The girls clapped and there were squeals of delight as I turned the lights on. We had been thinking about adding some outdoor string lights, but we hadn’t planned how we were going to string them so Christmas lights it was. Next the girls helped me set up the table and get flowers from the yard. They had fun making a cake and tasting the buttercream icing. I have had birthdays in the past with more elaborate plans, but this one was fun. I will definitely remember it because our girls had such a good time helping me make the party. I made some of our favorites: King Ranch chicken and black bean salad.

Here is our card table with a Two’s Company tablecloth I got several years ago and these fun paper doilies I found at Target recently. They were large enough to make cute placemats, but I also think they would look good strung together a a festive garland.

A good friend of mine teaches elementary music and she says that birthdays are always  more fun to celebrate when you have a classroom of excited kids. She is right there is nothing like hearing my girls belt out happy birthday at the top of their lungs while trying to get close as they can, so they can help blow out the candles. So here’s to celebrating even the small things and know that Christmas lights can make just about any party better.

Contact Us