This salad is the dish that always disappears when we serve it at a party. My sister’s baby shower was no exception, this was the one dish that had absolutely no leftovers. My mom is the one who gets all the credit for thinking about including it as a brunch side dish years ago. It’s delicious, healthy and it goes great with egg dishes or small sandwiches, which are typically on the menu at any brunch. The bite sized pieces also make it a great party dish since no knives are required. It’s a hardy salad that can also serve as a main course for vegetarian guests. However, don’t let that stop you from serving it at dinner too. I recently made it for a pizza dinner with a friend and I make it as a main course for dinner with some grilled chicken or with some pita bread and hummus. If you are trying to eat healthy in the new year then this is a great salad to try.
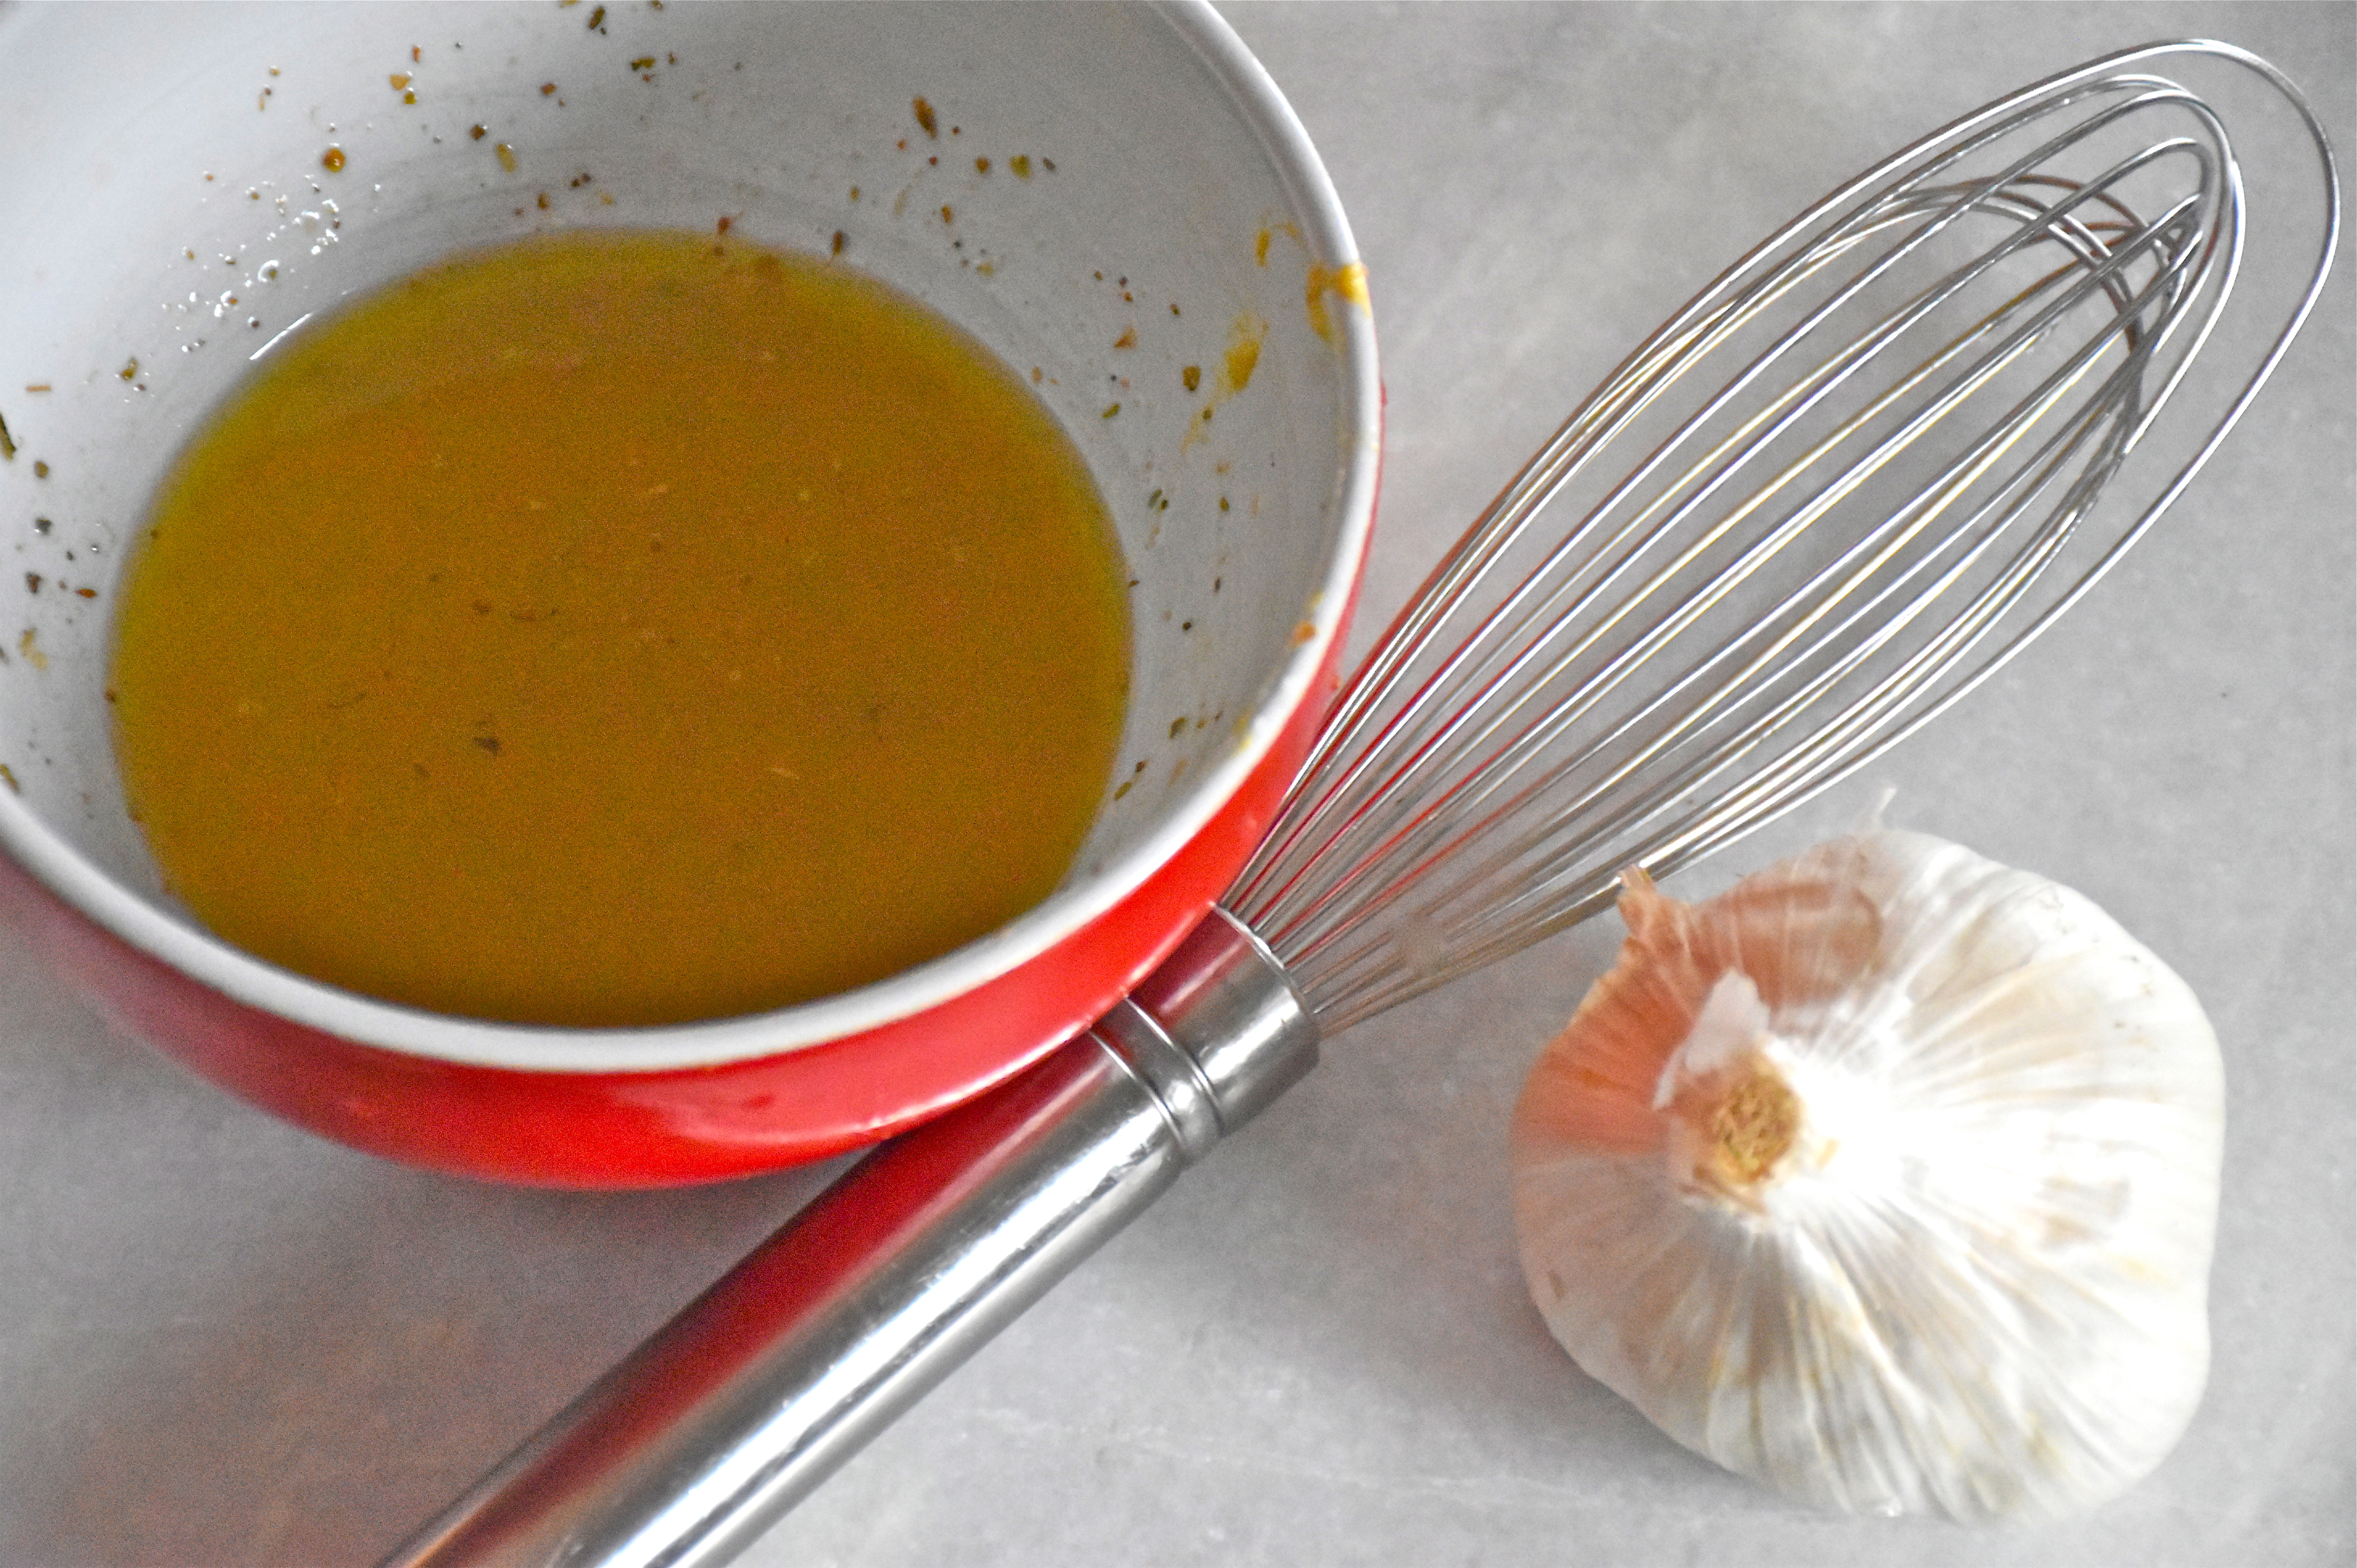
If you have never made your own salad dressing before let me assure you that it is easy to do and definitely worth the extra effort. In this dressing I used two types of vinegars and two oils, because I feel like it gives you a more balanced flavor. Olive oil can have a strong and sometimes overpowering flavor when used in salad dressing so I like add some canola oil as well. The sherry vinegar is also a wonderful addition because it adds some acidity with a faintly sweet aftertaste which makes it a nice balance with the more acidic red wine vinegar. The dressing can be made ahead of time and it will keep for up to two weeks when covered and stored in the fridge.
Chopped Greek Salad (Serves 4 to 6)
1 large cucumber quartered and sliced into bite sized pieces
1 (12oz) container of mixed cherry, grape and cocktail tomatoes (my package called them “Wild Wonders”)
1/4 cup pitted Kalamata olives
1/4 cup thinly sliced bite sized red onion
4 oz of feta cheese cut into bite sized cubes
1 heart romaine lettuce chopped into bite sized pieces
Chop all of your vegetables and toss them in a large bowl with the dressing right before you plan to serve your salad. If you are entertaining with this dish and want to get a head start on the prep work then chop your veggies and cheese and store each separately in a small zip top bags so you can quickly assemble your salad before your guests arrive.
Greek Salad Dressing
1 tablespoon sherry vinegar
1 tablespoon red wine vinegar
1 teaspoon dijon mustard
1 clove of garlic minced
1 teaspoon of dried oregano
1/2 teaspoon of kosher salt
1/4 teaspoon pepper
1/4 cup extra virgin olive oil
1/2 cup canola oil
In a small bowl whisk together your vinegars, mustard, garlic, oregano, salt and pepper. Then slowly drizzle in your oil as you whisk and continue to whisk it until the oil is fully incorporated.
So if you are looking for a party dish or a salad to share with friends then try this Greek Chop Salad. It’s tried and true delicious party food in our house. Finally, I will leave you with one more entertaining and food styling idea. If you are serving this salad at a party then think about serving it on a platter instead of a bowl. Salads with gorgeous vegetables look great when all the beautiful colors aren’t hiding behind a bowl.
My sister in law, Ashley is a wedding and event planner at Keely Thorne Events. She has impeccable taste and a gorgeous home. Some of the events she has planned including this glamorous destination wedding featured on Vanessa Jaimes Floral Design have been highlighted online or published.
Ashley recently hosted a lovely baby shower for my sister. Our family is excited because my sister and brother in law are expecting their first baby. As always, Ashley planned a beautiful event filled with so many pretty details that I thought I would share and few photos and entertaining ideas.
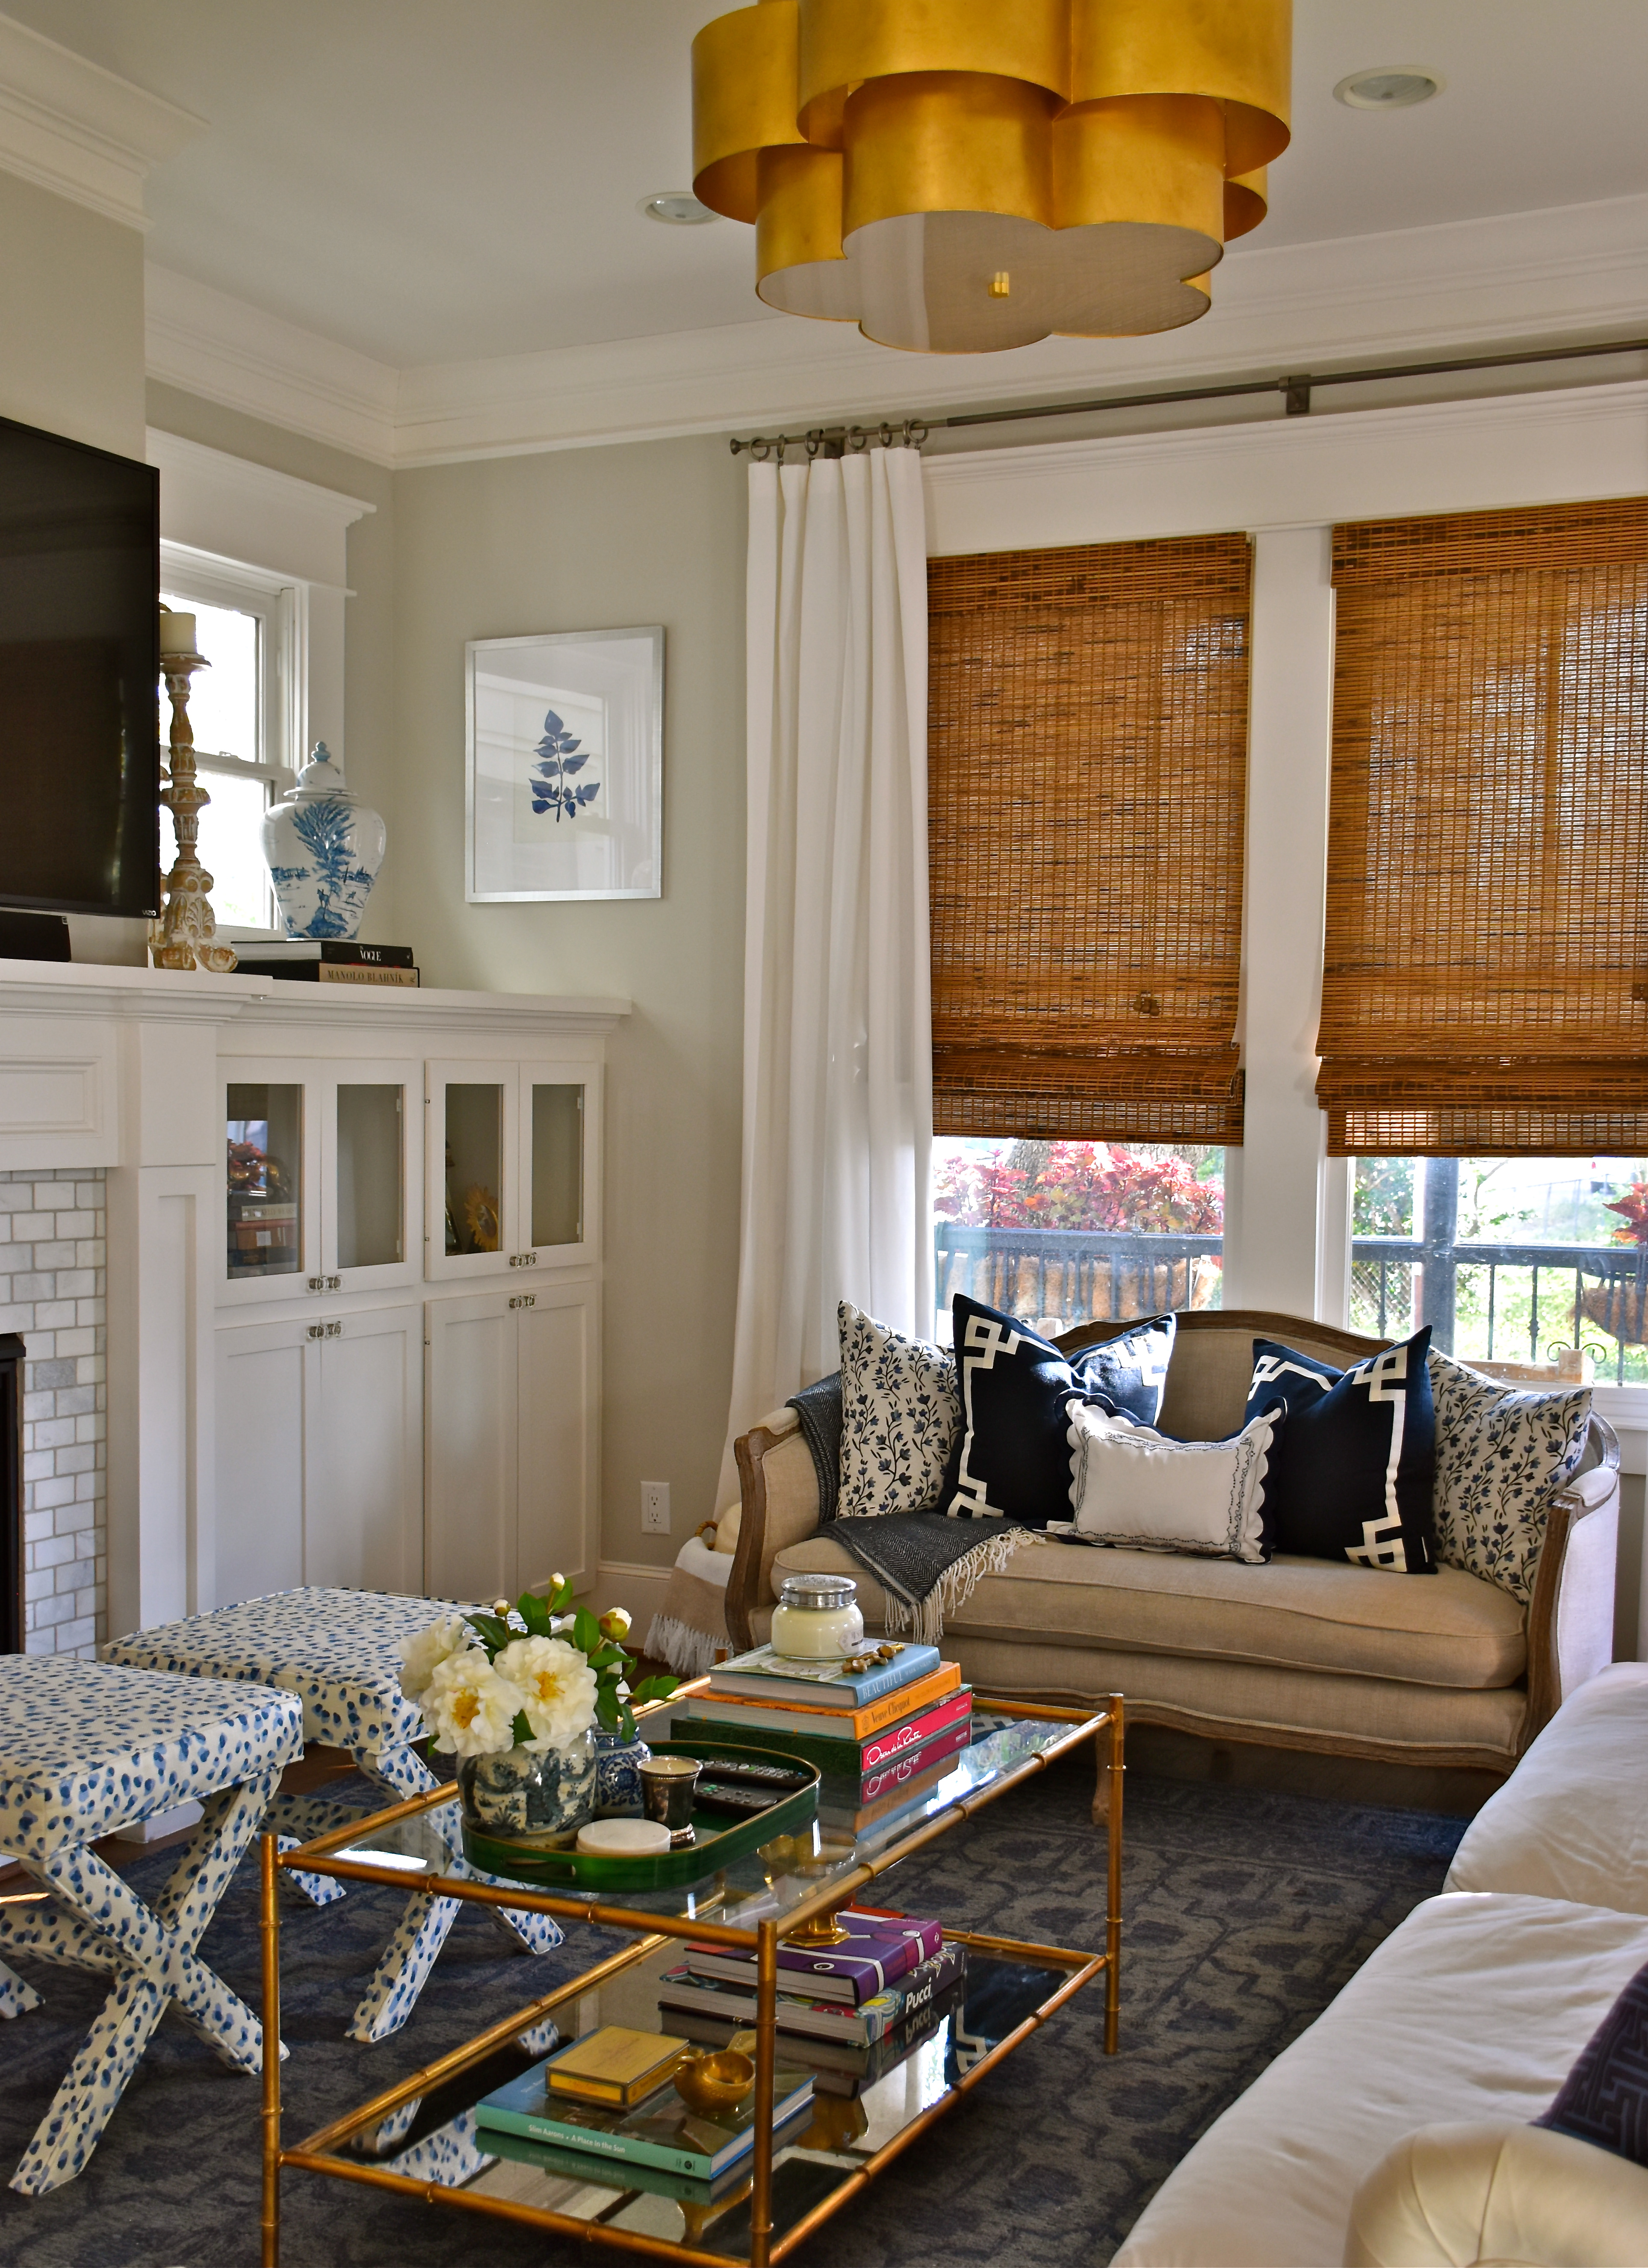
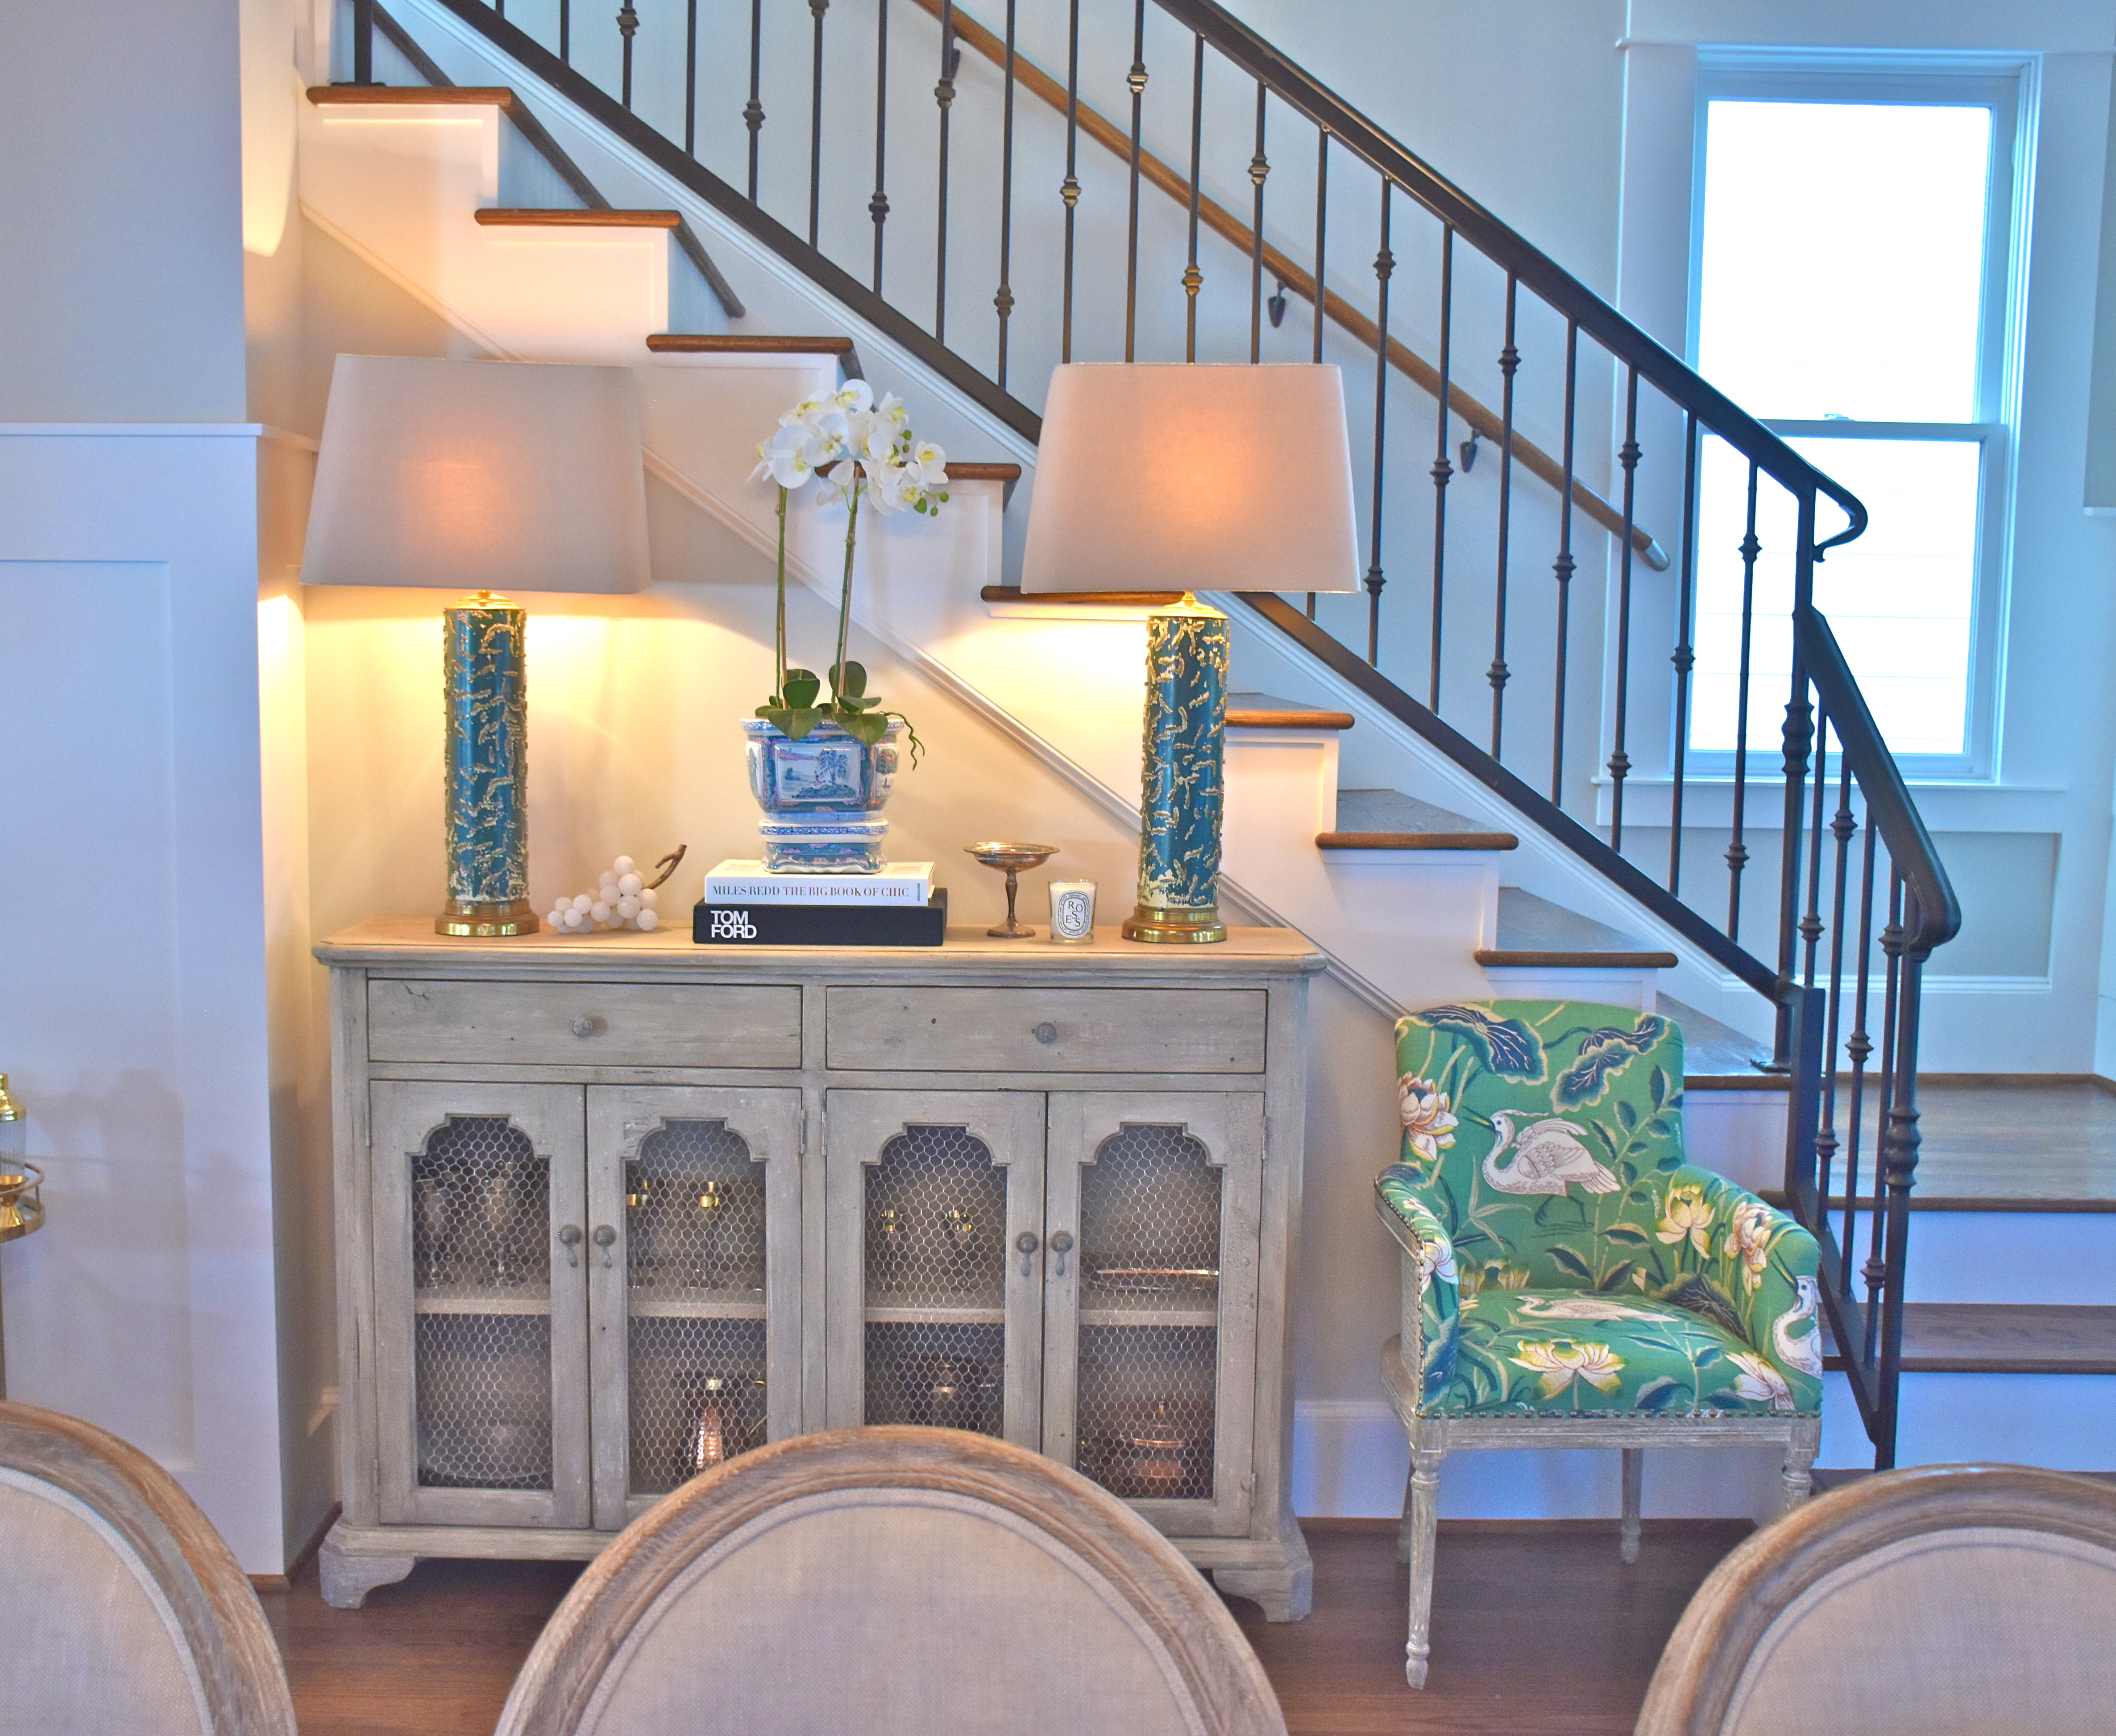
Here is the pretty entryway to her home and living room. I love how the console table makes a statement in their entry with the beautiful blue and white vignette. the small blue and white garden stool is the perfect place to set a drink at a party.
Think about adding in garden stools, small benches and chairs so you have extra places for guests to set their drinks and places to sit.
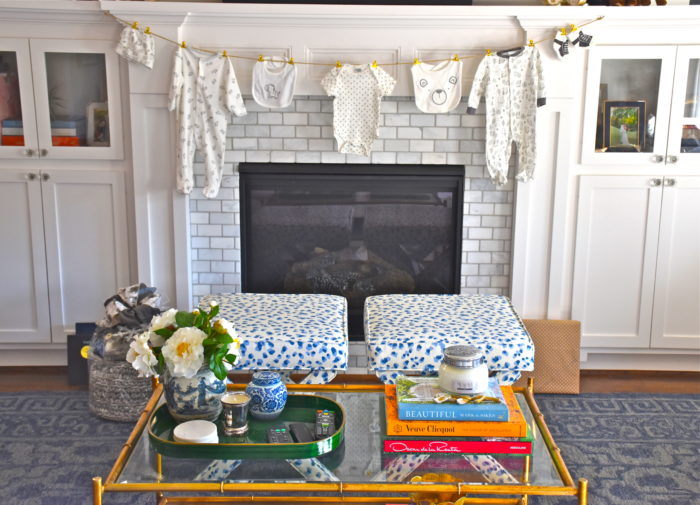
Here is another view of the living room which is right off the front. Here you can also see the fireplace which was featured at the top of this post. Ashley decorated it with a clothesline of sleepers, onesies and bibs.
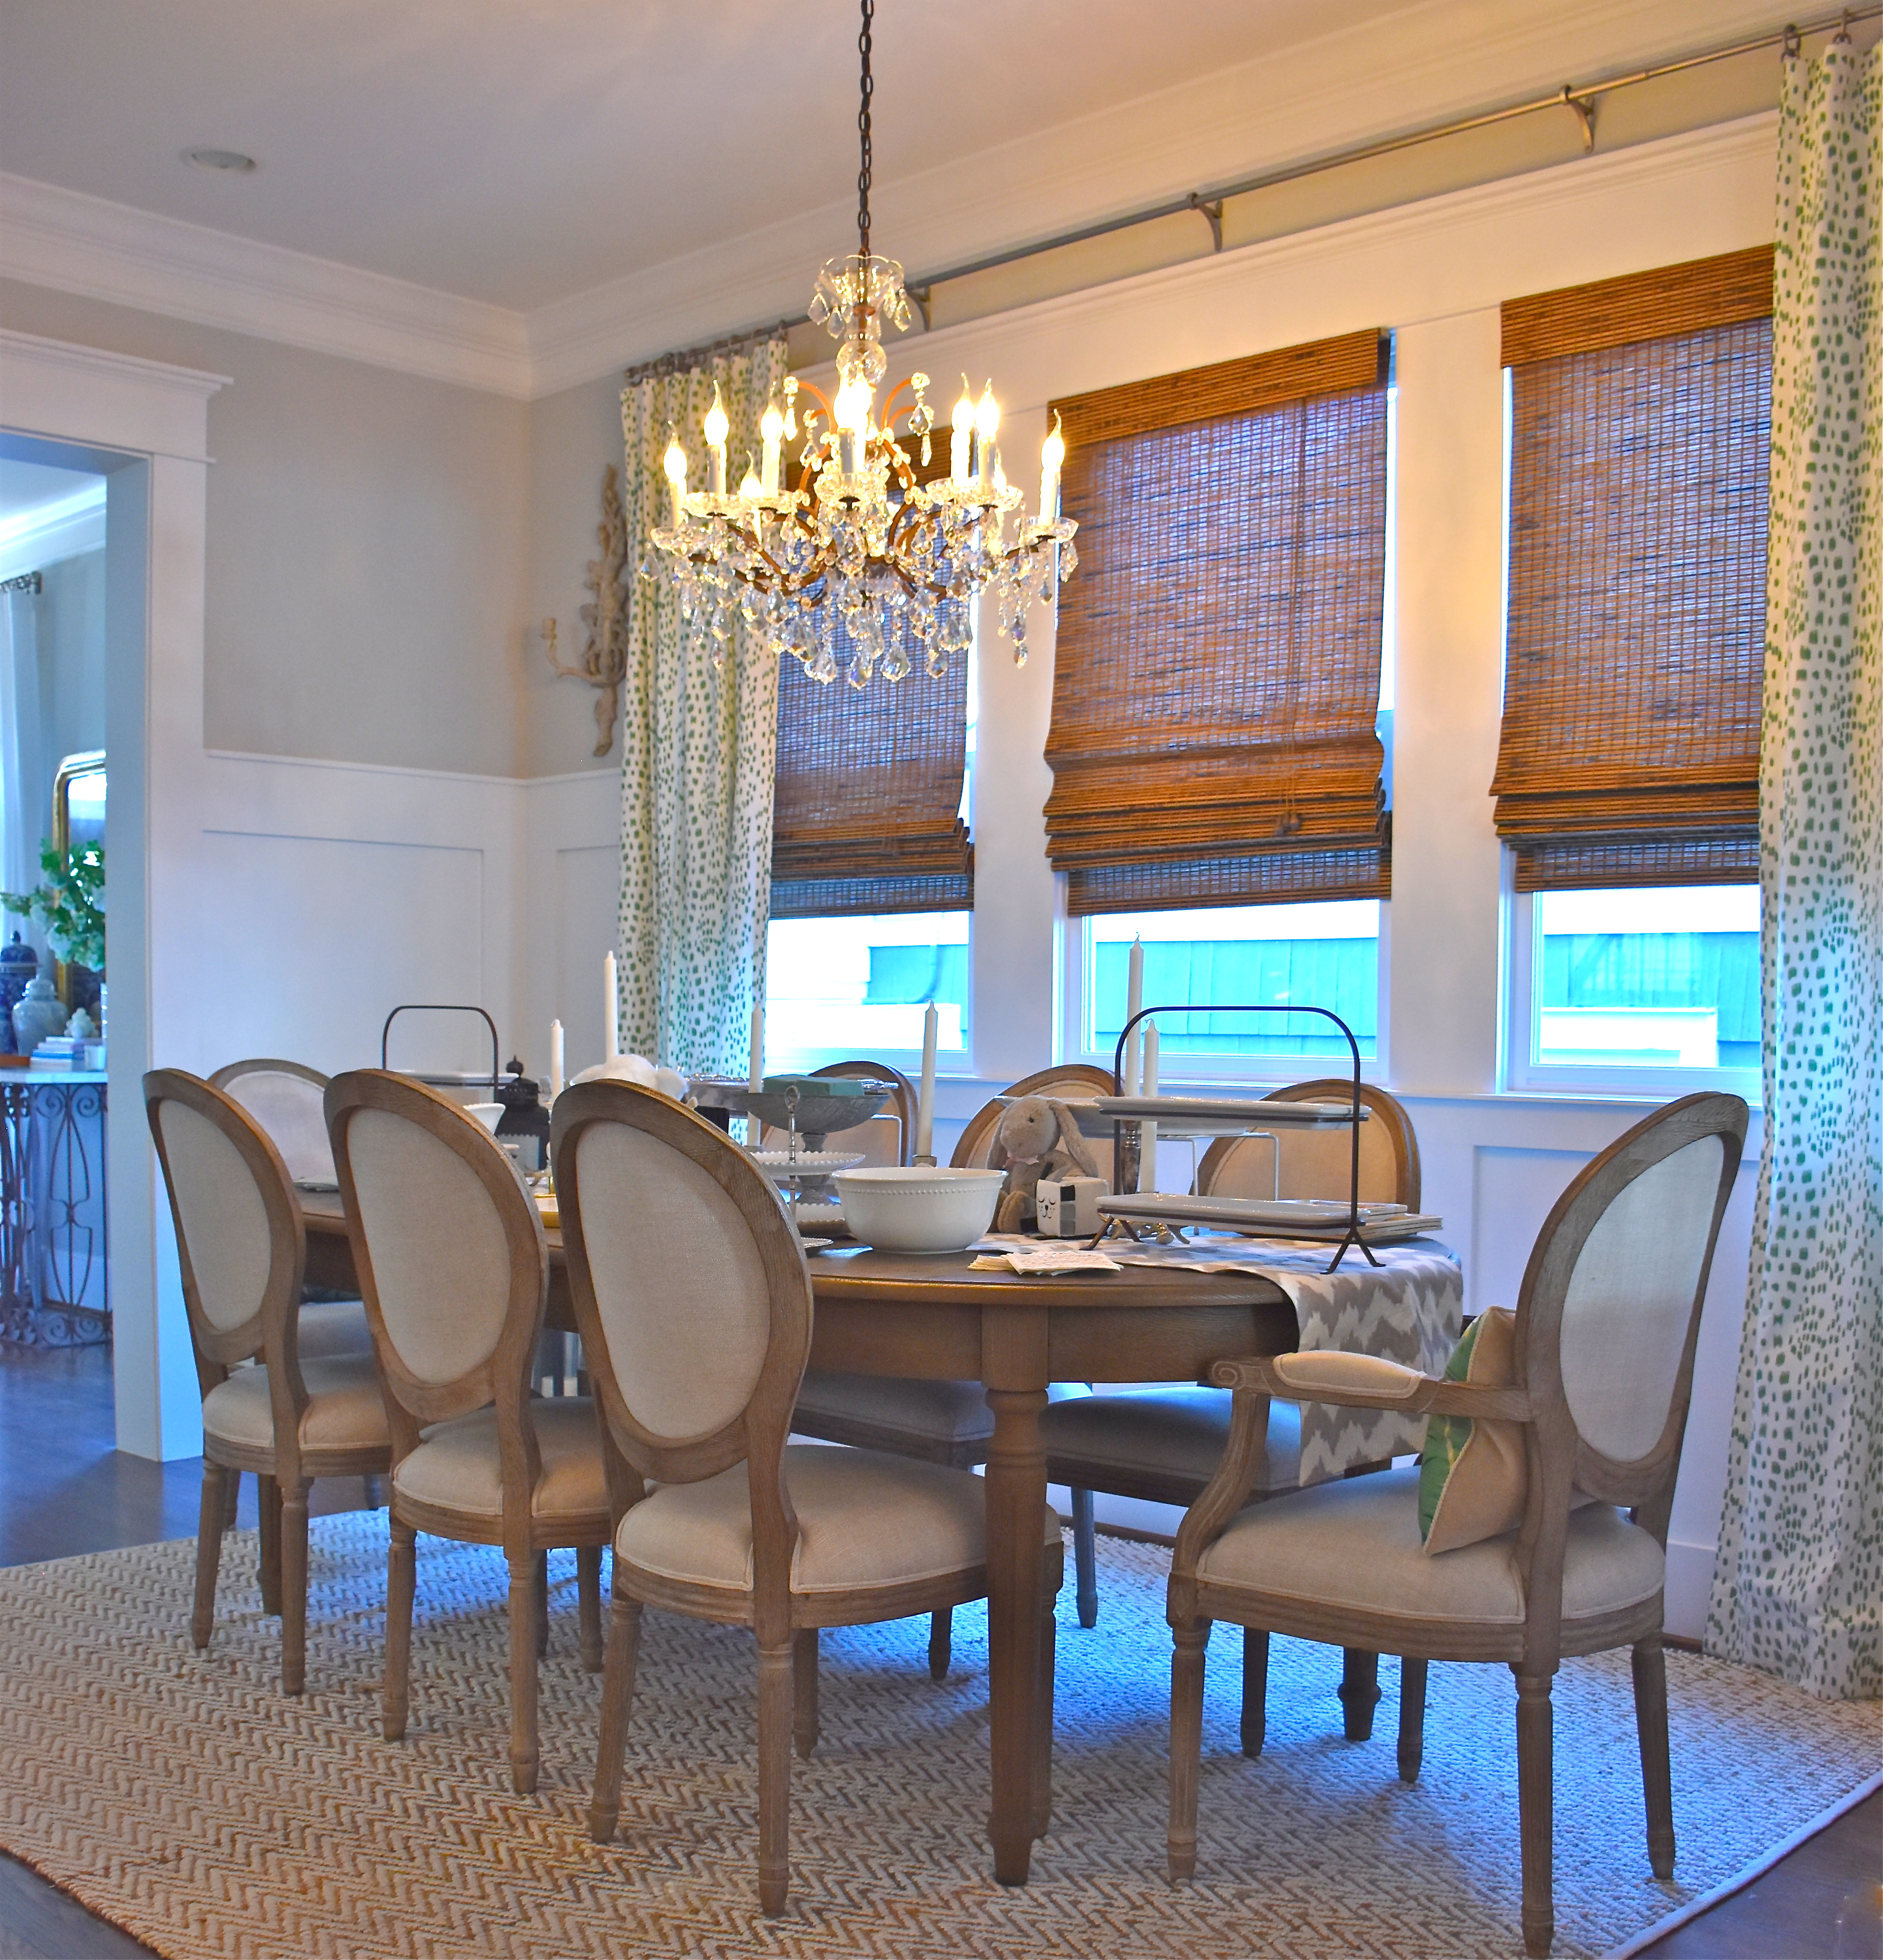
Ashley’s home is a new construction that was designed to look like a traditional row home. I love how she has incorporated classic antique features like this crystal chandelier. She has has added so many antique touches and unique lighting fixtures to give her home a warm and old world look. This is the dining room as we were setting up the last minute food and details.
A pretty and well chosen container filled with floral oasis foam can make your blooms look like a gorgeous one of a kind arrangement.
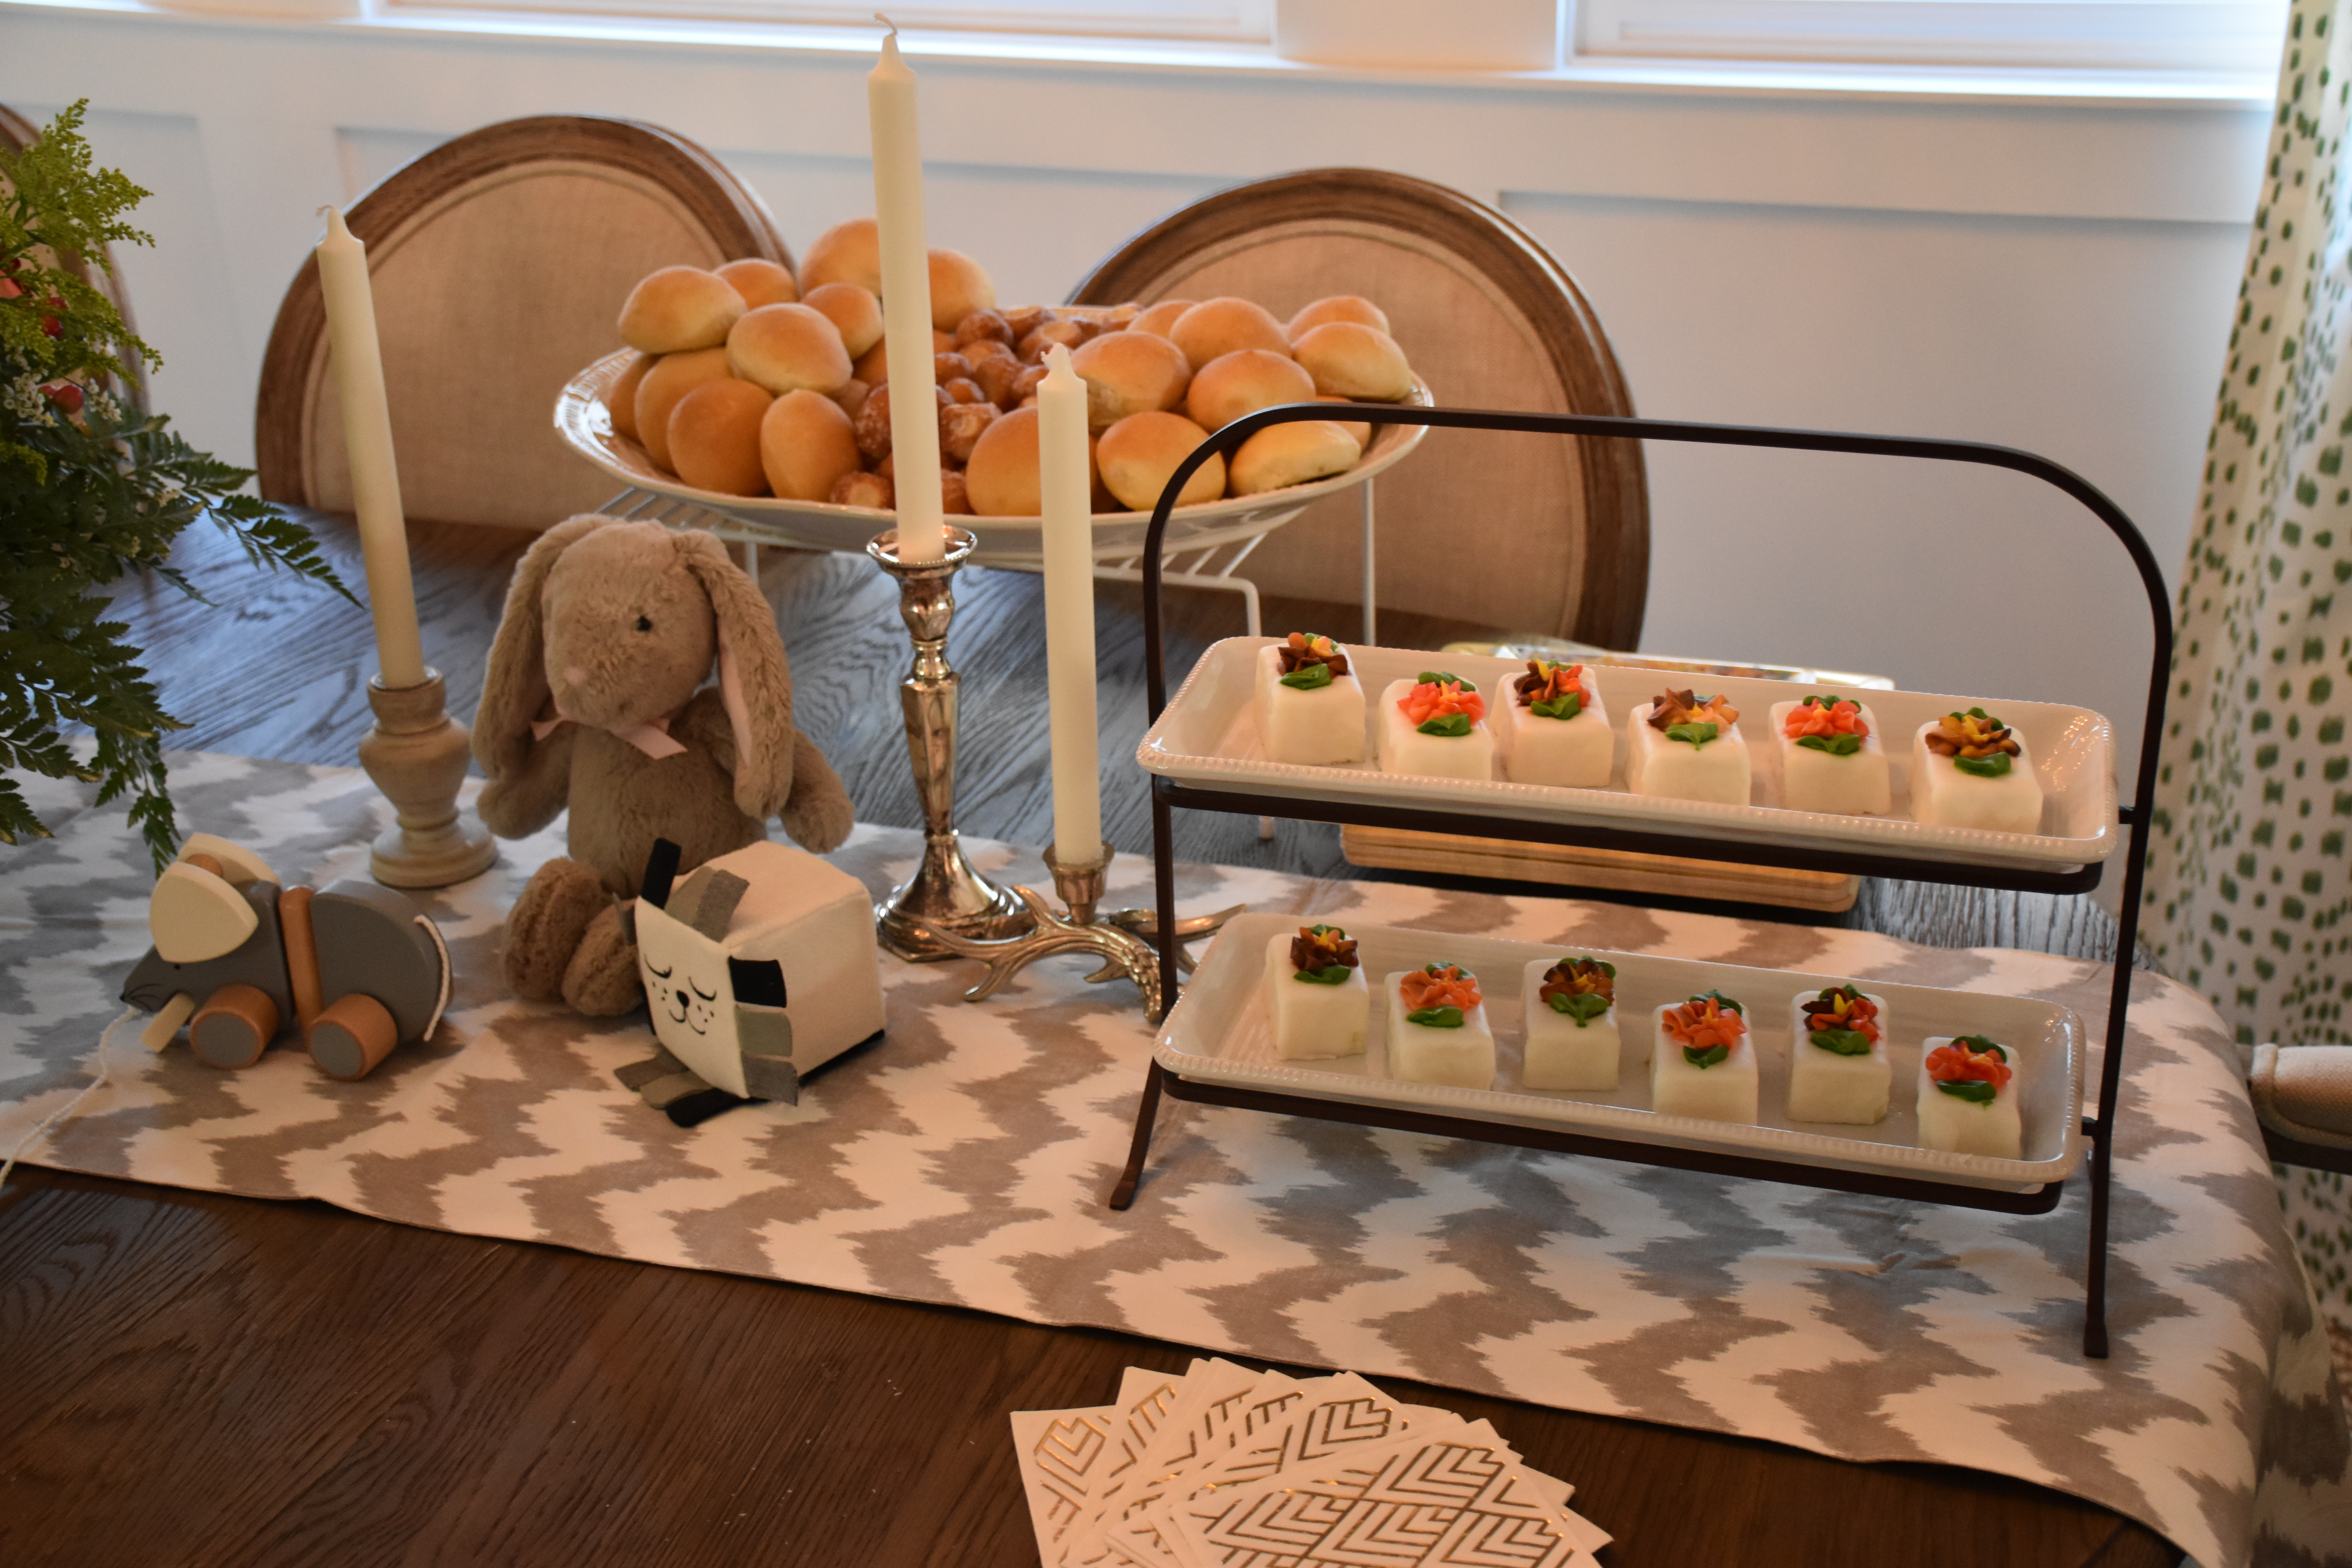
Ashley arranged these pretty gerber daisies and roses. I love how she gave them a bit of height and had the greenery cascading down the sides of her footed bowl. The table also had some animal themed toys which helped give the table a baby shower feel.
Use cake stands, glass blocks or pantry risers add height to your buffet table and give your event a catered look.
Ashley had stands ready to help raise the food up on the back of the table which is a great idea that gave the buffet table some height. The table was filled with some of my sister’s favorites including delicious petit fours from a local Houston bakery called Moeller’s.
On the other side of the table in a little nook by the stairs is the buffet table and a show stopping accent chair in green.
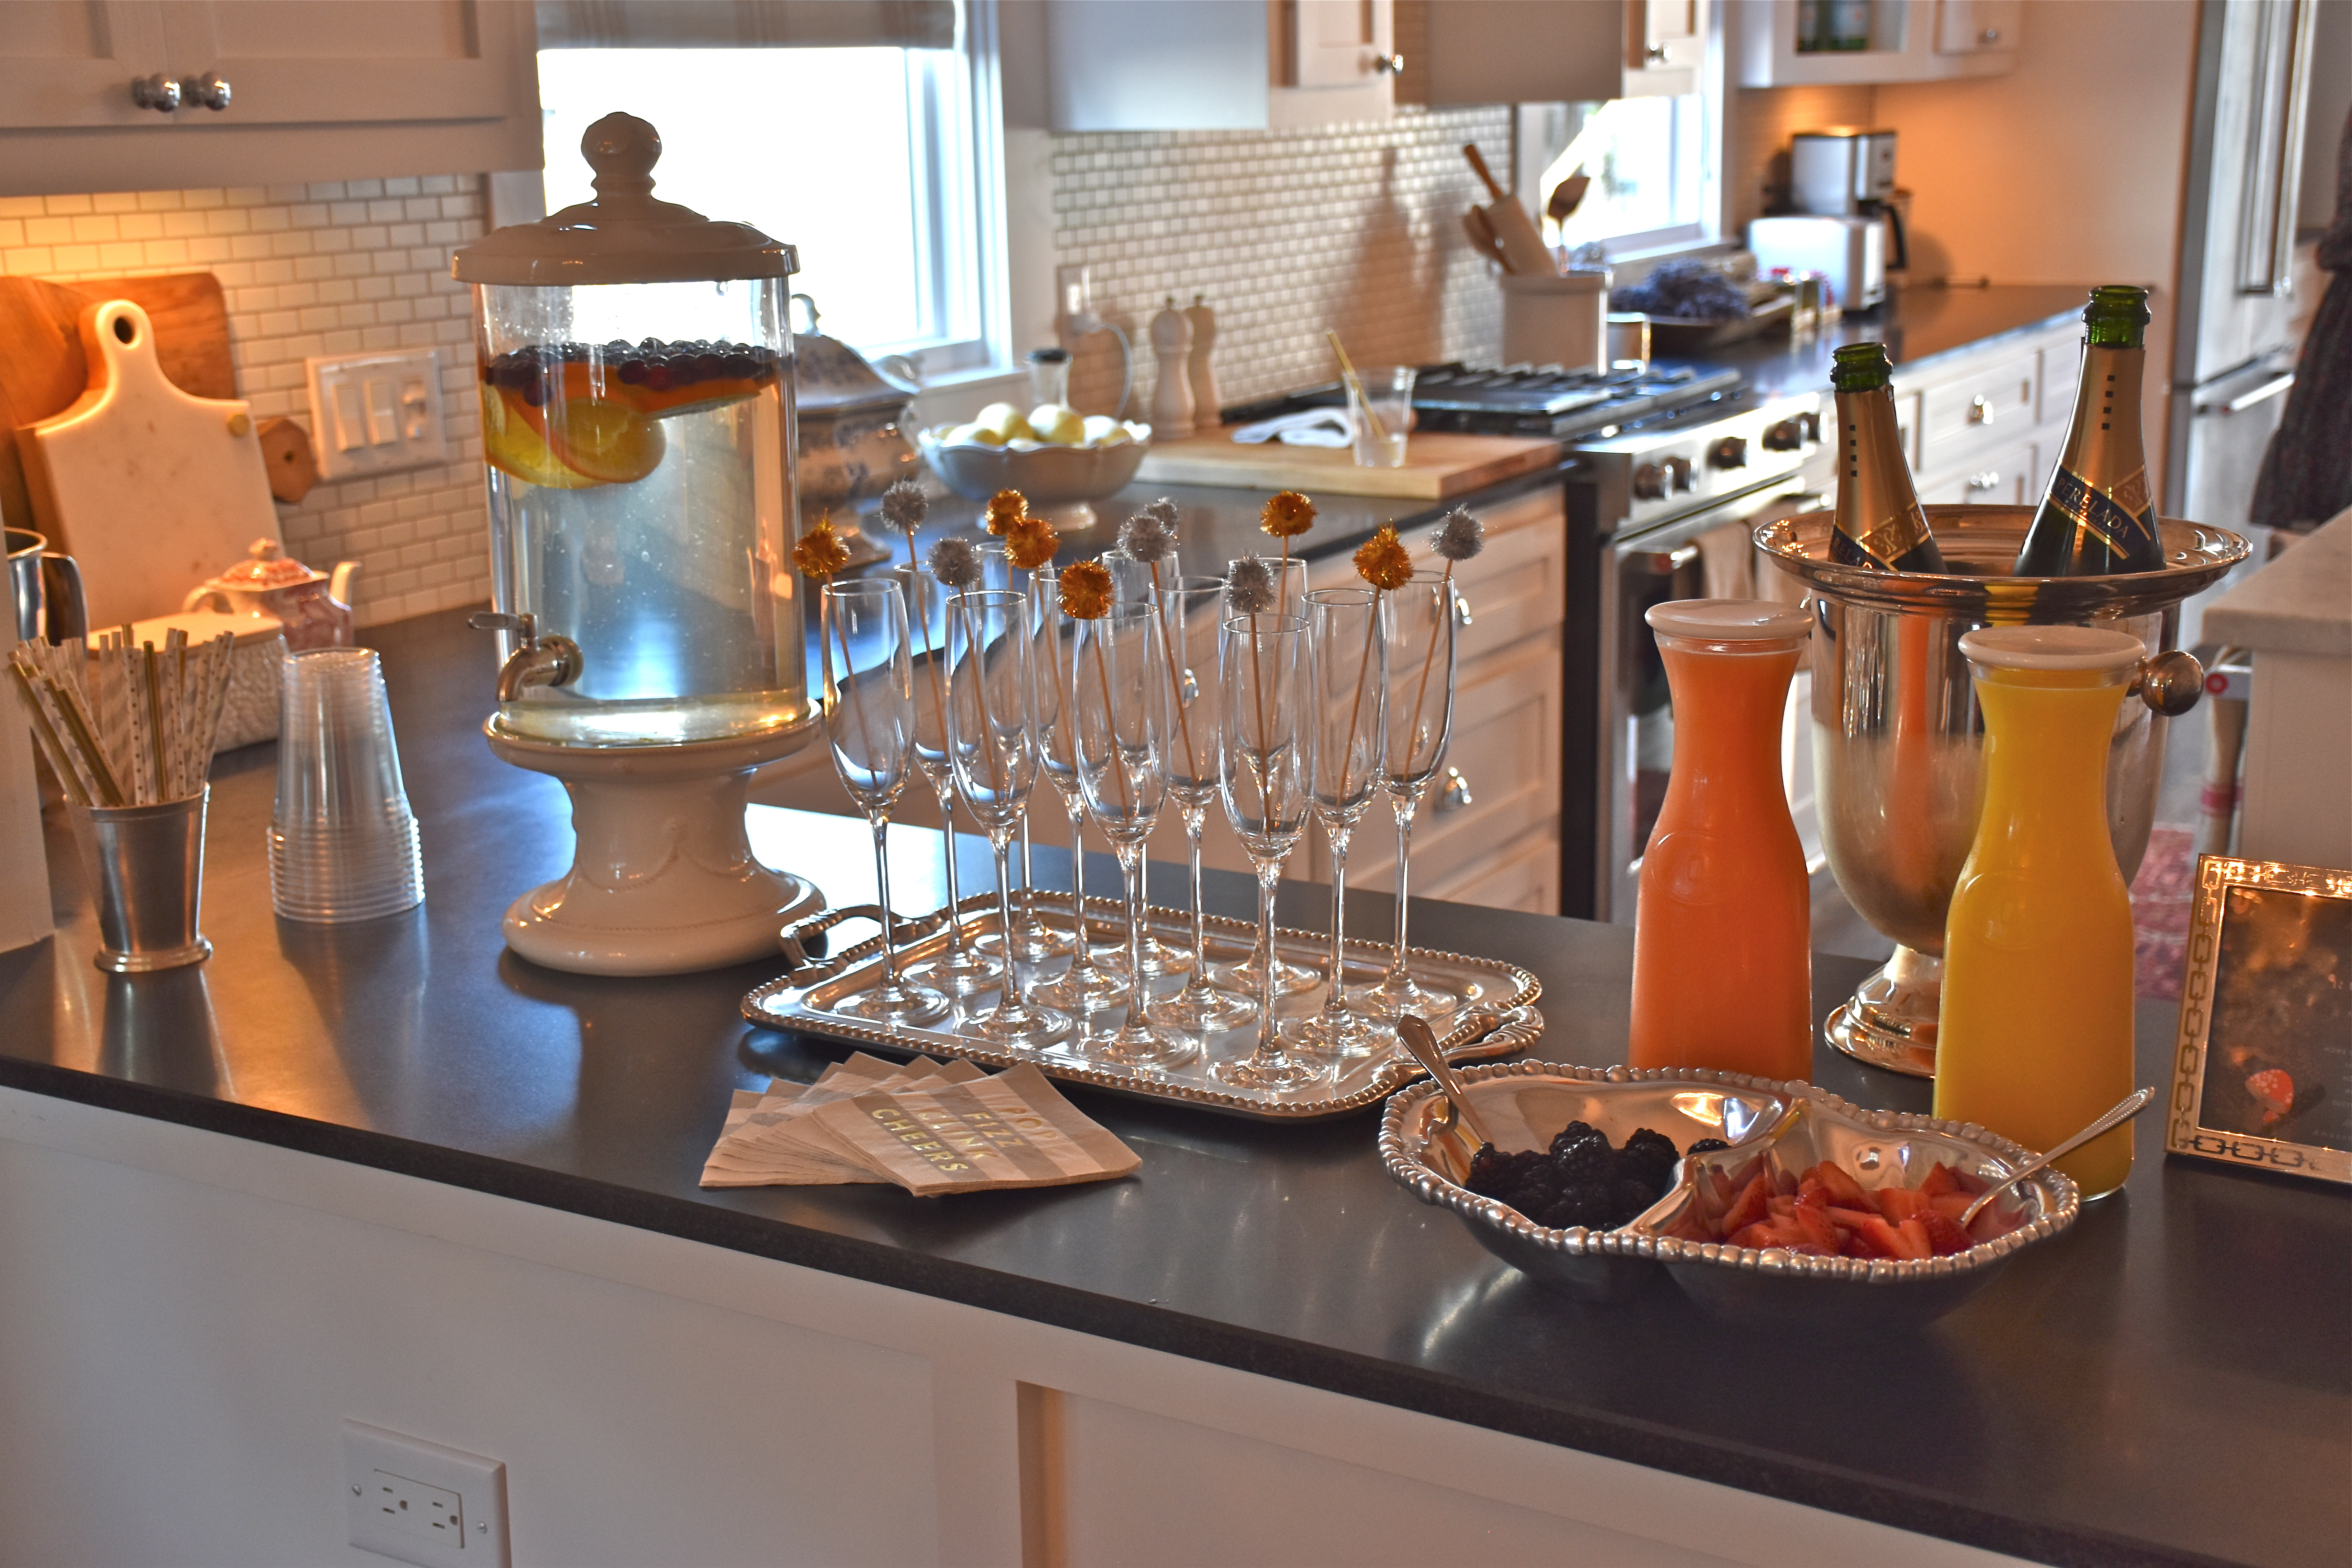
Use trays and some whimsical glass details to set an inviting beverage bar.
These little silver and gold pom poms add a festive touch to the champagne glasses. I love how she has them grouped on a silver tray. These glasses give this juice bar an elegant and festive touch. A bowl of berries that can be mixed in your juice and some flavored water make a pretty and delicious brunch styled beverage bar.
Use things that have a dual purpose for decorations. Gifts like colorful children’s books, toys or cute baby clothes make great decorations.
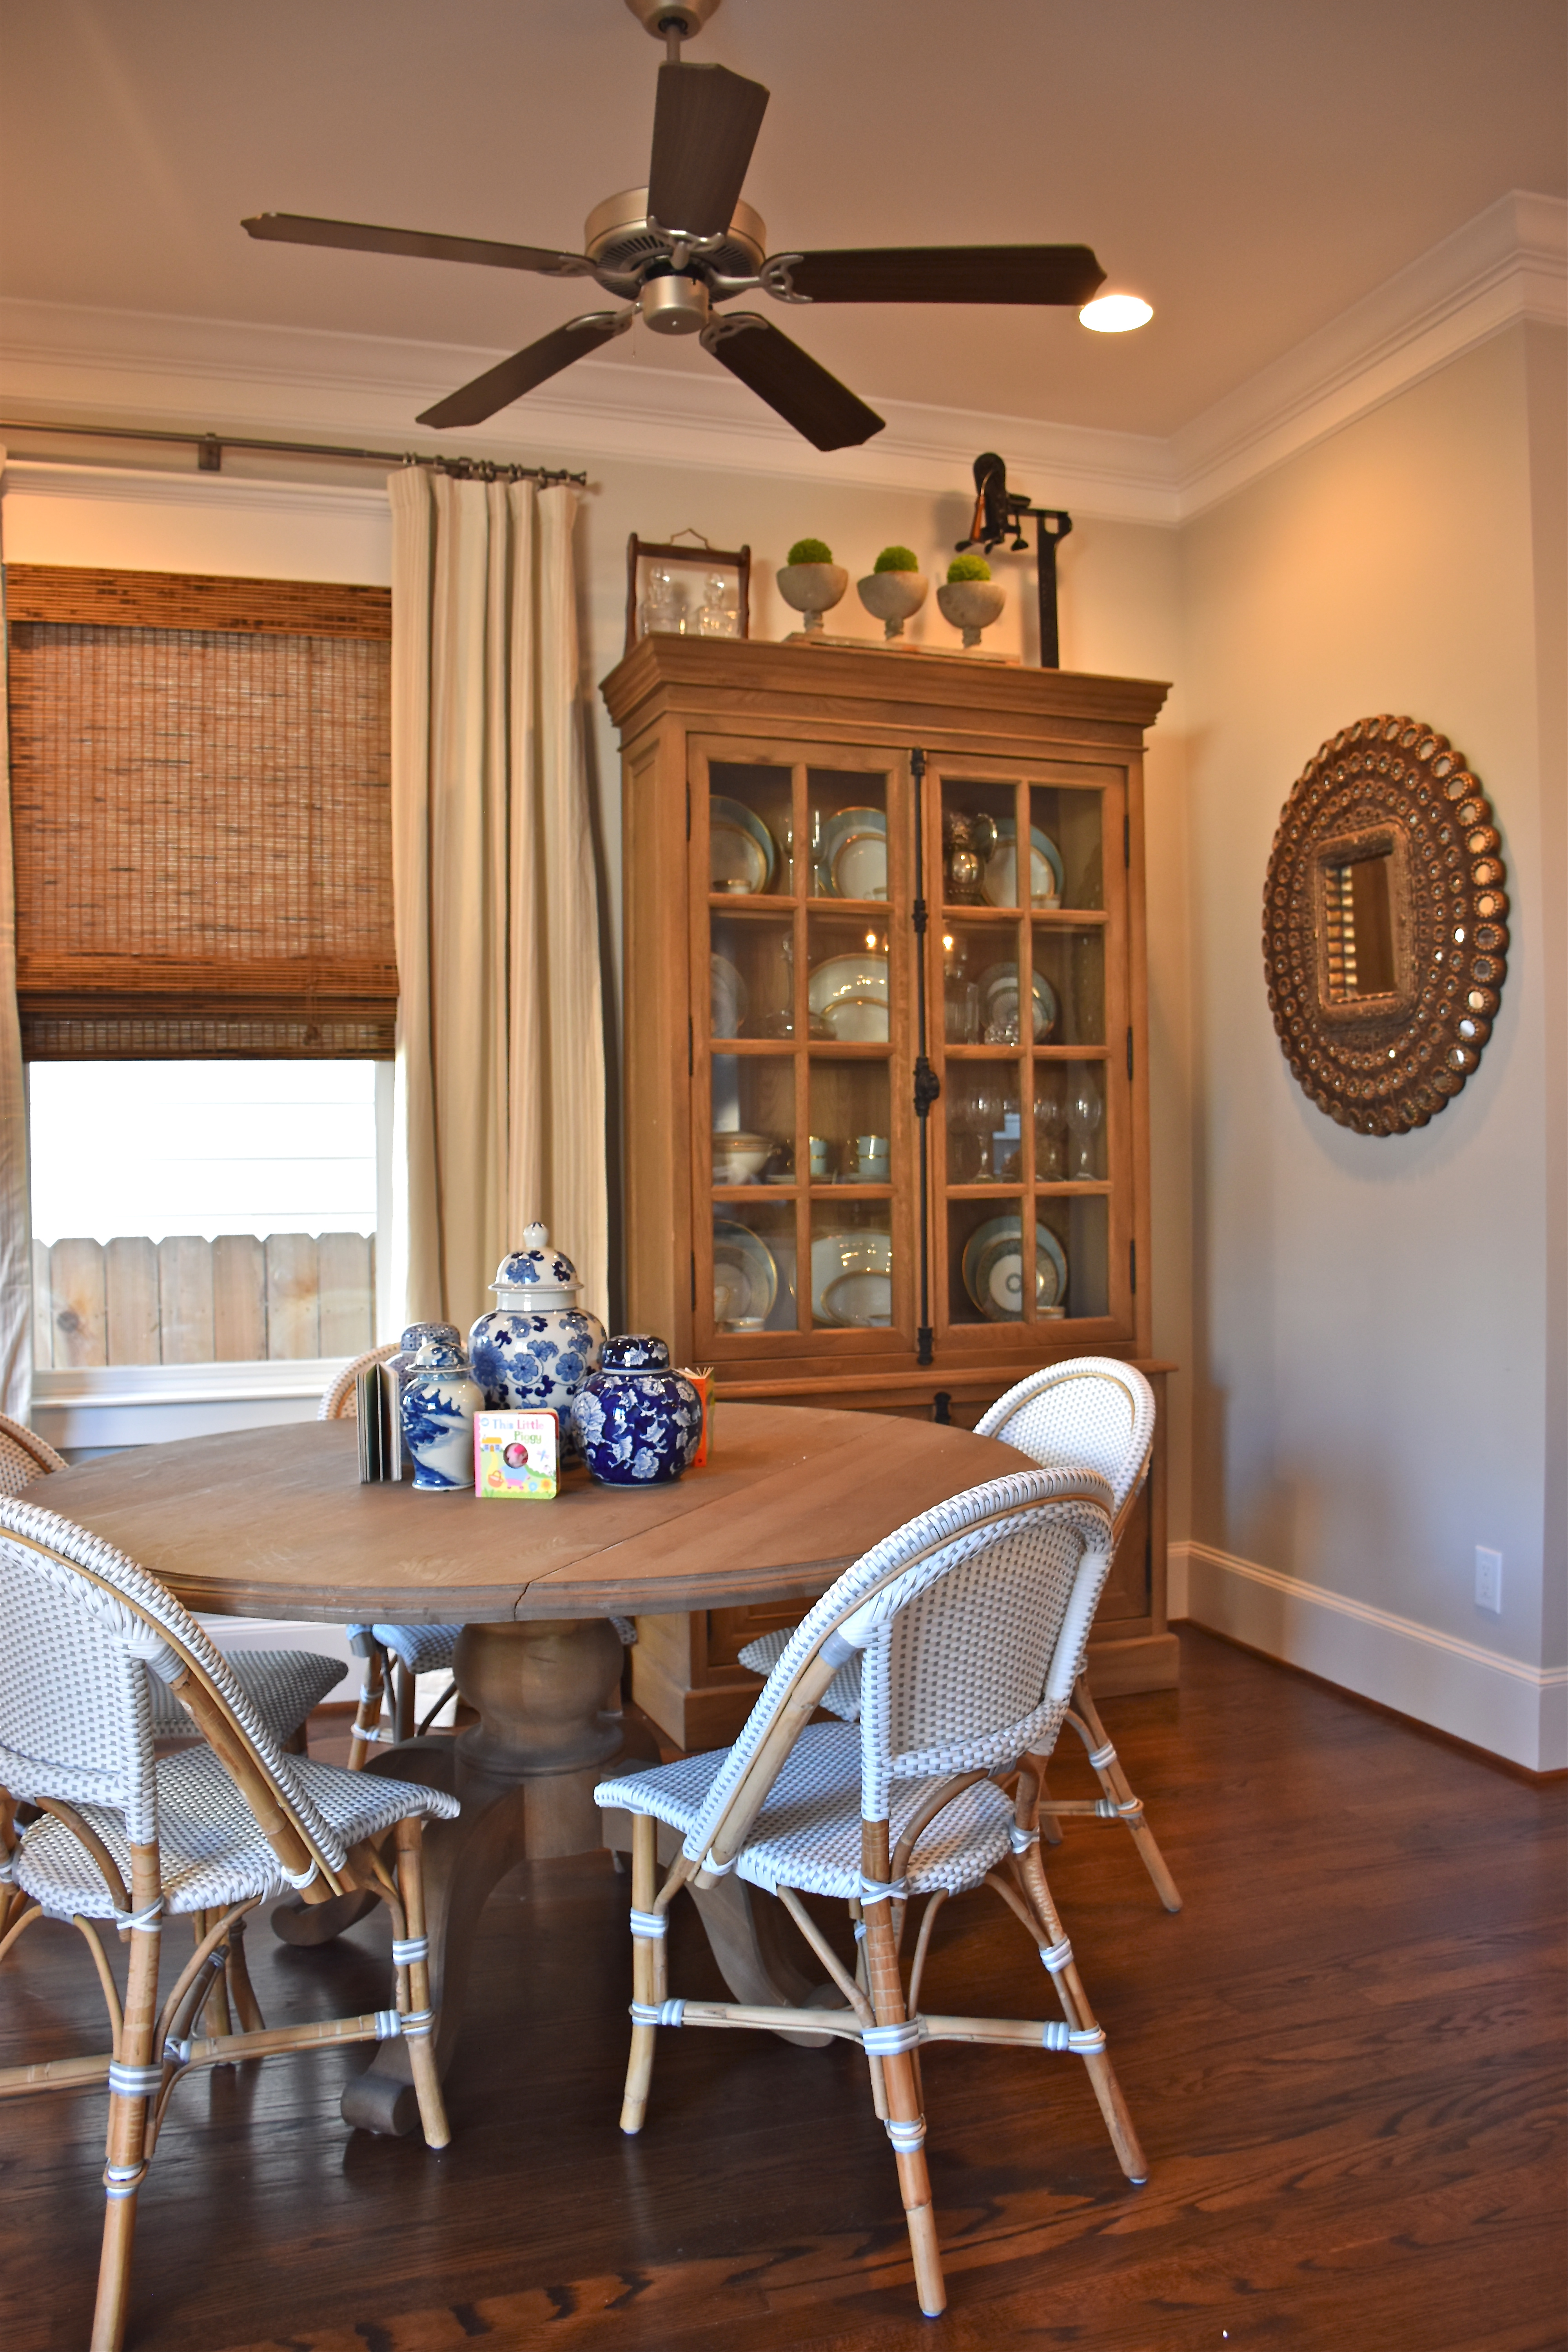
Even the breakfast table got baby shower touches with baby books mixed in with her collection of blue and white ginger jars.
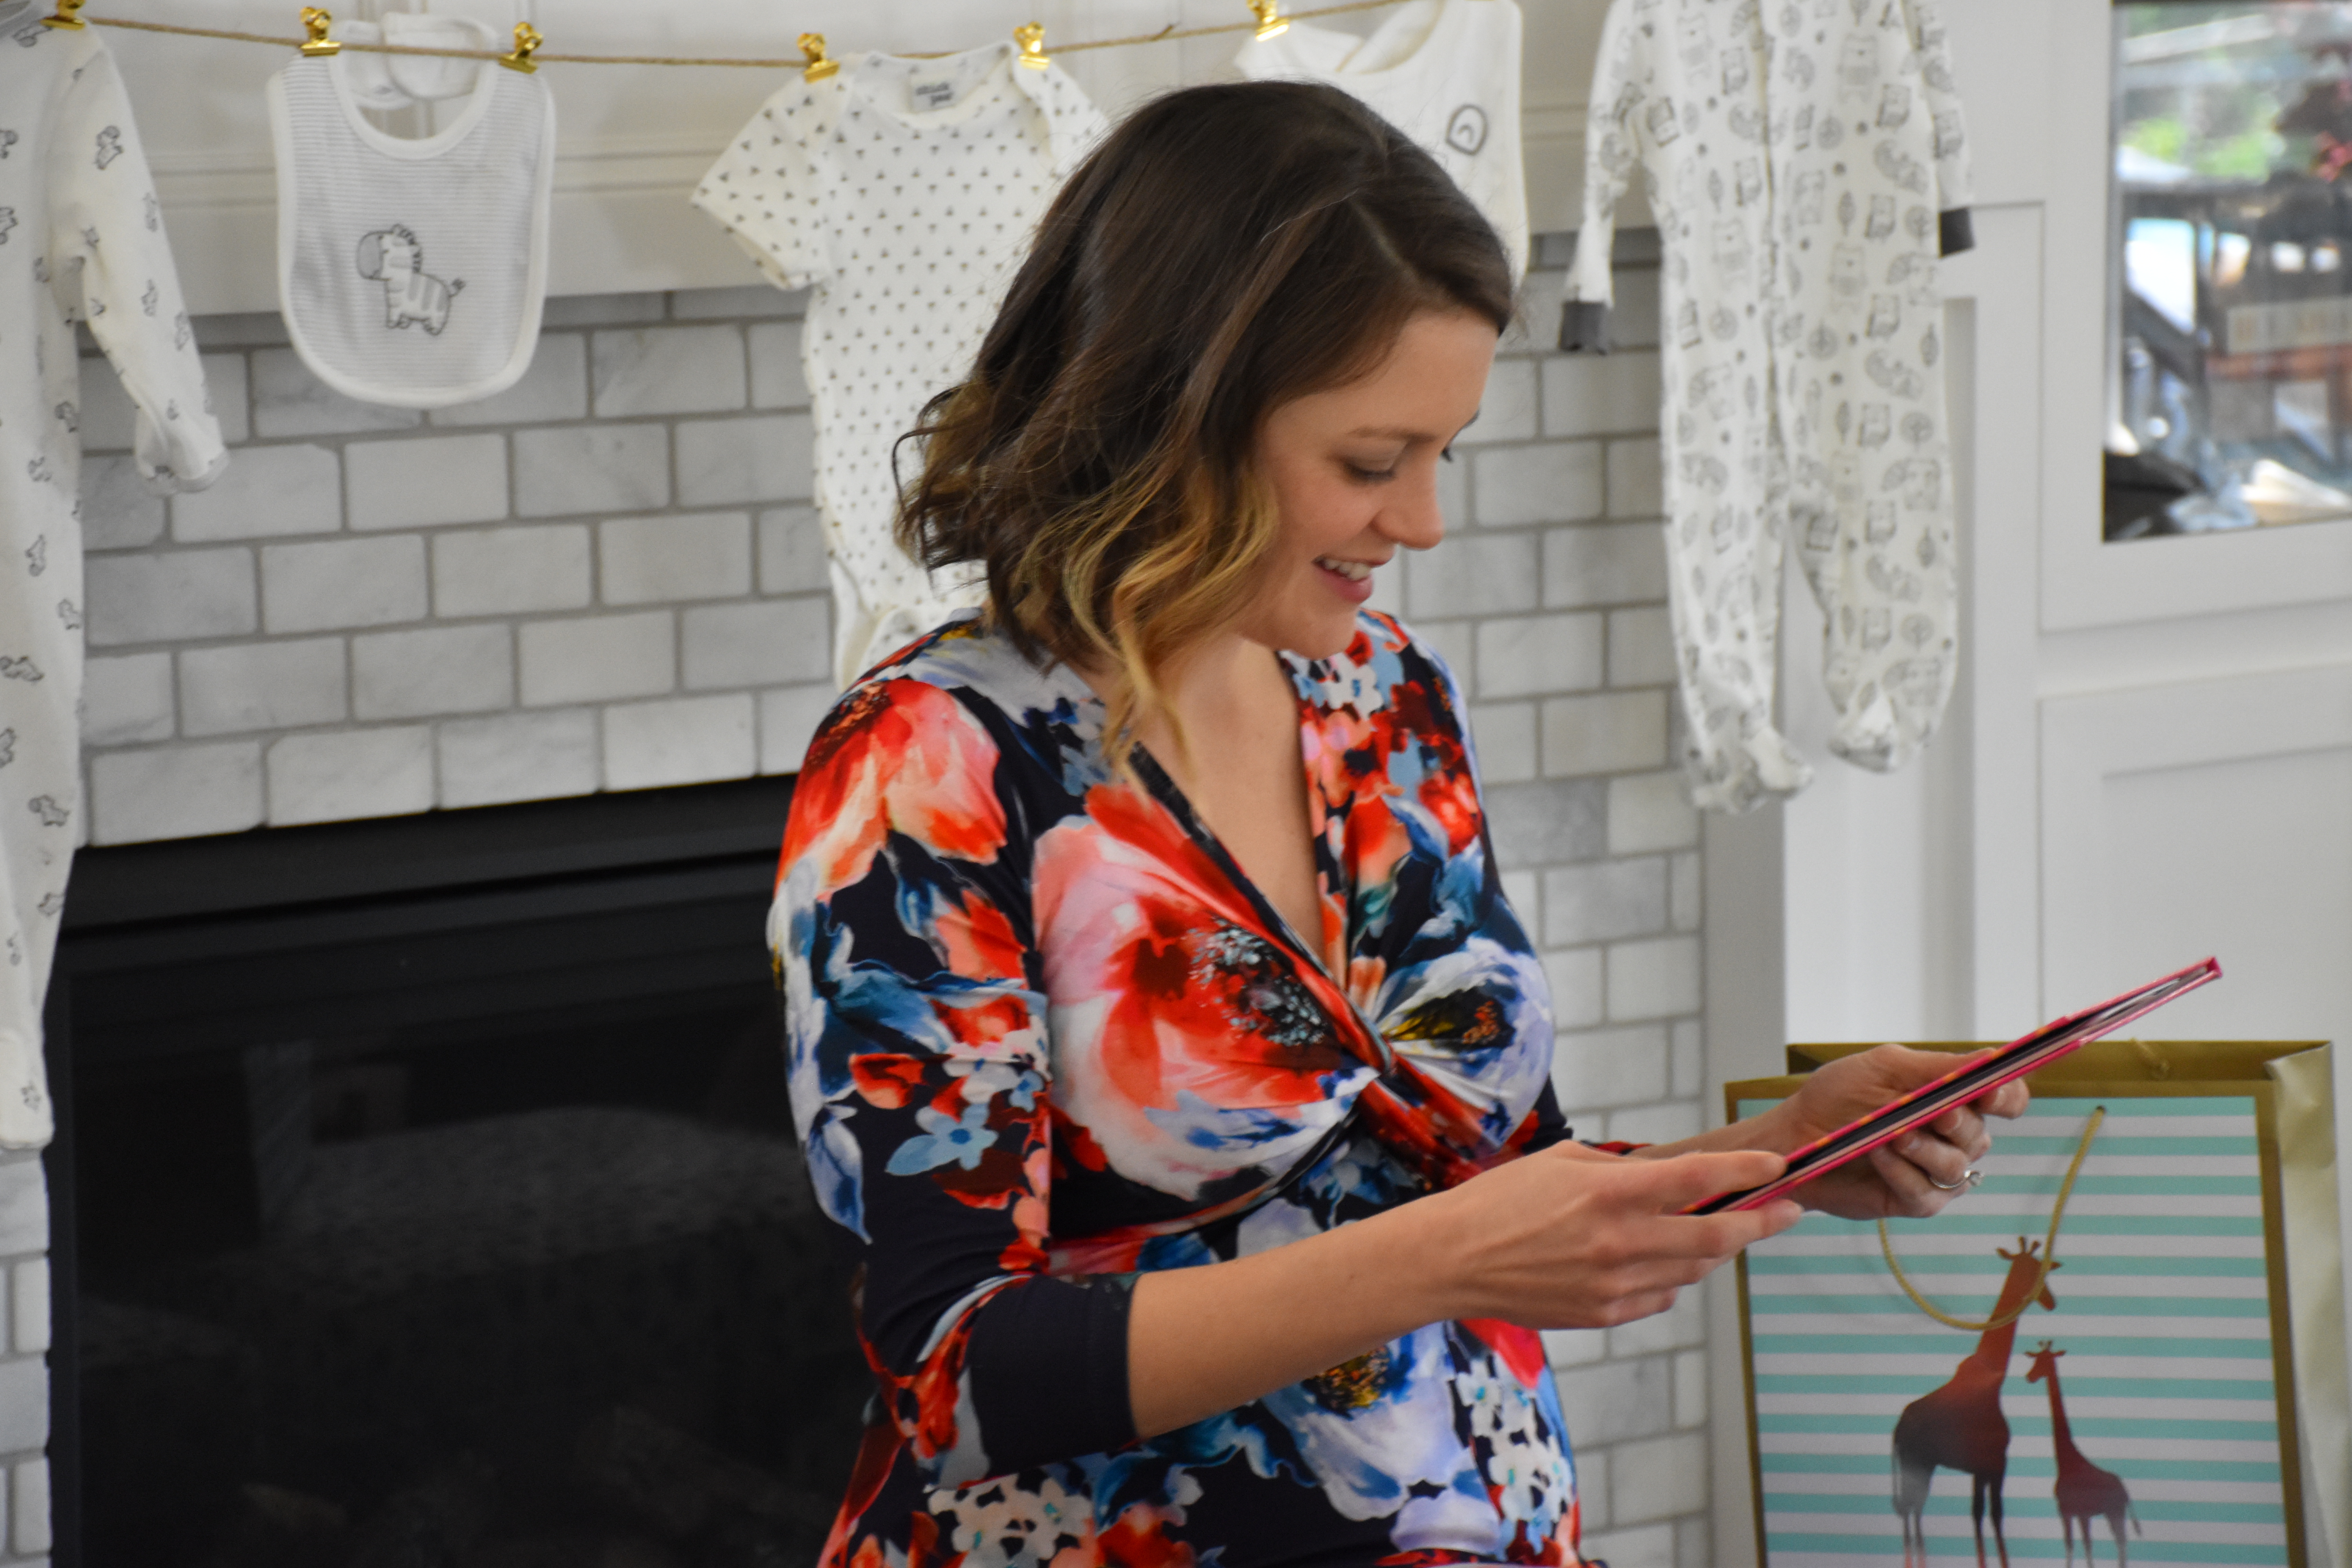
My sister had the great idea to ask everyone to bring a favorite book to build a library for her baby. She got so many thoughtful books that she is sure to have fun reading to her little one. Here she is reading one of the books she was given as a gift.
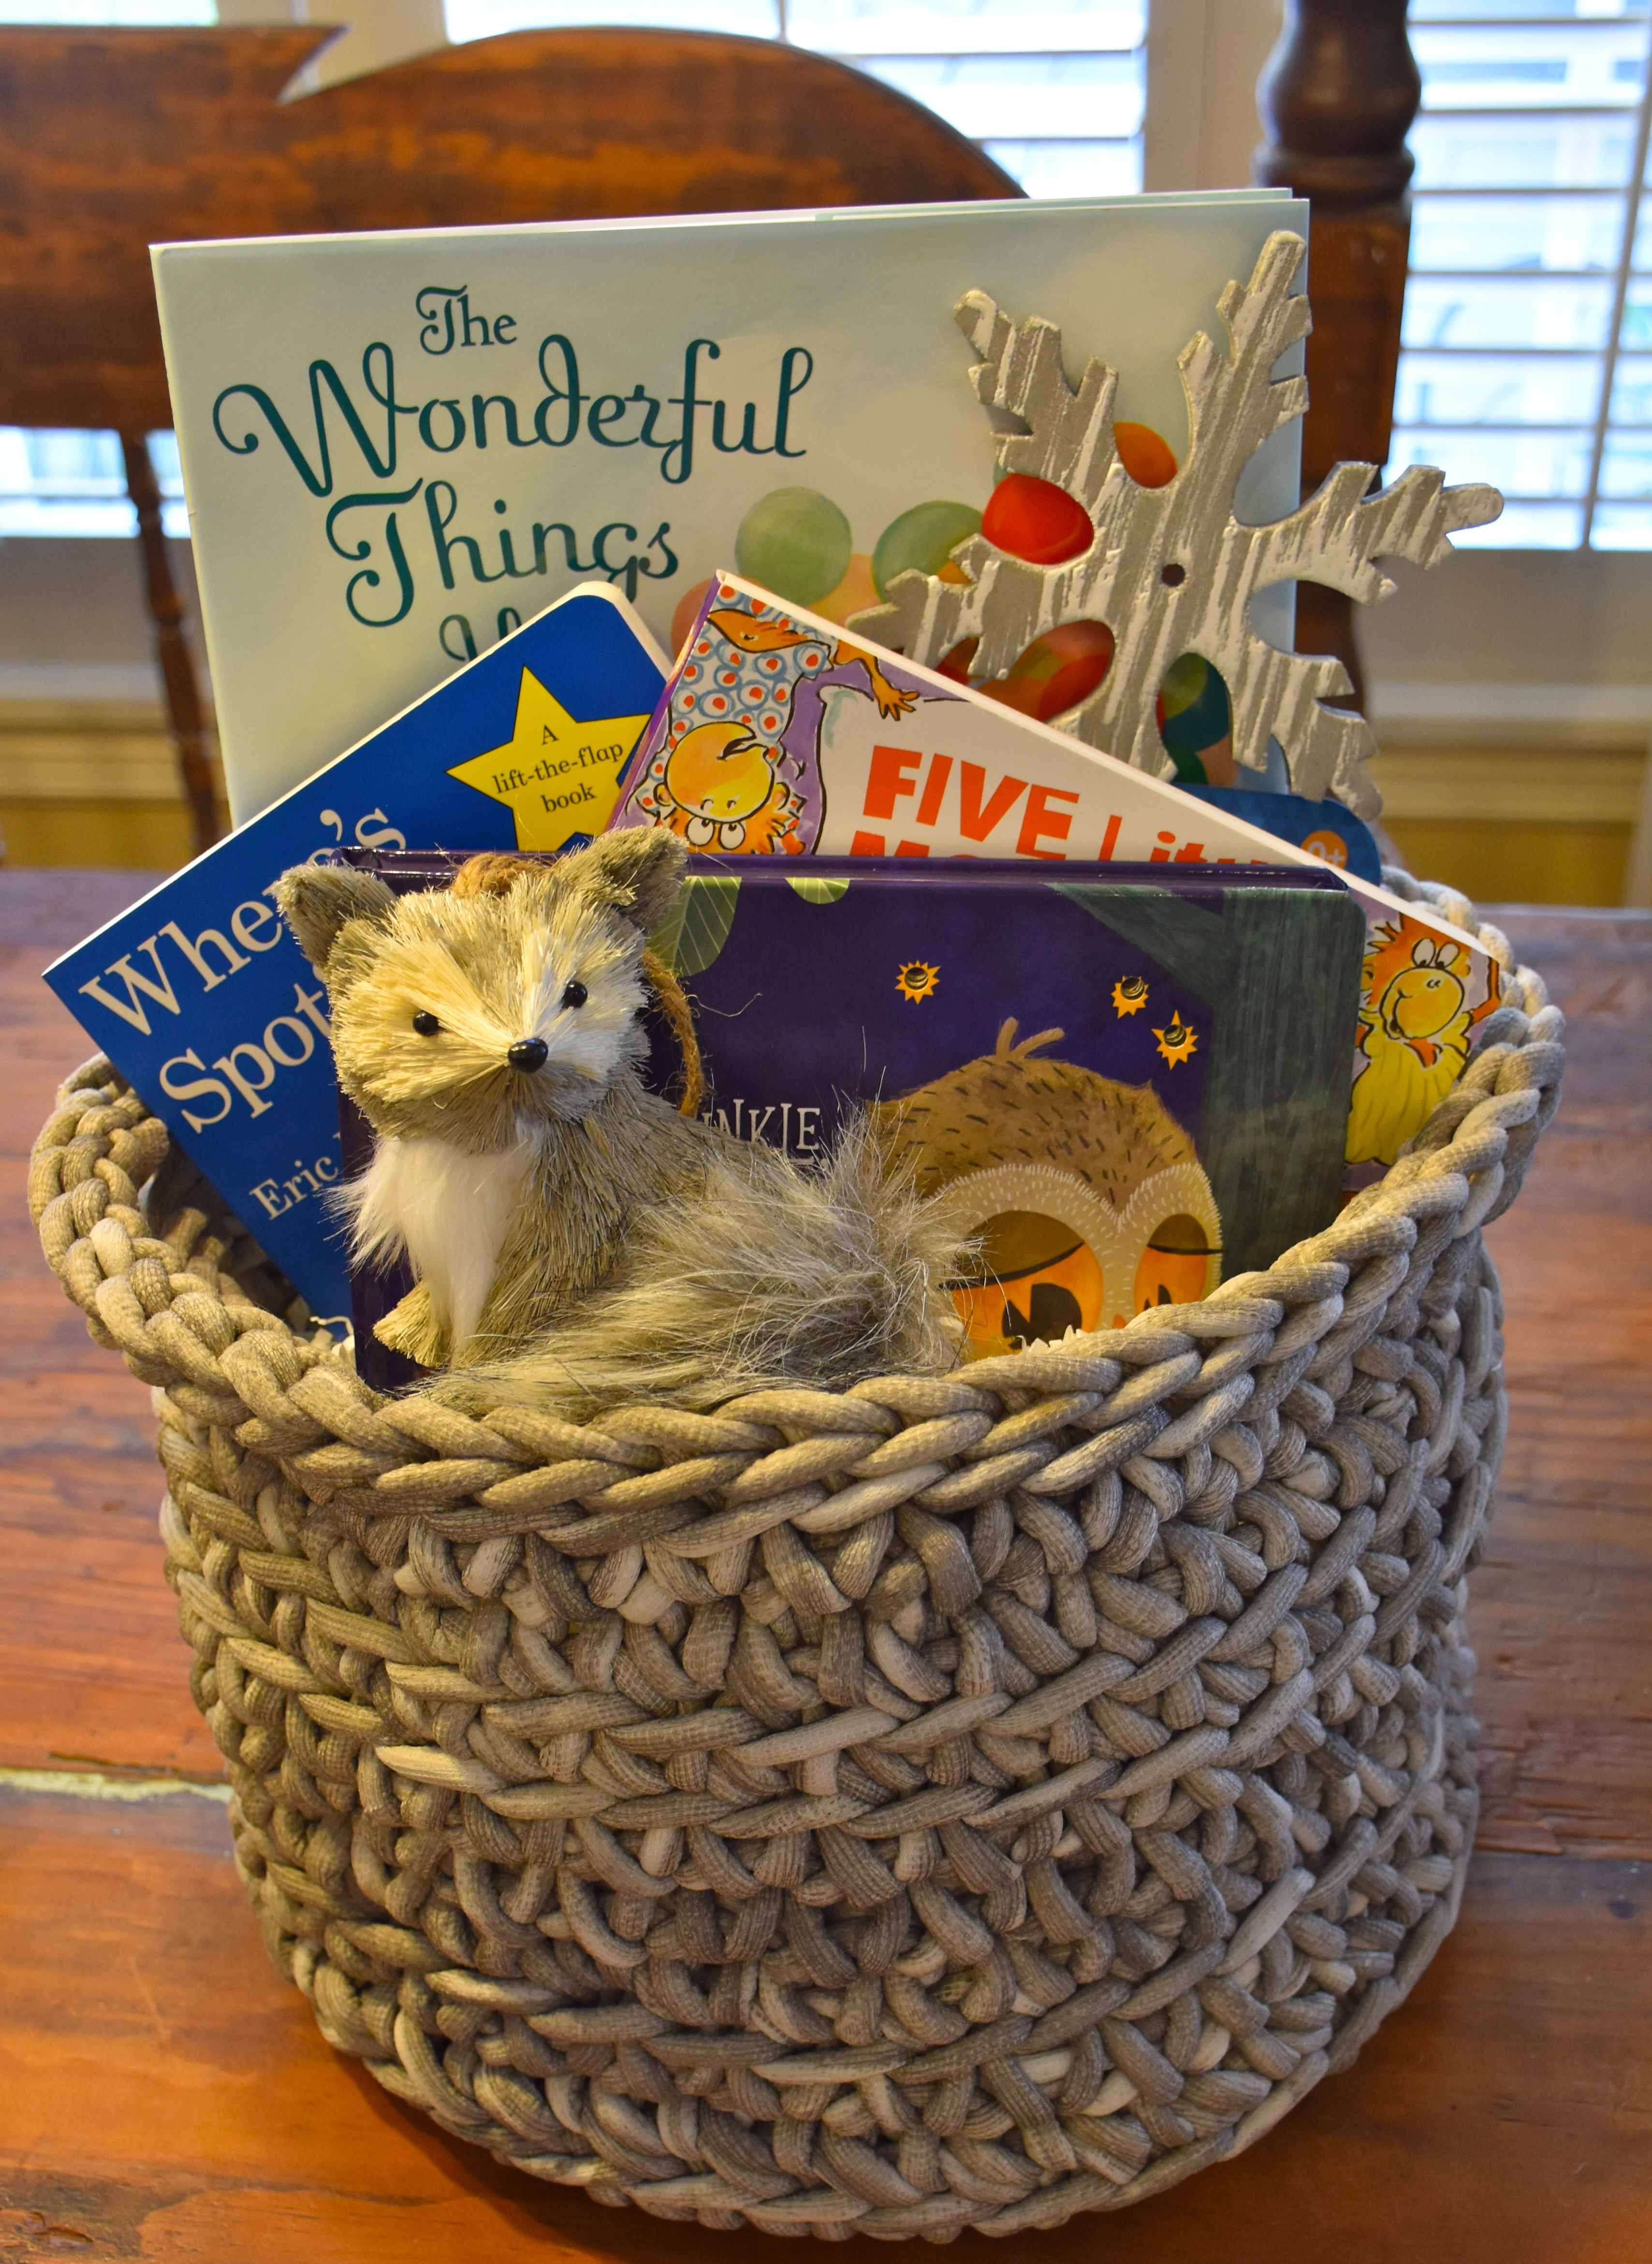
Use decorative baskets or bins that can double as storage for the nursery as a special wrapping or a container for your gift.
One of my favorite baby gifts to give is a themed book basket. I had fun creating a grey woodland themed basket with some of our favorite books that will match her nursery. I found a woven fabric basket from Pottery Barn Kids that would be good storage for books or all kinds of other nursery essentials and a cute little decorative fox. I filled my basket with shredded white paper and I wrapped my basket in a cellophane bag. I topped it off with a birch bark inspired ribbon and a gift tag made from a holiday ornament. So think beyond the gift bag when you are putting together your gift.I hope you enjoyed this small peak into the baby shower fun and that you enjoyed seeing the gorgeous home of my brother and sister in law. Come back on Sunday because I am sharing a hit recipe that we love to serve at our parties.
We traveled back home to Texas after the holiday only to return to Chicago for what one national news reporter called the “Arctic Outbreak.” It was so cold when we returned to Chicago that the window to my husband’s car froze open when we were exiting the airport parking garage. Needless to say it was a cold drive home as it was snowing. So we turned up the holiday radio station which to our amazement was playing the song “Snow” from the movie White Christmas and tried to make the best of it by singing and laughing at the craziness of it all.
This is the view of the road in front of our house. The sun has come out more over the last few days which has made things brighter and prettier in the snow.
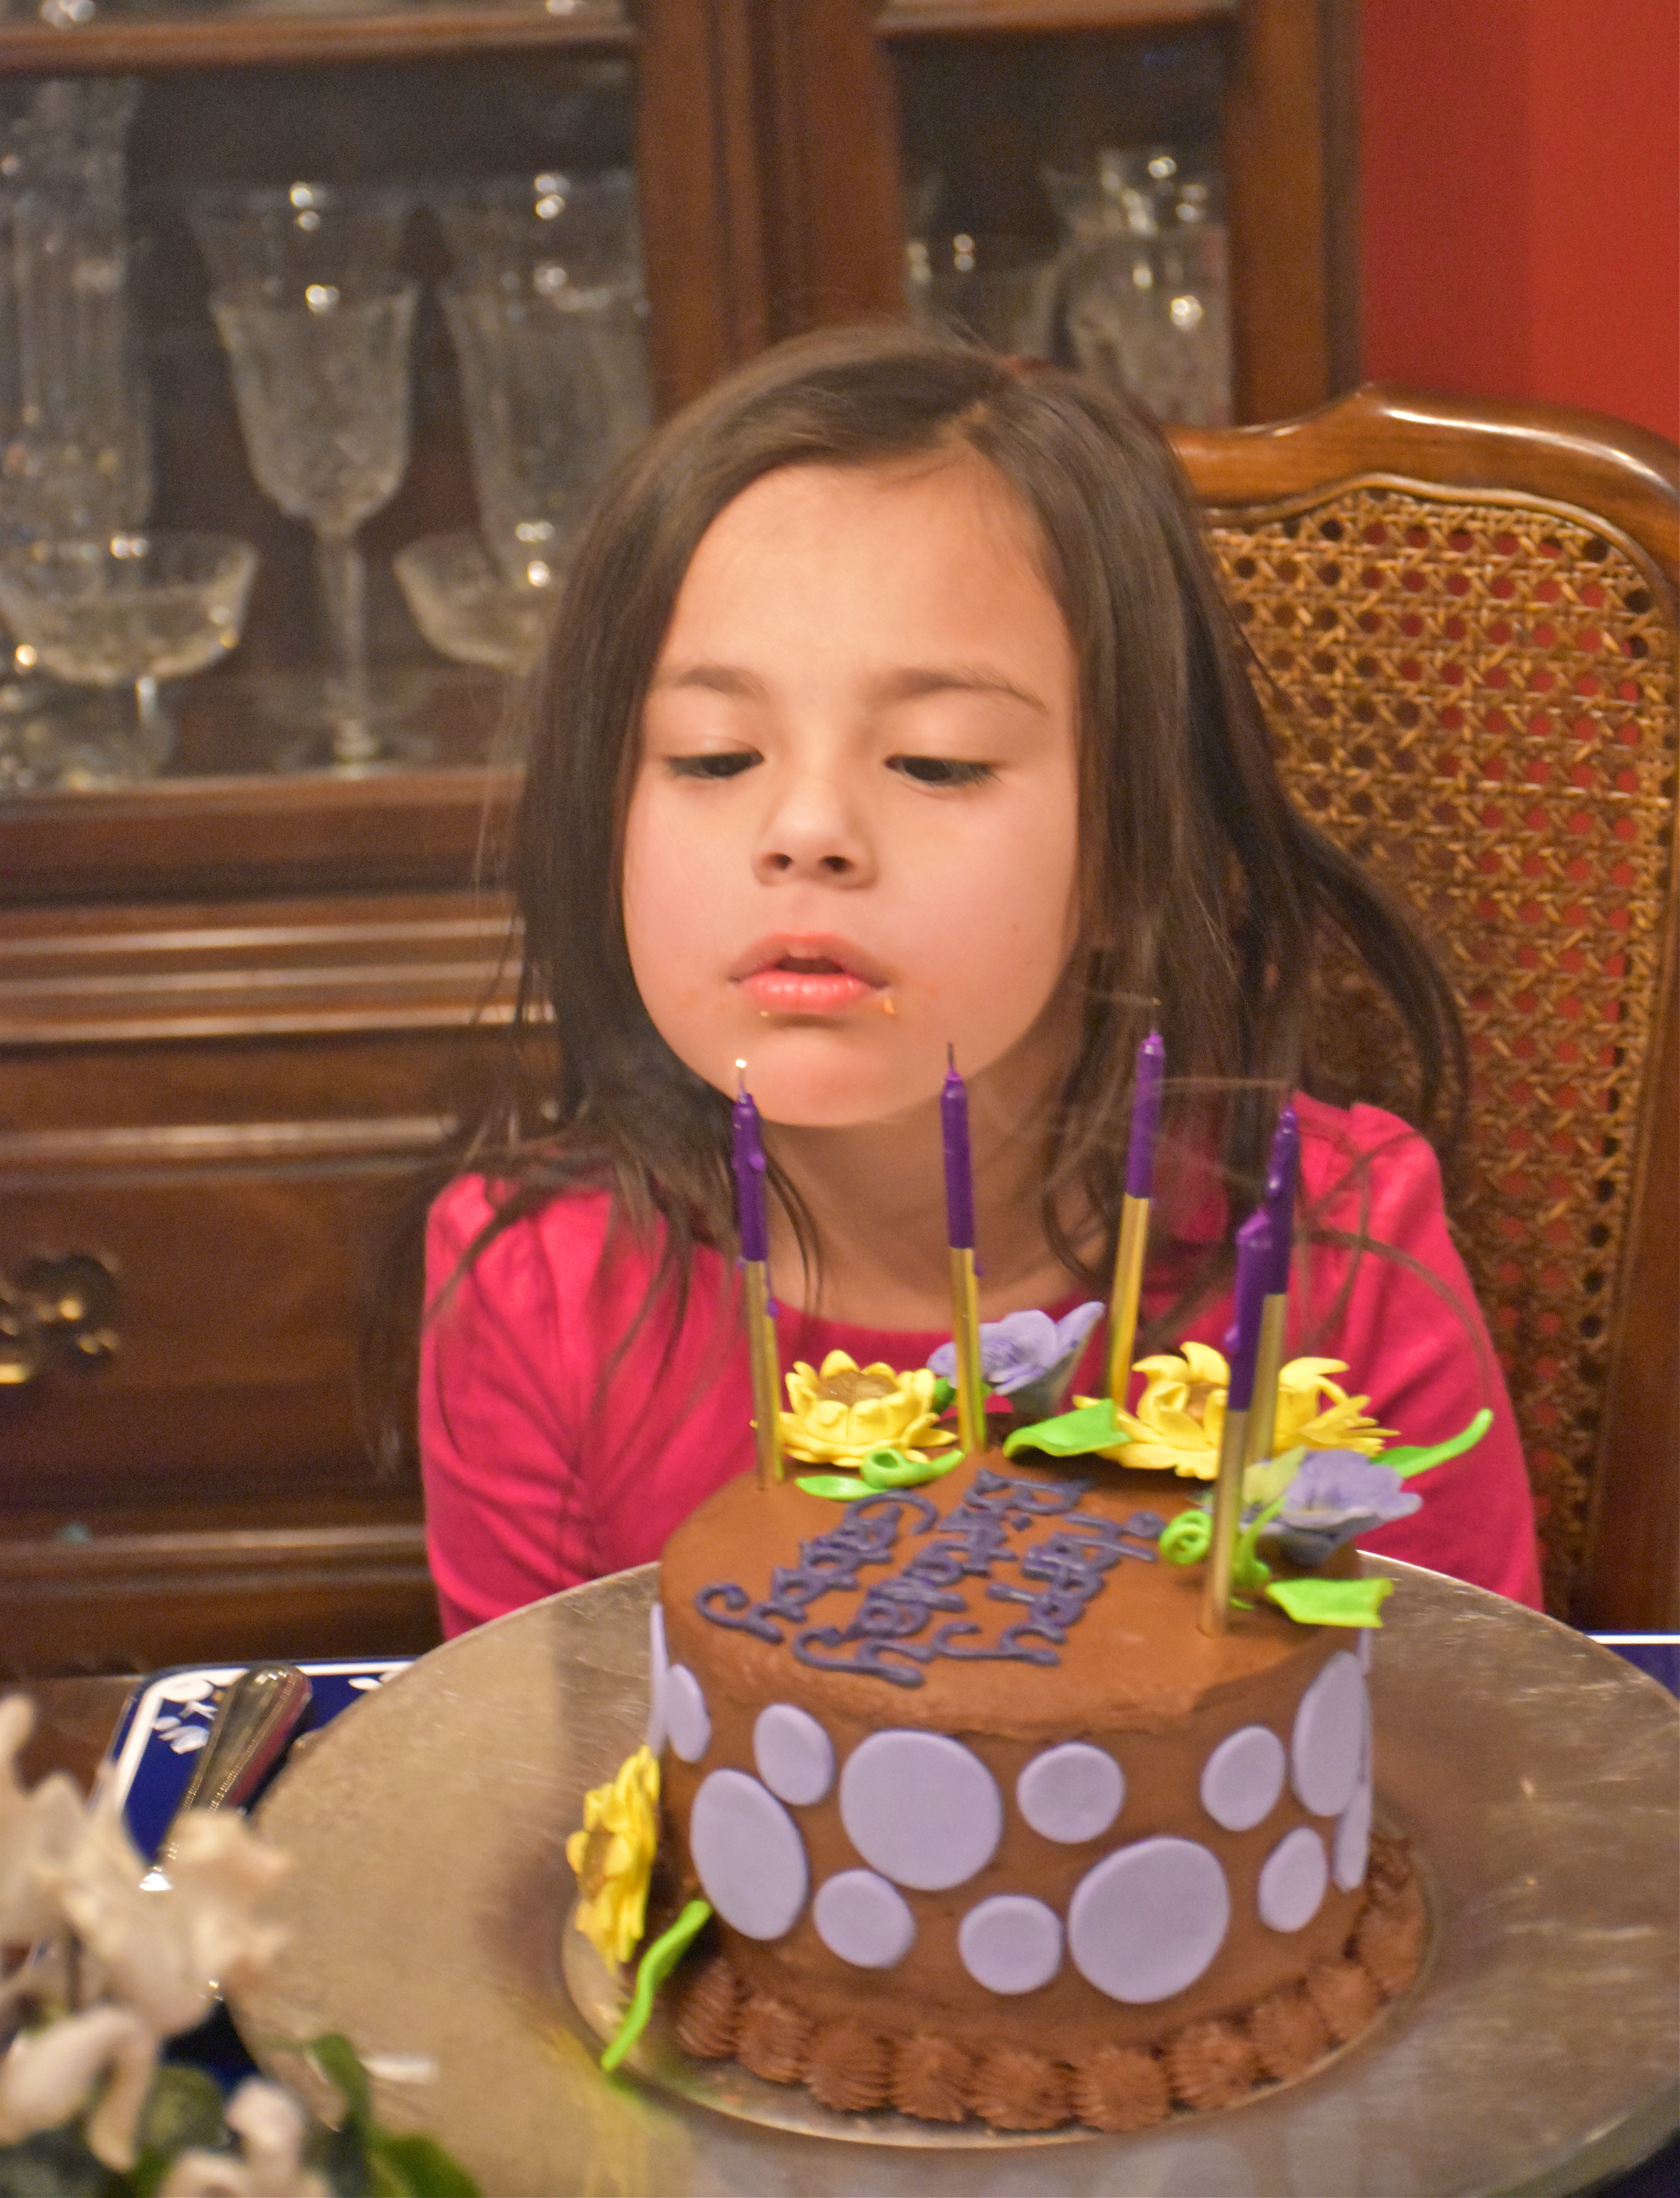
The single digit and at times negative digit temperatures have been a bit rough on us as Southerners. I cannot remember a time when I have been colder, so we are doing our best to stay bundled up and warm. In the middle of this Arctic craziness, we also celebrated my daughter’s birthday. My oldest daughter loves being outdoors and she adores gardens. So in the spirit of thinking ourselves a bit warmer we celebrated with a flower themed birthday dinner.
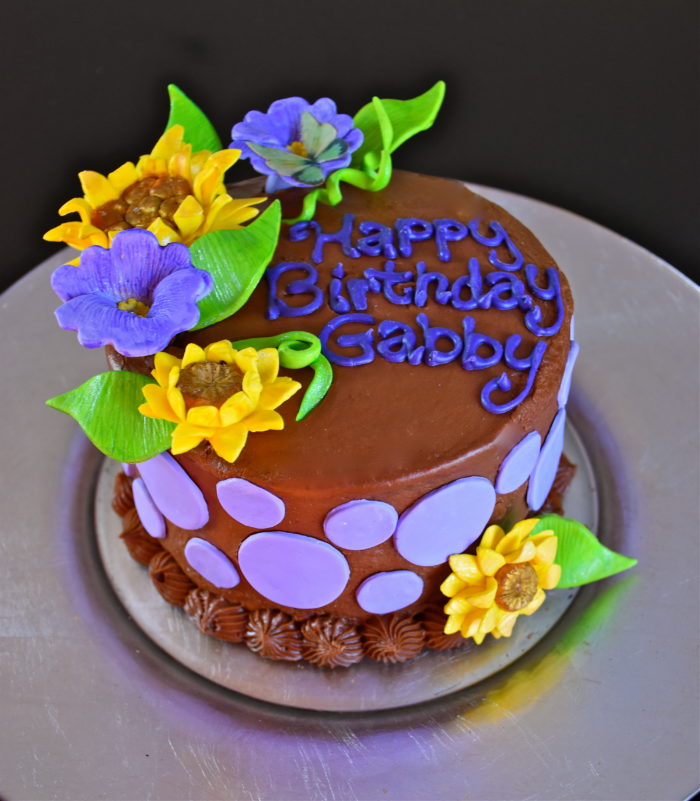
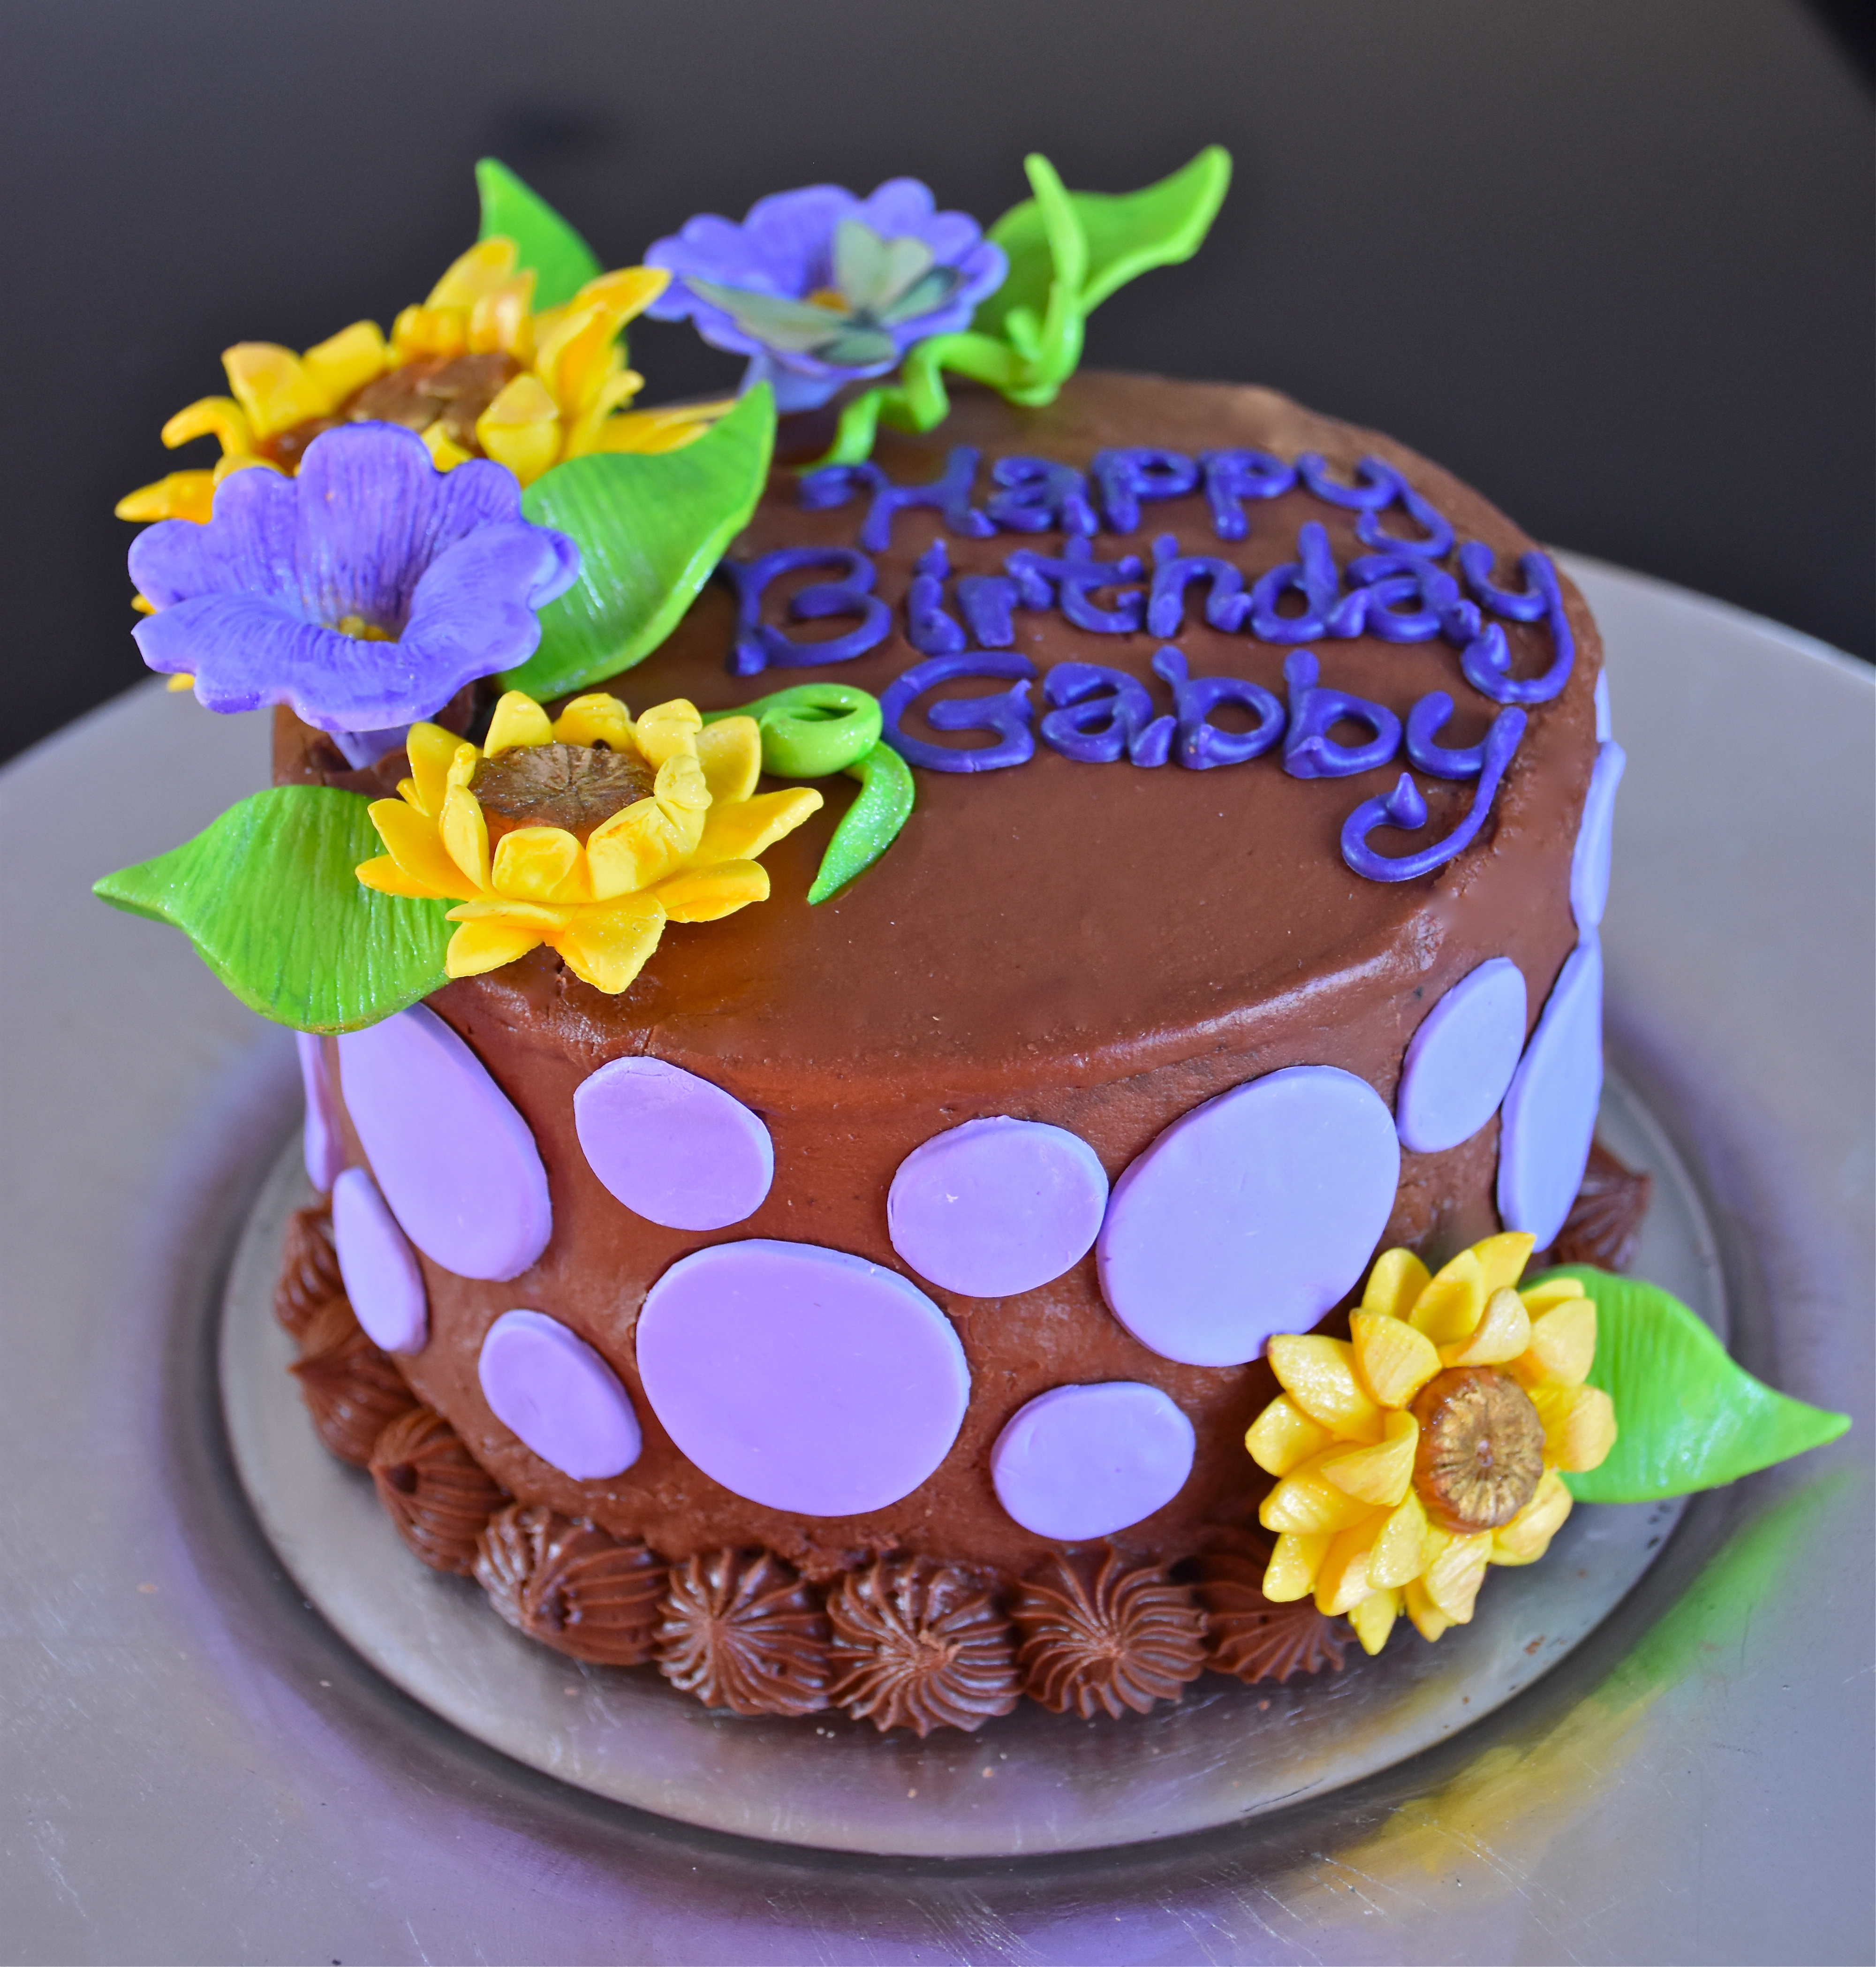
Homemade birthday cakes are a great tradition in our house. So as soon as we were home from celebrating the holiday I began working on some sugar gum paste flowers. I had found some pretty gold and purple candles at Papyrus when I was out Christmas shopping so I decided to go with a golden yellow and purple flowered cake. I made some sunflowers and then decided to add in some purple morning glories with some twisted vine detailing. Then for an extra touch of purple I made some whimsical lavender fondant polka dots. My daughter helped me cut out the dots and she loved taste testing the chocolate frosting. I like the taste of buttercream, so usually my preference is ice my cakes in buttercream and then use touches of colorful fondant like this polka dot border. One of my favorite parts of cake decorating is making sugar gum flowers. There is just something so fun about creating and painting the colorful details of flowers. Sugar gum paste is fairly easy to sculpt and once it dries the flowers will hold their shape and last for a long time. I plan share more about how to make your own sugar gum flowers and decorations. One of my goals this year is to incorporate some videos on my site and I think this is one of those projects that would work well as a short clip.
If you want the recipe for this delicious chocolate cake then click on the link to one of my very first posts where I shared it with cooking times for both a layer cake and cupcakes. This is one of my family’s favorite recipes.Here is a picture of the birthday girl blowing out her last candle. She had a fun day filled with all of her favorites including a trip to the aquarium. Birthdays are big in our house and we try to let the girls help plan what they want to do with their day. We had fun setting the blue and white table together, because blue is her favorite color.
Here is a view of the table with a few Christmas decorations in the background. Over the years I have learned that it is too much to try and have Christmas all put away before my daughters birthday so we always incorporate a bit of the Christmas fun in the celebration.
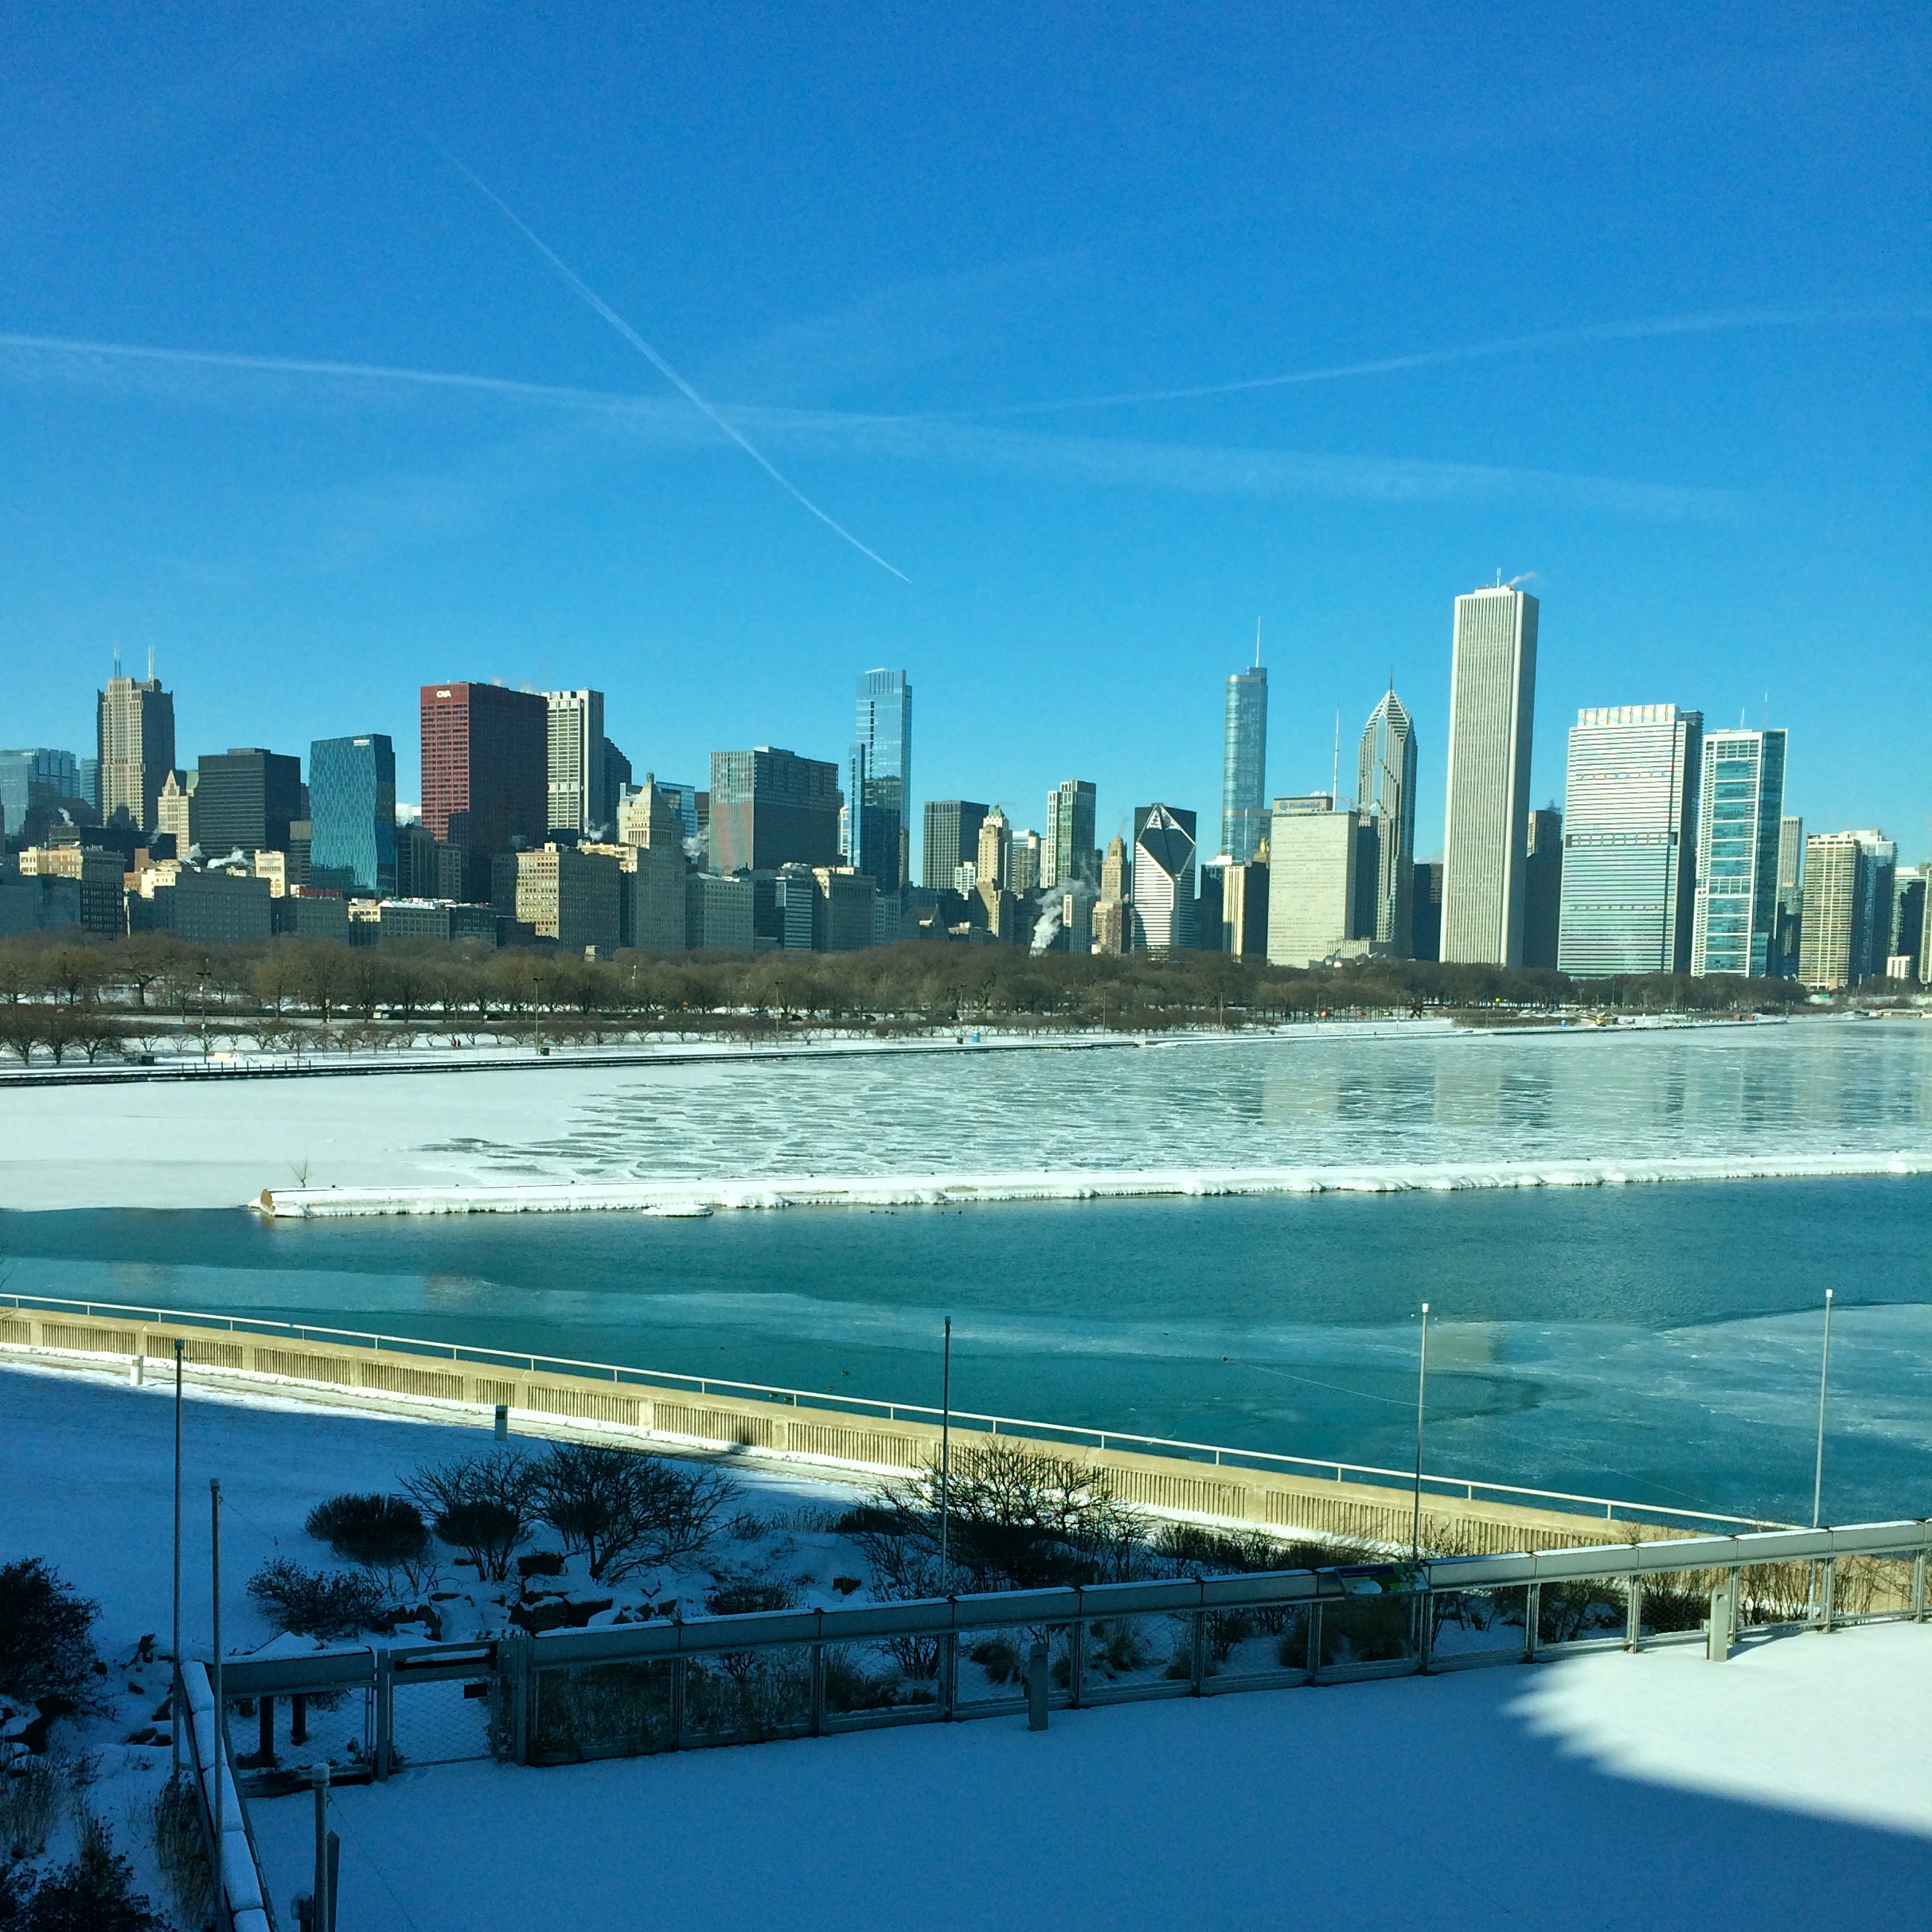
As a final last minute touch I took some small grapevine napkin rings I had and turned them into mini winter garden wreathes with some cedar leaves from our yard, some dried juniper berries and a blue satin ribbon. It was truly a fun day spending time together as a family and celebrating with all the flower filled garden details my sweet birthday girl loves. As a final parting shot I will share a pretty picture of lake Michigan and the Chicago skyline that my husband took when we were out and about in the city.
Here is the Chicago skyline with a partially frozen Lake Michigan.
I was talking to a friend who was contemplating making some big changes to her home and she said “I just wish I could convince Joanna Gaines to come decorate my house.” Who hasn’t had that thought after watching a particularly great episode of Fixer Upper? The show was newly featured on Netflix when we moved to Chicago and I must admit I was homesick and feeling a bit overwhelmed while trying to paint my whole house with my toddler helpers in tow. So at the end of a long day when everyone was asleep I would stay up to watch an episode of Fixer Upper, just to hear that familiar Texas twang and daydream about a home that was painted and finished.
So for my 100th blog post and my first post of 2018, I thought I would share a few Fixer Upper inspired furniture pieces and accessories. Joanna Gaines style has evolved a bit over the last five years to fit her clients’ tastes, but my favorite look is her own personal farmhouse style that you see in her home. Here is a link to a tour of her house in Country Living Magazine. So if moving to Waco is not in your life plan and you want a bit of that farmhouse feel then here are a few of key furniture pieces and decorative accessories that have that signature Magnolia Farms style.
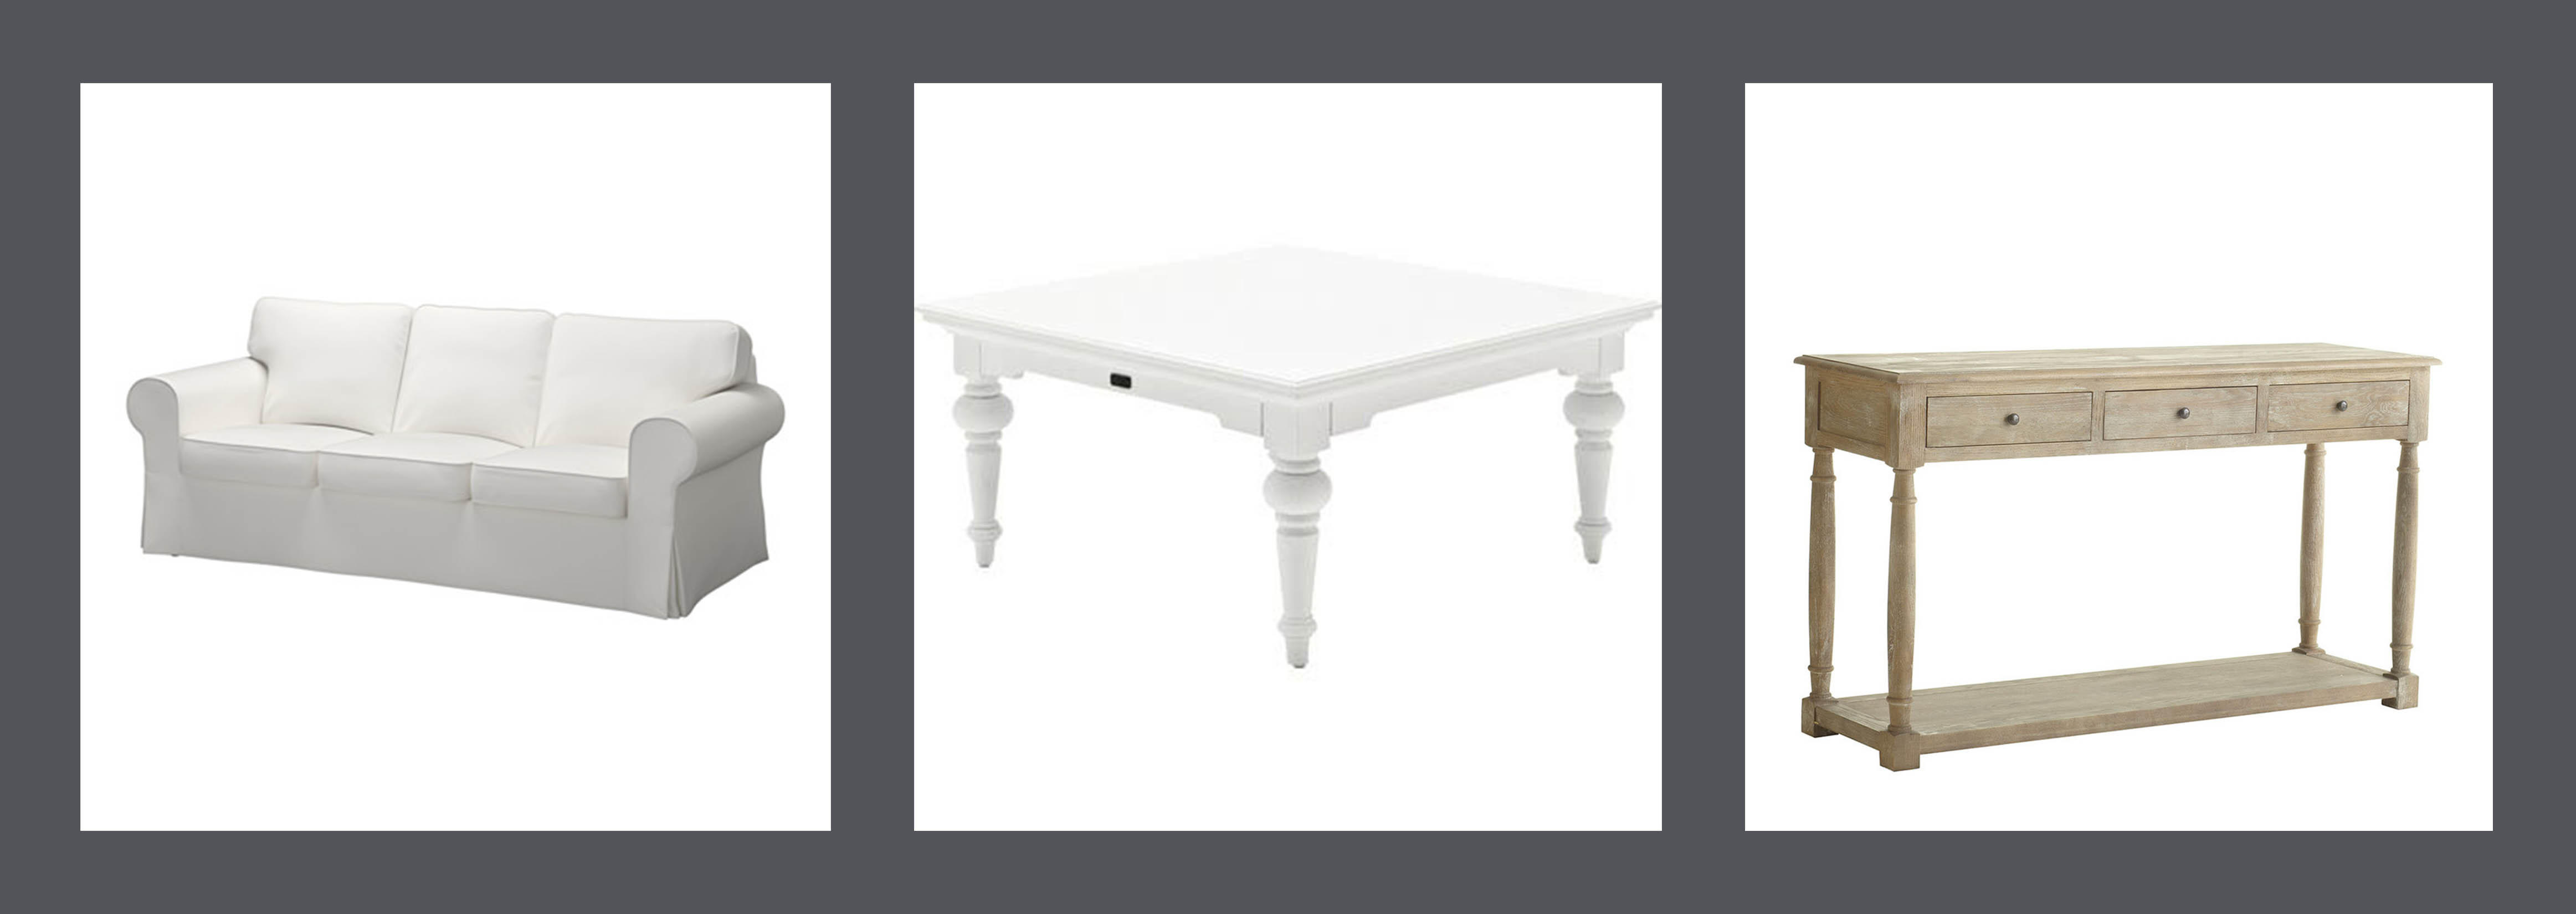
First, I thought I would start with the basics. Joanna Gaines uses lots of light colored upholstered pieces to anchor her rooms. I happen to like that look, but if you are going to make that kind of sofa work with kids and pets then slipcovers are the way to go. I have the Ikea Ektrop Sofa in my back room and the white slipcovers bleach well and have really withstood the daily grind. I am also comforted by the thought that if something truly disastrous happens that a new slip cover is 150 dollars, which is far less expensive then getting a new sofa. Another key element her farmhouse style is wooden tables with turned leg detailing. So maybe we all can’t own a Clint Harp original table, but this coffee table and accent table have that farmhouse detailing and they can be delivered to your doorstep. I especially like the wood finish on the console table from Wisteria. It has that vintage feel that would really make a statement when placed behind a sofa or when paired with the arched mirror I feature below.
The next thing I would layer in a room would be side chairs and some decorative pillows to add a bit of pattern and color to your room. These spindle chairs have that farmhouse feel I have shown them here in white, but they come in other wood finishes as well. You can customize the fabric and welting details on these chairs and they are only 250 dollars which is a good deal for a custom side chair. Gaines uses lots of black and white in her own home so I thought I would pair this black and white stripe with a pretty black paisley and a touch of ticking stripe pillows to add a similar pattern from the chair to your sofa or other upholstered pieces.
I have also loved living rooms where Gaines has added some blue touches. So in case you are a fan of blue and white then here is the same chair in a blue ticking strip paired with a pretty blue and white block print pillow and a solid navy linen to add a pop of color to your room.
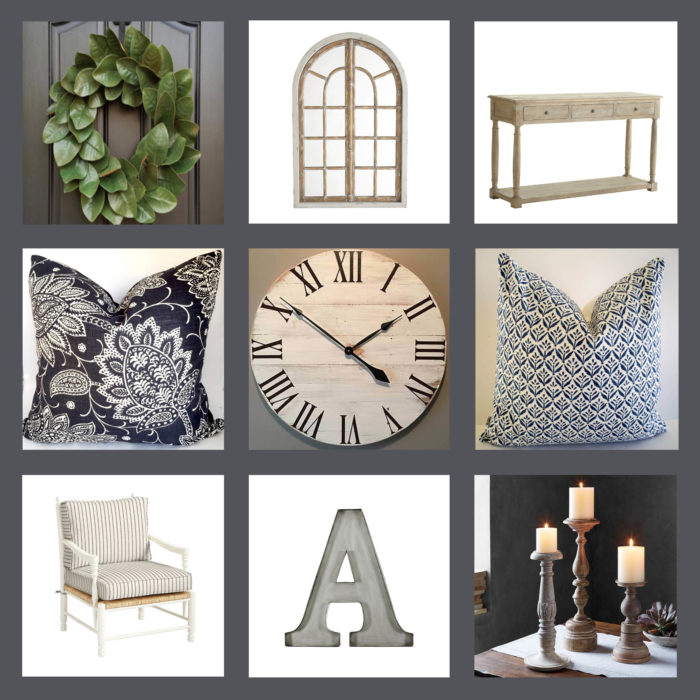
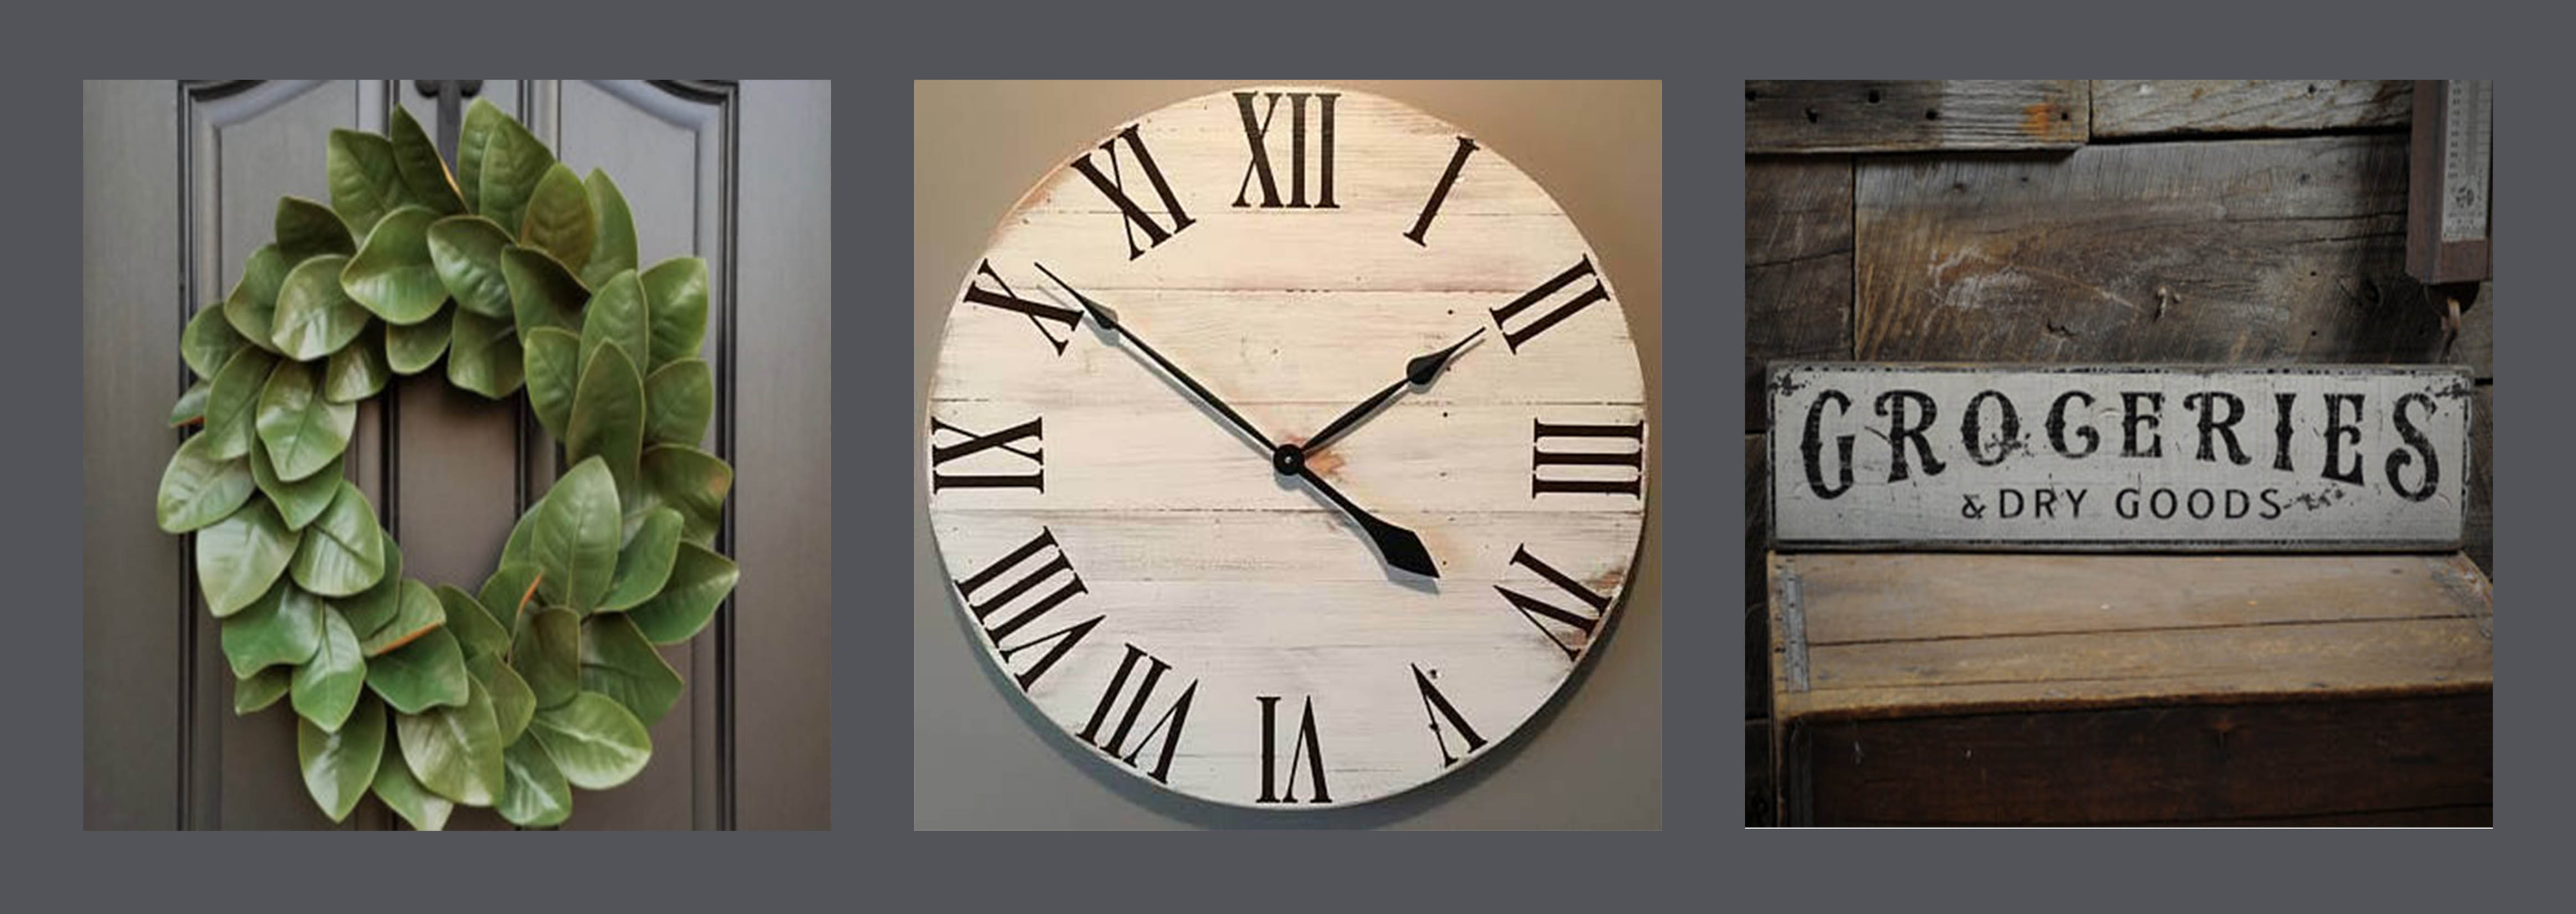
Now my favorite part, the decorative details. Sometimes it’s the small things that go a long way to change how you feel about a room. Want that signature magnolia wreath? I found a shop on Etsy that sells them for much less than ordering one for Magnolia Market. So add a bit of magnolia to your door, over a mantle or in your kitchen with this classic wreath. Another detail that Gaines likes to use is oversized clocks. I found an Etsy shop that sells custom clocks like this white one above. Want a custom sign that looks like the vintage ones you see in the Gaines home then try a sign from the Lizton Sign Company.
Another key element Gaines uses is metal work and lettering. The very first episode of Fixer Upper had a gorgeous metal flower above the fireplace. I found a similar piece from a Southern company called At West End that specializes in folk art and unique rustic pieces. If you don’t have a huge supply of vintage sign letters then these metal typeset letters from Ballard Design have a similar feel. Then what Magnolia styled room would be complete without some turned wood candle sticks. Add them to your mantle or console table to add some height and layers to your room.
Finally looking beyond the living room, another key element in the Magnolia style is a kitchen or dining space that feature a farmhouse styled table and some metal bistro chairs. Then last but not least, one of my favorite finds of this post an architectural styled mirror that has a distressed white finish. This mirror is currently 40 percent off at Wisteria and I love its details and shape which would make it a beautiful anchor piece above a sofa, chest or console table.
So if you have ever found yourself daydreaming about Fixer Upper taking over your home then take a look at these decorative pieces that are sure to add a bit of that warm, collected look that has made Fixer Upper so fun to follow.
The holiday gift wrapping is now in full swing in my house, but as I looked through old Christmas pictures to find some photos of some pretty package ideas to share with you my thoughts wandered back to my first Christmas as a newlywed. I don’t think I have shared this story with anyone, but you should know that the first major fight of my married life, eleven years ago was over something completely silly, gift wrap. My husband and I made it nearly a year into our marriage without a major issue, but somehow on Christmas eve I managed to say something I shouldn’t about my husband’s department store shopping bag gift wrap. Maybe it was just the stress of the holidays, but somehow in my mind I thought I should say something or I might never see a gift wrapped Christmas present ever again. Faulty logic I know, but I have to laugh at my younger self. I will spare you the details, because hopefully the statute of limitations has run on such craziness. However, I am grateful that my husband is a kind man who forgave my temporary lapse in sanity.
I made a last minute run for gift wrap at Target this week and I was glad to learn that my procrastination had an upside because all the gift wrap was 30% off as of Monday. I got a roll of Joanna Gaines’ Hearth and Home black and white hearing bone paper which looked cute with red and green accents. I also found these fun embroidered fabric gift bags.
So now as I write and share a few ideas about some last minute gift wrapping ideas I am reminded that perspective is everything. While I truly love the artistic fun of wrapping packages and all the details that make Christmas special, I try not to let the little things get in the way of celebrating the true meaning of the season. So if you are feeling frazzled then I have a few gift wrapping ideas to make any gift feel special.
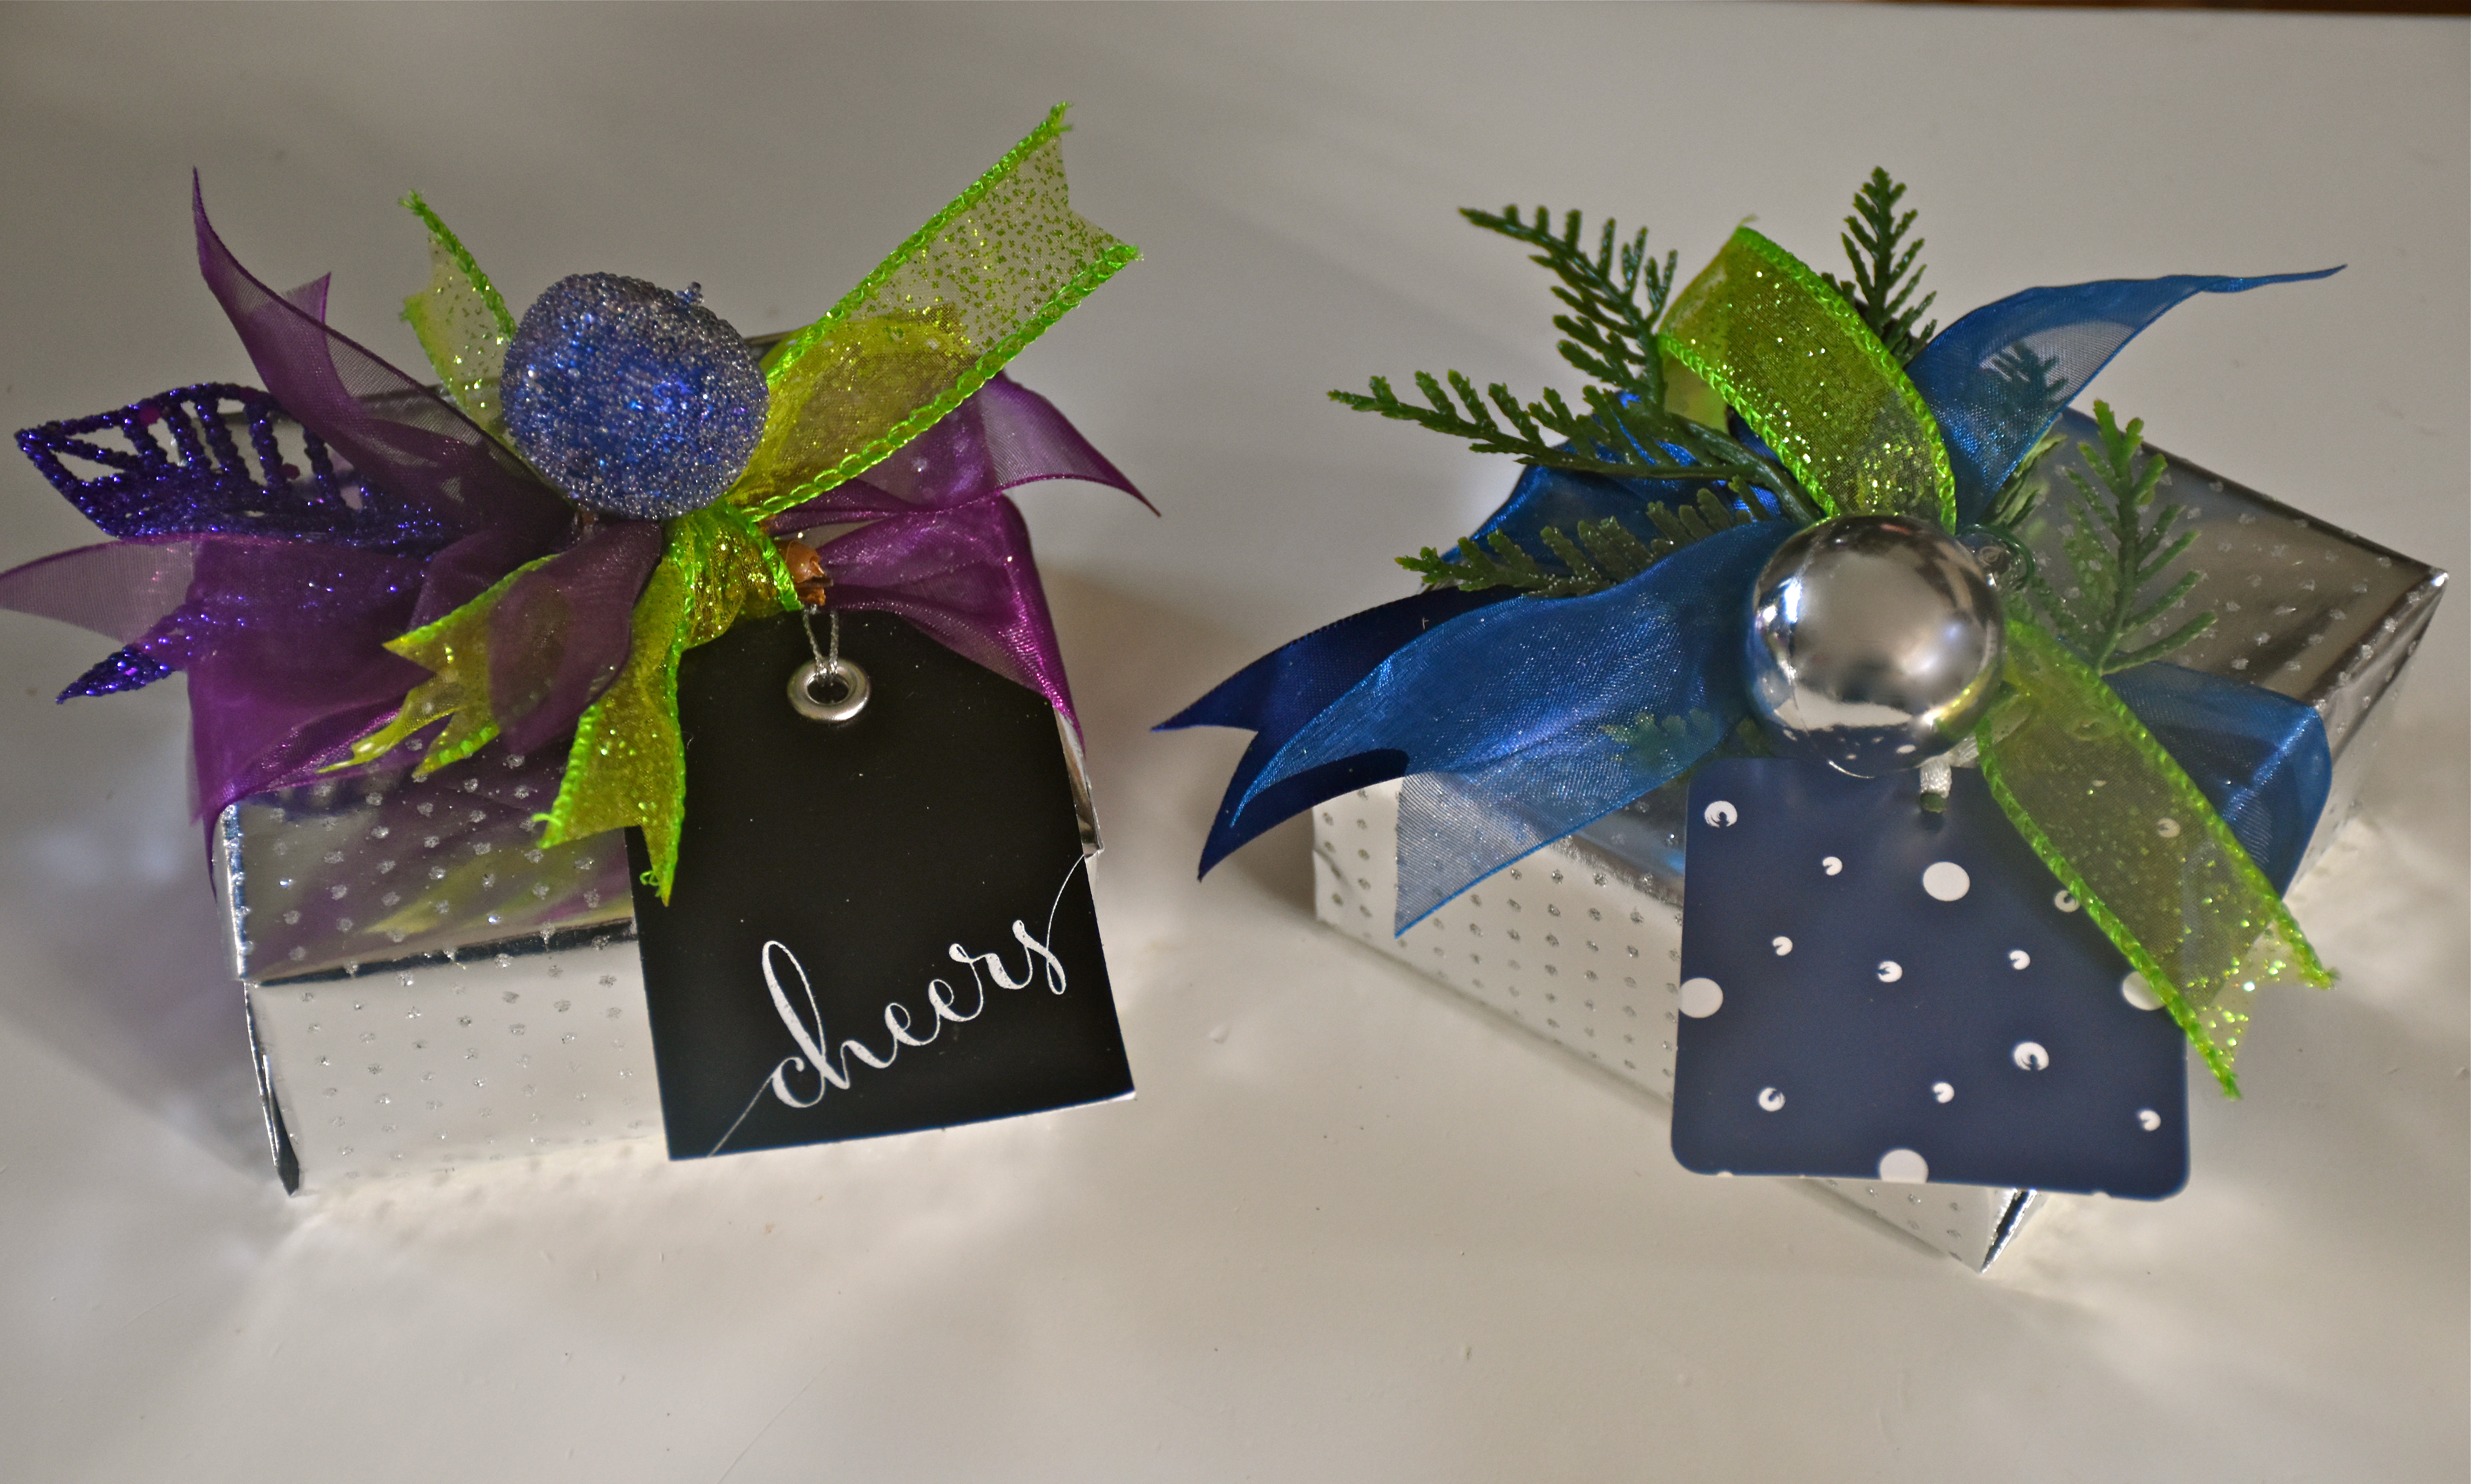
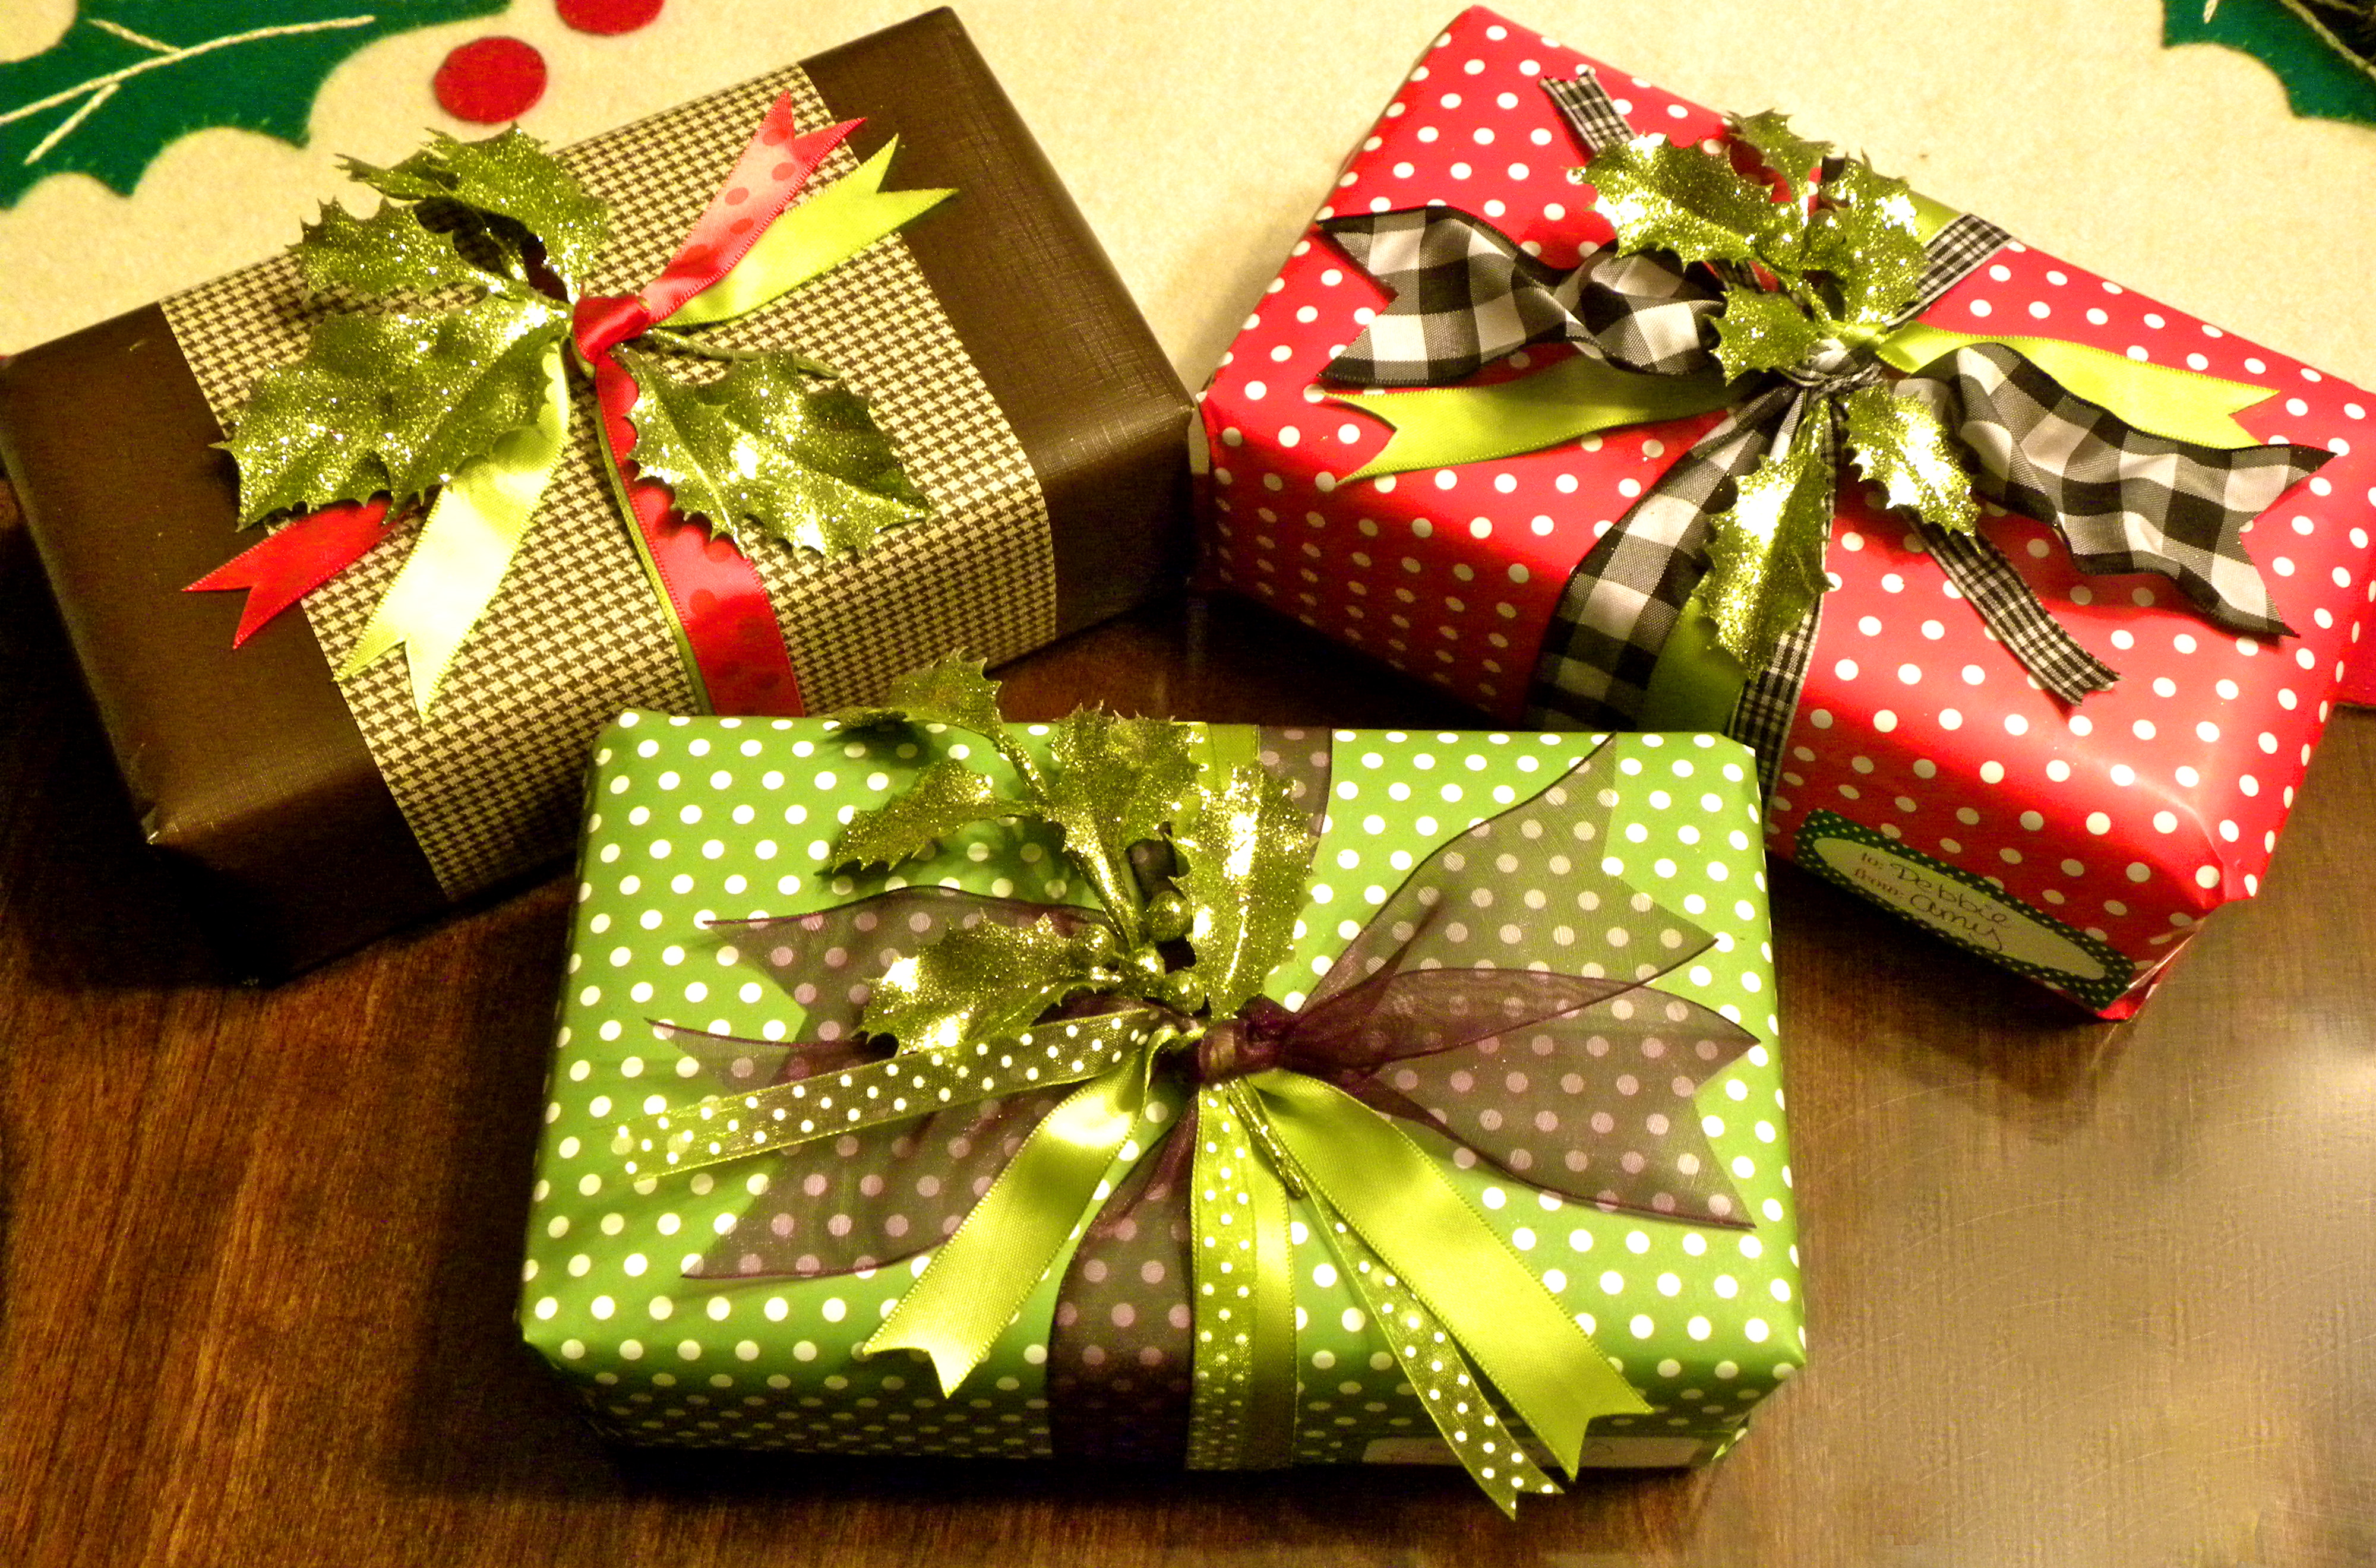
These packages have an elegant look with some silver paper I found at Target. Then to add an artistic touch to my first package I added a small sugar plumb like piece that I found in some decorative picks at Michaels. Don’t be afraid to take those picks apart and just use smaller pieces to fit the size of your package. The second package has a similar look but instead of using a plumb I cut a small faux cedar leaf and I added a plastic ornament.
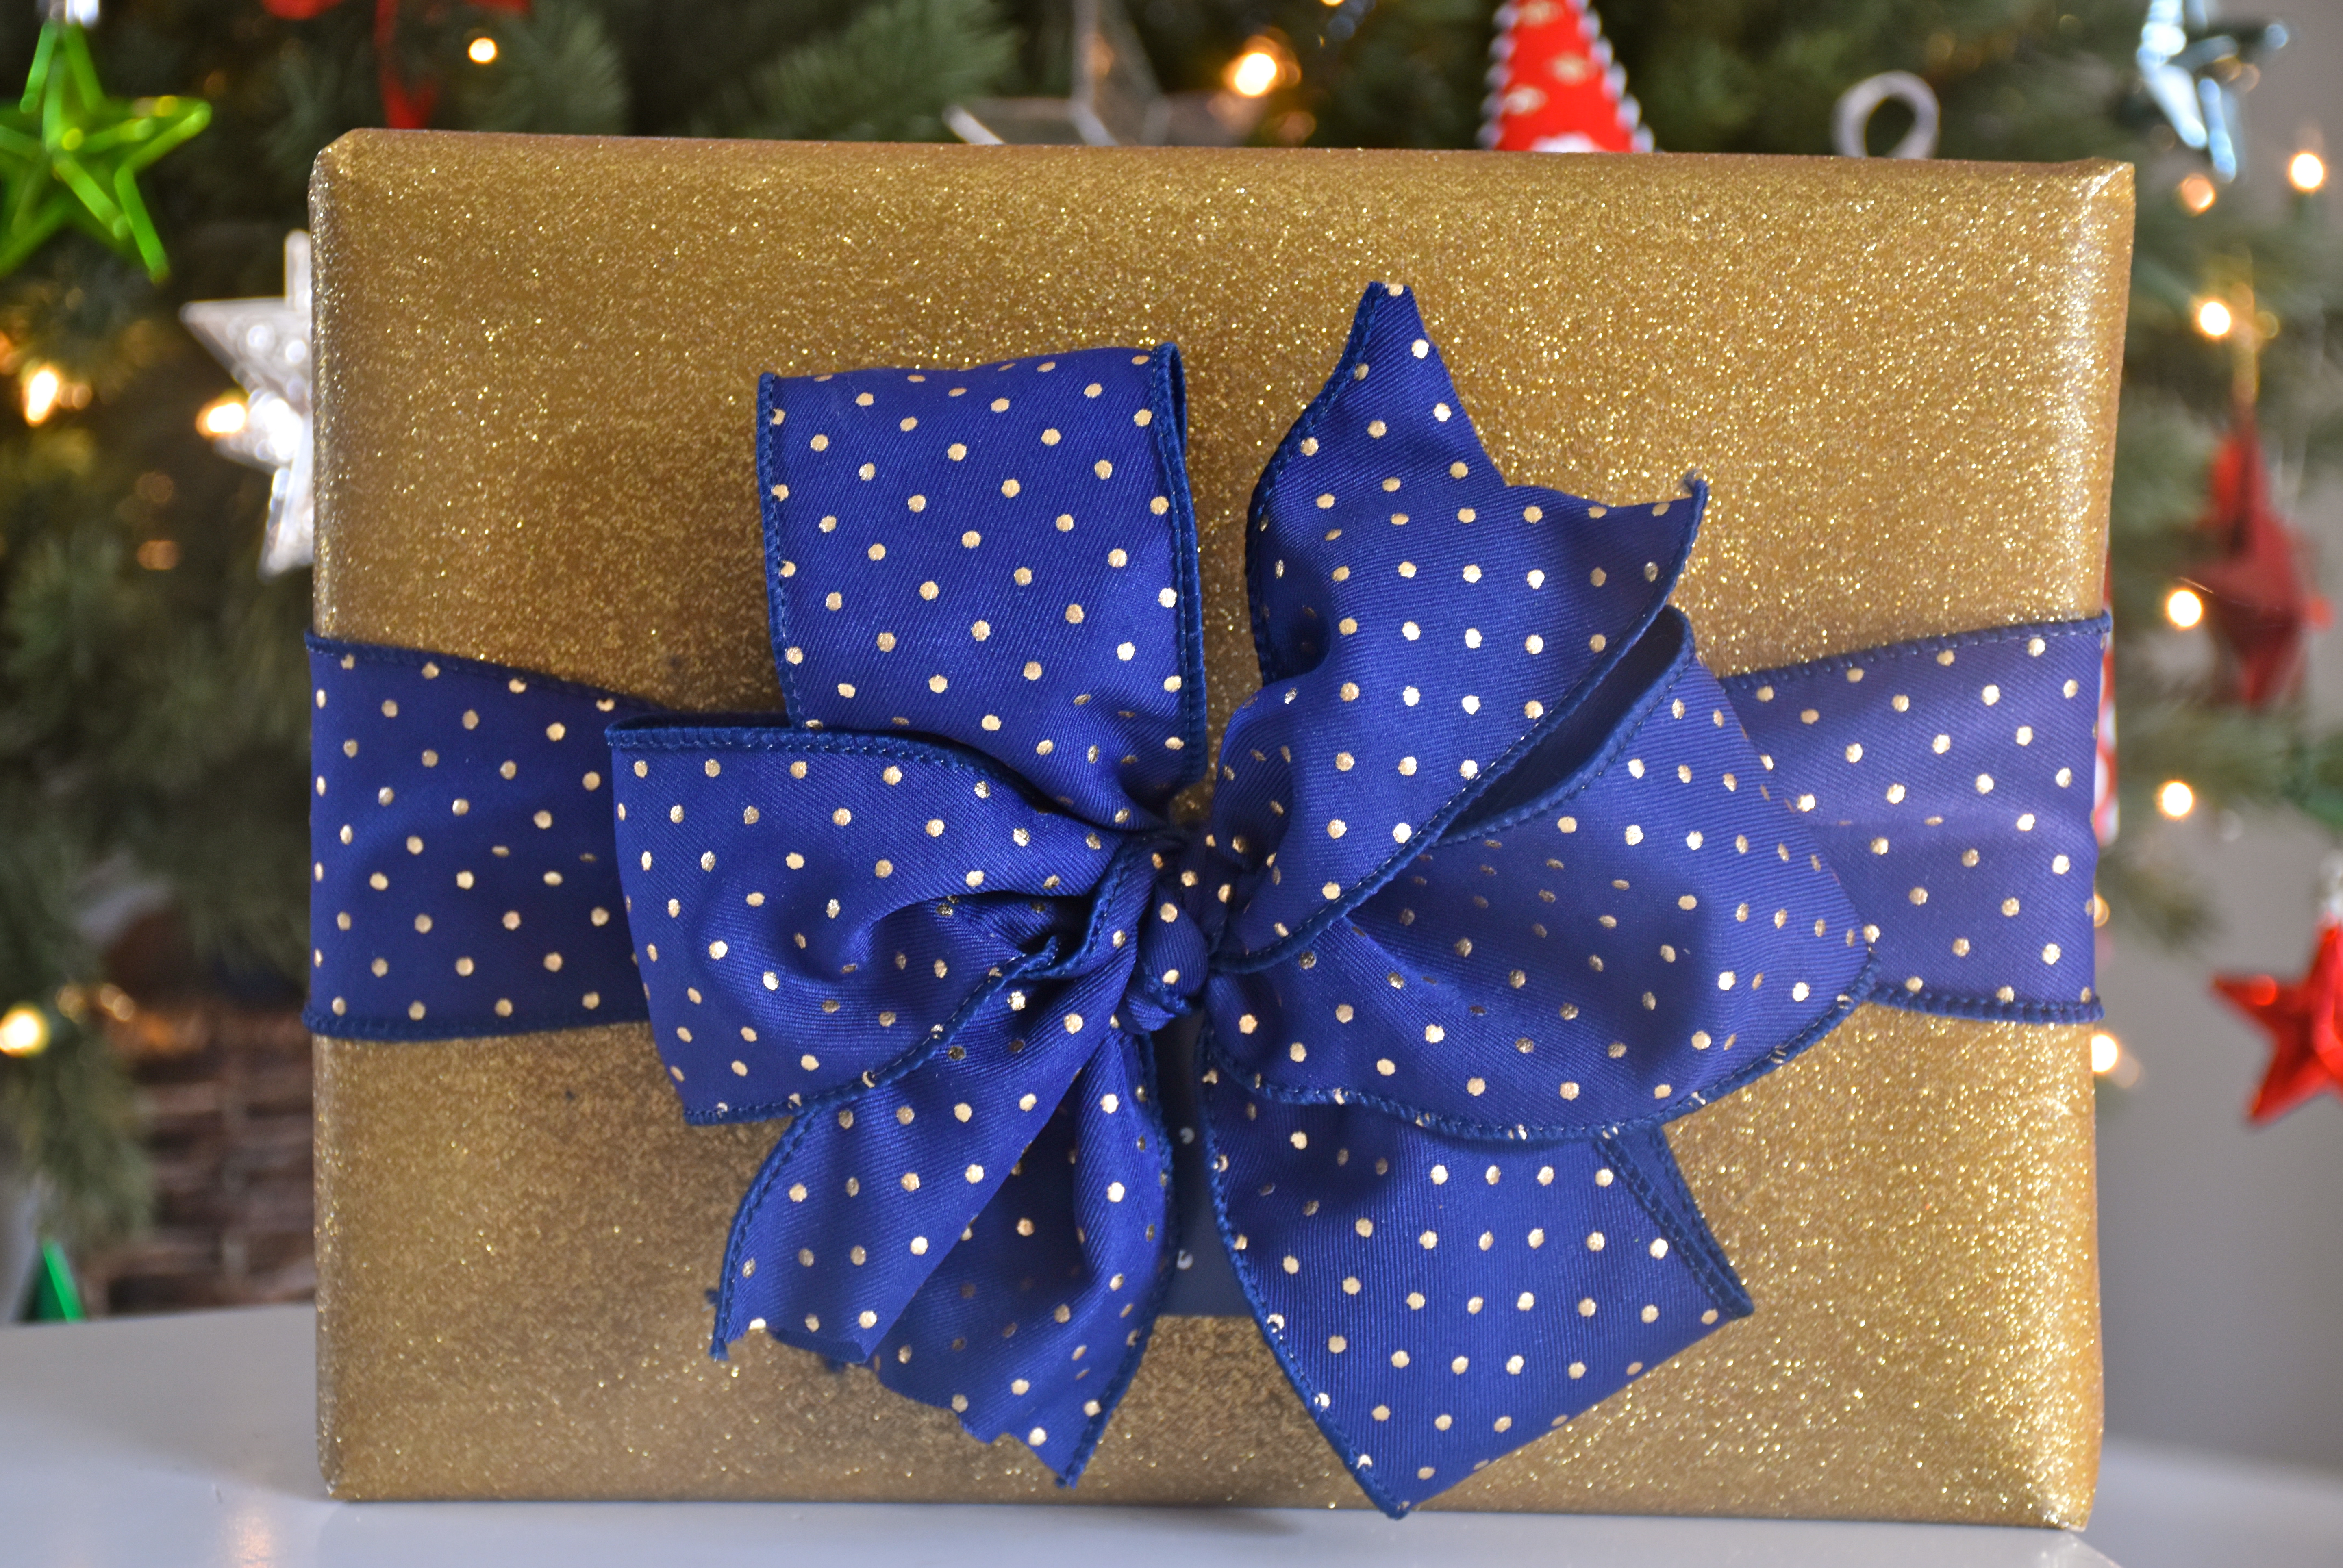
First, if you running low on time or you’re worried about traveling with wrapped paper packages in your suitcase then you can get some pretty paper boxes and just tie a bow with some wired ribbon that will hold its shape. Marshall’s Home Goods has my favorite selection of patterned paper boxes that make gift wrapping easy.
This is some wired ribbon I found at Michaels. I tied the base ribbon around my package in a simple knot and then I left the ends of that ribbon a little long. Next with a new piece of ribbon, I made four even loops which I tied in the center with the ends of base package ribbon I had just tied. Finally with my bow tied, I trimmed the ribbon ends to the same length as my bow loops.
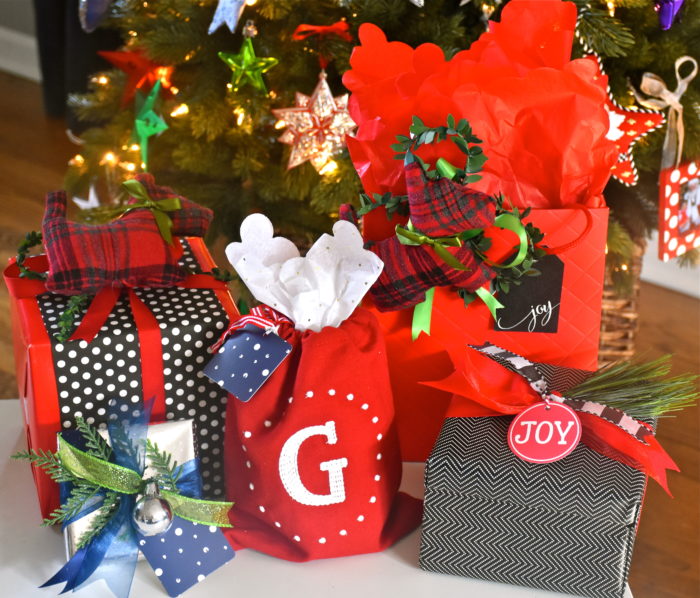
Want a package to instantly feel a bit more fancy? Then do what the department stores do and add something special to your bow. Craft stores like Michaels and Hobby Lobby usually have a wall of bins filled with small bits of seasonal greenery and decorations for garlands, wreaths and packages. Adding just a small touch like greenery leaves, some berries or even a plaid scottie dog can make a simple bow look gorgeous.
These gifts were easy to wrap because they don’t have your looped traditional bow. Instead, I tied three different ribbons in a knot or around some glittery Christmas greenery. The varied colors and textures in the ribbons create a gorgeous topper for your package without having to worry about making bow loops. All you need to do is tie some simple knots.
The packages above are something I wrapped a few years ago so the photo is a little grainy. However you can see that the same style can also work on a larger package. I had fun mixing the patterns and colors of theses ribbons together.
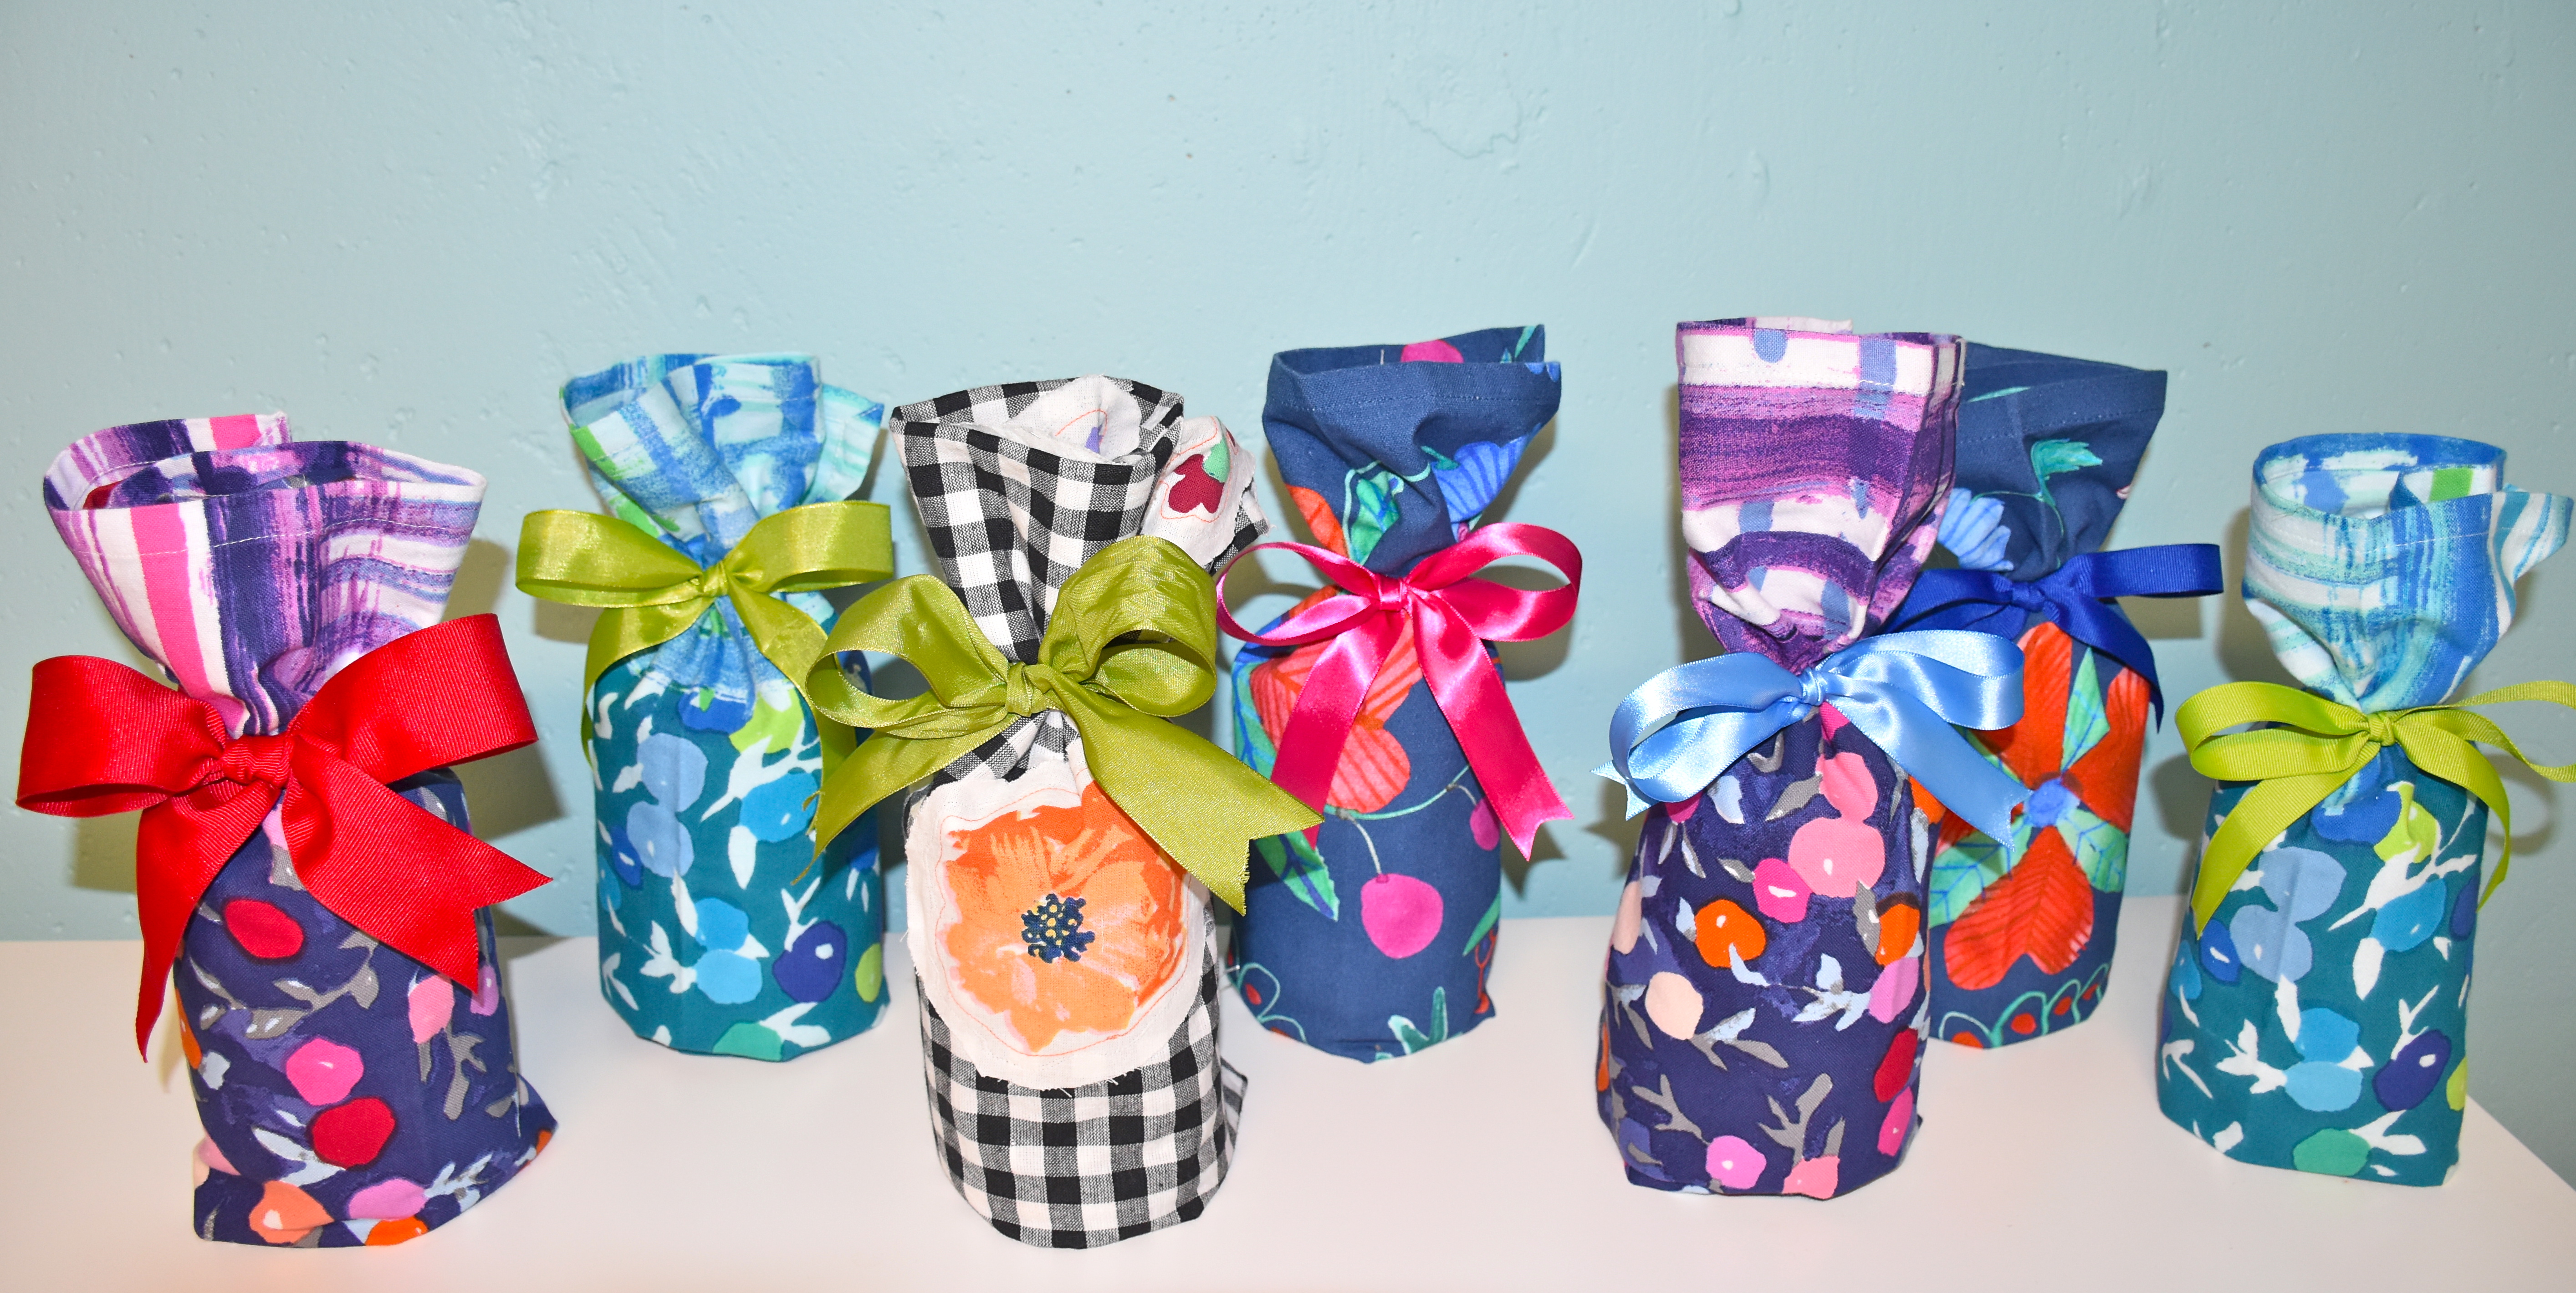
Finally, Are you looking for a last minute hostess gift? Do you have a bottle of wine, a jar of jam or homemade gift from your kitchen? Then think about using a decorative tea towel that can double as a part of the gift.
Last year I made cake truffles as gifts and I placed them in mason jars. I wanted to give them a more personal touch, so I wrapped them up in brightly colored tea towels and tied them with a ribbon.
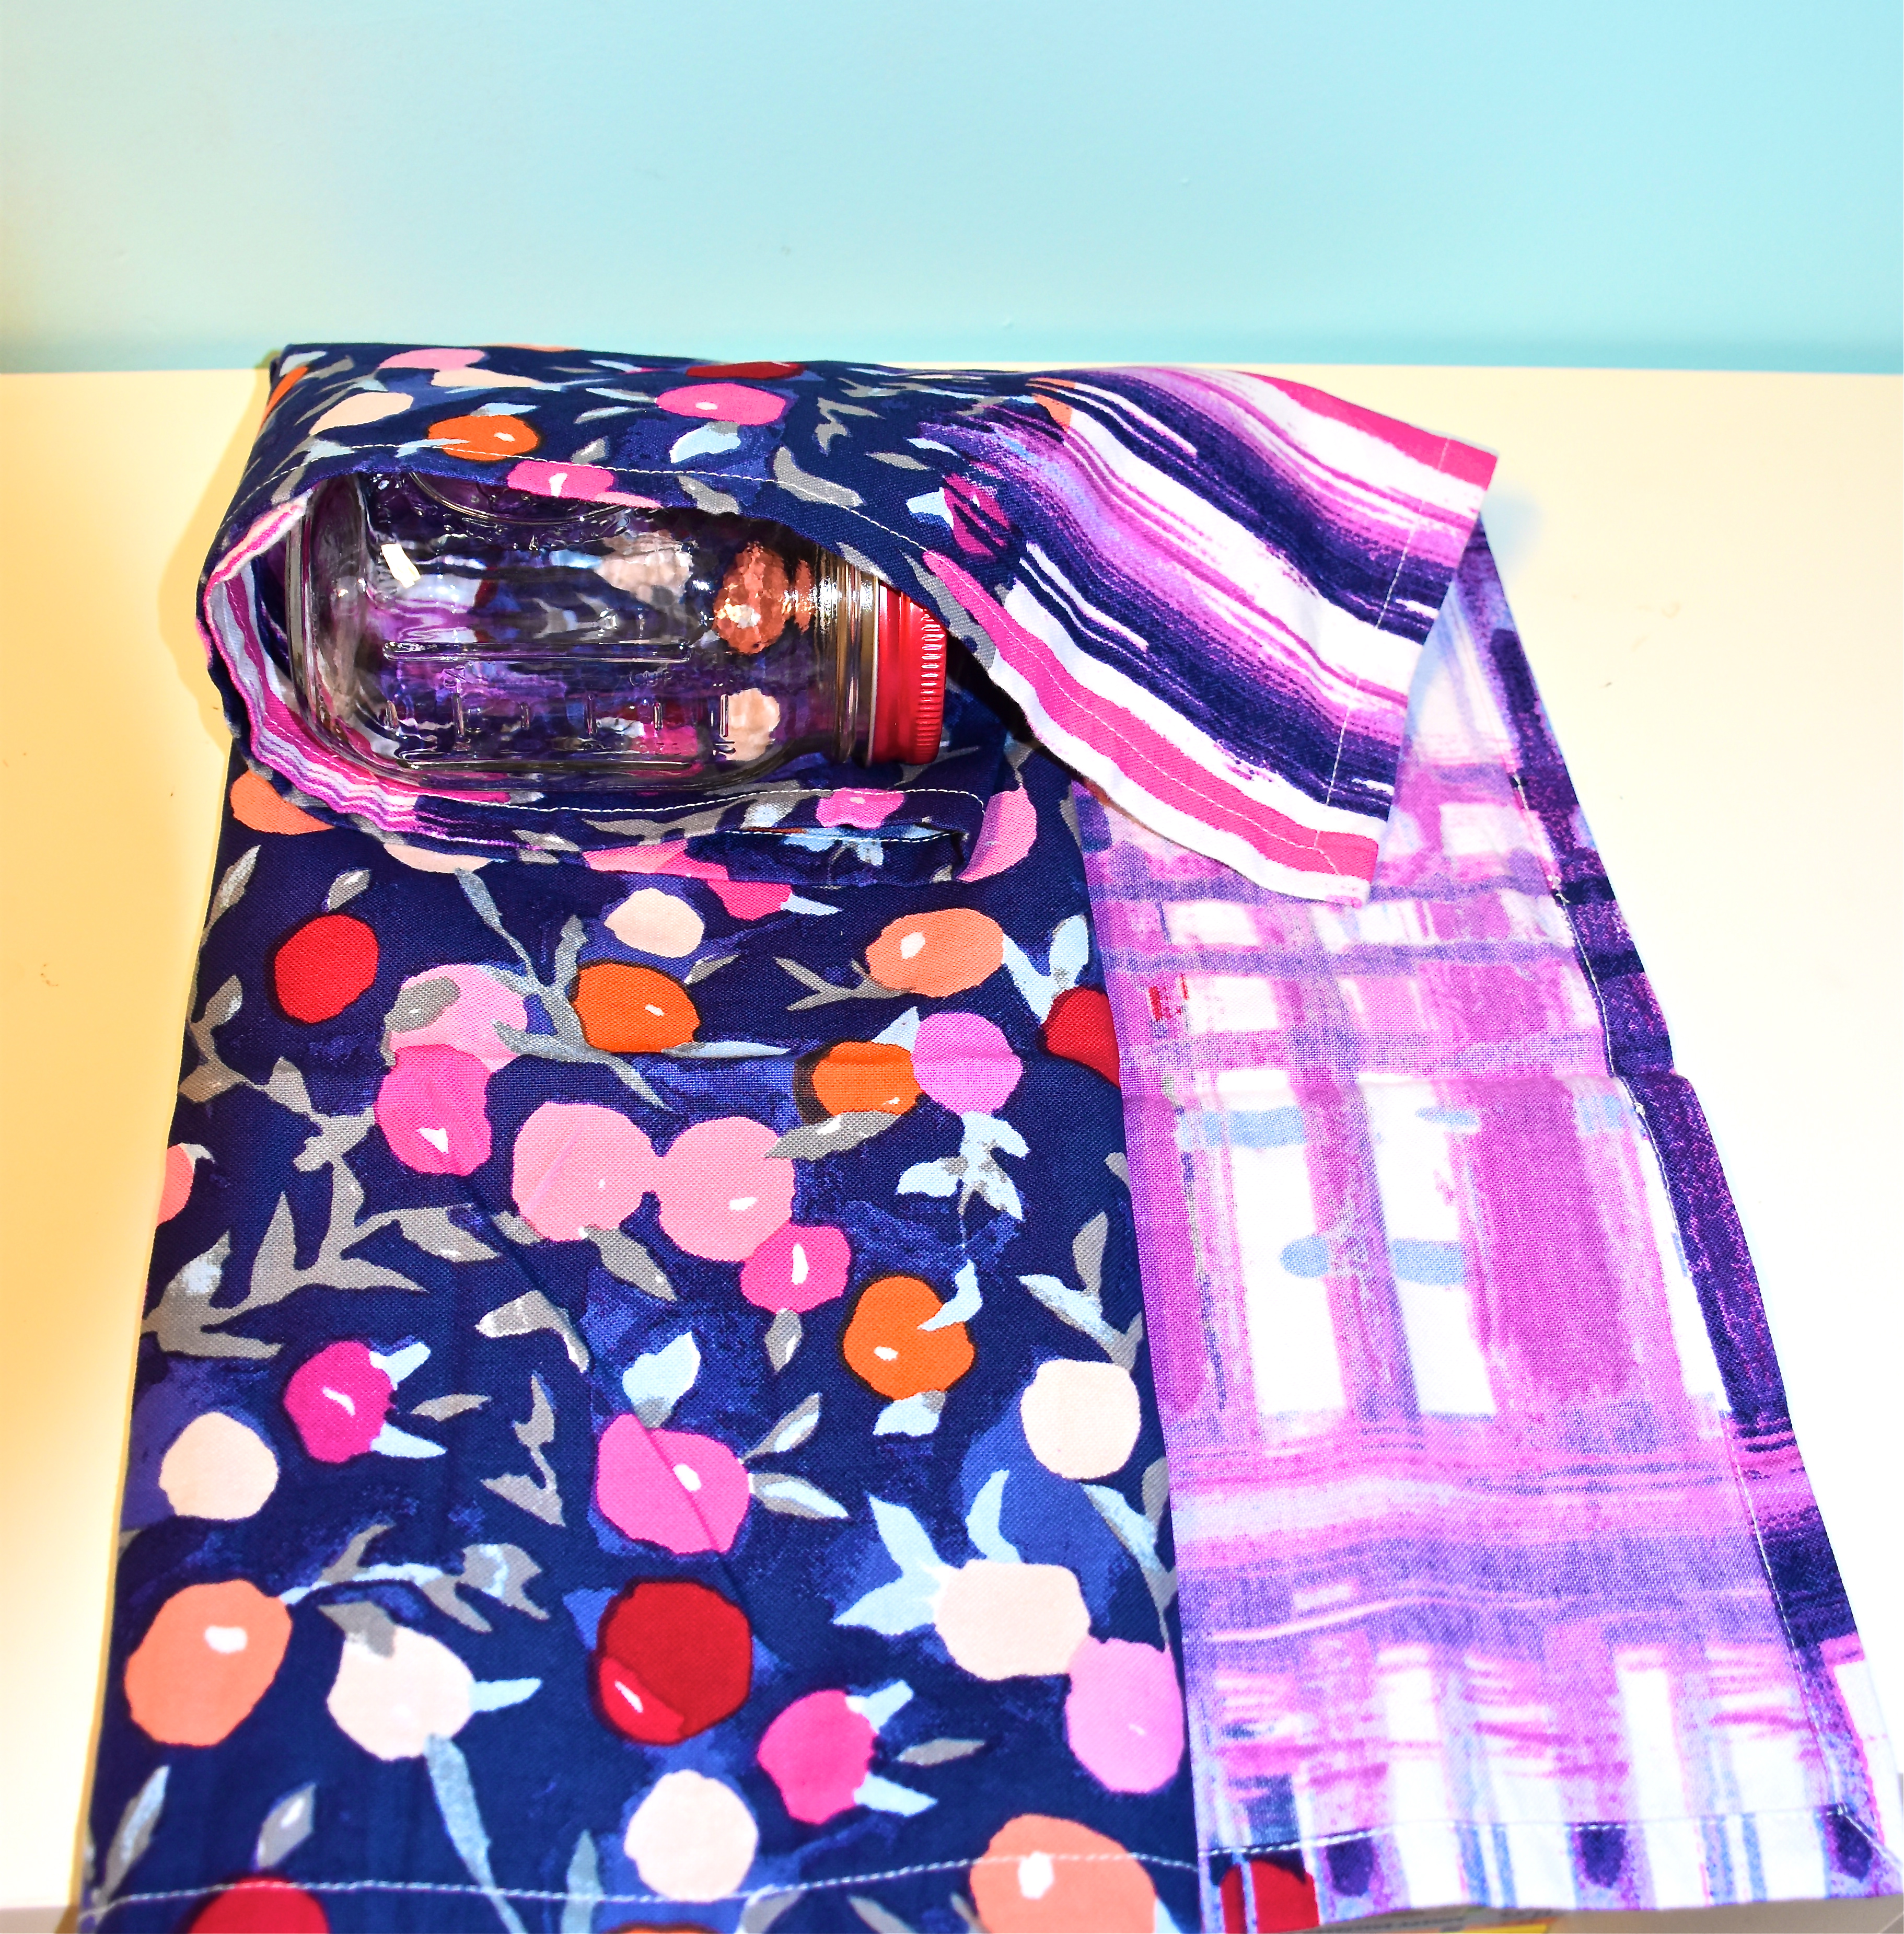
Here you can see I folded my towel over to fit the size of my jar and create a pocket, so the bottom of your jar is covered. You can adjust your fold to fit a taller bottle.
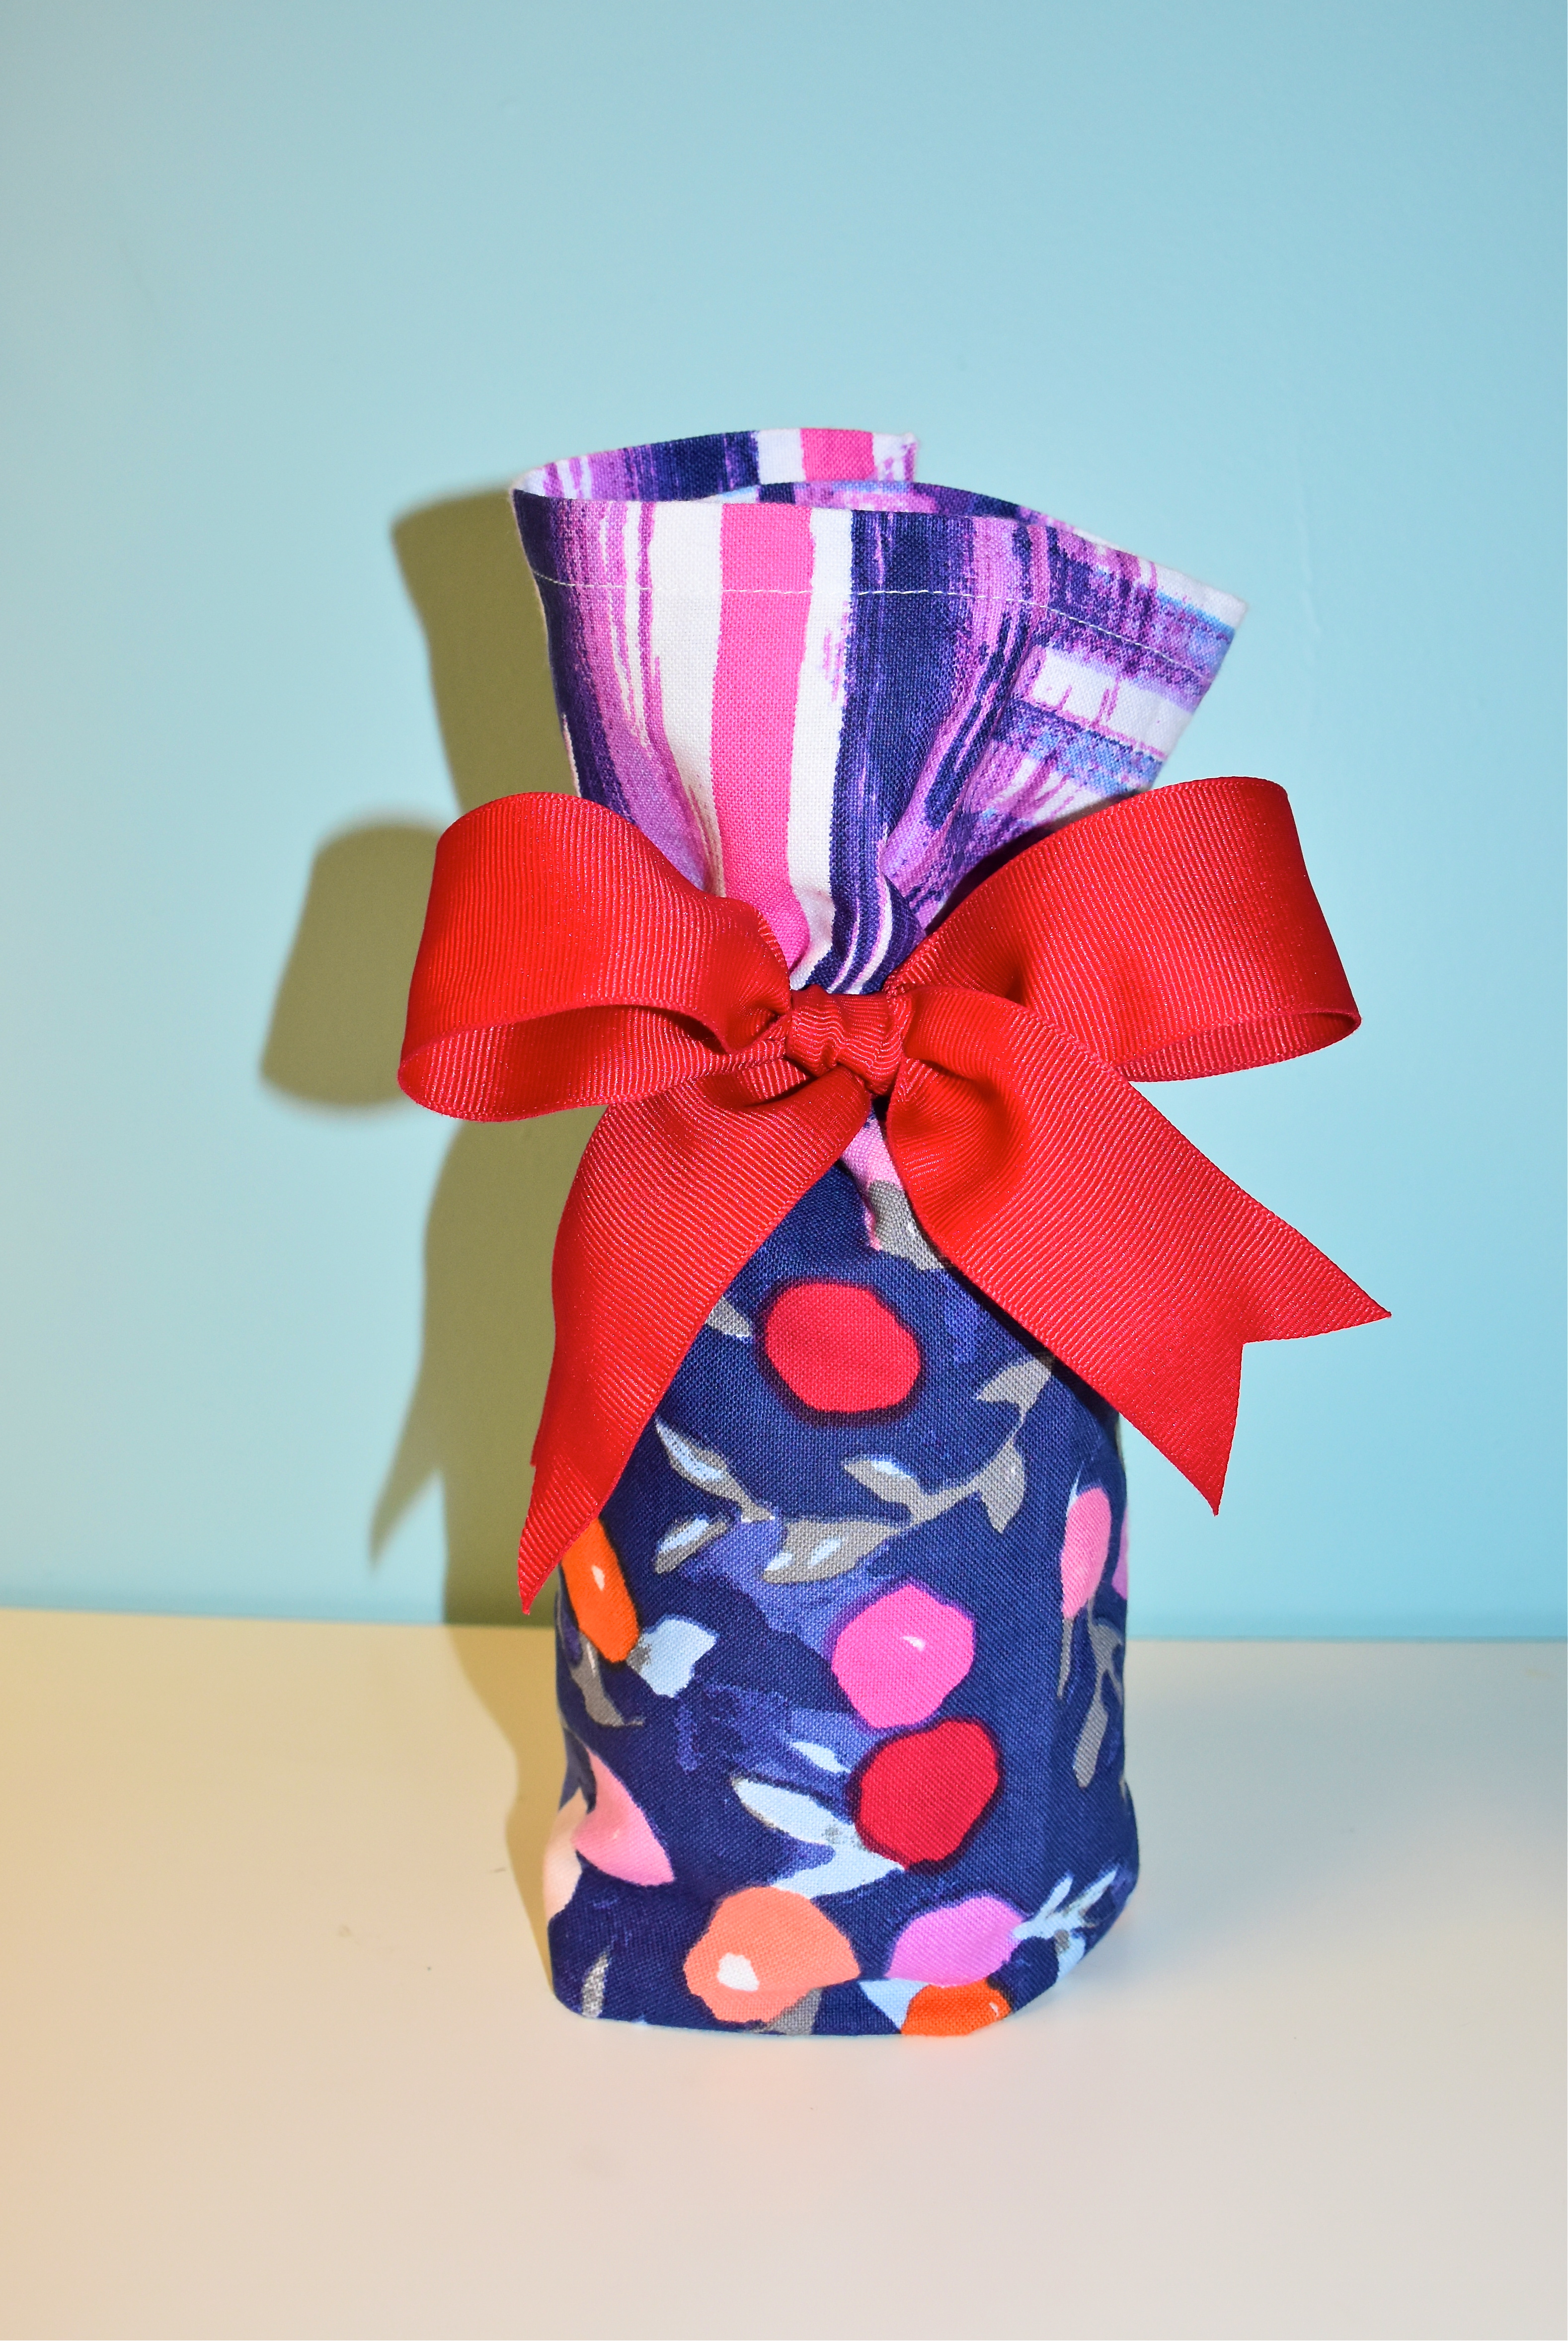
Next I put my jar inside the folded over pocket. Then I rolled it tightly and secured it with a small safety pin on the bottom and I tied the top with a large grosgrain ribbon.
This towel was fun because it had a different pattern on the edge of towel, but you could use a plaid Christmas towel or something with a smaller scaled pattern. These towels came from Anthropology, but I have also seen some pretty ones at Target, Sur La Table and Home Goods. This is a quick and easy way to wrap a gift. It’s unique and the fabric holds up better than paper in transport.
Just a few ideas to help you finish wrapping those special gifts, but if you find yourself up way too late and it gets crazy then gift bags are definitely the way to go. When I told my husband that I was going to share the shopping bag story it took a bit to get him to remember it. I think it’s a good sign if your husband loves you enough to forgive you and forget about the zaniness of it all. I am going to take a short break from the blog to spend some time celebrating the holidays with my family, but I will be back in the new year with more recipes, inspiration and fun.
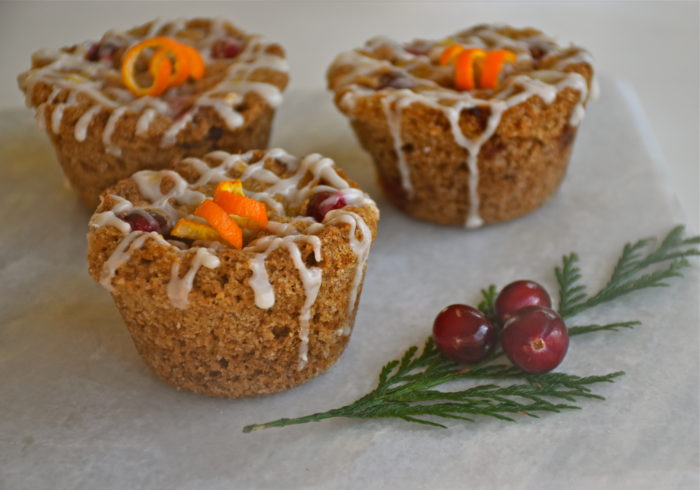
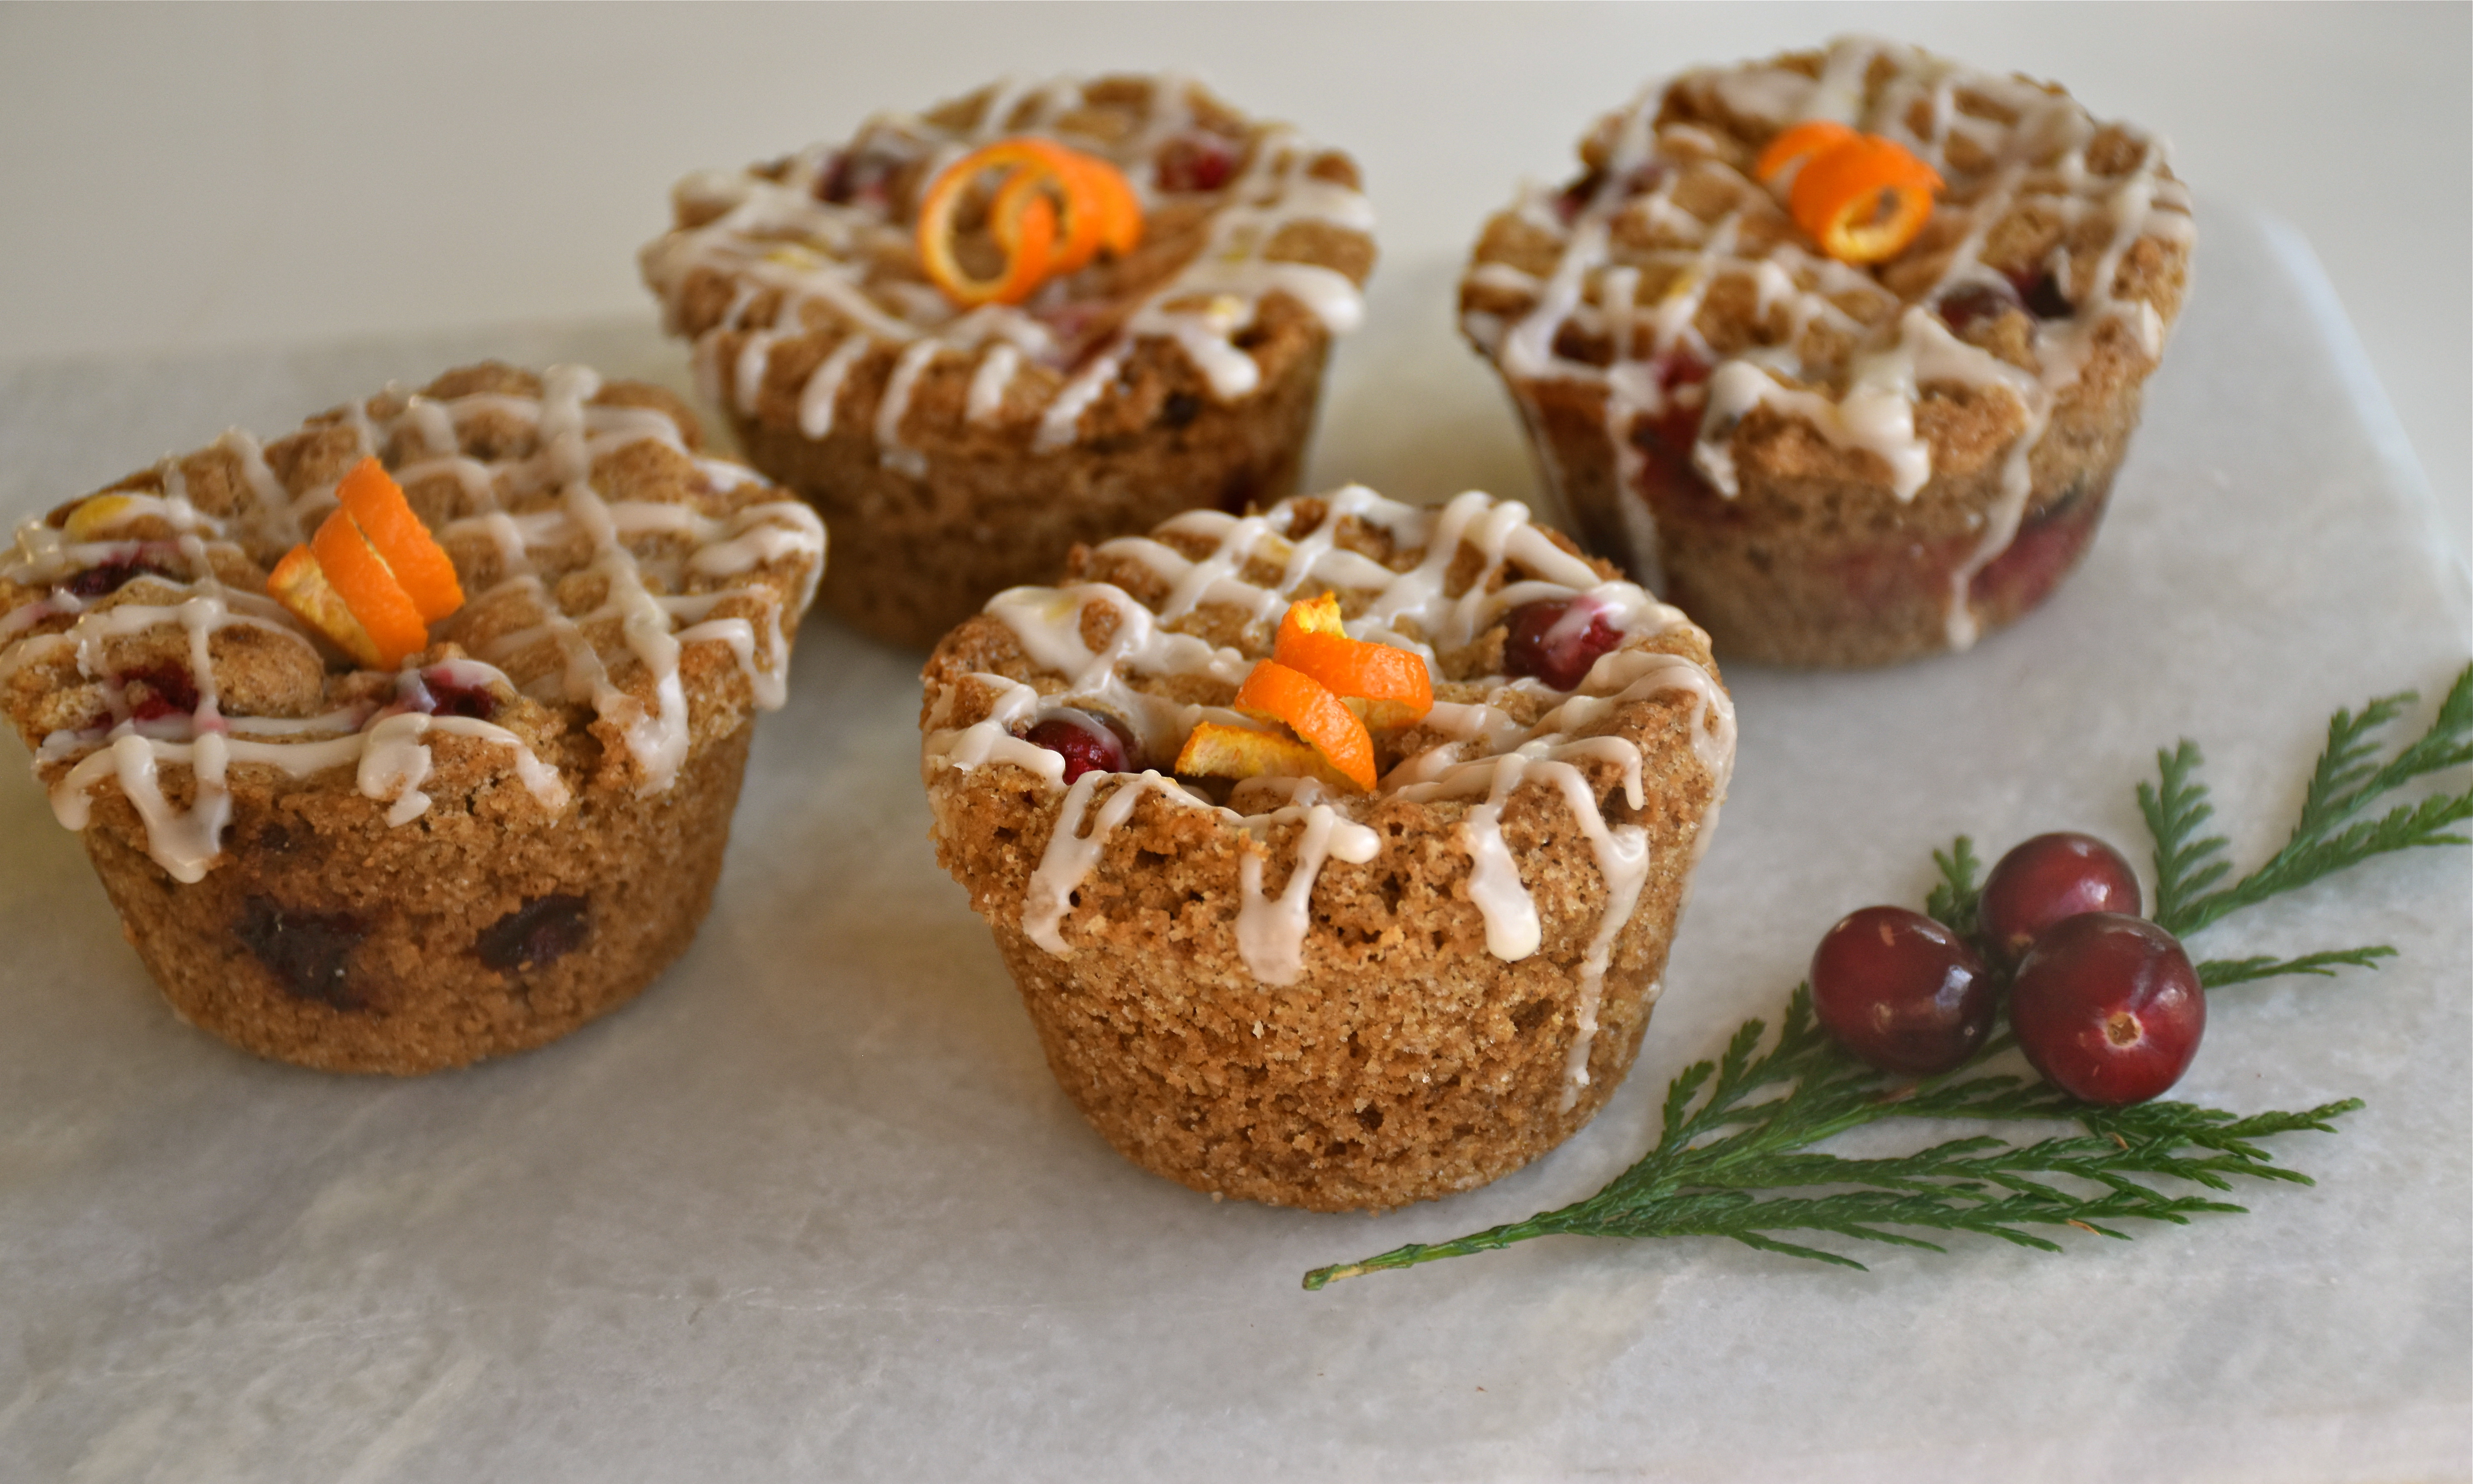
The holidays are the perfect time to make a quick cake or breakfast bread like these orange cranberry cakes. They are easy to make and the chewy cinnamon flavored bread reminds me of a sweet British fruit cake. The tartness of the fresh cranberries is balanced by the sweet orange and cinnamon. This recipe was something I clipped years ago from the Houston Chronicle, but with my love of The Great British Baking Show I was inspired to make these orange cranberry cakes again. The original recipe called for making cake loaves, but I prefer to make mini sized cakes because they take less time to cook and I like decorating these smaller sized bites.
Mini Orange Cranberry Fruit Cakes (makes approximately 12 cakes or 2 nine inch loaf pans)
2 cups sugar
3 cups flour
1 teaspoon baking soda
2 tablespoons cinnamon
1/4 teaspoon salt
2 tablespoons vanilla
3 eggs, beaten
1 cup canola oil
1/2 teaspoon orange zest
1 1/2 teaspoons fresh orange juice (I used mandarin oranges)
3 cups of fresh cranberries
Preheat your oven to 325 degrees
Then grease and flour two standard sized muffin or cupcake pans or spray them with Baker’s Joy cooking spray that has flour in it.
Next in a large mixing bowl or in the bowl of your stand mixer mix together your sugar, flour, baking soda, cinnamon and salt then mix in your eggs, oil, orange juice and orange zest. Then fold in your cranberries and make sure they are evenly distributed. The batter will be stiff almost like you are making a streusel. Fill your muffin tins about 3/4 of the way full.
Then bake your muffins for 35 to 40 minutes until a toothpick comes out clean. If you are making them in loaves they will need to bake for 1 hour and 30 minutes. These cakes take a bit longer than your average cupcake because of the fruit and the denser batter. When they have cooled a bit remove them from the muffin or cupcake tin and drizzle them with the orange glaze recipe below.
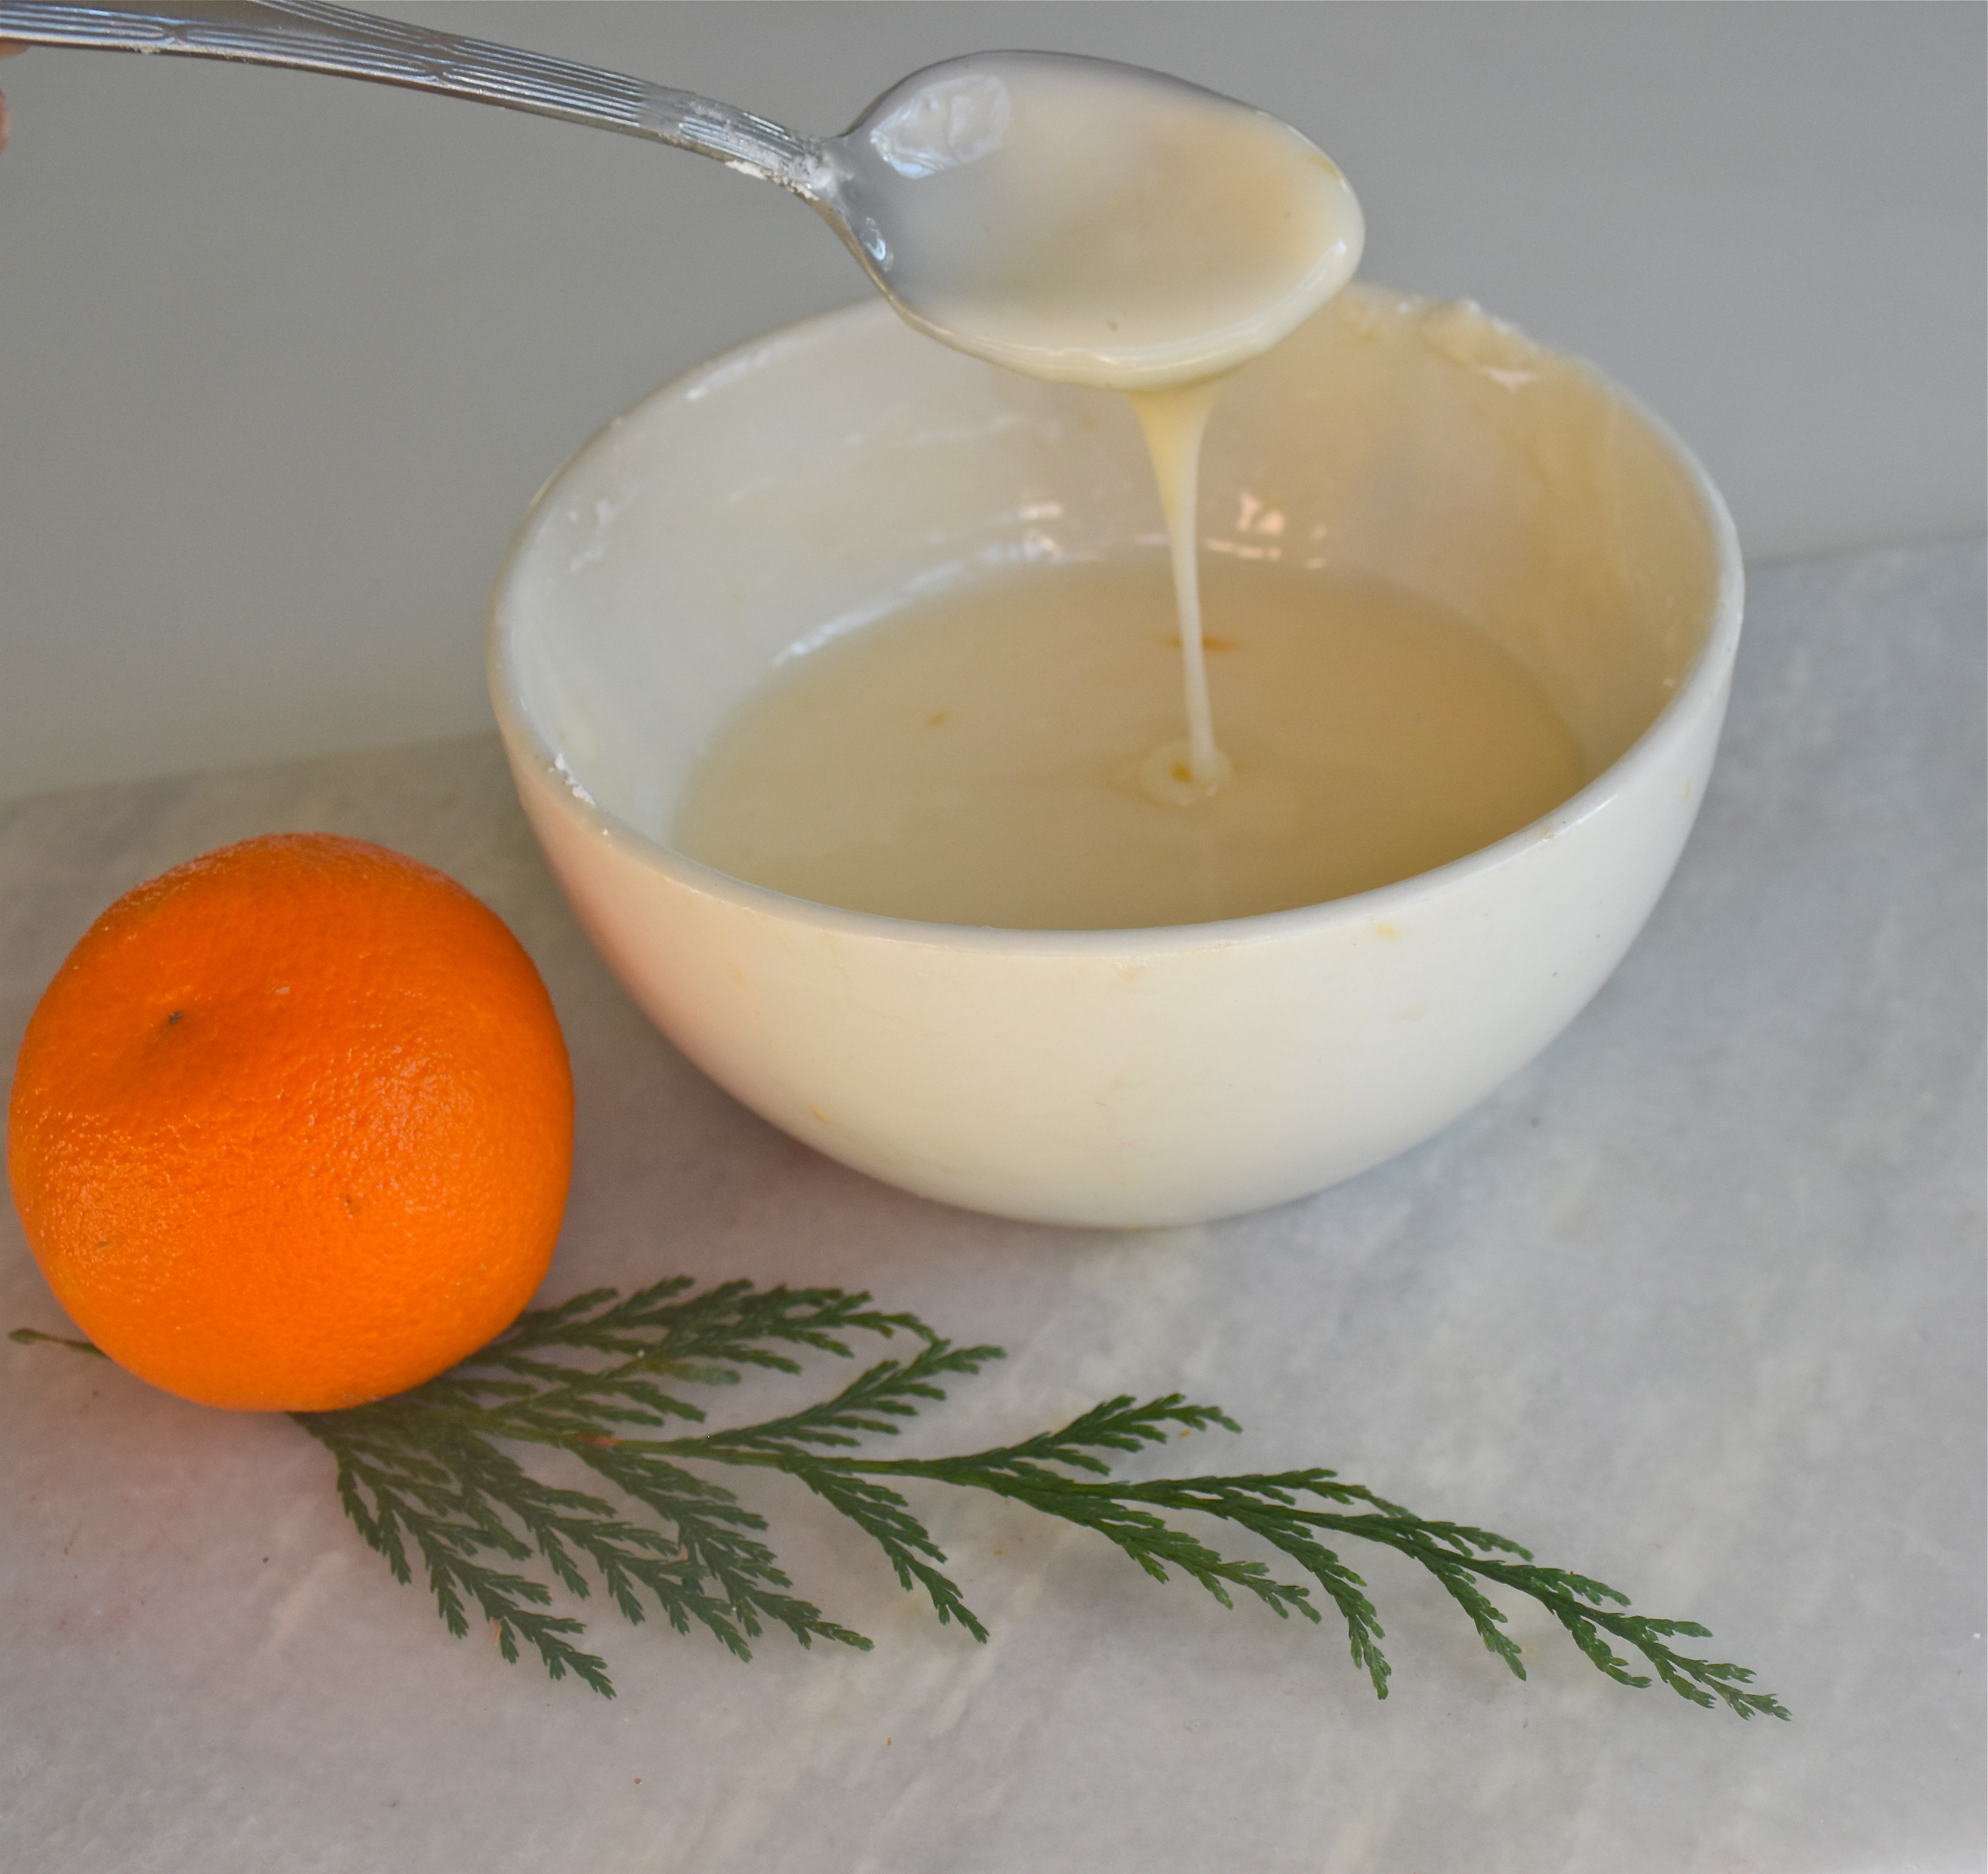
Orange Glaze
1 cup powdered sugar
3 tablespoons of fresh orange juice
Zest from two small mandarin oranges or I like to use my barware channel knife to make some decorative orange zest curls
In a small bowl mix together your orange juice and powdered sugar till you have a thick but still drizzly glaze. Then I like to put my glaze in a plastic pastry bag and cut of the tip to make a small hole. You could also use the tip of a large ziplock bag to make your own pastry bag or just drizzle it with a spoon.
I like to make a set of stripes going on way and then turn my muffin slightly and make a second set of drizzle stripes on the diagonal, but the icing tastes good any way you drizzle it on.
So if you too have gotten into a bit of the British baking fun then try this fresh take on a classic holiday fruit cake.
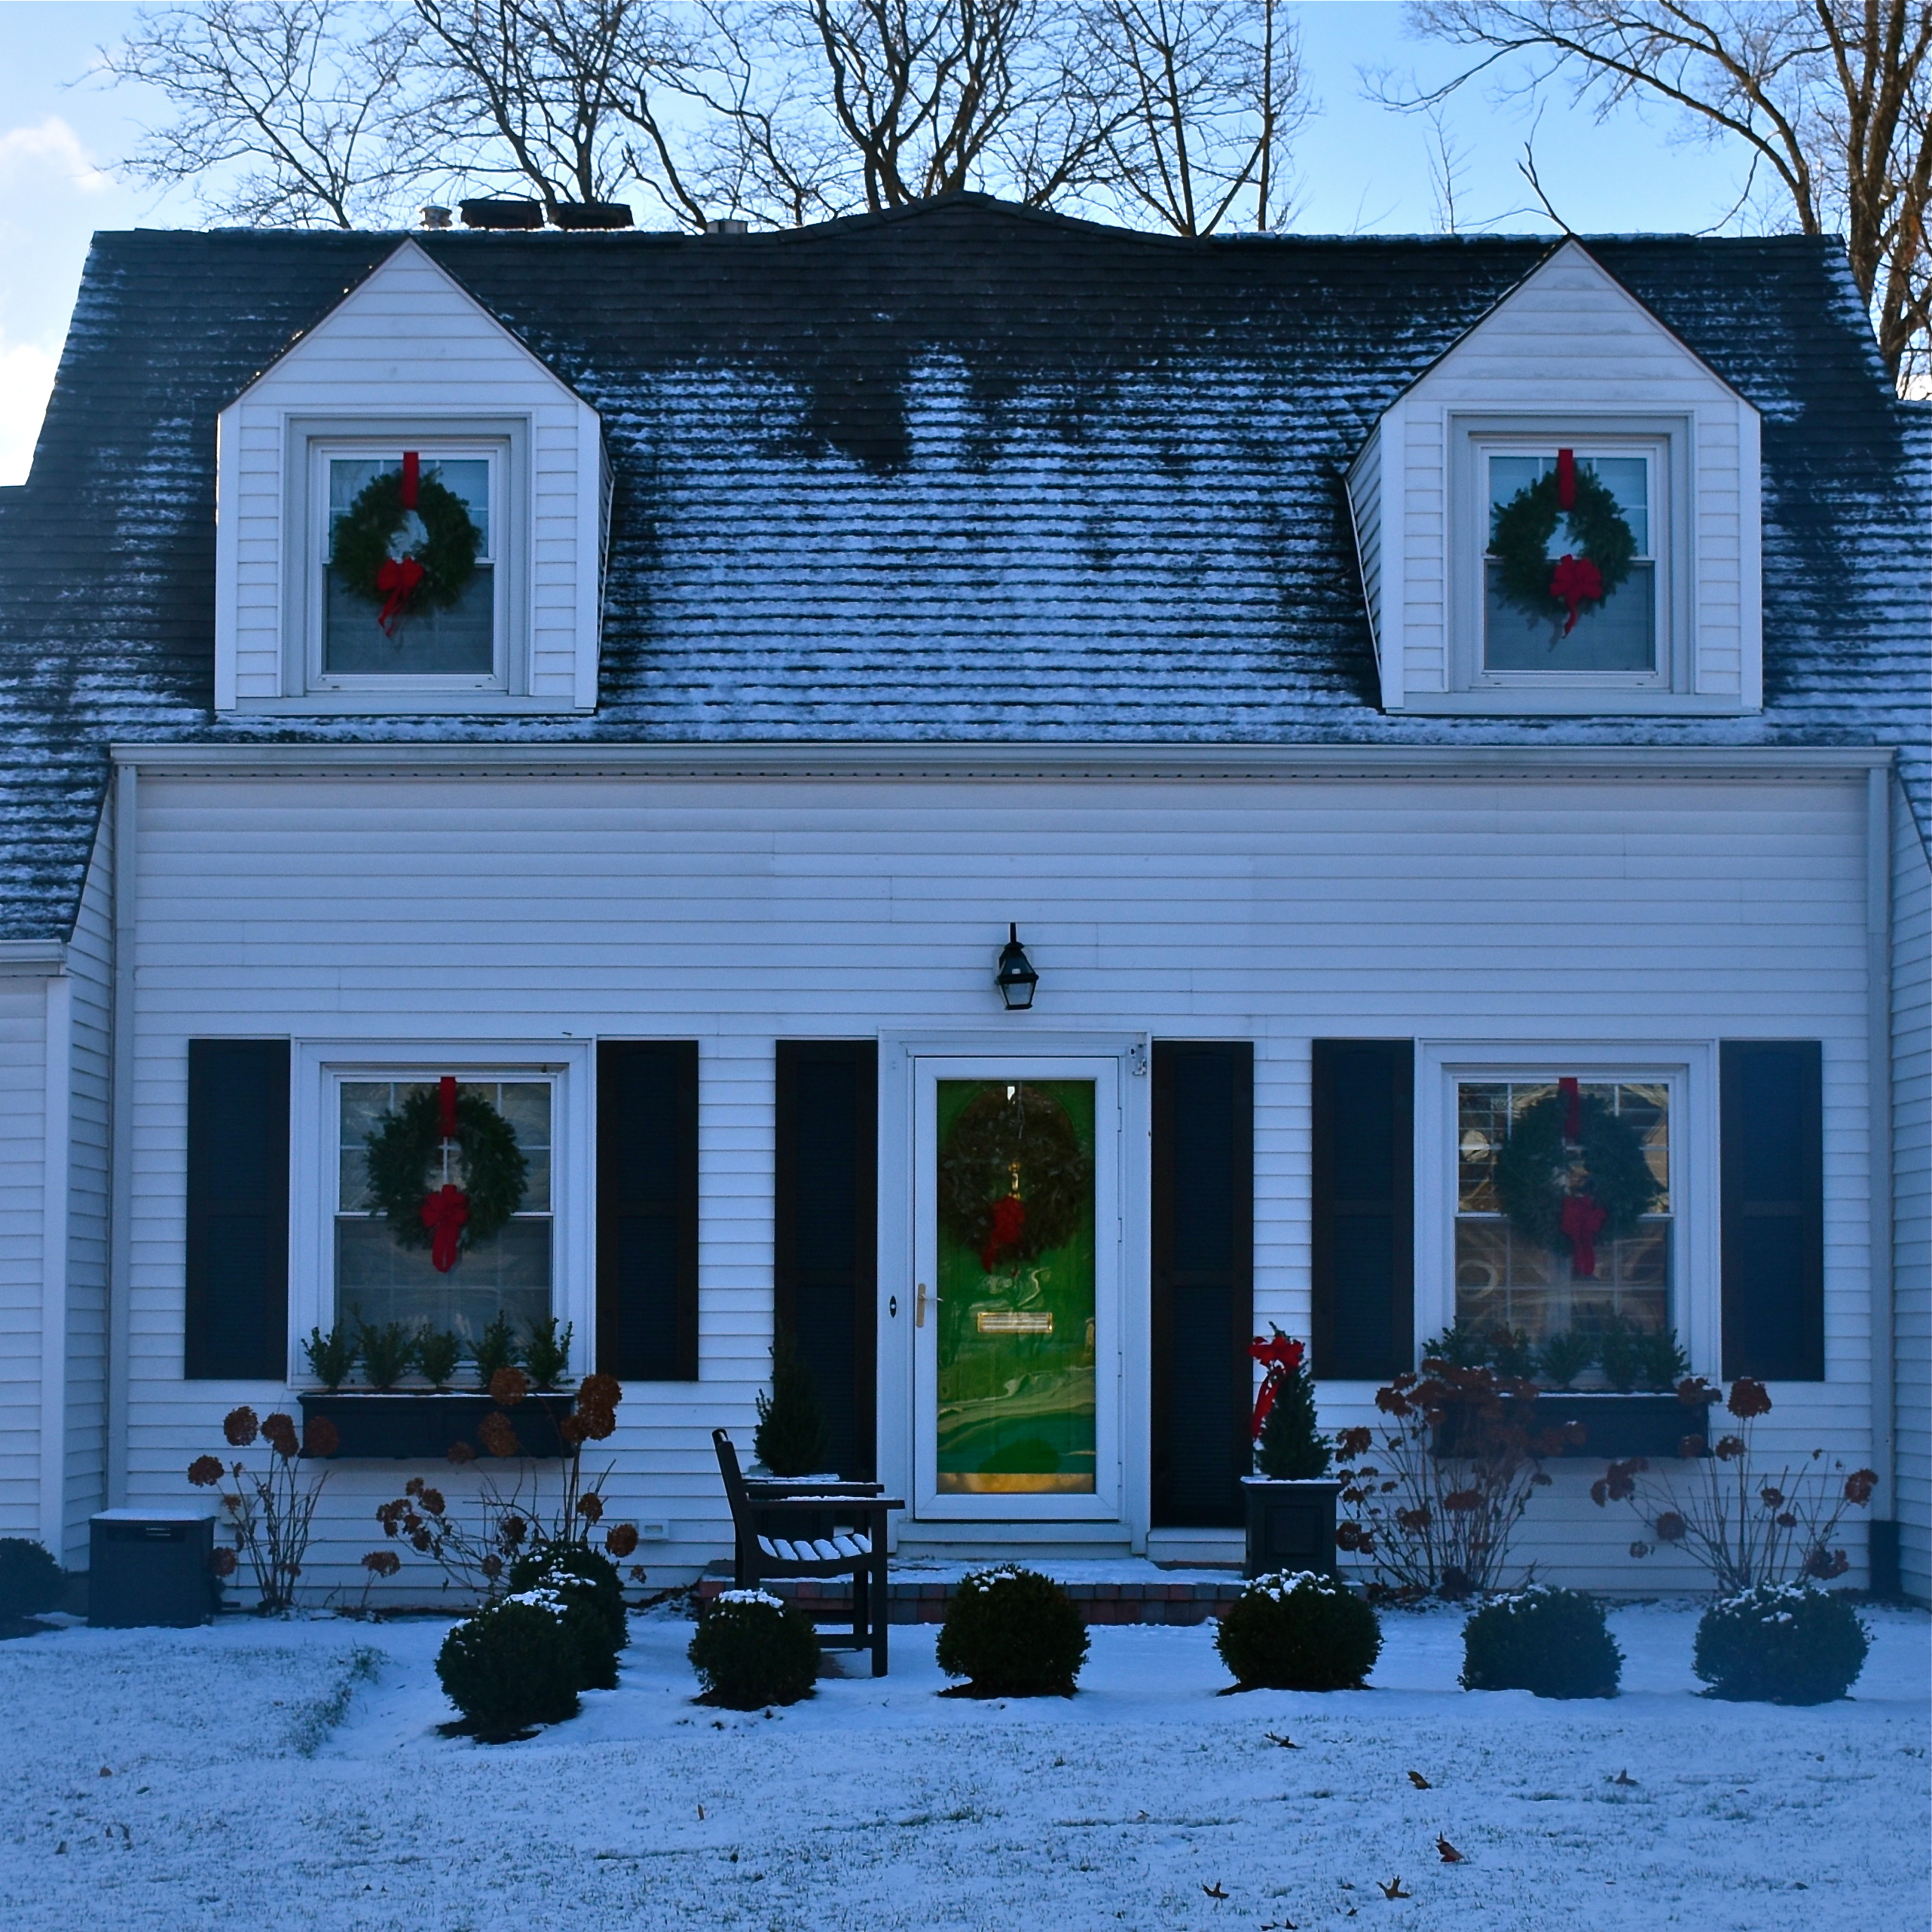
Have you ever driven by a house and just smiled? Sometimes it’s the painted door, a garden, a wreath. The details that catch your eye and make you stop a moment. This time of year I love checking out all the beautiful houses decked out in holiday style.
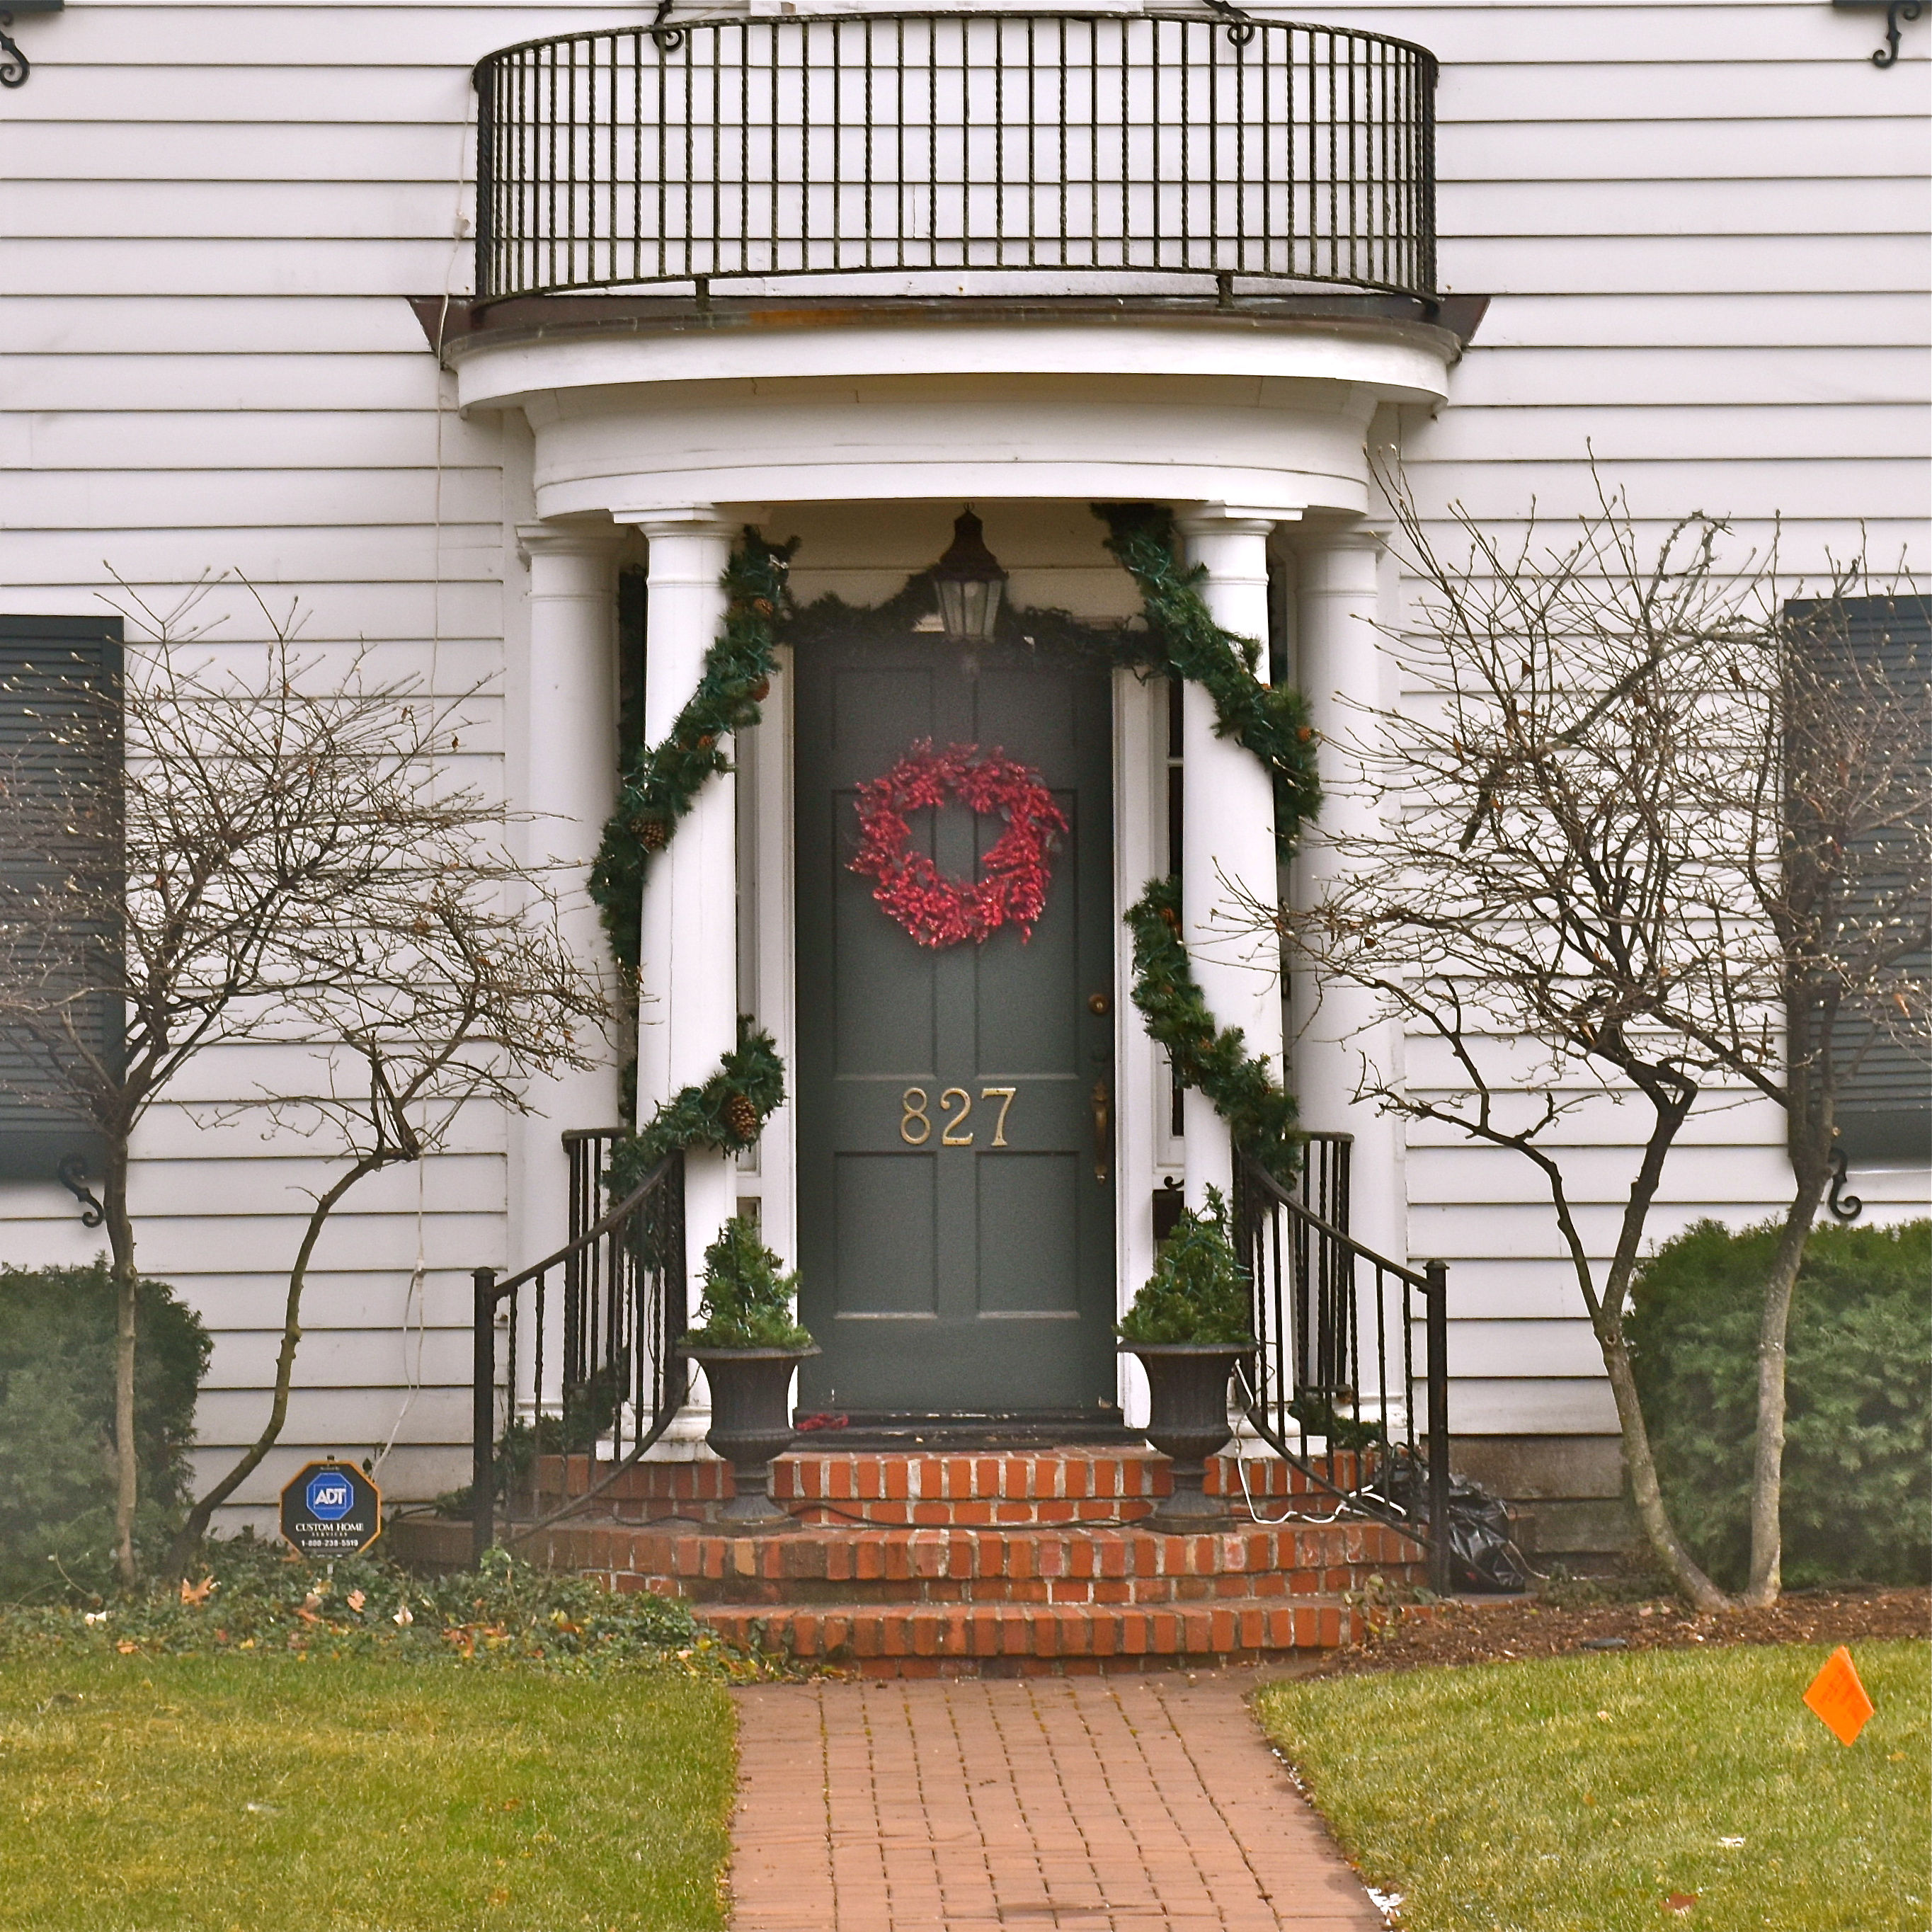
This little white house is on one of my routes through the neighborhood and it always catches my eye. That green front door with the black shutters and the boxwood window boxes. It’s the small details that make it charming. The classic wreathes with red bows just make me think of Christmas.
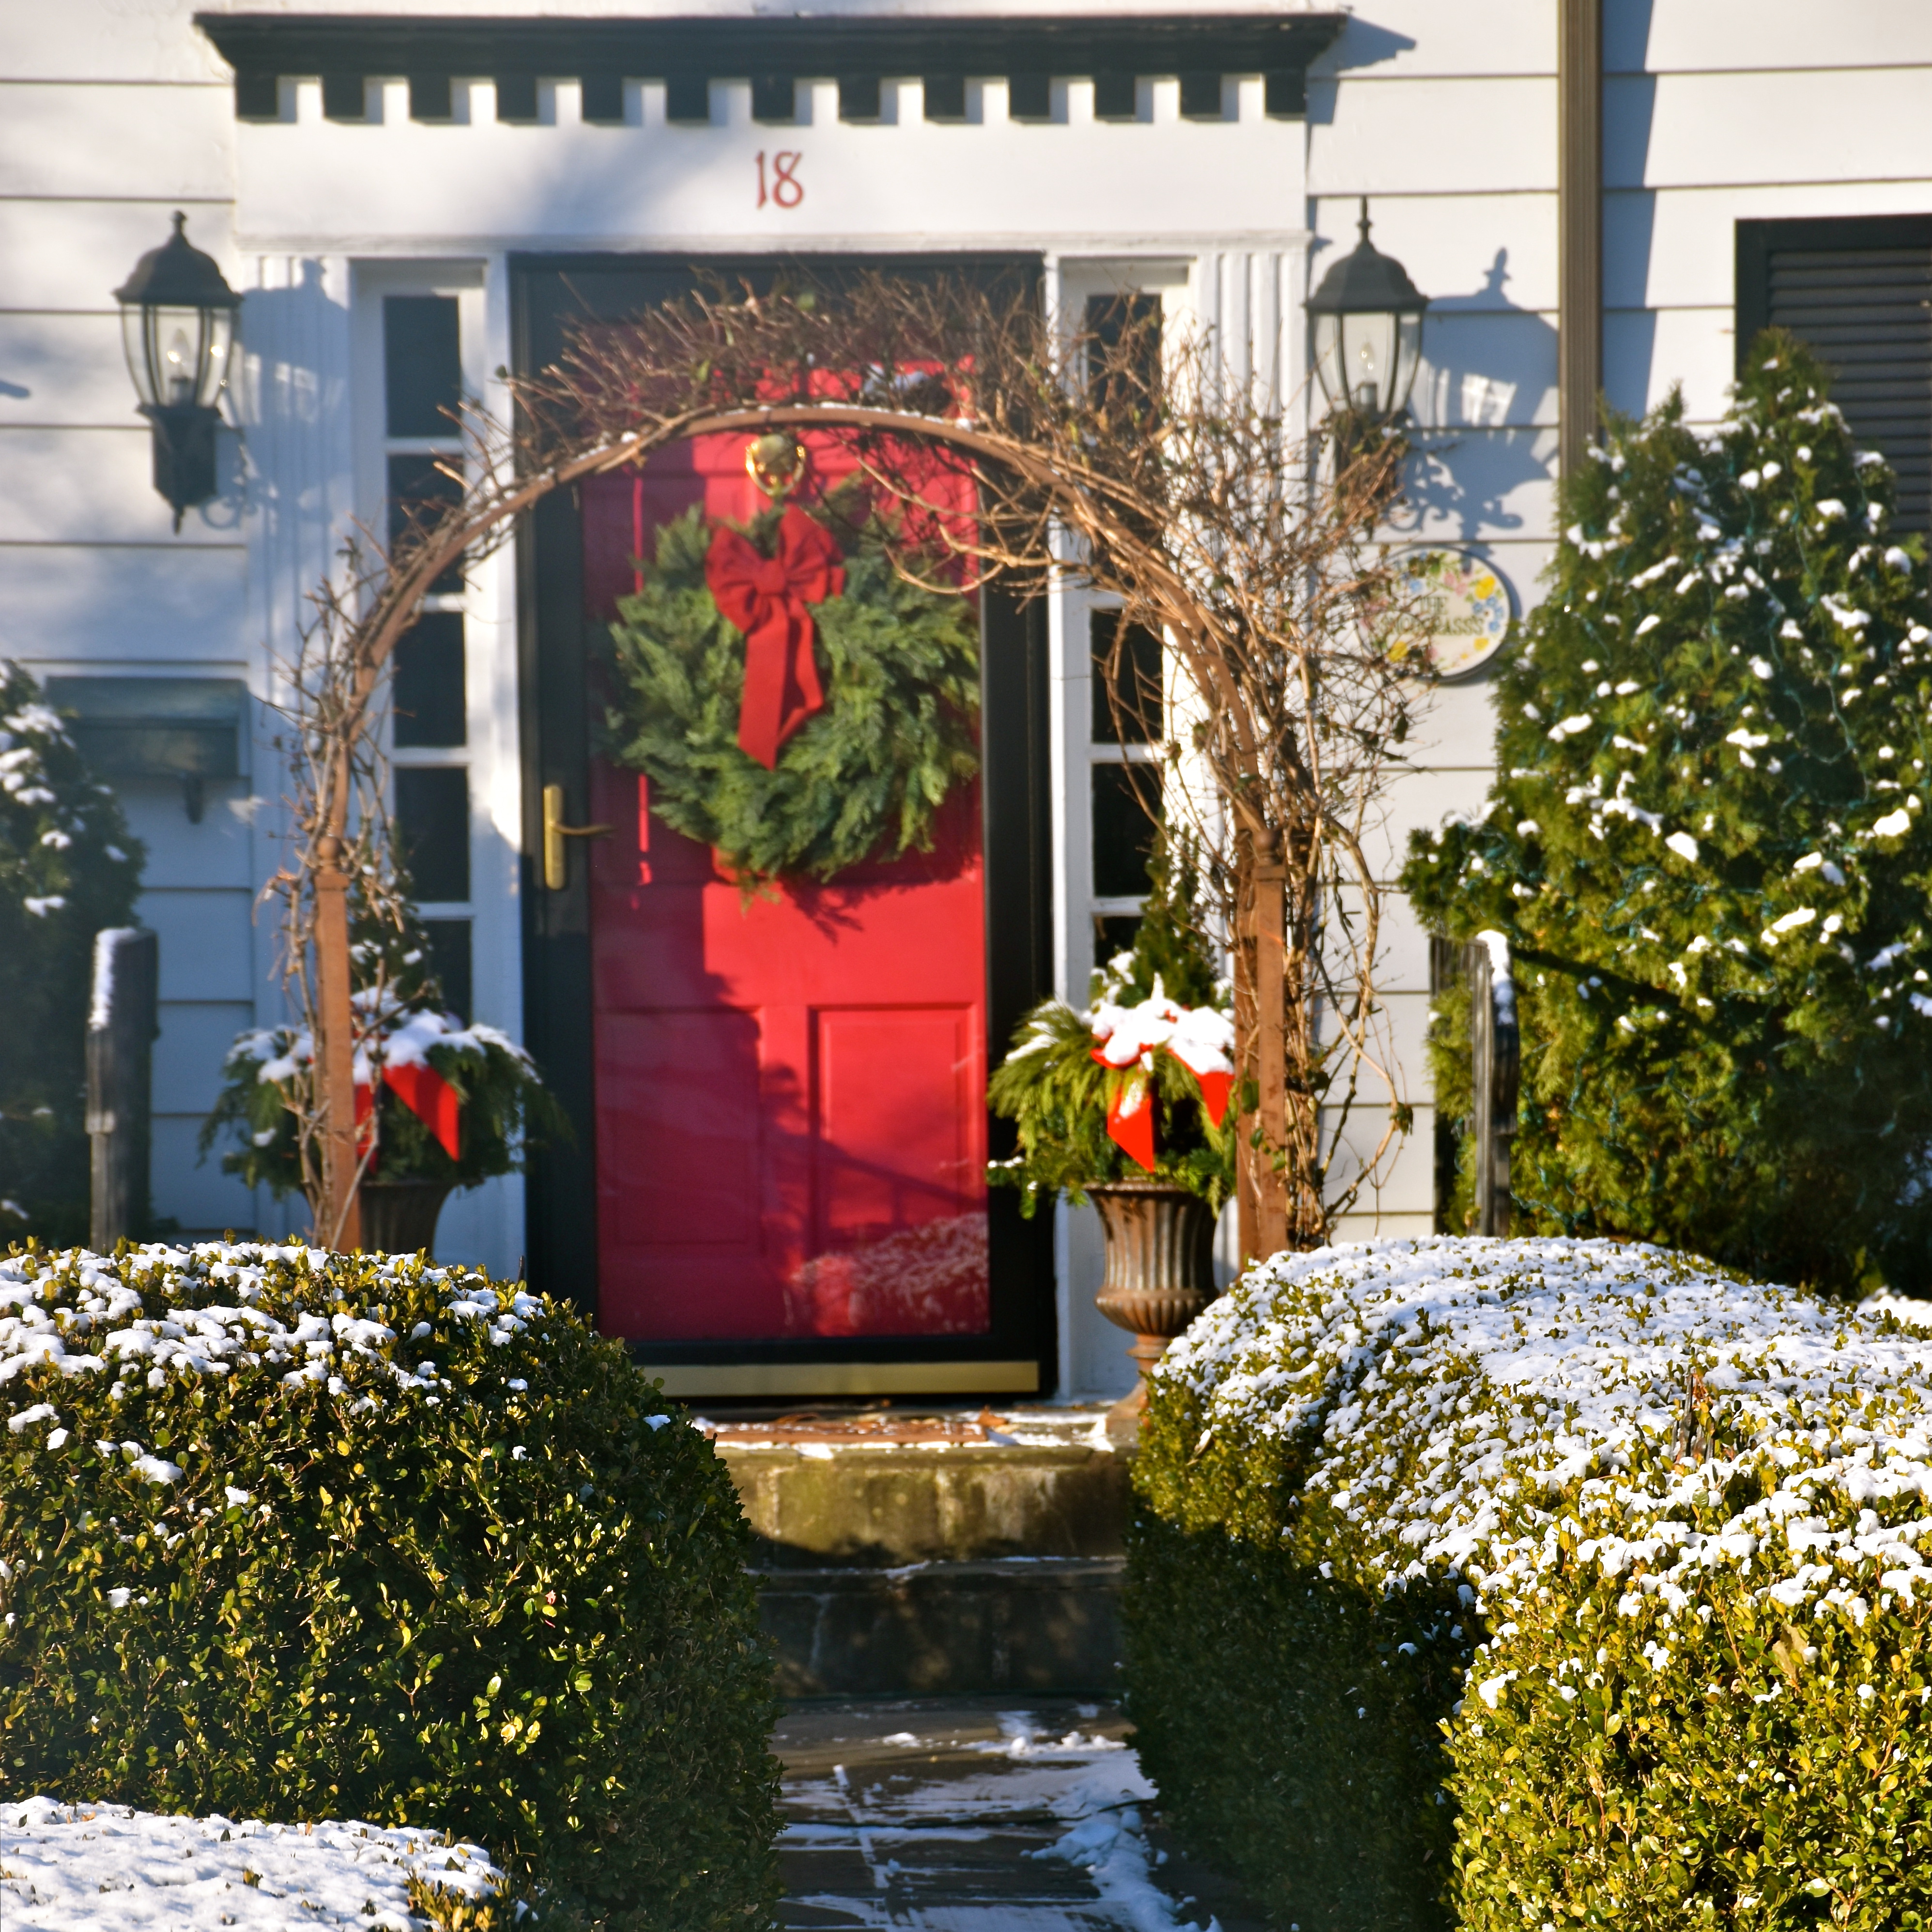
This red door caught my eye the other day. I was driving down a street I had not been down before and there was this small little house. That bright red door with the black trim details, the carefully manicured boxwoods and garden arch made me stop. I wonder what that arch looks like in the summer, but I love all those cottage details that make a little house like that stand proud.
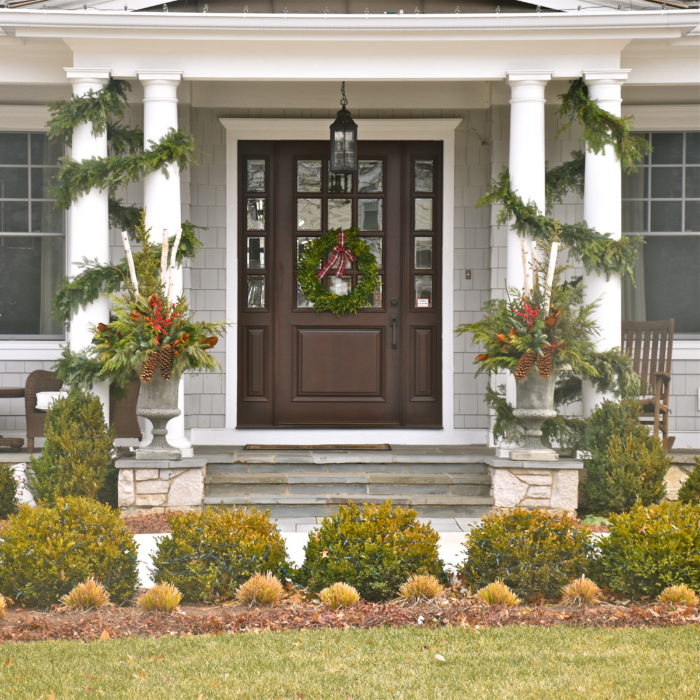
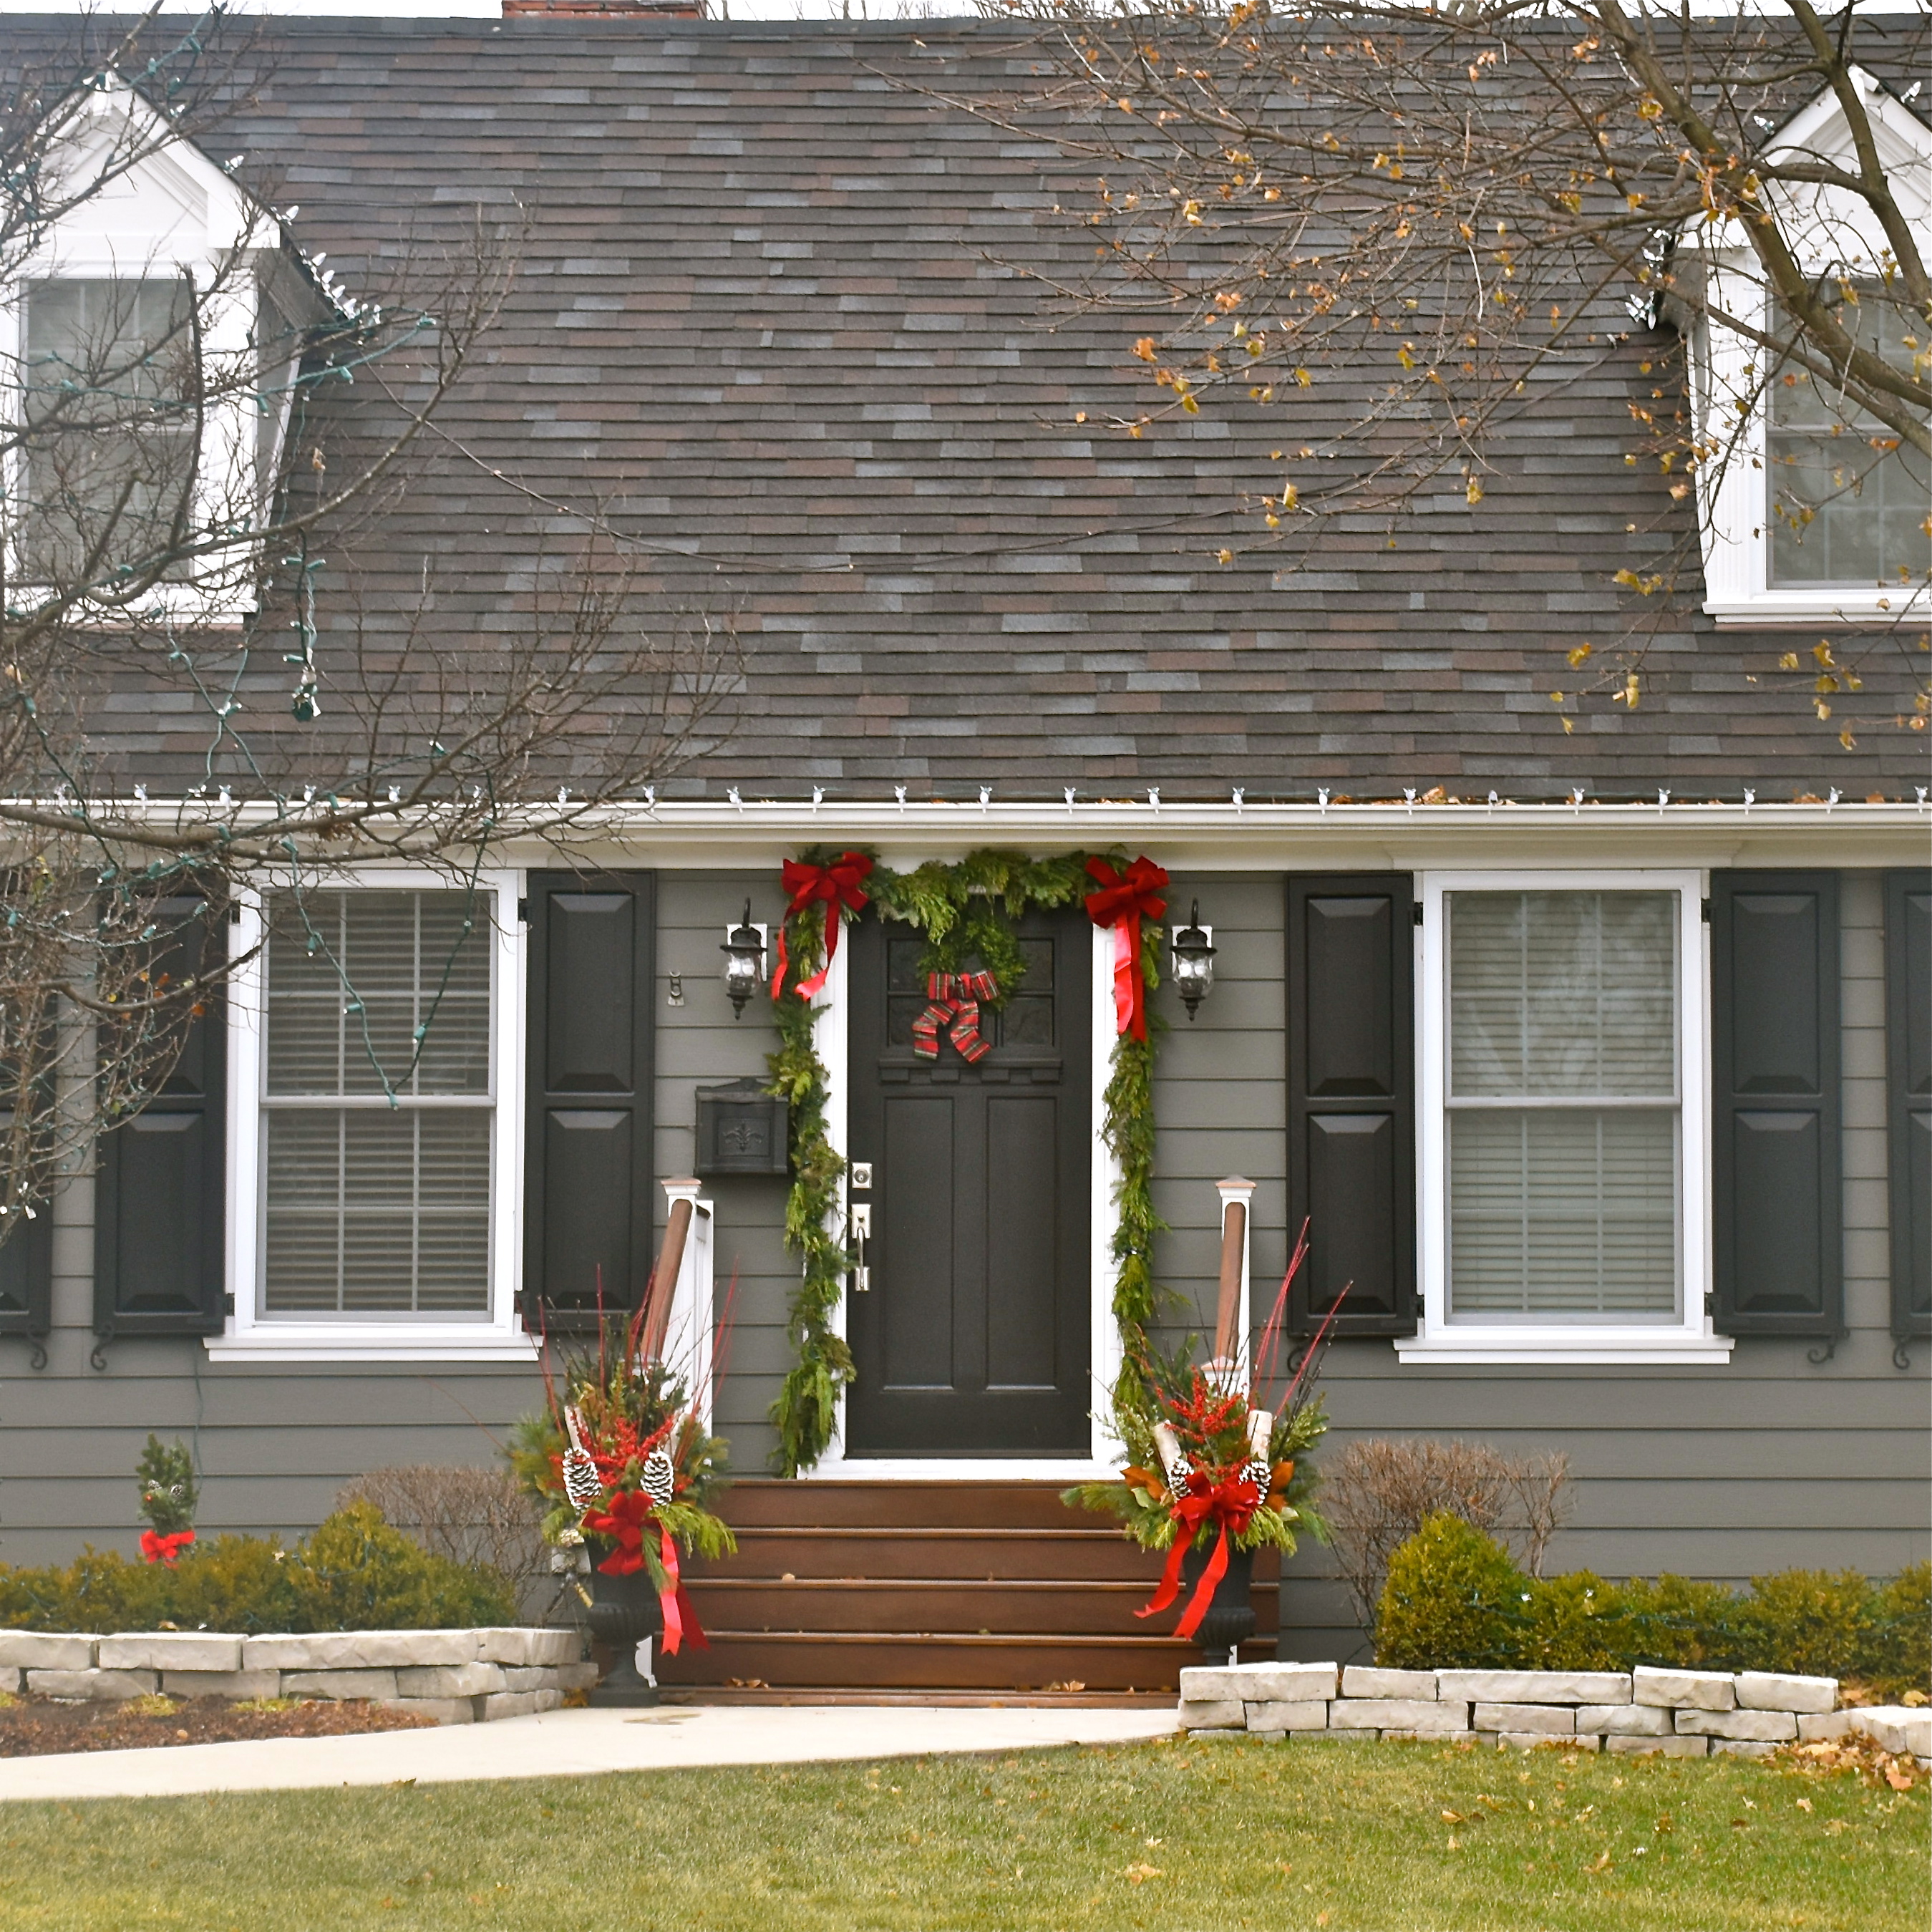
It was the planters that and the crisp gray and black paint that made me stop. The black craftsman door is well framed with a classic garland and the black pots are filled with winters best: evergreens, red berries and pinecones. It may be a small house but it’s the painted details and shutters that draw you in.
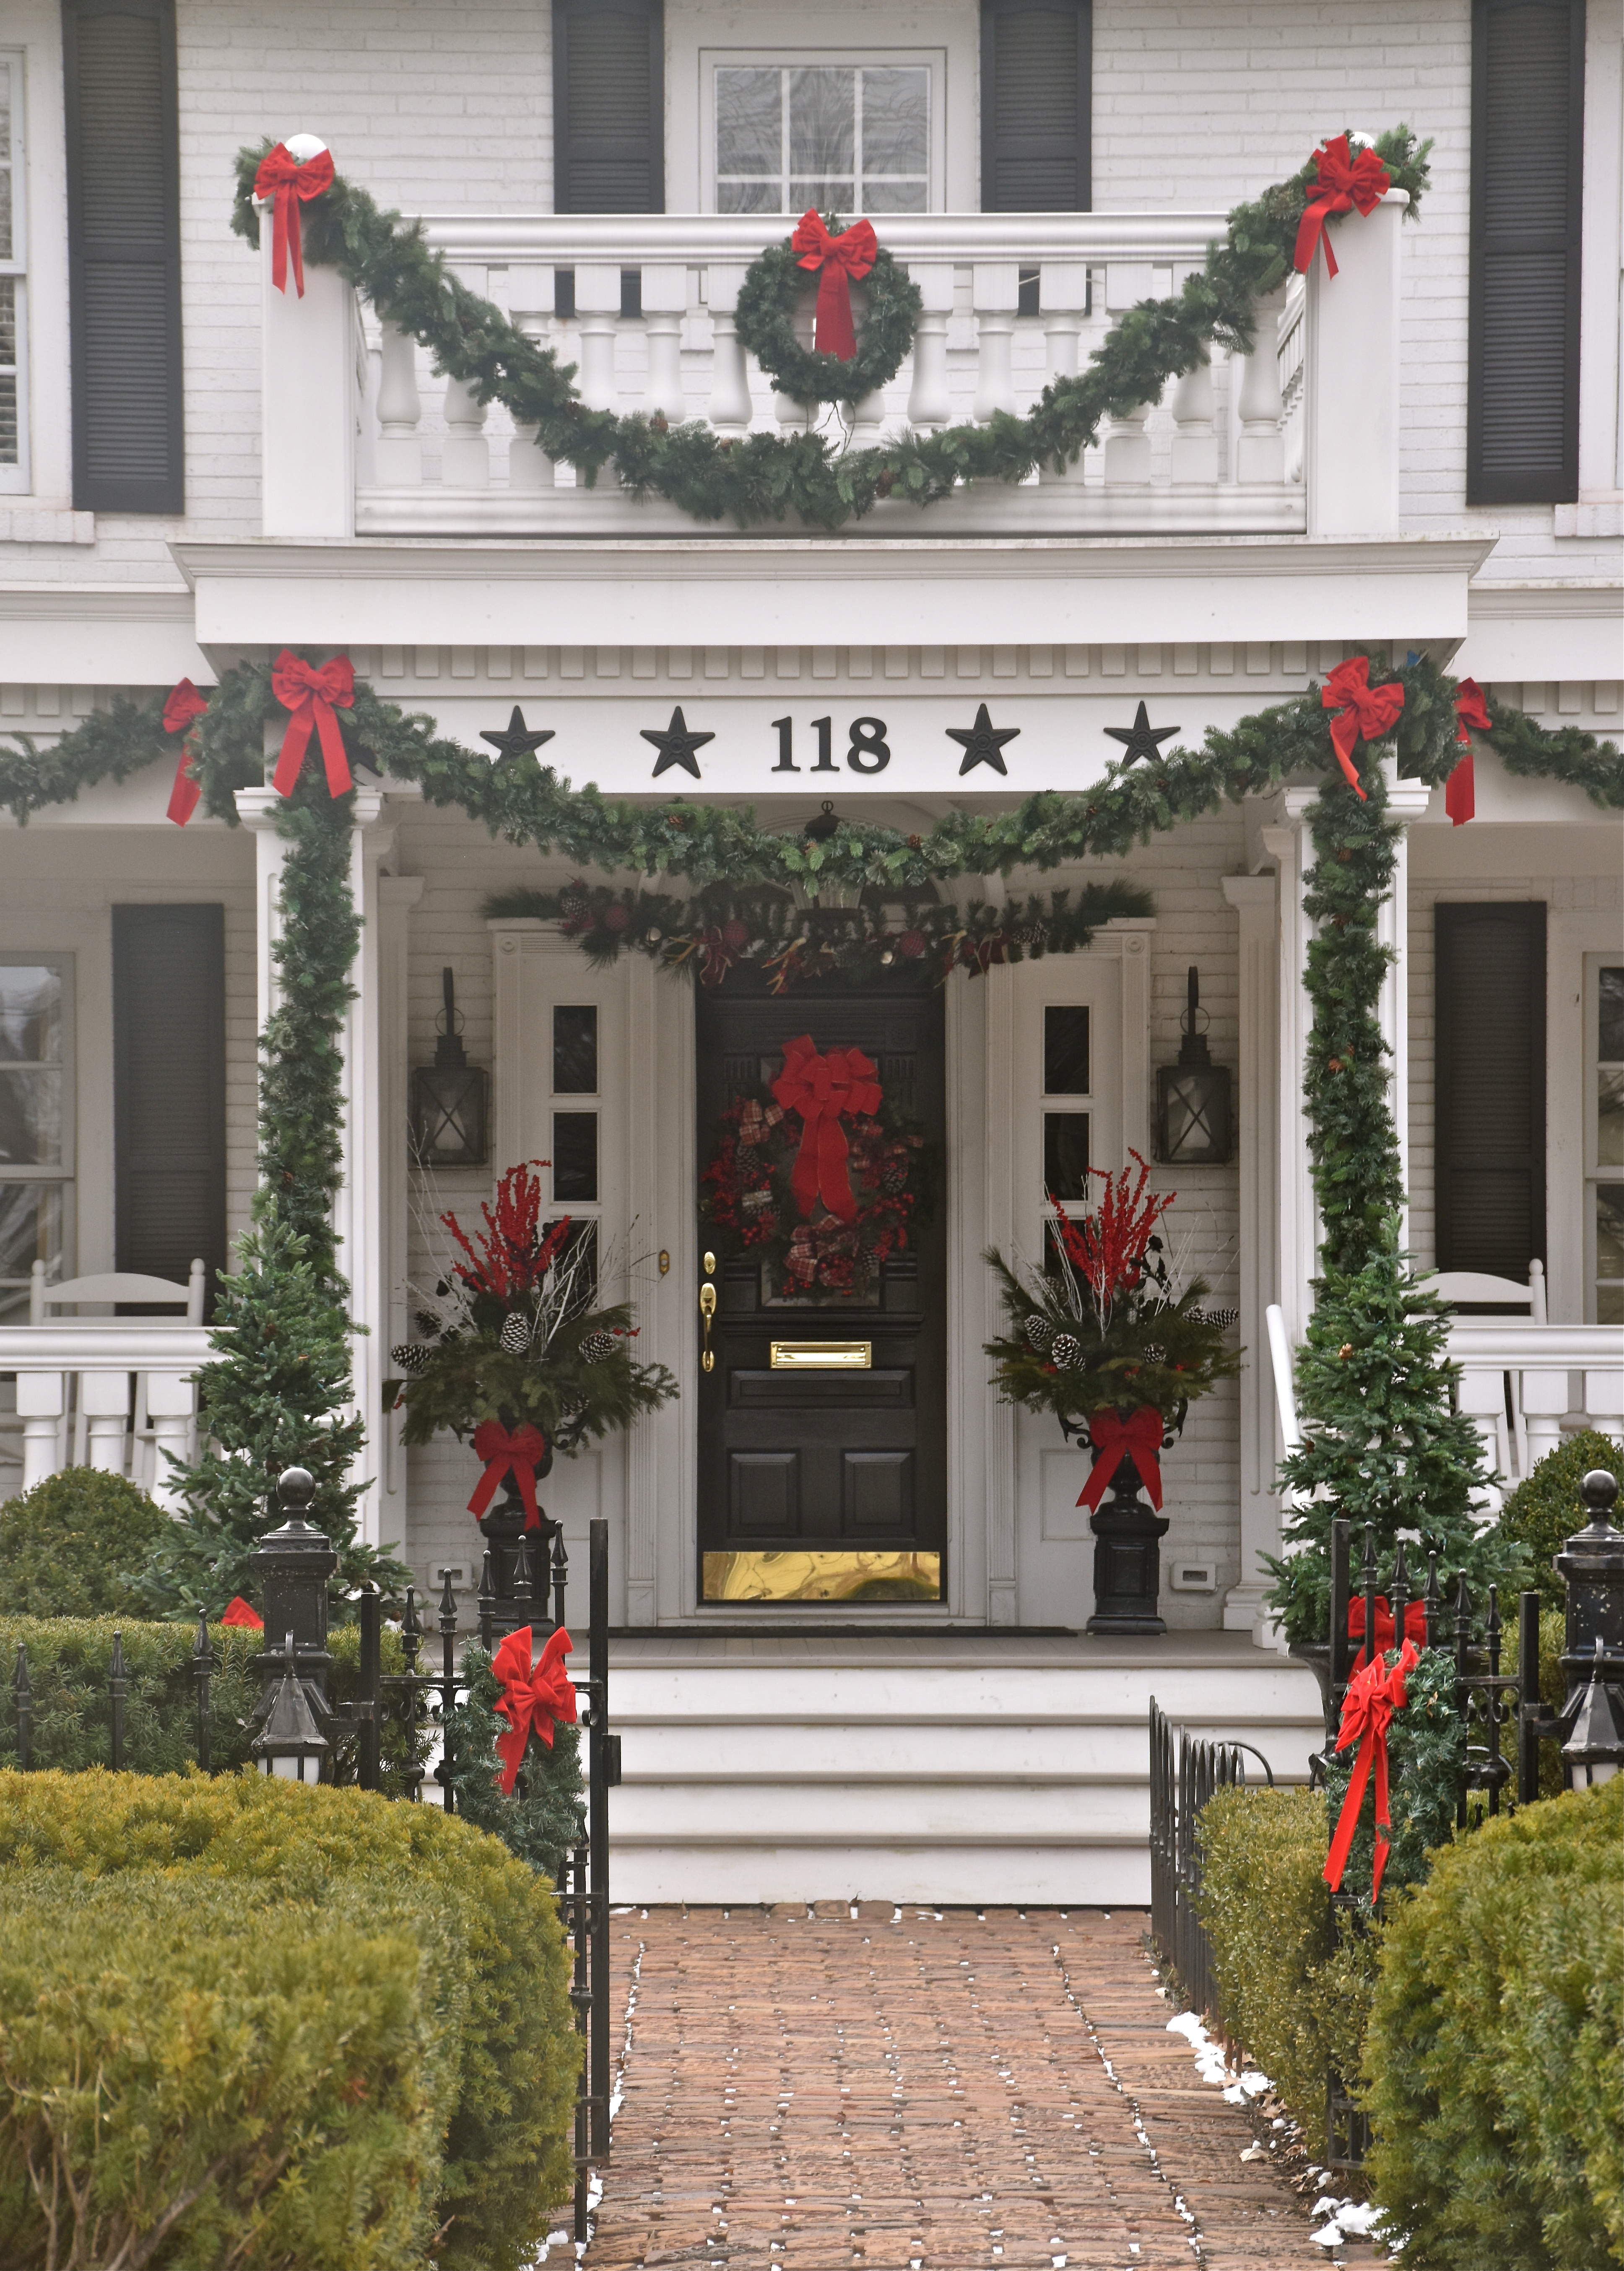
This black and white classic is in the historic district of our town. It is on one of the preserved cobblestone streets from when the town was founded in the late 1800s. The iron gates with there wreathes, the black urns bursting with red berries and christmas greens and the garlands swags beg you to stop and look. It’s classic Christmas at it’s best.
This colonial style home’s red berry wreath just makes it’s Christmas curb appeal. Sometimes it is just one small detail that makes the difference.
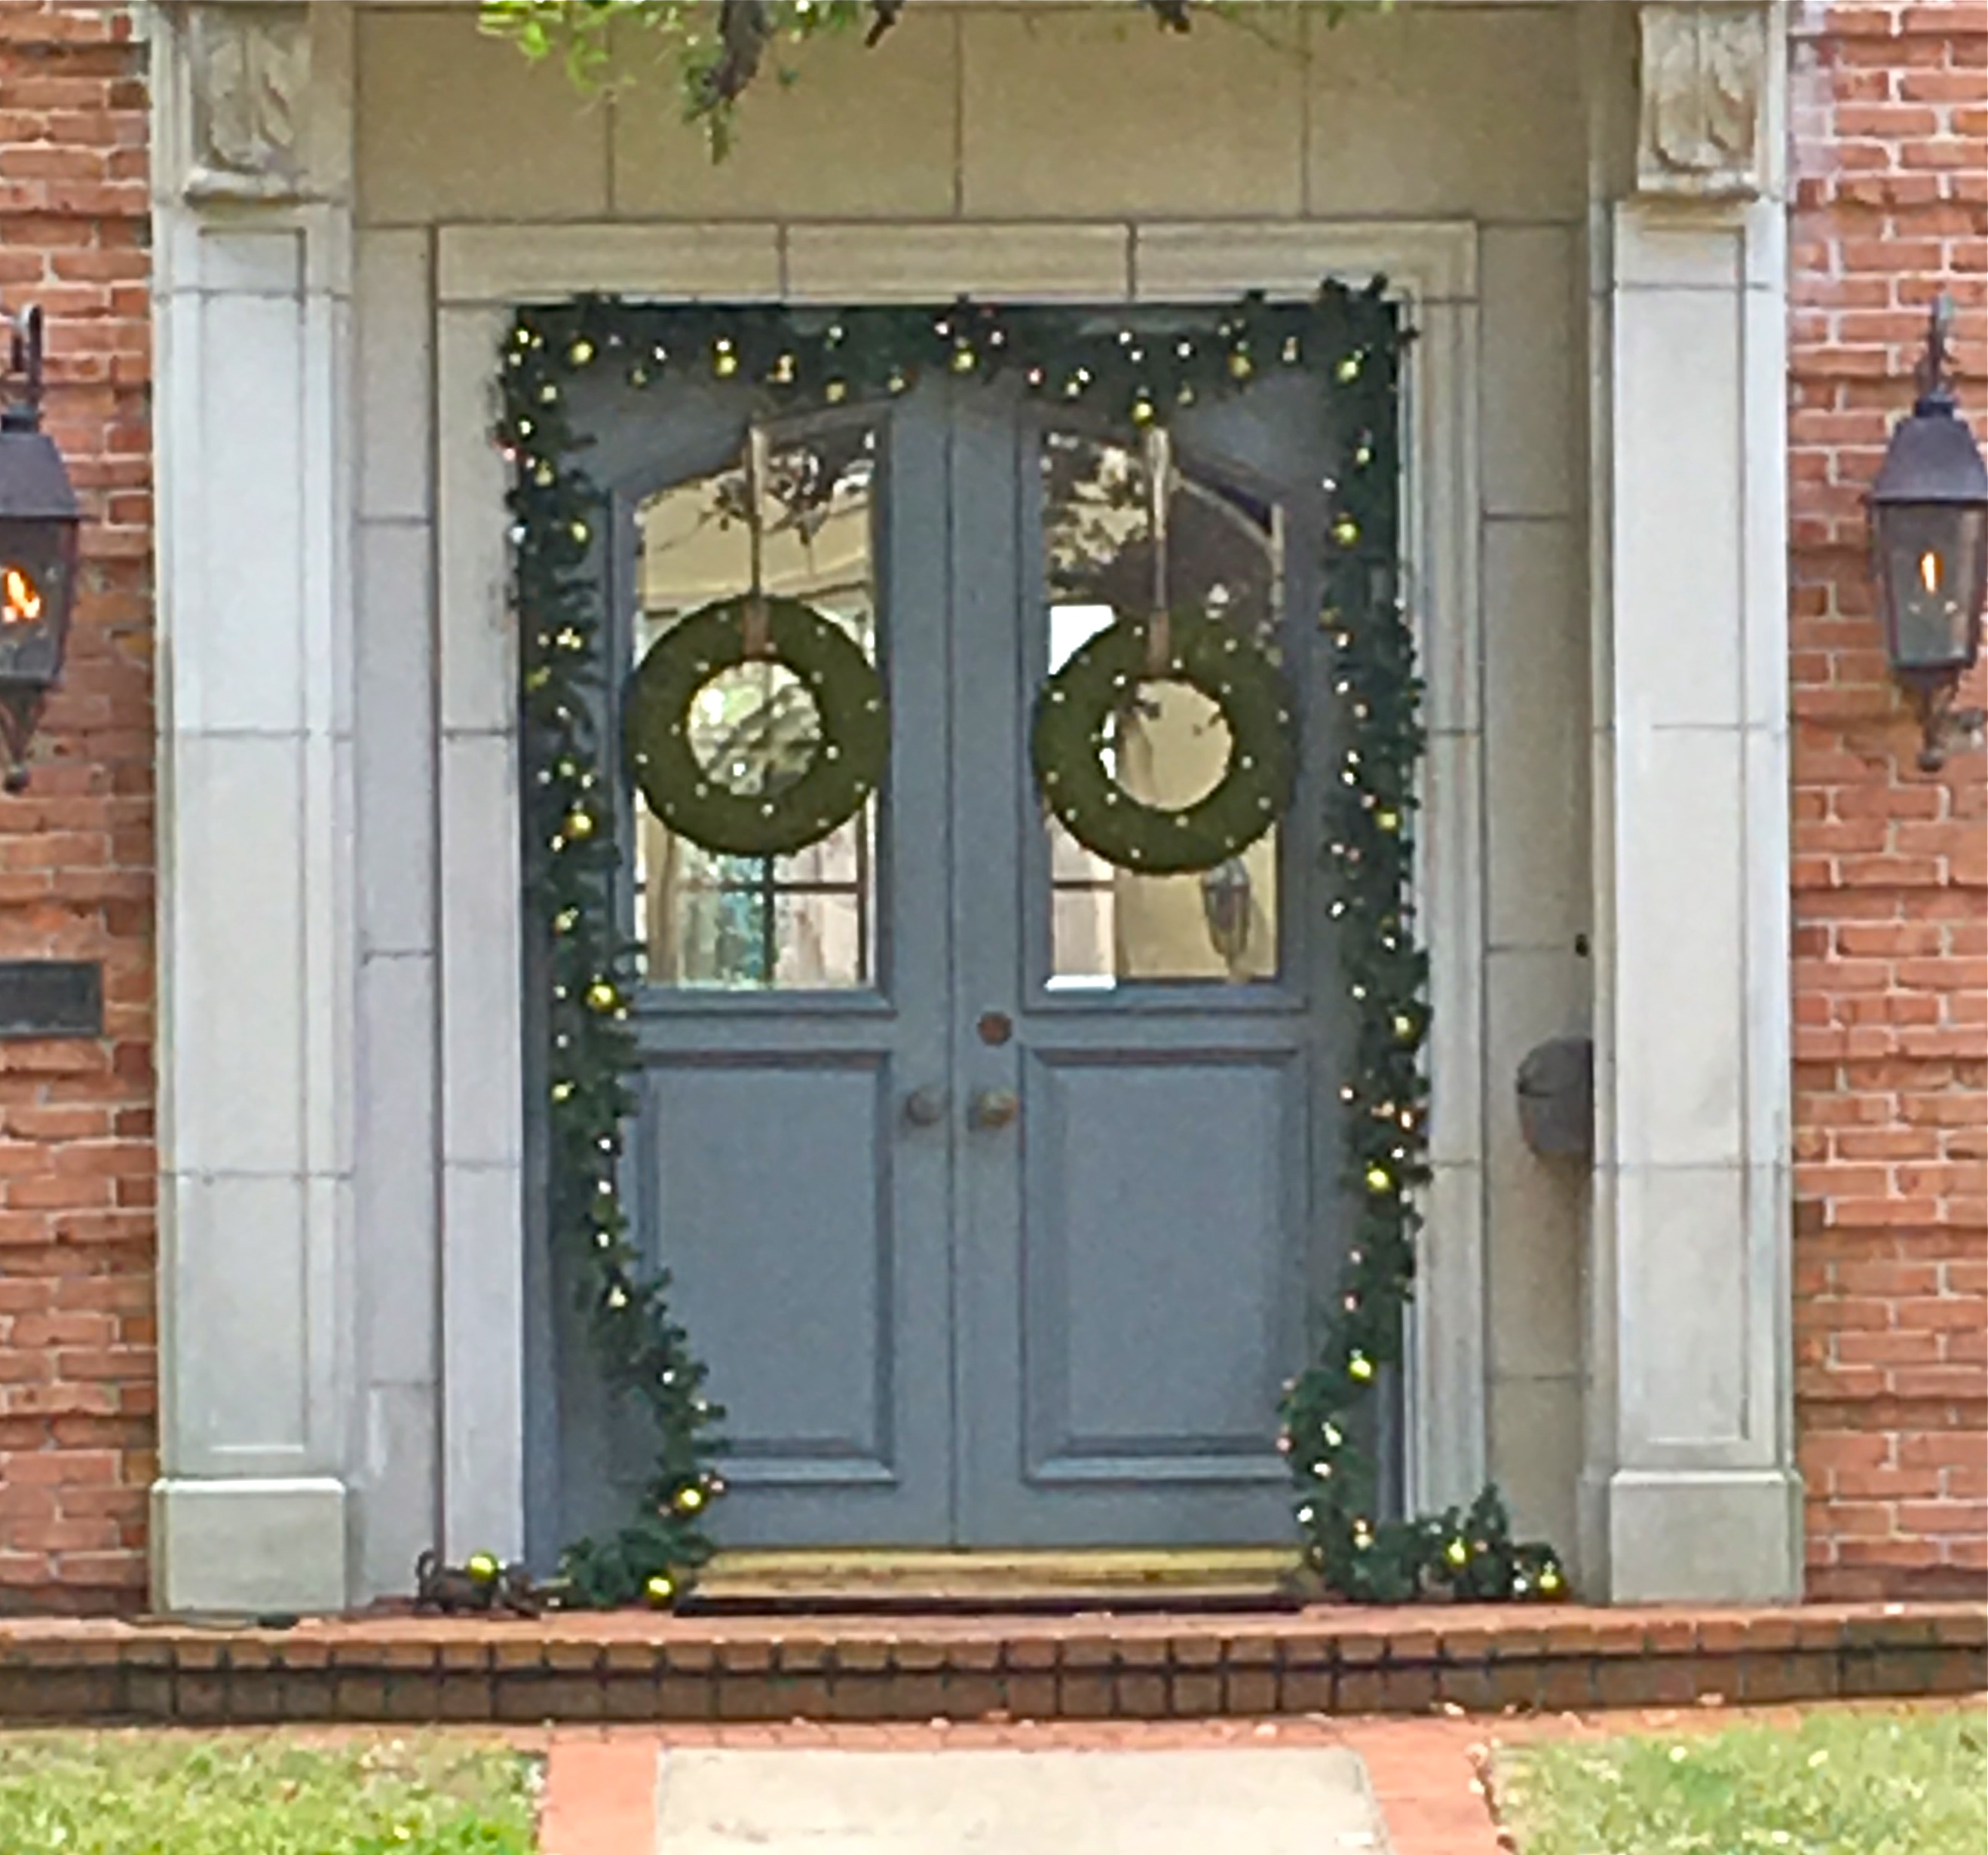
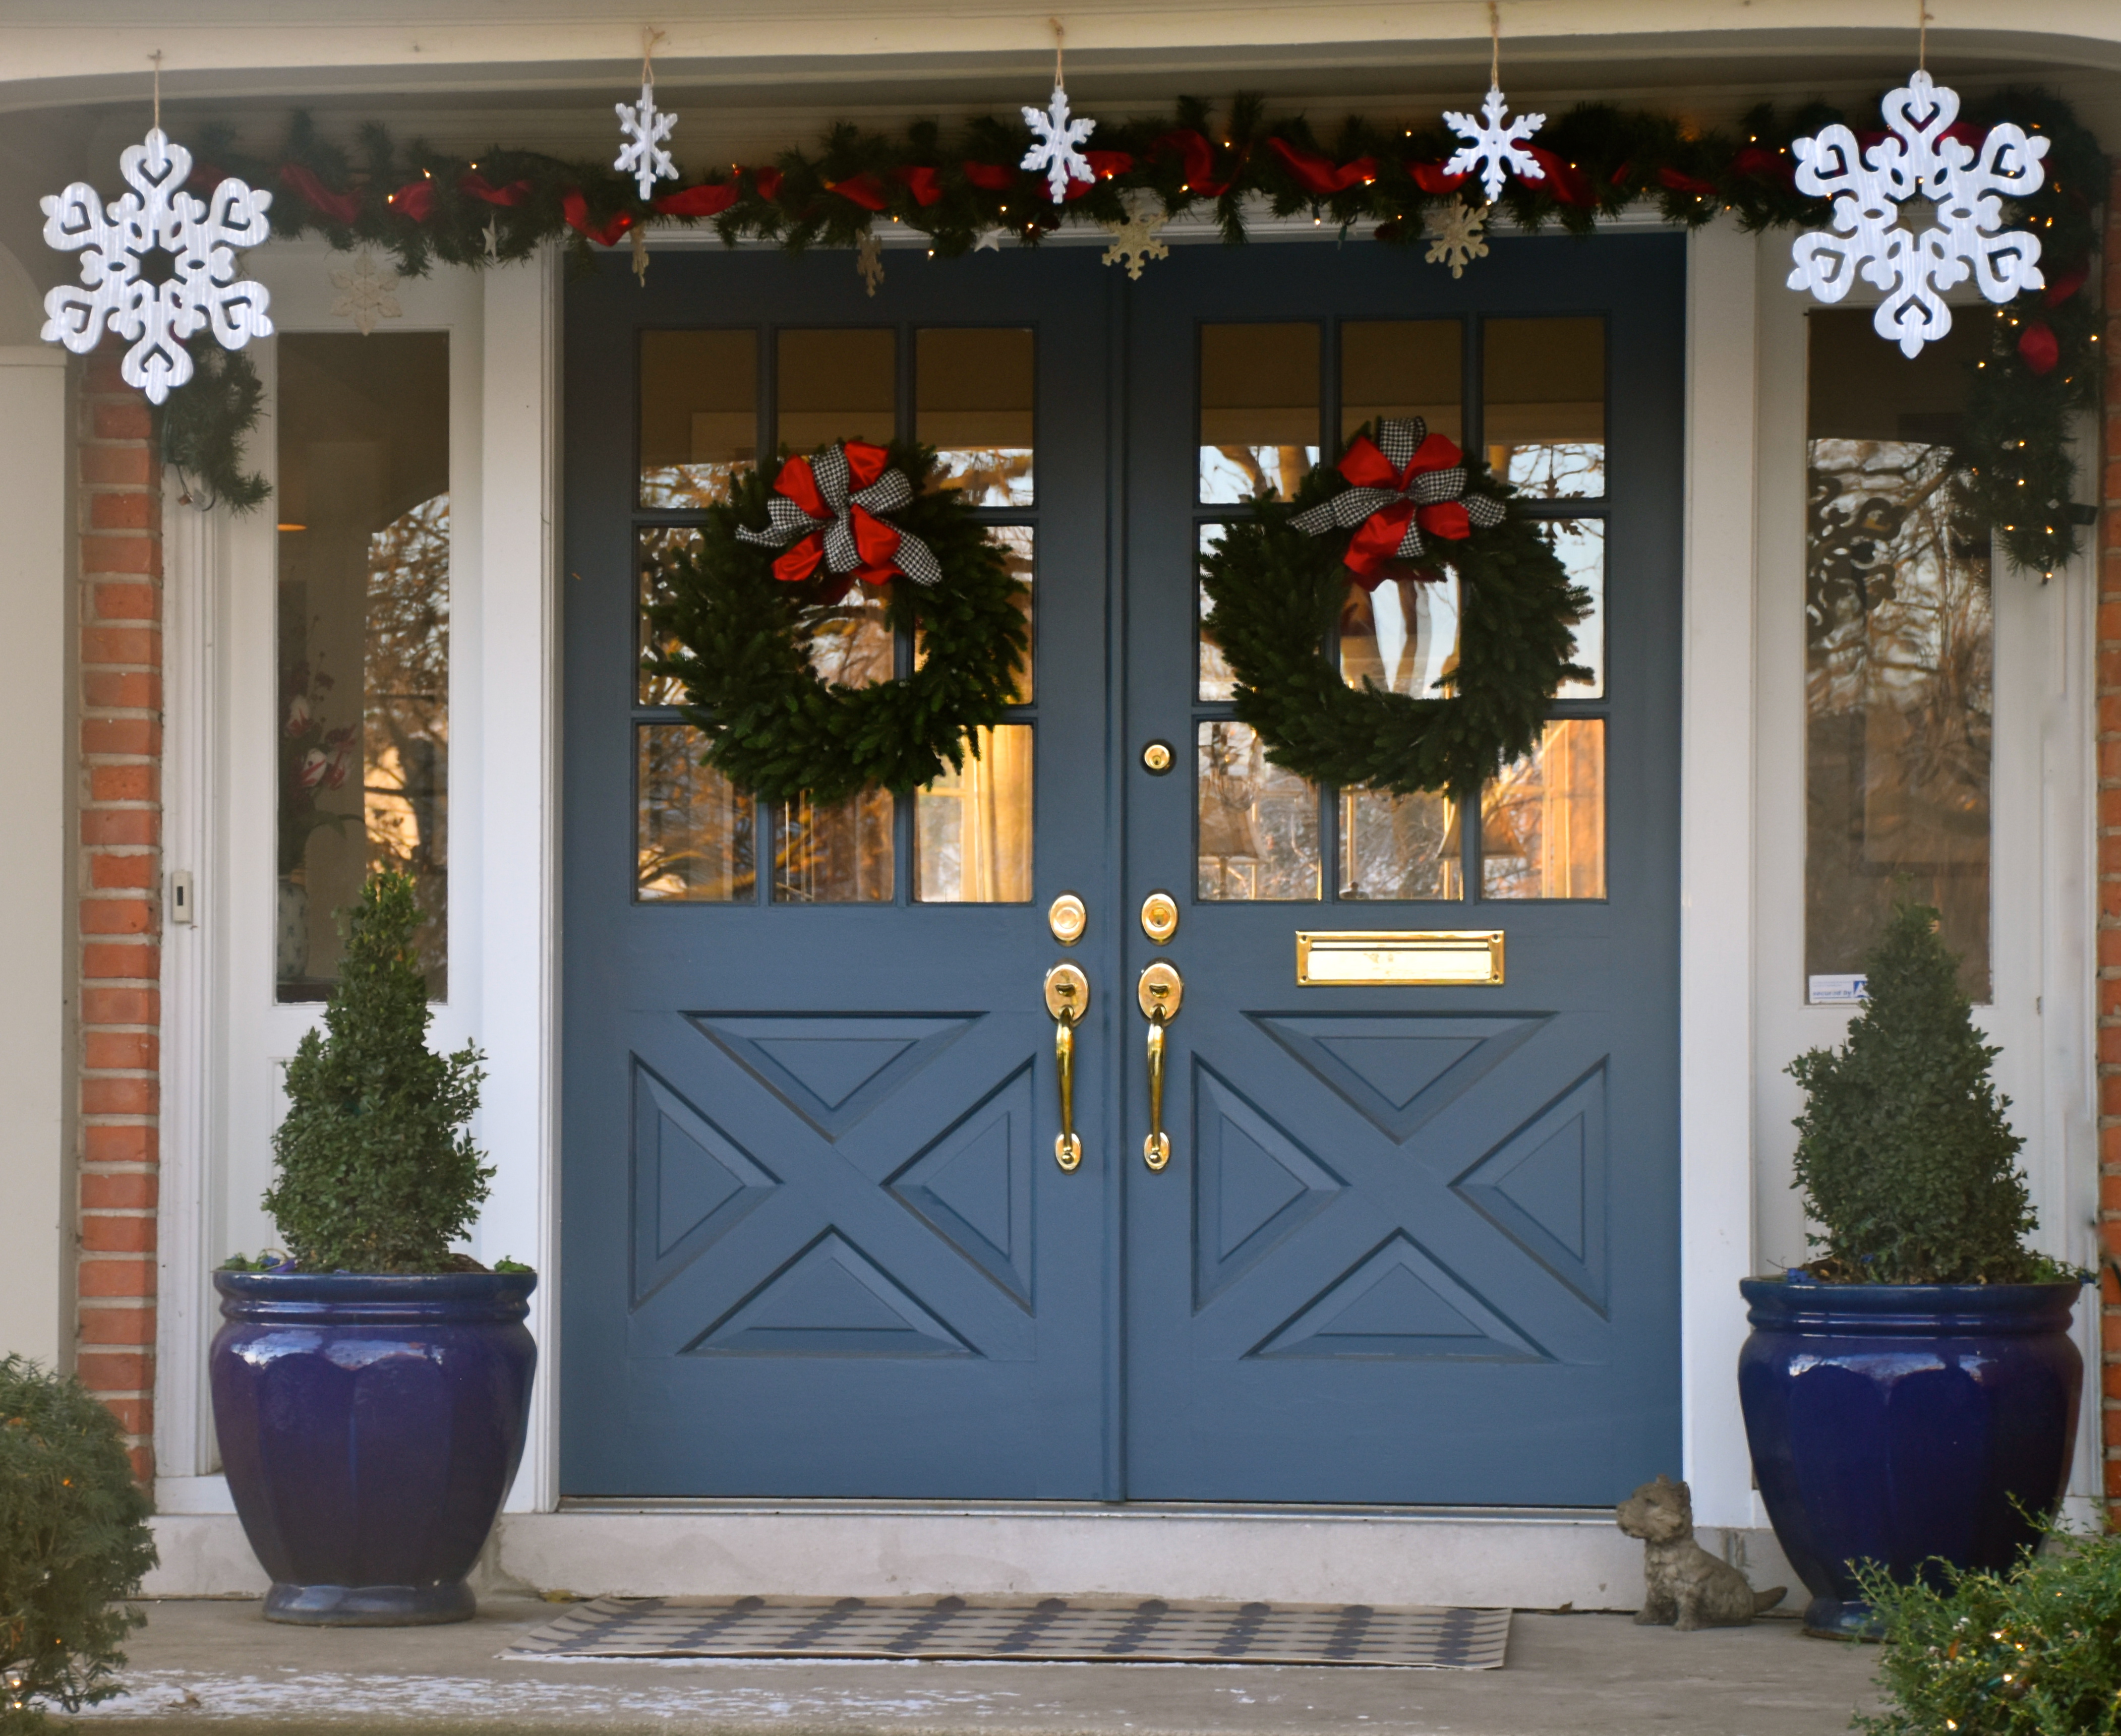
These more modern blue grey doors look stunning draped in this simple but elegant garland with tiny touches of gold. The simple moss wreaths are just perfection.
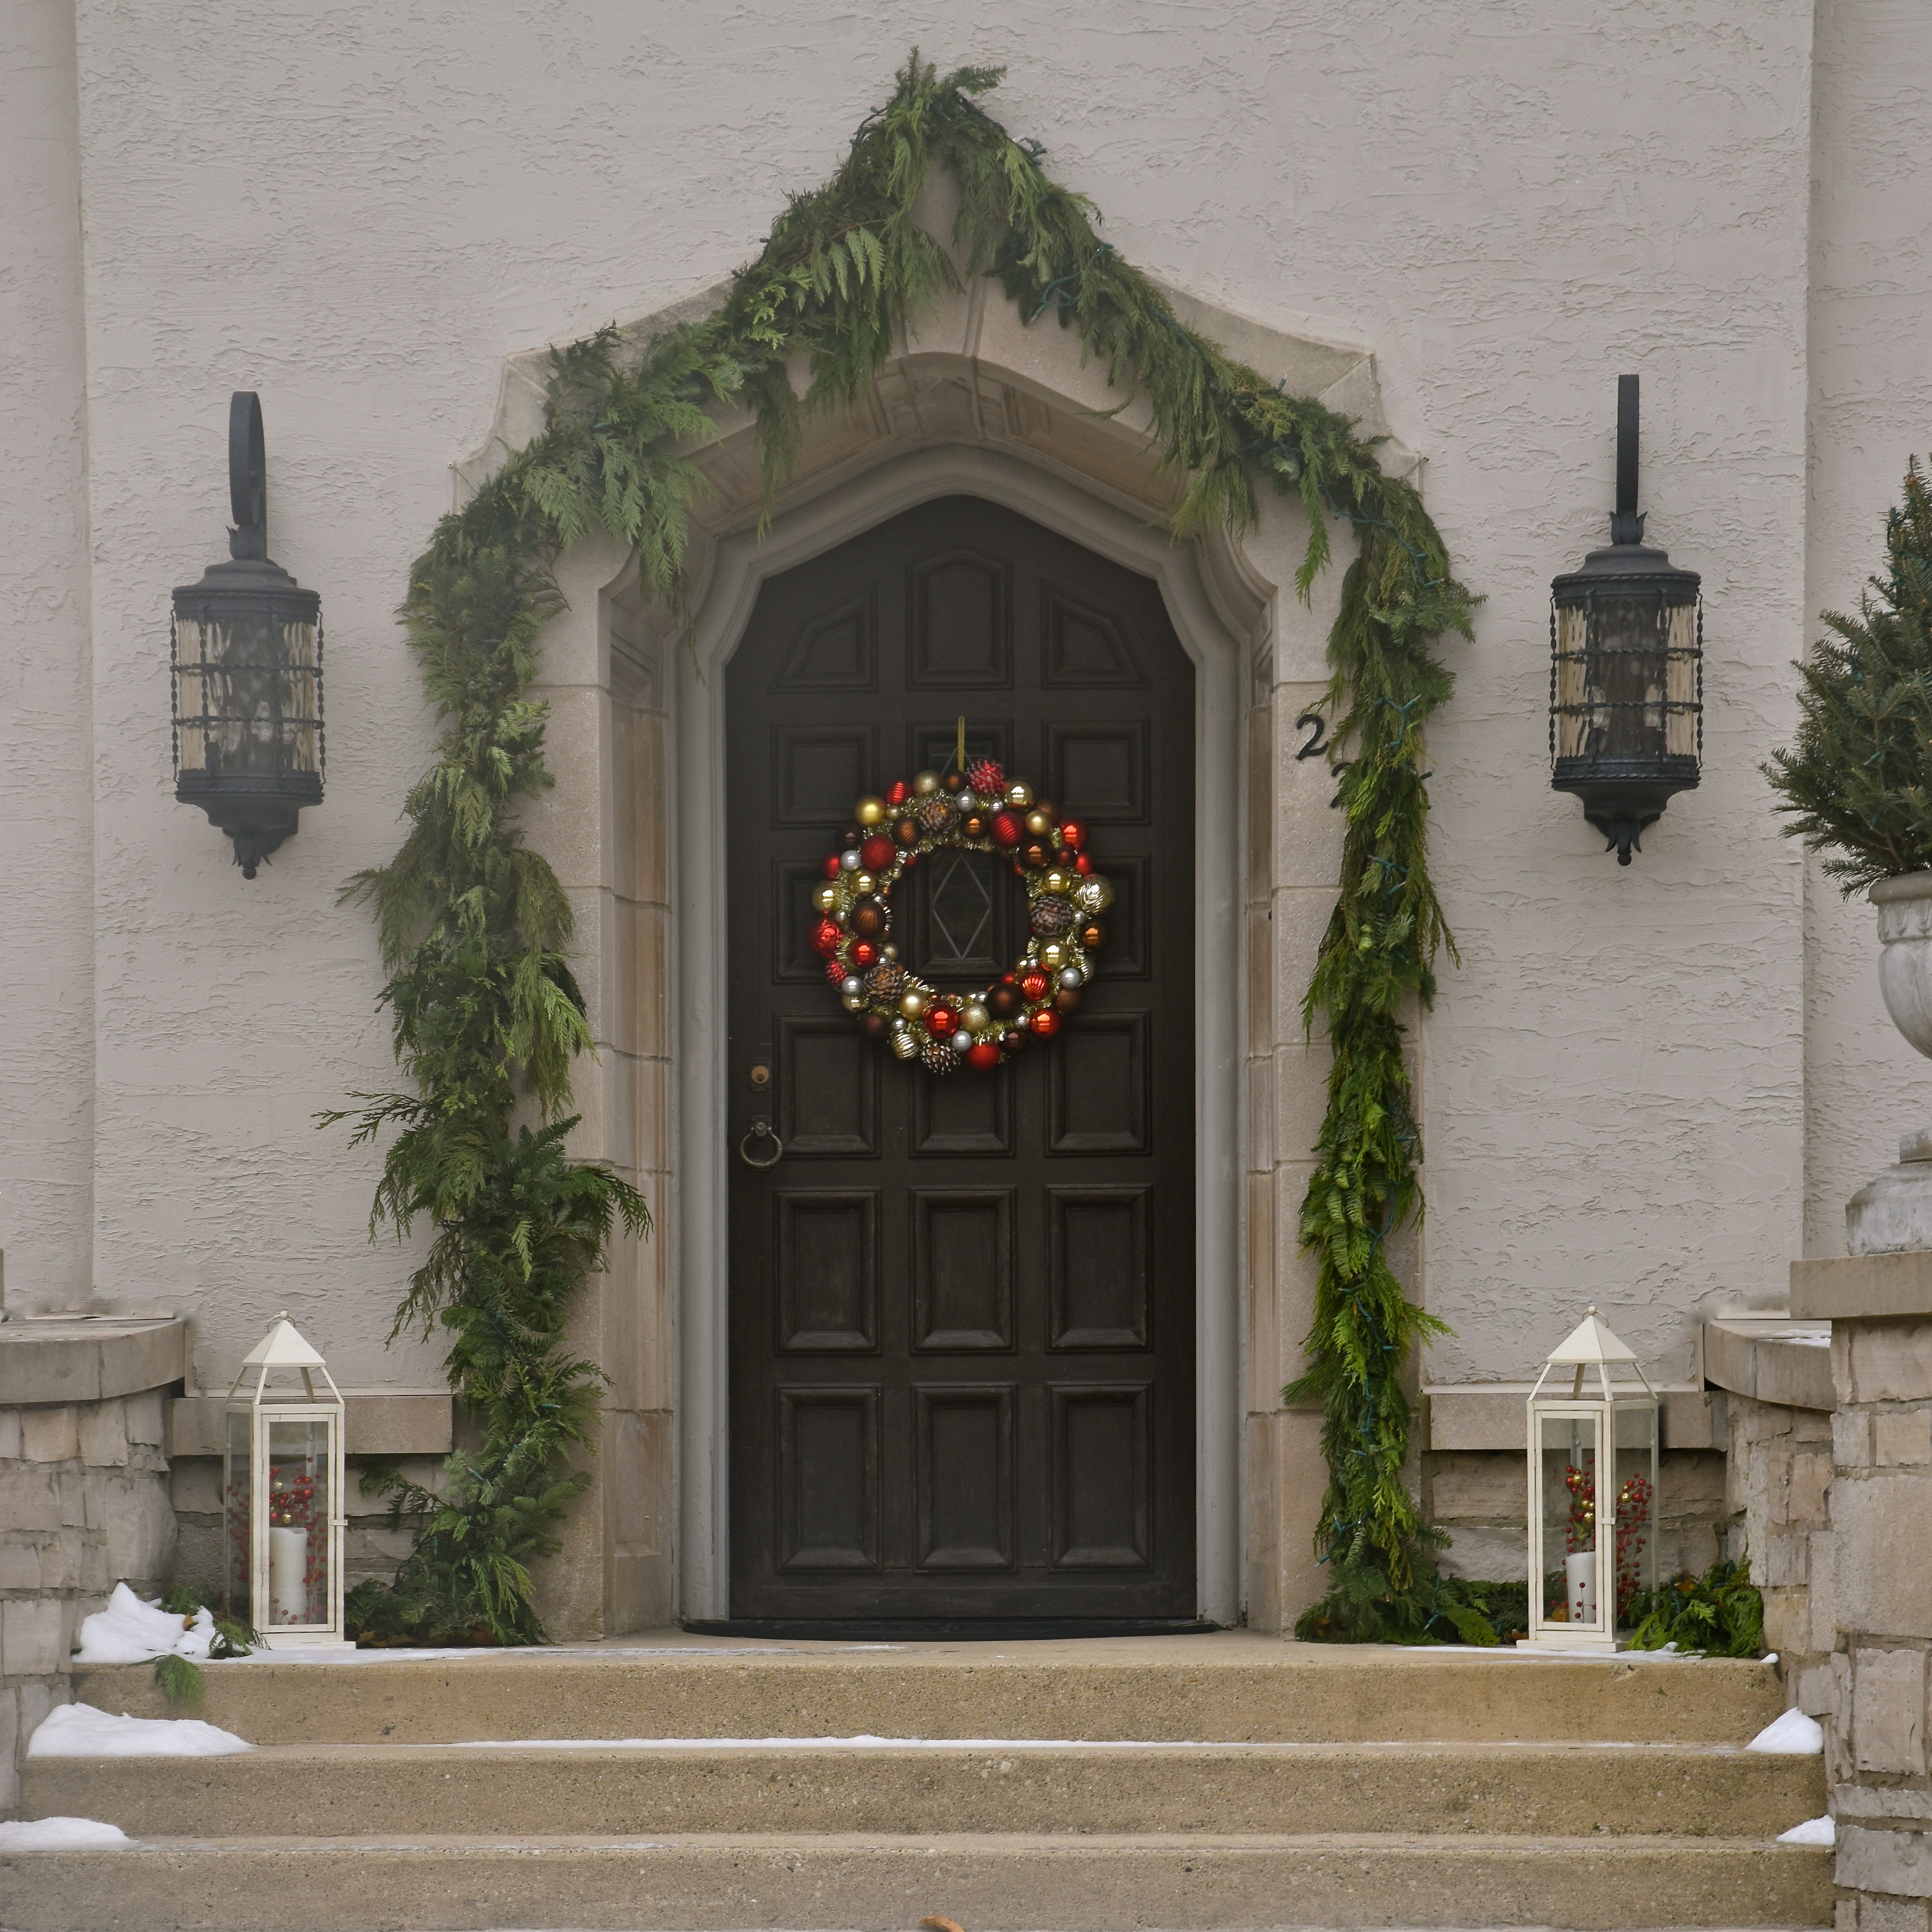
This spanish styled door has beautiful stone surround that is accented with it’s fresh green garlands. The sparkly tinsel and red and gold wreath is just the right touch for this old world door styled door.
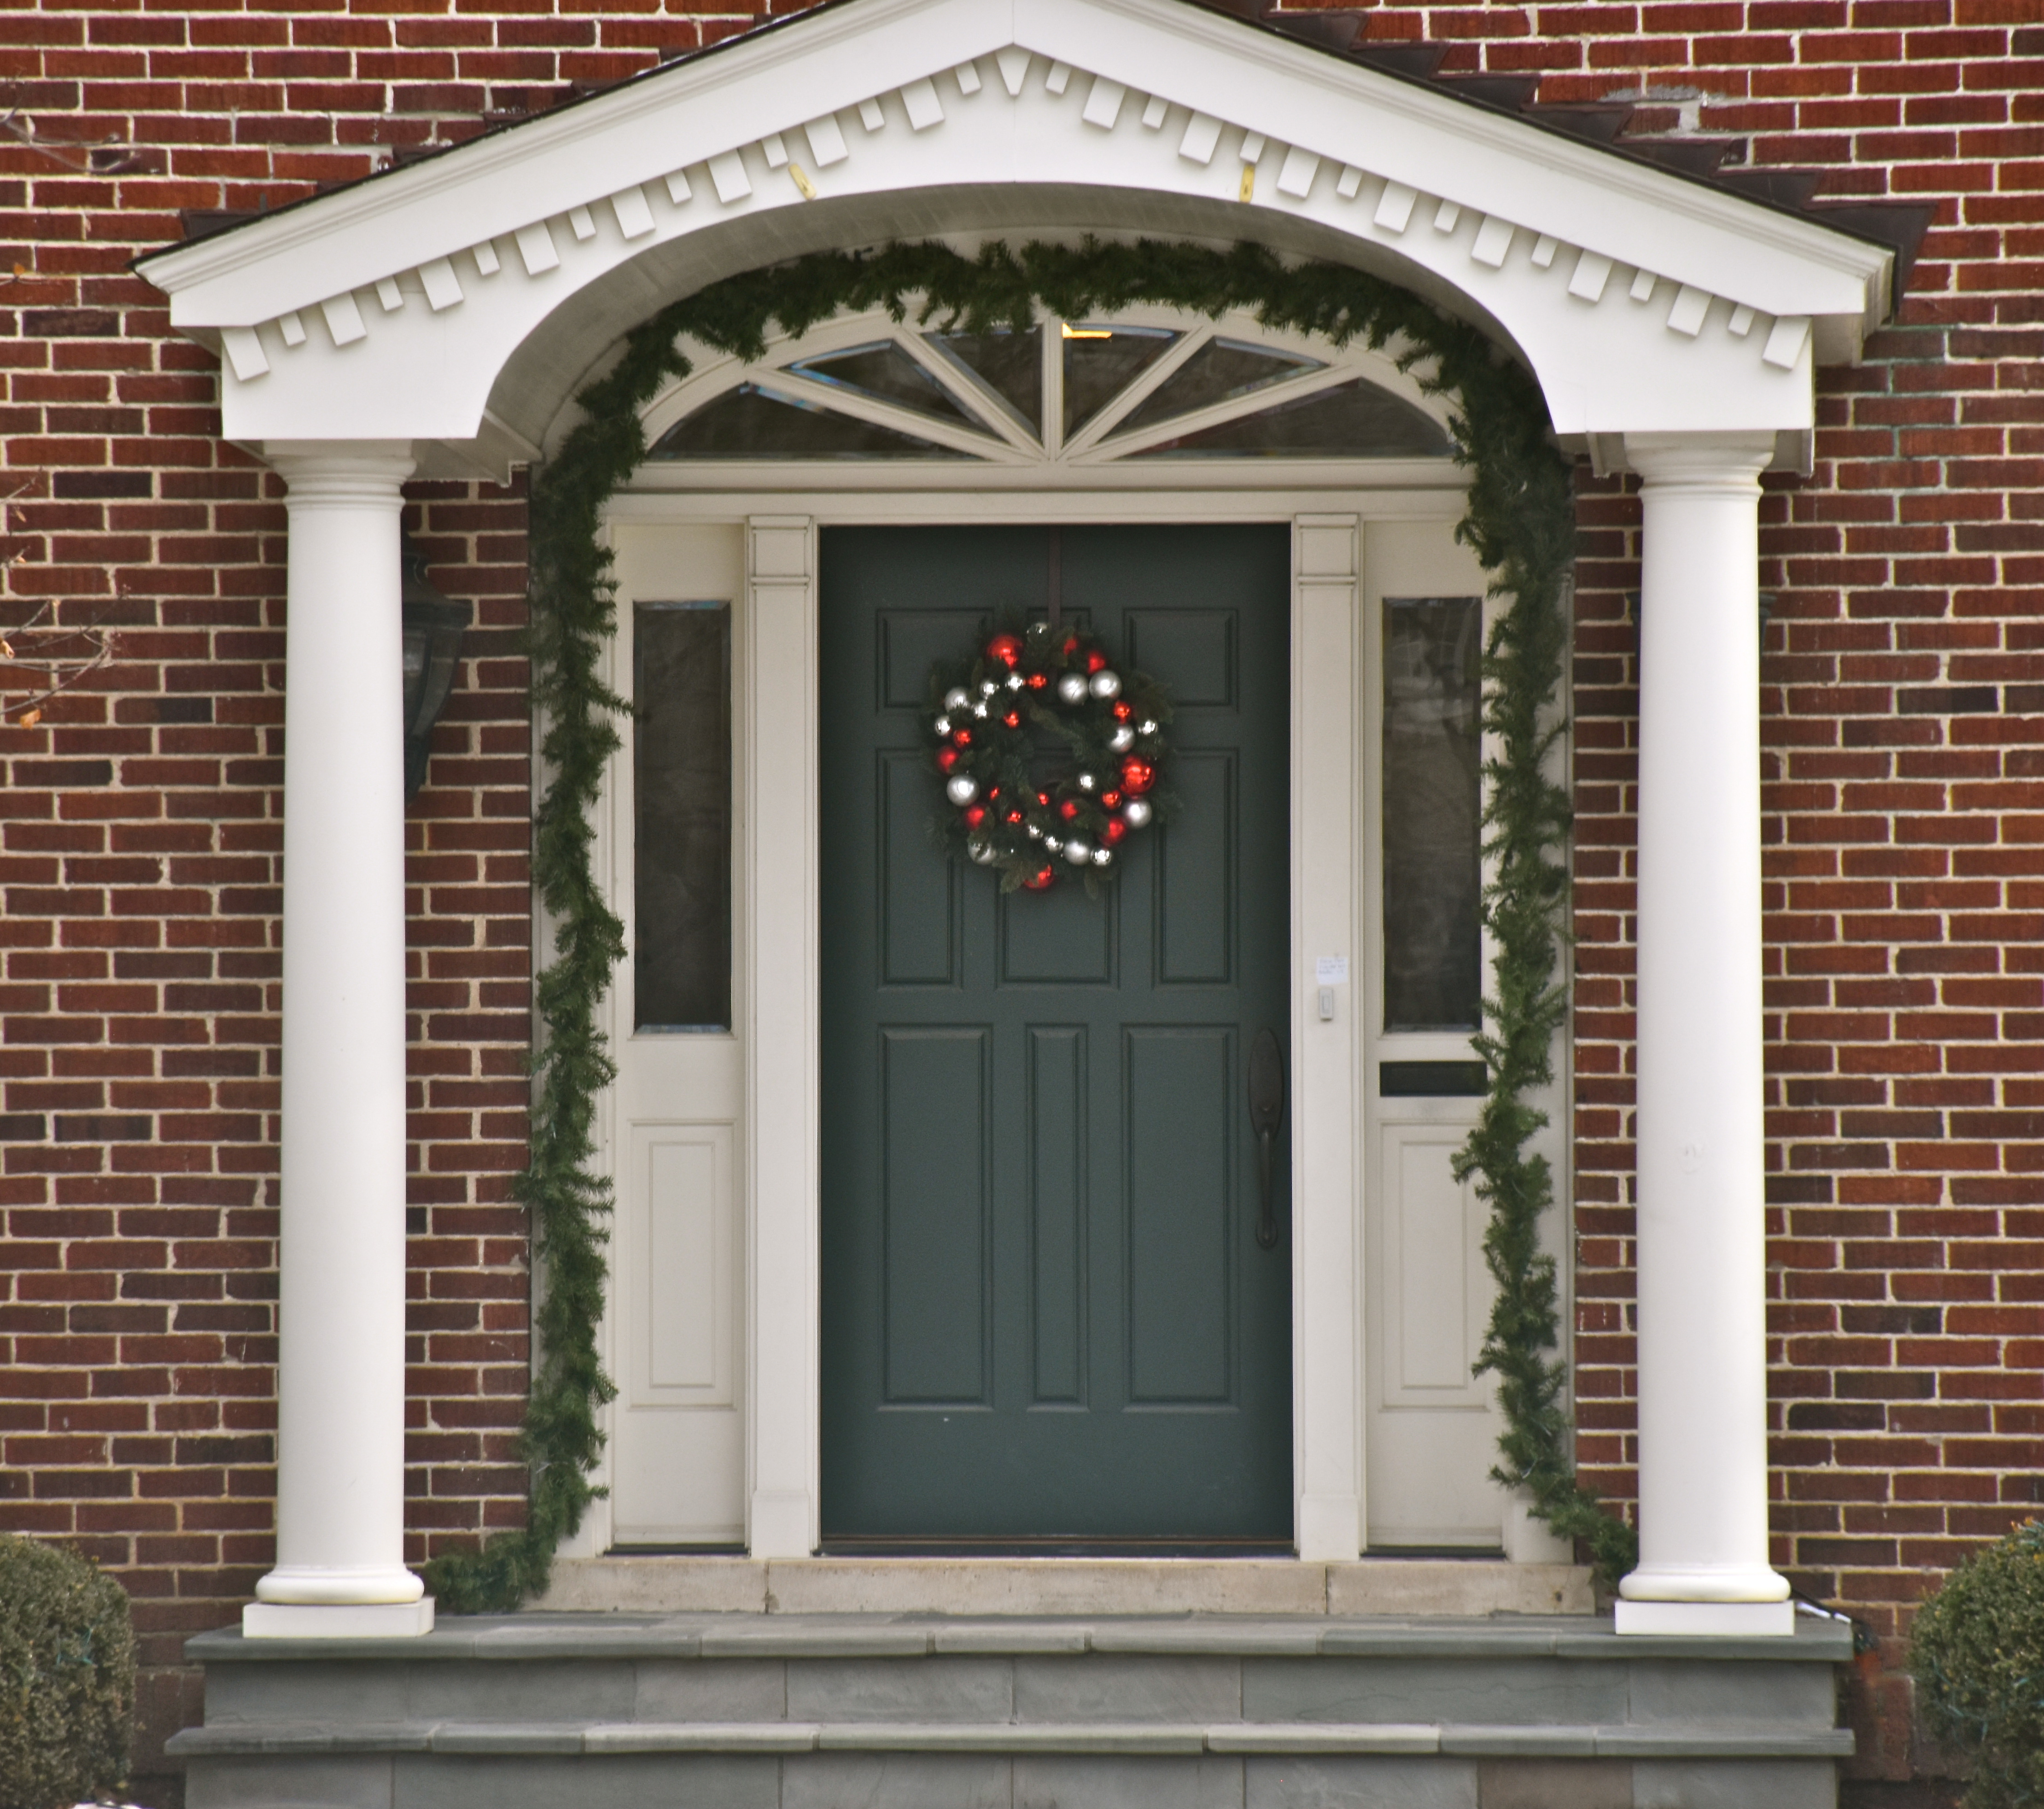
The classic red brick with the deep green door, and the window details make this home feel like that all American Christmas house, like the kind you would see all decked out in a Pottery Barn catalogue. It’s the wreath with it’s shiny red and silver Christmas ornaments that caught my eye and made me notice this striking door.
Finally, this house is right around the corner from me and the owner always has it decked out for the season. The large scaled wreath with it’s plaid bow and red berries really make the details of it’s rounded door stand out. The garland and the small Christmas trees make you stop and look. This little porch just draws you in and makes you feel like Christmas.
So hopefully you enjoyed this small tour of some of my favorite happy houses all trimmed out in holiday style.
Ok, the classic holiday song might not go exactly like that, but the holiday season is officially in full swing at our house. I started this holiday season trying to feel organized. I knew we were going to be out of town for Thanksgiving so I decided to tackle the outdoor lights before we left town and take out a few decorations. However, the last two weeks feel like they just whizzed by. This Friday I officially started worrying about all the Christmas and birthday shopping I had left to do. In our house I call the month of December “the season of giving” because my husband’s birthday is two weeks before Christmas and my daughters birthday is right after Christmas, so I seriously had to get started. All I can say is thank goodness for online shopping and Amazon.
However, it snowed today and things slowed down a bit. So I am grateful to take a little time to take in all the lights and pretty decorations and spend some time with my family. My girls were excited to wake up to the snow. Even a small snowfall is cause for celebration in our house. So we got out all decked out in our puffy coats and spent some time outside throwing tiny snowballs and just having fun. So with our first snow this week, I must say it really is beginning to feel like Christmas.
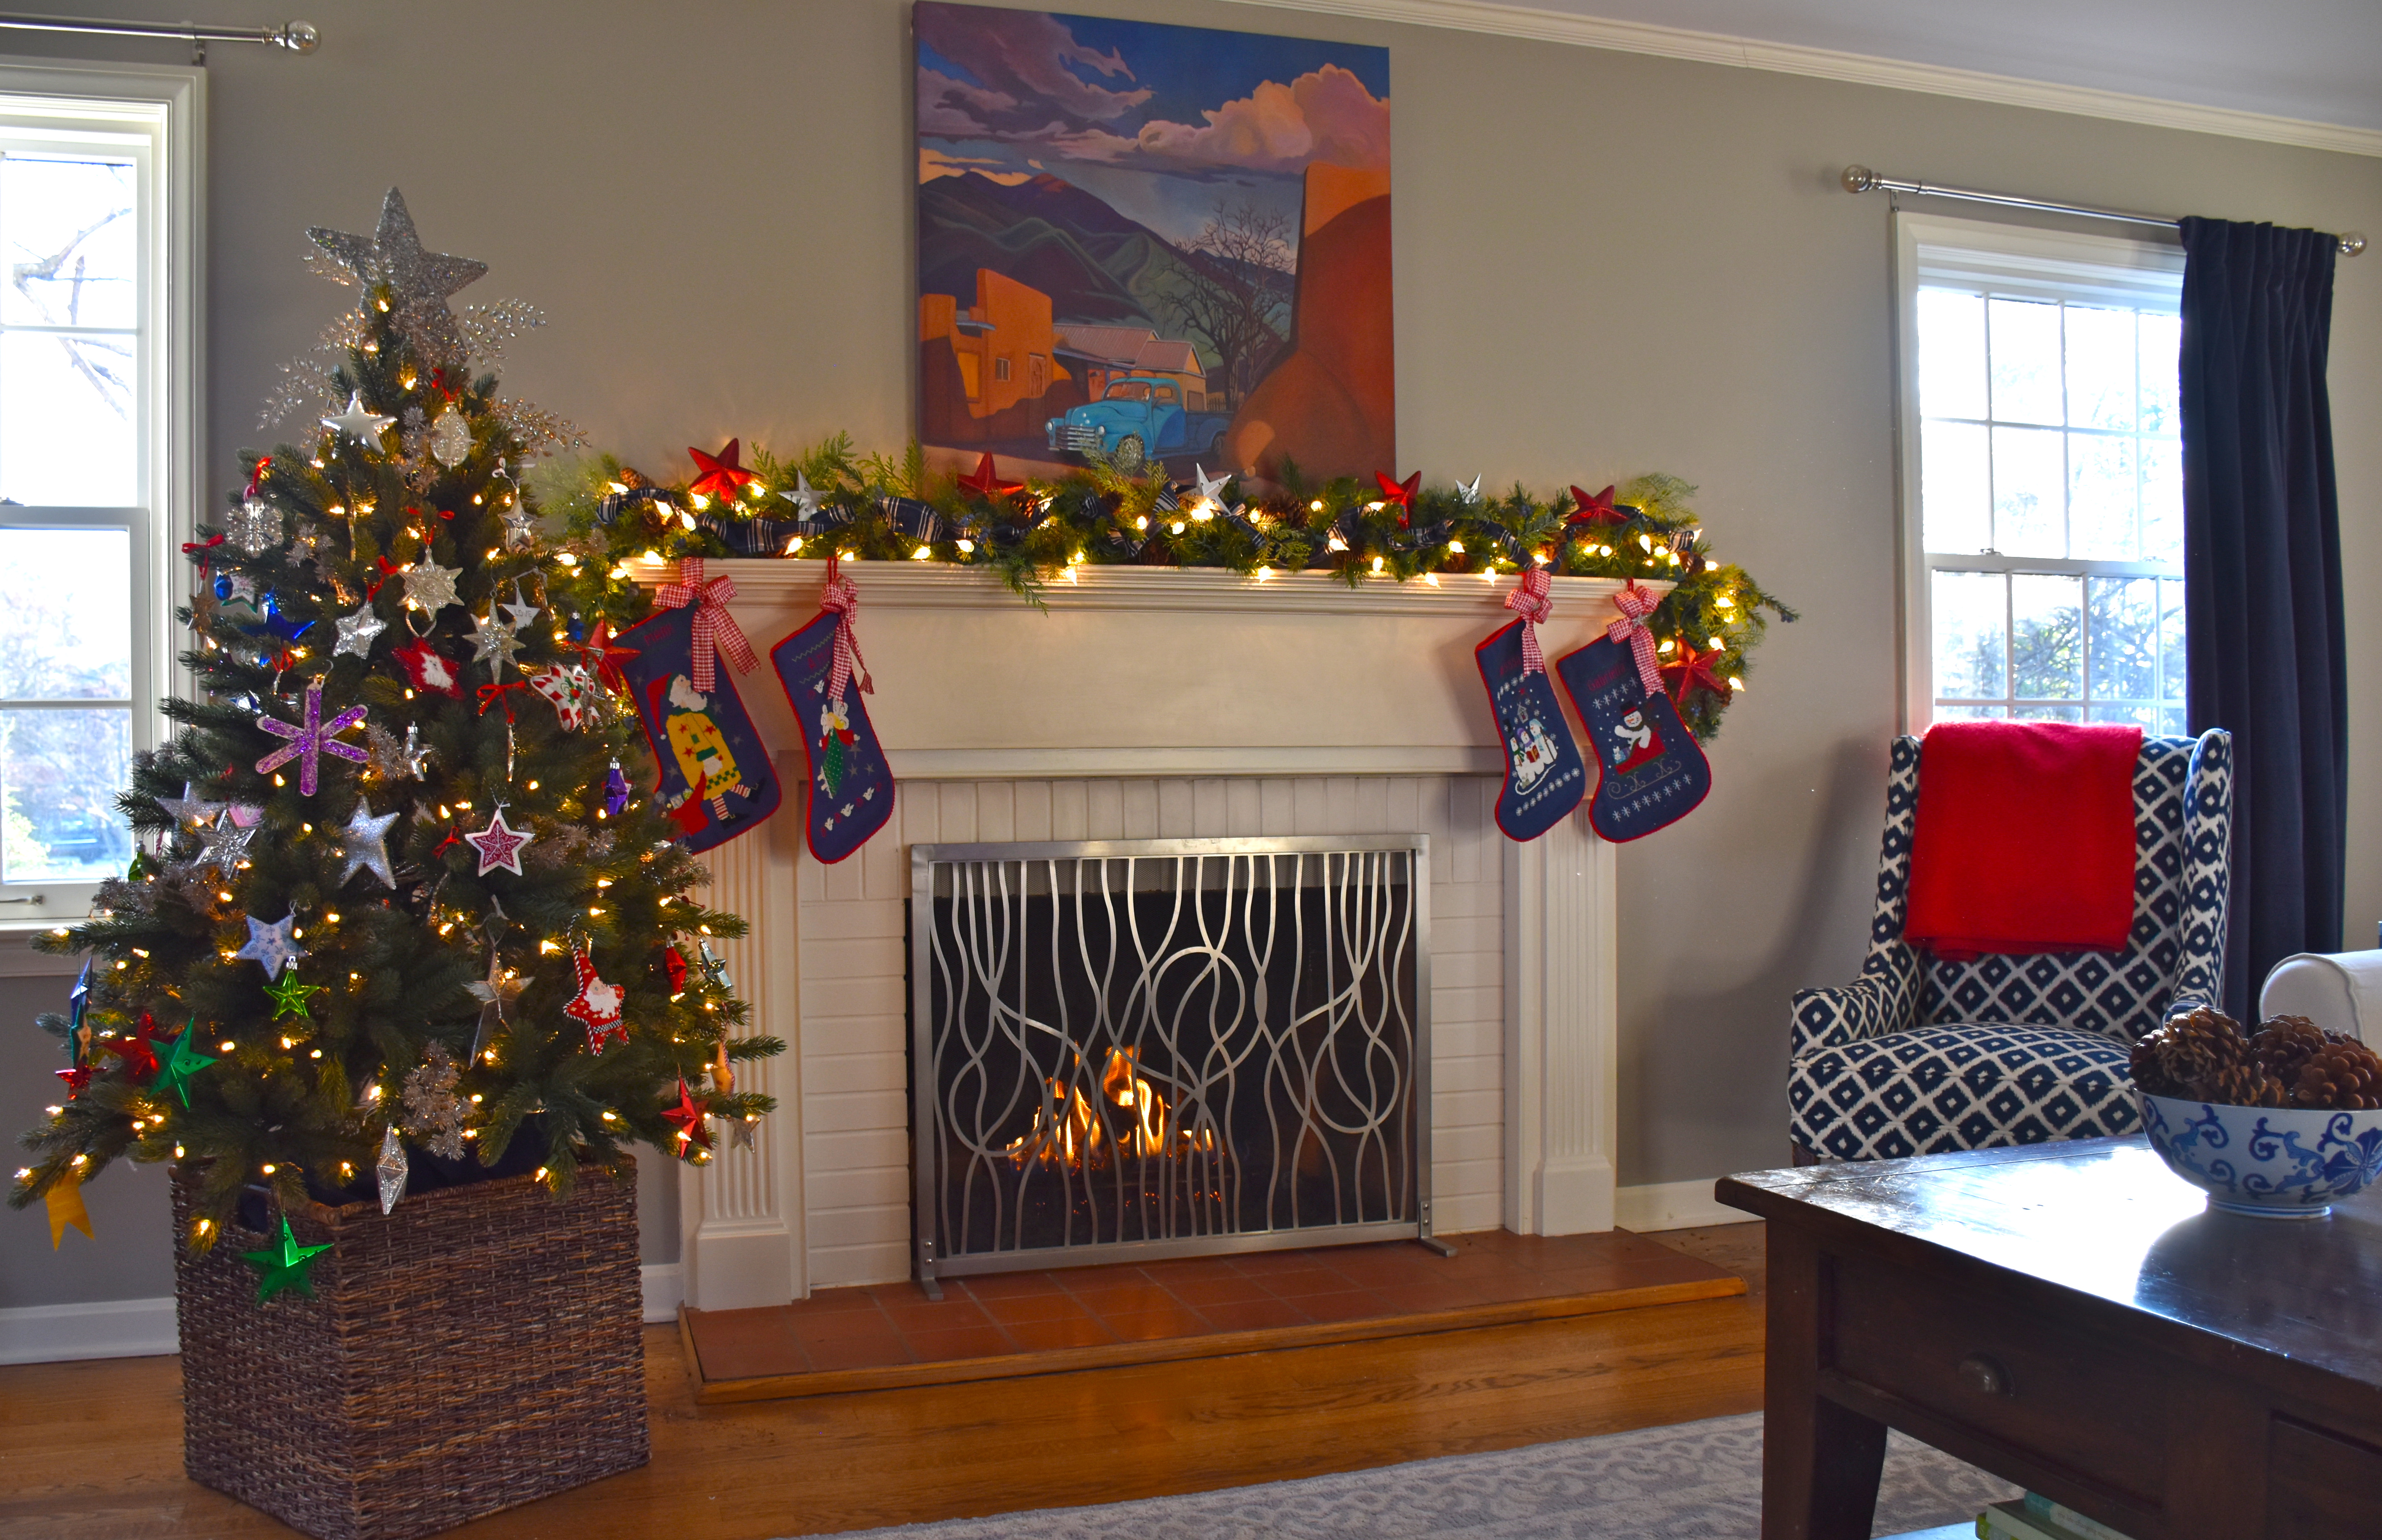
This year my girls helped me decorate our tree and I decided to remix some of our decorations up a bit. I love how our house feels at Christmas. There is just something about all those twinkling lights, ribbons and decorations. I love Christmas trees but I have to say that my favorite decoration around our house are the garlands. So this year I added some new touches of greenery and ornaments to give our house a festive feel.
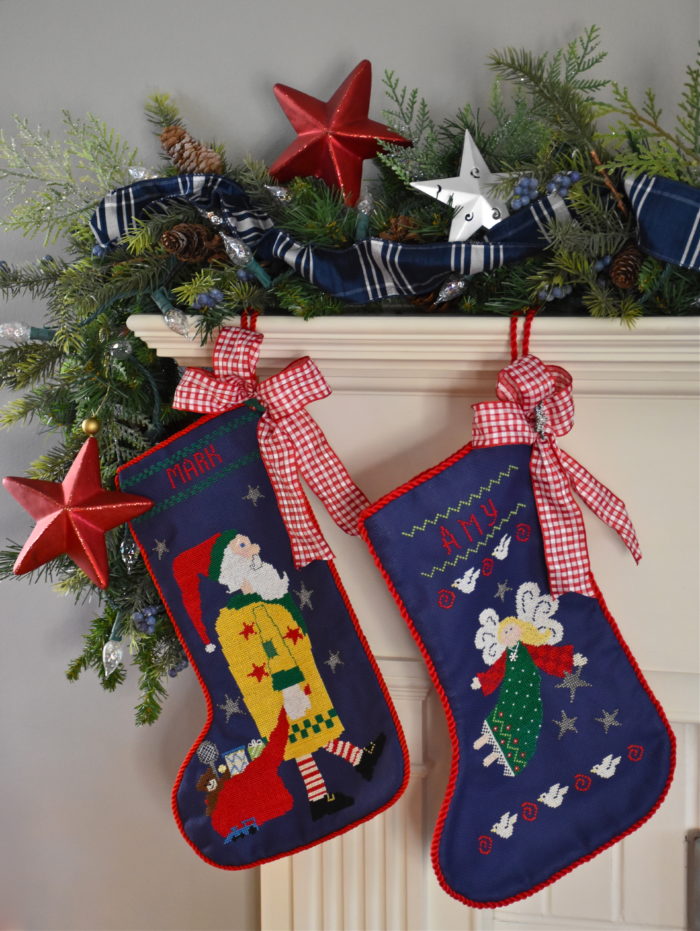
A few new branches with some blue juniper berries and some ornaments I had really went a long way to add something special to our mantle. The hand stitched stockings were inspired by my grandmother who was so talented at needlework. She started quite a tradition with her beautiful stockings, so when I had my own home I decided to make my own stockings. Mine are not quite as fancy as hers but they are always one of those things I so look forward to hanging each year.
I found room for some garland in the dining room too. I just love having a red dining room at Christmas. All the sparkly silver touches make this room feel festive. This was a basic garland I got at target years ago that I used to use in my office, but here in our new home I added some small silver ornaments from Hobby Lobby and some glittery red leaves. When I am thinking about adding in some extra pieces to my garlands I always try to mix up the scale of the things I am adding.
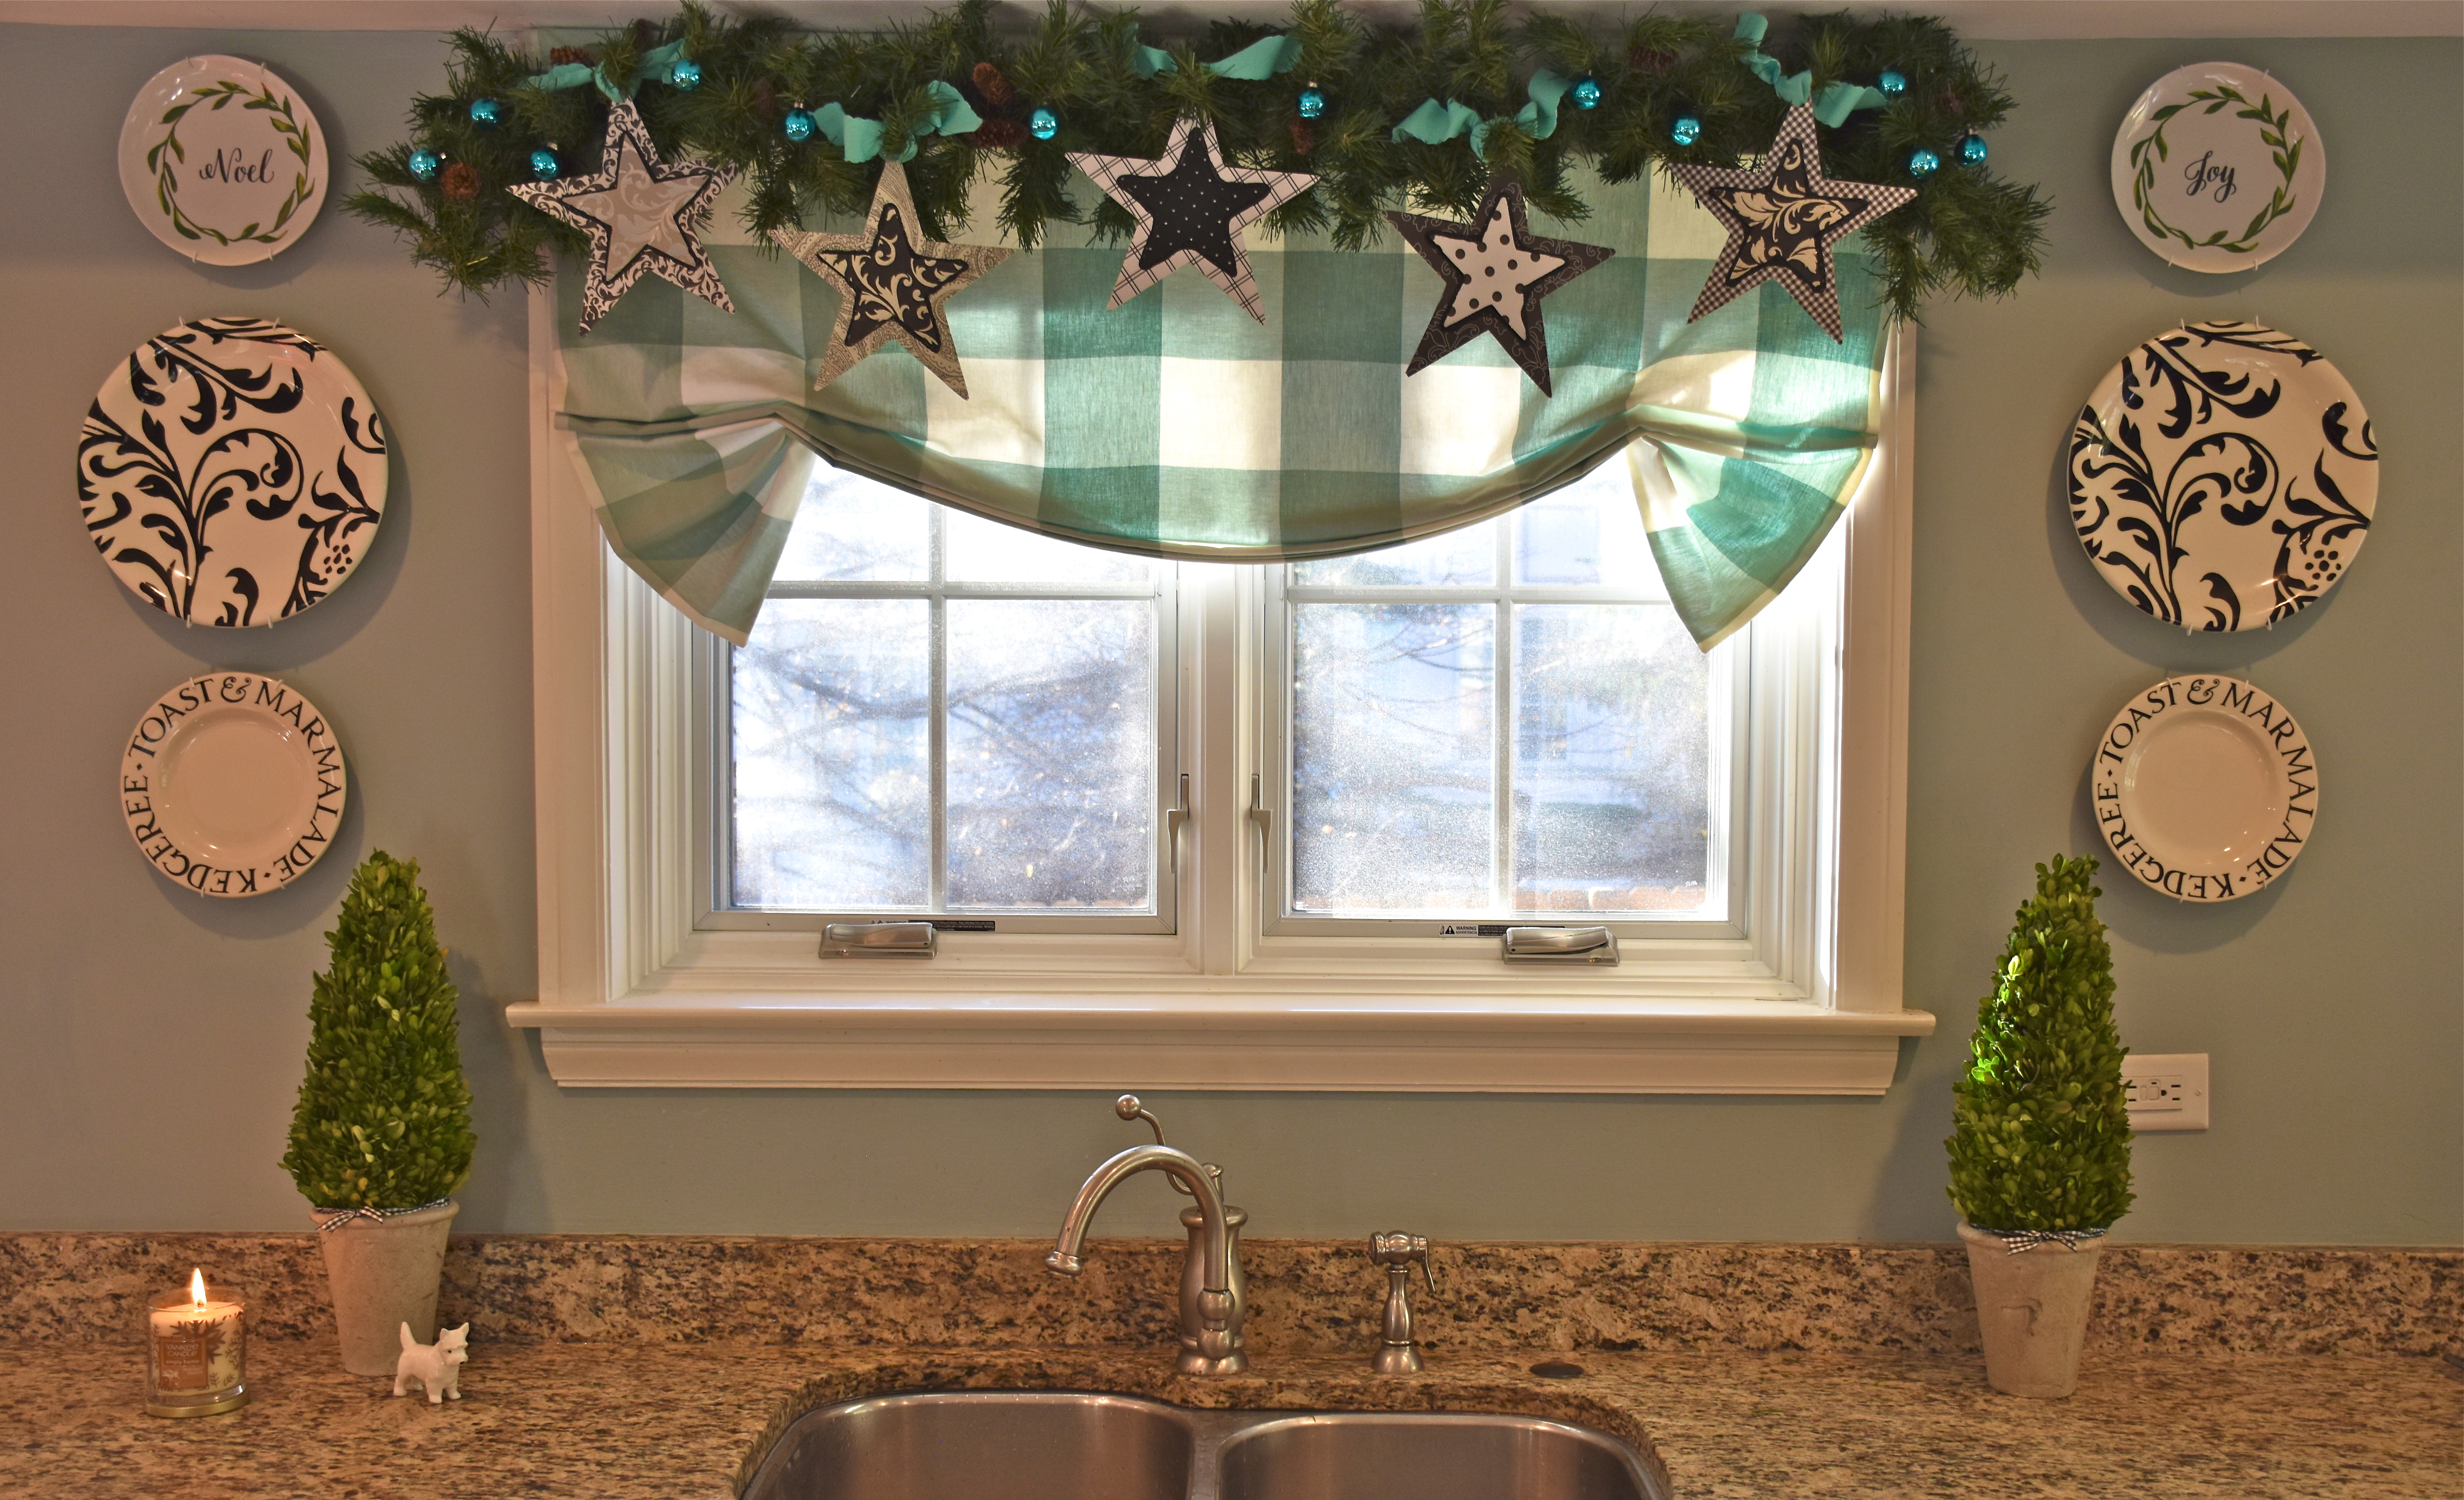
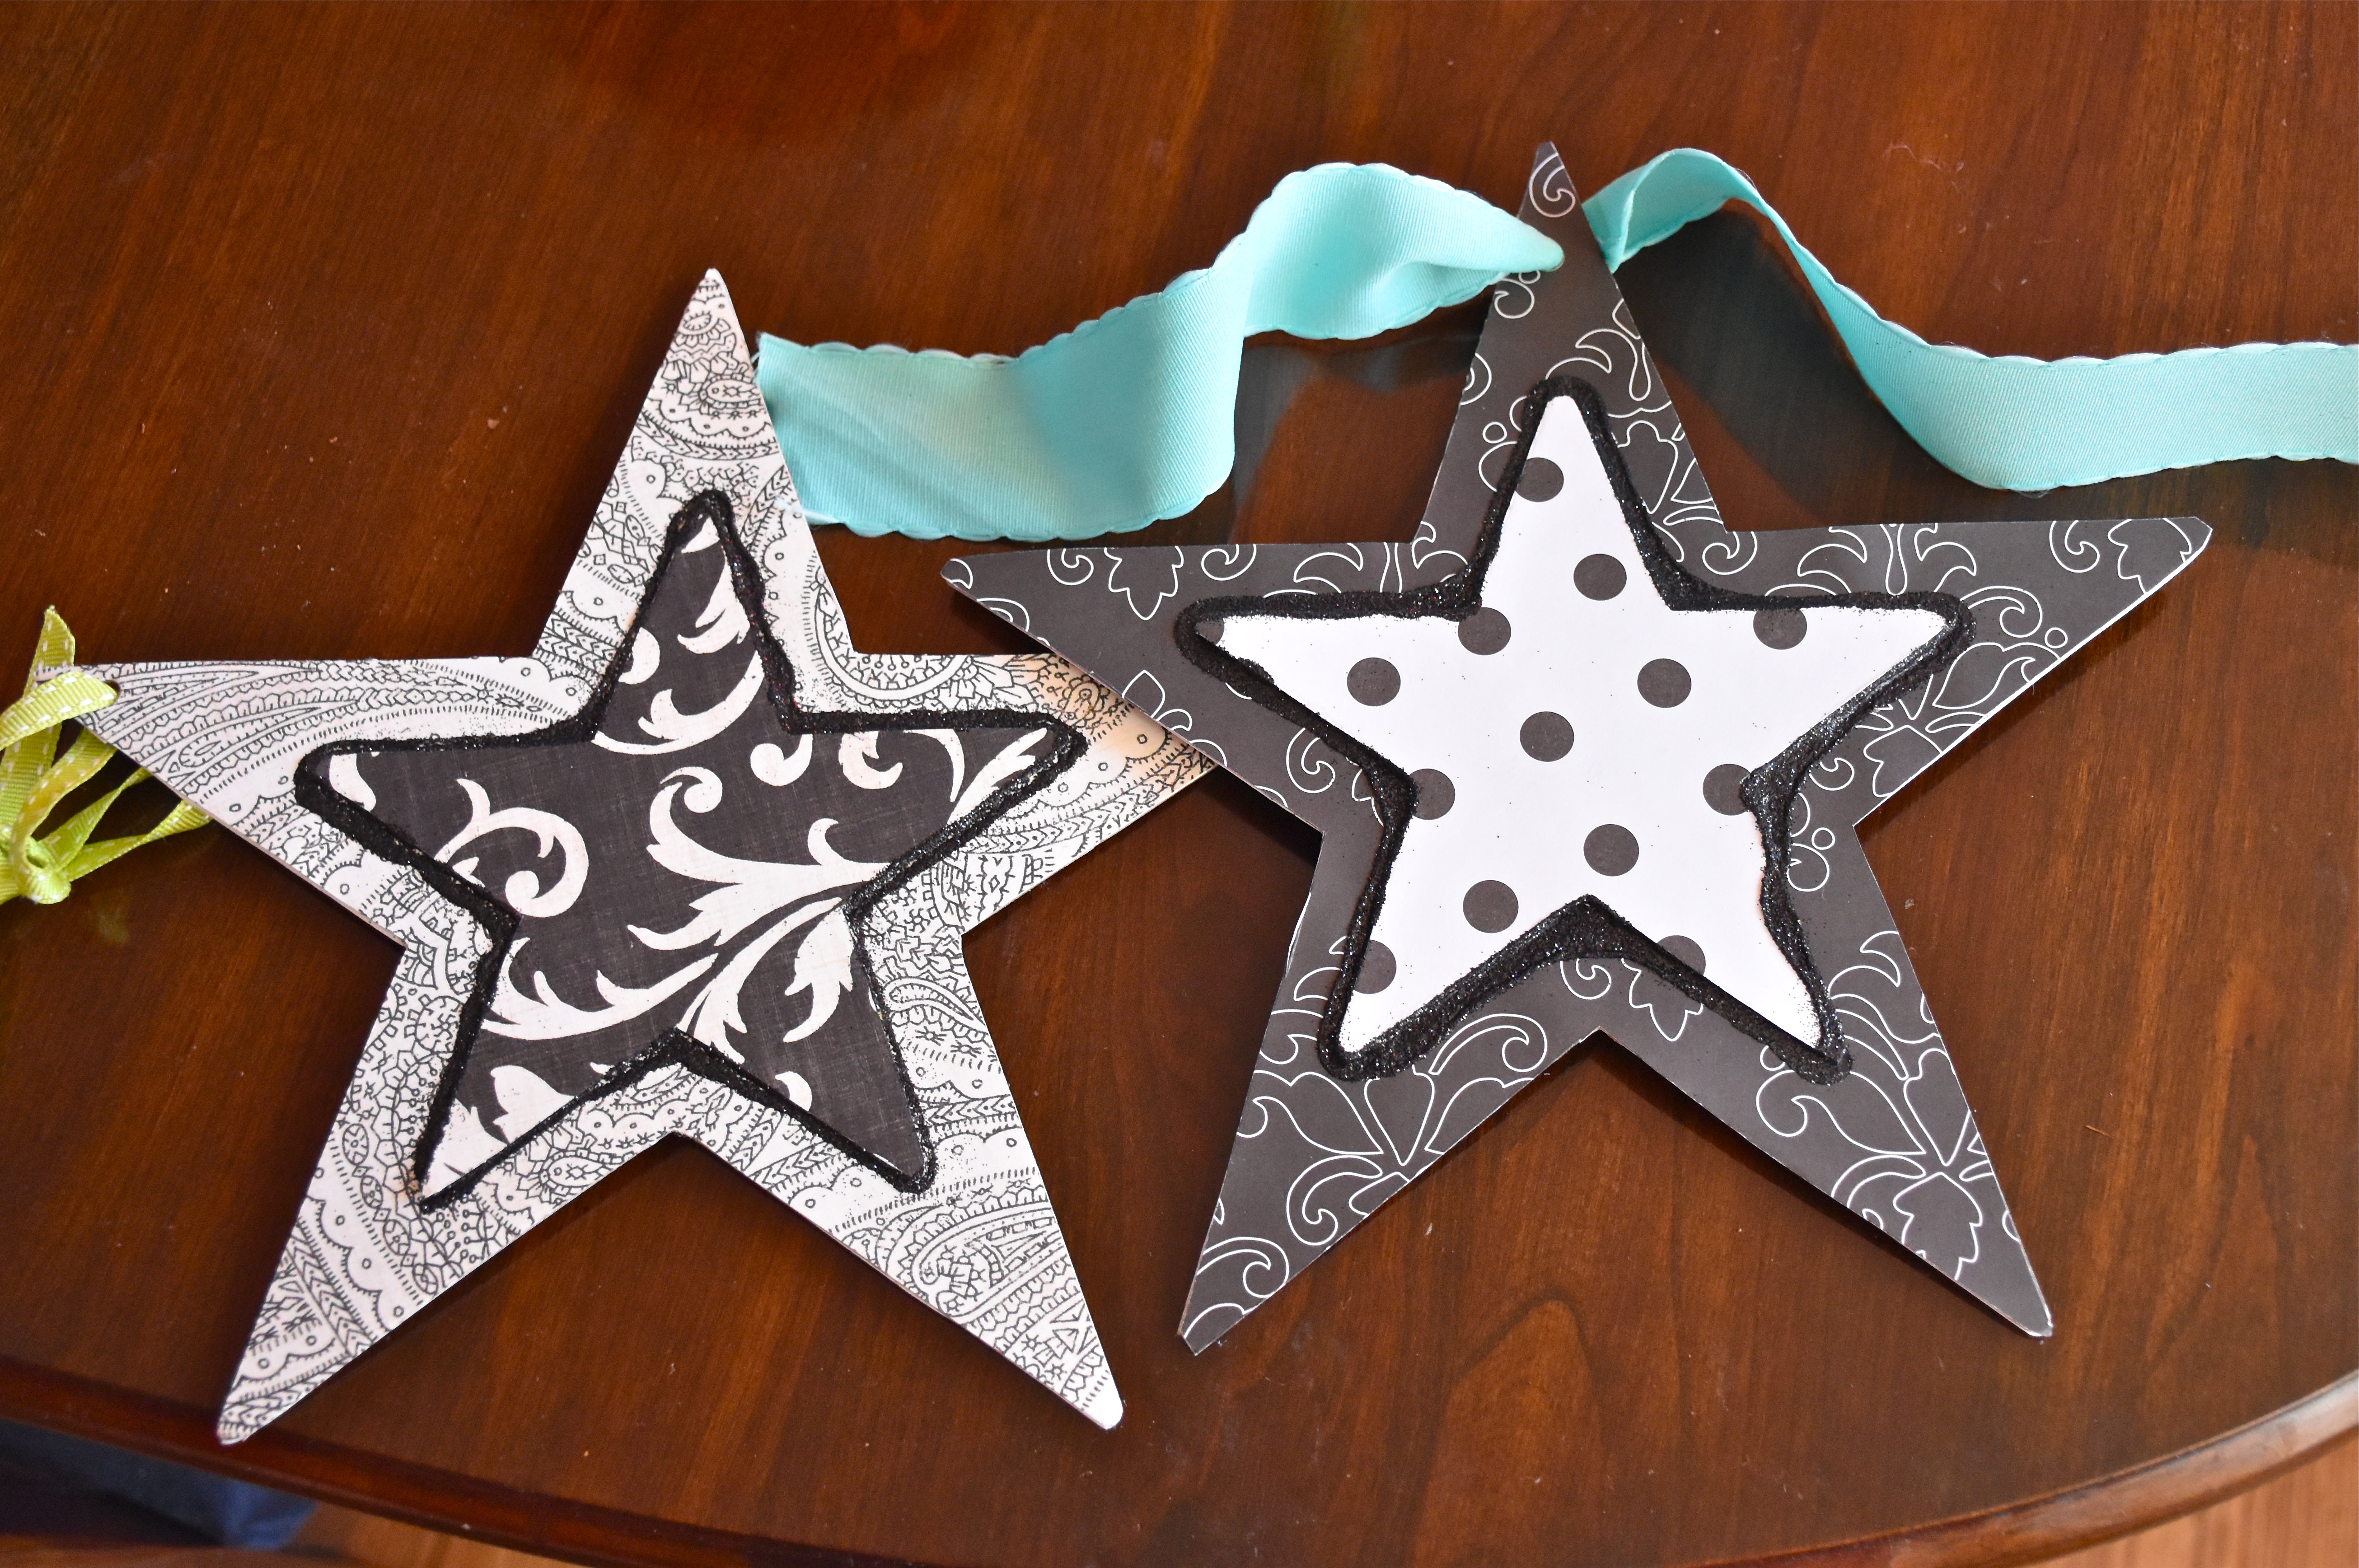
As you can see no room in the house is complete without a garland. Even the kitchen got its own unique blue christmas garland with touches of robin’s egg ribbon and black and white stars.
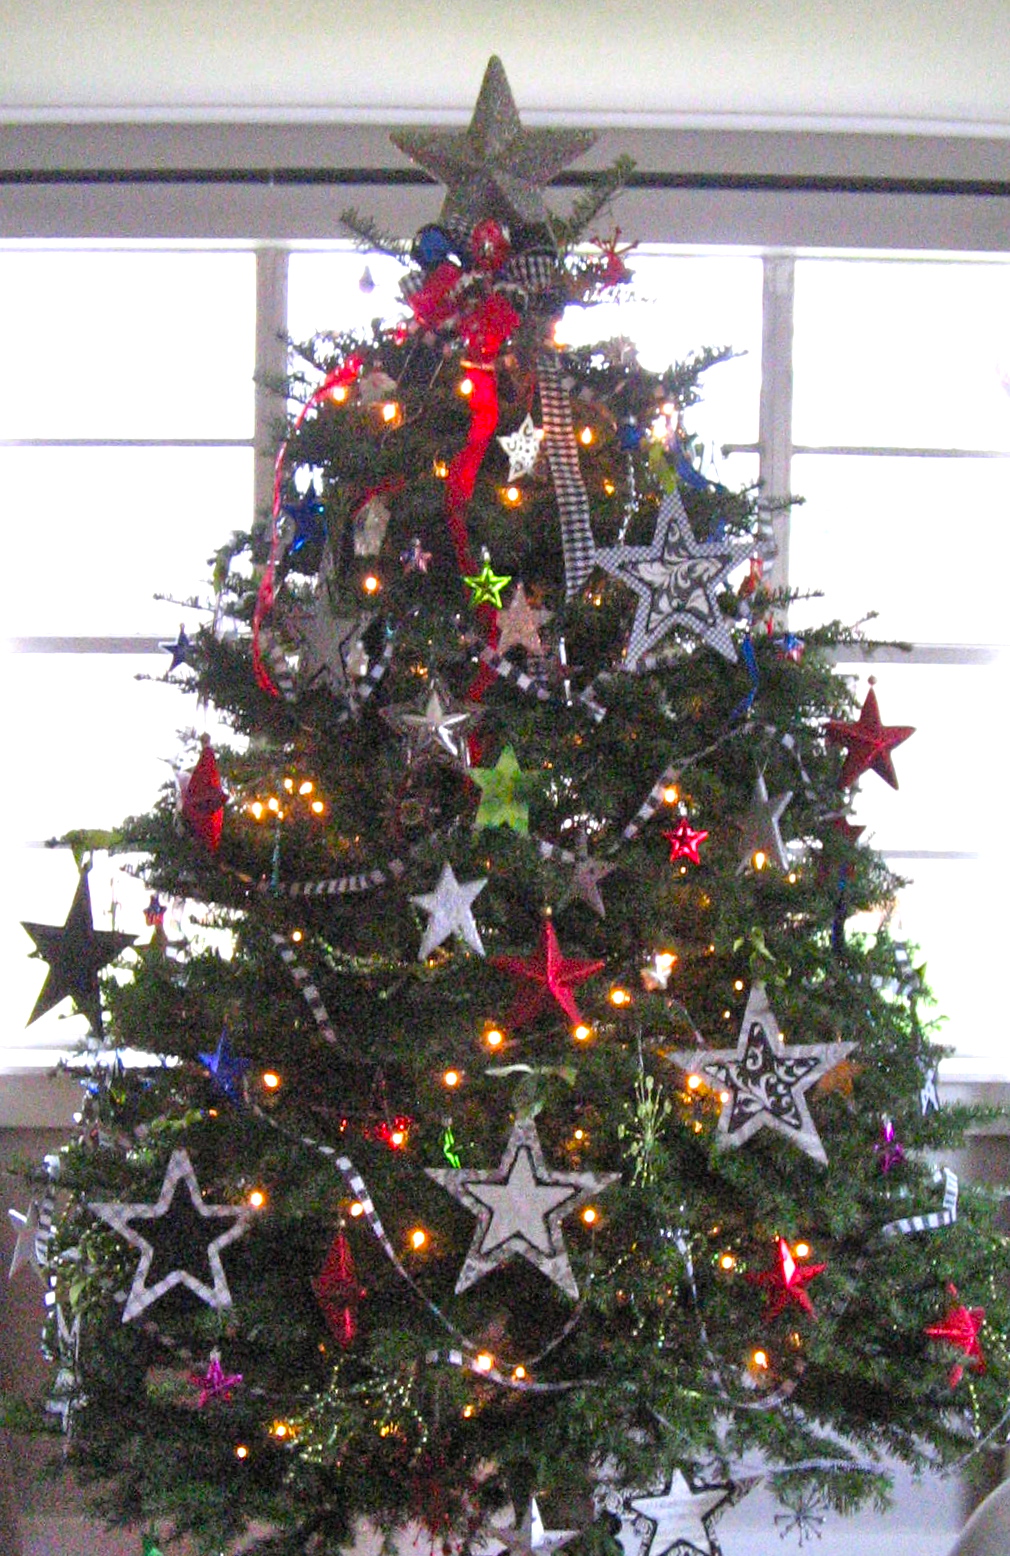
The black and white paper stars were something I made several years ago for a larger Christmas tree that we had in the past. I think one of the reasons I like garlands so much is that you can use them to feature a small collection of ornaments. I happen to have a thing for stars, but you could use any collection of ornaments that you love. I made these stars out of some cardboard cut outs I found at party city. I bought a set of large and small stars and then I covered them in black and white scrapbook paper and I trimmed the edges with black glitter. I punched a single hole in the top so I could hang them with ribbon. Those stars were a fun project so I was glad to be able to use them in my kitchen. Just for fun I found a picture of one of my trees from Christmas past where I used my stars. If you look closely you can also see the red stars I used on my mantle too. It’s fun to be able take the older decorations you love and mix them up to deck the halls with some beautiful garlands.
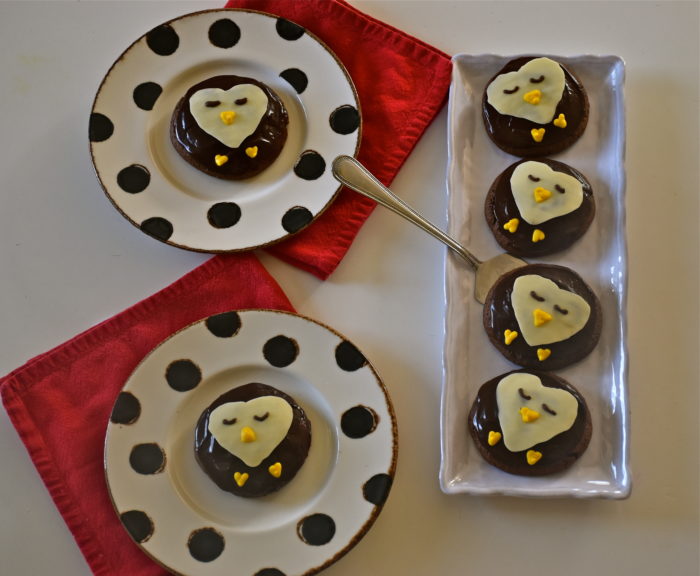
There is something magical about sugar and all the amazing things you can bake. Holiday baking is especially fun because whimsical cookies and cakes get to play a special role in celebrations with family and friends. So with the holiday season here I wanted to create a new holiday themed cookie that’s a twist on a classic: penguin black and white cookies. I must admit a have a certain weakness for black and white cookies. They are definitely one of my all time favorite desserts. I recently read a cookbook called The Weekend Baker by Abigail Johnson Dodge. It’s been out there for a while now, but it was new to me and I loved it. One of the recipes that caught my eye that I wanted to try was her chocolate black and white cookies, but I wanted to give my cookies a holiday look so instead of the traditional half black and half white chocolate dipped cookies I decided to turn my cookies into festive holiday penguins.
Although they are traditionally called black and white cookies they are actually more like tiny cupcake tops frosted in chocolate ganache. They are definitely decadent and sure to satisfy any chocolate lover. My girls absolutely adored the little penguin decorations. So if you are looking for something fun to share with your family or as a gift for others then I have cookie for you. There is a little basic chocolate work involved but as always I have step by step pictures that will guide you through it all. You can even bake the cookies a day or two ahead and frost them when you are ready.
Chocolate Black and White Cookies (Makes 16 Large Cookies)
2 cups flour
2/3 cup natural unsweetened cocoa powder
1 teaspoon baking powder
1/2 teaspoon baking soda
1/2 teaspoon kosher salt
12 tablespoons of butter at room temp
1 1/2 cup granulated sugar
2 eggs
1 teaspoon vanilla
1/2 cup sour cream
2/3 cup hot (but not boiling) water
Preheat your oven to 375 degrees.
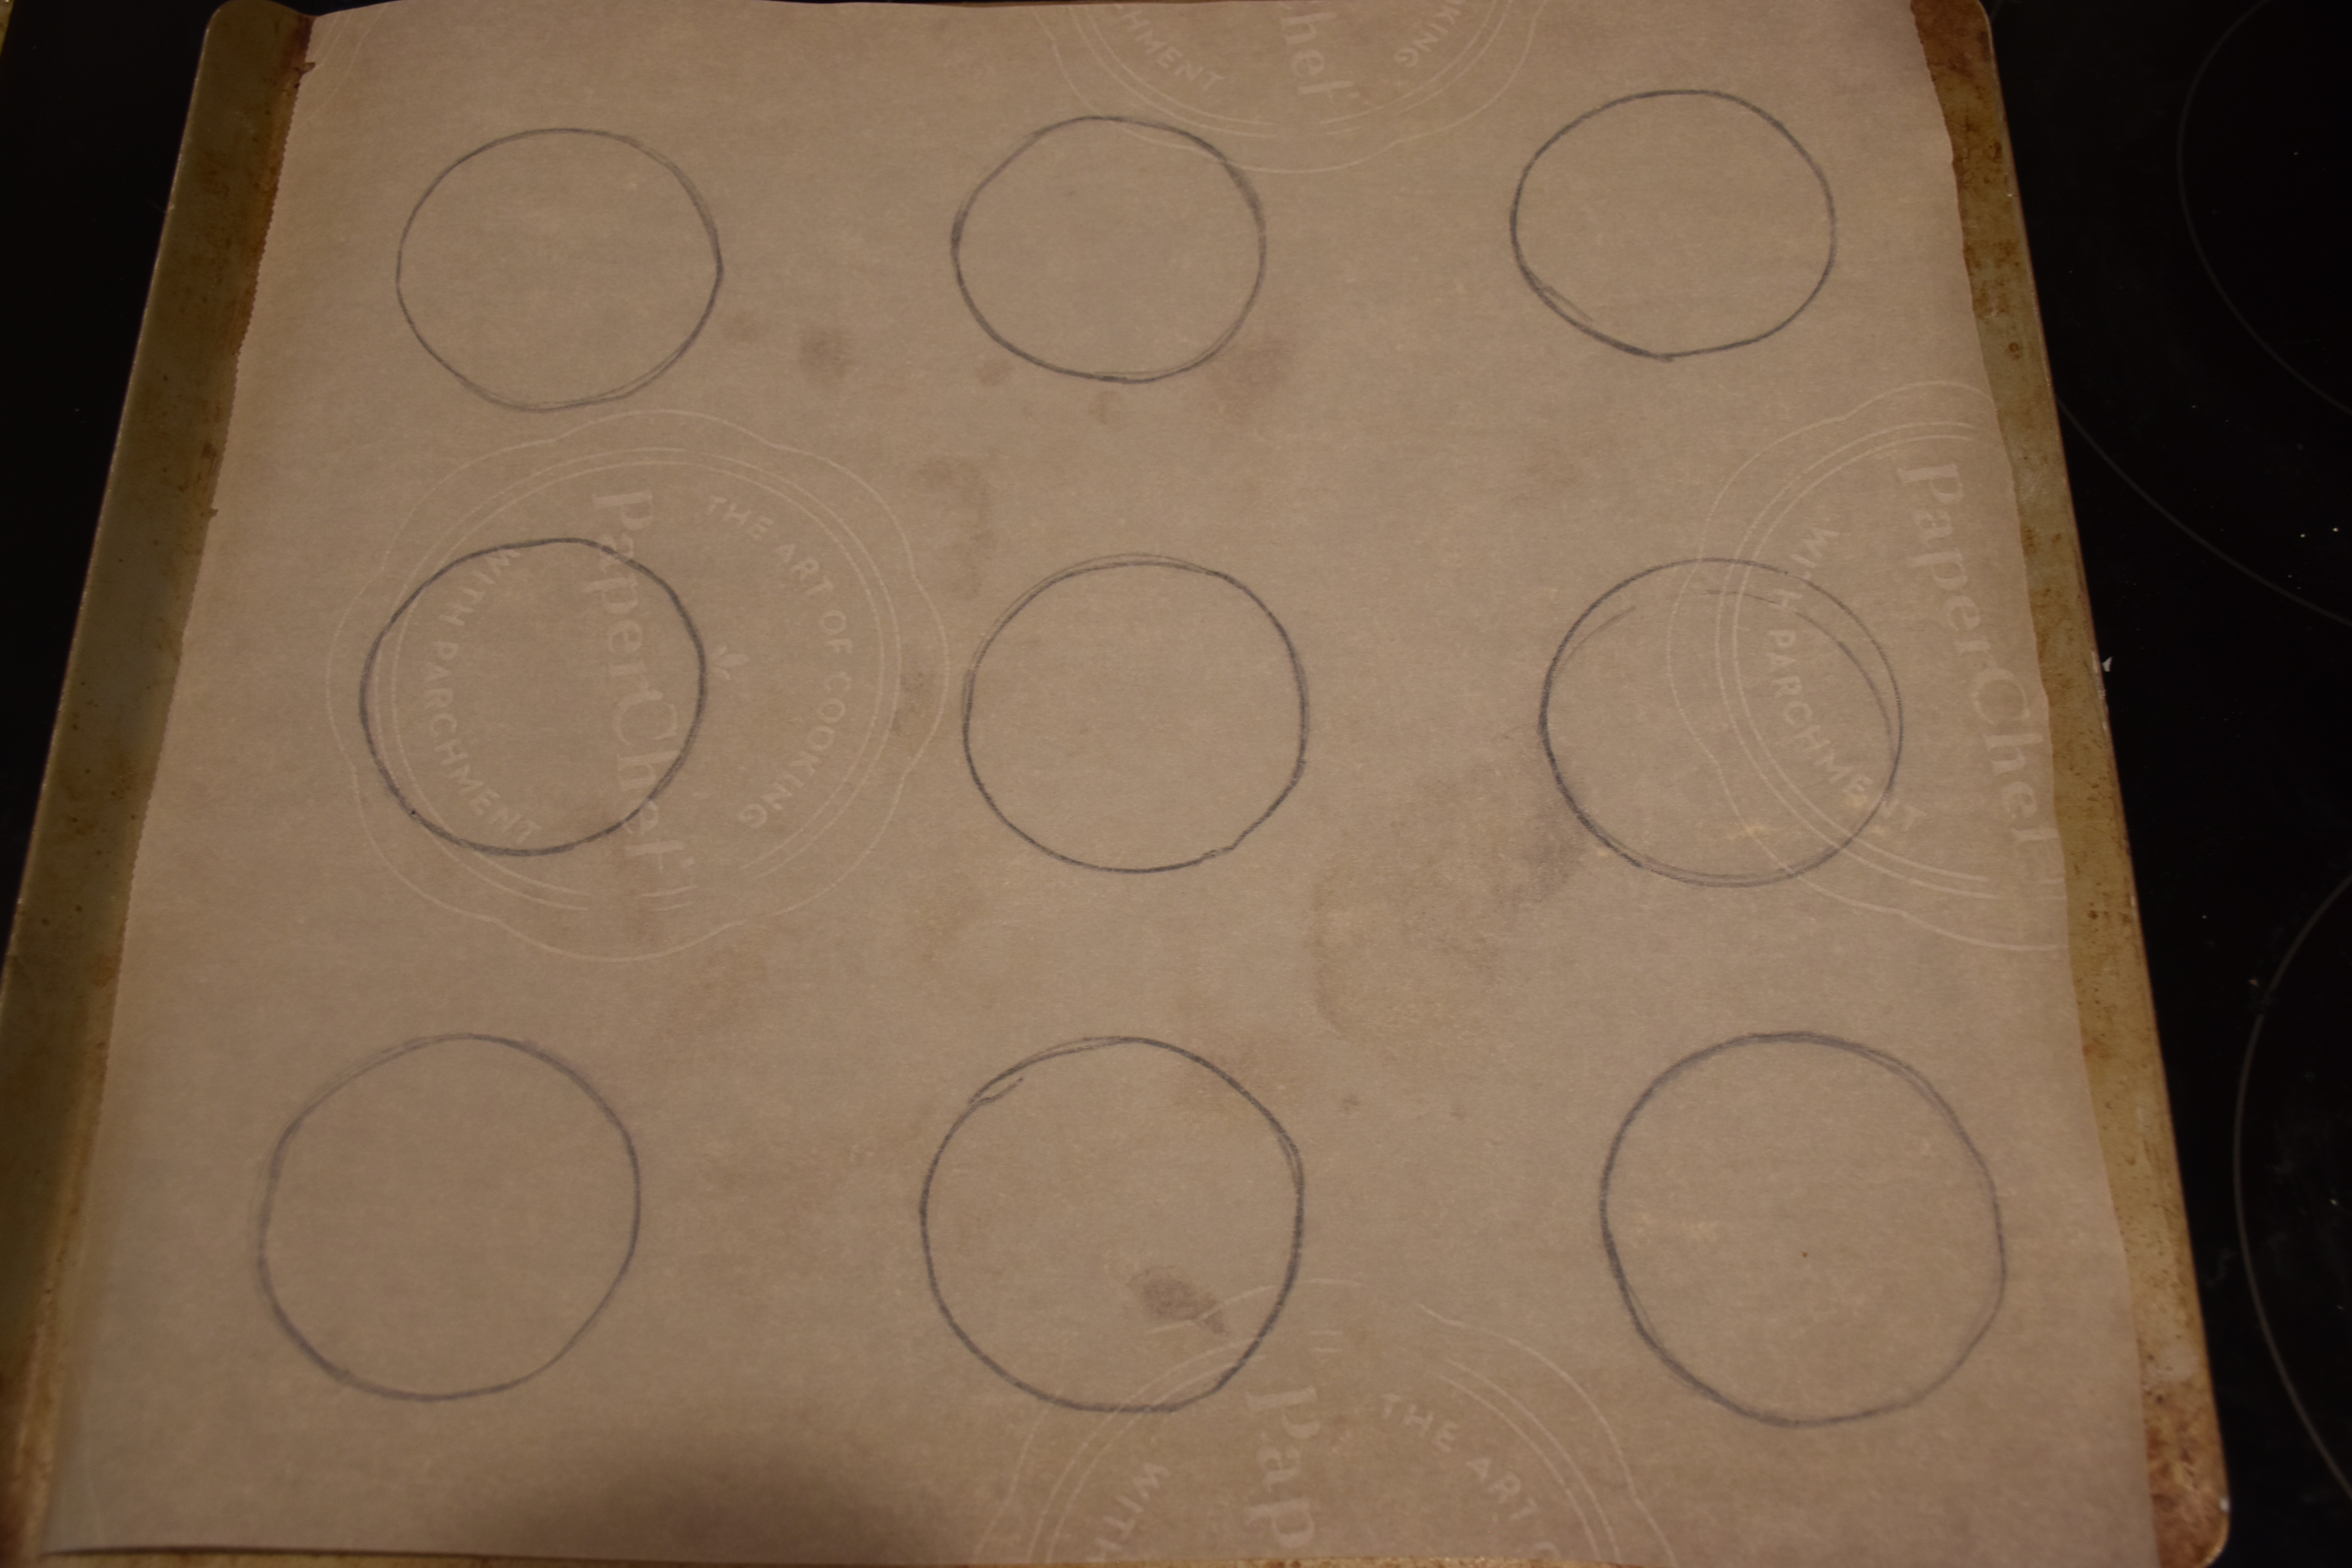
Here are the circles I traced on my parchment paper.
Next get you baking pans ready by creating parchment paper liners which will make it easy to remove your cookies from the baking sheet. I also traced some 2 1/2 inch circles on my baking sheet using the bottom of a standard baking powder tin as a guide. You don’t have to trace circles but I found it helpful so all my cookies were the same size. Then flip the side with your markings towards the baking sheet so the writing doesn’t touch the cookies.
Now you are ready to make your cookie batter. In medium bowl mix together your dry ingredients including your flour, cocoa, baking powder, baking soda and salt. Then in the bowl of your mixer fitted with a paddle attachment mix together your butter on medium speed until smooth. Then scrape down the sides of your bowl and add in your granulated sugar and beat on medium speed until it is light and fluffy.Then add in your eggs one at a time beating after each addition. Then add in your vanilla and sour cream. Then add half of your flour mixture and mix it until it is just incorporated and then mix in the rest of the flour. Finally add in your hot water and mix until just blended.
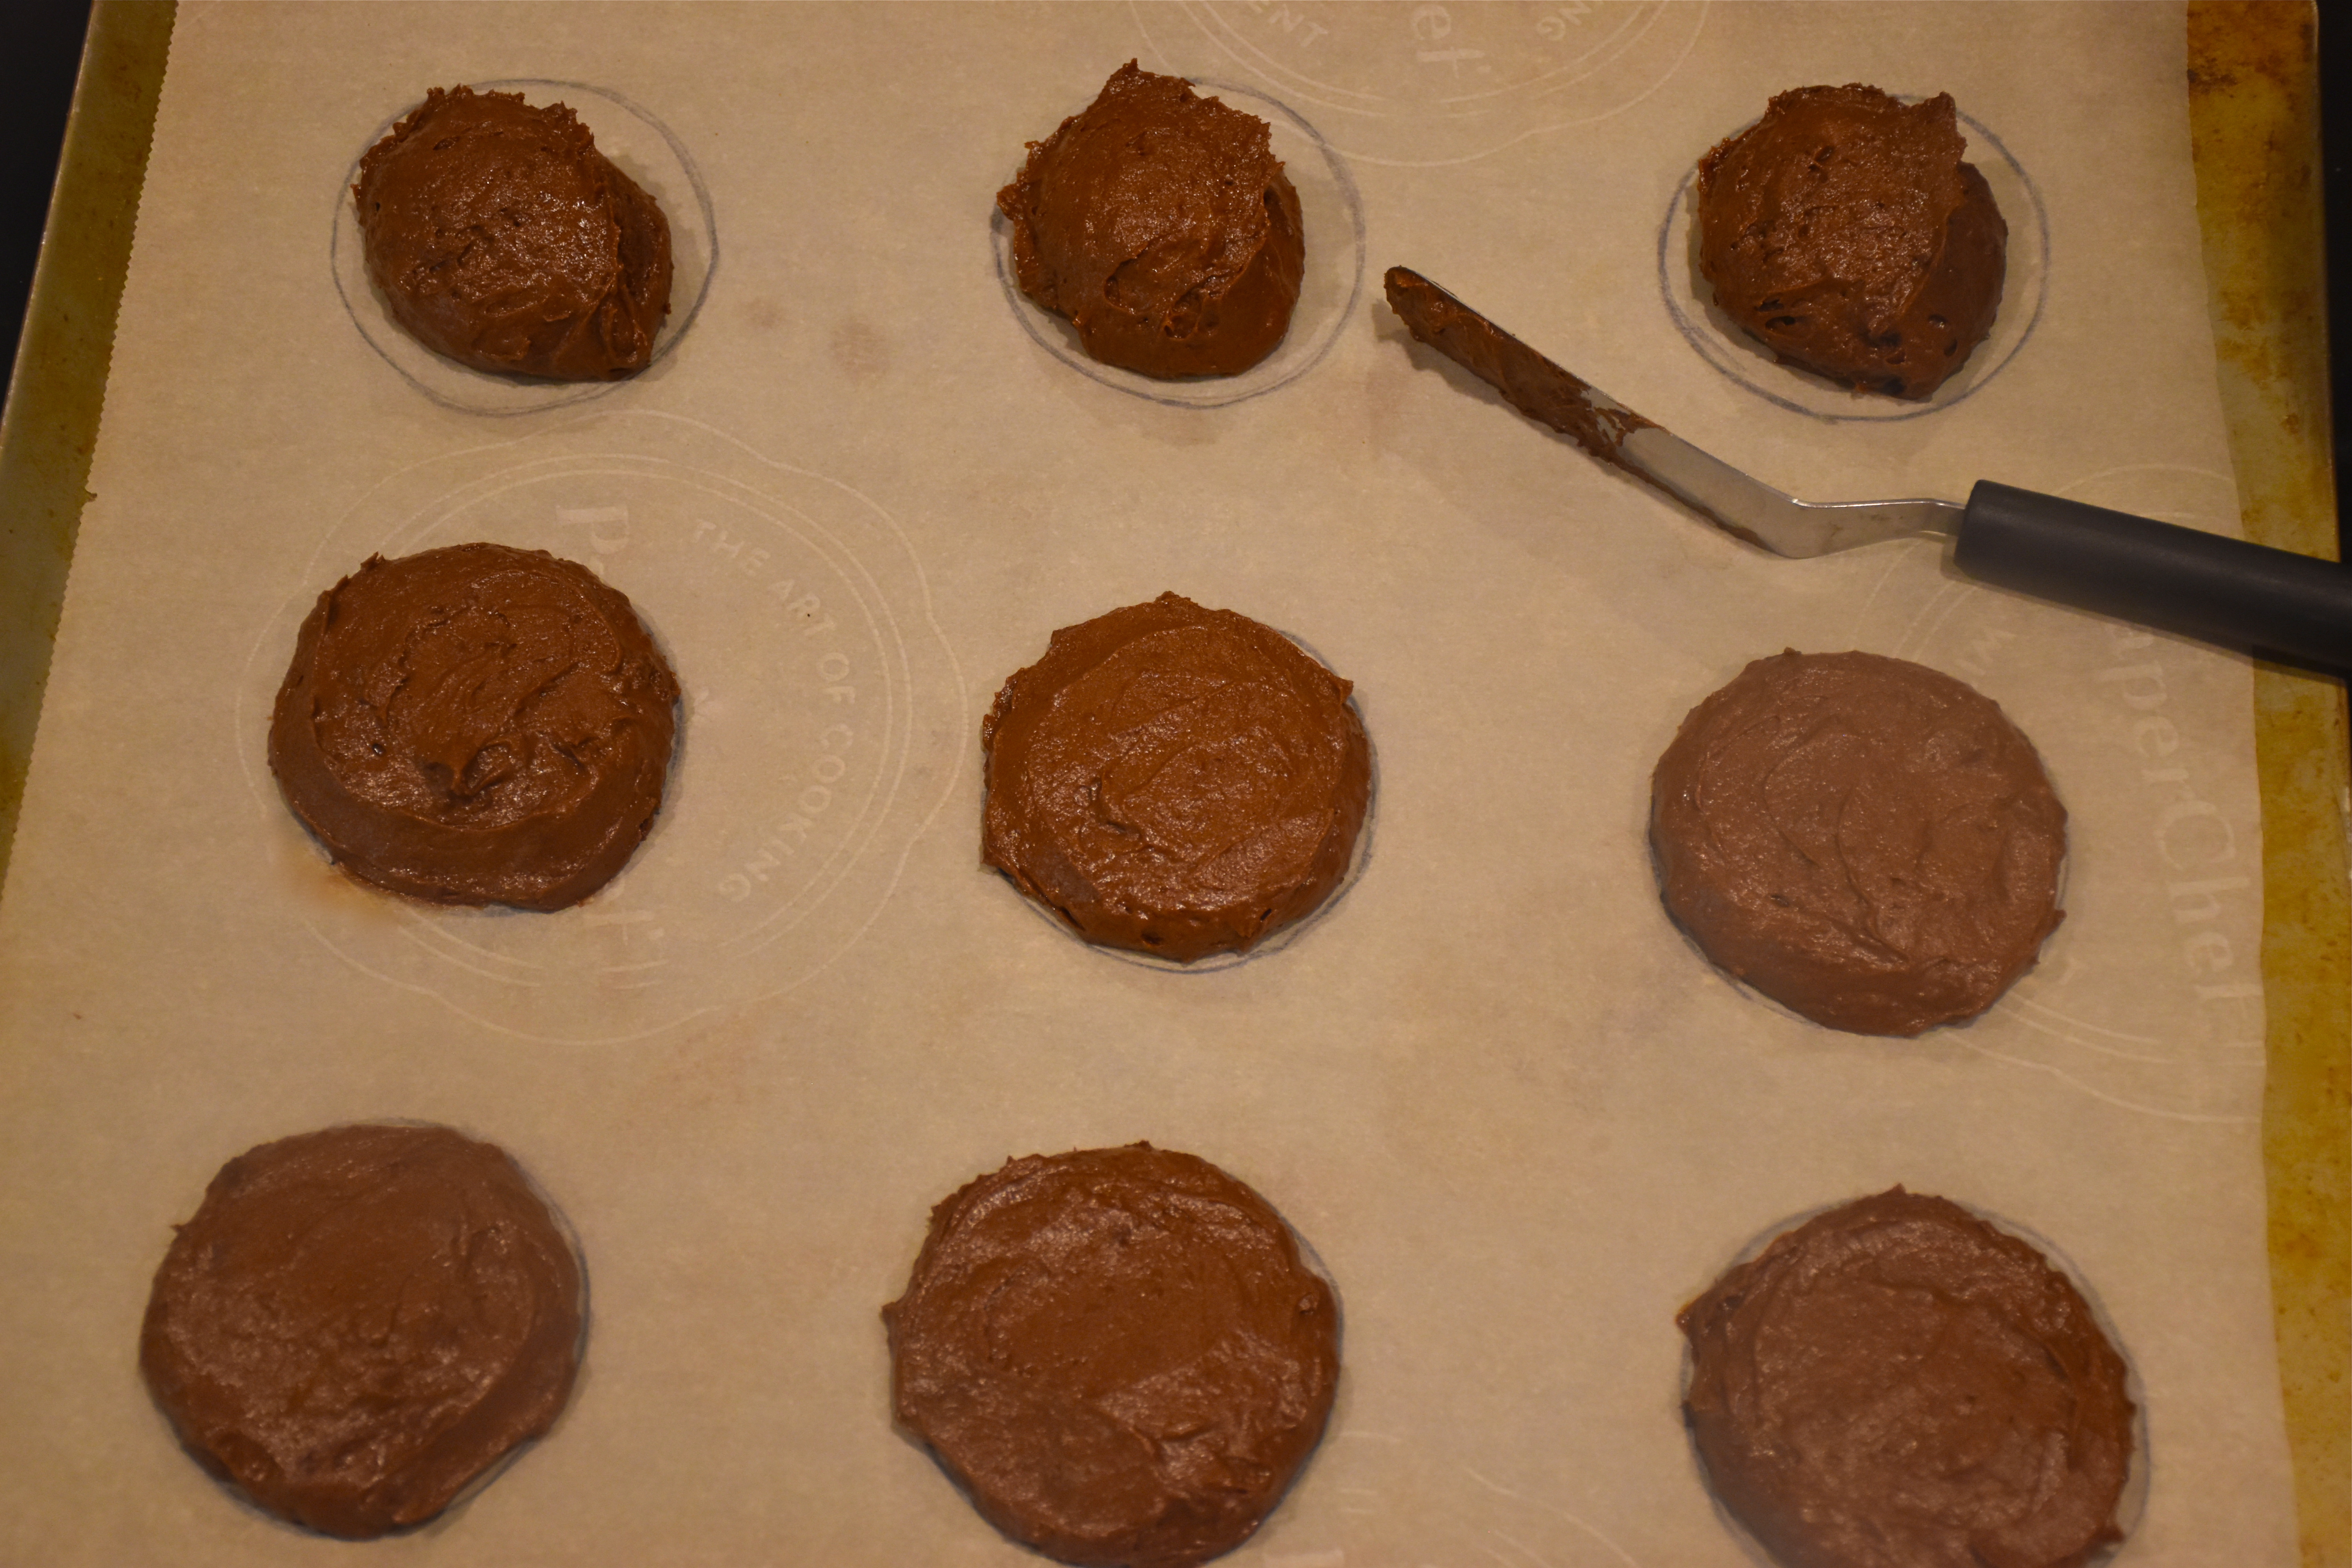
As you can see the batter will be like a thick cake batter.
Then make your cookies by dropping the batter onto each circle. I used an ice cream or cookie scoop that is 2 inches across or you could also measure two tablespoons of batter. Once your batter in on the parchment paper lined baking sheet use a separated spatula or table knife to spread you batter to evenly fill the 2 1/2 inch circle you drew.
Here are my cookies as I was spreading out the batter a just a bit. As you can see you want to leave a little room between your cookies because these will spread some.
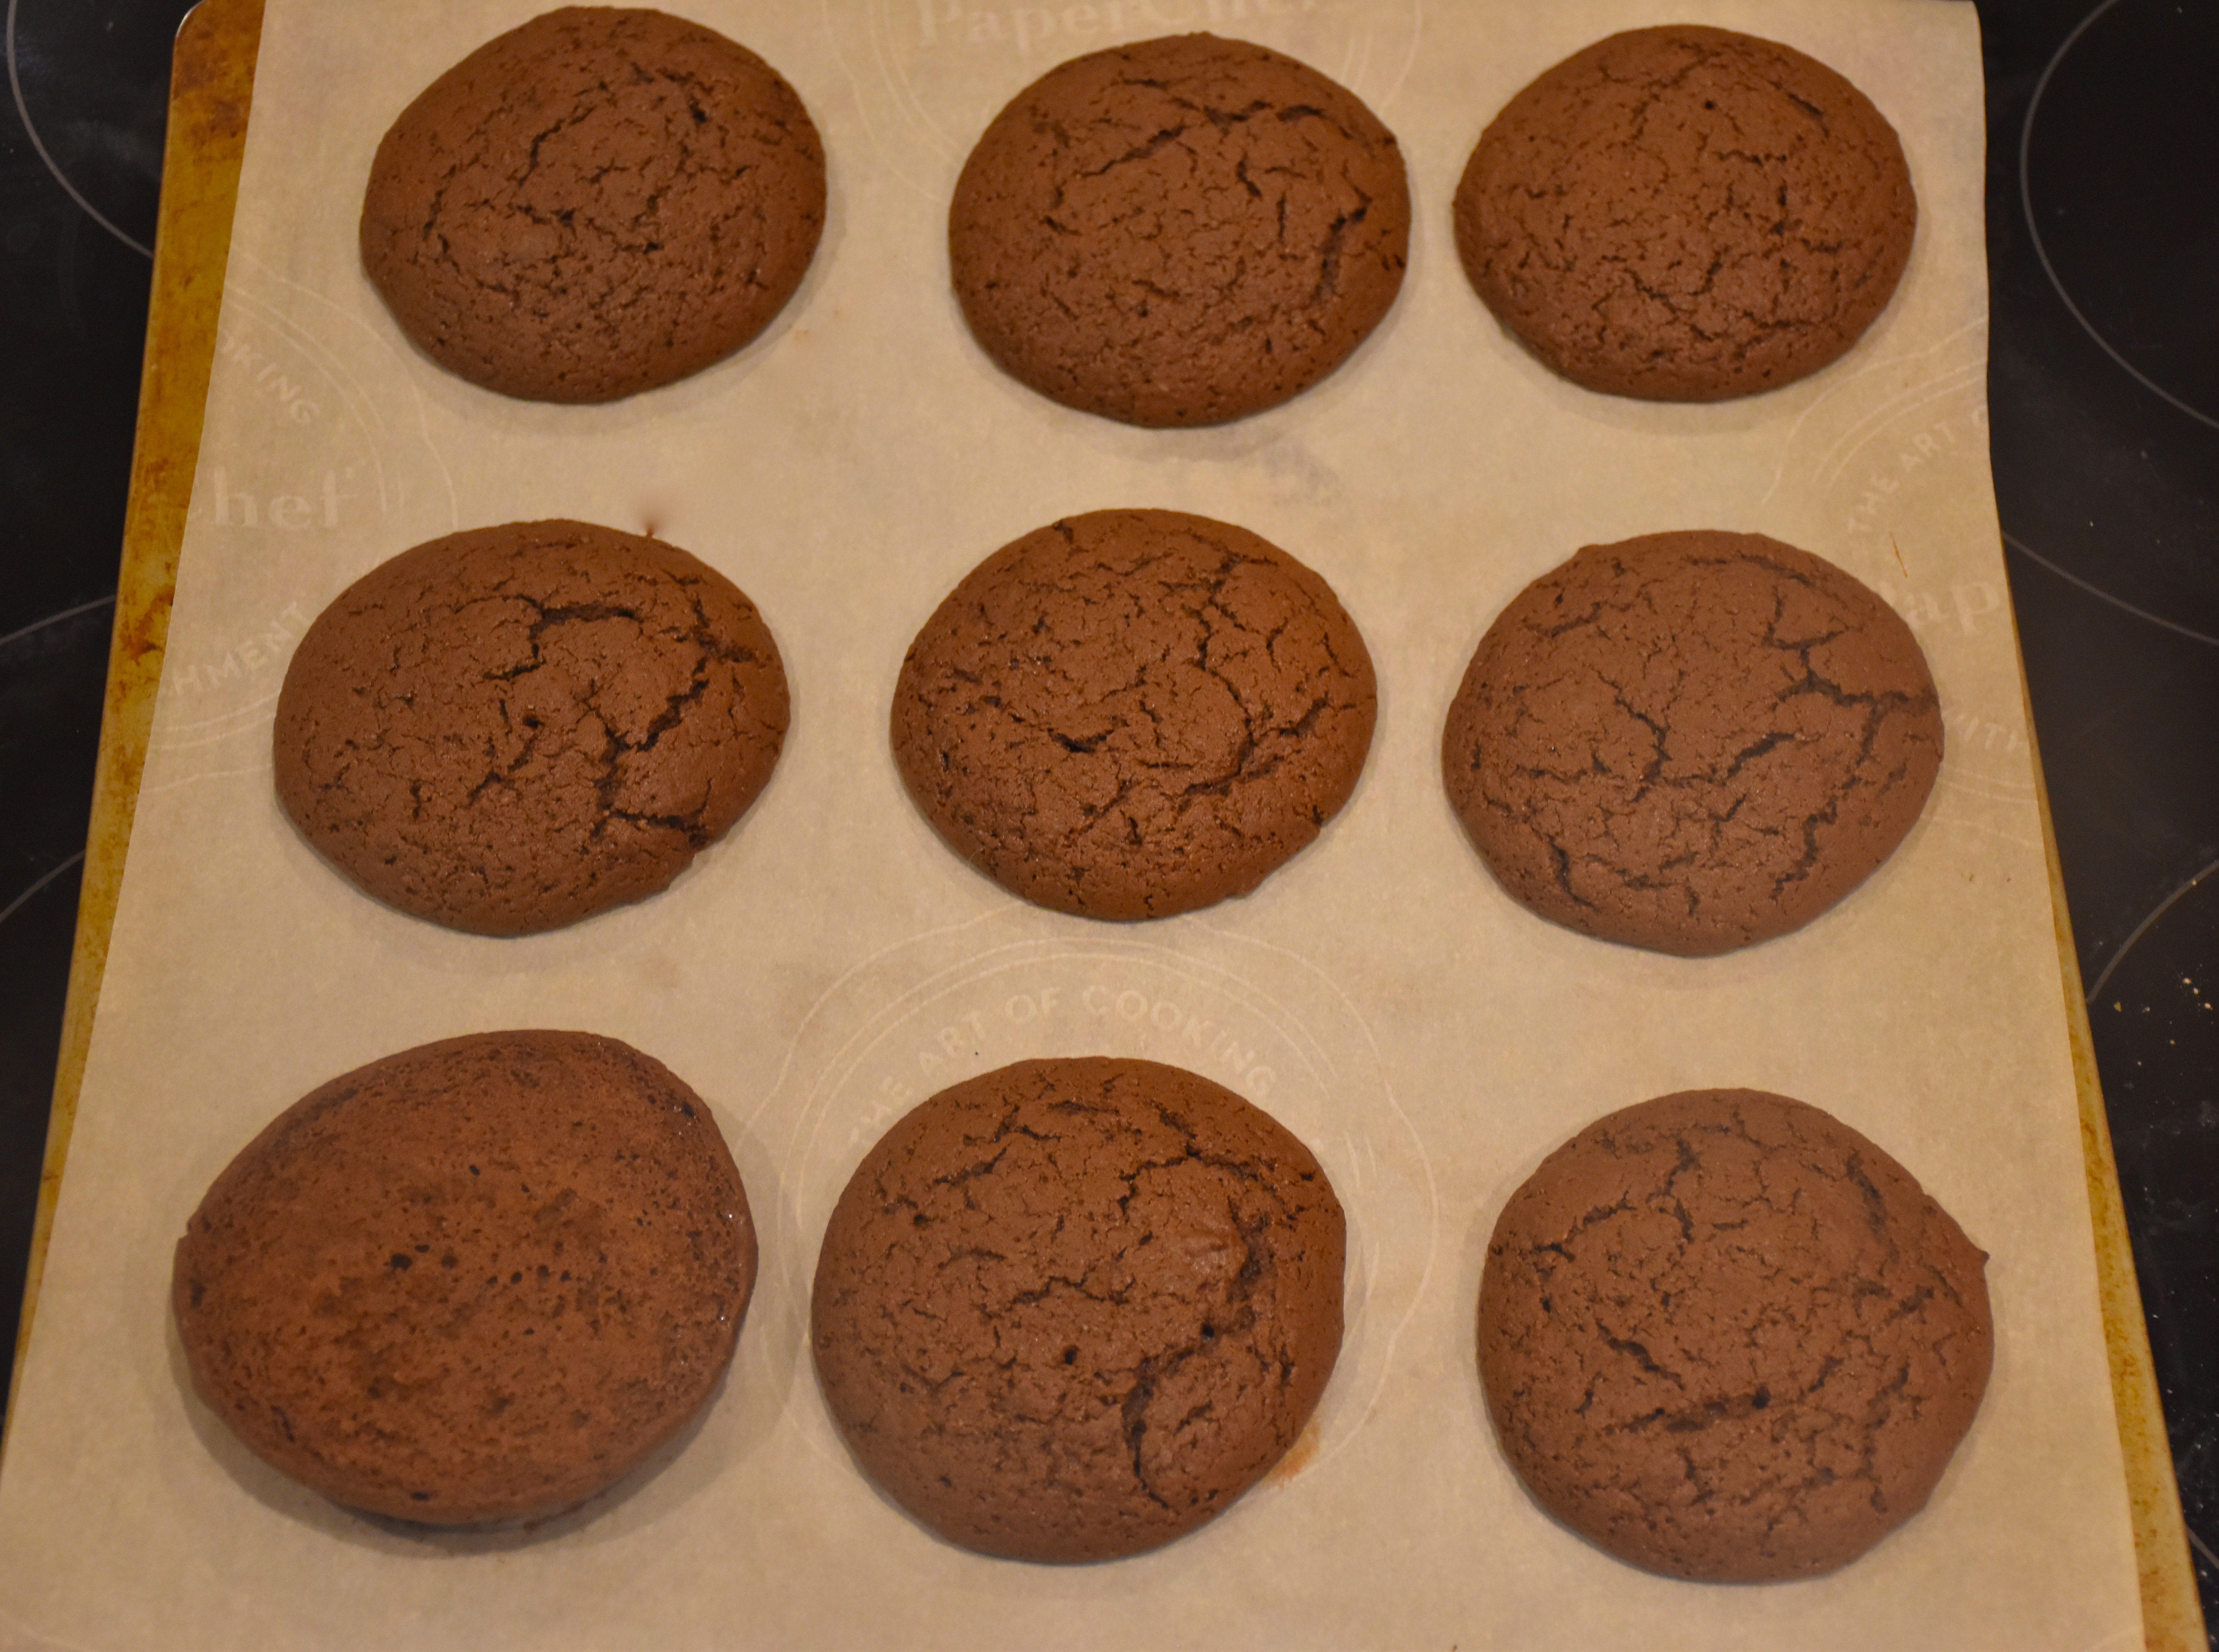
Then you are ready to bake your cookies. I like to bake one sheet at a time on the middle rack to make sure the heat is evenly distributed in my oven. Bake for 10 to 14 minutes. I found that my metal baking sheet baked in exactly 10 minutes but the batch I had on my baking stone took closer to 13 minutes. You can test your cookies by putting a toothpick in the center to make sure it comes out clean. Your cookies will puff of like little cupcake tops but the bottoms will be smooth.
Here you can see the cookies out of the oven. The parchment paper is great because the cookies won’t stick to it. You can see the bottom of this cookie I turned over is smooth.
Let your cookies cool before you frost them.
Meanwhile make your chocolate decorations. To make your penguin decorations you will need:
Penguin Decorations
1 1/2bars (6oz) of white chocolate, divided
Yellow gel food coloring
2 oz of semi-sweet chocolate
3 plastic pastry bags
parchment paper
To make your penguin faces you are going to want to melt 1 bar(4 oz) of white chocolate in a small microwave safe bowl. Heat for 1 minute then stir and heat for an additional 30 seconds and stir again. If it is not quite melted then heat for an addition 15 seconds.
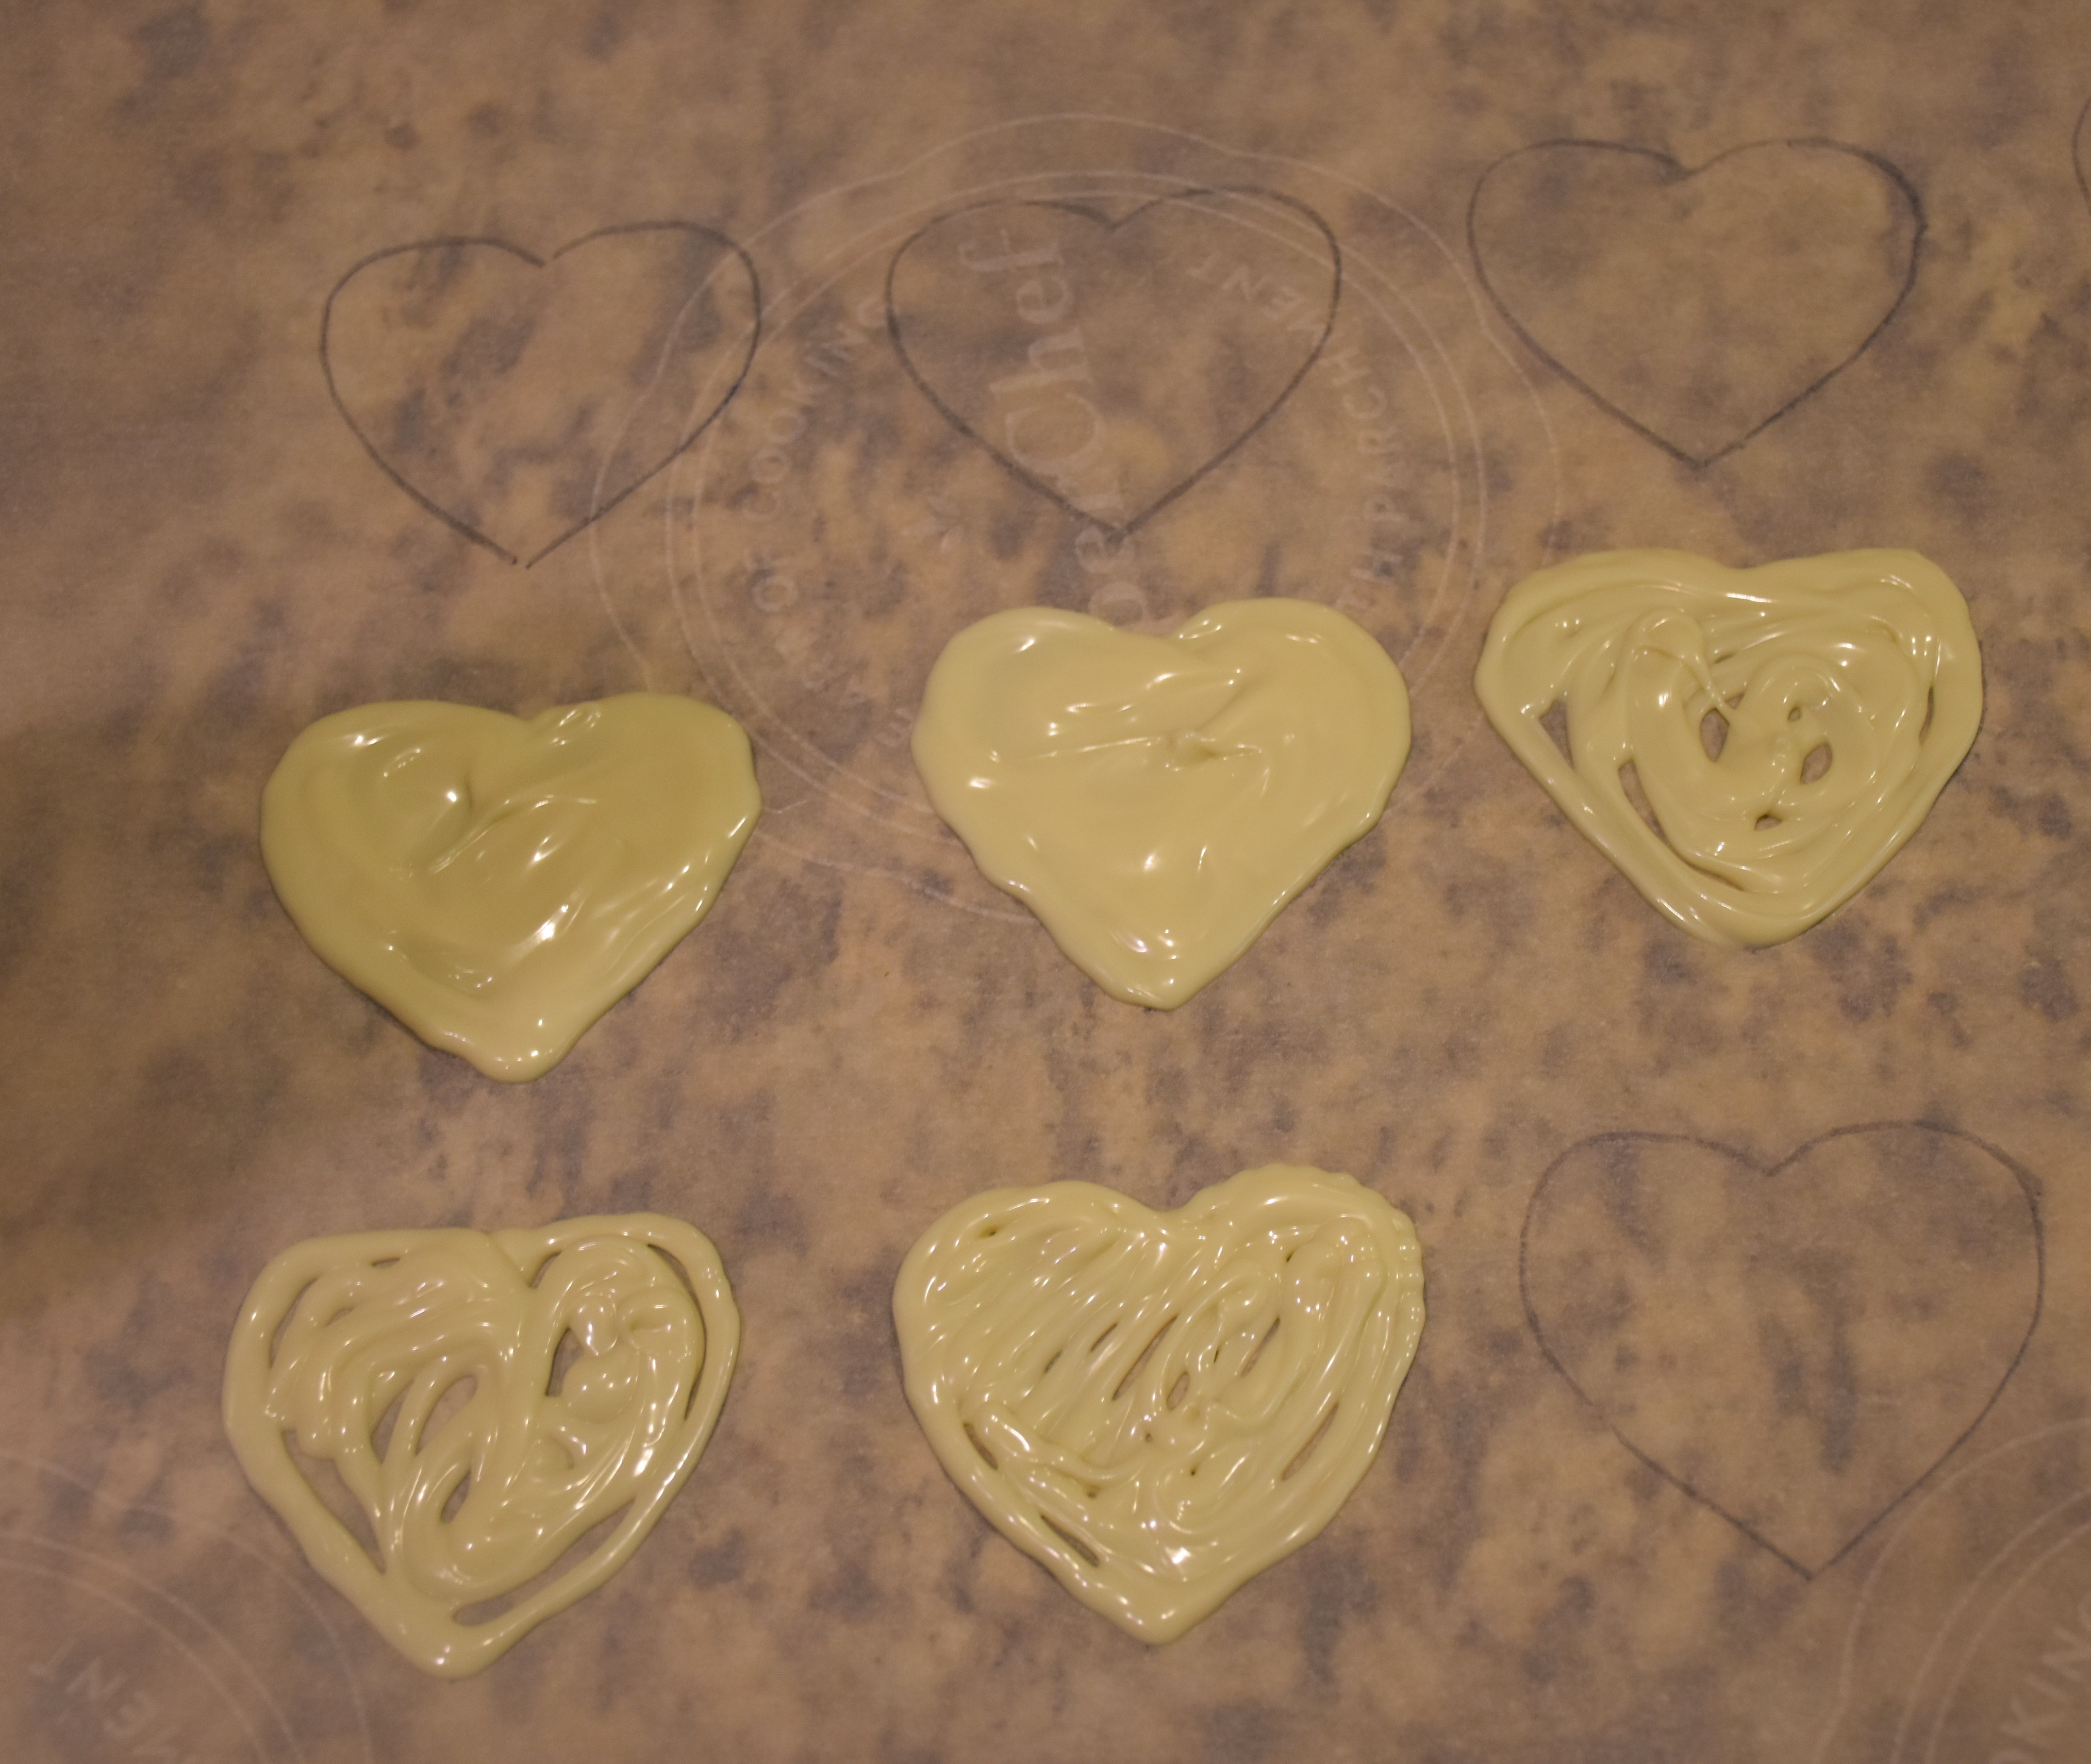
Now pour your white chocolate into your pastry bag and snip a small opening in the tip. Then I drew 16 two inch and a half inch hearts on my parchment paper and I took my melted chocolate and piped the outside borders of my heart and then I spread some chocolate in the center using a table or butter knife.
Here you can see some finished hearts and ones that I need to spread with my knife. Its just like coloring in a coloring book.
Then put your hearts in the fridge to firm up for 7 to 10 minutes. Meanwhile get your yellow colored chocolate ready to make a beak and feet. Melt the remaining 2 oz of chocolate in your microwave bowl for a minute then stir and if needed heat for an addition 30 seconds. Then add in a few drops of your yellow food coloring and stir until it is evenly colored. Then pour that chocolate in another pastry bag. This time I used a round writing tip but if you don’t have one you could still cut a small hole in the tip.
Melted chocolate is easy to draw with so all of these steps will go quickly.
Now pour your yellow chocolate into your pastry bag and snip a small opening in the tip. Then take your hearts out of the fridge and flip your white chocolate hearts over to the smooth backside. Then take your yellow chocolate and pipe a small heart shaped beak and two feet for each cookie.
Then to make eyes melt 2 oz of semi-sweet chocolate following the same technique and pour it in a pastry bag and draw two little eyes which look like an upside-down rainbow or U shape.
Then put your chocolate faces in the fridge until you are ready to frost your cookies.
Chocolate Ganache
5 oz of semi sweet chocolate
1 tablespoon of butter
1/4 cup whipping cream
In a small microwave safe bowl mix together your chocolate and butter and melt for one minute and stir and then for an addition 30 seconds and then a additional 15 seconds until it is melted. Then stir in your room temperature cream and you will have a thick and glossy chocolate ganache to spread on the tops of each of your cookies.
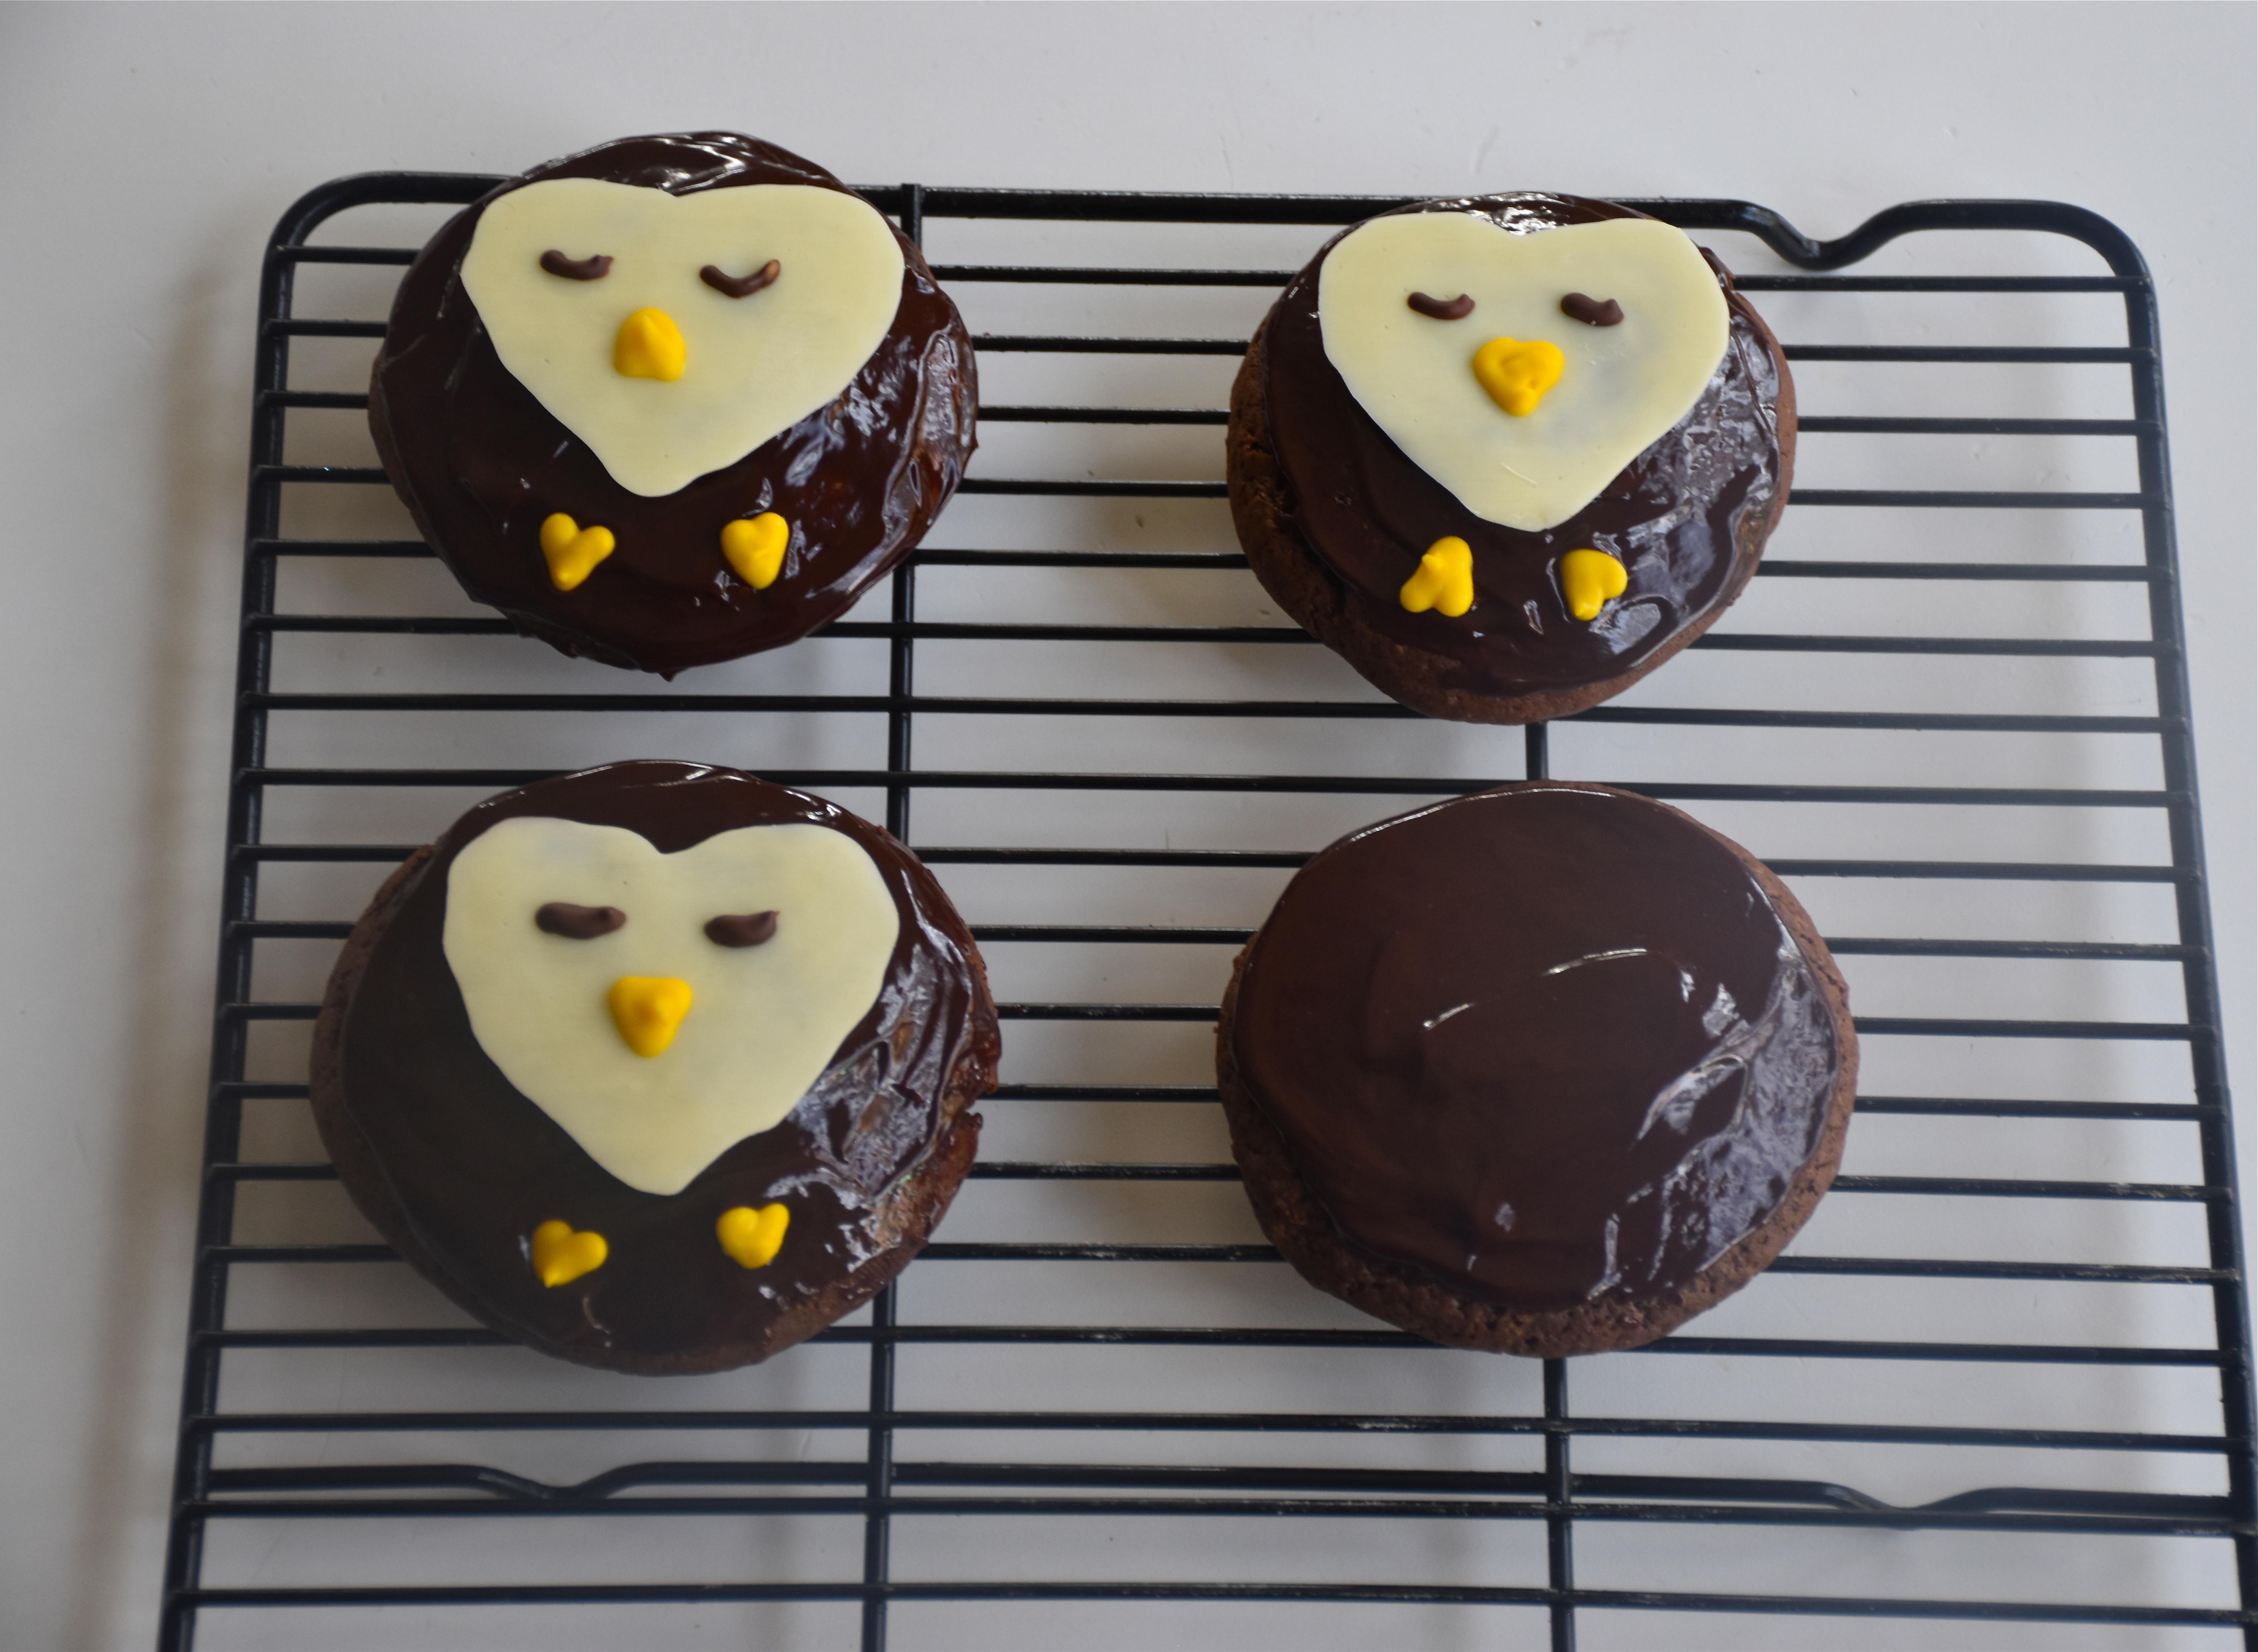
Use a separated spatula or table knife to spread you chocolate ganache on each cookie. Then while the ganache is still soft place on your white chocolate face and feet.
Place your cookies on a tray in your fridge and let the chocolate firm up a bit. There you have it Penguin black and white cookies. They are every bit as delicious as they are cute. Just like penguins these cookies are best kept stored in the cold of your fridge. Happy holiday baking!
So the tradition continues, after a four year break I am back baking gingerbread houses once more. This time I have a new pastry team which made it memorable and fun. Since preschoolers and patience don’t tend to go hand in hand, I decided to make a set of smaller houses so each of my daughters could work on their own little project. The smaller size also made it easier for them to decorate. We were able to finish the whole project in an afternoon and my girls enjoyed helping all along, from baking the gingerbread to decorating. Until now I have been a bit of a gingerbread purist, who wanted everything about the house to be completely edible. However little ones have a hard time waiting for royal icing to set and I didn’t want to use a potentially dangerous hot sugar syrup, which is another quick way to assemble the structure of your house. So I opted for the less edible, but quick and stable technique of using whipping cream cartons and hot glue.
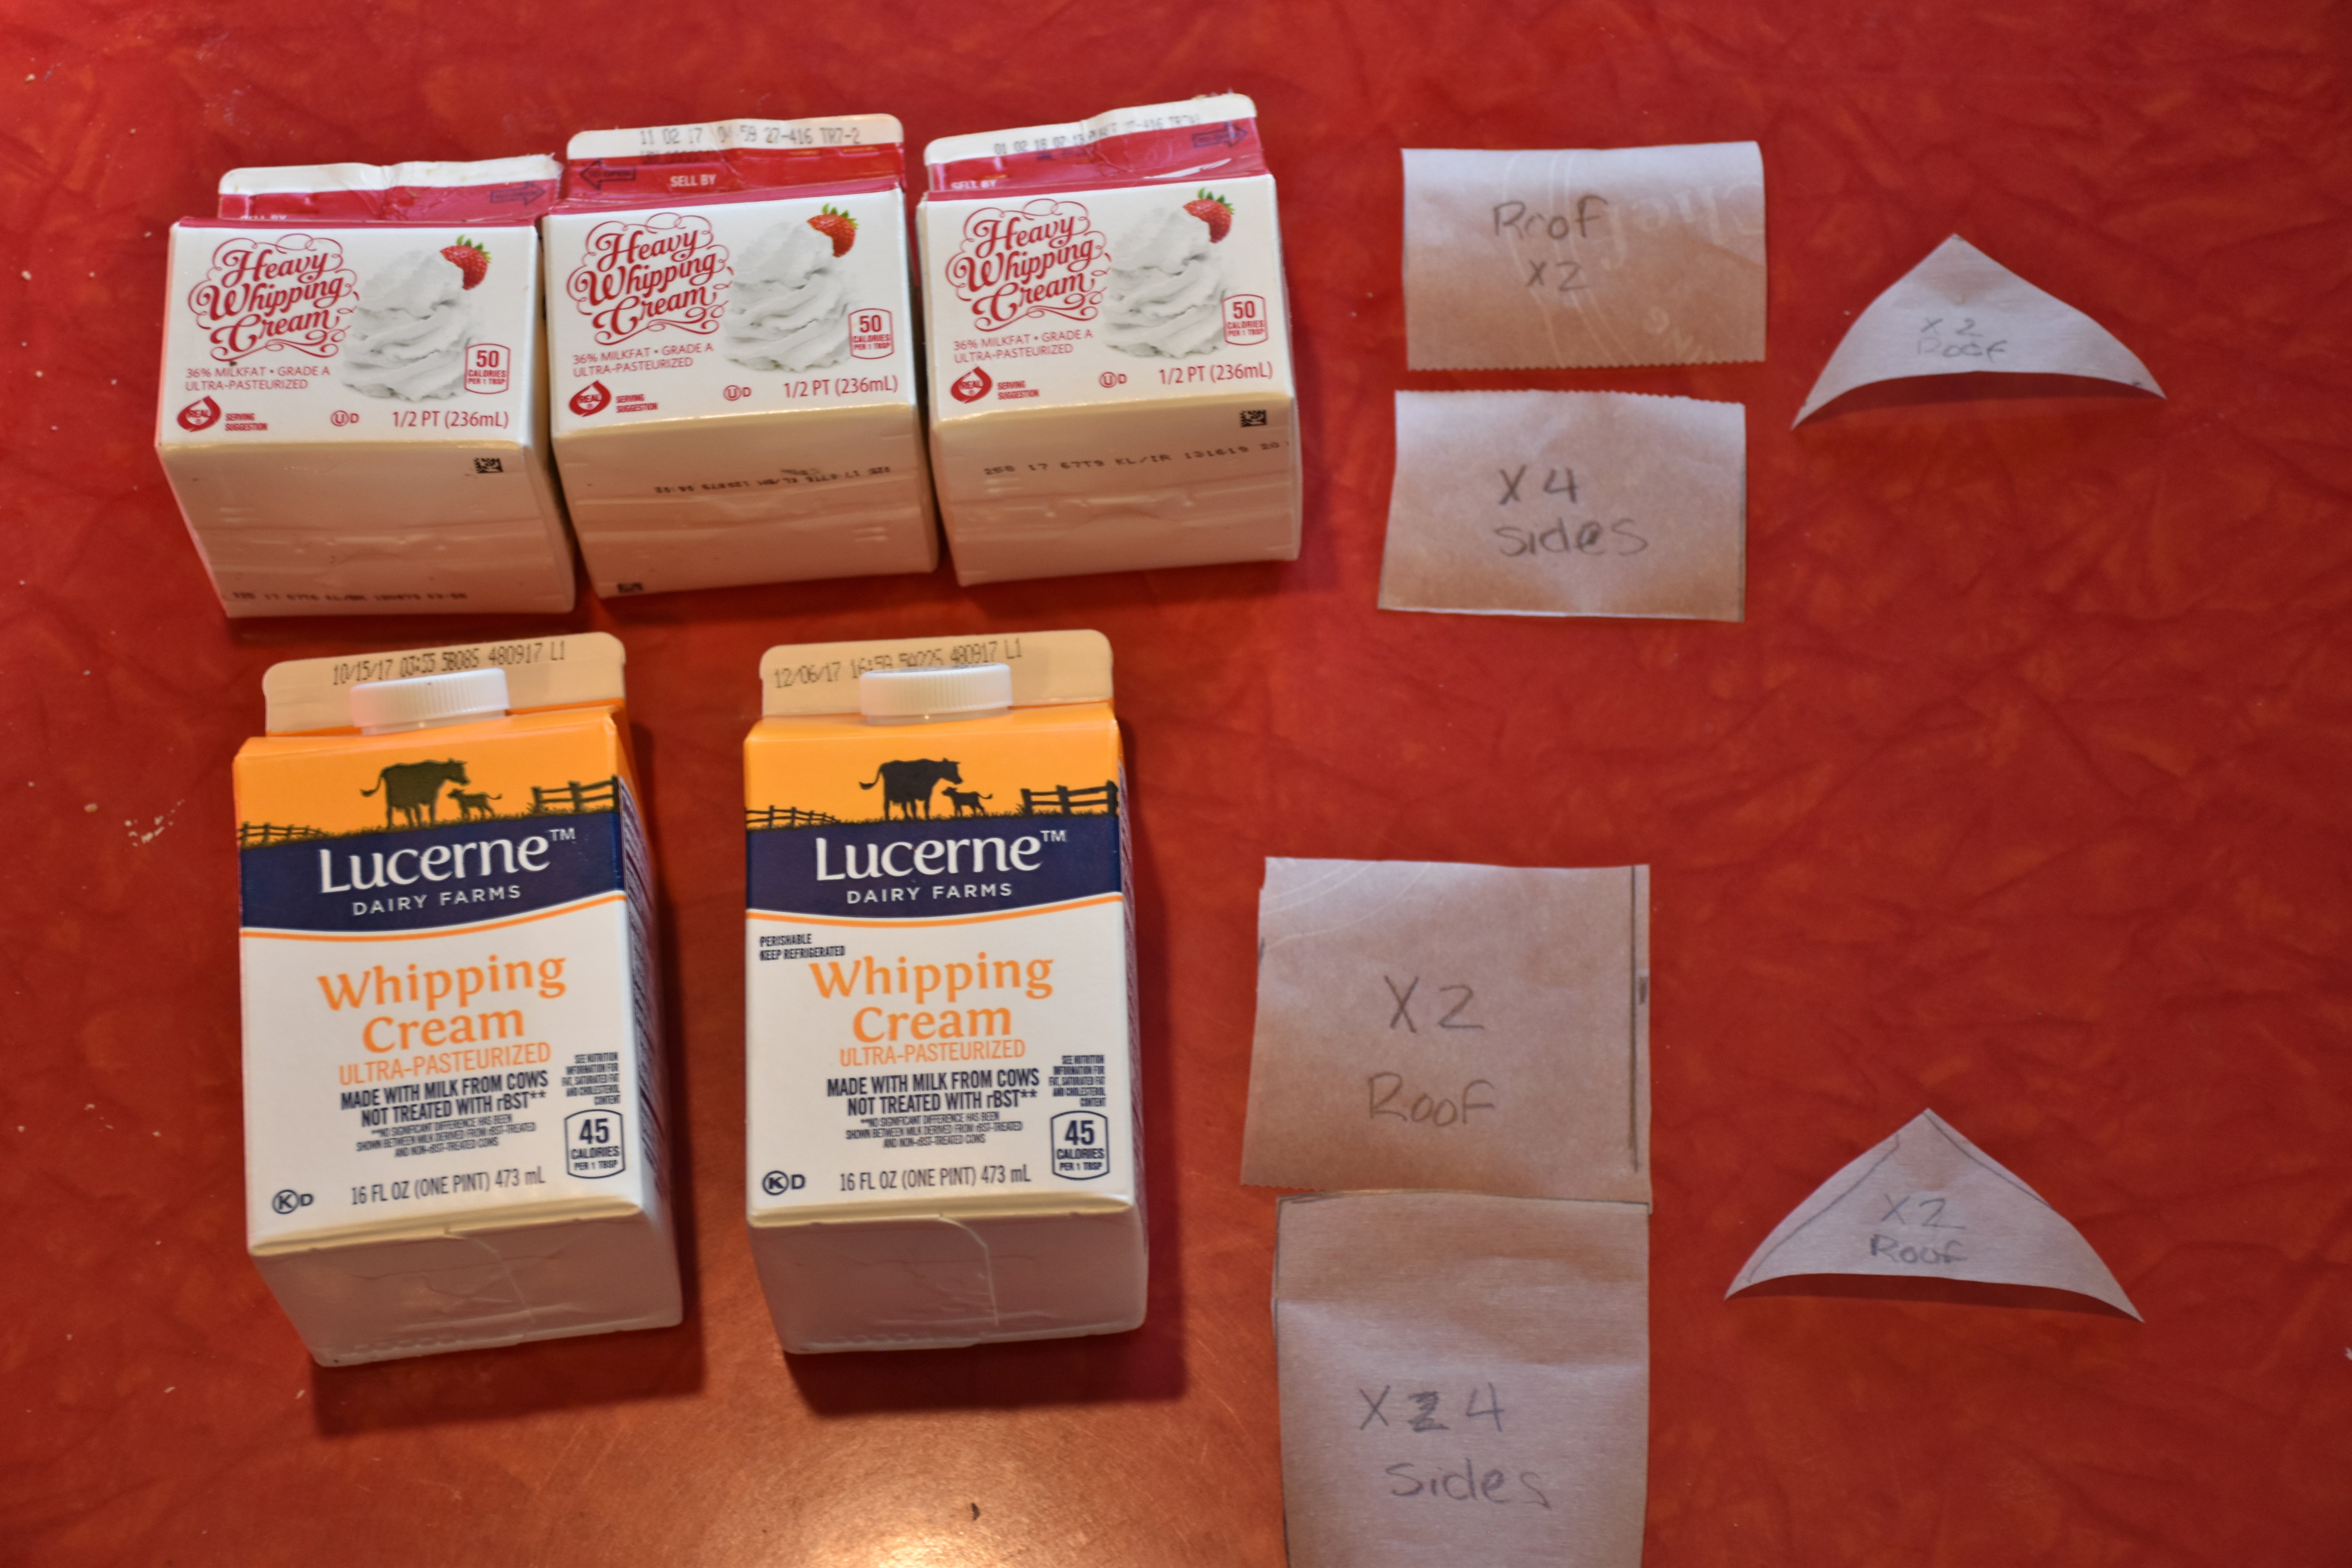
I was planning ahead and I saved up some cartons to use as the base of our houses.
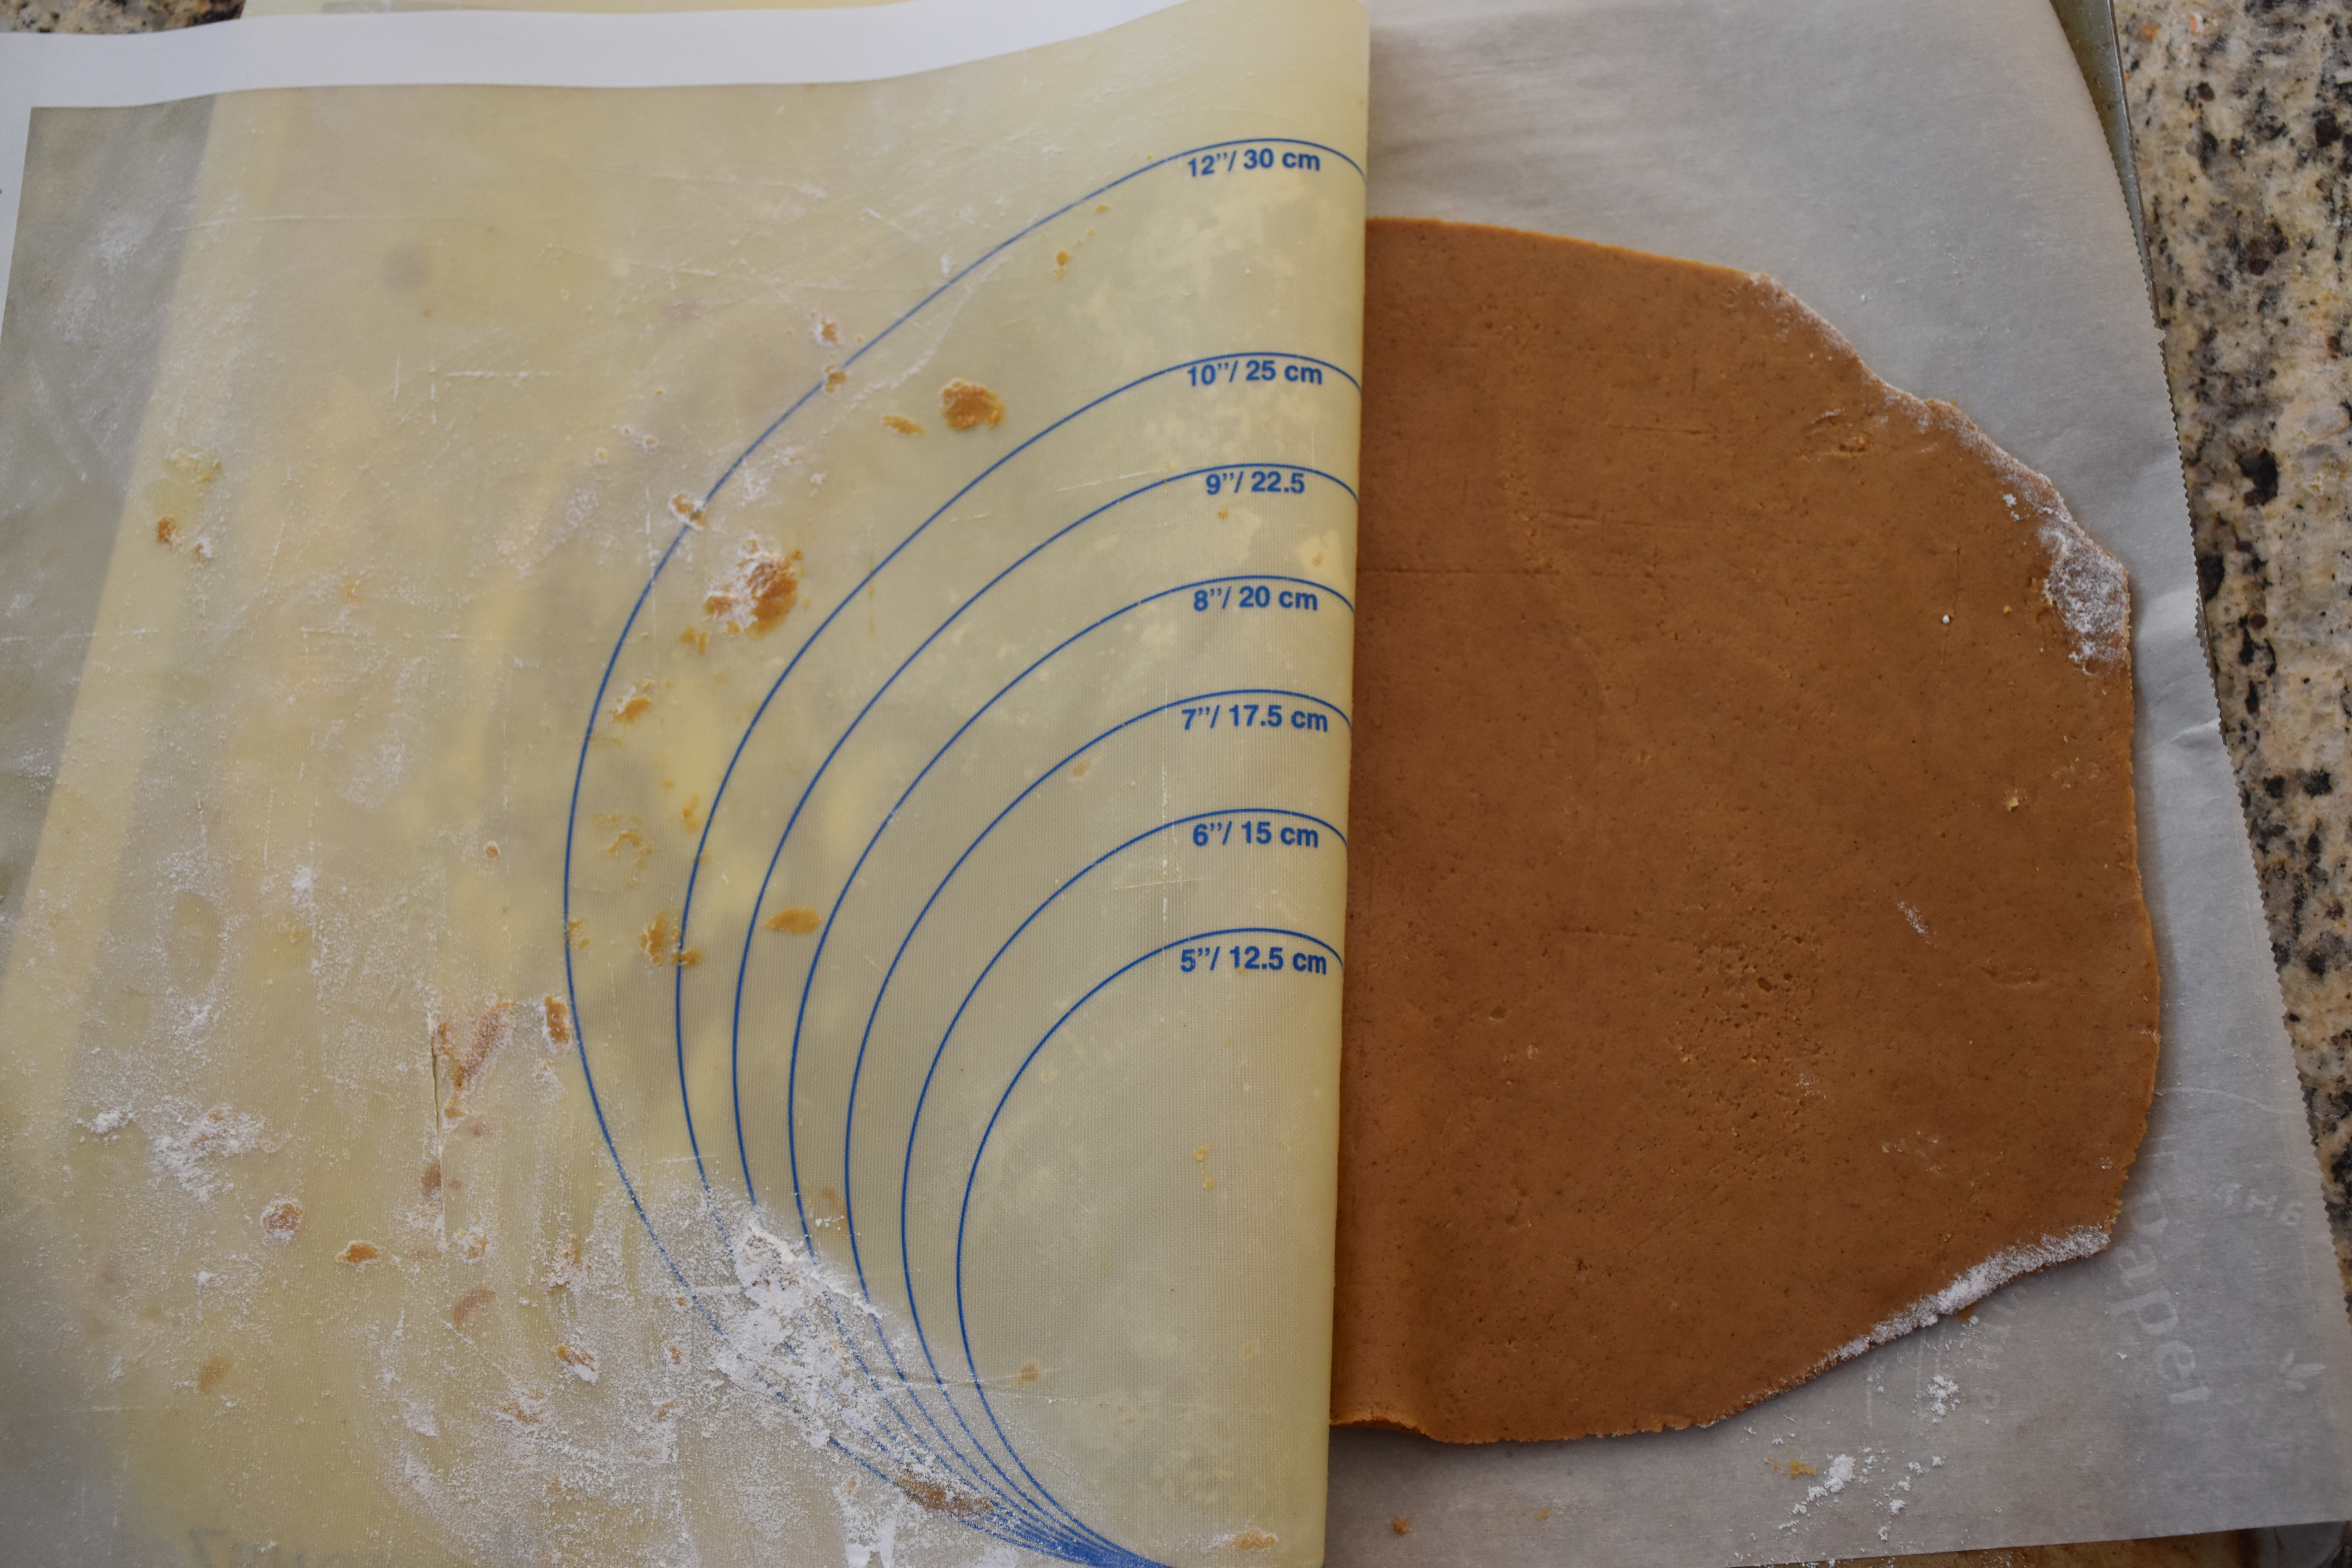
The key to any gingerbread project is to spend a little time planing the architecture of your structure. I have learned through experience that making a paper or cardboard pattern is key. You want your walls to be straight and uniform in size especially when you have to balance a slanted roof on top of them. When I was planning this project I measured the sides of my carton and I cut my patterns out of parchment paper. I also marked on each template the number of times I needed to use it to cut out the appropriate number of pieces for my house. This method helps keep things organized when you are cutting the gingerbread. Gingerbread will shrink some when baking and that can cause even the most precisely cut edges to become uneven. As a result, I bake large sheets of gingerbread and then I make my cuts using my templates while it is still warm. This method results in the best structure, but you have to work quickly so it is important to have things organized ahead of time.
Once you plan your project it’s time to get baking. My favorite construction gingerbread started from a recipe that came from a Southern Living. Years ago they featured a gingerbread contest winner and she shared her recipe. The recipe made an enormous quantity that would not work in a standard mixer so I have adapted the recipe for use at home. One batch was enough for me to make five small houses.
Construction Gingerbread
1 cup molasses
1 cup honey
1 cup canola oil
3 eggs
1 cup sugar
7 and 1/2 teaspoons baking powder (which is also equivalent to 2 Tablespoons plus 1 and 1/2 teaspoons)
4 and 1/2 teaspoons ground ginger
1 tablespoon cinnamon
2 teaspoons allspice
1 teaspoon cloves
1 (2.5 lb) bag of flour, plus one additional cup
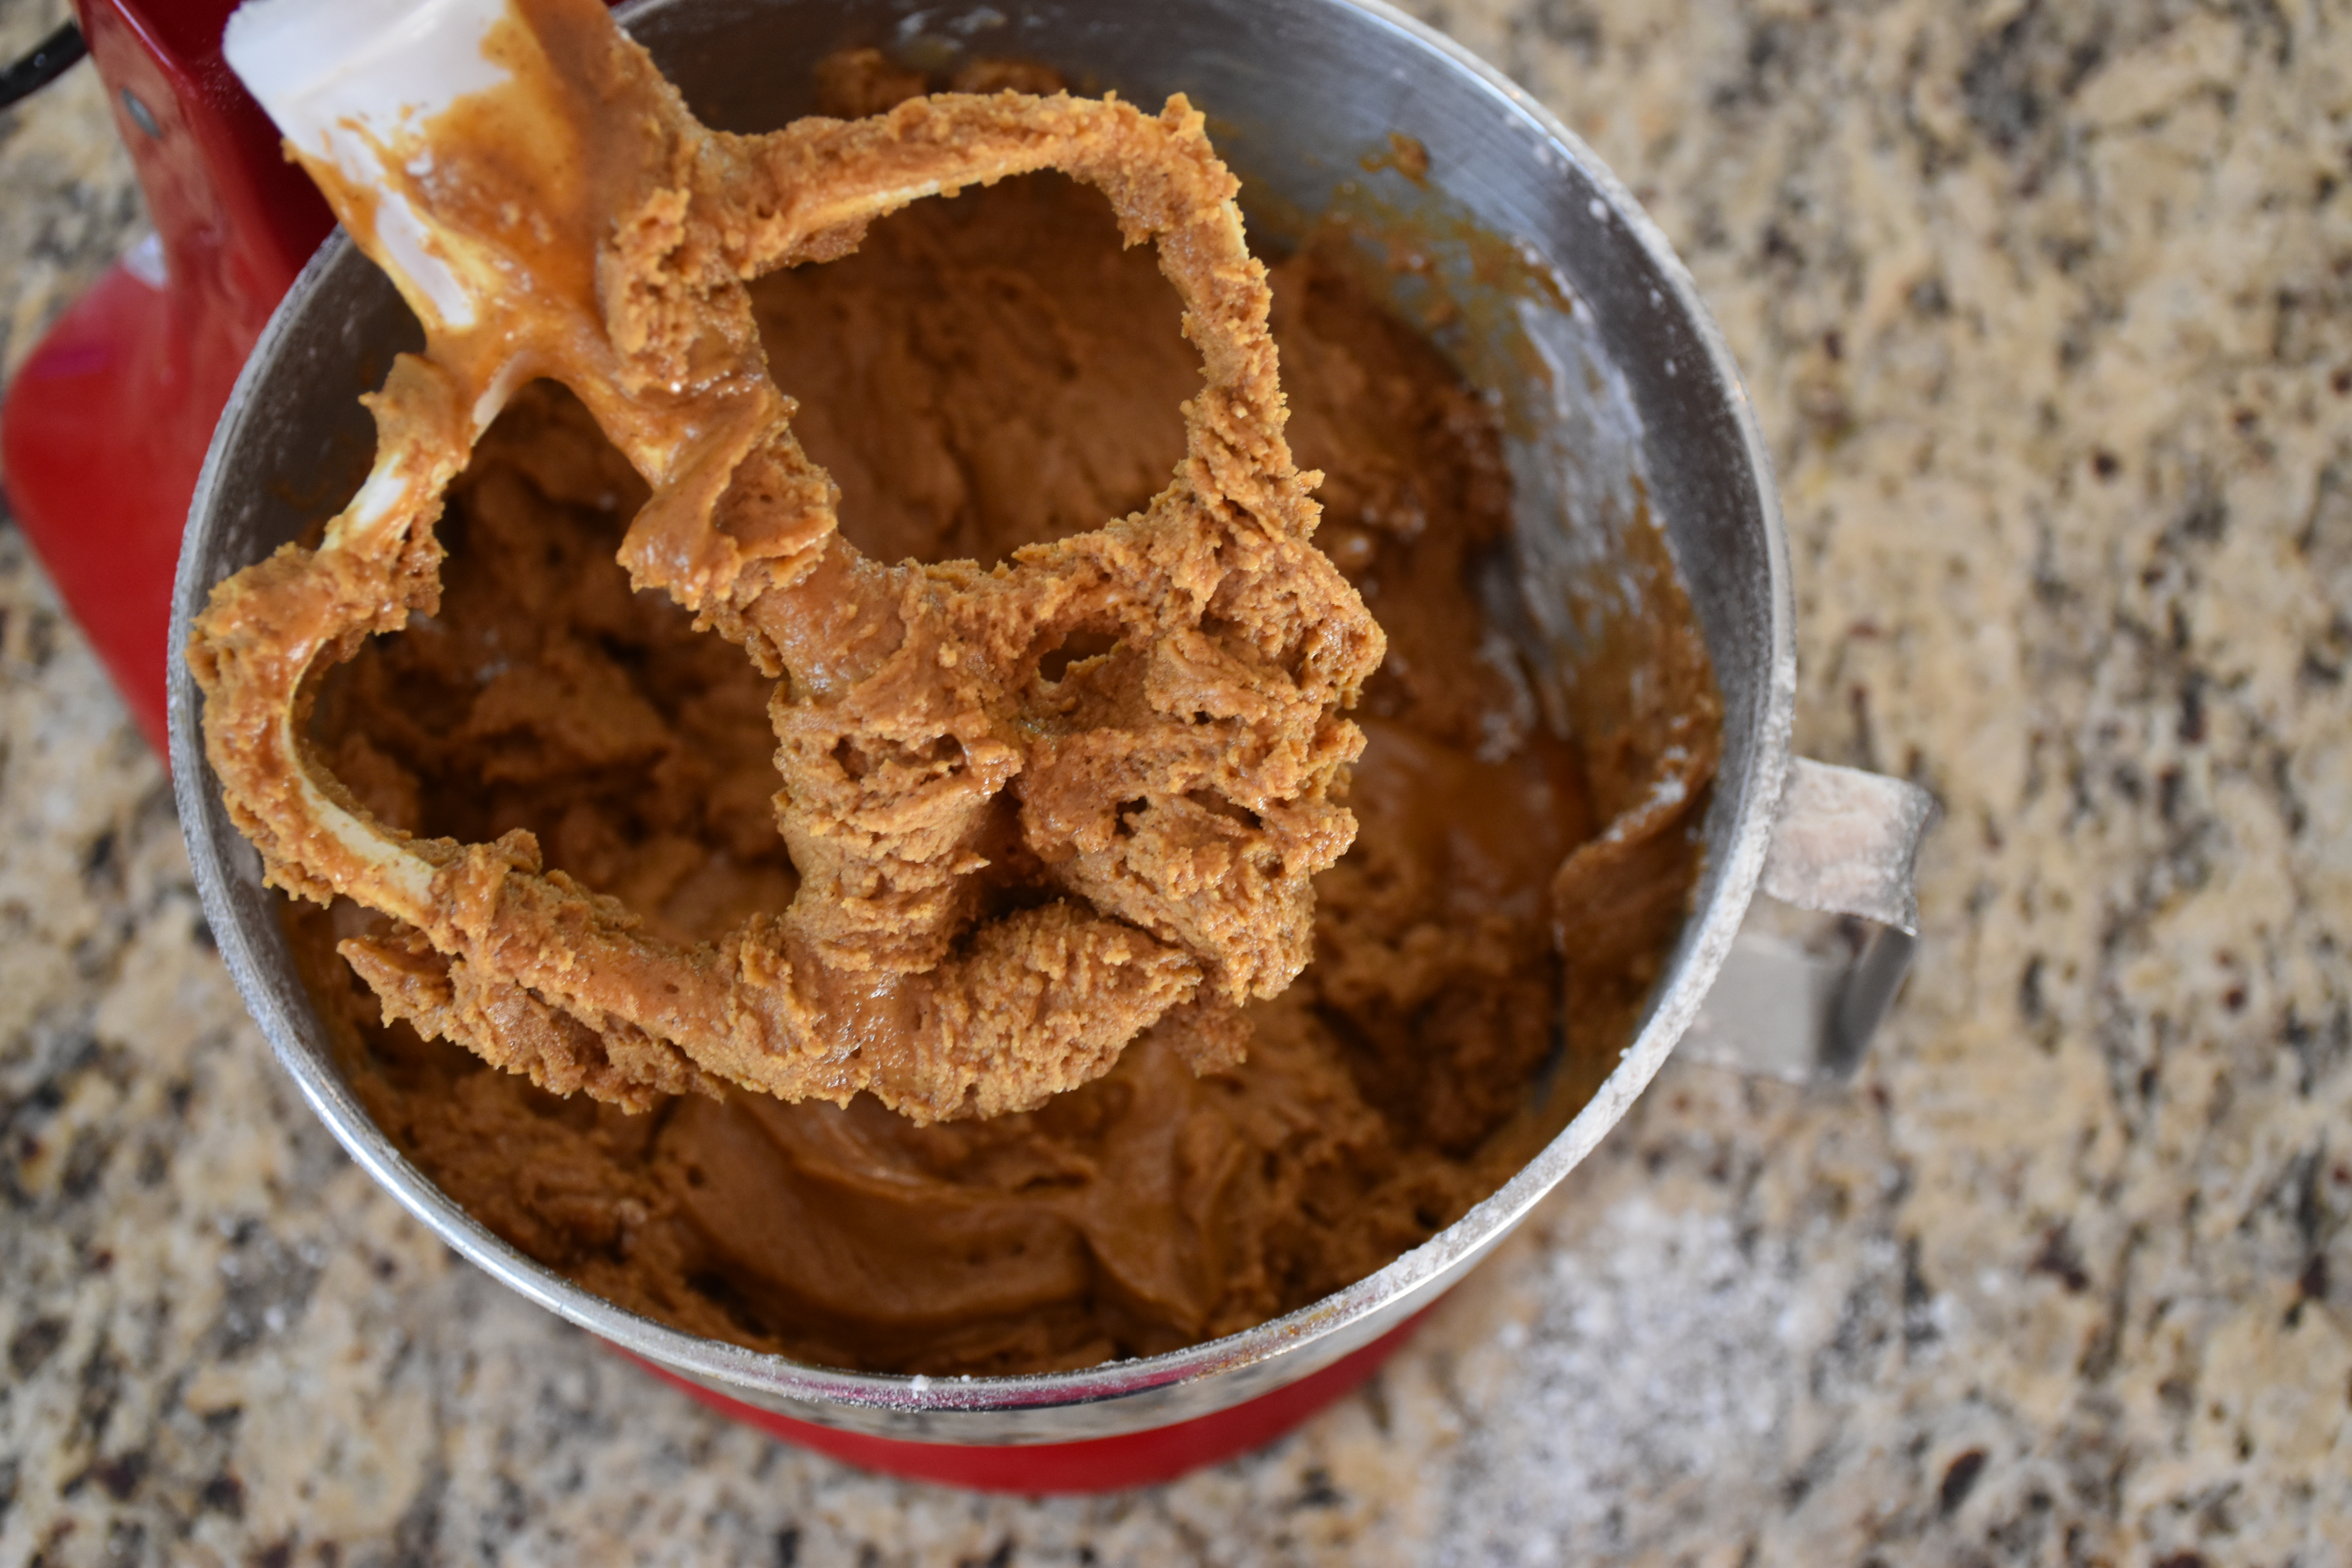
First preheat your oven to 300 degrees. Then in the bowl of your stand mixer mix together the molasses, honey, oil, eggs and sugar. Then mix those ingredients together on a low speed until they are fully mixed. Then add in you, ginger, cinnamon, allspice and cloves. Then mix in your baking powder and finally add your small bag of flour plus the two additional cups a little at a time till it is all mixed in and your dough comes together.
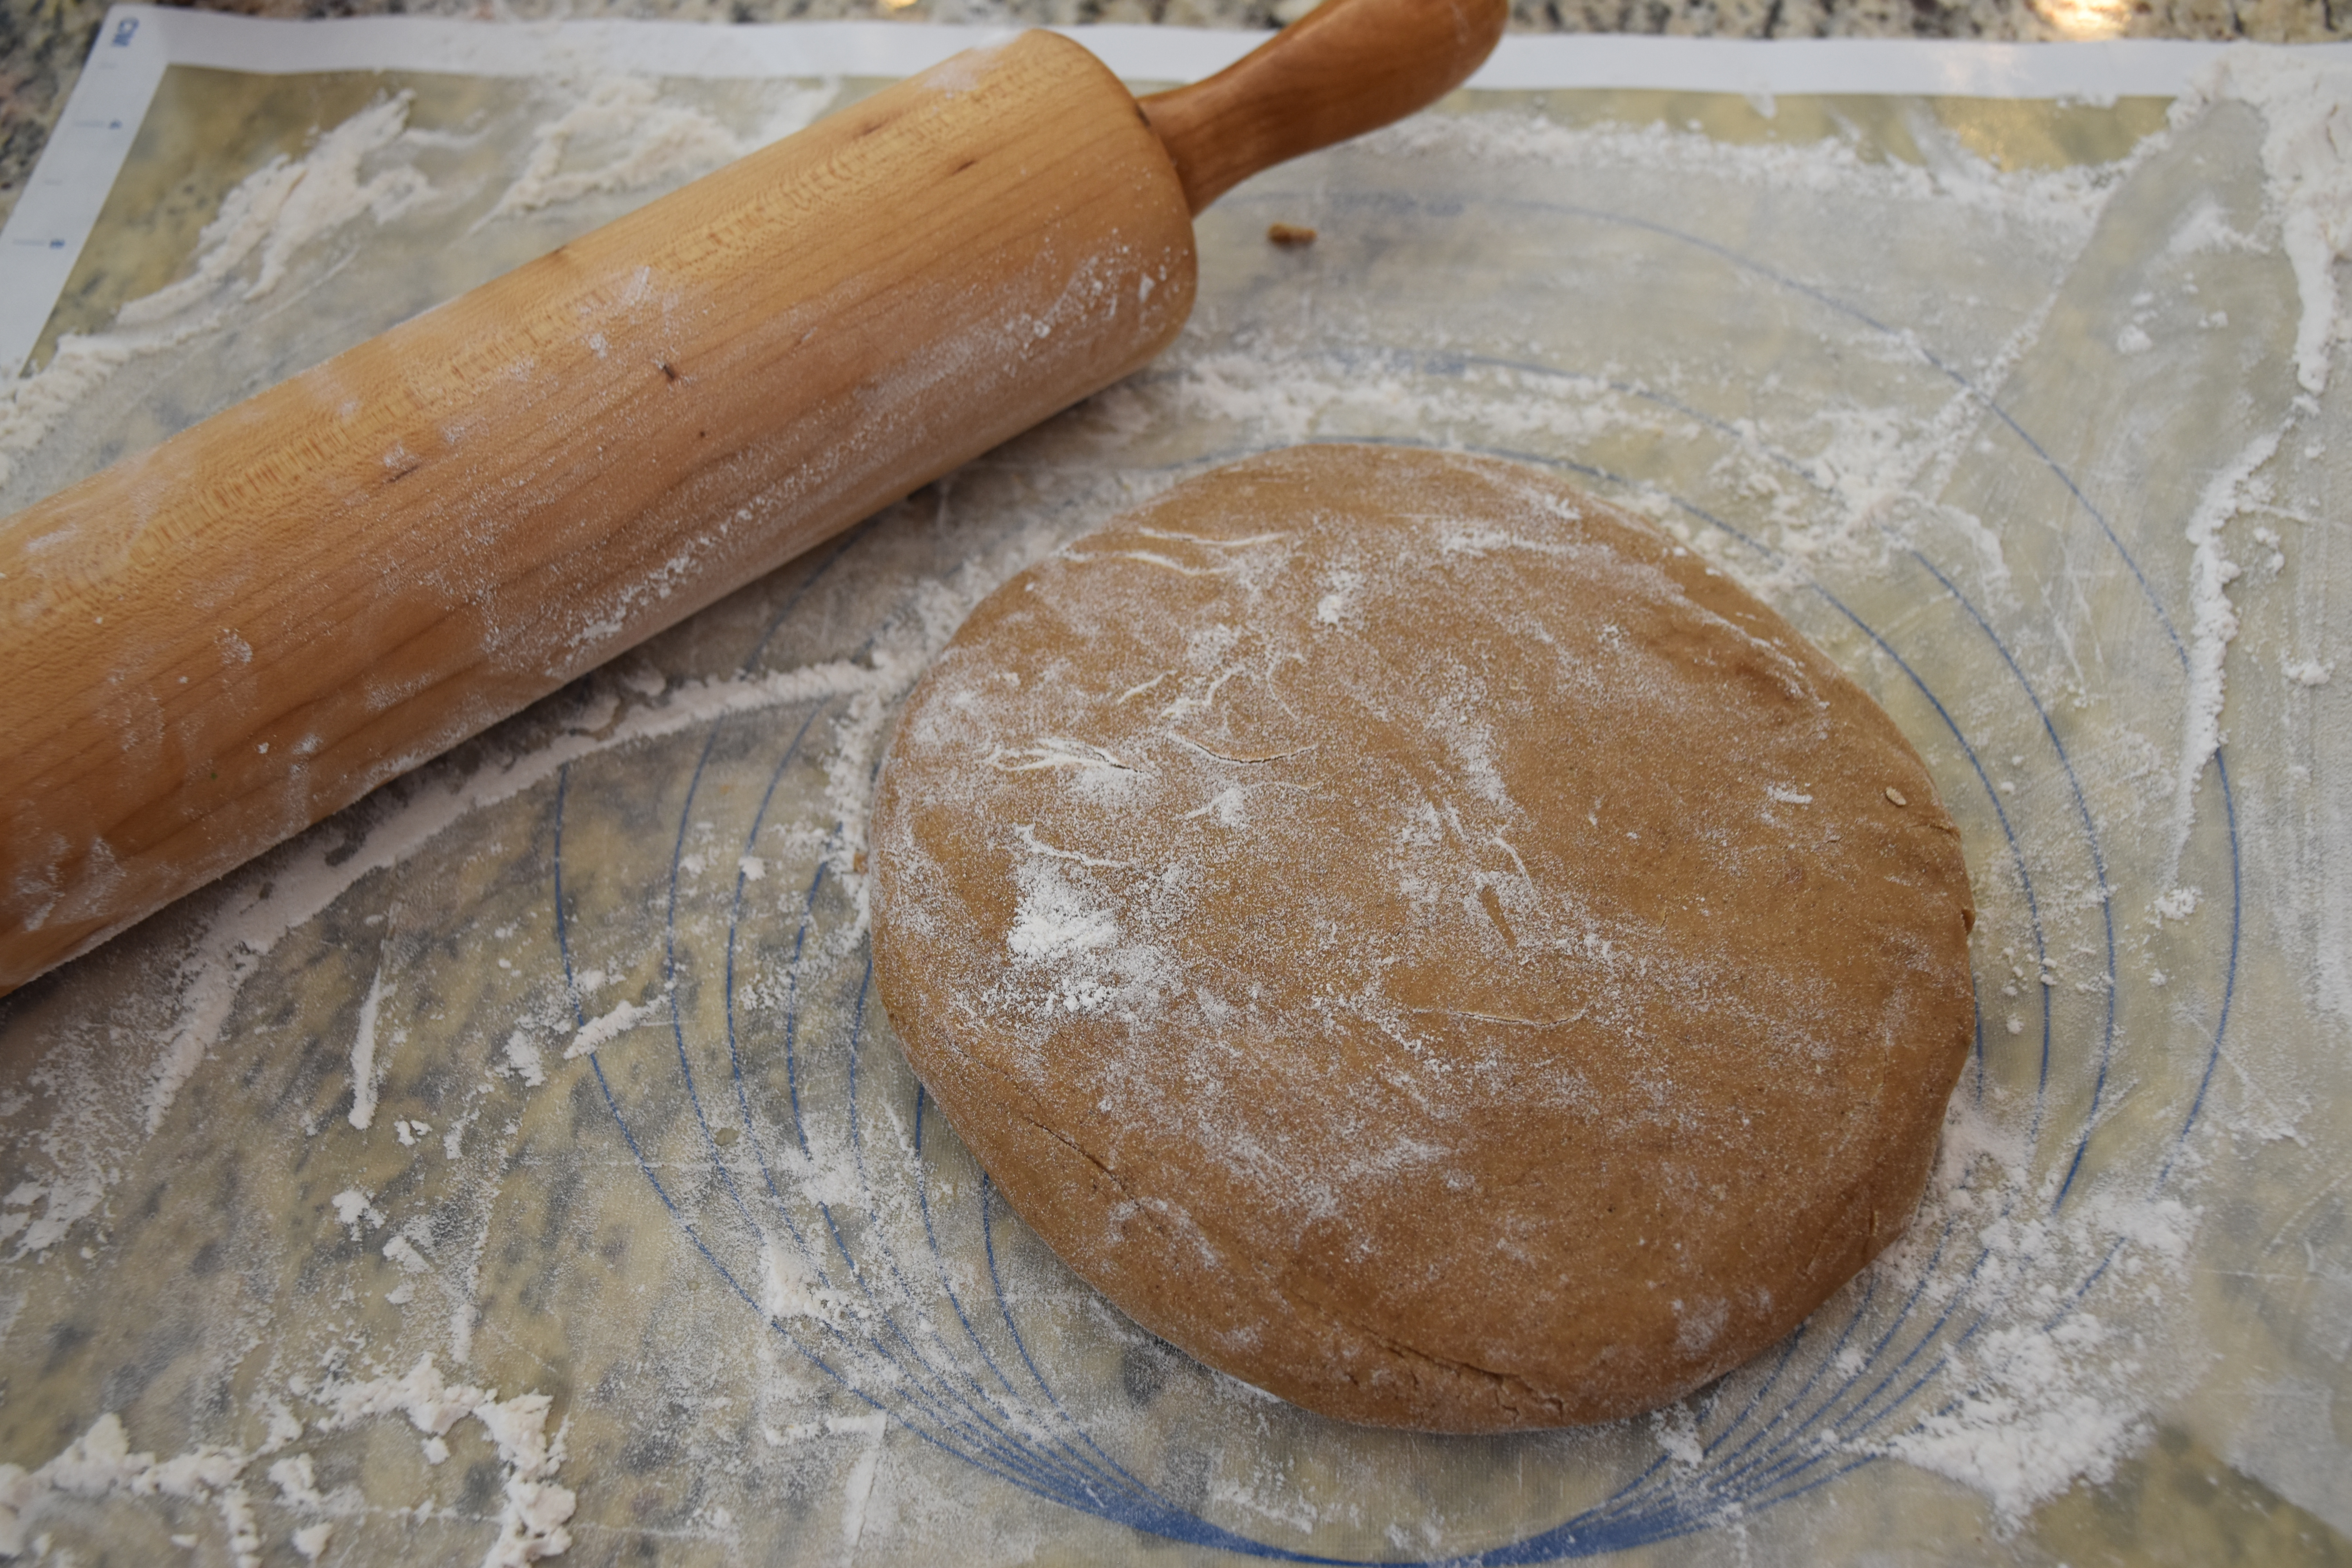
Here is my dough. Gingerbread dough can be a bit sticky so you are going to want to have the extra cup of flour to sprinkle on your silicone baking mat or piece of parchment paper. Divide your dough into four portions and roll each one out separately. If you like to bake I highly recommend that you get a silicone baking mat because it makes rolling out dough much easier. I also flour my rolling pin as well. You want to roll your dough out to an even 1/4 inch thickness. You don’t need to worry about having perfect edges, you just need to trim it to fit your pan.
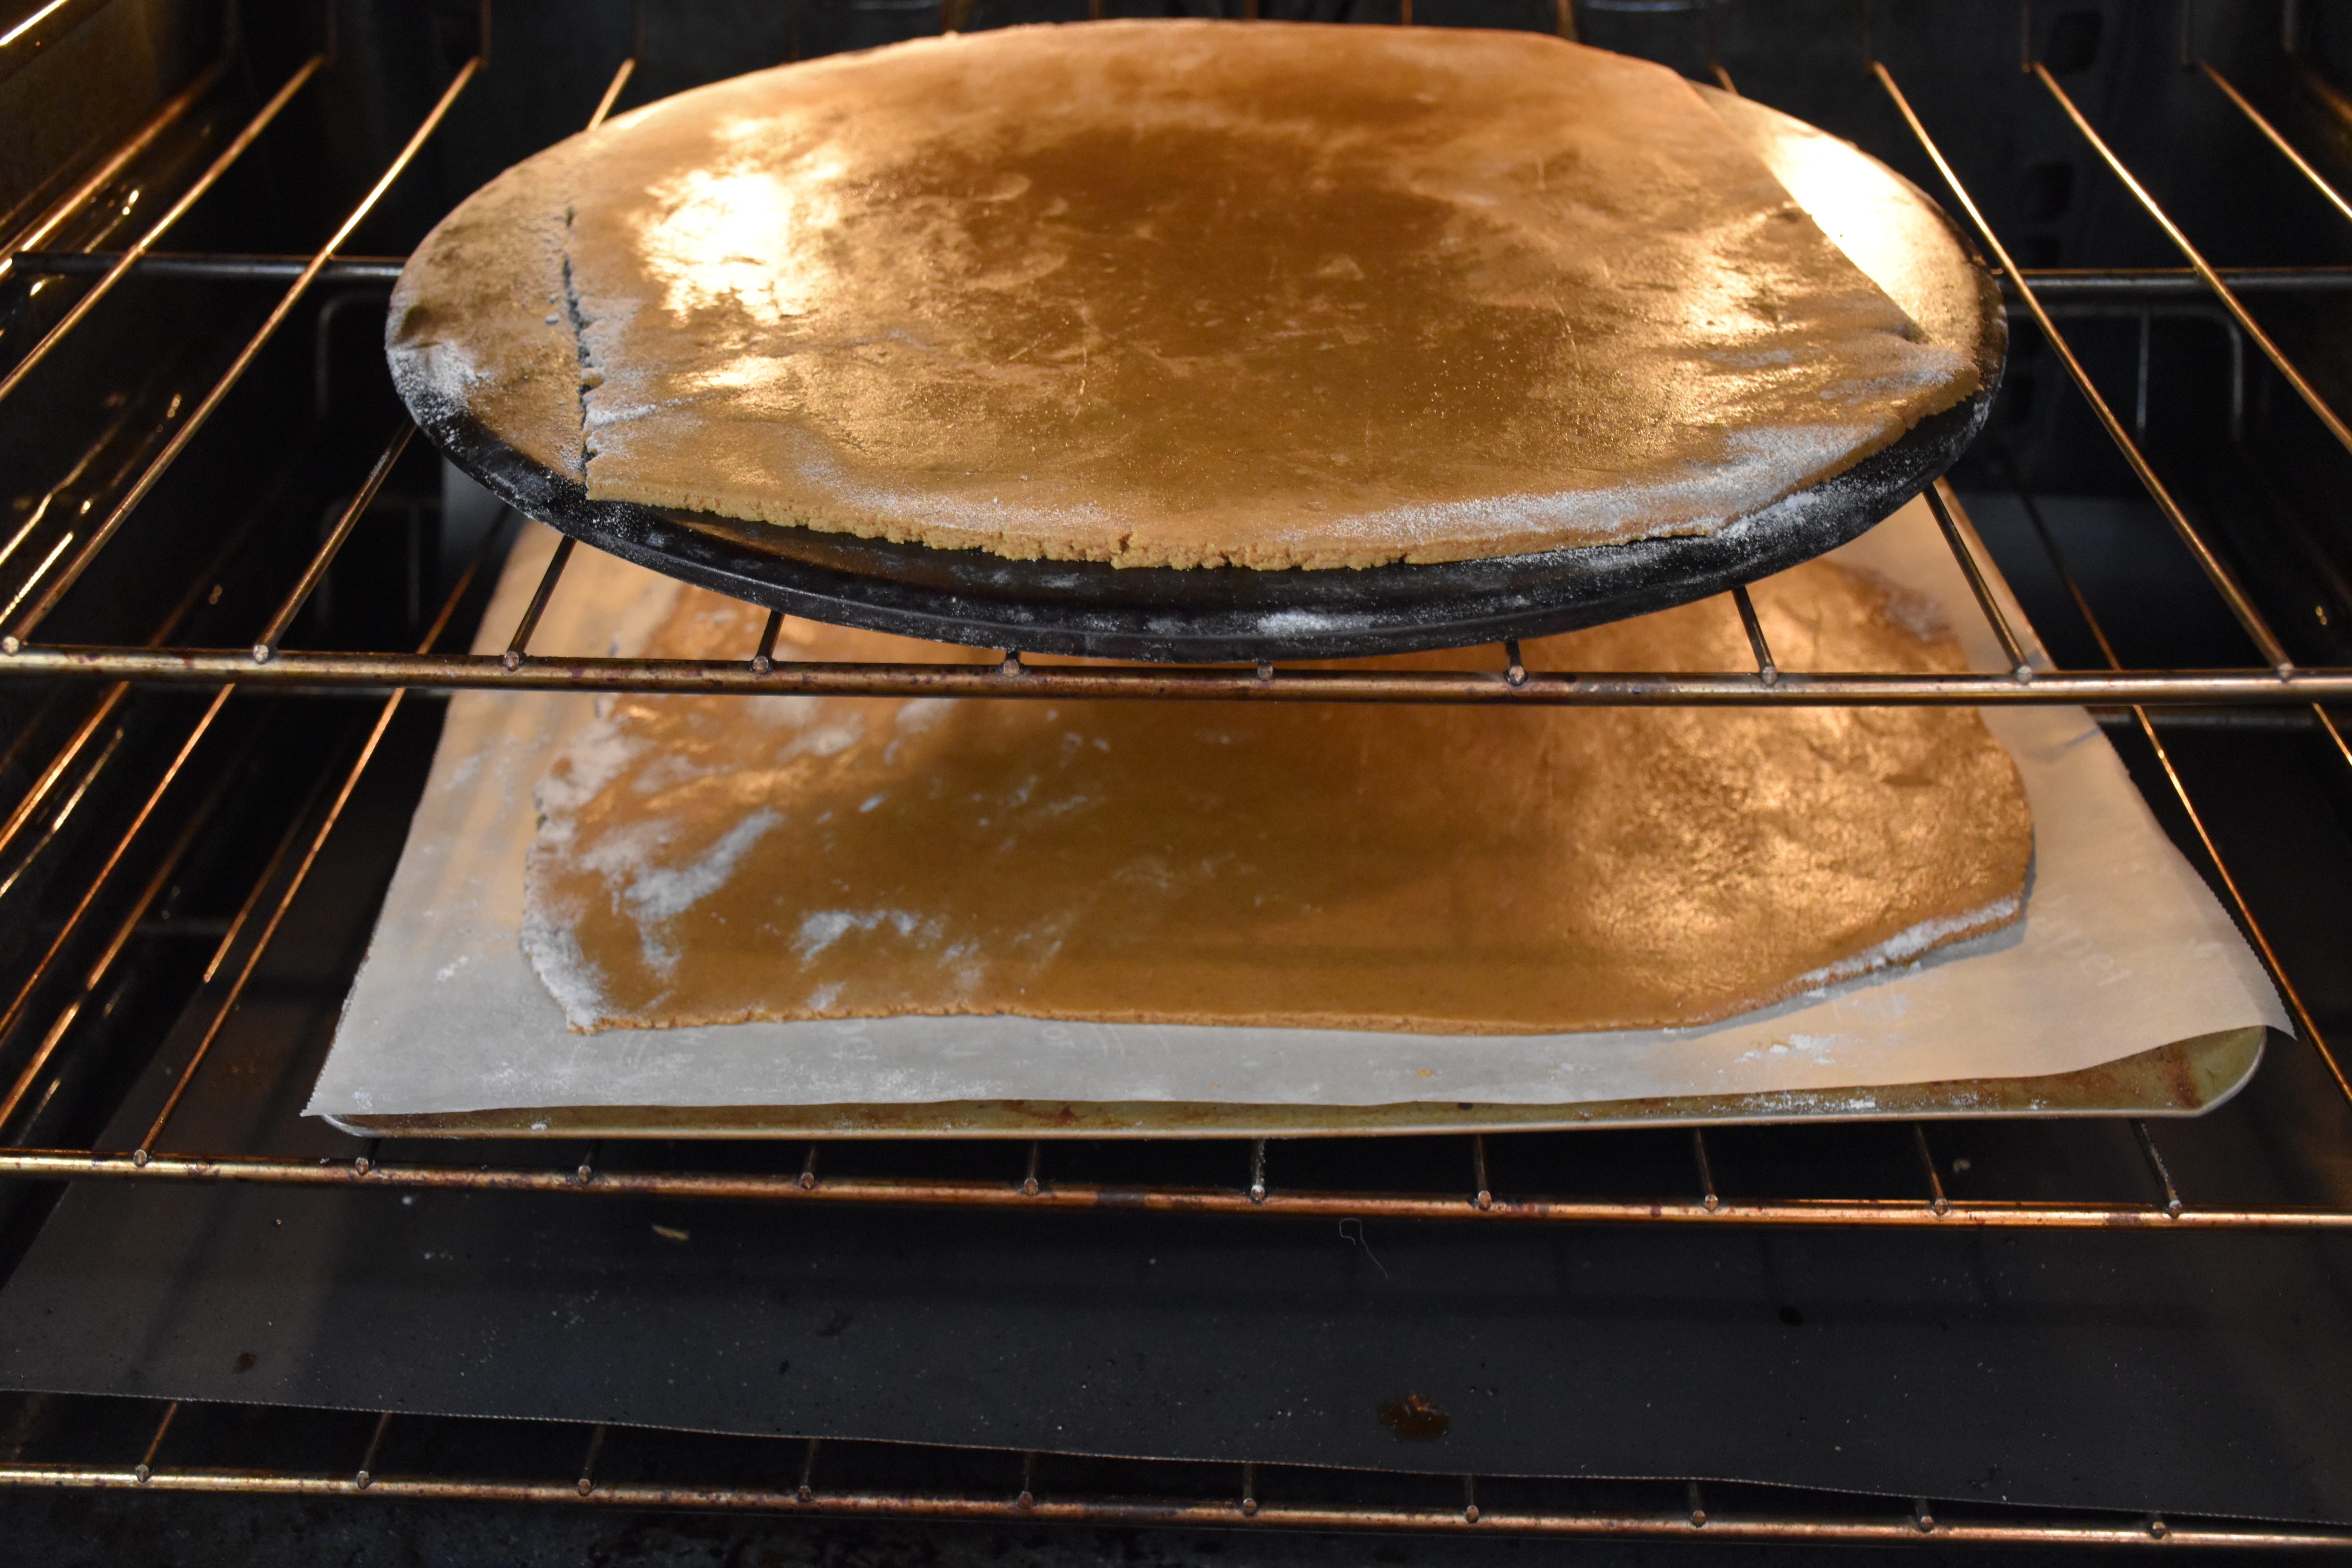
Then take your dough and flip it over onto your parchment paper lined baking sheet or baking stone and carefully pull back you silicone mat or parchment paper.
Then bake your gingerbread for 35 to 40 minutes. I like to stager my batches by about 10 minutes so I have time to cut out one batch before the next gingerbread sheet is ready.
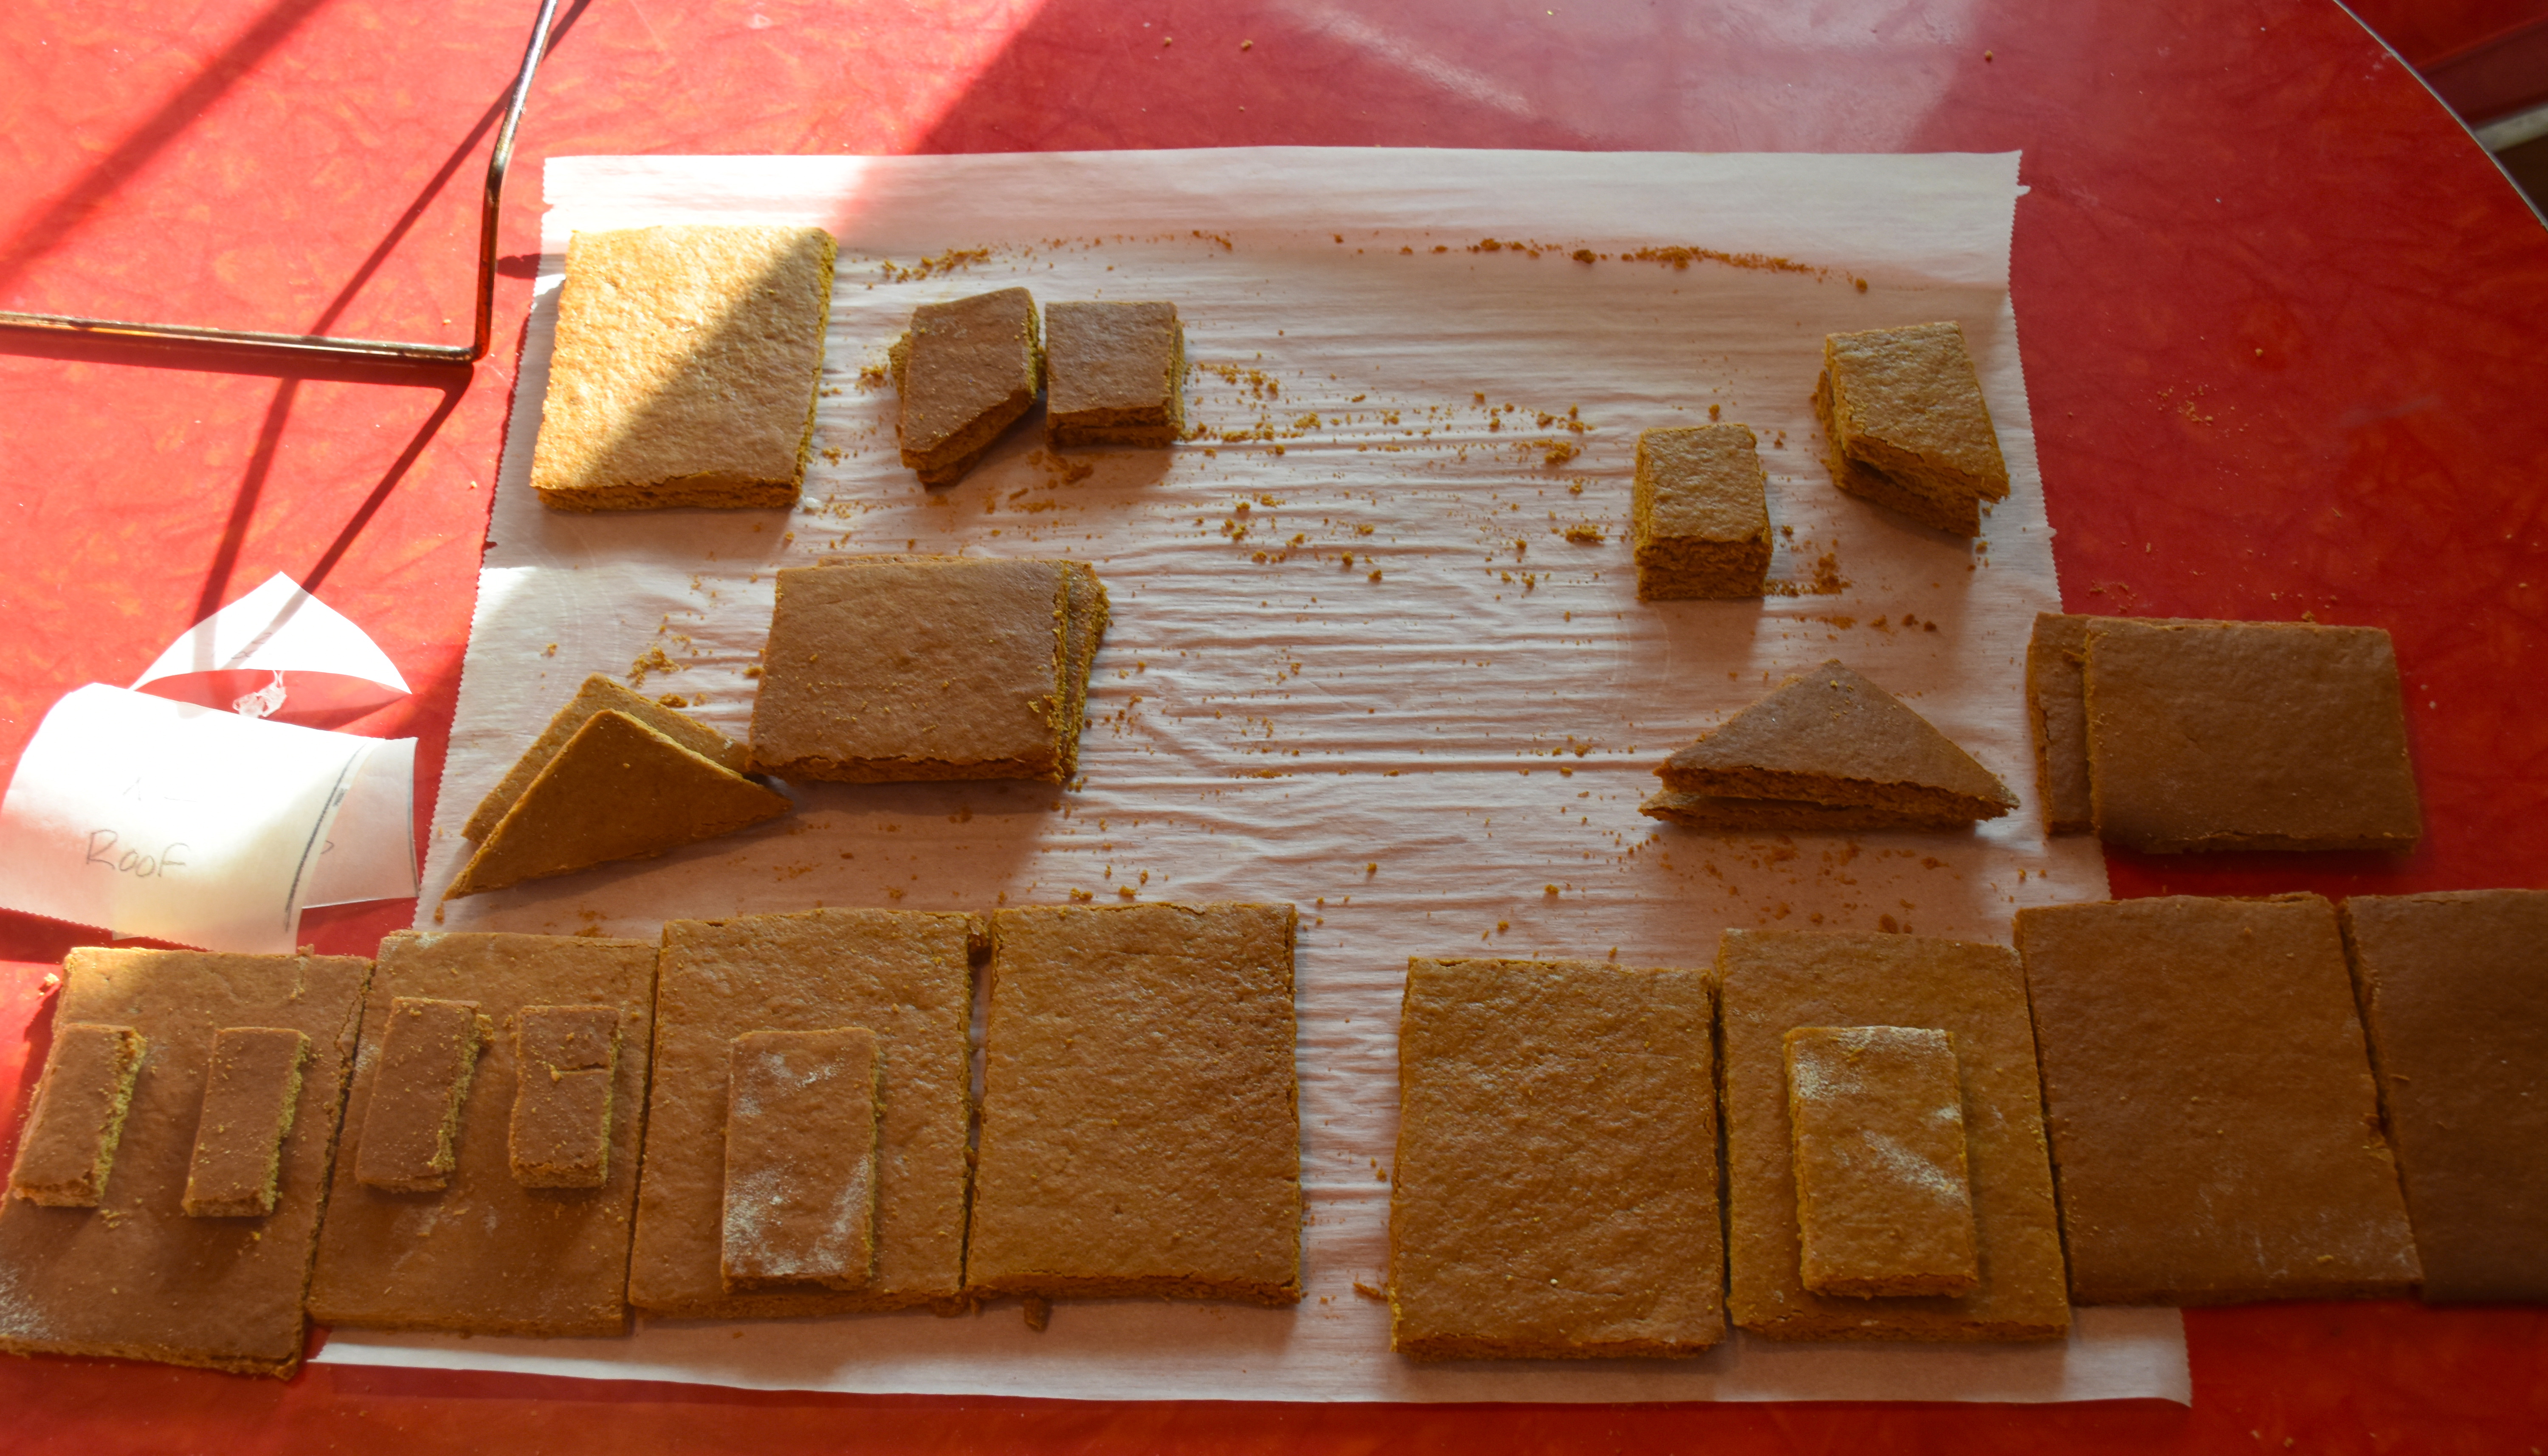
Here are my gingerbread walls and roof pieces. I like to cut an extra wall or roof piece to have just in case.
Once your gingerbread is out of the oven you need to work fairly quickly to get your pieces cut. I like to use a pizza roller to cut mine but you could also use a sharp knife. Here are my cut out pieces divided into groups for each house. You can see that I also cut out some doors and some chimney pieces.
Next I pulled out my glue gun and hot glued my pieces to my cartons. If you are a gingerbread purist or are not trying to complete this project with young children then you can use the royal icing recipe below to hold the sides of your house together.
Since I was making multiple houses using the same pattern I decided to play with where I put the chimneys and how I faced the houses so they would each look a little different.
Here are my assembled houses that are now ready for some royal icing.
Now if you have read the first part of the post and thought “This woman is nuts. I am never baking my own gingerbread!!!” Then I get it, I will admit this is my craziest hobby yet. However the royal icing recipe is easy to make and so much better than then the hard to use packets that come with the kits. So if creating a from scratch gingerbread house isn’t for you, then buy the kit and make the icing.
Royal Icing (makes 5 cups of icing)
4 egg whites
1 teaspoon cream of tartar
2 teaspoons of water
1 pound of powdered sugar
Mix all your ingredients in the bowl of your stand mixer at medium speed until your icing forms stiff peaks (about 5 minutes). You want your icing to be thick so it can hold your structure together. If your icing is not thick enough you can add more powdered sugar and if you want it a bit less stiff then you can add a little water, but be careful because a little goes a long way.
Here is my little gingerbread artist hard at work. One tip when using a pastry bag with kids is to put a rubber-band at the back to keep little ones who grab it from the center from causing all the icing to come out the back end.
You are going to need to use a pastry bag and a larger star baking tip to ice the sides of your houses. I like to use a tall glass to hold my pastry bag while I fill it with the icing. Then for piping small details like windows I like to fill a second pastry bag with a small round writing tip. Then you are ready to start my favorite part the decorating, I helped my girls pipe the sides and I added the small window details but then I let them use the icing to add some decorations of their own.
My favorite decoration is gum drops because you can use cookie cutters or a pair of kitchen scissors to turn them into all sort of things. What I like to do is to sprinkle a little granulated sugar on my counter and then roll two or three gumdrops together using my rolling pin. The sugar keeps them from sticking to your counter and then you have a even sheet of candy that you can cut into a wreath, star or what ever you can imagine.
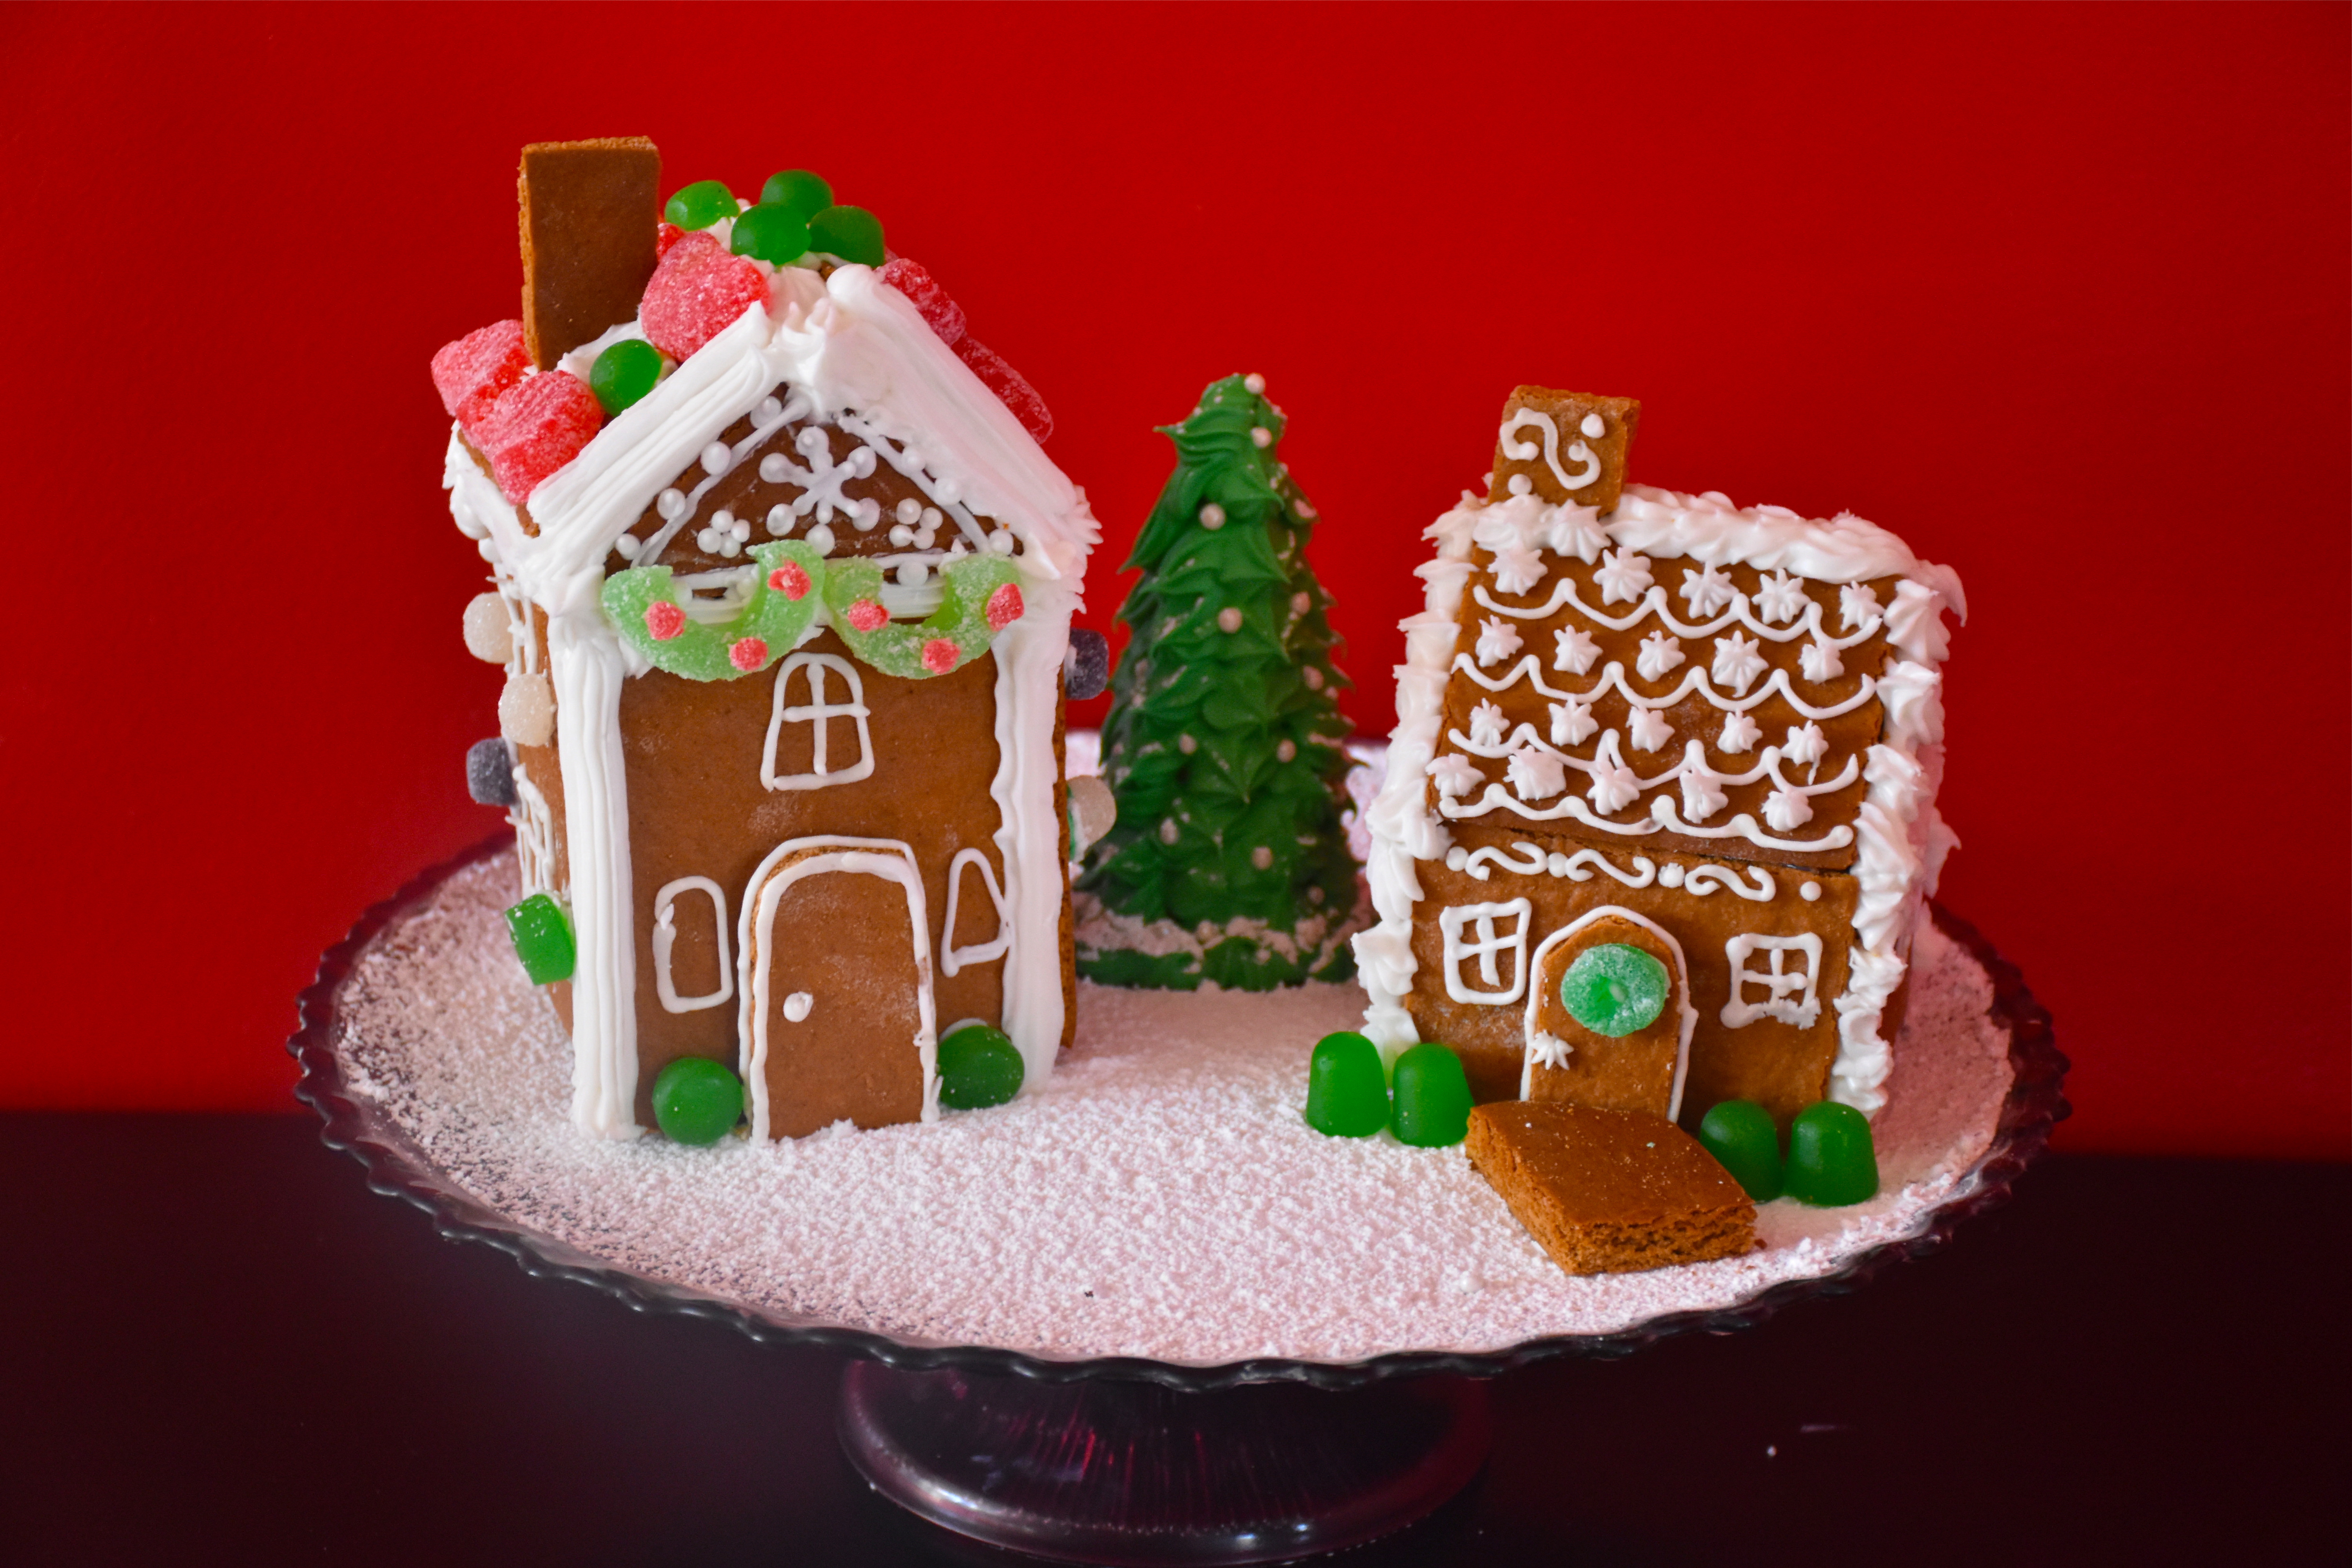
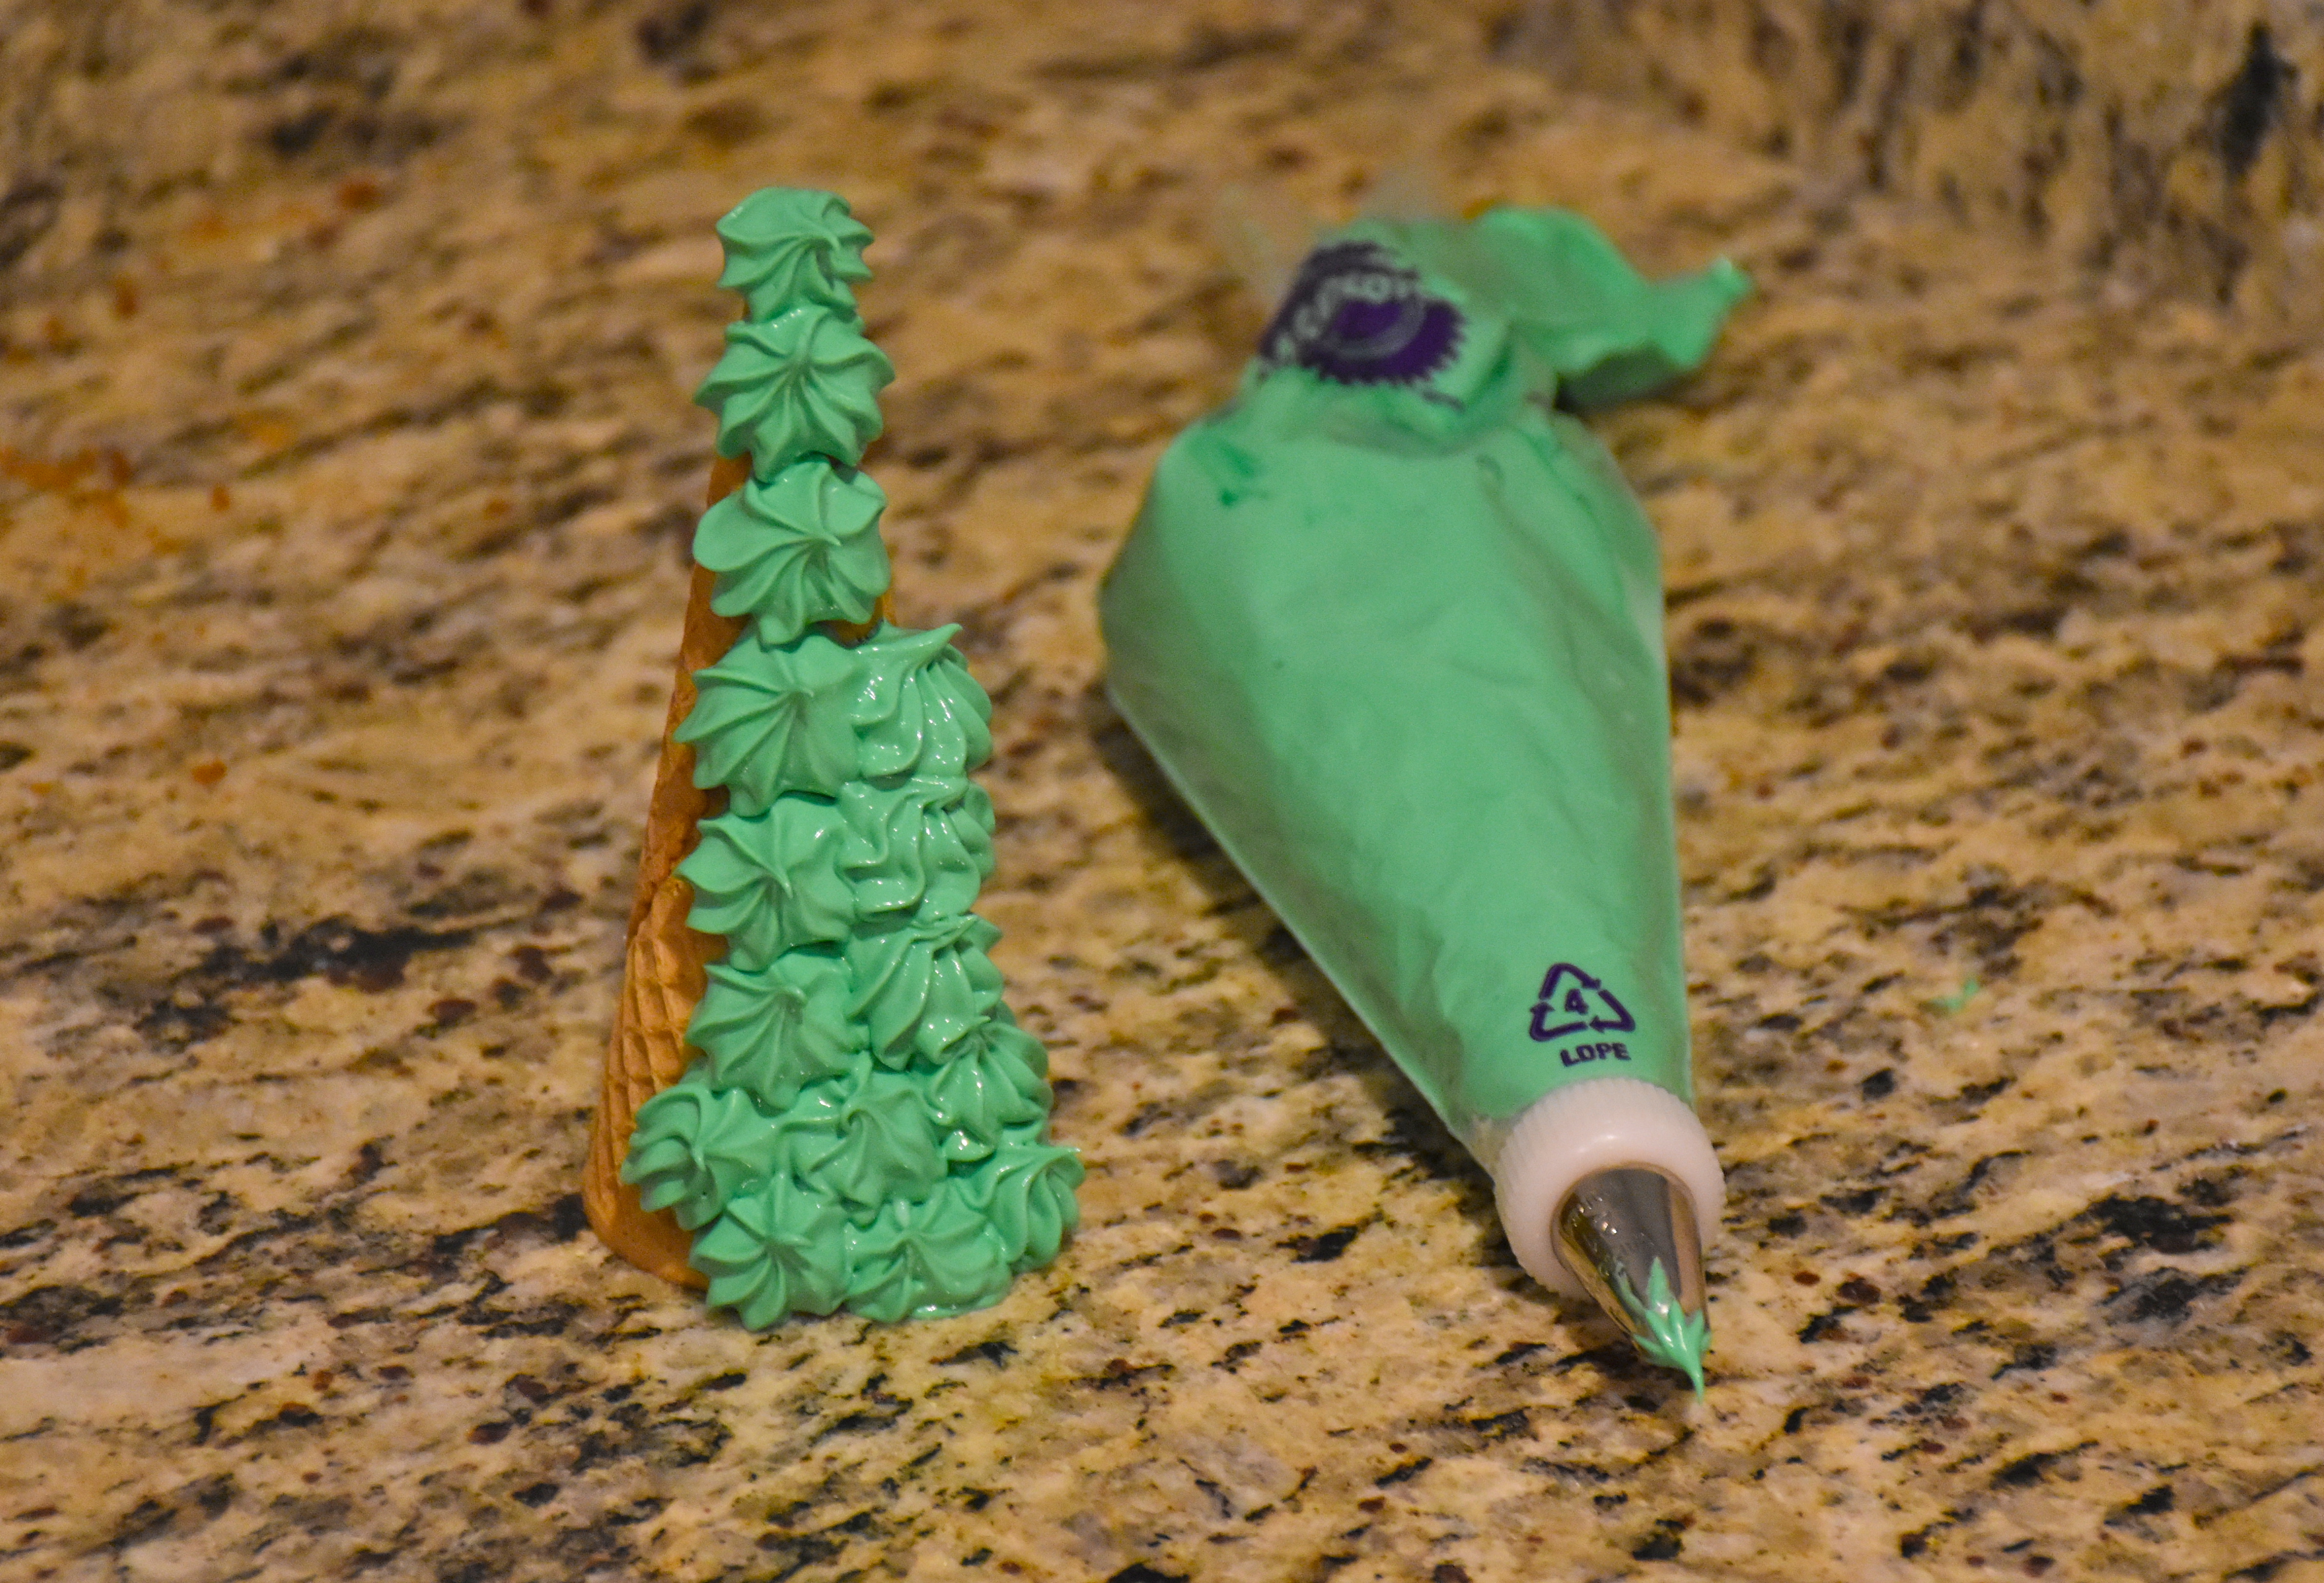
The house above is the one my oldest daughter made. I went with her cute pink and purple theme and helped her make a christmas tree using an upside down ice cream cone.
Here you can see how an upside down ice cream cone can become a Christmas tree in just minutes.
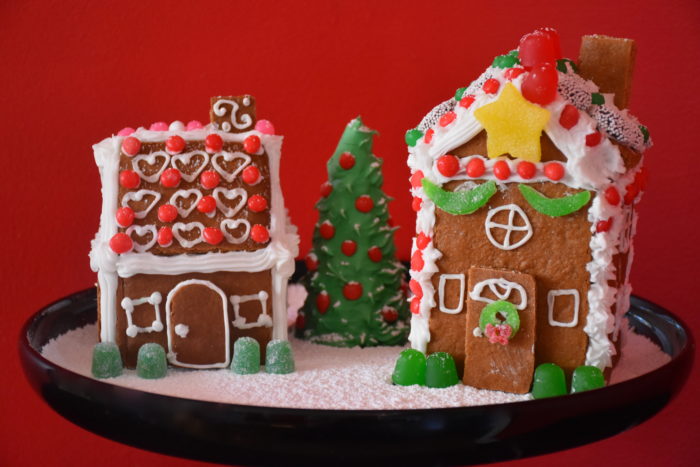
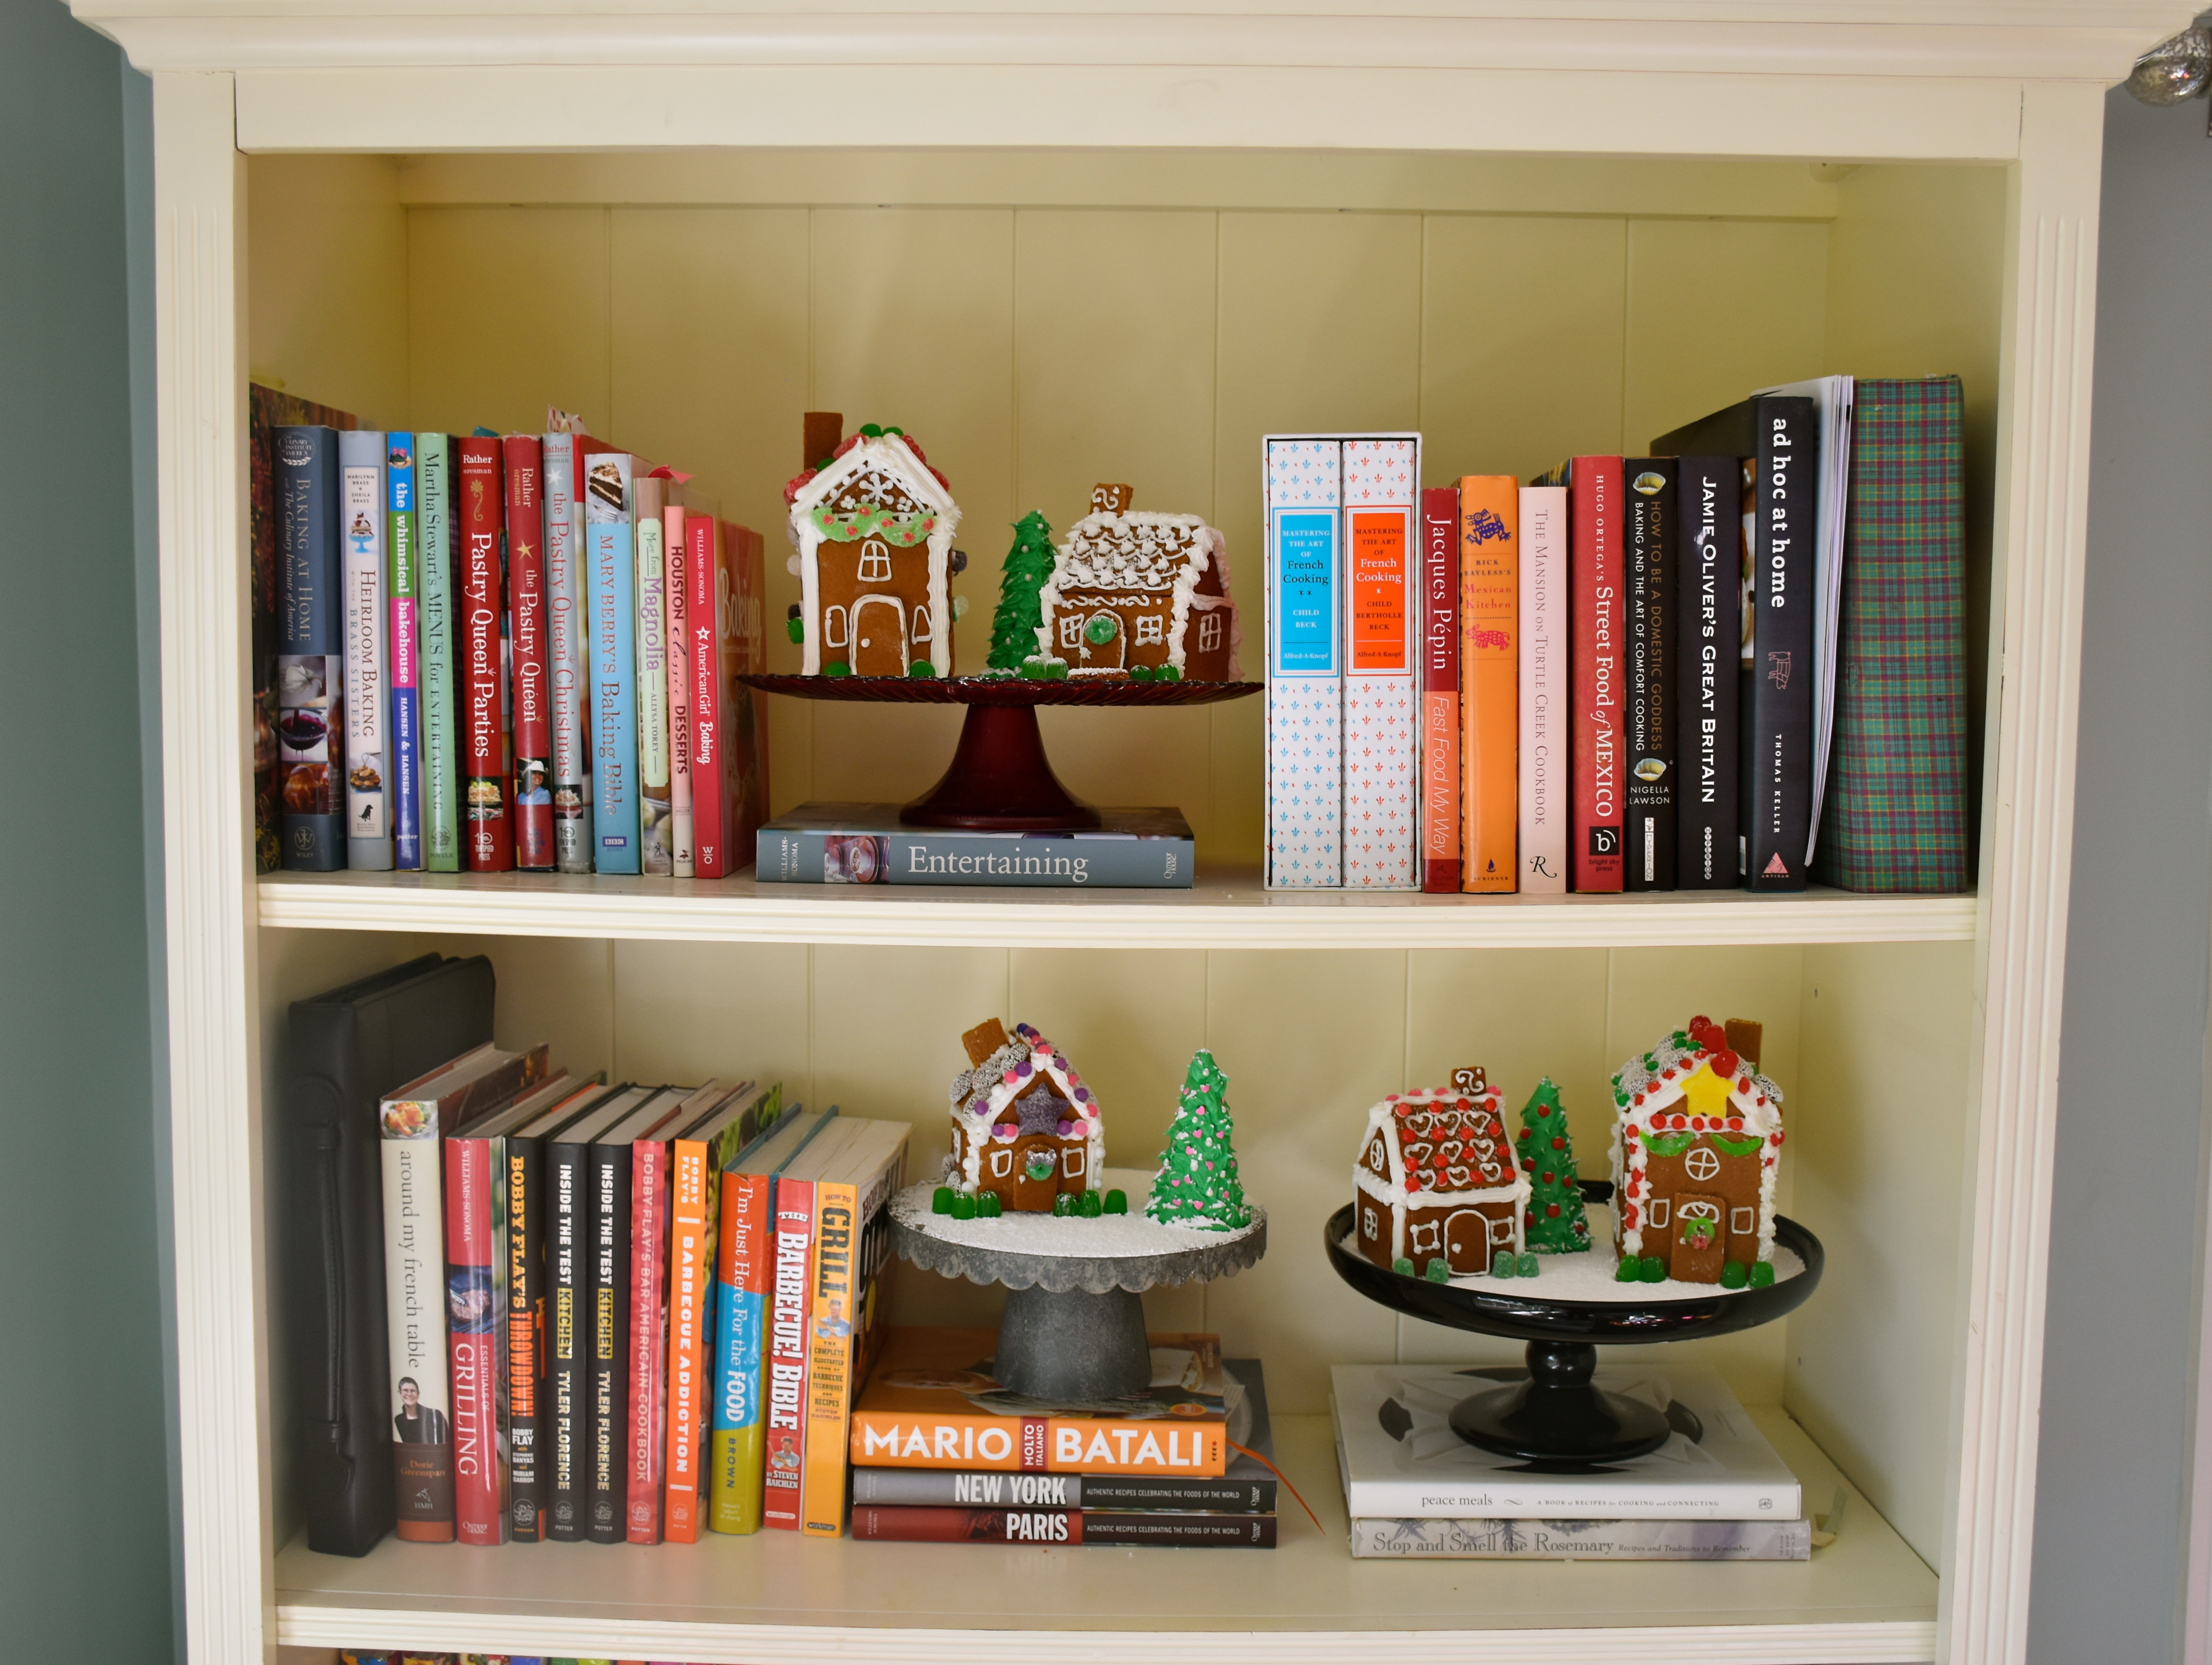
I made another small batch of royal icing that I colored green with gel food coloring and I used a star tip to cover it in “branches.” Then we added some heart shape sprinkles for extra fun. My youngest daughter helped design the house with the yellow star on top. She had a great time, but she wasn’t in the mood to stop for pictures. Once we finished our houses I used a metal strainer to sift powdered sugar as a snowy base on my cake stand then we placed the houses on them and added some gumdrop and dot candy bushes. I displayed our little gingerbread village in my kitchen bookshelf. I decided that our houses were fun to look at, but a bit safer on the higher shelves.
So after I few year hiatus it was fun to share something I love with my girls. I am already looking forward to more gingerbread adventures with my amazing little pastry team. My plans for a smaller scaled project made this something we could do together, but with their imaginations who knows what we will be building in the future.