Holiday House

My first magazine column, called Holiday House, appeared in Life in the Woodlands last week since it’s a small magazine with a limited distribution I thought I would share it here:

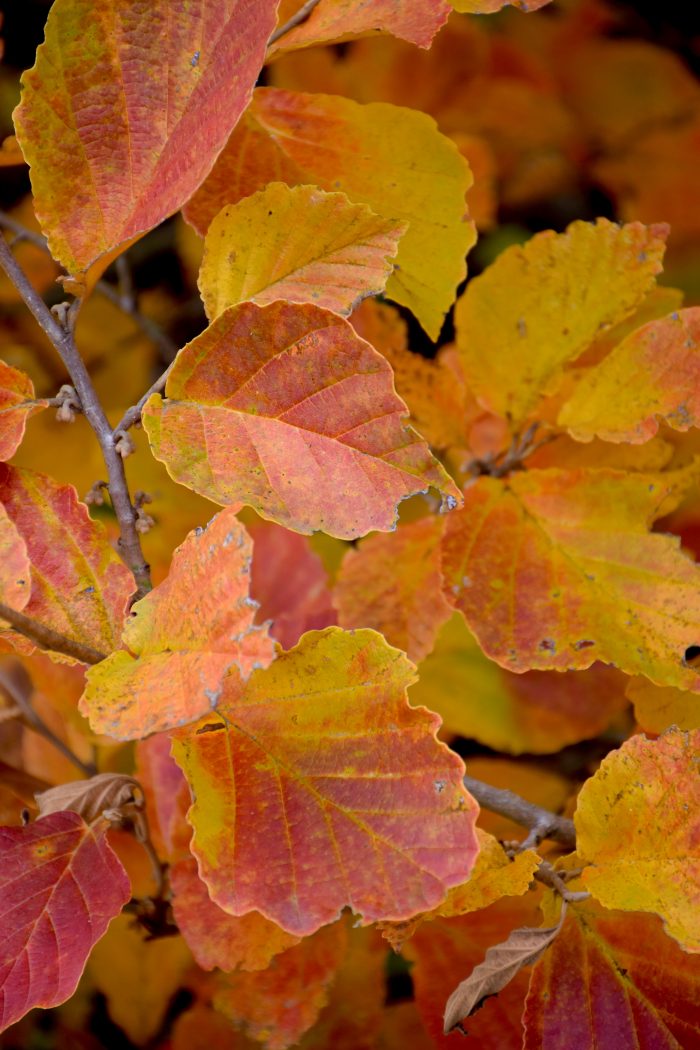
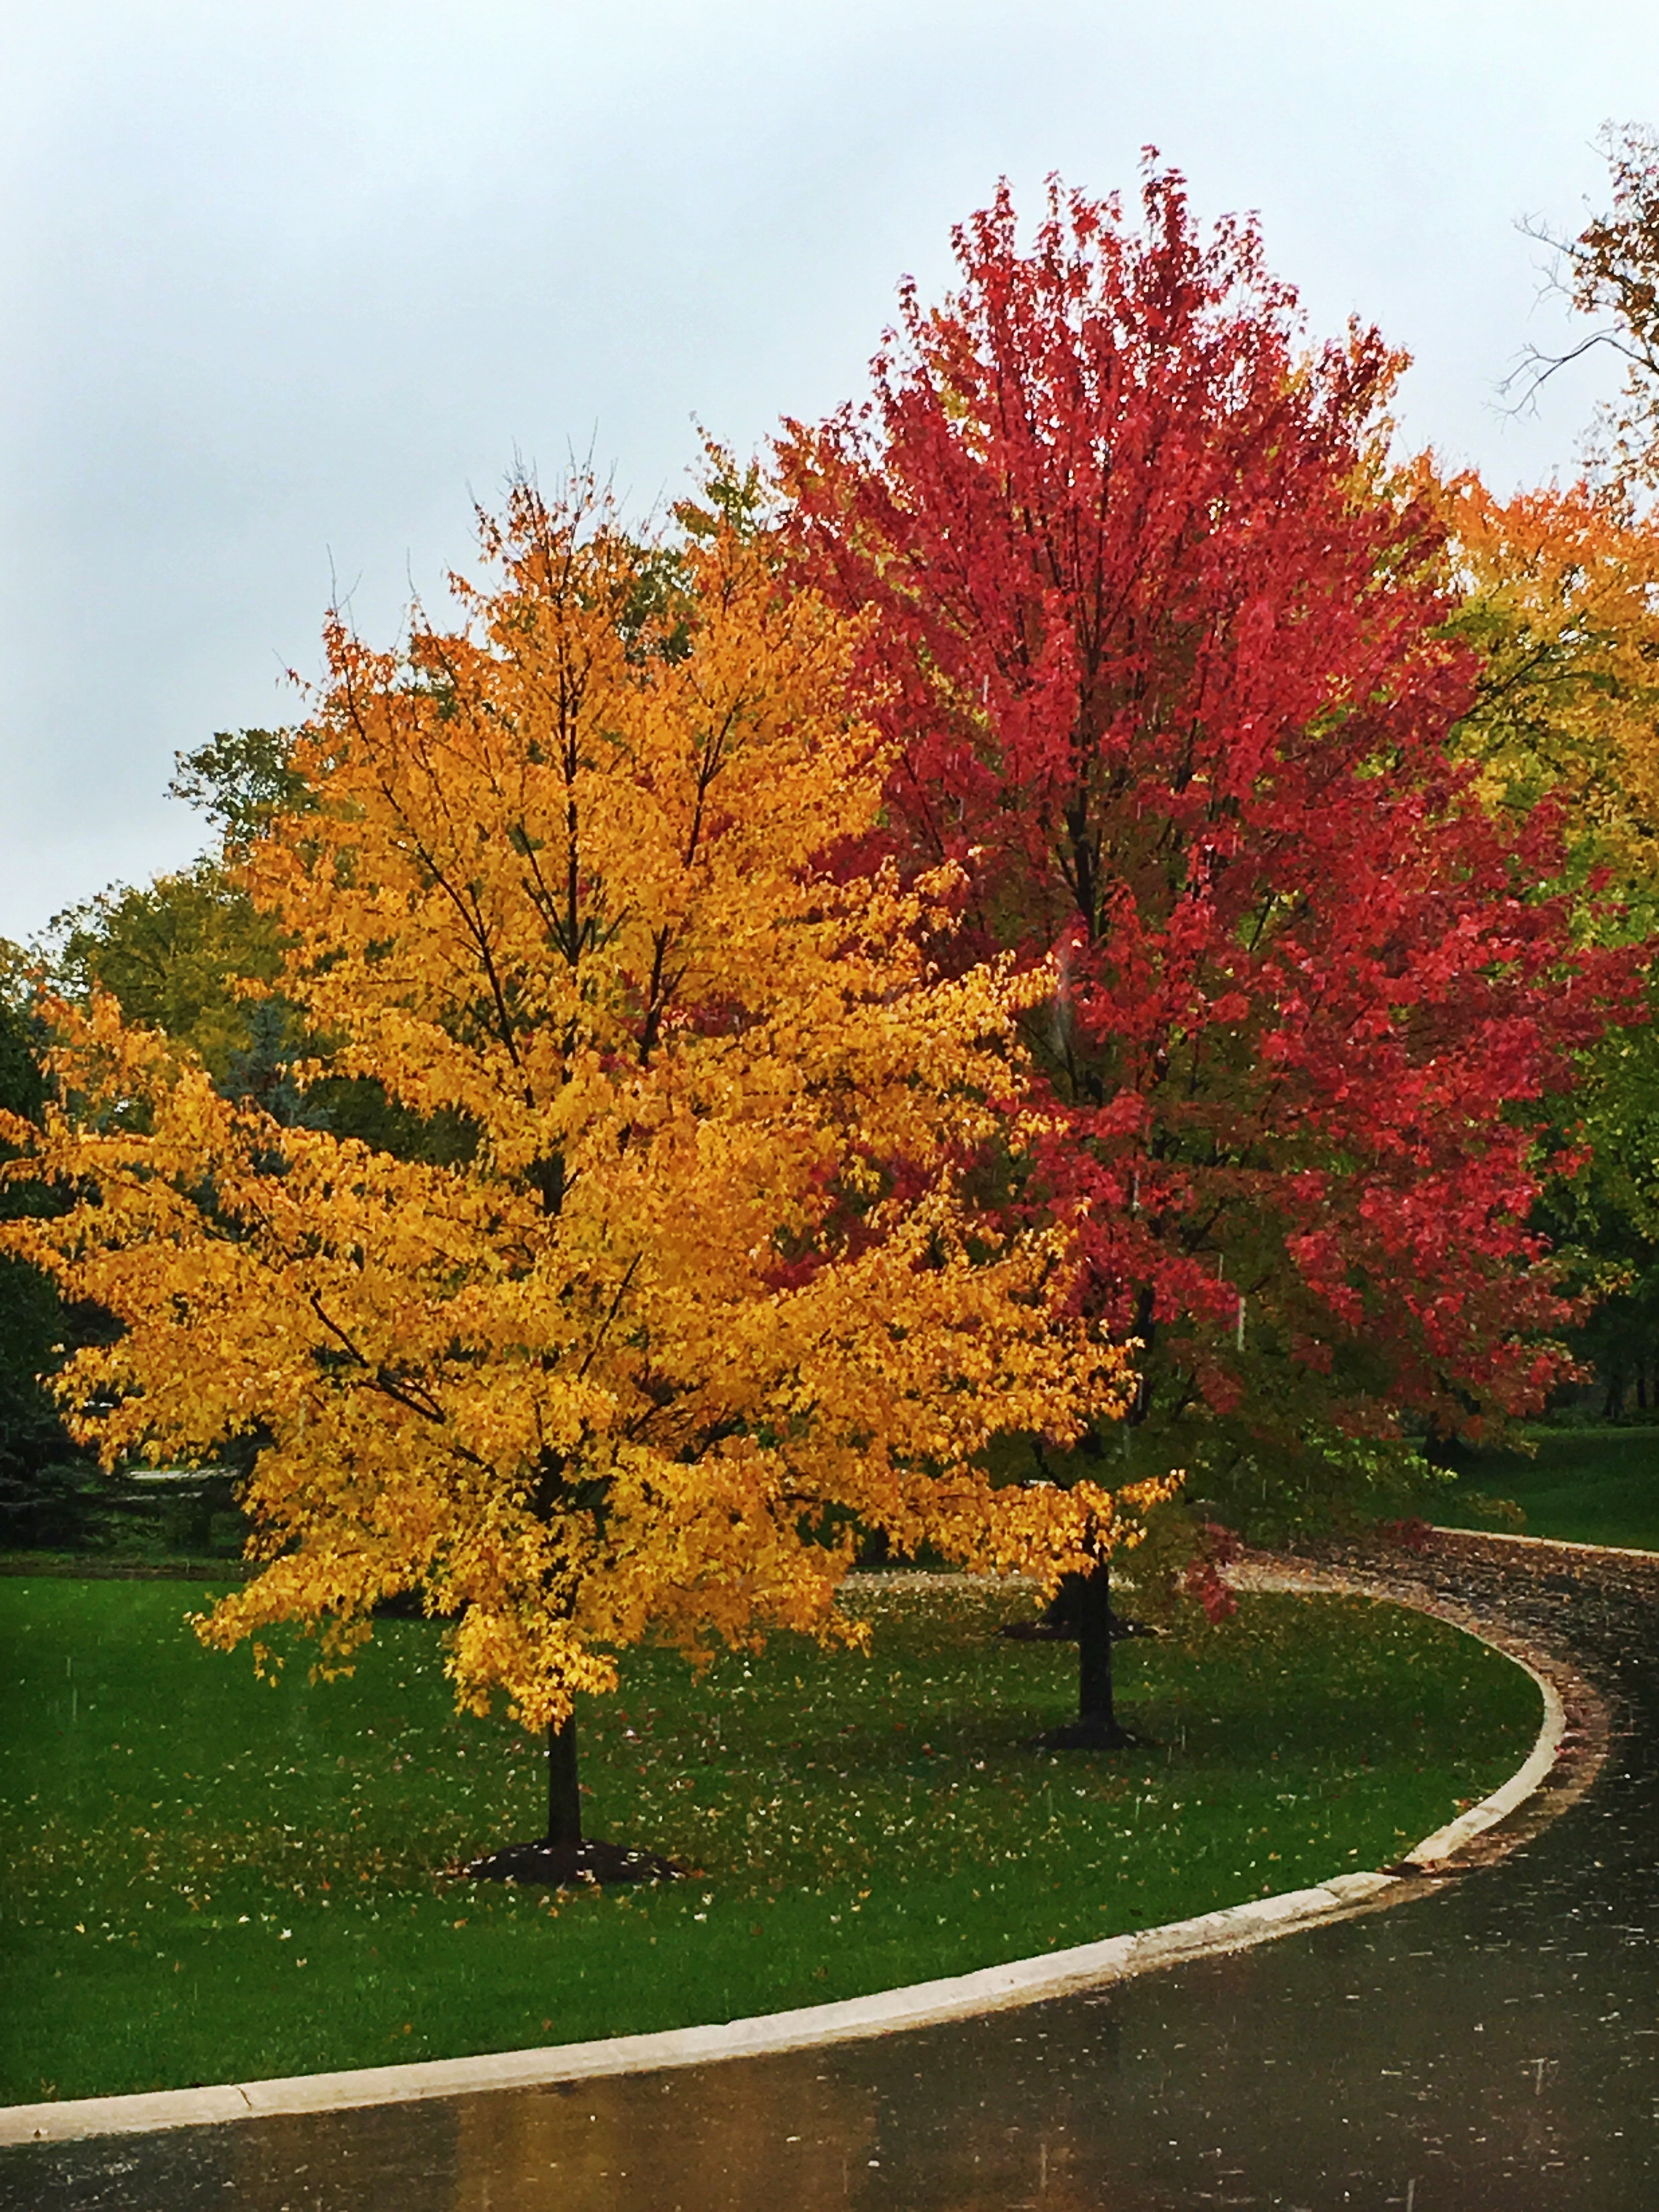
Maybe it’s because my mother is the queen of Christmas or because I love gardening and watching the seasons change or because I tend to be an optimist who is always looking for something to celebrate, but no matter the reason for as long as I can remember I have always loved the holidays. Family coming together, sparkling lights, and the smell of something baking in the kitchen, those are the moments I love. My young daughters will tell you that I am always decorating our home from one holiday to the another. At five and six they love to help and always want to know what we are celebrating next.

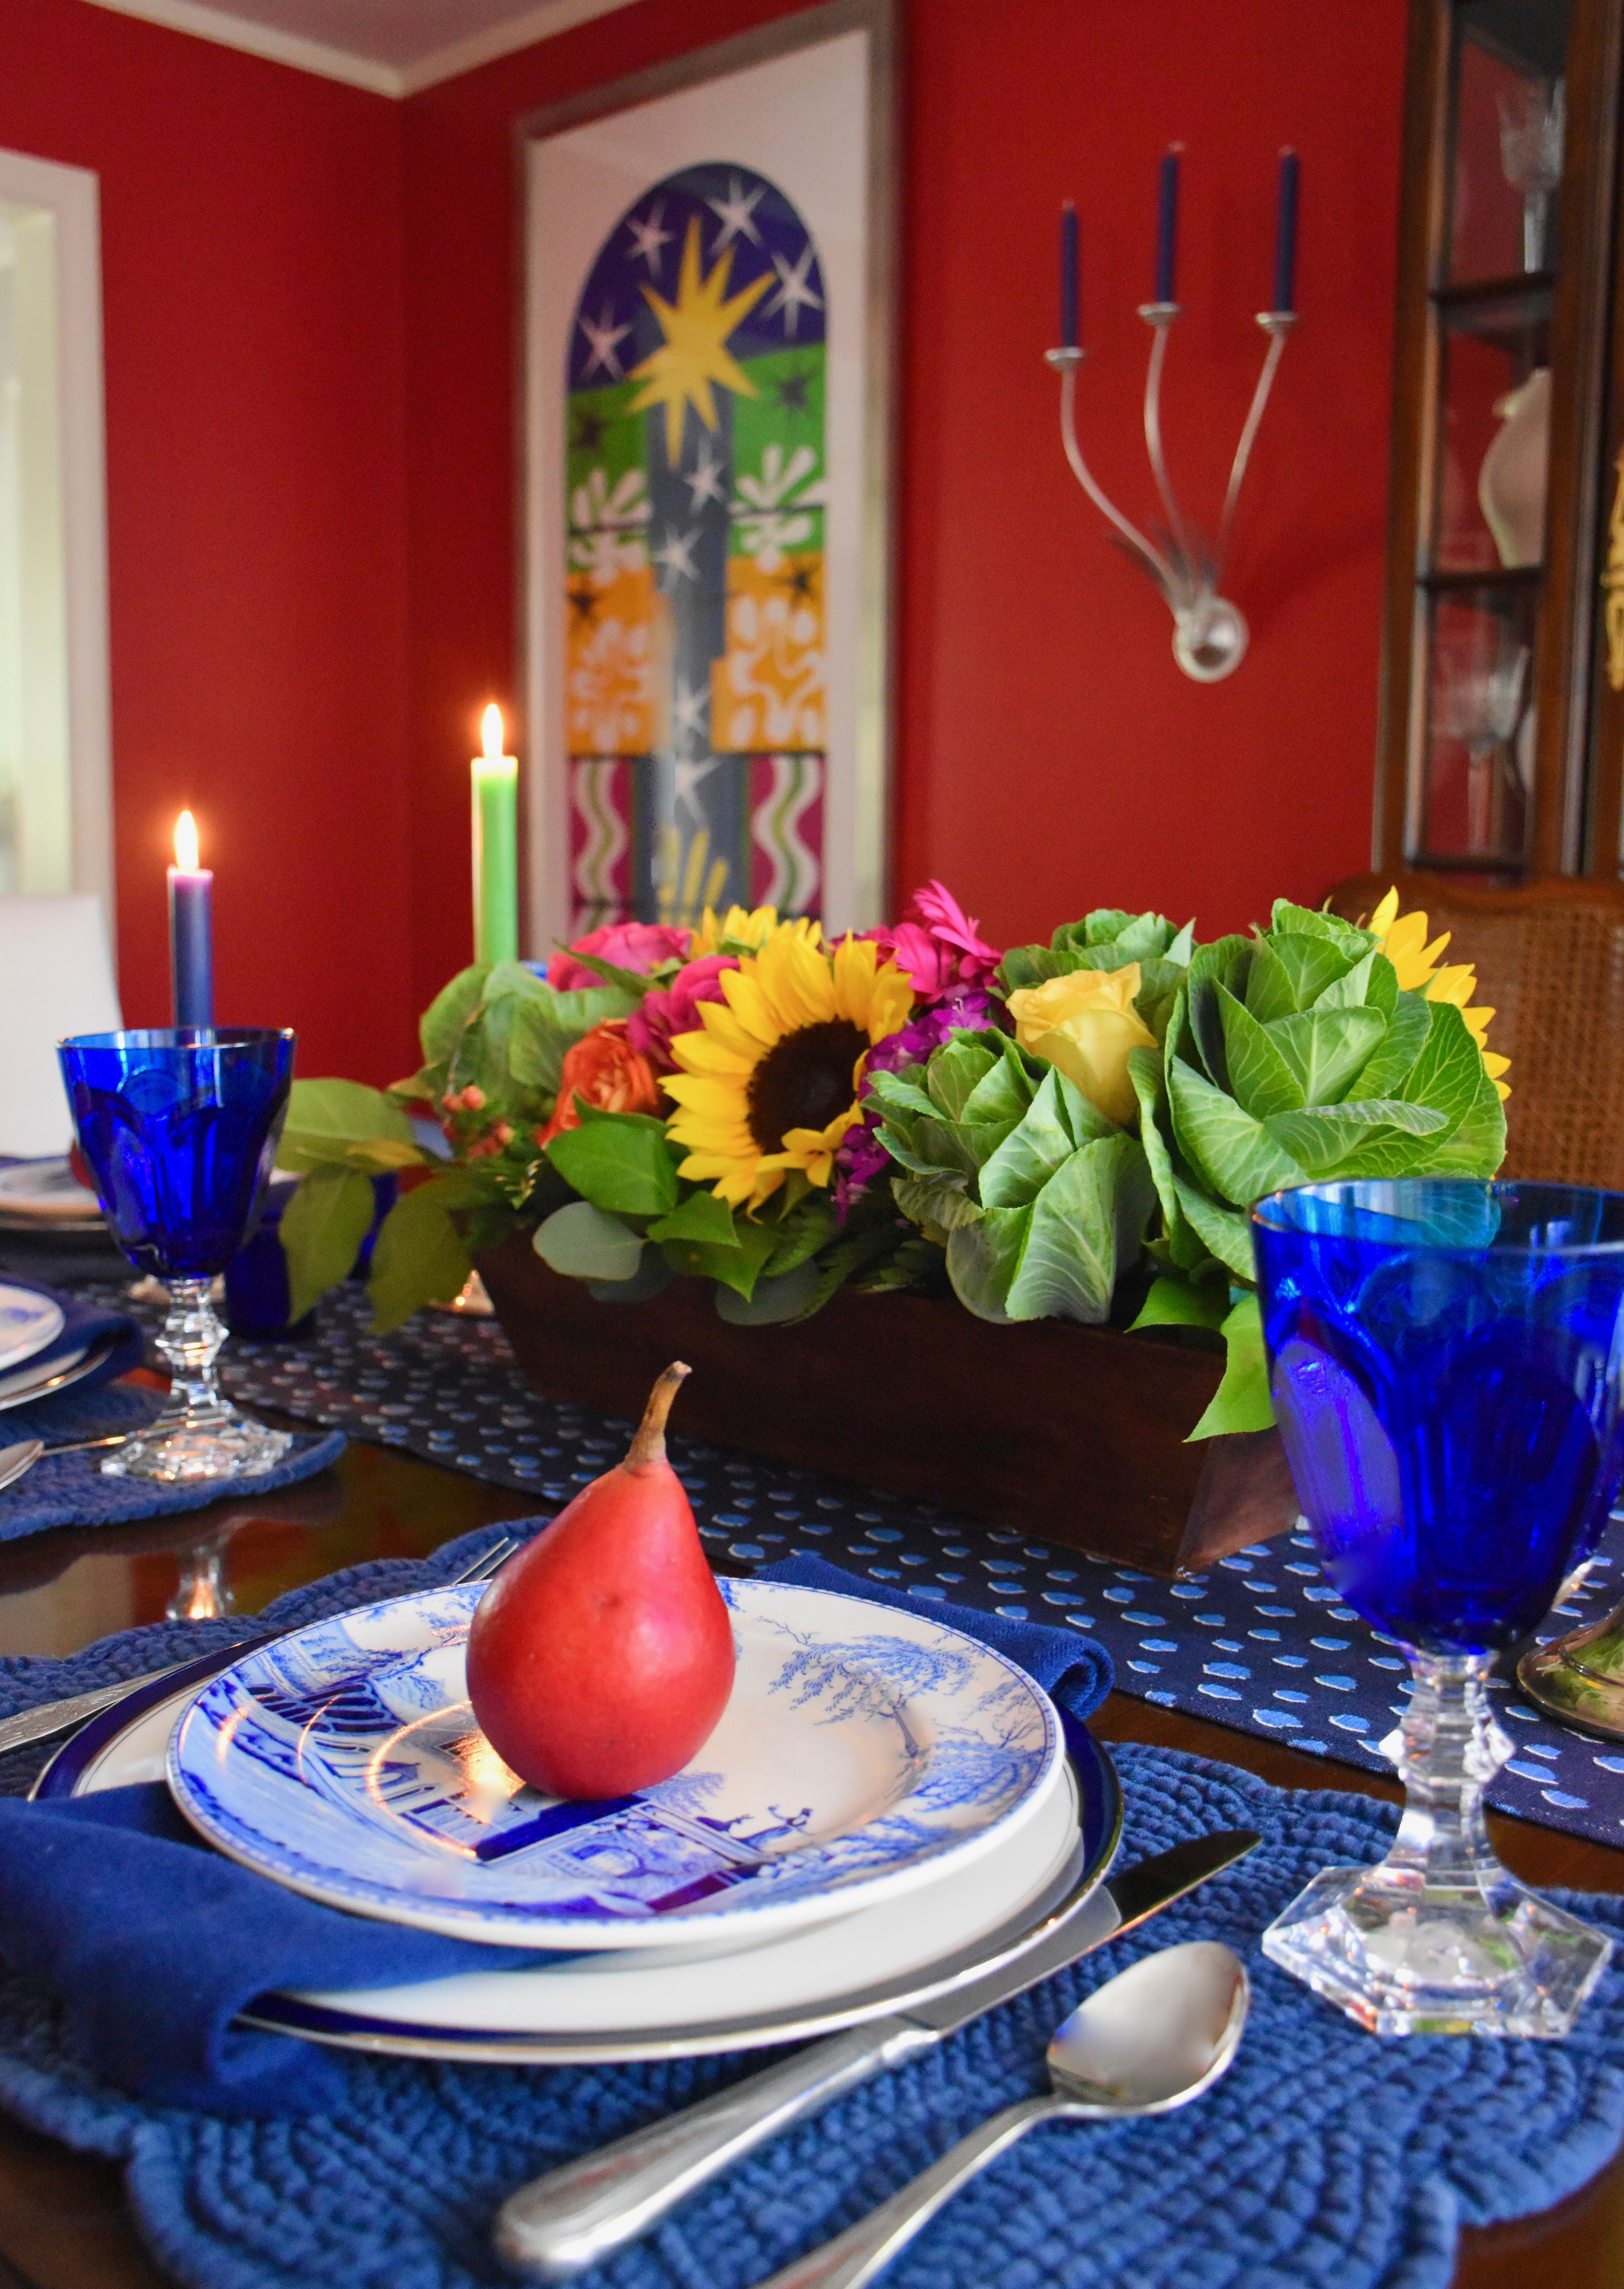
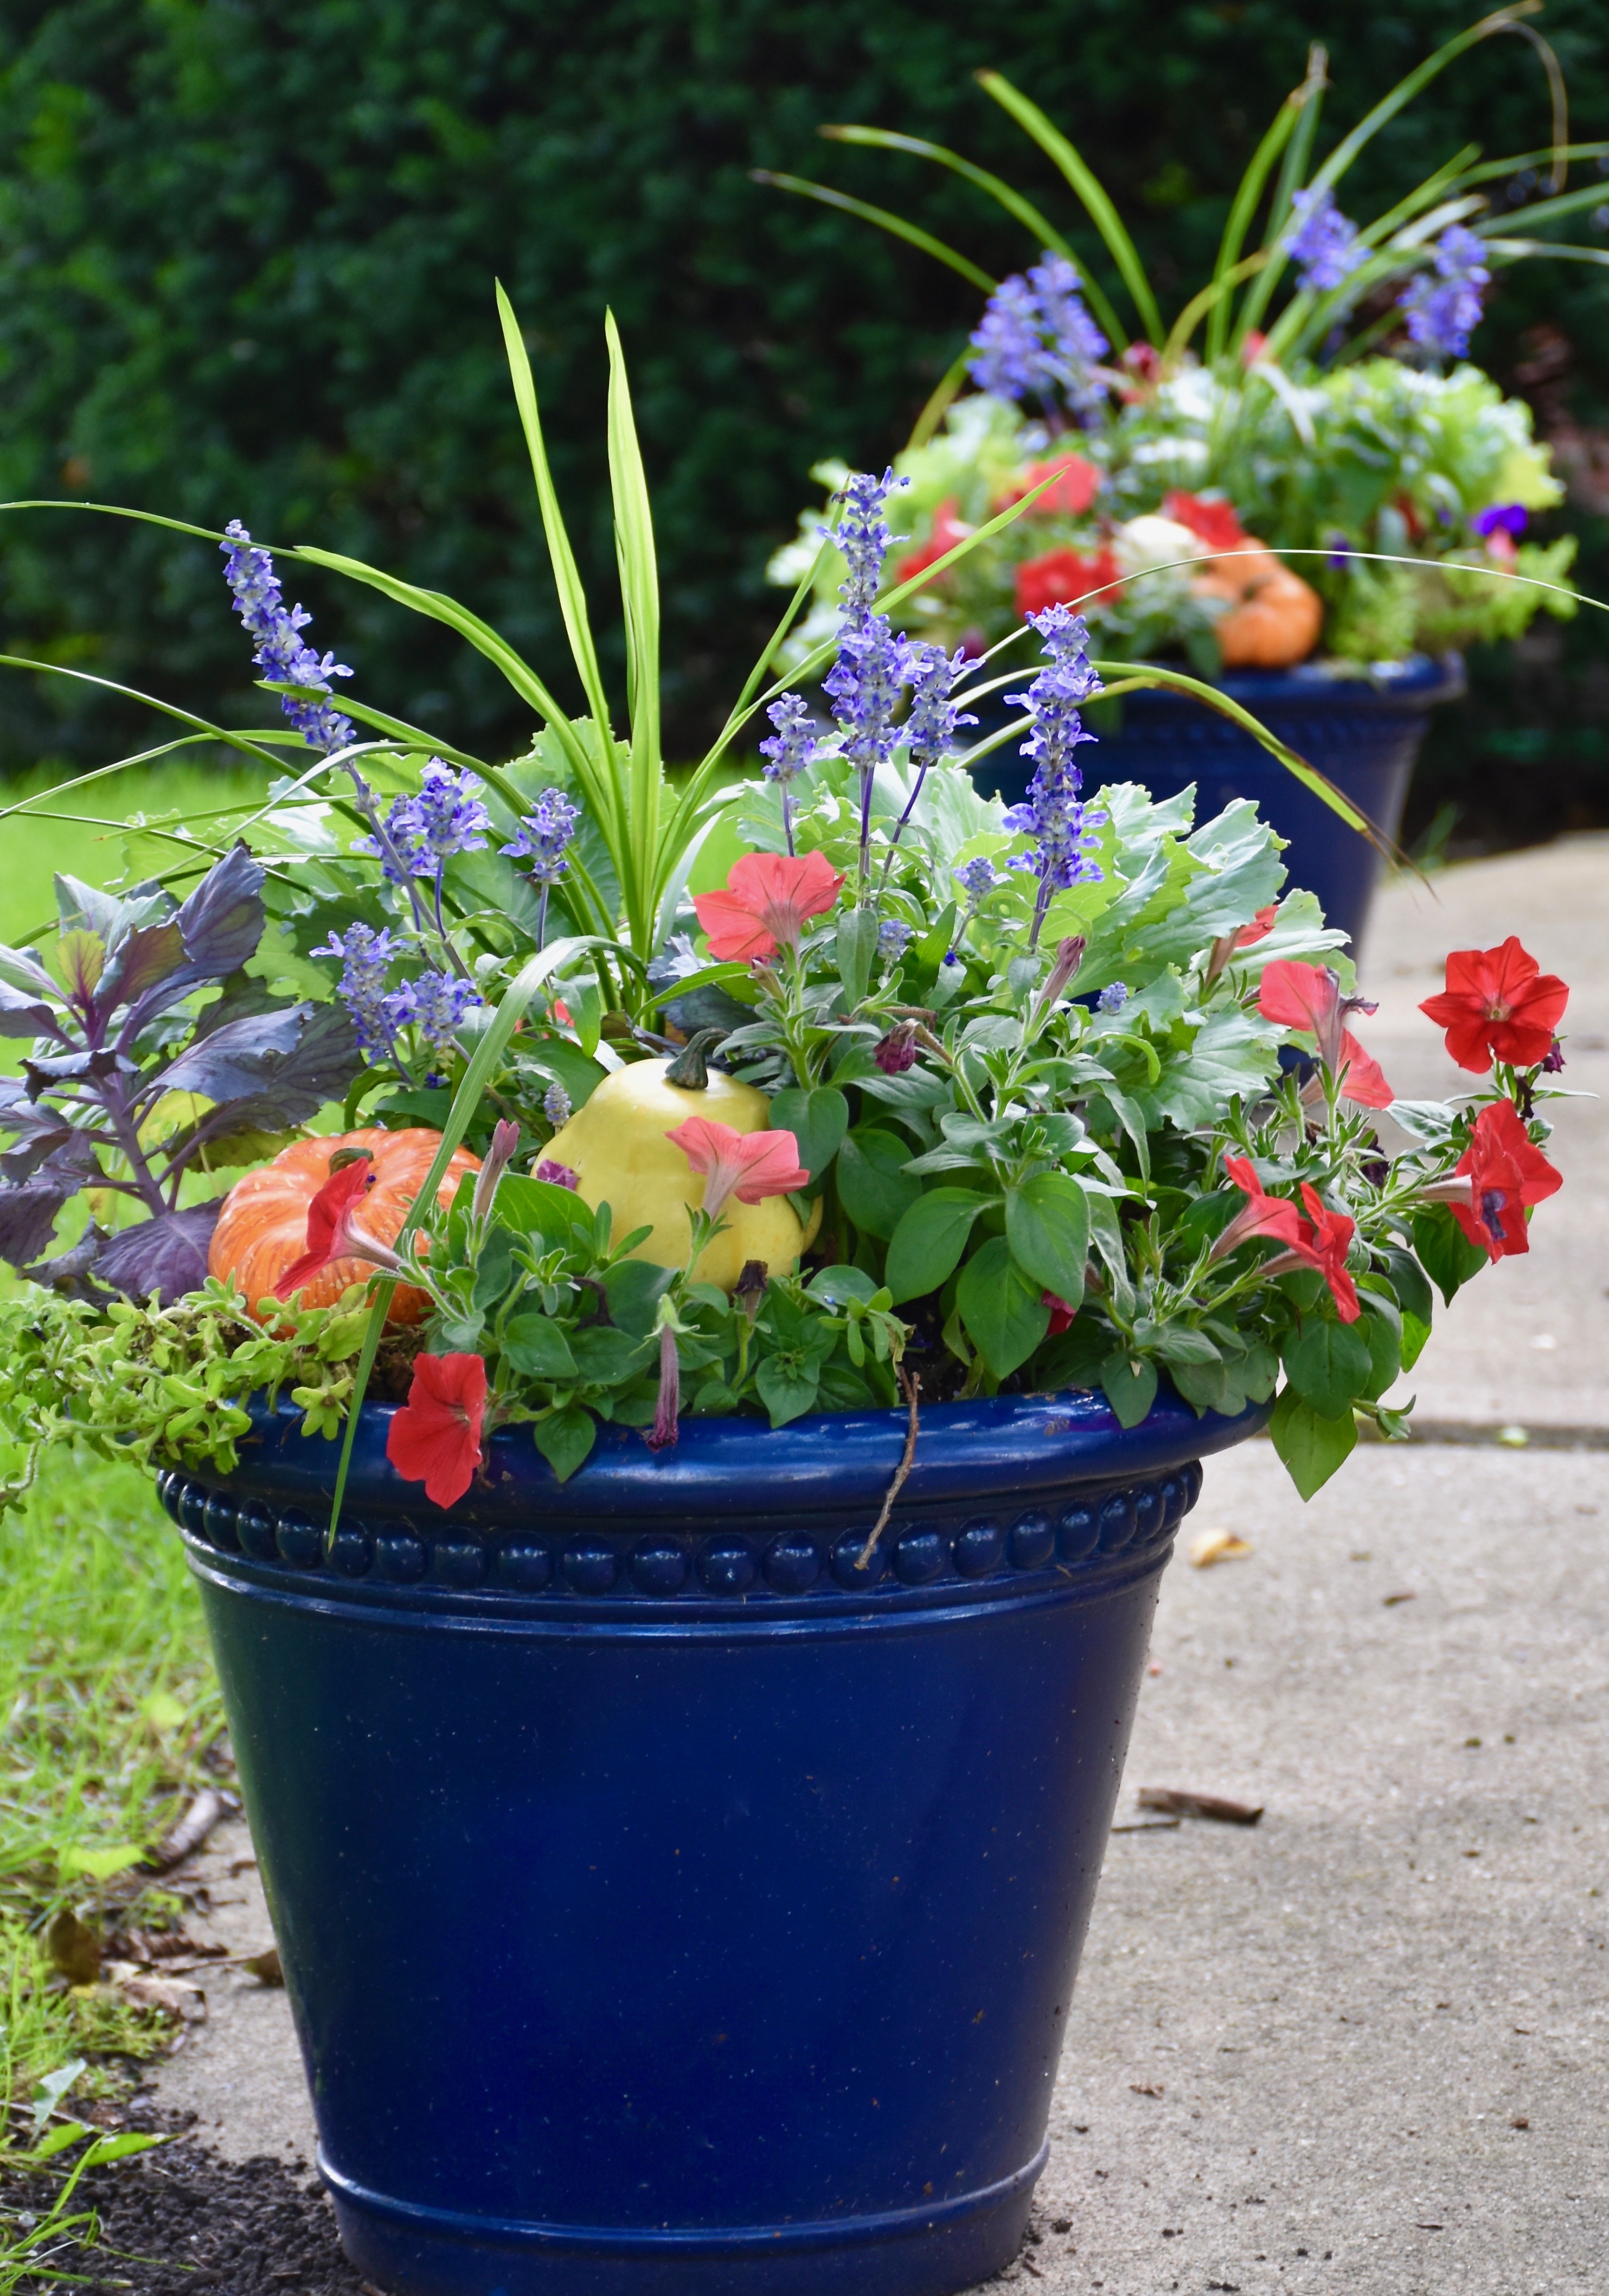
Sometimes we all need to take a break from the busy day to day to embrace the fun of the season and spend a little time with family and friends. My column The Holiday House will feature some of my seasonal favorites from the garden to the table. Ideas and recipes to share with the ones you love.

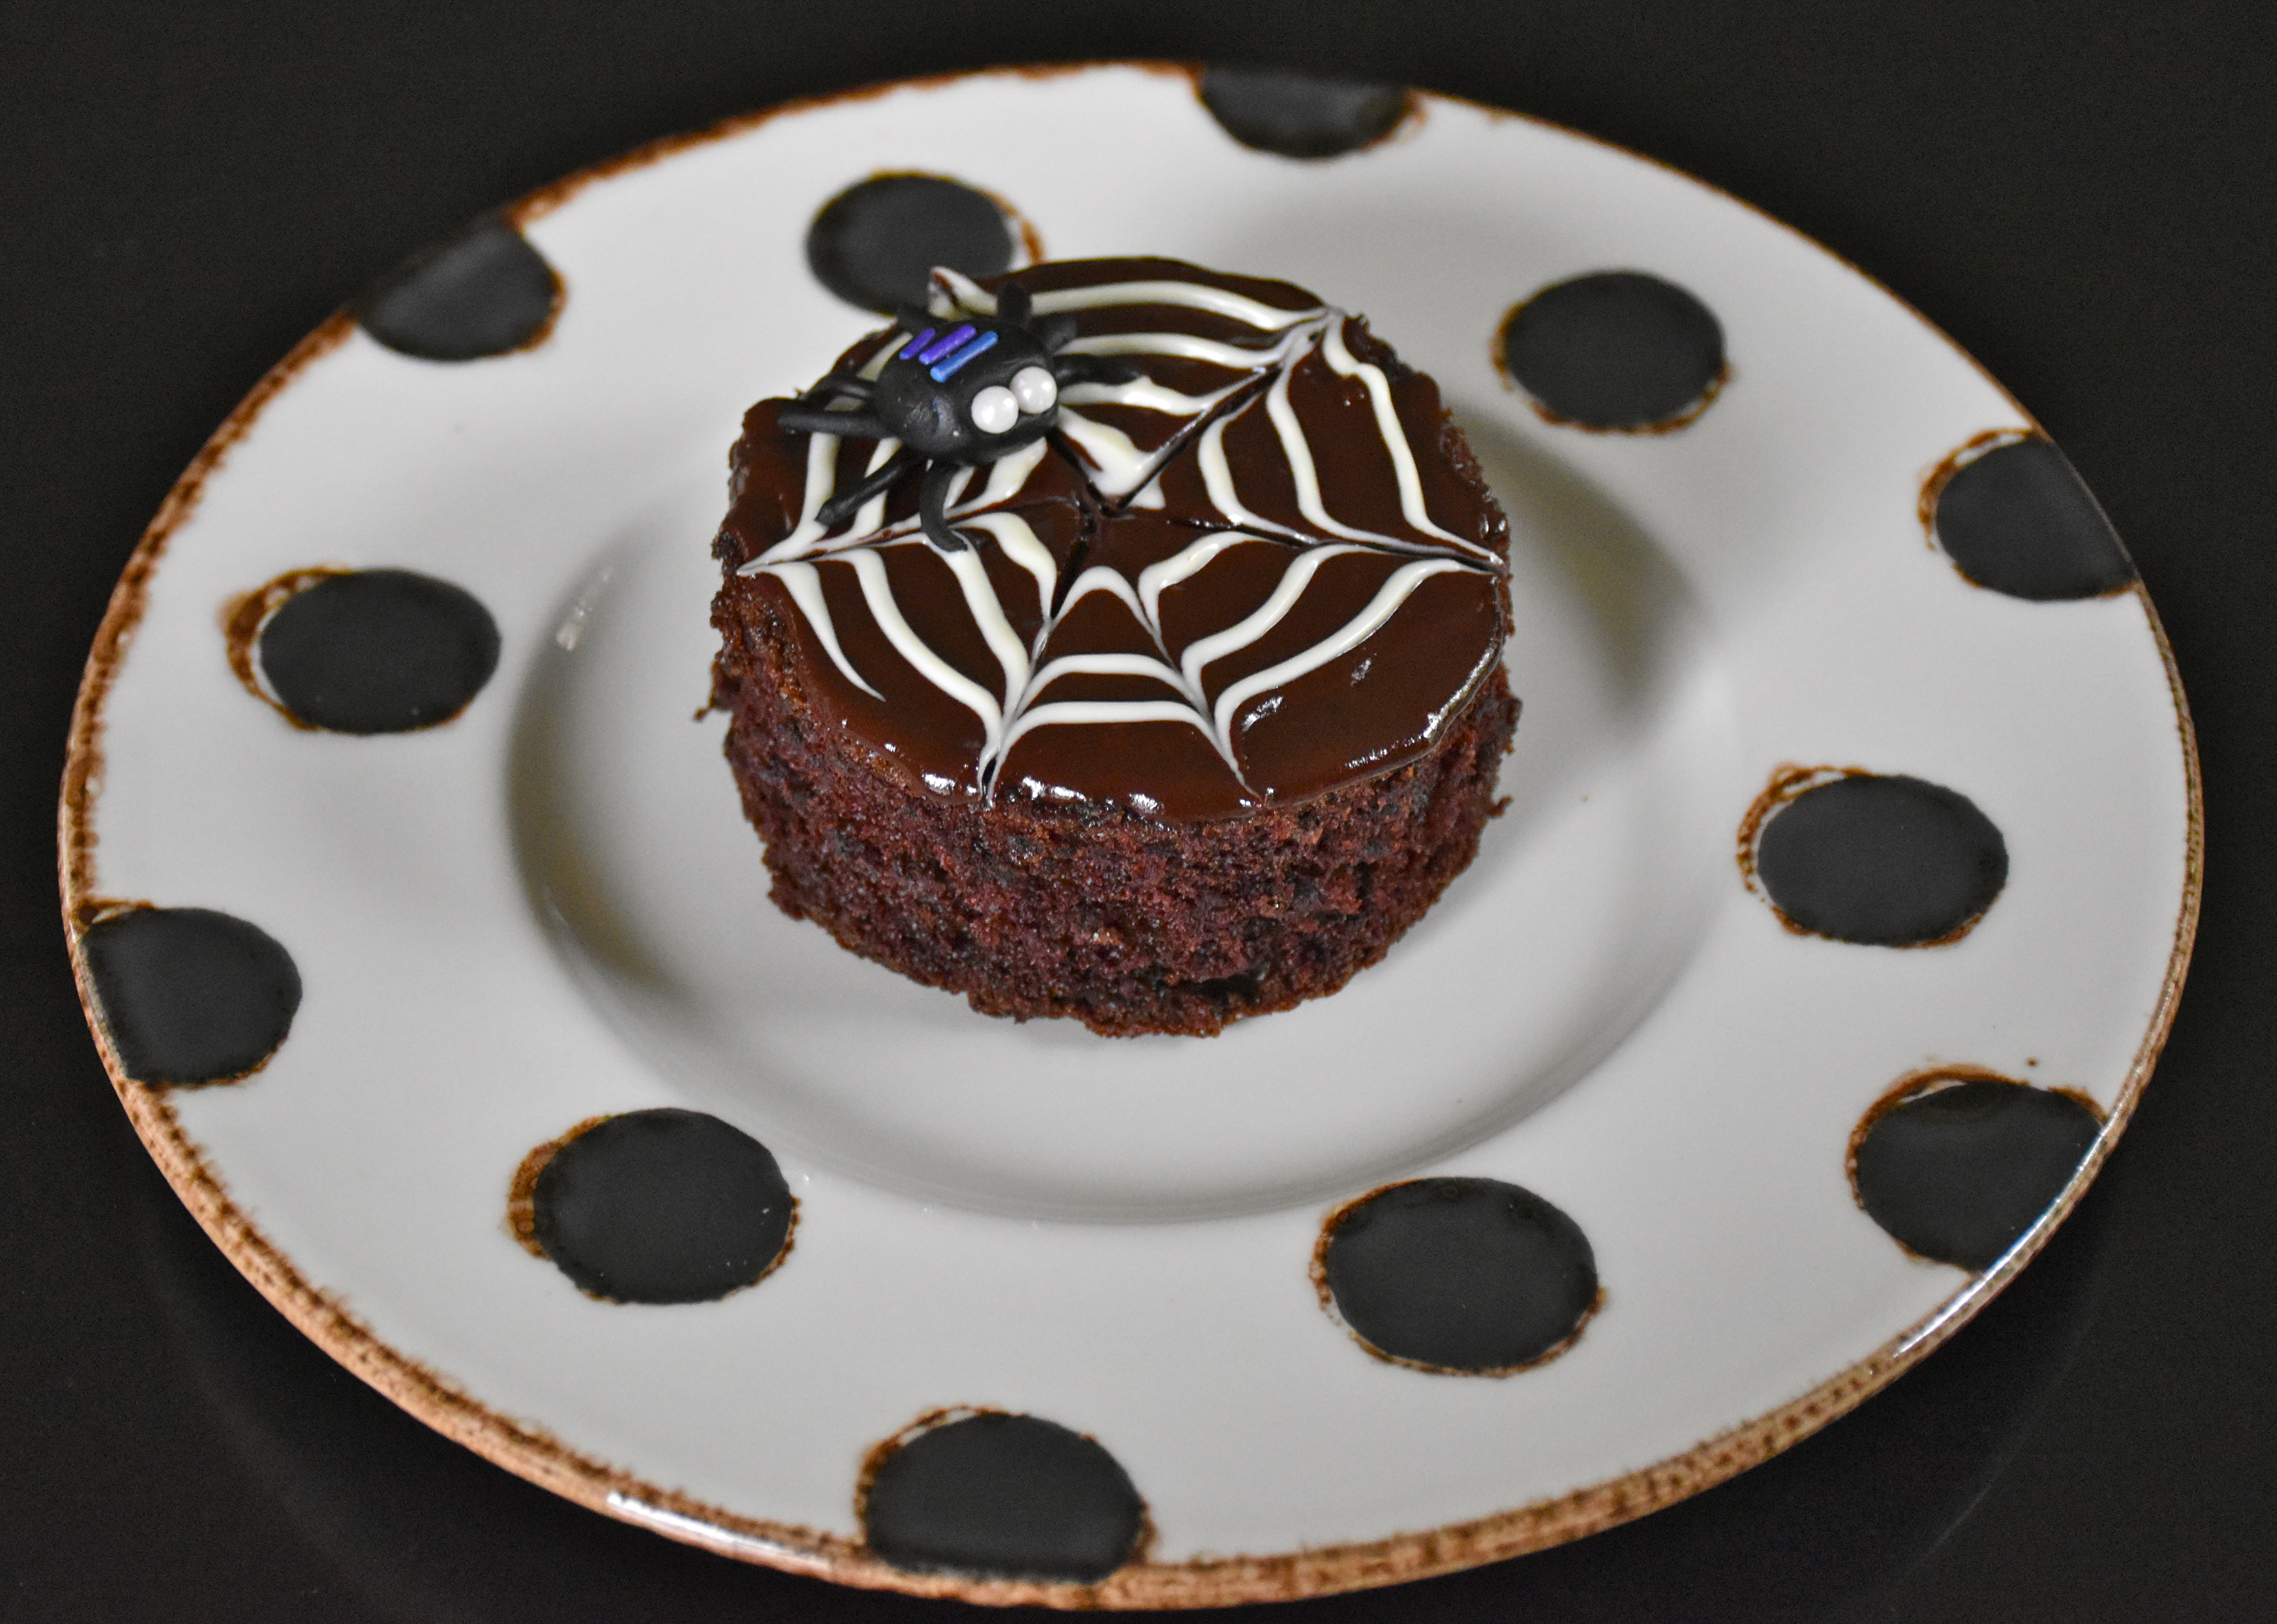
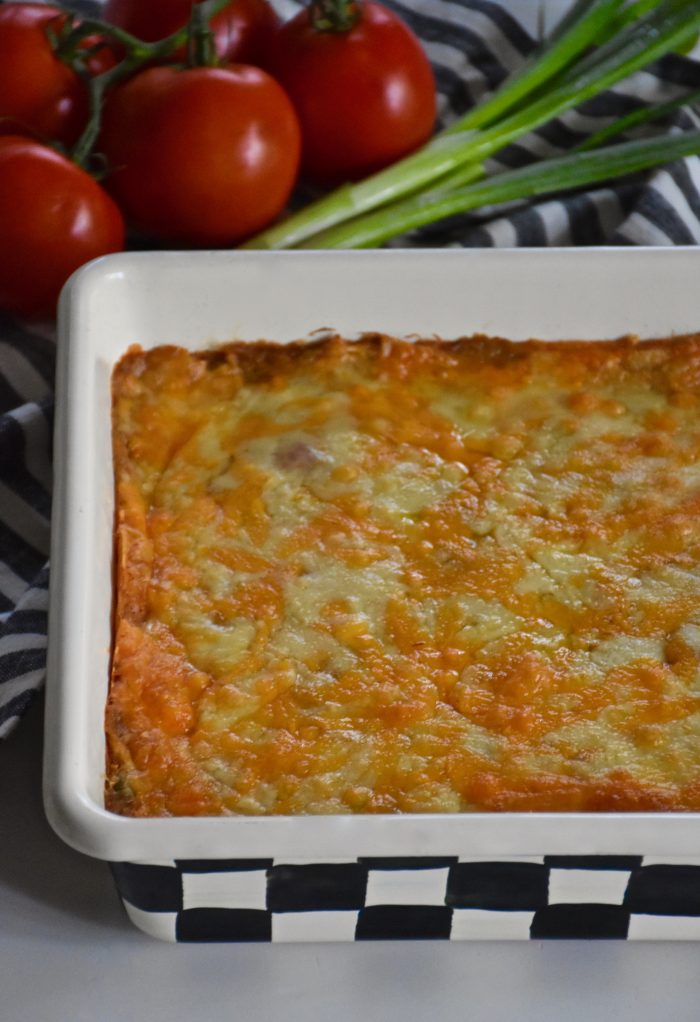
Each year October has me thinking of childhood memories of Halloween, from pumpkin patches to costumes and trick or treating with my sister and brother. In our house it also has us thinking about chocolate. These mini chocolate cakes are fun to make and decorate. The chocolate ganache is easier to decorate with than regular frosting and if you are pressed for time you could even use a small plastic spider ring. So have some Halloween baking fun, because the only thing frightening about these little cakes is how fast they will disappear.

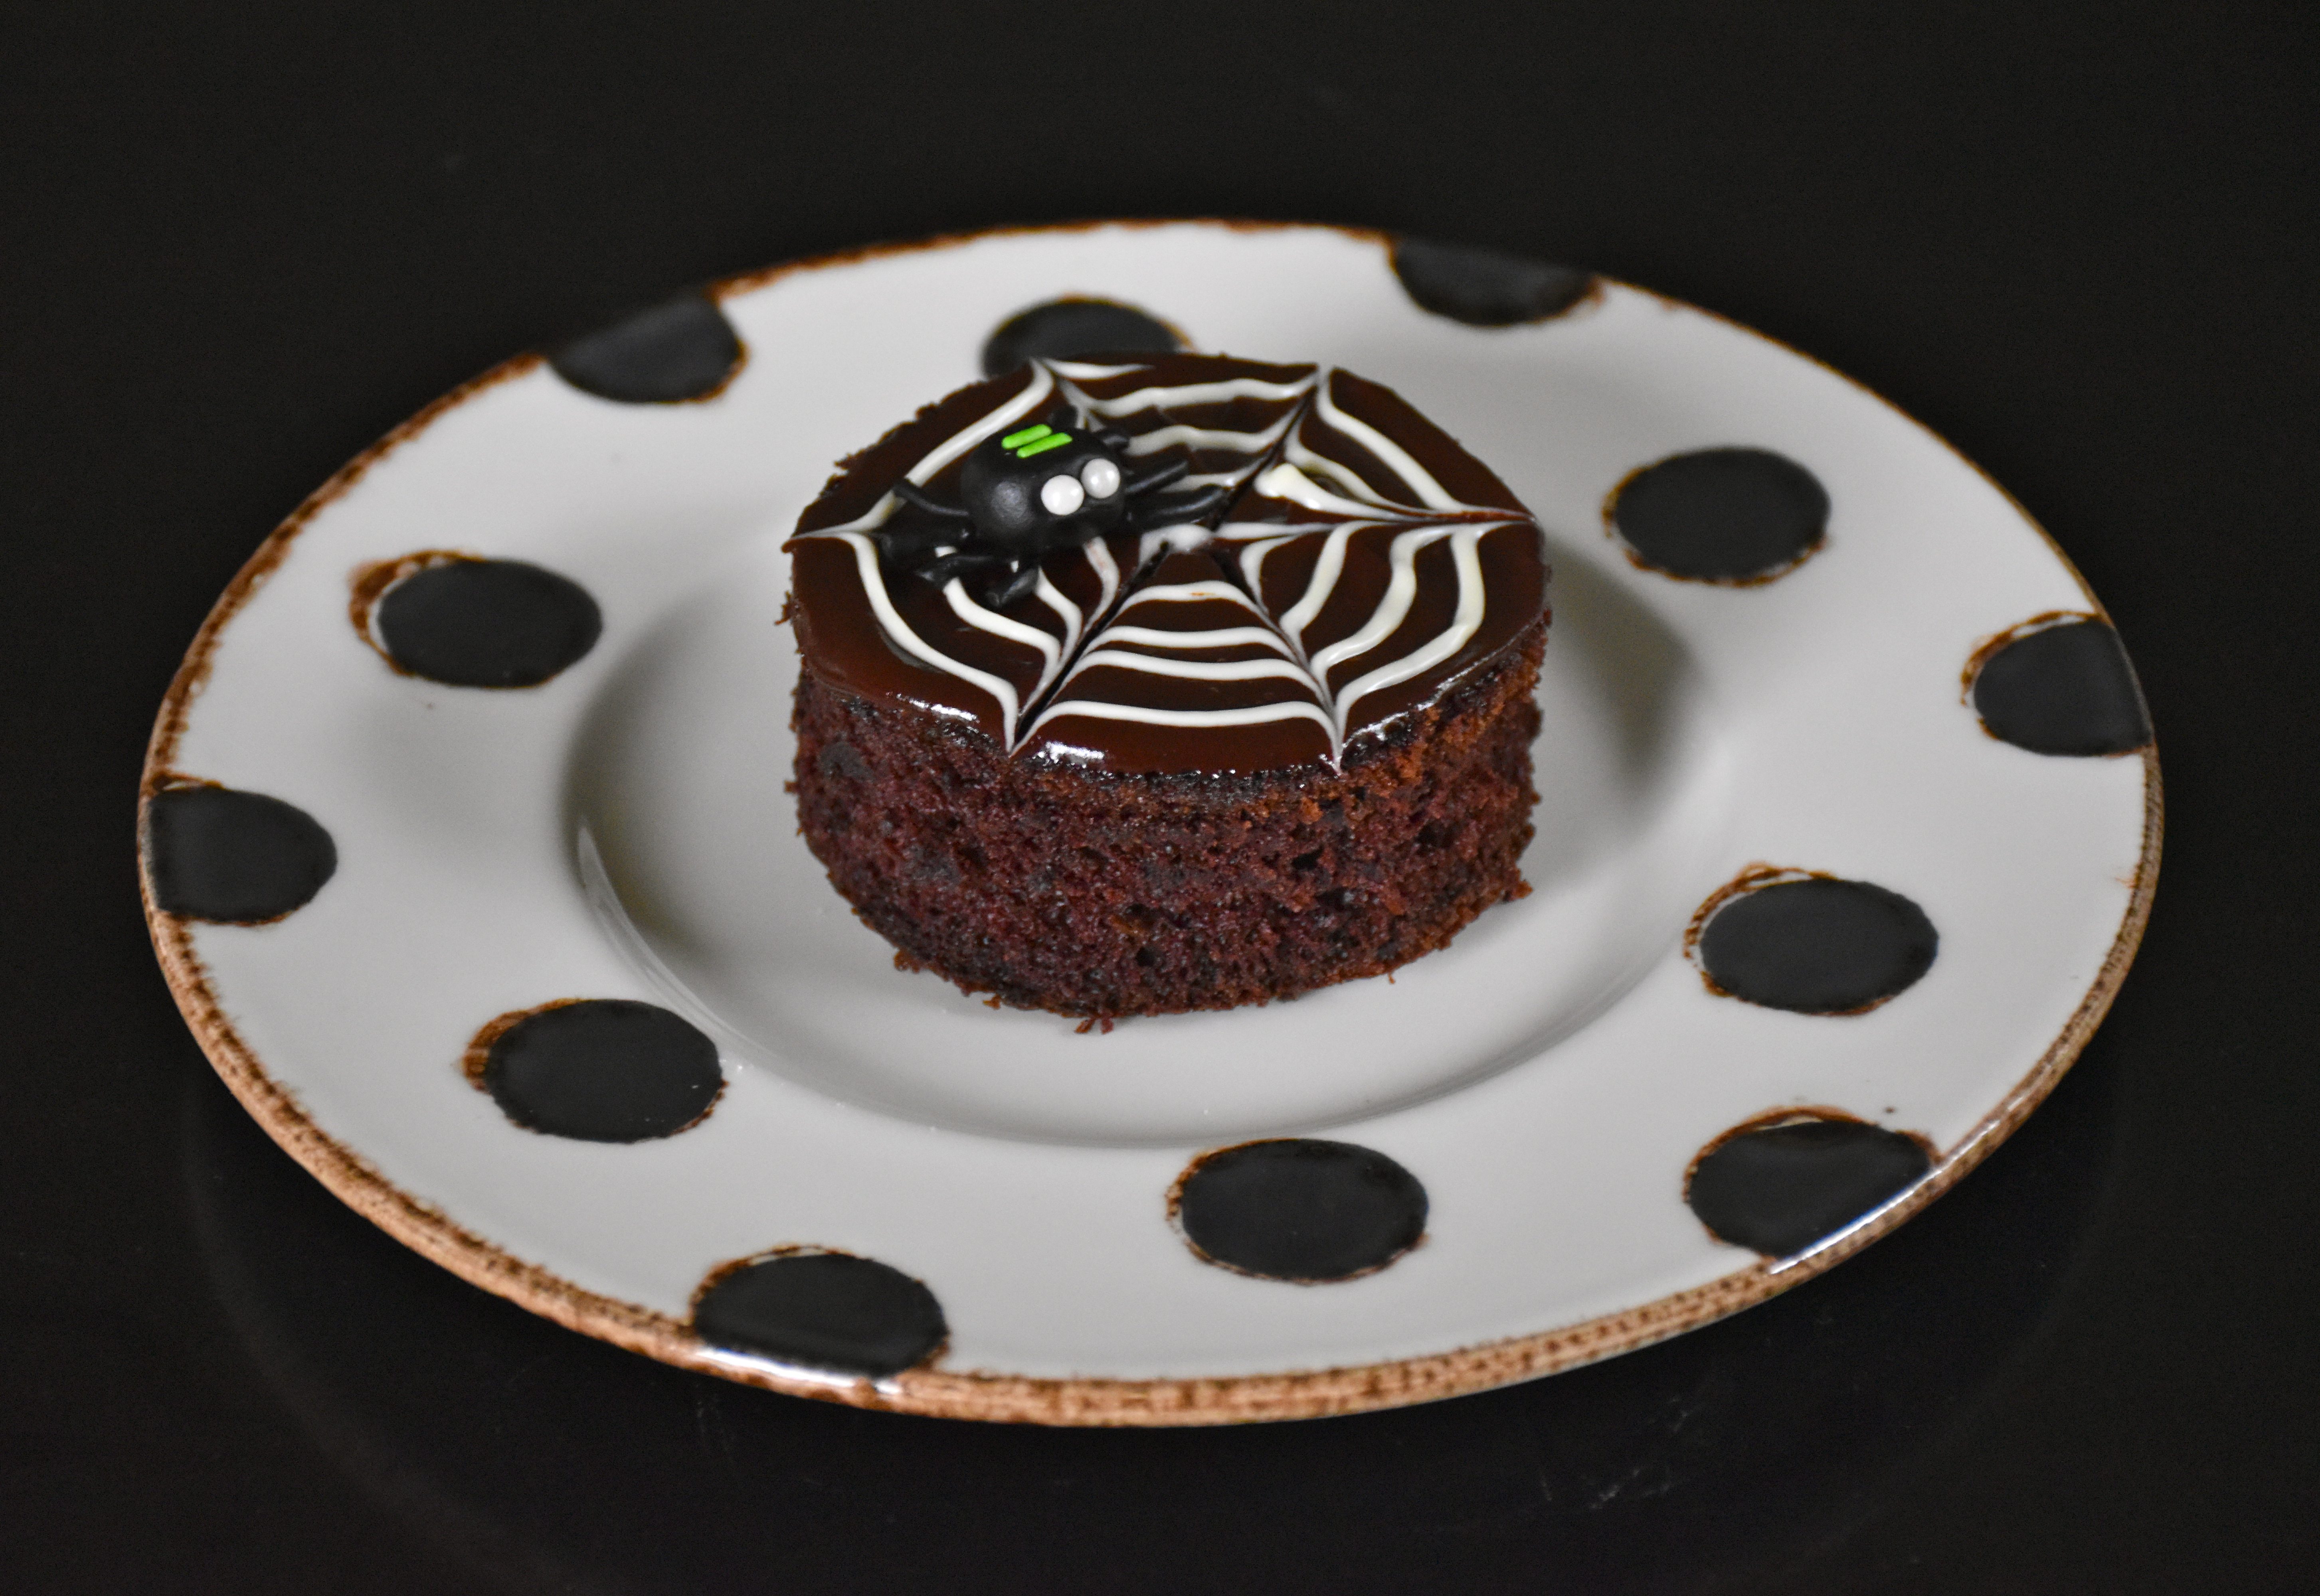
Halloween Chocolatines

Makes one 9 x 13 inch sheet cake which when cut makes 6 individual chocolatines

  • 1 stick of butter
  • 1 cup water
  • 1/2 cup canola oil
  • 2 cups sugar
  • 1/2 cup cocoa powder
  • 2 cups flour
  • 2 eggs
  • 1/2 cup buttermilk
  • 1 1/2 teaspoons baking soda
  • 1/4 teaspoon salt
  • 1 1/2 teaspoons vanilla

Chocolate Ganache 

  • 5 oz semi sweet chocolate chopped into small pieces
  • 1 tablespoon butter
  • 1/3 cup of heavy cream

Spider Web and Fondant Spiders

  • 2 oz white chocolate
  • 1 small container of black fondant
  • Dragees or sprinkles for decorating your spider
  • 1 plastic pastry bag
  • Toothpicks

Preheat to oven to 350 degrees. Prepare your cake pan by lining it in parchment paper and greasing and flouring the sides or spraying them with Baker’s Joy.

Then in a heavy saucepan combine the butter, water and canola oil and set over medium heat until the butter is just melted. Meanwhile in a large bowl of your mixer add together the sugar, cocoa and flour. Then pour the butter mixture into the sugar and flour mixture and beat until smooth. Mix in the eggs one at a time then mix in the buttermilk. Next add the baking soda, salt and vanilla all at once and mix one final time. Pour your cake batter into your prepared pan and bake for approximately 30 to 35 minutes.

Once your cake has cooled remove it from the pan and then place your sheet cake on a flat smooth surface. I cut my individual cakes by using a wide mouthed glass. My glass had a three and a quarter inch diameter, but you could use a jar, glass or cookie cutter of a roughly similar size. I found it helped to lightly spray the inside of the glass and edges with butter flavored cooking spray.

Next in a small sauce pan over medium low heat your chopped semi-sweet chocolate and your butter. Cutting the chocolate into smaller chunks helps it melt evenly. Meanwhile heat your cream in the microwave until it is warm, about 40 seconds. Then keep an eye on your chocolate. Give it an occasional stir as it melts and as soon as it does pull your pan off of the heat and slowly pour in your warm cream while stirring your chocolate mixture. You want to stir until the chocolate and cream come together and you get a glossy looking mixture.

Then while the ganache is still warm spoon a small amount on each cake and spread it evenly using a separated spatula or a butter knife.

Then while your chocolate ganache is still warm heat 2oz of white chocolate in a microwavable bowl. I heated mine for 30 seconds and then stirred it and then heated it for another 20 seconds. You want the chocolate to melt but you want to make sure it does not burn. Then take a plastic pastry bag (they are easy to find at any craft store) and fill it with the melted white chocolate.

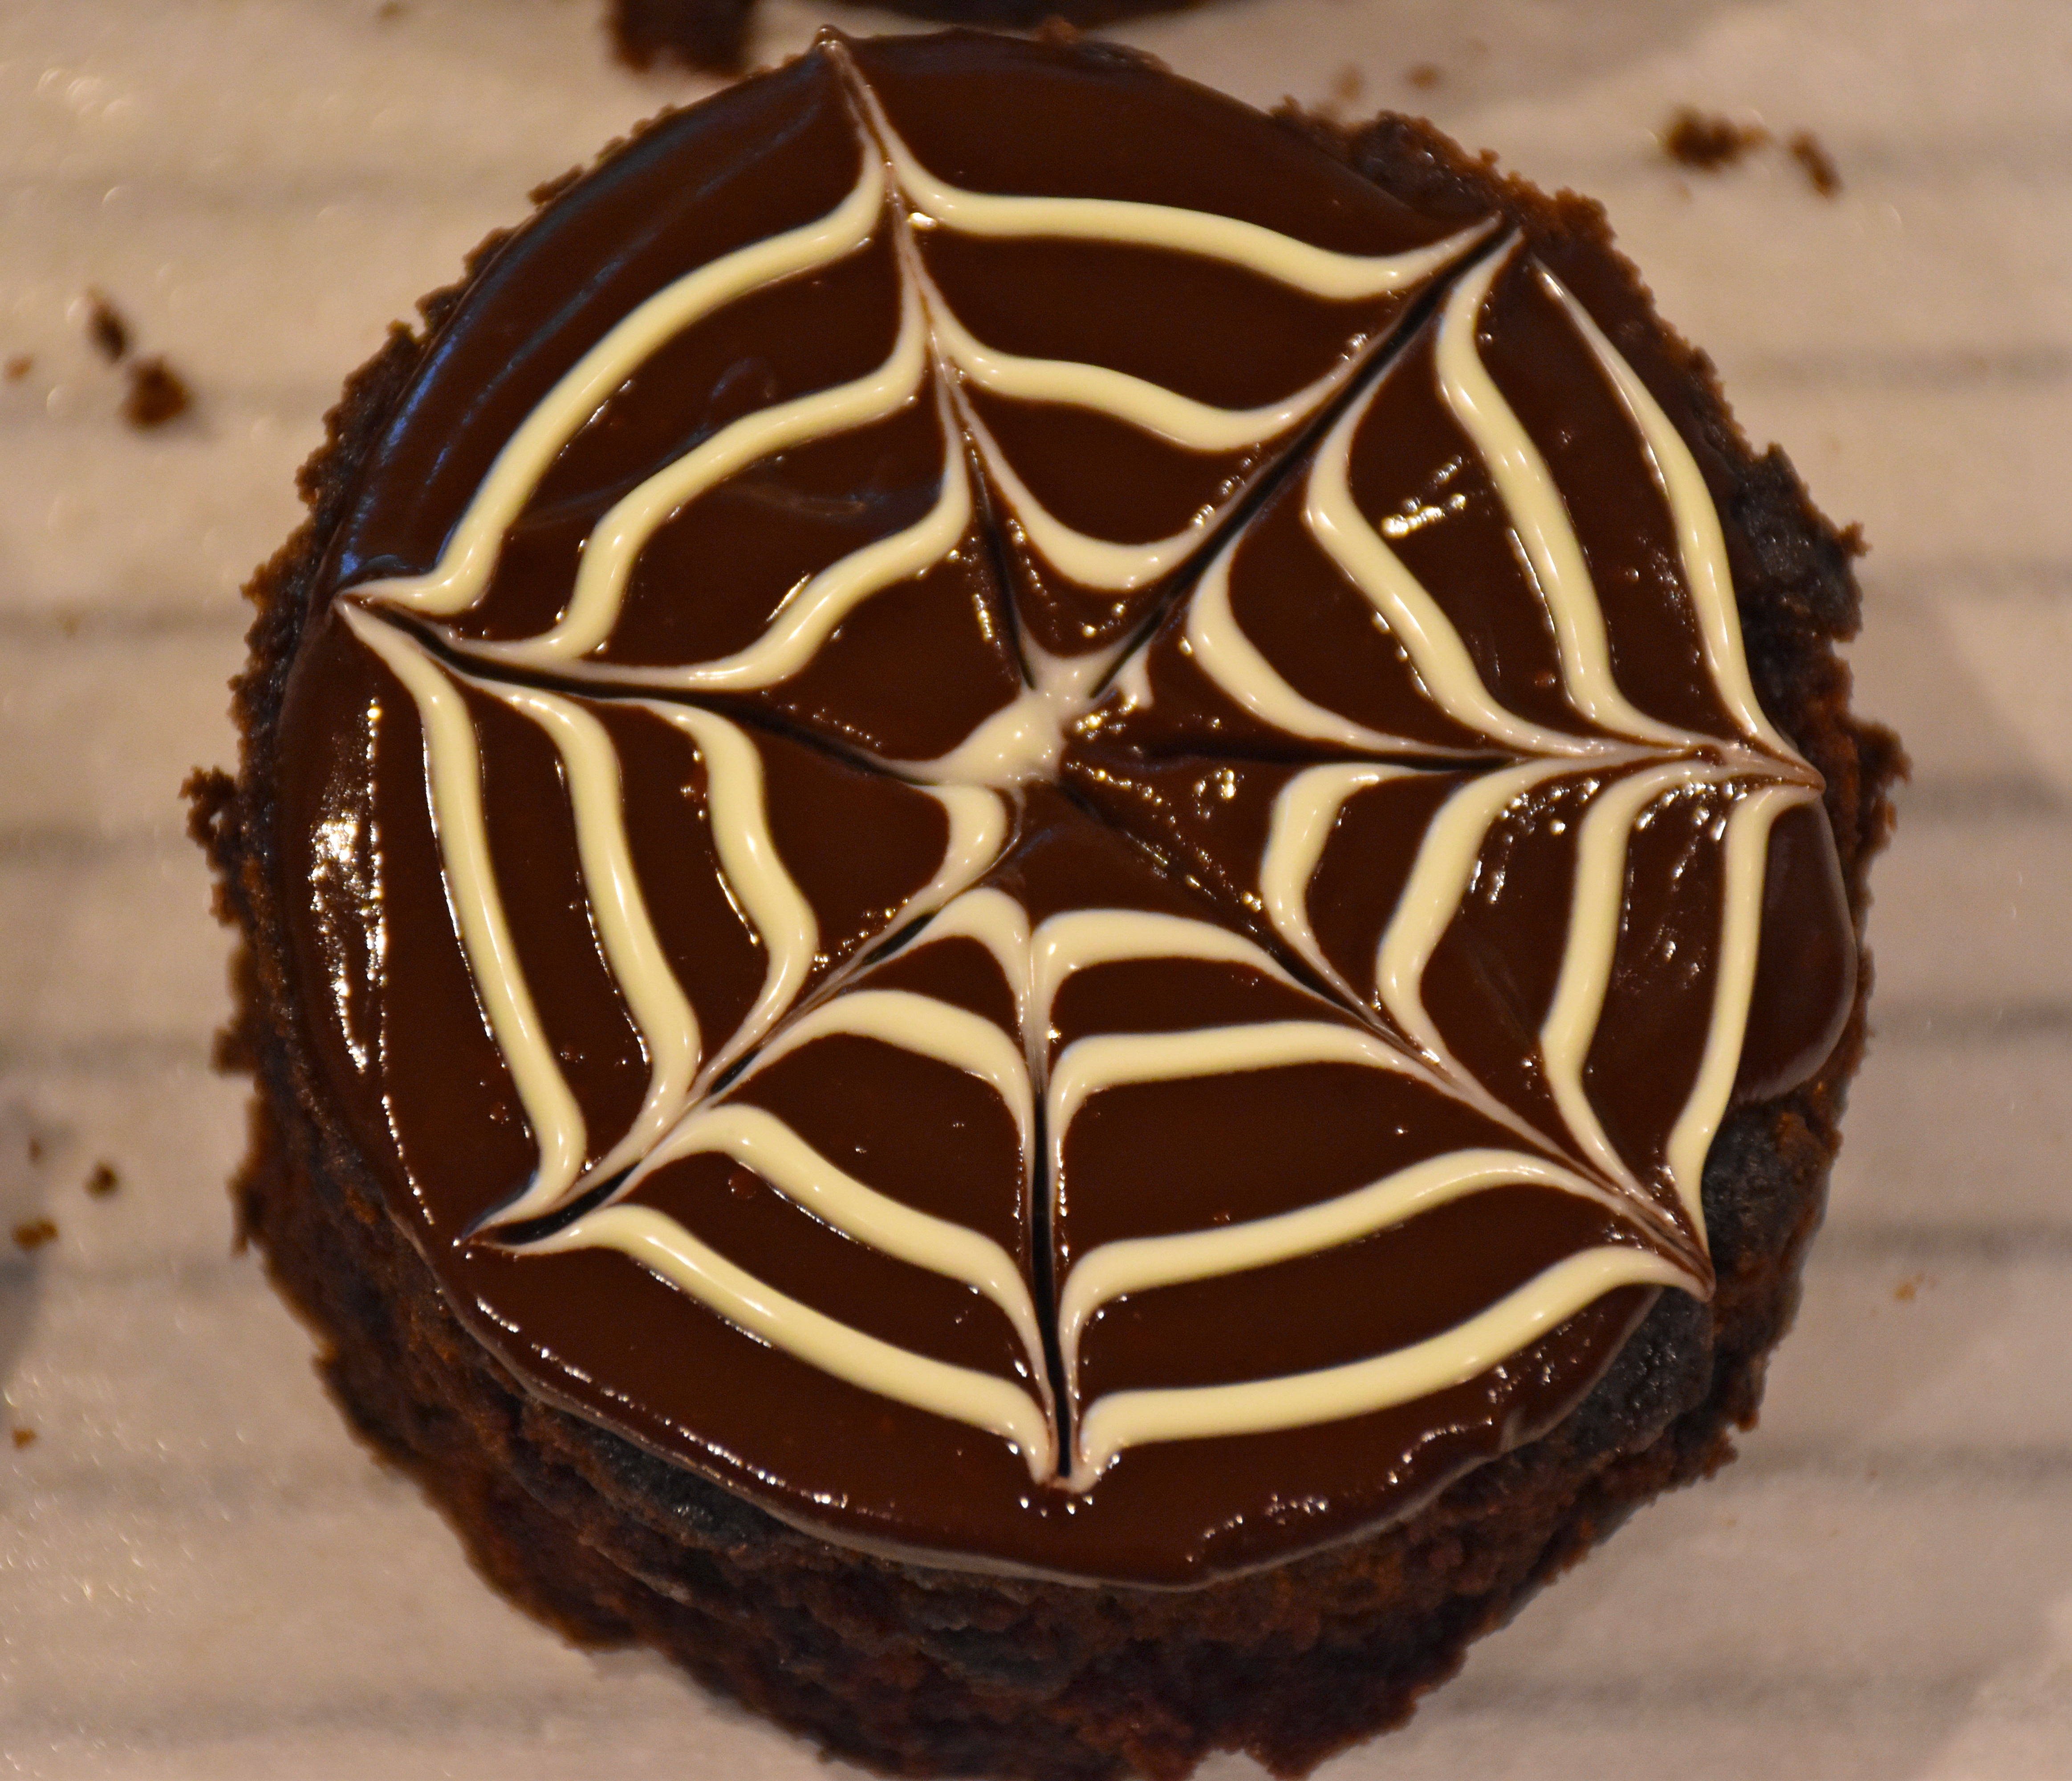
Then cut a small hole at the very tip of your bag and then you are ready to pipe your spider webs. To make your web pipe a white chocolate spiral on each cake. Then while it is still warm take a tooth pick and lightly drag it from the center out to form a web.

To make the spiders roll six little balls of black fondant. Then roll out some long thin snake like pieces. To make your spider legs cut four even pieces of your rolled snakes using scissors or a knife. Then make a bow tie like middle by pinching your legs together so you had eight legs with four on each side. Then put the little balls on top on each set of spider legs. I used some colored sprinkles to make stripes on our spiders and I used some white dragees to make eyes. Your chocolate cakes will do best when kept in the fridge. So share something delicious with your family and friends.


The Spellbinding Homes of Harold Zook

Ever seen a spiderweb sparkling in the sun and wondered how all those little details were created? I prefer to keep my distance when it comes spiders, but I do marvel at their designs. I had never seen a spider web and thought of home design until I saw the work of Midwest architect, Harold Zook.

Although not as widely known as Frank Lloyd Wright, Harold Zook was a notable and celebrated architect from the 1920s to the late 1940s. His artistic and distinctive homes are so beloved that nearly a century people are still talking about them. Zook built homes in the western towns that surround Chicago including: Hinsdale, Western Springs, Riverside, Downers Grove, Glen Ellyn, Homewood, Warrenville, Palos, St. Charles and Lake Geneva, Wisconsin.

This is the garage and an additional living/studio space belong to the home featured above. These were recent additions, but the architectural design beautifully matches Zook’s original home. I noticed that this home was recently photographed so hopefully we will see more of the interior renovation when it is published.

The craftsmanship and artistic details make his home designs truly one of a kind. Although known for his Cotswold styled cottages, Zook also built many Tudor and Georgian inspired homes as well. Zook was deeply influenced by nature. His homes feature exposed wooden beams and living rooms with cathedral like ceilings that let the natural light fill the room. He also found ways to add in distinctive floral and animal details to shutters, windows and iron work.

This is Harold Zook’s Office. When it was relocated they had to remove some of the original windows on the house and temporarily replace them with painter shutters which you can see in the distance. Hopefully with time they will be able to more fully restore it. Notice the undulating cedar shingle roof line. It was designed by Zook to mimic the look of a thatched roof. These roofs are one of the special trademarks of many of Zook’s Cotswold styled homes. Want to see the house before the move and learn more about its restoration then here is a video by the Hinsdale Historical Society.

However, his signature mark became adding a spider web detail in each home he designed. Sometimes he added it to a stain glass window other times it was featured in stonework above a fireplace or in a patio.

Here is close up of another signature Zook detail. This spider stained glass window is a special feature of the home he designed for Legge family. If you look closely a little spider has built it’s own web in the corner.

In the 1980s, Zook’s nephew, Coder Taylor, who worked with his uncle was interviewed by the Chicago Tribune. He remembered how his uncle loved spider webs. Zook believed that spiders were nature’s best builders. As his assistant Taylor remembers how Zook was fascinated with their structure. Taylor remarked that he drew so many spider webs while working with Zook that he thought he was a “baby spider.”

This Tudor inspired Zook home is filled with interesting woodwork and carved flower boxes. This home was recently restored and remodeled.

Zook’s personal home and his office have now been moved and preserved at Katherine Legge Park in Hinsdale, Illinois. They have been placed near another residence he designed for the Legge family in 1927 that is now used for special events. The local historical society hopes to be able to restore more of his home and office in the future.

Zook’s homes continue to live on and influence the architectural feel of Hinsdale and the western suburbs of Chicago. A recent renovation of one of his homes was feature in Luxe Magazine. His homes are all private residences so it’s special to see photographs of the interiors of this home.

This is one of the window boxes of this home all dressed up and planted for fall.

Zook’s homes have a magical quality to them. They feel like storybook cottages come to life. Zook was as much an artist as he was an architect thus it’s wonderful to see people treasure his work.

Even the garage is thoughtfully designed as if it was it’s own little cottage.

I love seeing Zook’s homes set against the fall leaves and decorated for the season. So, I hope you enjoyed seeing some of the spellbinding work of Harold Zook. Like the spider’s webs he studied his homes are uniquely beautiful, each spins their own fantastic tale in every detail he imagined.

There Is No Taste Like Home: King Ranch Chicken

My first newspaper column ran last week, which was exciting to see. My  assignment was to introduce myself to my local readers, so I decided to do it through food. Because food has a language of its own and it is one of my favorite ways to get to know a place. You can read my column here, but this week I thought I would share my recipe for King Ranch Chicken. If you are not familiar with this casserole then think of it as a Texas styled lasagna. So, if you have ever been homesick for a taste of Texas or just want to try a signature dish from the Lone Star State then you are in for a treat. This recipe is one of my all time favorites.

King Ranch Chicken -Serves 8 to 10 people

  • 1/2 cup (1 stick) butter
  • 1 medium yellow onion, diced
  • 1 red bell pepper, seeded and diced
  • 4 cloves of garlic, minced
  • 1 cup flour
  • 3 cups chicken broth, warmed
  • 1/2 cup cream, warmed
  • 1 teaspoon kosher salt
  • 1 tablespoon chili powder
  • 3 teaspoon cumin
  • 1 teaspoon coriander
  • 1 (10 oz) can Rotel tomatoes, drained
  • 4 cups shredded rotisserie chicken or roast your own
  • 18 corn tortillas or if you are not a fan of the traditional corn you can substitute flour
  • 5 cups of a blend of shredded cheddar a Monterey Jack cheese
  • 1 cup sour cream for garnishing
  • Avocado Pico de Gallo (see recipe below)

In a large skillet or dutch oven melt your butter over medium heat. Sauté your onion and bell pepper until they are tender about 6 minutes. Then add in your garlic and cook it for an additional minute.

Next sprinkle in your flour and stir it into your onion mixture until it is no longer white. Then slowly add in your warm chicken stock about 1/2 cup at a time until it is all added. Then add your cream. Adding warm stock and cream is the key to having a creamy chicken base.

Then add in your seasonings including your salt, chili powder and coriander. Finally stir in your Rotel tomatoes. (If you like things on the less spicy side they make a mild version of Rotel that has fewer chilis.)

Now that your sauce is finished you are now ready to start assembling your casserole. Spray a 9×13 inch dish with cooking spray and then speed a very thin layer of sauce on the bottom. Next add a layer of your torn tortillas to cover the entire bottom of your pan. Layer on half of your chicken and 1 1/2 of your shredded cheese then cover that with a thin layer of sauce.

Continue with a second layer of chicken, tortillas, cheese and sauce.

Finally make a third and final layer of tortillas and cover that with the remaining sauce and sprinkle the top with the remaining 2 cups of cheese.

Bake at 350 degrees for 45 minutes or until the top is gold and bubbly. You can also make this ahead of time, but it you are baking it straight from the fridge you may want to adjust your cooking time.

I like to garnish mine with a dollop of sour cream and a little avocado pico de gallo

Avocado Pico de Gallo (I sometimes double this pico de gallo if I am making this dish for a crowd)

  • 1 avocado chopped into bite sized pieces
  • 1 large tomato, chopped
  • 2 green onion tops (just the green part) sliced thinly on the diagonal
  • 3 tablespoons cilantro, chopped
  • 1 TBSP lime juice
  • 1/2 tsp kosher salt
  • 1/4 tsp garlic powder

Mix your ingredients in a medium sized bowl and add a  spoonful or two on top of your casserole.

Texas Monthly Magazine said it best, if Texas “were to declare a state casserole then it would have to be King Ranch.” The spicy Tex-Mex flavors of this dish are what makes it so memorably delish. There are versions of this recipe with cream of mushroom soup, but this from scratch version is much better. There is just no comparison when it comes to taste. The other thing I love about this dish is how easy it is to make ahead of time and if you have leftovers it freezes well too. I hope my King Ranch Chicken aka “Texas Lasagna” brings your taste buds as much joy as it does mine.

Autumn Gardens

Fall Porch Planters

Autumn is here and the morning air is now cool and crisp. The gardeners are now out planting borders of cabbages, kales, mums and pansies. As I walk, I love to linger and take in the beauty of fall’s regal colors. The deep reds, purples and oranges paint fall gardens in such a gorgeous palette. This English styled cottage had a lovely front garden. Green boxwood topiaries line the flower beds and the planters were overflowing with kale, cabbages and pansies.

This planter was particularly pretty. I love the height and color they added by using the dried branches and berries.

It feels a bit like a story book cottage with its ivy-covered doorway and the lantern lights and wooden door.

I loved this set of stunning purple planters that brighten this front porch. Purple fountain grass is one of my favorites for creating height and adding texture to any planter or flower bed. The fountain grass is circled with New Guinea impatiens, which I have found to be more hardy in the fall than traditional impatiens.

A front walkway filled with vibrant colors and blooms. The purple cabbage and mums make a spectacular statement.

Mixing in planters, flower boxes and  pumpkins make for a pretty fall statment.

Just a touch of fall with this planter. I love how these mums and fountain grass brighten the doorway.

This cheerful apple green door is decked out for fall with flowerbeds filled with deep red mums and purple cabbages.

Even if a vibrant apple green door isn’t the right look for your home you can still add some light green touches to your garden with lettuces that create lovely contrast against fall friendly purple and white violas.

So if the fall weather has you out gardening or thinking about planting a fall pot or two, then take a little inspiration from some of these picturesque gardens. Just a few flowers can brighten your home and welcome the season.

Chicken Vesuvio A Chicago Classic

Chicago’s famous deep-dish pizza and its signature hot dogs get lots of attention, but the city has other uniquely delicious dishes like Chicken Vesuvio. This Italian inspired chicken is a beloved restaurant dish. The Chicago Tribune traces its possible origin to Nick Giannotti at Giannotti’s Steak House. They believe that they called it Vesuvio because cooking it causes the skillet to smoke like the Italian volcano.

This memorable dish features crispy pan-fried chicken and potatoes served with a garlic white wine sauce. After tasting this Chicago specialty, I knew I had to find a recipe to enjoy it at home. So, after much fun researching different versions of this dish and I have created my own that has all the flavors we have come to love.

Chicken Vesuvio – Serves 4

  • 4 boneless, skin-on chicken breasts
  • 1 1/2 teaspoon kosher salt
  • 1/4 teaspoon pepper
  • 1/2 teaspoon oregano
  • 2 tablespoons olive oil
  • 1 tablespoon butter
  • 1 head garlic, peeled and with the cloves sliced in half
  • 3 cups small gold potatoes halved lengthwise
  • 1 1/2 cup chardonnay
  • 1 1/2 cup chicken broth
  • 1 tablespoon fresh lemon juice
  • 1 cup cooked green peas
  • 4 tablespoons chopped parsley (for garnish)

Preheat your oven to 375 degrees

Prepare your chicken breasts by removing the bone. Carefully take the tip of a sharp knife and side it between the bone and the meat to loosen it. Use your fingers to pull the bone away from the breast meat and make another cut if necessary to free the bone. Pat your chicken breast dry with a paper towel and season with the salt, pepper and dried oregano.

In a large skillet heat your olive oil and butter oven medium heat. Once your butter has melted and your pan is hot add your chicken and cook it skin side down until it is golden brown. Then flip your chicken and cook it an addition two to three minutes on the other side.

Once your chicken is browned remove it from the pan and set it aside. Then add in your potatoes to your skillet cut side down. Cook them over medium heat for about eight to ten minutes or until they are golden brown.

Remove your potatoes from the pan and set them aside with your chicken. While your pan is still hot add in your white wine and deglaze your pan over medium heat. Taking care to get all of the good little brown bits mixed in with a rubber spatula. Add in your chicken broth and remove your pan from the heat.

Next, place your potatoes and your chicken breasts in a large roasting pan with the skin of the chicken breasts and the cut side of your potatoes facing up. Add in your garlic cloves and pour in your wine from the skillet.

Place your roasting pan in the oven and cook it for about 25 minutes until your chicken is cooked through and your potatoes are soft.

Once your chicken, garlic and potatoes have roasted remove them to a serving platter and carefully pour your sauce back into your skillet. Place the sauce over medium heat to reduce it down and concentrate those flavors. Meanwhile take 8 of your roasted garlic clove halves and add them to mini food processor or blender along with one tablespoon of lemon juice and 1/2 cup of the pan sauce. Puree or blend your garlic mixture until it is well chopped. Pour the roasted garlic into your pan and whisk it until it is well incorporated and your pan sauce has reduce by half. The roasted garlic adds a depth of flavor that makes this white wine sauce especially tasty.

If you want to serve your chicken Vesuvio the traditional way then add some peas to your dish and you are ready to serve. Make sure when you serve it to be generous with the sauce, because it’s what makes this chicken so delicious. Add some chopped parsley on top to finish your dish.


There is a reason that Chicken Vesuvio is so loved. The flavorful sauce begs you to serve it with some good Italian bread to make sure that you can enjoy every bit of it. It will also have your house smelling amazing.

Add a glass of white wine and you have a wonderful meal.  So, even if you can’t make it out for a night in the Windy City give this Chicago classic a try at home.

How Does Your Garden Grow?

Do you have a television show that you love, but have to watch all on your own? That program that none of your family members can stand. I must confess that I love British gardening shows. My family on the other hand finds these programs to be too much of a snore for their tastes. Nevertheless, if I can find time, I love watching a few of these programs on Netflix.

I was watching one of my gardening shows when the host and garden expert Monty Don was talking to an overwhelmed homeowner about their garden plans when he asked a simple and yet insightful question: what is it that you grow that has you wanting to be outdoors? What plant or flower would have you out working in the cold or watering and weeding in the heat?

Plan a garden around the flowers or plants you love and suddenly it doesn’t feel like work. I have two types of flowers that I grow in my garden that are for me pure joy. One are tulips, but the others are Dahlias. Their late summer blooms are at their peak in my garden each September. When summer flowers begin to fade Dahlias will keep blooming until the frost comes. This year I decided to turn an empty, but sunny spot where we had lost a tree into something new. Instead of planting a  tree I made a  flower bed for Dahlias. I planted my bulbs this May and now they have grown into something beautiful.

Lavender Perfection Dahlia

Lavender Perfection is probably my favorite their large purple blooms are gorgeous.  I have planted these for the last two years and I have been impressed by how easy they were to grow from a bulb. They can get a bit top heavy and might need support from a garden steak but their repeat blooms are worth the effort.

Hawaii Dahlia Bulb

This Hawaii Dahlia is a new variety that I tried some of the blooms were more yellow and fuchsia while others of the same variety were white and pink. They are a bit smaller, but I love their vibrant colors.

Hawaii Dahlia

The Lake Tahoe dahlia has an amazing coral color with just a touch of yellow. It reminds me of a pretty sunrise.

Lake Tahoe Dahlia

I also planted these little orange beauties called Noordwijk’s Glorie.

Noordwijk’s Glorie Dahlia

Finally, more fuchsia with these Le Baron Dahlias. I love that bit of chartreuse green at their center.

Le Baron Dahlia

The very best part of having a small garden bed filled with these gorgeous blooms is the bouquets you can make to enjoy indoors as well.

So what do you love to grow? I would love to know. Is there something that brings you joy? Plant a garden or just fill a window box or a pot or two. Because as Don wisely noted “A garden is not a place. It’s a journey.” So find a way to surround yourself with something absolutely beautiful. Gardening has a way of keeping me grateful. Because as I marvel at natures awesome beauty its hard not to smile.

Want more gorgeous dahlia’s then check out English designer Ben Pentreath and his garden designer husband Charlie McCormick’s picturesque autumn garden.

Living Colorfully

Benjamin Moore Exotic Red

Our house was for a moment so clean that she must have done a little happy dance. There was of course that last minute blue marker coloring disaster in my daughters room, but Bissell oxi clean came to my carpet’s rescue. Since it isn’t everyday that our home is styled and ready for a photographer, I just had to take a picture or two of my own to celebrate the occasion.

I also took time to sit down and answer a few questions about our home. The one question from the magazine interview that caused me to think a minute was “What is unique about your house?”  As I reflect, I believe my home’s uniqueness is in the colorful stories it has to tell. My home is a 1960s colonial revival. It doesn’t have high ceilings, marble countertops, custom cabinetry or architecturally amazing features, yet it’s home. Its beauty is the way it reflects who we are as a family and what we truly love.

The bright red dining room is the first room you see when you walk through the double blue doors. I love the vibrance and glow of a red dining room. I know this bright shade isn’t for most people, but I love how it feels when the table is set and the candles are lit. The Matisse print in the corner is a museum print from our honeymoon in New York. The vivid colors and stars make me smile and remember the fun.

Our house is bright and happy. It is filled with color from red, pink, orange, yellow, turquoise, indigo and green. I have always been drawn to color and its power to change how you feel.


Blue and white is everywhere in our home, but the shade changes from room to room.
Robin’s egg blue with colorful and playful accents. The quirky yellow pencil I made from an old wrapping paper tube and a couch full of pillows that are perfect for building play forts.


Turquoise and white are calming at the end of the day. It makes me think of a bright blue summer sky.

I have always been one to color with the full box of crayons. So its been fun to color with my girls and let them show me their favorite things. My youngest daughter loves pink and orange. They fit her happy and outgoing personality. The dust ruffle is an old quilt filled with all the bright colors she loves. The pillows, bunny and bird details add a little whimsy that is just right for my five year old.

Finally, my oldest daughter loves flowers and fairytales. The soft pink walls and mix of florals and ruffles give it a dreamy cottage garden feel. Perfect for my creative girl who is always drawing and dreaming up her own tales of fairies and princesses.

In the end, I believe that great houses come in all shapes and sizes. However, the memorable ones are the homes that tell the story of the families and people who have lived there. Ours just happens to be a more colorful tale. So let the people and things you love inspire your own home design.

The Beauty of Change

“Beauty begins the moment you decide to be yourself.”

Coco Chanel

Pumpkin spice lattes may not be available yet, but that hasn’t stopped me from decorating for fall a little early this year. It’s August and I have been out looking for pumpkins. Usually, I don’t start pull out the fall decorations until at least September, but I have a good reason to decorate sooner. A local magazine is going to be featuring our home for their October issue. So, I have been busy cleaning and trying to touch up a few of the more lived in spots in our home. Two little girls and a puppy create lots of messes along the way. Along with it comes a few other exciting projects. I am going to be a columnist for our local paper The Hinsdalean and I will also be writing a monthly food and garden column for a local magazine called Life in the Woodlands. I am excited about the possibilities and a chance to write and share more.


Things are also changing as the new school year starts tomorrow. My oldest daughter will now be in school for a full day. When we first moved to my girls were little and now they are more independent. I now have a little time to take on a few more projects of my own.

I began writing this blog when we moved to Chicago as a creative outlet. I had left my career as an attorney to spend more time with my daughters. Overwhelmed by change, I found joy in writing. I always loved to write, but before I began blogging, most of my writing had been for work or school. Moving as hard as it was, gave me a gift, the opportunity to see things differently. In ways I hadn’t realized, I had allowed my job to define who I was. Suddenly at home with my two girls I began to pour myself into what I really love. What would you do for the pure joy of it? I have always loved cooking, but what that took me be surprise was how much I enjoyed writing about it. I will admit that writing my first post was scary, but once I began to write and share more my worries began to fade.

Never underestimate the power of kind words. I want to thank all of my readers who have encouraged me along the way. It’s given me the strength I needed to write and share more. There is great beauty in owning who you are and doing what you truly love.  So thank you for being a part of that!

I’ve been busy creating a fall look with some faux pumpkins. On the upside the squirrels seem to not be as temped as they are with the real ones.


Pulled Chicken Sandwich with Southwestern Carrot Slaw

Chicken Sandwich with Carrot Slaw

I cook with a sense of adventure and fun. Never one to make just the same rotation of dishes I am always trying to push the flavor boundaries and create something different. Sometimes I never know where my inspiration will come from. I was sitting in a waiting room looking at a magazine when I saw a picture of a pulled chicken sandwich. Inspired, my mind began to swirl with ideas about creating my own ultimate version, a pulled chicken sandwich with a Southwestern carrot slaw. My recipe is a twist on your traditional roasted chicken with a lime and smoky cumin flavored slaw.

These sandwiches are the perfect Sunday night dinner. Roasting chicken takes just under an hour; however, the hands on cooking time isn’t much. If you take a little help from the store by buying shredded carrots and barbecue sauce, then it makes a fun and easy dinner. Add a side of macaroni and cheese or, a pasta or potato salad and you have a delicious meal.

Pulled Chicken Sandwiches -Serves 4

  • 3 bone in skin on chicken breasts
  • 4 tablespoons unsalted butter, at room temp
  • 1 teaspoon kosher salt
  • 1/2 teaspoon garlic powder
  • 1/2 teaspoon onion powder
  • 1/2 teaspoon cumin
  • 1/4 teaspoon chili powder
  • 1 cup barbecue sauce (I use a brand called Head Country)
  • 4 brioche or bakery quality burger buns, toasted

Preheat your oven to 375 degrees.

Next make your flavored butter for roasting your chicken. In a small bowl add the softened butter, salt, garlic powder, onion powder, cumin and chili powder. Evenly mix the spices into your butter using a rubber spatula or spoon.

Line a roast or sheet pan with aluminum foil, for easy clean up. Then place your chicken breasts on the pan. Take your flavored butter and place one third of the mixture under the skin of each chicken breast. To do this you need to carefully lift up the skin and create a little pocket to spoon in your flavored butter. You want to avoid making a whole on the bottom or sides.

Roast your chicken for 45 to 50 minutes depending on the size of your chicken breasts. A very large chicken breast could take up to 55 minutes.

Let you chicken cool in the pan for about 5 minutes until it is cool enough to handle. Next peel off your skin and while holding your chicken over a medium sized bowl to catch all the flavorful drippings. Then discard the skin and shred your chicken off the bone using a fork. Once you have shredded all of your chicken take about 1/4 cup of the pan drippings and mix it into your chicken along with 1 cup of barbecue sauce. (The chicken pan gravy is what makes this chicken so delicious.)

Southwestern Carrot Slaw

  • 3 cups of shredded carrots (You can save some time by using a bag of pre-shredded carrots from the store)
  • 1 cup shredded red cabbage
  • 3 green onion sliced on the diagonal
  • 1/4 cup cilantro leaves
  • 1 lime zested
  • 1 tablespoon of lime juice
  • 2 tablespoons apple cider vinegar
  • 1 tablespoon of honey
  • 1/2 teaspoon cumin
  • 1/2 teaspoon kosher salt

In a medium sized bowl mix together your carrots, red cabbage, green onions and cilantro.

In a small mixing bowl whisk together the lime zest and juice. Add in the apple cider vinegar, honey, cumin and salt. Whisk until it is well combined. Then add your dressing to your carrot slaw and toss to combined.

To assemble your sandwiches spoon some shredded barbecue chicken on the bottom of each bun and top with a spoonful of the Southwestern Slaw.

Outrageously delicious these big mouth sandwiches were a hit in our house. They would be a great dish to share with friends because you can make the pulled chicken ahead of time, even the day before. They would also work well as sliders for a tailgating party. The big flavors and crunchy slaw make theses a swoon-worthy sandwich and supper.

Greek Chicken Skewers

Chicken Souvlaki Recipe

Late summer is a fabulous time to cook. So many vegetables and fruits are in season and the flavors are amazing. I love making big salads that use all of the gorgeous summer tomatoes, corn, cucumbers, berries and peaches. Although salad might be enough for me my family loves a little protein. So these greek inspired lemon chicken skewers are one of my summertime favorites.

Skewers or kebabs are a great way to cook chicken on the grill because they cook quickly and evenly. The lemon garlic marinade is a fast way to add flavor. These skewers have become a favorite in our house. Serve them with a large side salad like my Chopped Greek Salad and add some hummus with good pita bread or naan and you have a quick and delicious dinner.


Greek Chicken Skewers – Serves 4

  • 1 1/3 pound boneless skinless chicken breasts (2 large chicken breasts)
  • 1 teaspoon lemon zest
  • 1 Tablespoon lemon juice (about 1/2 large lemon)
  • 1 garlic clove, grated
  • 1/4 cup olive oil
  • 1/4 teaspoon dried oregano
  • 1/2 teaspoon kosher salt
  • 1/8 teaspoon pepper

First get your grilled prepared and ready to cook the chicken on direct medium high heat

Then prepare your chicken by cutting it into one inch pieces. A quick tip, if your chicken breasts are large then I like to cut mine in half horizontally and then cut them into pieces.

Next make your marinade. In a medium sized bowl whisk together your lemon juice, zest, garlic, oregano, olive oil, salt and pepper. Then place your chicken and the marinade in a large gallon sized ziplock bag. Let your chicken marinade in your fridge for at least 10 to 15 minutes. You can let them marinade a bit longer, but I wouldn’t let it sit longer than an hour because of the acidity from the lemon juice.

Next thread your chicken onto your skewers. you can use metal or wooden skewers, but if you are using wooden skewers let them soak in some water while you are marinating your chicken. It will keep the wood from getting charred on the grill.

Then grill your chicken for 4 to 5 minute on one side and then flip them and cook them for an additional 4 to 5 minutes on the other side until they are cooked through. If you don’t have an outdoor grill you could also use an indoor grilling pan.

These Greek chicken skewers are an easy and healthy dinner that are perfect for those summer nights when you want to eat well but not spend all of your time in the kitchen. Hope you enjoy this summer grilling favorite.

Contact Us