
Our guest room has had a serious case of the leftovers since we moved into our house three years ago. It has been filled with been a hodgepodge of left over furniture and bedding, but with the holidays coming soon it is finally time to do something about it. I repainted the room when we first moved in. It was originally a dark hunter green and we sheet rocked in an open doorway that had originally connected it to the master bedroom. The previous owners had used the room as an office, but when we moved in we needed a guest room for out-of-town family and friends. After I painted the room I got busy with other projects, but after I finished my girls’ rooms I decided our guest room could use a few updates. There is nothing like finishing another room and seeing the difference it makes to motivate you to finish other house projects.
I have liked John Robshaw’s fabrics for sometime so when I saw that his Prasana Bluebell fabric was available at one of my favorite discount designer fabric stores I decided to buy a couple of yards and sew some new pillows. In the end, I liked the fabric so much that I decided to order a few more yards to create some new fabric shades for the windows. I like the look of decorative shades, but having them custom-made can be expensive so keep my project on budget I decided to make my own shades. I have created a few of these shades for my kitchen and office so I decided I might share a project guide for creating your own custom shades. You don’t have to have a sewing machine to make these relaxed Roman shades. Fusible sewing tape and an iron is all you need create your own designer shades.
Supply List:
- Lining fabric (I used black out lining from an online fabric supply store called Sailrite, but you could use a lighter weight if light control is not an issue)
- Decorative shade fabric
- Measuring tape
- Iron
- Fabric pencil
- Fusible interfacing tape
- Iron on Roman shade rib tape (I ordered 12 yards for these 2 shades from Sailrite)
- Sew on rings for Roman shades (one box was enough for two shades)
- One drapery rod or a 1×2″ board cut to size of shade
- Needle and thread
Measuring Is Everything
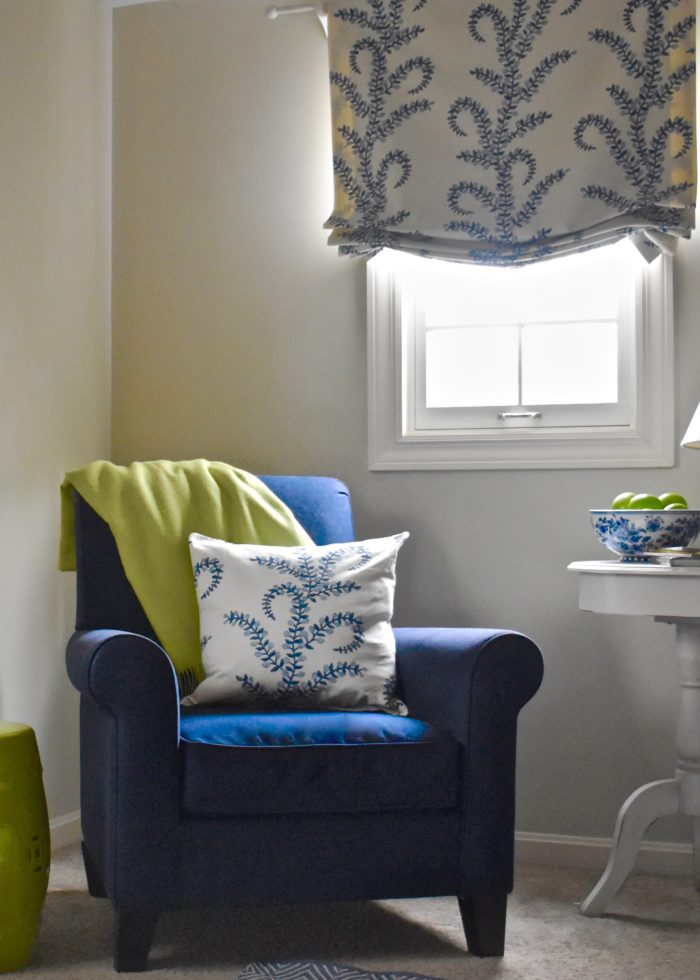
The key to any drapery project is to know your measurements and then double check them before you cut anything. The first thing I did was to order my fabric so I checked the width of the fabric and my windows and determined that the fabric was wide enough to that I did not have to add any side panels. Then lengthwise I determined that three yards would be enough to cover my two windows. I also ordered three yards of blackout lining which gives the fabric some weight and will help my guests sleep better.
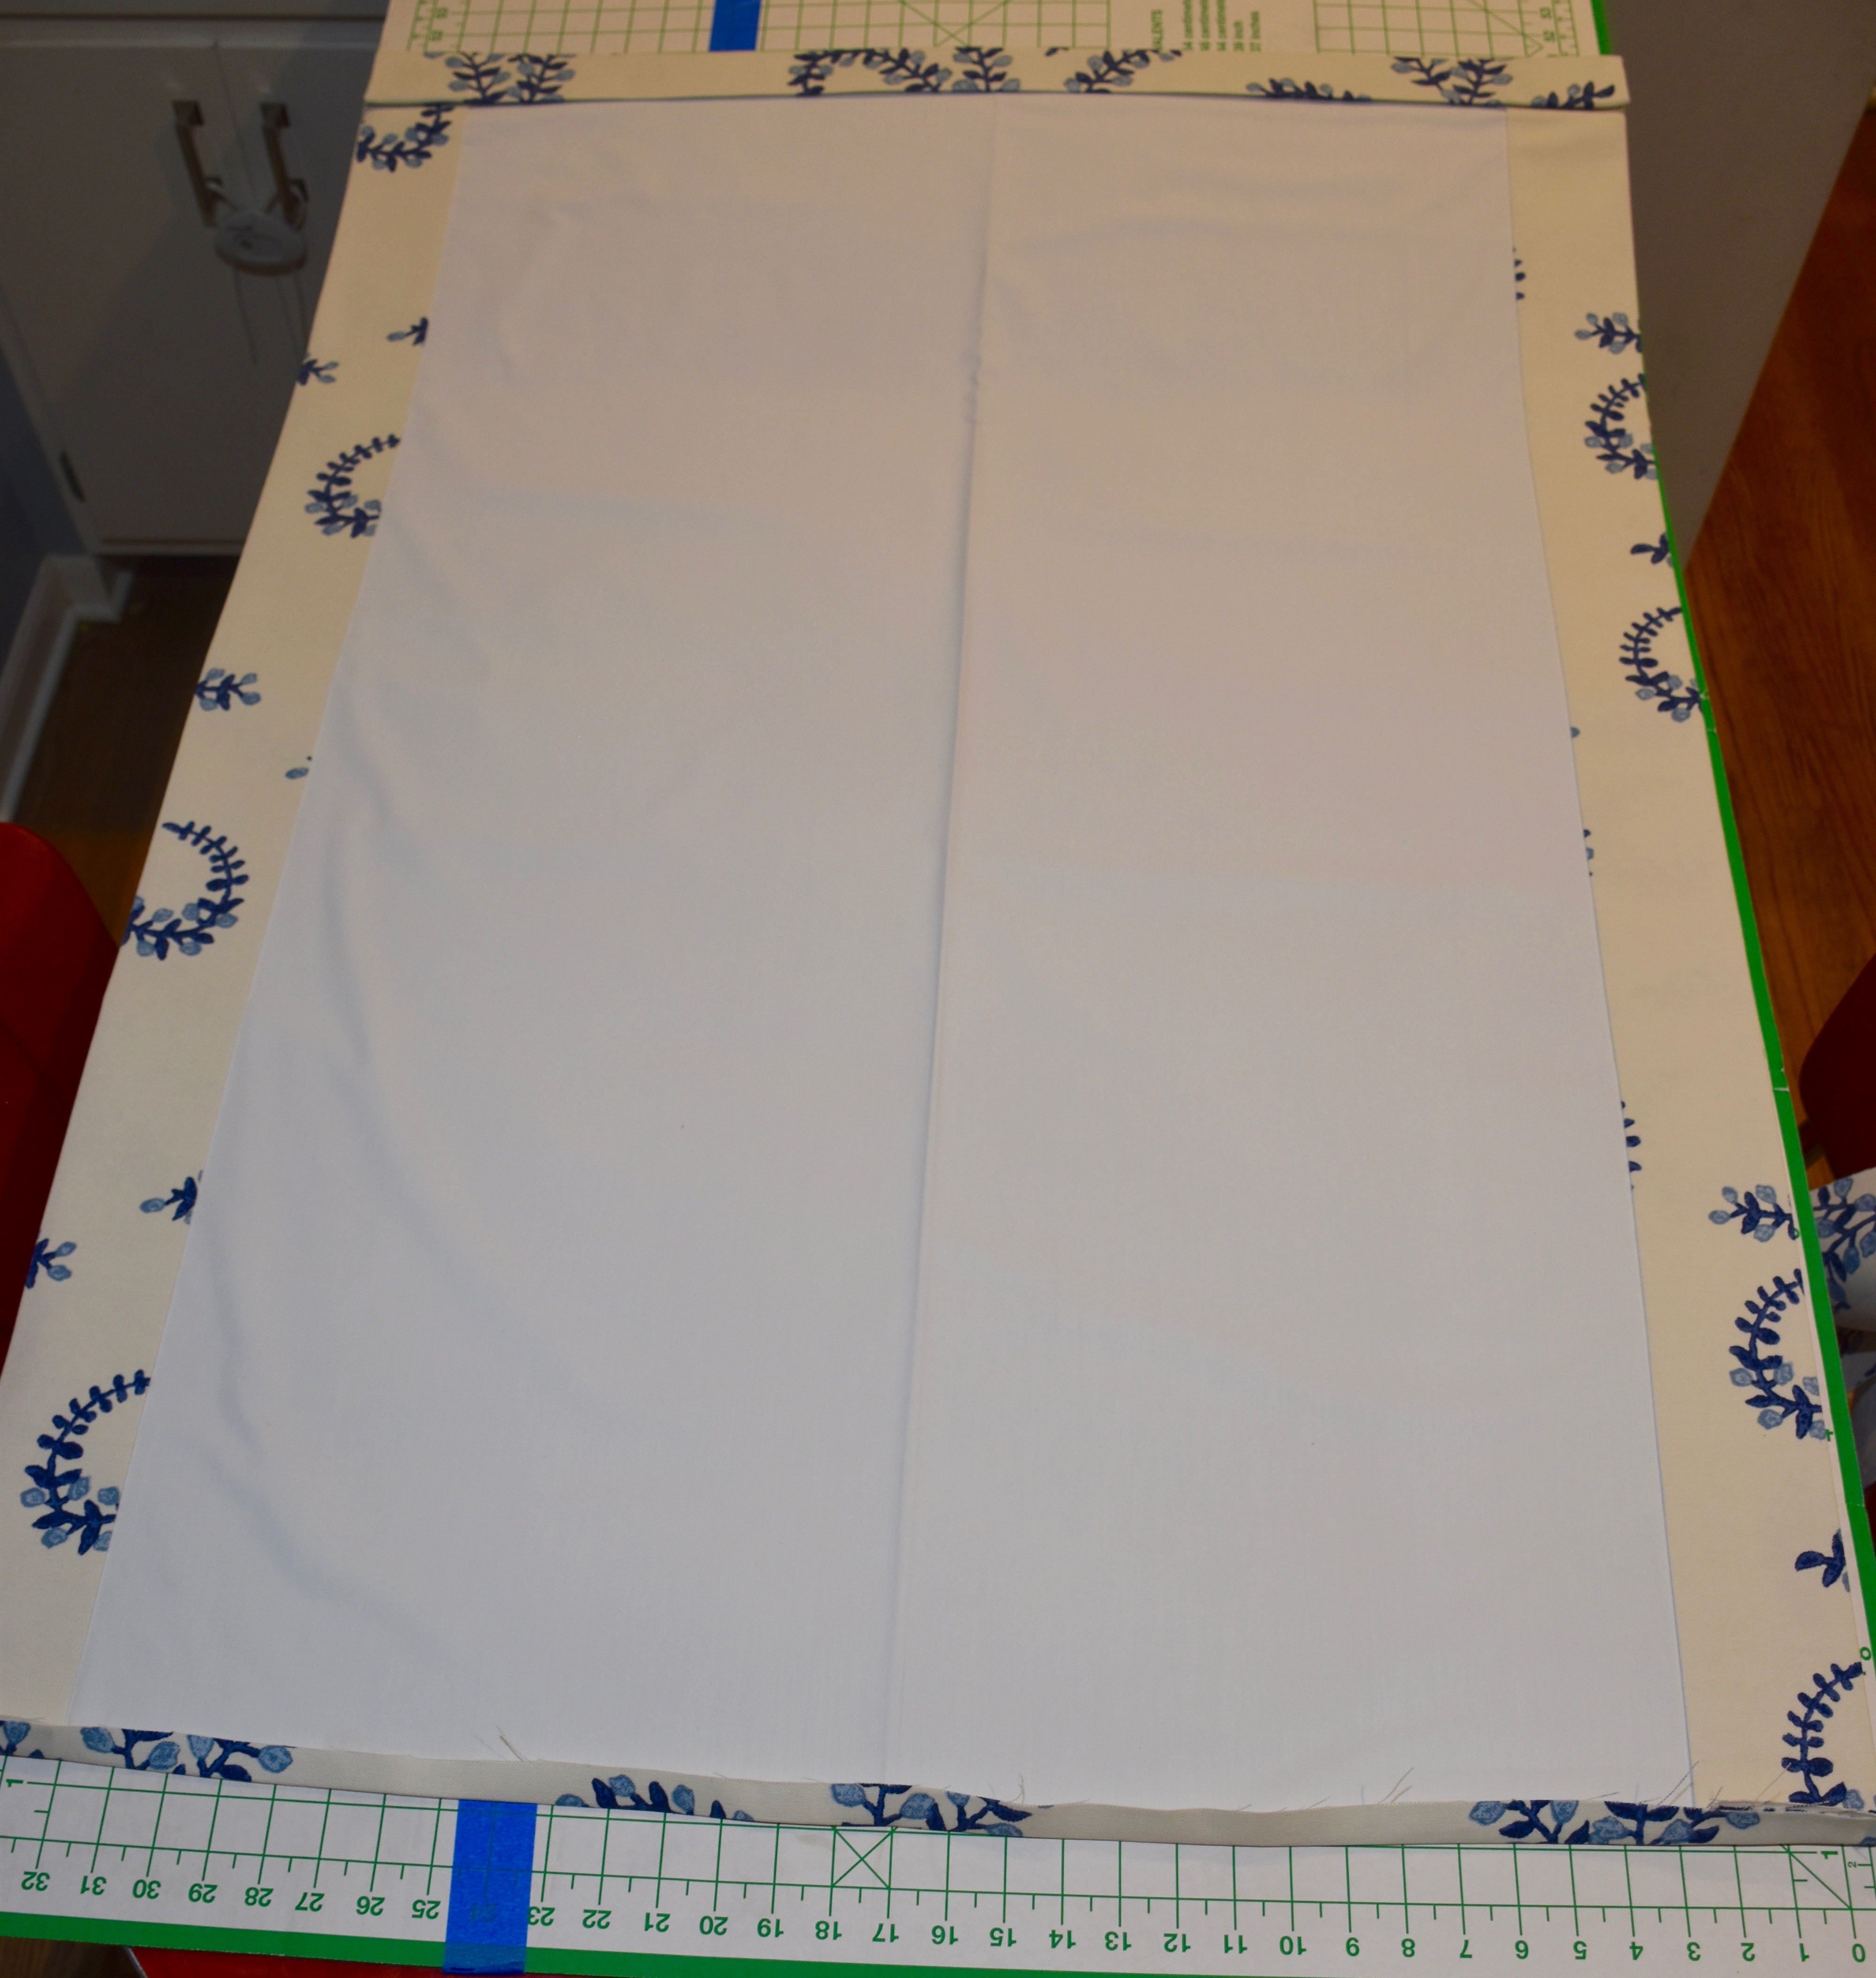
Next, once I got my fabric, the first thing I did was cut my blackout lining to cover my window width plus the wooden window casing on the sides making sure to add a few inches extra on the height to allow for room to hang it from a drapery rod or board. I used a sewing board to help me measure and cut my shade. I ironed straight lines where I needed to cut my fabric to size. Ironing a straight line is my trick for key making sure I have straight lines.
Once you cut your lining you are ready to add your fabric.
Finding Your Center Line: The Key To Getting A Professional Finish
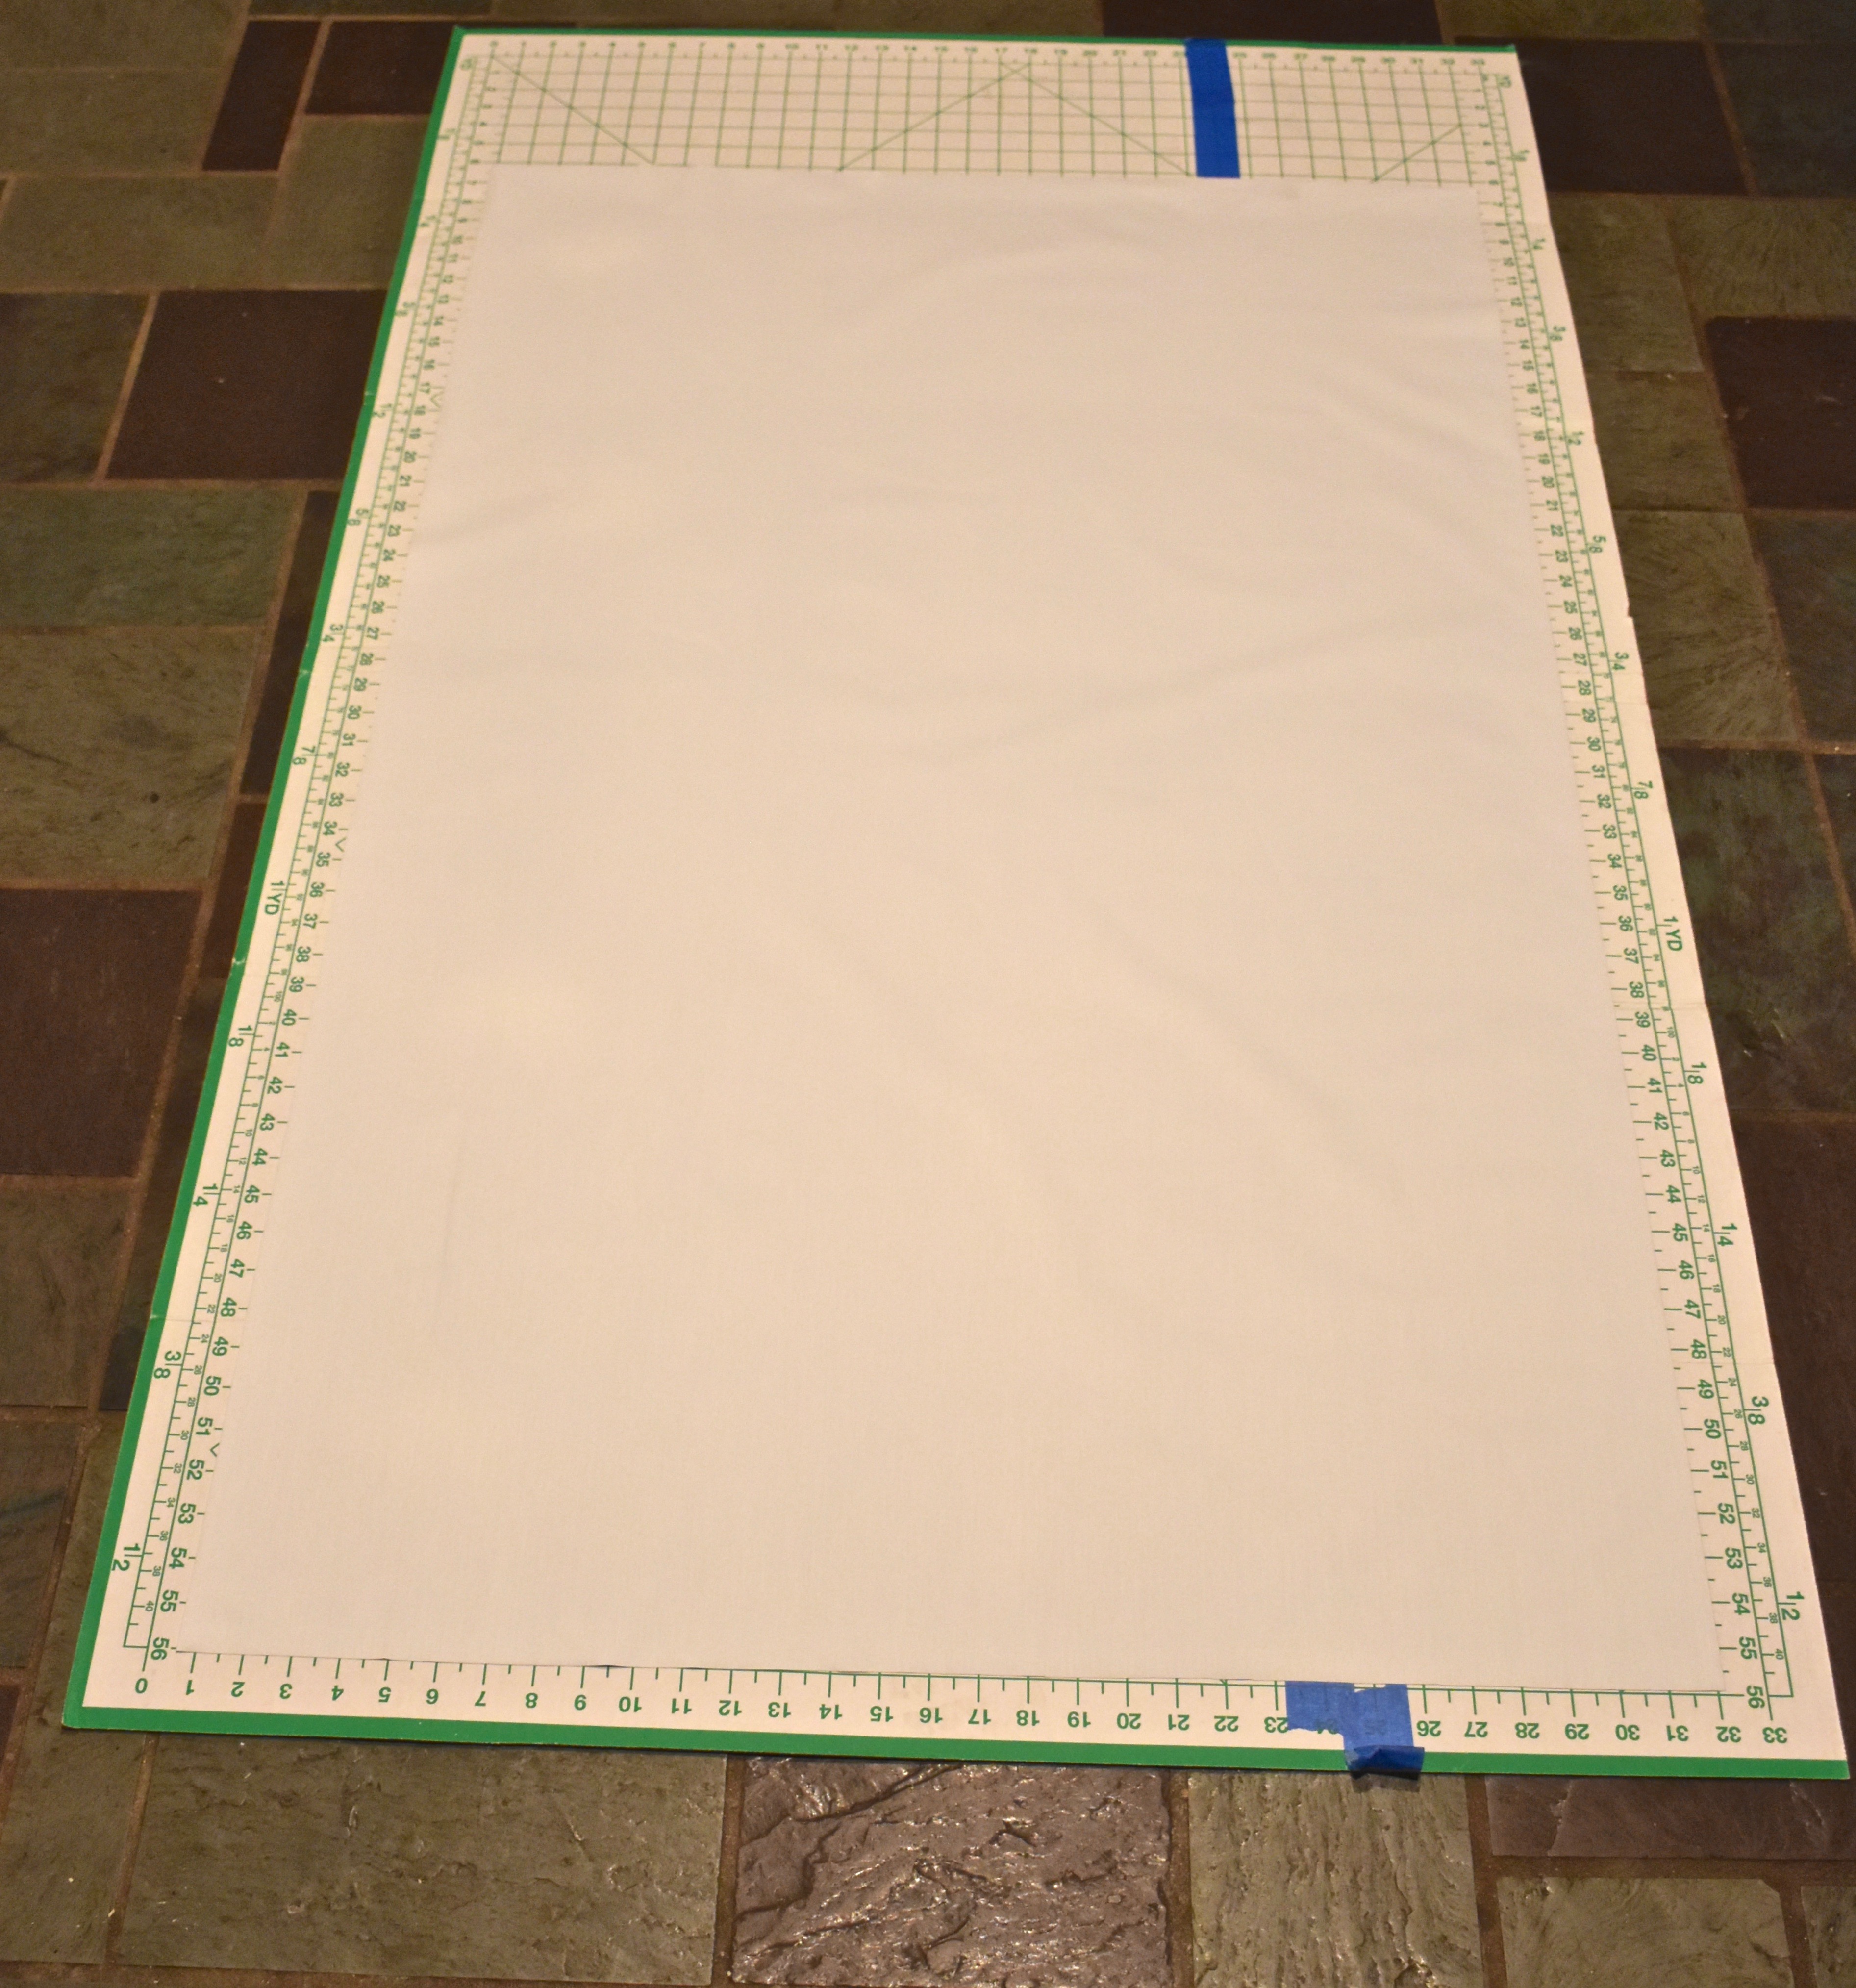
Once you know that the lining is cut straight, then it is time to place the pattern of your decorative fabric. The key to making multiple window treatments look the same and to have your pattern look even is to find the center of your fabric. So I ironed a straight line down the center of my decorative fabric and my lining. Then I matched them up to double check my pattern placement. Since my vine fabric ran vertically I wanted to make sure that the pattern lined up evenly with one vine in the center and one on each side.
Every fabric pattern is different so take the time to make sure it lines up evenly or if you have a floral fabric that the pattern placement is same for each shade. If you have a chintz or larger scaled pattern then you might need to order extra fabric so you have enough to match each shade. I found that this fabric was fairly easy to work with and it didn’t require extra yardage since the pattern ran vertically.
Iron Your Way to Pretty Drapes With Fusible Interfacing Tape
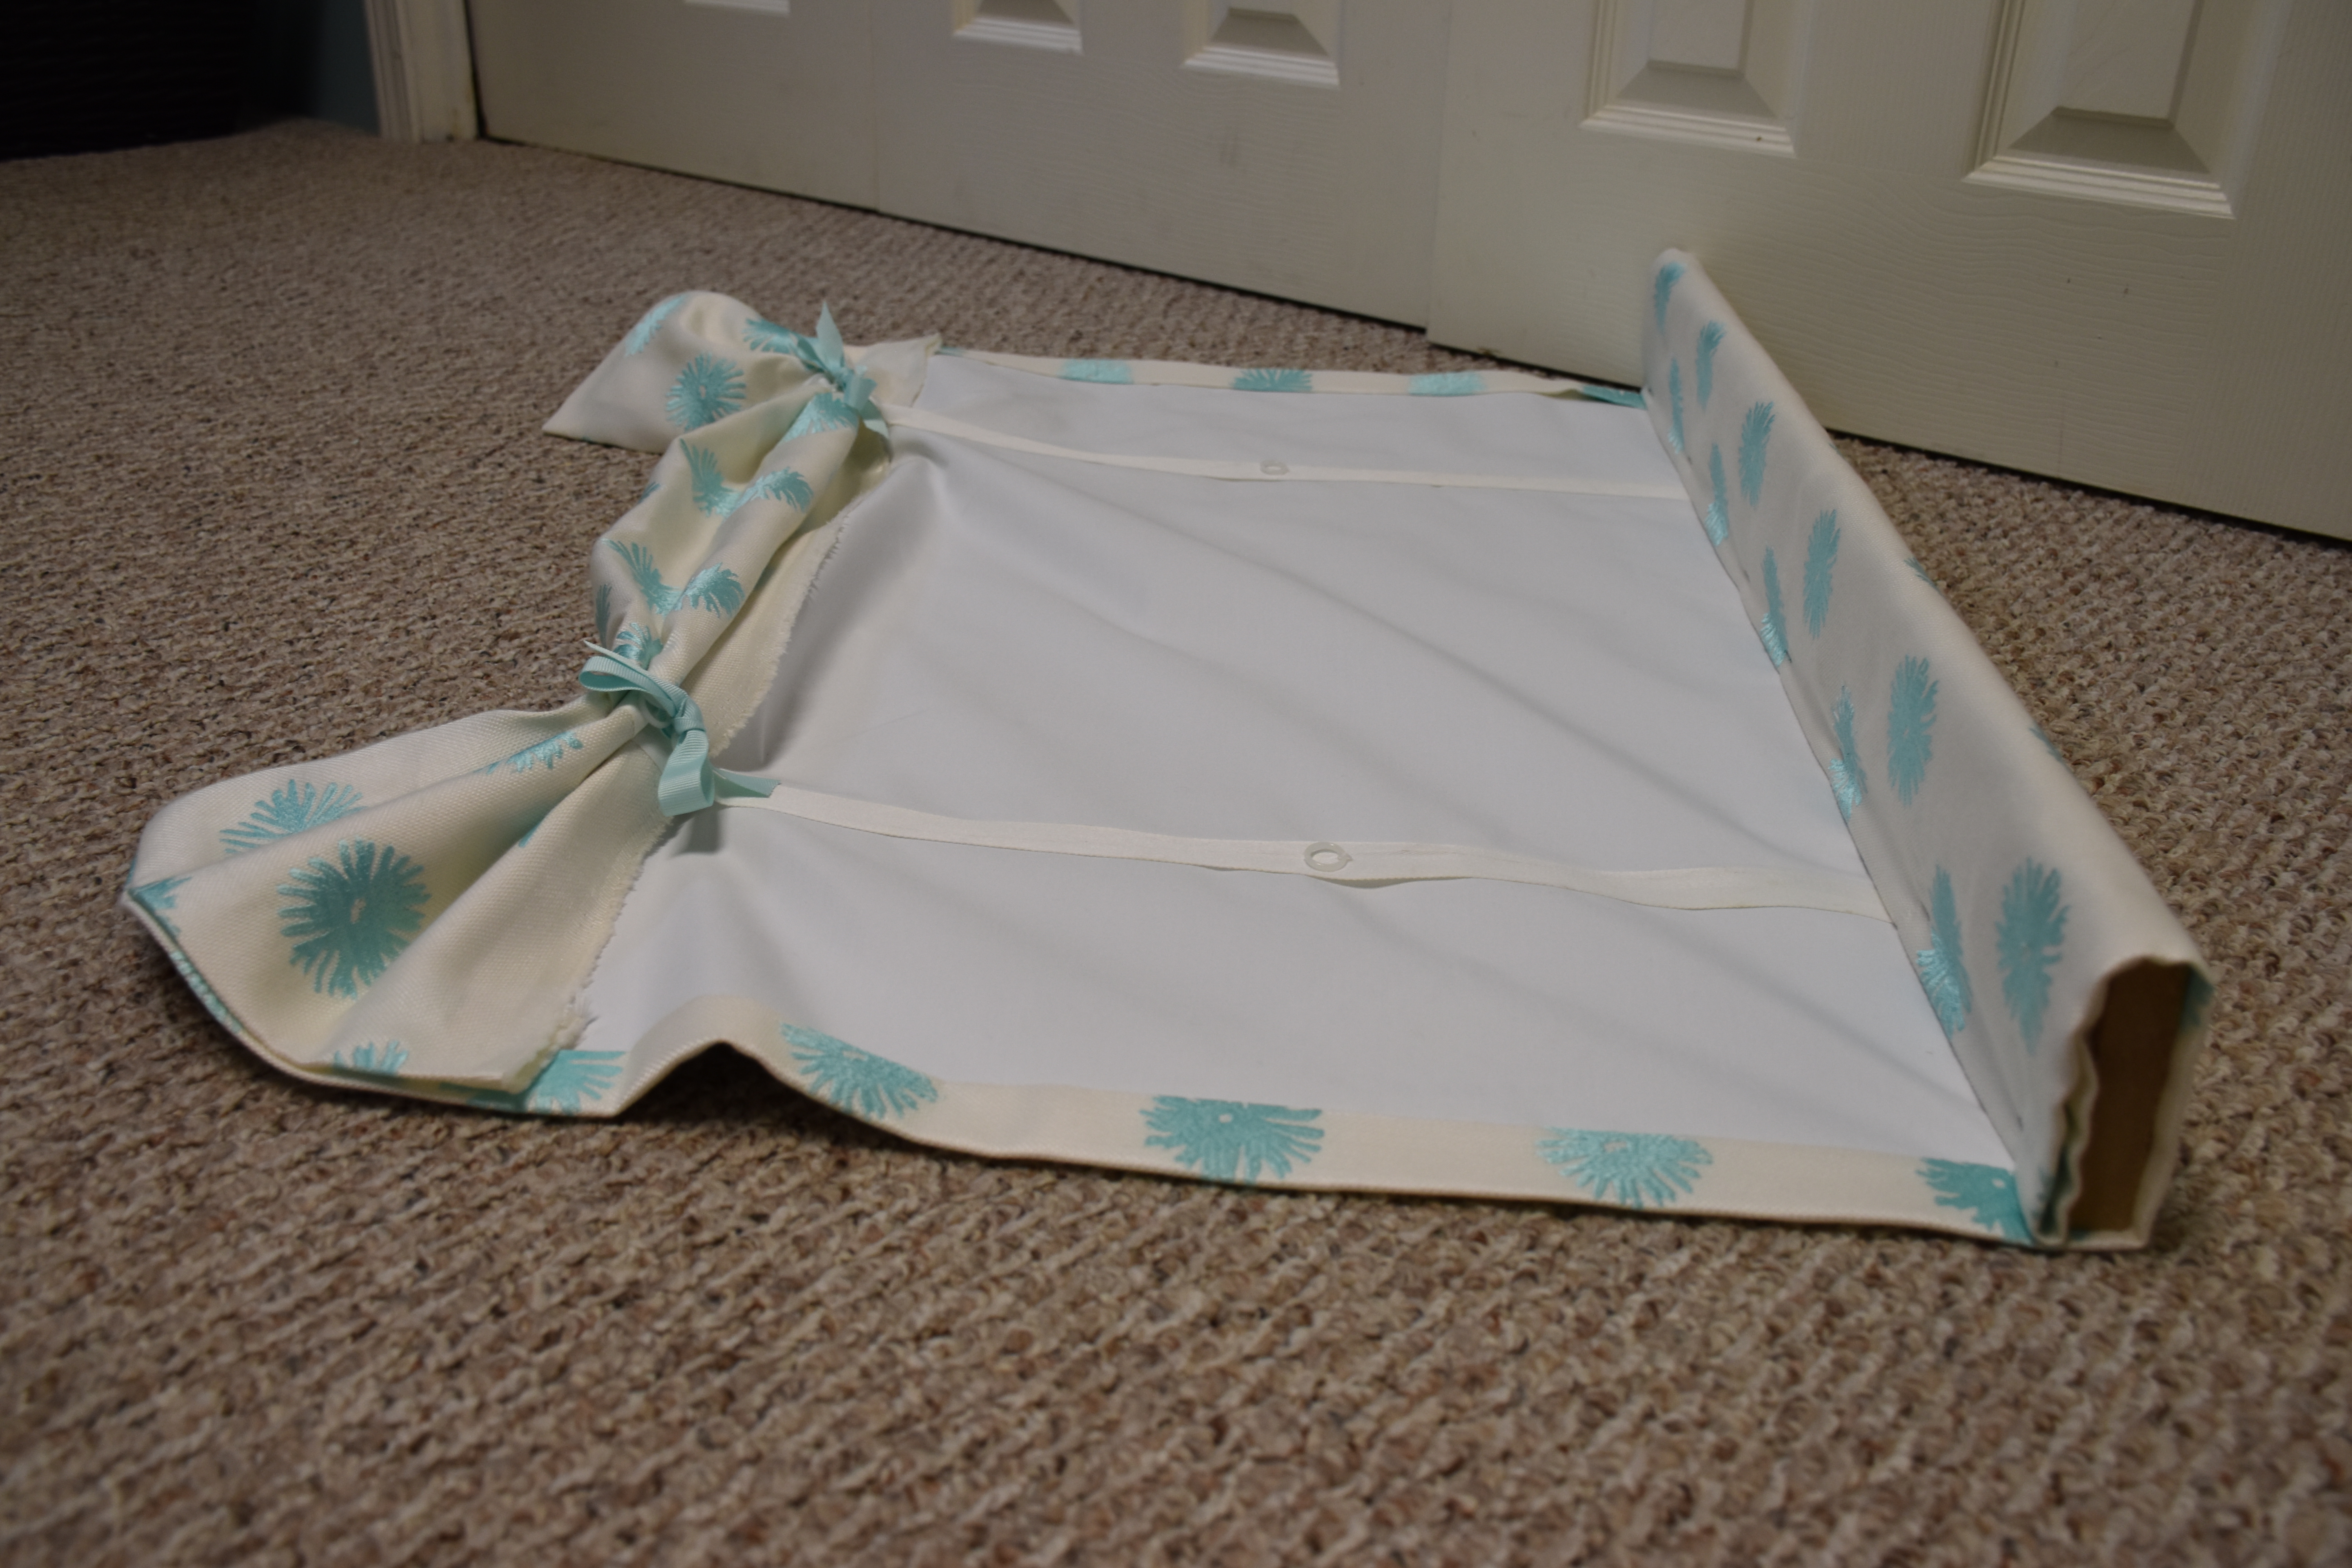
Once you get your pattern set then you want to pin the center lines together where the finished pattern side of your fabric is facing down on the ground or your board and the smooth fabric side of your lining is facing up. I then pinned my fabric at the top to make sure the center lines matched and the fabric was all even. Then I trimmed my fabric slightly and folded the edges over so I had a five inch border that folded over the back of my shade (you could have slightly less of a border if you have a wider window). You want to have to raw or cut side of the fabric folded under so you have a smooth finish.
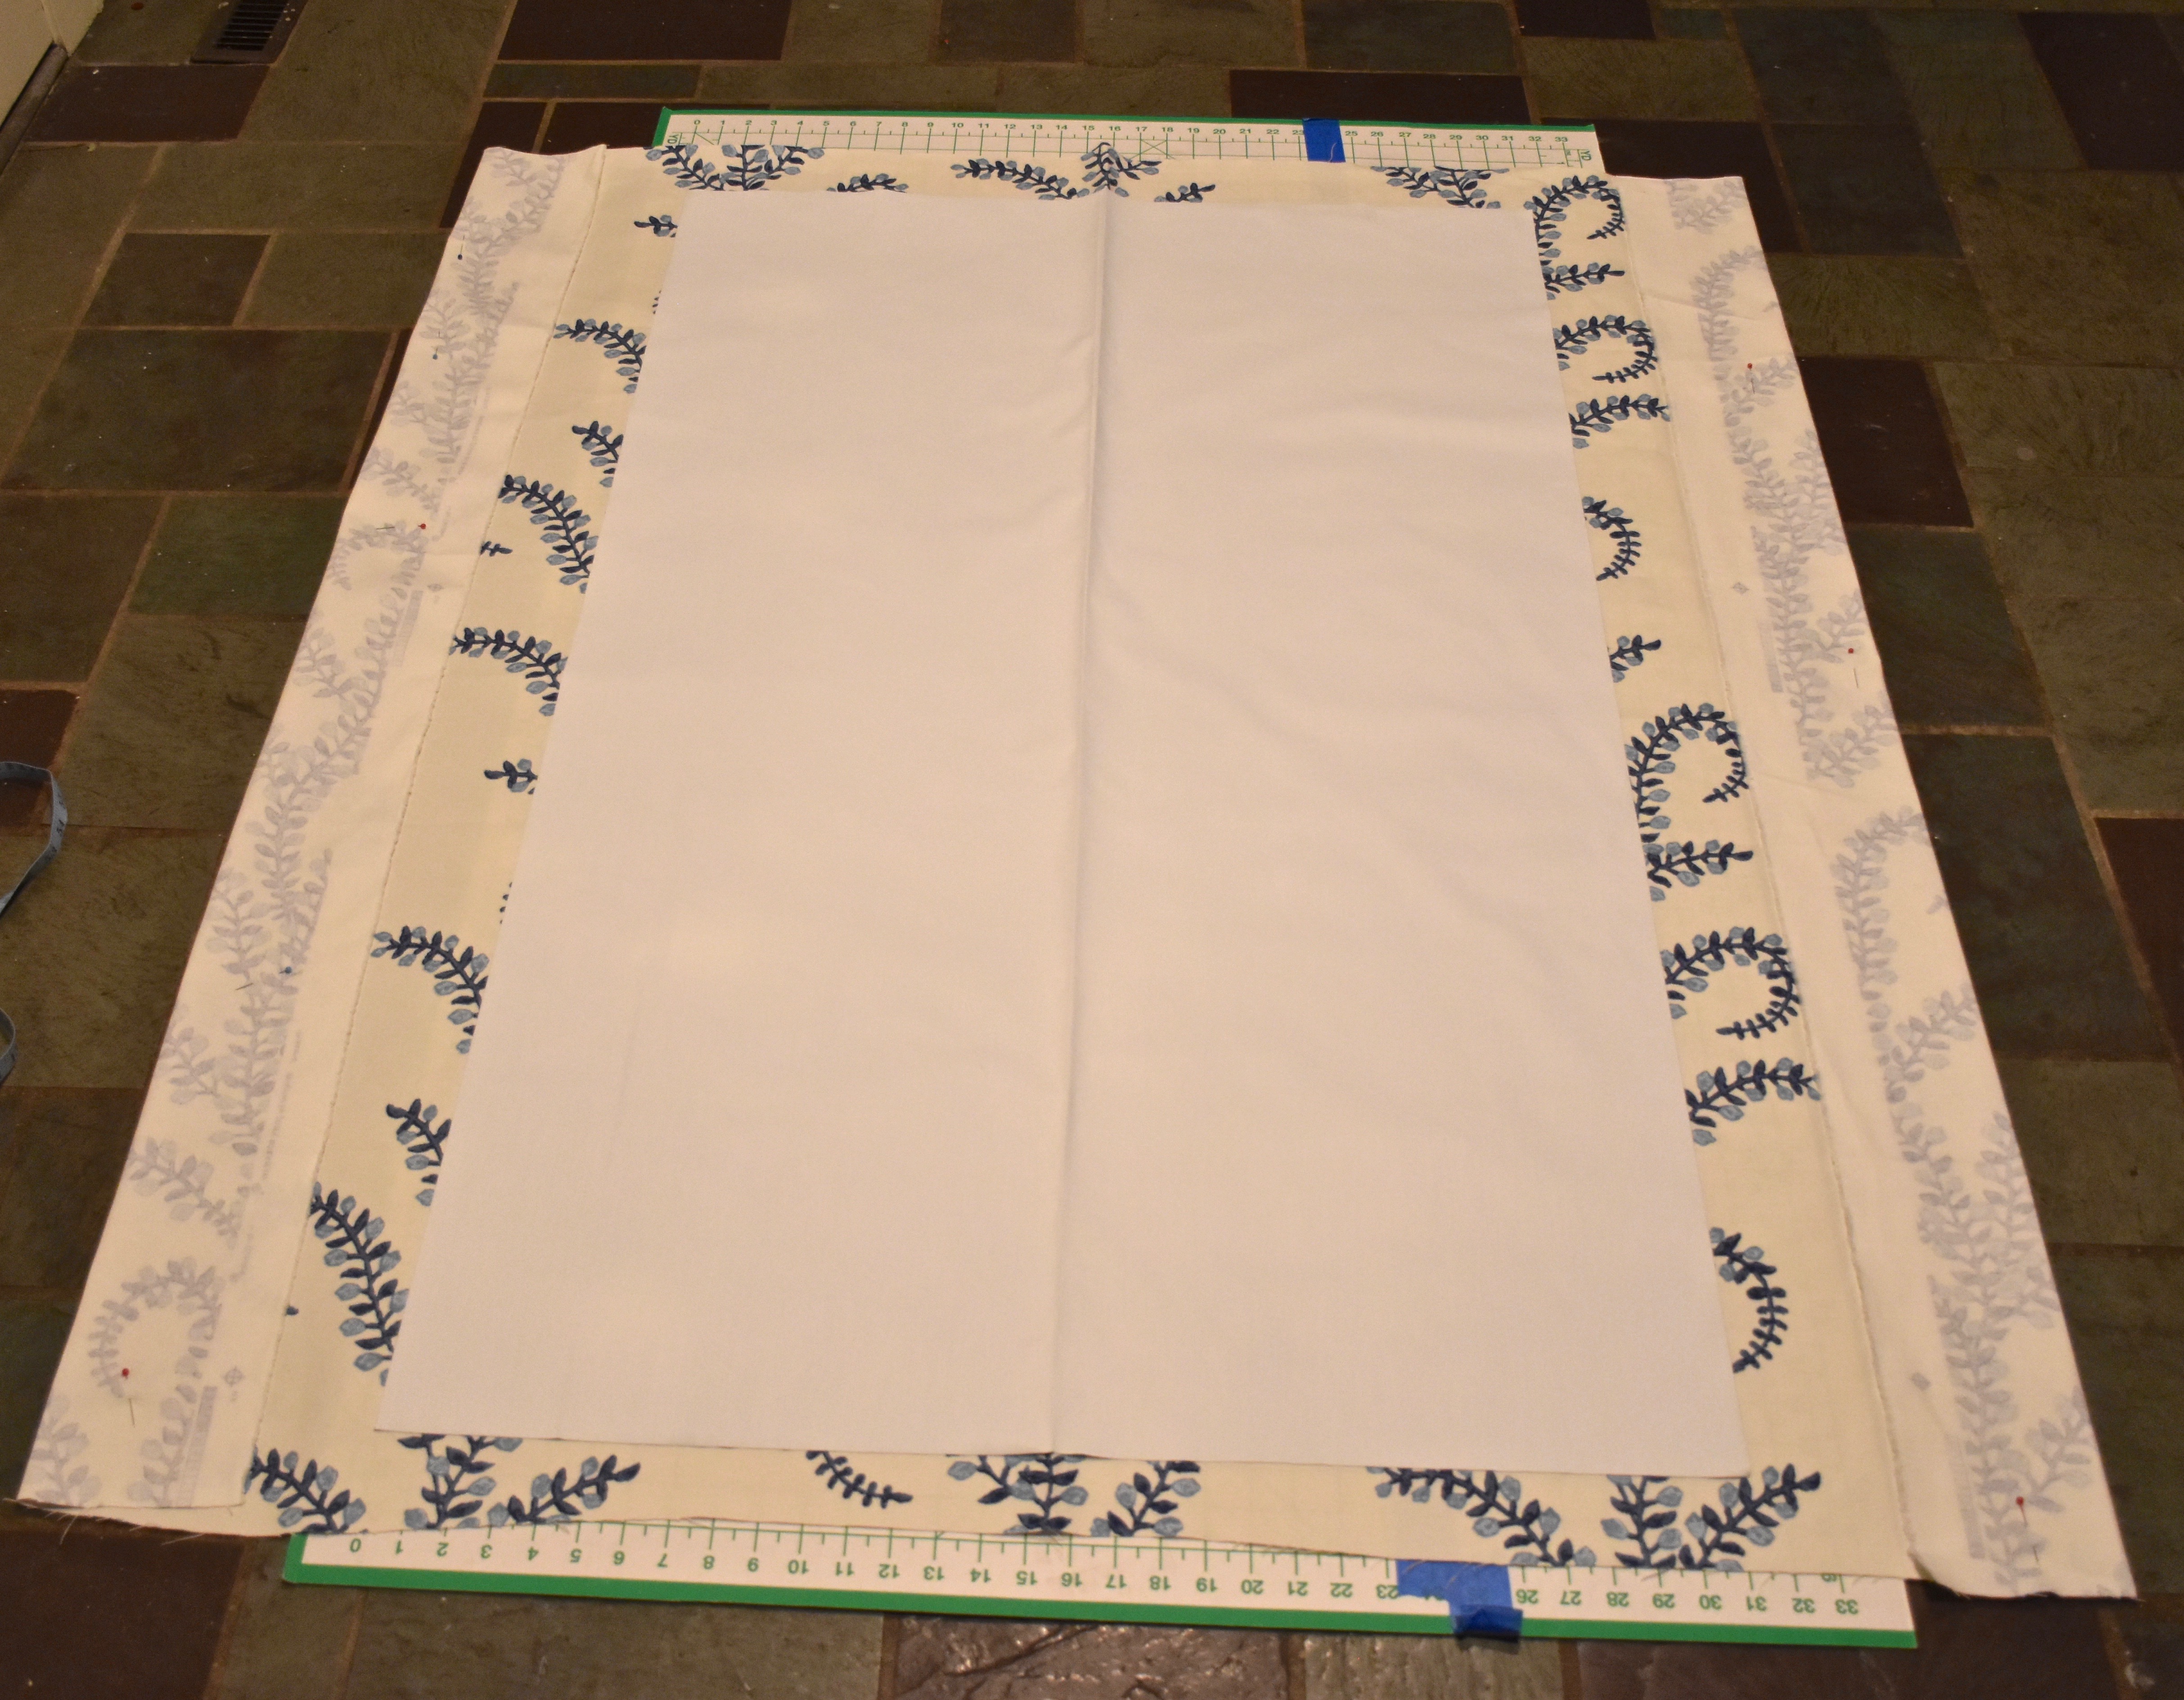
Then when it is all iron and folded around your lining you are ready to attach it together using fusible interfacing tape. This tape acts like glue to hold your shade together. This tape is easy to find at Hobby Lobby or any fabric store. I have found that the super adhesive strength works best of this type of project. Cut a strip from the roll that exactly fits the length of your side and then put the fabric on top and use a hot iron to fuse the folded edge of your fabric to your lining.
Be patient with the ironing because it can take a little bit of time to make sure that it is well bonded.
Iron or Stitch Your Finished End
Once you finish your sides then you are ready to fold a straight finished end for your drape. I ironed mine and then stitched a straight line with my sewing machine to hold the bottom end, but you could use more fusible tape for an easy no sew finish.
I left a smaller fold on the top because I hand sewed my finished drape to a drapery rod, but if you are mounting it to a board (see further instructions below) then you could just leave it unfinished and use a staple gun to attach it to the back side of your board.
Iron On Rib Tape Is The Key To Attaching Your Rings Evenly
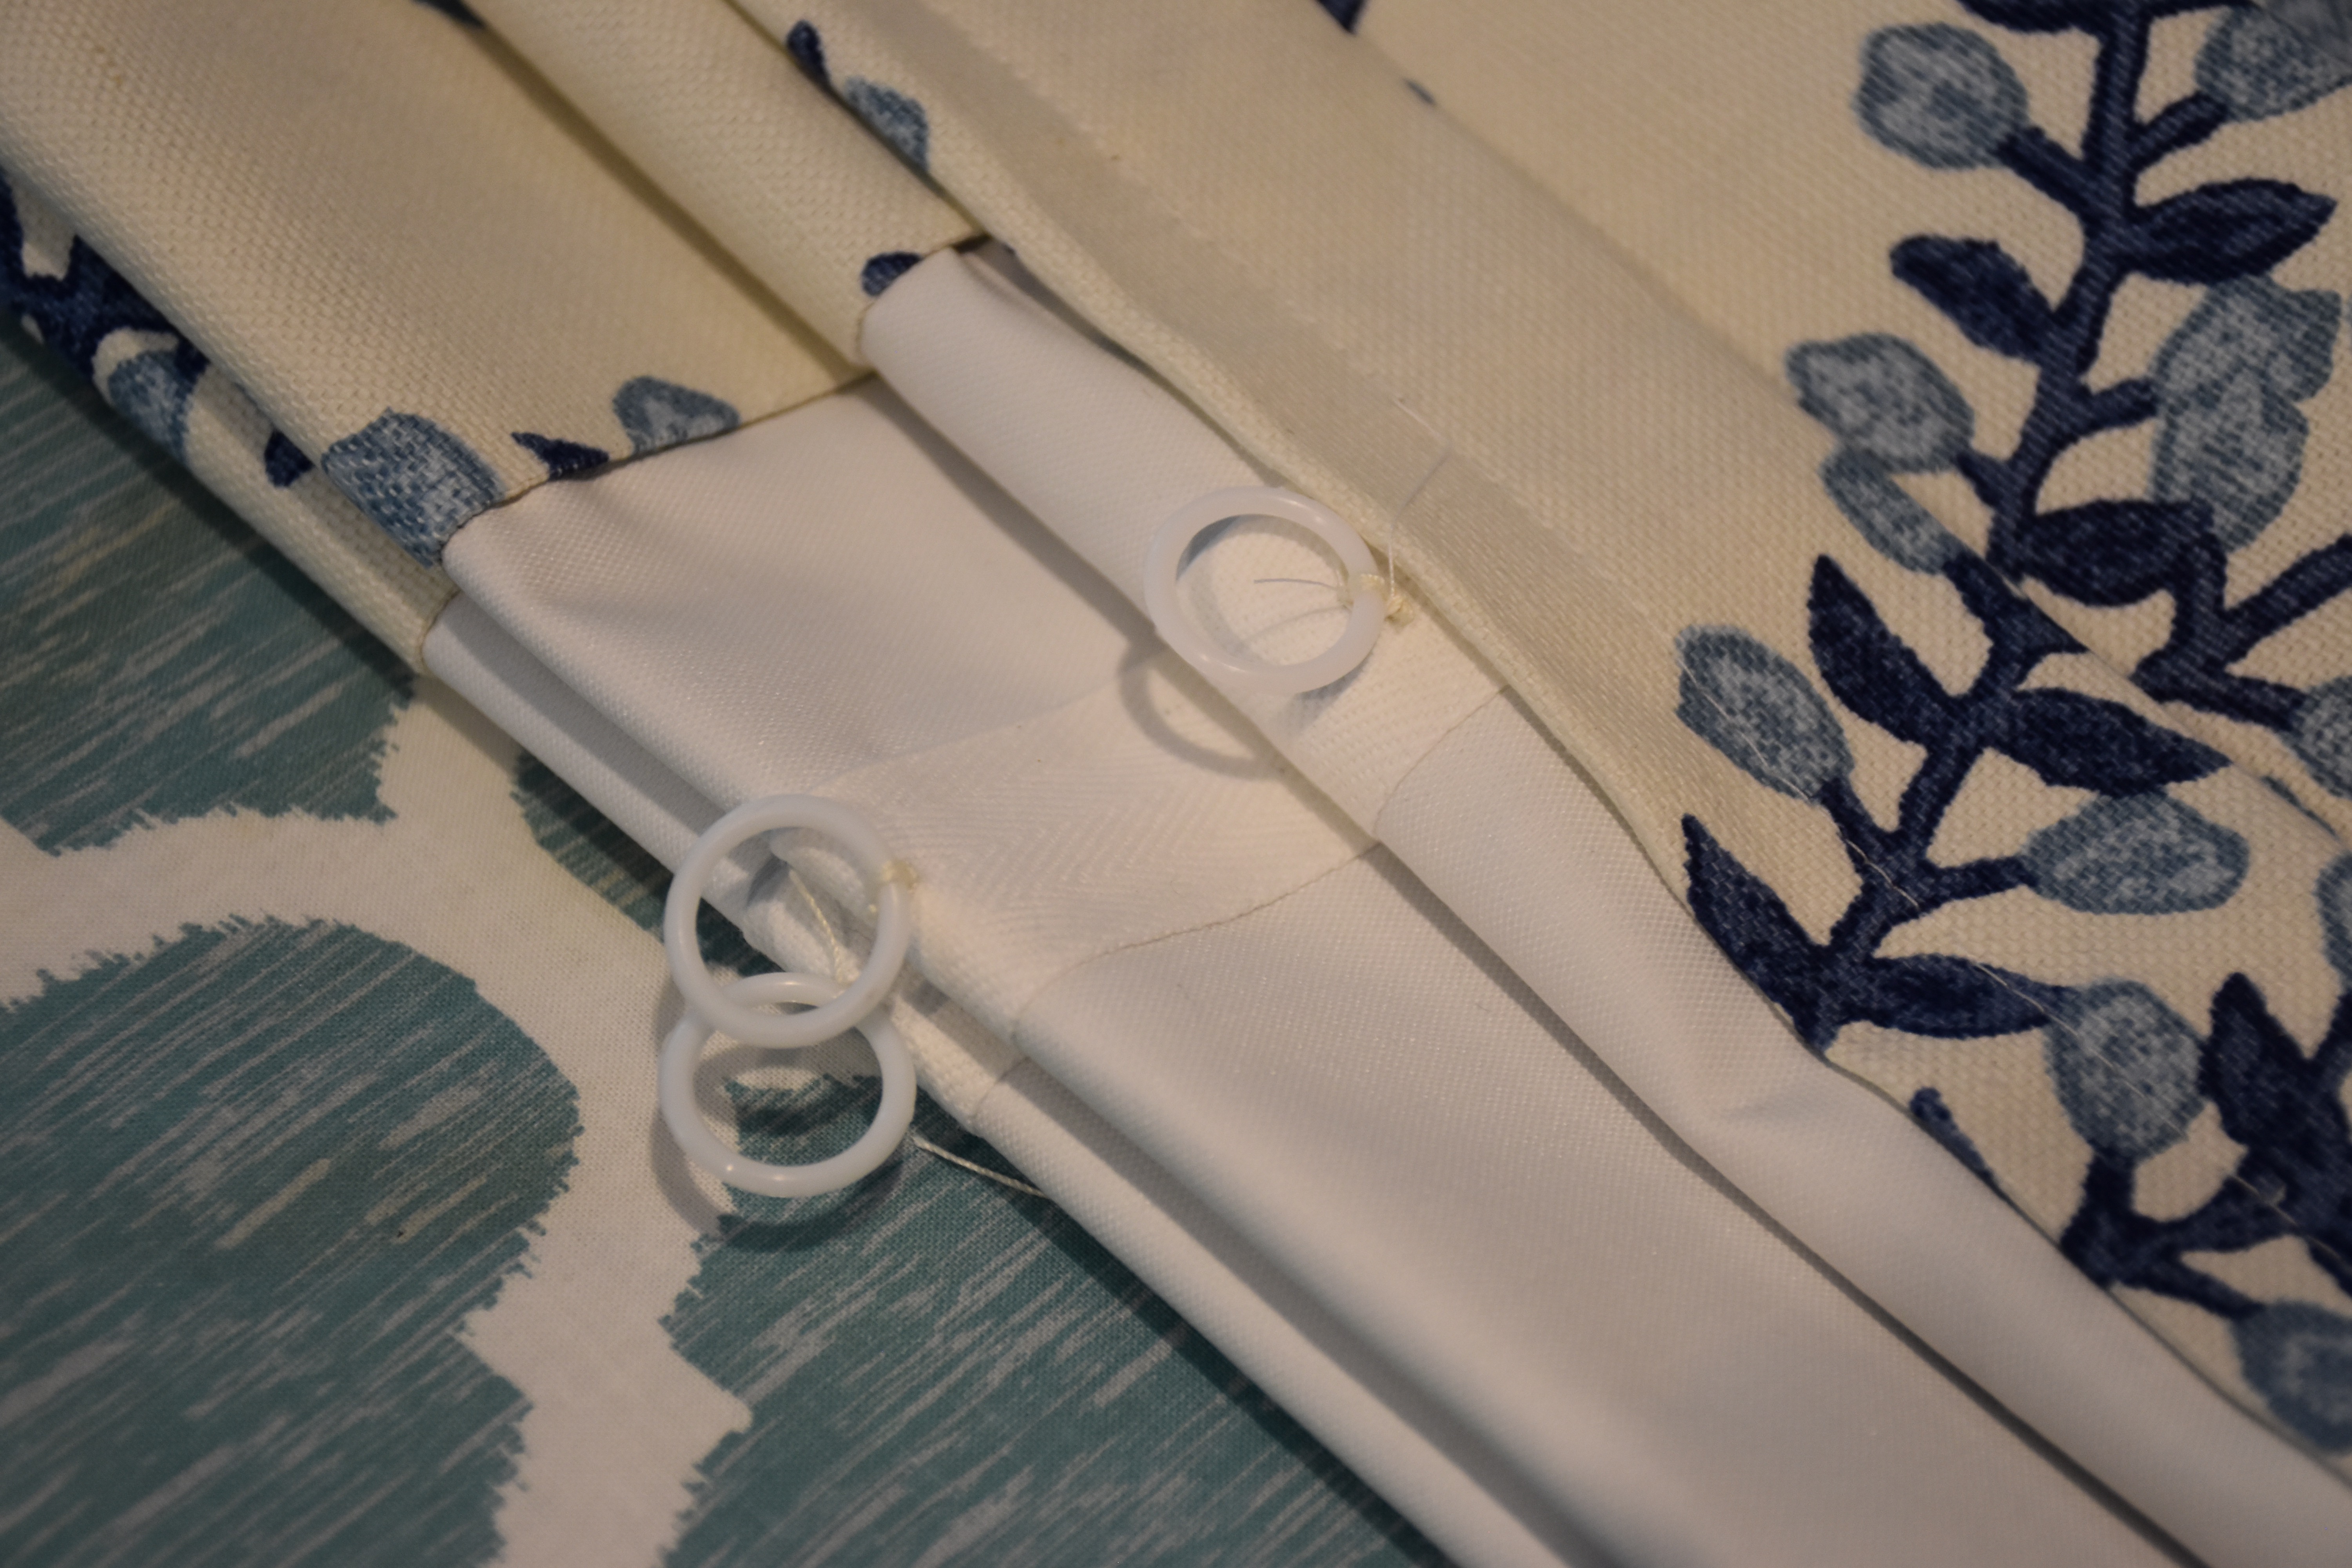
Now that your edges are finished you are ready to add your rings. I have found that the easiest way to do this is to use iron on rib tape. You can find plain rib tape or tape with the rings attached. I prefer plain rib tape because it lets me custom set my pleats or folds. The iron on tape has a subtle pattern to it that makes it easy to center you ring evenly on each side. I placed my rib tape five inches inside my drape on each side. Then I ironed it down to attach it.
Then I measured and marked the spacing of my rings. for these drapes I placed my rings six inches apart. I placed one at the edge of the fabric fold on the bottom and then with a fabric pencil I marked every six inches on each side. This ensure that you have even pleats or folds on each side.

Think Odd Numbers When It Comes To Rings
Now once you have your markings you need to sew on your rings using a needle and thread. This is the one part of the project that does require just a tiny bit of sewing. You need to sew your rings through the lining and the decorative fabric on front. Even if you have tape with pre-sewn rings you still need to sew them through the decorative fabric with a couple of stitches around the rings. If you don’t then your fabric won’t pleat right. I used five rings or pleats on each side. I find that an odd number of pleats or rings to form those folds looks best. You don’t need to have rings all the way up the sides for a stationary shade like this. So decide how high you want it to hang and calculate your ring spacing based on that. I had 5 rings on each side which allowed my shade to fall at the center of my window height, but you can customize it to fit your window.
Now iron your finished shade to make it crisp and to get rid of the crease in your center line. Once you do that you are ready to hang your drape and gather your rings together with ribbon or a ring clip.
Options For Hanging Your New Shade: Attaching It To A Board Or A Drapery Rod
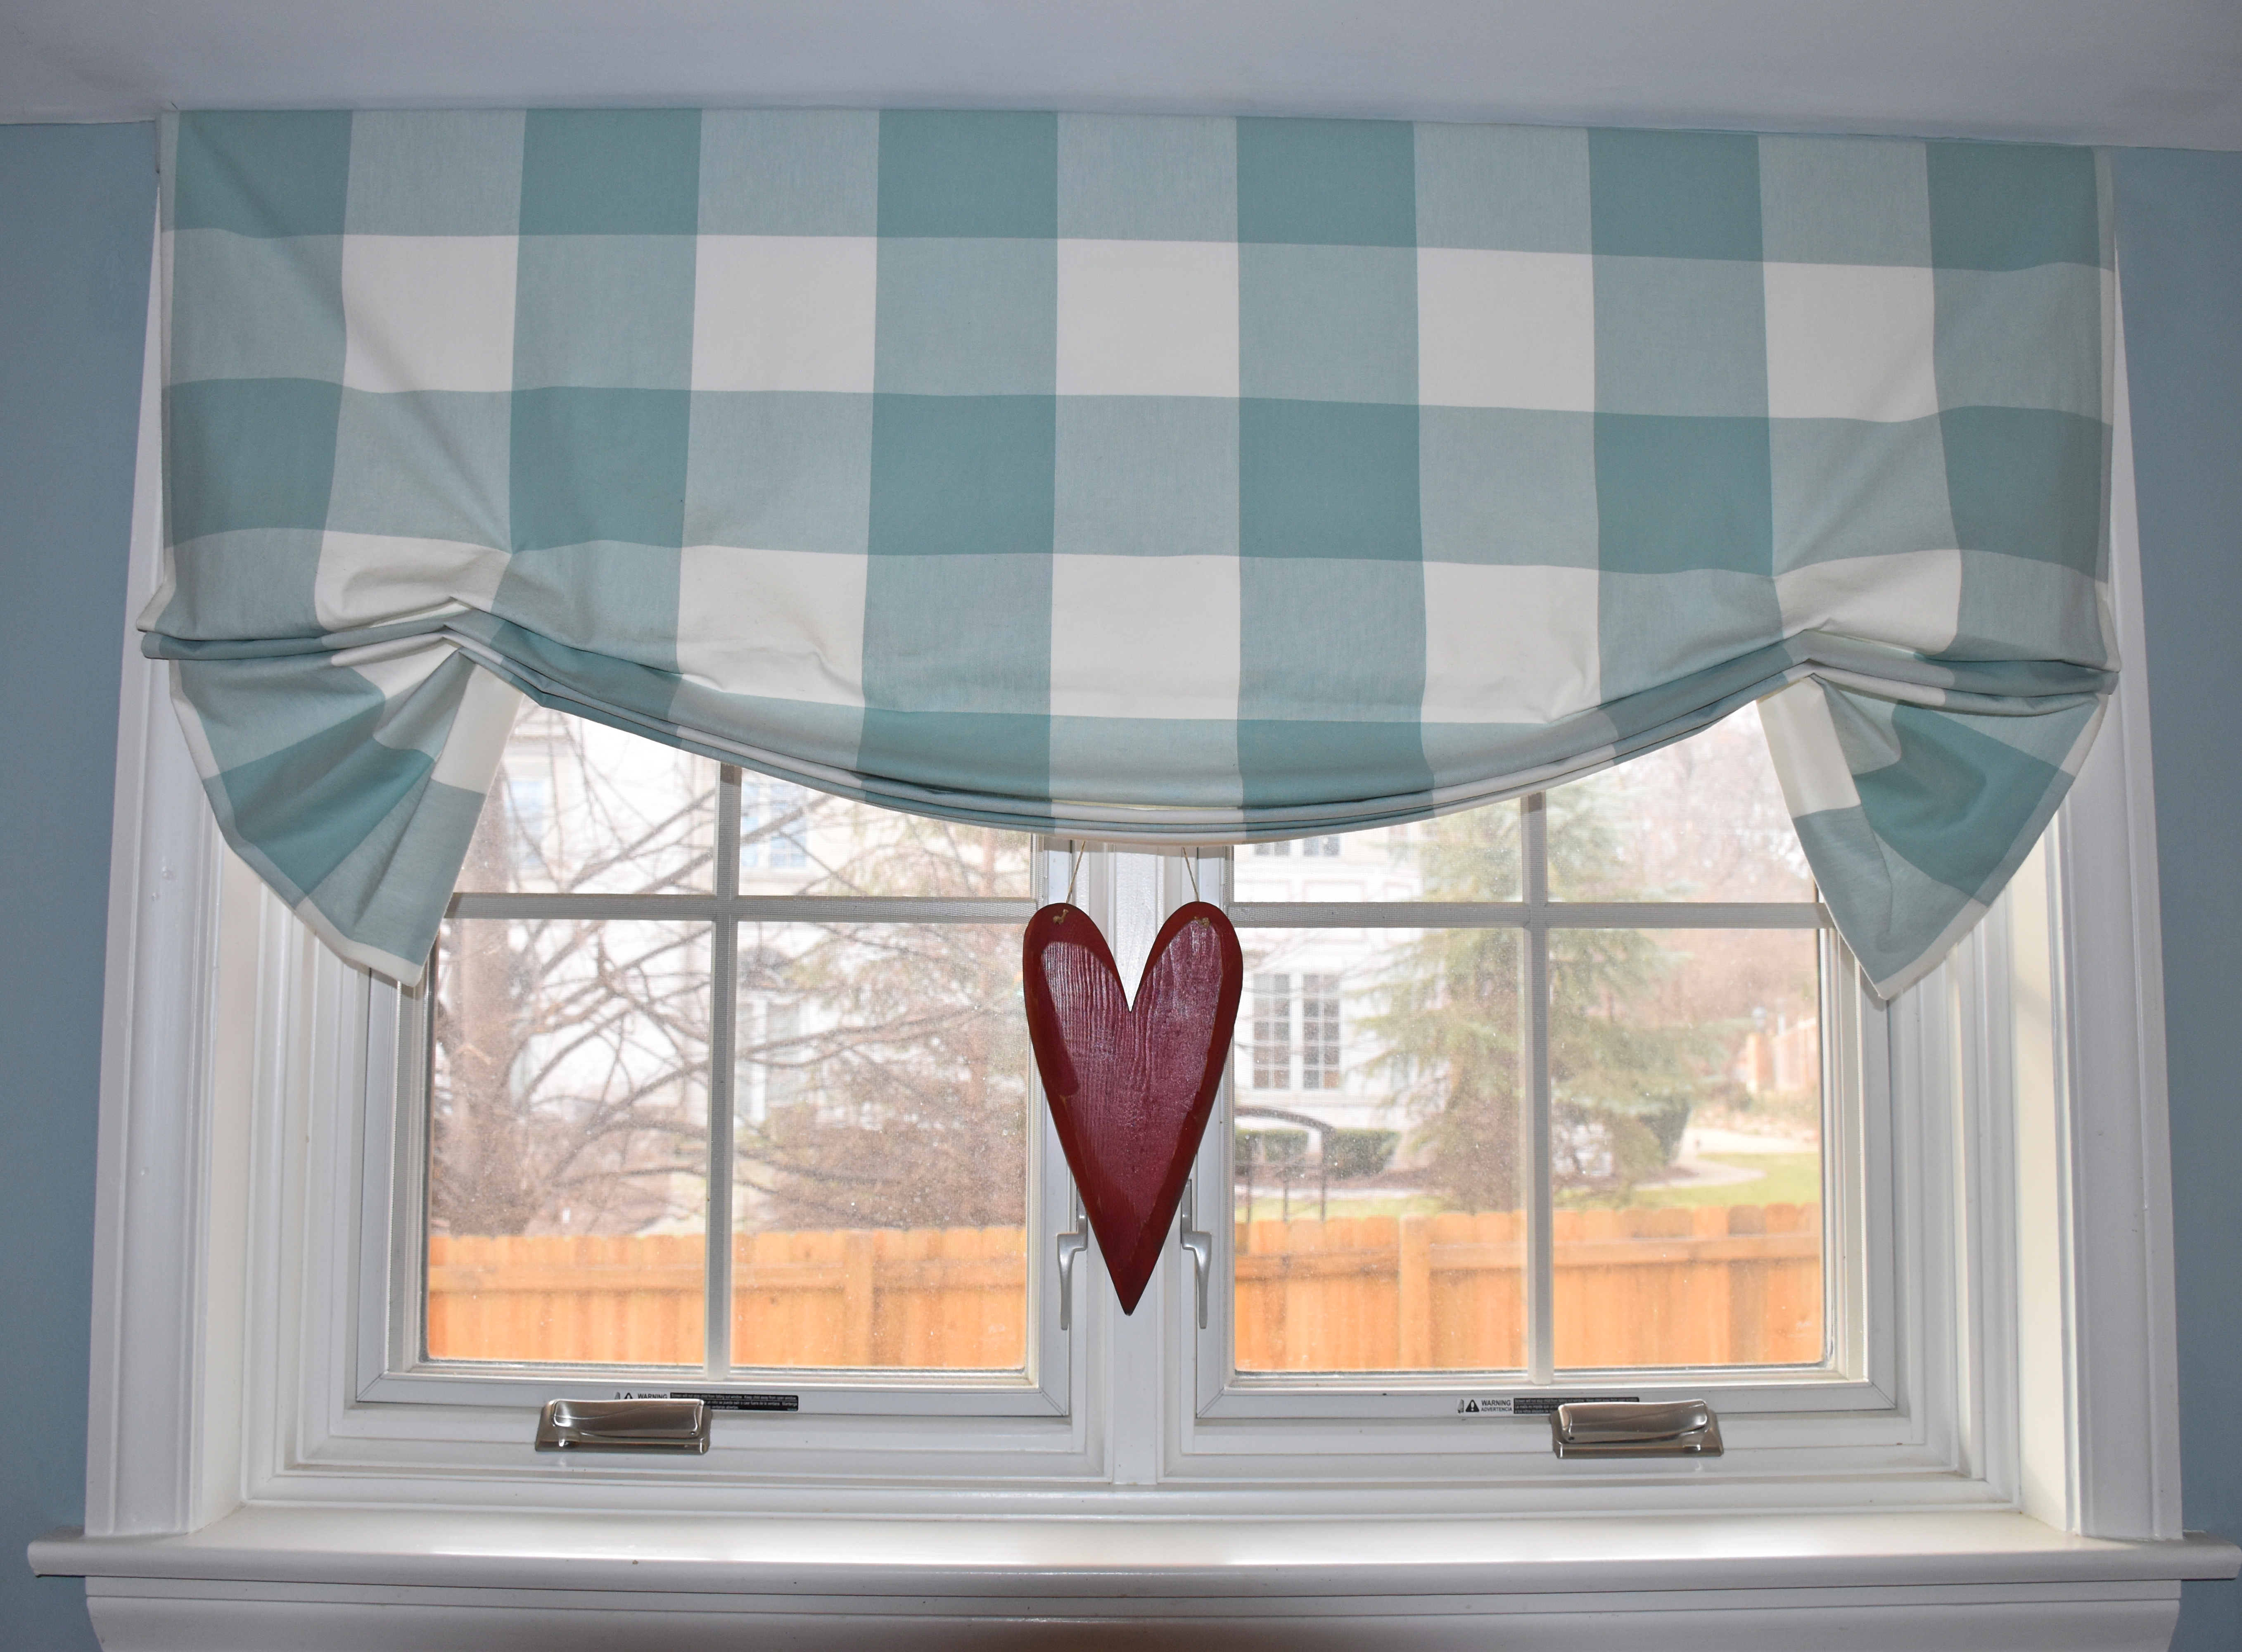
I had some existing blinds that were functional, but not pretty so I decided to keep the blinds but cover them with my shade. I used my existing wooden drapery rods to attach my shades to the wall. I just hand stitched the top fabric around my pole to create a pocket for the pole with tiny stitches that you cannot see.

I have made similar shades for my kitchen and office where I mounted them closer to the wall using a board that I had cut at the hardware store to fit the top of my window trim.
Here is a photo of the board that I attached my roman shade to using a staple gun to attach it to the backside of the wood. I painted my board the same color as my wall and I hot glued some fabric to the end caps for a seamless and custom finish.
One note here when using boards, make sure they are very dry and straight. I had a problem on one window when I realized that my board was warped when I brought it home from the hardware store.
Here is one more photo of a shade I made for my office where I wrapped the board with fabric since I had to mount it to the ceiling to avoid issues with the concrete basement walls.
Each of my two shades took me about three hours to make, so all these details took a bit of time. However, the smile on my face every time I pass down the hallway makes it completely worth it. The entire project with all of the fabric and supplies cost just under one hundred dollars which kept this project budget friendly. If I had them custom made each shade would have been at least a two hundred dollars each. So I loved being able to make them myself.
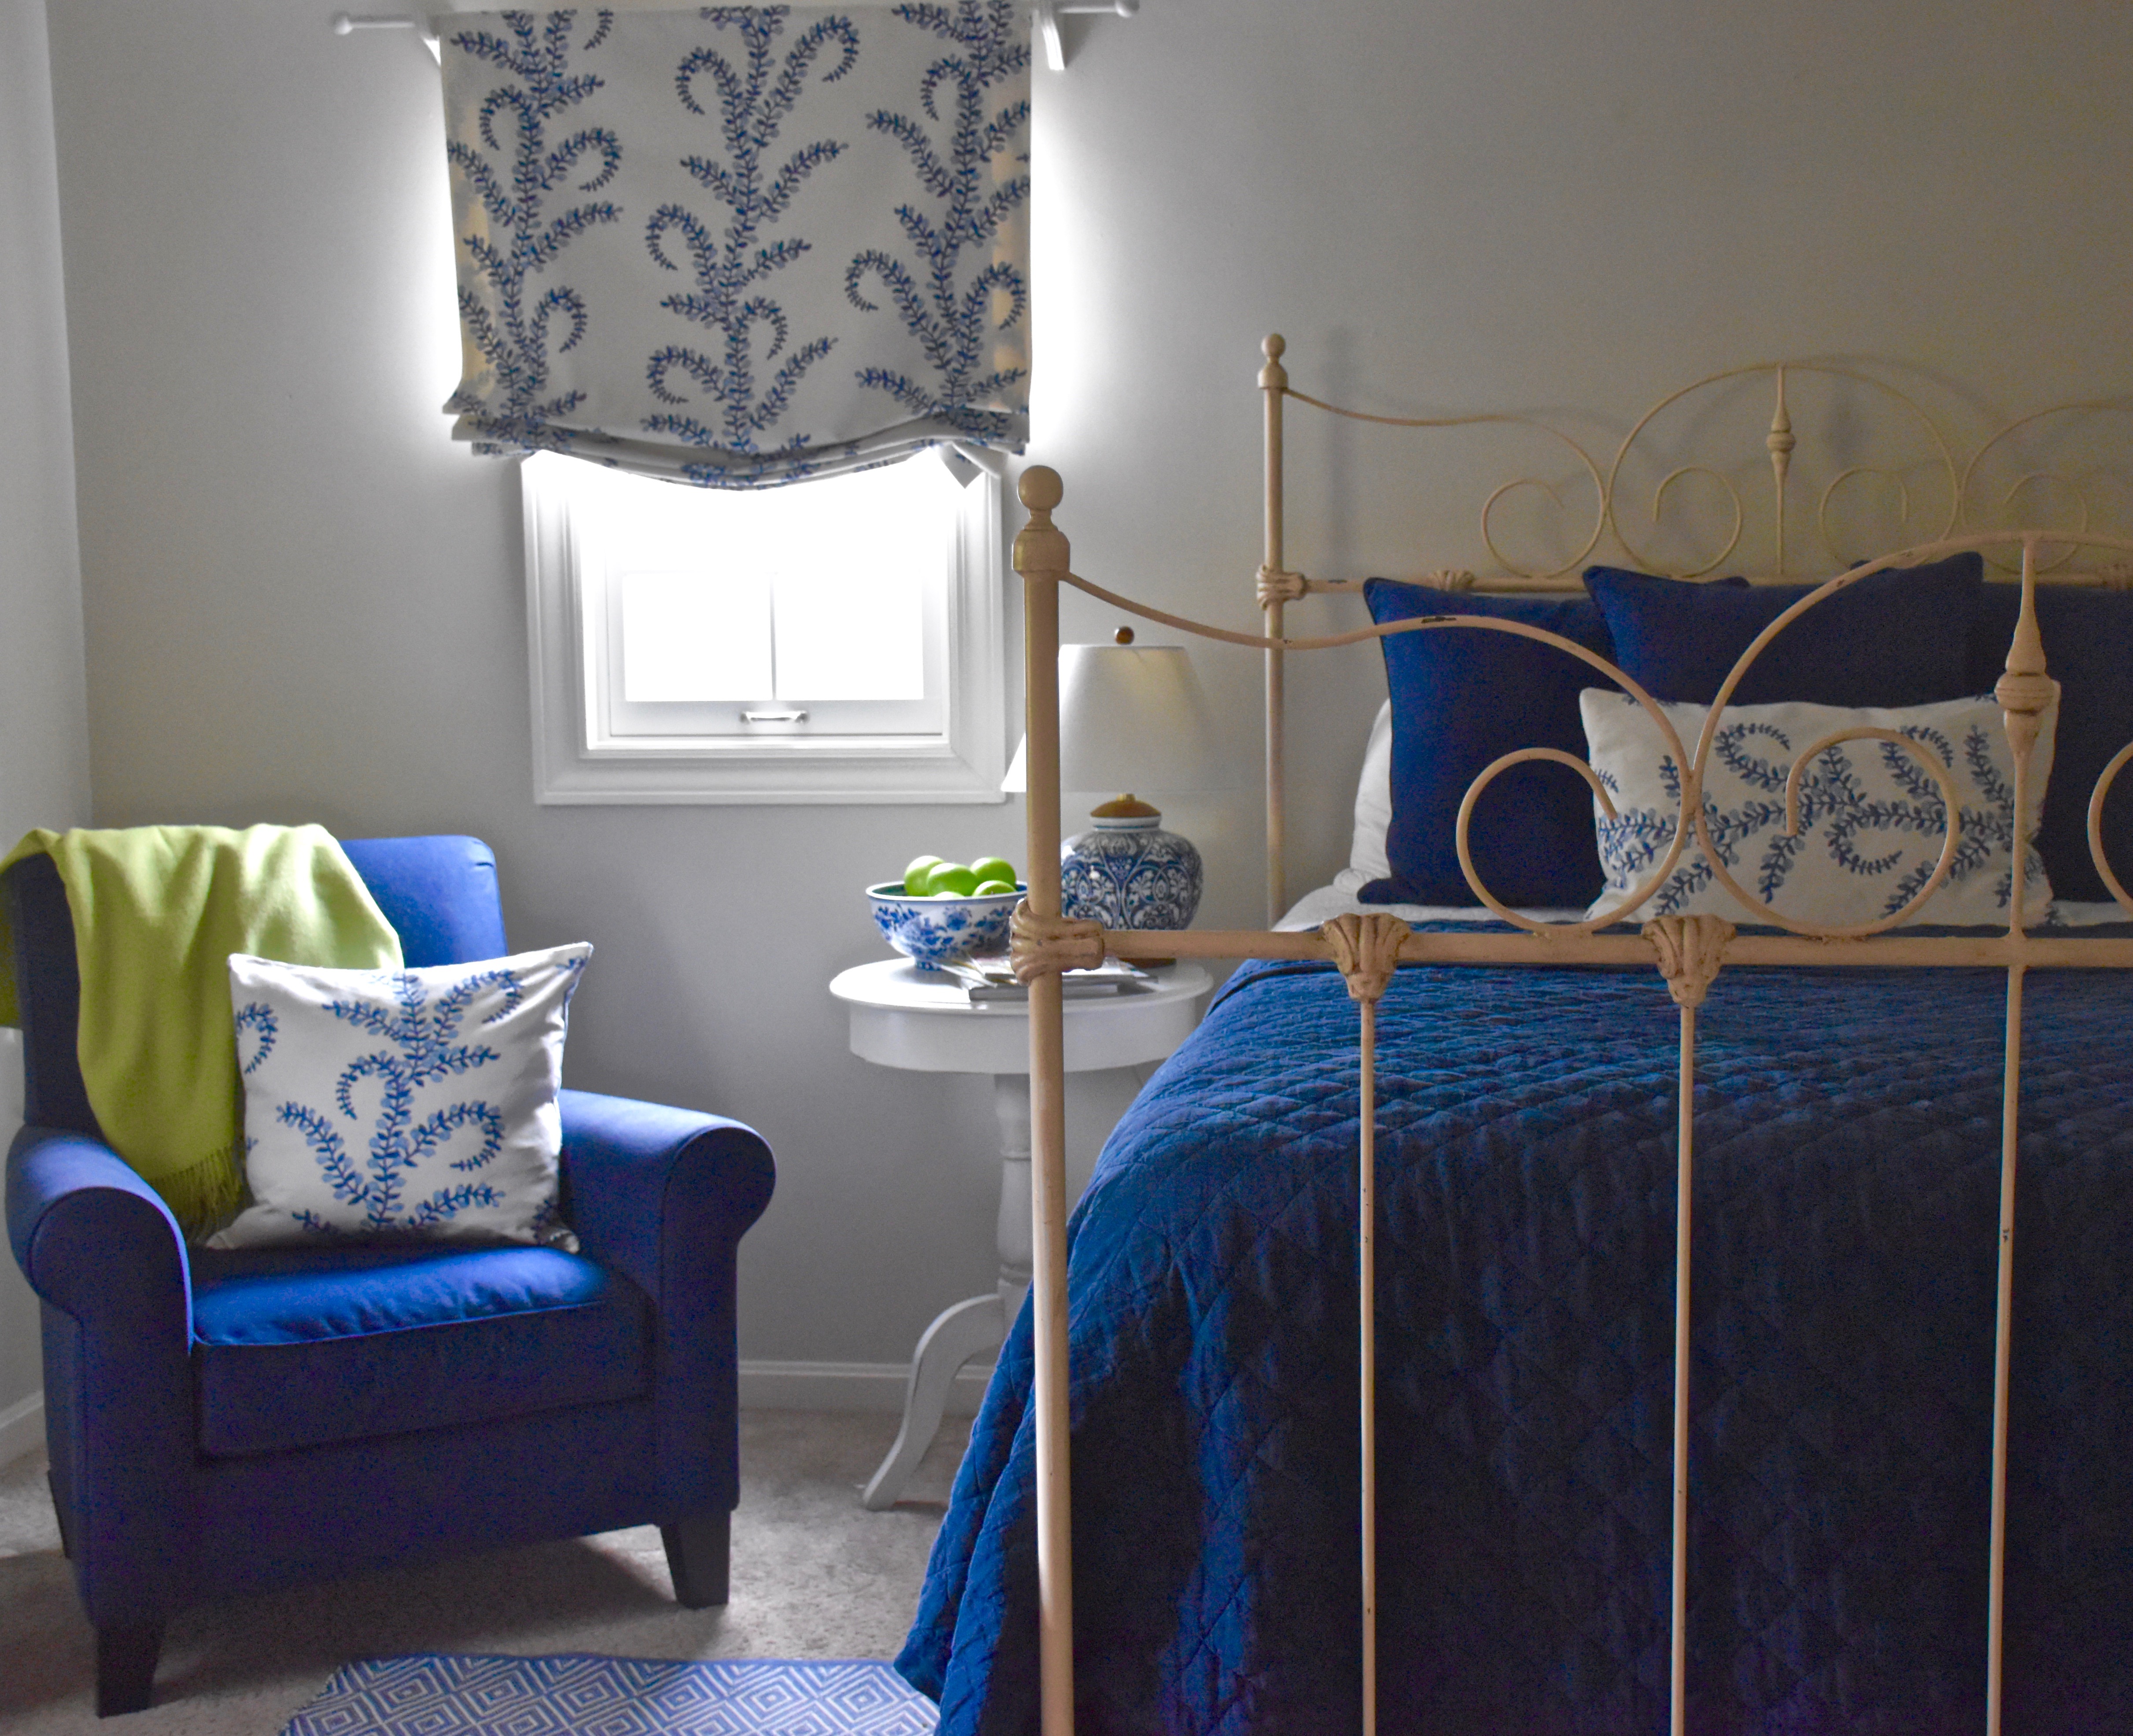
I have more details to add before this guest room is finished, but a new apple green blanket some custom shades and pillows have our guest room ready to welcome our family and friends in style.