Fall is perhaps one of the shortest and yet most anticipated of all the seasons. It isn’t technically here until next week on September 22nd, but I can feel it just around the corner. People are planting cabbages, kale and mums. This week I saw a few brave maple leaves starting to turn color. School is back in full swing and pumpkin spice lattes are already back at Starbucks.
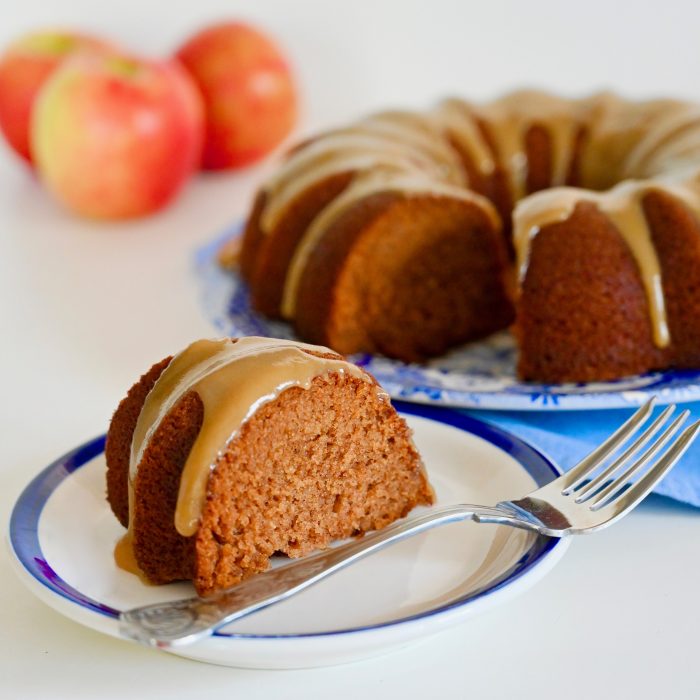
While I might like to hang on to just a few more warm sun filled days, I do love the beauty of a Midwest fall. I am looking forward to apple picking, autumn leaves, pumpkin patches and fall baking. So this week I baked one of my favorites gingered applesauce cake from Ruth Reichl. It’s a simple mix and bake bundt cake with a poured caramel glaze that is so delicious.
Gingered Applesauce Cake
2 eggs
1 cup white sugar
1/2 cup brown sugar
½ cups applesauce
2 teaspoons freshly grated ginger
3/4 cup vegetable oil
1 teaspoon vanilla
1 ½ teaspoon baking soda
1 teaspoon kosher salt
2 teaspoons cinnamon
1/4 teaspoon ground cloves
2 cups flour
Preheat the oven to 350 degrees. Prepare a 12 cup bundt cake pan by spraying it with Baker’s Joy or buttering and flouring it well.
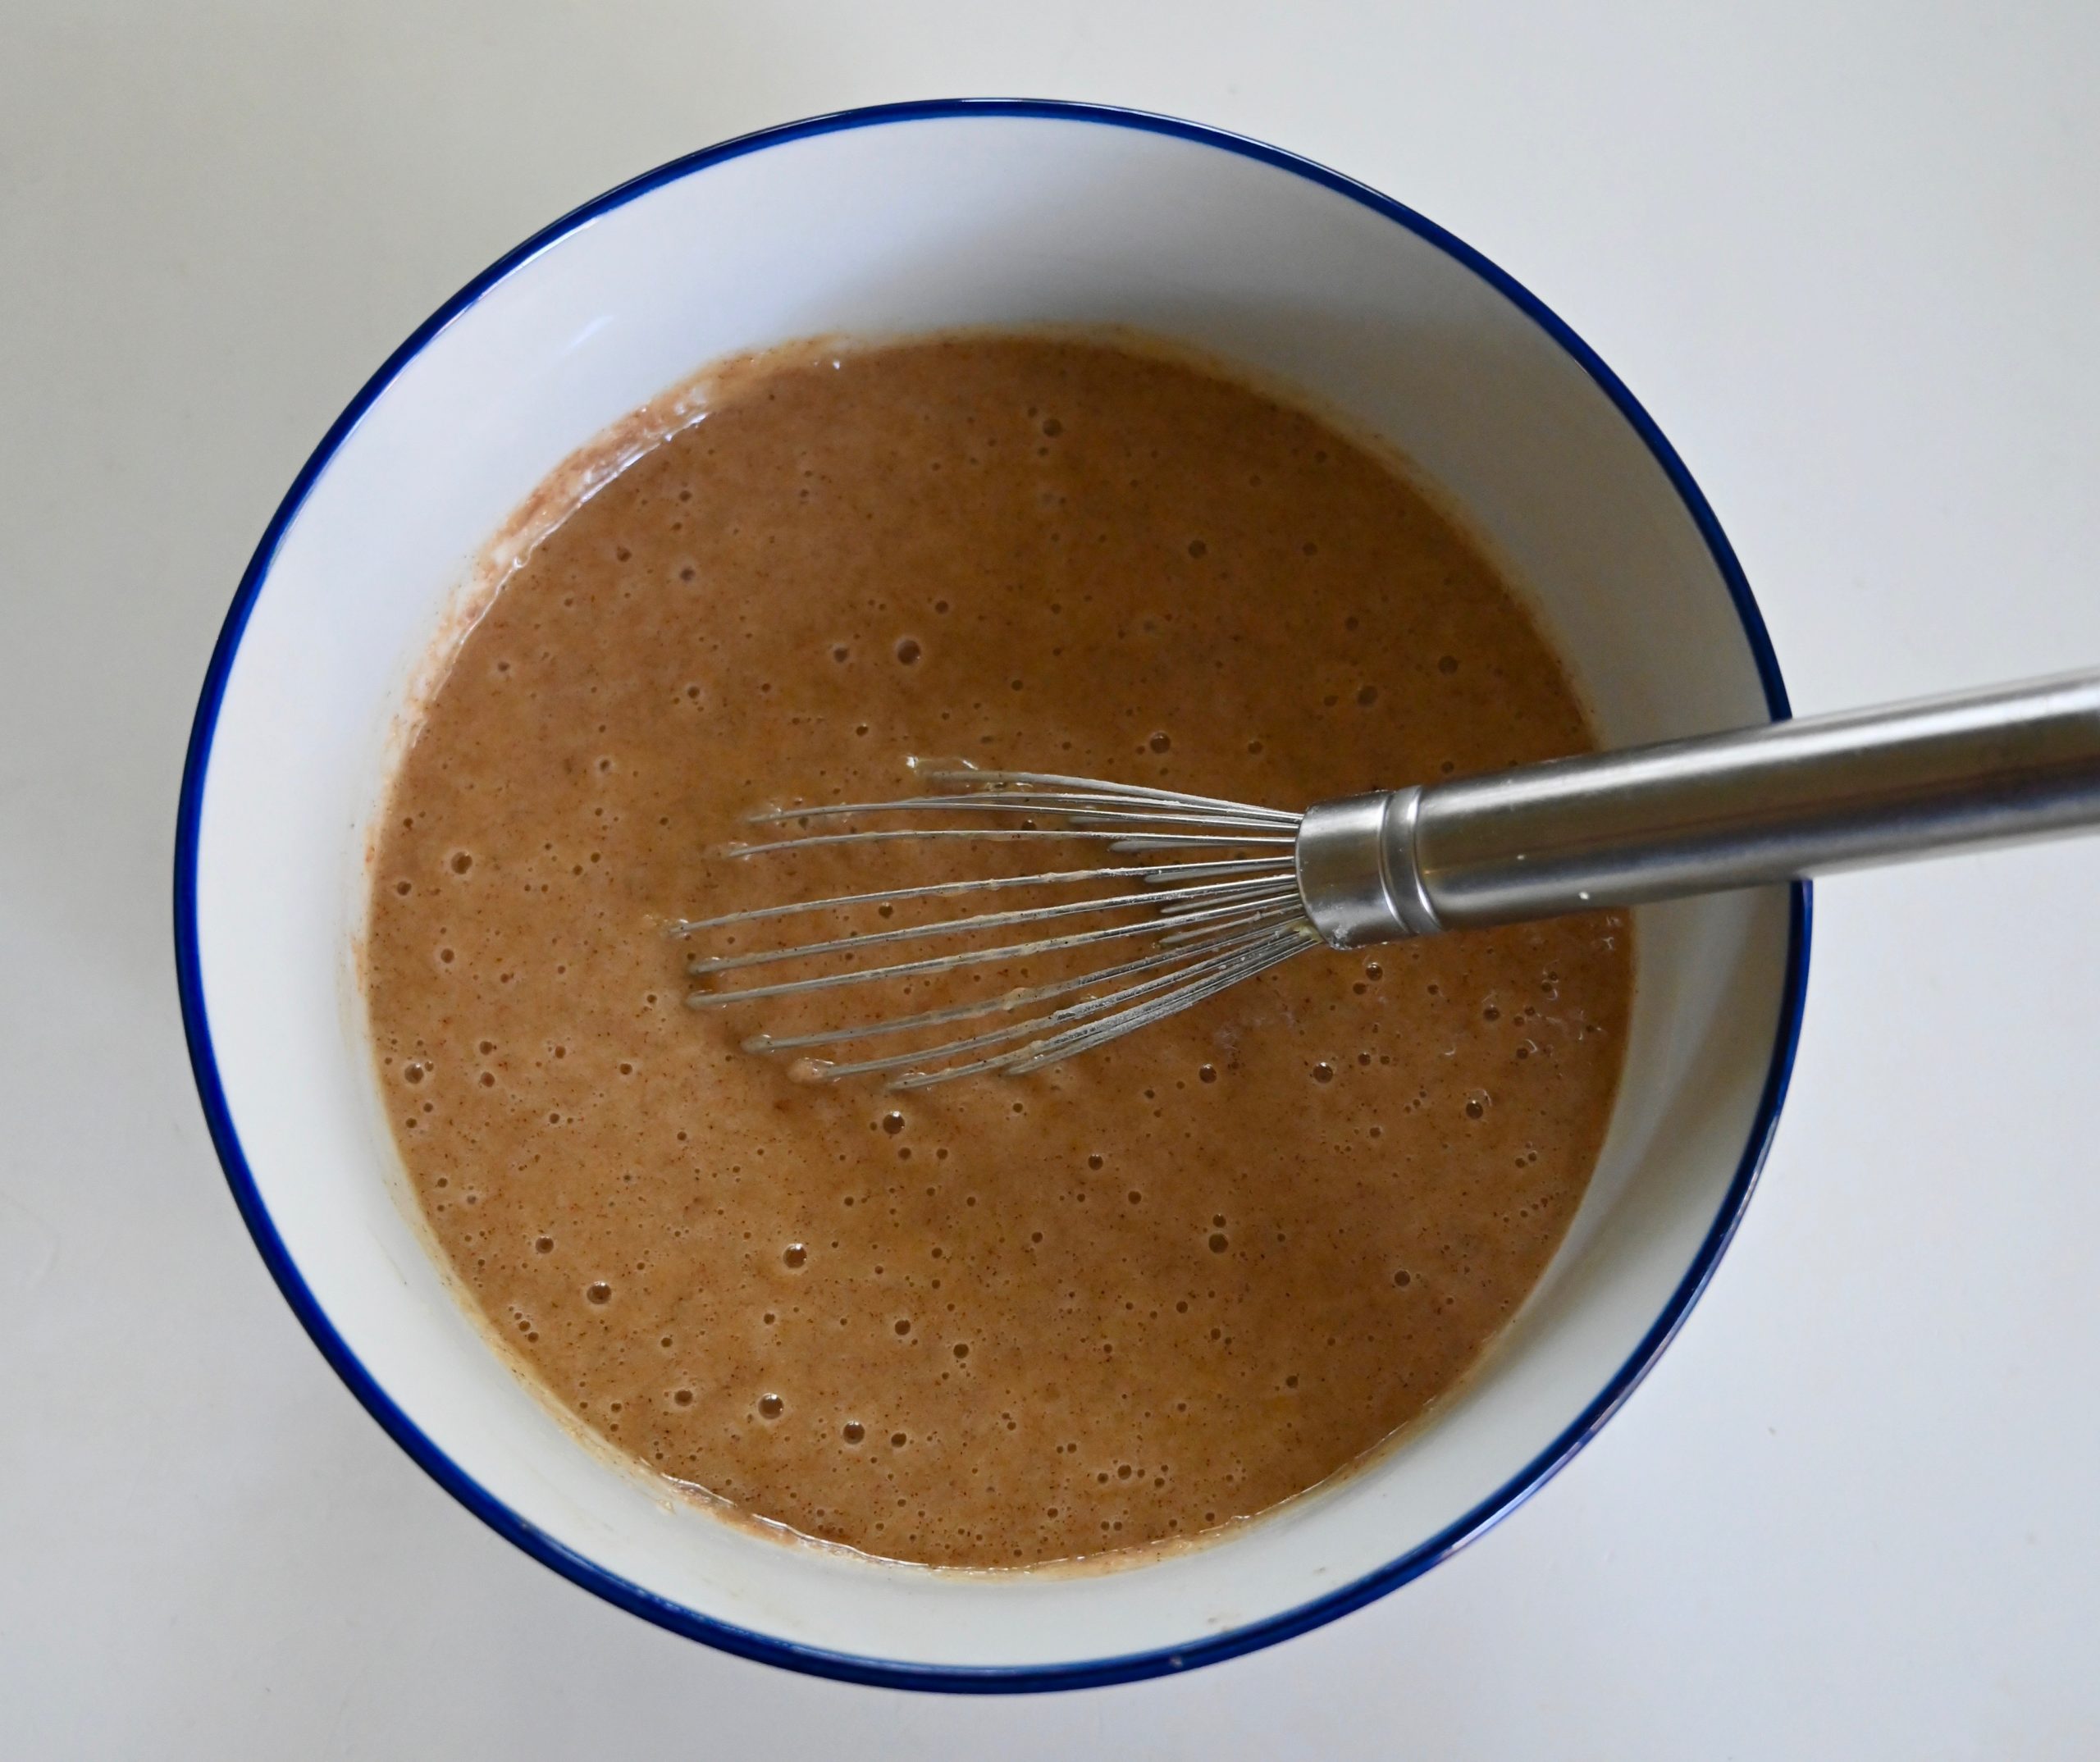
In a medium sized bowl whisk together the egg and both sugars. Add in the applesauce and grated ginger. Next mix in the vegetable oil and vanilla until smooth.
Add in the baking soda, salt, cinnamon and cloves. Finally mix in the flour until well incorporated. Pour the batter in the prepared cake pan.
Bake for 35 to 40 minutes until a toothpick or cake tester comes out clean. I found that 37 minutes is exactly right in my convection oven. Let the cake cool for a few minutes before turning it out on a plate or cake rack.
Caramel Glaze
1 cup heavy cream
1 tablespoon light corn syrup
1/2 cup brown sugar
1/4 teaspoon salt
1 teaspoon vanilla
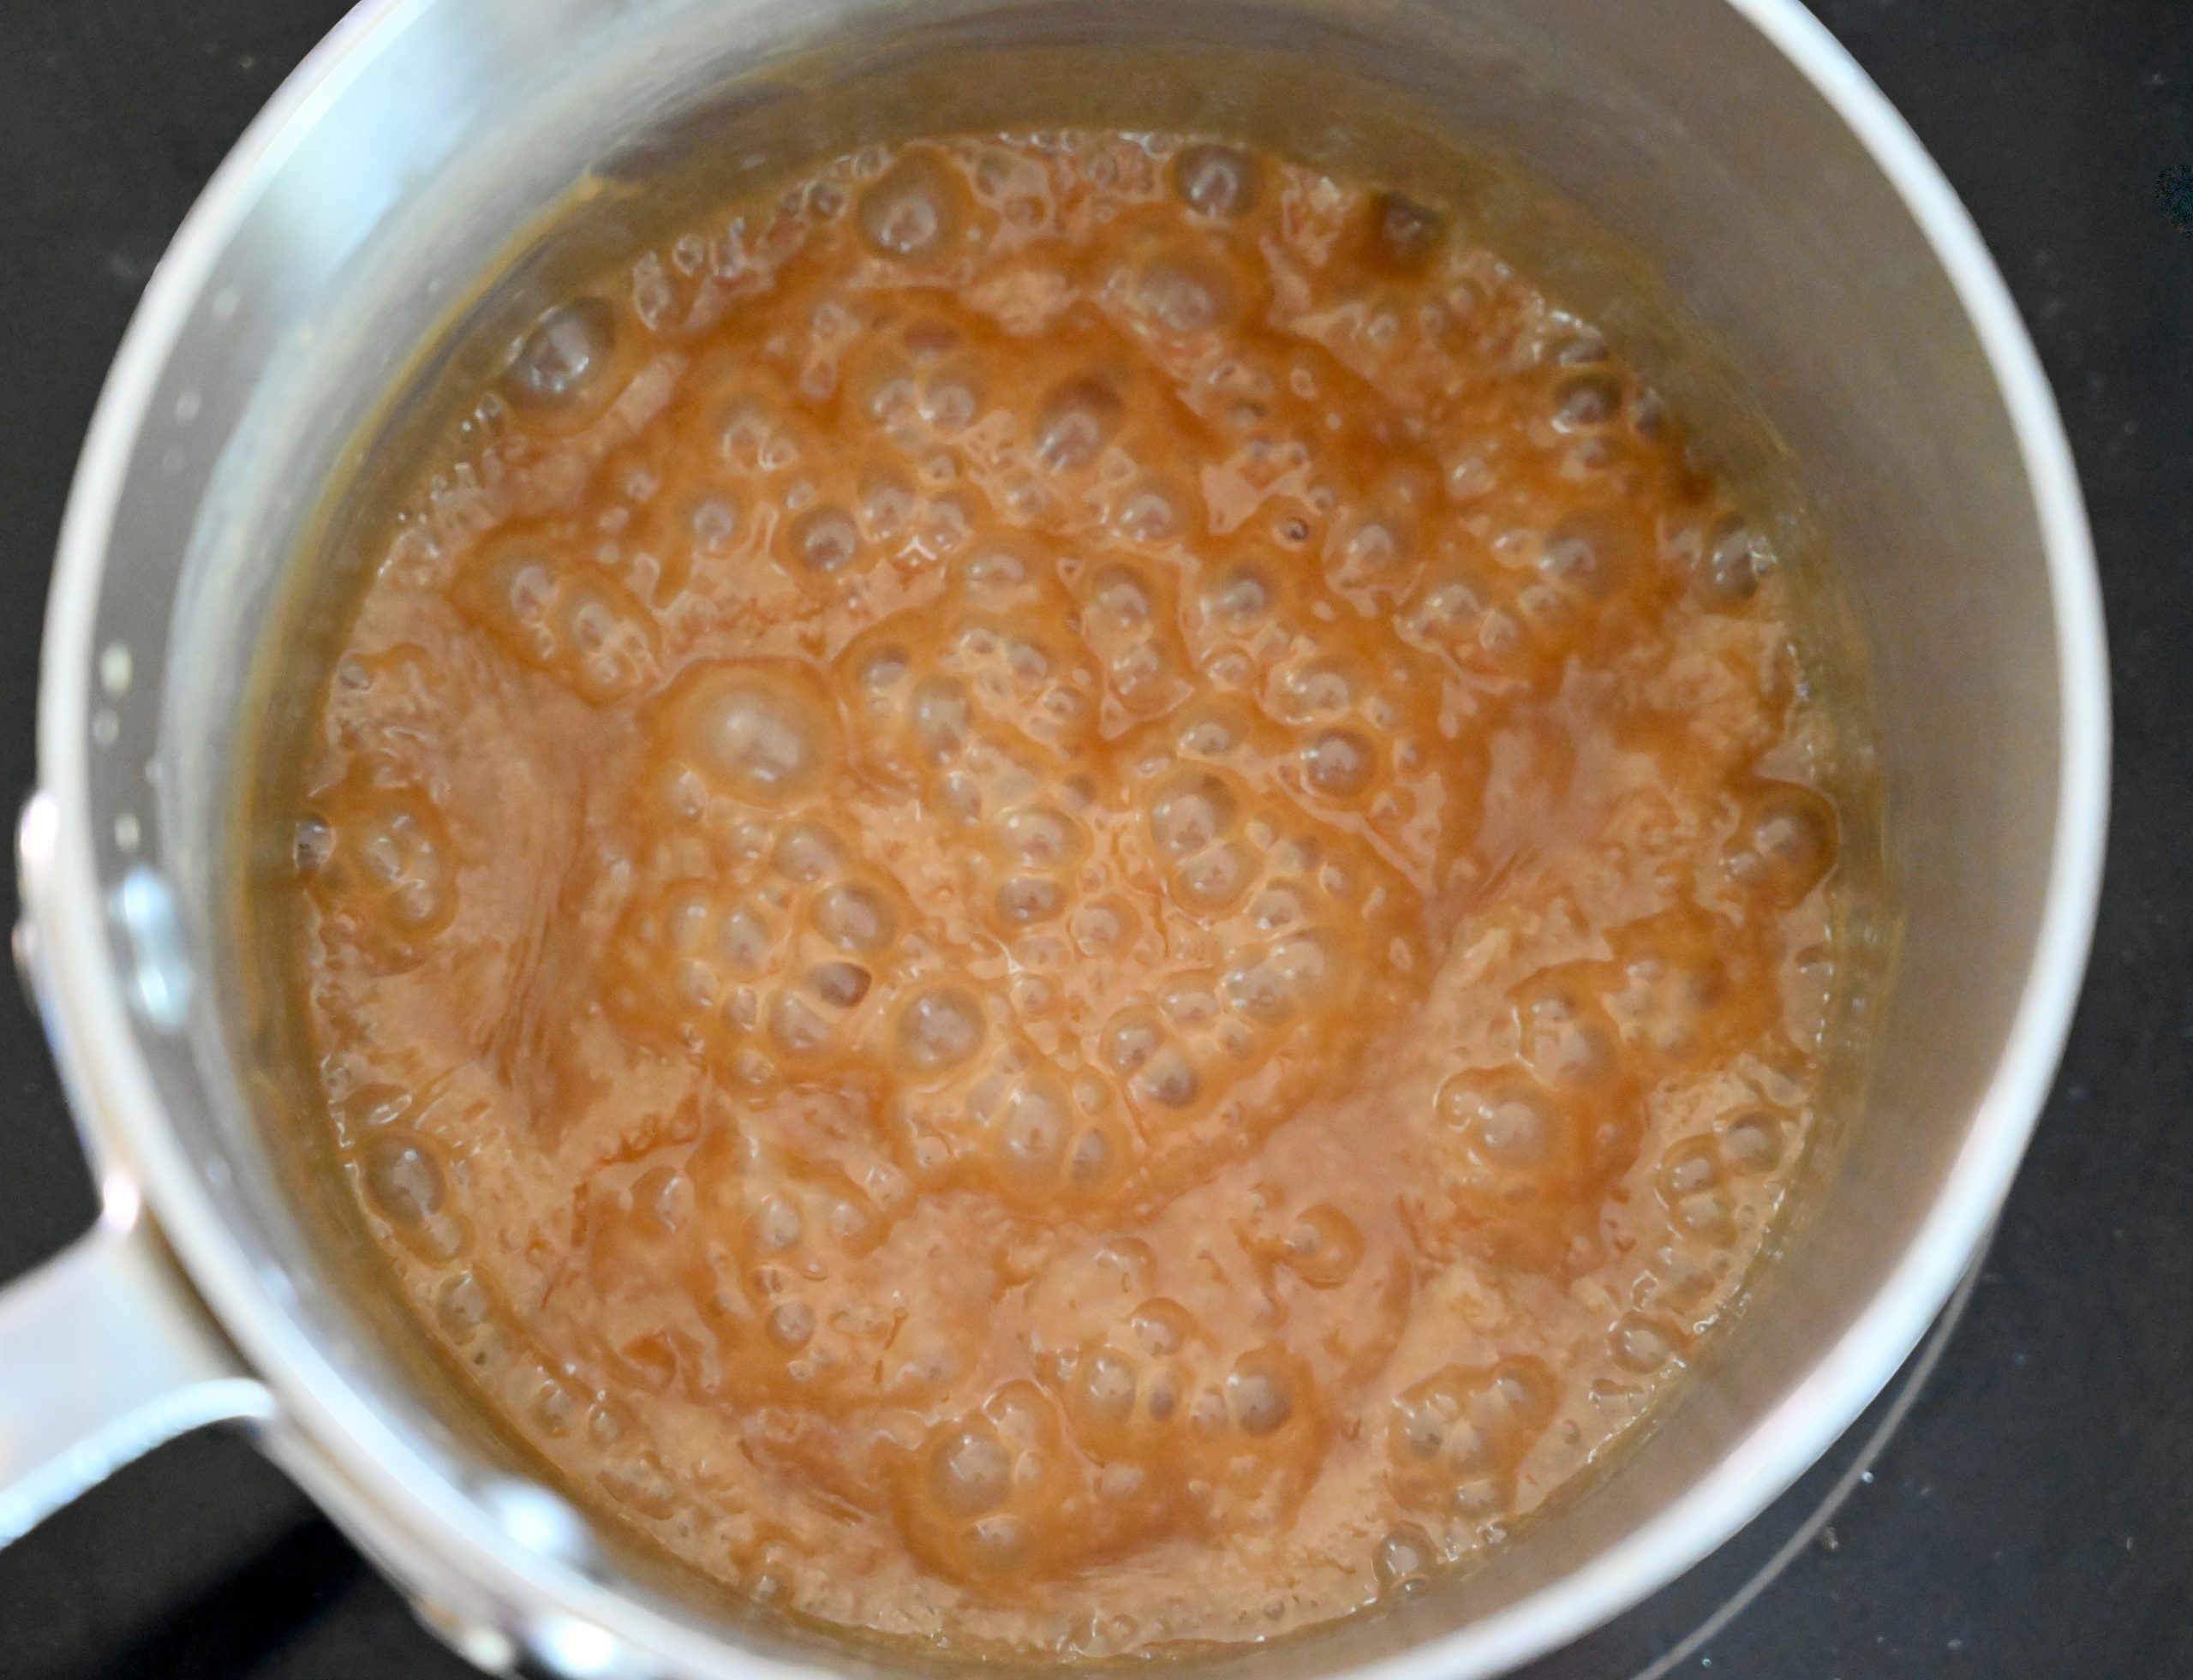
Put the cream, corn syrup, brown sugar and salt in a small sauce pan. Whisk the ingredients together and heat over medium high heat until it comes to a boil. Then turn the heat down to medium. Continue to let the mixture bubble for 14 to 15 minutes stirring every few minutes until the sauce thickens.
Finally, remove the glaze from the heat and whisk in the vanilla.
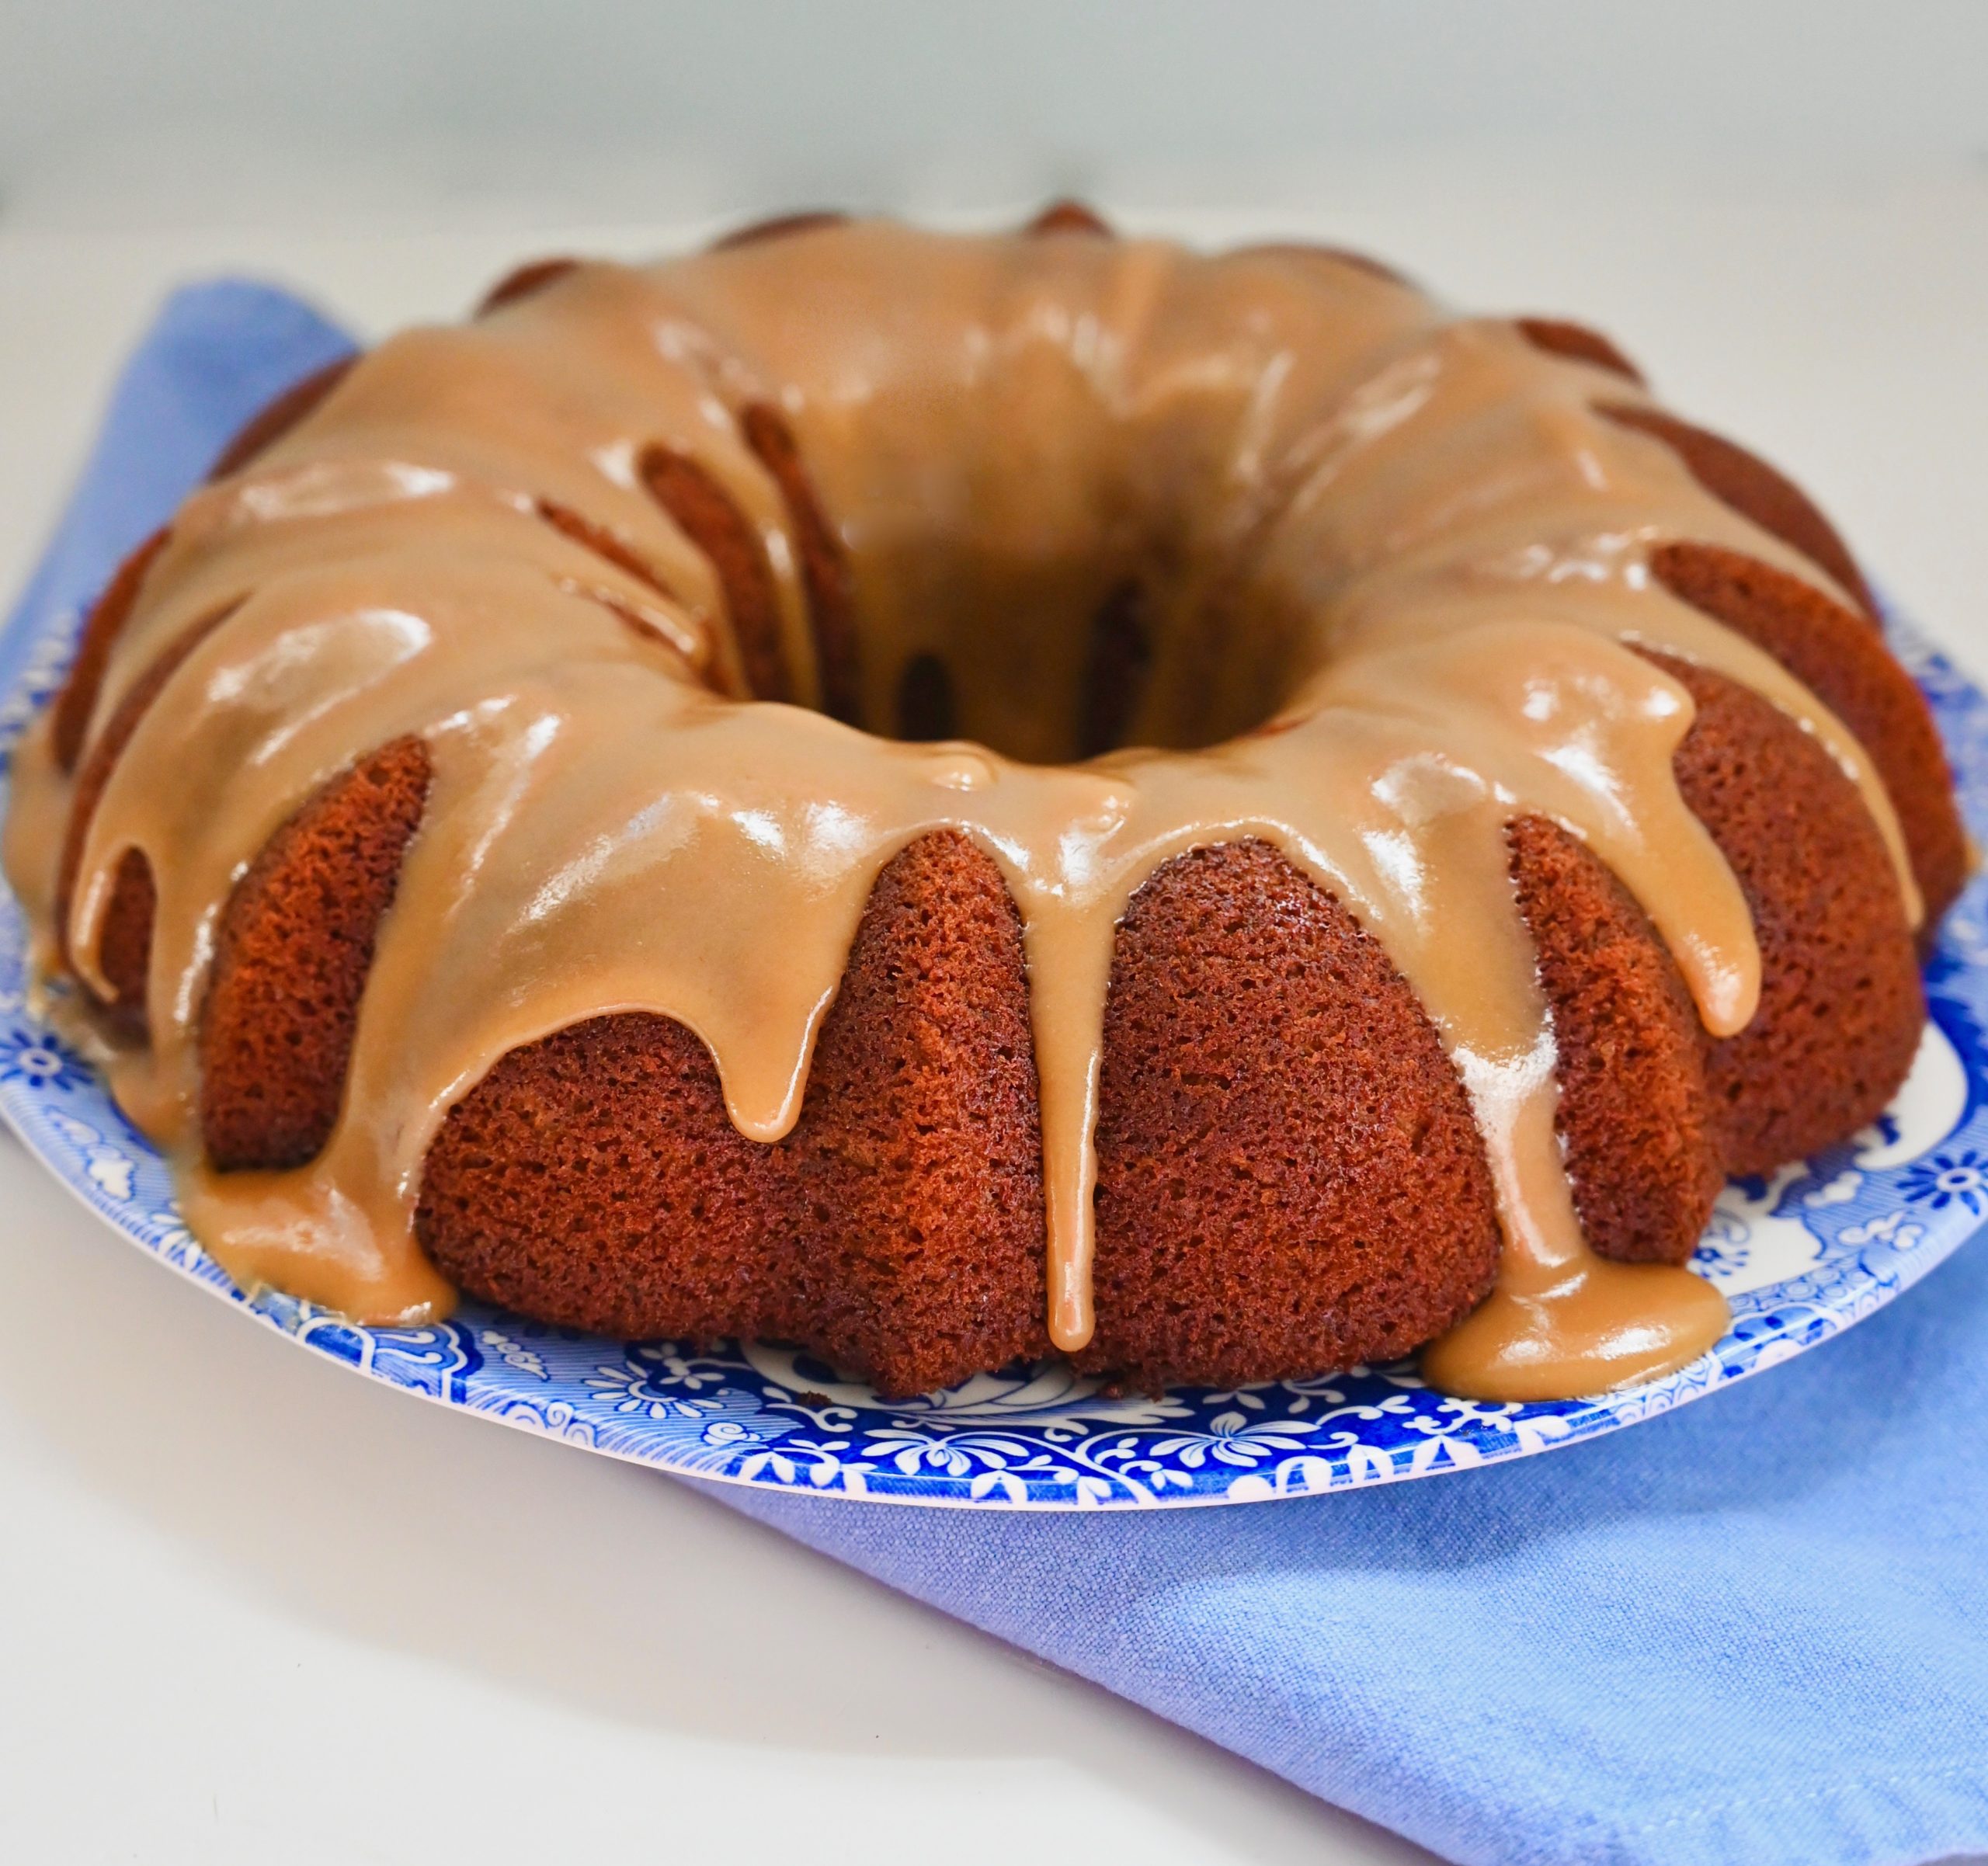
Immediately spoon or pour the sauce over the top of the cake. I like to pour the caramel glaze into a small cream pitcher because it makes it easy to create a controlled and slow pour.
This moist and sweetly spiced cake hits all the right notes for fall baking. Gingered applesauce cake will have you in a fall mood no matter what the temperature is outside.
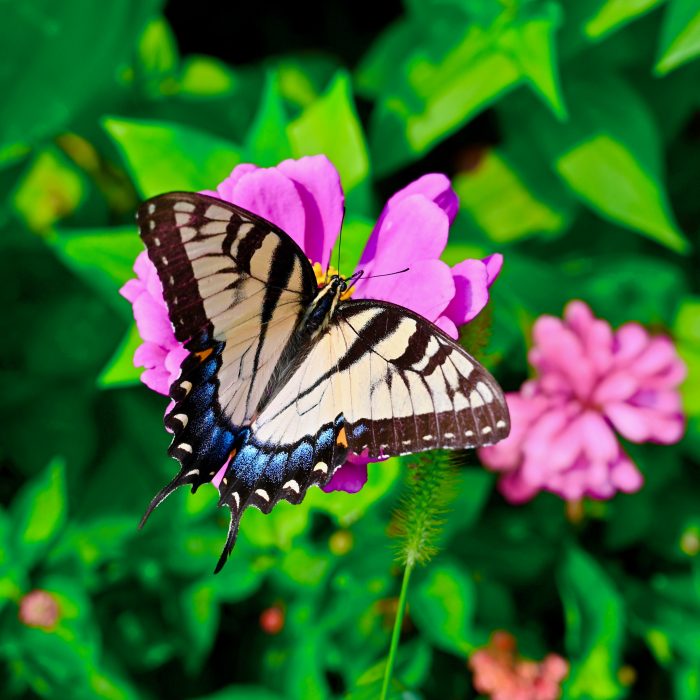
“We delight in the beauty of the butterfly, but rarely admit the changes it has gone through to achieve that beauty.”
Maya Angelou
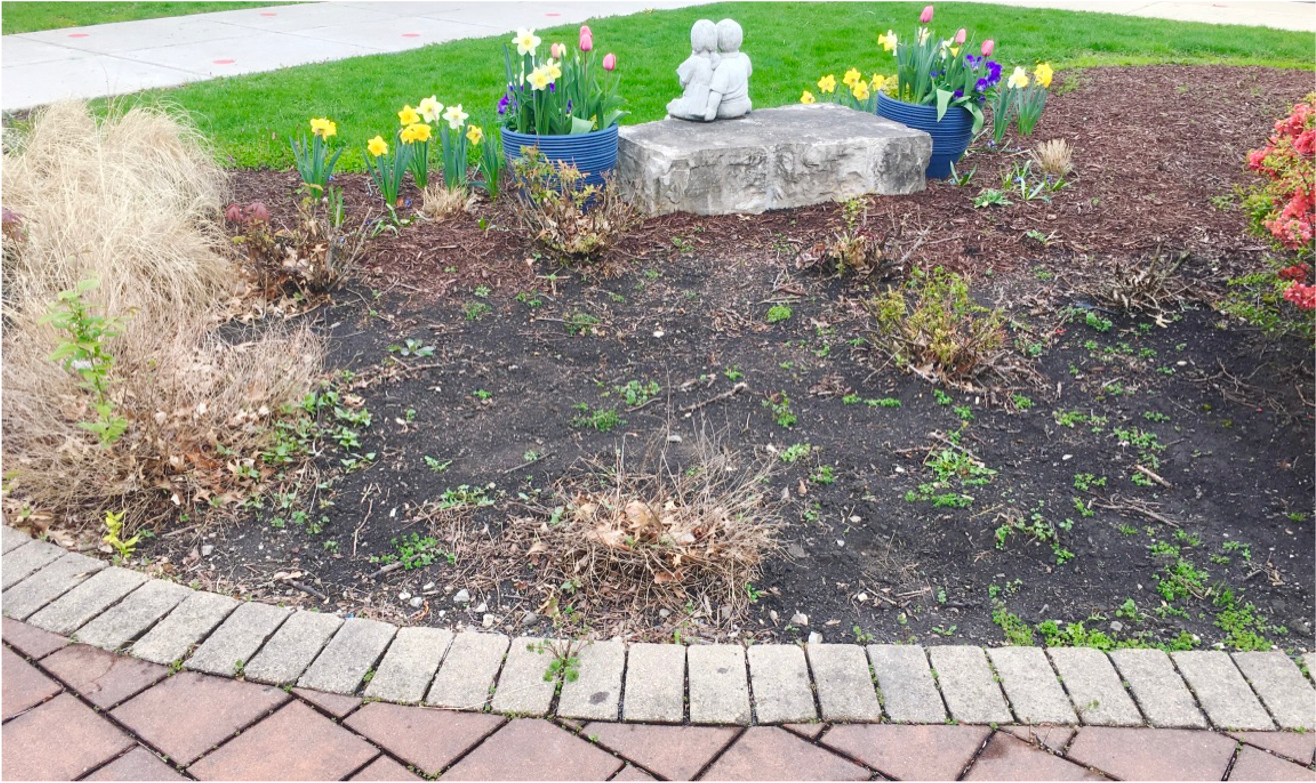
Every morning I would stop as I took my daughters to school and wonder what a small weed covered flowerbed could be with a little love. There had once been blue spruce tree there and a few rose bushes. However, several years ago the old tree became sick and needed to be cut down. Nothing had been planted in its place so that’s when the weeds crept in.
I knew it wasn’t my yard but each time I drove by a part of me longed to give the school something beautiful. A place where children, teachers and parents could gather. A space for children to connect and experience nature’s wonders.
Then last year the PTO decided it would create a new garden and grounds committee. Suddenly as the pandemic hit, the school was using its front lawn more than ever. Classes were meeting and playing out front. So, when the principal was interested in getting a new tree for the front flowerbed, I began to dream a little bigger. What about a new tree and … a butterfly garden?
The before: the school has a large back patio area, but the landscaping here had seen better days.
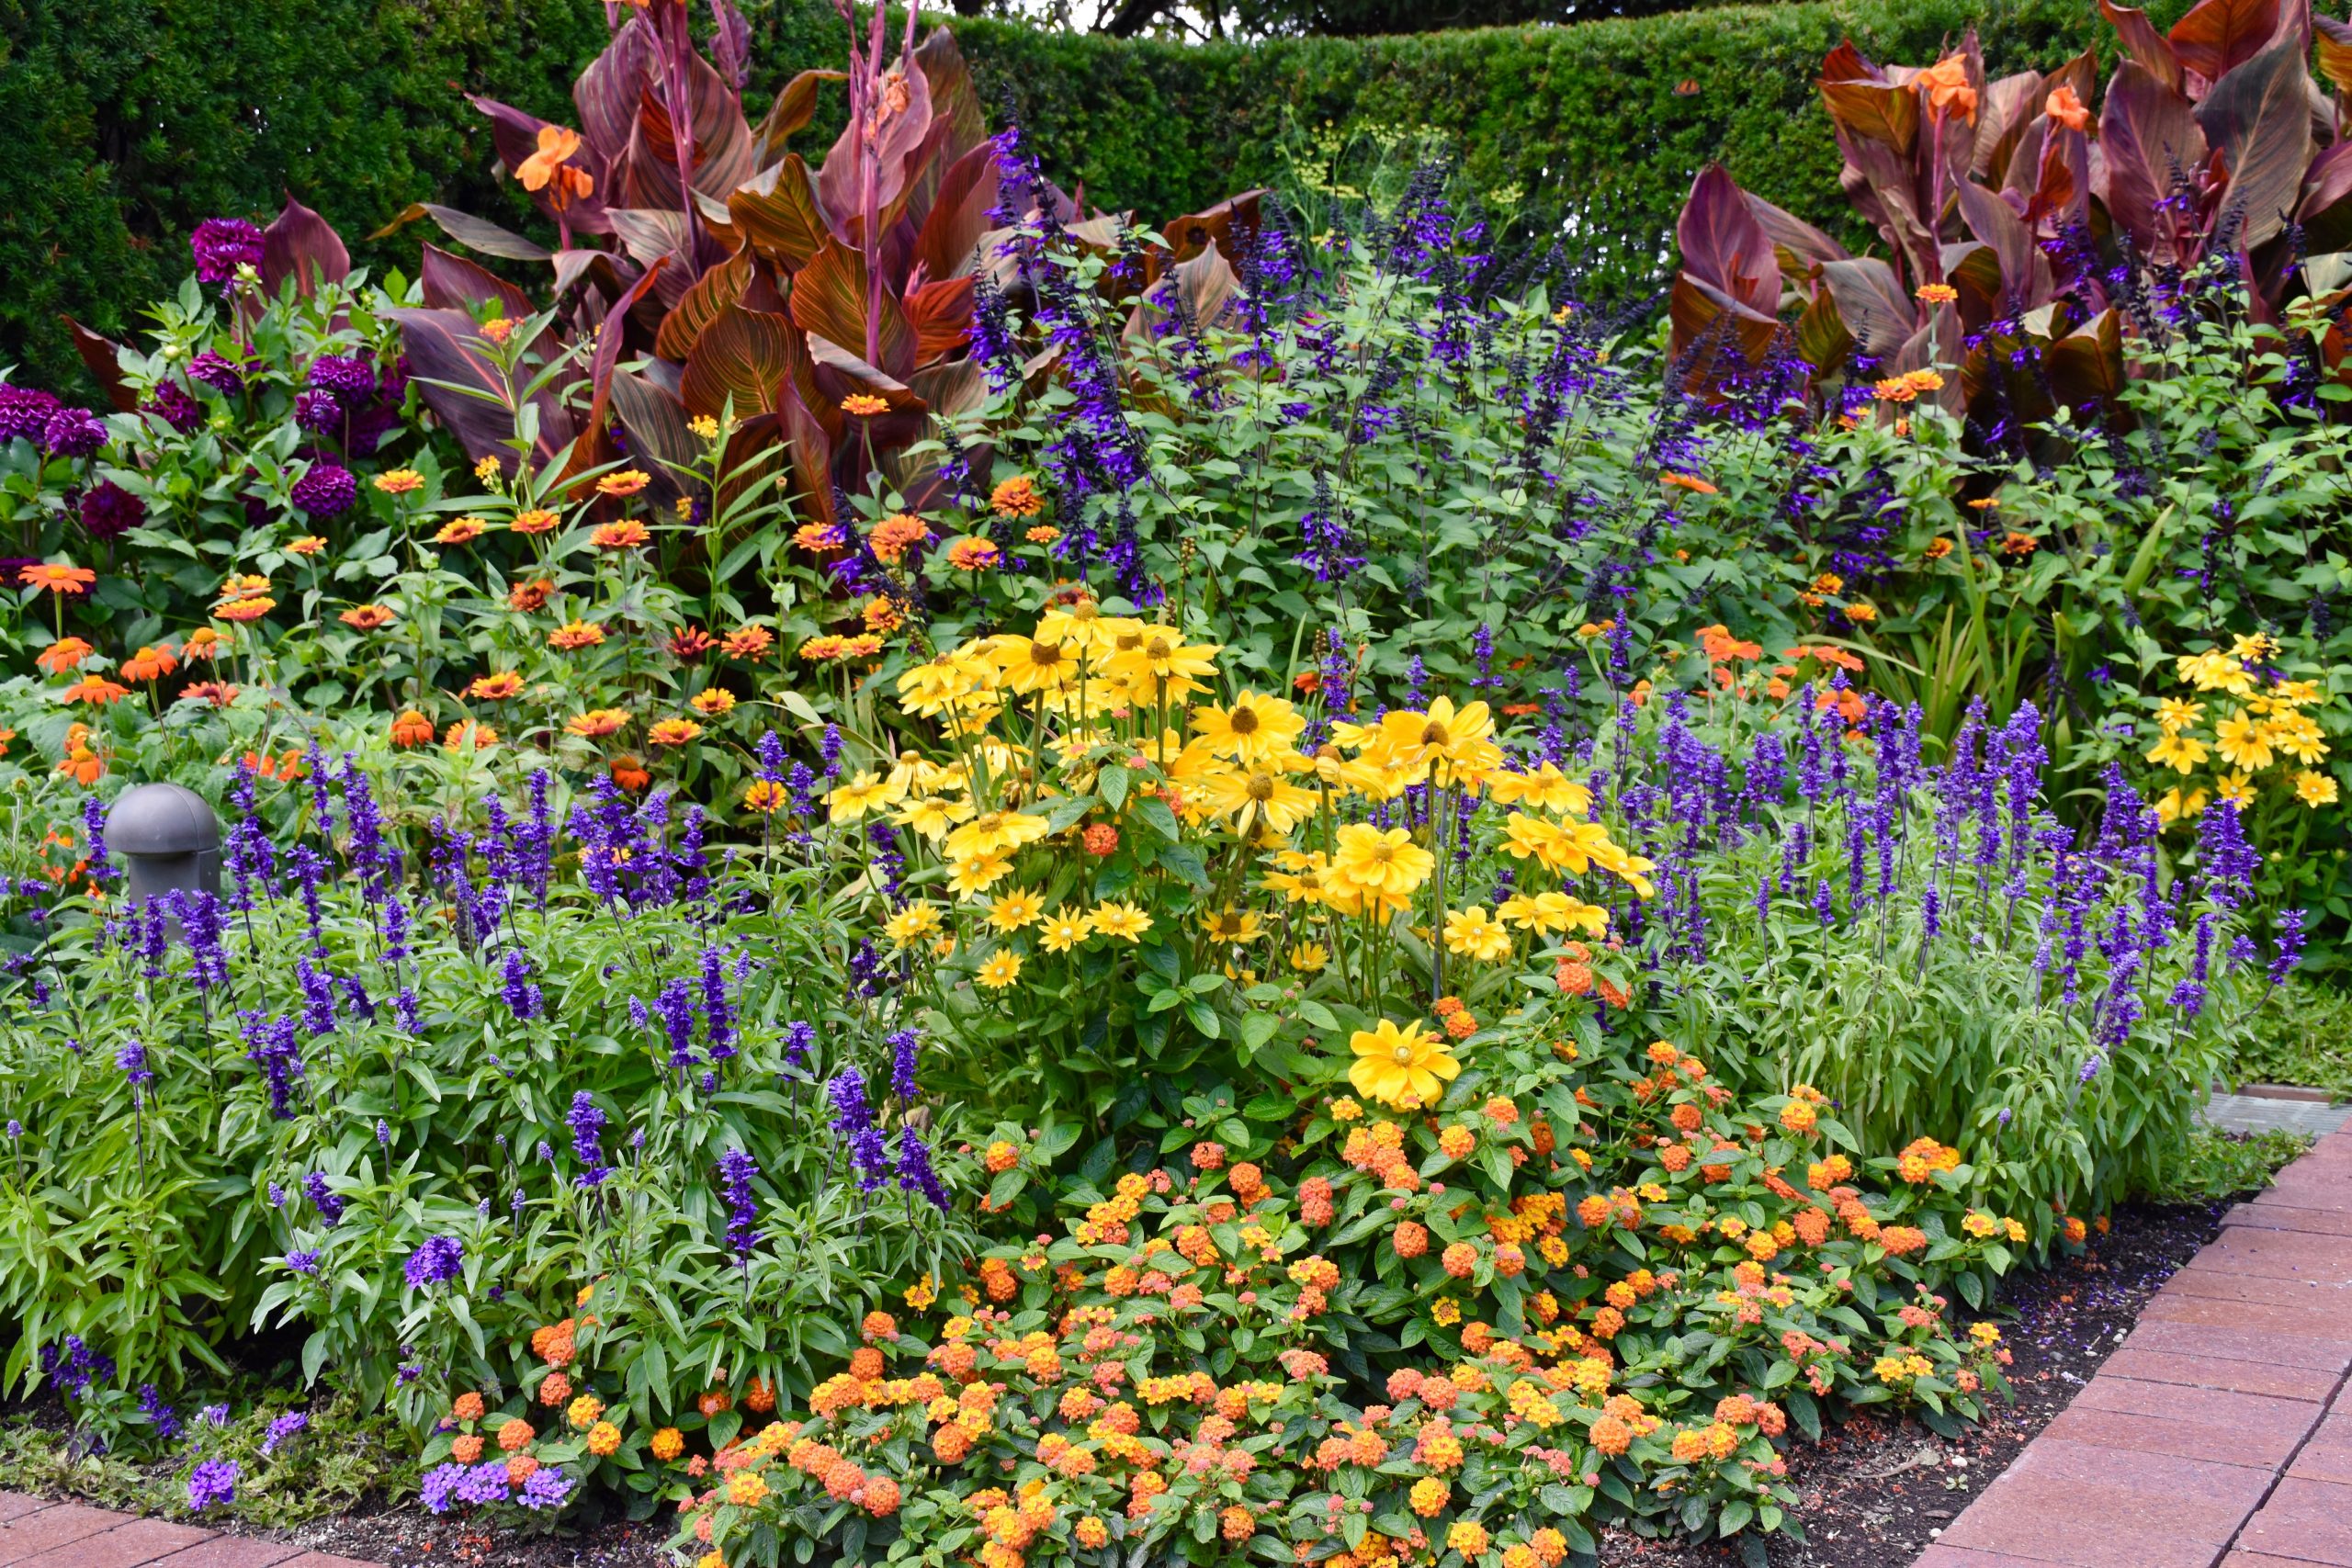
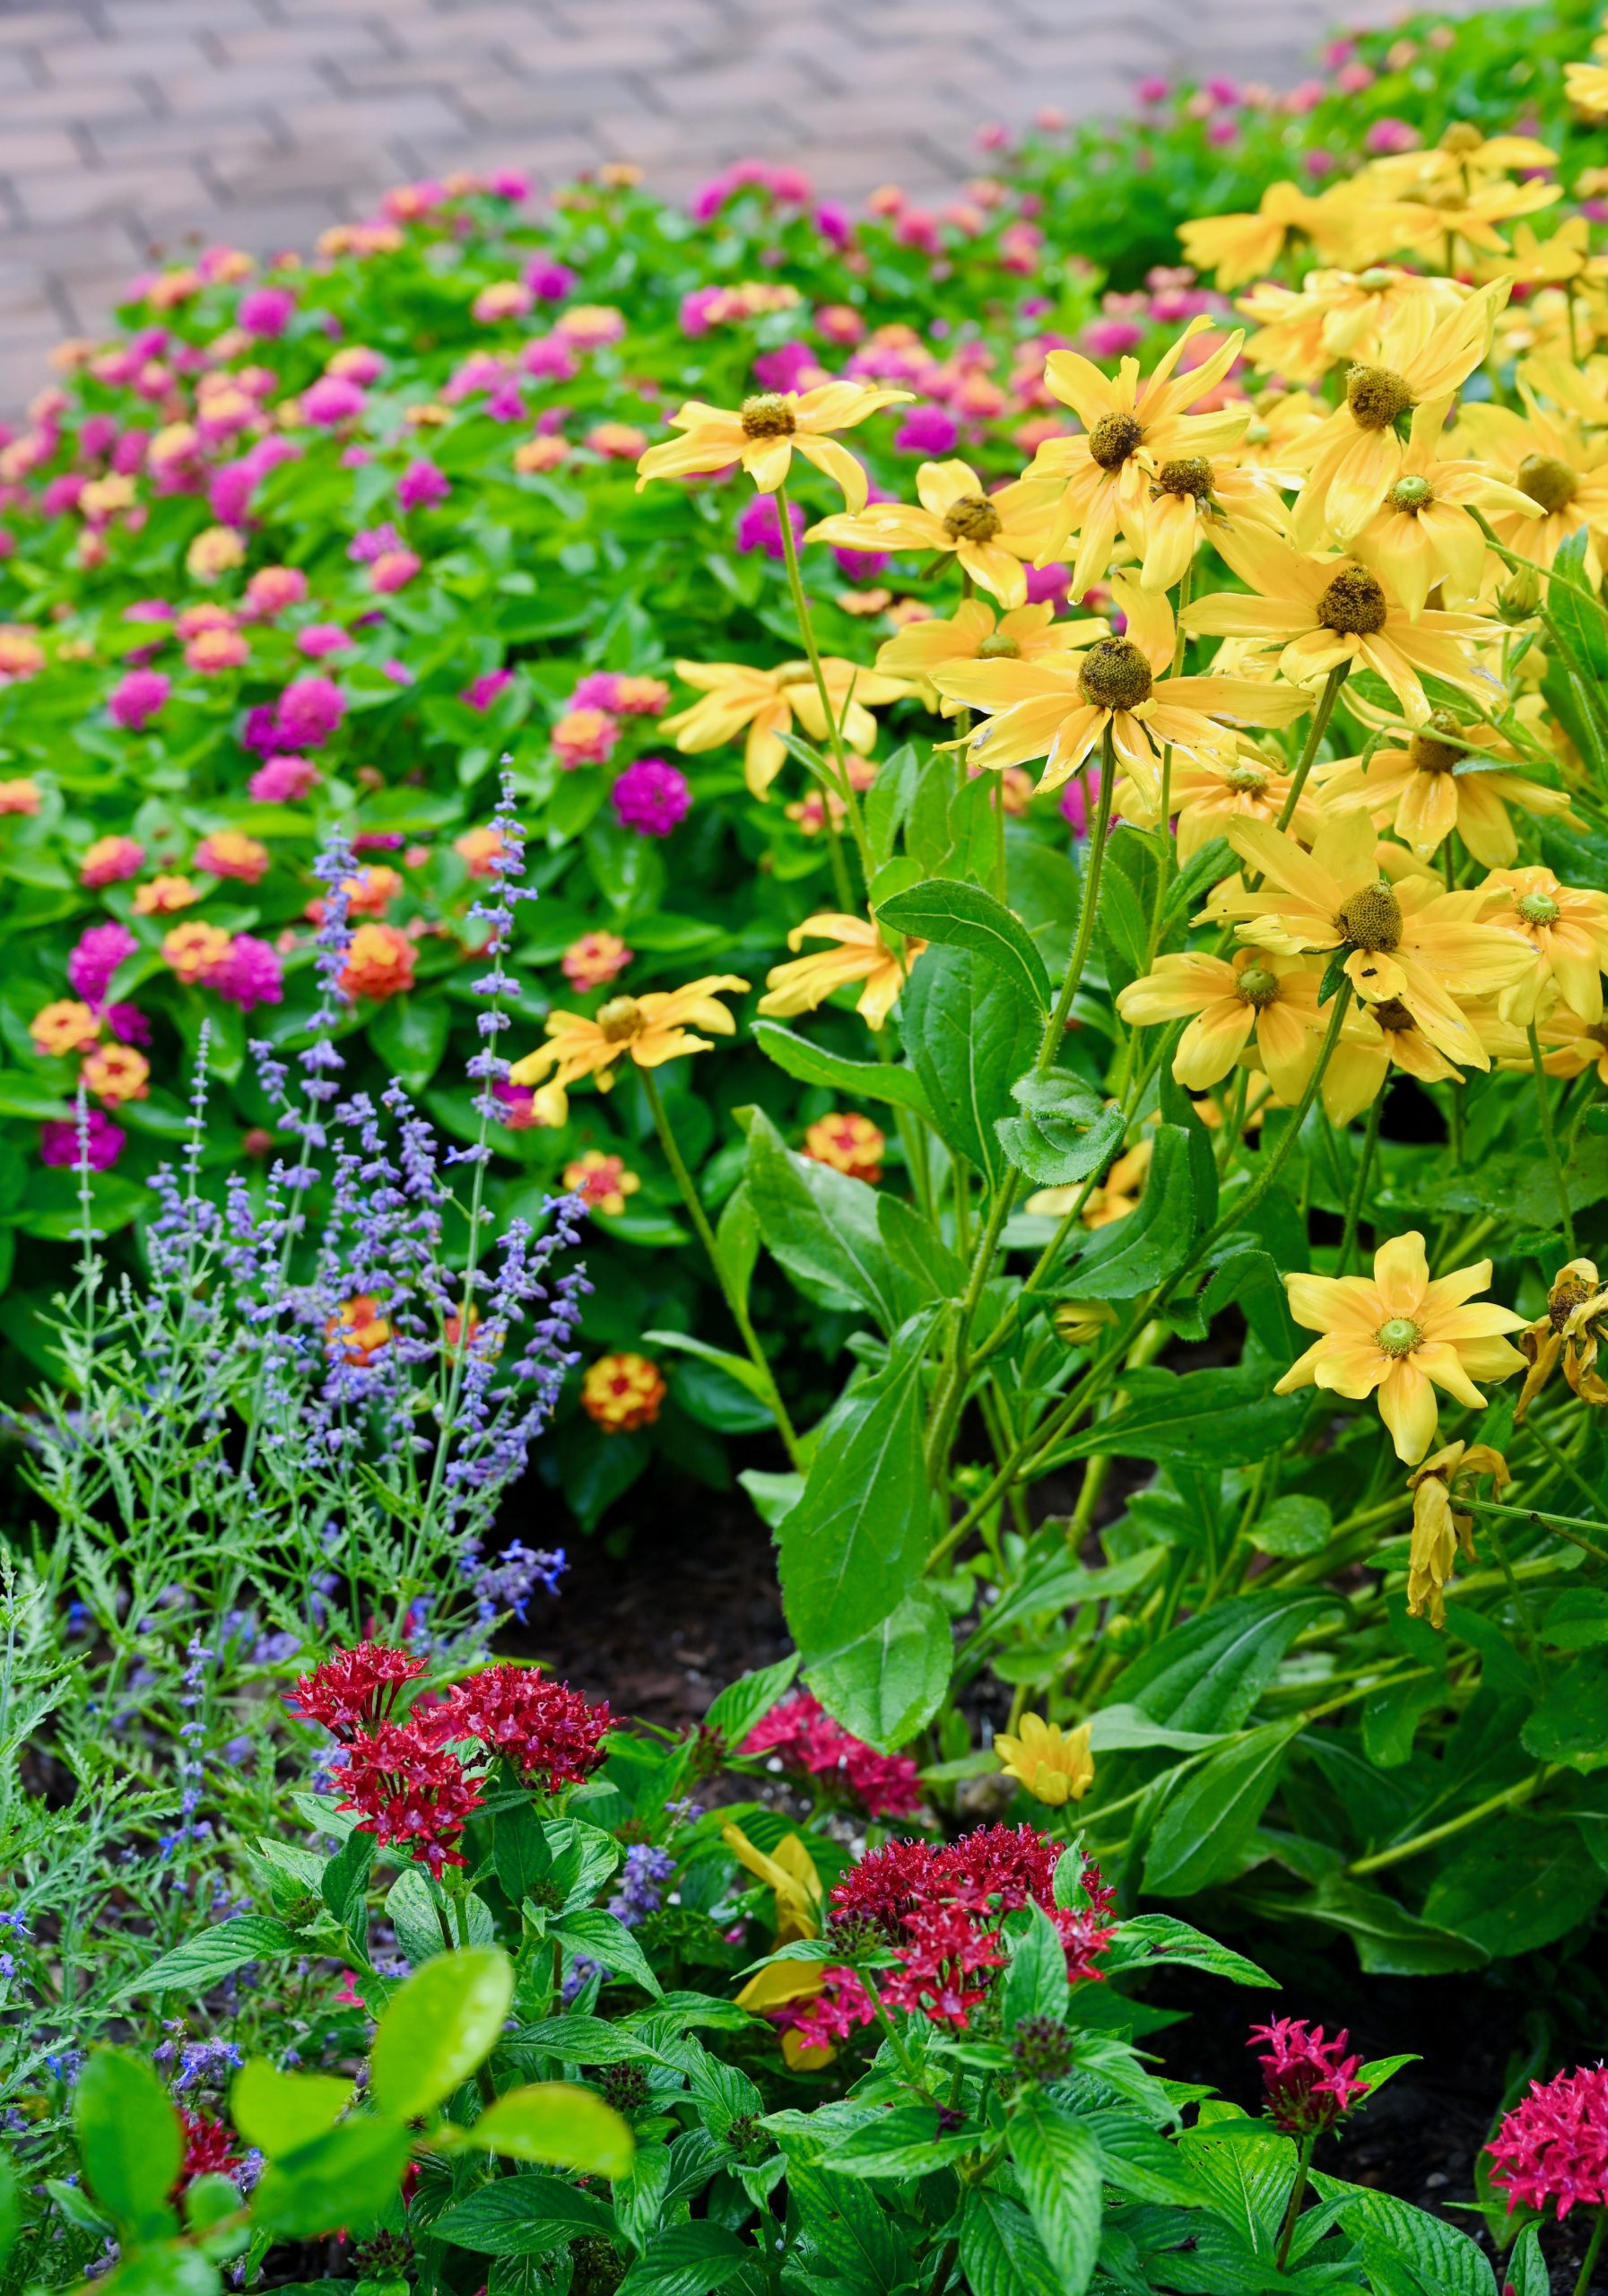
I wanted to plant something that created an experience. A place where you can’t help but smile when you pass by. A magical spot filled with towering zinnias and cheerful coneflowers. As I began to make detailed butterfly garden plans, I decided to take a little inspiration from the Chicago Botanical Gardens.
My inspiration: a gorgeous summer flower garden at the Chicago Botanical Gardens.
Then my dream became a reality when wonderful group of PTO volunteers their families came to help me prepare the flower beds and make the new butterfly garden.
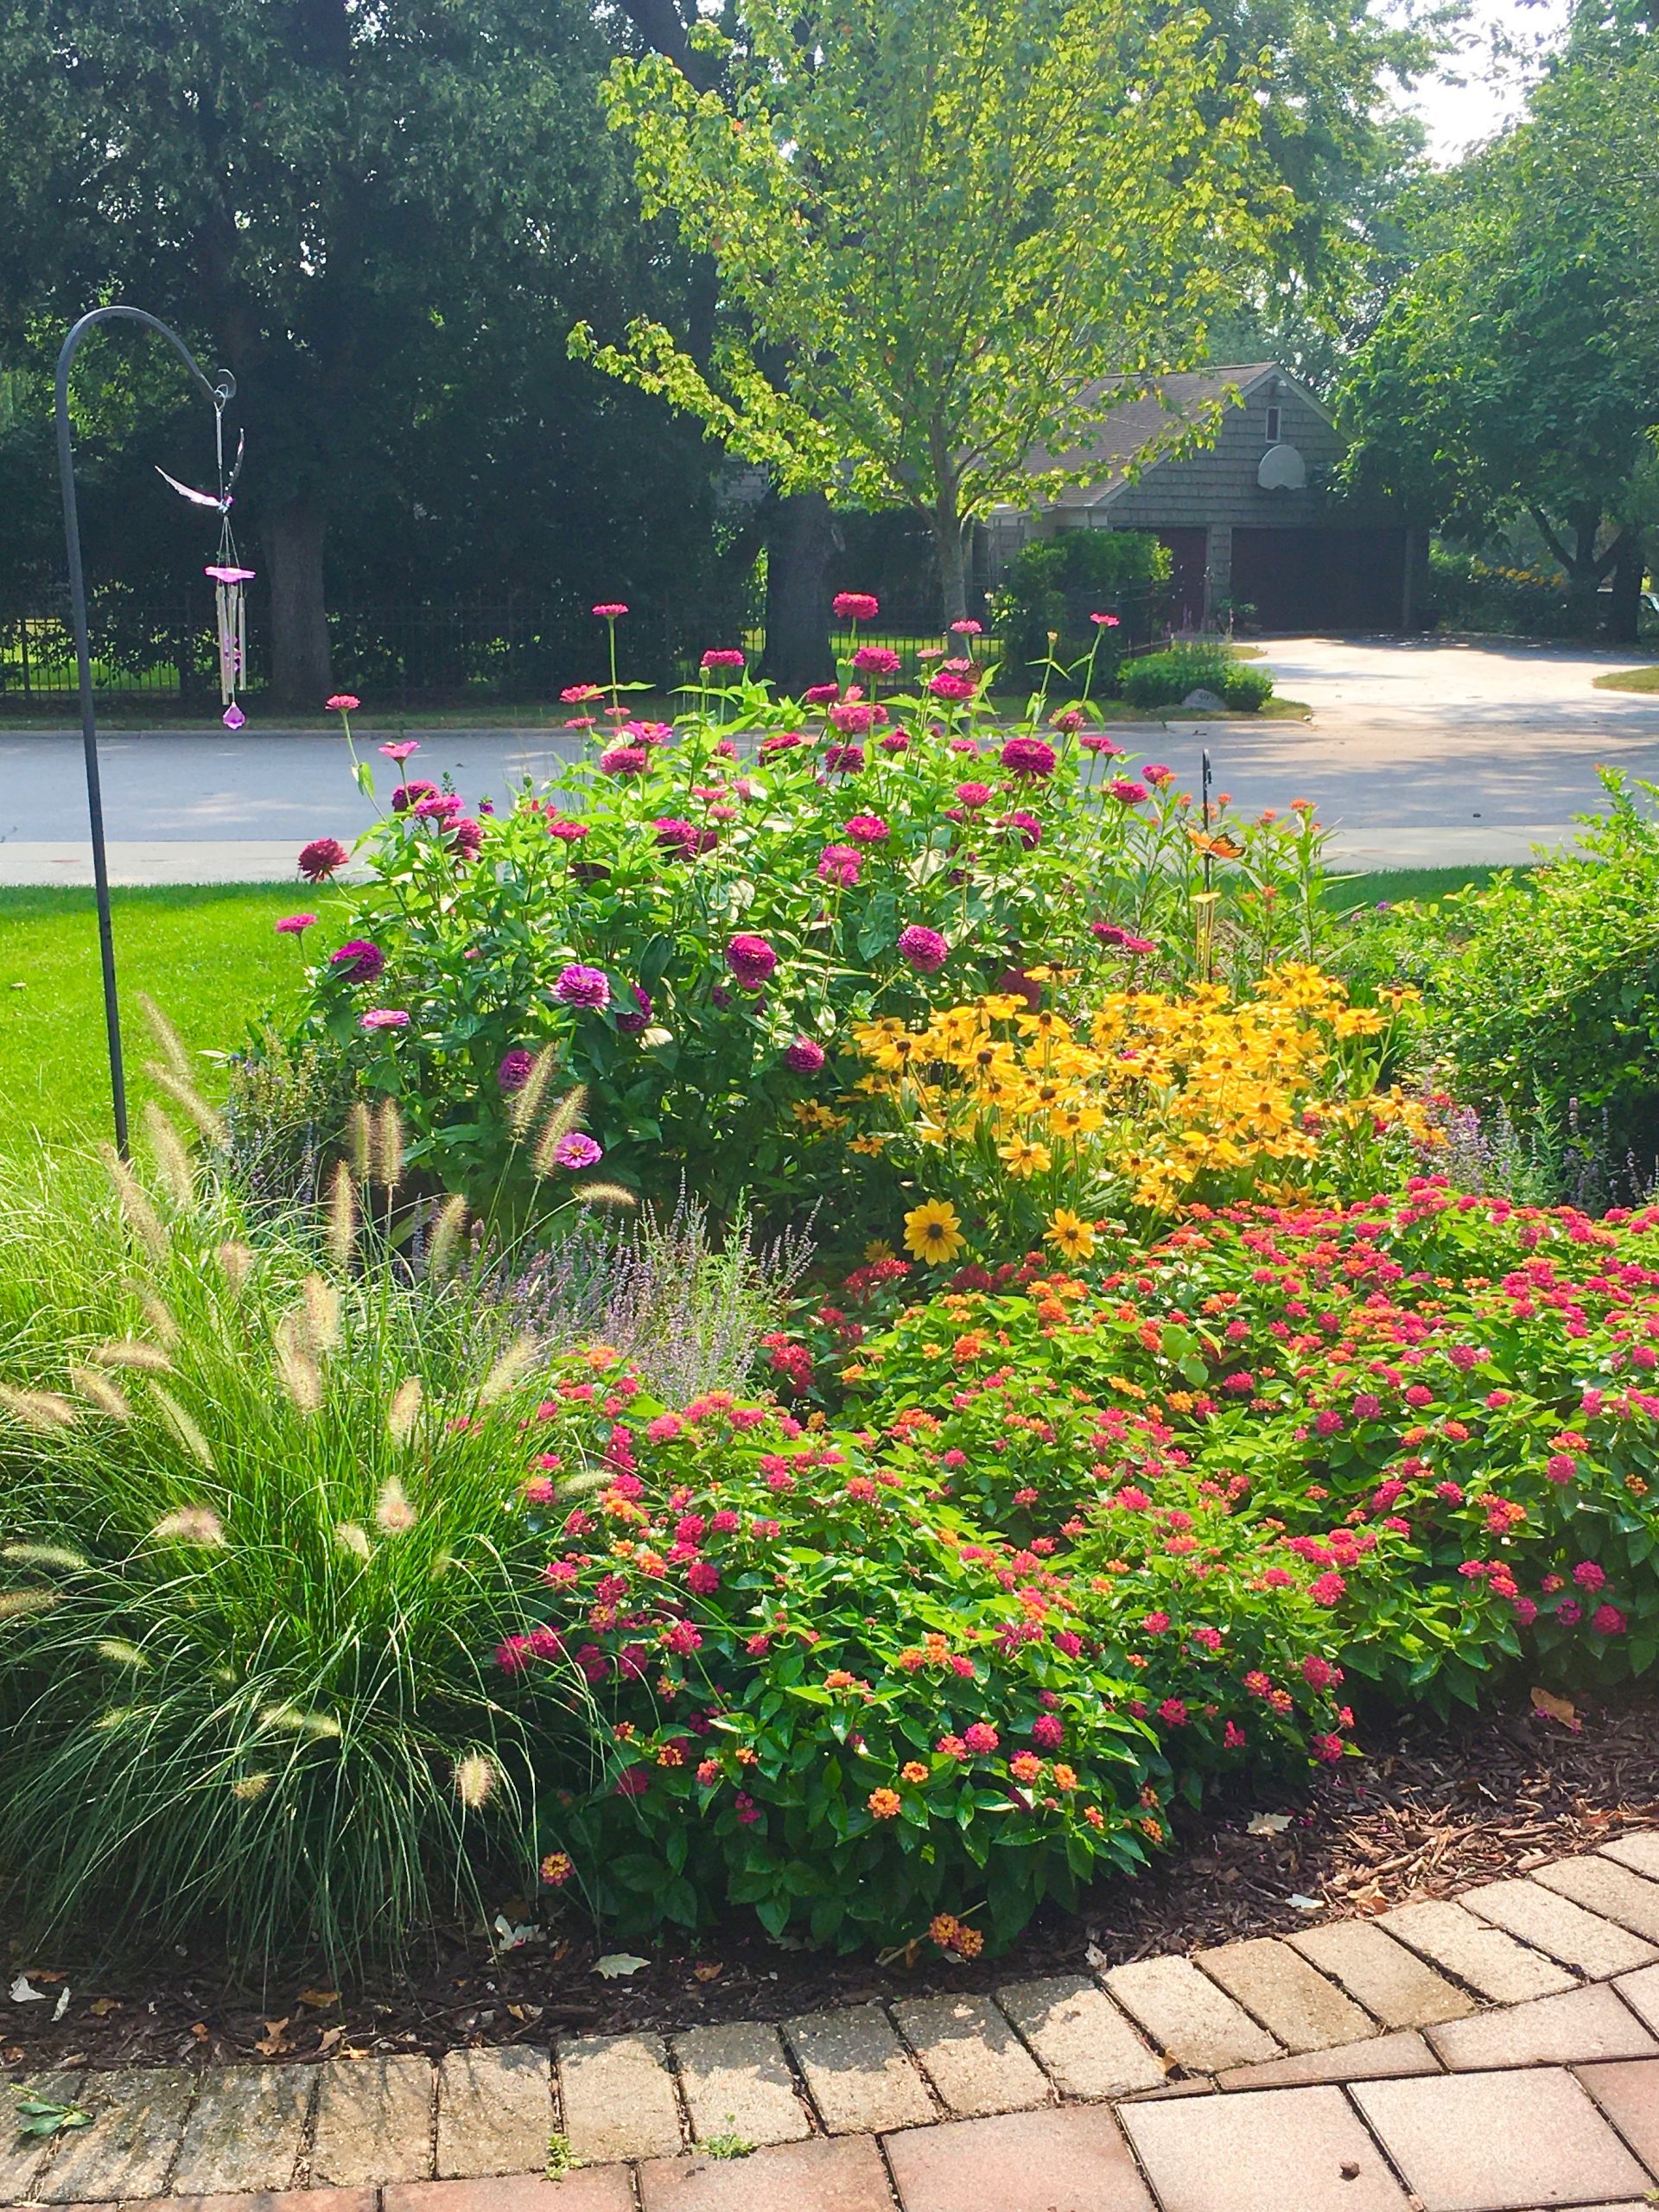
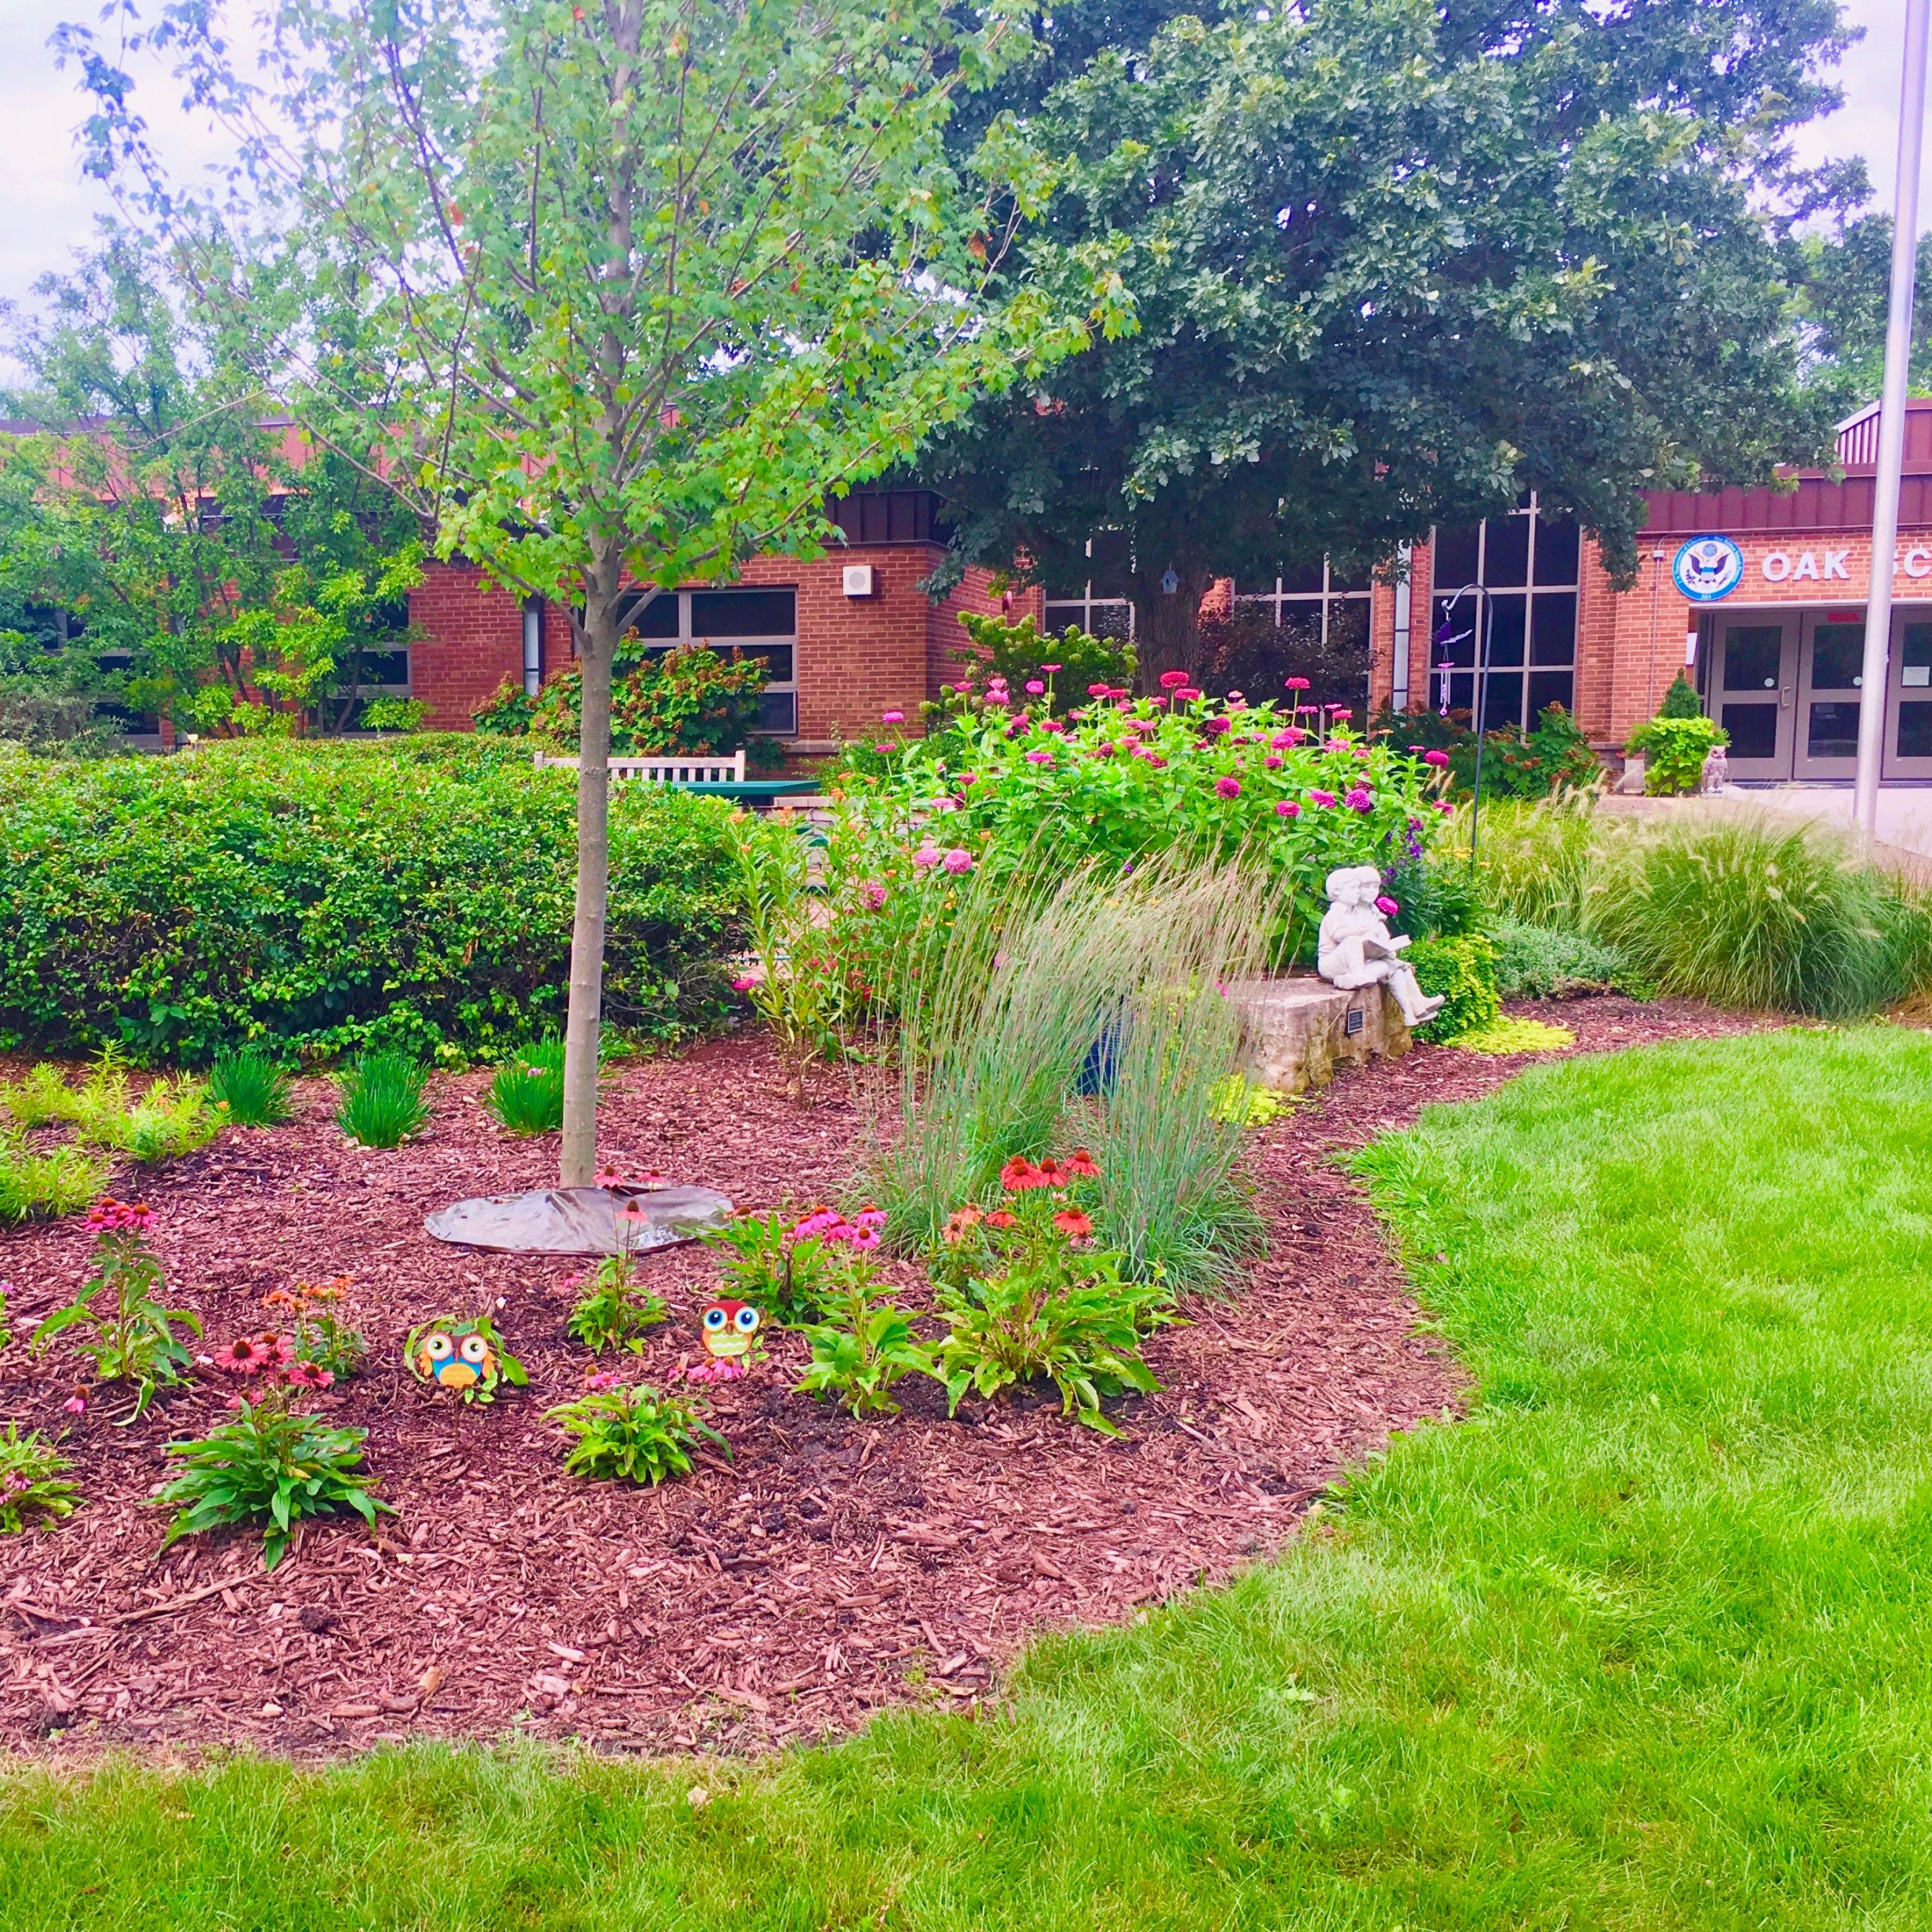
The after: the butterfly garden now in full bloom. All the vibrant colors and flowers make for quite the view.
First, we planted a new maple tree. We had a tree planting ceremony and had the children help us fill in all the dirt to officially plant our new tree. Then we began to fill the garden with butterfly friendly flowers. Now the front lawn has neighbors stopping, parents gathering and children looking and playing. It has been wonderful to see the change. A once rather lonely spot is now welcomes everyone to come and stay a while.
The view from the school patio where there are outdoor picnic tables.
However, the thing that surprised me the most is how it impacted the sense of community at the school. I have been grateful to hear how happy it’s made other people. Teachers have told me that they love to eat lunch outside near the new garden and that it makes them feel great about the school. Parents have told me how wonderful it is to see the school looking so good and kids have come to help me water and take care of the plants. I never expected that one small garden would touch so many people in such an amazing way.
Have you ever wanted to plant your own butterfly garden? I have gotten lots of questions about the flowers I used to create the school garden so I thought I would share some of my favorite butterfly garden plants.
My favorite butterfly garden plants:
1. Lantana
A full sun and heat loving annual that adds color and continuous blooms. They come in lots of color varieties from cherry red and pink, to coral, orange and yellow. They don’t require deadheading and they are heat and drought tolerant.
2. Rudbeckia and Sage
Prairie sun rudbeckias add height and a cheerful daisy like yellow blooms. They are perennials that will come back each spring and the butterflies love them.
Another great perennial is sage. I love the contrast of the purple sage against they yellow and fuchsia flowers.
3. Pentas
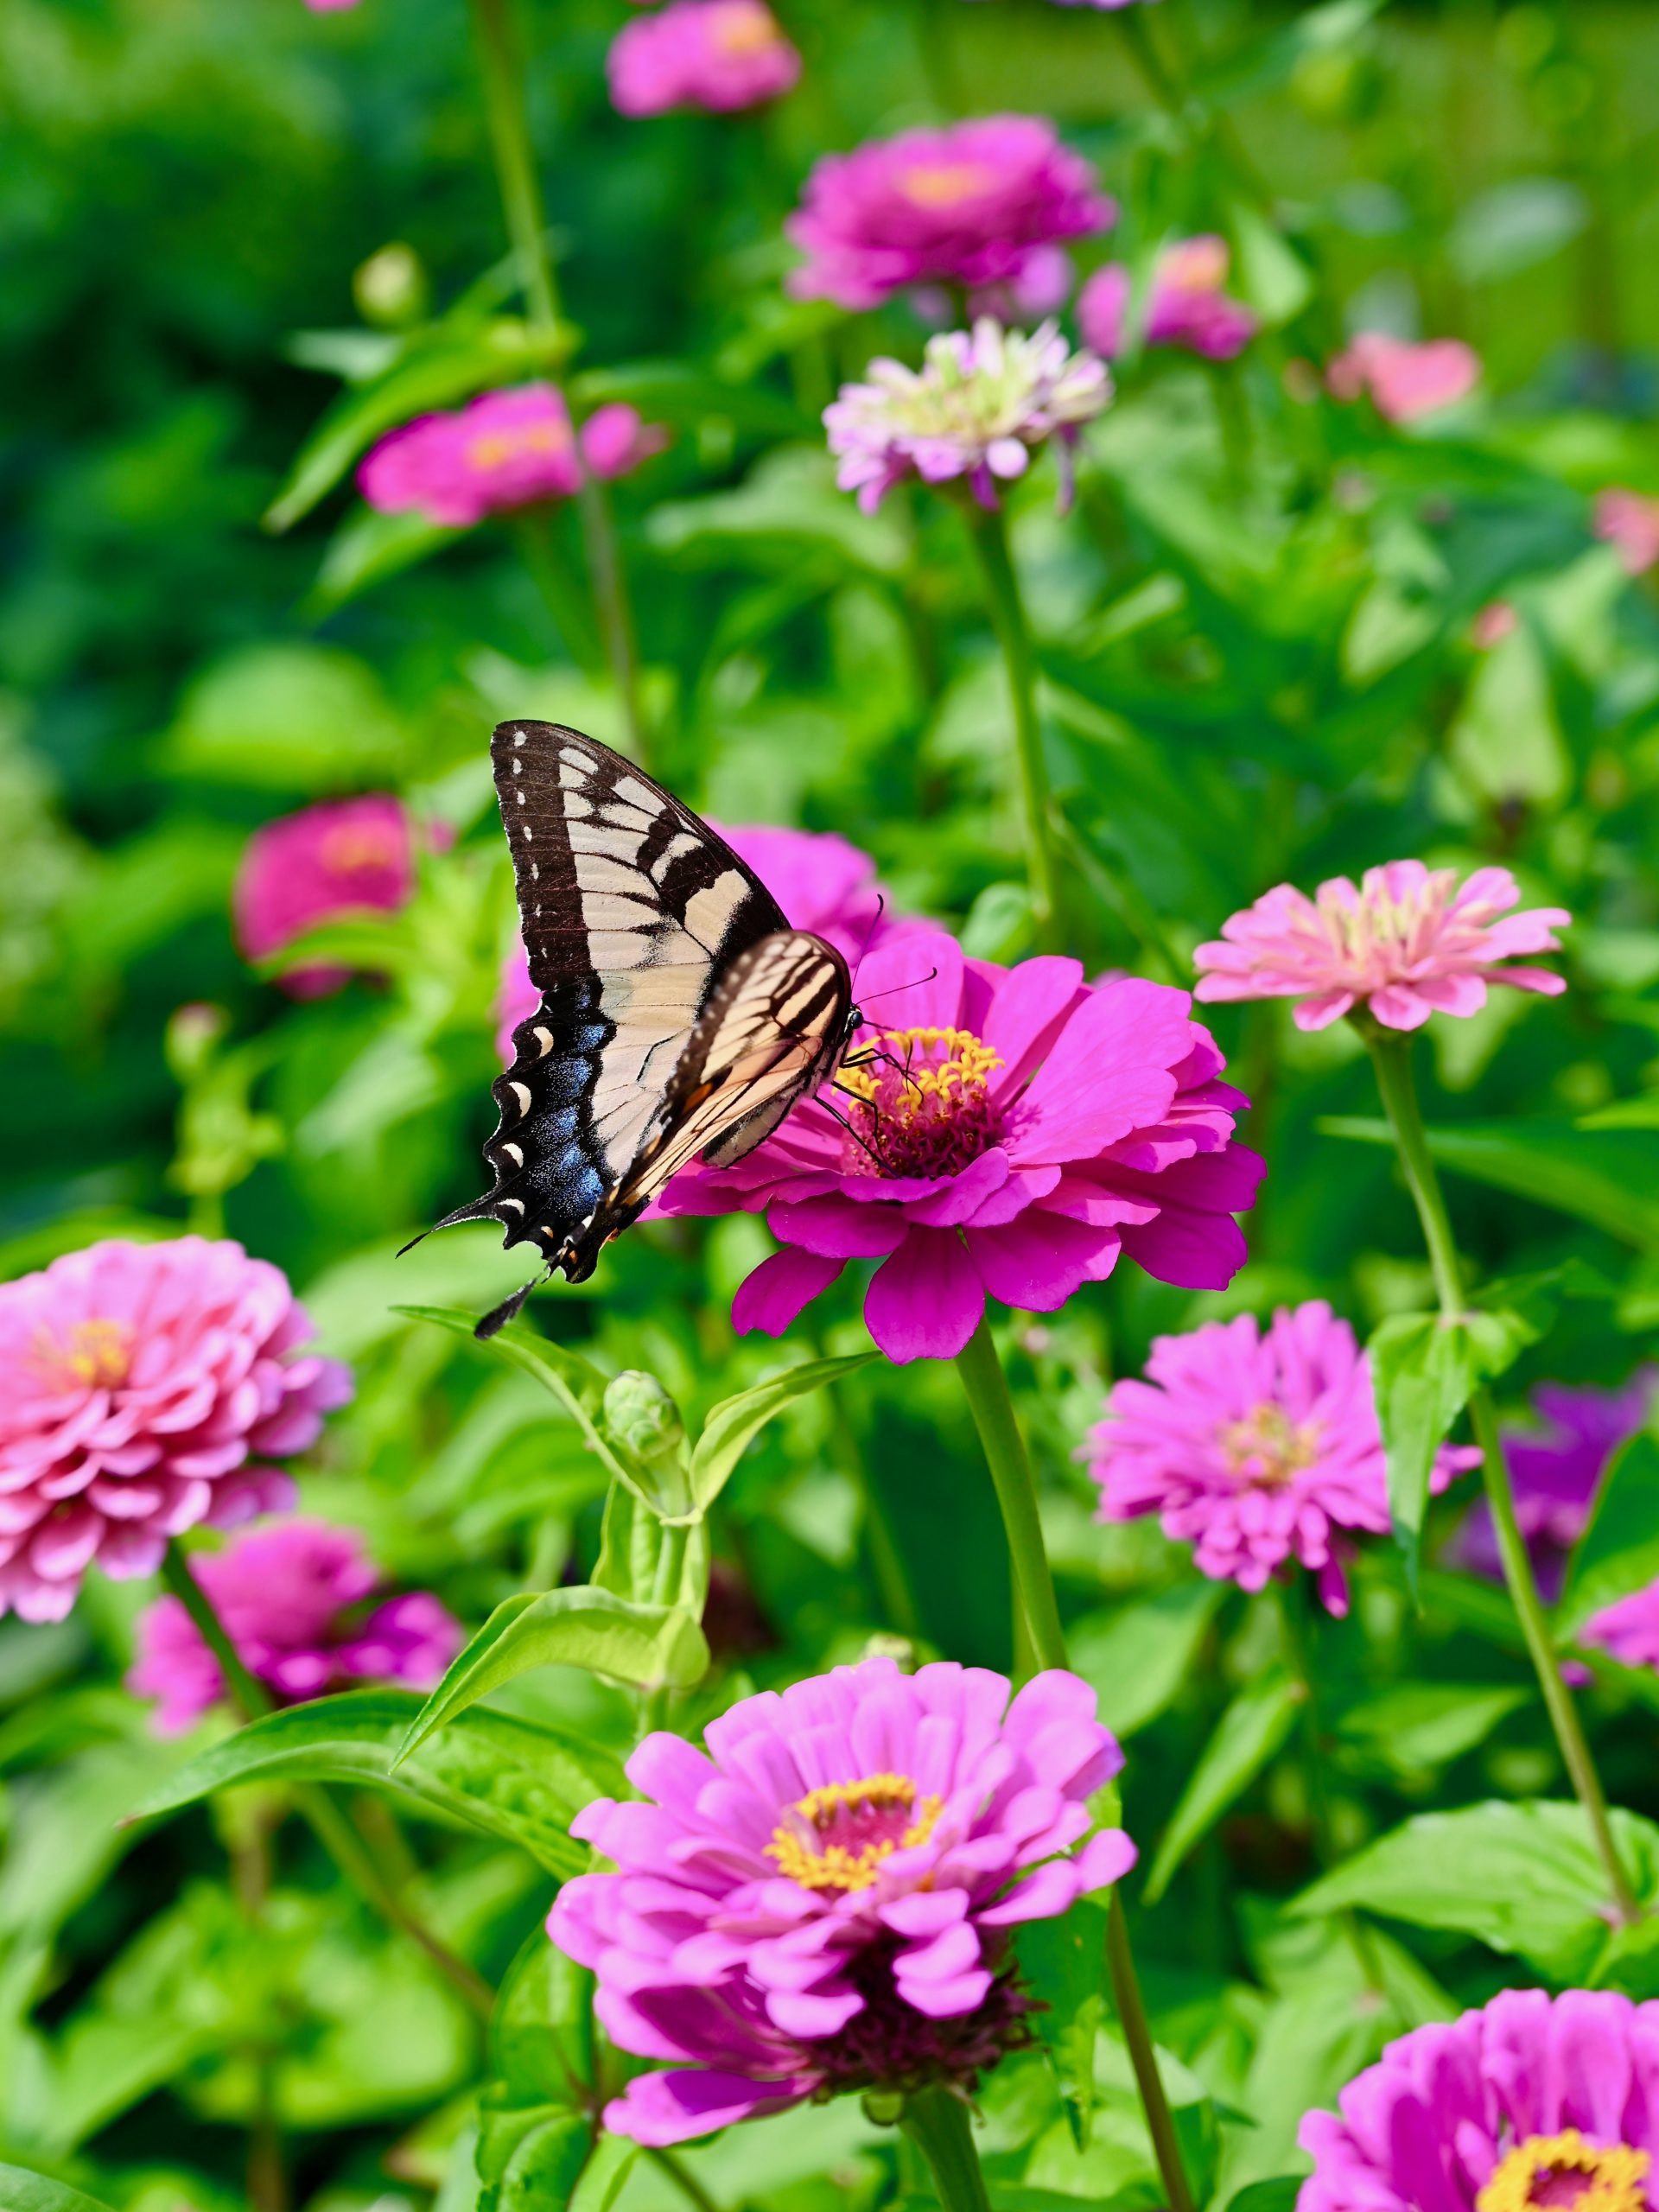
A black swallowtail that is loving theses pentas.
Pentas are great at attracting butterflies and pollinators. They are an annuals in the Midwest but can be a perennial in warm tropical areas. The large star flowers grow in clusters that are easy for butterflies to land on. They come in pink, red, white and purple.
4. Zinnias
My favorite flowers for attracting butterflies and hummingbirds are zinnias. They are butterfly magnets. In the school garden I planted tall pink and purple double zinnias that I grew from seed. Butterflies and birds adore these large zinnia flowers. If you cut the spent blooms they will continue to bloom well into the fall. If you get lots of rain, zinnias can be prone to leaf spot and powder mildew. Keep a look out for any spots on the leaves. I use a neem oil spray on the leaves only, so I don’t hurt the butterflies.
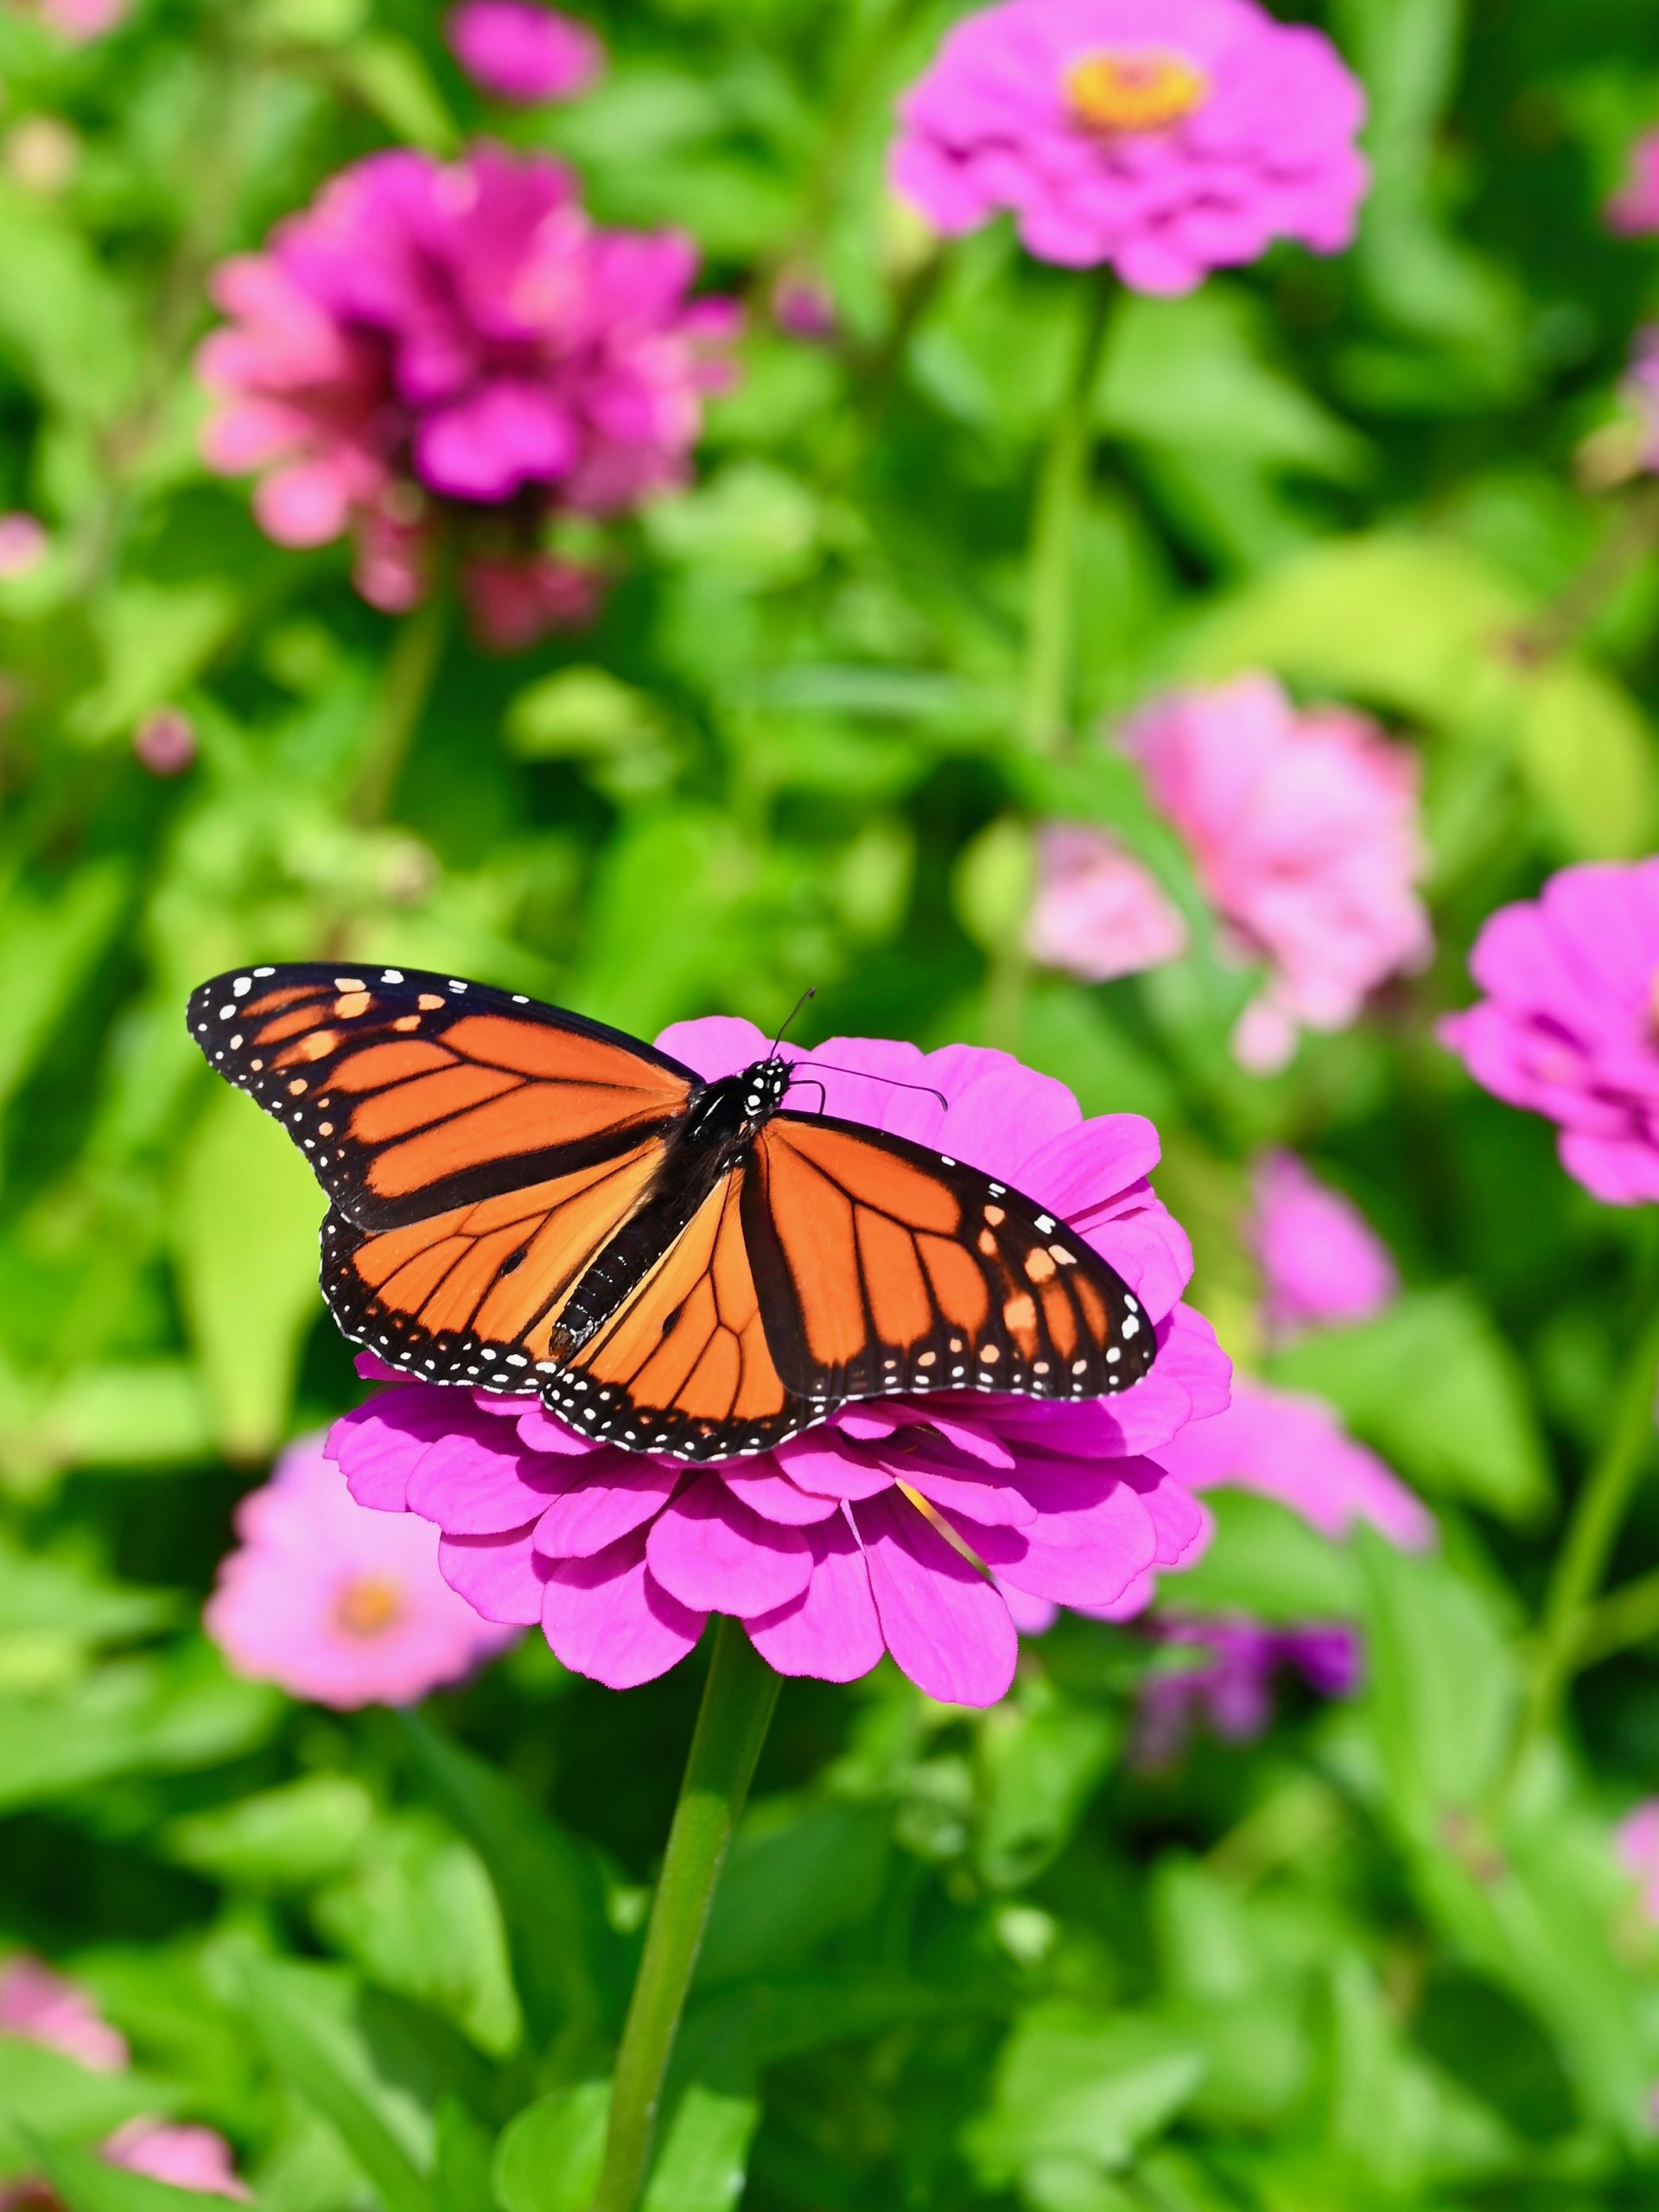
This beautiful monarch butterfly stopped long enough for me to get a picture.
5. Butterfly and Milk Weed
Butterfly weed which is native to the midwest.
Around the the maple tree I planted butterfly weed and milkweed plants. They are perennials and important flowers for butterflies. Milkweed plants are the only food that Monarch butterfly larvae can eat so I wanted to make sure that I included them in the garden.
I also rounded out the front of the flowerbed with some coneflowers and blue heaven grass. They are both perennials that should provide lasting color and interest into the fall.
Now every time I take my daughters to school, I look at the front flower bed and I smile. I love looking for butterflies and seeing how their beauty has brought happiness to everyone around them. The pandemic has created so many challenges for schools and families over the last two years. This small garden project has exceeded all my hopes because it has sparked so much joy in the school community. I am still surprised by this, but I think I underestimated how much we all long to grow something good. This project has taught me that in a way we are all looking for butterflies and the beauty that can come from working together to change things for the better.
“What a beautiful, appetizing and satisfying creation the salad is-and what a simple one, too. Nature provides; you combine.”
Julia Child
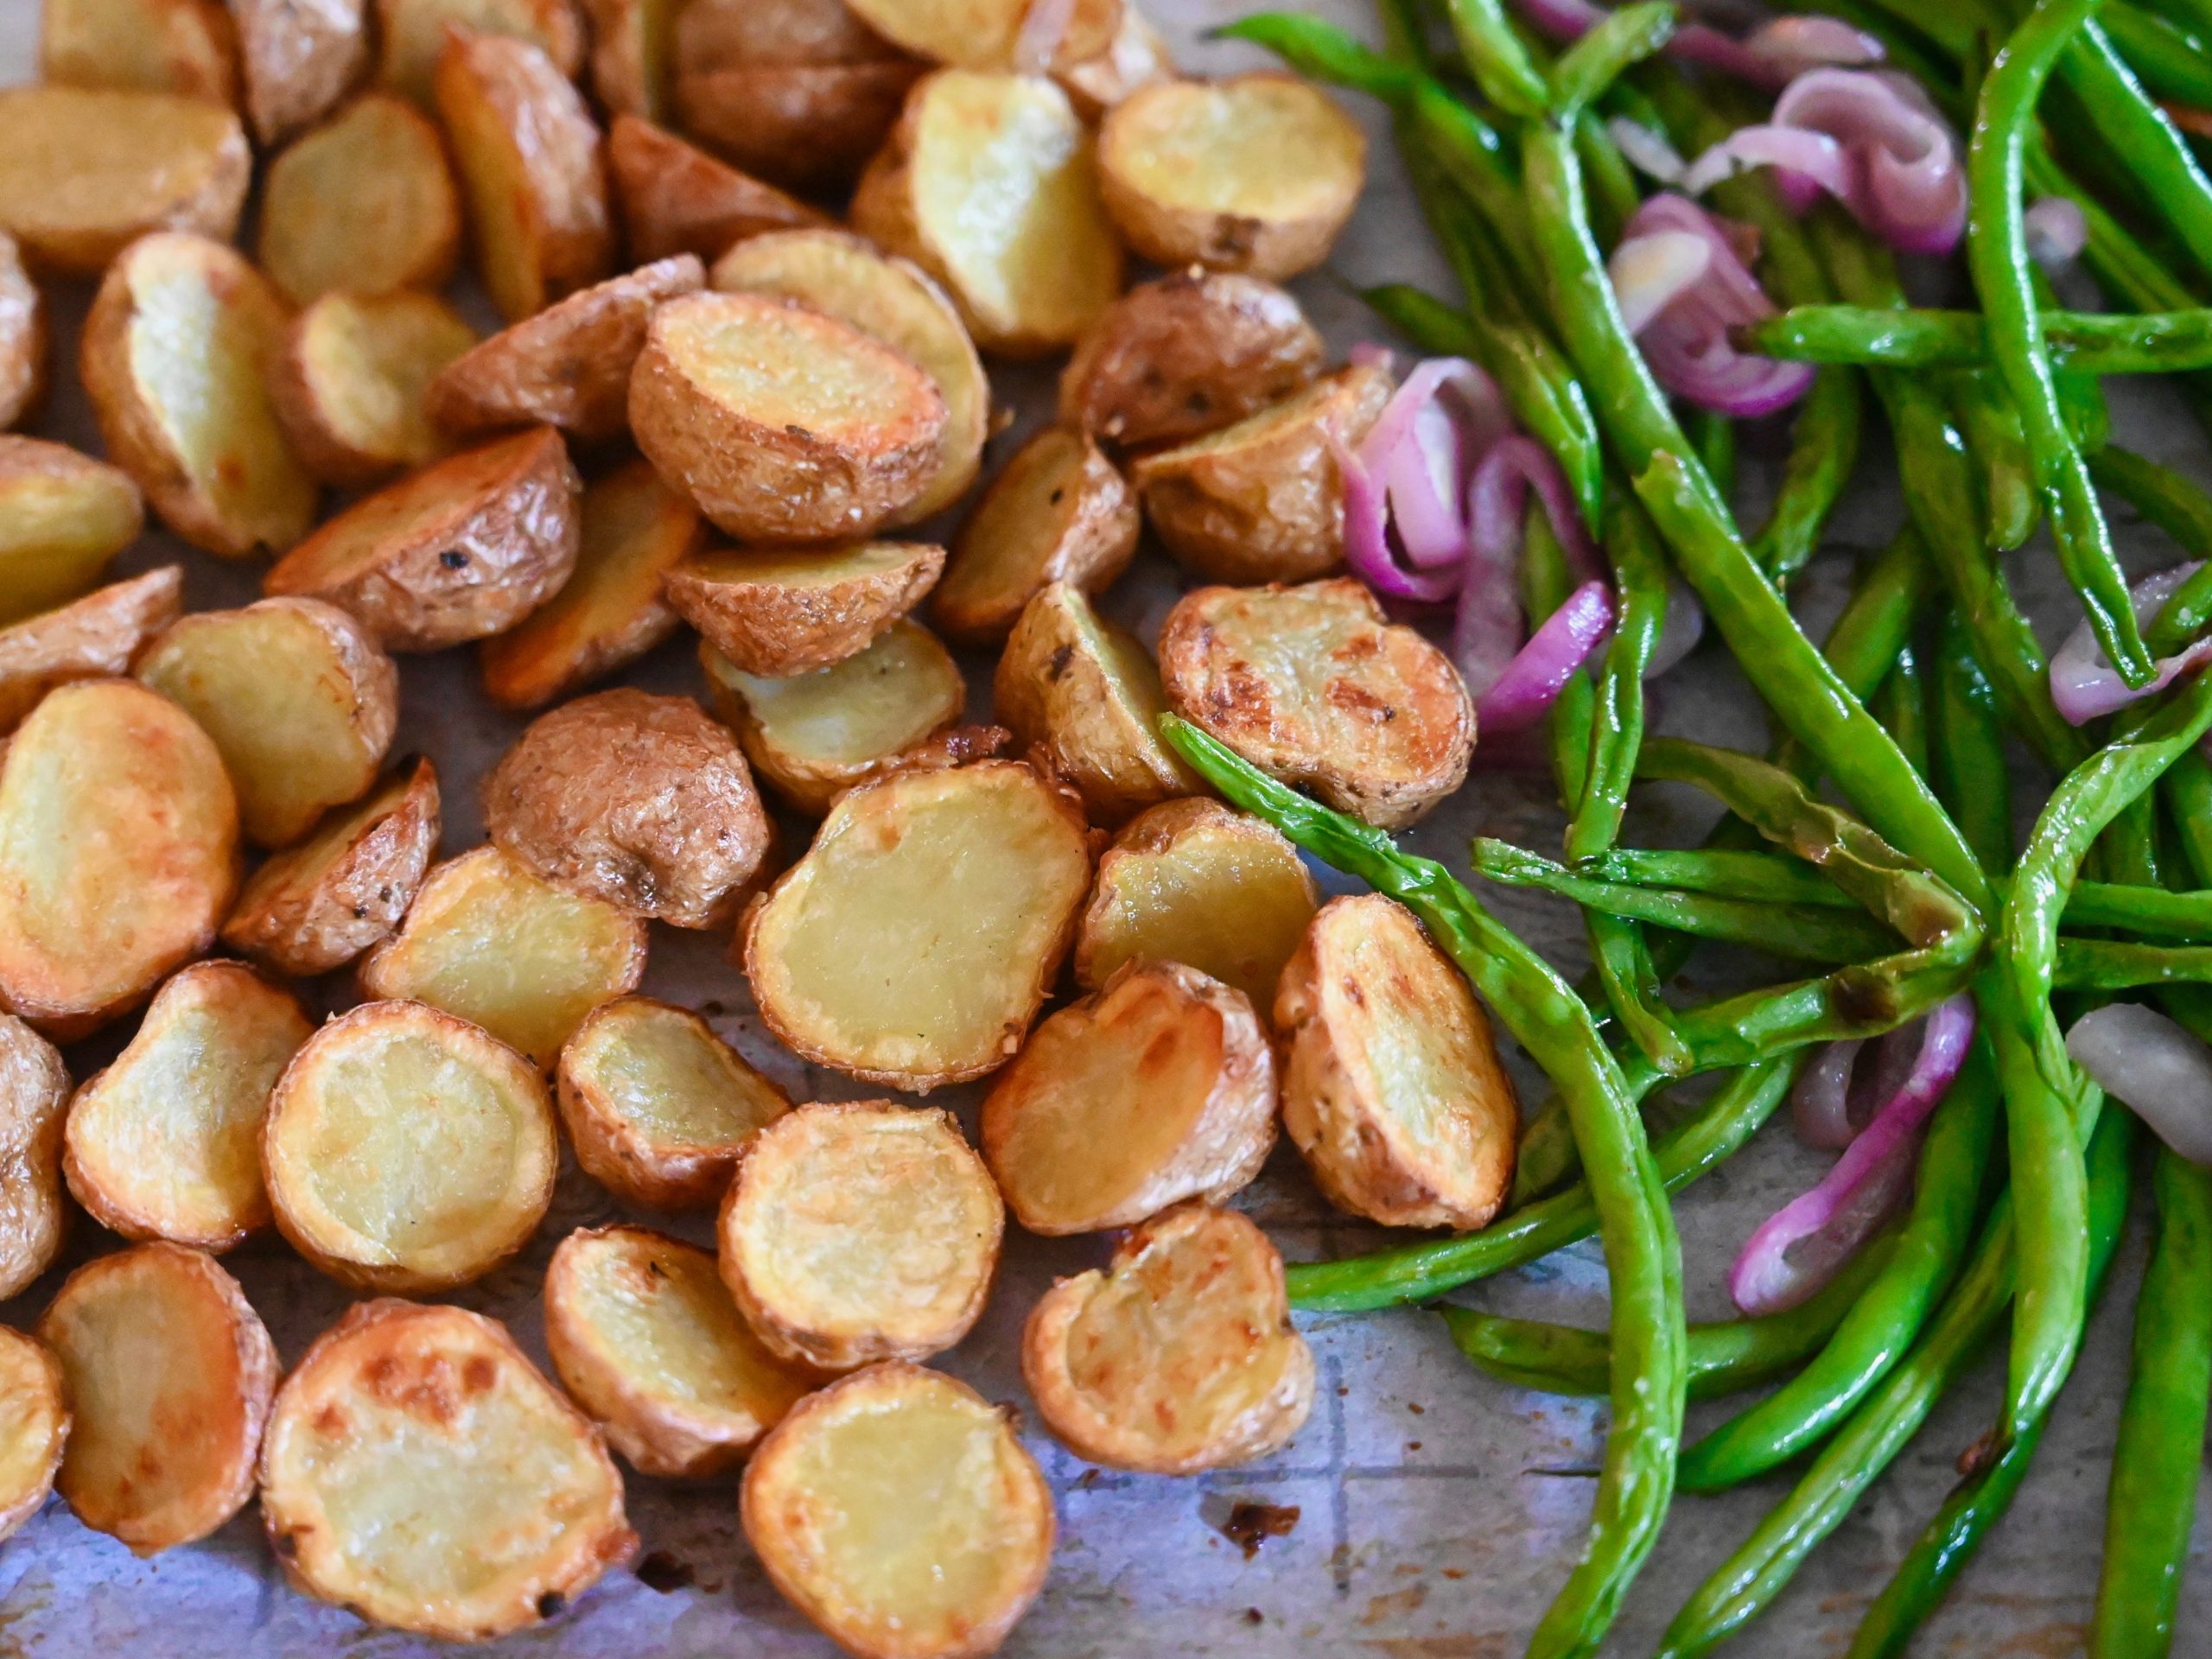
I can still remember the taste as if it was yesterday. On a hot summer day in Paris, after a long day of walking my husband and I wandered into a little bistro where I ordered the best salad I have ever had. It had the most divine roasted potatoes. They were crisp and golden with a hint of Dijon mustard and a creamy center. It was summer salad perfection.
Memories of that roasted French potato salad have found their way into my kitchen and my recipe for Roasted Salad Niçoise. Looking for a way to make the prep work a little easier than the usual blanched vegetables, I decided to try roasting my potatoes and green beans. The caramelized flavors were so delicious that it’s now the only way I make it. Grill some fresh tuna steaks. Add a glass of wine and for a moment it takes me back to that little bistro in Paris.
Roasted Salad Niçoise- Serves 4 to 6
Tuna Steaks and Marinade
3 to 4 tuna steaks
2 garlic cloves, chopped
1 teaspoon kosher salt
1 tablespoon fresh rosemary leaves
½ teaspoon oregano
Zest from one lemon
¼ cup fresh lemon juice
½ cup extra-virgin olive oil
Roasted Potatoes and Green Beans
1 pound small yellow or gold potatoes, slice in half
1/2 teaspoon of Dijon mustard
2 tablespoons of olive oil
1/2 teaspoon kosher salt
1/4 teaspoon pepper
1 pound French green beans (haricot verts)
1 medium shallot, sliced into thin rings
2 tablespoons extra virgin olive oil
1/4 teaspoon kosher salt
1/8 teaspoon pepper
Salad and Dressing
2 heads of baby romaine lettuce, chopped
2 large tomatoes, chopped
6 hard boiled eggs
2 teaspoons dijon mustard
4 tablespoons red wine vinegar
½ teaspoon kosher salt
1 cup extra virgin olive oil
First, prepare the tuna steaks. Preheat your grill for medium direct heat (alternatively you could also use an indoor grill pan). Rinse the tuna steaks with cold water and then pat them dry with paper towels. Place the steaks in a large gallon sized zip top bag. Next, make the marinade for the tuna. In a small bowl whisk together the garlic salt, rosemary, oregano, lemon juice and zest. Then drizzle in the olive oil until fully incorporated. Pour the marinade in the bag and let it marinate for 15 to 30 minutes.
Second, get the potatoes ready for roasting. Preheat the oven to 350 degrees. Slice the potatoes in half. Then in a medium sized bowl whisk together the olive oil, Dijon mustard, salt and pepper. Coat the potatoes in the mustard and olive oil mixture. Place the potatoes cut side down on a sheet pan lined with parchment paper or foil. Bake for 30 minutes.
Third, get the green beans prepared. Mix together the French green beans, sliced shallots, olive oil, salt and pepper. Place them on a sheet pan in an even layer. Place them in the oven to roast at 350 degrees for 15 minutes.
Next, cook the hardboiled eggs. Place the eggs in a sauce pan with enough water to cover the eggs by an inch of water. Heat the pan on high heat. Let the water come up to a full boil and boil the eggs for two minutes. Then turn off the burner and place a lid on the pan. Let the eggs sit in the hot water with the lid on for 15 minutes. Then take the pan and place it in the sink and let cold water run over the eggs in the pan until the eggs are cool enough to handle. Peel and slice the hard boiled eggs in half.
While the eggs are cooking grill the tuna steaks. Grill the tuna steaks until cooked to taste, 2 to 3 minutes a side for rare and 5 to 6 minutes per side for medium. Then when cooked slice the tuna steaks into thin slices.
Finally make the salad dressing and assemble the salads. In a medium bowl whisk together 2 teaspoons dijon mustard, 4 tablespoons red wine vinegar and ½ teaspoon kosher salt. Then slowly drizzle in 1 cup extra virgin olive and continue to whisk it until fully emulsified. Place the chopped romaine lettuce in a large bowl and add some of the dressing to taste. Then save the rest to drizzle over the tomatoes, potatoes and green beans. Place a bed of lettuce in each bowl or plate. Top the lettuce with the roasted potatoes, green beans, tomatoes and sliced tuna. Drizzle with additional salad dressing.
As Julia Child once wrote in Mastering the Art of French Cooking, the thing that makes French vegetables so memorable is the way they are prepared. “The French objective is to produce a cooked green vegetable so green, fresh-tasting, and full of flavor that it really can be served as a separate course.” This salad may not be the recipe for a hectic weeknight, but it is well worth the effort. The flavors of each vegetable and ingredient shine. When you make Roasted Salad Niçoise dinner is a memorable experience. Bon appétit!
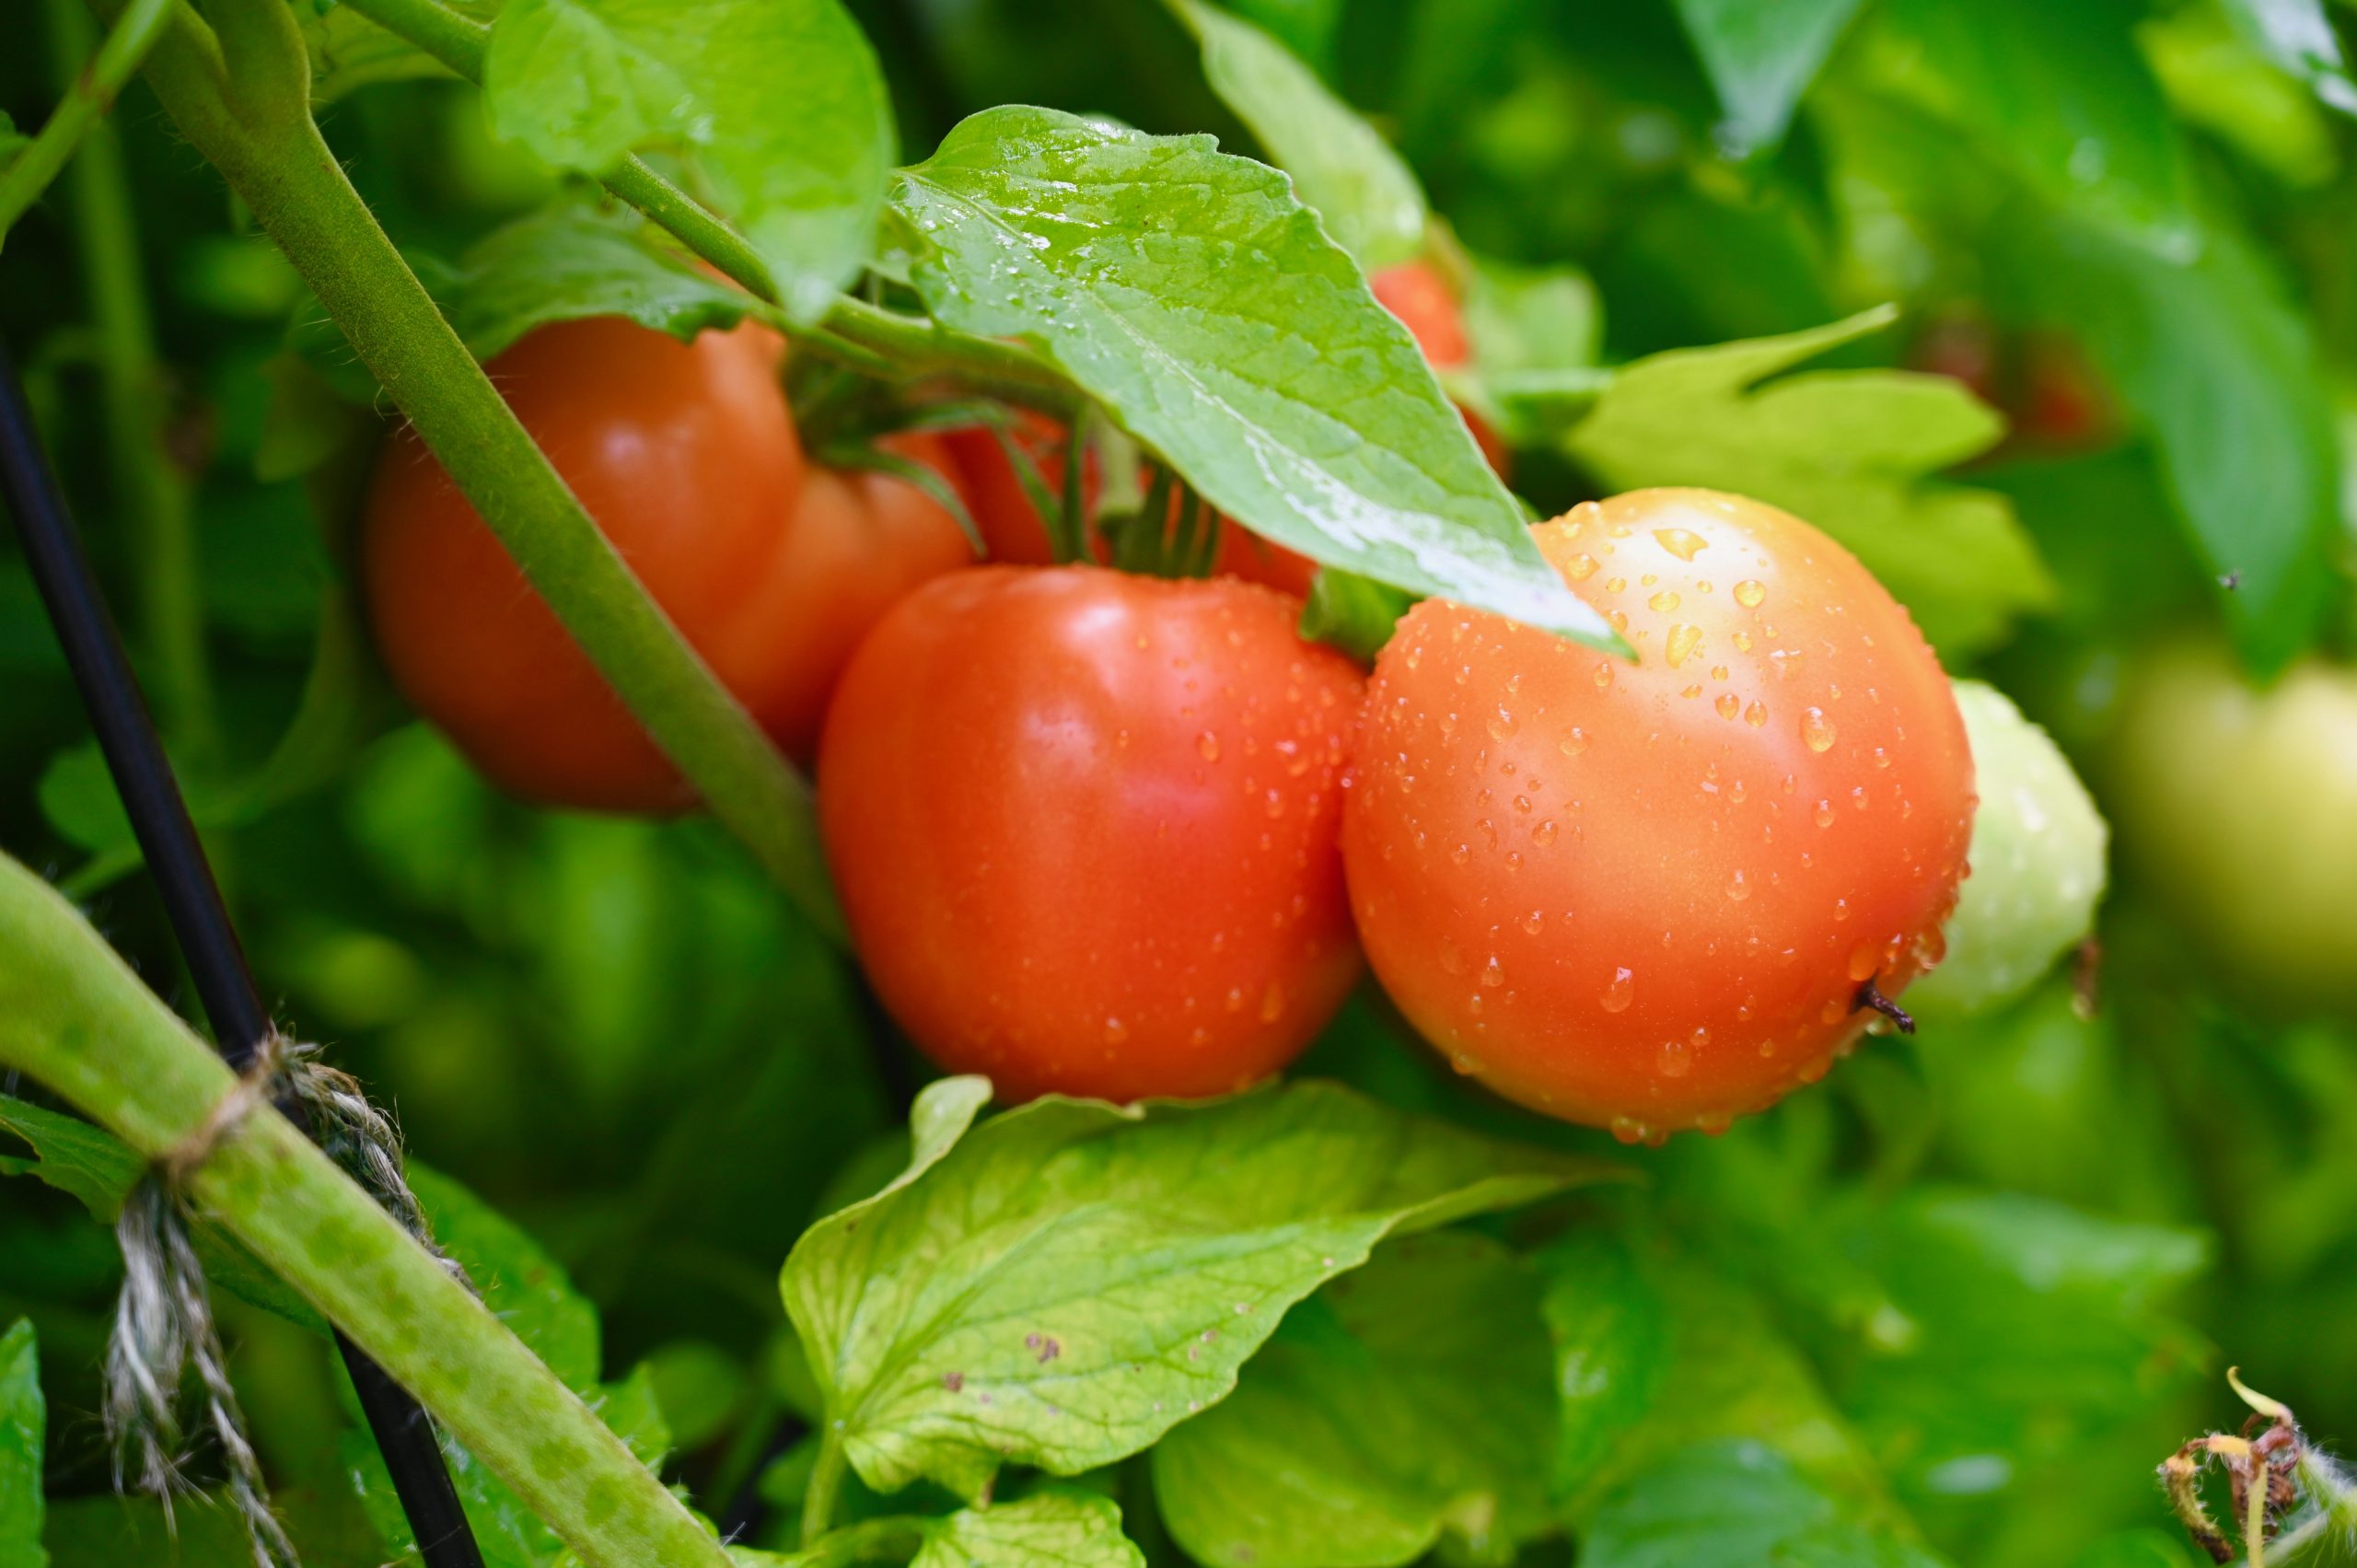
I am loving and cooking everything I can using fresh garden vegetables. Our tomato plants have been especially happy and abundant this year!
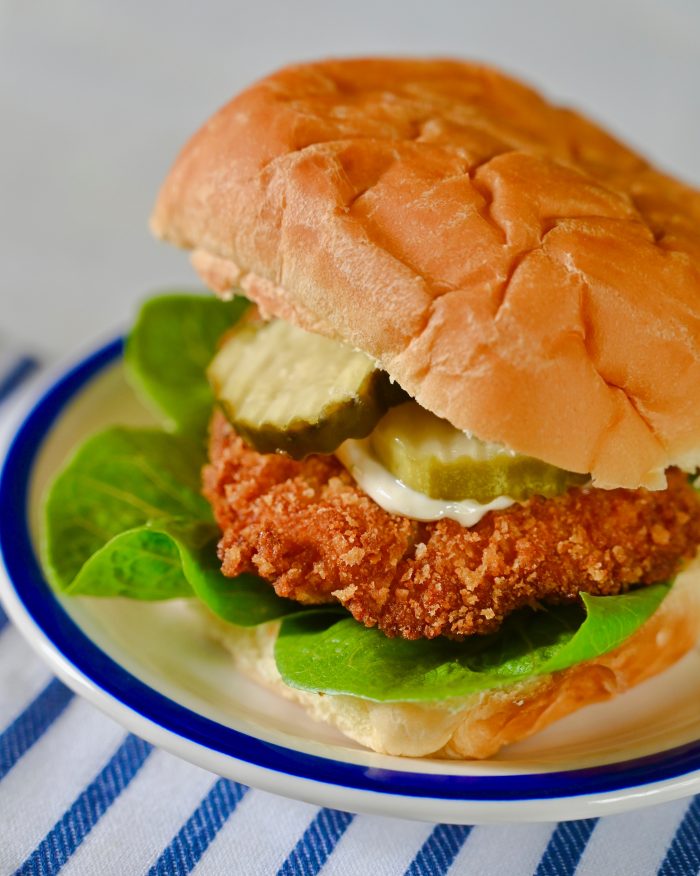
Friday night dinners in our house are usually simple and fun. At the end of the week I don’t want to be fussing over something too difficult. Fridays dinners are usually gastro pub inspired sandwiches, tacos or burgers. Things everyone in our house loves. The current Friday night favorite is this fried chicken sandwich. My daughter loves to help me with the breading. It’s one of those meals that has everyone smiling.
Fried Chicken Sandwiches -Makes 4
4 bakery burger buns
8 baby romaine lettuce leaves
12 dill or sweet pickle slices
4 chicken cutlets (2 chicken breasts split)
salt and pepper
2 eggs and 1 egg yolk
1¼ cup flour
1 cup fine bread crumbs
1 cup panko bread crumbs
2 cups vegetable or canola oil
Ranch Mayonaise
1/2 cup mayonnaise
1/2 teaspoon Hidden Valley Ranch Dressing Mix
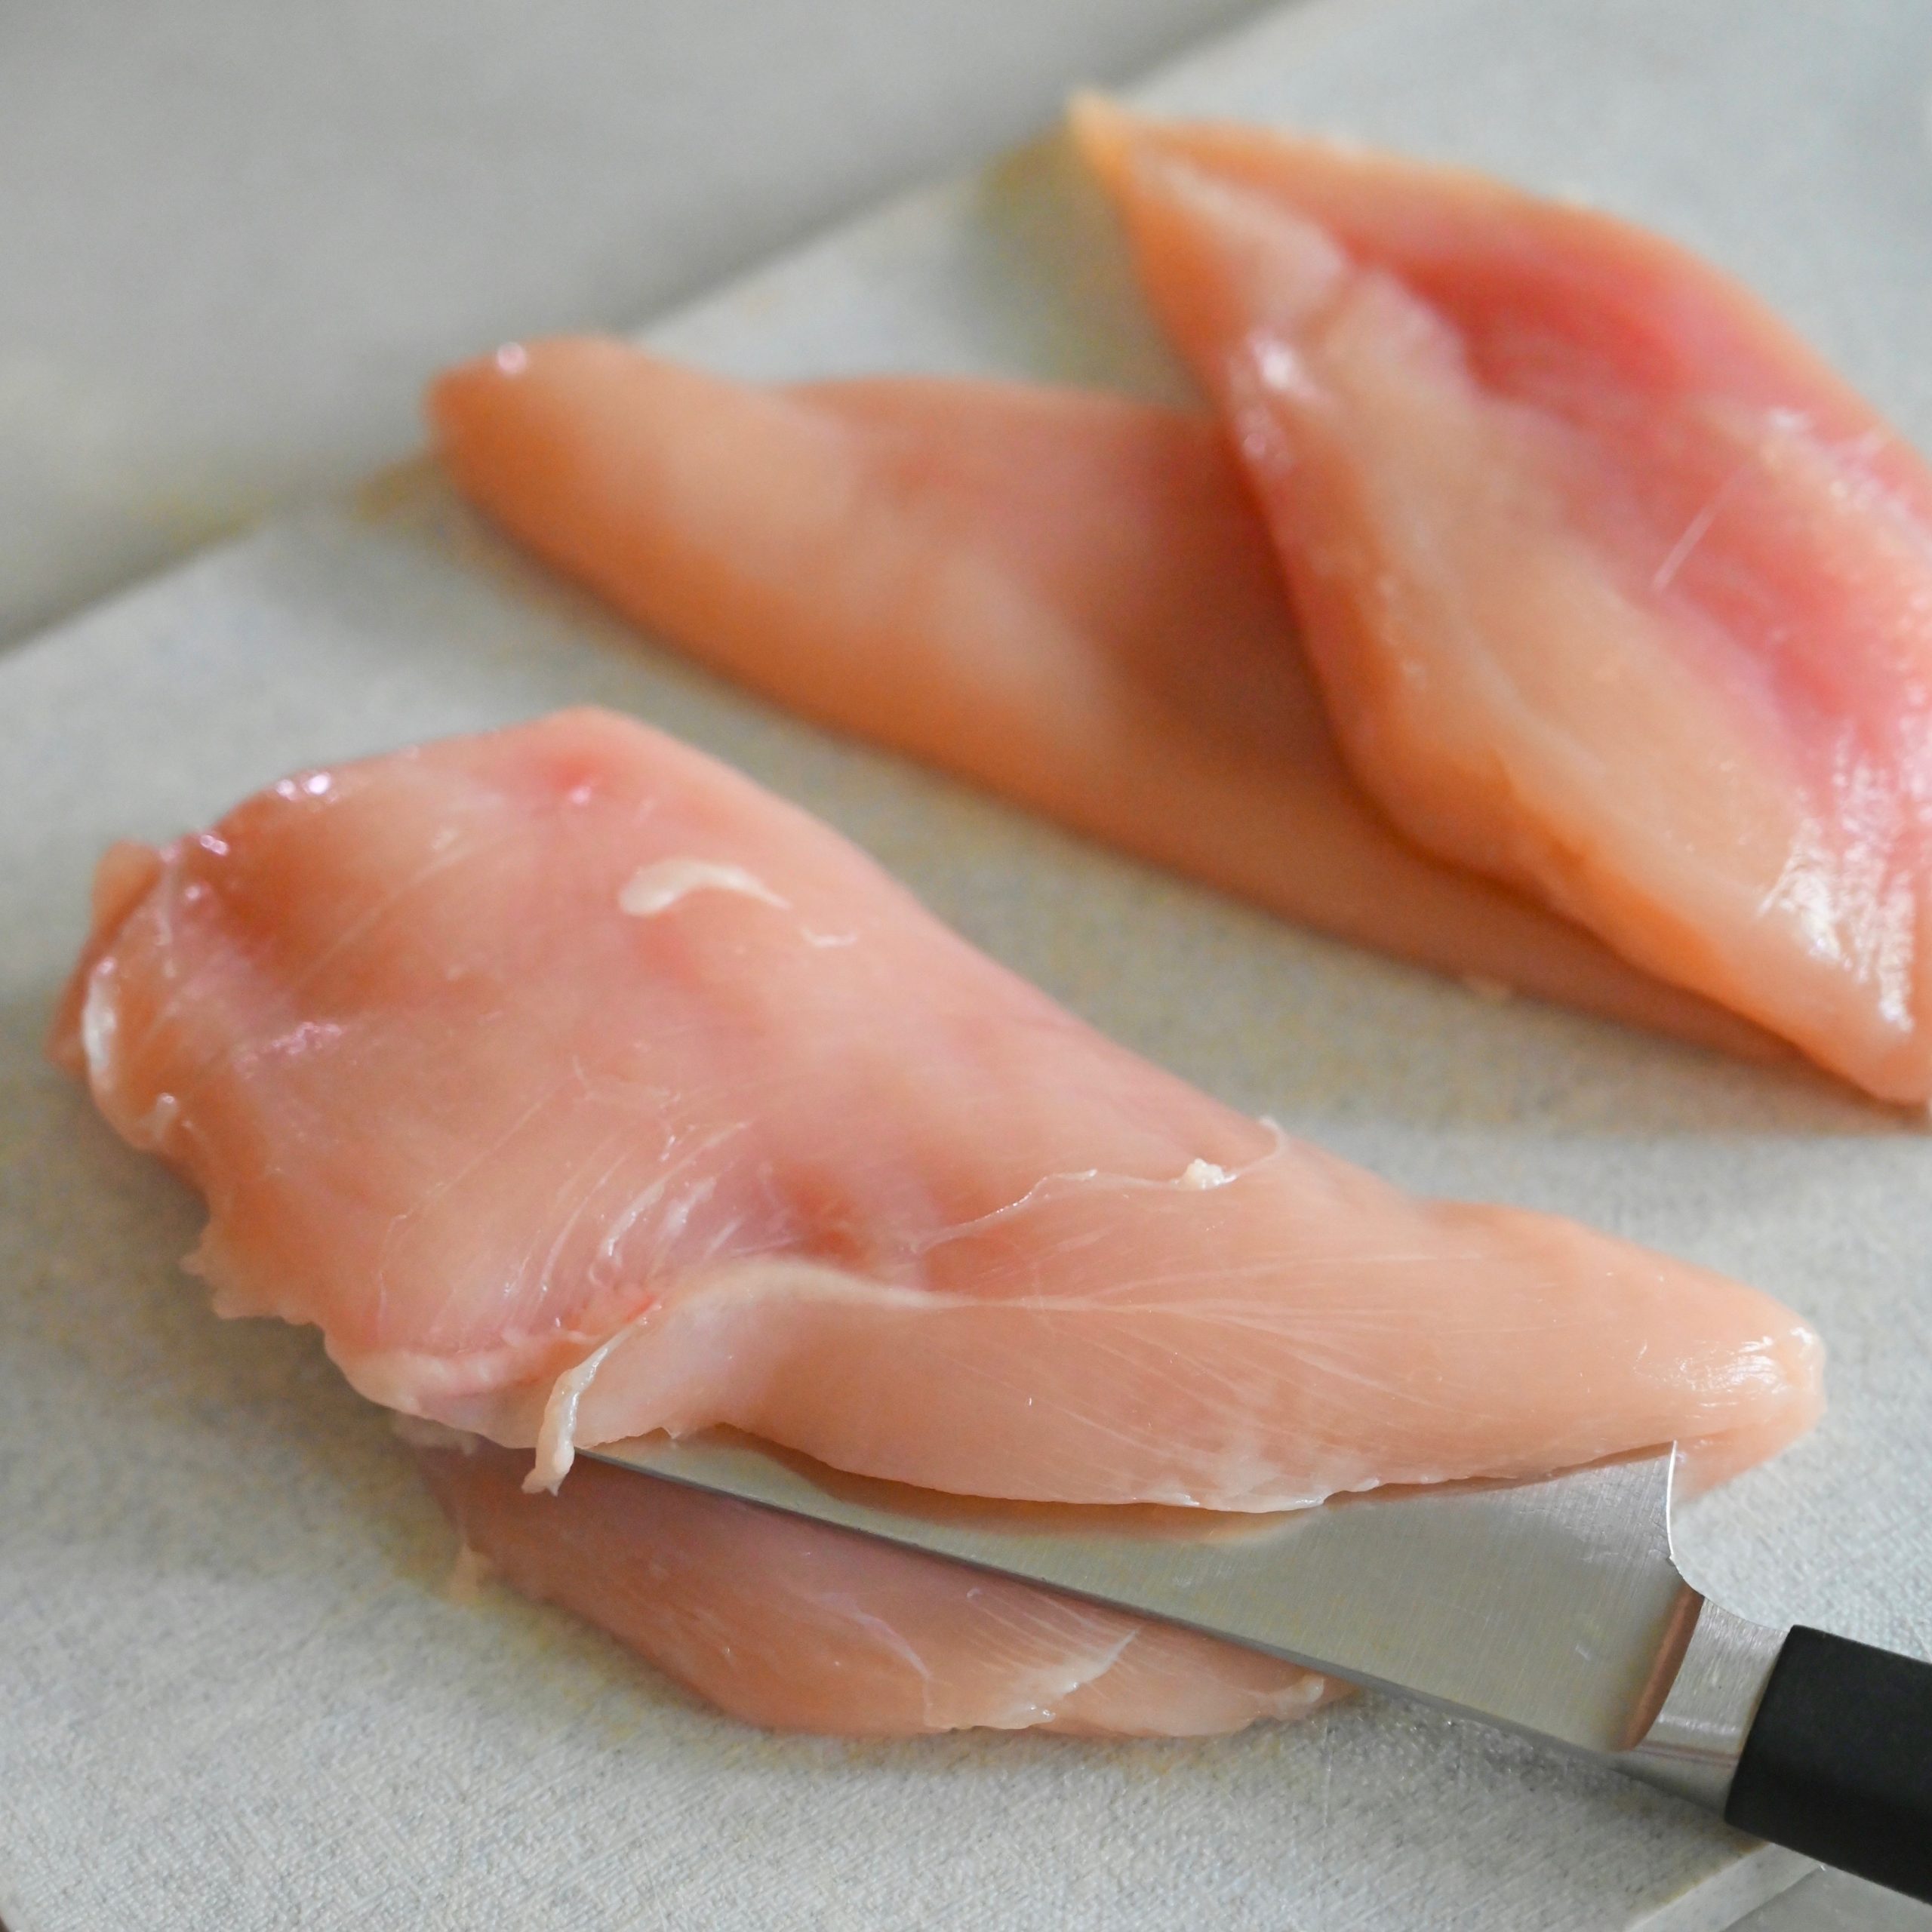
First prepare the chicken cutlets. Remove any rib meat. Then carefully place your hand on top of the chicken and cut or split the chicken breasts in half horizontally like you are butterflying them. Each chicken breast should be cut into two cutlets.
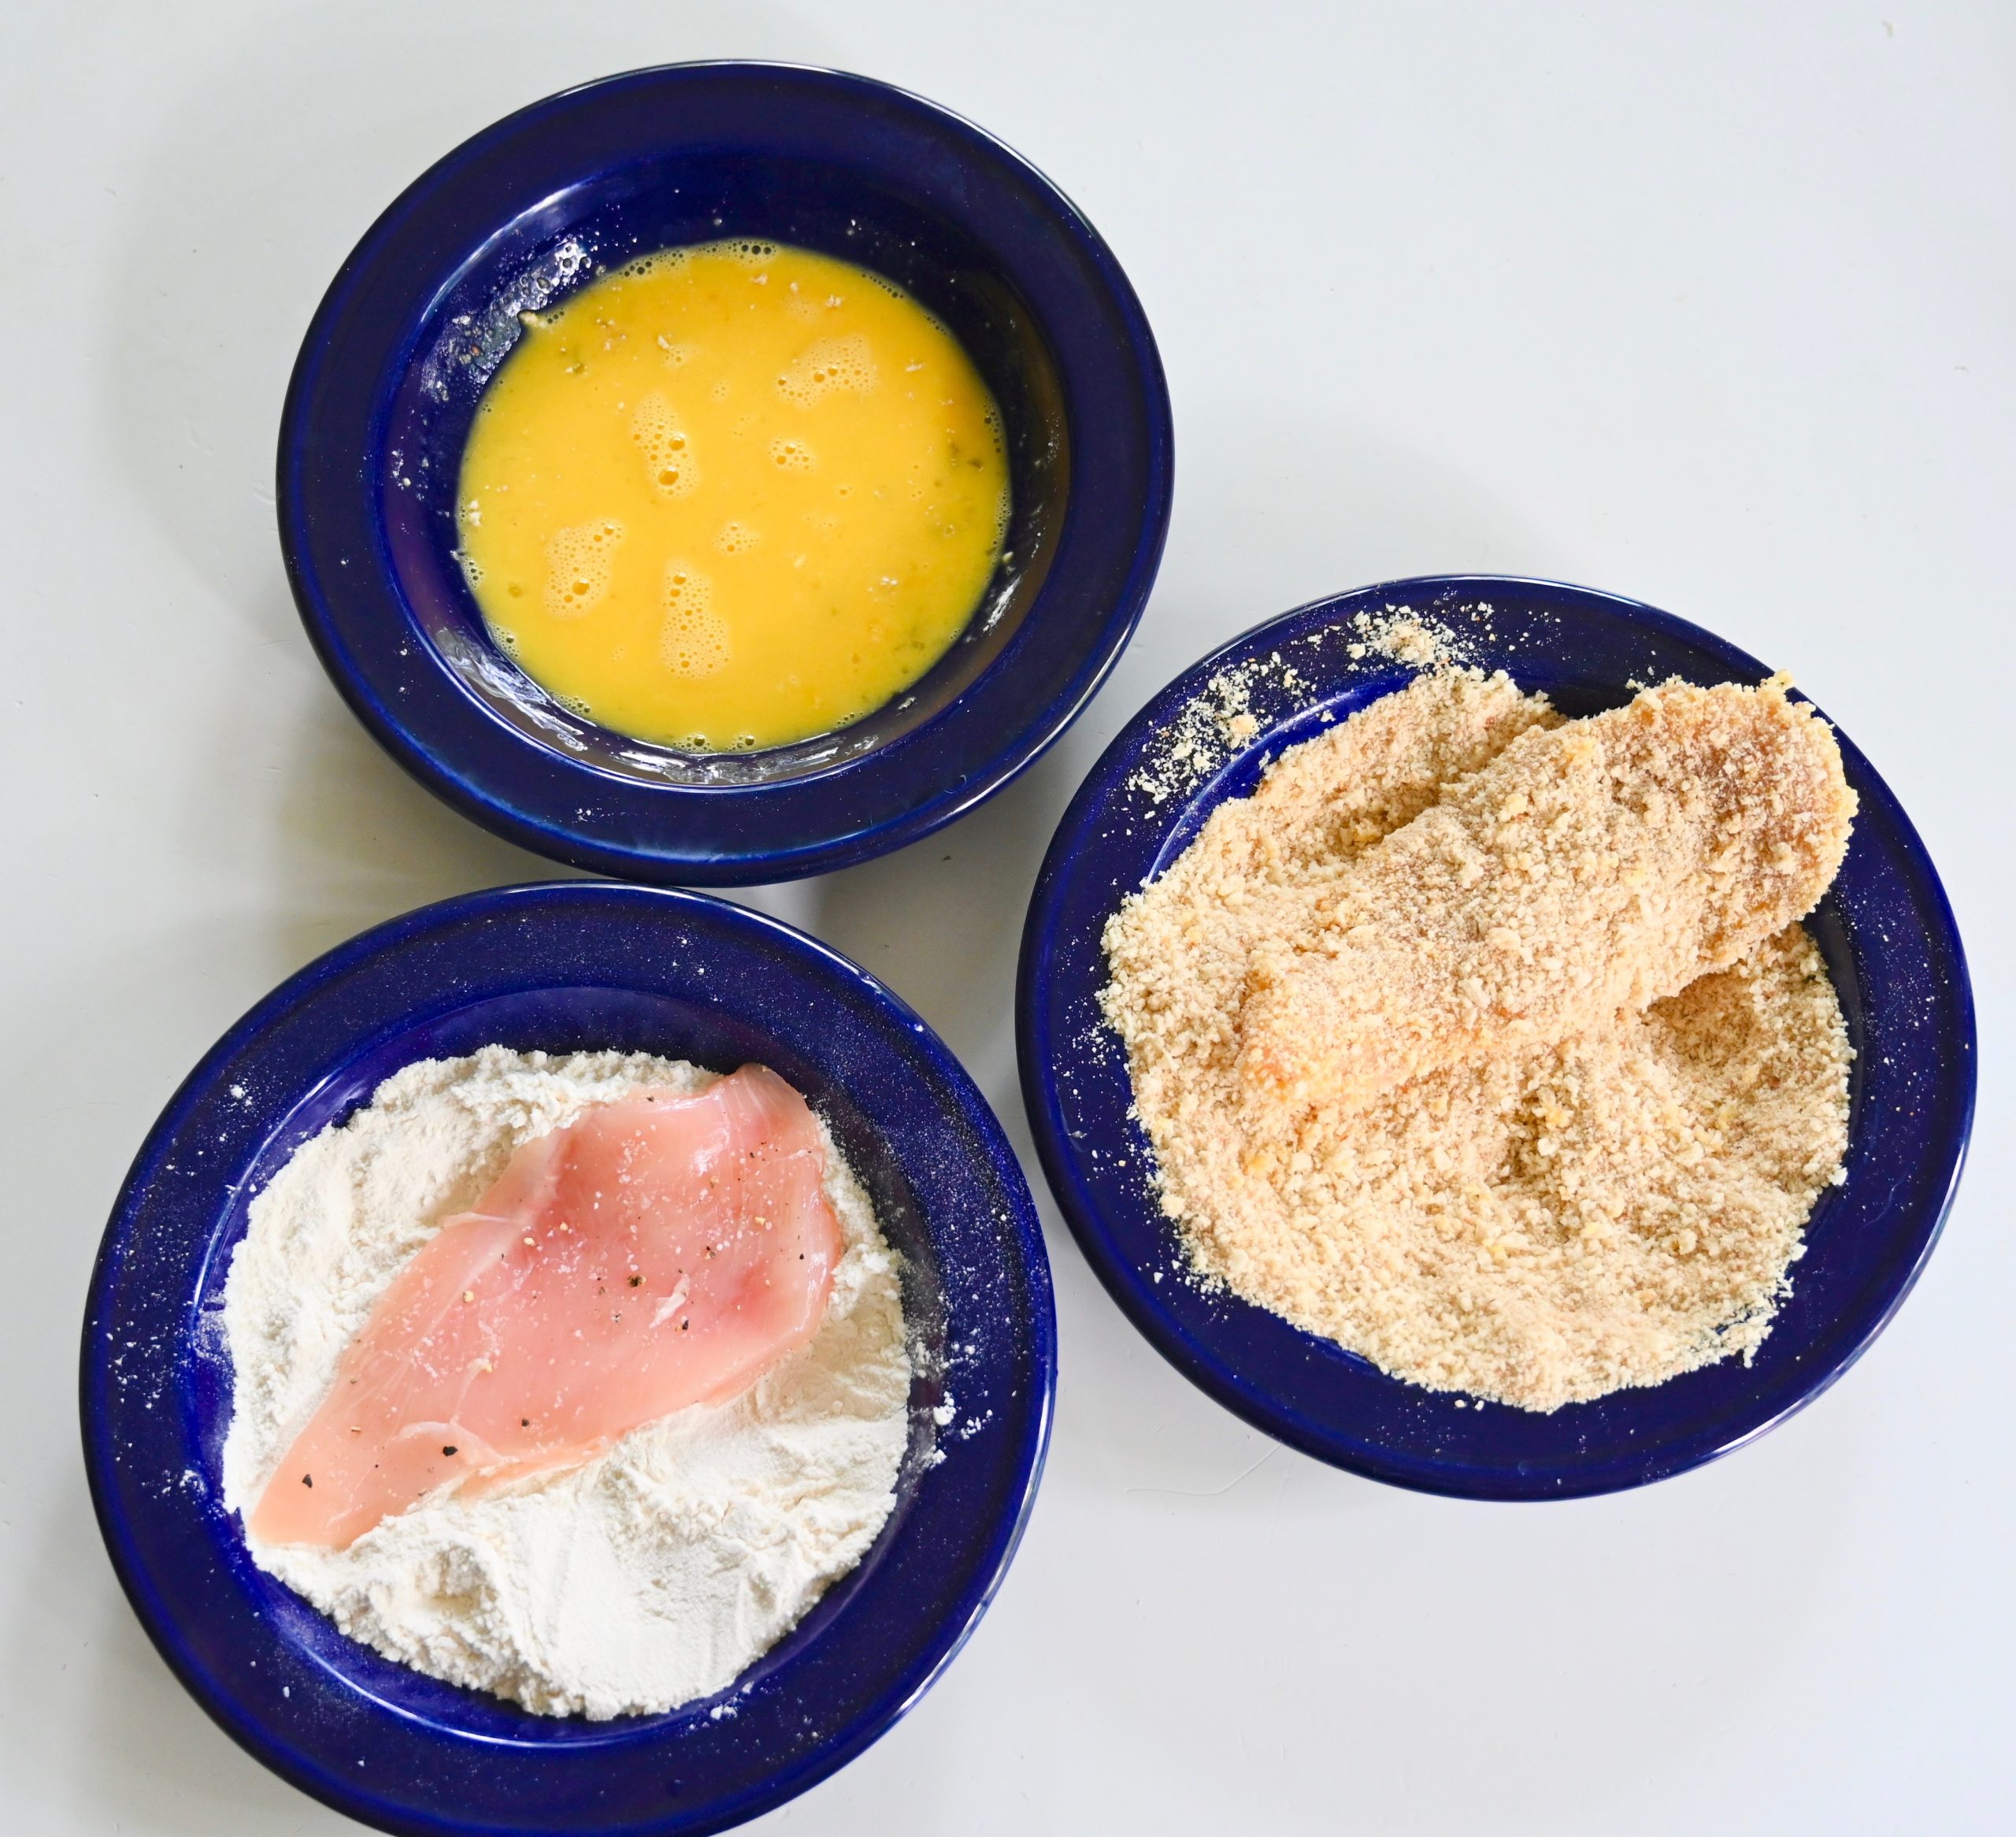
Next prepare the chicken breading. Season both sides of the chicken breasts with salt and pepper. Then in one shallow bowl or plate place the flour. Next in a second bowl whisk together the eggs and egg yolk. Finally in a third bowl mix together the bread crumbs.
Dredge the seasoned chicken in the flour, then dip it in the egg mixture and let the excess slide off. Then press the chicken cutlet in the bread crumbs. Finally, (although some people might see it as gilding the lily) I like to dip the cutlet back in the eggs and coat it one last time in the bread crumbs. This last step ensures that every piece of chicken is extra crispy and well coated.
Then prepare and fry the chicken. Place the oil in a deep sided skillet or Dutch oven. Heat the pan over medium heat until the oil reaches 350 degrees or until placing the end of a wooden spoon in the pan causes vigorous bubbles to appear. Then carefully add 2 or 3 breaded chicken cutlets. If the chicken doesn’t all fit in the pan you can fry it in two batches, because you don’t wan to crowd the chicken.
Cook each piece for 5 to 6 minutes turning it using a fork every couple of minutes to make sure that it cooks evenly. Place the chicken on a plate or pan lined with paper towels
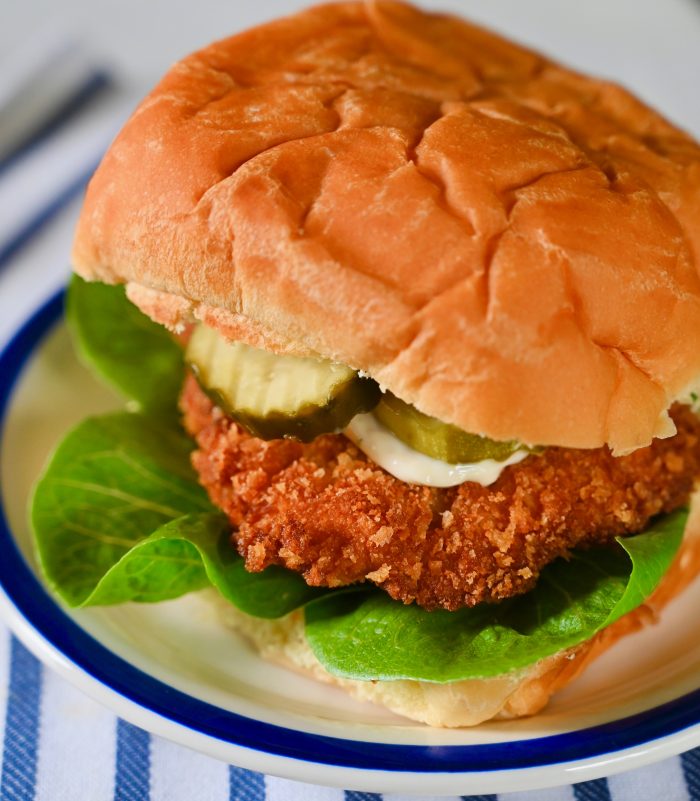
Finally assemble the fried chicken sandwiches. Make the ranch mayonnaise by stirring the seasoning mix into the mayonnaise. Then place each fried chicken cutlet on a burger bun with the romaine lettuce. Top it with the ranch mayonnaise and pickles.
There is nothing like a crispy fried chicken sandwich. A mixture of fine and panko breadcrumbs makes this breading especially good. A topping of ranch mayonnaise and pickles add just the right zing of flavor. It’s the perfect Friday night dinner and a delicious way to start the weekend.
Ah, the joy of summer and the gift of a moment with nothing to do. It’s been an unusually rainy summer. When storm clouds had my six-year-old beginning a familiar refrain of “I’m bored” I suggested we find a way to bake up a little fun. We had some fresh berries in the fridge so I turned on the oven and set out to teach her to make something new. I pulled out an old copy of the Silver Palate cookbook and when I couldn’t exactly what I wanted we improvised and created our own berry shortcake muffins. A cross between a muffin and a biscuit that had us all smiling as we watched them bake and took a taste.
Berry Shortcake Muffins -makes 1 dozen
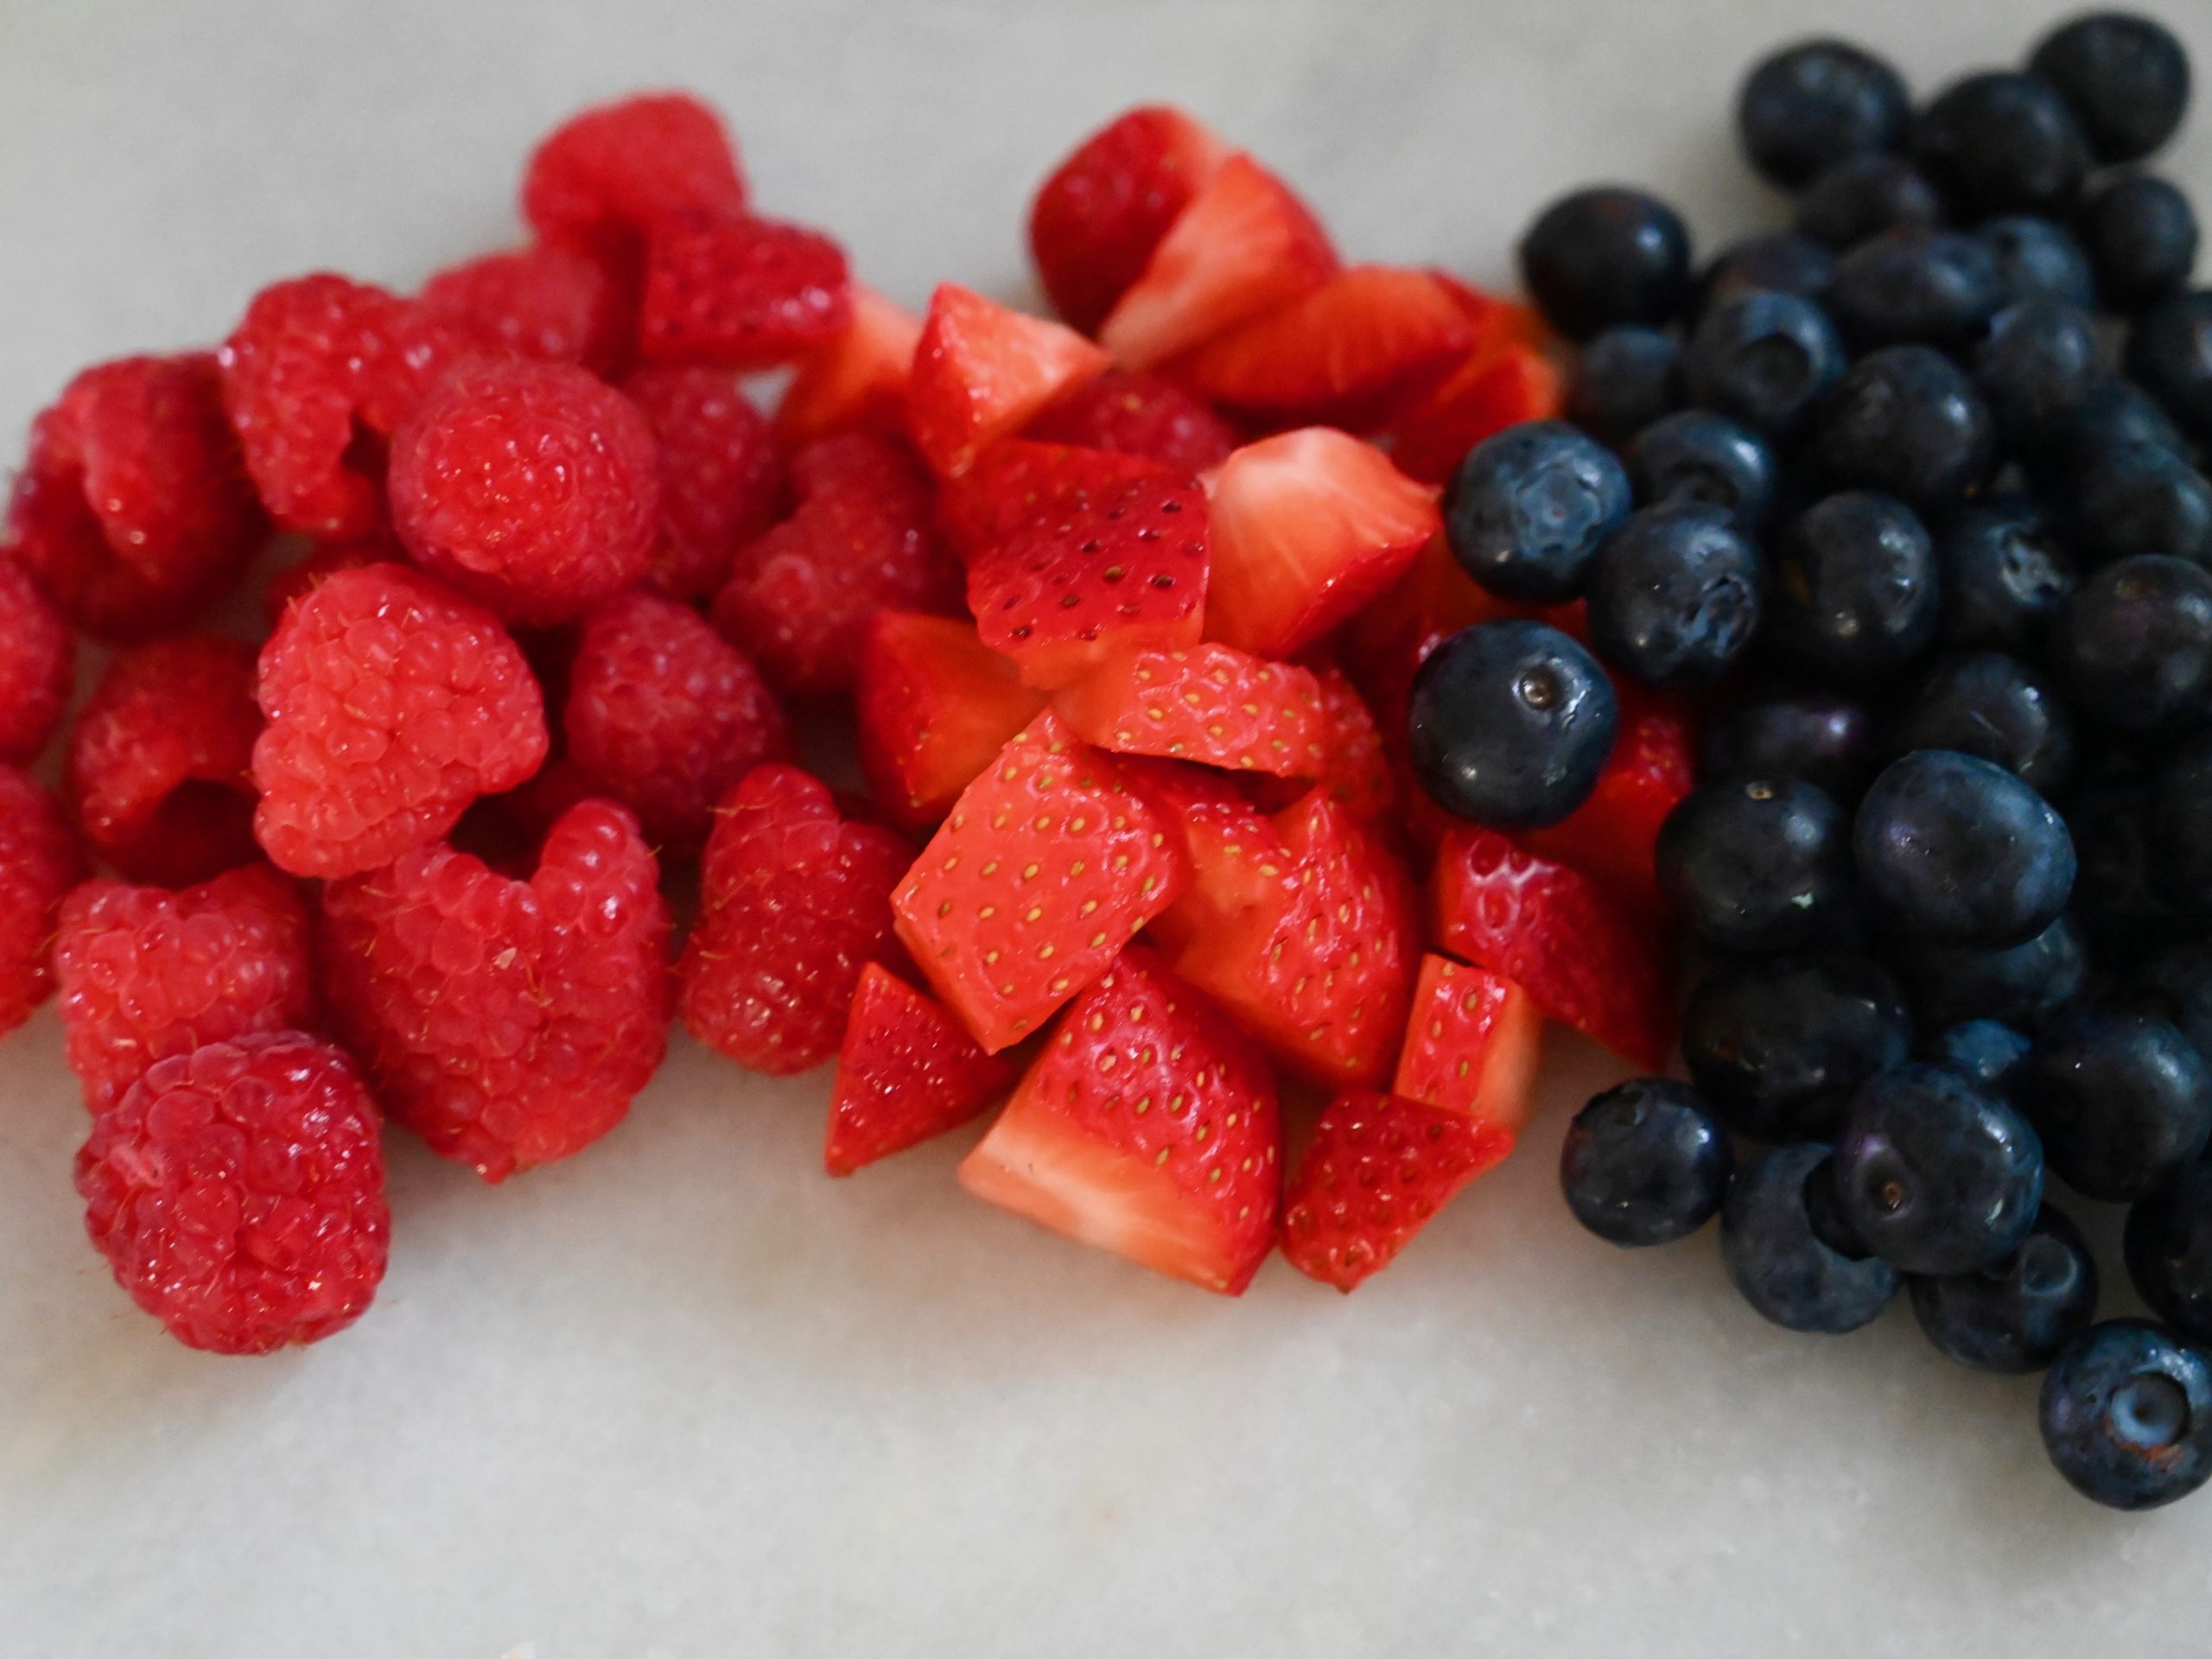
2 cups summer berries (raspberries, blueberries, strawberries or blackberries)
2 cups cake flour plus 1 tablespoon
1 cup sugar
1/2 teaspoon salt
1 tablespoon baking powder
1 cup buttermilk
2 eggs
1 stick (8 tablespoons) melted butter
1 teaspoon lemon zest
Decorating sugar, for sprinkling on top of muffins
Preheat the oven to 350 degrees.
First wash and dry your berries well. You can create a mix of your favorite berries. If using strawberries cut them into small pieces. Then in a medium sized bowl mix the berries with 1 tablespoon of flour to coat them.
Next in a large bowl mix together all of the dry ingredients- flour, sugar, salt and baking powder.
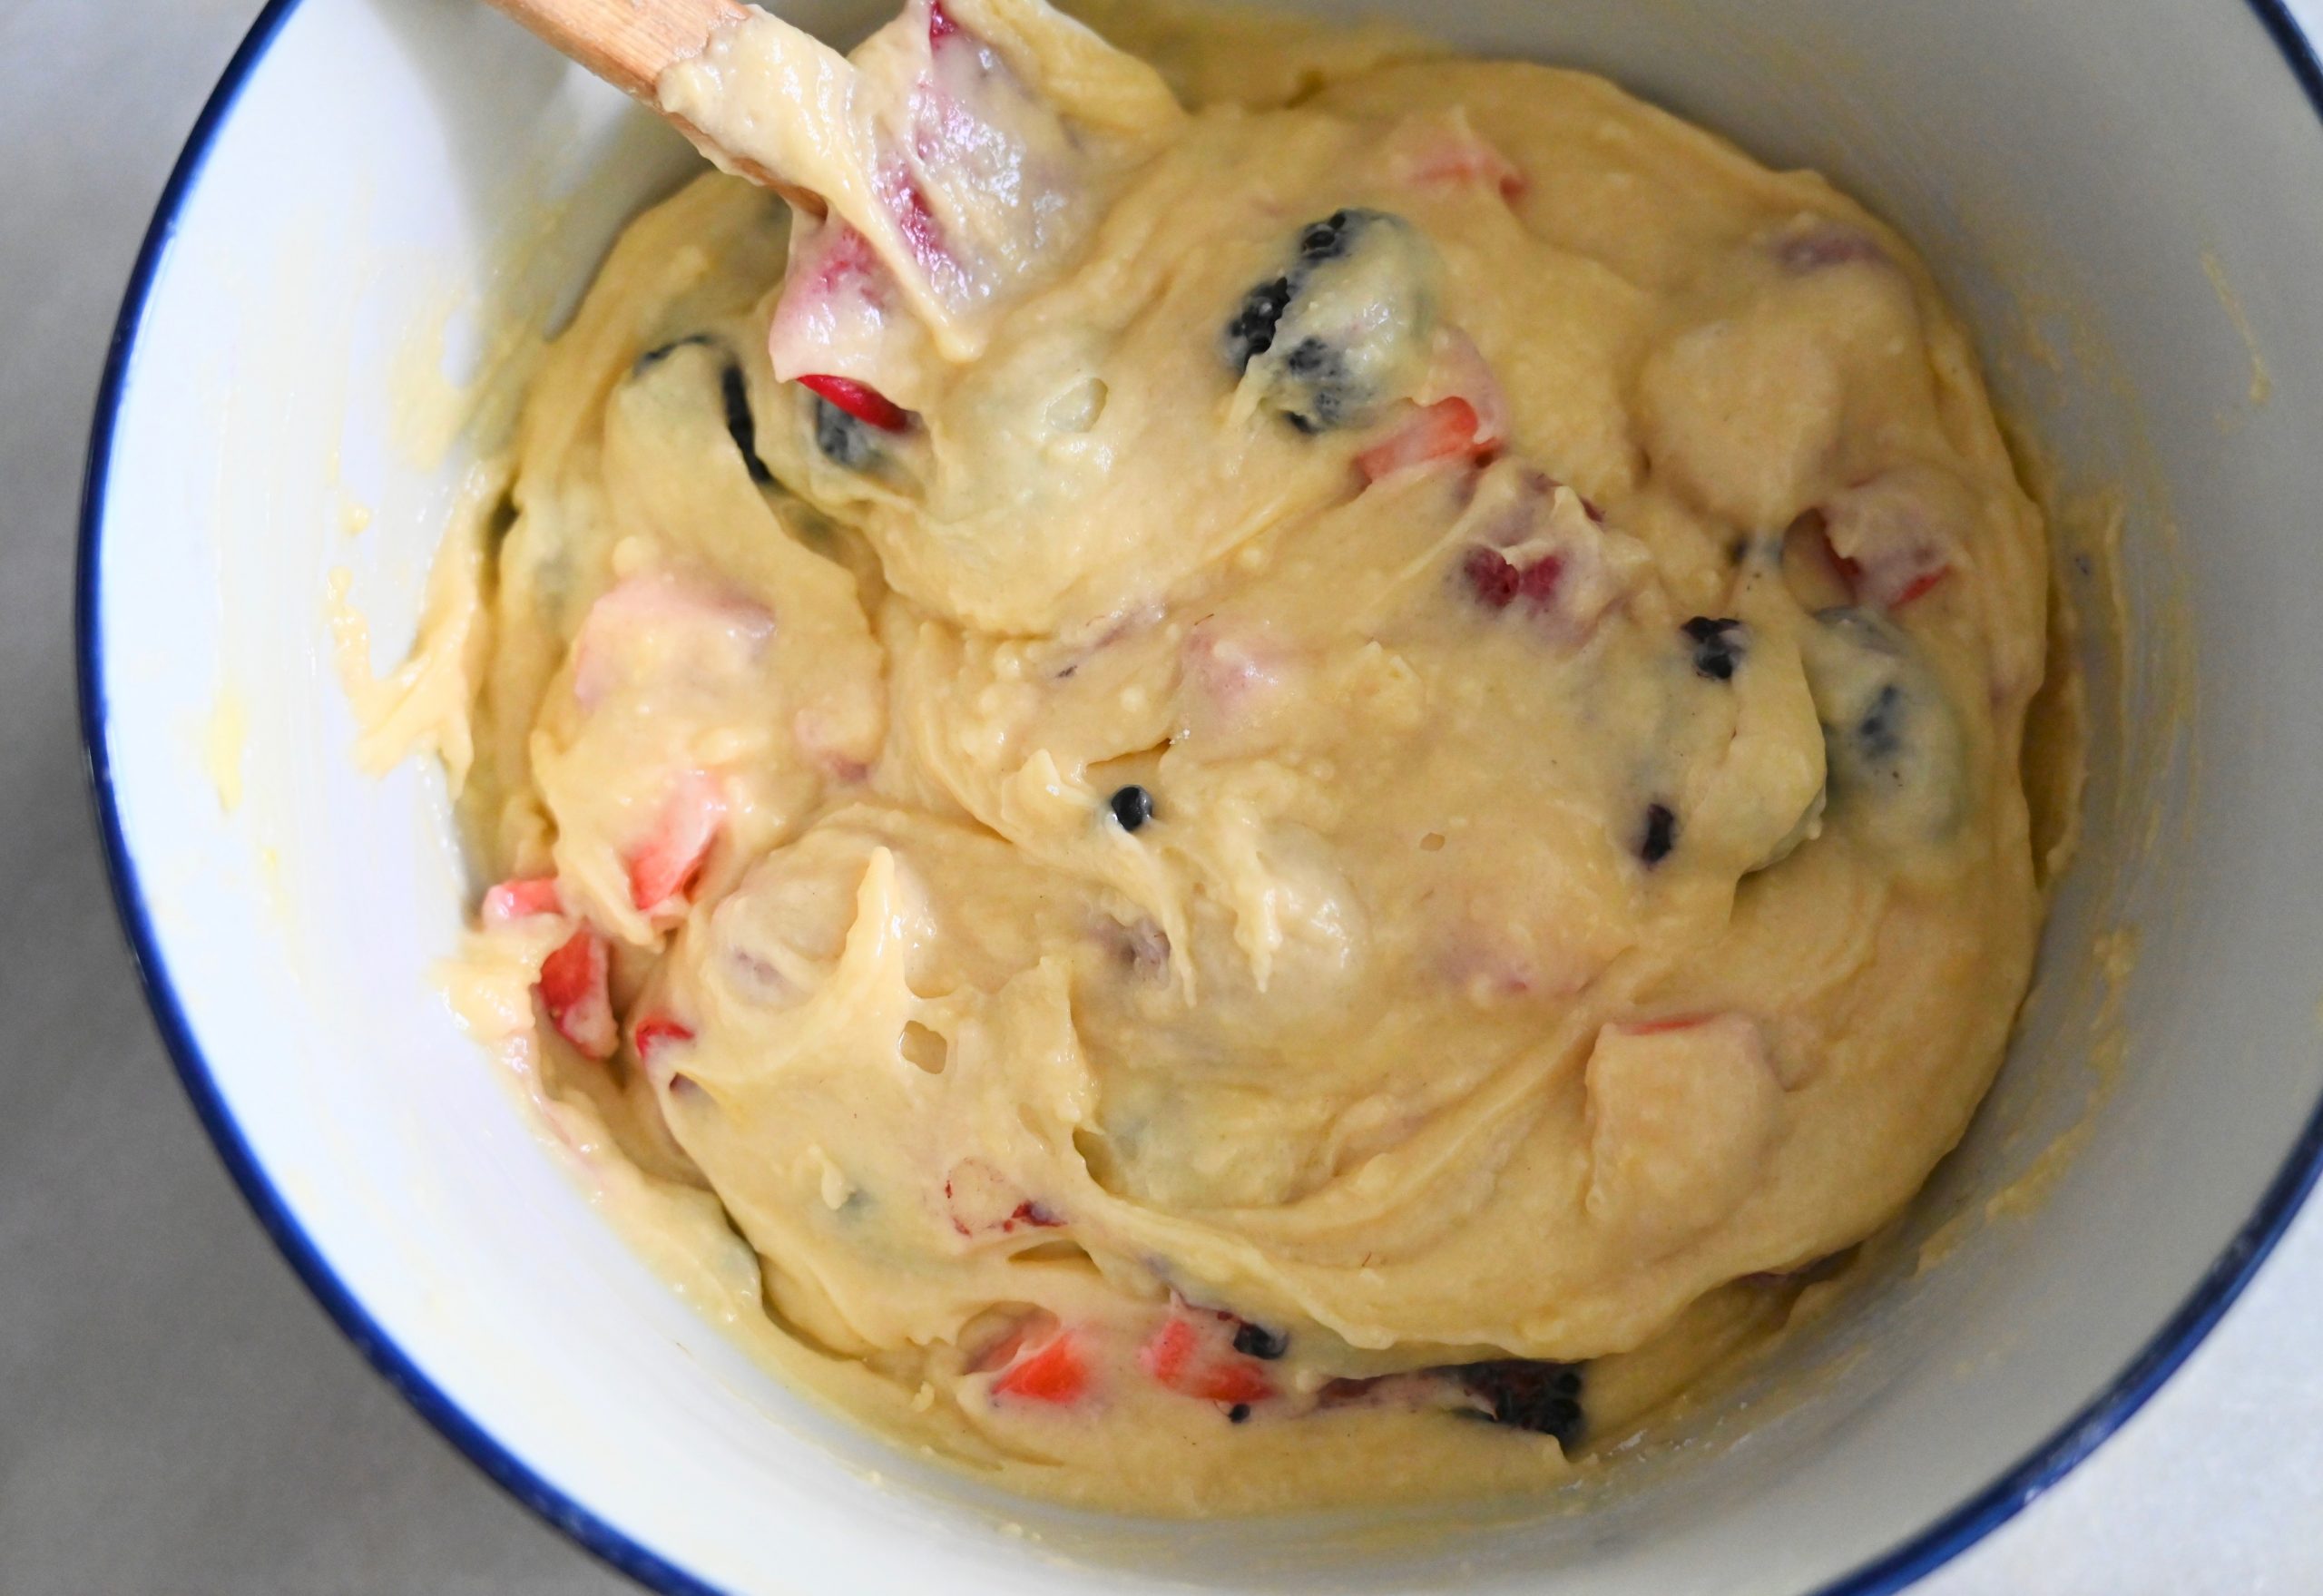
Make a well in the center of the dry ingredients and pour in the buttermilk, eggs and melted butter. Mix until well incorporated, being careful not to over mix it. Then gently fold in the lemon zest and berries.
Evenly spoon or scoop the batter into 12 standard sized muffin tins with cupcake liners. Then sprinkle the tops with decorating sugar.
Bake at 350 degrees for 20 to 23 minutes until the muffins are golden brown on top.
Berry shortcake muffins an easy mix and bake recipe. The perfect thing to make when you just want to get in the kitchen and bake something together. A sweet treat to brighten any rainy day.
I have been away from writing a little longer than I had planned as we took an unexpected road trip to back home to Texas. But I am back with a new summer garden inspired recipe for Greek salmon burgers. I always look forward to summer flowers and our small vegetable garden.
Lately, I must confess that have begun to sympathize with Mr. MacGregor. The original grumpy gardener in Beatrix Potter’s Tales of Peter Rabbit. My Sir Crunch a Lot cucumbers seedings have been under attack by a pack of cheeky little chipmunks. Cute as they may be I am growing tired of devising new ways to keep them out my raised vegetable beds. I have now had to resort to window screen netting and chili peppers. The chipmunks may have won round one, but my culinary knowledge of chilis runs deep. I am now on to them and determined to create the ultimate spicy defense system. One that hopefully has them feeling the heat and packing up for good.
Last year before the aforementioned chipmunks took up residence in my garden, we were overwhelmed by the bounty of cucumbers. By August I was giving them away to neighbors and adding them to every dish I could think of.
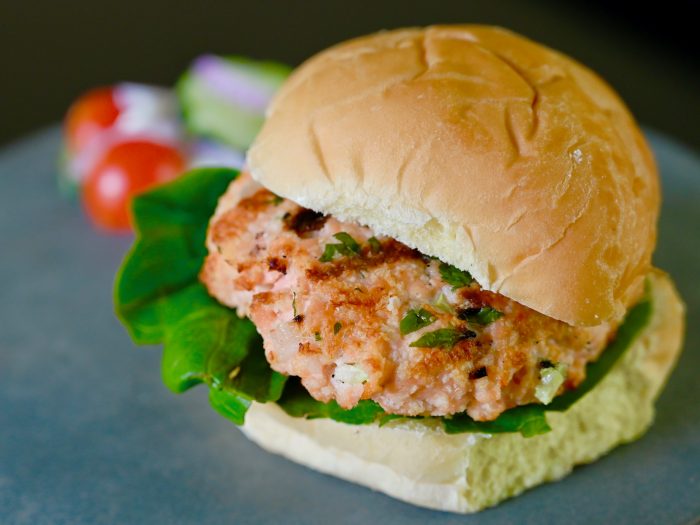
One of our favorite recipes was these Greek salmon burgers. Homemade salmon burgers are surprisingly simple to make and so delicious! These salmon burgers are great on the grill and they make getting a healthy dinner on the table easy. I like to serve mine with a cucumber, tomato and feta cheese salad.
Greek Salmon Burgers -Serves 4
1½ pounds salmon fillet, skinned
½ cup panko bread crumbs
1/3 cup cucumber, seeded and finely chopped
2 tablespoons shallot, finely minced
1 tablespoon parsley, chopped
1/2 teaspoon kosher salt
2 tablespoons olive oil,
4 bakery burger buns
4 Boston or romaine lettuce leaves
Tzatziki sauce (see recipe below)
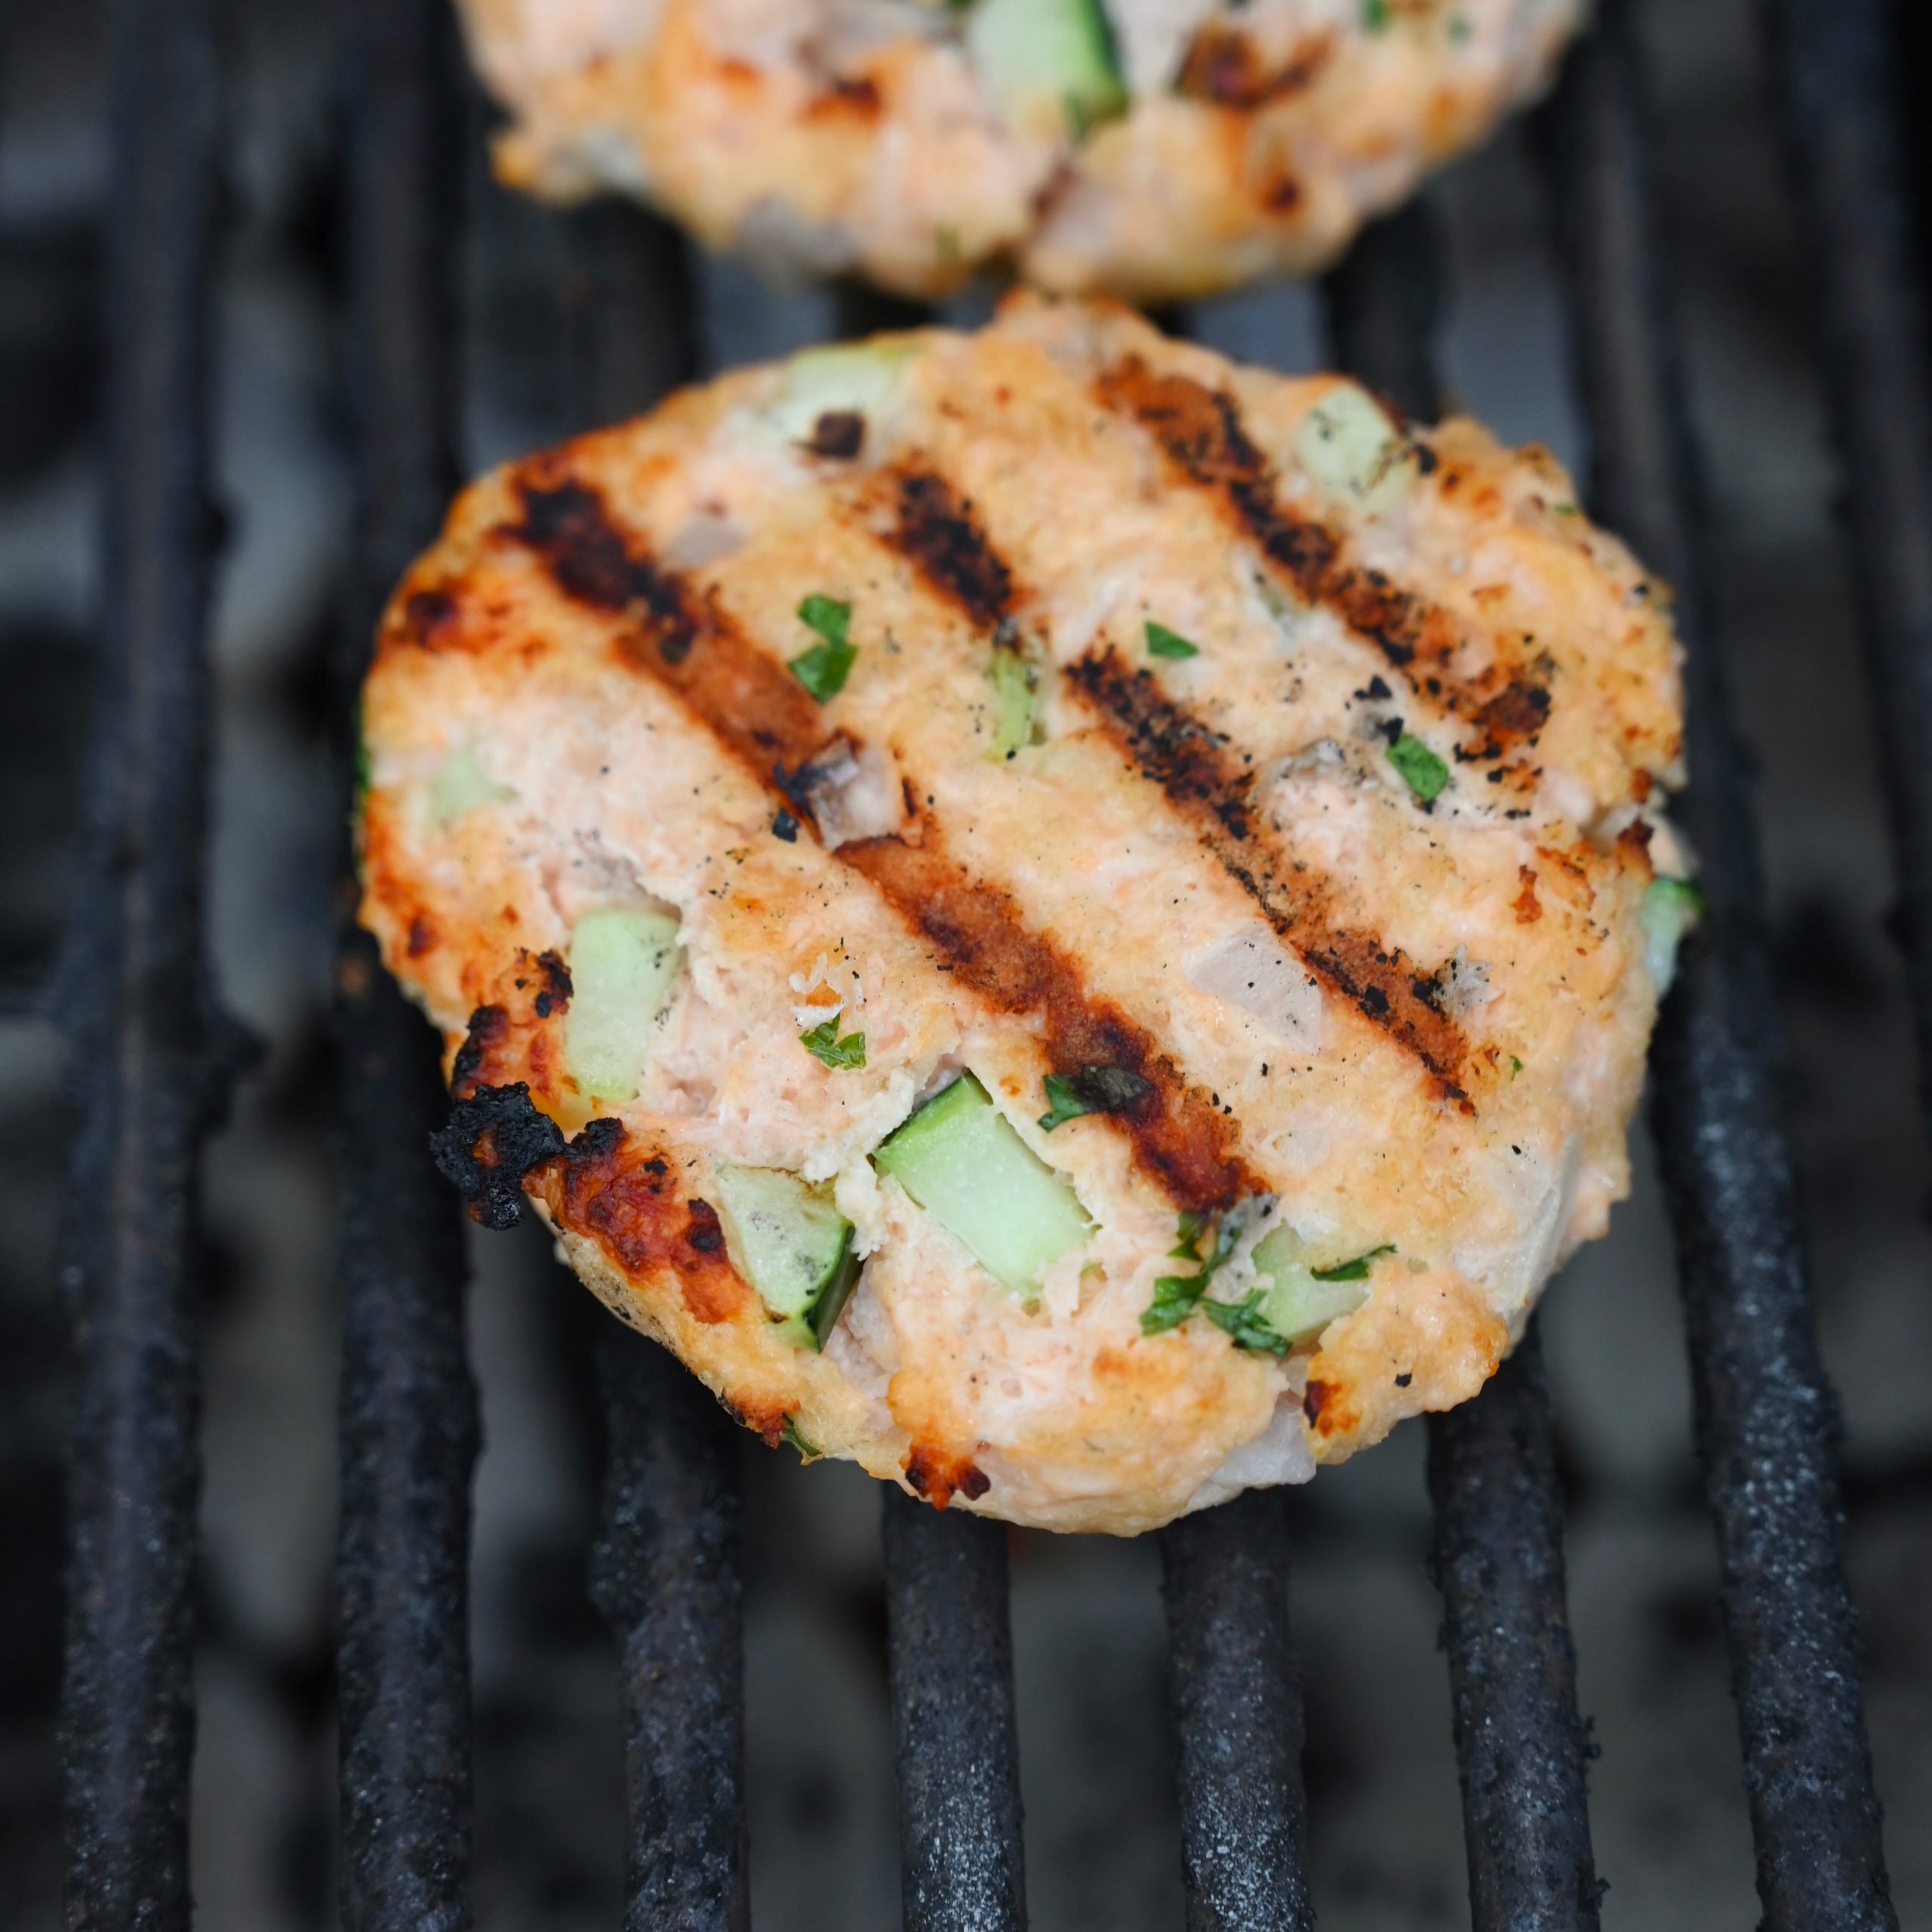
First, preheat your grilled for direct medium high heat grilling.
Next, make the salmon burgers. Prepare your salmon remove the skin with a sharp knife. Then cut the salmon into smaller chunks or pieces. Place the salmon in a food processor and grind it till it is in small pieces, like you would see if making a tuna salad.
Then in a medium sized bowl mix together the ground salmon, bread crumbs, cucumber, shallot, parsley and salt.
Divide the salmon mixture into 4 equal portions. Shape each portion into a burger patty. Then brush or rub a little olive oil on each side of the patties to keep them from sticking to the grill. Refrigerate the burgers until ready to grill.
Grill the burgers. Cook each salmon burger for 4 minutes on the first side and 3 ½ minutes on the second side until just cooked through.
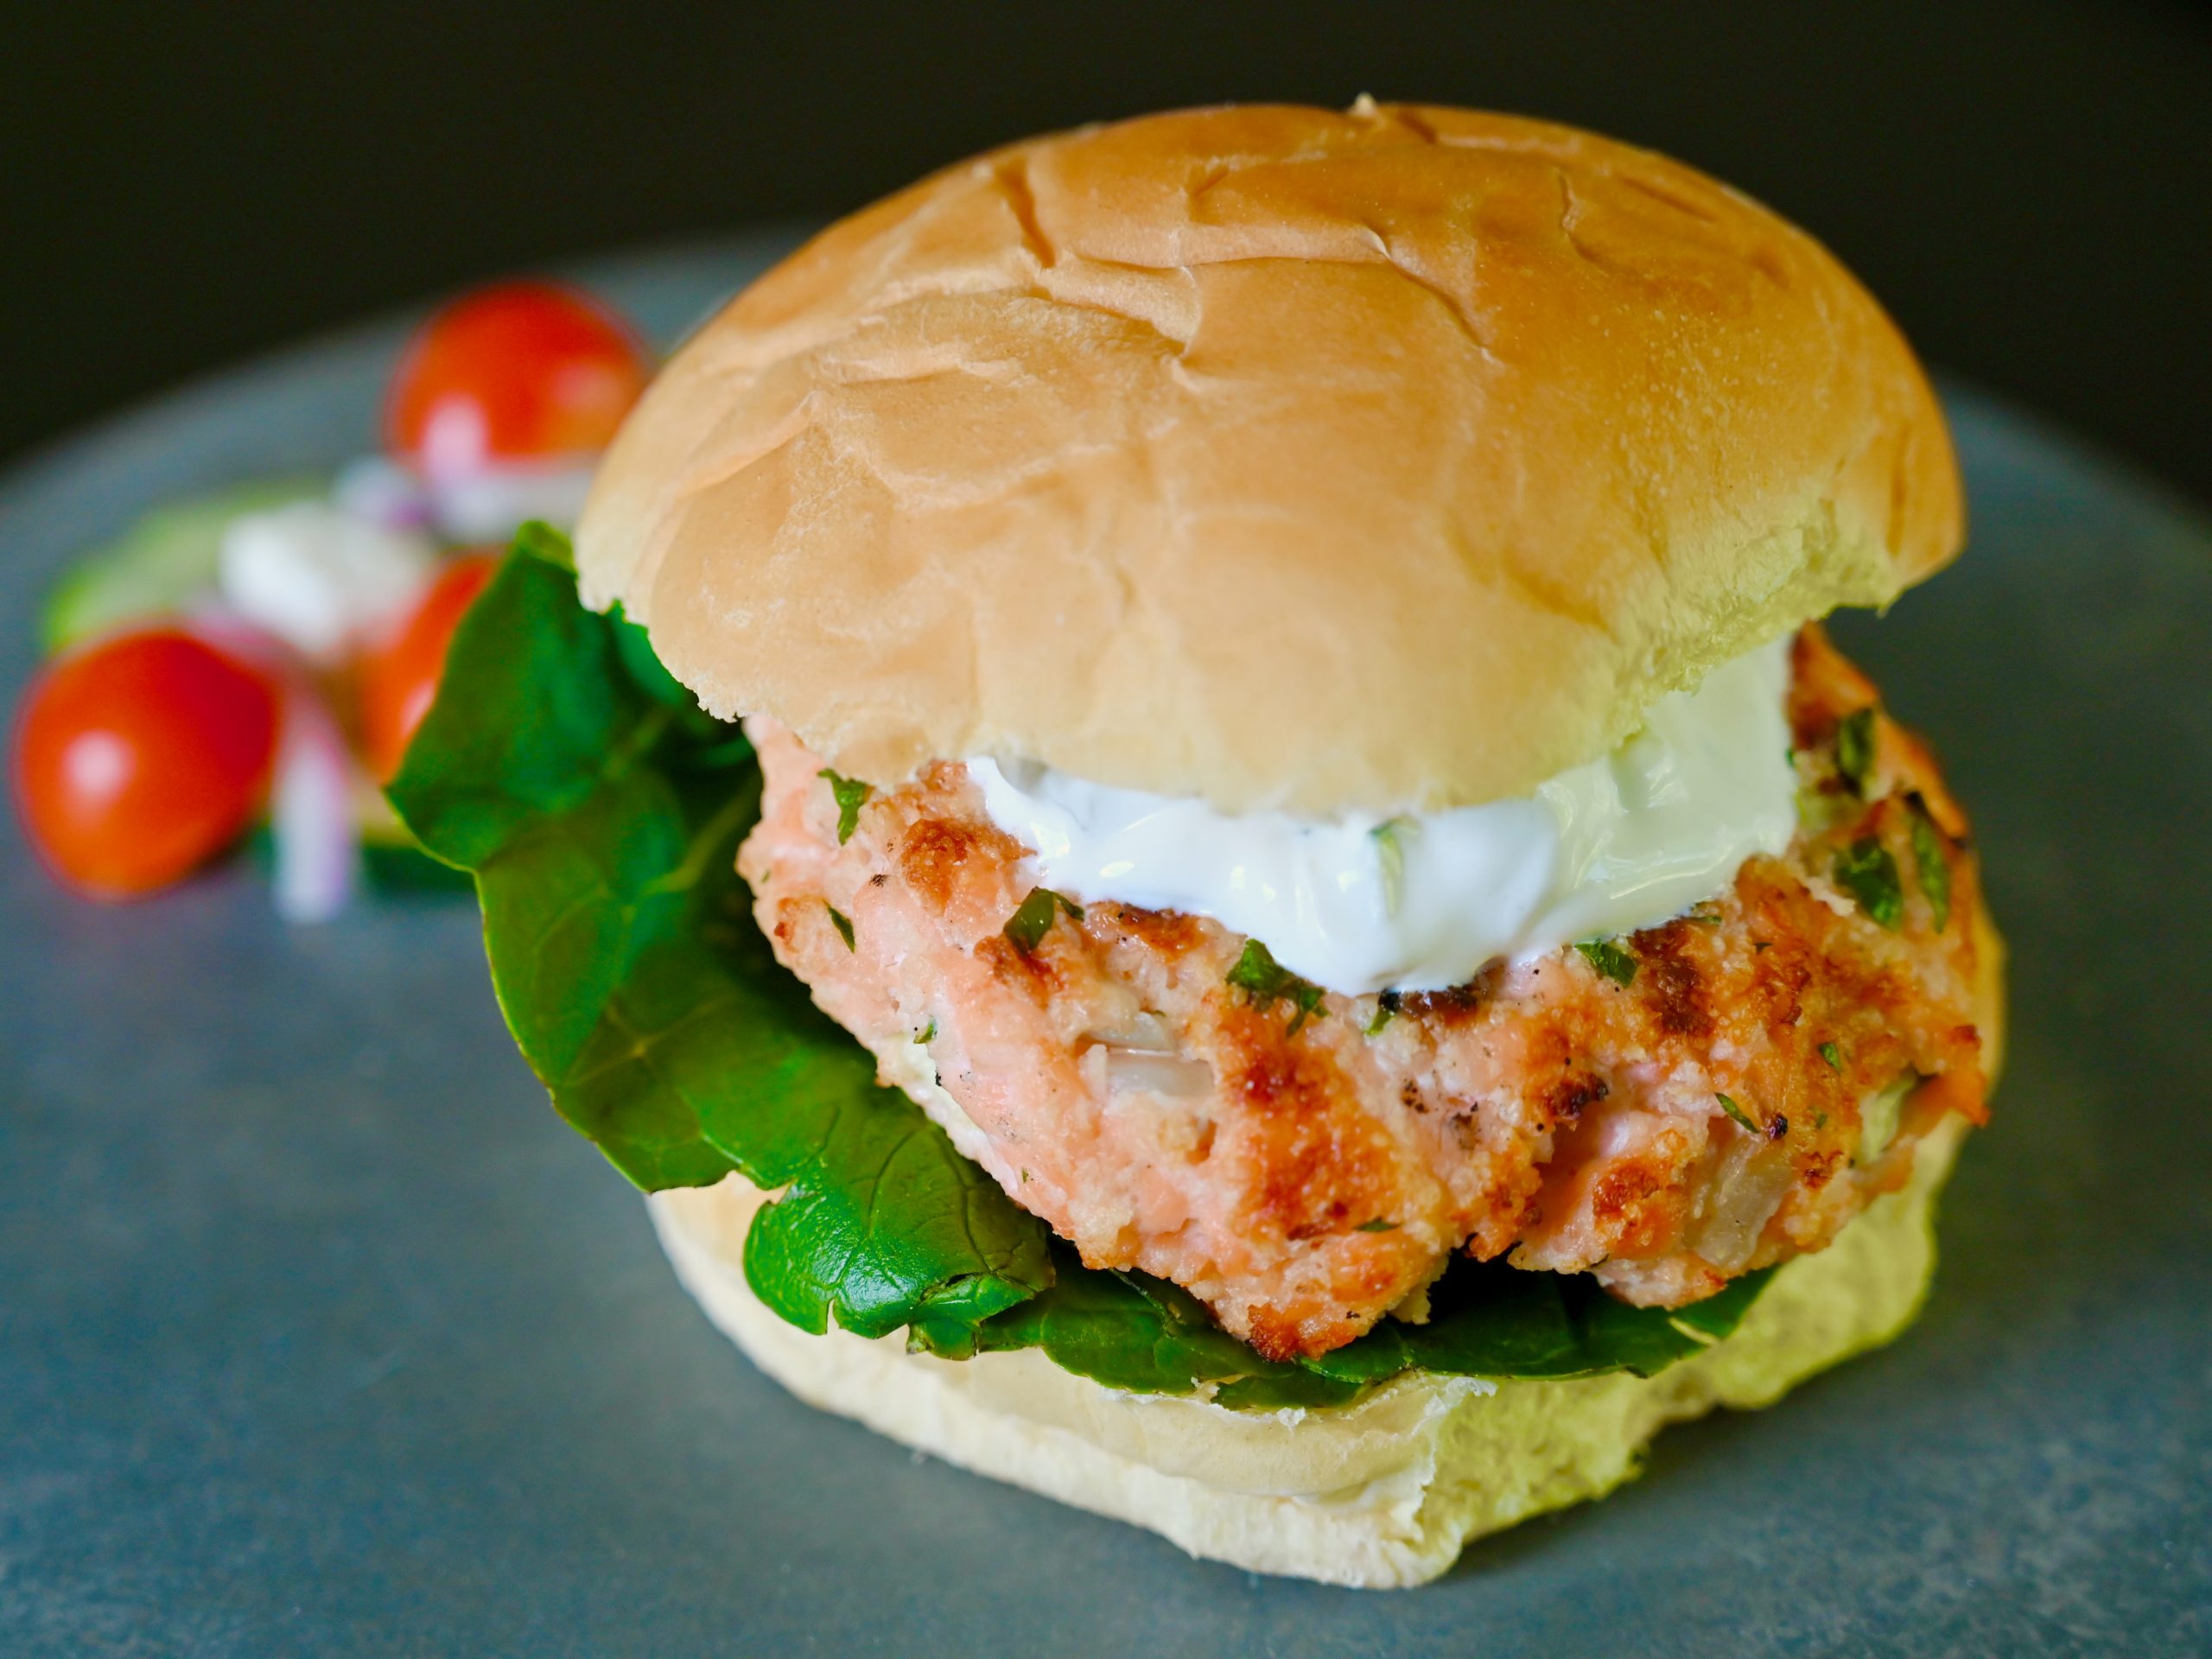
Serve the salmon burgers on a toasted bun with lettuce and a generous dollop or two of tzatziki sauce. The sauce is amazing! It really makes these burgers memorable.
Tzatziki Sauce
1/2 cup mayonaise
3 tbsp sour cream
2 tsp fresh dill
1/4 cup cucumber, finely chopped
1/2 tsp garlic powder
1/4 tsp oregano
1 tbsp lemon juice
Salt and Pepper to Taste (about 1/8 tsp of both salt and pepper)
In a small mixing bowl mix together the mayonnaise, sour cream, cucumbers and all of the herbs and seasonings. Keep refrigerated until serving. This sauce is also wonderful as a dip with pita chips.
If the thought of cucumber in your salmon burger has you raising an eyebrow, then have faith. They really make these burgers outstanding. They keep the salmon moist and perfectly done when grilled. Greek salmon burgers are a summertime garden inspired favorite.
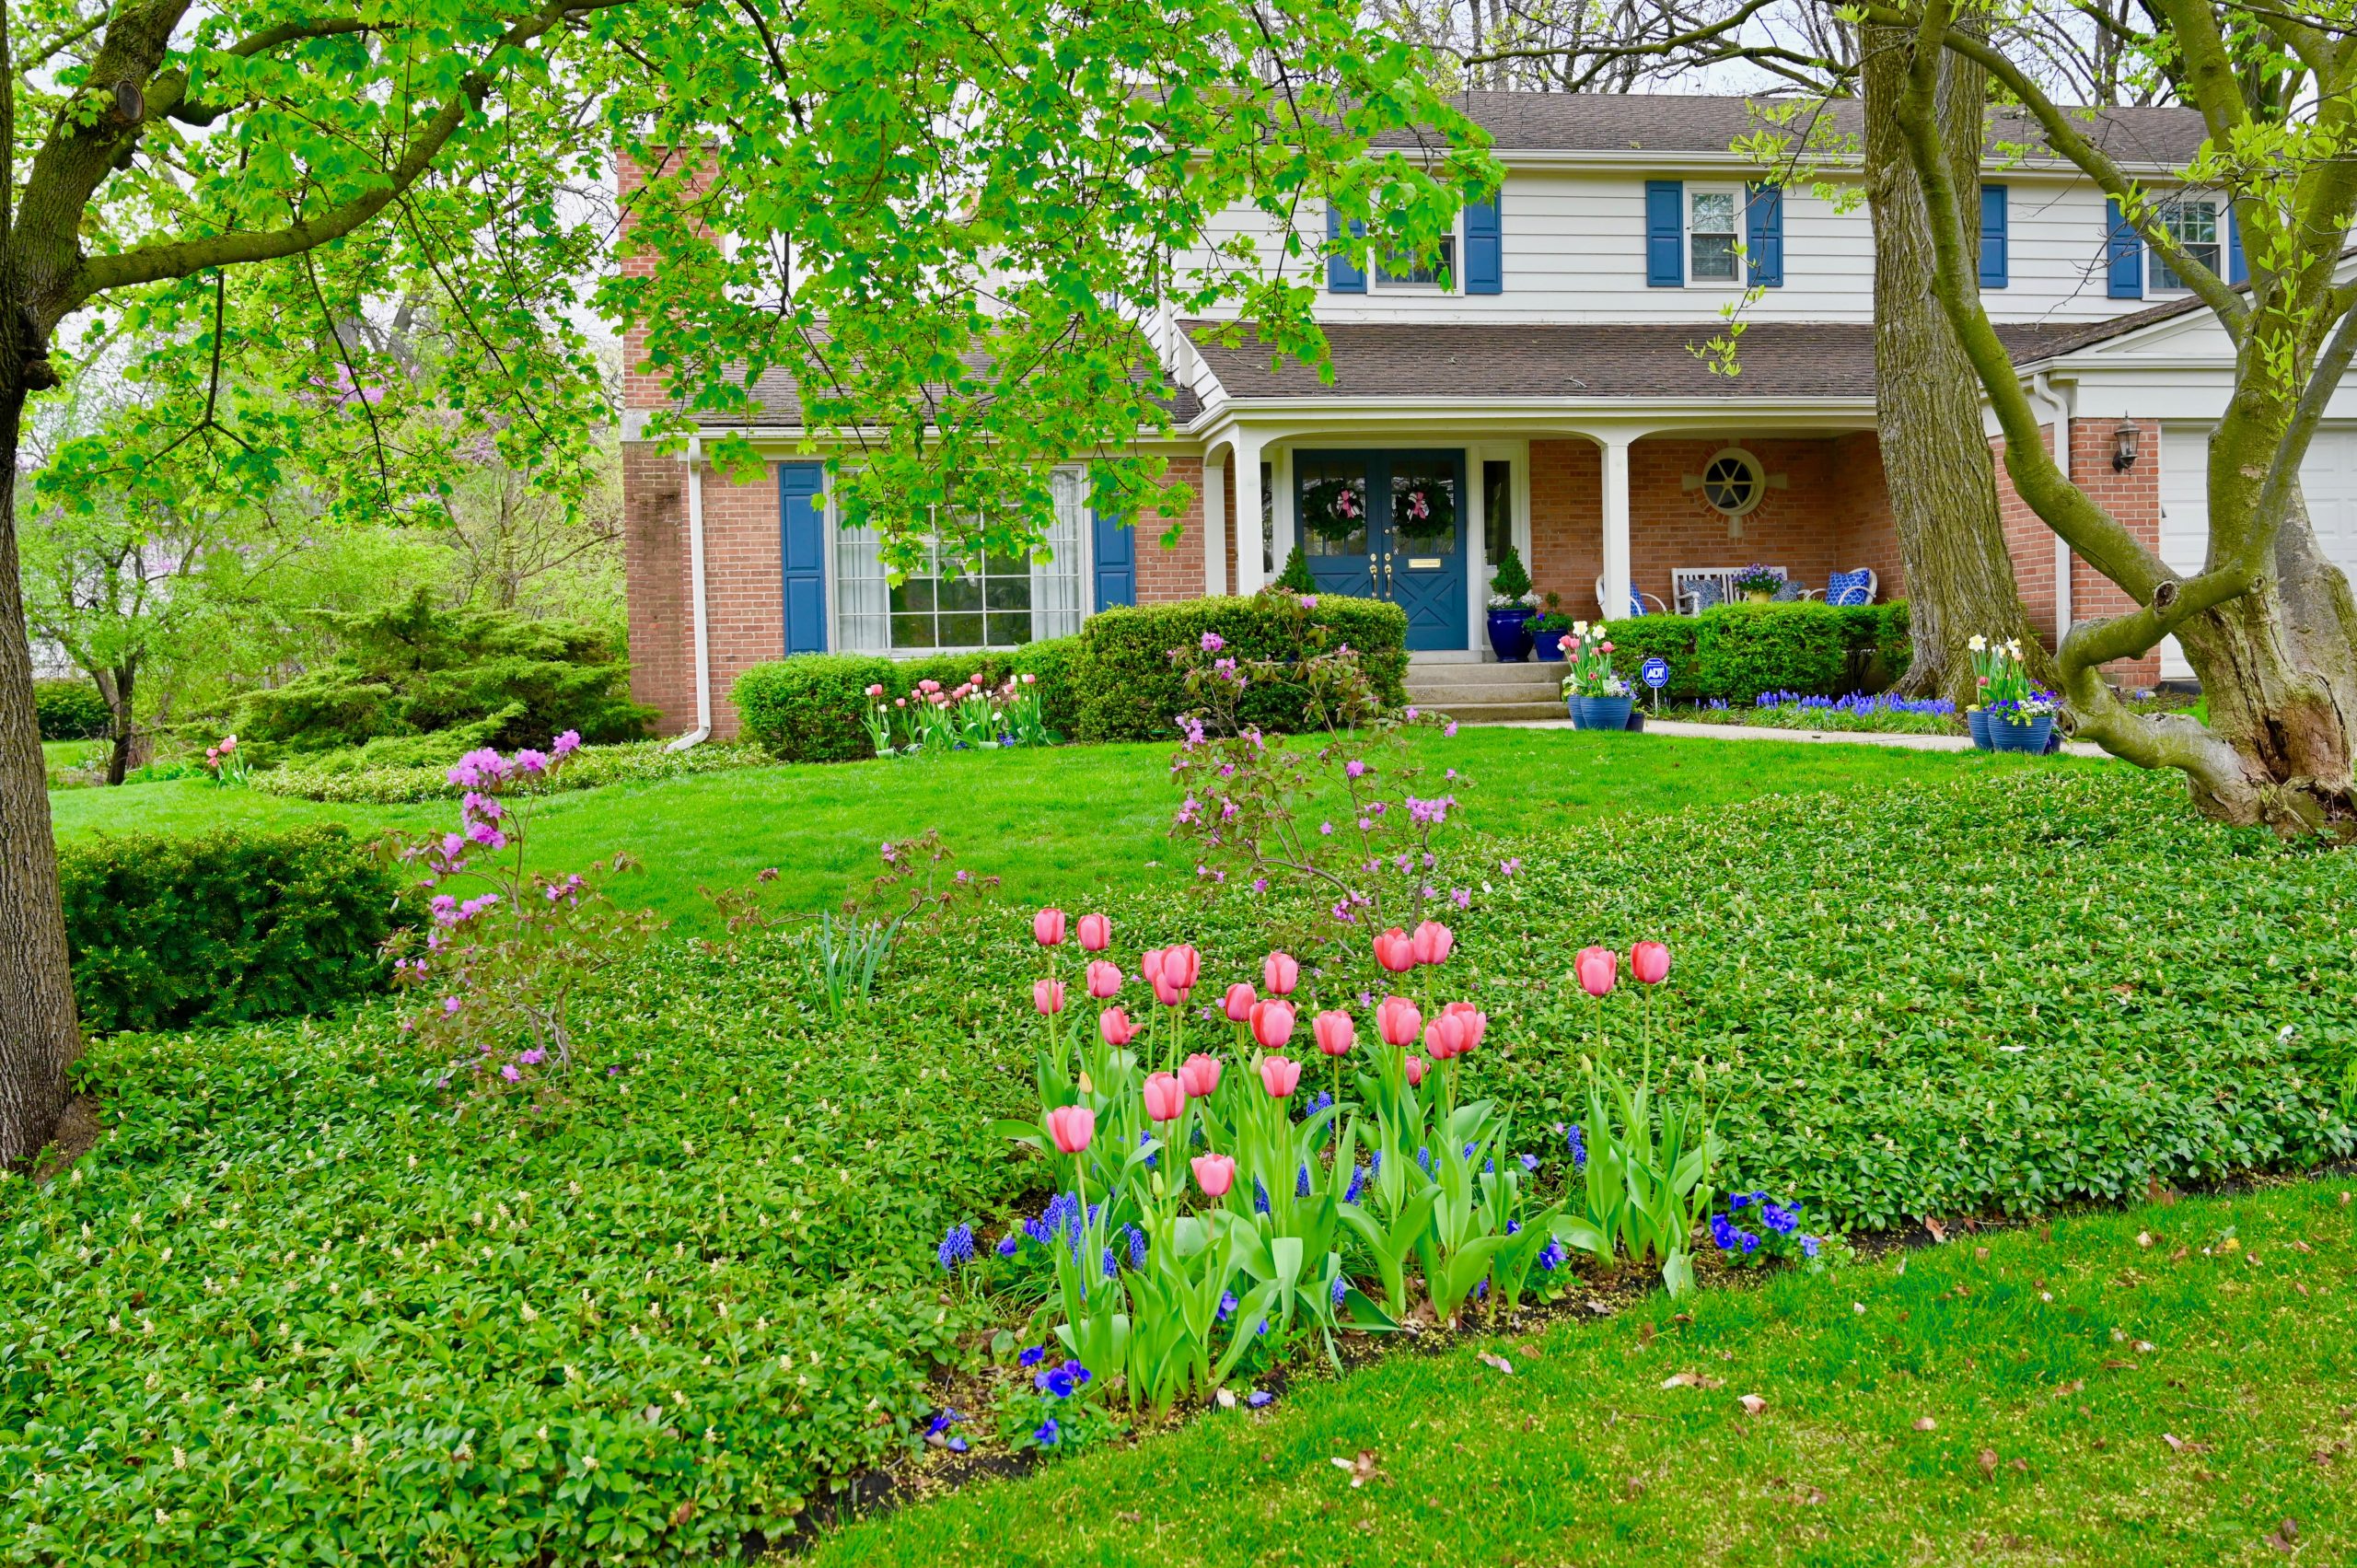
Every fall I dream, plan and plant for this moment. I wait with anticipation as the winter snow and ice arrive and then as if by magic a warms breeze blows in and suddenly spring arrives. The sunshine and longer light filled days usher in a blossom filled garden party.
One Chicago spring blossom party was all it took. Suddenly I was smitten with tulips. I had to find a way to create my own spectacular tulip garden.
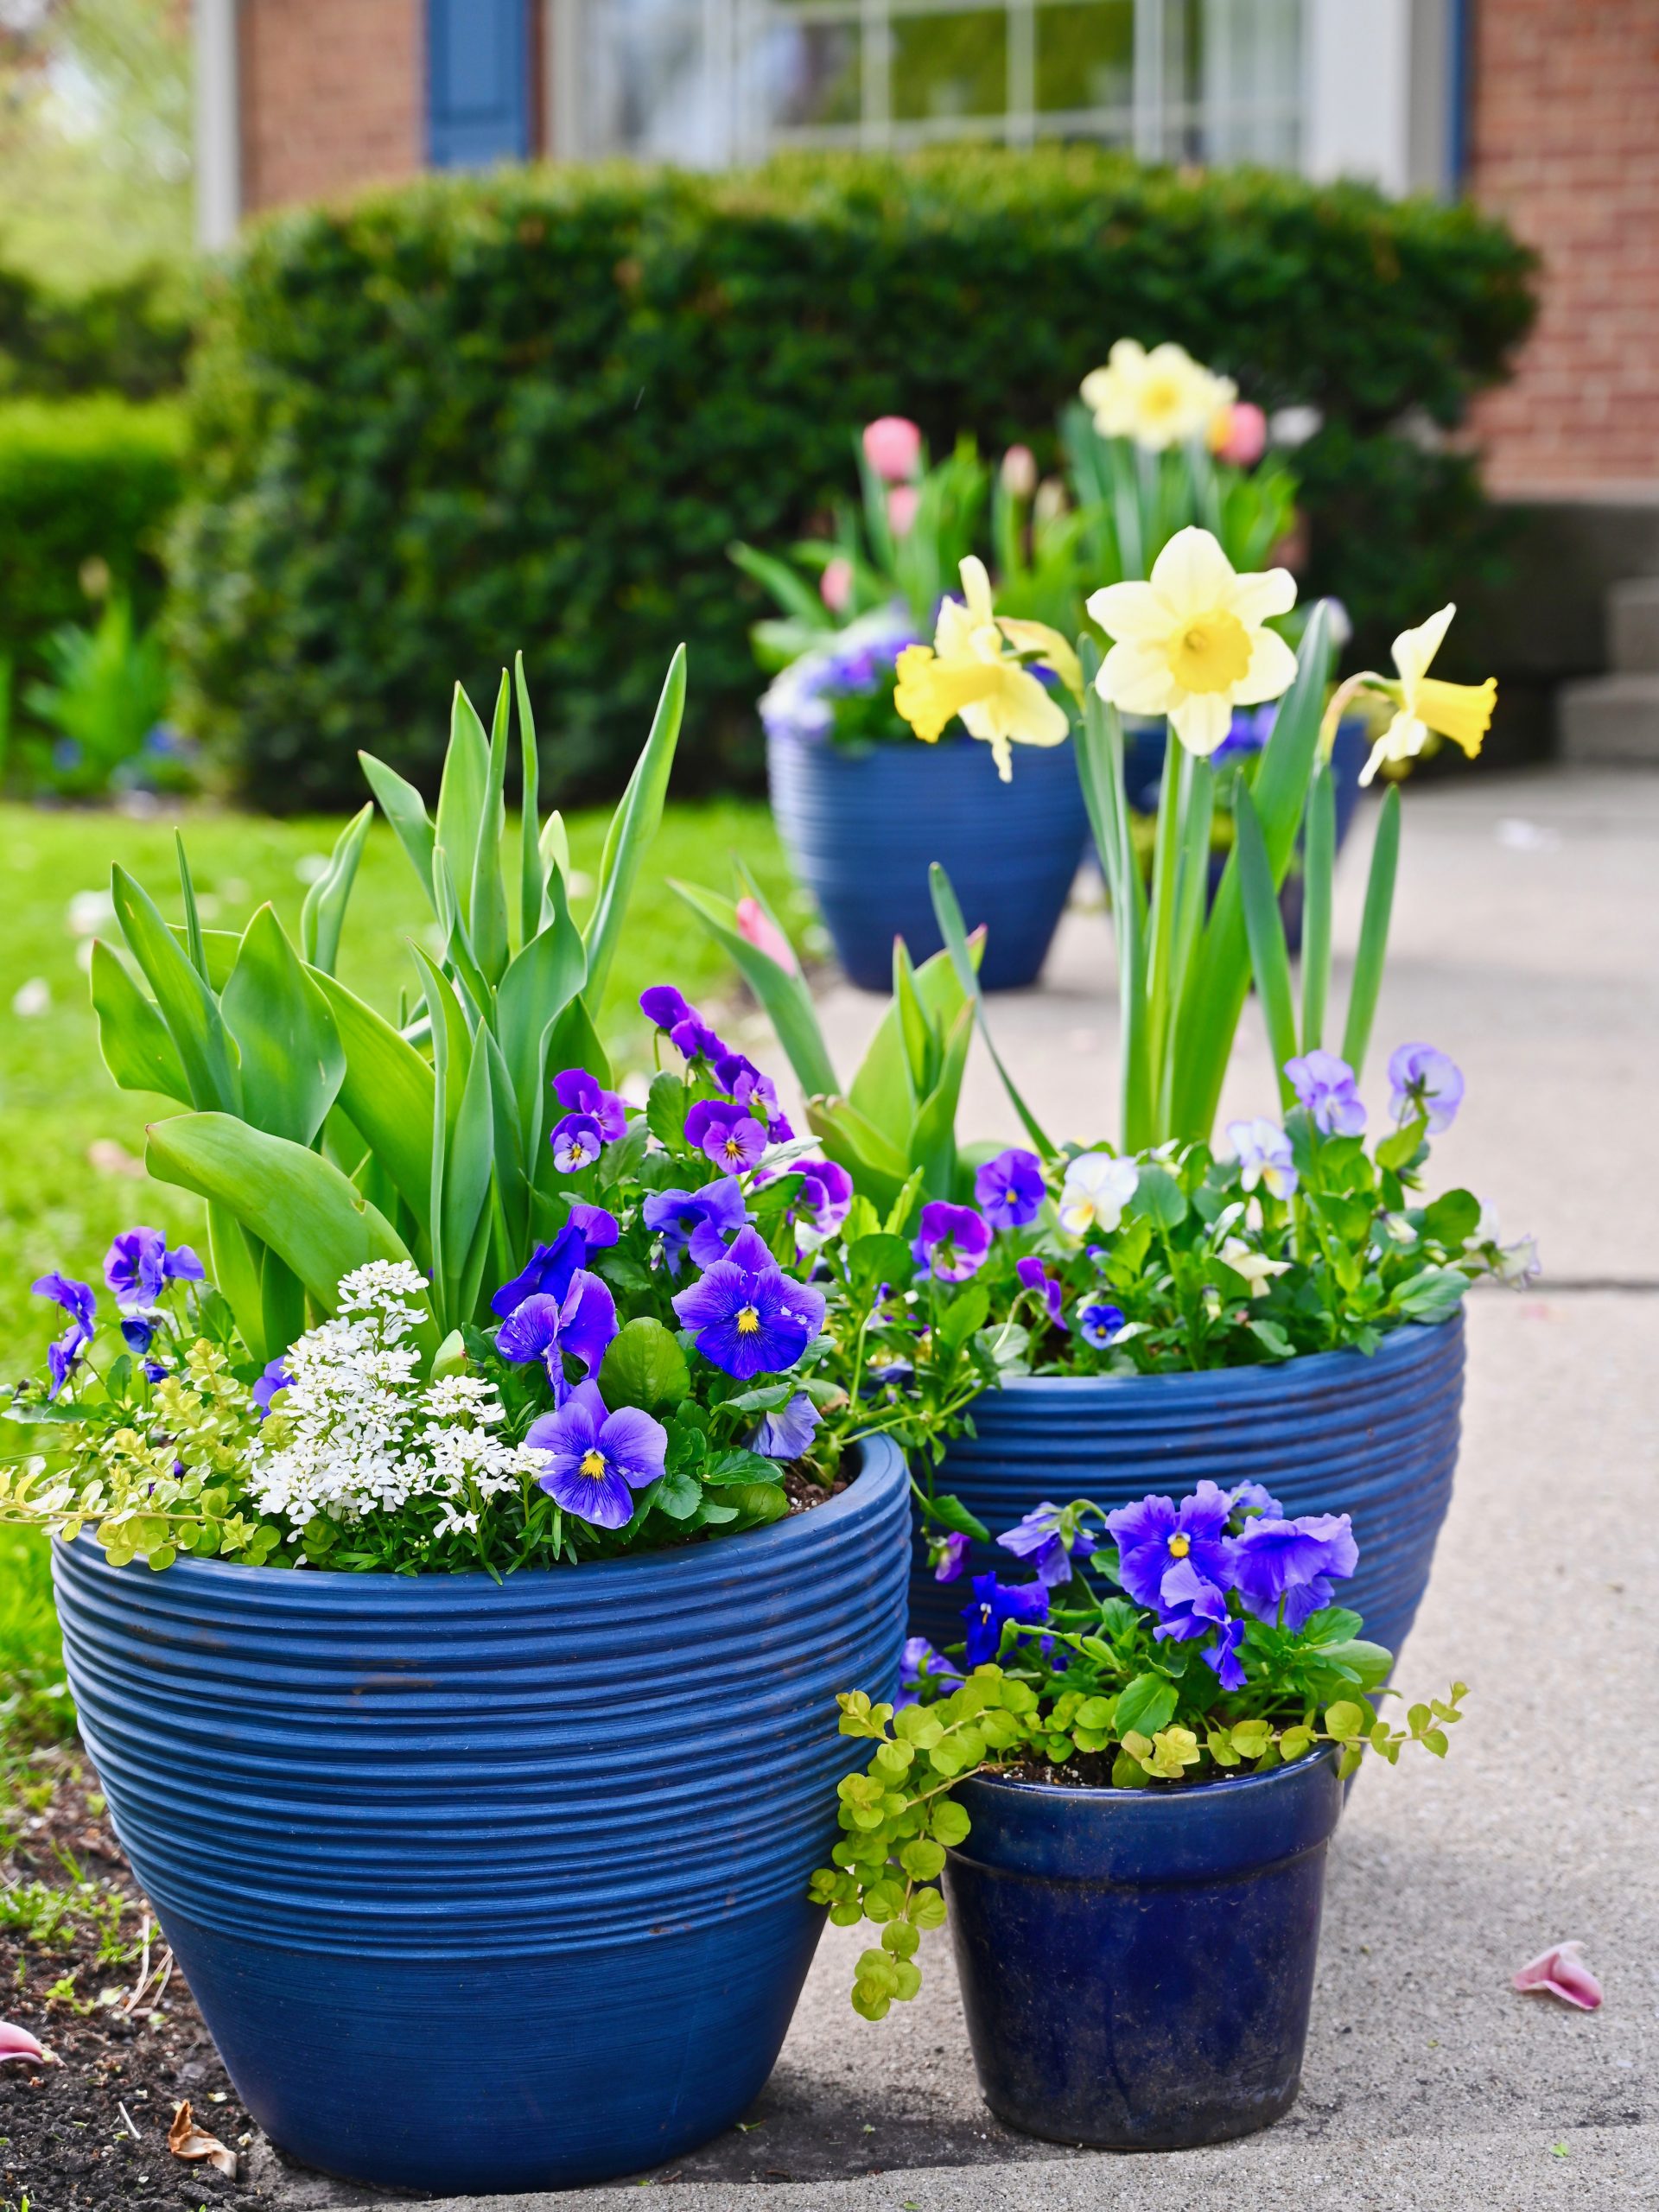
These are the bulbs flower pots that I wrote about this fall. I burried nursery pots of bulbs in a side flowerbed and then as they began to grow I dug them up and planted them in collection of flowers pots.
When I began four years ago I planted 150 bulbs, mostly muscari and tulips. However, what I found was 150 bulbs was simply not enough. The tulips were so gorgeous that I began gardening. I wanted to create more beautiful moments and places. The only problem with becoming a gardener is the temptation to grow more and more every year. I love the thrill of creating something beautiful.
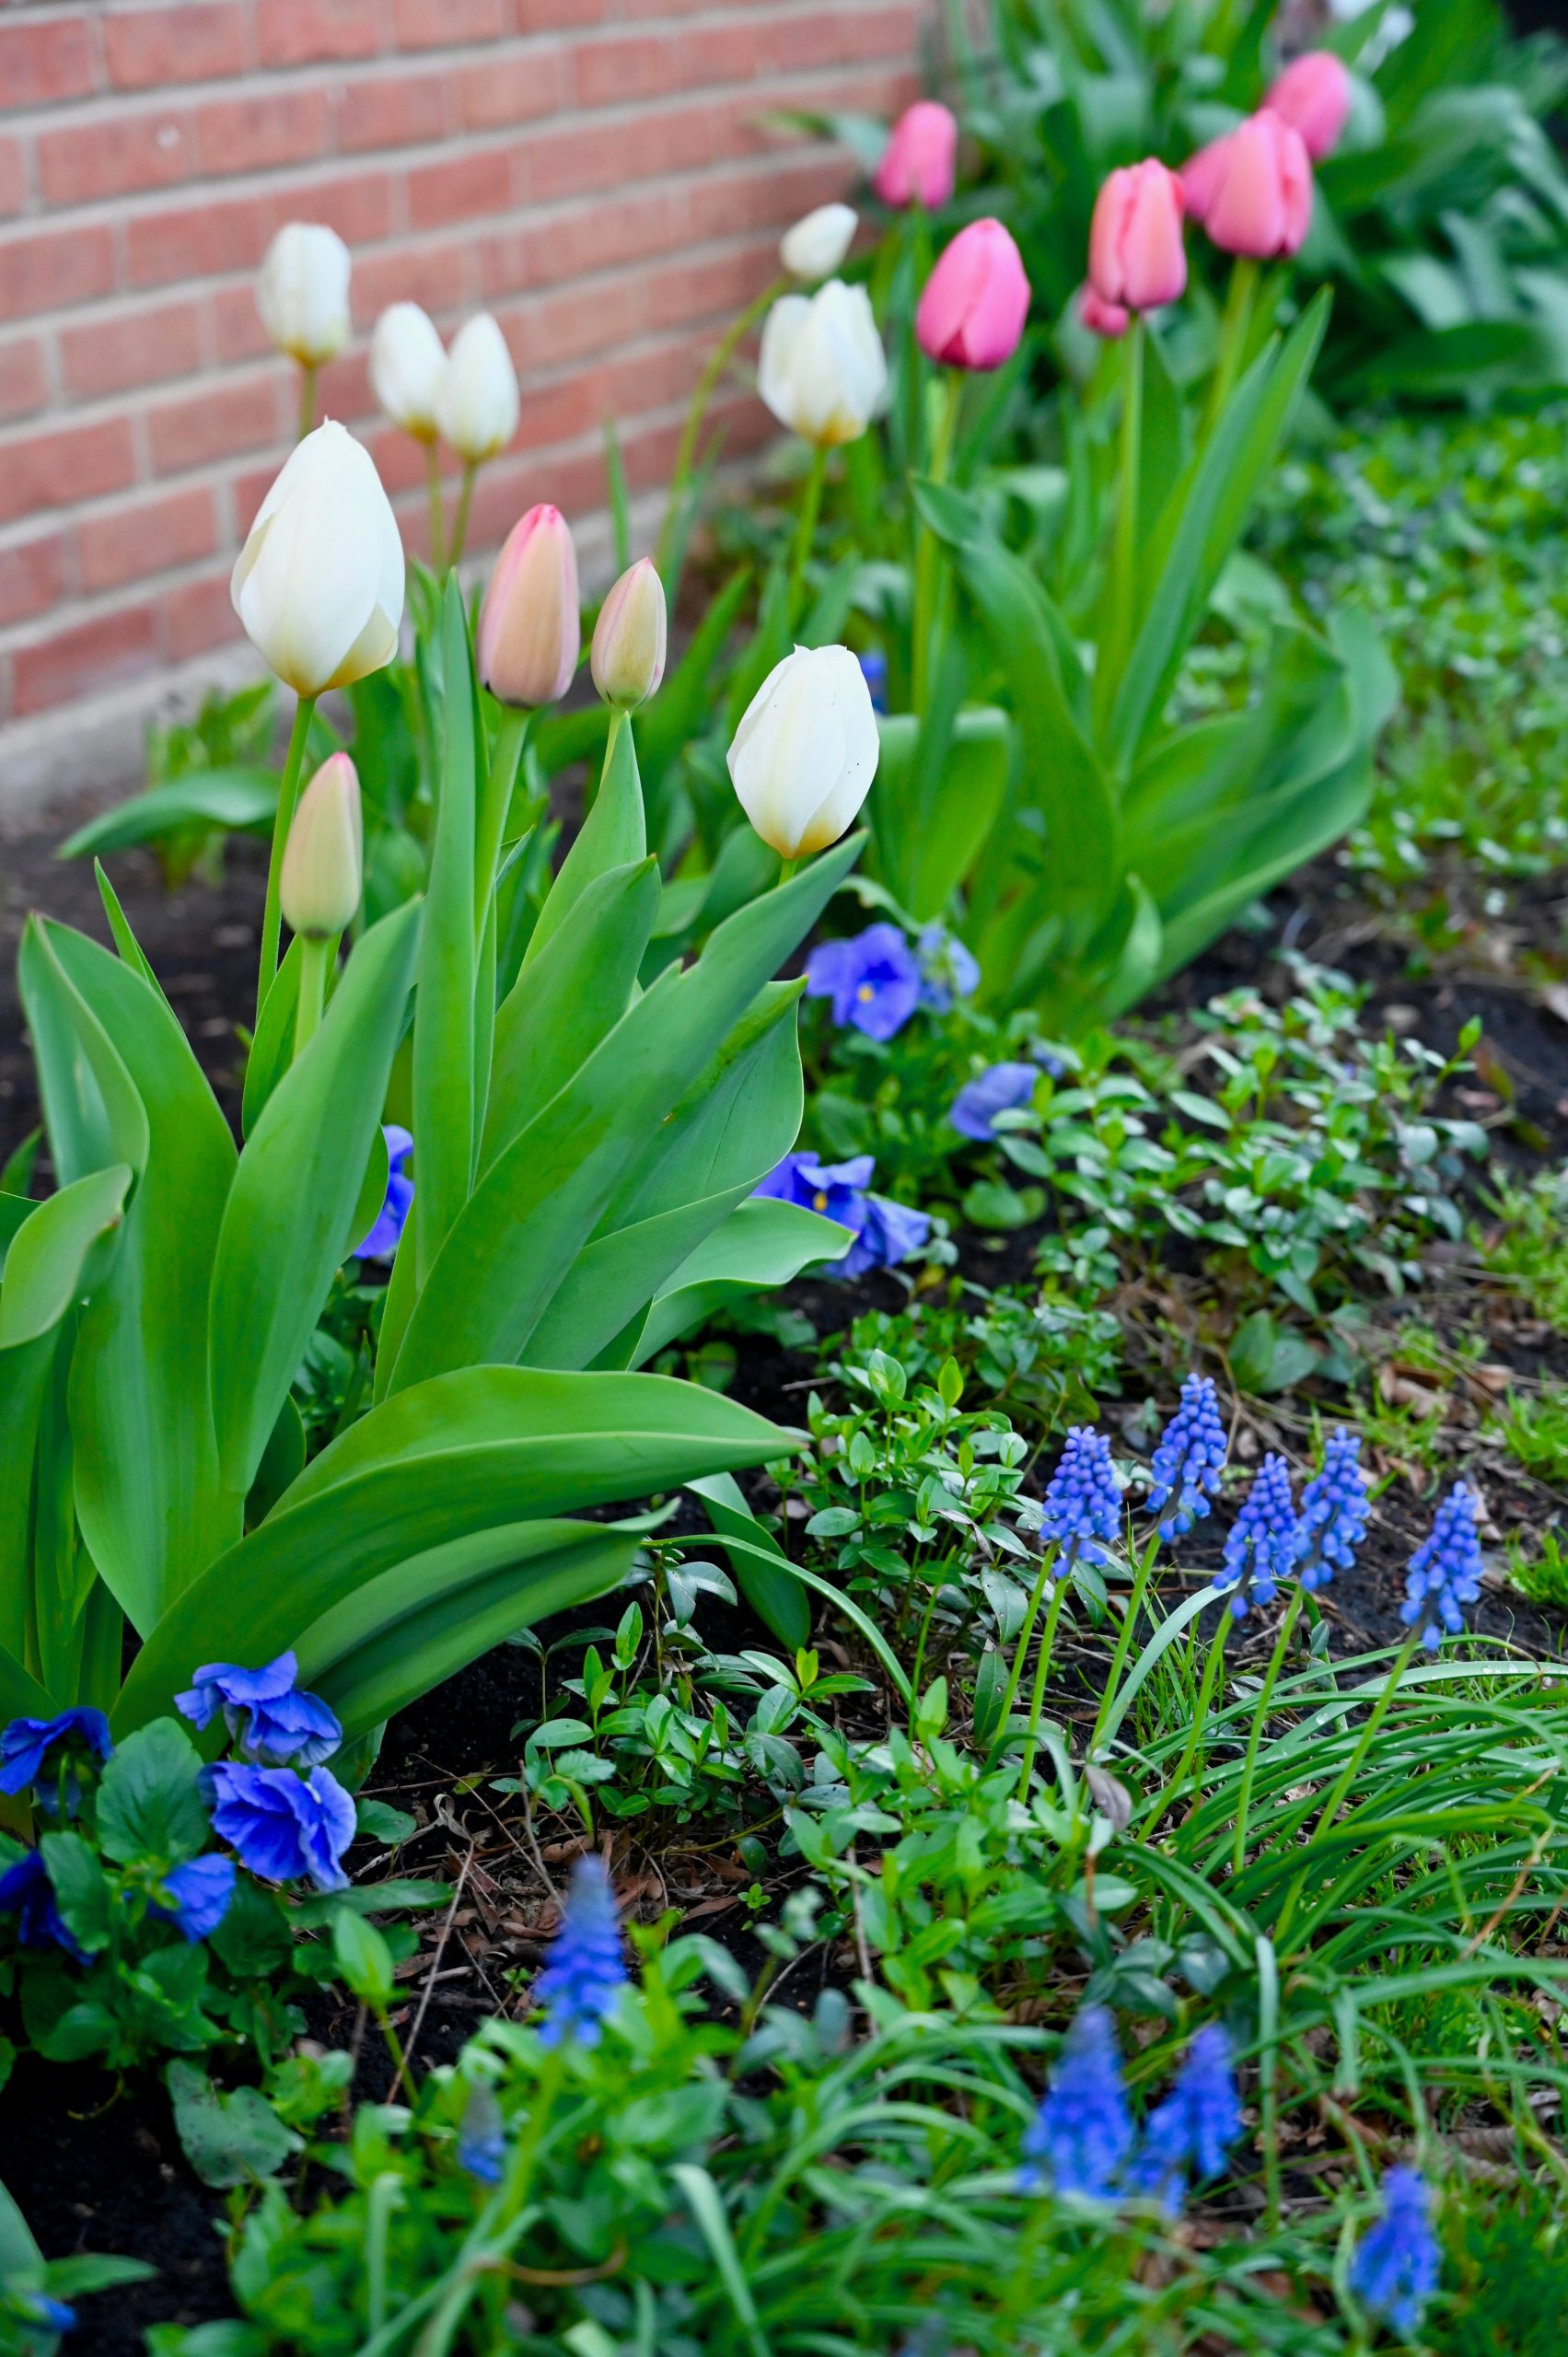
I filled the base of my flower pots with violas, pansies, candytuff and creeping Jenny.
Each year I choose a different pallet and mix of colors. It makes spring exciting because I wait in wonder as the buds begin to open and the blooms unfold.
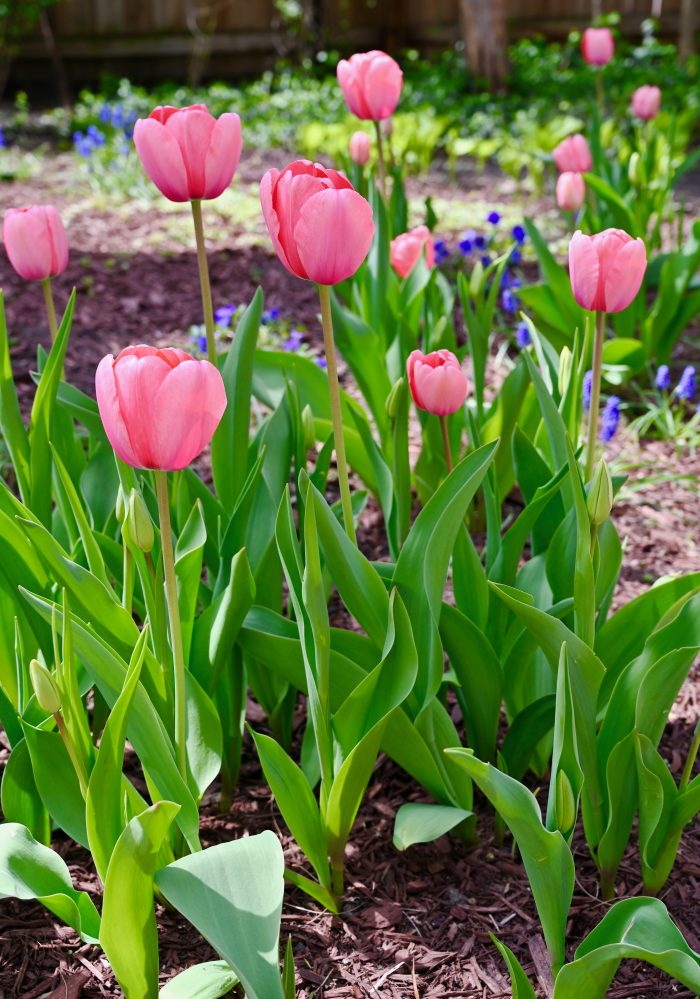
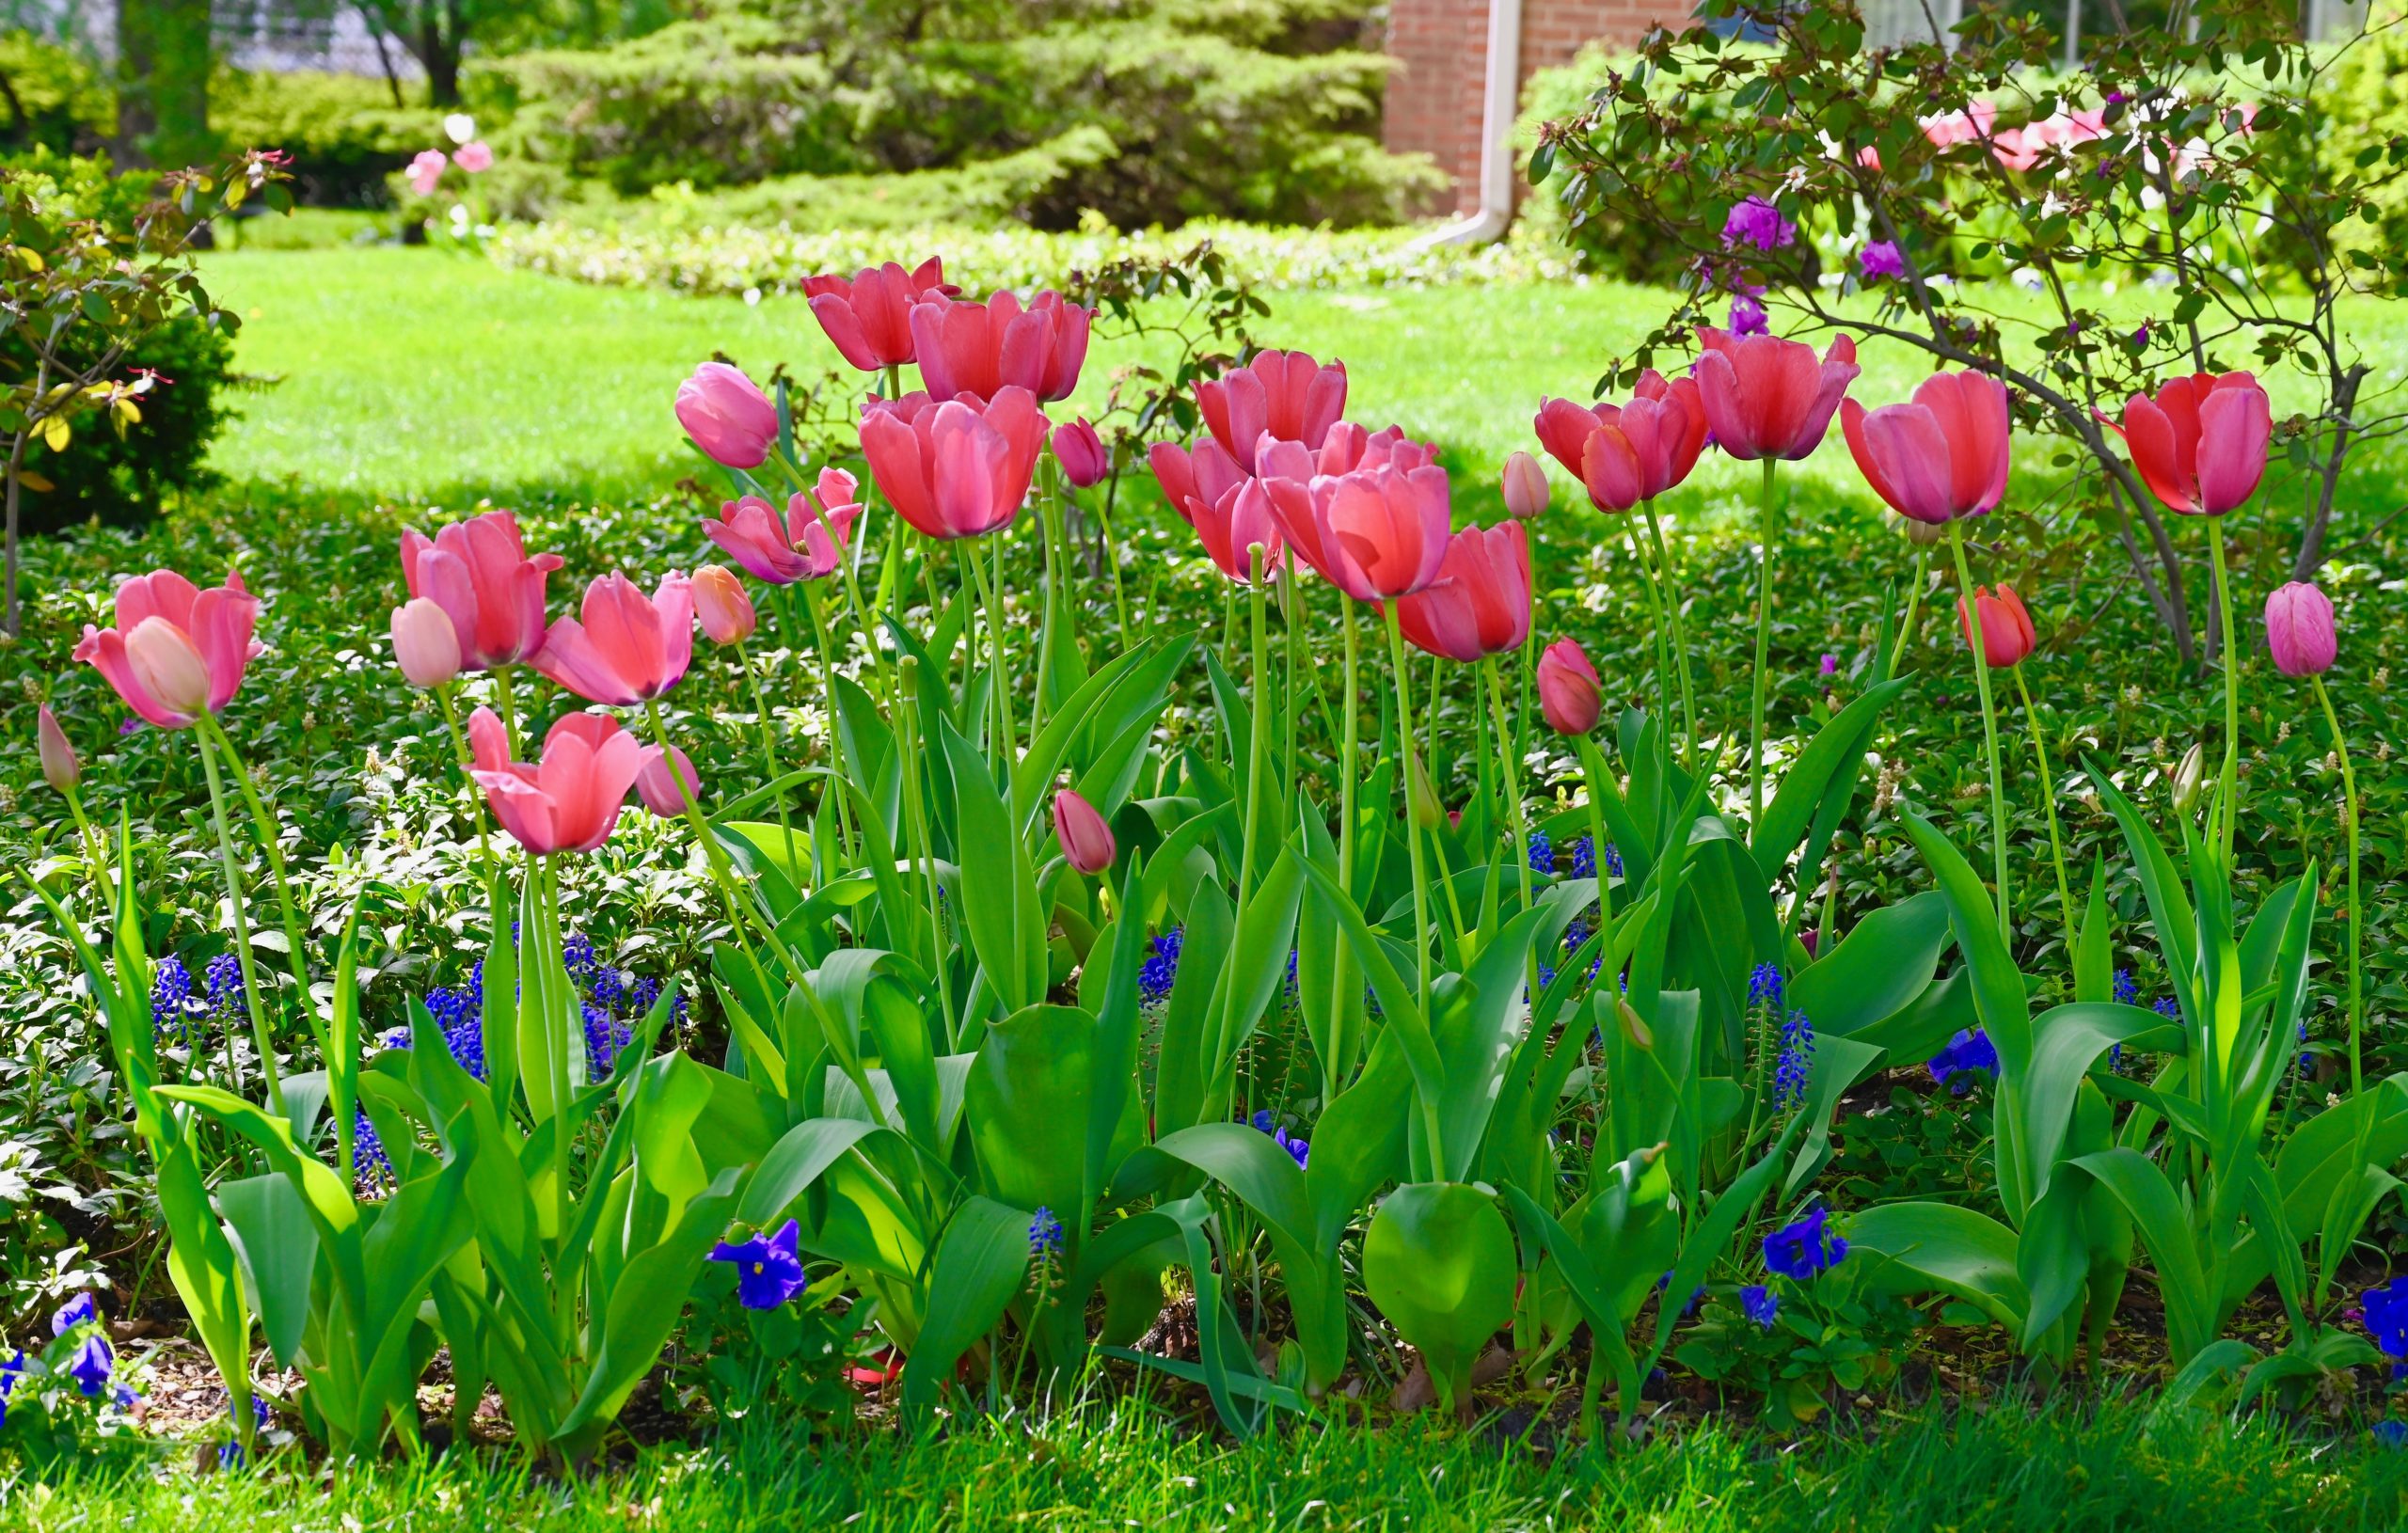
This year in order to keep the tulip party going I planted a greater mix of early and late season tulips. My front flowerbed above had pink tulips and Ma Bell daffodils and as the pink flowers and daffodils began to fade the white clearwater tulips began to shine.
Colorblends best pink tulips
My favorite place to spend time each spring is my back patio. It’s my secret garden of sorts. The place that few people see. I plant it because it gives me such joy. This time of year we spend as much time as we can out here.
I planted more pink impression tulips here as well, but I mixed them with an equal number of a late blooming French Rose tulip mix.
As I was making a cup tea this weekend I looked out the window and saw an iridescent humming bird flit about. It was so tiny that it seems to disappear as it danced from to flower to flower.
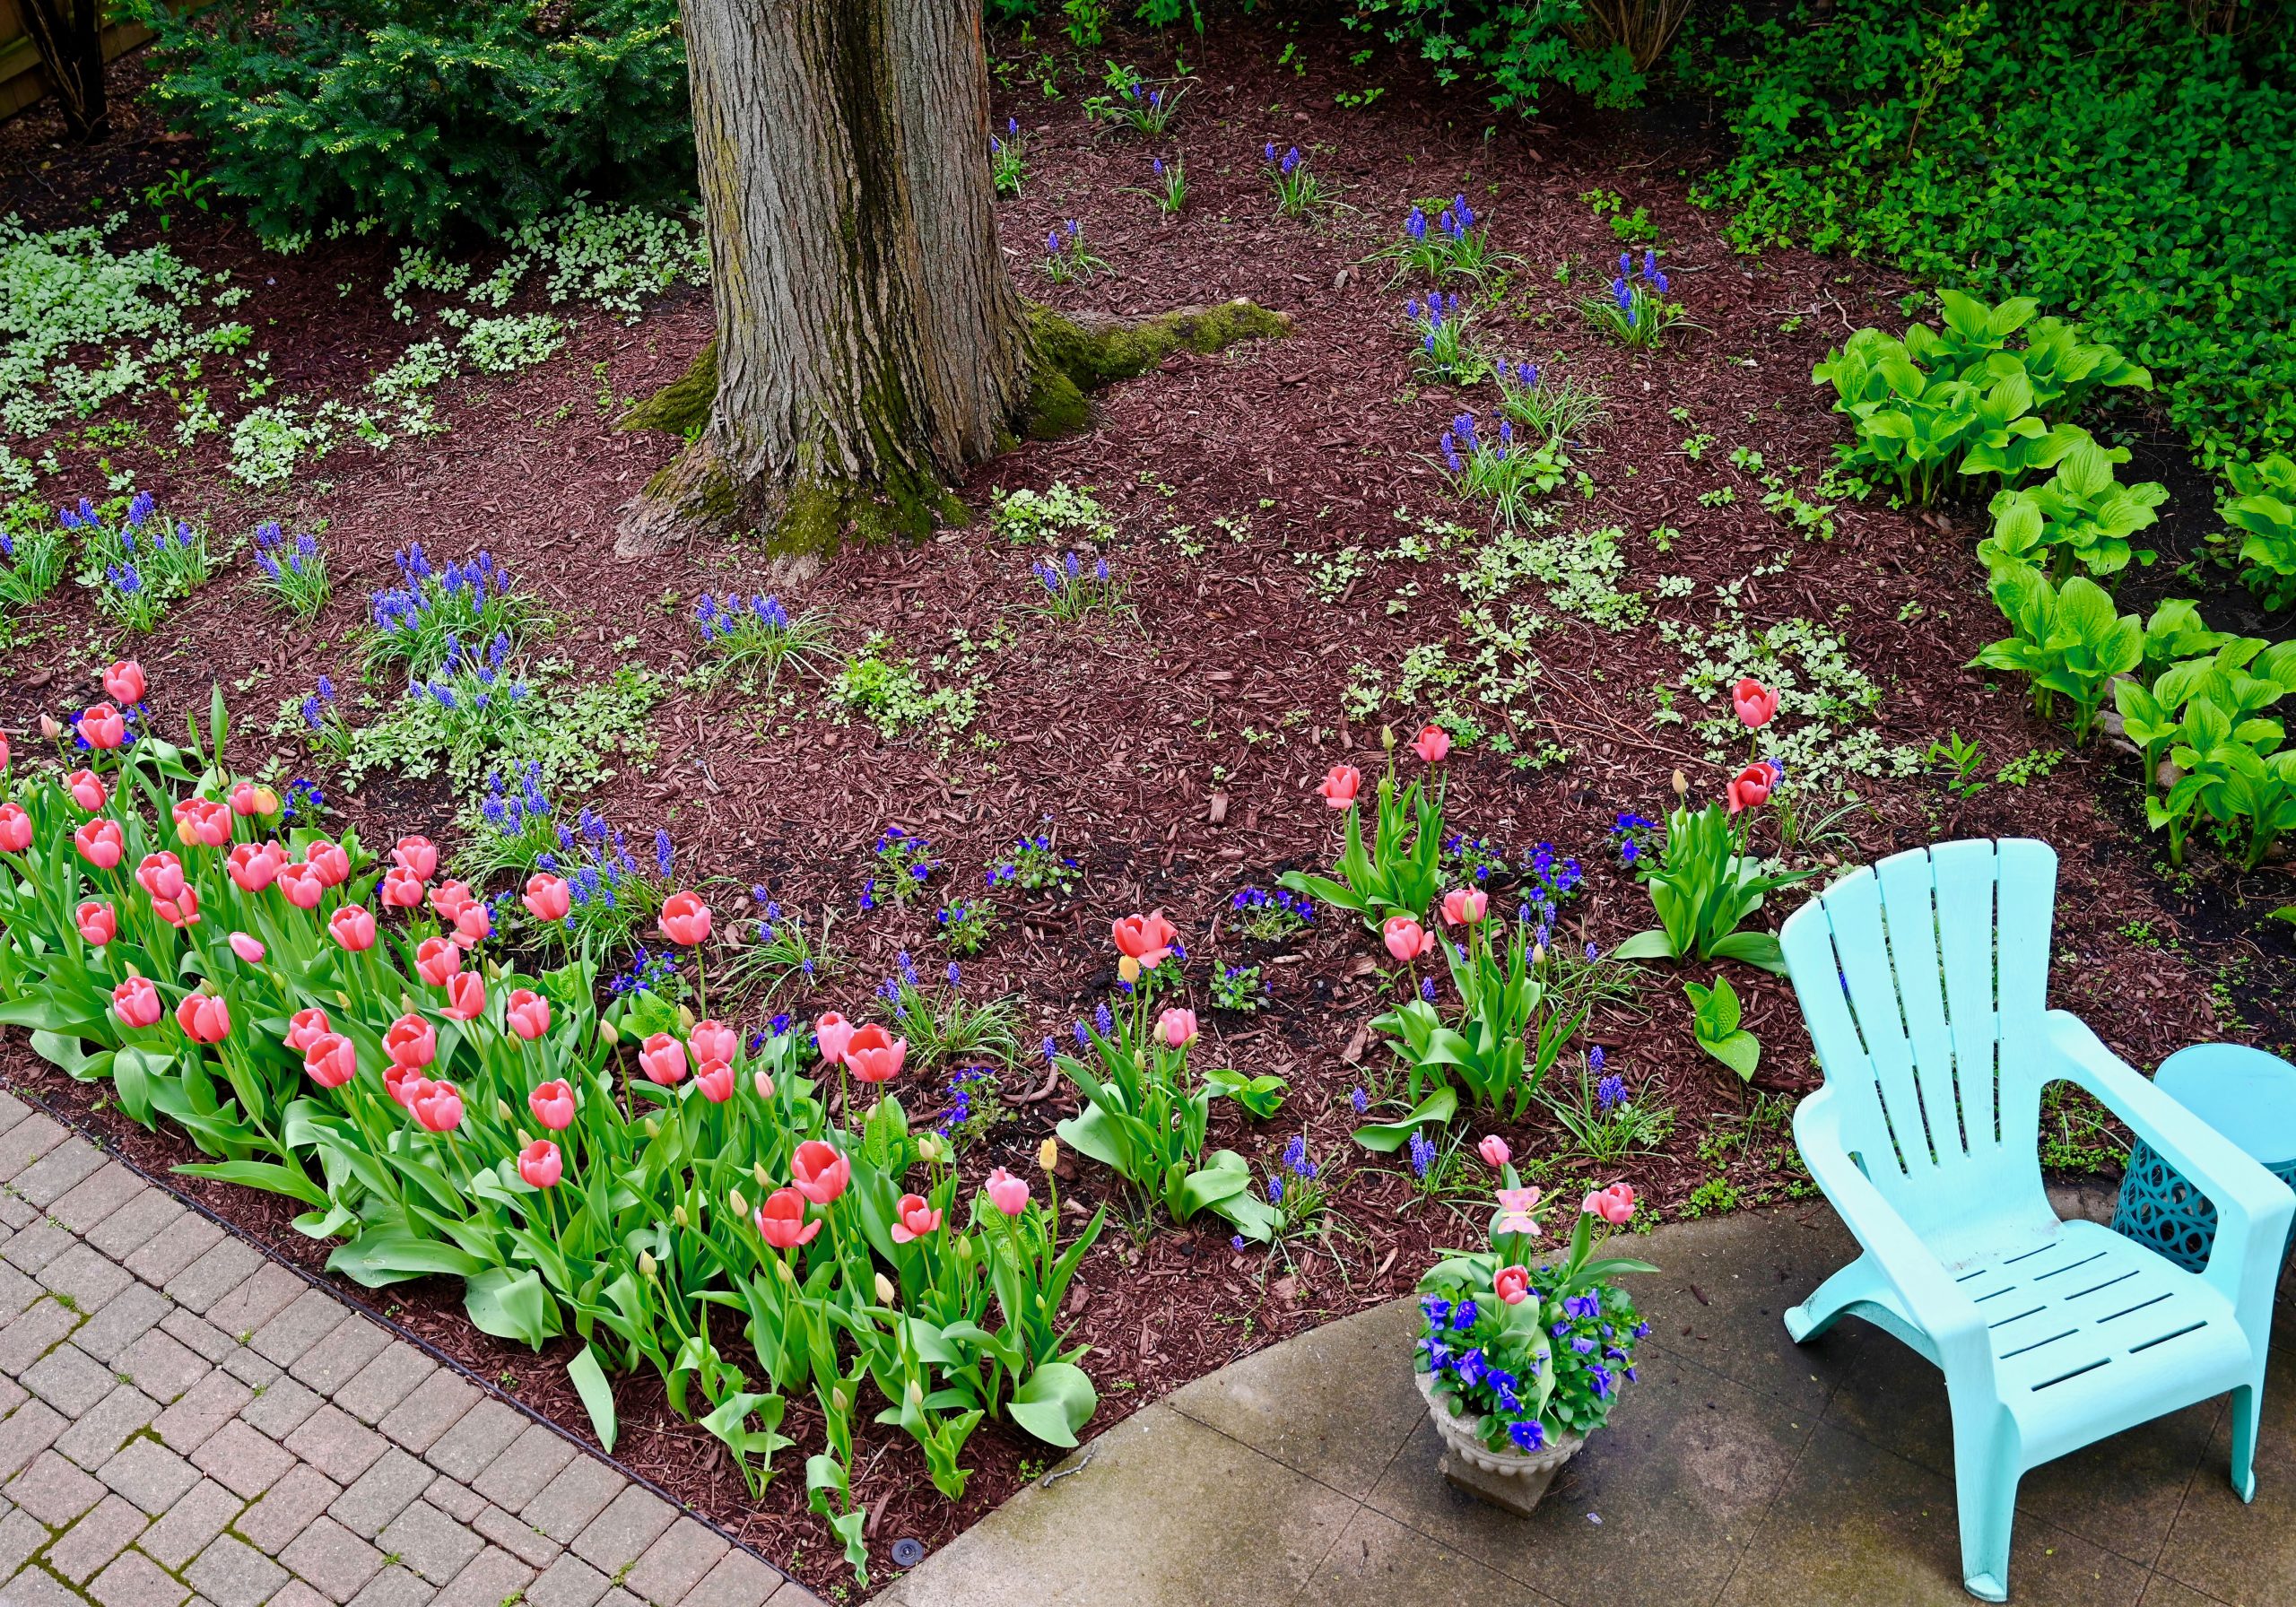
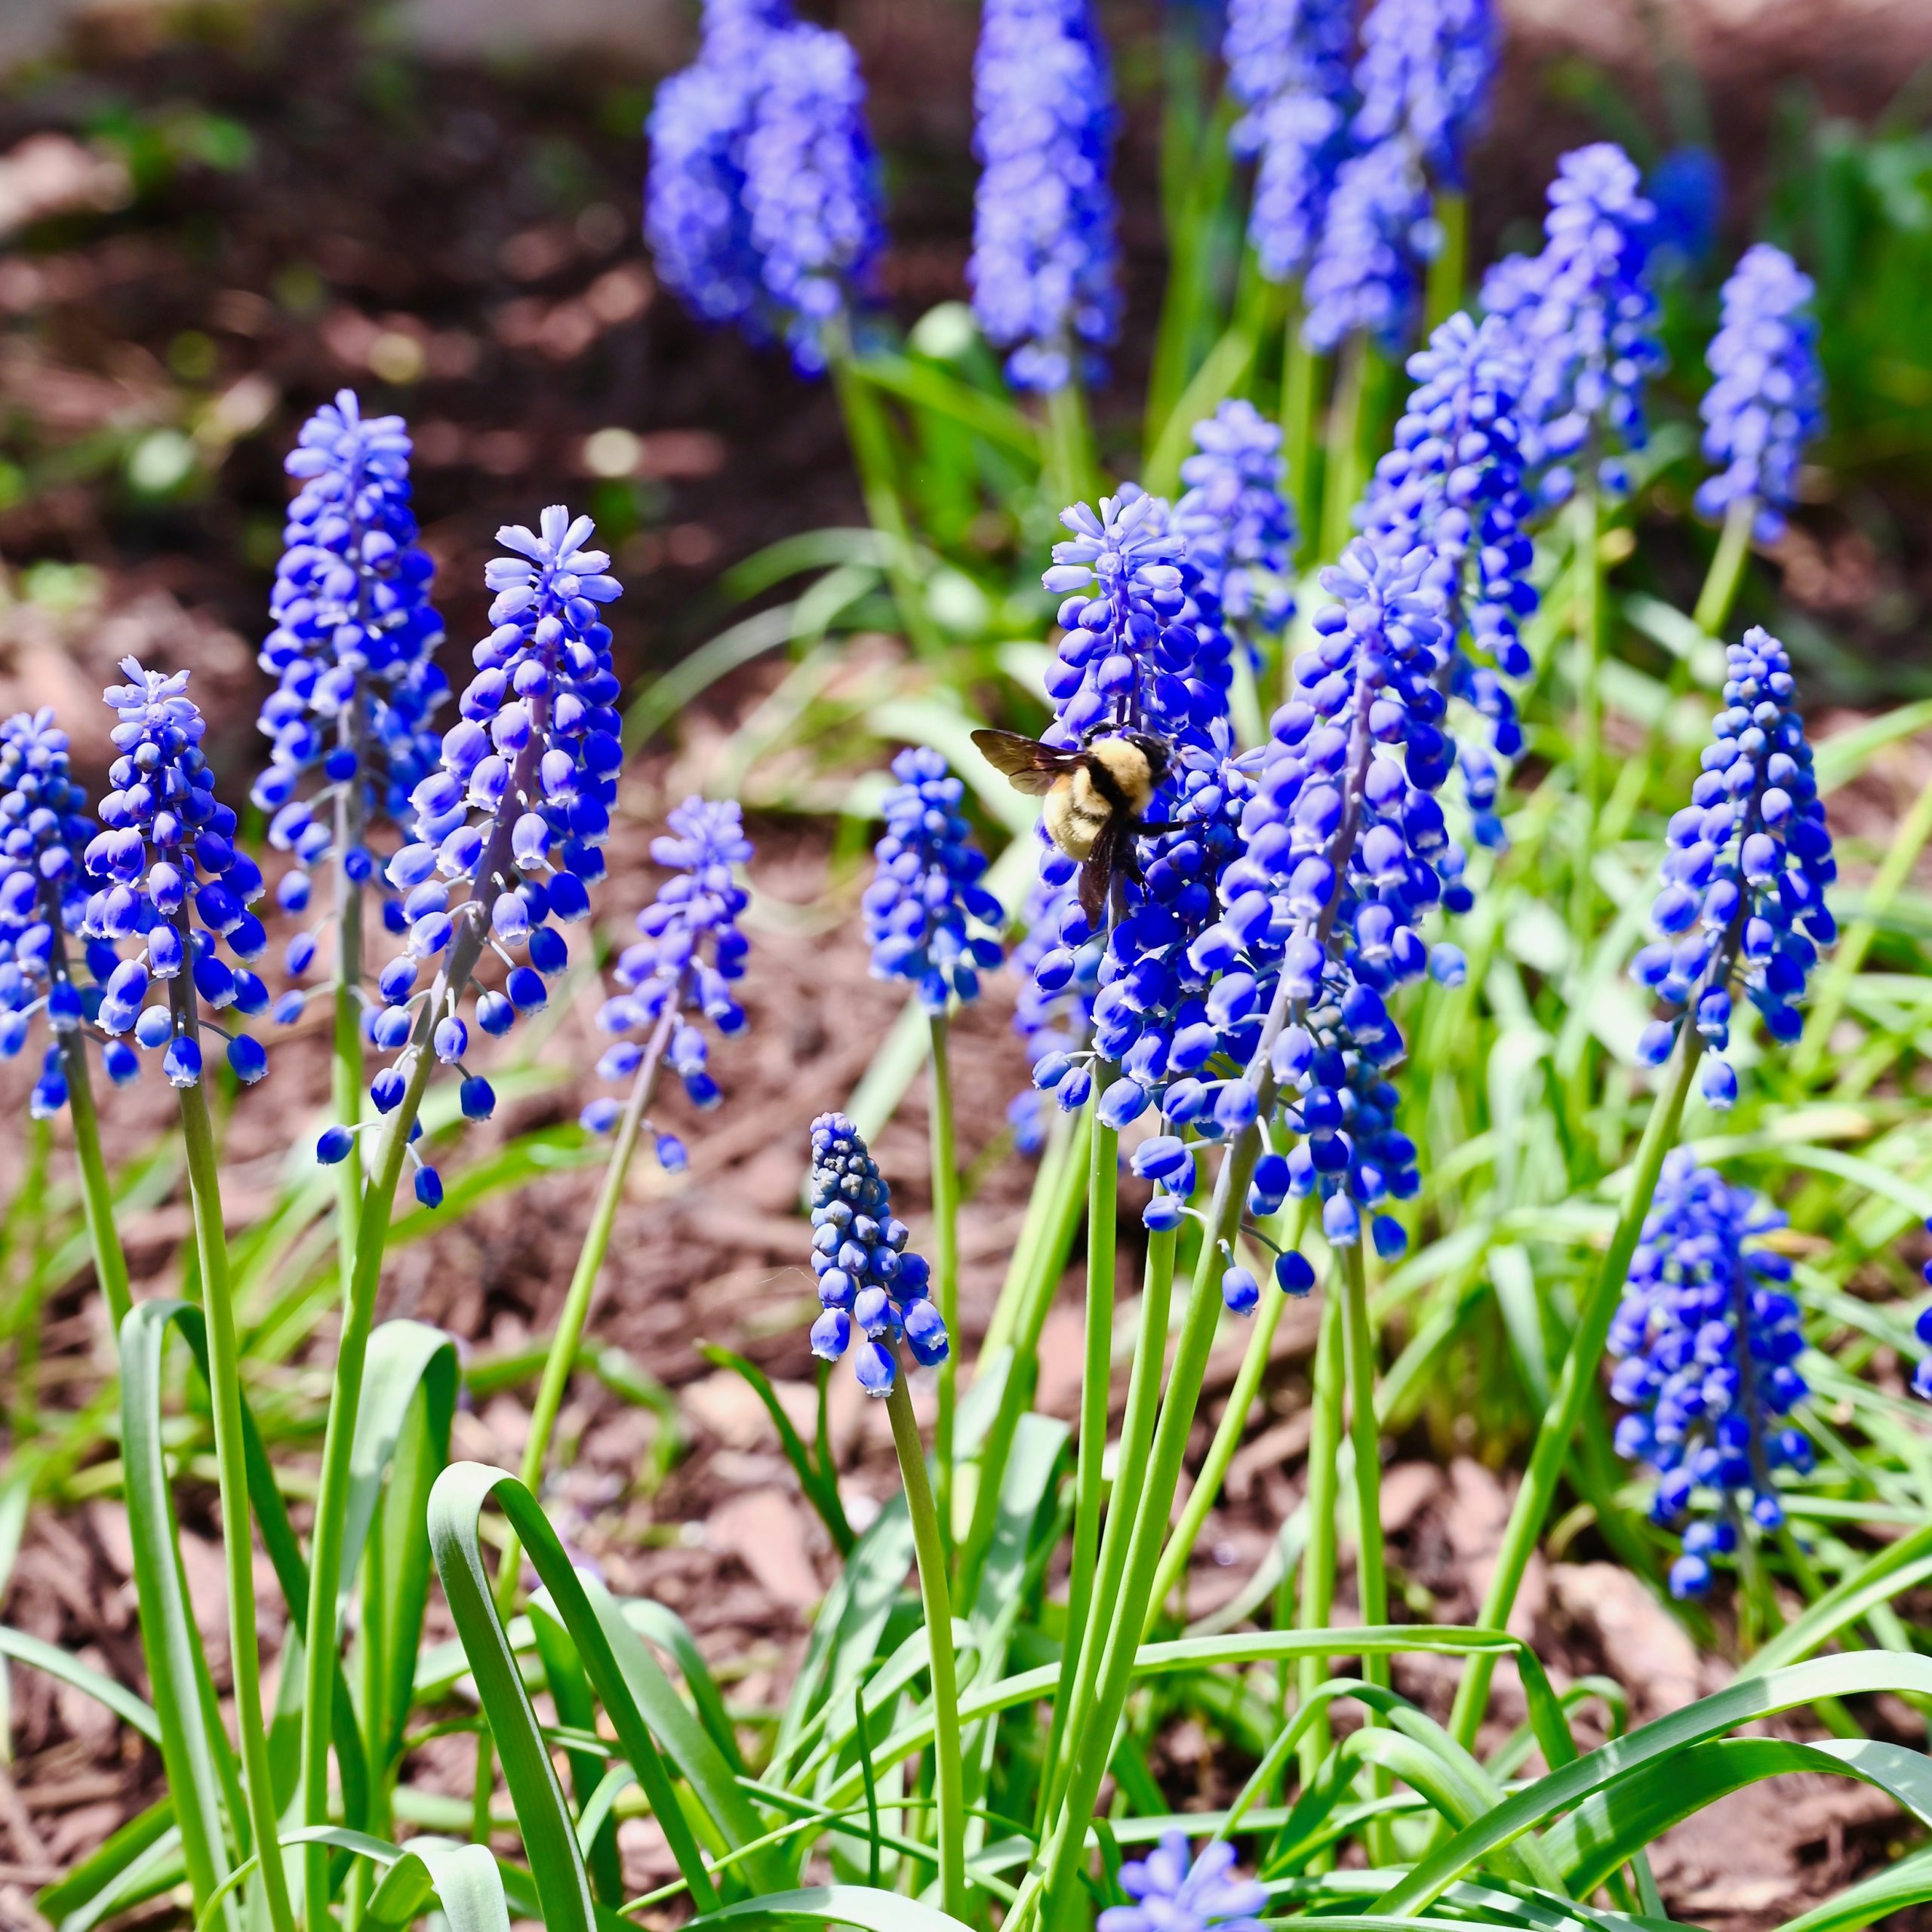
The muscari I planted have thrived under the trees. Their bright blue blossoms are one of my favorites. The bees have come to visit too. I love to sit and listen to the sounds of spring. The wind rustling the leaves and the birds chirping and singing a happy song.
Another flowerbed in my backyard has a mix of early and late season tulips. First came the pink and white tulips and next a colorful blend of apricot, orange and rose.
The pink tulips have been cut back now, but the spring blooms continue with this second layer of late spring color.
Gardening this time of year feels like painting with a touch of the divine. The colors and blossoms have me loving every moment of this spring tulip party.
Caramelized onions have a savory sweetness to them that adds a certain magic to many classic French dishes. I happen to love them in quiche. My favorite quiche to share is a caramelized onion and bacon quiche. This recipe is something that I have been making for years, so I thought it might be a good spring recipe.
Quiche is often thought of as being a brunch or breakfast dish, but in our house it is usually something that I make for dinner. I like to serve it with a small Caesar salad. or if I am feeling fancy a mandarine orange salad. I assemble everything and get it in the oven. I let it bake while I help my daughters with their homework. It’s an easy and delicious dinner.
1 cup sweet yellow onion (1/2 of a large onion), sliced into thin strips
2 tablespoons butter
4 slices bacon, cooked and crumbled (finely chopped ham could also be used)
1 cup shredded cheddar or Colby-jack cheese
6 eggs
3/4 cup cream
1/2 tsp kosher salt
1/8 teaspoon pepper
1 tablespoon chopped parsley or chives (optional garnish)
Preheat your oven to 375 degrees.
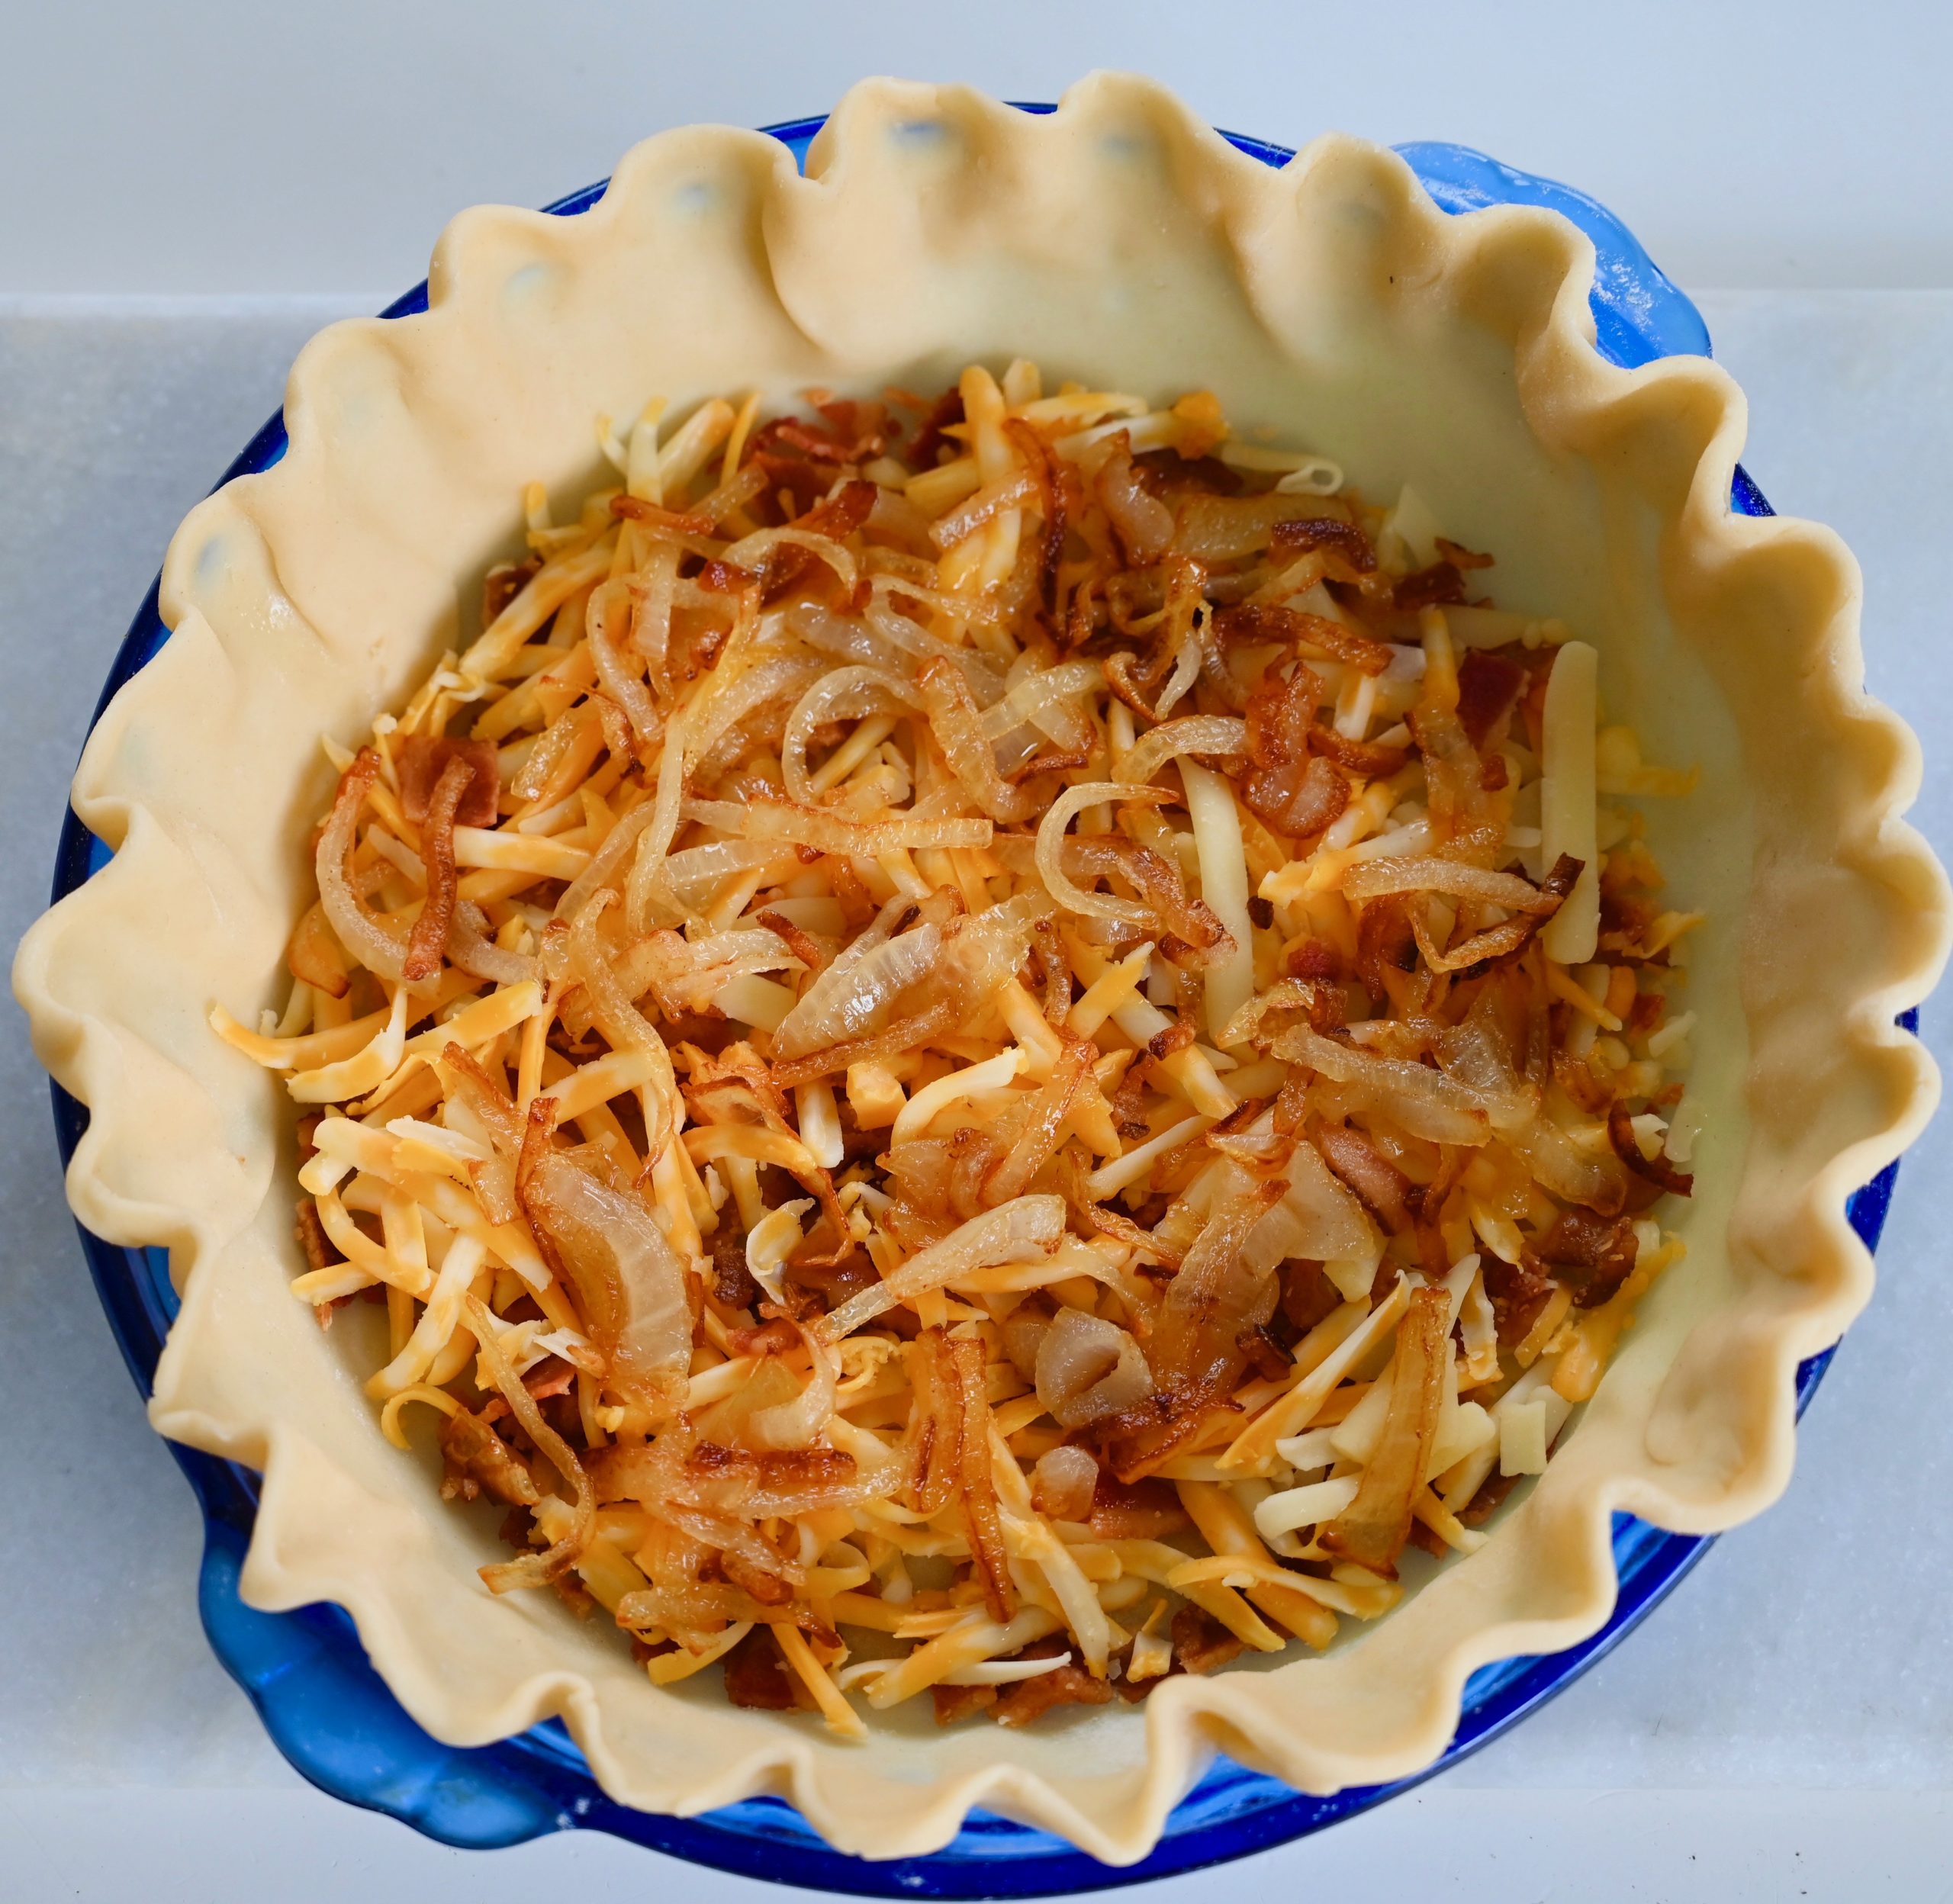
First, prepare your pie crust. Make sure that you press the fluted top of the crust to the sides of the pie plate to keep it from sliding down when it bakes.
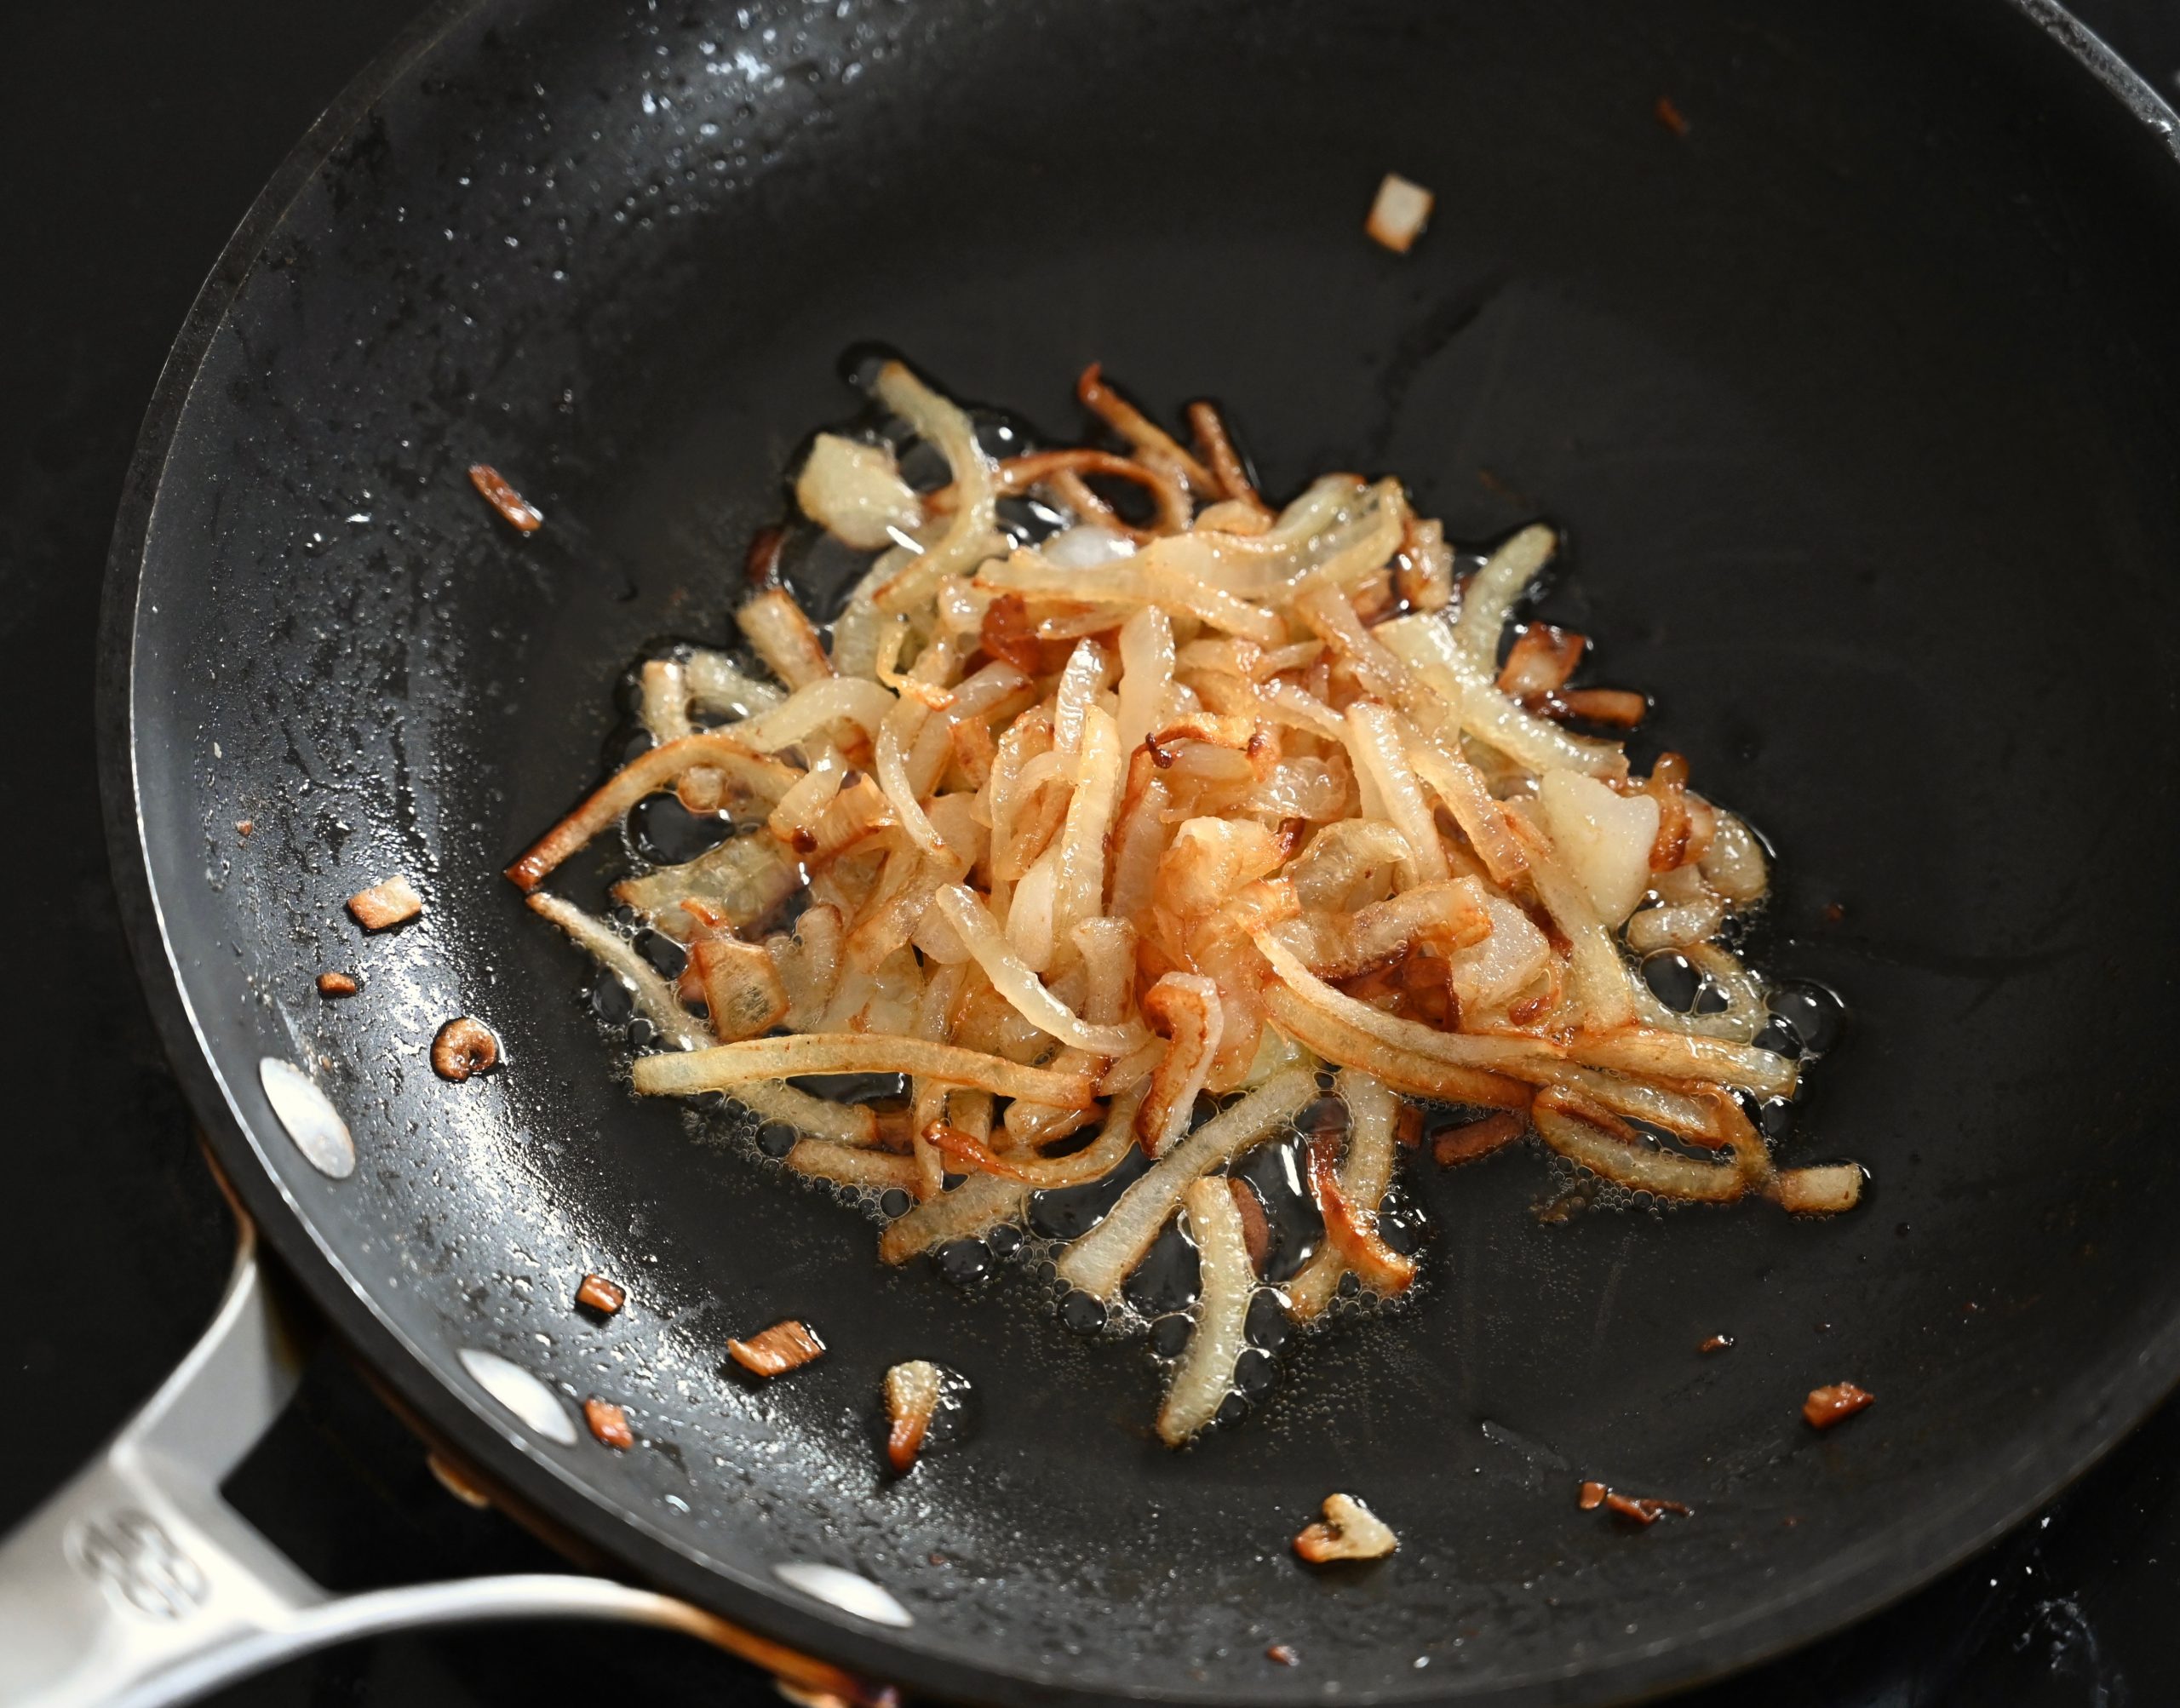
Next, caramelized the onions. Melt 2 tablespoons of butter in a medium sized skillet. Cook the onions over medium to medium low heat until golden brown.
Spread the caramelized onions, cheese and bacon evenly over the bottom of the pie crust.
Whisk together the egg mixture. In a medium sized bowl whisk six eggs and 3/4 cup of cream, add salt and pepper. Pour the eggs in the pie crust. Cover the quiche in aluminum foil that has been sprayed lightly with cooking spray. The foil will keep the pie crust protected while the filling cooks.
Bake the quiche covered in foil for 55 minutes. Then carefully remove the foil and bake an additional 5 minutes. You will know the quiche is cooked when the center is firm and the edges are beginning to turn a golden brown. Finally, sprinkle some finely chopped parsley or chives on top.
This caramelized onion and bacon quiche has a buttery pie crust with a delicious savory sweet onion filling. It’s a great dish for Mother’s Day or any spring meal. Sweet onion season begins in April so look for all those delicious Vidalia or Texas 1015 onions and cook up a simply delicious quiche.
Maison McCauley is celebrating four years and what a last year it has been. What I didn’t fully appreciate as I began this adventure is how much I would love the storytelling that comes with each recipe and project. My blog has become the best sort of writer’s notebook that I am constantly drawing from as I write for other publications. So thank you for reading and inspiring me along the way.
This past year as a cook I have desperately missed cooking for others. I can’t wait to till I can safely host a dinner party again and feel like I can share food with neighbors and friends. However, I remain especially grateful to still be able to share recipes on my blog. I have loved hearing how you have tried something new like French bread or chocolate cream or key lime pie. Cooking is such a comfort to me. It has seen me through so many hard times.
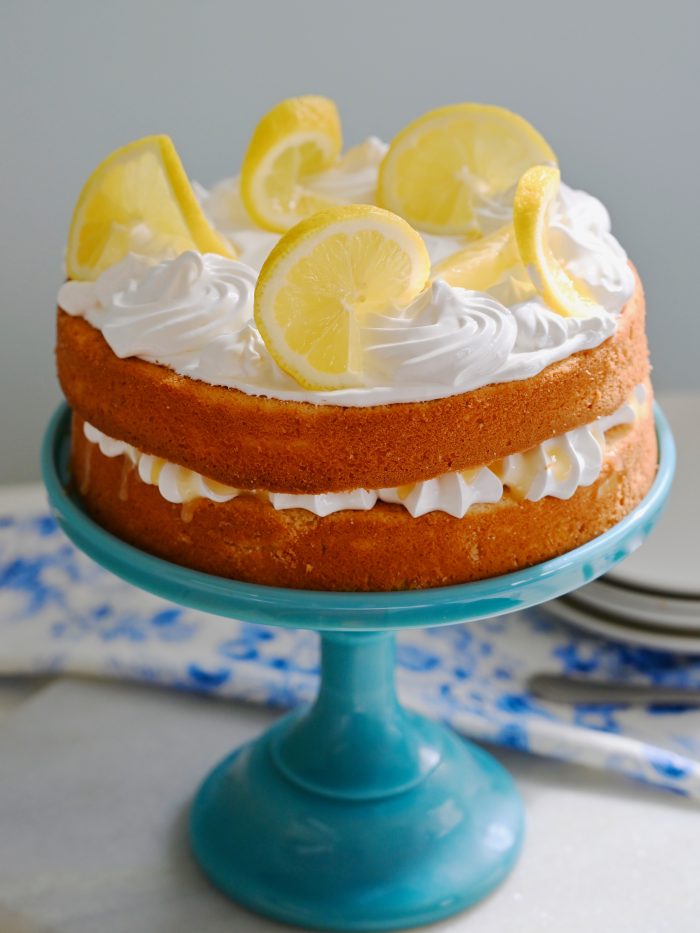
So to celebrate four years, 265 posts and my 130th recipe, I have a sweetly nostalgic lemon cake. This cake was inspired cake by my grandmother’s signature marshmallow frosting. A pretty, but simple cake that is perfect for celebrating the everyday. The cake is a light egg white based cake that is sometimes called a silver cake. The light texture of the cake pairs well with the marshmallow frosting. My mom says that as a kid this frosting was always a birthday cake favorite.
A favorite photo of my mom and grandmother at the beach.
I love the combination of the light white cake and lemon curd. It’s like a lemon meringue cake. However, the marshmallow frosting is also really delicious with chocolate cake .
Lemon Cake – makes 2 ten inch cake rounds
1 cup (2 sticks) butter, at room temperature
2 cups granulated sugar
3½ cups cake flour
4 teaspoons baking powder
1/4 teaspoon salt
1 cup milk
2 teaspoons vanilla extract
1 teaspoon lemon zest
8 egg whites, at room temperature
Preheat oven to 350 degrees. Grease and line the bottom of two ten inch cake rounds with parchment paper.
To make the cake beat the egg whites with a balloon whisk attachment at high speed until stiff. Then place them aside in a separate bowl.
The egg whites should be stiff enough to hold their shape.
Next, cream or beat the butter and sugar at medium speed until fluffy.
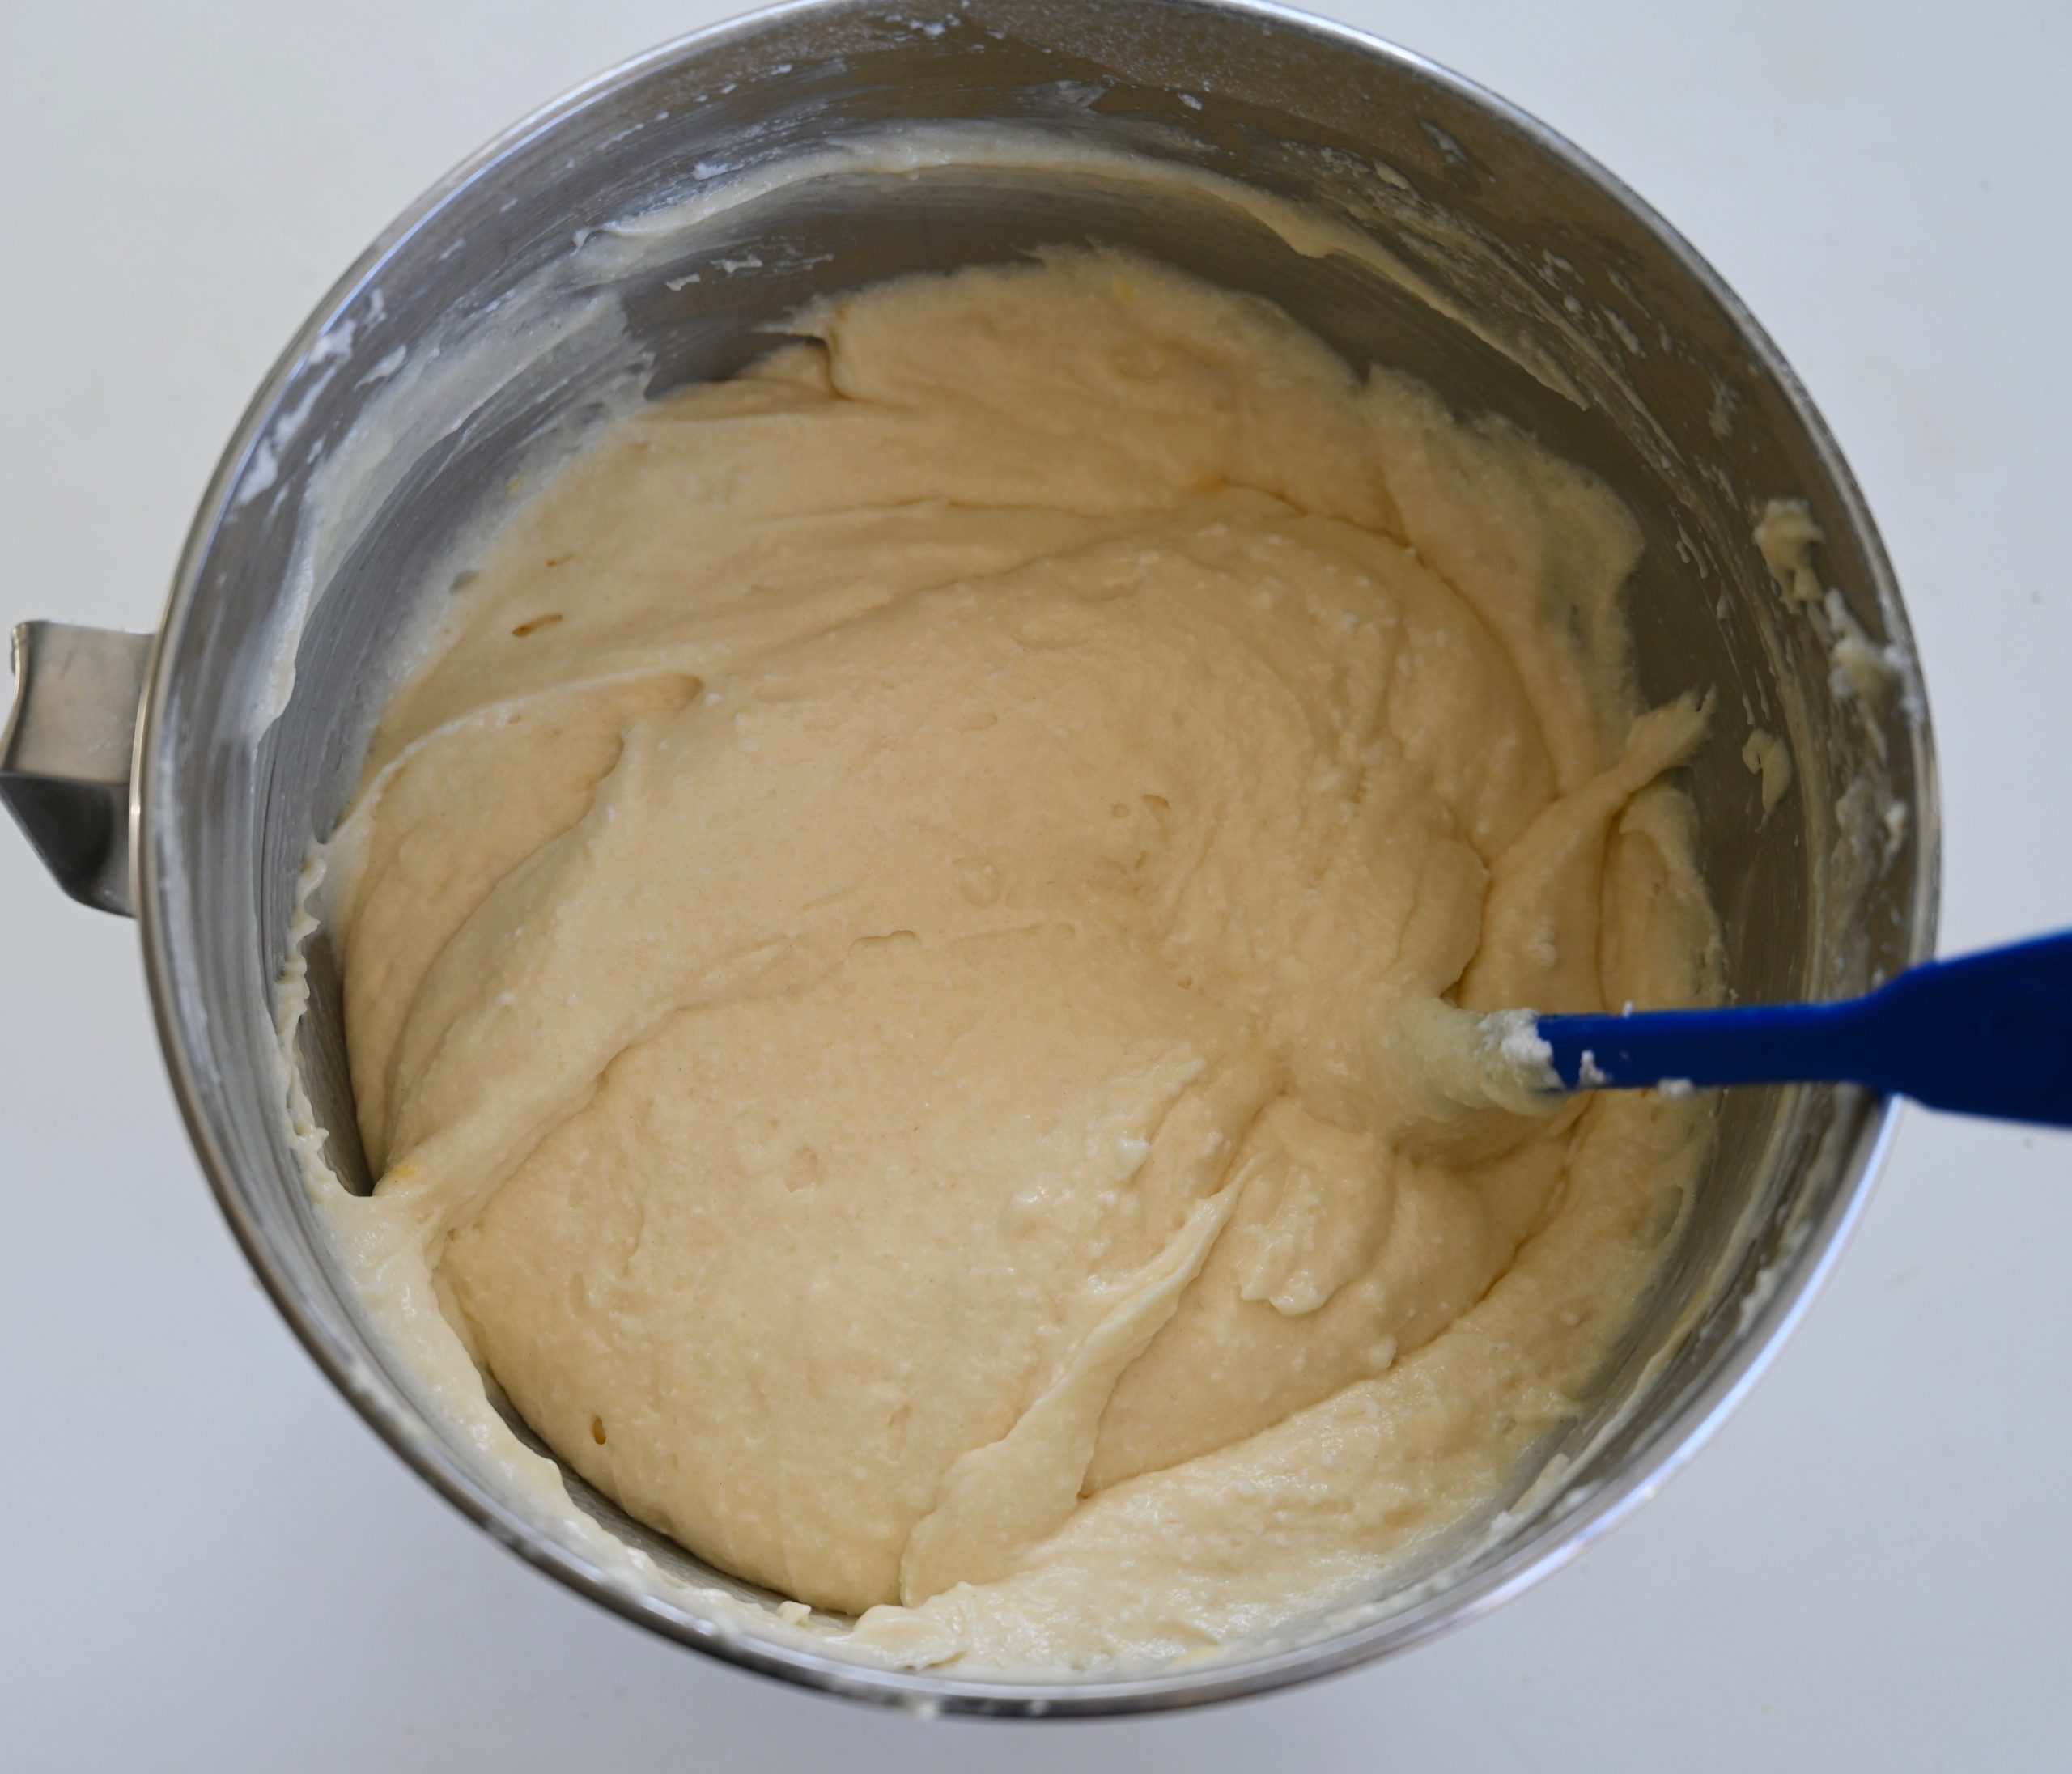
In a separate bowl mix together the dry ingredients: flour, baking soda and salt. Then mix the flour mixture into the butter and sugar alternating with the milk. Now, mix in the vanilla extract and the lemon zest.
Finally, gently scoop and fold the egg whites into the cake batter a little at a time to keep the egg whites from deflating.
Divide the cake batter evenly between the two pans. Bake for 25 minutes until golden. Let the cakes cool for 10 minutes before turning them out of the pans.
Marshmallow Frosting
2 extra large egg whites or 3 regular sized egg whites, room temperature
1/4 teaspoon salt
1/4 cup granulated sugar
3/4 cup light corn syrup
1¼ teaspoon vanilla extract
2 tablespoons lemon curd (for decorating the cake)
1 lemon sliced into thin twists
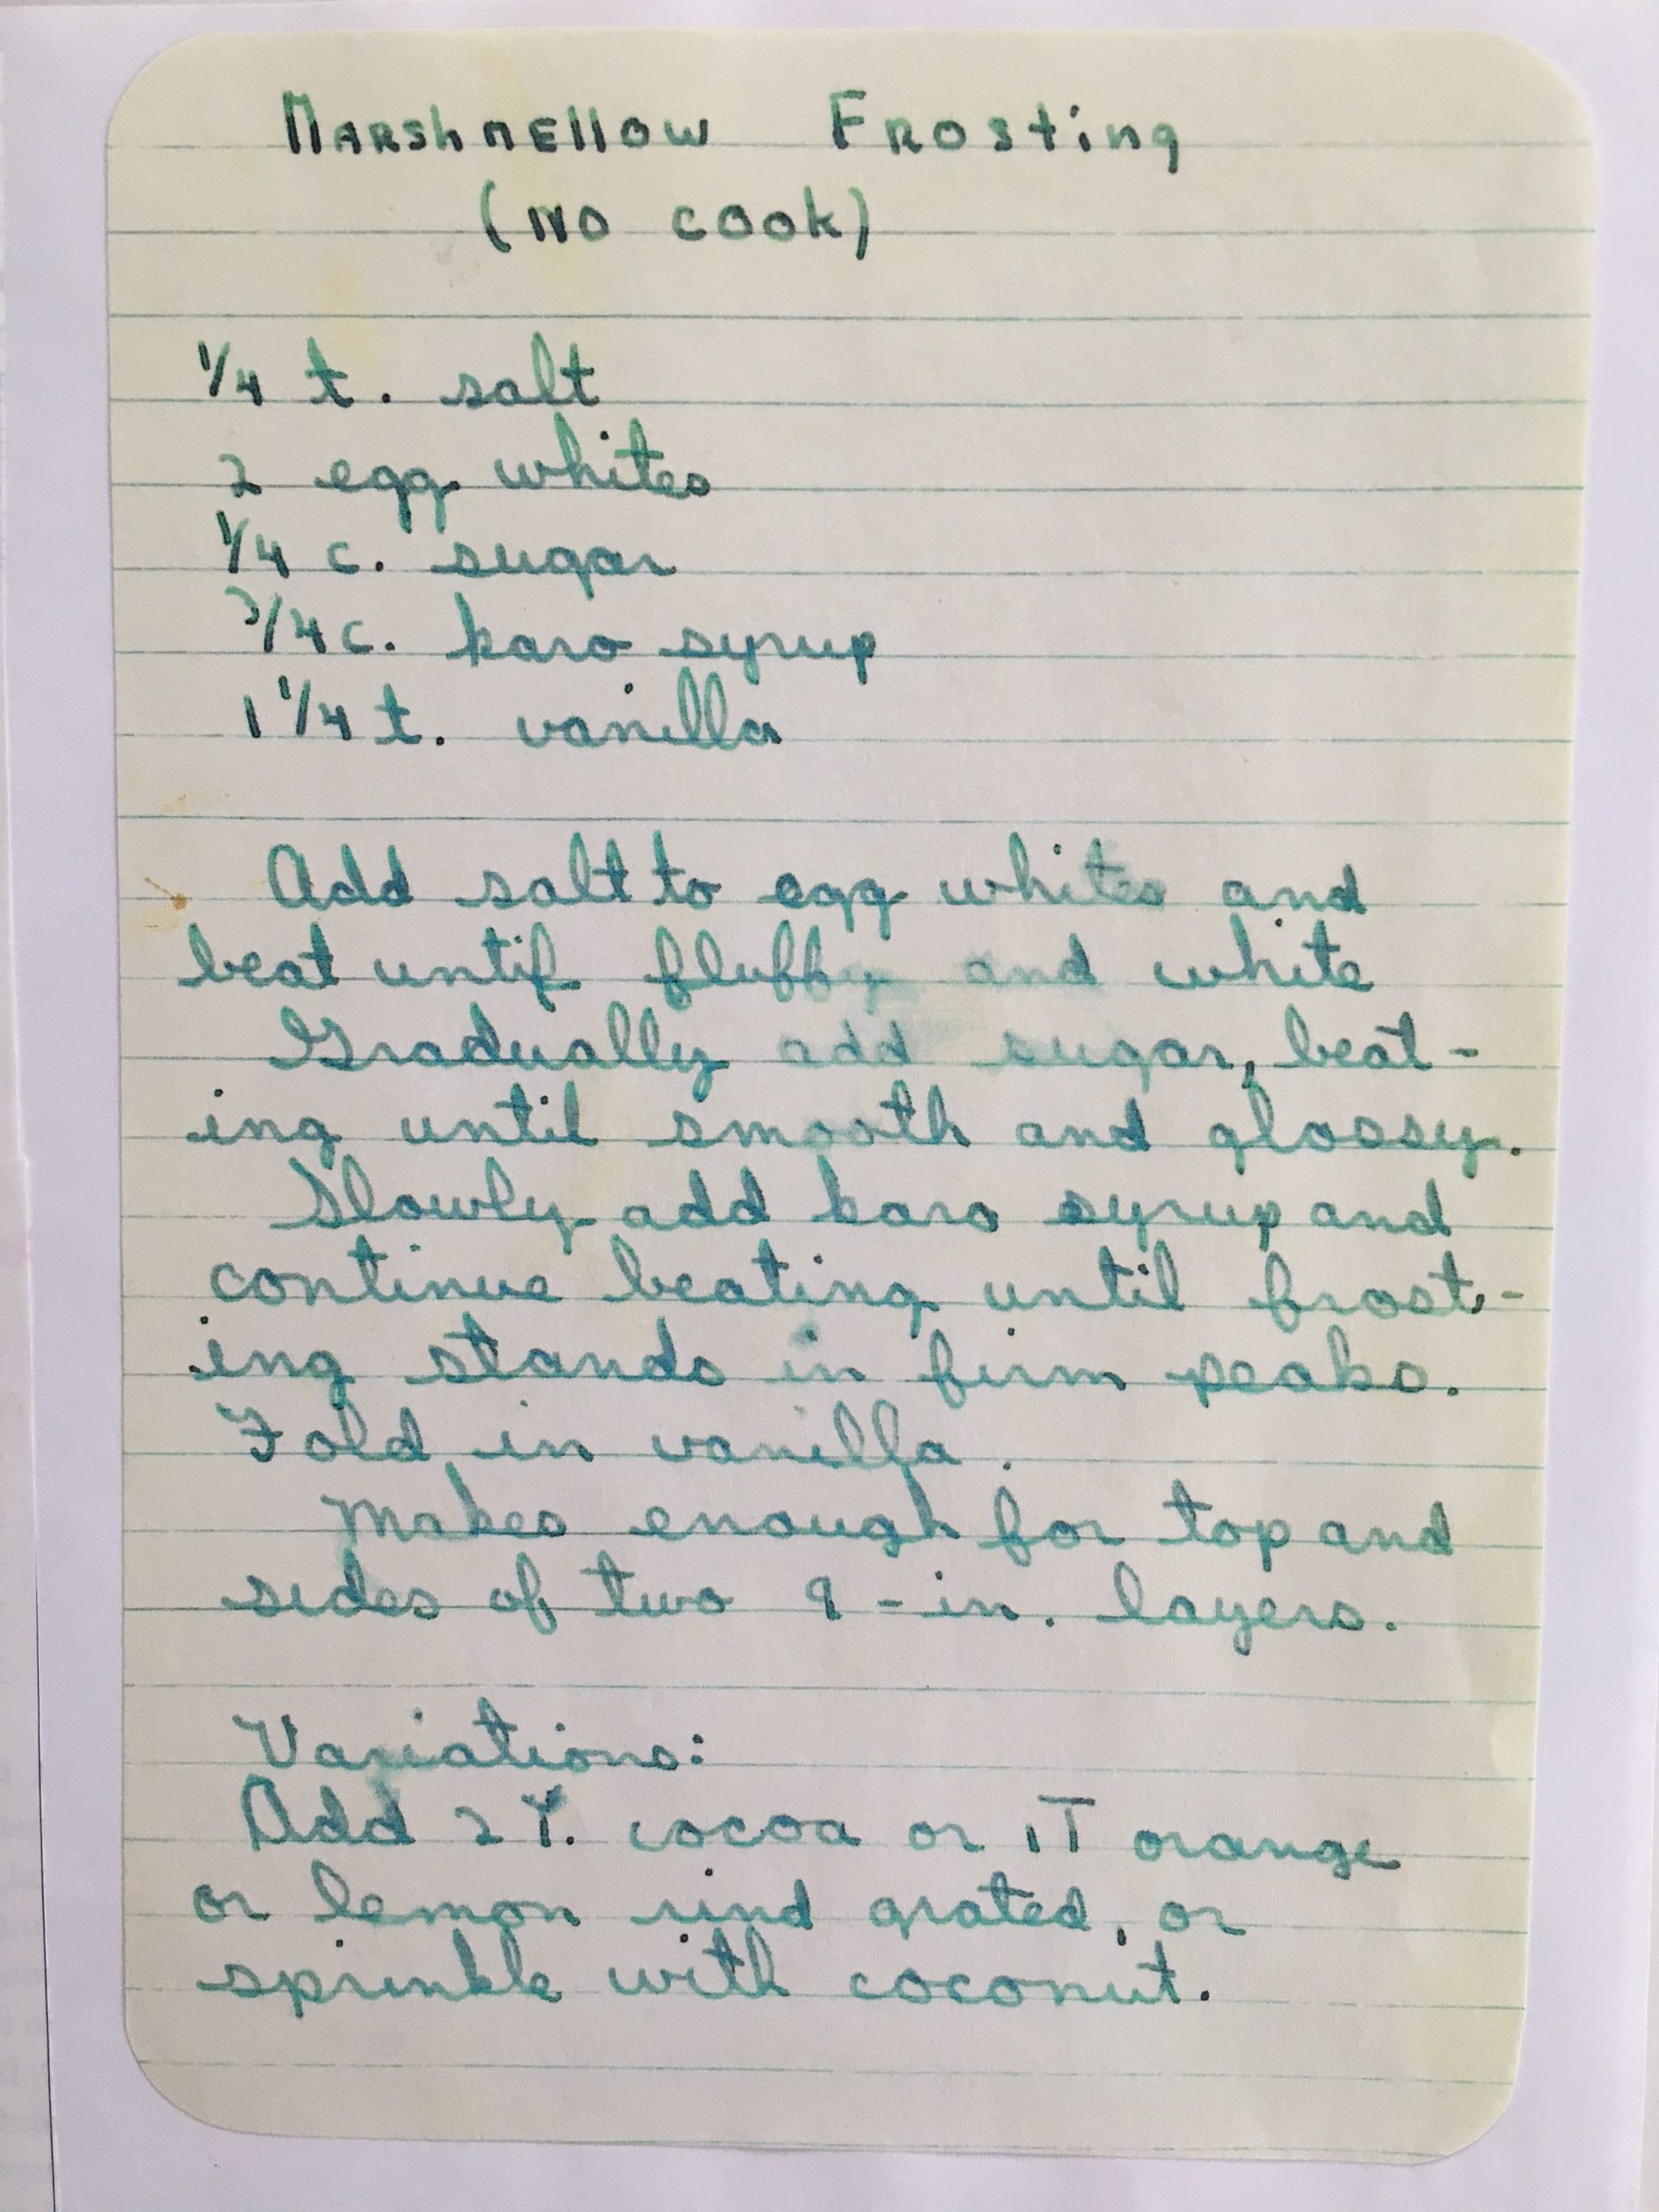
My grandmother’s handwritten recipe and some variations that she added.
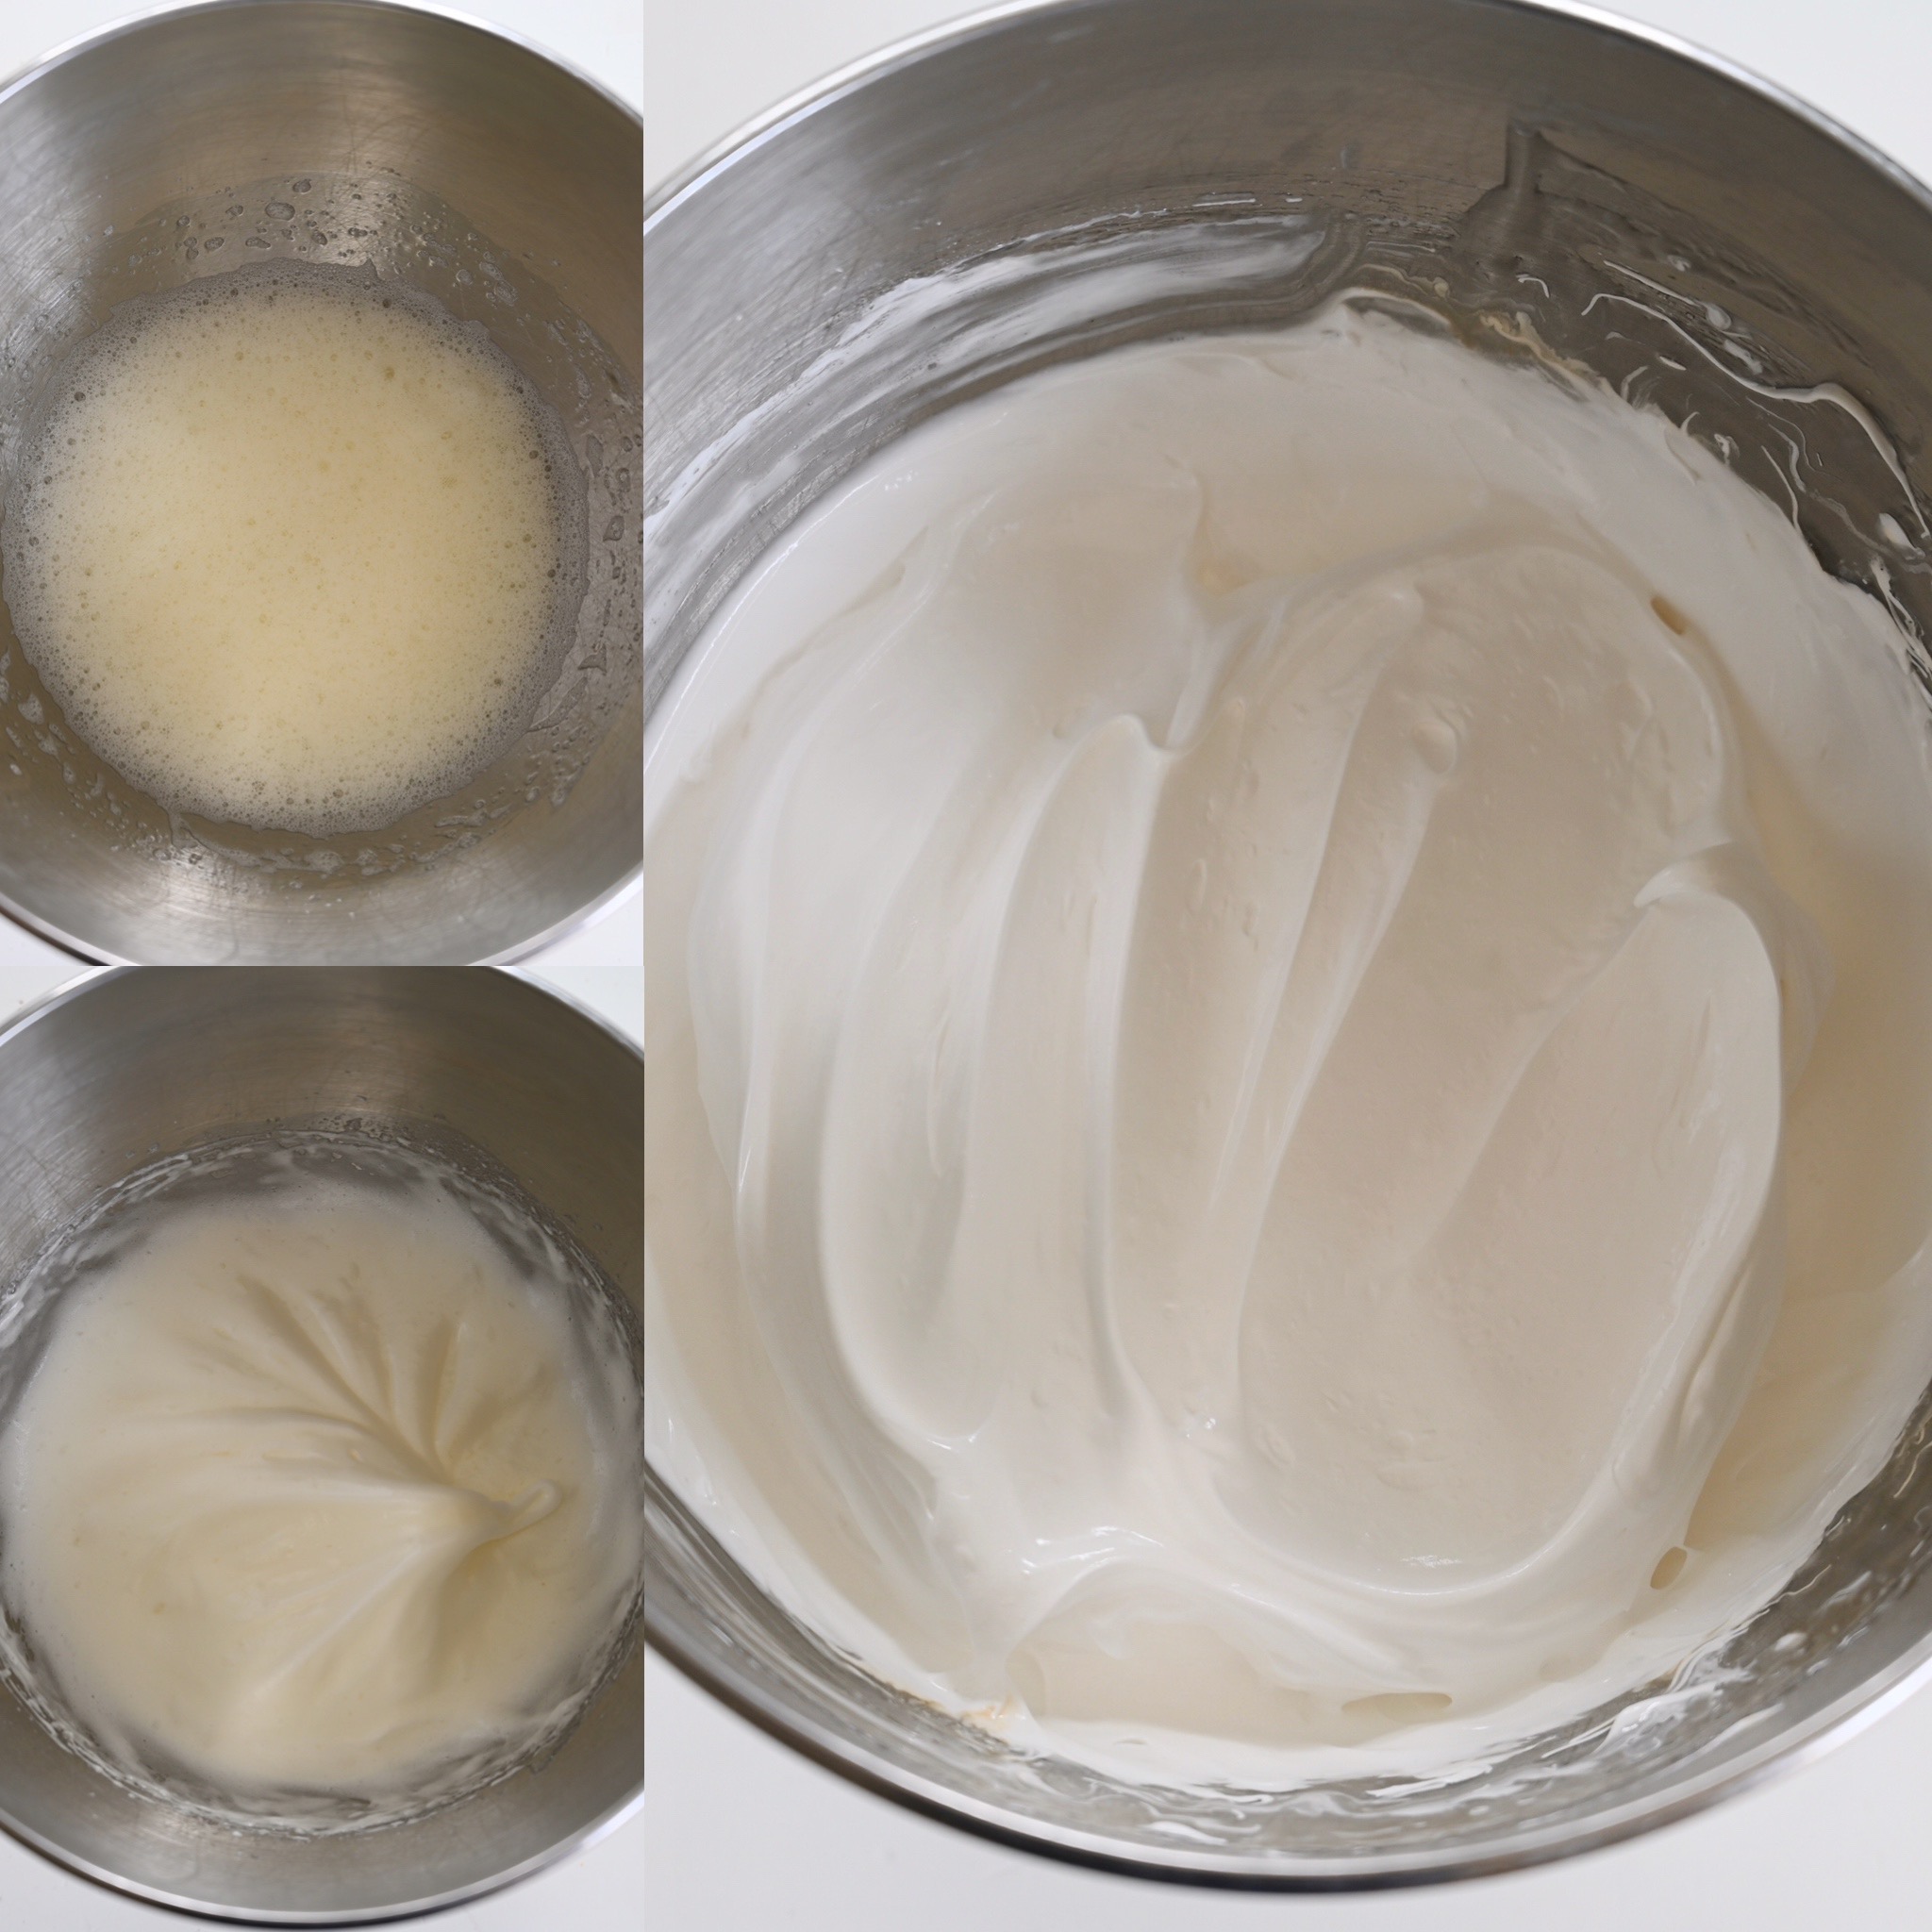
Add the egg white and salt to the large bowl of stand mixer. Beat with a balloon whisk at high speed until fluffy and bubbly.
Then gradually add the sugar and beat over high speed until shiny and smooth.
Finally, slowly stream in the corn syrup while continuing to mix the egg whites at high speed until the frosting is glossy and stiff. Once you blend in all the syrup scrape down the sides of the bowl and continue to beat the egg whites. Then blend in the vanilla. You want to beat the frosting until it is firm and can hold its shape.
Step by step pictures of what the frosting looks like. Since this frosting uses raw egg whites use care and make sure your eggs are very fresh. If serving this frosting to a health sensitive person you can use pasteurized eggs, but you will need to add 1/2 teaspoon of cream of tartar after the first step where you beat the eggs and salt until bubbly. Without the addition of the cream of tartar the pasteurized egg whites will not whip properly.
Decorate the cake by using a large star tip and a pastry bag. Create an even layer of icing stars on top of the first layer of cake. Alternatively, you could spread an even layer with a rubber spatula. Then drizzle the lemon curd on top.
Place the second layer on top and spread a thin layer of marshmallow frosting on top. Pipe some decorative swirls on top and add five lemon twists, some edible flowers like pansies or violas or some fresh berries. Make the icing the day you plan to serve it. The sponge cake can be made ahead. The frosted cake needs to be refrigerated.
This lemon cake is light and delicious. The icing is miraculously fluffy and smooth. It has beautiful shine to it and it’s easy to spread. The drizzle of lemon curd adds a nice balance to the sweet frosting. It would make a great spring cake or just something fun to get in the kitchen and bake.
I am truly grateful for everyone who keeps reading and cooking along with me. Thank you for being such a sweet part of my year.
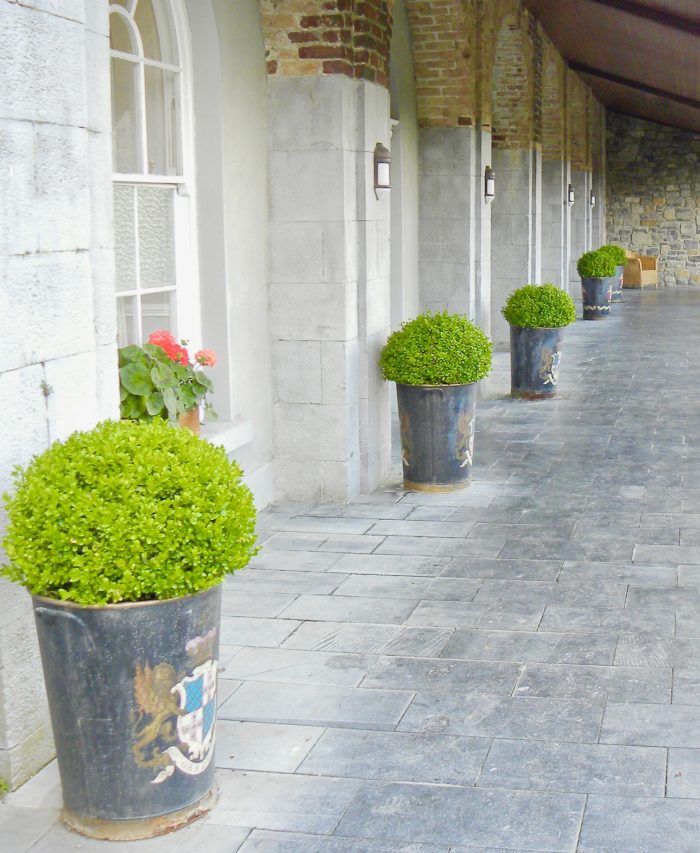
So many European landscapes feature beautiful potted gardens. The picture above is from a trip I took to Ireland years ago. All those potted boxwoods in gorgeous antique flower pots made a lasting impression on me.
Early March has me eagerly awaiting all those spring flowers. As the snow melts, I am already planning new projects for my garden including creating a larger potted kitchen garden inspired by some of my favorite European container plantings.
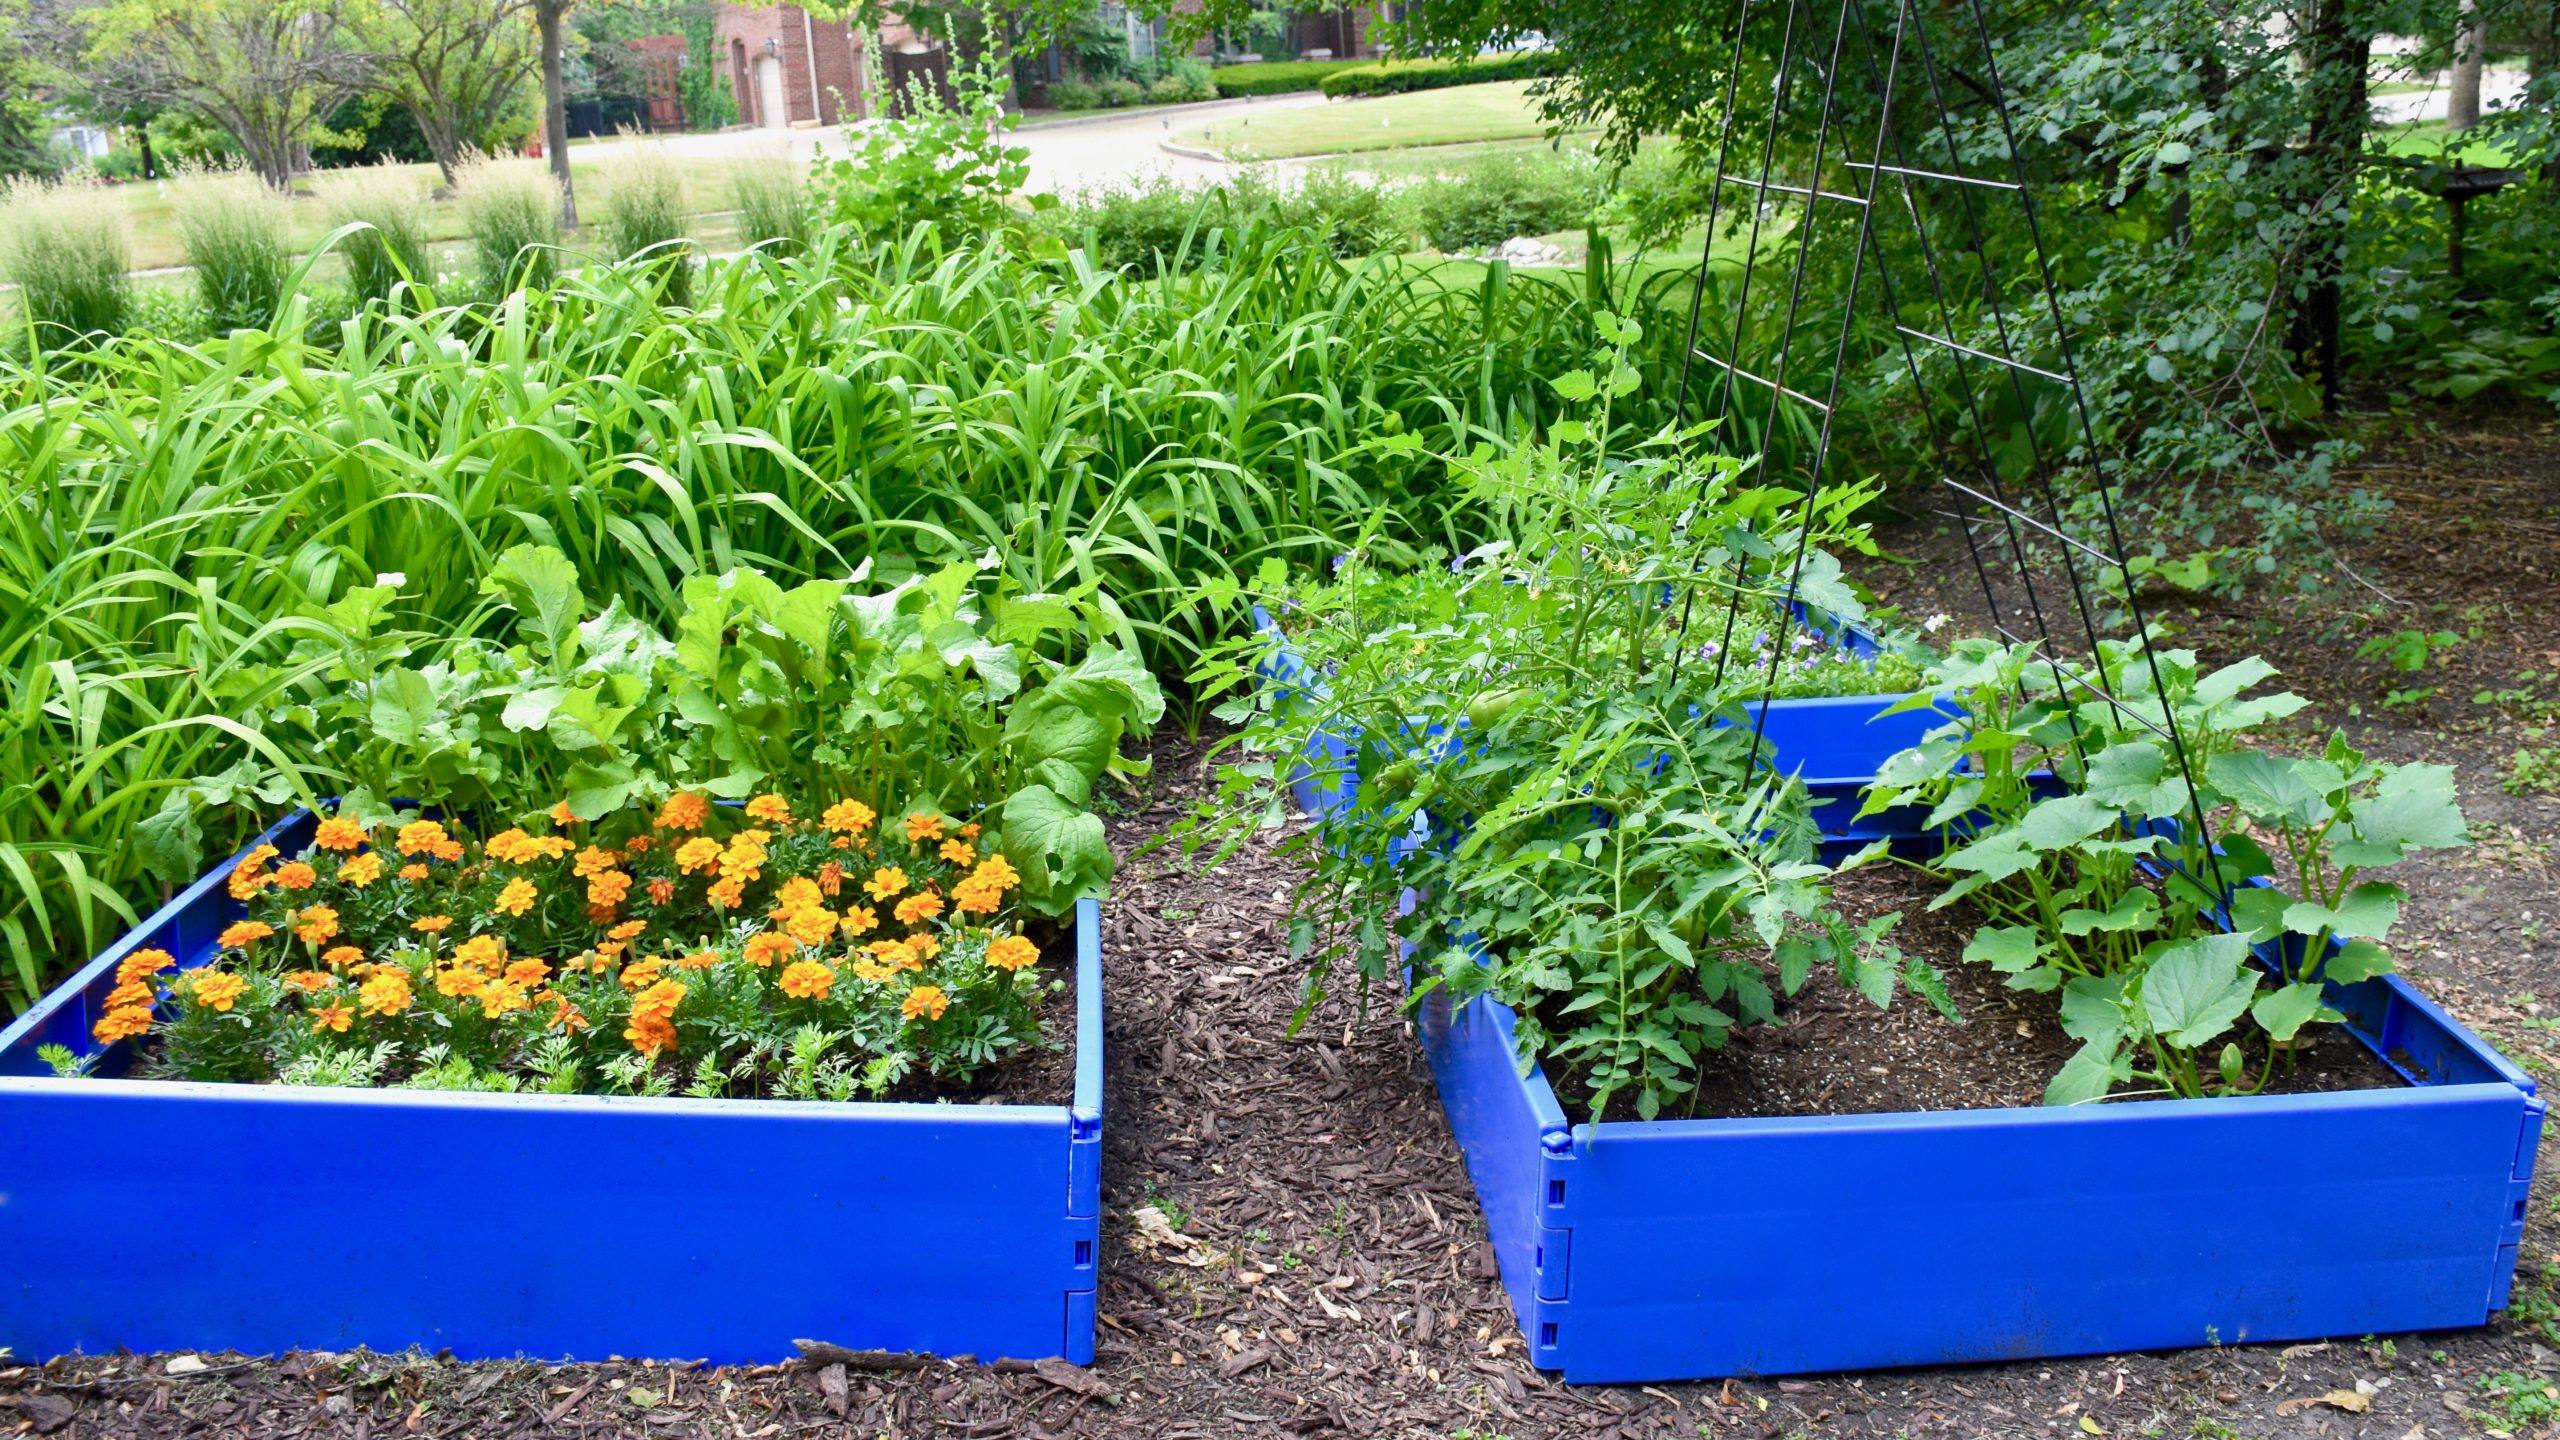
Last spring I created three large raised garden beds for herbs and vegetables. The flowerbed that they are in can have drainage issues. So I need the raised flowerbeds protected my plants and allowed me to reclaim this formerly washed out garden space.
My small kitchen garden produced an amazing amount of herbs and vegetables, but it could definitely use a garden style upgrade.
Inspired by British designer David Hicks’ book My Kind of Garden, I want to expand my vegetable and herb garden with other pots that add height and interest. My Kind of Garden was Hicks’ last book and in it he shares pictures of his favorite landscapes that he designed and others that inspired him. I love his book because it gives you a glimpse of so many interesting gardens from around the world. This gorgeous potted garden below is one that Hicks designed for his own home in England.
I like how he used lots of different styles of pots all in a similar shade of green. So while looking for new containers from my own potted garden project, I thought I would share a few of the beautiful gardens and planters that have inspired me.
Formal English Garden Styled Planters
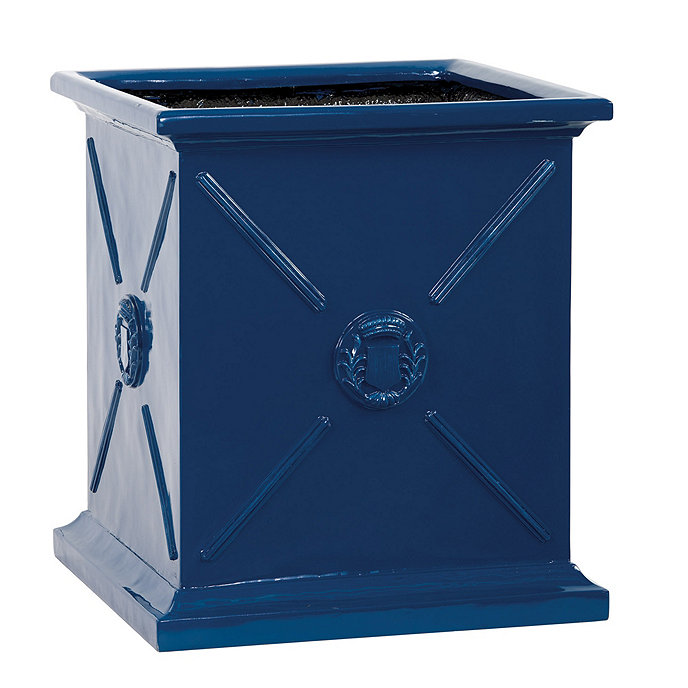
The Nantucket Planter from Grandin Road comes in several colors and heights the price is reasonable.
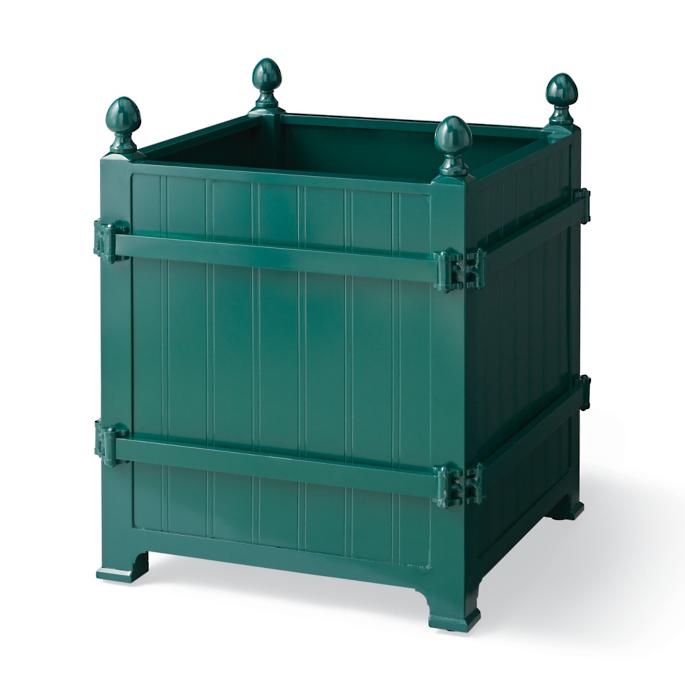
This second pot called the Versailles Planter. It comes with a fairly royal price tag, but it has a wonderful formal garden feeling and it comes some beautiful colors including this deep green as well as a pretty British blue.
Ballard Designs also has a lovely collection of stately planter boxes including this collection of Beauclaire Planters.
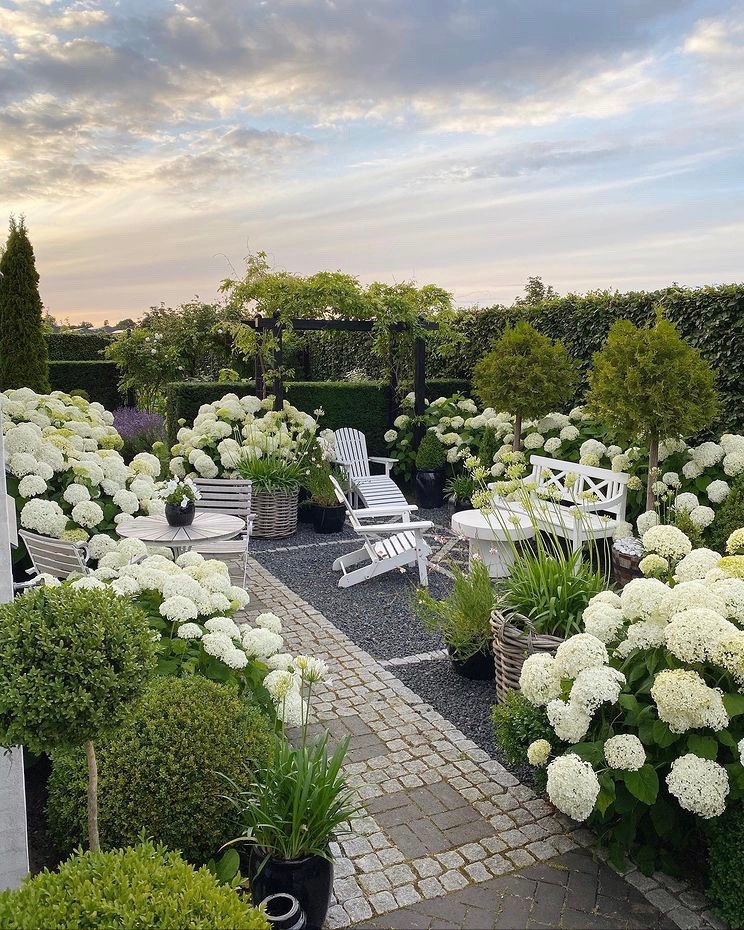
Another one of my favorite gardens is in Denmark. It’s one that I follow on Instagram. Have you seen Gina’s lovely garden at GNC Garden? It’s certainly a memorable one and I am looking forward to seeing more pictures this spring. Gina’s garden features a beautiful collection of woven basket planters and darker pots, which makes a real statement in her mostly green and white garden.
Danish GNC Garden Inspired Woven Flower Pots:
These All Weather Wicker Pots are from Cost Plus World Market. They have a wonderful basket like texture that would look beautiful in any potted garden.
Another flower pot that I loved for this look is called the Foxcroft Planter from White Flower Farm. I particularly like the weathered gray finish.
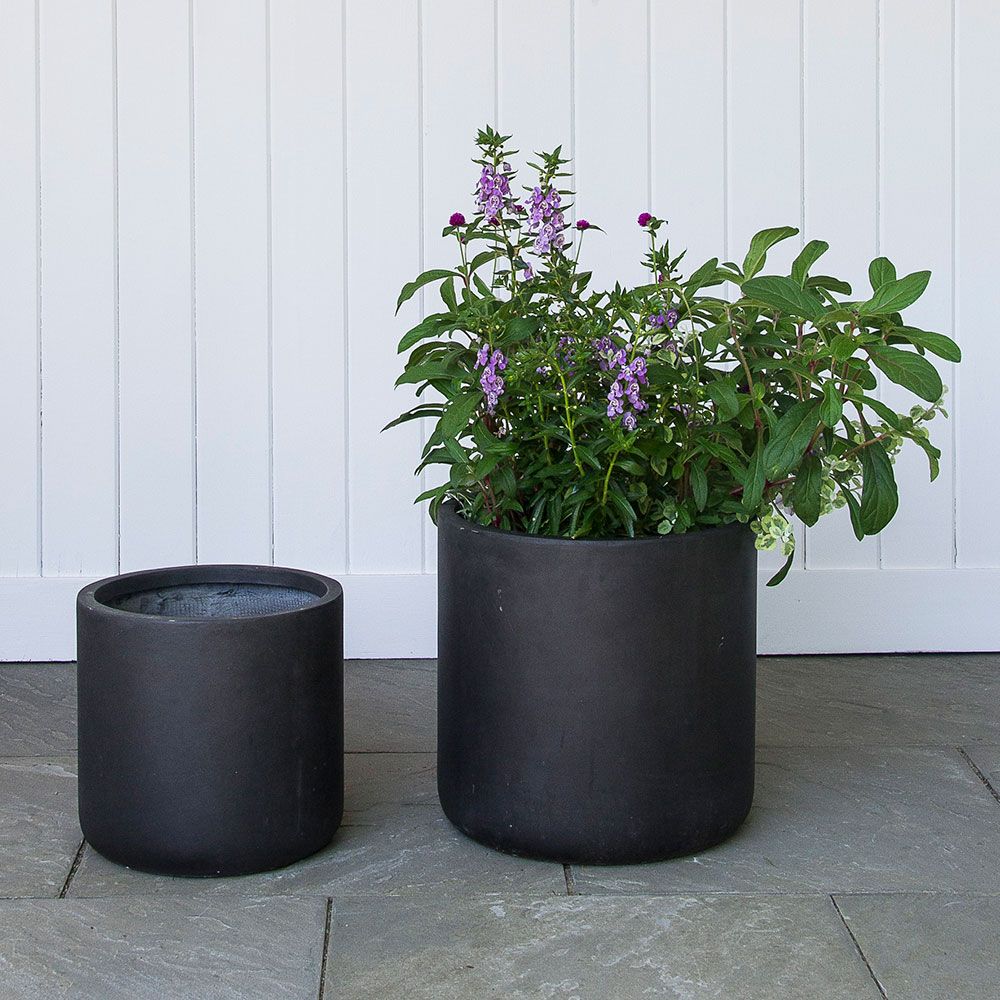
White Flower Farm also has these smaller Urban Accent Black flower pots that would look great on a table or in mixed in with all the woven basket planters like GNC Garden.
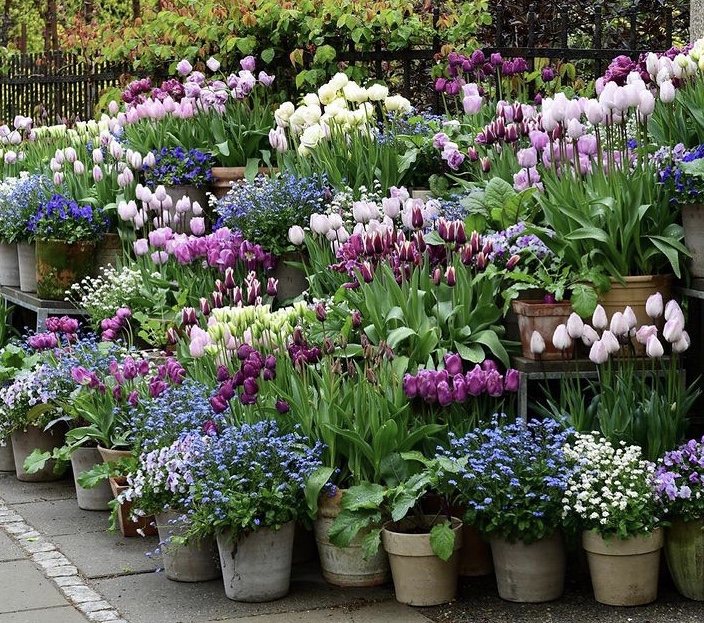
Finally, a very colorful potted garden from Danish gardener, writer and photographer Claus Dalby. His gardens and Instagram account always make me smile. I particularly love this spring collection of pots in front of his garden gate. It changes over the seasons, but it is always beautiful. Following his Instagram account is such a joy.
Claus Dalby Inspired Pottery Garden
Dalby’s collected pots have a pretty washed out gray color to them that remind me of the flower pots made by Ben Wolff Pottery. I like the lettuce leaf edge on these pots, but Wolff has lots of other designs as well.
Next for a more traditional terra cotta collection look that these beautiful flowerpots that were made for the British Horticultural Society by Whichford Pottery their RHS Flowerpot would make a lovely statement surrounded by other smaller pots.
Lastly, for an Italian inspired potted garden check out the Alto Pot from Seibert Rice. Their potted gardens are breathtakingly beautiful. Here is a link to a project they completed at the New York Botanical Gardens.
So as spring draws near, looking at all these potted gardens has me inspired and ready to plant my own.