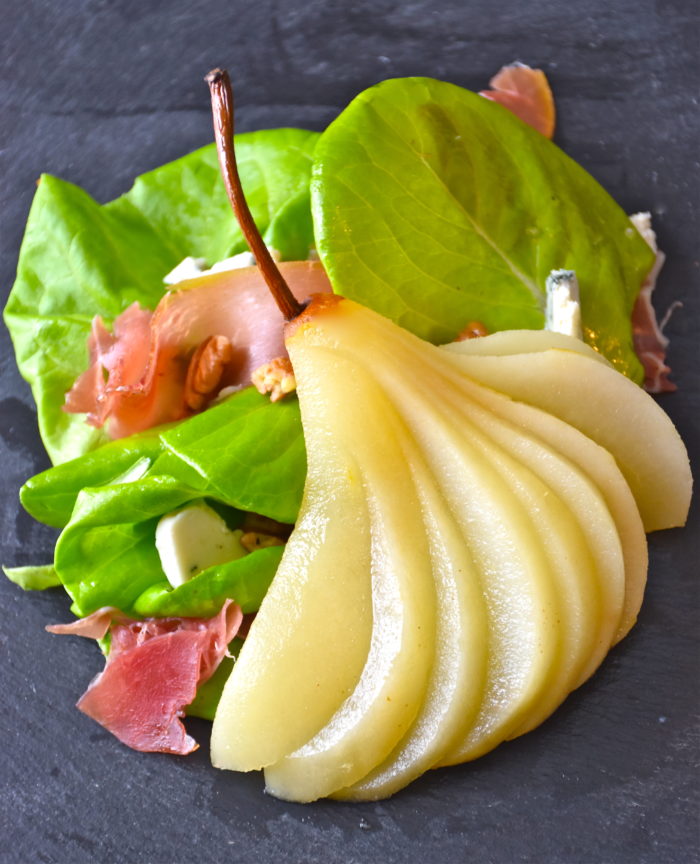
This year was our twelfth wedding anniversary. The day became a bit more eventful than we had planned, because our furnace decided to suddenly stop working that morning and by late afternoon it was becoming clear that we were not going to make the top of the repair service call list. So we called our babysitter to let her know about our home’s falling temperatures and thankfully she agreed to come with some extra layers of clothing. Despite our concerns about having to cancel our plans we were able to spend a night out. We had a wonderful evening together and a delicious pear salad that left me inspired. Pears are one of my favorite fruits, but take that pear and poach it in some white wine, cinnamon and cloves and you have something special.
Bosc pears are sweet, but firm so they hold their shape when cooked.
Cooking and sharing meals together is an important part of our relationship. My first date with my husband was cooking together at his apartment. My husband often says that even when his day is crazy or stressful there is something about coming home and having a great dinner together. It’s a meaningful part of who we are as a couple and as a family.
I have been tweaking the ingredients in this salad over the last month and I love the balance of flavors. The sweet and spicy pears with the slightly salty prosciutto and a little sharpness from the cheese makes this a salad to share with the ones you love. I made this salad for our Valentine’s dinner so I thought I would share it with you.
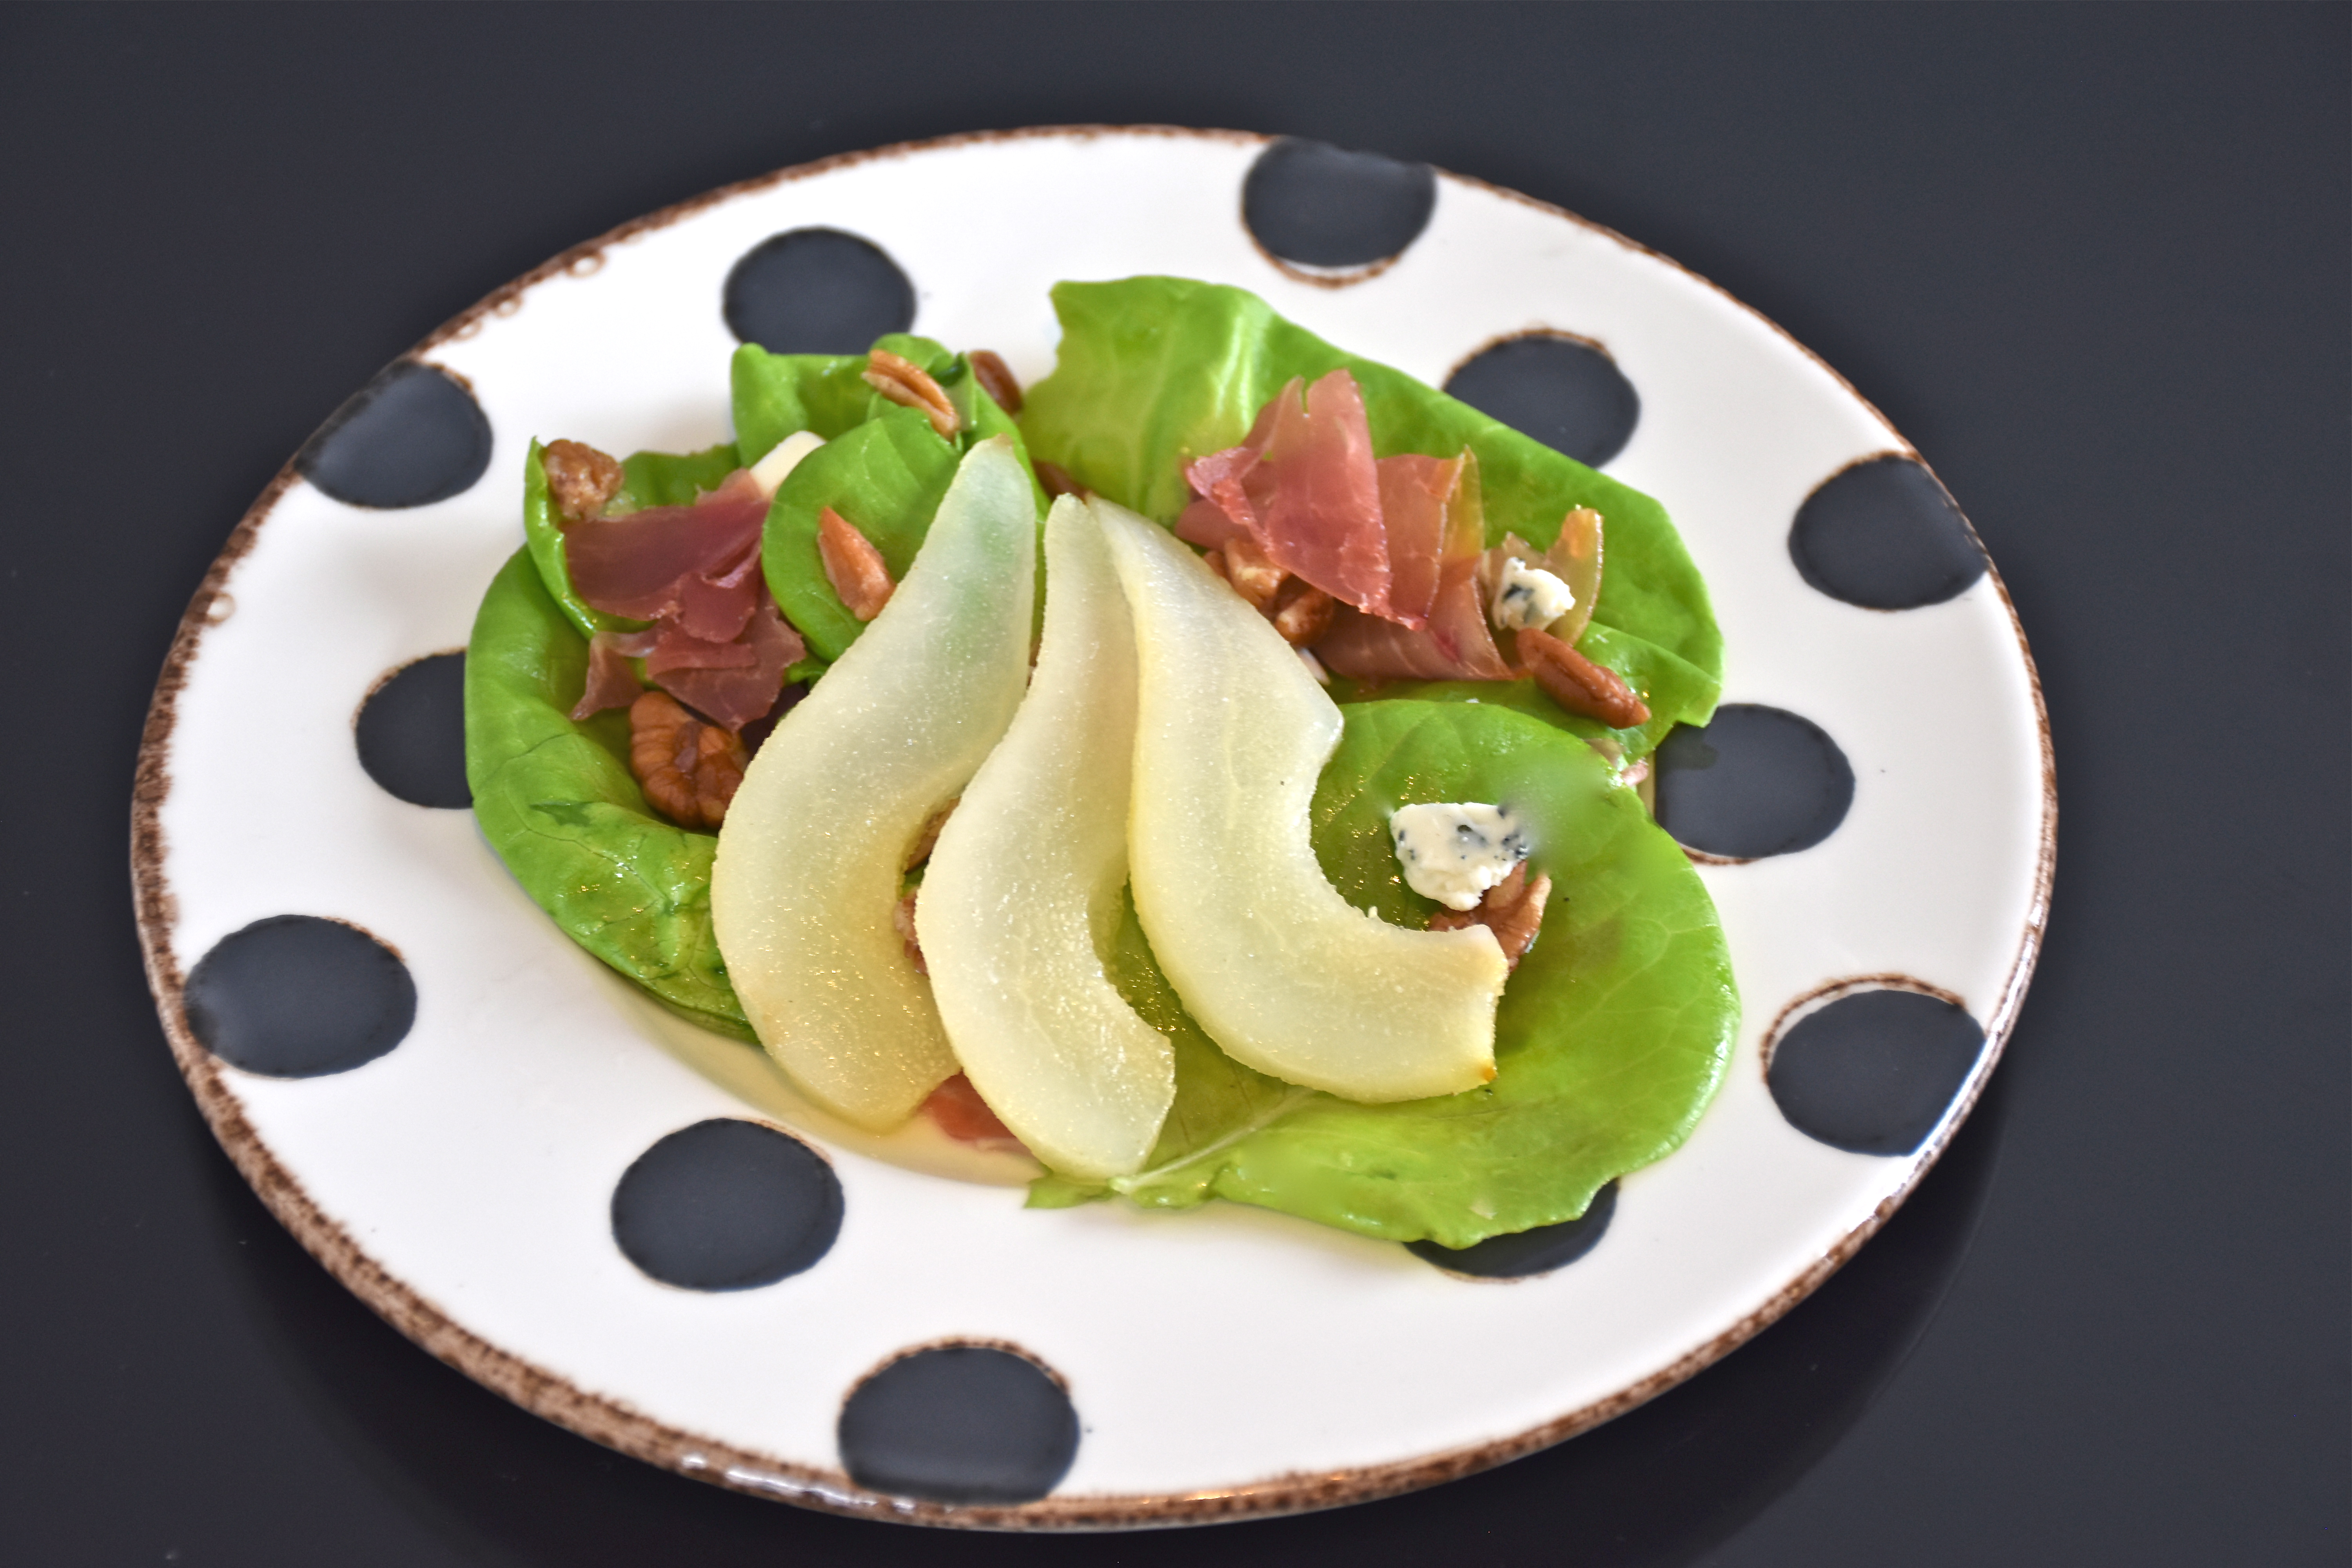
Pear and Prosciutto Salad
2 Bosc pears
2 cups of chardonnay or another white wine that is not overly sweet
3/4 cup granulated sugar
3 cloves
1 cinnamon stick
3 tablespoons of the reduced pear poaching syrup
2 tablespoons of minced shallot
3 tablespoons champagne vinegar
1 tablespoon sherry vinegar
1/2 cup canola oil
1/2 tsp kosher salt
pick of ground pepper
4 slices of prosciutto sliced into thin ribbons
1 head of butter lettuce
1/3 cup pecan halves (optional)
1/4 cup of crumbled blue cheese
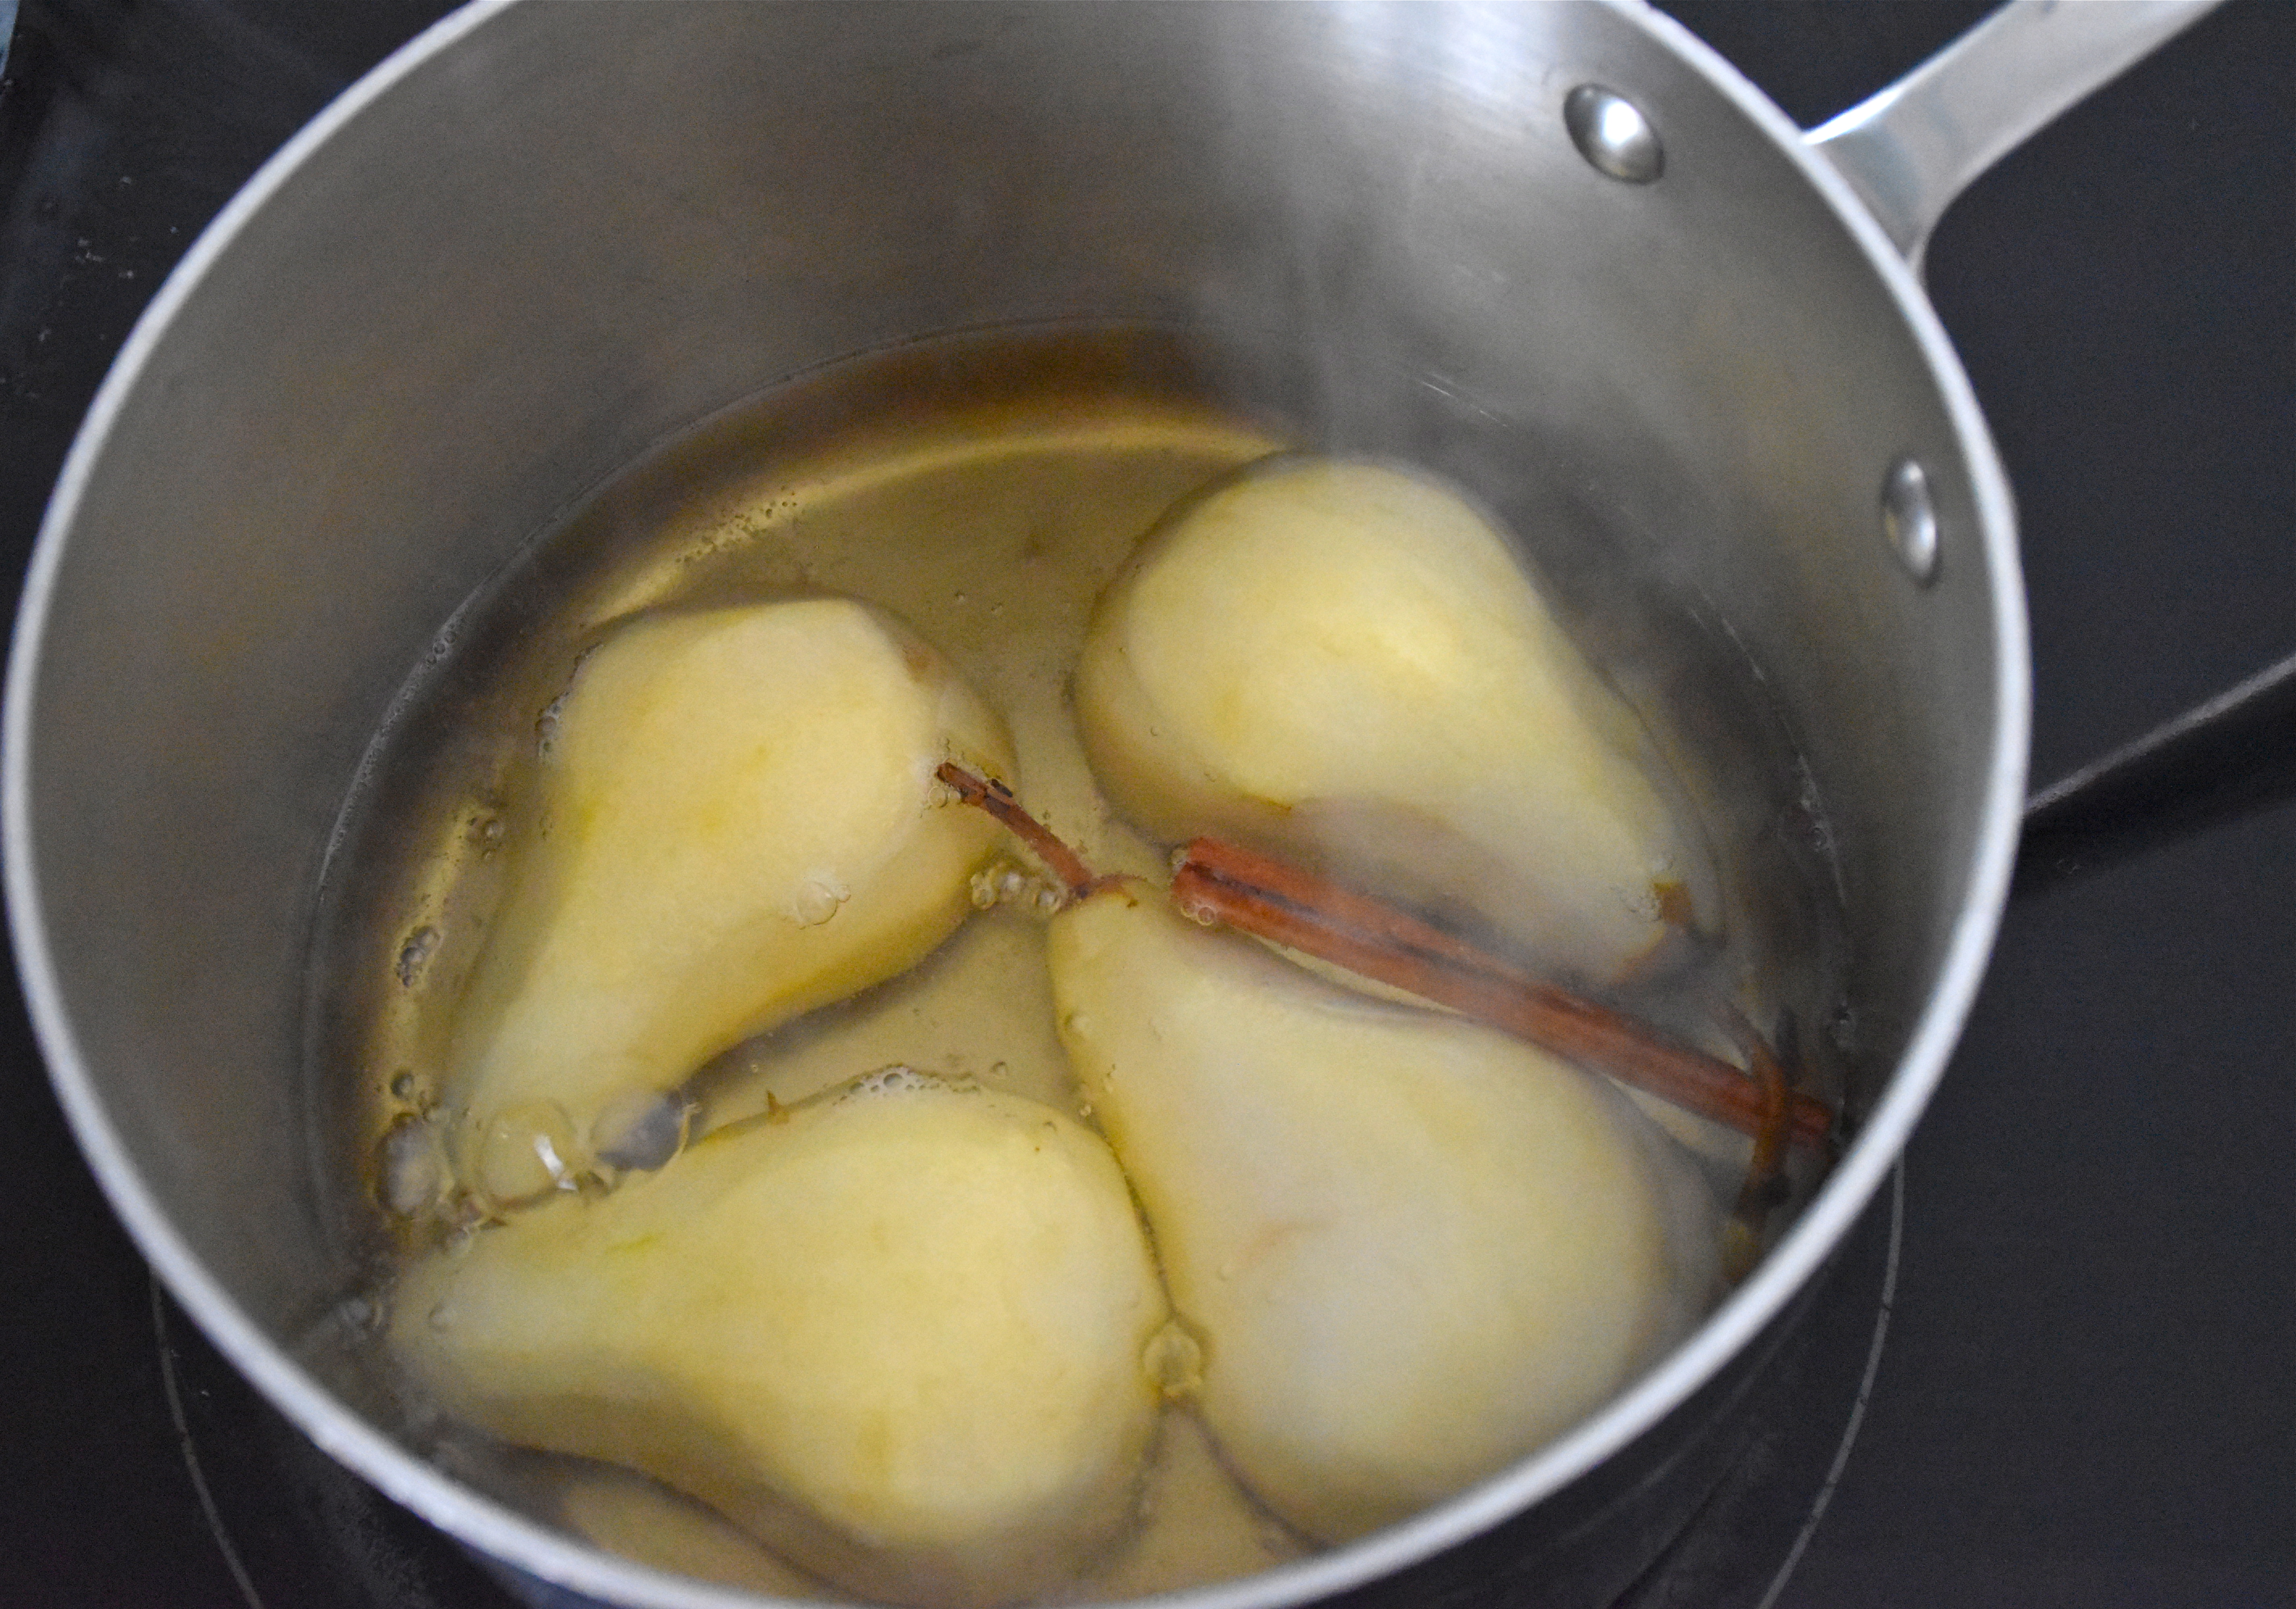
First prepare your poached pears. You can make these in advance if you are entertaining with this salad. Peel your pears and slice them in half lengthwise. Then use a melon baller or small spoon to scoop out your seeds.
Then in a medium sized saucepan heat your white wine, sugar, cinnamon and cloves over medium high heat. Then when it begins to bubble add in your pears and reduce your heat slightly to medium low. Let your pears cook for 15 minutes until they are soft, but still firm enough to cut into slices. When your pears are cooked remove them from the pan, but reserve one cup of your poaching liquid.
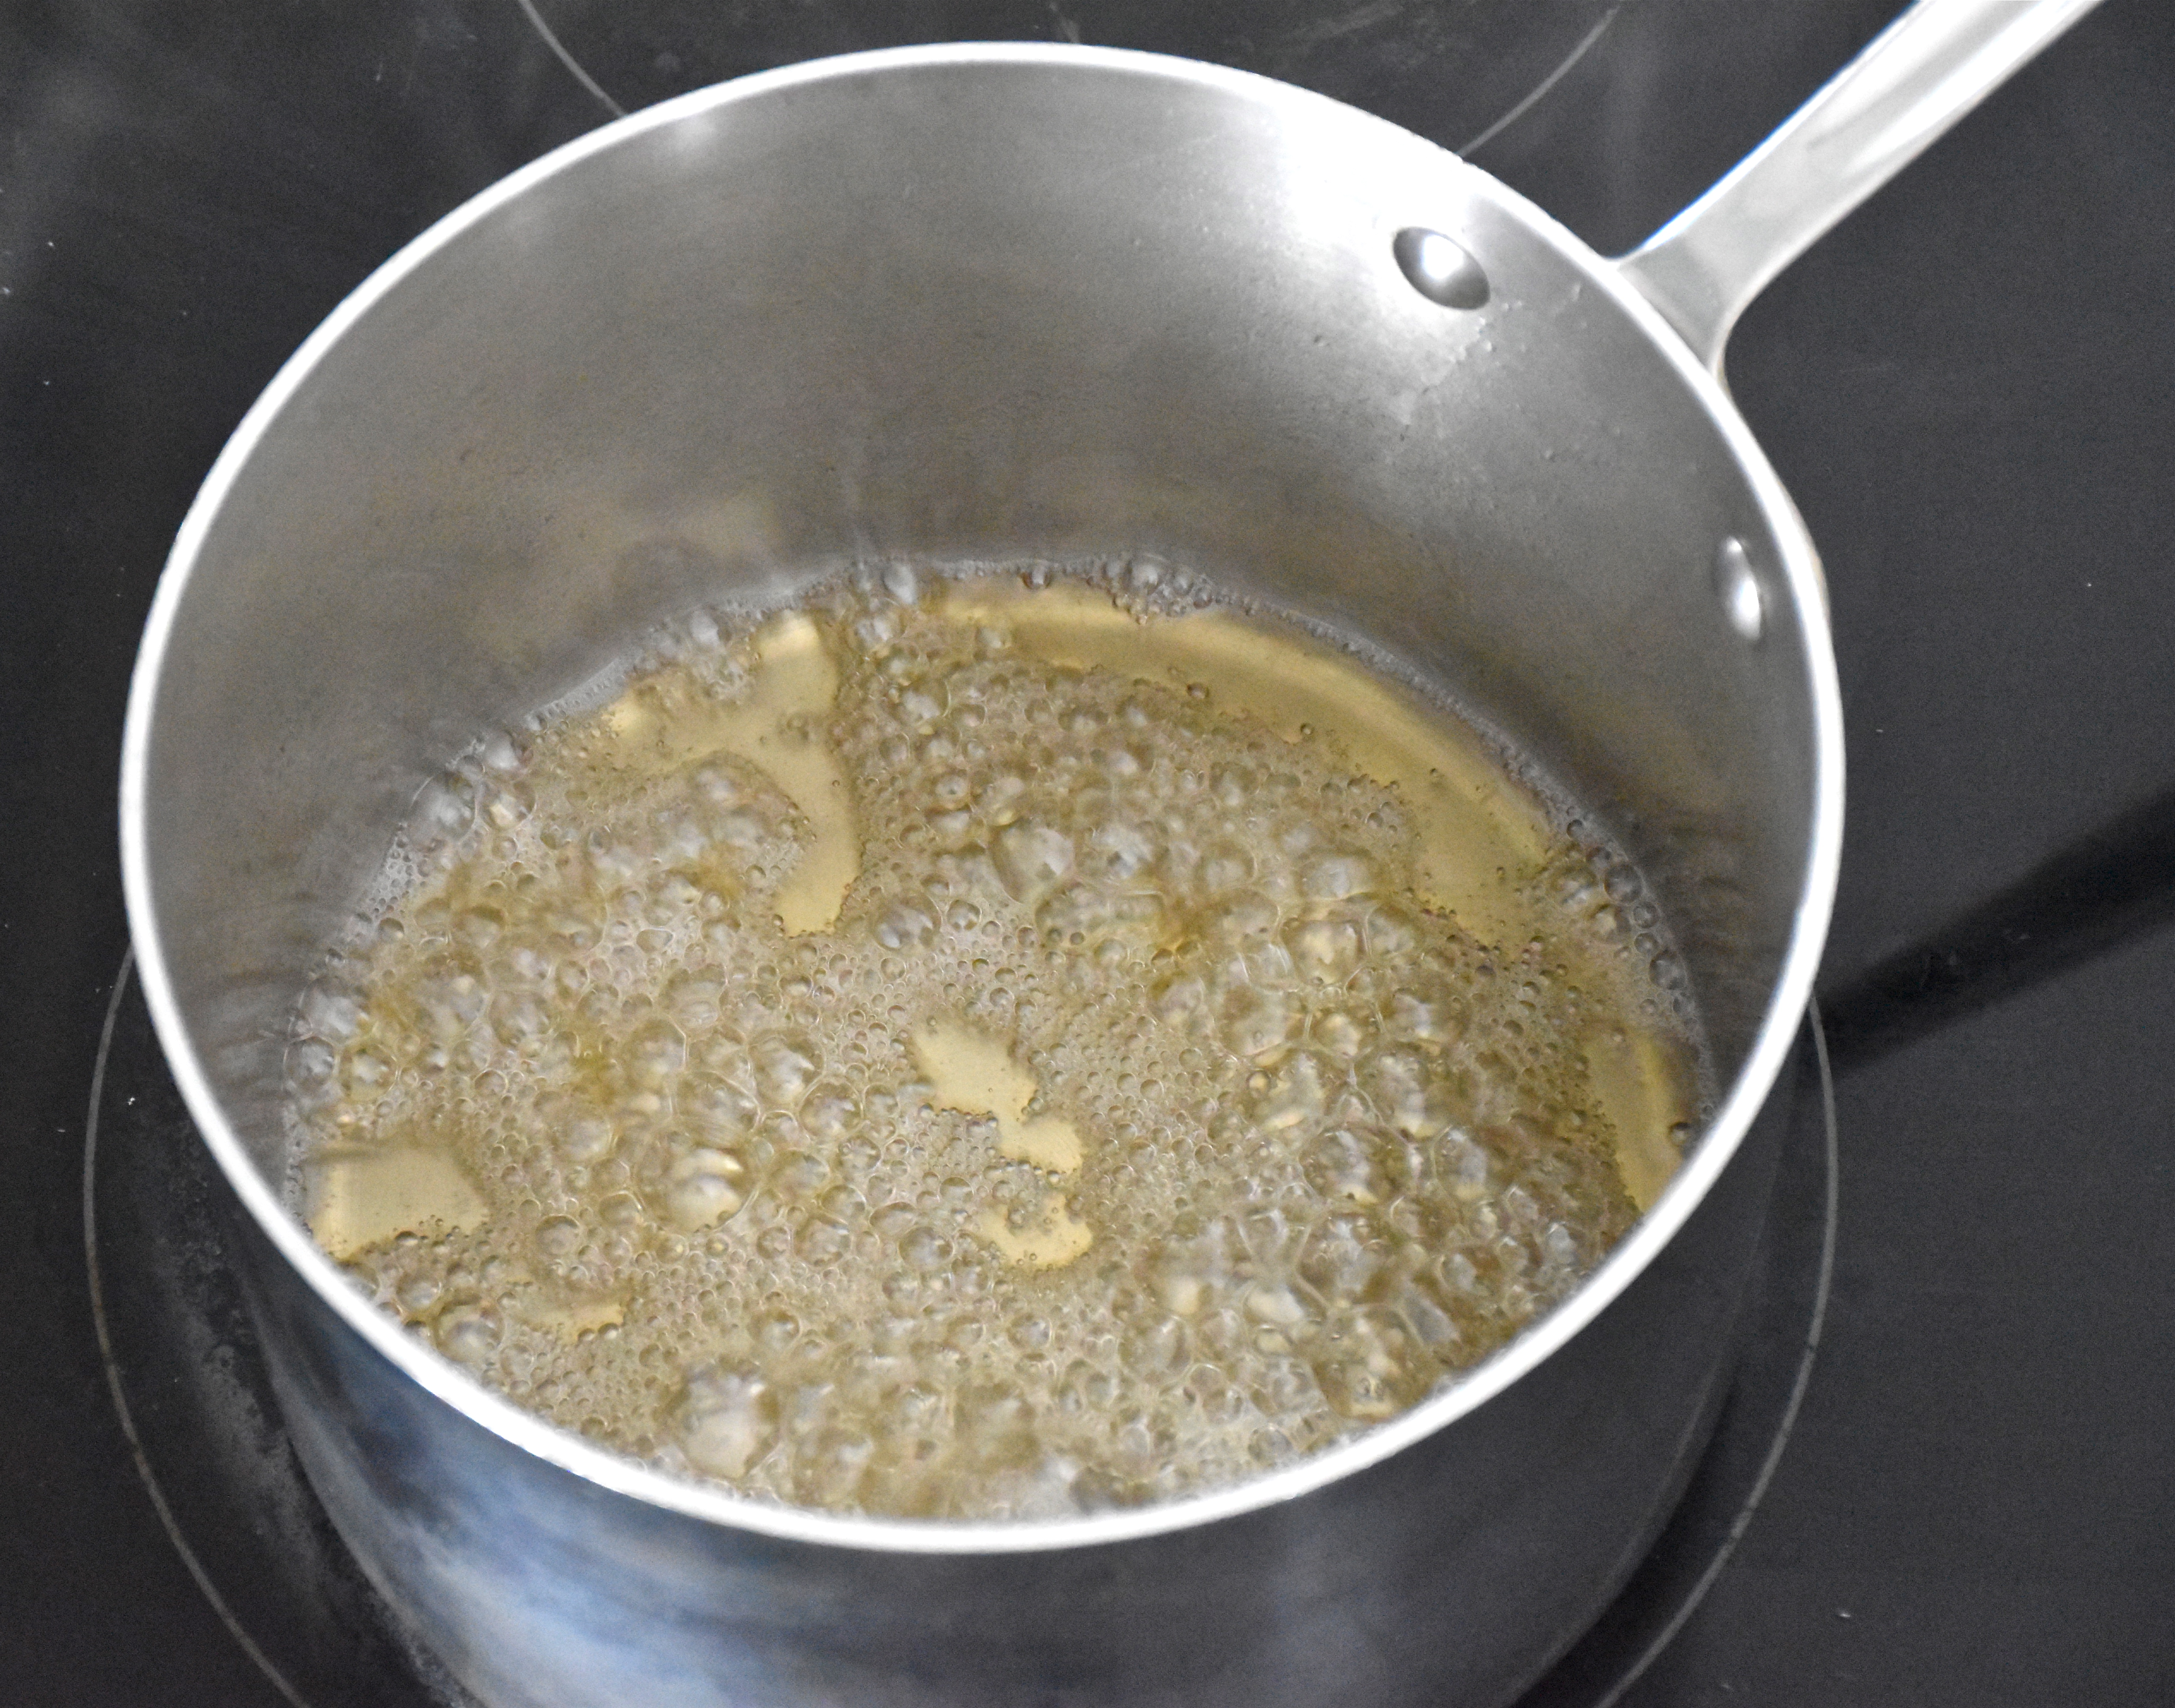
Then reduce that poaching liquid over high heat until it reduces down to 1/4 cup and becomes syrupy.
Now make your salad dressing. In a medium sized bowl or a mini food processor mix together 3 tablespoons of the pear poaching syrup, 2 tablespoons of minced shallots, 3 tablespoons of champagne vinegar, 1 tablespoon of sherry vinegar, salt and pepper . Then whisk in your oil or pulse your salad dressing together until it becomes thicker and full emulsified.
Finally, assemble your salad close to the time you want to serve it. In a large bowl toss your dressing and lettuce. Then layer on your prosciutto, pecans and blue cheese and top it off with your pears. You can either slice them into separate thin slices or slice your halves as a thin spiral by not cutting them all the way through at the very top of your pear stem.
This salad is not only gorgeous on the plate it’s absolutely delicious. These poached pears are so wonderful that I think they would also be great as a dessert. I would serve them with vanilla ice cream and drizzle the pear syrup over them and I am already thinking about how that pear syrup might make a wonderful base for a cocktail. Oh the possibilities and recipes to come.
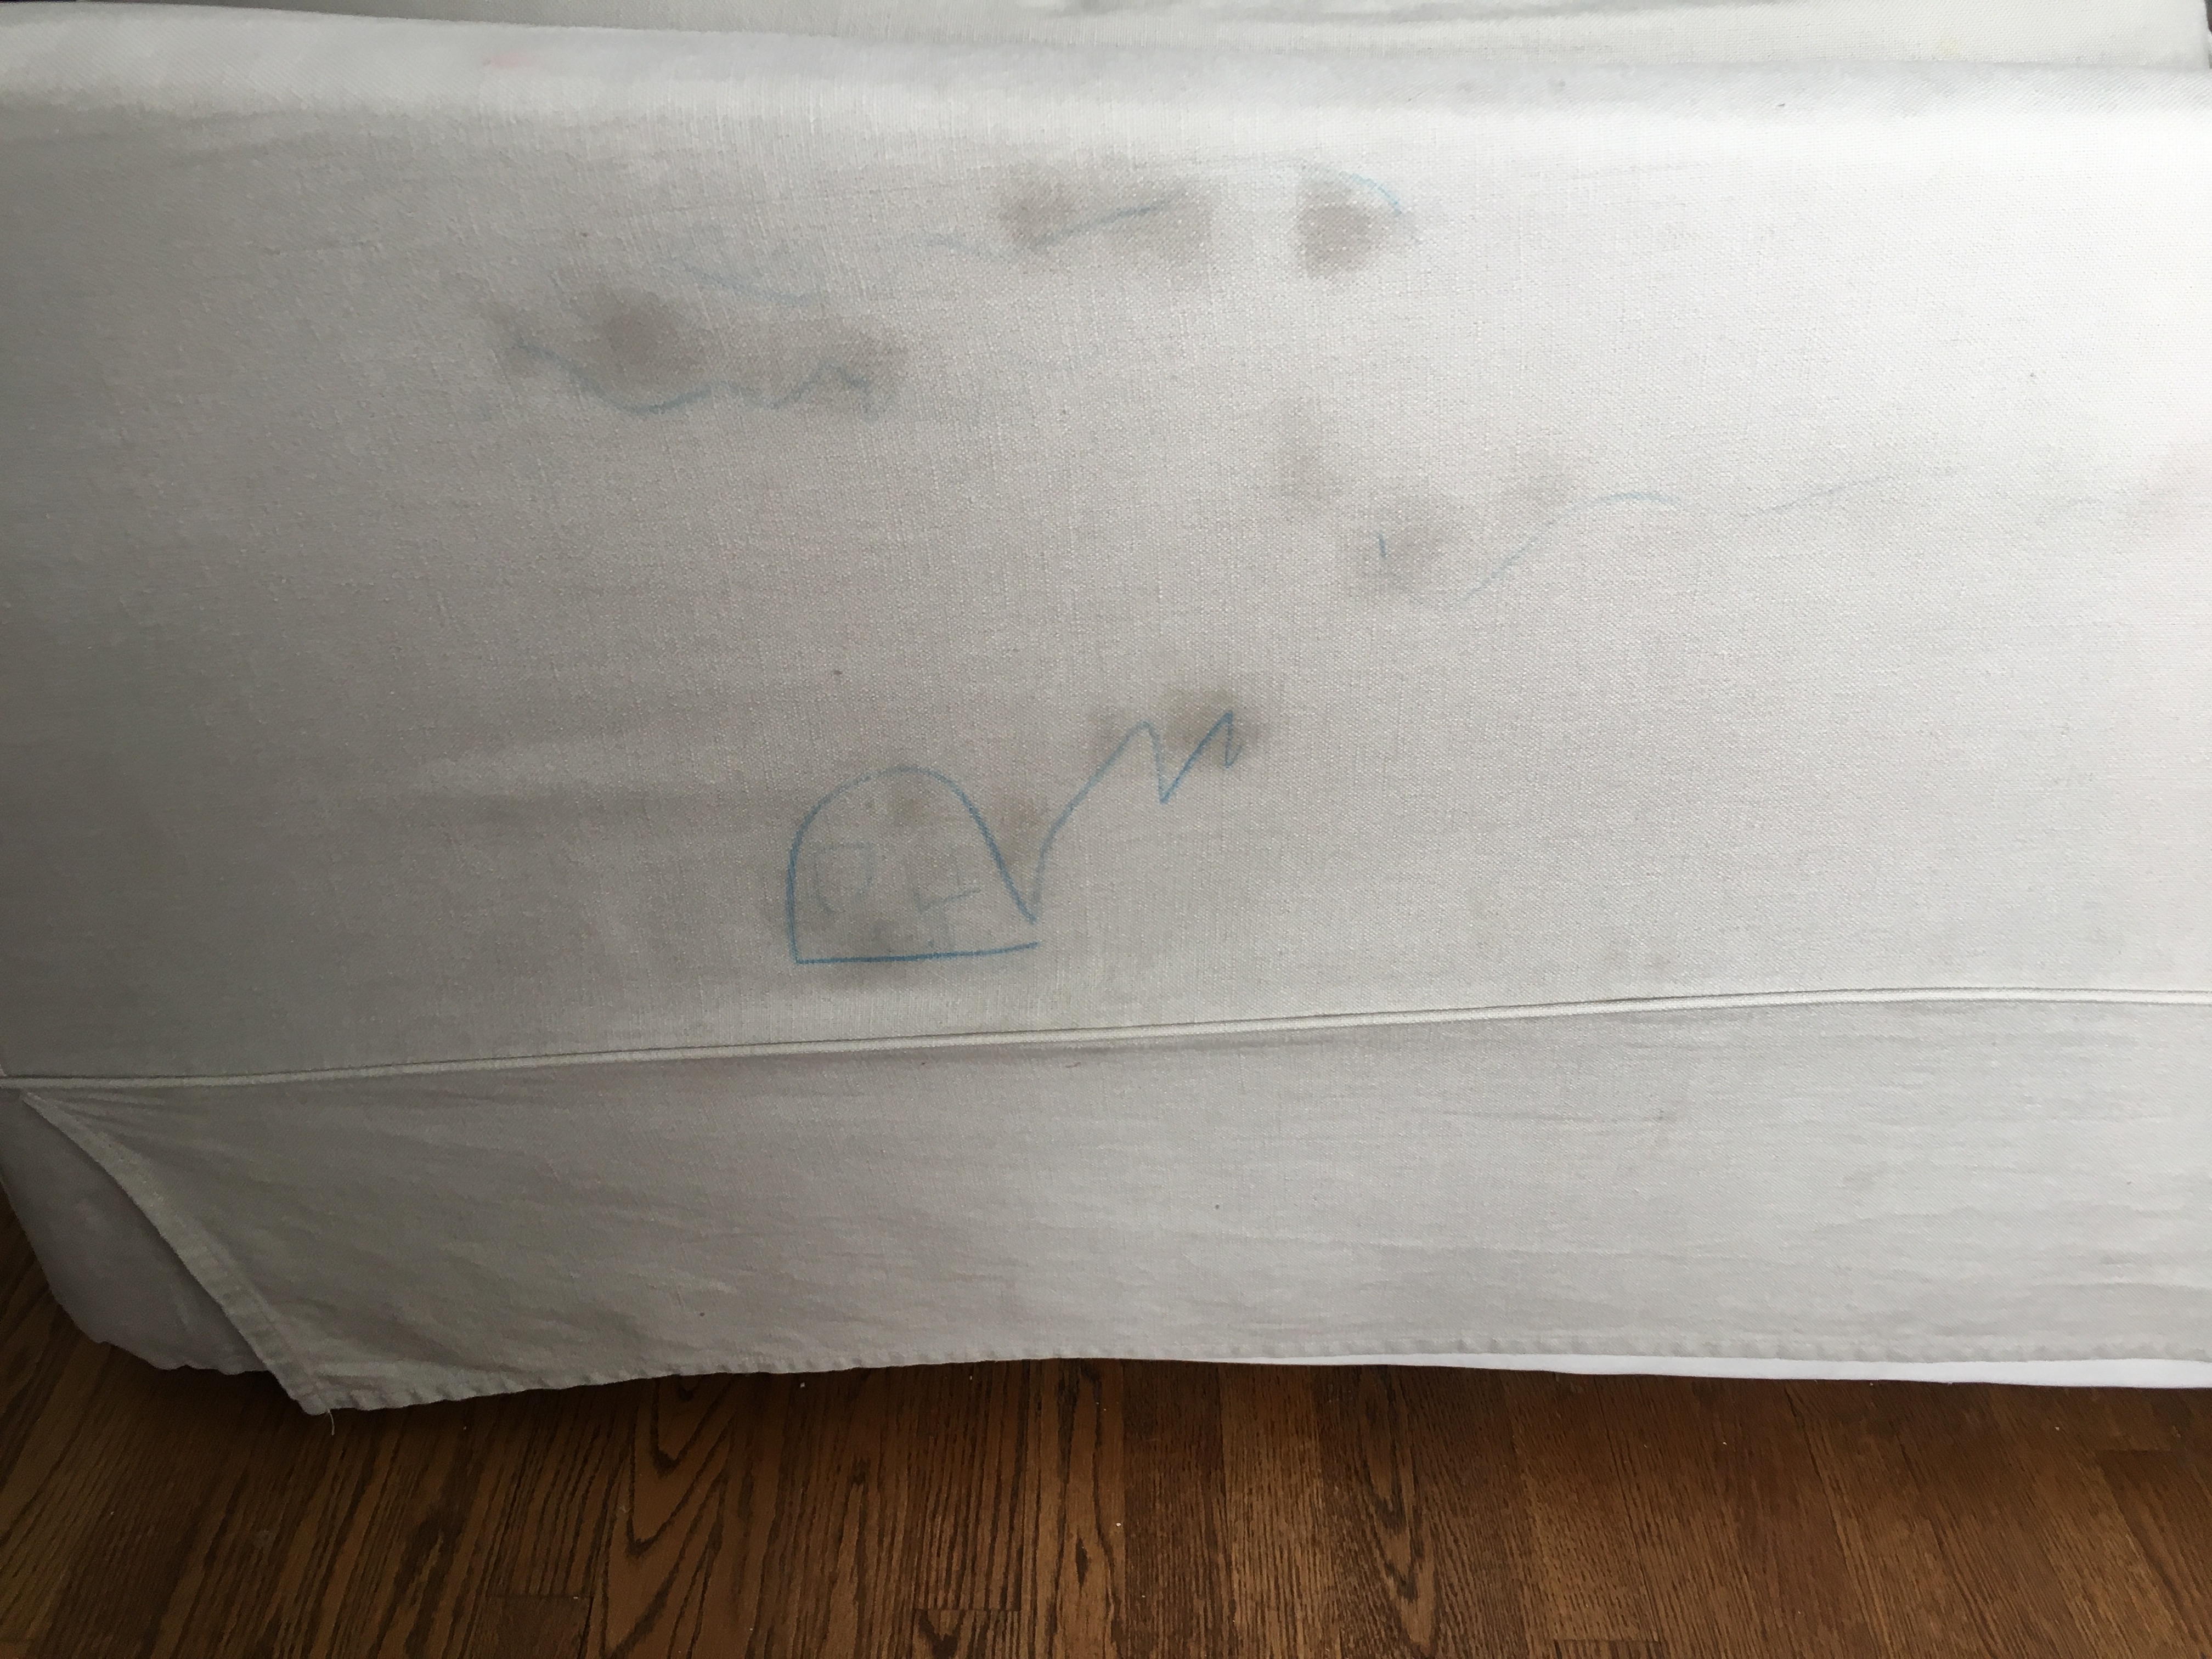
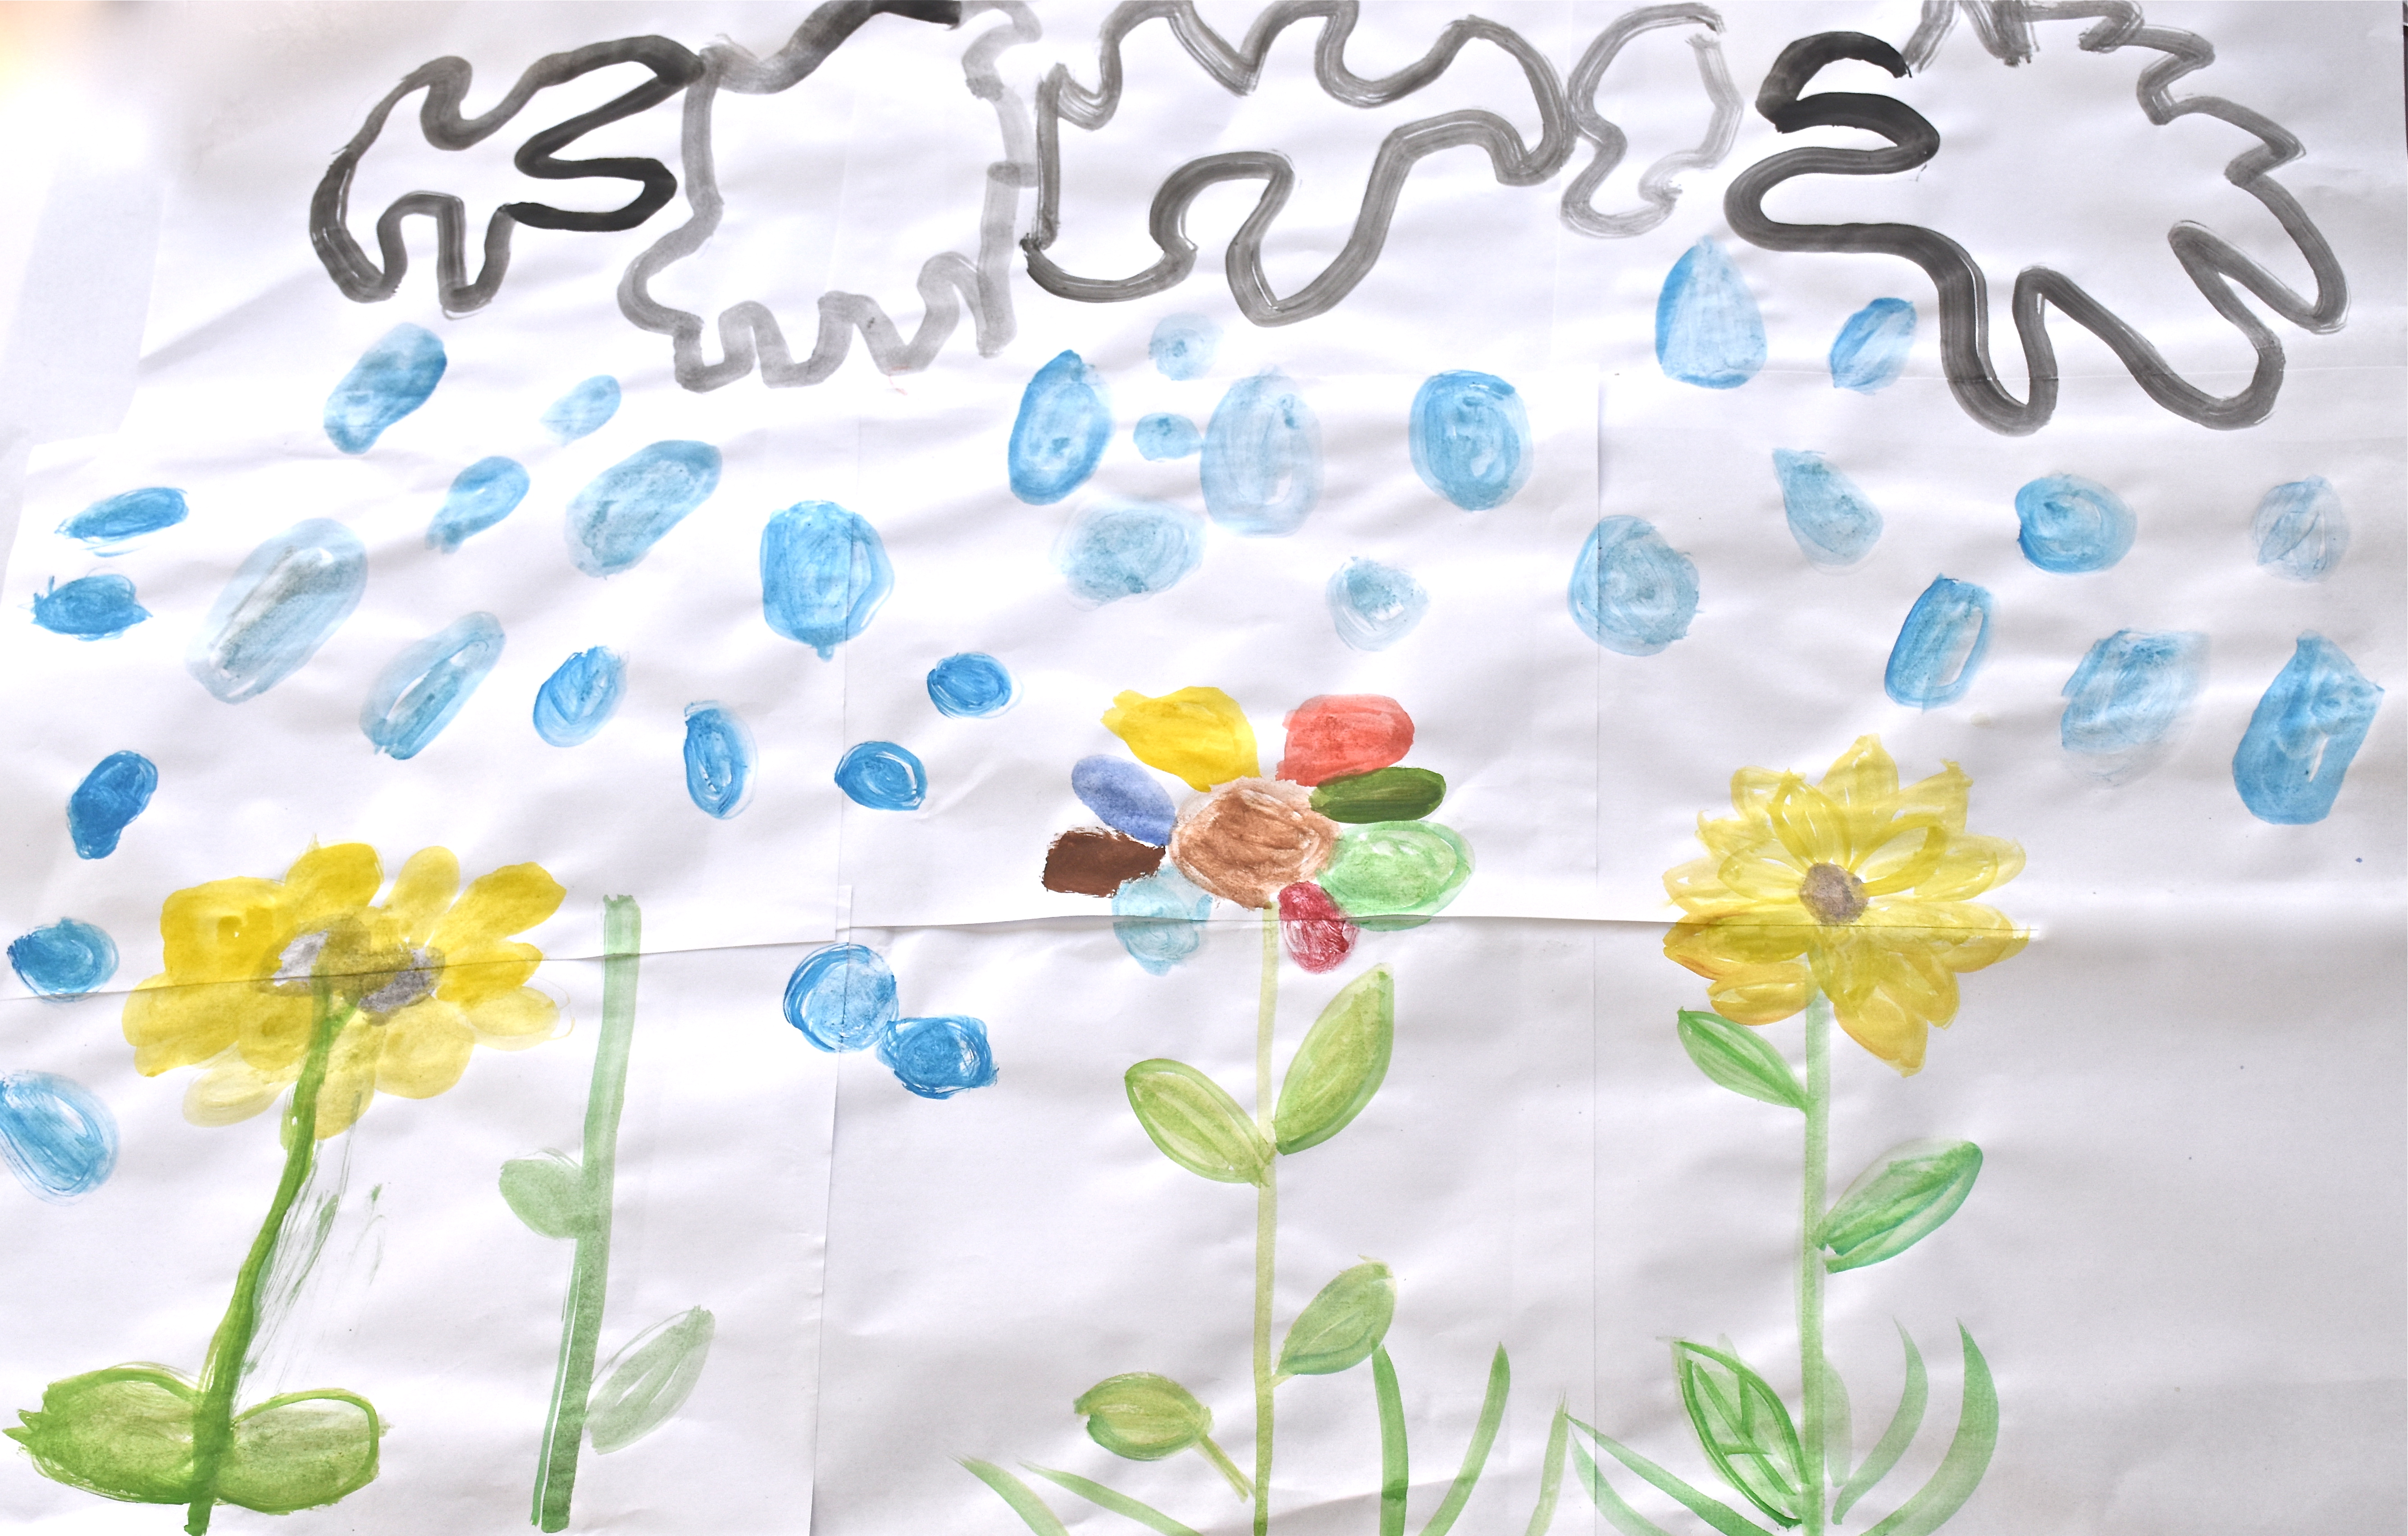
I was getting ready to walk out the door this weekend when I turned to see a blue crayon on my living room floor and as I picked it up I caught a glimpse of the back of my couch. There right before my eyes was a igloo and mountain scene. I am thinking my daughter was inspired by the winter olympics and it would be a lovely mural, had it not been on the back of my nice sofa. Oh how I love my daughter, but what was she thinking?
I took this photo after I had panicked and began spraying the sofa with emergency stain cleaner, but I had to take a minute and just laugh.
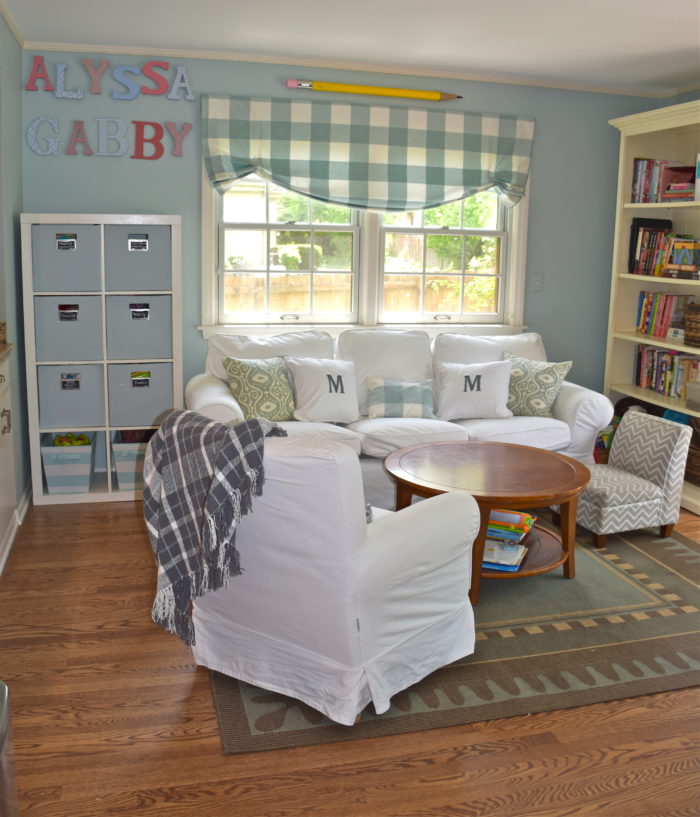
The thing that really put this over the top was that just minutes before this my husband had also discovered bite marks on the wooden armchairs. I love my girls but sometimes the balance of crayons, plastic toys and damage can get completely out of whack. So in an effort to prevent my living room from becoming an art studio I am going to make some changes to our more kid friendly room off our kitchen. So before I take on another project I thought I would share some before and after pictures of this play space.
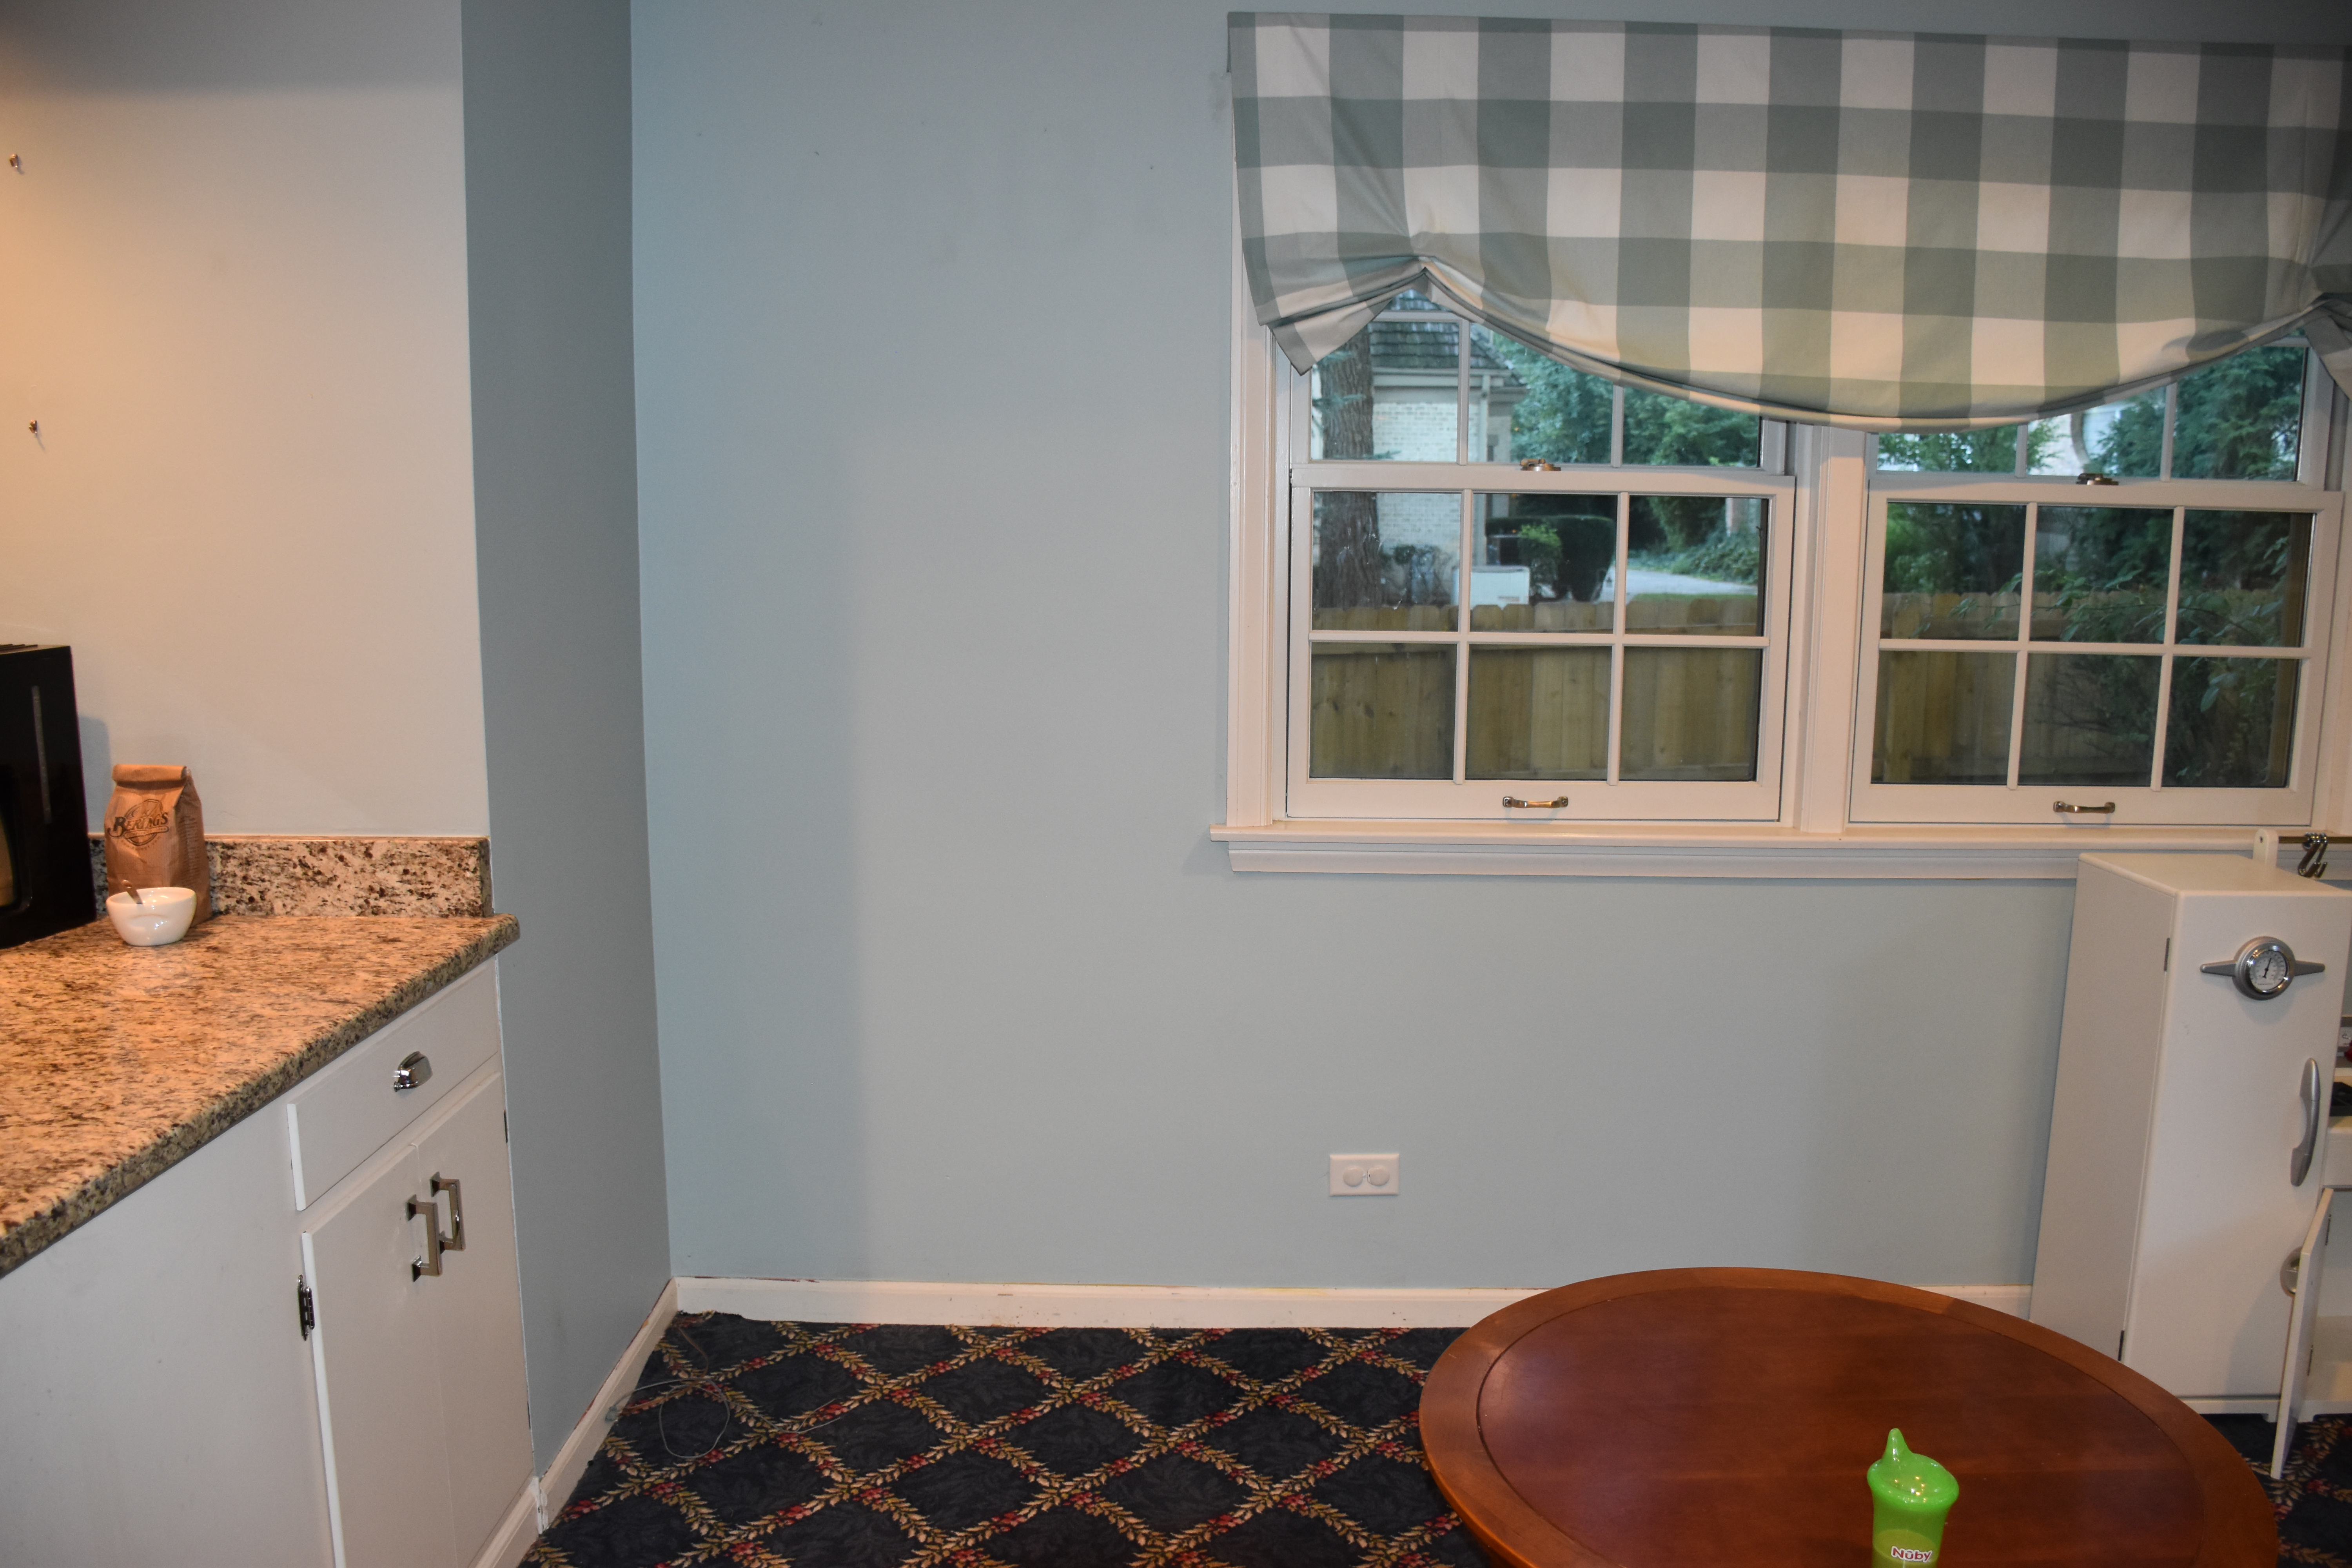
The previous owners had used the room as a more formal den and television room. The wall color was a golden mustard color that had a strong orange undertone to it. I wanted to give the room a lighter and brighter feel, but making changes in this room have taken time.
This is the photograph from the real-estate listing
The carpet and draperies all tied into this more old world look. The patterned carpet was tough for us to keep clean and the sliding glass door is the only entry way into the back yard so muddy and snowy boots were an issue. We knew we wanted to extend the hardwood floors from the kitchen but it took us some time to complete. Here is a photo I took as I was finishing the painting in this room.
I took this photo when I was happy to be nearly done painting, but you can see the difference that some new paint made.
I painted the room one shade lighter than the kitchen in a Benjamin Moore paint called Woodlawn Blue. I was so happy to finish the painting in this room. It made the room feel like a kid friendly space.
This is a photo I took before we replaced the carpet.
Then once we finished the floors, I decided to add in some washable slipcovered furniture from Ikea. These white slipcovers have taken all kinds of abuse, but I have been able to bleach them clean time and time again.
This is the cleaner version of my girls room. We are still learning to pick up after ourselves, so some days things look a little better than others.
The shelf is also from Ikea and to try and corral the toys and art supplies I got some fabric covered containers from Target’s Threshold line. I added some chalkboard styled labels to try to keep things sorted and organized.
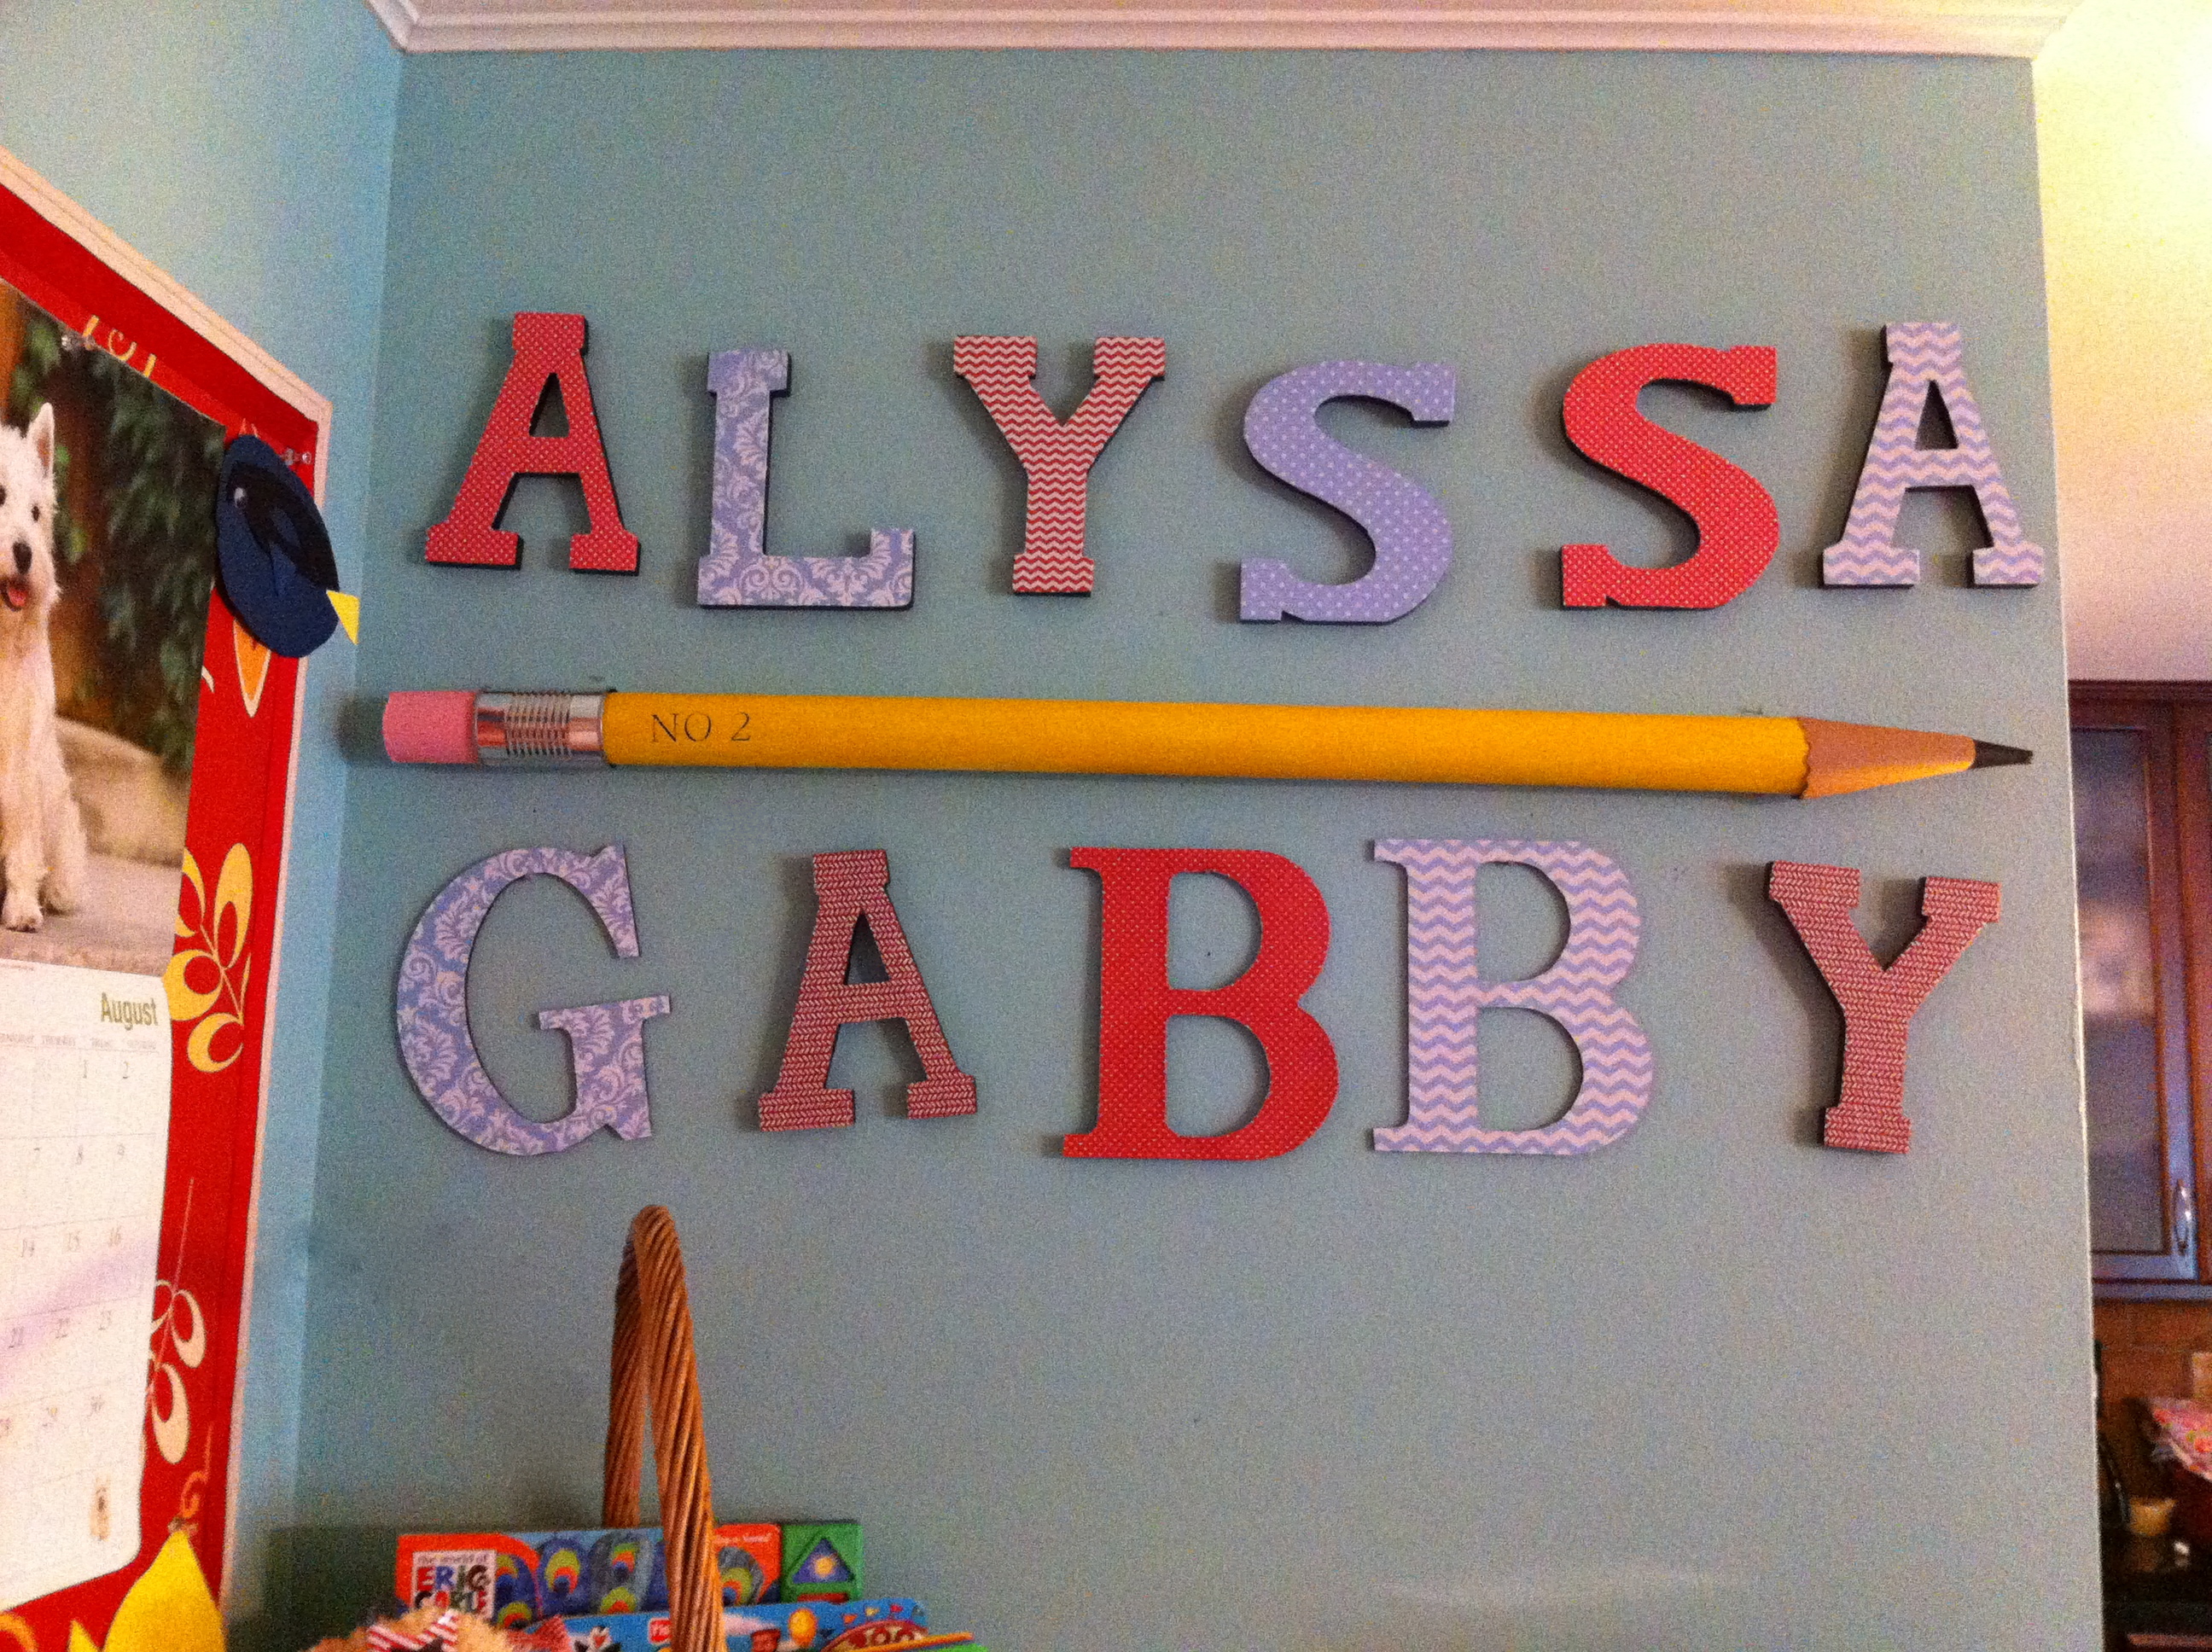
Then since this is a kid friendly space I added some personality with a yellow pencil I made from a wrapping paper roll and a tomato paste can and some craft store letters I covered in red and blue patterned paper.
Here is a close up of the letters that I originally had in a small art corner in our old home.
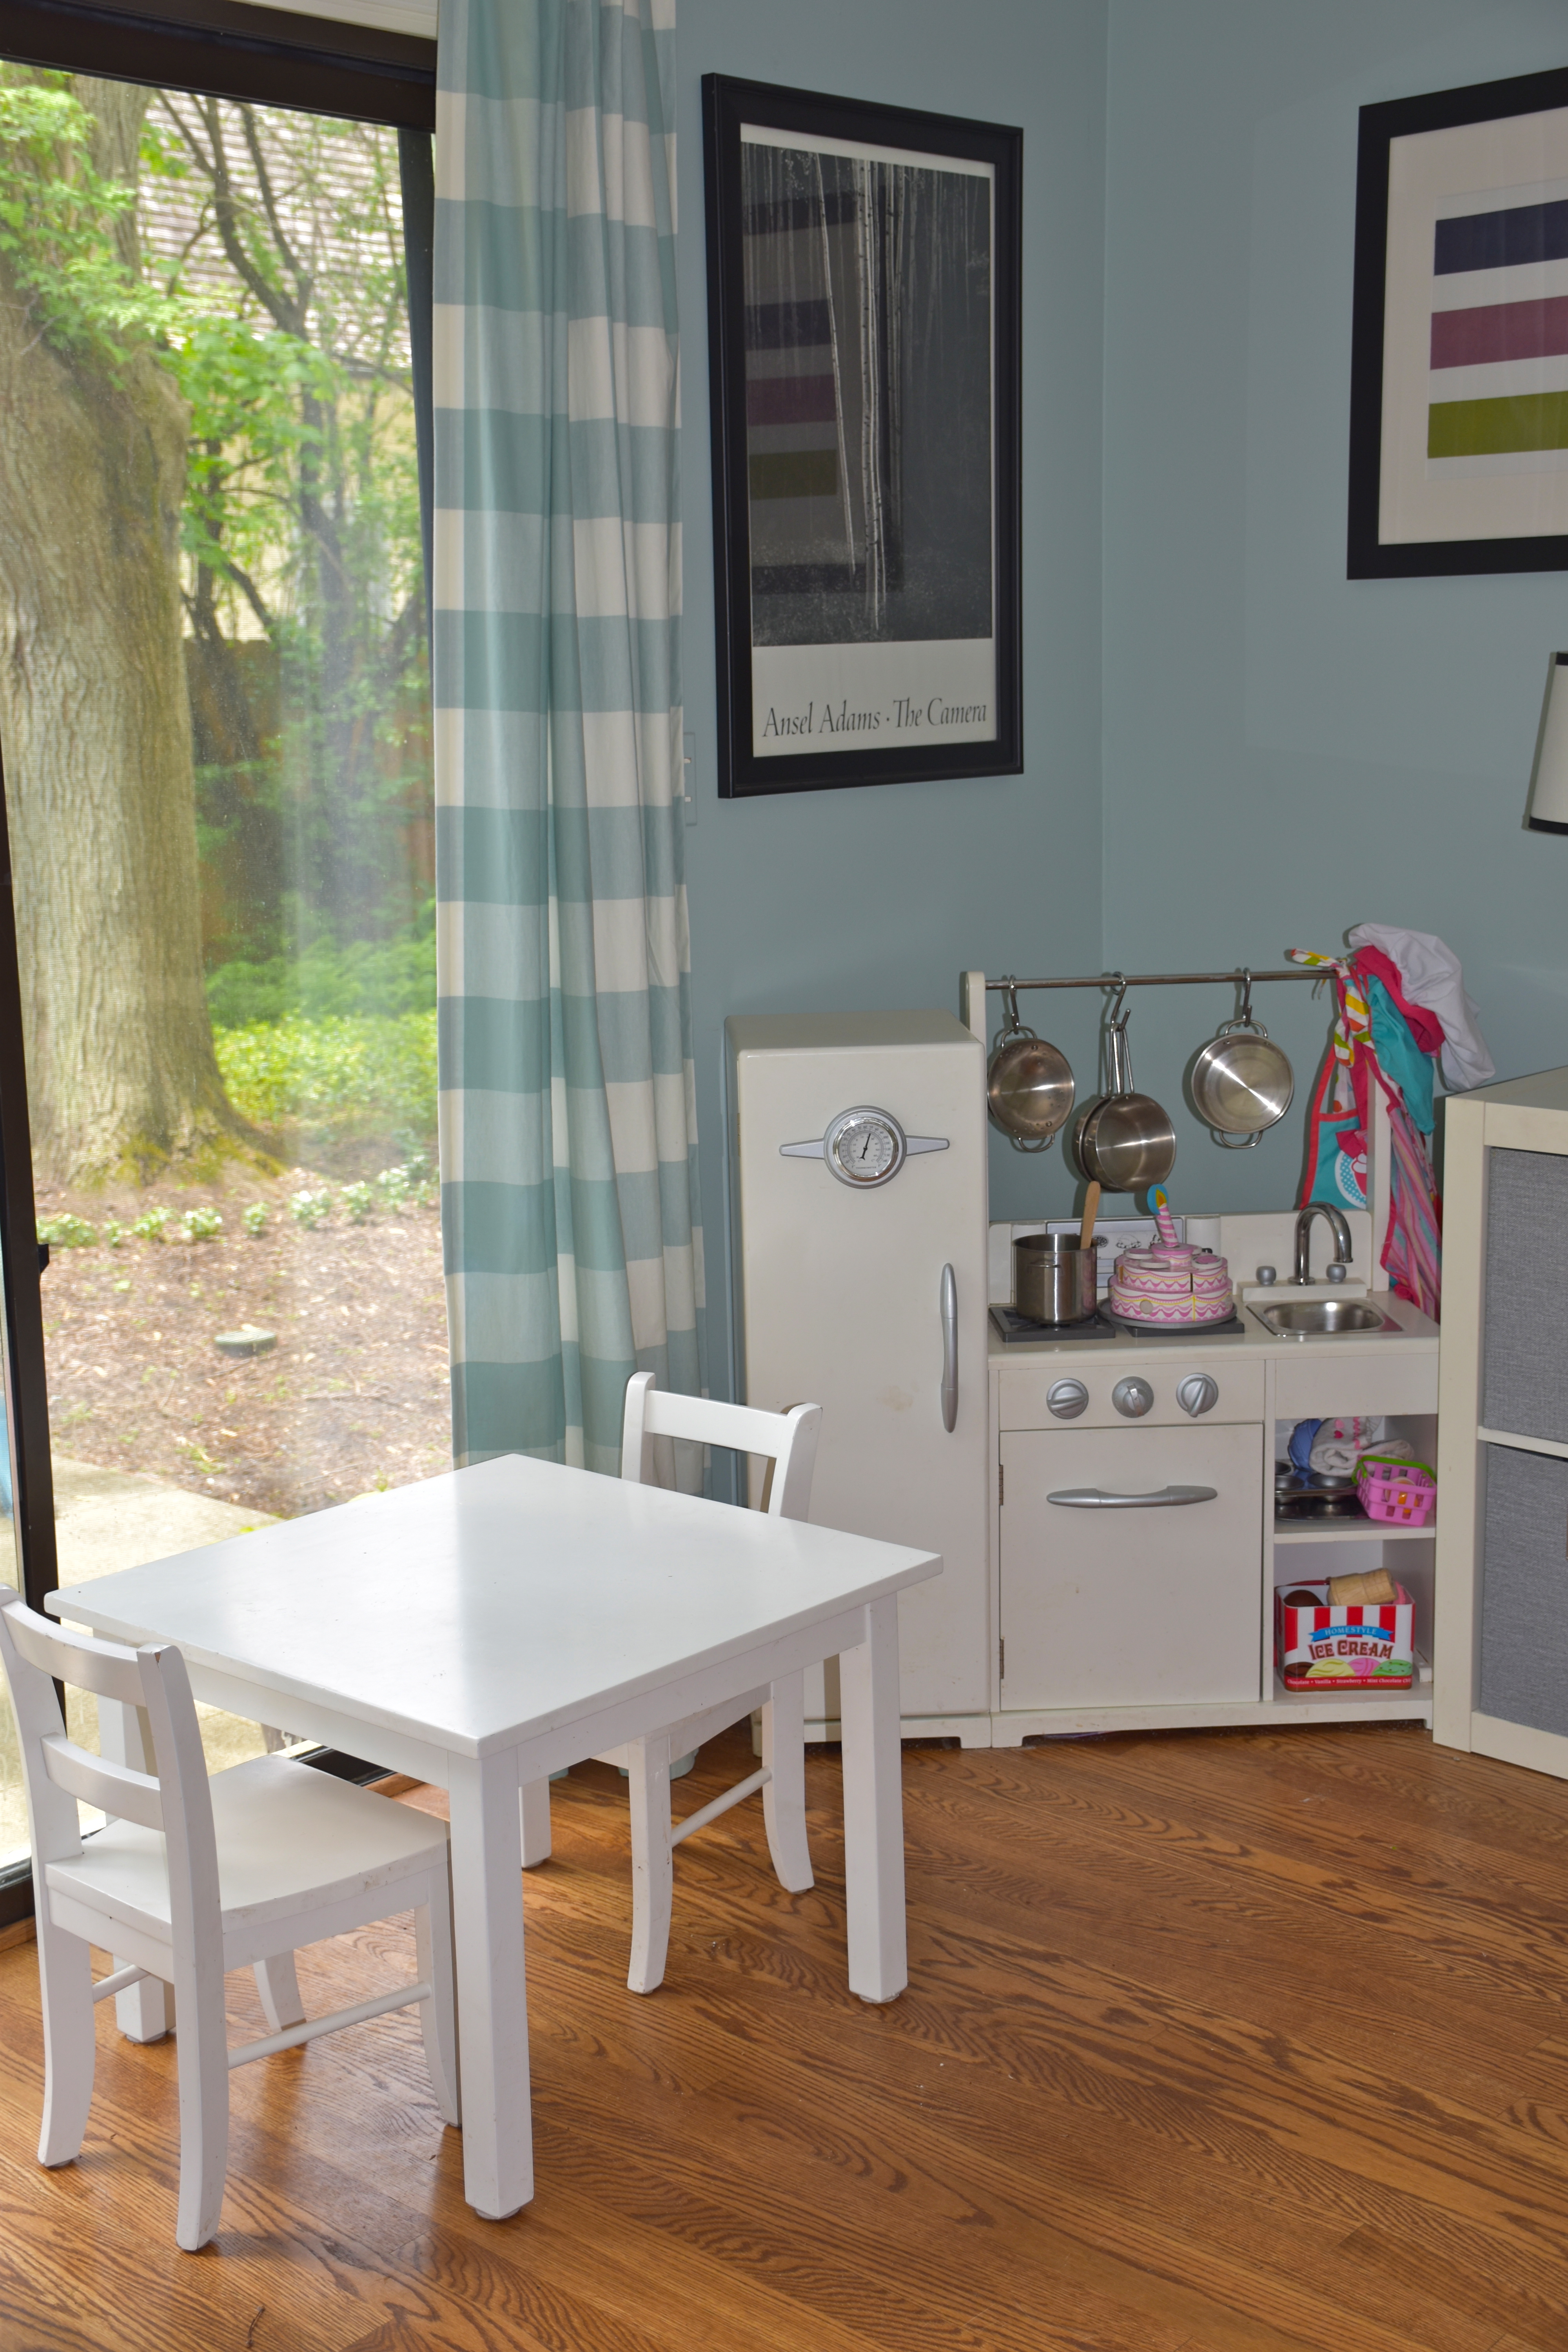
Finally, In the corner I have the play kitchen and table set and this is the part of the room that is going to change to keep up with the crazy amount of painting and art projects that are taking over our kitchen table and now the back of the sofa.
I have already begun to make changes, so this room can evolve to become a more art friendly room. Just as we were beginning to feel overwhelmed with all the watercolors, glue and crayons taking over our house I made a lucky roadside trash find. A family was throwing out a large Pottery Barn Kids art table and chairs. My very sweet neighbor stopped to help me load it in my car when the weather was, no exaggerating, two degrees. Great decorating finds know no temperature limits. So when the weather gets a bit warmer I plan to take on a new project by painting our art table to fit the color scheme of our room. Until then I am going to buy some butcher paper, because all future murals in our house need to be on paper. There is nothing more for fearful for a design loving momma than art supplies gone rogue. I love to see my girls thinking creatively, however after this week we clearly need to learn to channel our creative energy in new ways.
This is a drawing my oldest daughter painted recently. I love her clouds they remind me of a matisse like cut out.
It’s been a snowy week here in Chicago. On Friday we had a foot of snow fall over the day and the forecast is predicting more by the end of this weekend. The snow and more reasonable temperatures (by Chicago standards) had us excited about getting out to enjoy it. This weekend we decided to go cross country skiing at our local arboretum. Our girls had never been on skis before so we were surprised at how well they did and how much fun they had.
All of this snow had me thinking about soup. One of my favorites is this wild rice soup. My husband isn’t a chicken noodle soup fan, but he likes rice so I decided to create a recipe for wild rice soup. It’s easy to make and my whole family including my picky preschoolers love it. So I thought I would share the recipe for this hearty and delicious soup. Serve it with some warm french bread and you have a savory and satisfying dinner you can make under 30 minutes.
1 box (6.2oz) Uncle Ben’s fast cooking long grain and wild rice
6 cups of chicken broth
1/3 cup cream
salt and pepper to taste
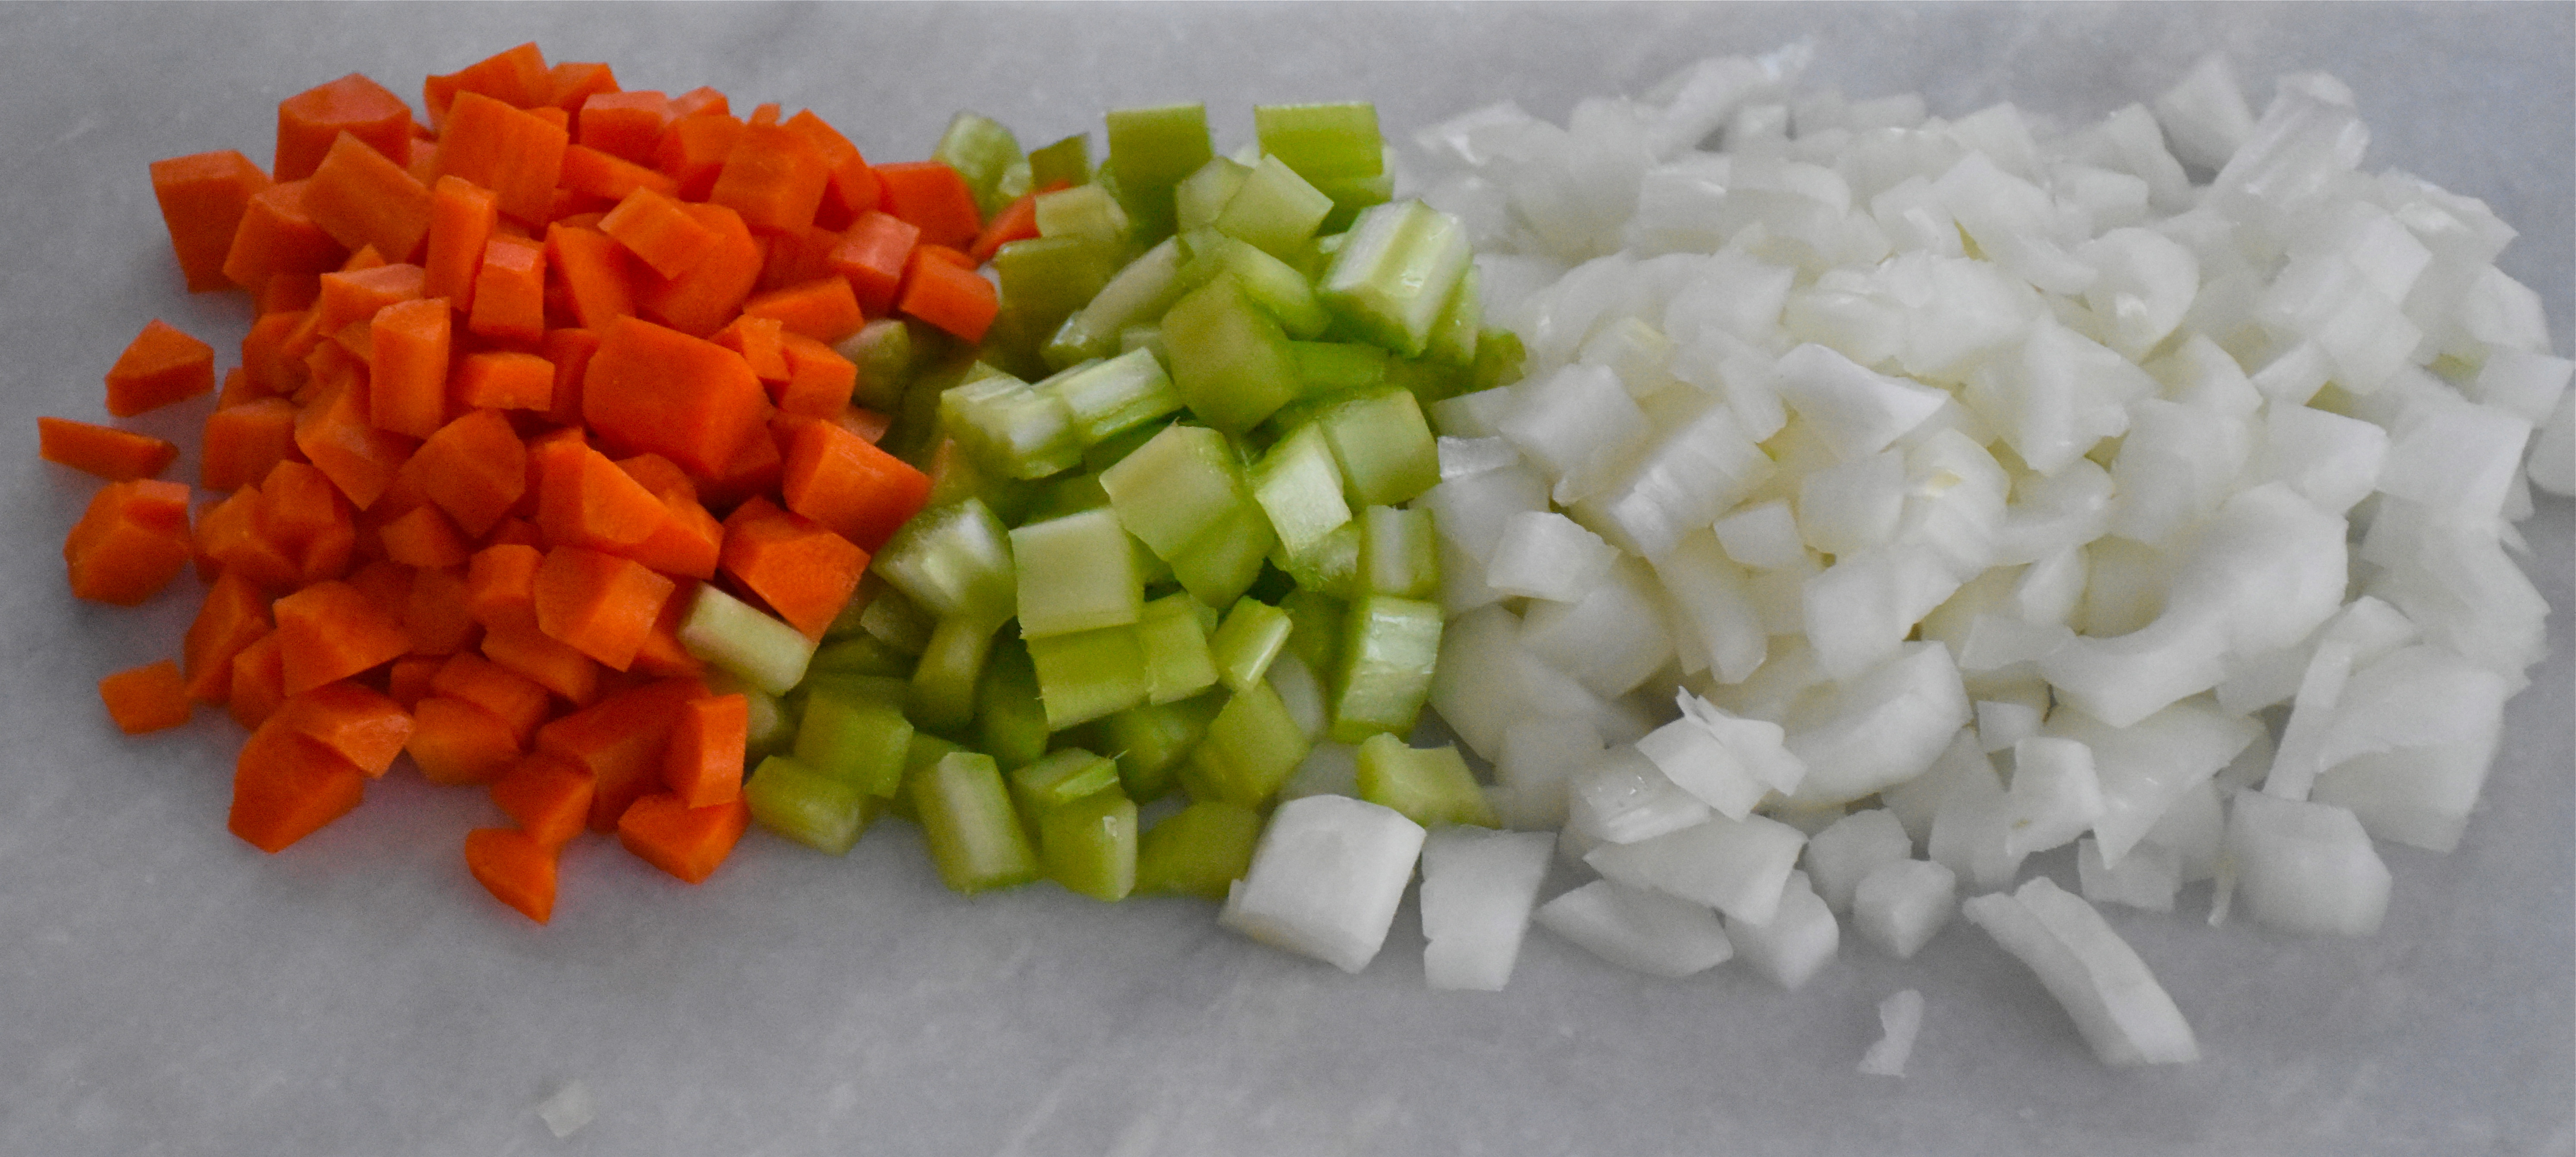
First, dice your onion, carrots and celery.
Next, over medium heat in a large stock or soup pot melt your butter. Then add in your onion, carrots and celery and sauté them until the onions are translucent and the carrots and celery beginning to get soft. Then add in your chicken broth and the seasoning packet from the wild rice. Mix the seasoning in well and then add your wild rice and chicken. Then let your soup simmer on medium low heat for ten minutes until your rice is cooked.
Finally to finish off your soup, stir in your cream and season to taste with salt and pepper.
This soup has been one of my winter favorites. It’s perfect for a busy weekday or for those days when you would rather be out playing in the snow.
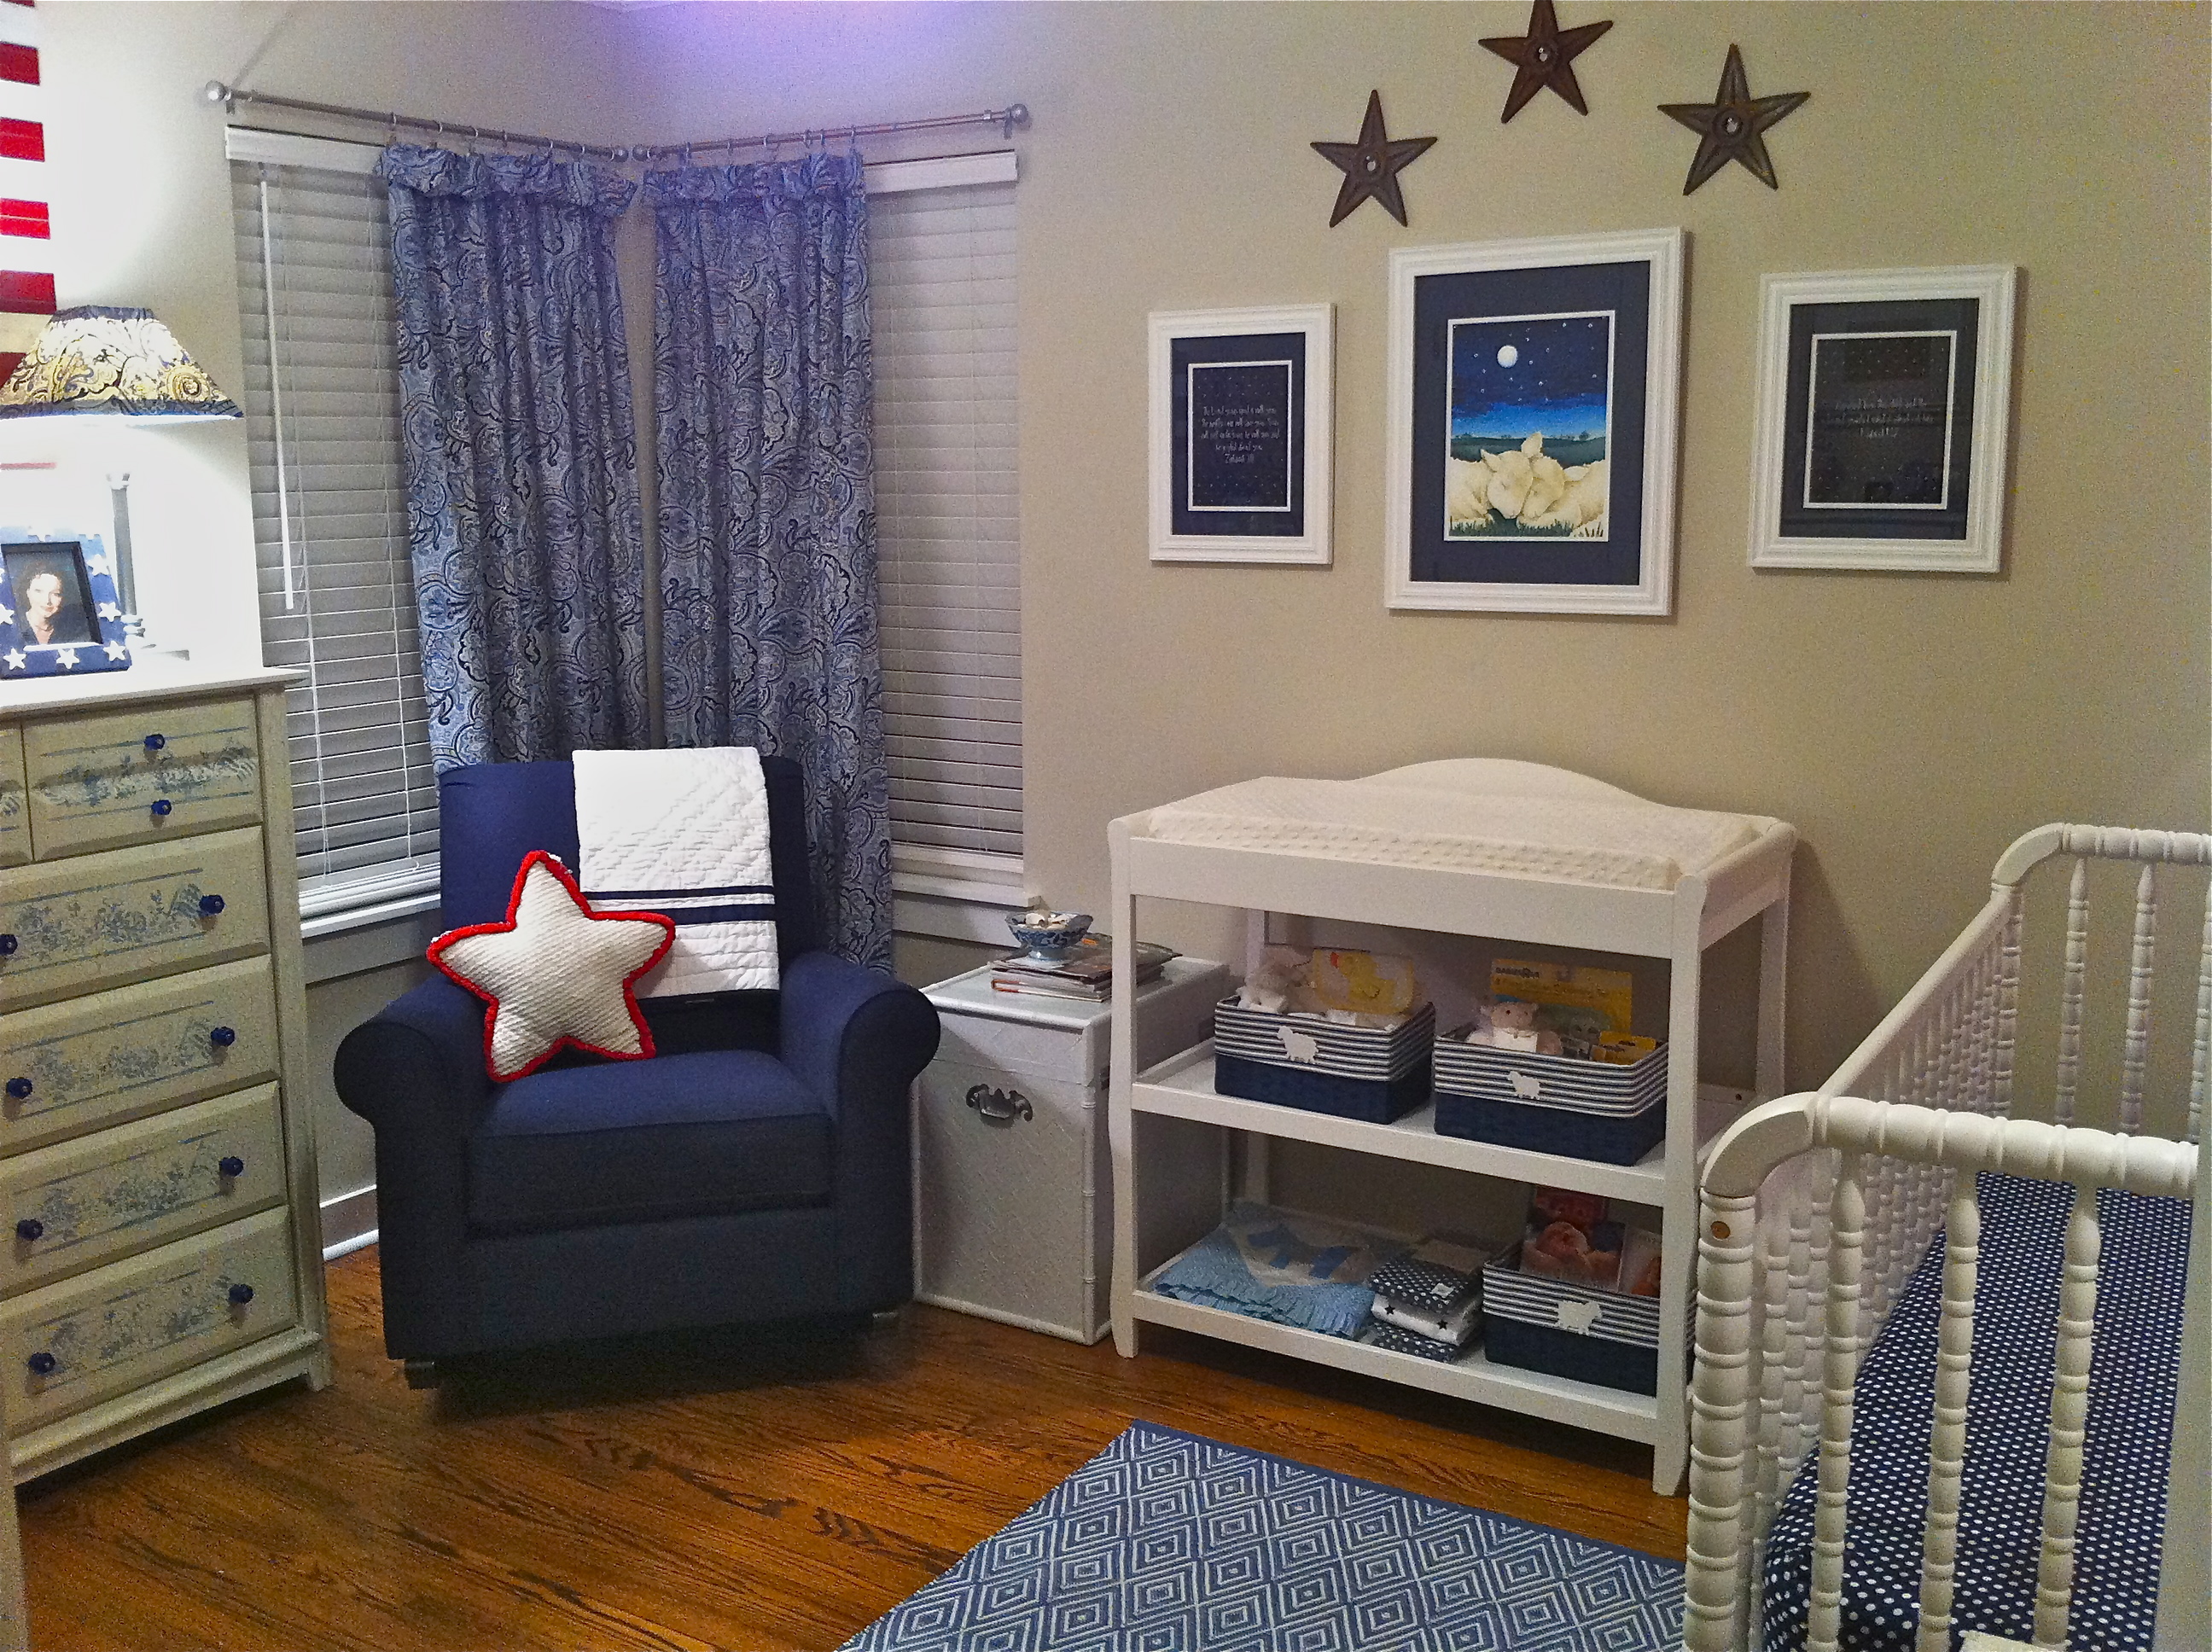
My sister had a baby girl this past week, so I am now officially an aunt. My family and I are so excited about this new little one and we can’t wait to meet her. As I have been talking with my sister this week, it has brought back so many good memories of when my girls were babies. I wasn’t blogging at the time I decorated my girls nursery so I thought I would take a trip down memory lane and share a few photos of the nursery in our old home and I also got my sister to share a few pictures of her baby’s room as well. We both designed neutral rooms around a favorite art pieces, but each room has its own distinctive style.
My family is an adoptive family so we didn’t know enough details in advance to plan a room for a specific gender. There are lots of great bedding options out there but I knew I wanted to go with a classic blue and white that could potentially become more girly with floral details.
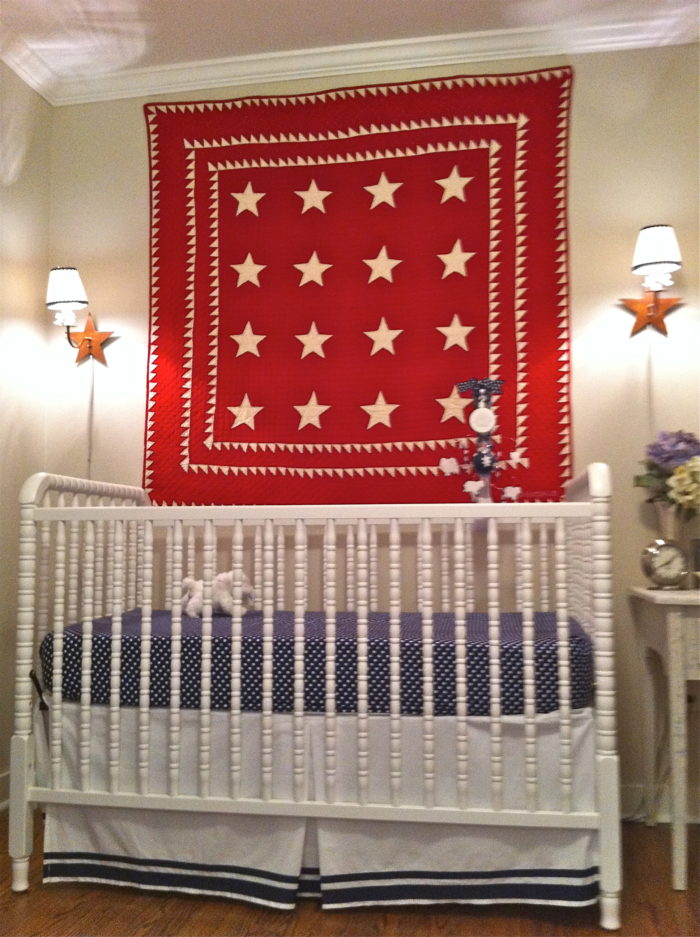
The design plan for my daughter’s room came from an art print by artist Tracy Lizotte that featured the two sleepy lambs. I was searching for art on Etsy when I found Lizotte’s beautiful watercolor prints. I loved her animals and birds, but these lambs were just so sweet. Once I decided on the art the other details began to fall into place. I decided to add in some stars like the night sky and some additional sheep to round out the flock. The quilt is something I had on the bed in my guest room, but the stars worked with the theme and I decided to hang it above the crib by sewing some small rings on the top.
This is my oldest when she was just three weeks old. My how time flies.
This mobile was a special project. I made it to match the details from the watercolor painting. The round base is a paper Christmas ball I painted, then to add my sheep I attached some metal cake jewel holders and I added some beads and felt sheep stickers I found from Martha Stewart. Then I ordered my own custom music box that played “Greensleeves” and a mobile arm from Amazon. The selection of music box songs on Amazon is amazing. In the end, I got just the look I wanted by just thinking outside the box a bit and using things from my craft store that had the right shape for a one of a kind mobile.
I had fun adding in some architectural stars I had and a star pillow for the chair.
Here you can see the drapes I had previously made for our guest room, but I thought the various shades of blue in the paisley worked well in the blue and white room. I also was glad I took the time to line them with black out lining because it helped keep the room dark for bedtime.
Then I sewed some basket liners out of a blue mattress ticking material and I used the same material to cover some lampshades on my star sconces.
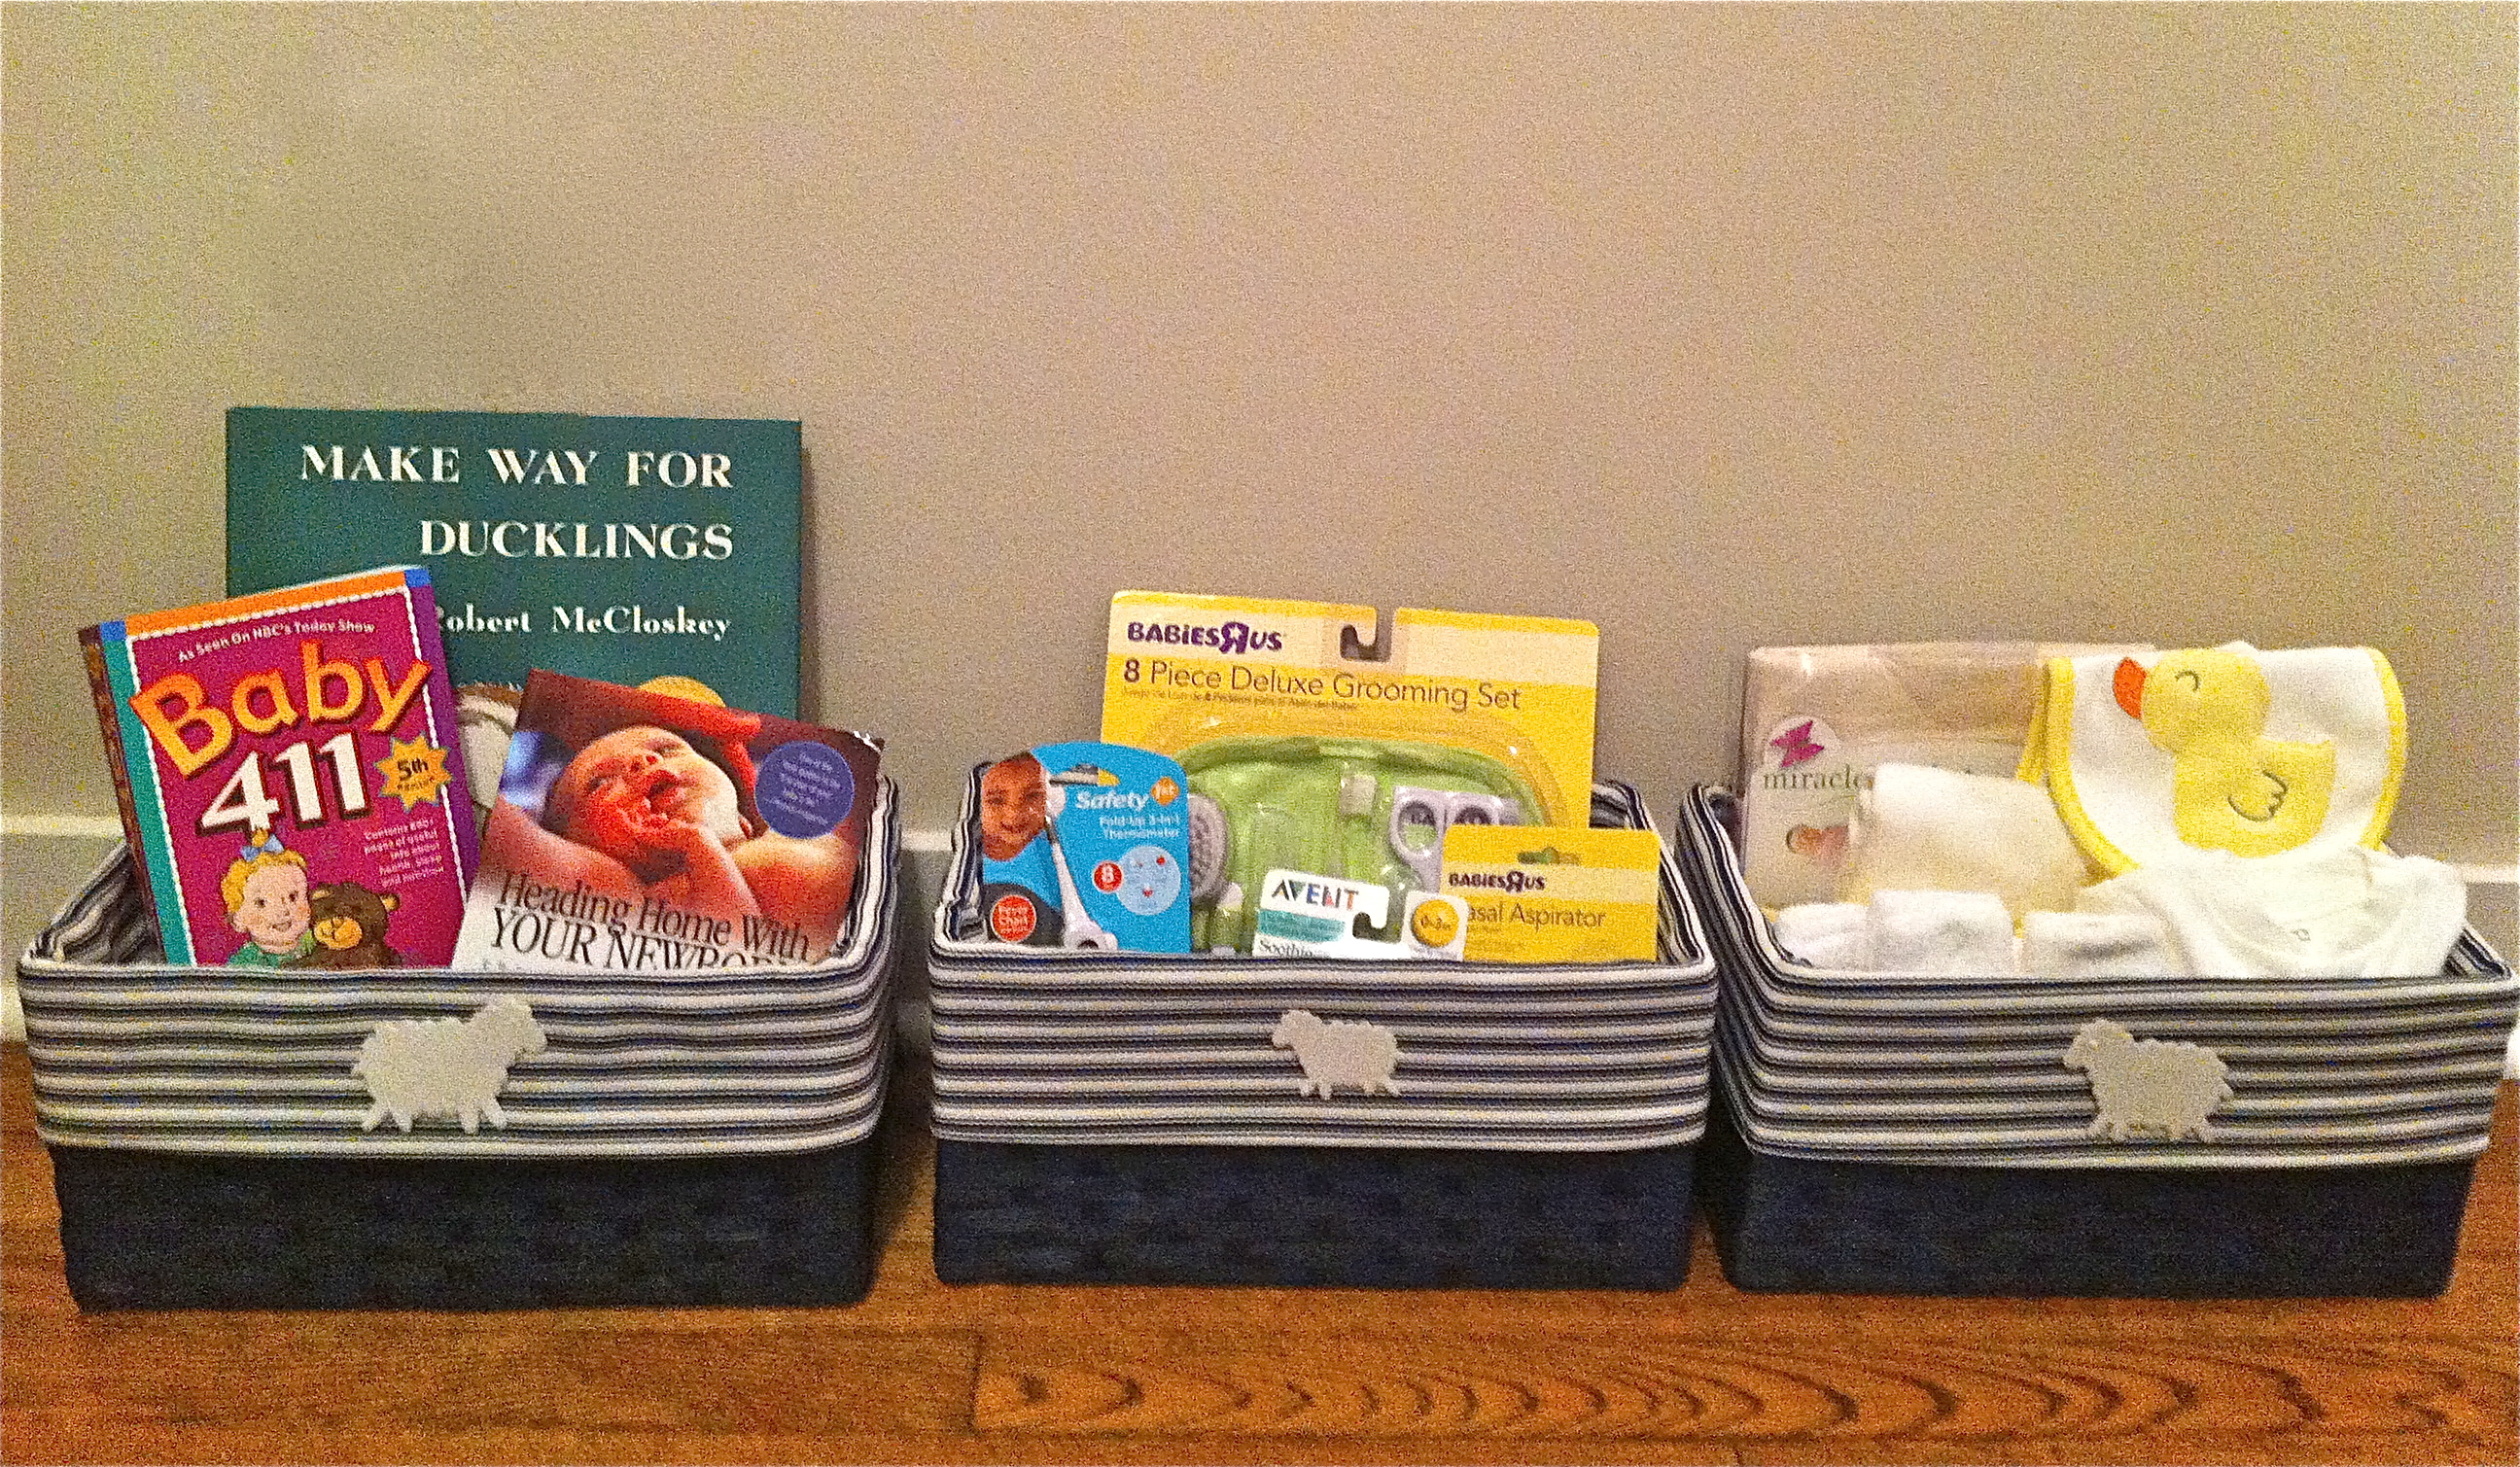
I used more felt stickers on the baskets to give them a custom look. I love baskets for storing all kinds of small accessories, book and toys. They keep all those essential items organized and close.
The blue and white dresser was mine. My mom and I had painted it for my room years ago, but the colors and vintage style worked in the room. I added a wall anchored book shelf from pottery barn kids in the corner that help me make the most of the small space between the dresser and the closet. My girls have loved that shelf because it makes it easy for them to reach their own books. I styled the dresser with a pretty flower arrangement and some photographs of family.
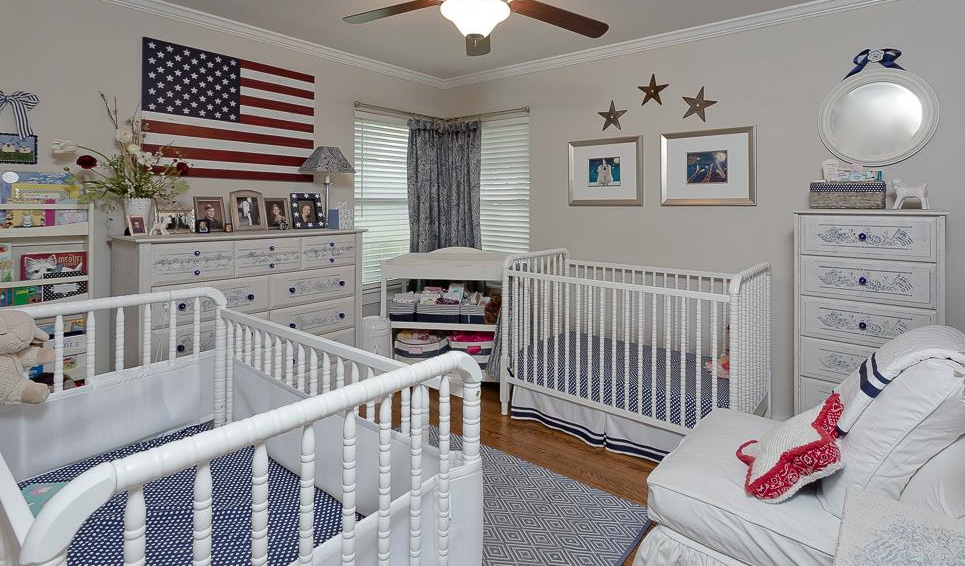
Then when my second daughter arrived a year and a half later I rearranged the furniture and artwork to add in a second crib, that made this nursery for work for two. My youngest daughter still has many of the pieces from this room in her new bedroom, but I am planning some updates with a new big girl bed this summer.
Things got a bit busy when we added a second crib in the small room, but how great it is to have a sister. I have lots of good memories of sharing a room with my sister.
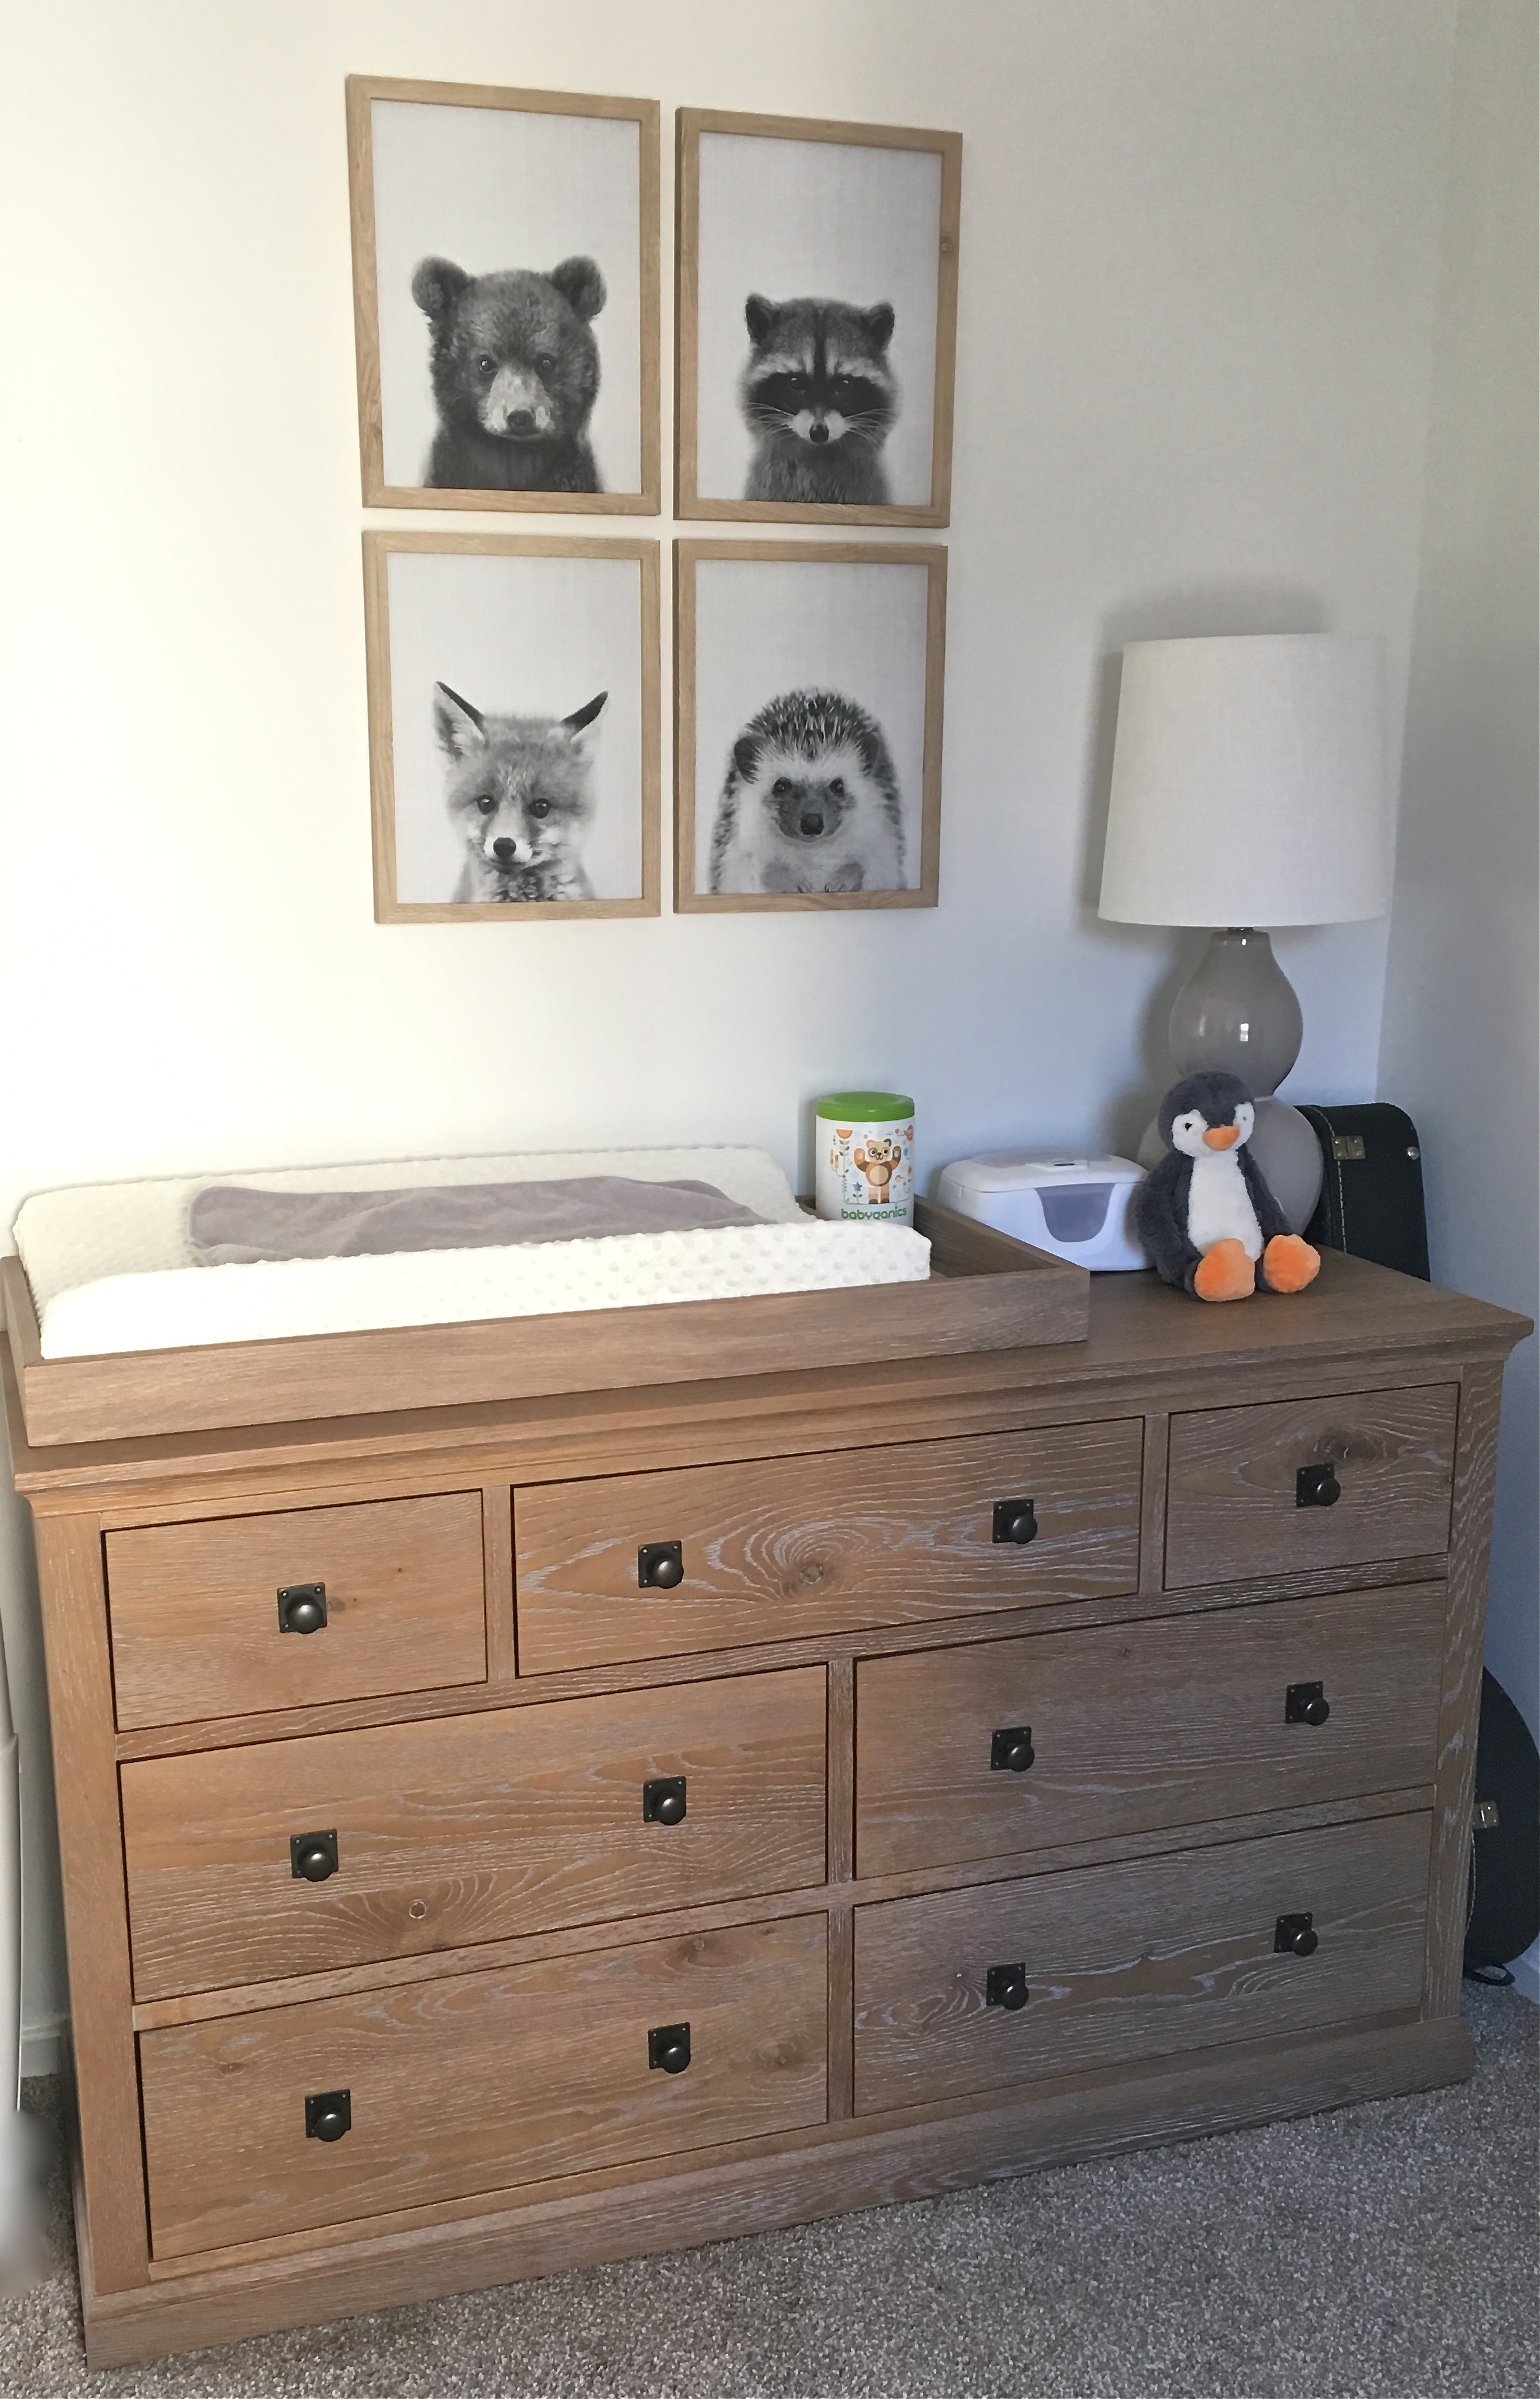
My sister has a more modern style so when she was planning a room for her baby she went with warm woods and grey accents. My sister wanted to wait till her delivery to know the gender of her little one so she planned a neutral room. Here are a few pictures from my niece’s room. My sister was inspired by some animal photographs she found on Etsy at a shop called Lila x Lola. They have lots of great nature photographs in both black and white and color. They also have some abstract watercolor prints that I thought were pretty as well.
Those photographs set a woodland nature theme for the nursery and to go with the theme my sister used a painting that belonged to my grandmother that has a flower filled meadow.
Then she used a rocker that had been in her husband’s nursery with a more modern ottoman she found at Target.
I love nurseries they are the beginning of something wonderful. All the excitement and anticipation of planning and creating something new. I especially love the personal touches that say something about your family. Our journey to bring our daughter home was a long one, but decorating our nursery was a joyful part of waiting and every detail was fun to create. This week has been wonderful because my phone is filled with cute pictures and videos of my new niece. I so happy for my sister because there is nothing like bringing your little one home.
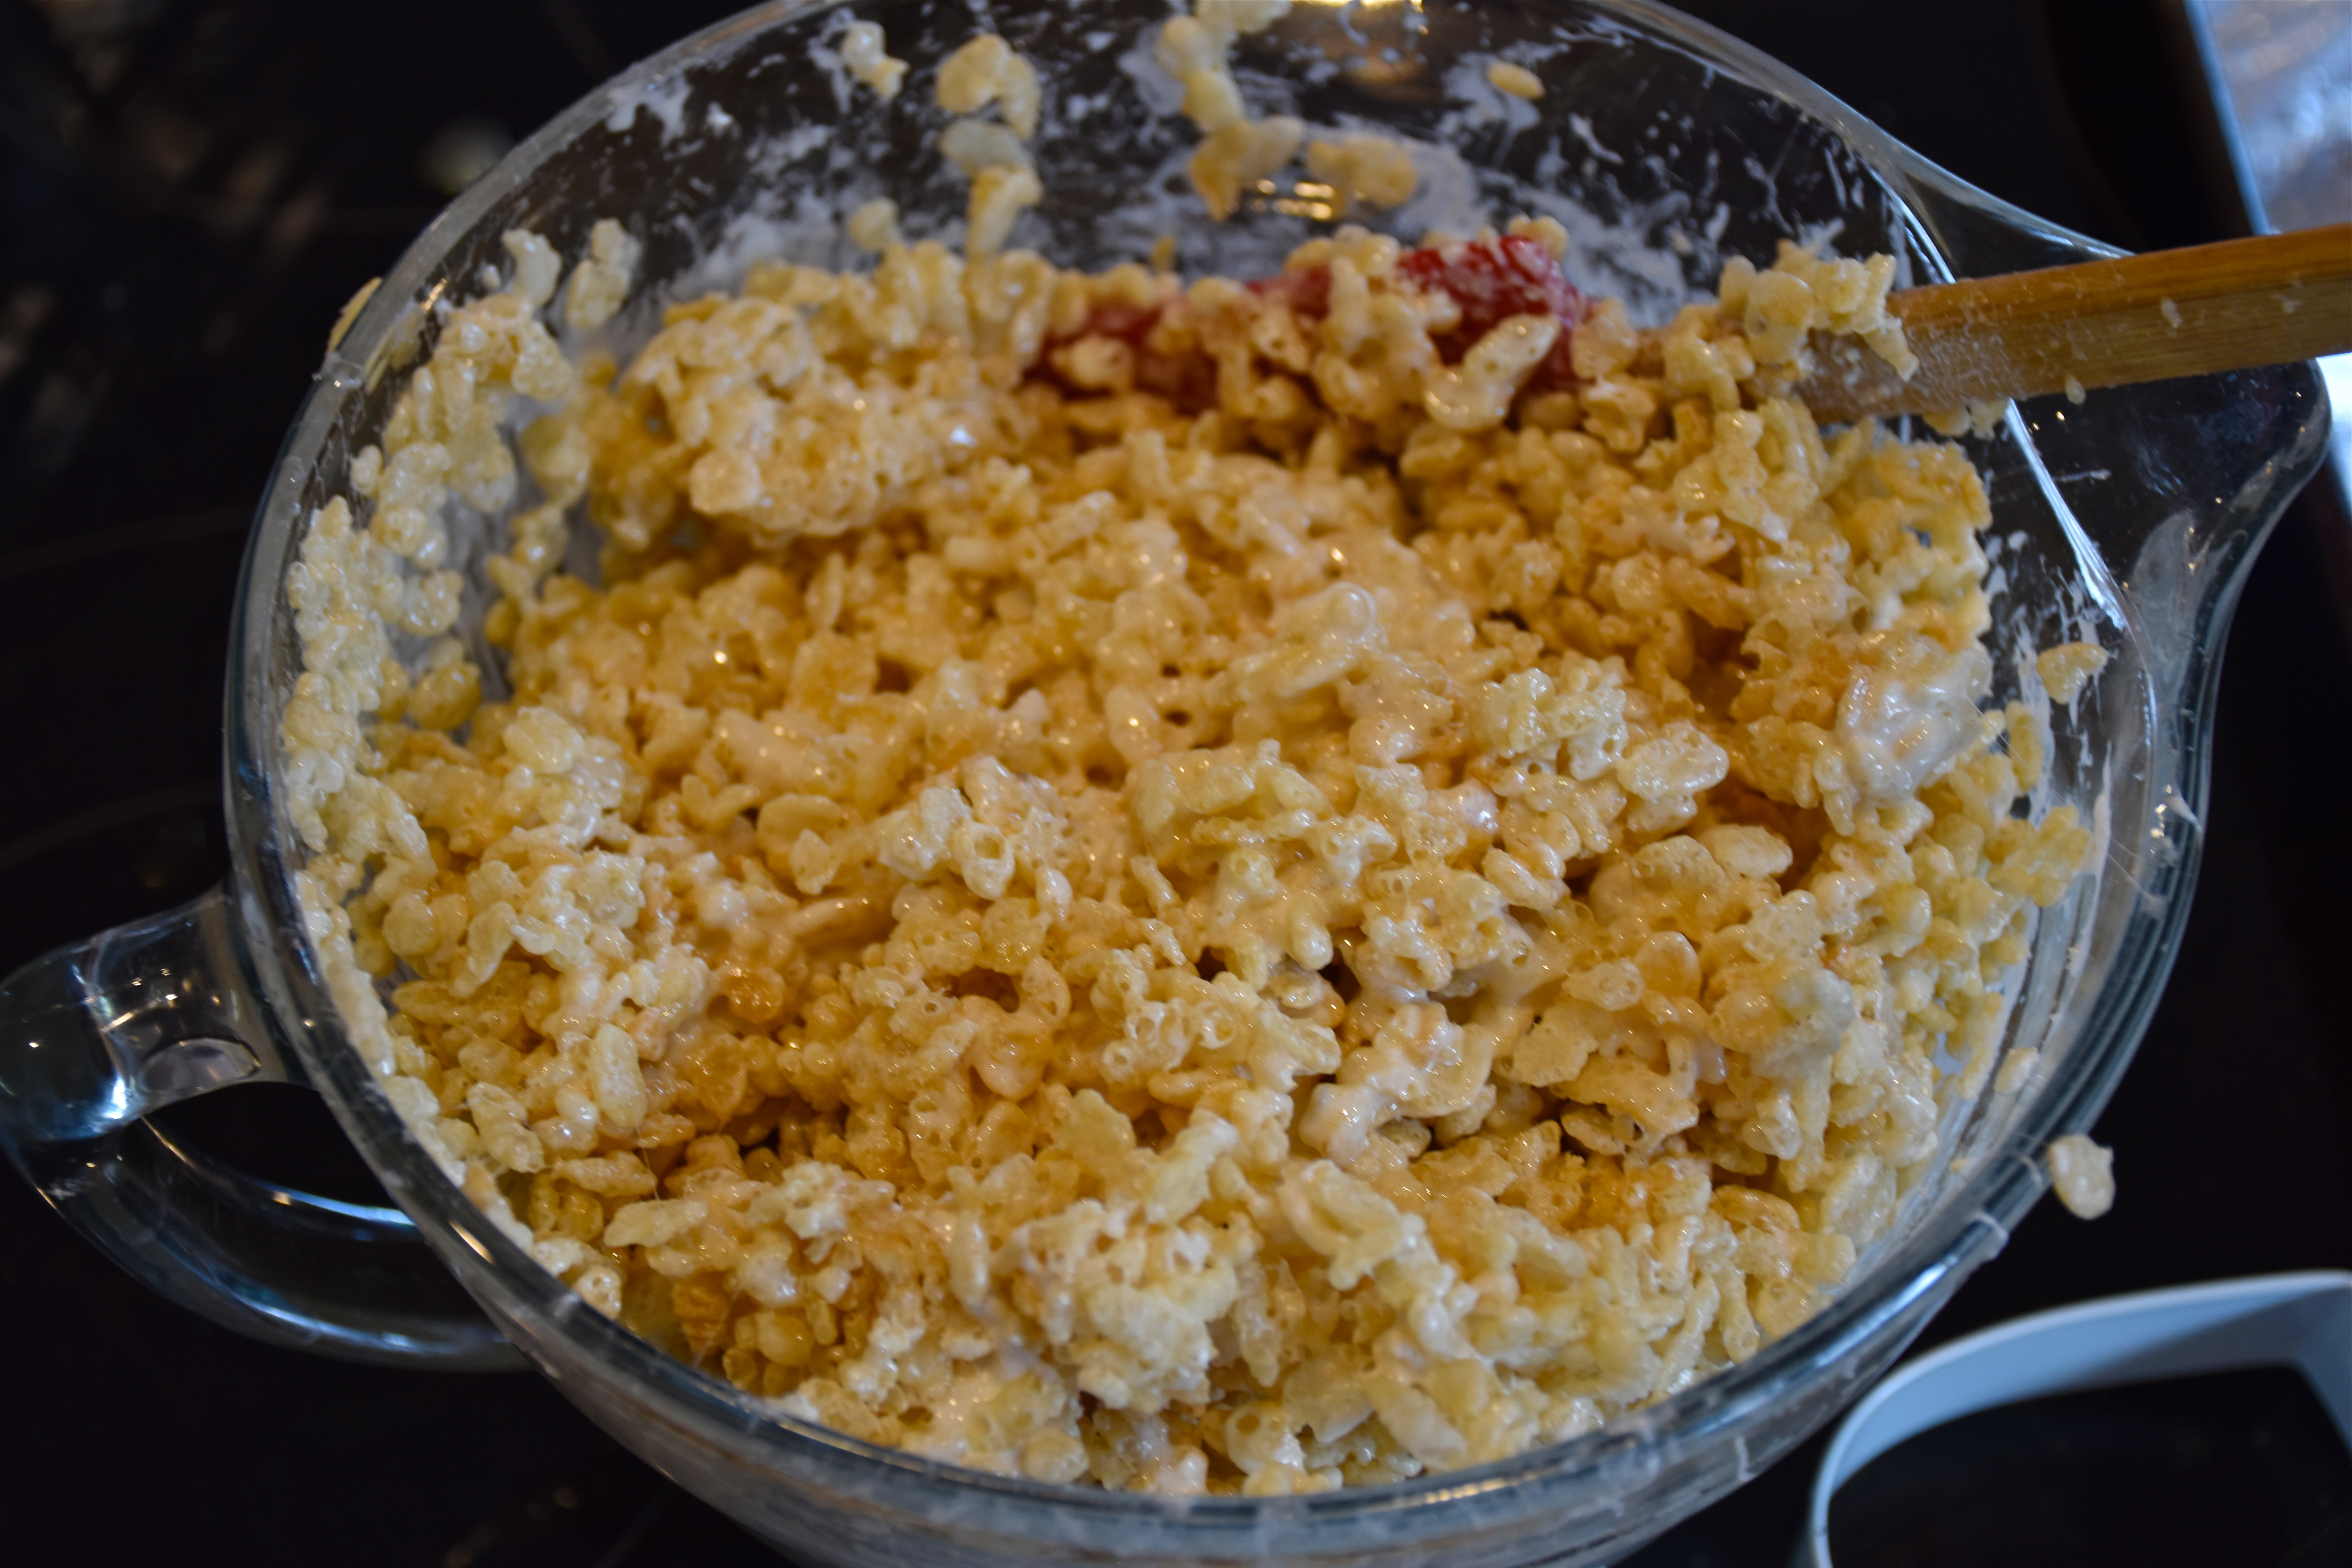
One bite of a crunchy marshmallowy sweet rice crispy makes me feel like a kid again. They are just so fun to eat. Creating these pink sprinkled rice crispy treats brought back fun memories of elementary school Valentine’s Day parties. As a kid I loved making cards and decorating the Valentines day bags and the shoebox mail boxes we made at school. My girls are already talking about Valentine’s Day. My oldest is especially excited about making and sharing cards, because this year she has learned to write her name. So if you are getting into the spirit of Valentine’s Day and you want to make something festive then give these easy sweet heart crispies a try.
Sweet Heart Crispies (Makes 12 Hearts)
3 tablespoons of butter
4 cups of miniature marshmallows (one bag will be enough)
6 cups of Rice Krispies cereal
3 packages of candy melts in Valentines Day inspired colors
Sprinkles
First line a cookie sheet or tray with a piece of aluminum foil sprayed with butter flavored cooking spray or use a silicone mat so you have a flat nonstick surface to shape your treats on.
Then in a large microwave safe bowl melt your butter
Then add in your marshmallows and microwave them for one minute.
Then using a rubber spatula mix the melted marshmallows and butter and stir in your Rice Krispies two cups at a time. Stirring well to make sure they all get evenly coated in the marshmallow mixture.
Then I take a 3 1/2 inch heart shaped cookie cutter and spray the inside of it with butter flavored cooking spray. Then spoon enough Rice Krispie treats to fill the cookie cutter up to the top and then use a spatula to level off the top. Then carefully lift off your cookie cutter and let your heart shaped treat cool and firm up.
Keep working until you have made all of your hearts. I made eleven because I had some taste testers in my kitchen, but your should be able to make twelve.
Now it’s time for the fun part, decorating your hearts. Choose three different colors of candy melts, which you can find at the craft store. These candy wafers are easy to work with because they are not as temperamental as chocolate. You will need to use half of each bag or 6 ounces of each color for this recipe.
My local craft store was all sold out of red and violet candy melts so I went with two shades of pink and white
Get three microwave safe bowls ready and pour each of your colors in a separate bowl. Place each bowl in the microwave on normal power for one minute then stir them and continued to microwave them for just 30 seconds at a time stirring in between until they are just melted. You don’t want to over heat it. Then use a separated spatula or a butter knife to spread on a smooth layer of candy on each heart. Don’t worry if as you are working your melted candy gets a bit cool. You can reheat it for 20 to 30 seconds to get it melted again if needed.
Then if you want to add some writing or drizzles of other colored candy on top the put some of your melted candy in a plastic pastry bag and either use a round tip or just snip a small hole in the tip. The pastry bag makes decorating easy. Then get creative with your decorations. Finally, for extra fun add on some sprinkles.
These Valentine’s Crispies were a huge hit with my daughters. The pink candy and the sprinkles really put this dessert over the top. So if you are looking for some old school Valentines day fun then make a batch of these easy no bake treats to share with your family and friends.
This past week has been a tough one in the McCauley kitchen. Last Thursday I was on the phone with my mom when my preschool aged daughters came hand in hand to whisper to me that something was broken. I was in the next room and I hadn’t heard a tell tale crash or noise so I thought how bad could it be, that was until my youngest motioned towards the stove top. Then I looked down at my ceramic top and saw a long crack all the way across the glass. How did this happen? My oldest was silent and then pointed towards her foot. I was still in shock trying to figure out how her foot could have done this. There was no way she could kick it hard enough, but then I finally got my little one to spill the truth. My oldest had climbed on the counter and stepped on the edge of the stove that had a small chip in it and that was all it took.
My slide in electric stove is, truth be told, not my favorite. My oven and I have a bit of a love hate relationship. It has a burner that hasn’t worked quite right since we moved in and the oven has issues baking any cakes or bread that take longer than 30 minutes. It leaves things like banana bread or bundt cake raw in the center with crispy edges. This would not be a problem if I was the type of person who used my oven for tupperware storage, but for me it’s something I use everyday. So when the stove top crack happened, I began to think it might be time to move on.
I quickly began researching my options knowing that it could be a challenge since the previous homeowners cut a hole in the hardwood floor to accommodate the current slide in. I looked up the old owners manual for my existing stove to get the measurements and I spent hours reading oven reviews and their measurements. I had to use an electric slide in since I don’t have a gas line. This limited my choices, but I finally found a professional grade electric range made by Frigidaire. I compared prices online and took lots of pictures of my current slide to the showroom to explain all the potential installation issues.
Image from Abt Electronics and Appliances
Here it is the oven that everyone raved about and I was lucky the store had one on sale and in stock. Delivery day came and I was so excited. I was finally going to have a great oven. It all seemed to be going to plan until I had to face the sad reality that our kitchen counters and floor had been built around the existing oven. There were specially carved out holes in the wood to accommodate its exact dimensions and a new slide in no matter what brand was not going to work without hiring a contractor. I realized that the newer slide in ranges were going to be a little too deep for my existing cabinetry. No matter how much I wanted it to work, the handles and lower drawer blocked access to the cabinet next to it. The installer and I thought we could potentially solve the issue by getting the granite counter top behind it trimmed back. After carefully measuring the overhang it was clear that cutting the granite wasn’t going to be enough to solve the issue. So for five minutes my kitchen had an amazing stove in it before I had to made the sad decision that it wasn’t meant to be. The new stove simply had to go back.
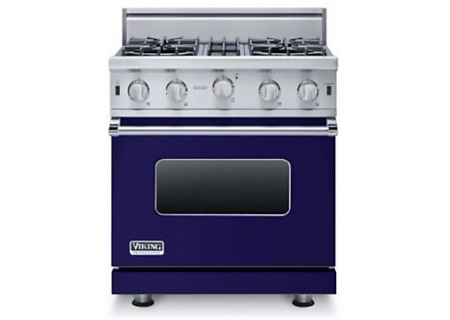
So I am now going to have to spend more than I wanted to fix my old stove, but it’s less than the cost of remodeling my kitchen. So for now it’s the practical thing to do. While I was on hold with customer service getting my stove officially returned, I began thinking as much as I would like this new stove, I am not sure that it’s the stove I am so head over heels for and that I would remodel my kitchen around it. Trying to think more optimistically I began to let myself daydream, while listening to the hold music, about the type of stove that would make a statement. The stove that as a foodie you would want to build a kitchen around.
Image from Viking Stoves
Kitchen design is beginning to change. Over the last fifteen to twenty years, Kitchen trends have been leaning towards clean lined stainless steel appliances, but now you are beginning to see more colorful options available. I happen to love the look of these newer stoves and appliances. It’s a way to add a bit of color and personality to your kitchen. Viking Appliances is one of the companies that is leading the way with its line of professional grade stoves in 24 different colors. My only real hesitation with building a kitchen around a Viking stove would be the cost, but if you are going to make your stove the centerpiece of the kitchen this is certainly a pretty one. Thom Felicia recently decorated a Colorado home around this cobalt blue Viking stove and his work was recently featured in the Wall Street Journal and House Beautiful Magazine. Here is the link so you can see his modern yet rustic kitchen and the blue stove that inspired it all. Even if you are not to type to paint your cabinets a bold blue, there are certainly lots of options and ways to incorporate a little color in your kitchen.
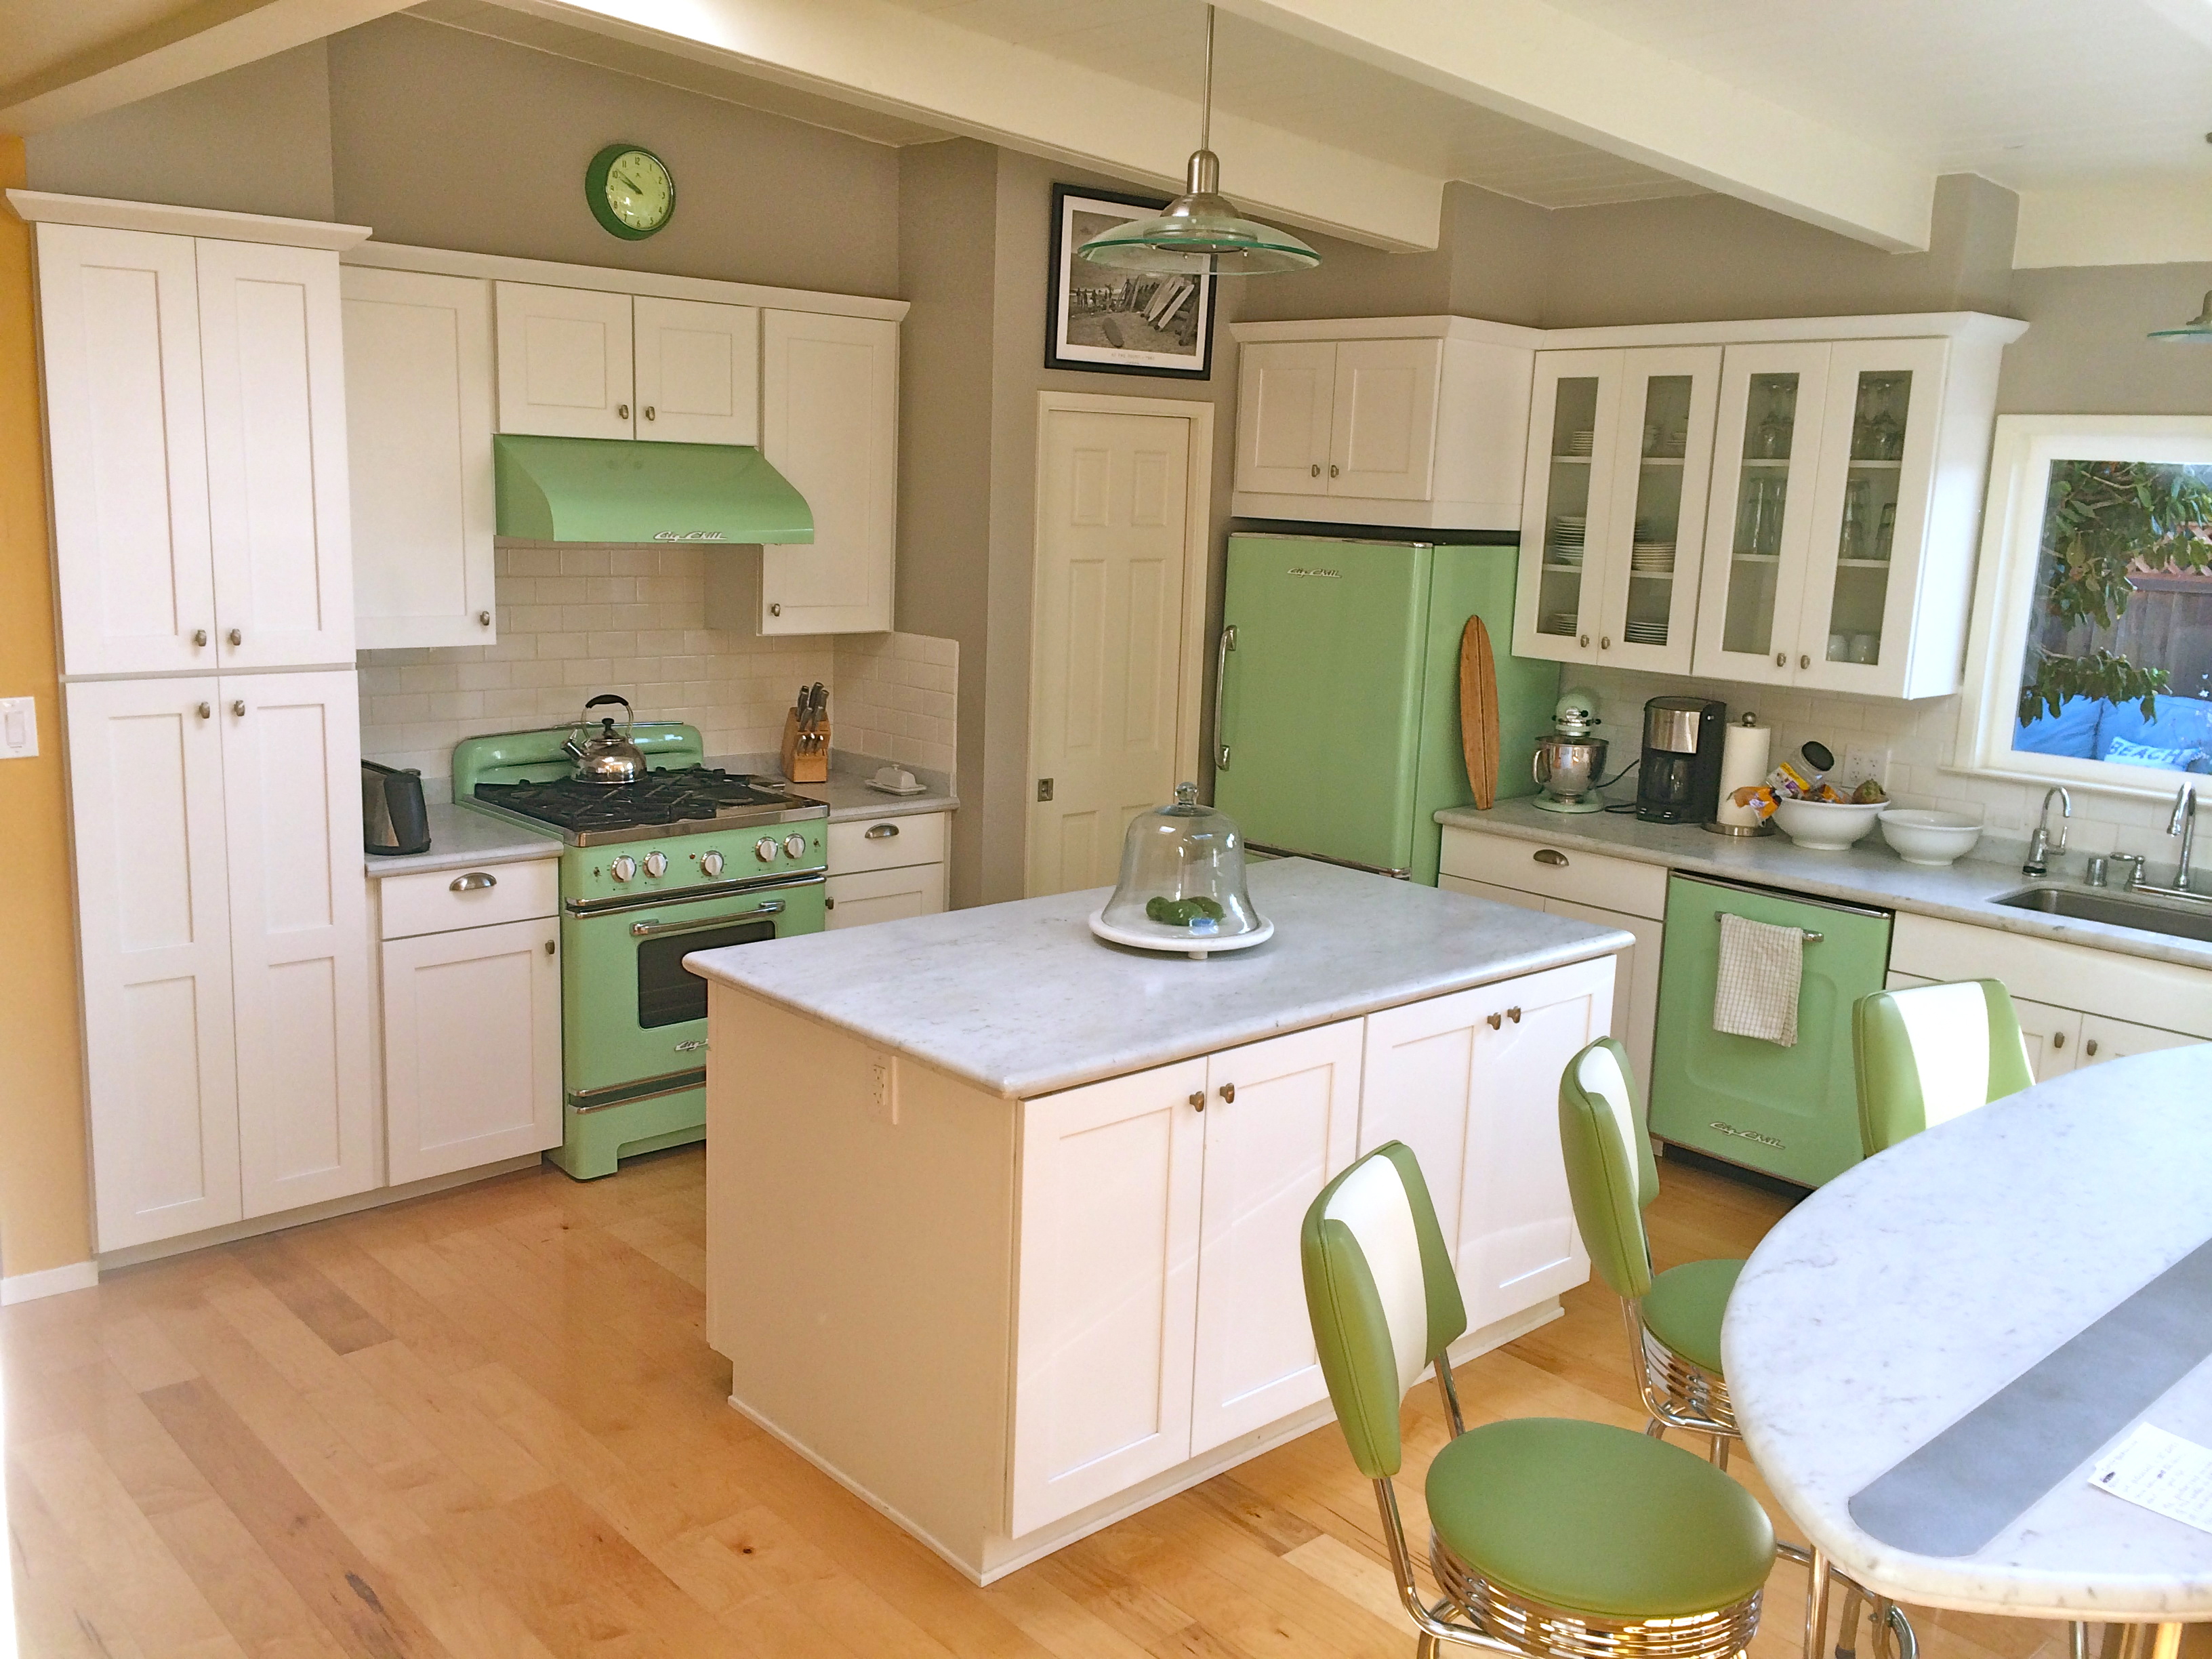
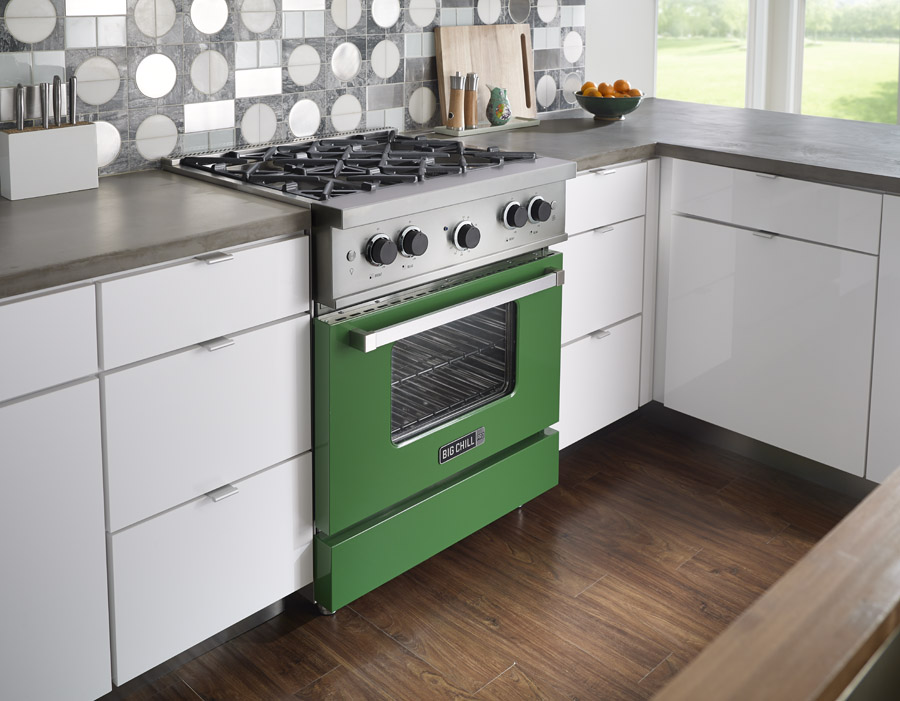
Image from Big Chill Appliances
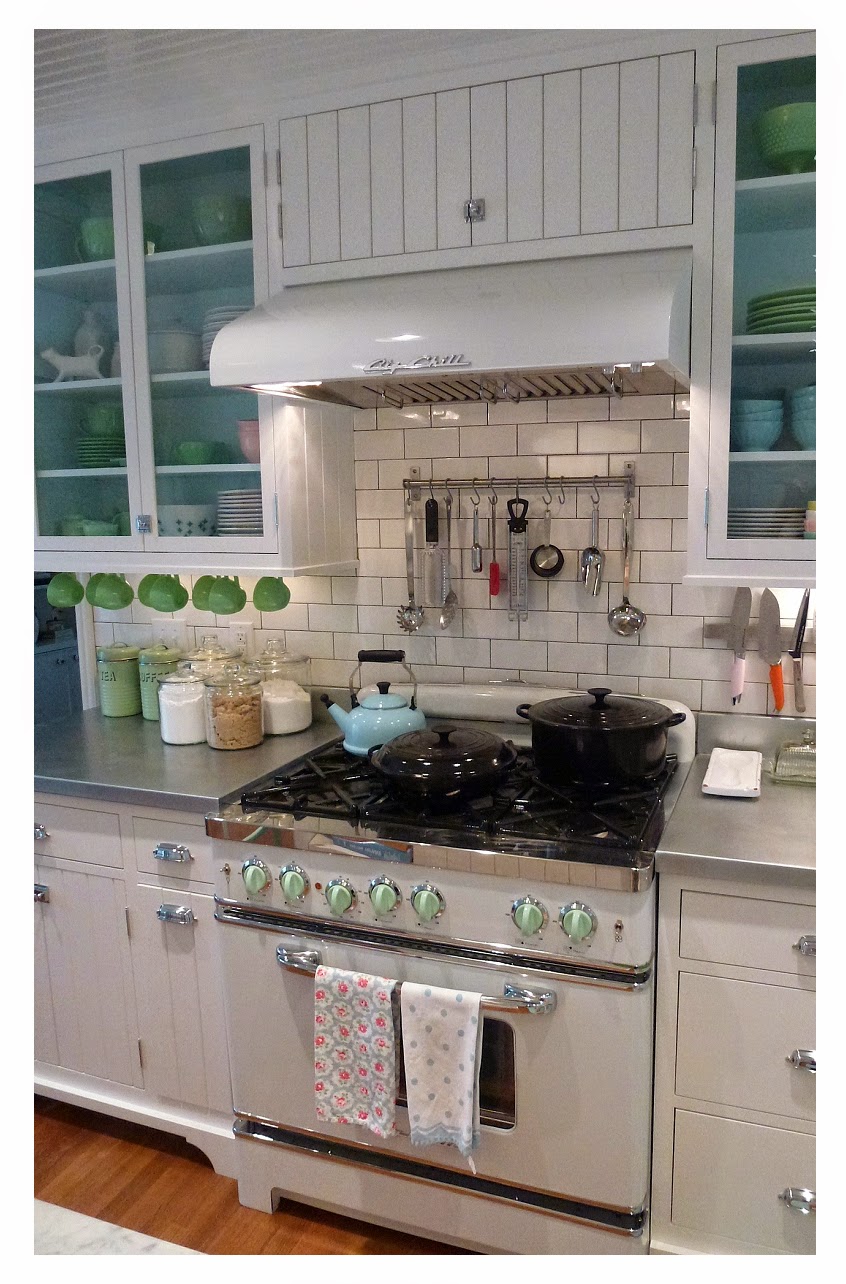
If you love the look of the colored gas stoves made by Viking, but you need an electric cooktop then Big Chill Appliances has a collection of colored electric induction ranges or induction cook tops you can stack with an electric oven to create your own custom look. I have always loved the retro look of Big Chill Appliances. This kitchen above has a clean modern look with a whimsical twist. The retro inspired jadite green appliances make this a memorable kitchen. However as much as I love the color I think I would choose their white appliances with custom colored knobs.
Image from Big Chill Appliances
I like the look and lines of the white stove with the white cabinetry. However the small detail of the soft green knobs is really what makes this kitchen. I love how they add a fun touch of personality without it dominating the room.
Image from Big Chill Appliances
Want all the fun of bright colors with more of a contemporary look then check out their professional line, which has cleaner lines in the colors Big Chill is known for.
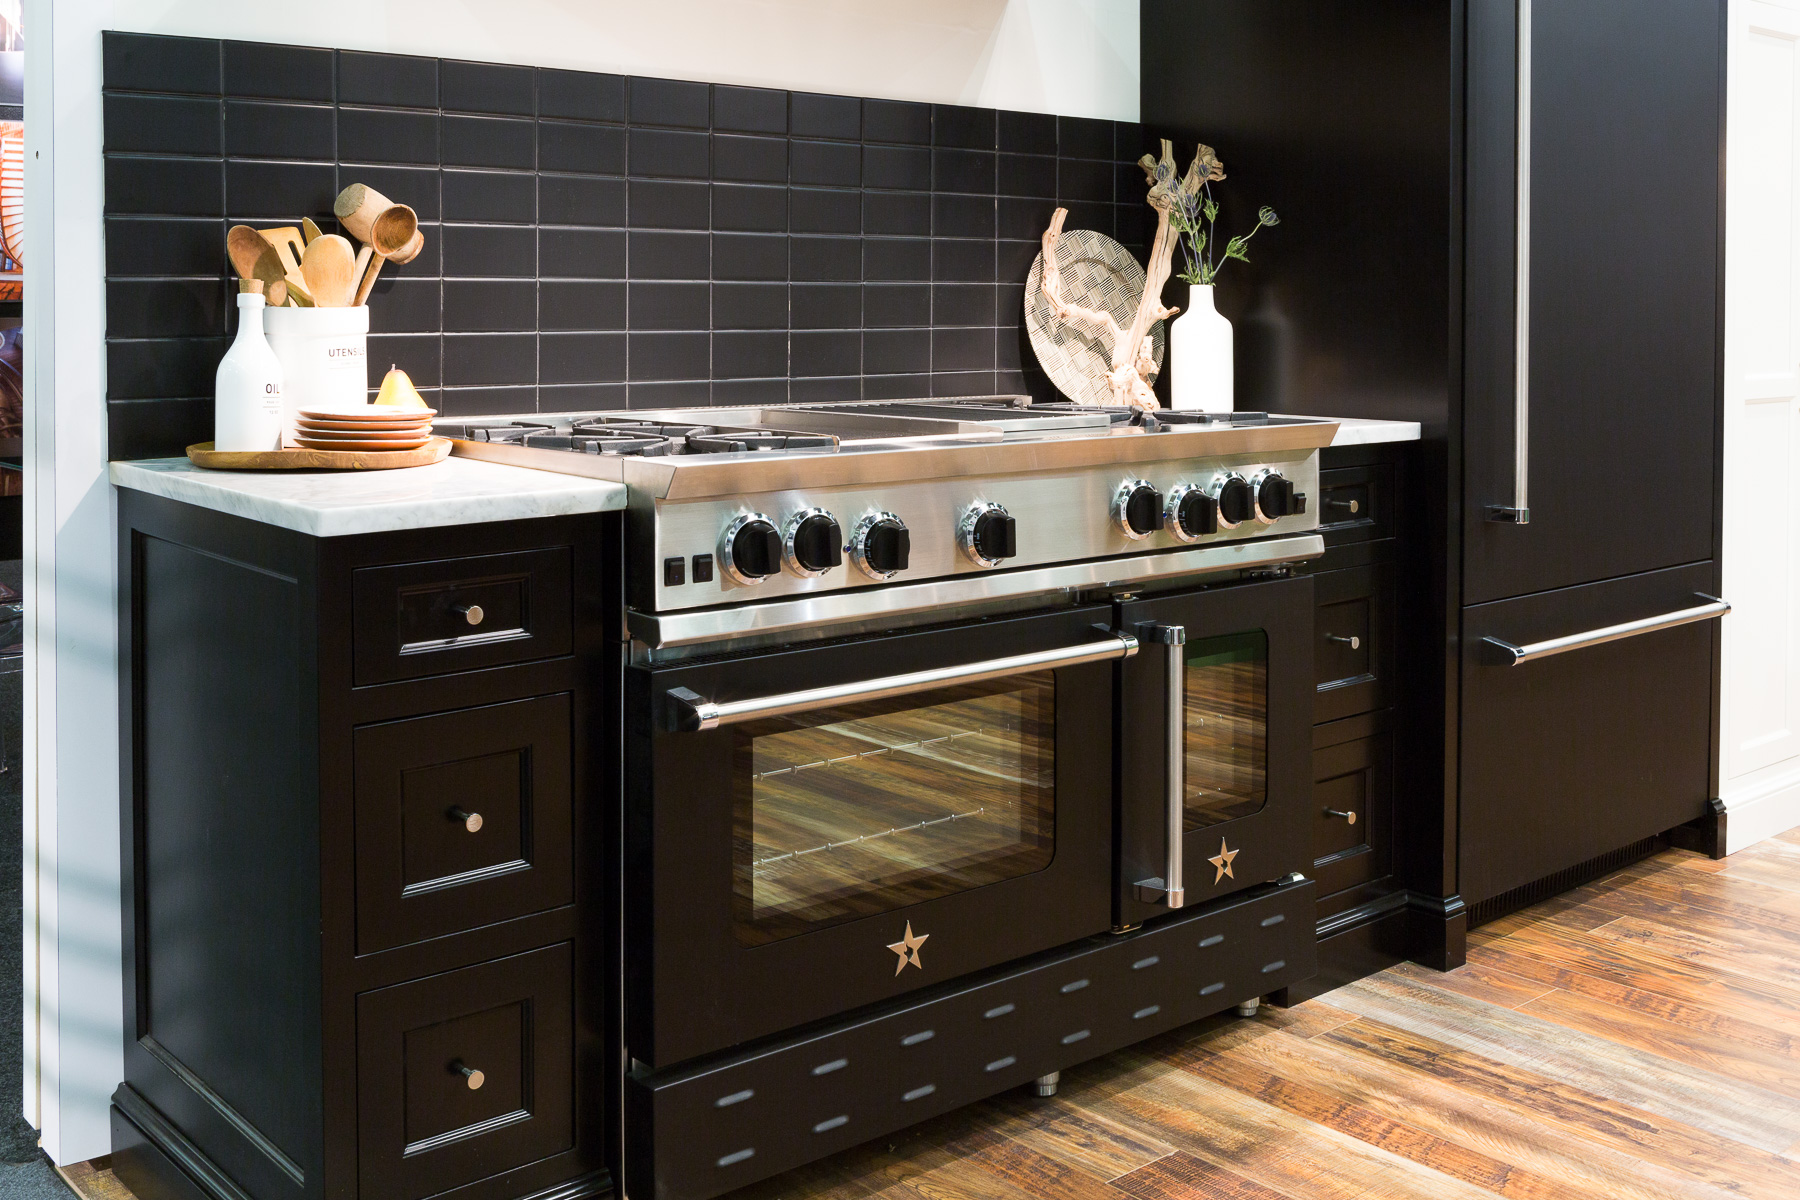
However, the company with the most amazing array of custom color combinations is Blue Star. Blue Star specializes in making custom colored stoves and oven and with over 750 different colors and textured finishes to choose from you can definitely find a statement piece for your kitchen. If a purple or pumpkin colored stove has you worried about the future resale value of your home or if you are afraid you will tire of the look, then one of feature I would consider is their customizable appliance knobs, They come in an amazing array of shades and its a way to add a little color to a stainless steel appliance. The light pink knobs on the Blue Star range below and in the ovens featured at the top of this post add just the right touch of fun to this stainless steel range.
Image from Blue Star
Here is another one of Blue Star’s Stoves in a very contemporary black finish. These stoves are a major investment, but the wide variety of customizable details on all of their products is impressive.
Image From Blue Star
Now if you are like me and one of these gorgeous stoves isn’t going to find their way into your kitchen anytime soon then here are some fun smaller appliances that would certainly give your kitchen an update and add a little color and personality.
Image from Crate and Barrel
Love the look of the Big Chill Appliances then check out these smaller colorful and retro inspired toasters and small appliances from Smeg. I have a picture of the mint green collection, but they come in other colors as well.
Image from Amazon
Did you love those fun pink knobs on the Blue Star Appliances? Then this pink coffee pot from Cuisinart would add a little personality to your kitchen at a fraction of the cost. You can find this pastel pink coffee pot here on Amazon.
Finally if you like the look of a more professional Viking stove then check out this counter top smart oven from Breville. I have this oven in stainless steal and I absolutely love it. This small convection oven is where most of the baking happens in my kitchen. It bakes so evenly that I like to use it to bake bread and other cakes that are more difficult for me to make in my larger oven. It also makes a fabulous toast and I even use it to make grilled cheese. Here is a link so you can see it at Williams Sonoma. So if you too have an oven with a few issues or you would like a second oven without remodeling then I highly recommend this versitile Breville smart oven.
If red isn’t your color and you are dreaming of Thom Felicia’s cobalt blue stove then check out Kitchen Aid’s line of small appliances including this bold blue toaster oven.
Image from Home Depot
A week later, I can laugh about the stove incident. I am also grateful that although my stove has been discontinued, they still make parts for it. I am now crossing my fingers and hoping my new glass cook top comes in soon, so cooking can get back to normal around here. In the meanwhile, the baker in me is still dreaming about that oven and the ultimate stove that someday might be worth remodeling for.
Sometimes the art of cooking is more like matchmaking. My grandmother used to serve a classic 1950s dish called “No Peek Beef” which she served with egg noodles. It was a good recipe but I always felt like that flavorful wine braised beef could use a better match. Then one day I was trying out a new steak recipe that was served with parmesan polenta. The steak wasn’t anything to write home about, but the polenta was fantastic. So I thought what if I paired an updated version of my grandmother’s beef with a parmesan polenta. The combination was a perfect match. The pairing of these two dishes was definitely love at first bite.
My grandmother’s recipe called for braising the beef in a dutch oven or covered dish for three hours, but committing to being home for three hours before you serve dinner can sometimes be difficult, so I decided to make a crockpot friendly version of the recipe. I love crockpot recipes because with just a little morning prep work you can come home to the wonderful aroma of this braised beef. The polenta takes under ten minutes to make, so its also a great meal that you can quickly get on the table. This recipe is simple enough for a weeknight and I like it because it is one of those dishes that can be ready when you want it. So if its going to be a crazy day this is a great meal to have waiting for you when you get home.
Rosemary and Wine Braised Beef (Serves 4 to 6)
2 pounds of boneless sirloin steak cut into 1 inch pieces
1 tablespoon kosher salt
1 tablespoon garlic powder
1 teaspoon ground pepper
2 tablespoons of olive oil
1 can cream of mushroom soup
1 packet of Lipton onion soup mix
1 cup red wine
1 cup of beef broth
1 tablespoon fresh rosemary (if using dried rosemary then use only 1 teaspoon since dried herbs are stronger in flavor)
1 1/2 cup of frozen green peas, cooked (optional but I like the flavor and it makes this a complete meal no side dishes needed)
First get your sirloin steaks cut into bite sized pieces. Then in a small bowl mix together your salt, garlic powder and pepper. Pat your beef with a paper towel so it’s dry and will brown better. Then season it with your garlic salt seasoning mix.
Then heat 2 tablespoons of olive oil on medium to medium high heat in a large skillet. Then add in your beef and brown it on each side (about 2 to 3 minutes on each side).
Then in the bottom of your crock pot whisk together your onion soup mix, red wine, cream of mushroom soup, beef broth and rosemary. Once your ingredients are well mixed add in your browned beef pieces. Then set your crockpot on low and let it cook for eight hours.
You want your beef to be completely covered by the sauce so it cooks.
Then right before you are ready to serve your braised beef make your parmesan polenta.
Parmesan Polenta with Rosemary Infused Olive Oil
1 1/2 cups of quick cooking polenta
4 1/2 cups of water
3/4 cup of grated parmesan
4 tablespoons of butter
1/4 cup extra virgin olive oil
3 tablespoons of fresh rosemary leaves or small sprigs (I tested dried rosemary and it is not the same)
Bring 4 1/2 cups of water to boil in a medium sized sauce pan. Then stir in your polenta and turn the heat down to a lower simmer. Allow your polenta to simmer until it gets thick, but still pourable about 5 minutes. Polenta tends to bubble and pop when cooking so be careful when stirring it. I usually cover my pot with my metal spatter screen.
Then remove your polenta from the heat and stir in your butter and parmesan cheese.
Then in a small skillet heat your olive oil over medium high heat with your fresh rosemary for about 2 minutes until your oil is hot and you can smell the rosemary.
Now you are ready to assemble your dish. I like to serve mine in a rimed soup bowl. I place about a cup or so of the polenta on my dish then I add my braised beef with some of the sauce on top. Next, I add on about 1/4 cup of peas, which adds a little color and makes this a complete meal. Then I drizzle a little of the rosemary oil on top.
This recipe is not your ordinary 1950s recipe, because the parmesan polenta and the rosemary oil give this dish a new depth of flavor with a restaurant styled finish. Finally, the best part of this recipe is that it is easy to make because you can let your crock pot do all the work.
You can get a on page printer friendly version of my recipe at this link to Tasty Kitchen.
“Anyone who thinks gardening begins in the spring and ends in the fall is missing the best part of the whole year; for gardening begins in January with the dream.” -Josephine Neuse
Winter in Chicago requires more than just the recommended fur-trimmed puffy coat. What I have learned over the last two years is that dressing like an Eskimo is simply not enough; instead, it takes a certain amount of outrageous optimistic thinking to enjoy Chicago winter. I used to think news reports of people wearing sandals while Christmas shopping in the snow and pictures of nearly naked people running into Lake Michigan for the polar bear plunge were crazy; however, I have now come to realize that it’s precisely that type of insane thinking that is necessary to fully appreciate this type of winter.
These were the thoughts I was thinking this morning, as my car did its slow slide down our long icy drive. My girls now accustomed to this chimed in on cue with a pubic safety alert about about being careful on the ice. Last year, on a particularly icy day my car accidentally slid into our big blue trash can, which I think has my girls a bit concerned about my ice navigation skills. What can I say, I am from the Gulf Coast, where if it even threatens to get icy everything shuts down. So I have had a bit to learn about making turns in the ice and snow.
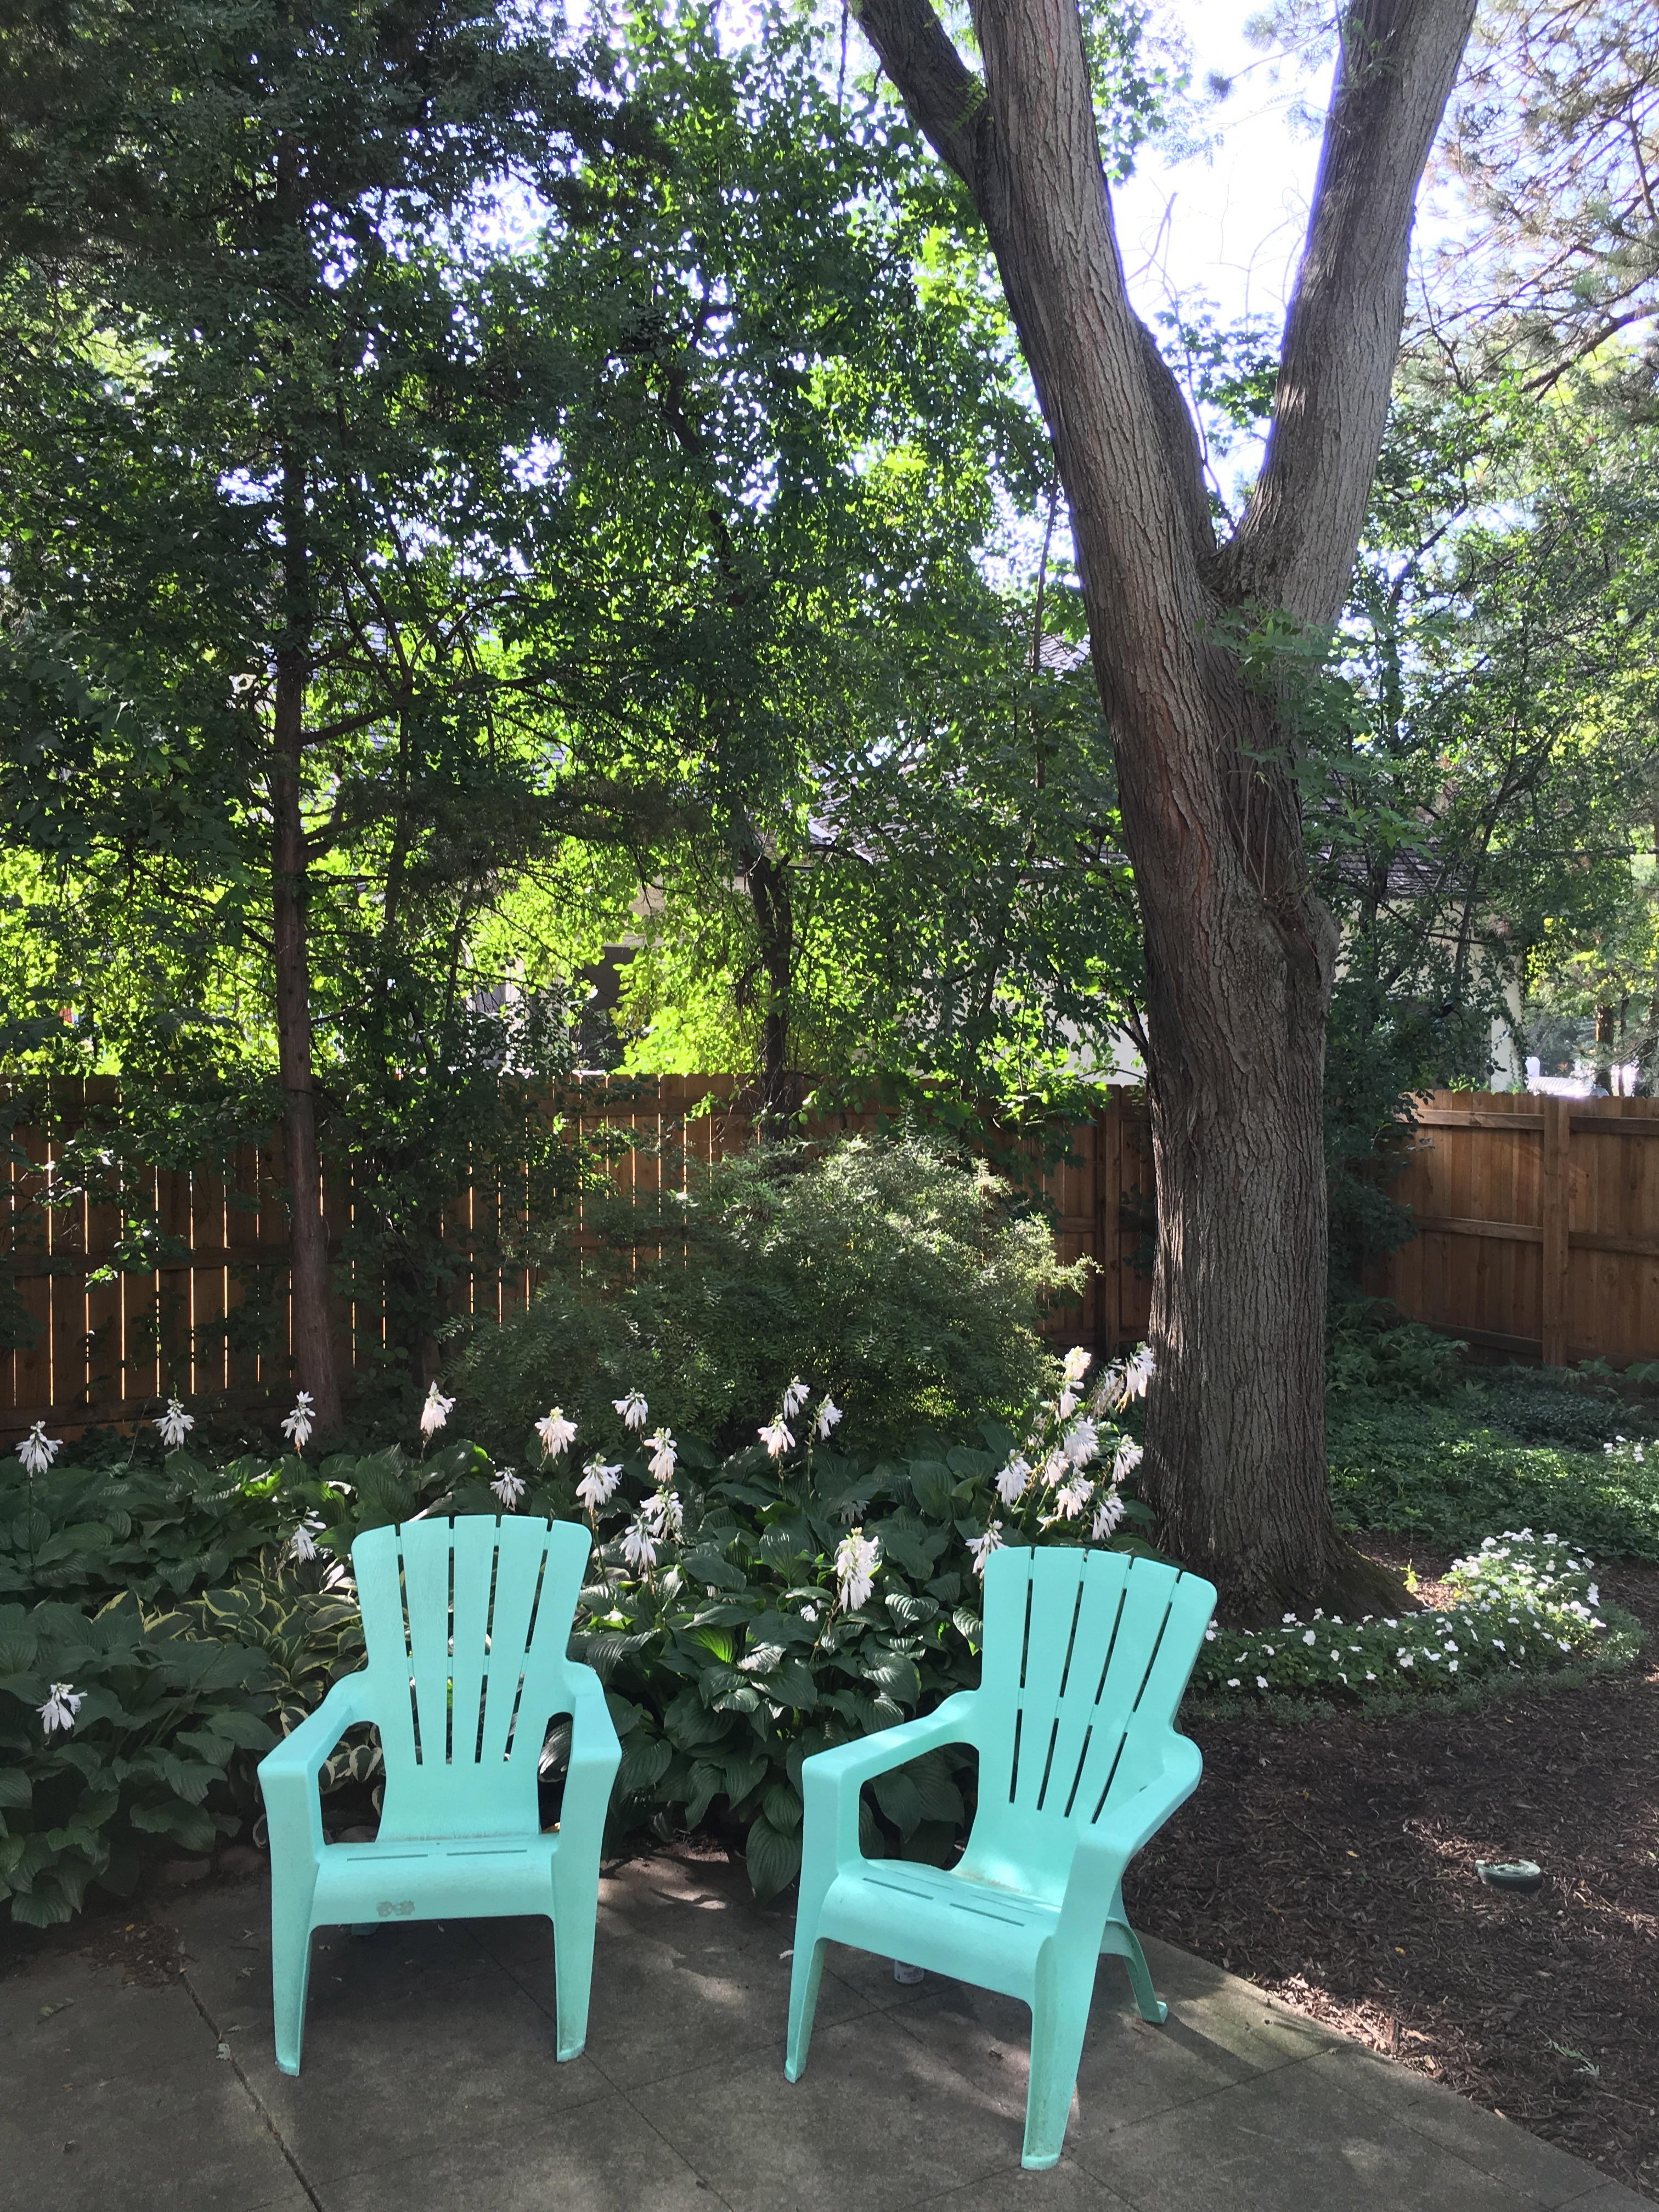
I must admit that there is a certain festiveness about the cold, but somehow my level of personal enthusiasm tends to wane a bit after I pack up the Christmas lights and decorations. So even though my backyard looks like this:
Maybe it’s a vitamin D deficiency or just cabin fever, but sandals and a fruity drink anyone?
I am engaging in some nonsensical, but highly necessary optimistic thinking, as I am day dreaming about the beauty of our yard dressed in its full glory. Spring is even more beautiful when it’s been months since something green has sprouted. As much as I lament the cold, I know that the frozen ground is necessary for a whole host of beautiful bulbs and flowers that would never suvive the subtropical climate that I was accustomed to. So it maybe January but my mind is already planning and eagerly awaiting the garden to come. Those of you who know me, know I love flowers so I thought I would share some pictures I took of the blooms in our garden.
I bought some caladium bulbs that came in a package with these mystery lilies. There was no picture on the box so when these flowers bloomed I was thrilled to see how pretty they were.
Here are a few of those caladiums I planted in our backyard with some coleus and fuchsia impatiens.
My daughters came running in the house to let me know about this bug. They thought it was a spider, but when I came out and saw this amazing katydid I ran to get my camera.
Hydrangeas were maybe the best surprise we found growing in our yard that first summer.
These pretty pink hydrangeas were a late bloomers, but by the beginning of fall they began to turn a pretty light lavender.
Bleeding hearts are another one of my favorites. These beauties bloomed in May. I love how their little pink flowers look like lanterns brightening up the garden. I can see this bush from my front living room window and late one afternoon I was looking outside and the lighting was just perfect, so I raced out to take this photograph.
I am also looking forward to all the butterflies we had visiting us. Including this swallowtail that came and stayed long enough for a picture. The girls and I spotted him on our way in from school.
Finally, these peonies blooms are some of my favorites. I have several peony bushes under my dining room window and I just love June when these beauties begin to bloom. These gorgeous flowers have the most wonderful smell.
So although there is snow on the ground I am already looking forward to spending some warmer flower filled days in these chairs. Soaking in some sun without my coat and scarf and enjoying the beauty of it all.
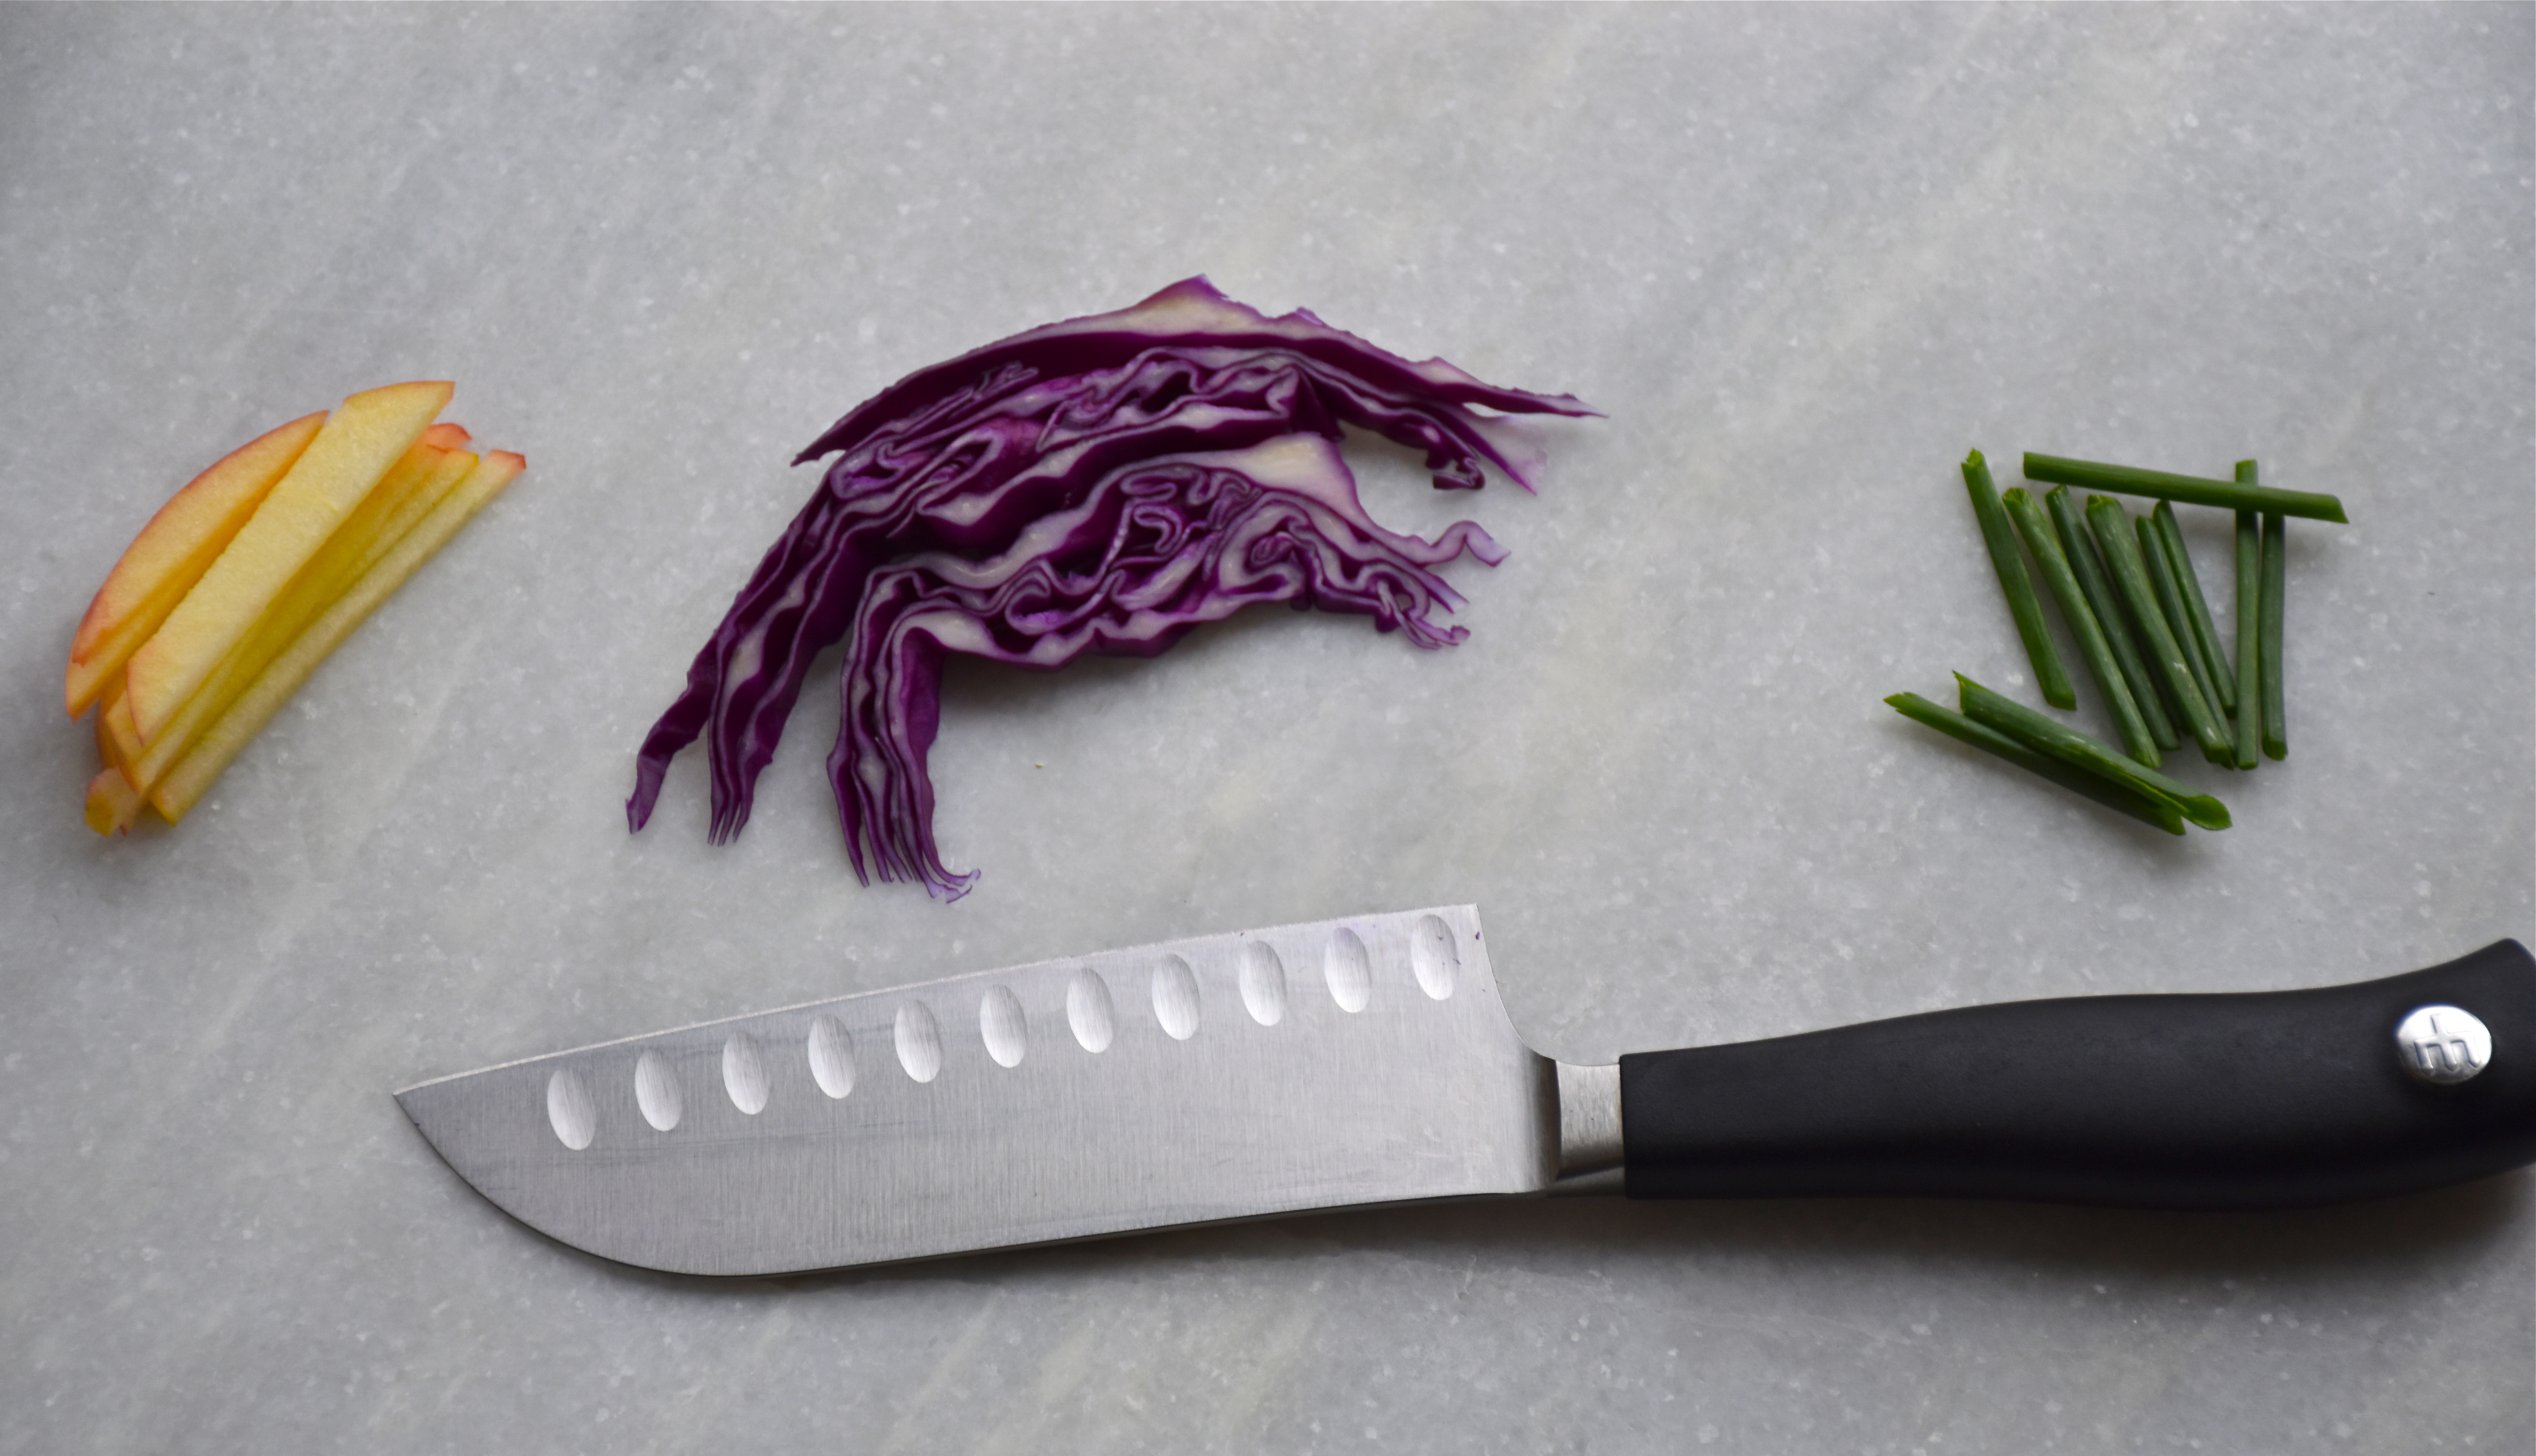
Have you ever had that perfect bite? The one that somehow captures all these different textures and tastes and you just want to savor it a moment as it it melts in your mouth. My mom has been talking about this brisket topped sweet potato that they serve at a Houston restaurant called Dish Society, since I first shared my crock pot barbecue brisket recipe. So when I was back in Texas I decided to make plans to try this most talked about sweet potato. She was right it was absolutely delicious. The only problem is that there are about a thousand miles that regularly separate me from this dish and I have yet to find a Chicago barbecue spot that that serves these Texas style brisket topped potatoes. My friends in the North, this is a real barbeque deficit, because it is one of my favorite ways to eat brisket. So I came home determined to recreate the magic in my kitchen.
My recipe is a little different because once I started creating my slaw I decided to add in some apple. I had been cutting some honey crisp apples for my daughters so I decided to put some in my slaw. The sweet crispy texture really took the flavor balance of this dish to a whole other level. The brisket has a slightly salty chewiness that only gets better when you add it to the cheddar topped sweet potato and a tangy apple slaw. This is one of those dishes that might sound unusual but the flavors are so mind blowing that you have to try it.
Barbecue Brisket Sweet Potatoes with Apple Chive Slaw (Serves 4)
1/2 cup of barbecue sauce (I used a slightly sweet bourbon maple sauce)
2 tablespoons butter
1 cup shredded cheddar cheese
Apple Chive Slaw
1 cup of red cabbage sliced into thin bit sized pieces
1 cup of honey crisp apple sliced into thin matchstick sized pieces
1/4 cup of chives sliced on the diagonal into 1 inch sized pieces
2 tablespoons apple cider vinegar’
1/2 teaspoon kosher salt
1/8 teaspoon pepper
First, prepare your sweet potatoes by piercing with a fork a few times on each side to allow some steam to escape when you cook them. (Please don’t skip this step or you could have a big exploding potato mess on your hands.)
Then because it is so much faster, I microwave my sweet potatoes. I place my potatoes on a plate and heat them on high for about 5 minutes at a time flipping them over so they cook evenly. Microwave strengths and potato sizes can vary so you will need to keep checking their doneness every so often but I find in my microwave it takes about 12 minutes to cook several sweet potatoes at once but it could take anywhere between 10 to 15 minutes.
While your potatoes are cooking get your oven preheated to 375 degrees. Then when your potatoes are soft carefully make a single lengthwise slice down them to open them like a baked potato. Then I like to add a small pat of butter inside them and season them to taste with salt and pepper. Then top each sweet potato with 1/4 cup of cheddar cheese and place in an oven safe dish to bake for about 5 minutes or until the cheese is melted.
Meanwhile slice your cabbage, apple and chives to prepare them for the slaw.
Here you can see how I sliced my ingredients. The apples are easier to slice if you stack thin slices on top of each other and then cut those slices in either halves or thirds depending on the size of your apple.
Then in a medium sized bowl whisk together your apple cider vinegar, salt and pepper and then add in your cabbage, apples and chives.
Then in a separate bowl mix your chopped or shredded brisket with 1/2 cup of barbecue sauce.
Then assemble your sweet potatoes by putting the brisket on top of the melted cheese and then top that off with some apple slaw and there you have it. One delicious dinner. Are you hungry yet?
As I reflect on a new year I know some of my greatest insights have come from moments of great change. I have come to trust that that it’s not the difficult times that define us, but what we choose to do with them that matters. This week marks the one-year anniversary of my blog, Maison McCauley. I was a little nervous to begin writing last January, but after a life changing cross-country move the time seemed right.
In an effort to find my footing and embrace change I decided to begin sharing some of my projects, recipes and thoughts. What began as a creative outlet and a way to share my life in Chicago with family and friends has become over this last year something more. I began writing last year as my new year’s resolution. I promised myself that I would write two posts a week for a year to see where it would lead me. Somewhere along the way, I realized that writing this blog has become in some ways like a love letter to my girls. It has been a chance to write about life and share with them the importance of living creatively, being true to yourself and being courageous enough to share what you love with others.
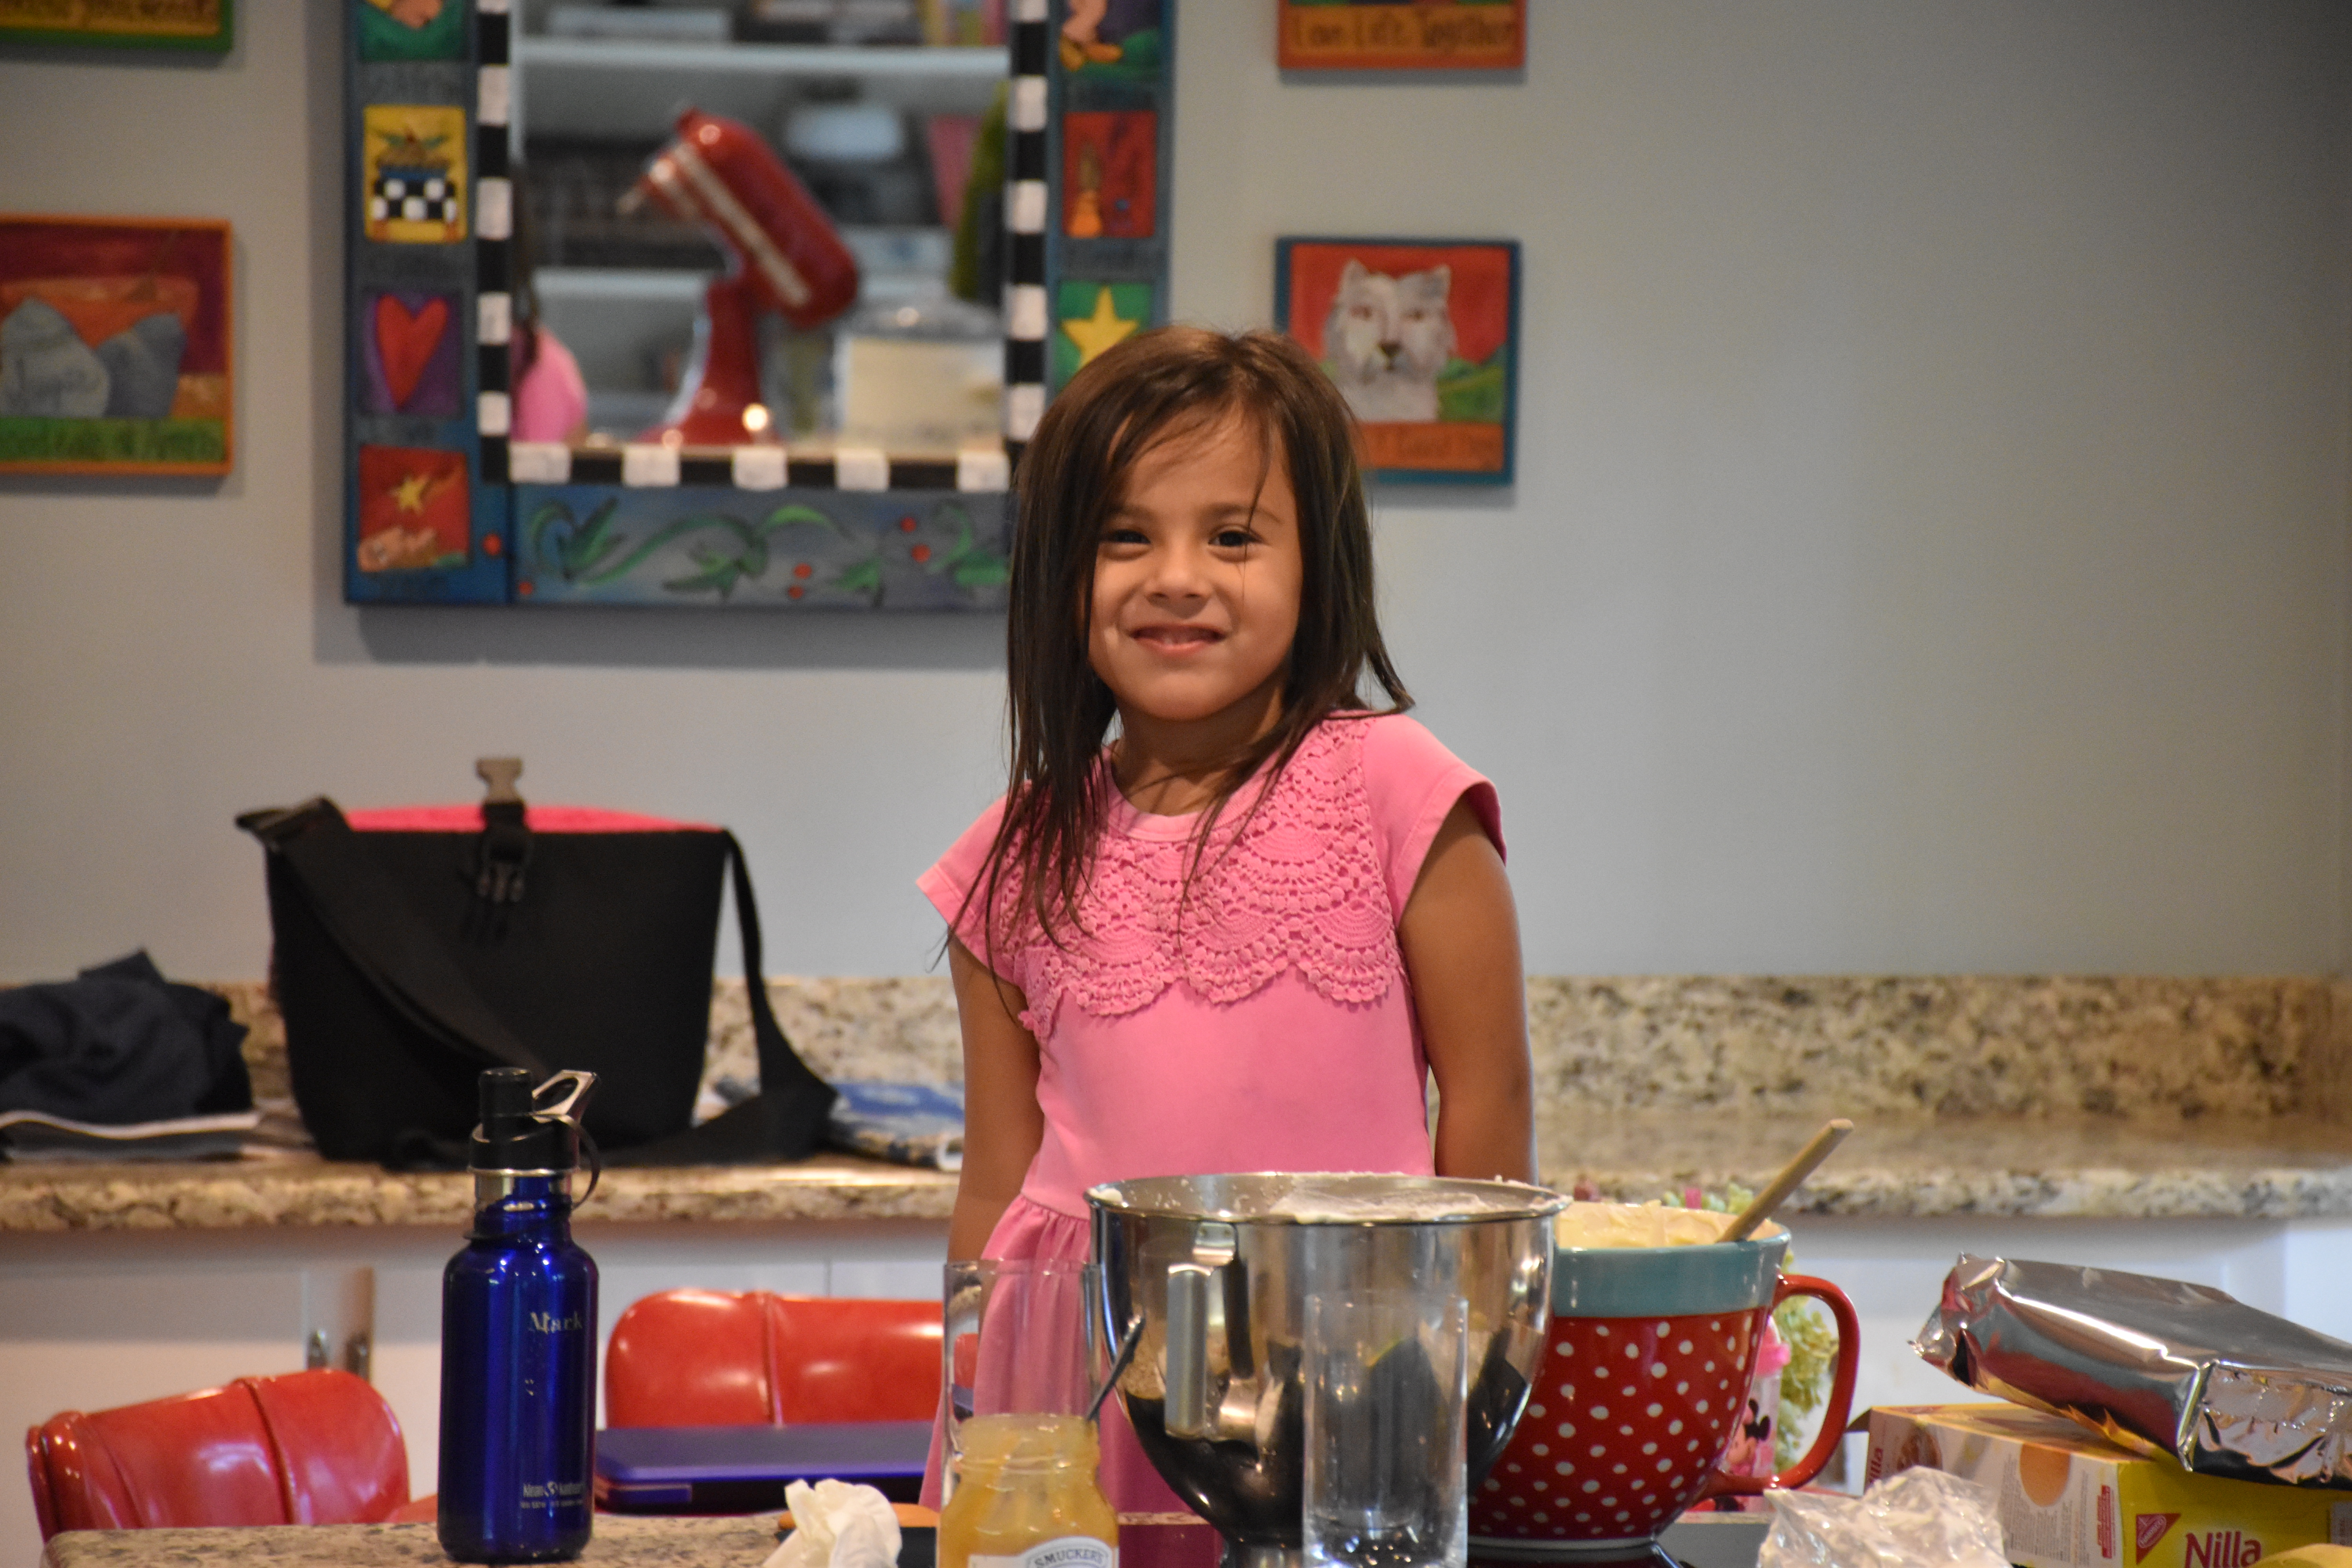
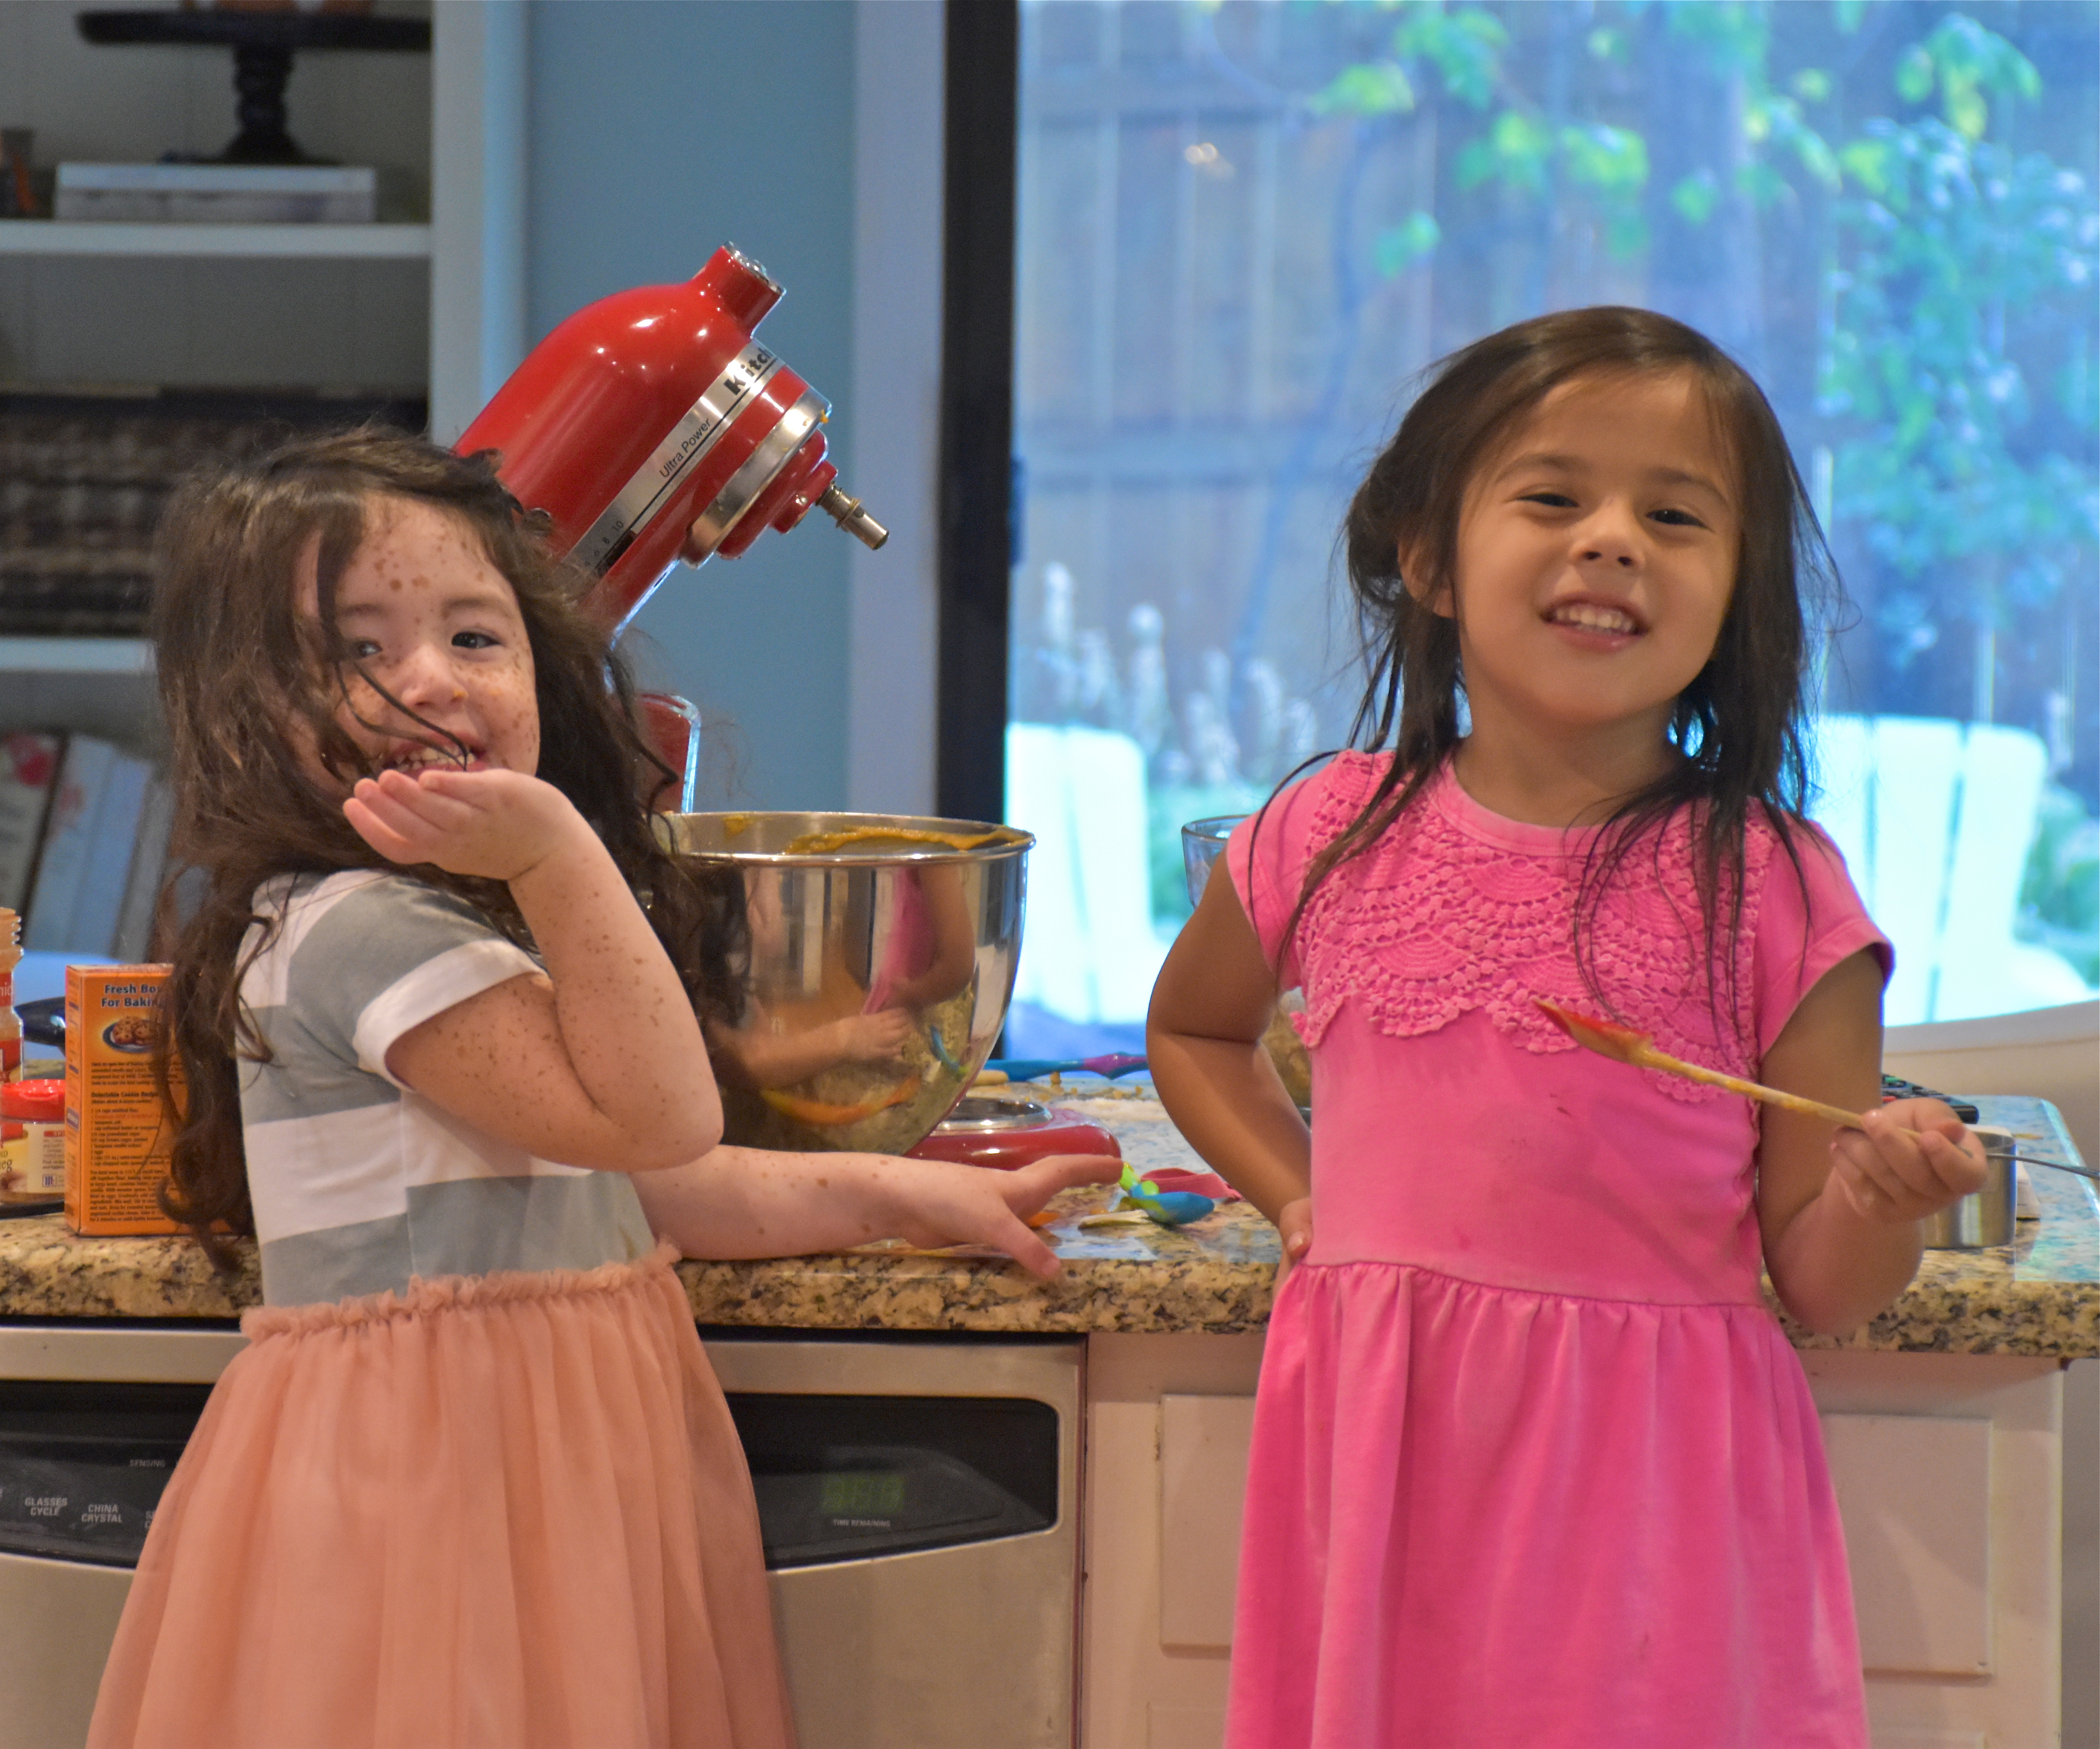
The truth is that although I am the one writing each week, my girls and my whole family have all been apart of this. Their encouragement and thoughts have shaped what you see and read. My daughters and husband are the ones I cook for, my taste testers, and my cheerleaders when they like something new. So today I thought I would share with you a few behind the scenes photographs of what it is really like to write a food and design blog.
Love these girls who happen to be absolute rock stars in the kitchen!
Writing a food blog means there is usually some kind of creative mess happening in my kitchen. This is my kitchen table when we were making the final version of Bourbon Banana Pudding. My computer is on the table, my camera case is out and the kitchen definitely needs a good cleaning.
Here we are trying to get some better lighting to photograph our dessert. My daughters are eating the left over Nilla wafers while trying to get in the photograph. No one said this job was easy.
You expect us to have to wait till after dinner to eat these?
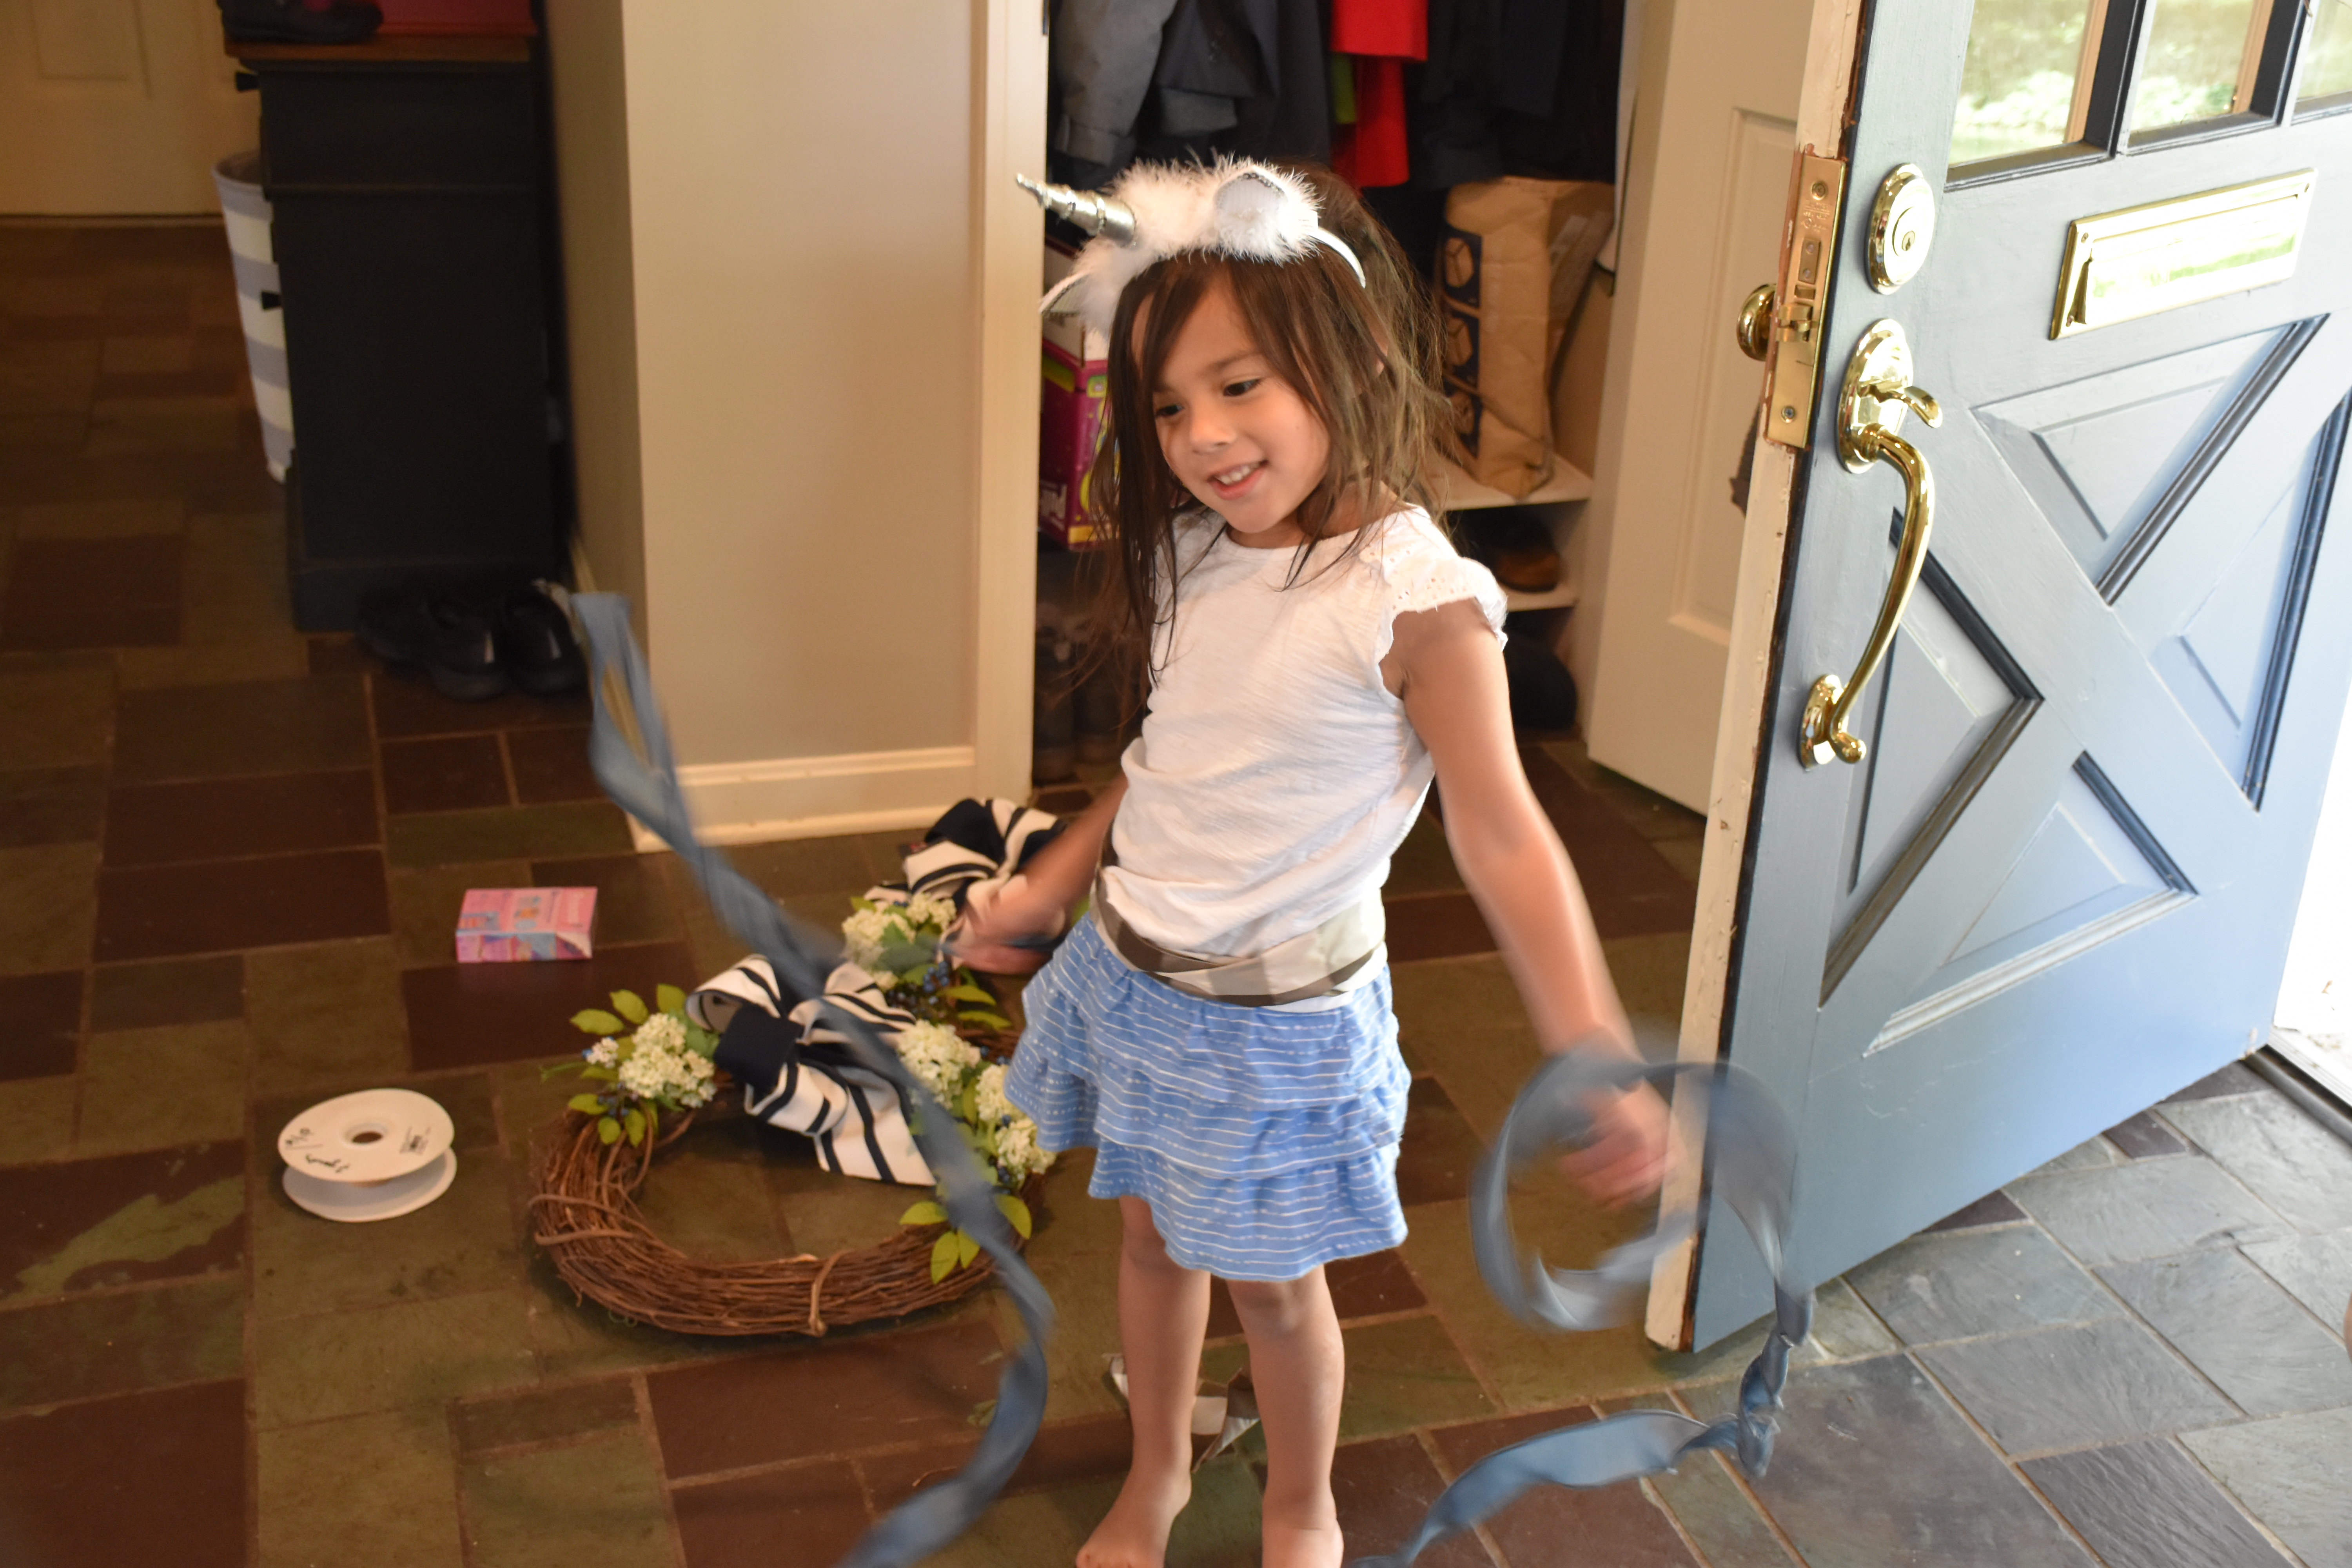
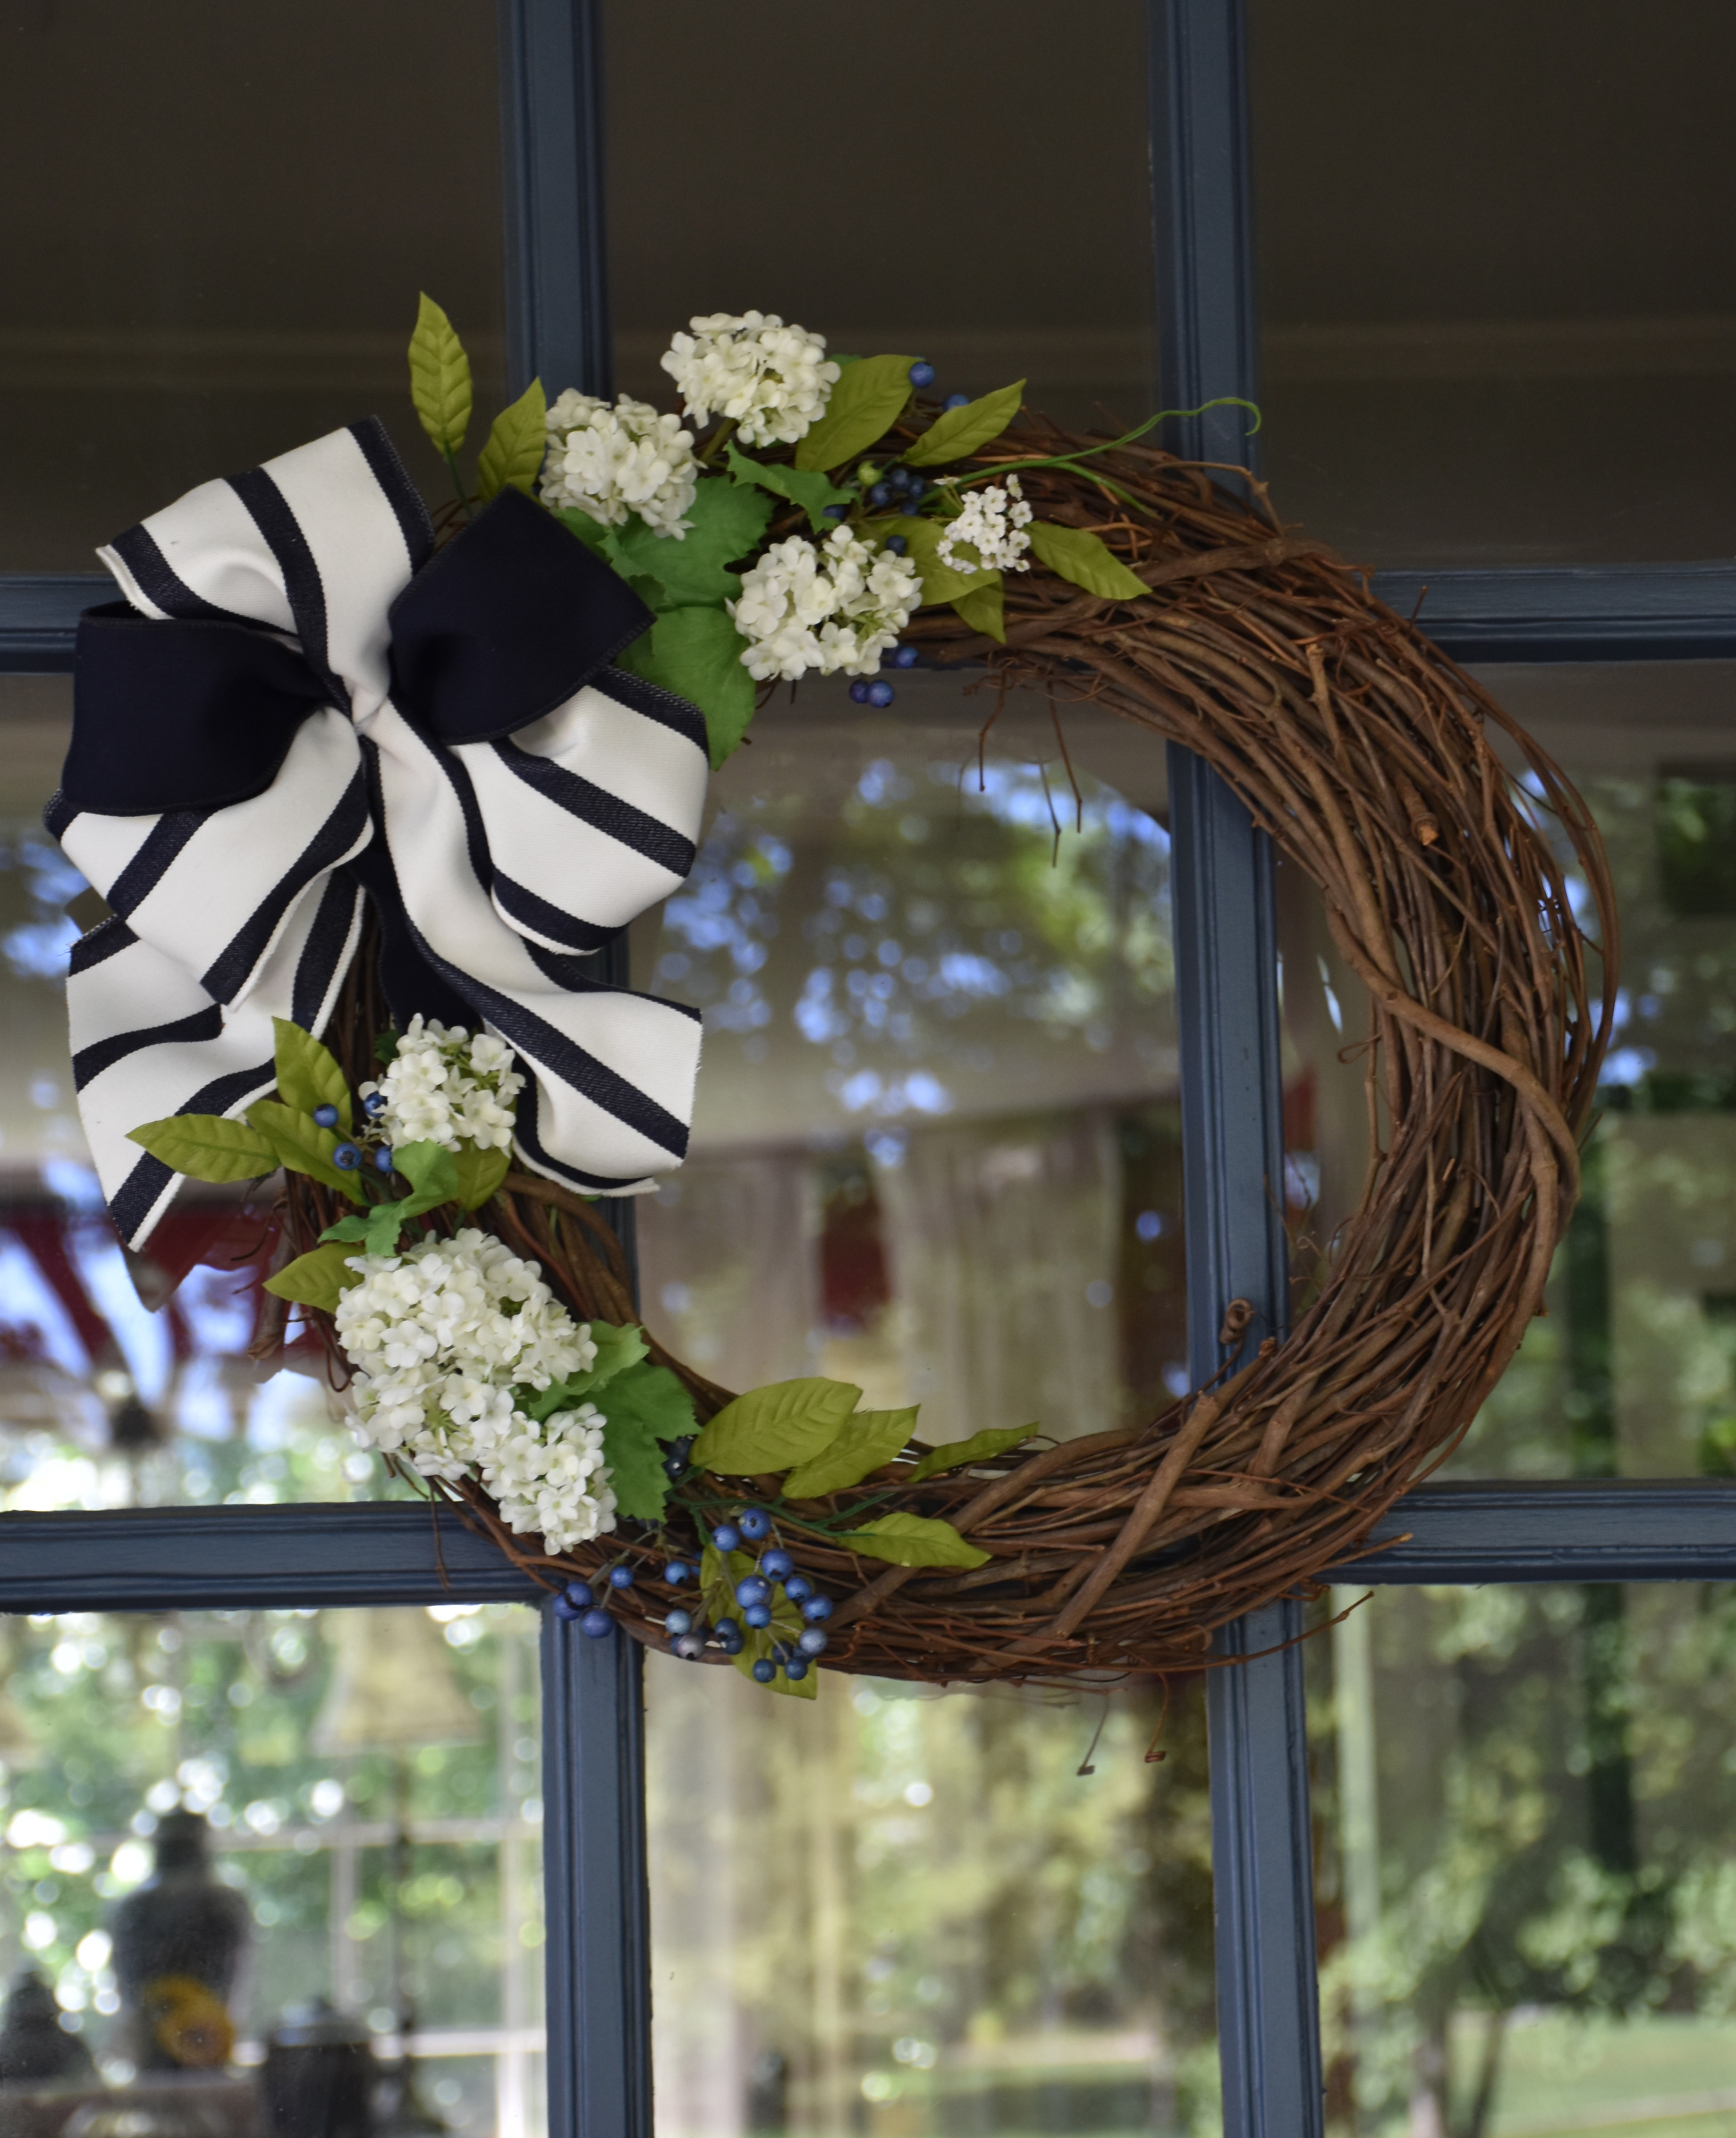
Daughters dressed as unicorns will get into your ribbon stash and make themselves a glamorous outfit while you are writing a post about about wreaths.
Oh the fun preschoolers can have with ribbon.
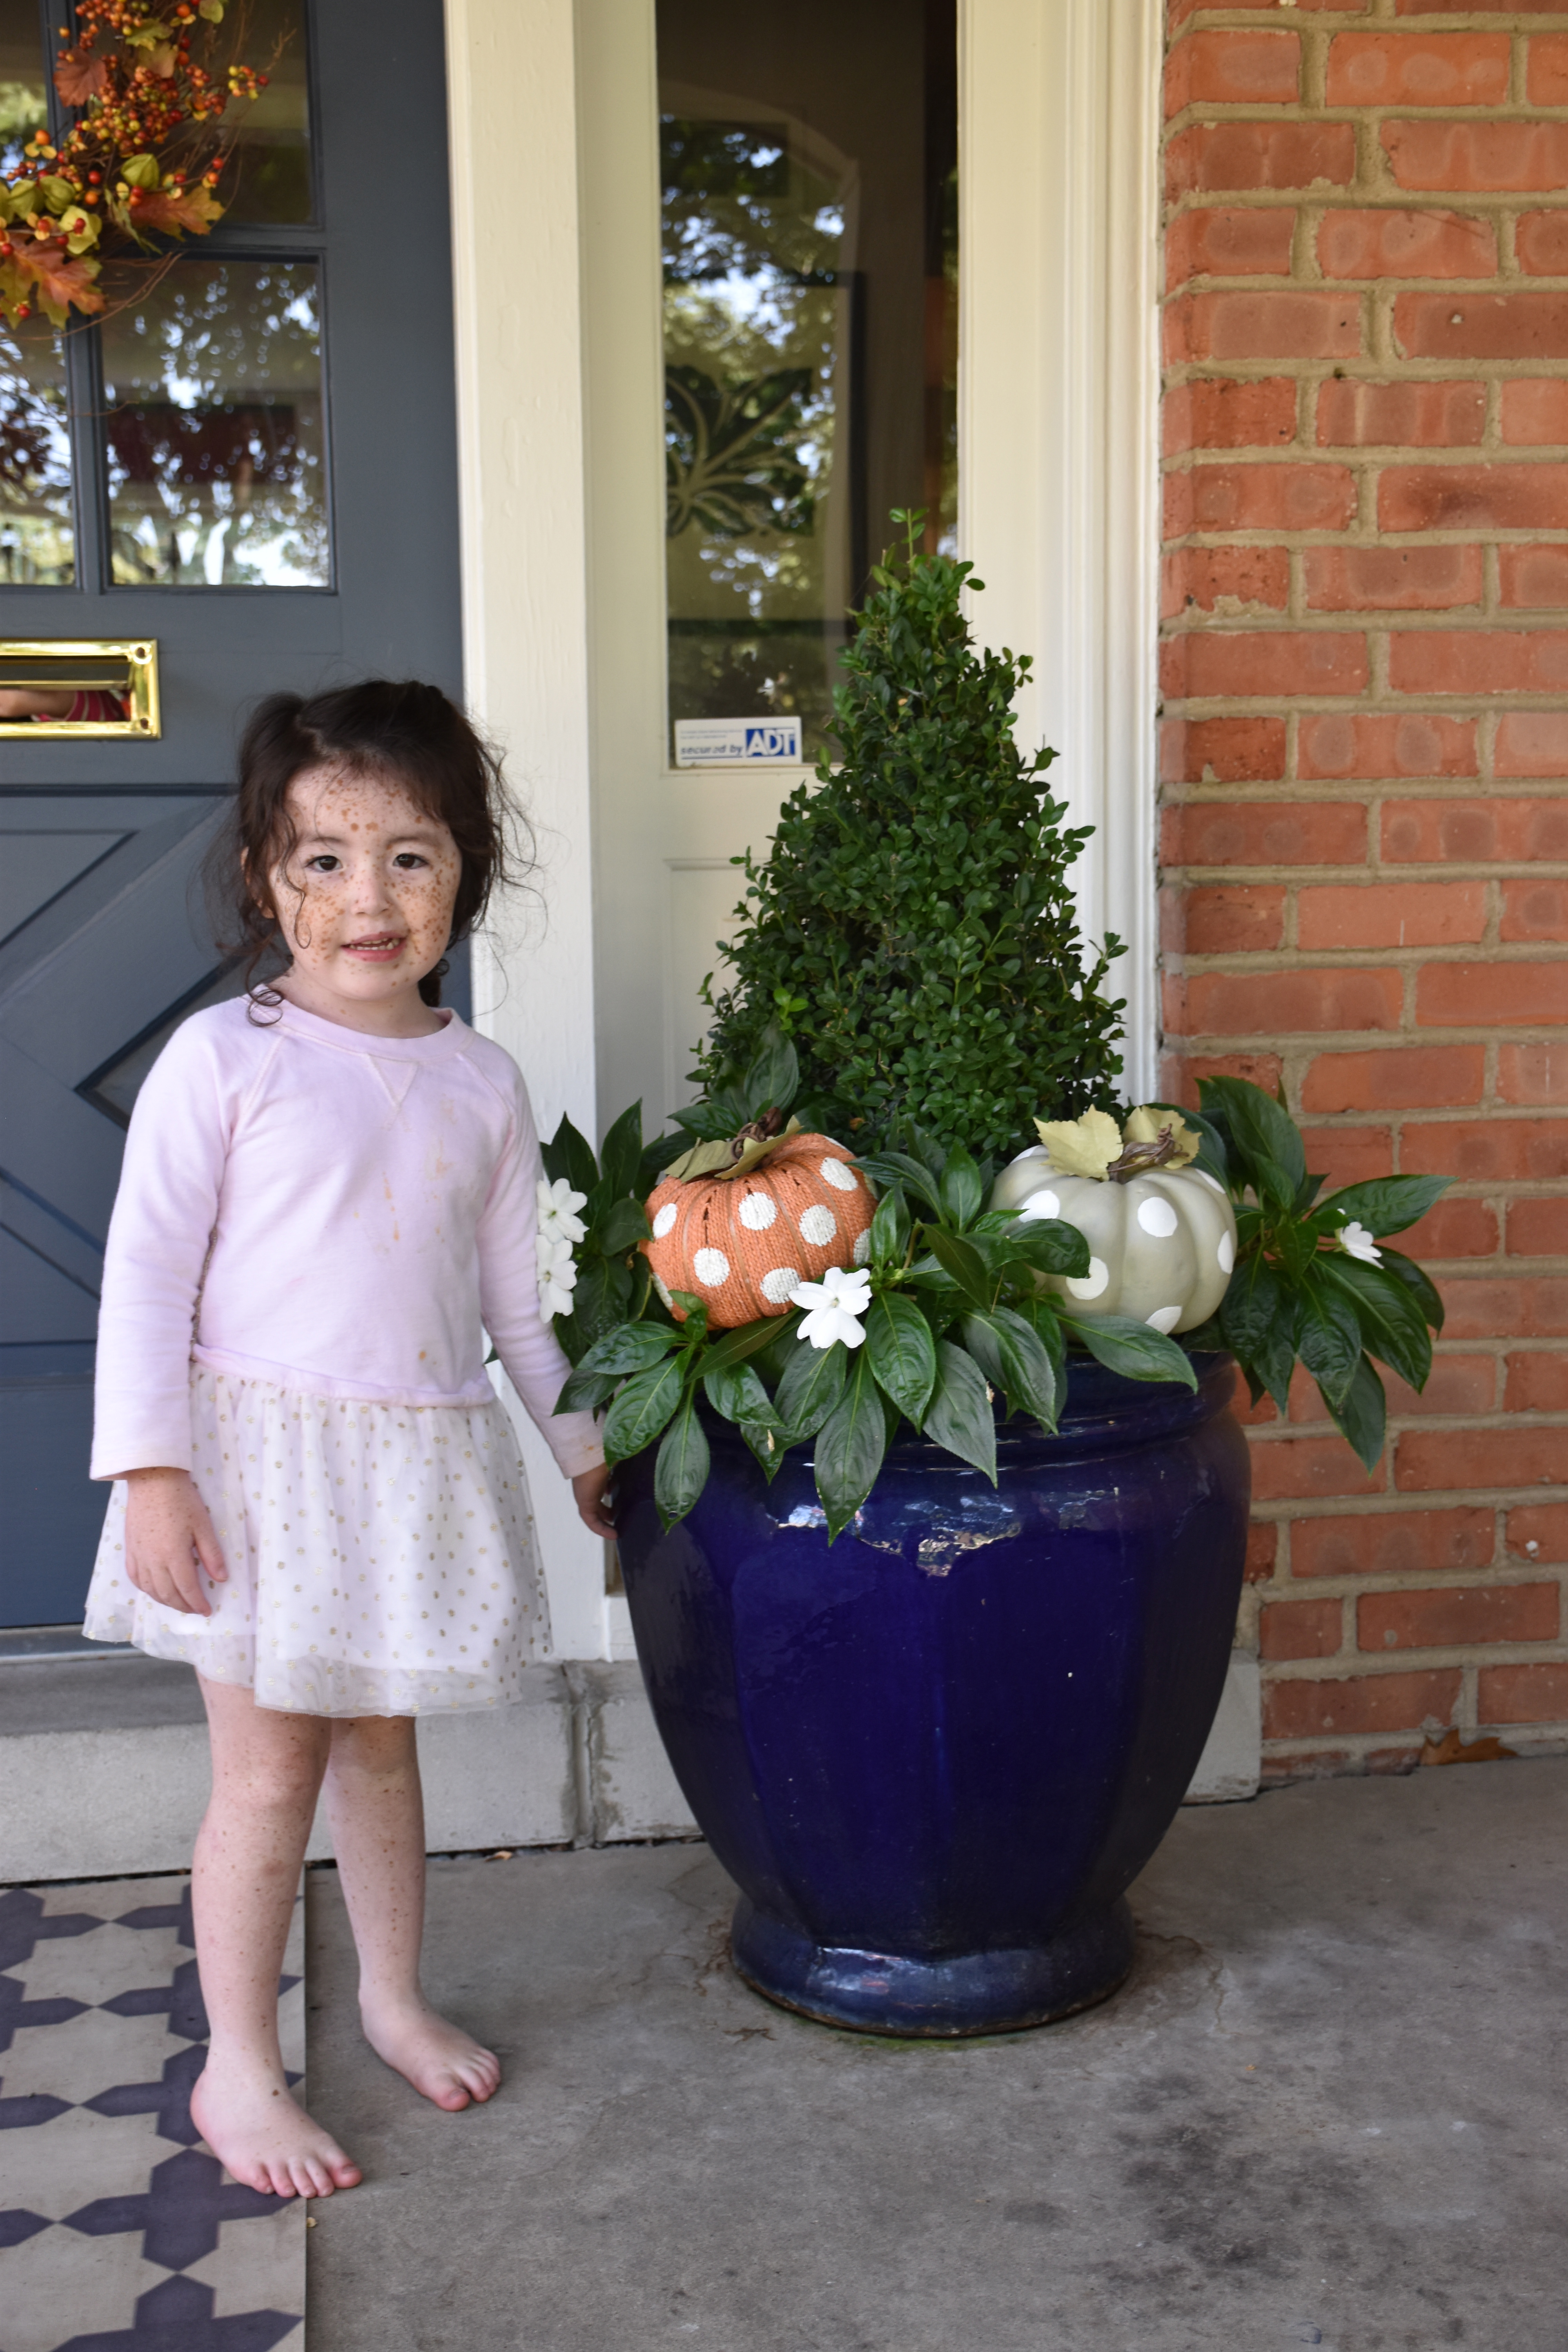
My youngest loved those painted pumpkins so she wanted to have her picture taken next to them.
If you look closely you can see my oldest sticking her hands out of the mail box.
I take breaks when writing about window treatments and photograph my girls jumping on the furniture and having fun instead. These are the great moments behind every post and the best part of my very different life as a blogger.
Every day is bring your daughter to work day in our house.
People often ask me what my family’s favorite recipes are, so I you should know that the Chocolate Chip Cookie recipe is definitely my girls and I think my sister’s favorite recipe this year. My oldest daughter LOVES to make these cookies!
When I asked my husband what his favorite recipe was he was excited about a new chicken recipe that is still in the research and development phase (I will have to share that one sometime soon), but his favorite published recipe is the Salmon in Puff Pastry and then his next favorite is the Cedar Plank Salmon Tacos.
My personal favorite was the Halloween Chocolatines, because not only were they delicious, but that photograph helped land me on the front page of The Pioneer Woman’s recipe blog, called Tasty Kitchen.It also caused me to think differently about food photography. However my top refering post on Tasty Kitchen was my Peach Cobbler, so if you found me through Tasty Kitchen I am so glad you are here.
I was so excited the Friday I looked and saw my photograph featured on Tasty Kitchen and the best part was hearing my youngest daughter talk about how much she liked that picture of her cake.
I have learned over the year that you all love posts about pillows, wreaths and blue and white home decor finds. I am working on sharing more great sources soon
Finally, as I was working on this post in a strange turn of events I learned that my law school somehow published that I had died this year. Yikes, you leave a profession for two years and suddenly it seems possible that they believe you are truly gone. Thanks to everyone who looked into the matter and found me alive and blogging here. As much as I loved and was passionate about what I did before, oh what a gift it has been to step out and do what I really love each day. So my dearest readers thank you for reading and coming back each week. It’s been quite a year. As I look back on over 100 posts, I am so glad that I took the leap to begin writing. In the coming year I hope to share more with you, to be a good friend to you in the kitchen and most importantly to inspire you to trust your own creativity and share what you love.
Can you tell this hot pink dress is one of my daughter’s favorites?
Last but not least a special love note to my girls who have been there to create every recipe. You are too little to know that not every mommy is in the kitchen this much, but I have absolutely loved sharing every minute of the fun with you.