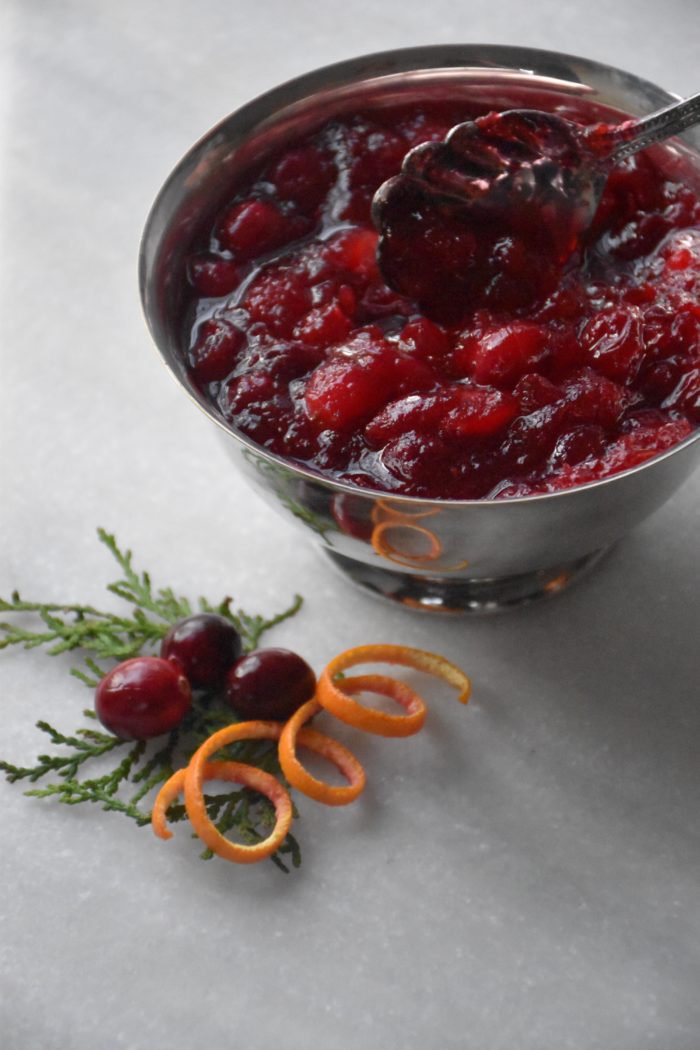
Cranberry sauce is more than a condiment in our house; it is a celebrated side dish. My family’s recipe comes from an old Houston Chronicle recipe that has been shared around our family for years. Our family loves it so much that this Grand Marnier cranberry sauce makes an appearance at both Thanksgiving and Christmas. I should note that we don’t even serve turkey at Christmas. It’s just such a beloved side dish in our house that it wouldn’t be a holiday meal without it. So while my mom, the expert on Thanksgiving sides, was in town I got her help in the kitchen. I took notes and I am sharing all her tips for this delicious sauce.
Grand Marnier Cranberry Sauce
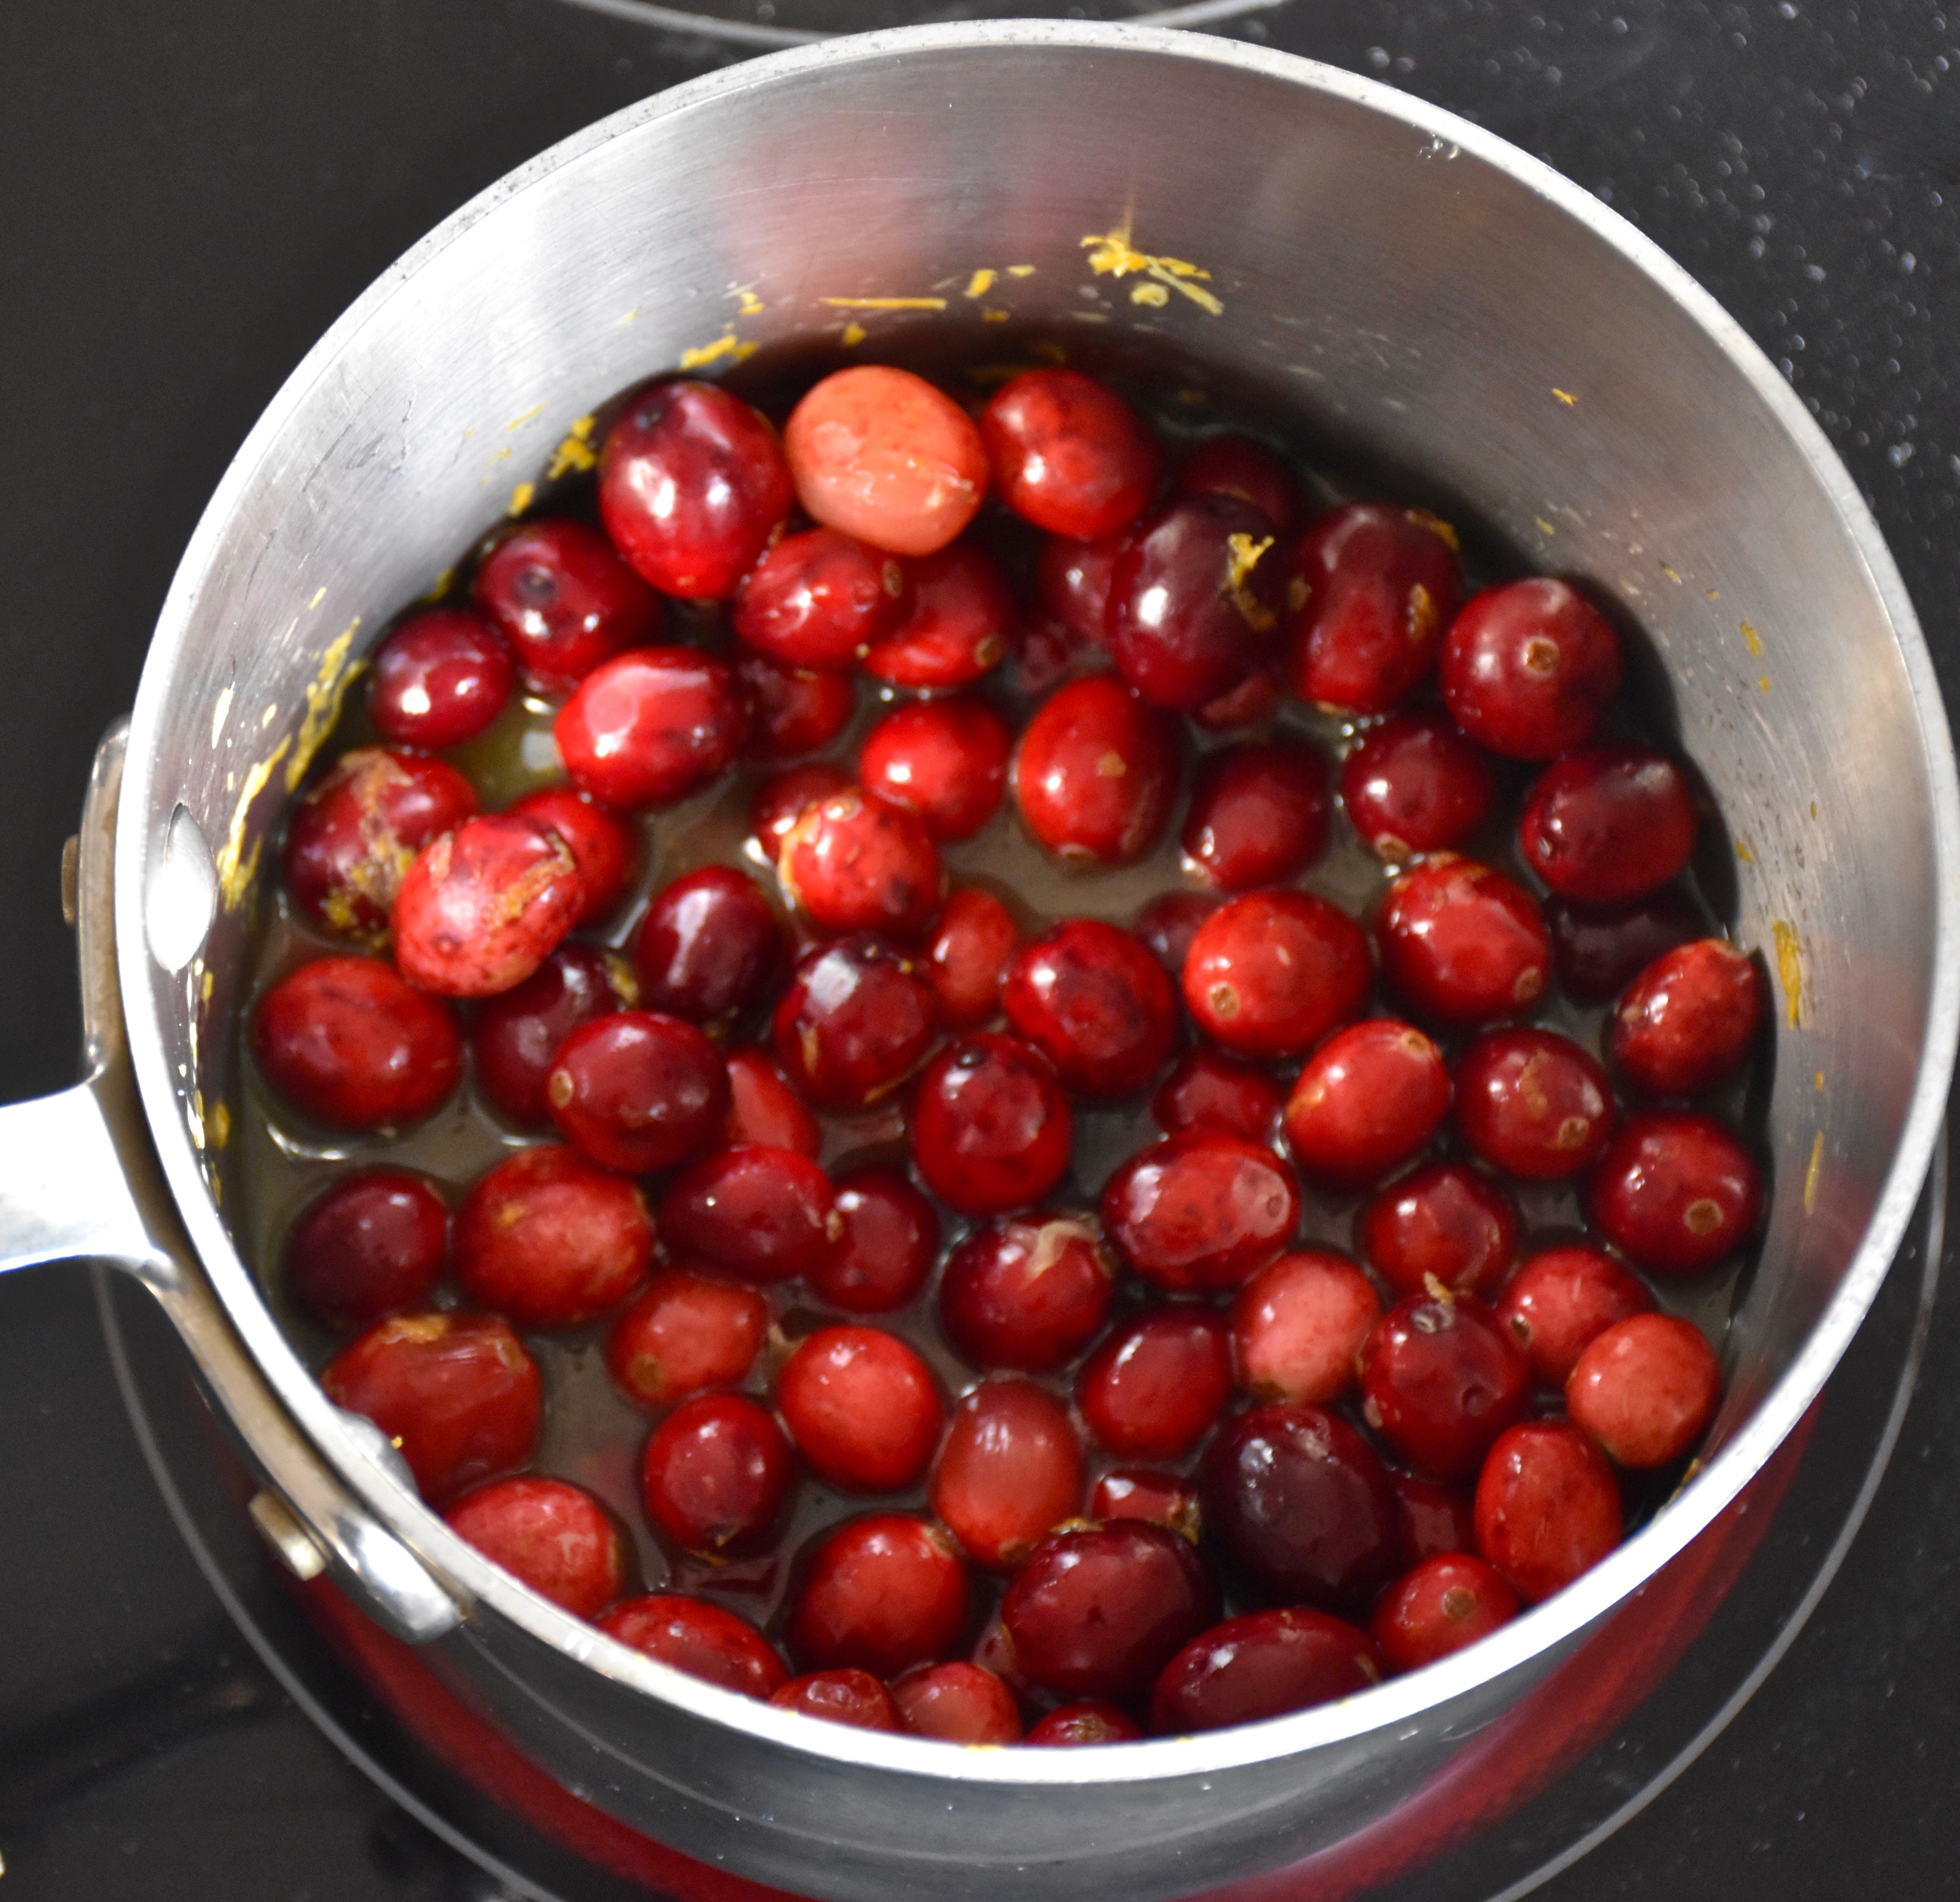
2 (12oz) bags of fresh cranberries, washed and drained
3/4 cup of orange juice (about 3 medium oranges squeezed)
1/4 cup Grand Marnier Liquor
The zest of one orange
The zest of 1/2 of one lemon
2 cups of brown sugar
In a large sauce pan combine your cranberries, orange juice, Grand Marnier and citrus zest. Then heat your cranberry mixture on medium heat for about 15 minutes stirring intermittently, until you hear your cranberries popping as they cook. You want about 3/4 of your cranberries to have popped before you add in your brown sugar.
Then add in your brown sugar and stir. Continue to cook your sauce it at medium heat for about 5 minutes. The brown sugar will melt and your sauce will begin to thicken like a cranberry jam. Then let your sauce cool and refrigerate it. The sauce will thicken a little more as it cools. This cranberry sauce can be kept in your fridge for one week, so you can easily make it ahead and the flavors will only get better.
The orange juice and the orange liquor make this sauce special. The citrus and the brown sugar add some sweetness that balances without overpowering the signature tartness of the cranberries and has me wanting to eat it by the spoonful. I feel like Thanksgiving has snuck up so quickly this year, so if you too are just getting your meal plans together, then this easy make ahead side would be a great one to share with family and friends. I am sharing one last side dish this Sunday so come back for another quick and easy Thanksgiving recipe.
Thanksgiving in our family is all about the sides. So over the next couple of weeks I am going to share recipes for some of our family’s favorites. This first recipe is one I created for my family this fall, but it is so delicious that it’s definitely found a place on my table this year.
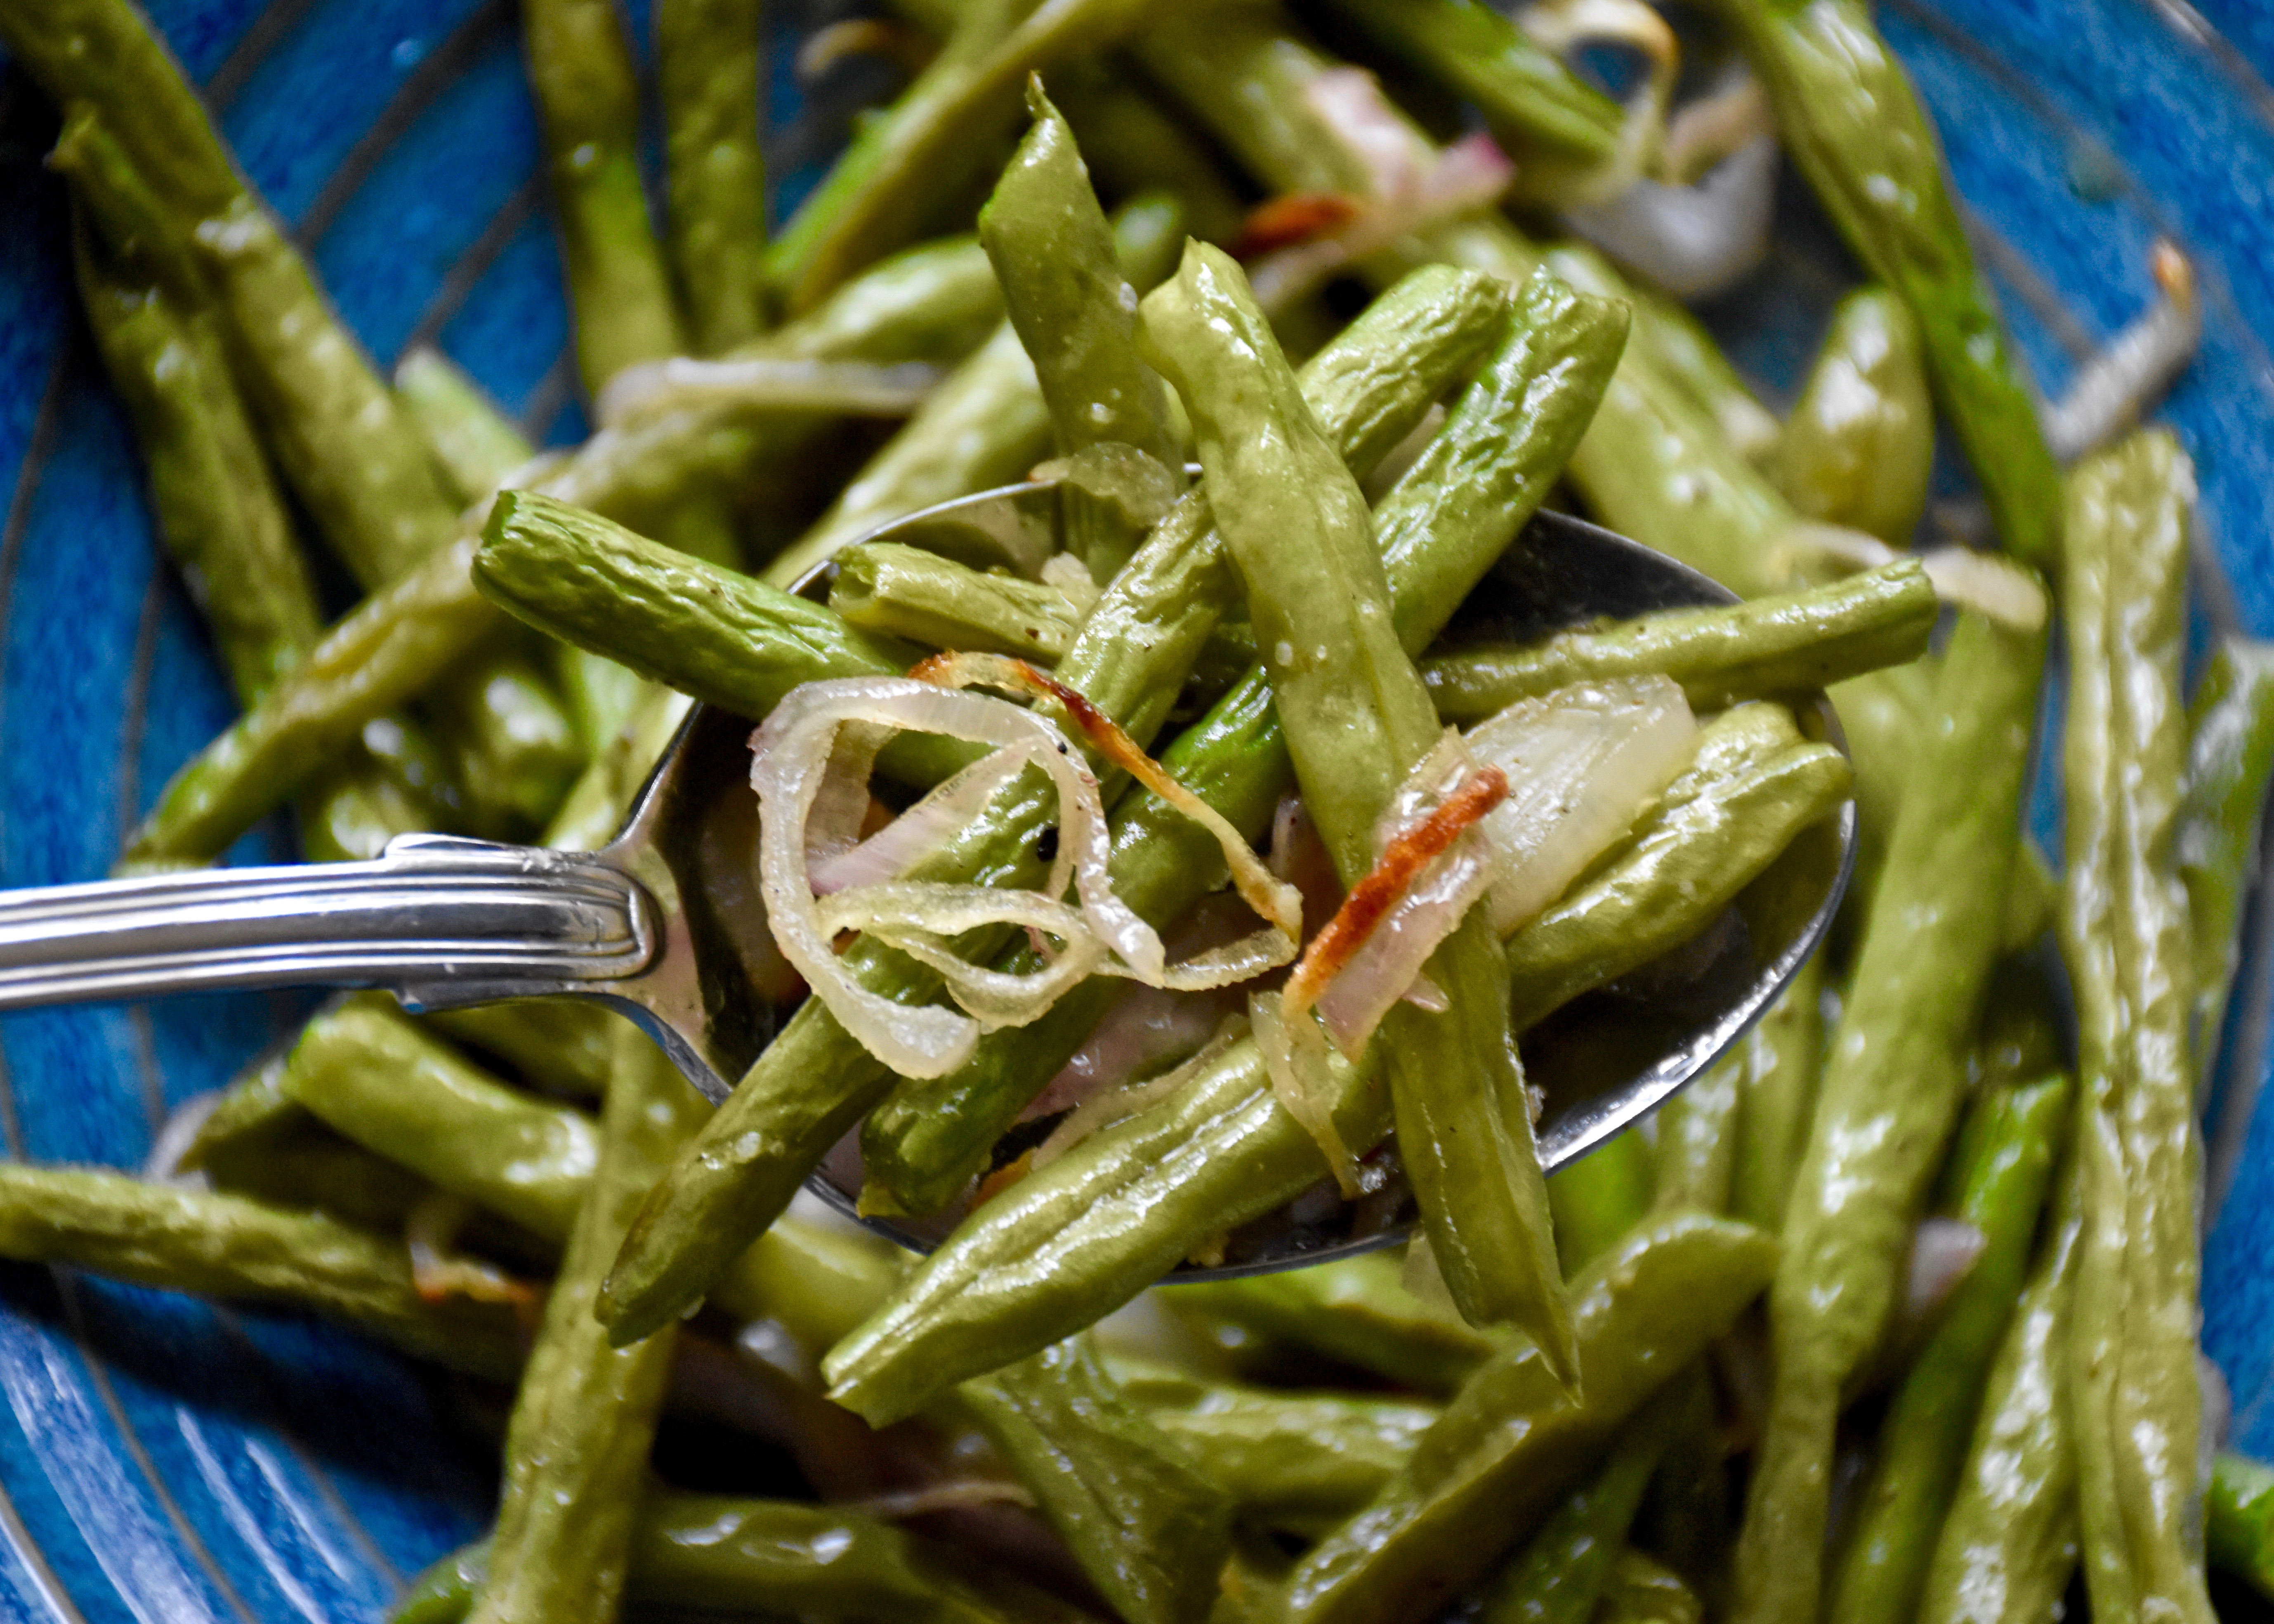
Move over traditional green bean casserole these roasted shallots and green beans have an amazing umami flavor that make them a memorable side. These aren’t your ordinary steamed beans. The savory umami flavor in this dish comes from the caramelized shallots when they cook with the green beans it creates an delicious flavor. The first time I tried this dish I found myself standing at the stove eating all the remaining green beans. They were just that good.
Roasted Shallots and Green Beans -Serves 4 (Can be doubled or tripled to serve a crowd)
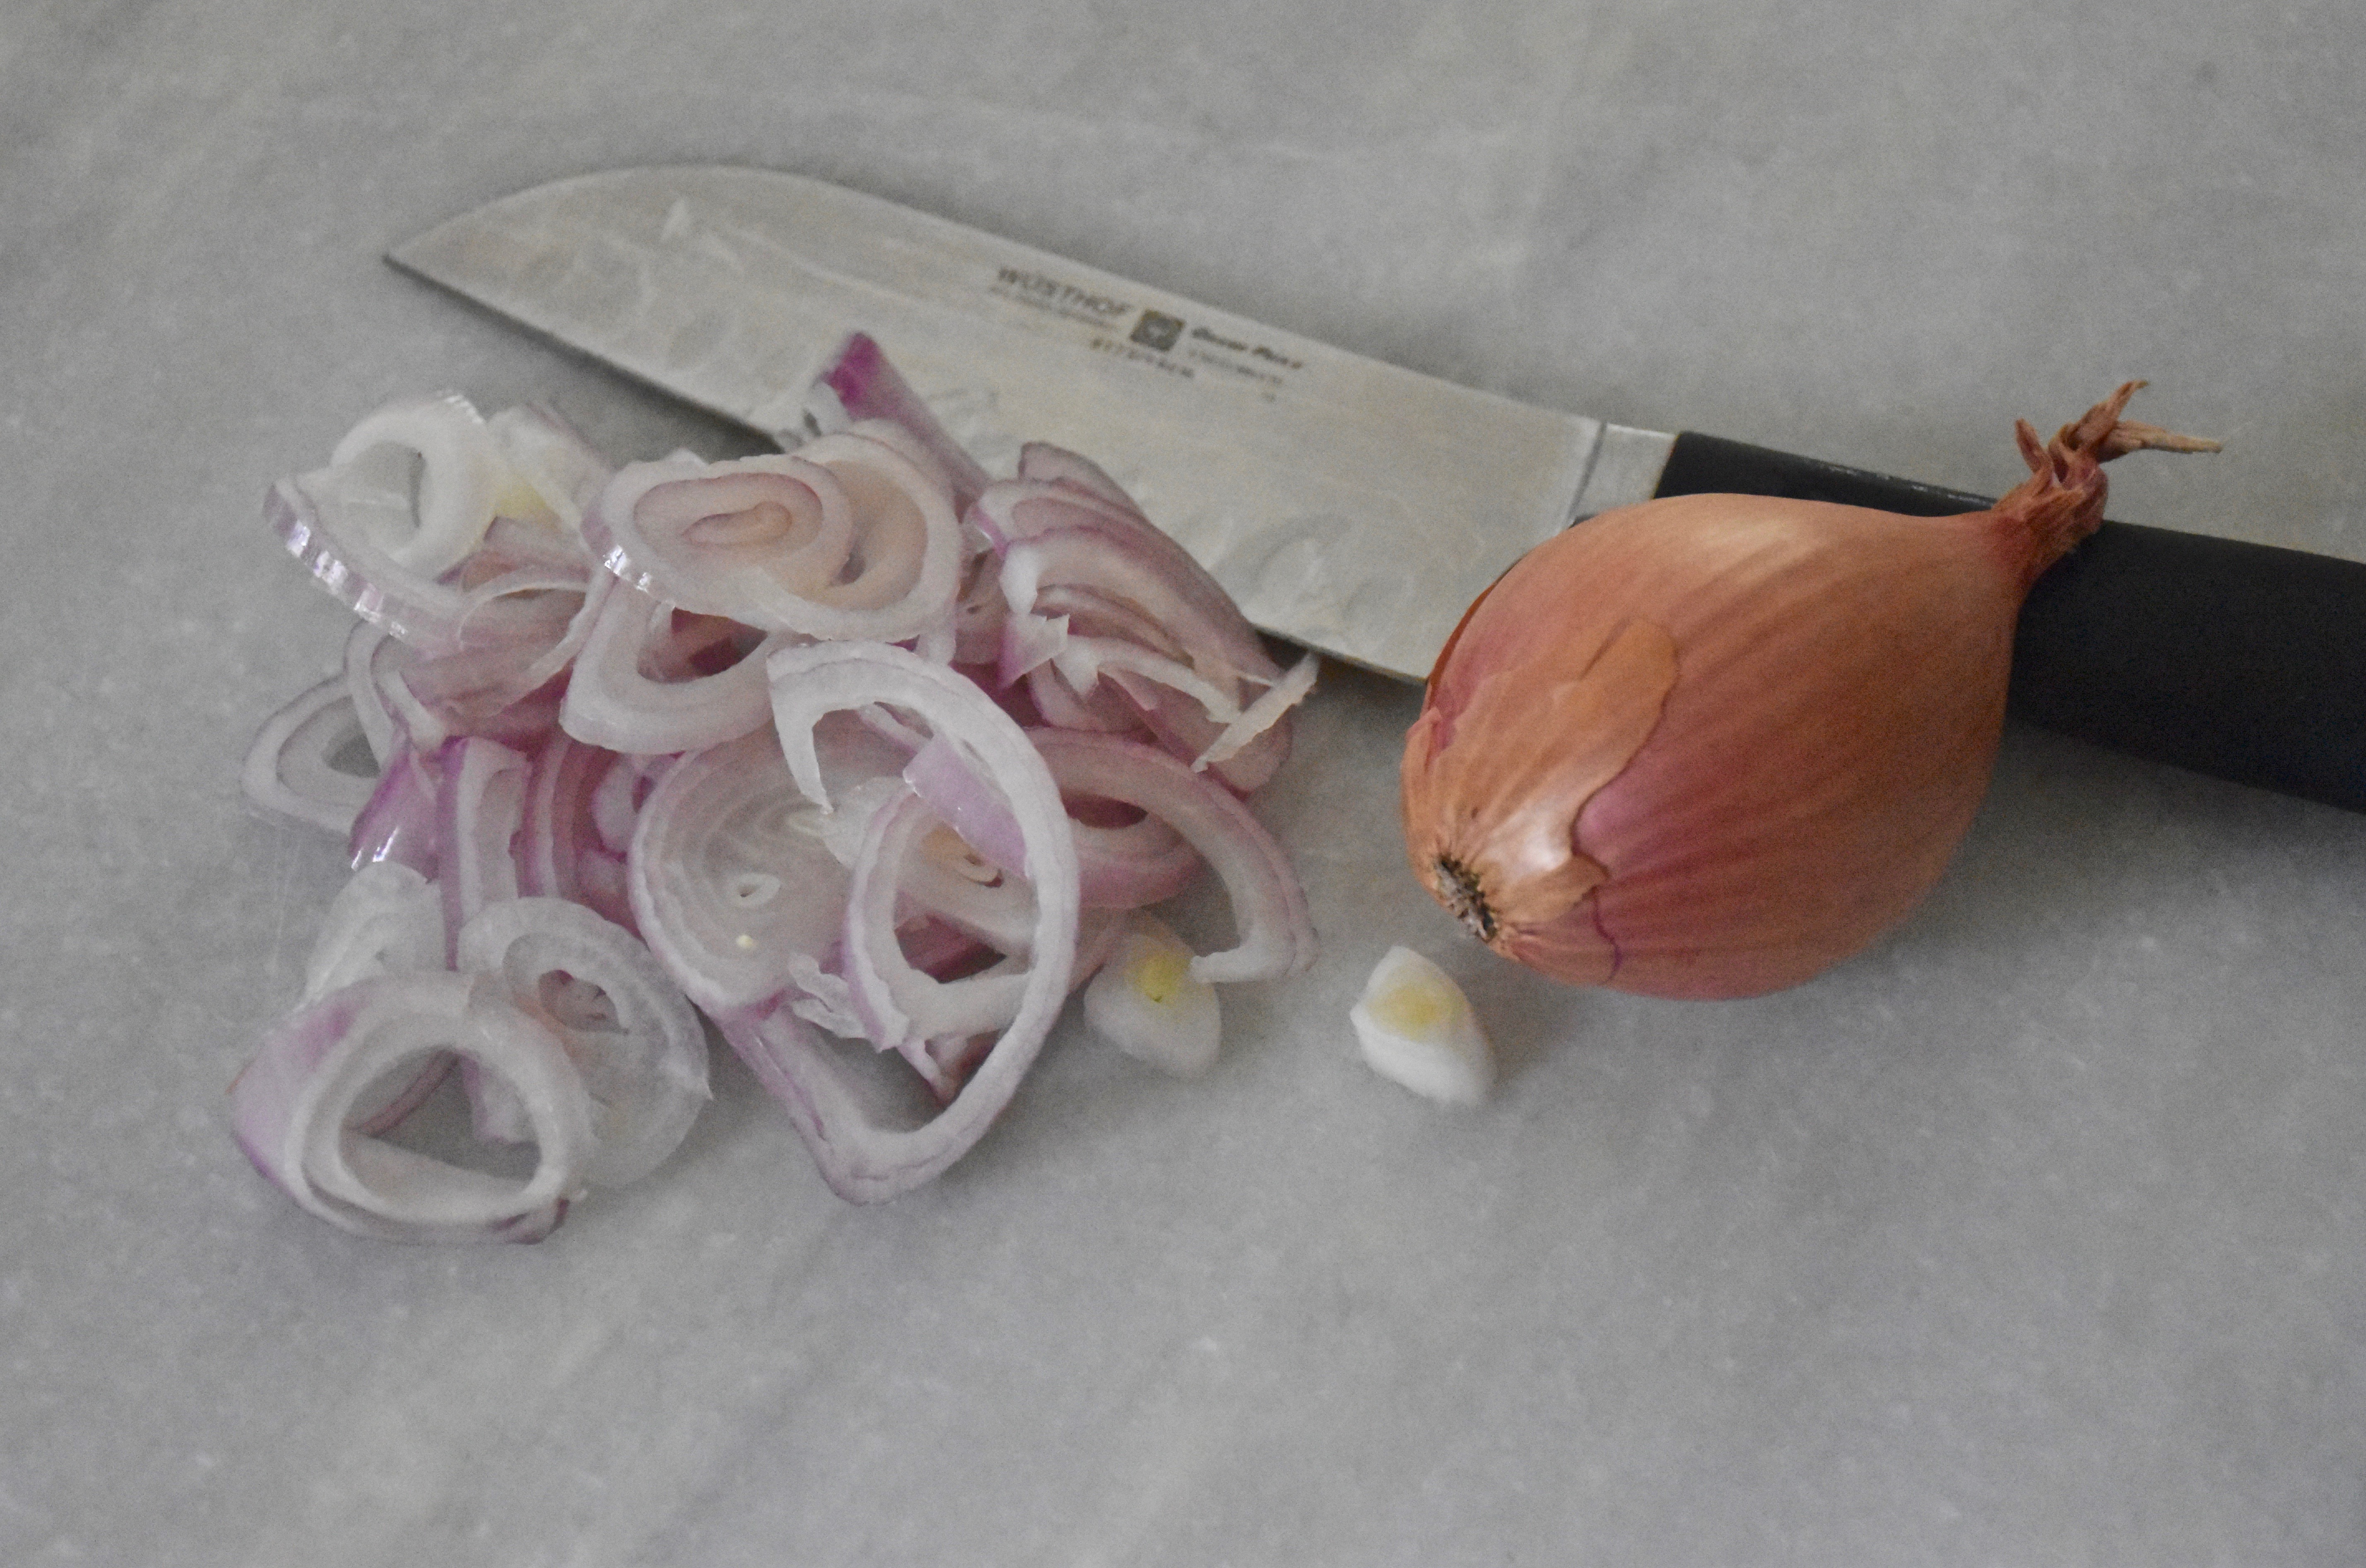
1 medium shallot, sliced into thin rings
3/4 pound fresh green beans with the ends trimmed (about 2 rounded cups)
2 tablespoons extra virgin olive oil
1/4 teaspoon kosher salt
1/8 teaspoon pepper
Preheat your oven to 400 degrees
First peel and thinly slice your shallot into rings.
Next wash and trim your green beans.
Then in a large mixing bowl toss your beans and shallots in the olive oil. Then add your salt and pepper.
Pour your green beans and shallot mixture on a sheet pan.
I lined my pan in aluminum foil for easy clean up.
Roast them on a rack towards the top of your oven for 18 minutes. You will know they are done when your shallots turn a caramelized golden brown.
This recipe has just five ingredients so it’s a simple dish to assemble ahead of time and have ready to roast while your turkey is resting. But you don’t have to wait for Thanksgiving to make this one. It also makes a great healthy weeknight side.
The views are breathtaking; the air, cool and crisp. This year the ice and snow that traditionally love to nip at the heels of fall have stayed at bay a little longer. So the trees have put on an outrageous show. The displays of crimson, orange and ochre have made it the most gorgeous fall I have ever experienced. Streets lined in maples, ashes, ginkgos and burning bushes have each street corner and tree seeming more beautiful than the next.
Days like this are fleeting so I have been out walking and savoring the beauty. Trying to photograph and capture just a piece of this vibrant color parade. The leaves rustle in the wind and a leaf takes flight swirling towards the ground. Reminding you how delicate this view is.
A view from the botanical gardens
Falling leaves also mean it’s time to start planting for spring. As the temperatures have dropped and frosty days draw near, my girls and I set out to plant spring bulbs. We cleaned out the flowers beds from the last of the summer flowers and dug deep trenches. We carefully planted beds full of bulbs. Winter is coming but what I love about tulips is how hopeful they are. When it’s still too cold to venture out into the garden their bright green leaves pop from the ground. A beacon and sure sign that warmer flower filled days are near.
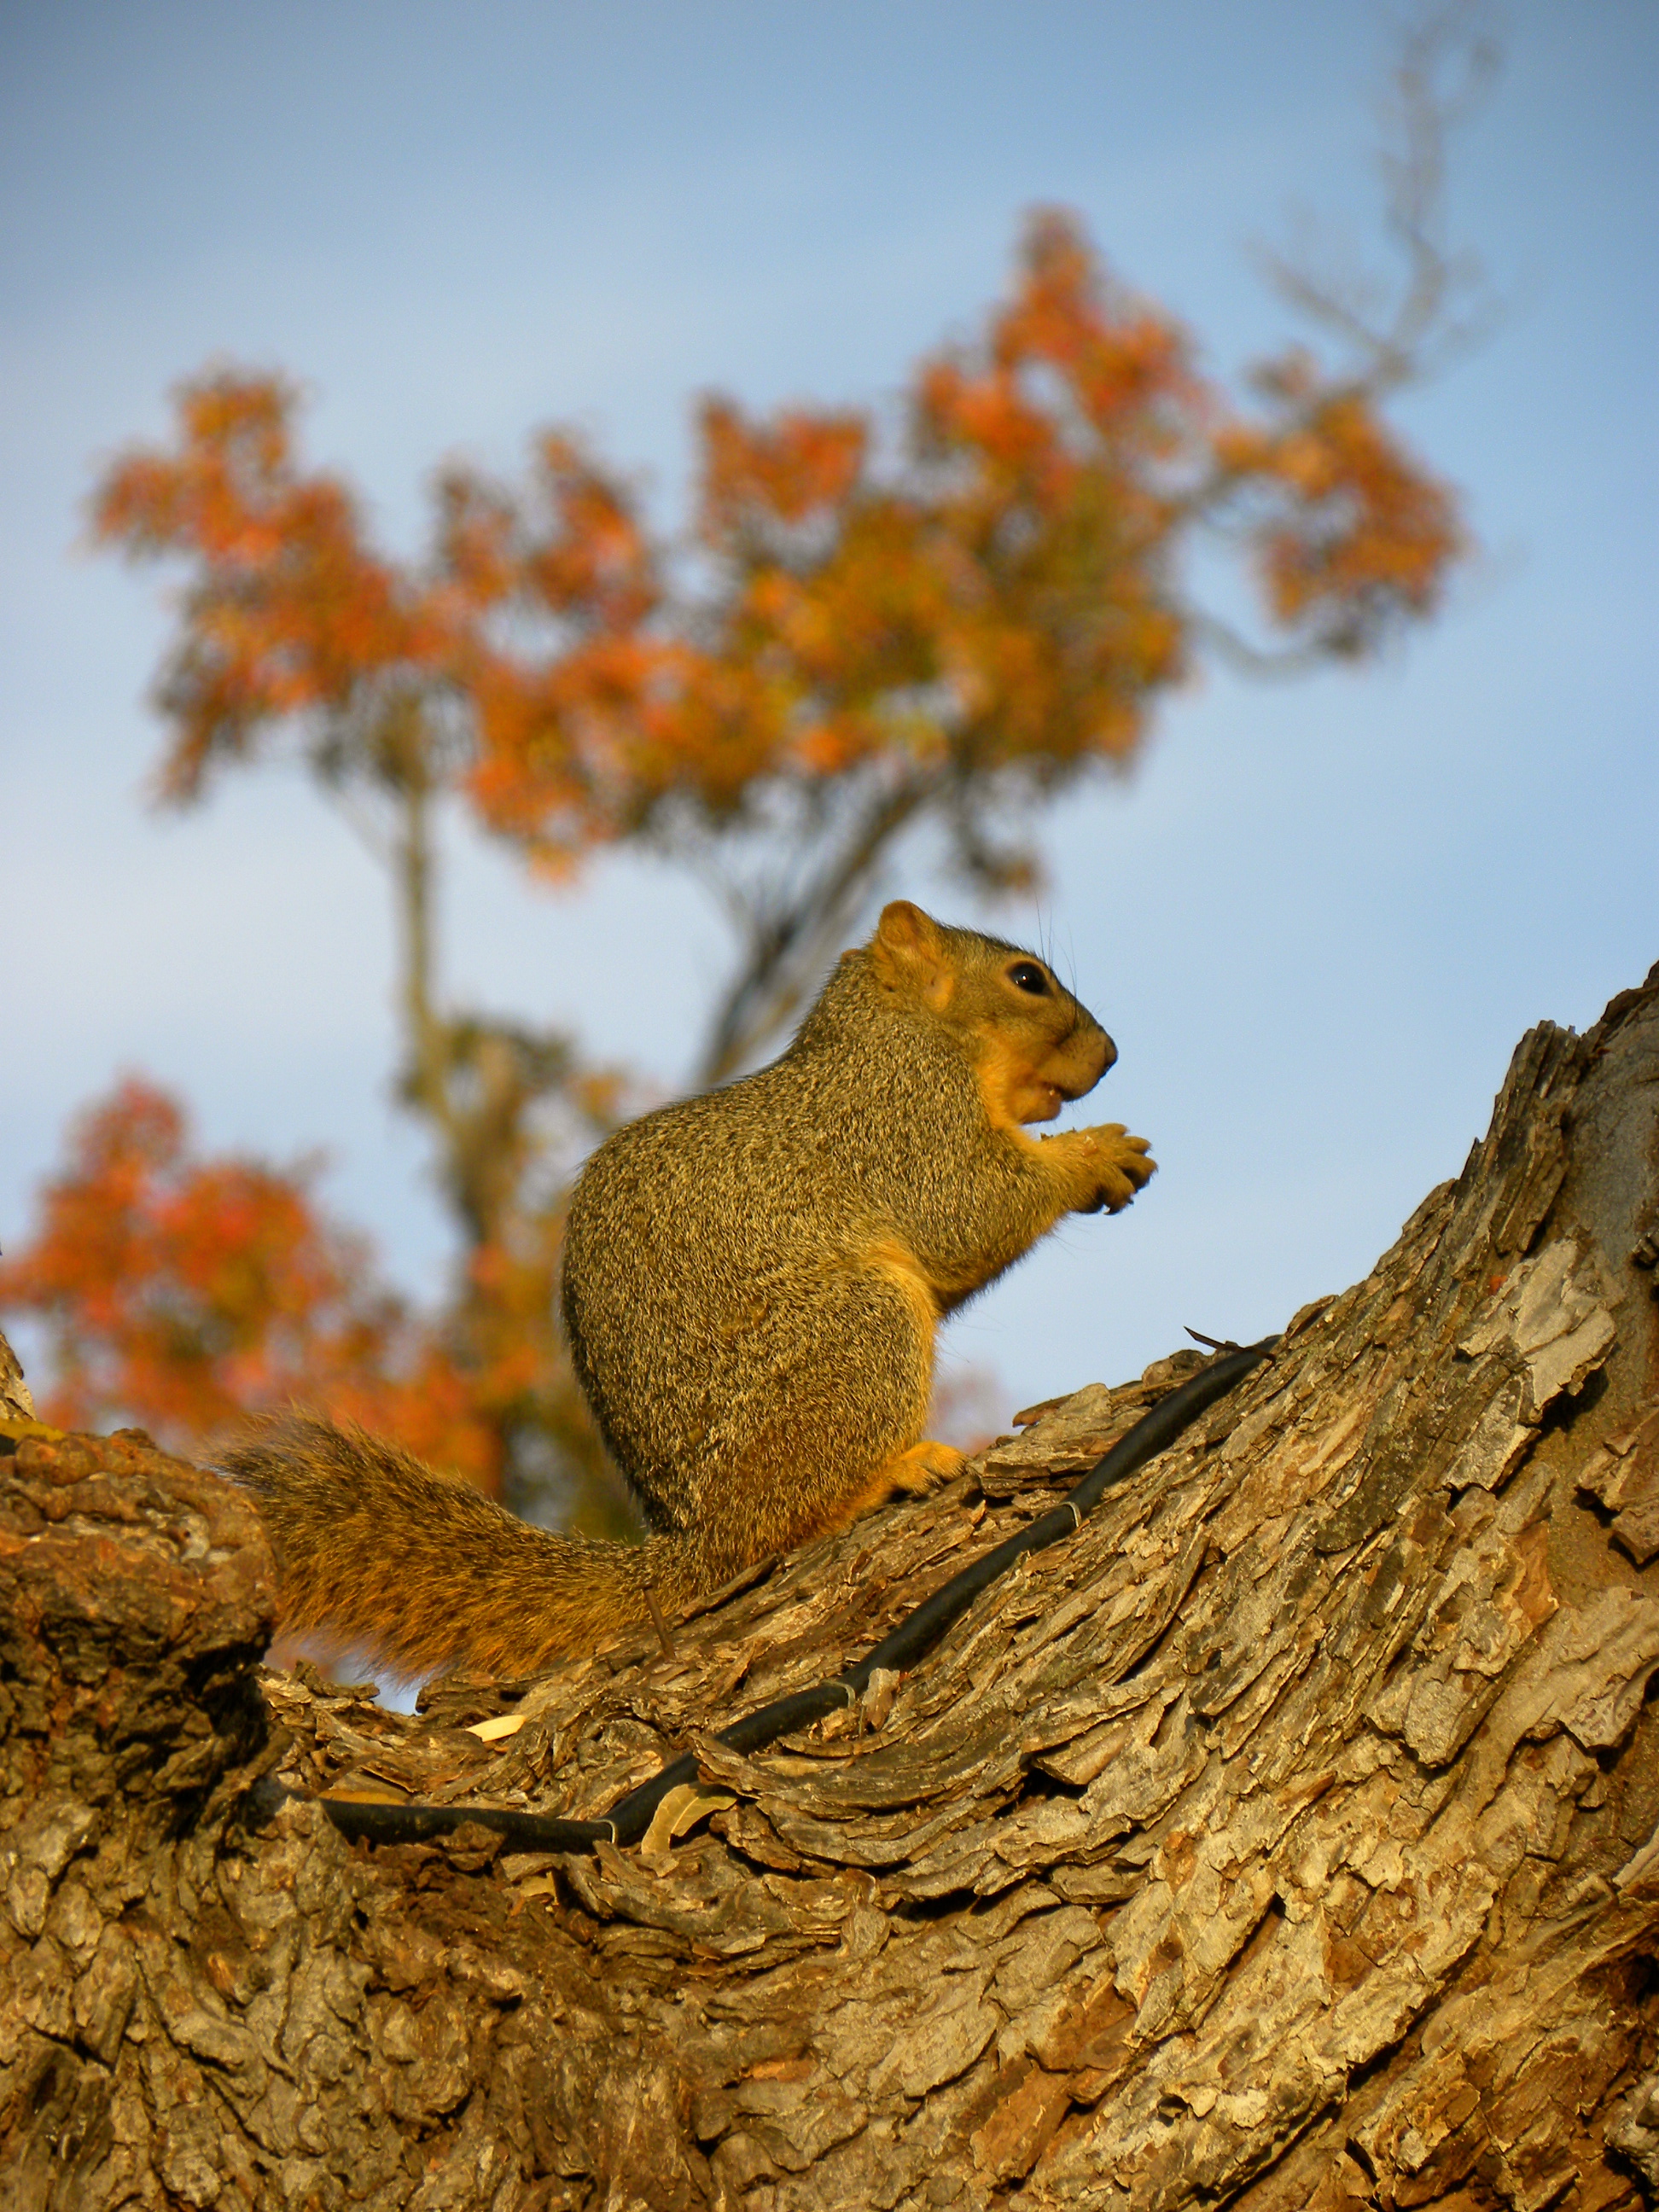
However, as soon as we finished planting nearly 200 bulbs the insatiably hungry neighborhood squirrels were out to investigate. Had they been watching us? Were they dreaming of an all you can eat tulip buffet? I caught a cheeky and curious few checking out my newly planted beds and the moment I opened the door to investigate they immediately sprinted across the street to the neighbor’s yard. The looks on their faces seemed to say “who me?” So I took to the garden with a bottle of red pepper flakes hoping the spicy topping might send my squirrels looking for another meal, but I may have to get some chicken wire to make sure they don’t come back looking for a tasty snack.
When I was looking for ways to keep my squirrels from digging in the flower beds I came across an article where the White House gardeners had similar frustrations. It seems those D.C. squirrels were an especially savvy crew, so as a last ditch effort to save the tulips the gardeners began setting up feeding boxes hoping that providing an alternative meal plan would solve the problem. However, the ultimate winner was definitely the squirrels. Once word got out that there was food it was like an out of control high school party. It turns out that those tulip loving squirrels had friends.
So what is a flower loving girl to do? The red pepper flakes seem to be working for now, but squirrels in my yard beware I will not be falling for the alternative buffet plan. These fall days may be numbered, but as the view changes I am already planning for spring.
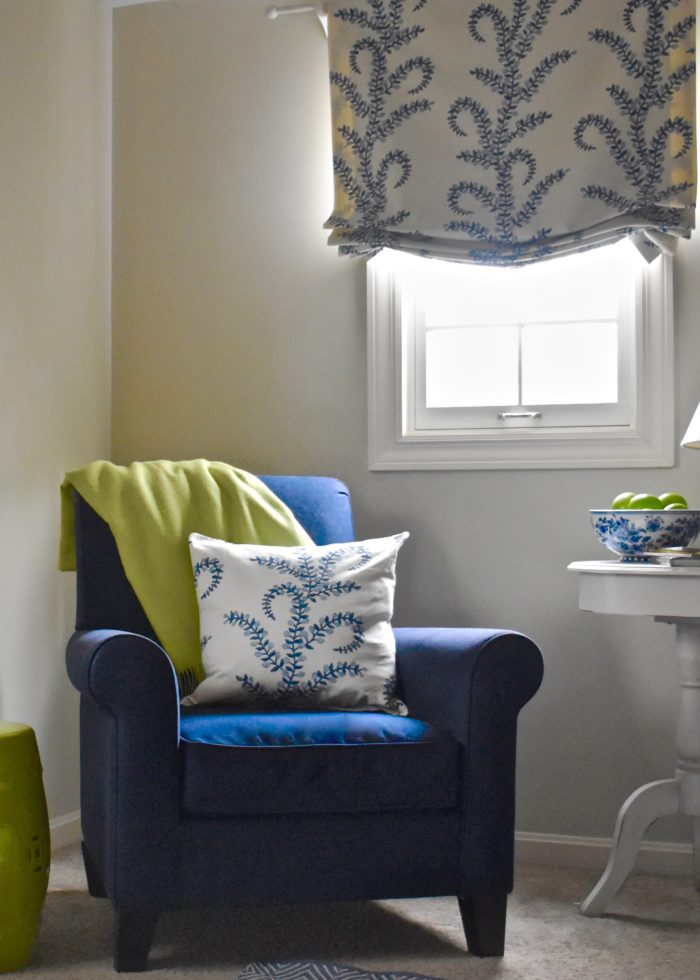
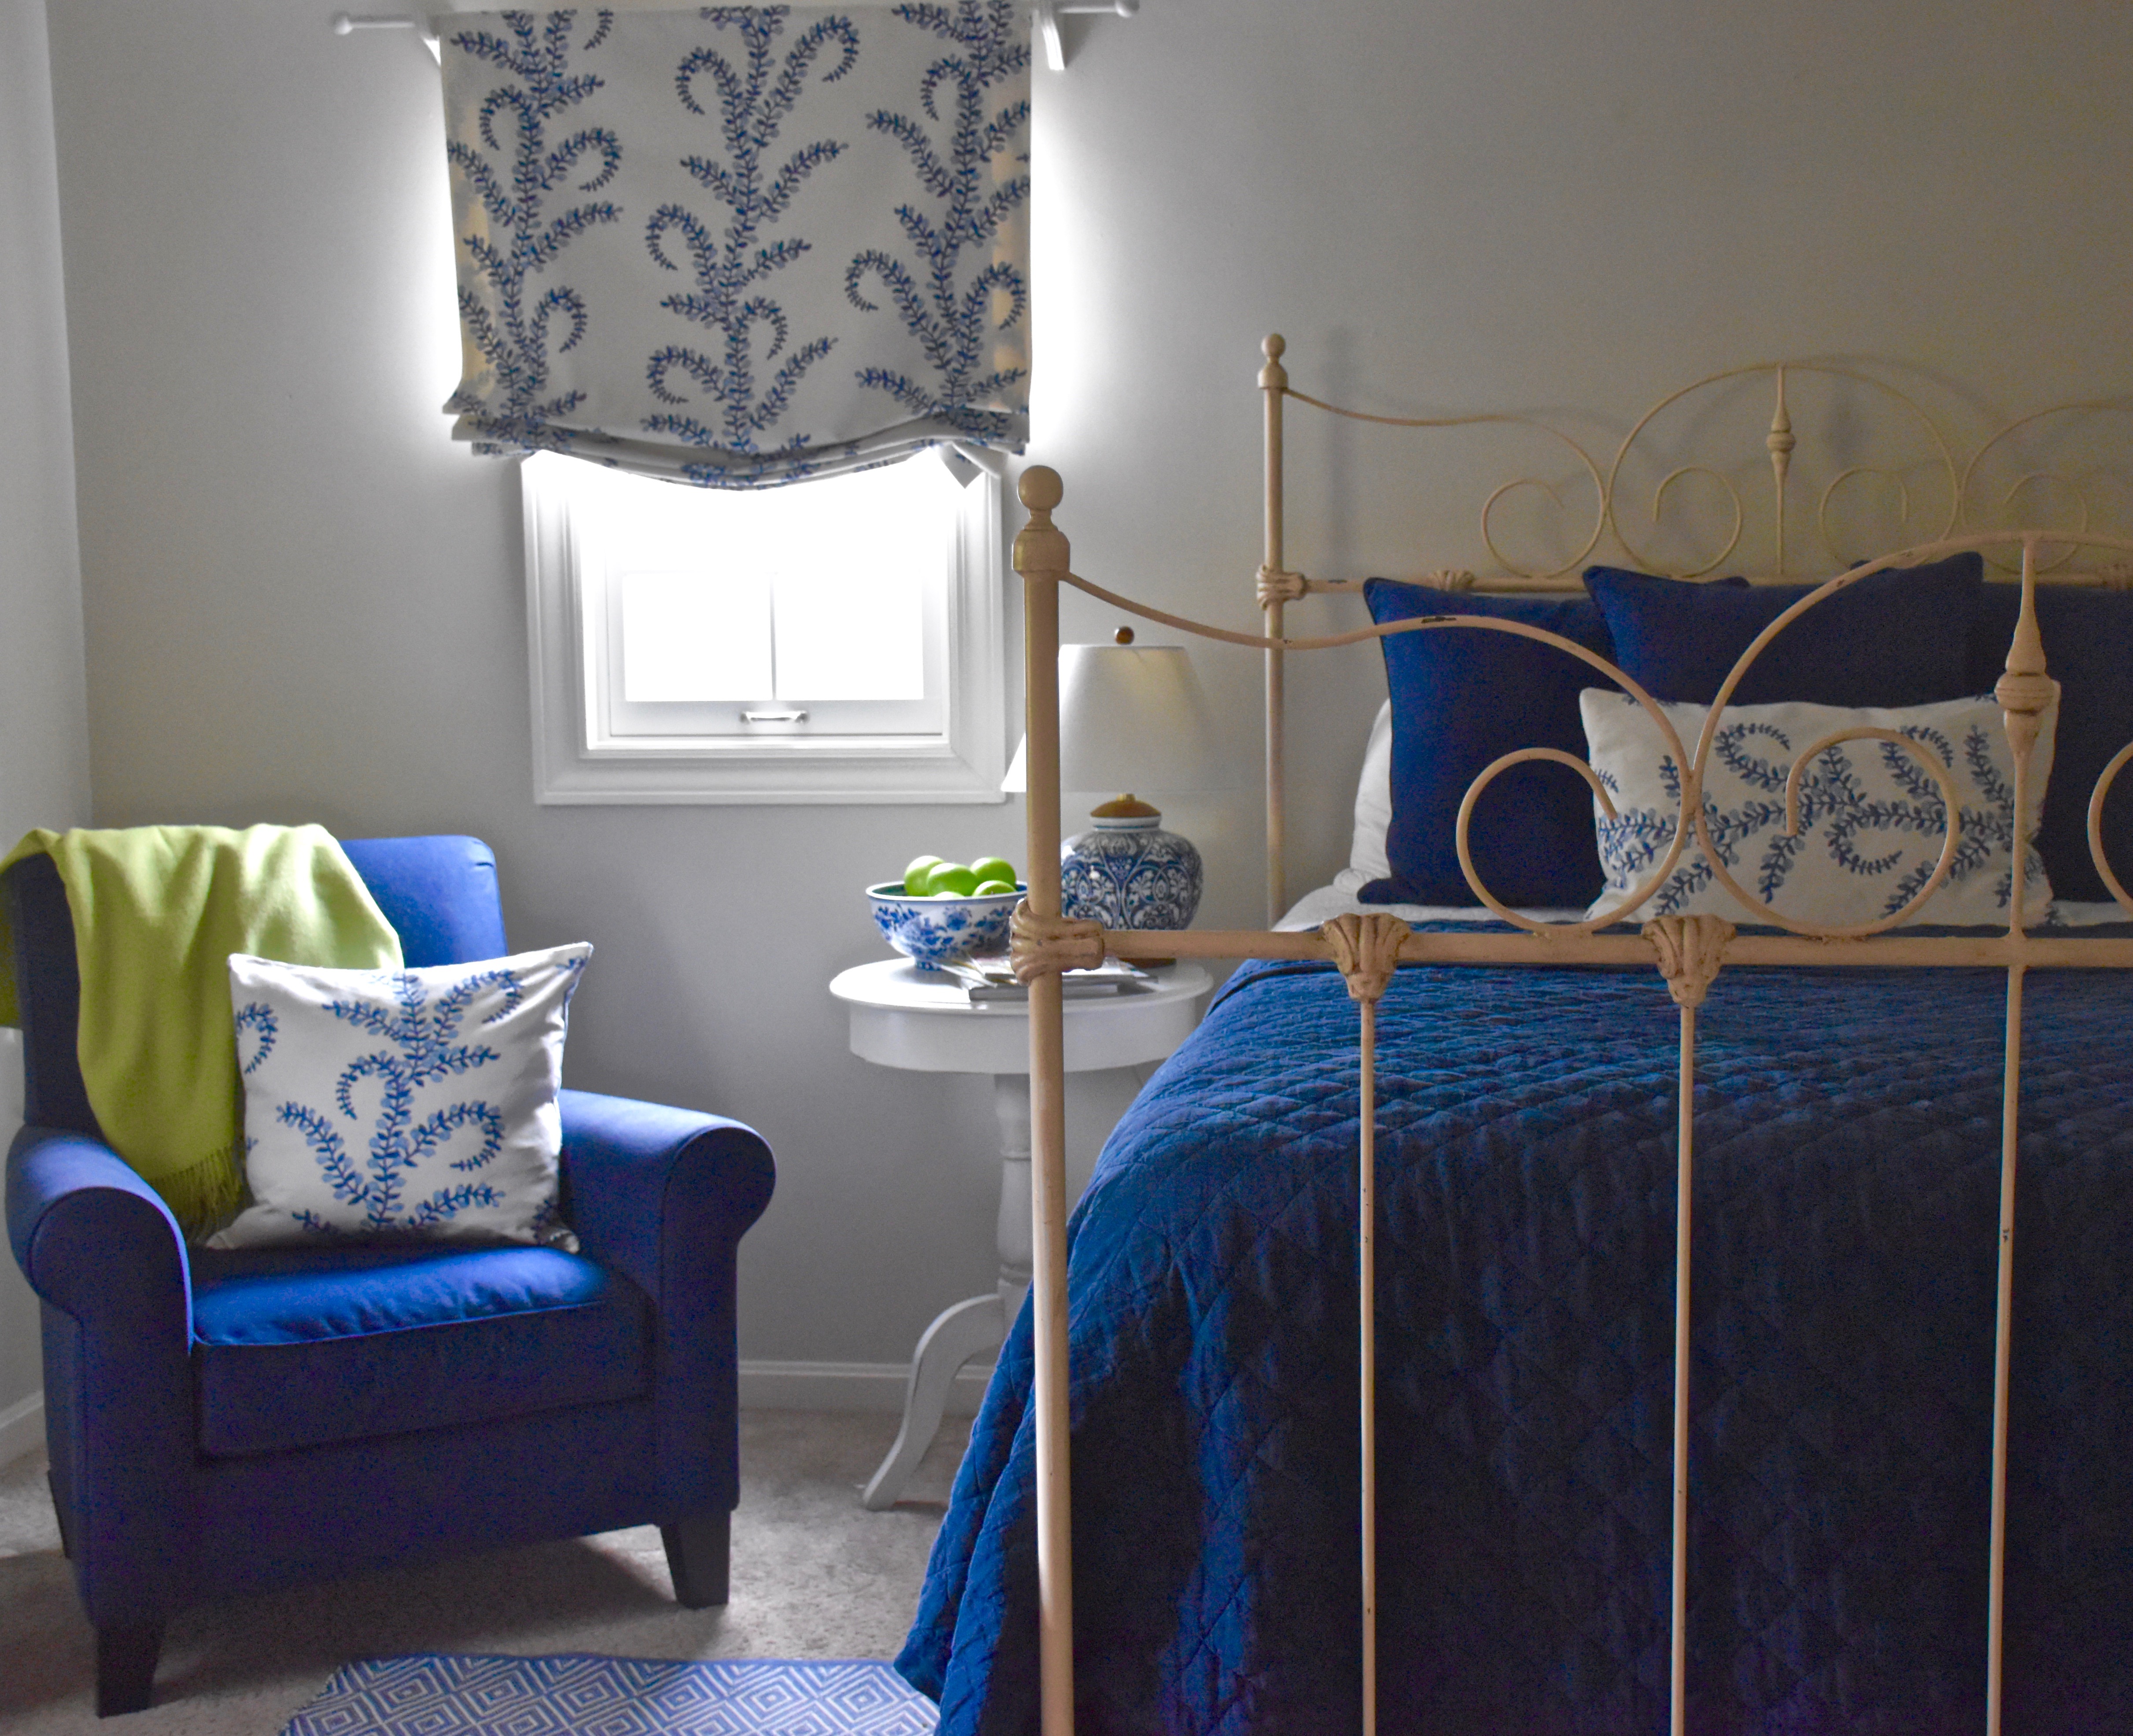
Our guest room has had a serious case of the leftovers since we moved into our house three years ago. It has been filled with been a hodgepodge of left over furniture and bedding, but with the holidays coming soon it is finally time to do something about it. I repainted the room when we first moved in. It was originally a dark hunter green and we sheet rocked in an open doorway that had originally connected it to the master bedroom. The previous owners had used the room as an office, but when we moved in we needed a guest room for out-of-town family and friends. After I painted the room I got busy with other projects, but after I finished my girls’ rooms I decided our guest room could use a few updates. There is nothing like finishing another room and seeing the difference it makes to motivate you to finish other house projects.
I have liked John Robshaw’s fabrics for sometime so when I saw that his Prasana Bluebell fabric was available at one of my favorite discount designer fabric stores I decided to buy a couple of yards and sew some new pillows. In the end, I liked the fabric so much that I decided to order a few more yards to create some new fabric shades for the windows. I like the look of decorative shades, but having them custom-made can be expensive so keep my project on budget I decided to make my own shades. I have created a few of these shades for my kitchen and office so I decided I might share a project guide for creating your own custom shades. You don’t have to have a sewing machine to make these relaxed Roman shades. Fusible sewing tape and an iron is all you need create your own designer shades.
Supply List:
Lining fabric (I used black out lining from an online fabric supply store called Sailrite, but you could use a lighter weight if light control is not an issue)
Decorative shade fabric
Measuring tape
Iron
Fabric pencil
Fusible interfacing tape
Iron on Roman shade rib tape (I ordered 12 yards for these 2 shades from Sailrite)
Sew on rings for Roman shades (one box was enough for two shades)
One drapery rod or a 1×2″ board cut to size of shade
Needle and thread
Measuring Is Everything
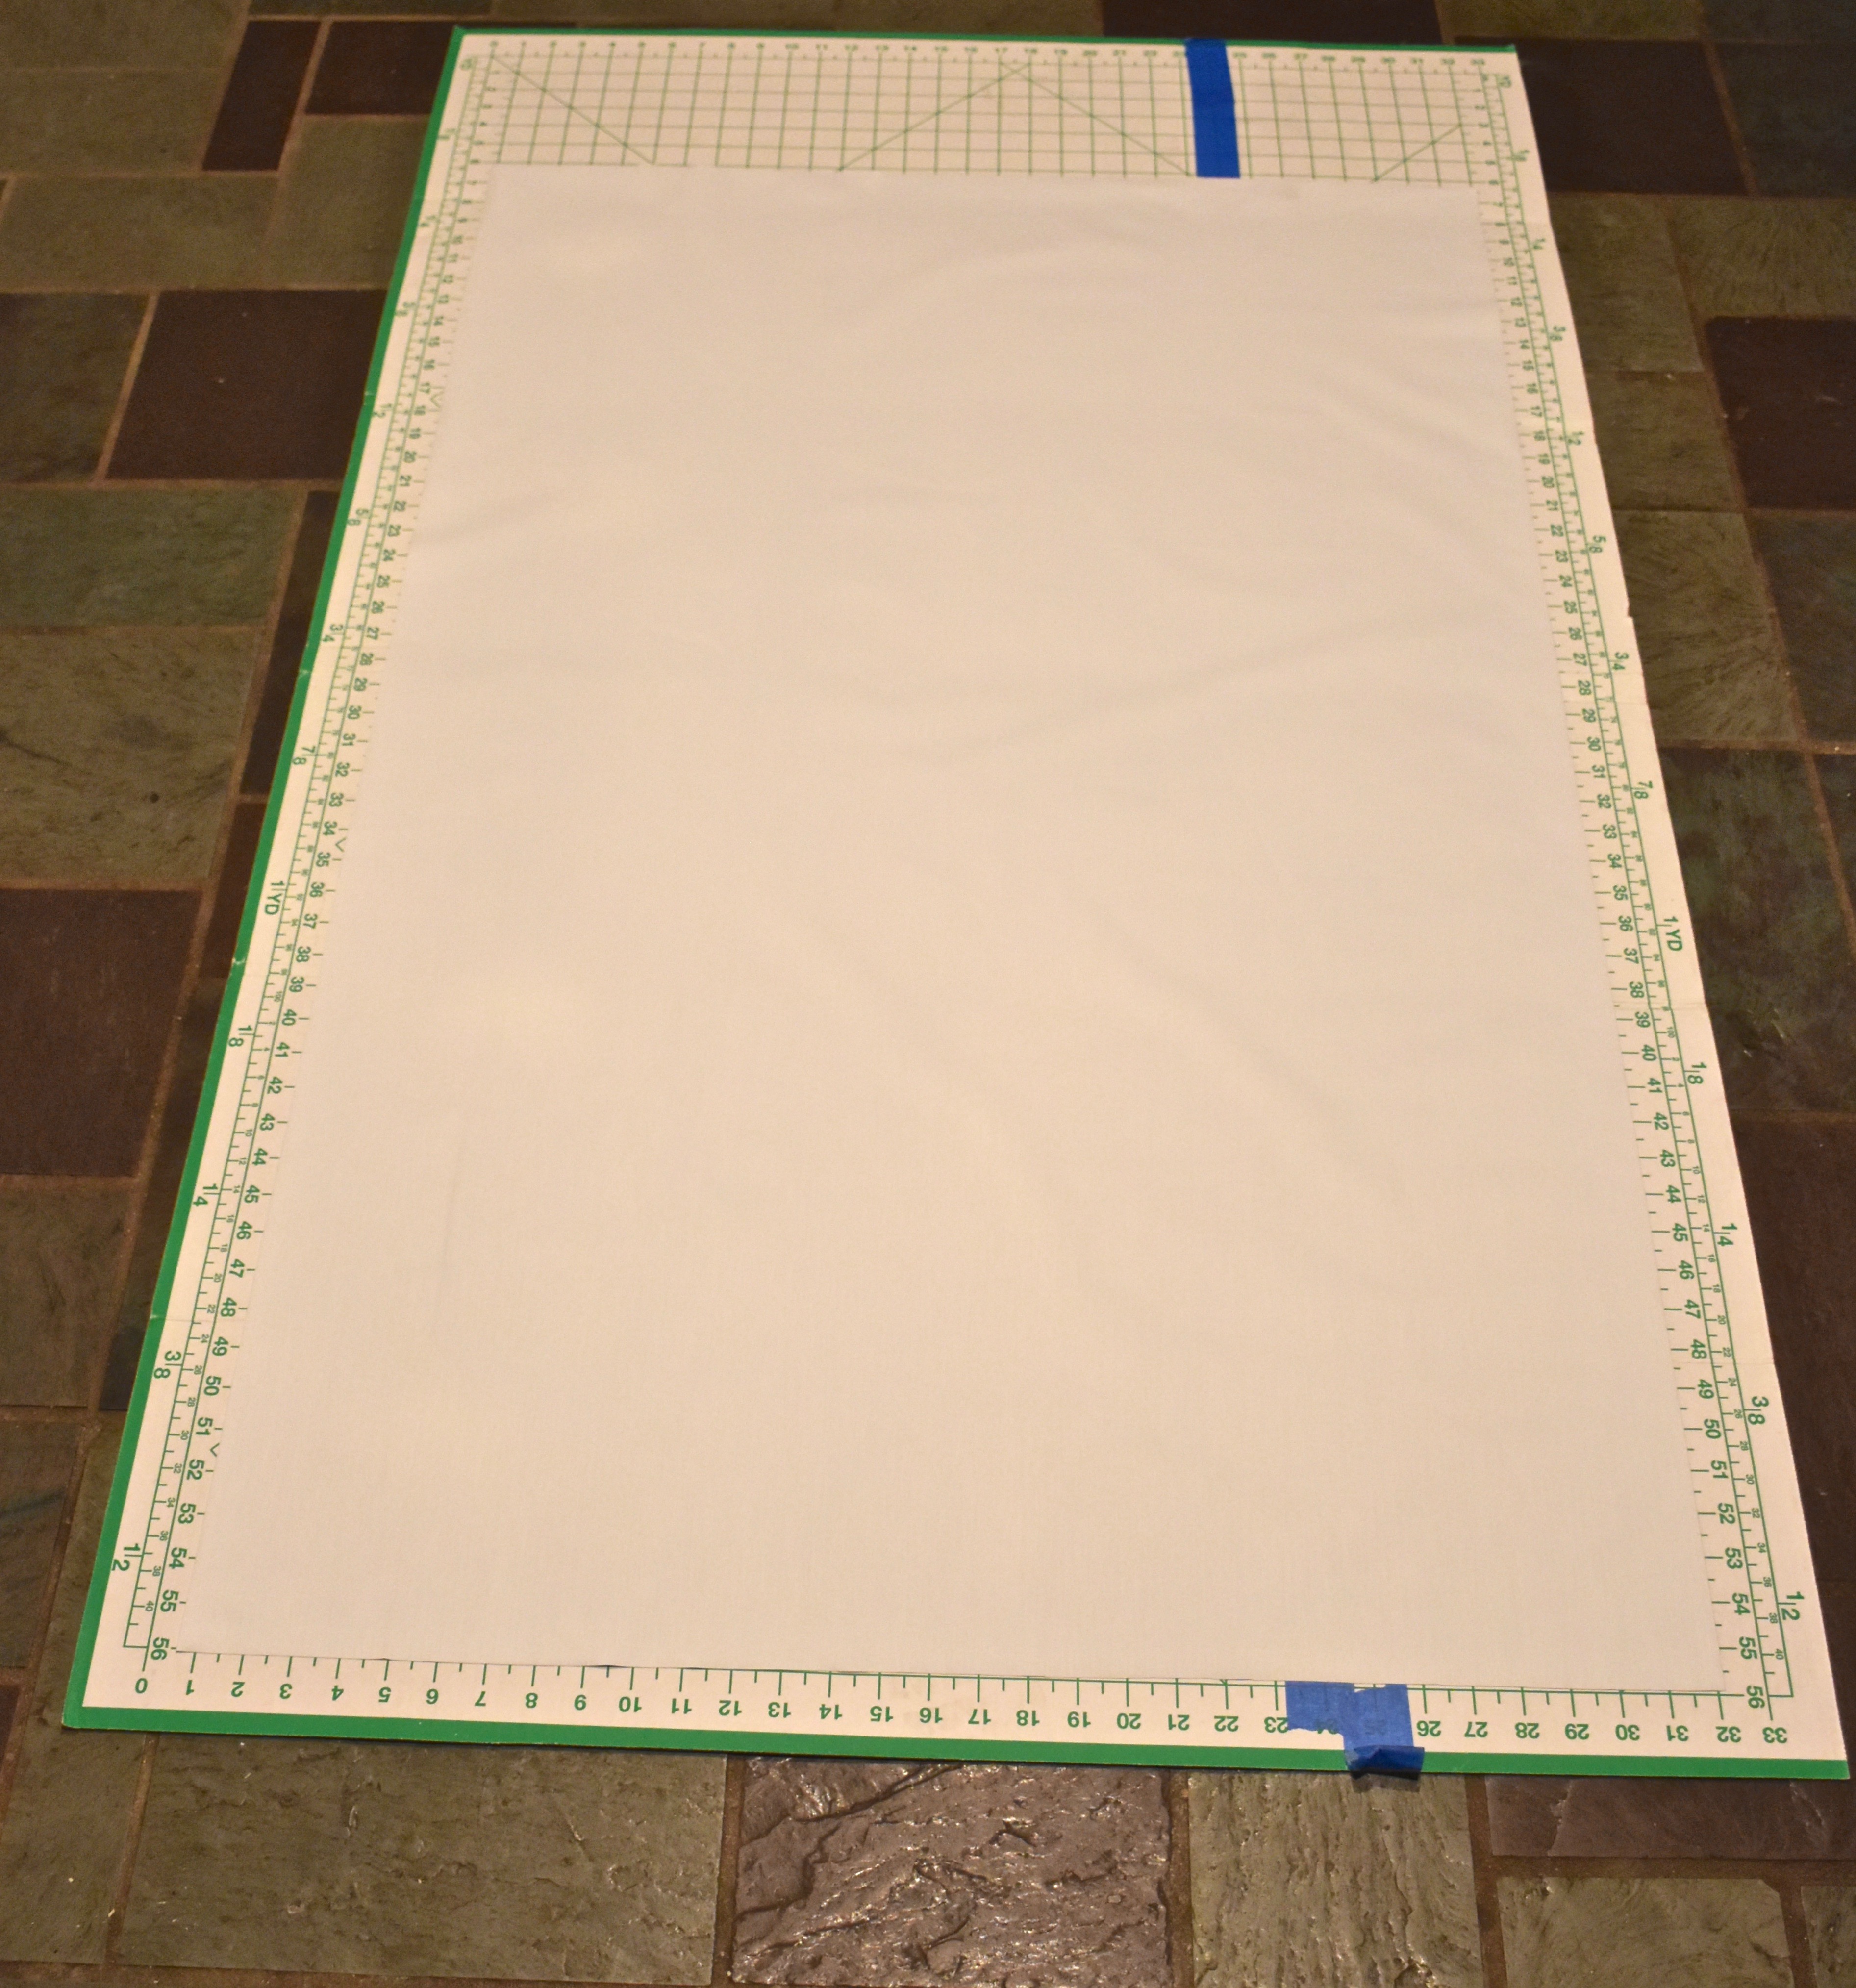
The key to any drapery project is to know your measurements and then double check them before you cut anything. The first thing I did was to order my fabric so I checked the width of the fabric and my windows and determined that the fabric was wide enough to that I did not have to add any side panels. Then lengthwise I determined that three yards would be enough to cover my two windows. I also ordered three yards of blackout lining which gives the fabric some weight and will help my guests sleep better.
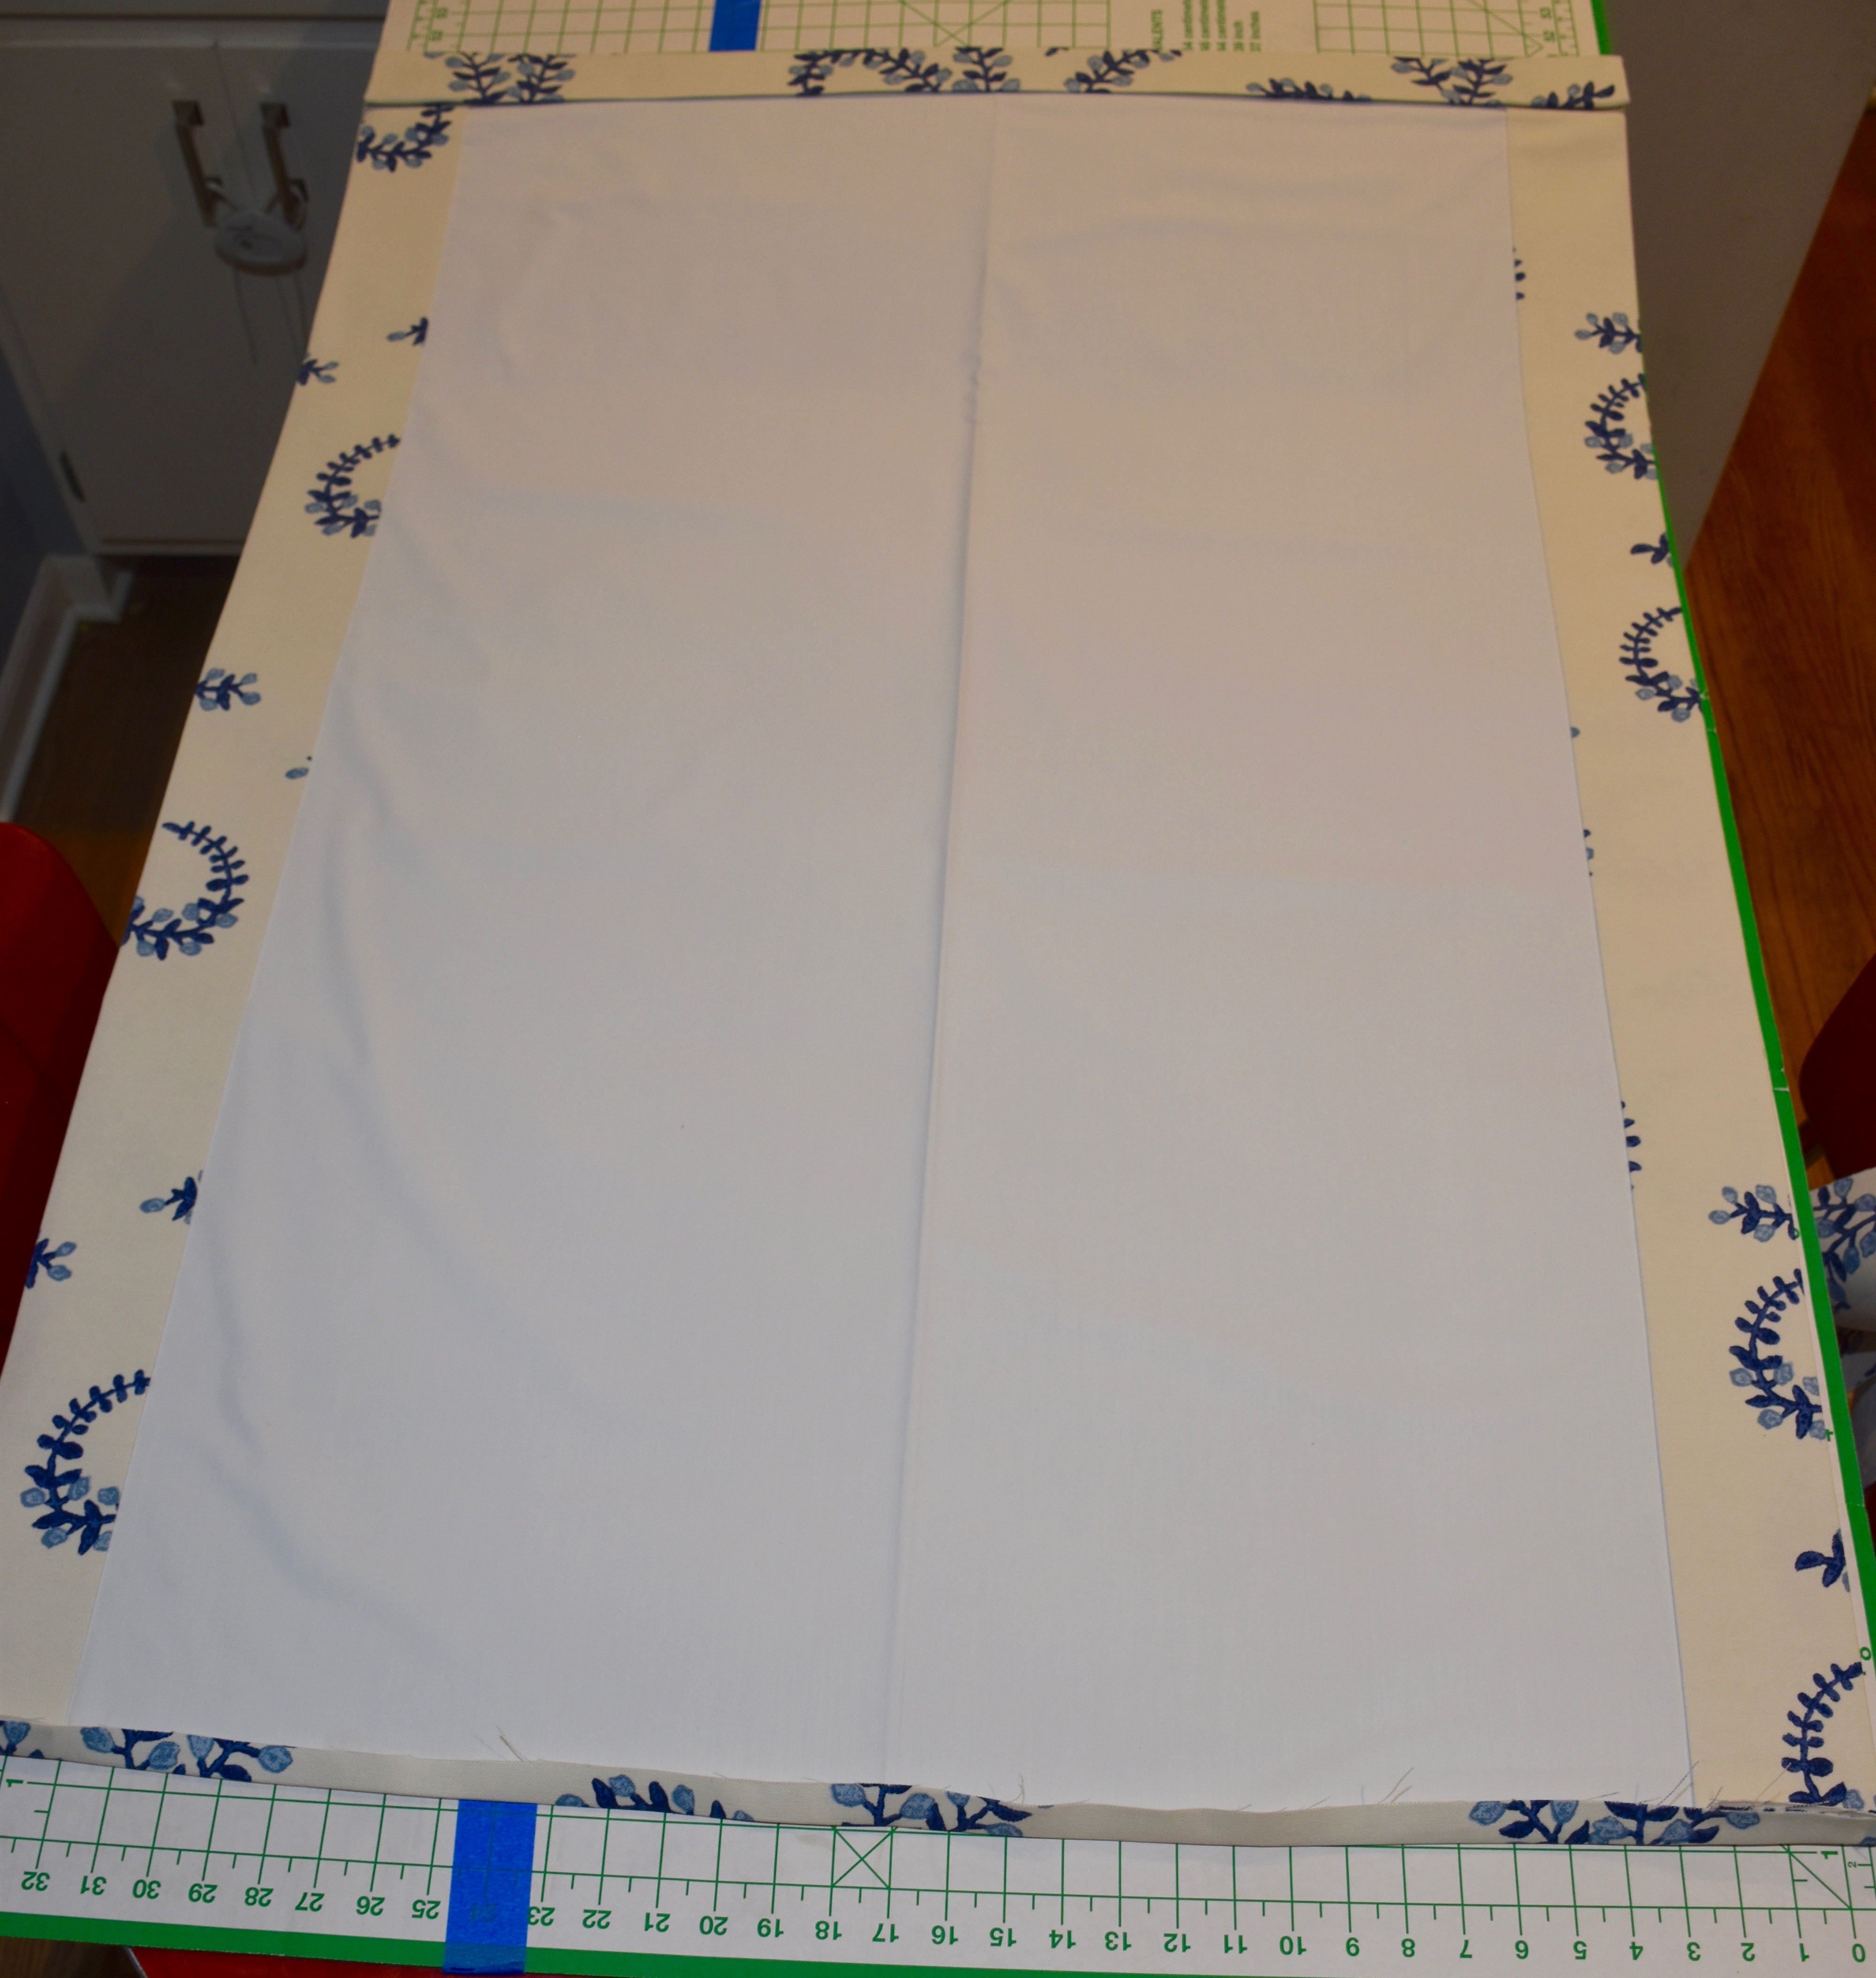
Next, once I got my fabric, the first thing I did was cut my blackout lining to cover my window width plus the wooden window casing on the sides making sure to add a few inches extra on the height to allow for room to hang it from a drapery rod or board. I used a sewing board to help me measure and cut my shade. I ironed straight lines where I needed to cut my fabric to size. Ironing a straight line is my trick for key making sure I have straight lines.
Here is the blackout lining cut to fit my smaller window.
Once you cut your lining you are ready to add your fabric.
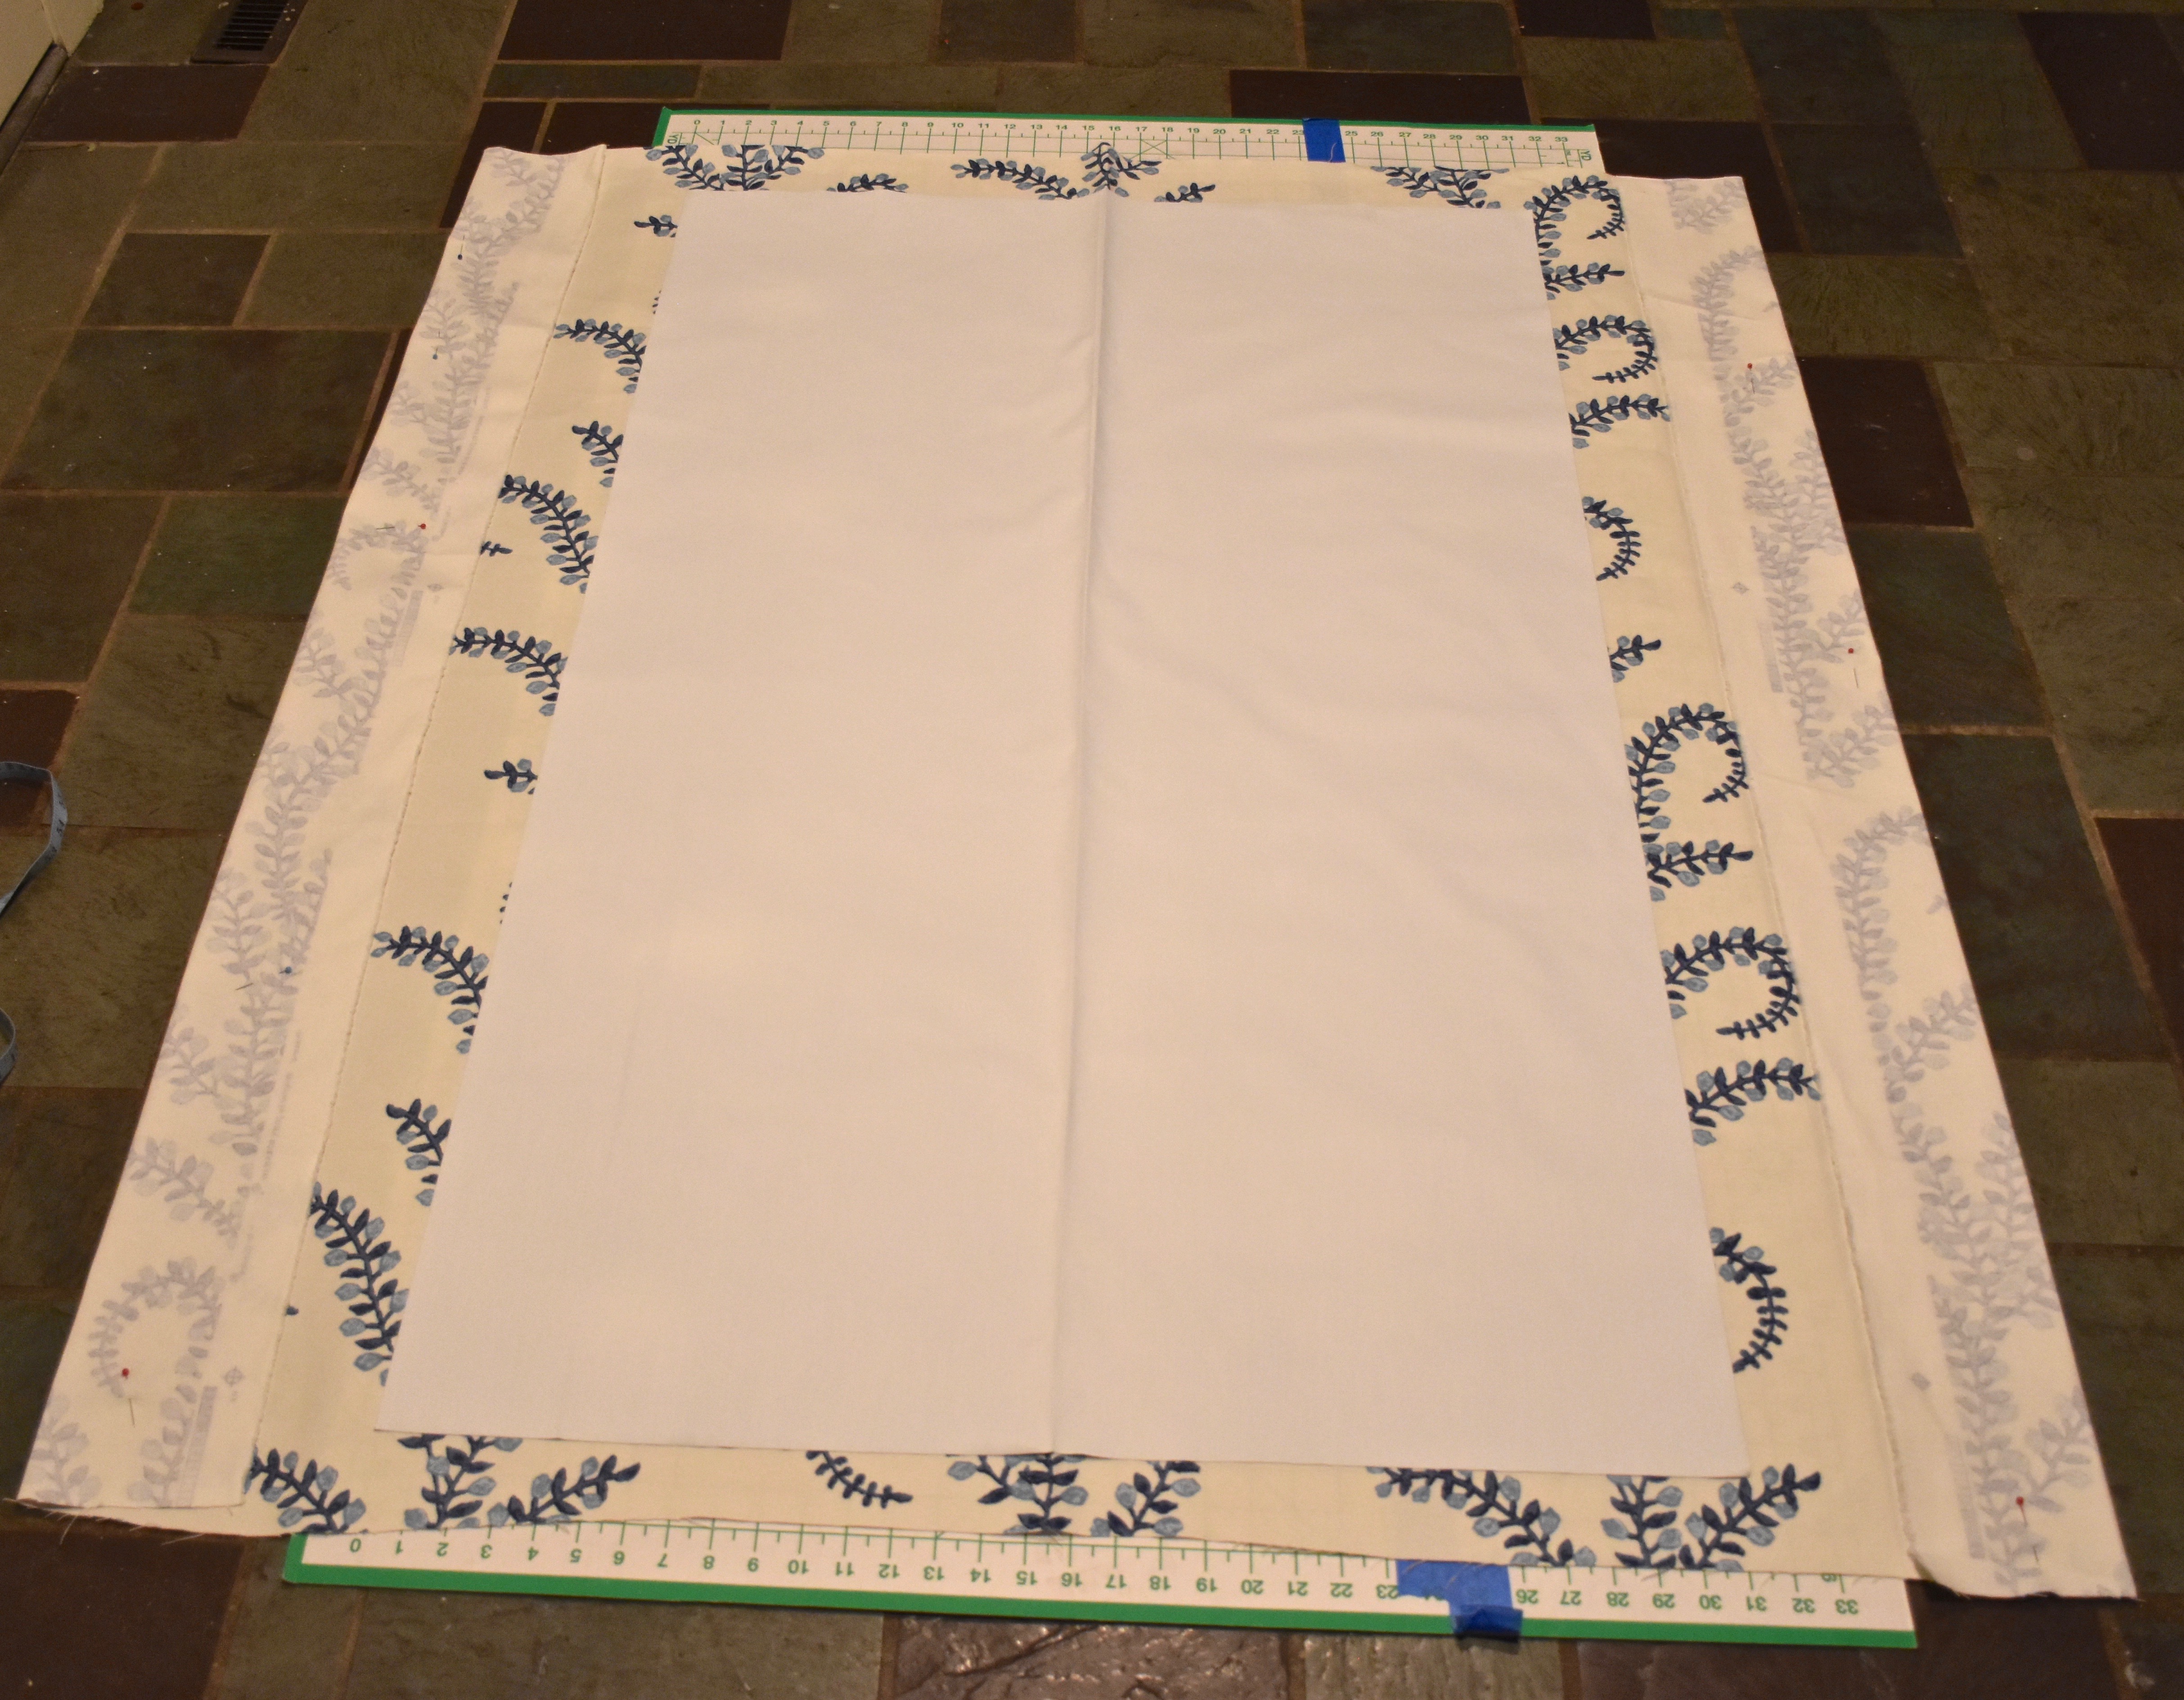
Finding Your Center Line: The Key To Getting A Professional Finish
Once you know that the lining is cut straight, then it is time to place the pattern of your decorative fabric. The key to making multiple window treatments look the same and to have your pattern look even is to find the center of your fabric. So I ironed a straight line down the center of my decorative fabric and my lining. Then I matched them up to double check my pattern placement. Since my vine fabric ran vertically I wanted to make sure that the pattern lined up evenly with one vine in the center and one on each side.
Here you can see where I was checking my pattern placement and beginning to iron straight lines on my side pieces so I could cut the side fabric evenly. You can also see that I left an extra three inches on the bottom so I would have extra fabric to fold over a border on the bottom.
Every fabric pattern is different so take the time to make sure it lines up evenly or if you have a floral fabric that the pattern placement is same for each shade. If you have a chintz or larger scaled pattern then you might need to order extra fabric so you have enough to match each shade. I found that this fabric was fairly easy to work with and it didn’t require extra yardage since the pattern ran vertically.
Iron Your Way to Pretty Drapes With Fusible Interfacing Tape
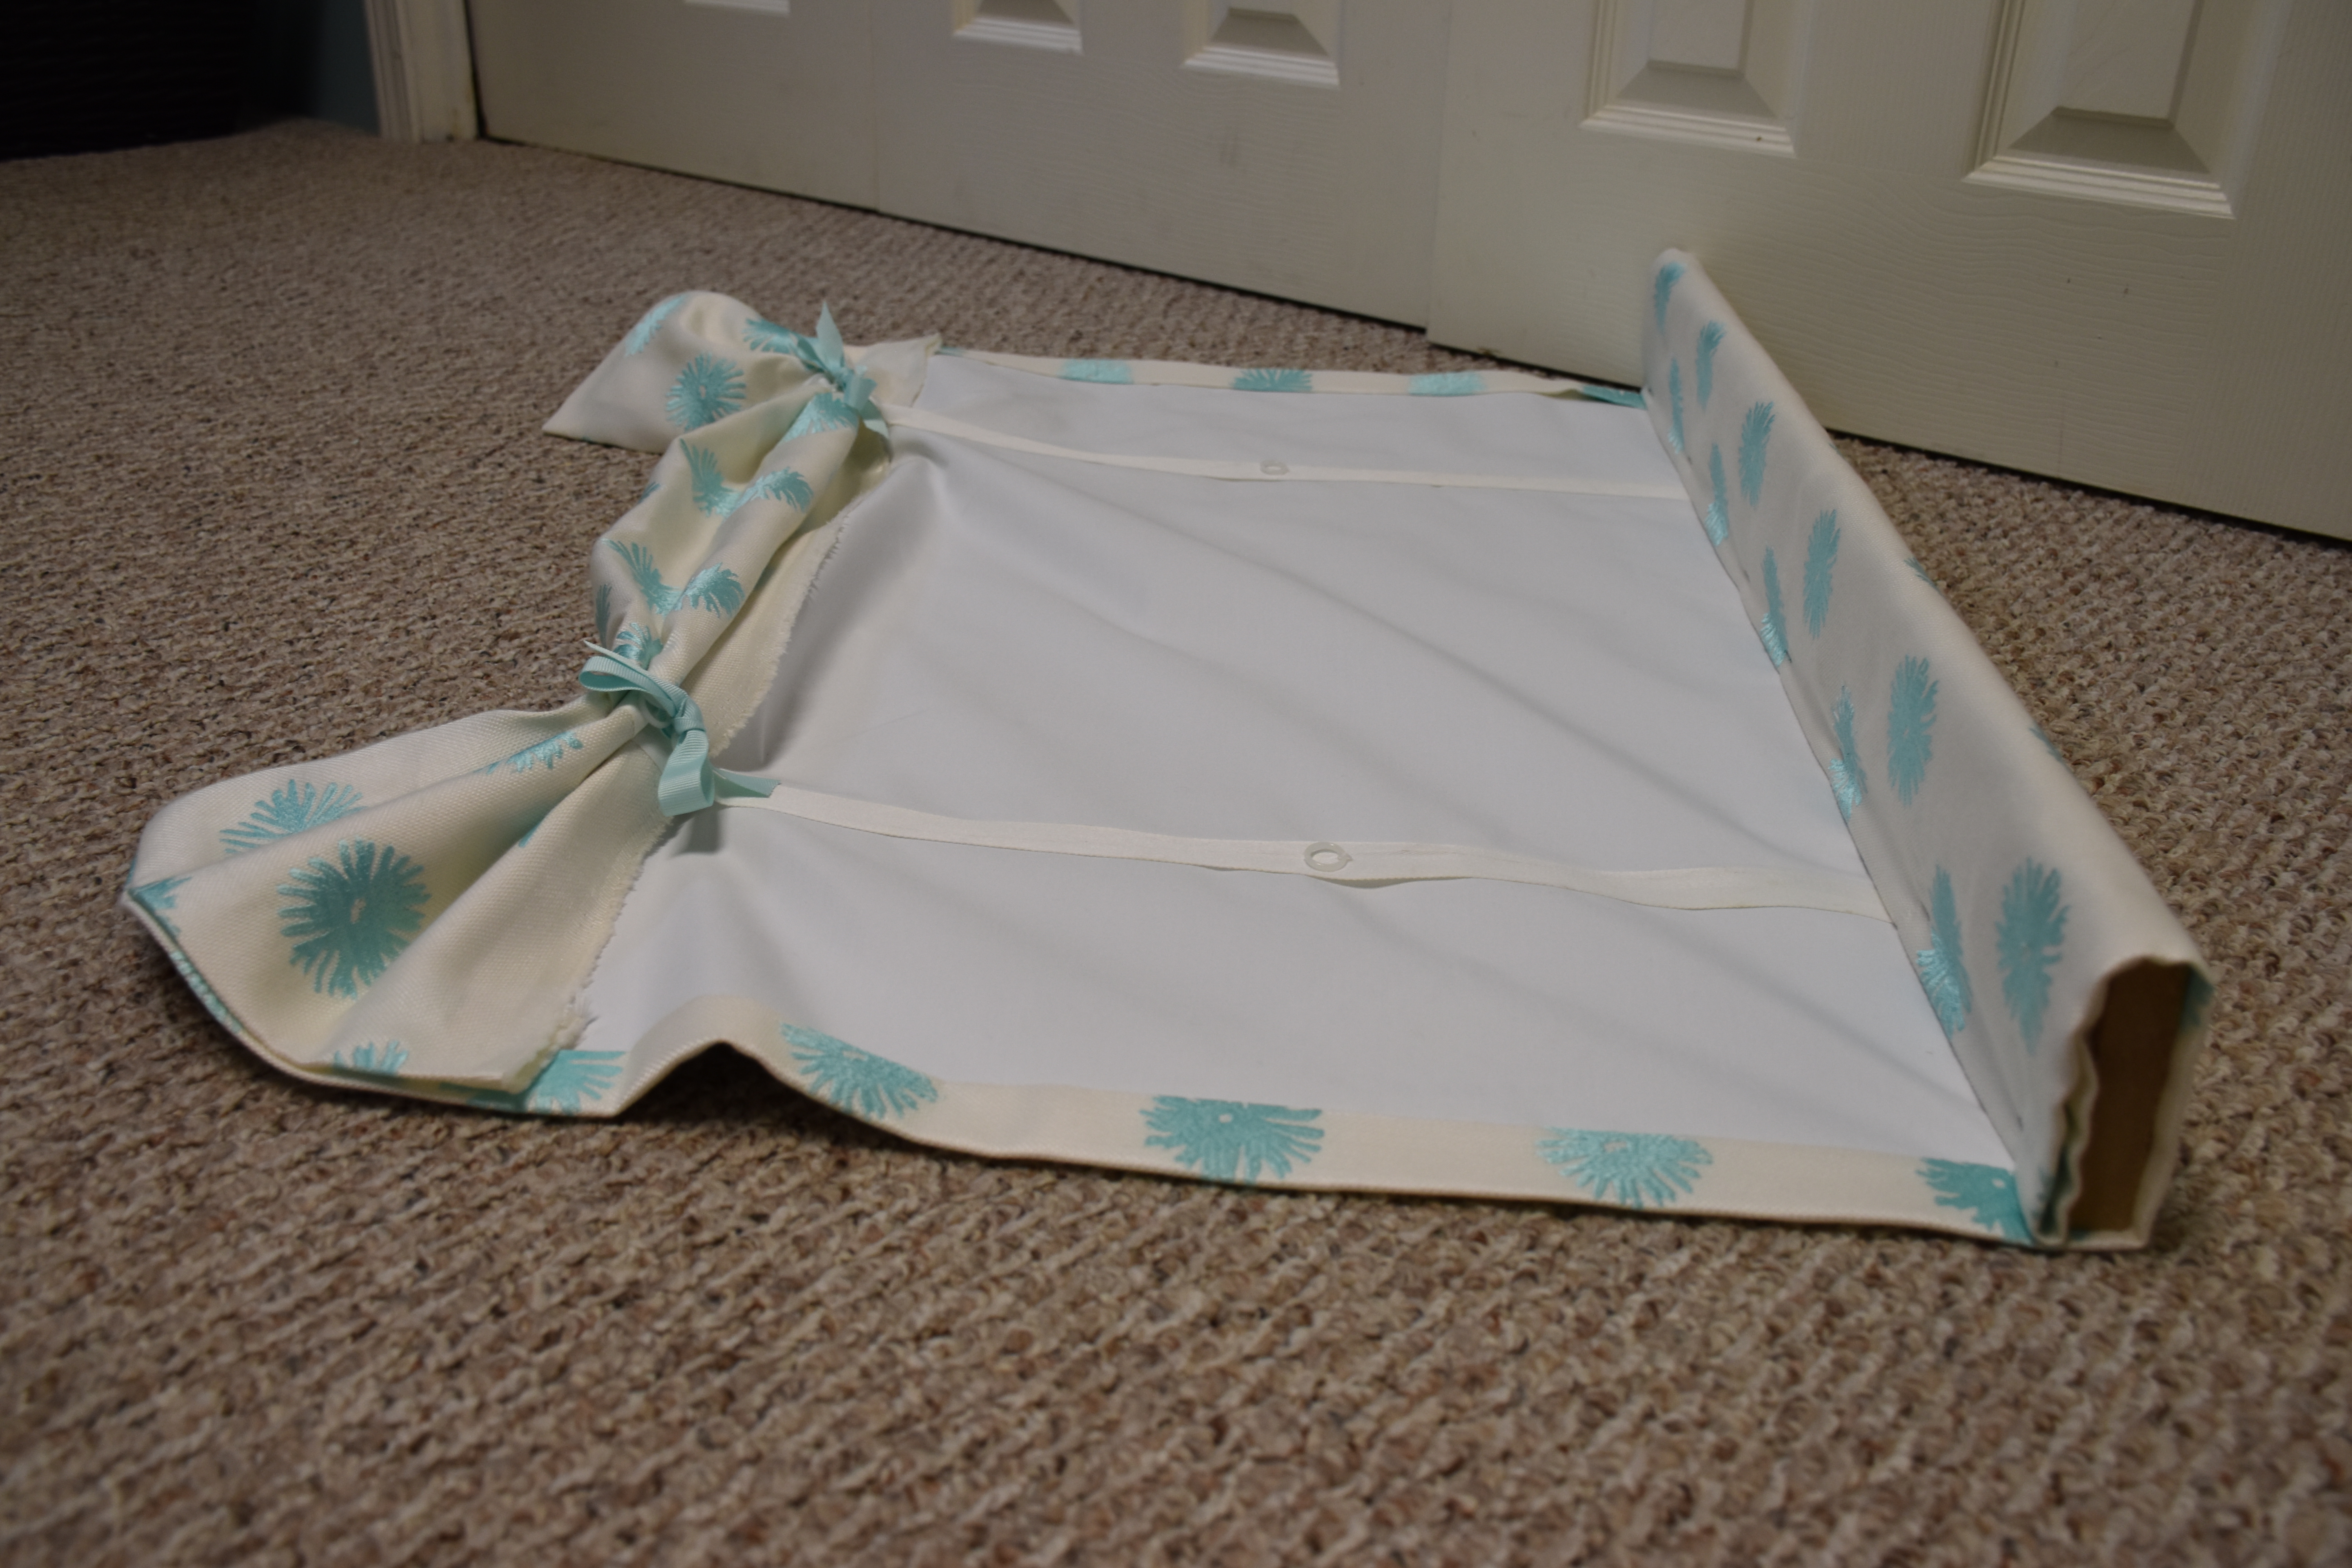
Once you get your pattern set then you want to pin the center lines together where the finished pattern side of your fabric is facing down on the ground or your board and the smooth fabric side of your lining is facing up. I then pinned my fabric at the top to make sure the center lines matched and the fabric was all even. Then I trimmed my fabric slightly and folded the edges over so I had a five inch border that folded over the back of my shade (you could have slightly less of a border if you have a wider window). You want to have to raw or cut side of the fabric folded under so you have a smooth finish.
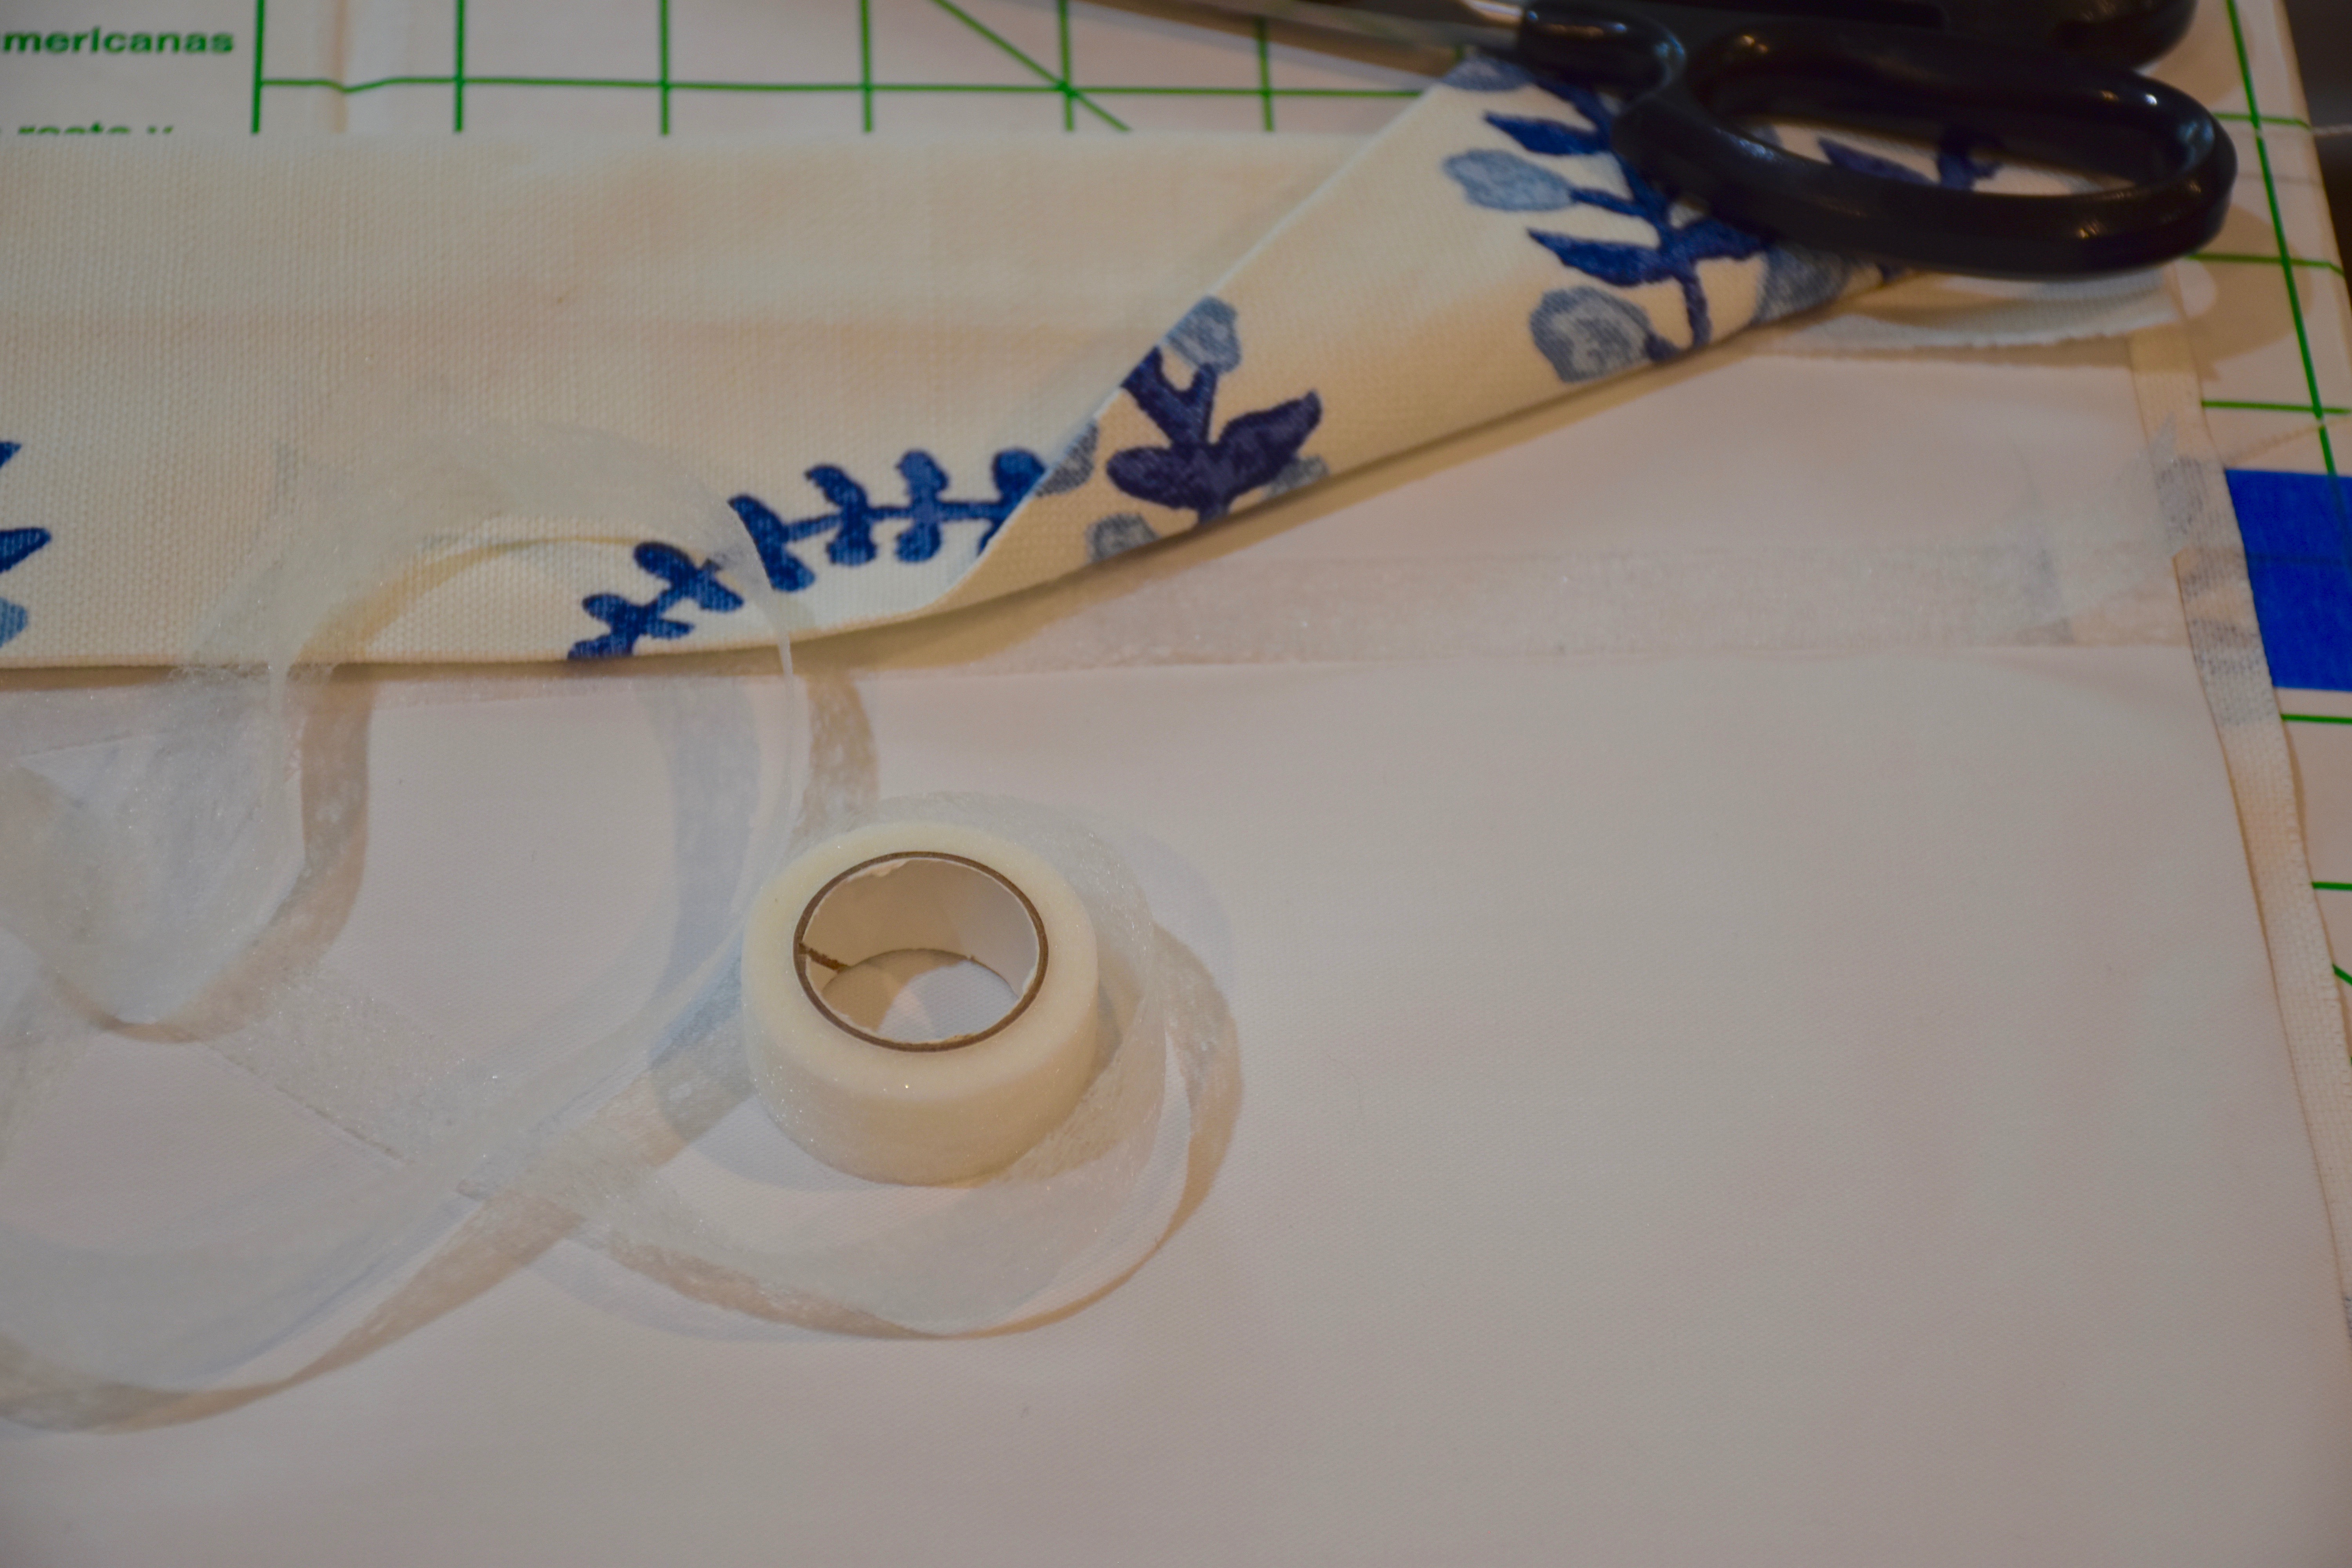
Then when it is all iron and folded around your lining you are ready to attach it together using fusible interfacing tape. This tape acts like glue to hold your shade together. This tape is easy to find at Hobby Lobby or any fabric store. I have found that the super adhesive strength works best of this type of project. Cut a strip from the roll that exactly fits the length of your side and then put the fabric on top and use a hot iron to fuse the folded edge of your fabric to your lining.
Here you can see the roll of the fusible interfacing tape and how I placed it so it touched both the lining and the fabric edge.
Be patient with the ironing because it can take a little bit of time to make sure that it is well bonded.
Iron or Stitch Your Finished End
Once you finish your sides then you are ready to fold a straight finished end for your drape. I ironed mine and then stitched a straight line with my sewing machine to hold the bottom end, but you could use more fusible tape for an easy no sew finish.
Here is the backside of my shade so you can see how I pressed the edges.
I left a smaller fold on the top because I hand sewed my finished drape to a drapery rod, but if you are mounting it to a board (see further instructions below) then you could just leave it unfinished and use a staple gun to attach it to the back side of your board.
Iron On Rib Tape Is The Key To Attaching Your Rings Evenly
Now that your edges are finished you are ready to add your rings. I have found that the easiest way to do this is to use iron on rib tape. You can find plain rib tape or tape with the rings attached. I prefer plain rib tape because it lets me custom set my pleats or folds. The iron on tape has a subtle pattern to it that makes it easy to center you ring evenly on each side. I placed my rib tape five inches inside my drape on each side. Then I ironed it down to attach it.
Then I measured and marked the spacing of my rings. for these drapes I placed my rings six inches apart. I placed one at the edge of the fabric fold on the bottom and then with a fabric pencil I marked every six inches on each side. This ensure that you have even pleats or folds on each side.
Marking my ring spacing on each side of my roman shade.
Think Odd Numbers When It Comes To Rings
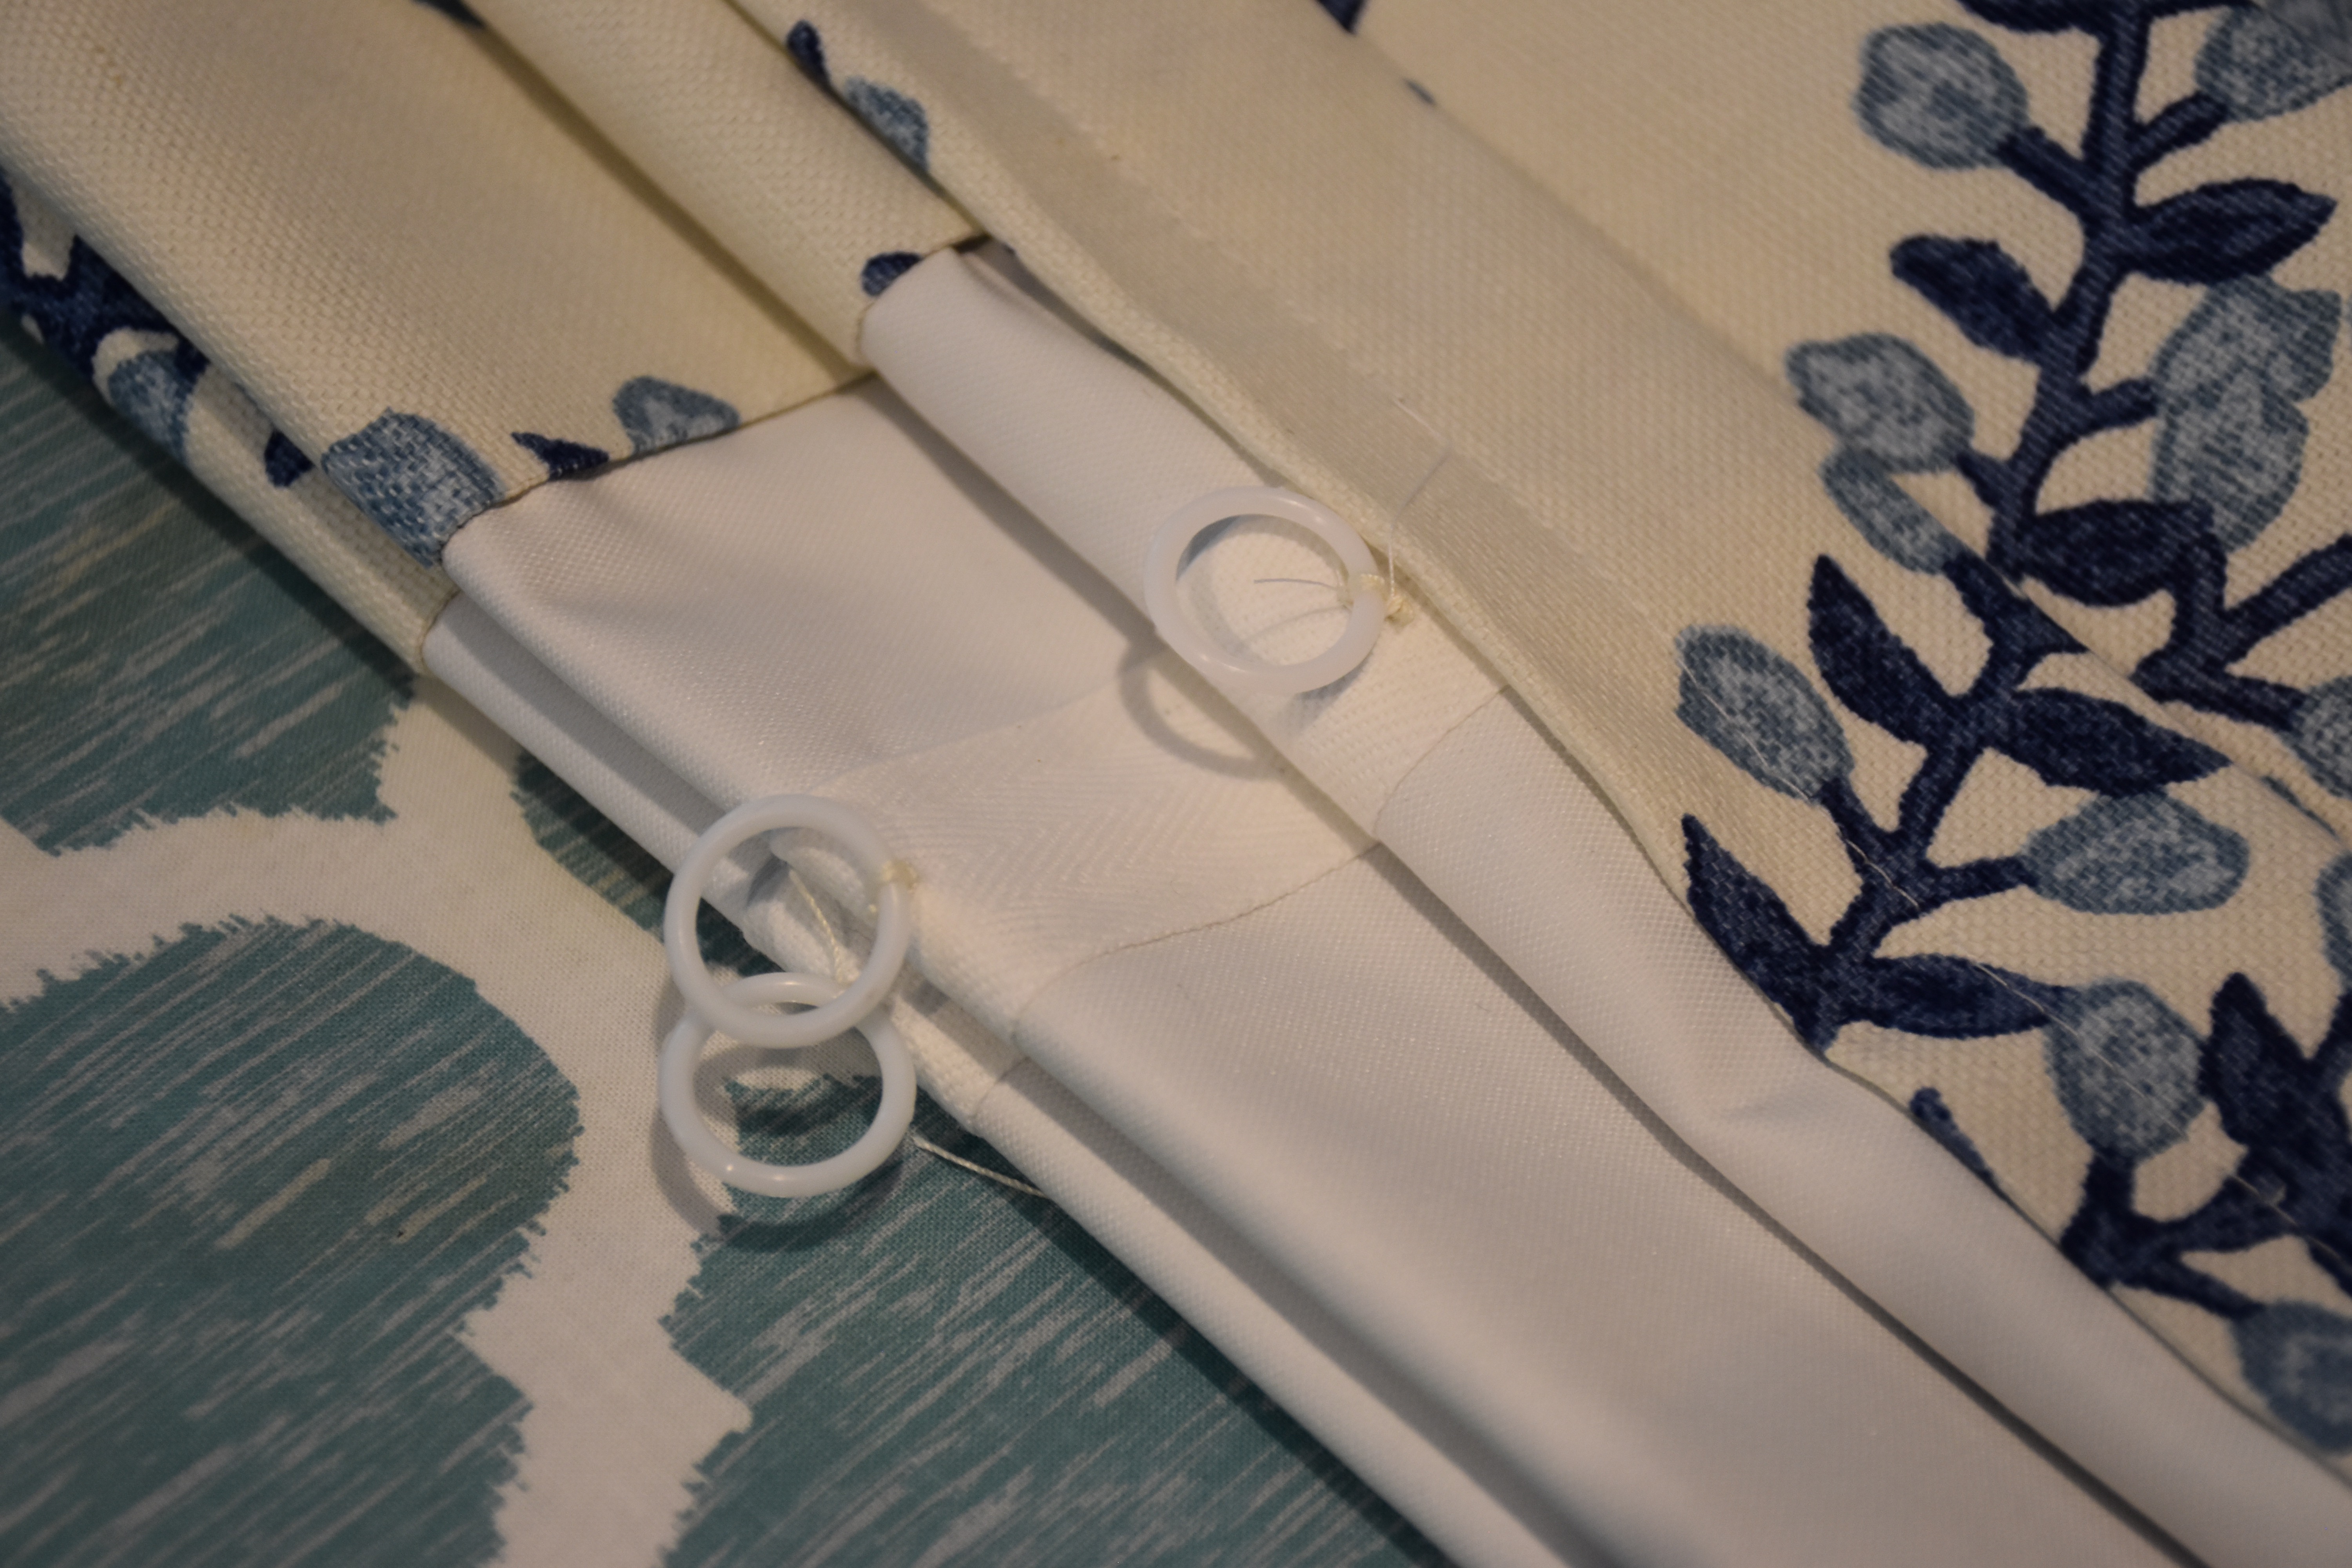
Now once you have your markings you need to sew on your rings using a needle and thread. This is the one part of the project that does require just a tiny bit of sewing. You need to sew your rings through the lining and the decorative fabric on front. Even if you have tape with pre-sewn rings you still need to sew them through the decorative fabric with a couple of stitches around the rings. If you don’t then your fabric won’t pleat right. I used five rings or pleats on each side. I find that an odd number of pleats or rings to form those folds looks best. You don’t need to have rings all the way up the sides for a stationary shade like this. So decide how high you want it to hang and calculate your ring spacing based on that. I had 5 rings on each side which allowed my shade to fall at the center of my window height, but you can customize it to fit your window.
Here is a close up of the fabric so you can see how I sewed the rings on up close.
Now iron your finished shade to make it crisp and to get rid of the crease in your center line. Once you do that you are ready to hang your drape and gather your rings together with ribbon or a ring clip.
Options For Hanging Your New Shade: Attaching It To A Board Or A Drapery Rod
I had some existing blinds that were functional, but not pretty so I decided to keep the blinds but cover them with my shade. I used my existing wooden drapery rods to attach my shades to the wall. I just hand stitched the top fabric around my pole to create a pocket for the pole with tiny stitches that you cannot see.
Using the drapery rod allowed my draped to hang just a small distance from the wall so it covered the sun shades which were mounted to window casing.
I have made similar shades for my kitchen and office where I mounted them closer to the wall using a board that I had cut at the hardware store to fit the top of my window trim.
This is a picture of the window treatment that I made using the same technique on my kitchen window. I stapled the top of my drape to a piece of wood and then I used several wood screws to attach the board to the wall.
Here is a photo of the board that I attached my roman shade to using a staple gun to attach it to the backside of the wood. I painted my board the same color as my wall and I hot glued some fabric to the end caps for a seamless and custom finish.
This is a close up of the board so you can see how I attached it to the wall.
One note here when using boards, make sure they are very dry and straight. I had a problem on one window when I realized that my board was warped when I brought it home from the hardware store.
Here is one more photo of a shade I made for my office where I wrapped the board with fabric since I had to mount it to the ceiling to avoid issues with the concrete basement walls.
Here you can also see how I gathered my rings and tied them with ribbon before I hung my shade.
Each of my two shades took me about three hours to make, so all these details took a bit of time. However, the smile on my face every time I pass down the hallway makes it completely worth it. The entire project with all of the fabric and supplies cost just under one hundred dollars which kept this project budget friendly. If I had them custom made each shade would have been at least a two hundred dollars each. So I loved being able to make them myself.
I have more details to add before this guest room is finished, but a new apple green blanket some custom shades and pillows have our guest room ready to welcome our family and friends in style.
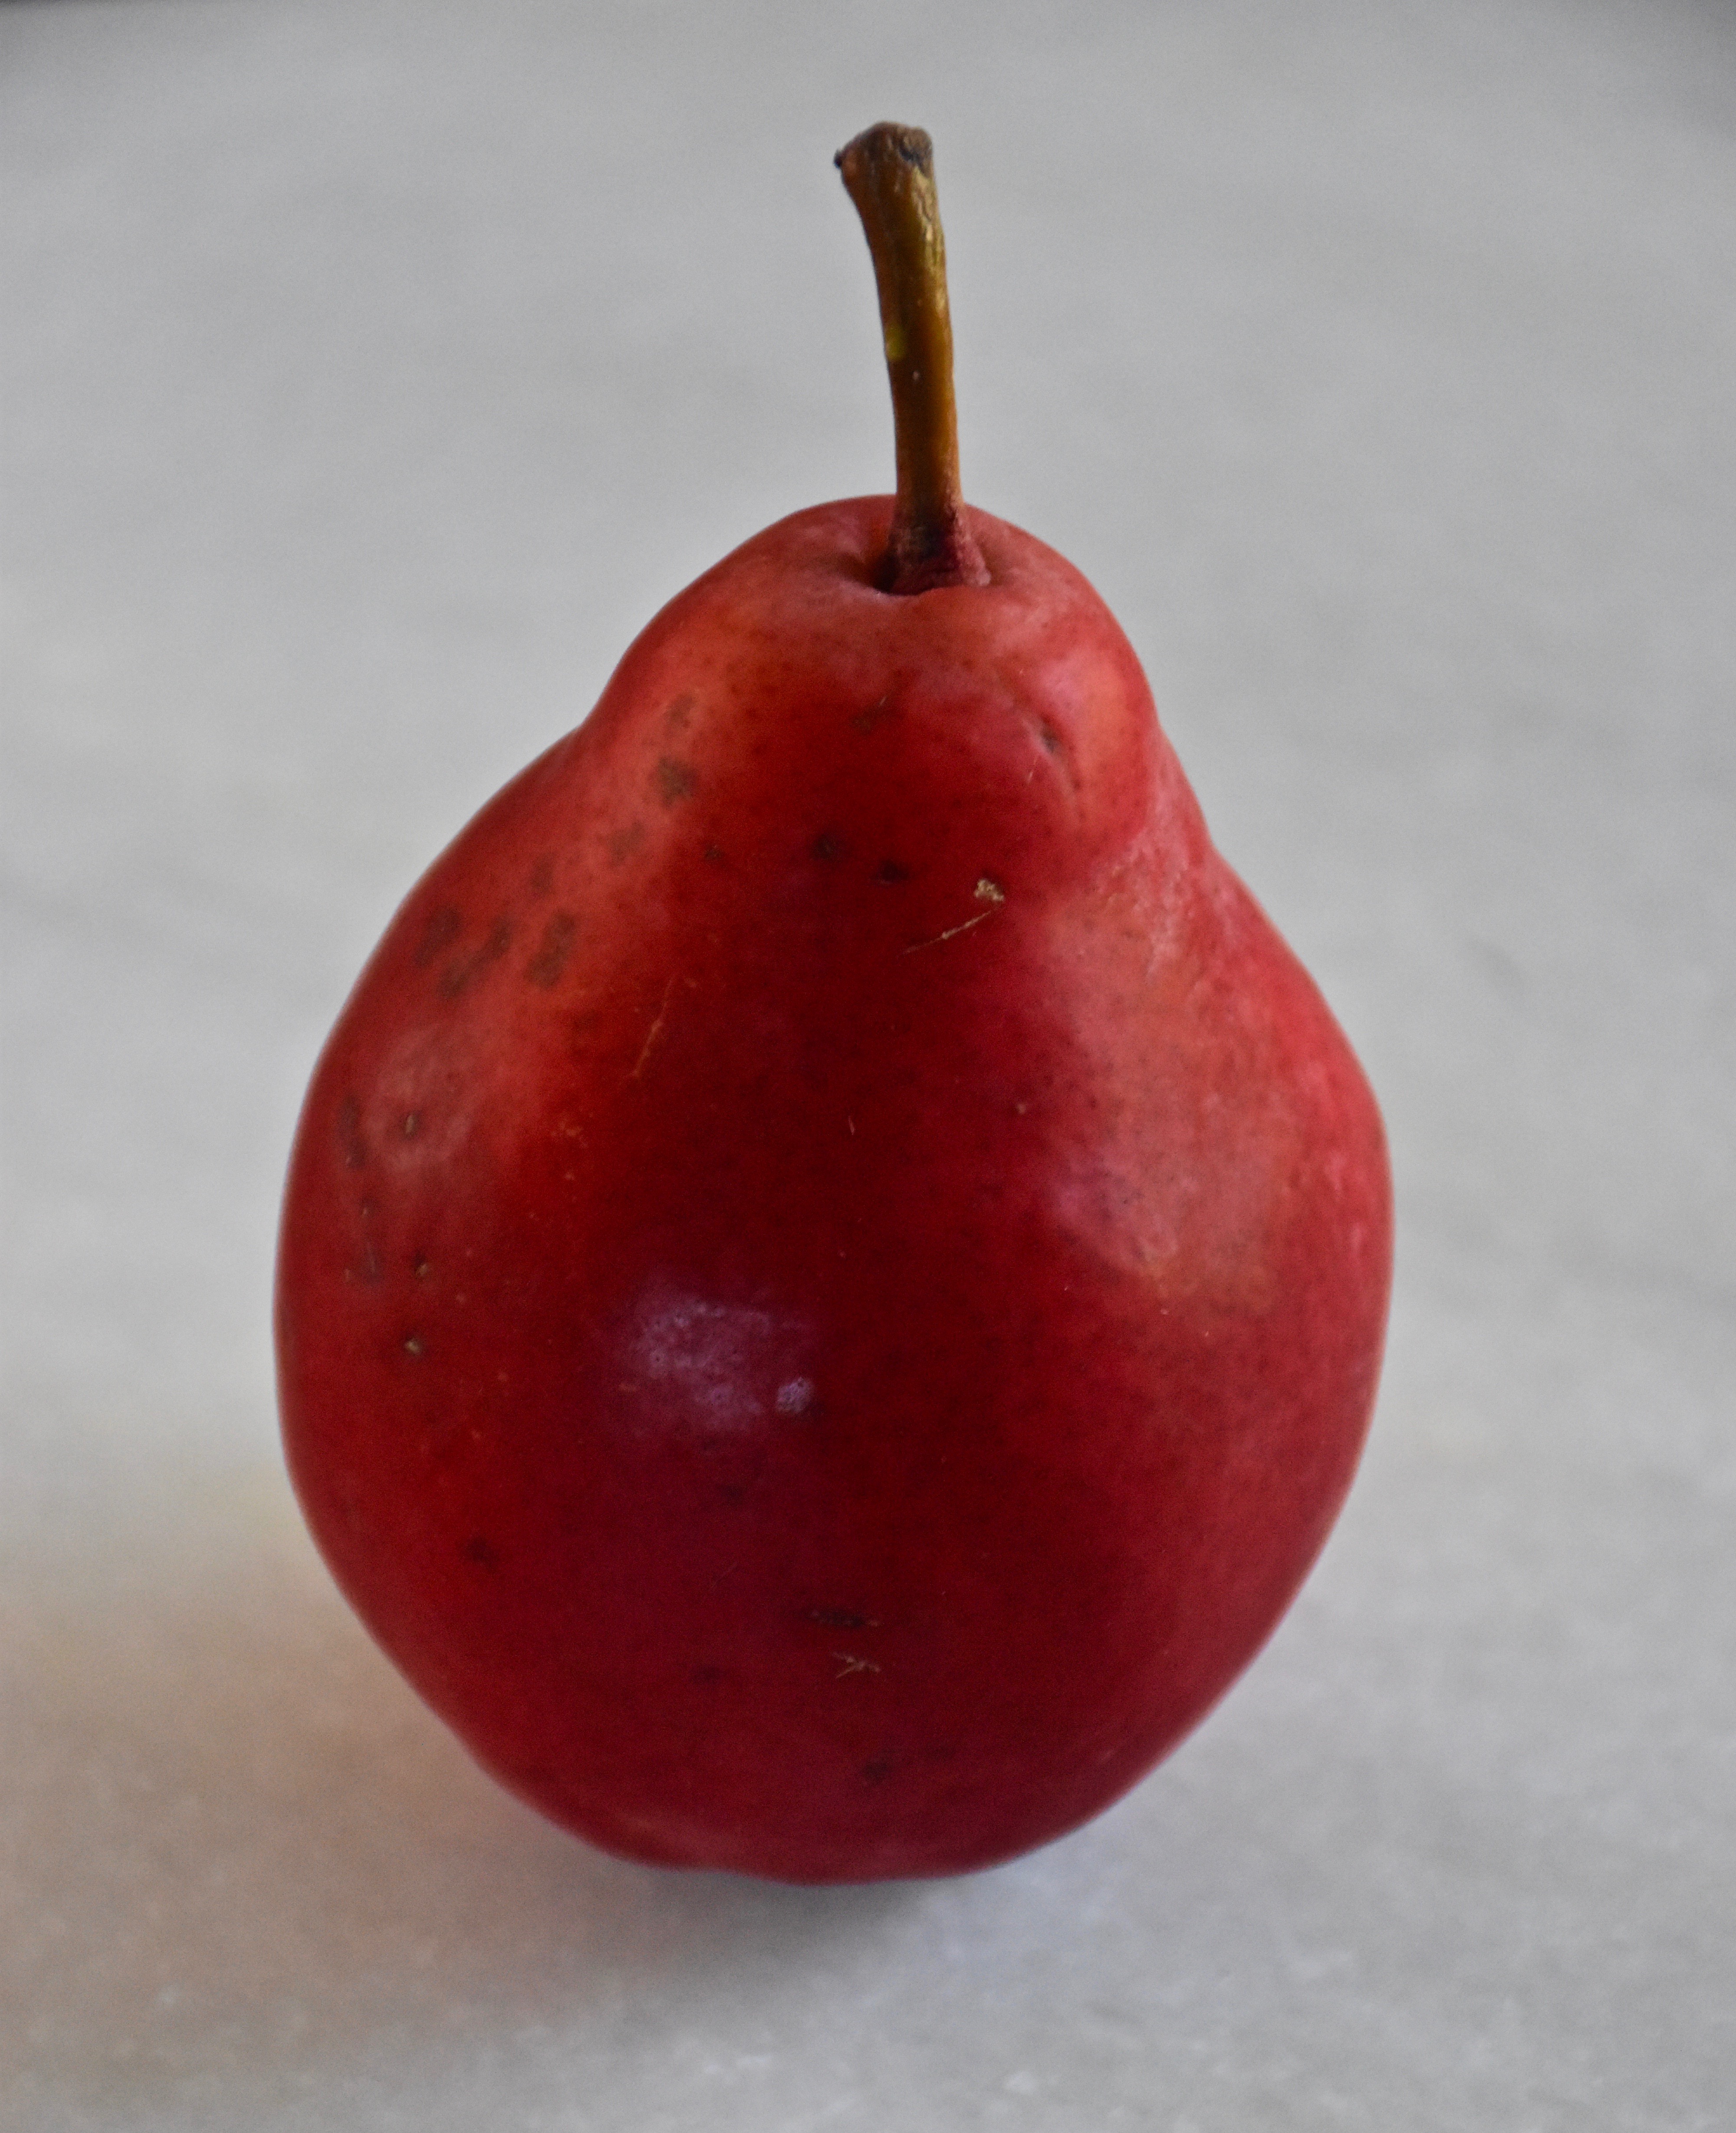
Pumpkins and apples seem to steal all the attention when it comes to fall baking, but one of my favorite fruits of the fall season is red pears. They are sweeter than their yellow cousin and their light buttery flavor make them one of my very favorites for both eating and baking.
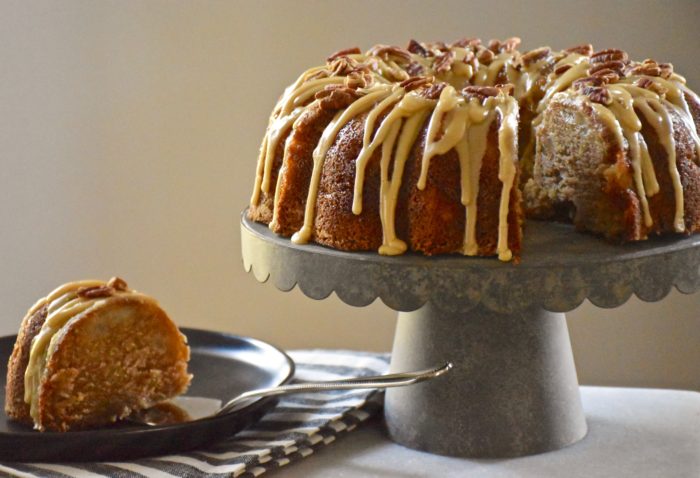
So this week I brought home a bag of these delicious pears and decided they were so good that I would bake a pear cake. When baking at home I love making bundt cakes because they are a fairly quick cake that is easy to decorate and serve. The pear cake is light so I wanted to add a little decadence with a sweet buttery praline frosting that compliments the buttery taste of the pears.
Pear and Praline Bundt Cake (Makes 1 ten inch bundt cake)
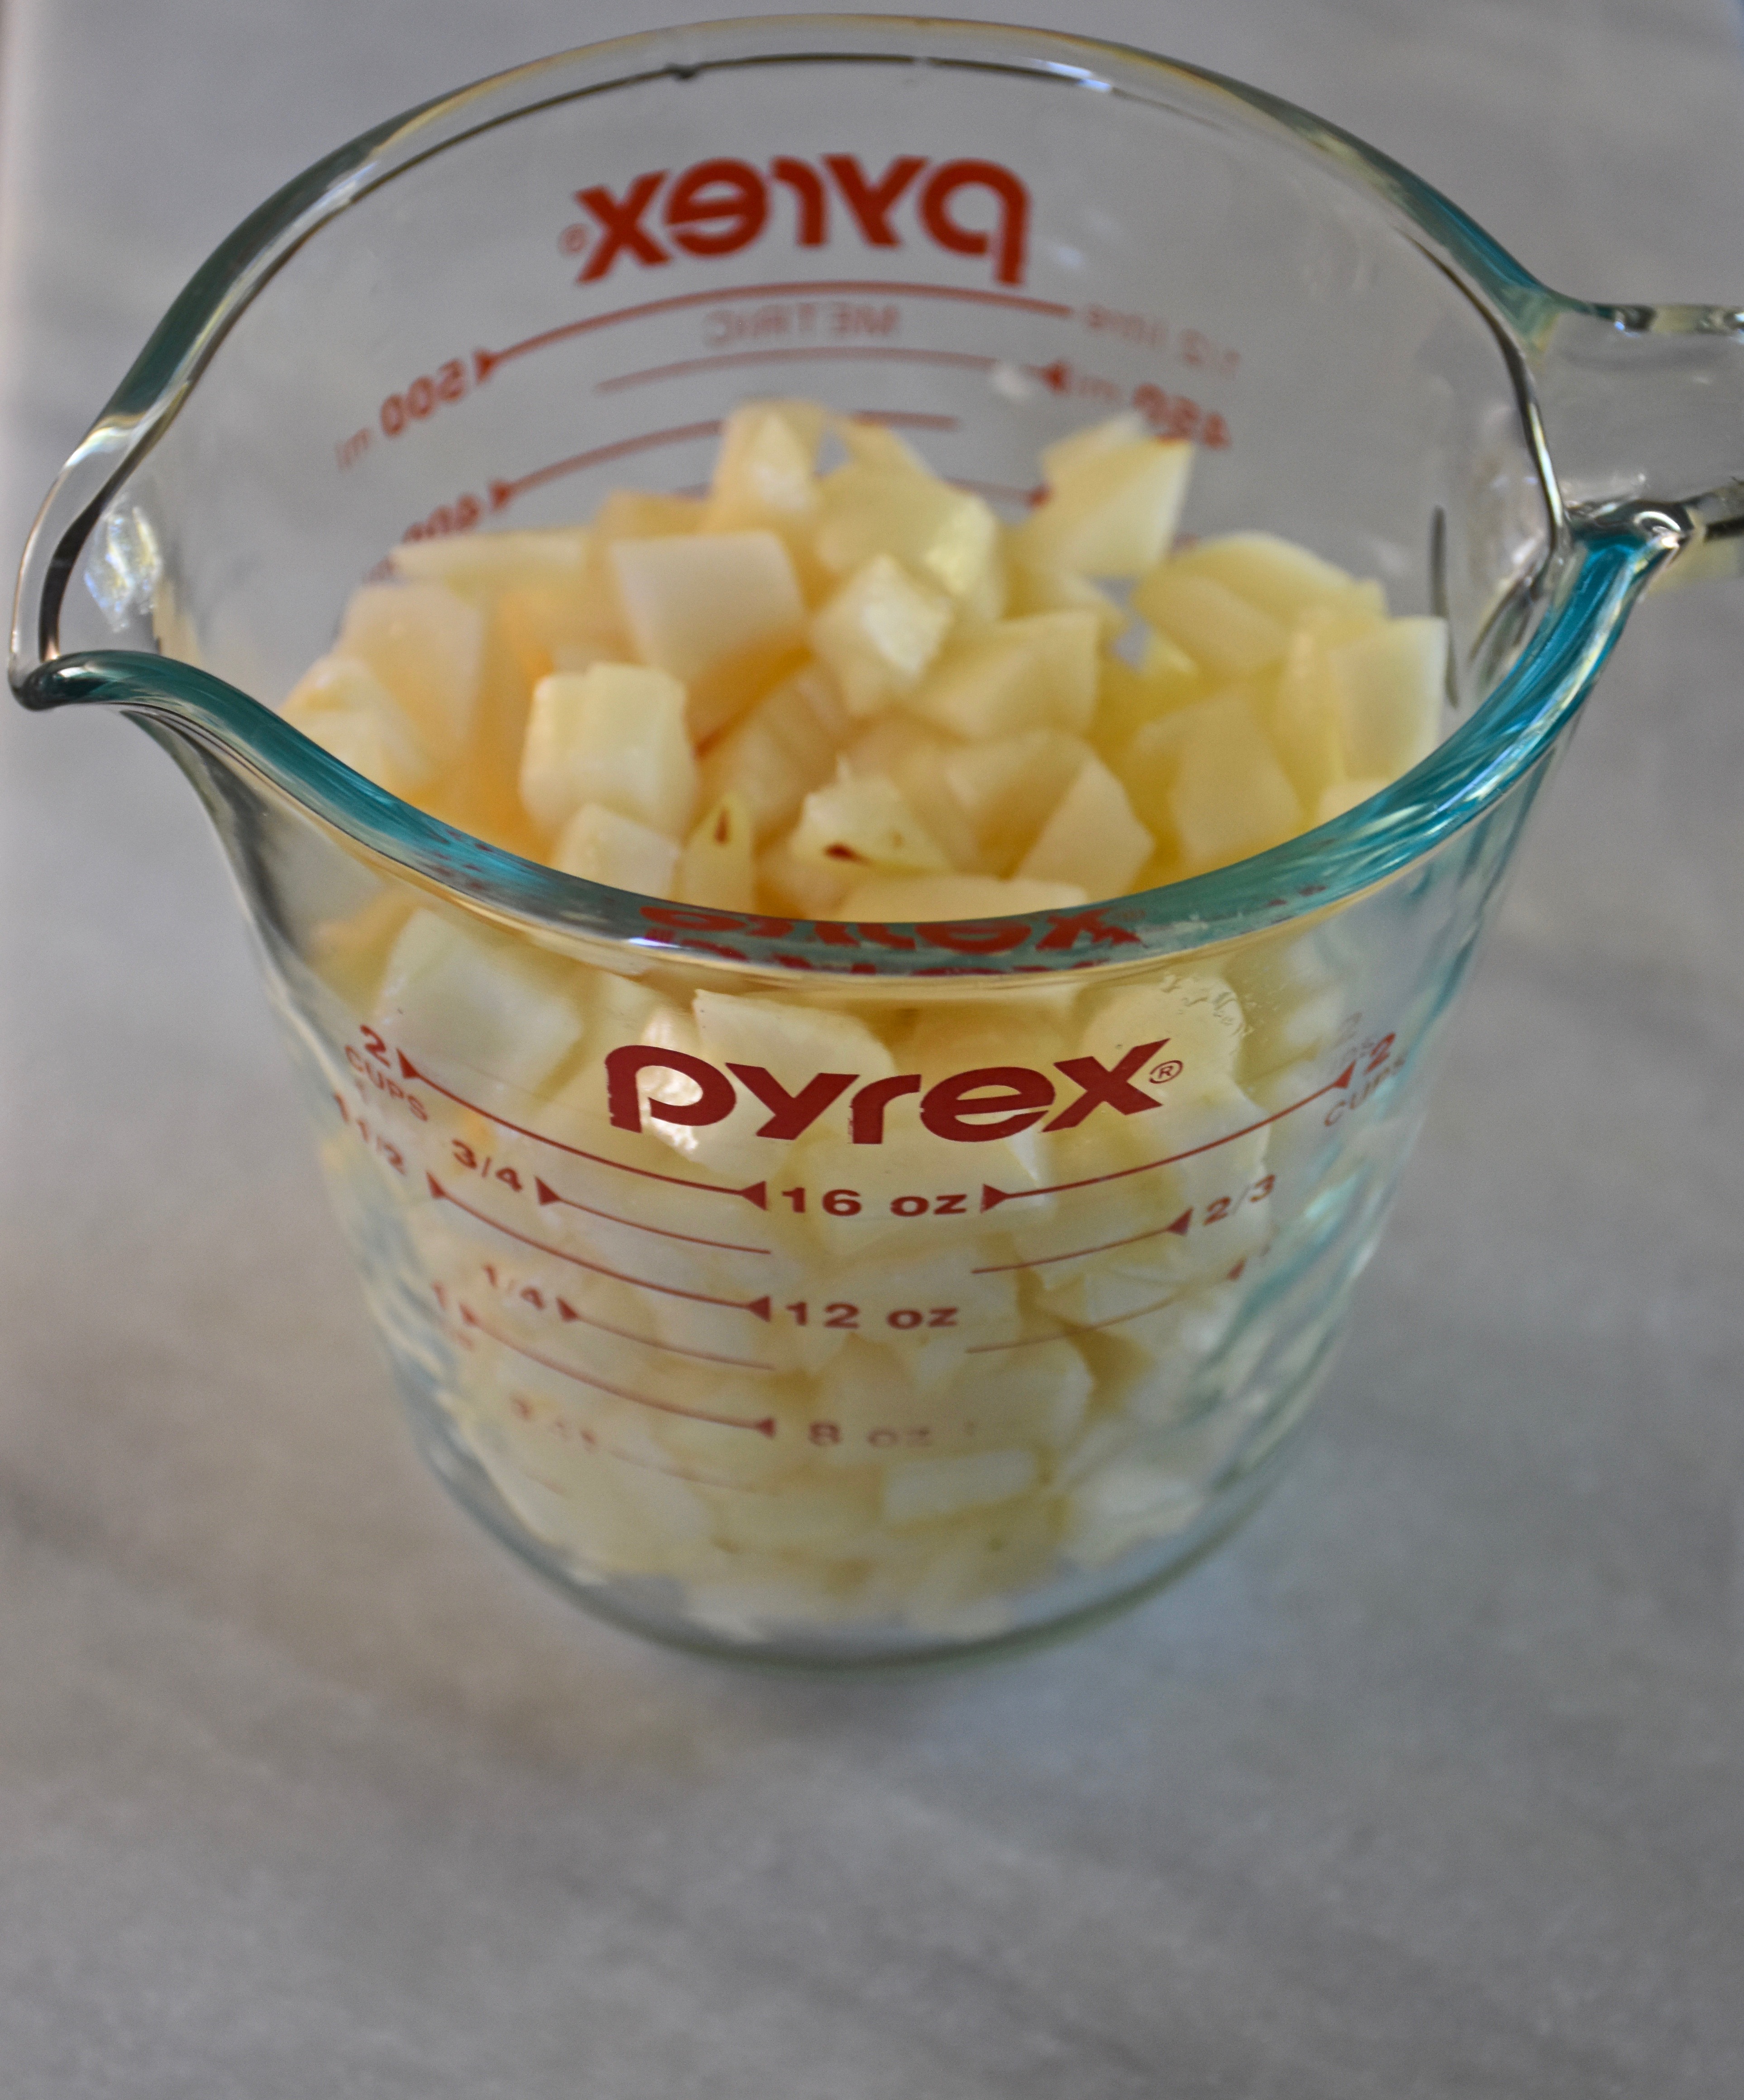
2 cups Red Bartlett, Red D’Anjou or Bosc Pears (2 medium pears) peeled and diced into small pieces
1 cup (2 sticks) sticks of butter at room temperature
3 cups sugar
5 large eggs at room temperature
2 teaspoons vanilla extract
1 teaspoon cinnamon
1/4 teaspoon allspice
3 cups all-purpose flour, sifted
1 teaspoon baking soda
1 cup milk
Preheat your oven to 350 degrees
First get your pears peeled and chopped and set them aside to fold them into your batter at the end.
Mix or cream your butter at medium speed for about two minutes. Then add in your sugar and continue to beat on medium for an addition two to three minutes until your butter and sugar are light and fluffy.
Next mix your eggs in one at a time until they are each incorporated into the butter mixture. Then add in your vanilla, cinnamon and allspice.
Then add in your baking soda and half of your flour and mix on low until just incorporated. Add in your milk and then the remaining half of your flour being careful not to over mix your batter.
Then using a rubber spatula or spoon fold in your chopped pears.
Grease and flour or spray your bunt pan with Baker’s Joy (my personal favorite for ensuring your bunt cake doesn’t stick). Once your pan is ready evenly pour your batter in the pan.
Bake for 1 hour until golden and a long skewer or cake tester comes out clean. Allow your cake to cool at least 10 minutes before you turn it out of the pan. Then allow it to cool before adding the praline frosting.
Praline Frosting
1/2 cup light brown sugar
1/4 cup butter
3 Tablespoons milk
1 teaspoon vanilla
1 cup powdered sugar
1/4 cup pecans, chopped (optional)
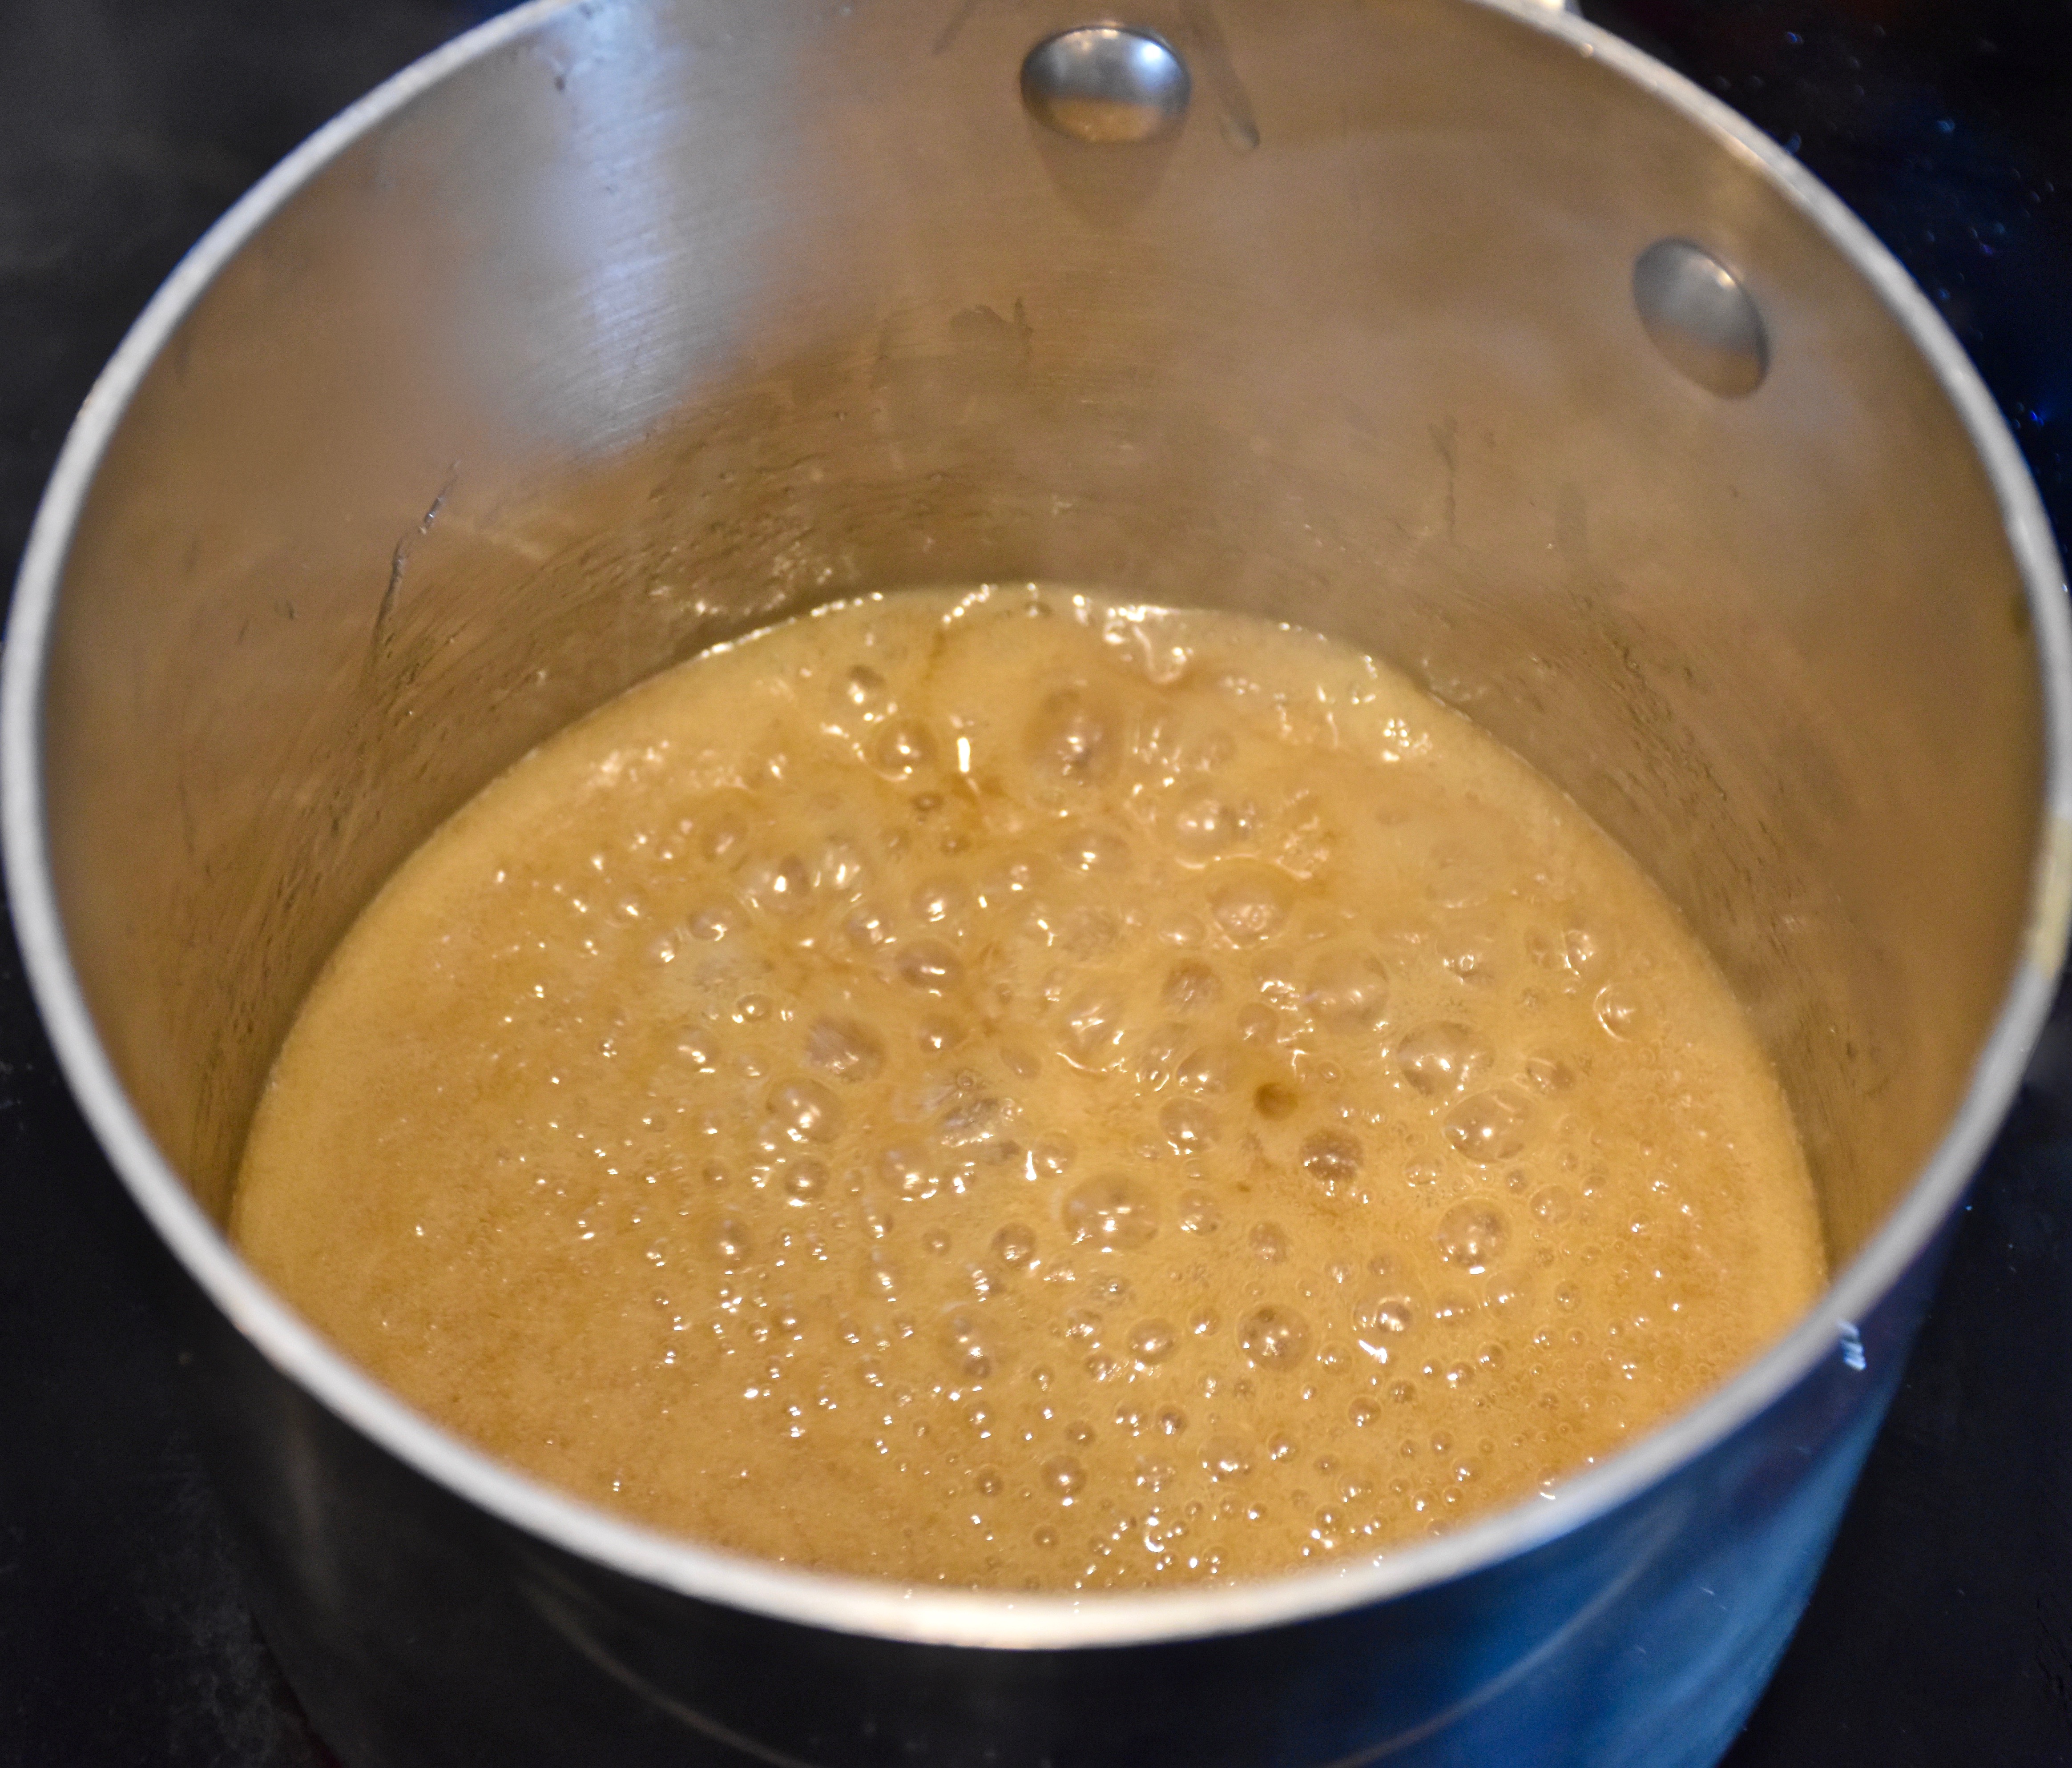
In a small sauce pan add in your butter, brown sugar and milk. Heat over medium high heat until it comes to a boil. Whisk it as it boils for one minute. Then take your pan off the heat and whisk in your vanilla and powdered sugar. Continue to whisk your praline mixture as it cools for about 2 to 3 minutes.
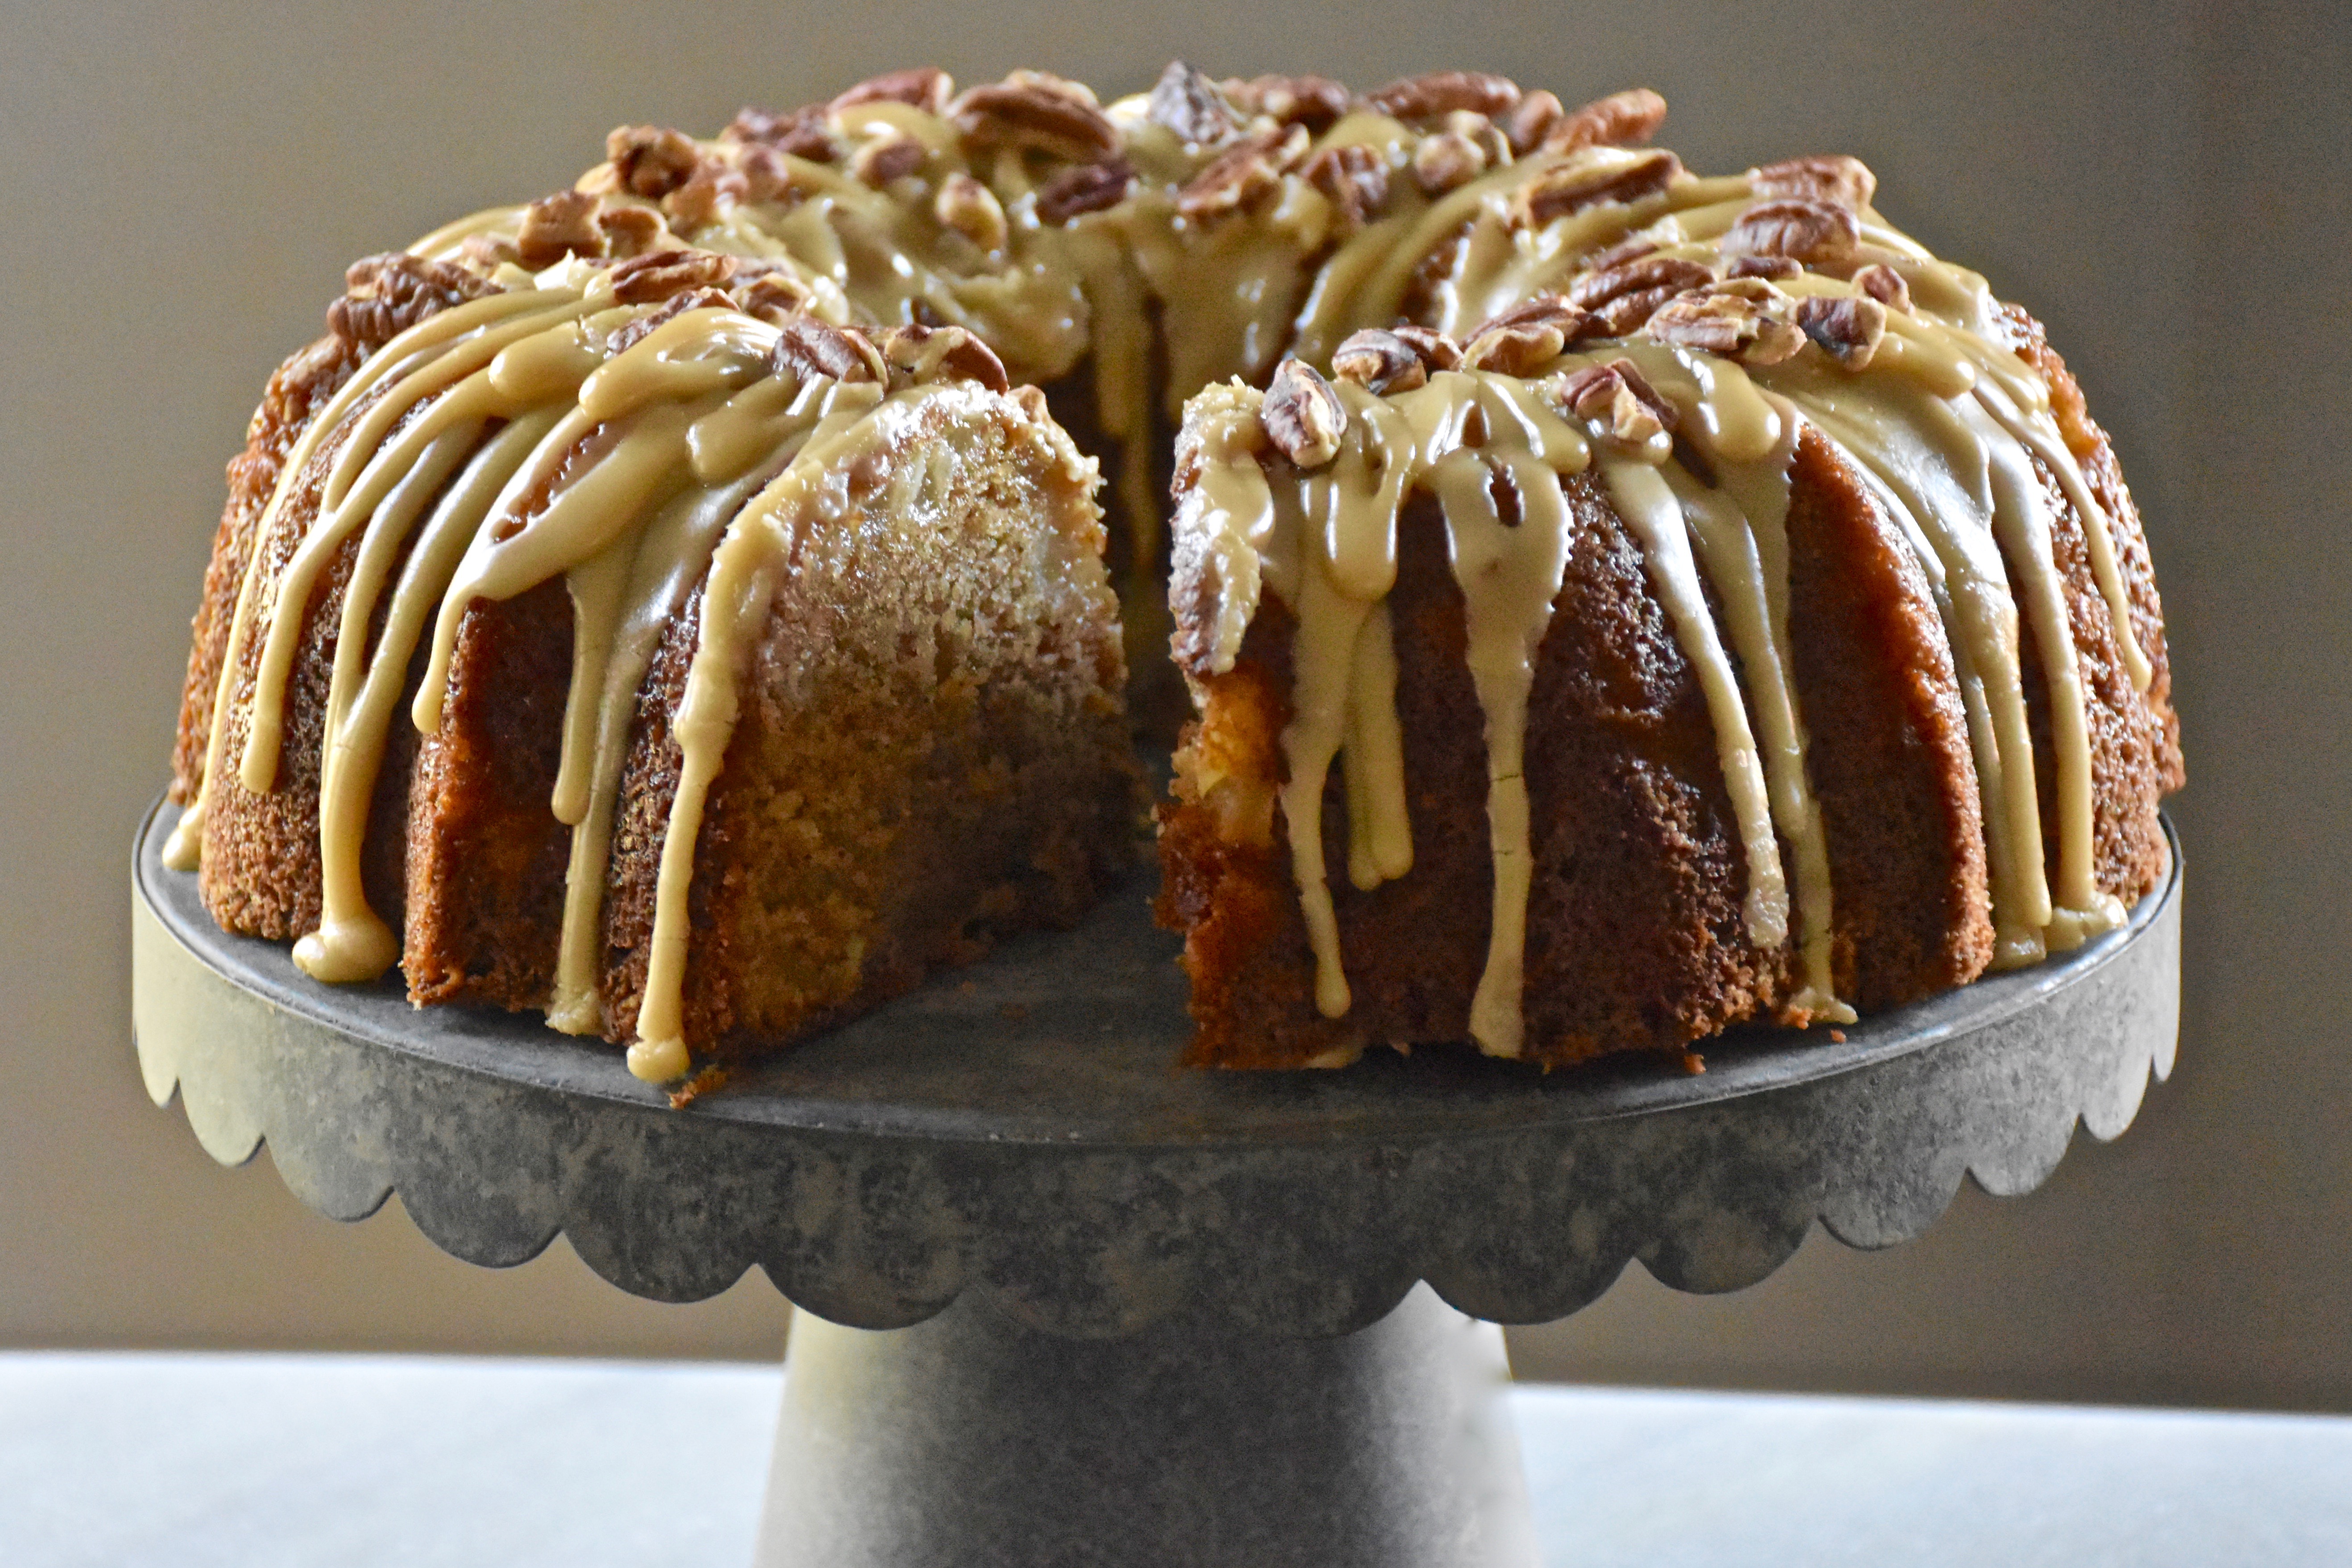
Then pour or drizzle your praline icing on top of your cake. If you want you can sprinkle on some chopped pecans, but the nuts are optional.
This pear and praline bundt cake is so light and sweet that it would make a wonderful coffee cake. I must admit that I loved it so much that I had a small slice for breakfast with my coffee this morning. If you are serving it for dessert then try adding a scoop of vanilla ice cream for rich and delicious treat. So bake with one of my favorite fall fruits and give this red pear and praline cake a try.
This week marks the third anniversary of our move to Chicago. It was an unexpected whirlwind of a cross-country move, but we had hoped that with time things would settle and we would find our way. Our new home was the one our realtor affectionately called the “Leave It To Beaver” house. A two story green and beige colonial revival meets 1960s ranch style home. It was the first house we saw on our fast paced one weekend real estate tour. We loved the big double doors and the beautiful tree filled yard.
Before: this is the first photo I took of our house when we were looking at homes in the area.
We had big painting plans for our new home, but it has taken time to make it ours. Three years and countless gallons of paint later, we have finally painted everything that I had begun to imagine when I first walked in the door. What started out as a big paint-it-yourself project has along the way turned into a journey. There were times when it felt like with two toddlers it might take me forever to finish, but wall by wall and room by room it happened.
This was my then one year old daughter who hated to nap while I was painting so she fell asleep watching me paint the living room.
The last project we just completed was to finish repainting the exterior, we had painted the doors and shutters a year ago, but we got professional help to finish this last project: the siding and windows. I went with a lighter color called Edgecomb Gray. So the “Leave It To Beaver” house has gone a little lighter and bluer.
After: new hardware and paint have given our house a new look
The house that felt so green and gold and far from home finally feels more like us. There is an emotional undercurrent to color and the sea of blues: from robin’s egg to indigo to turquoise and a few other colors too, have in a sense changed the tide. I wondered for a while if this house would ever really feel like home, but I have learned that a lot of paint and time can make a difference. So for all the trends out there I think it’s important to really ask yourself what colors do you really need and love?
I recently came across a book by decorator, Lori Weitzner, called Ode to Color. In it Weitzner talks about the psychology of why we are personally drawn to certain colors and how you can use that knowledge to create a happier home. She also has a fun color personality test that she developed with the help of a psychologist. So I took her quiz and found that my color personality is what she calls Waterslide, which translated means many shades of blue.
A favorite photo from my travels. Oh how I love a trip to the beach!
Weitzner describes blue as a color of honesty, and intelligence. I find it to be spiritual and peaceful, but when paired with white it can take on a more graphic presence.
Add a brighter color to the mix and it can take on a whole new vibrance and energy.
Or go bold with a deep inky blue.
So what is your color story? Do you have a color you are just drawn to? If you ever wondered what your color personality might be then click on this link to take the quiz yourself.
We may be done with painting for a while, but we are still writing and creating the story of this house. So the work and fun continues…
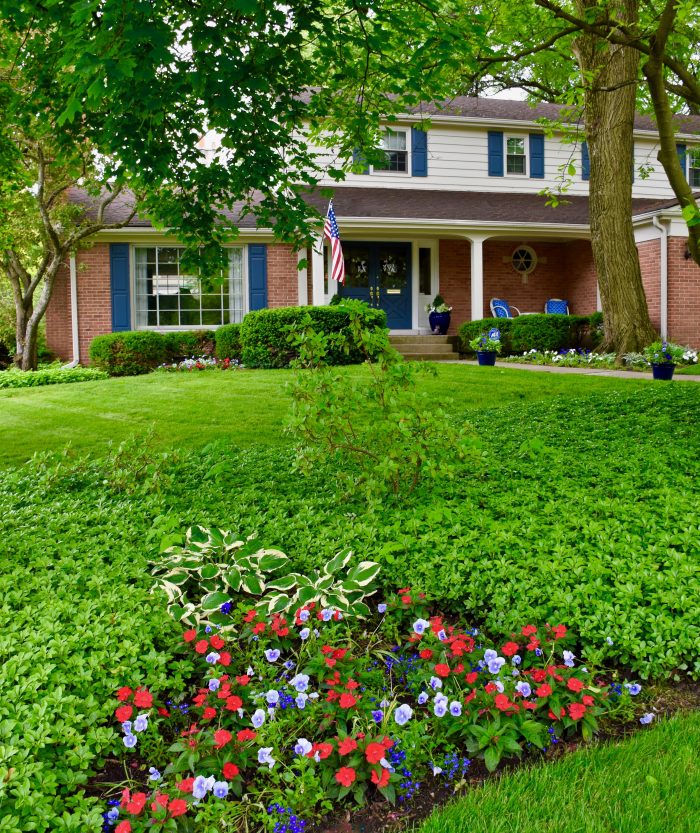
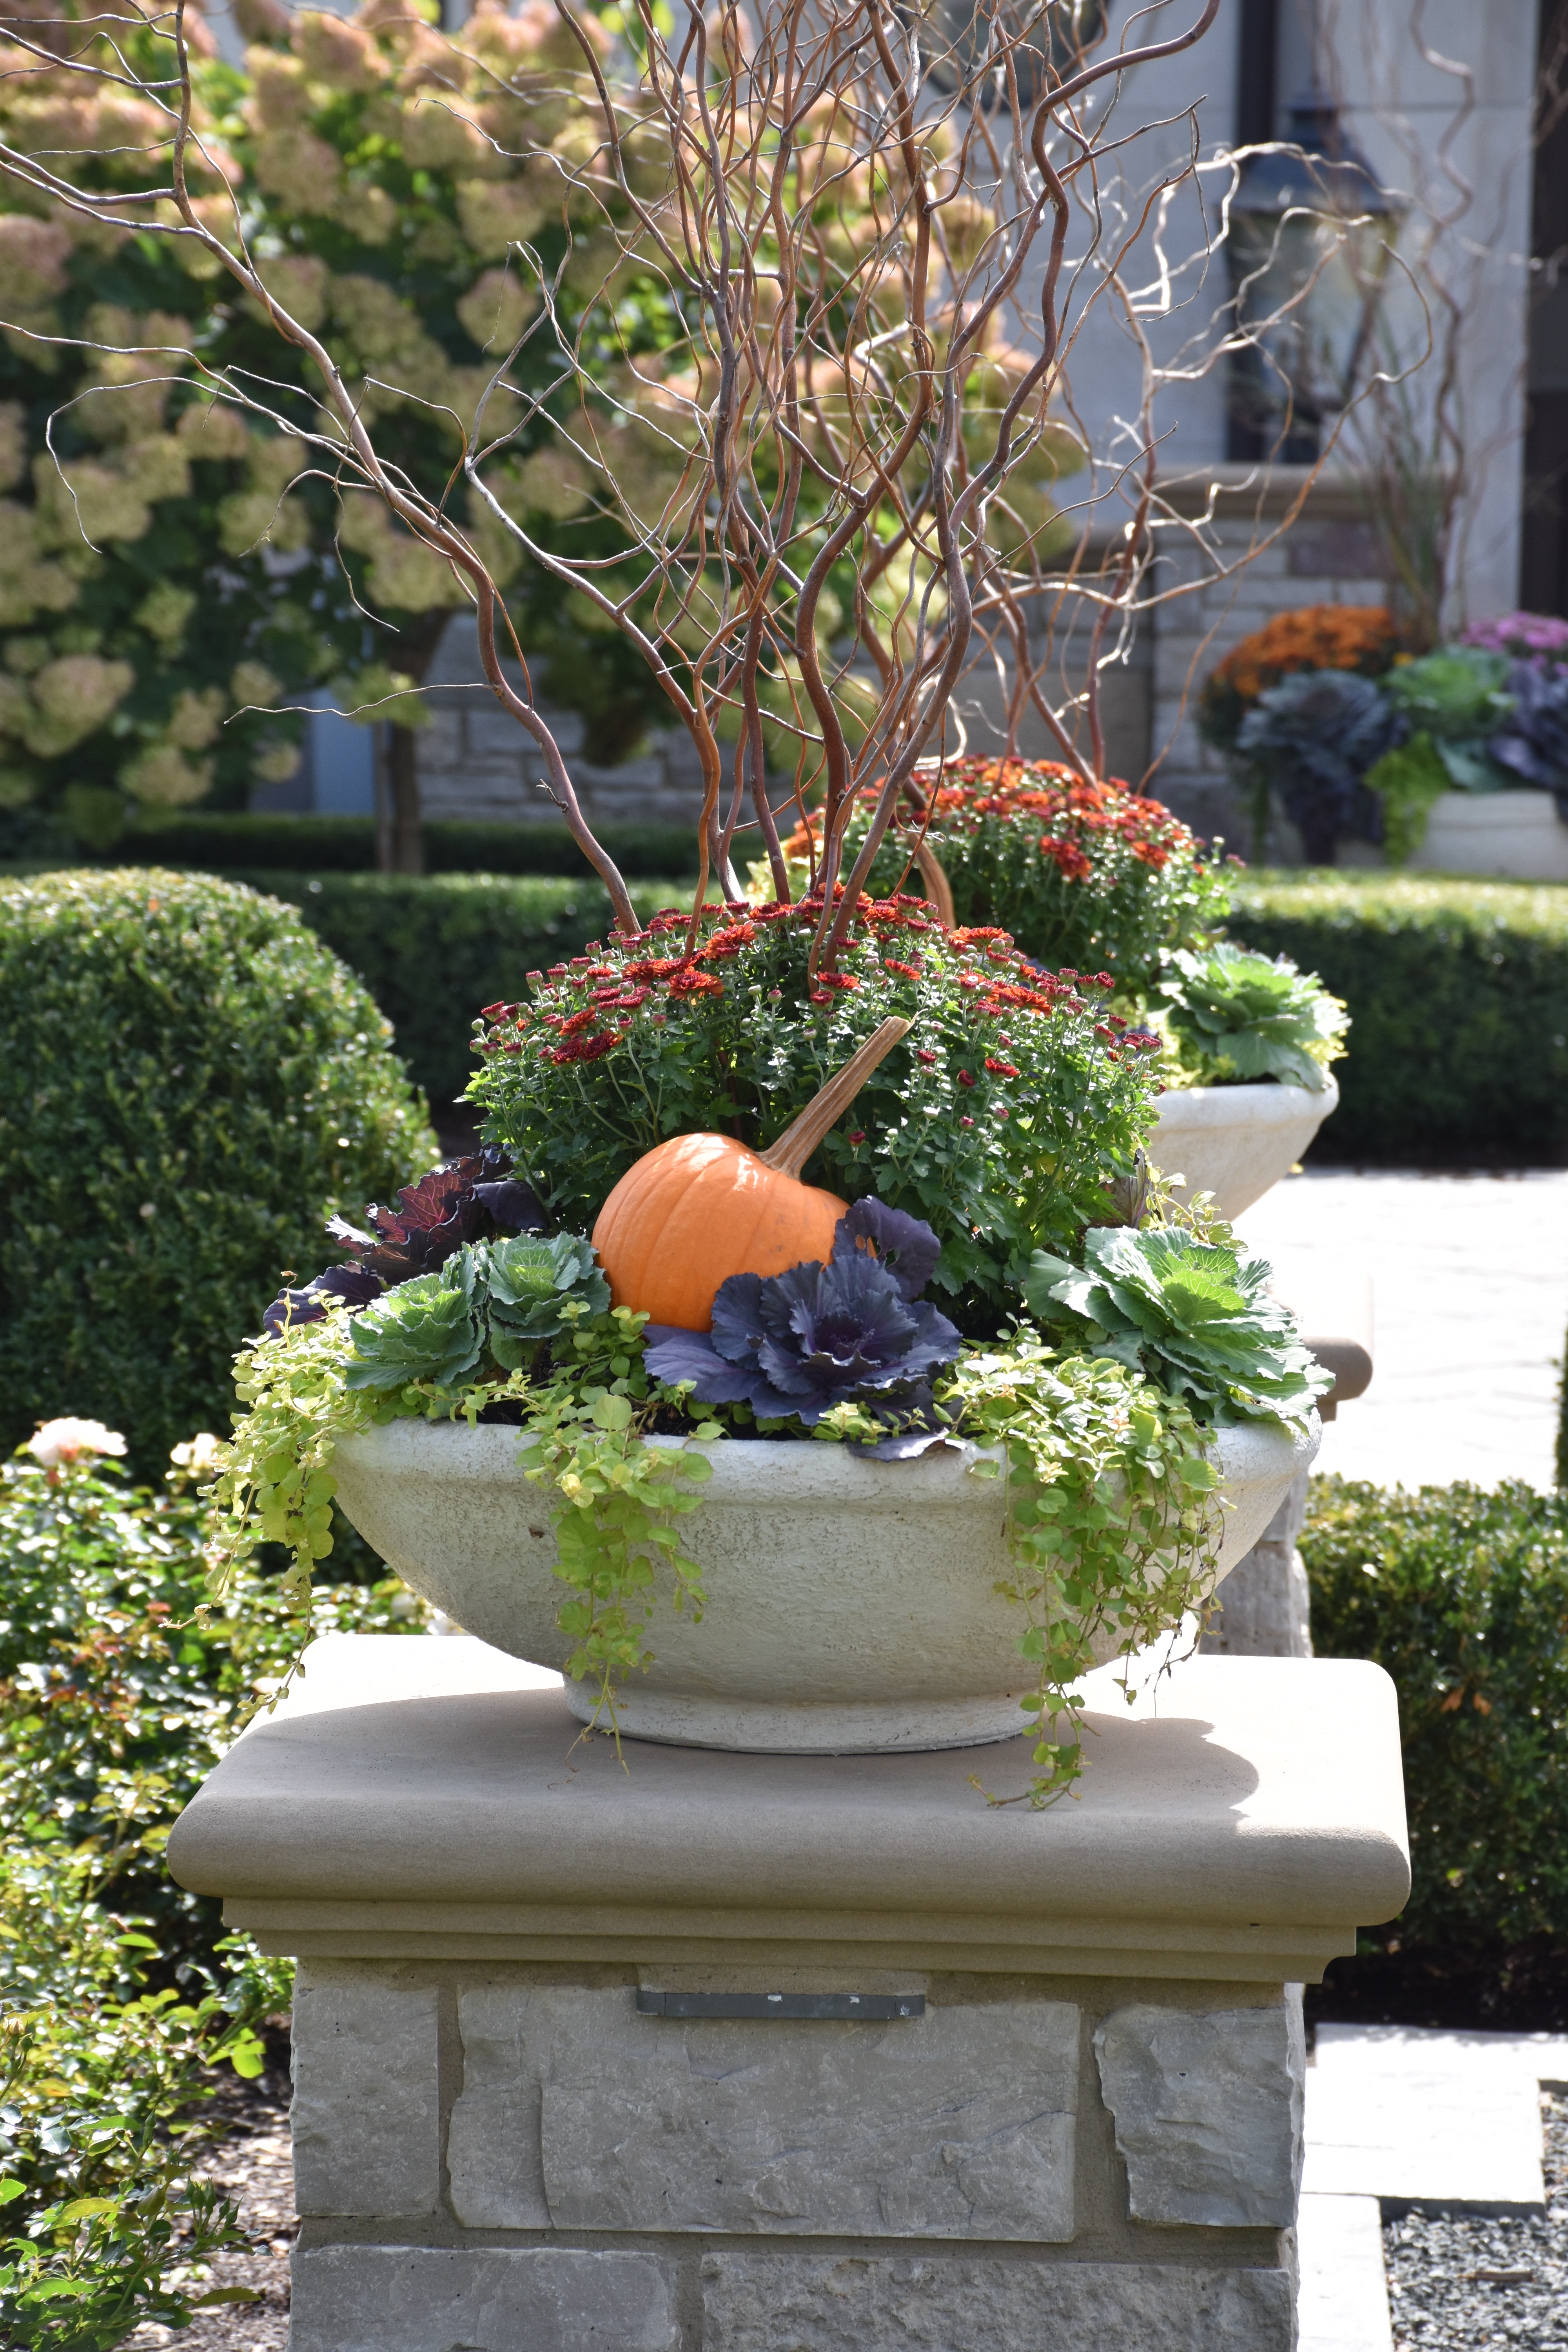
Fall is here and there are small hints of color as the leaves are just beginning to turn. Porches and front doors are dressed with brightly colored mums, vibrant green and purple kales and orange berries and pumpkins. As I was out walking in the neighborhood I saw some gorgeous planters dresses up in the most beautiful fall colors, so I thought I would share a little fall gardening inspiration.
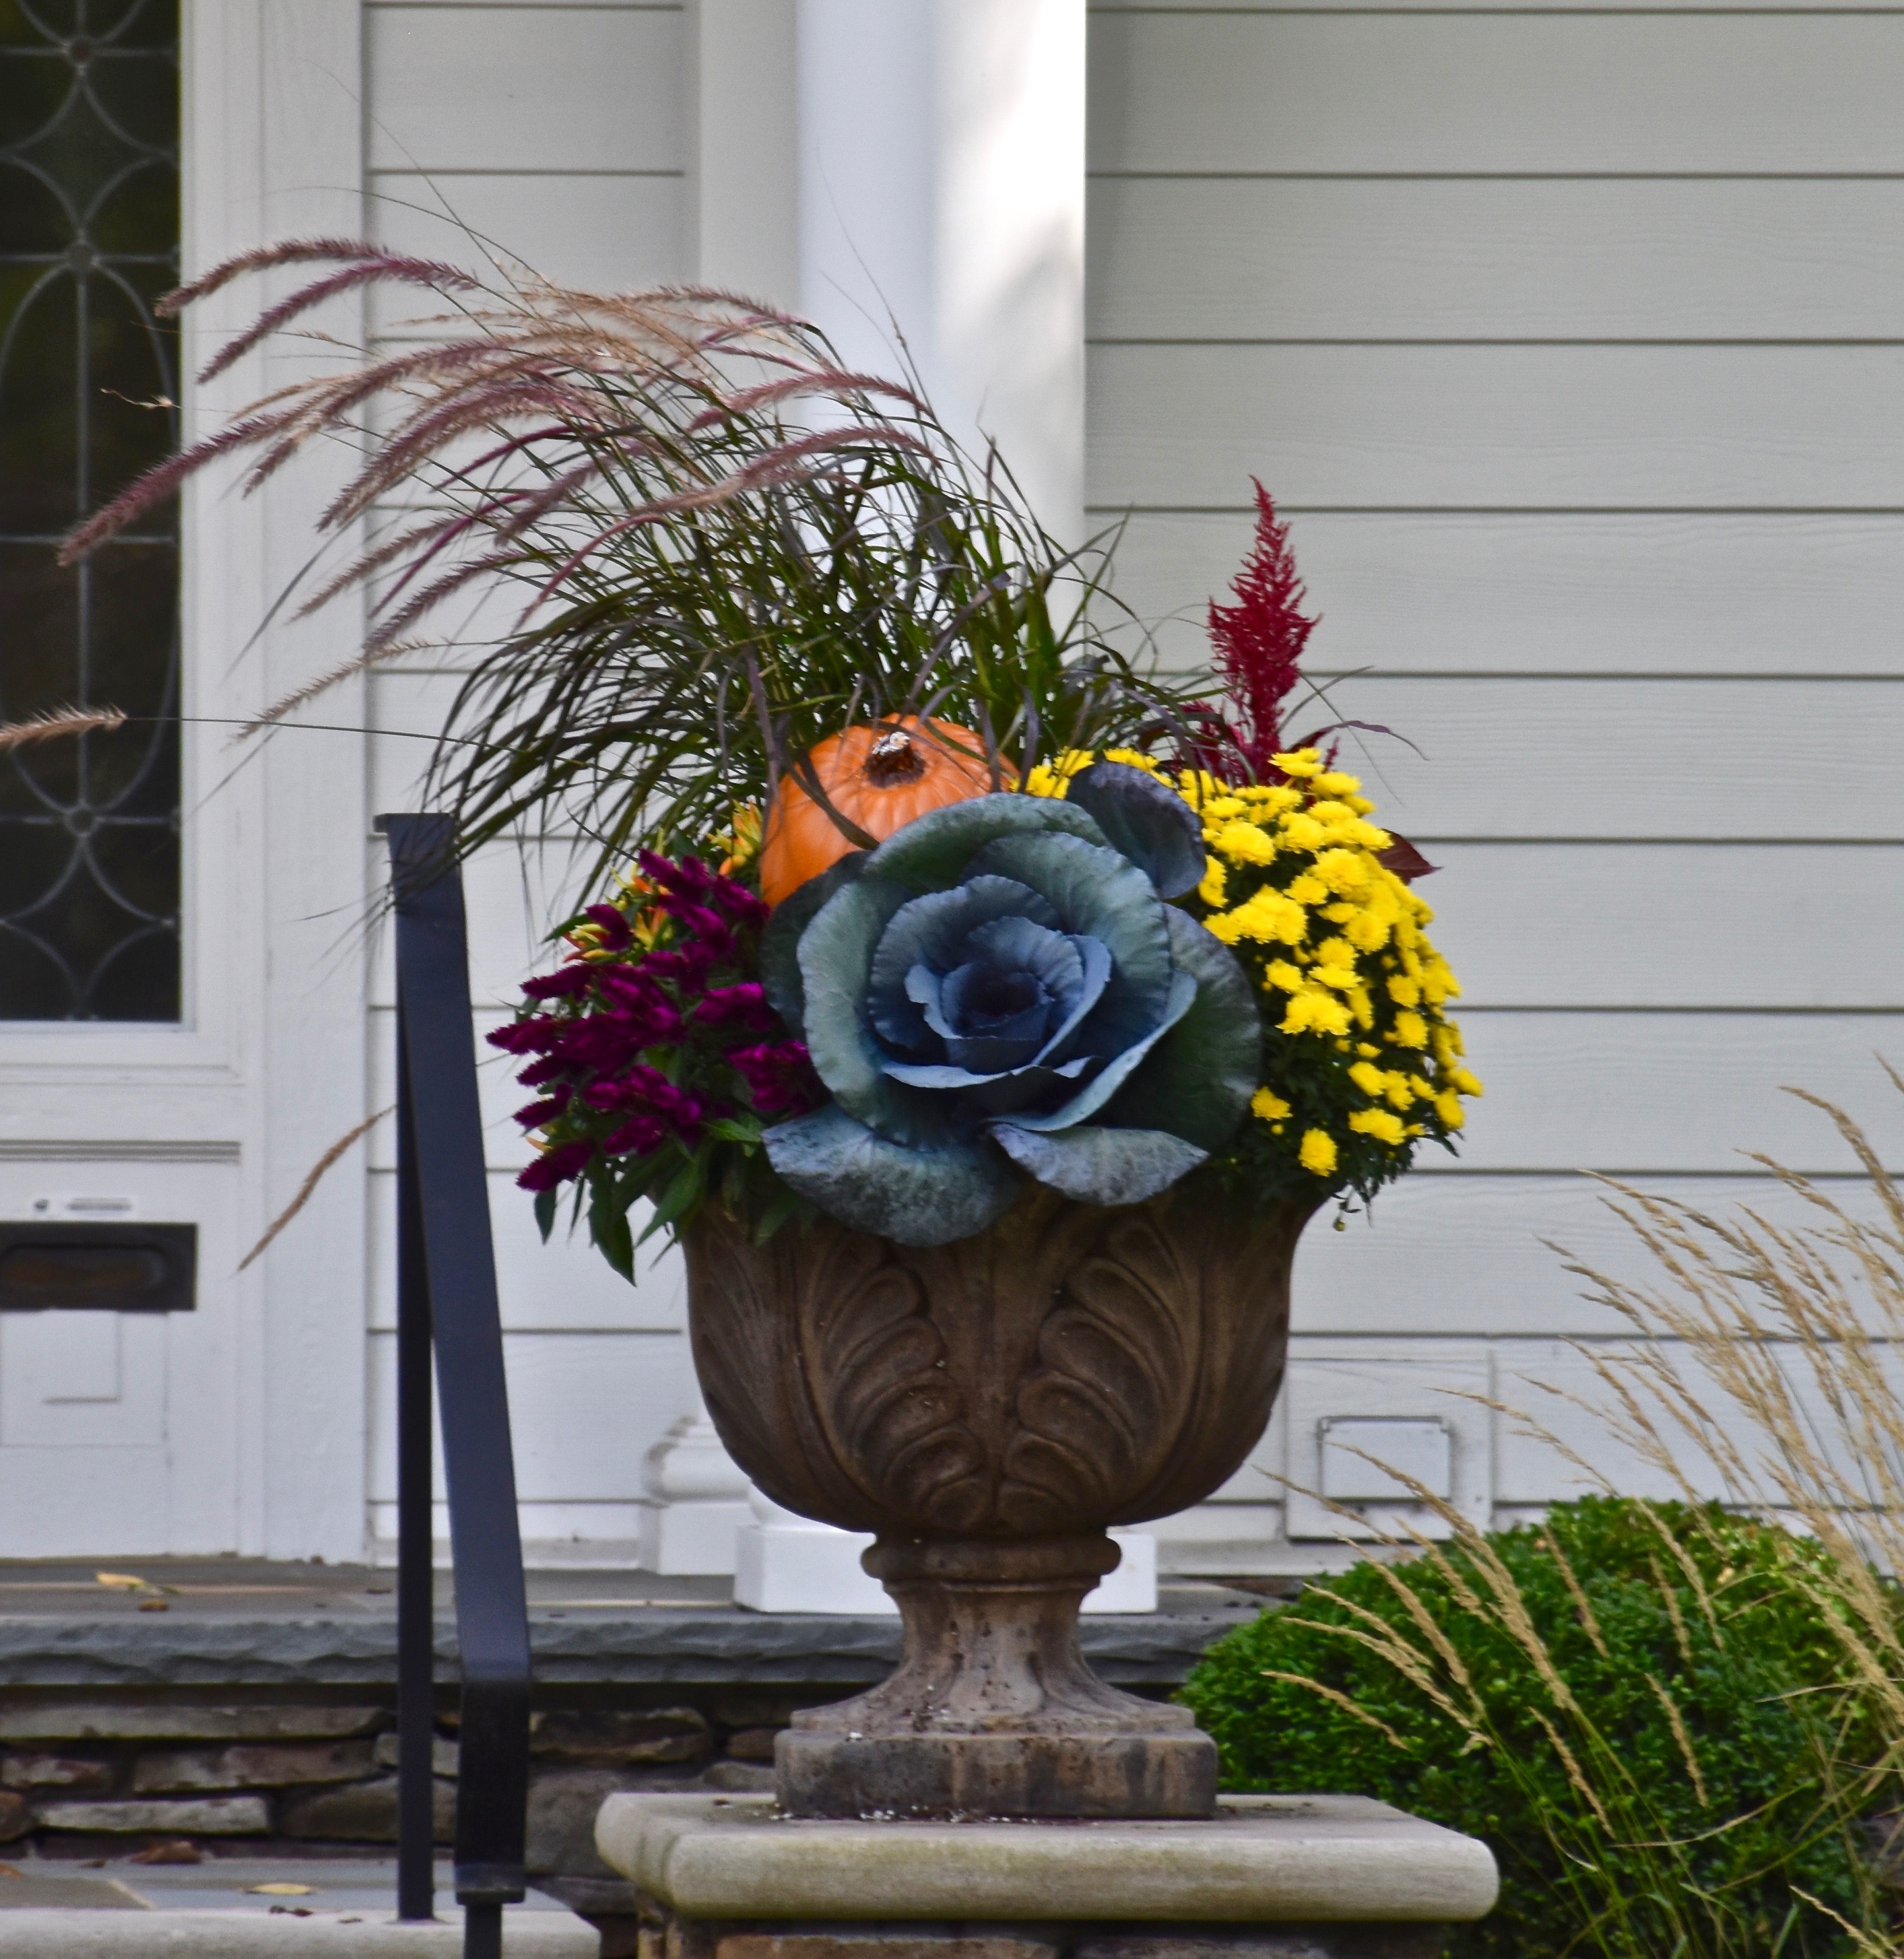
Kale and cabbage are some of my favorite fall plants their leaves have such beautiful colors and a sculptural quality to them that makes them a great base for any fall planting. I love the height and pop of color that these orange berries add to these arrangements.
These branches in the center of the planters make these pots fall showstoppers.
The color combinations in these planters were so striking. I love the fuchsia cockscomb paired with the yellow mums and purple kale. The grass adds height and a lovely bit of movement to this arrangements as it sways in the wind.
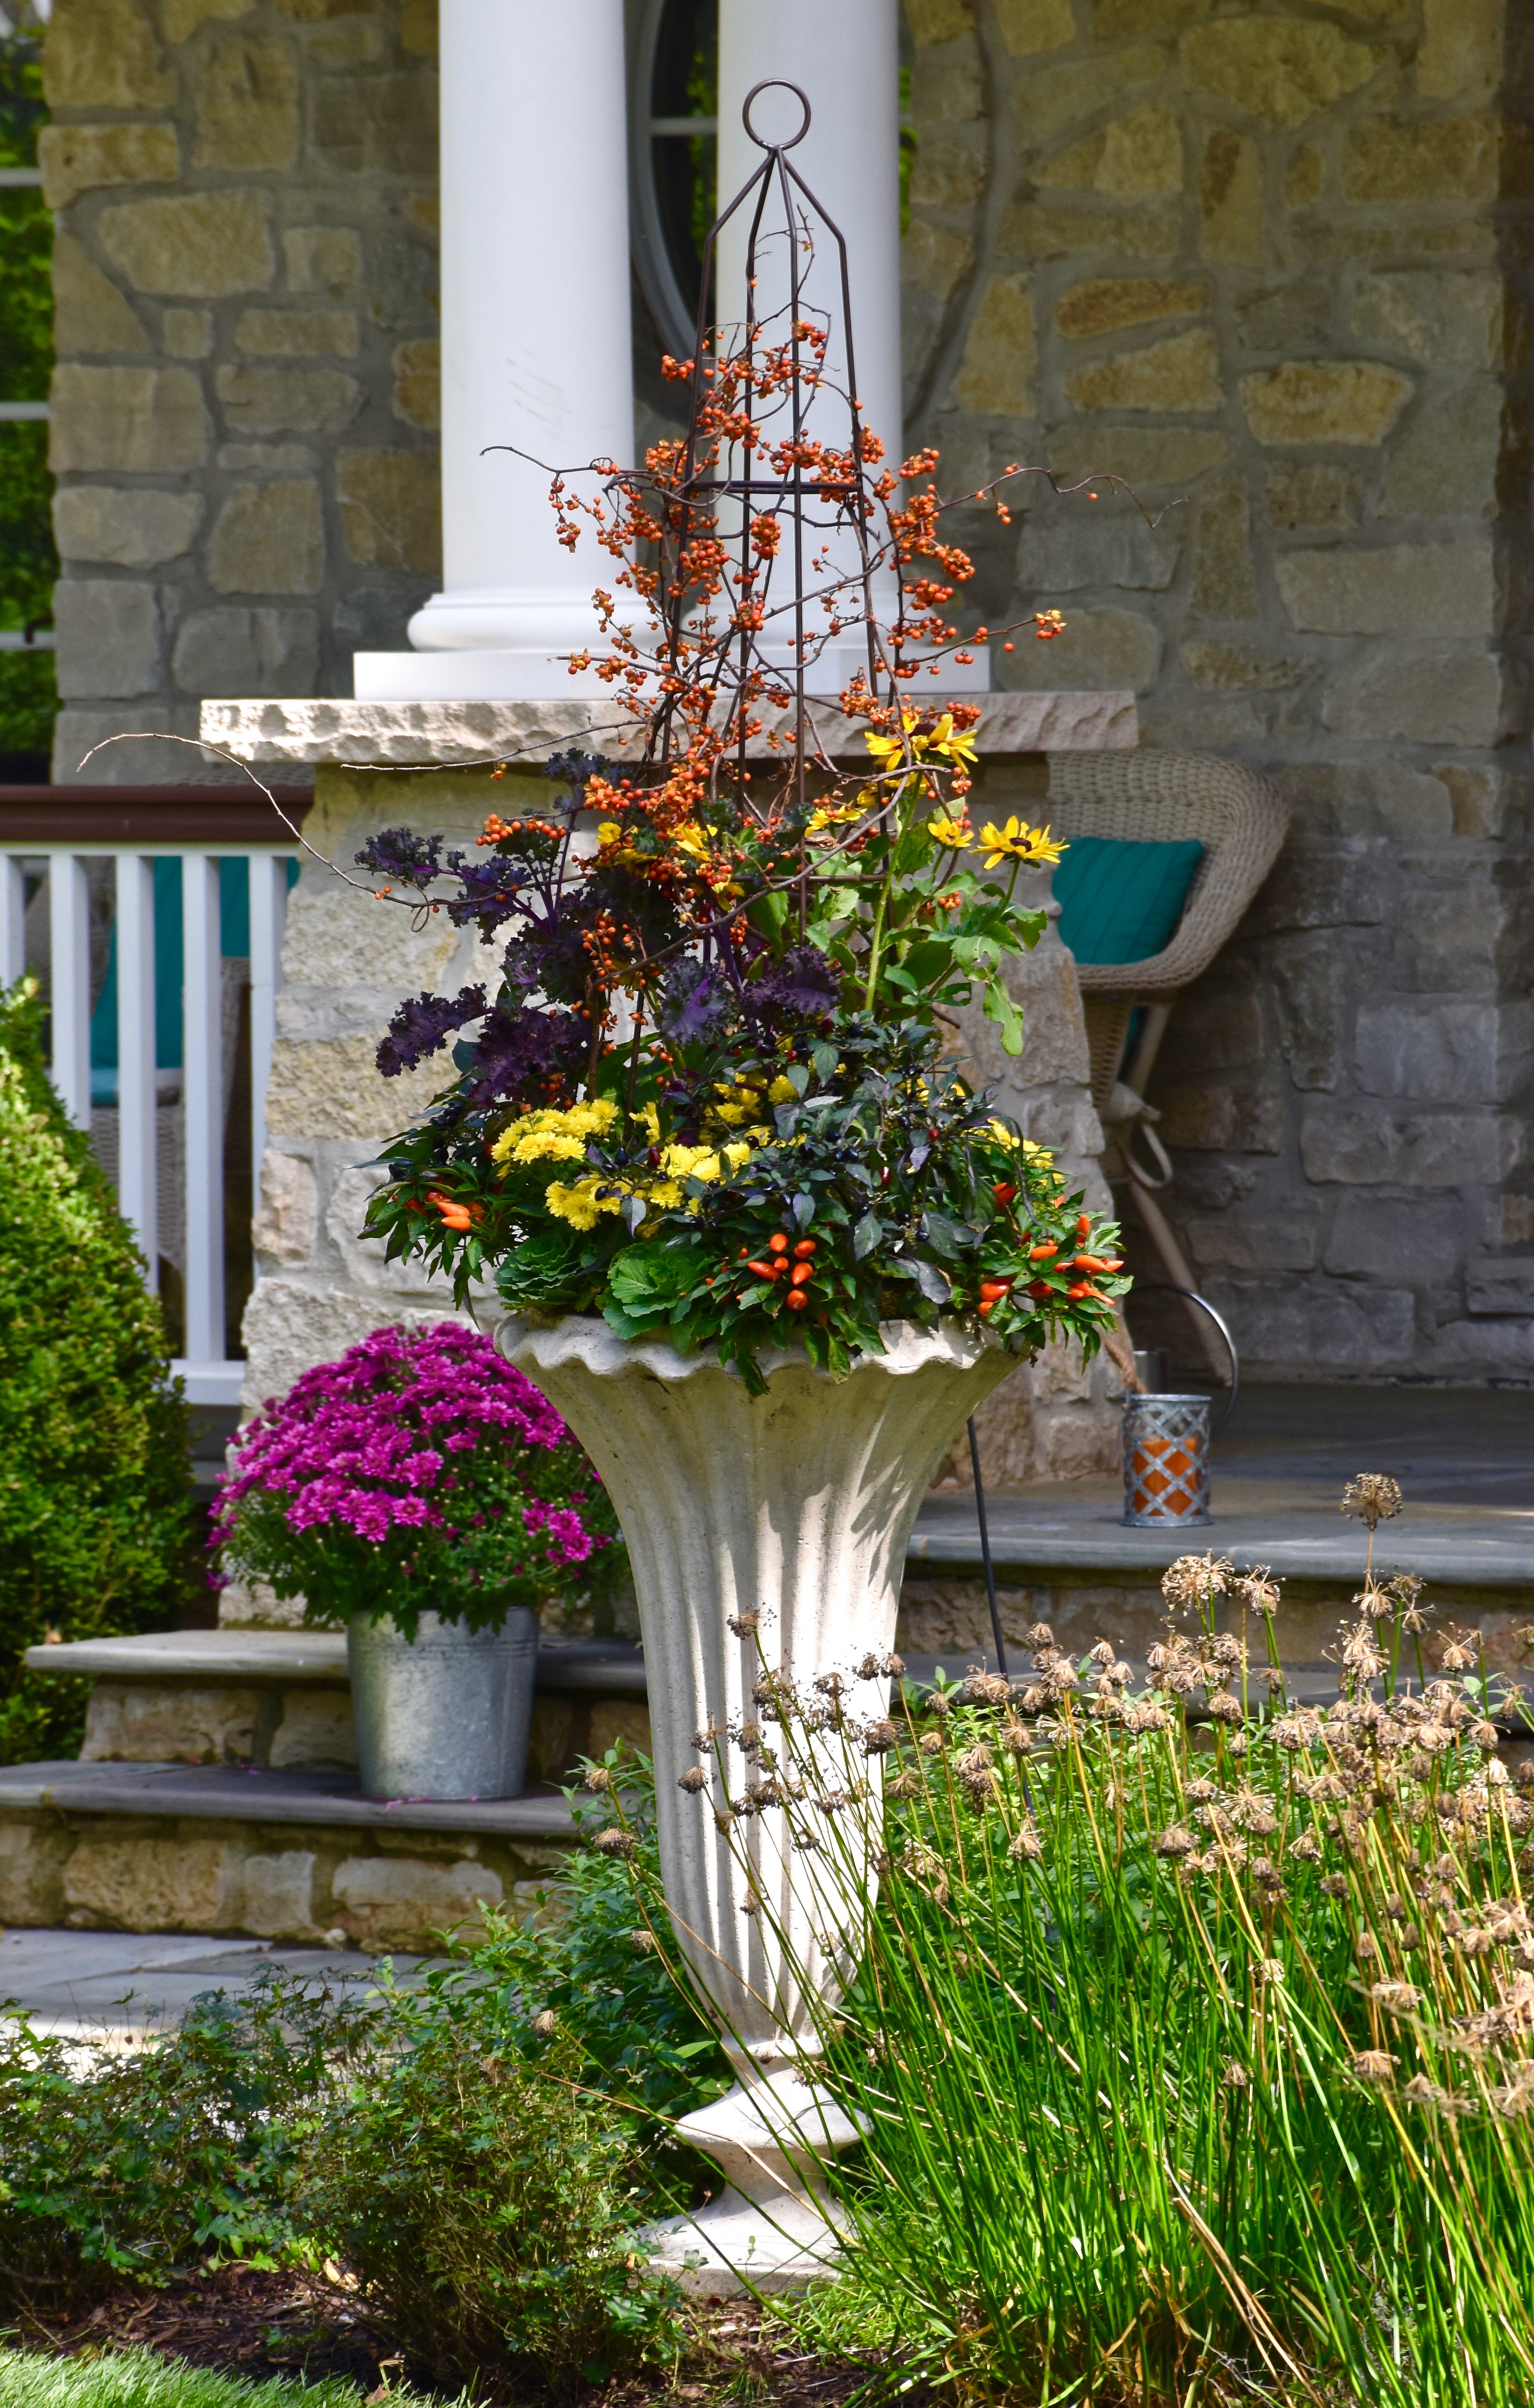
This trumpet-shaped planter with this metal trellis is so uniquely beautiful . I love the hight and sculptural quality it adds to this arrangement. The chili peppers and the black-eyed Susans add color and whimsy.
This new modern home had these beautiful blue gray window boxes. What a lovely view to see out of your kitchen window. The kale pansies and mums add a touch of fall.
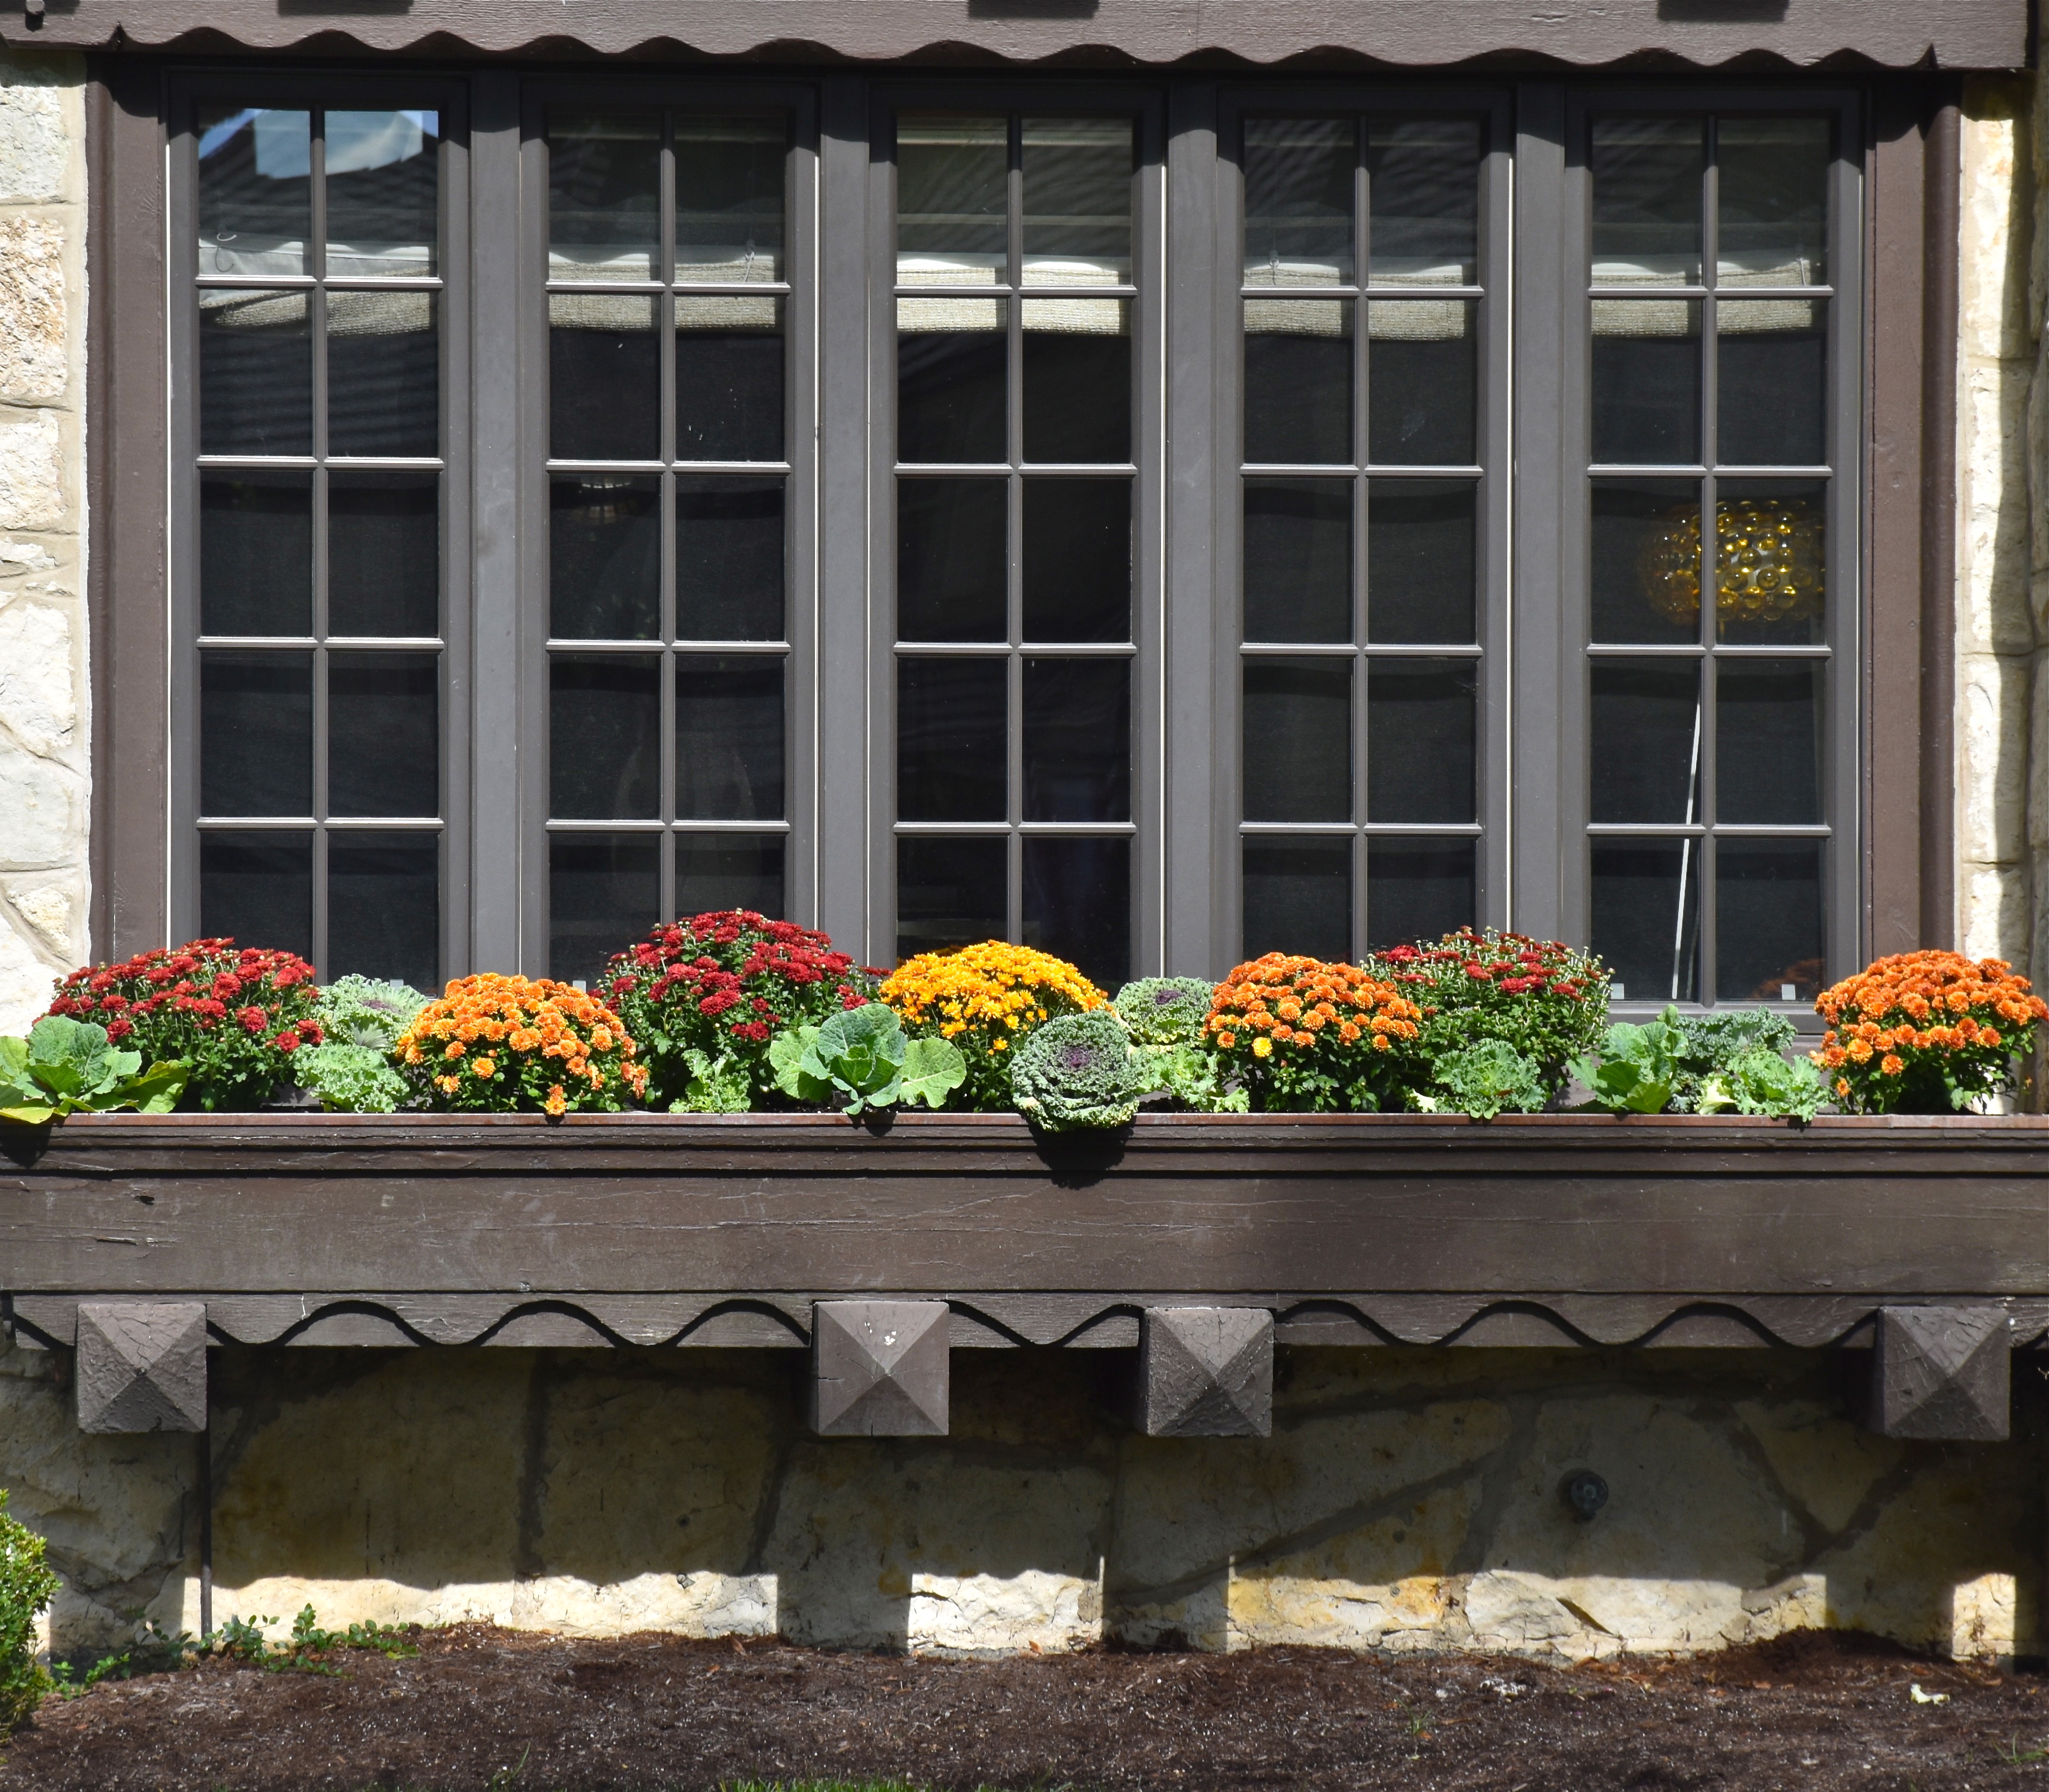
This classic English styled home had a beautiful set of window boxes filled with mums in orange and red that caught my eye.
If the thought of all these planting seems like a little much. Then I also saw some simple but stunning pumpkin planters that would brighten any home.
These white planters with these stacked heirloom orange pumpkins were simply beautiful.
This home had antique metal planters scattered in their garden and they were filled with these fairytale like pumpkin stacks that added a little color and fun to their lovely garden.
These planters and pumpkins are a welcome sign of the season and such a great way to add just a bit of color to your garden or front porch. Sometimes just a few pumpkins or well planted pots are all you need to add a touch of fall’s splendor to your home. Happy Fall!
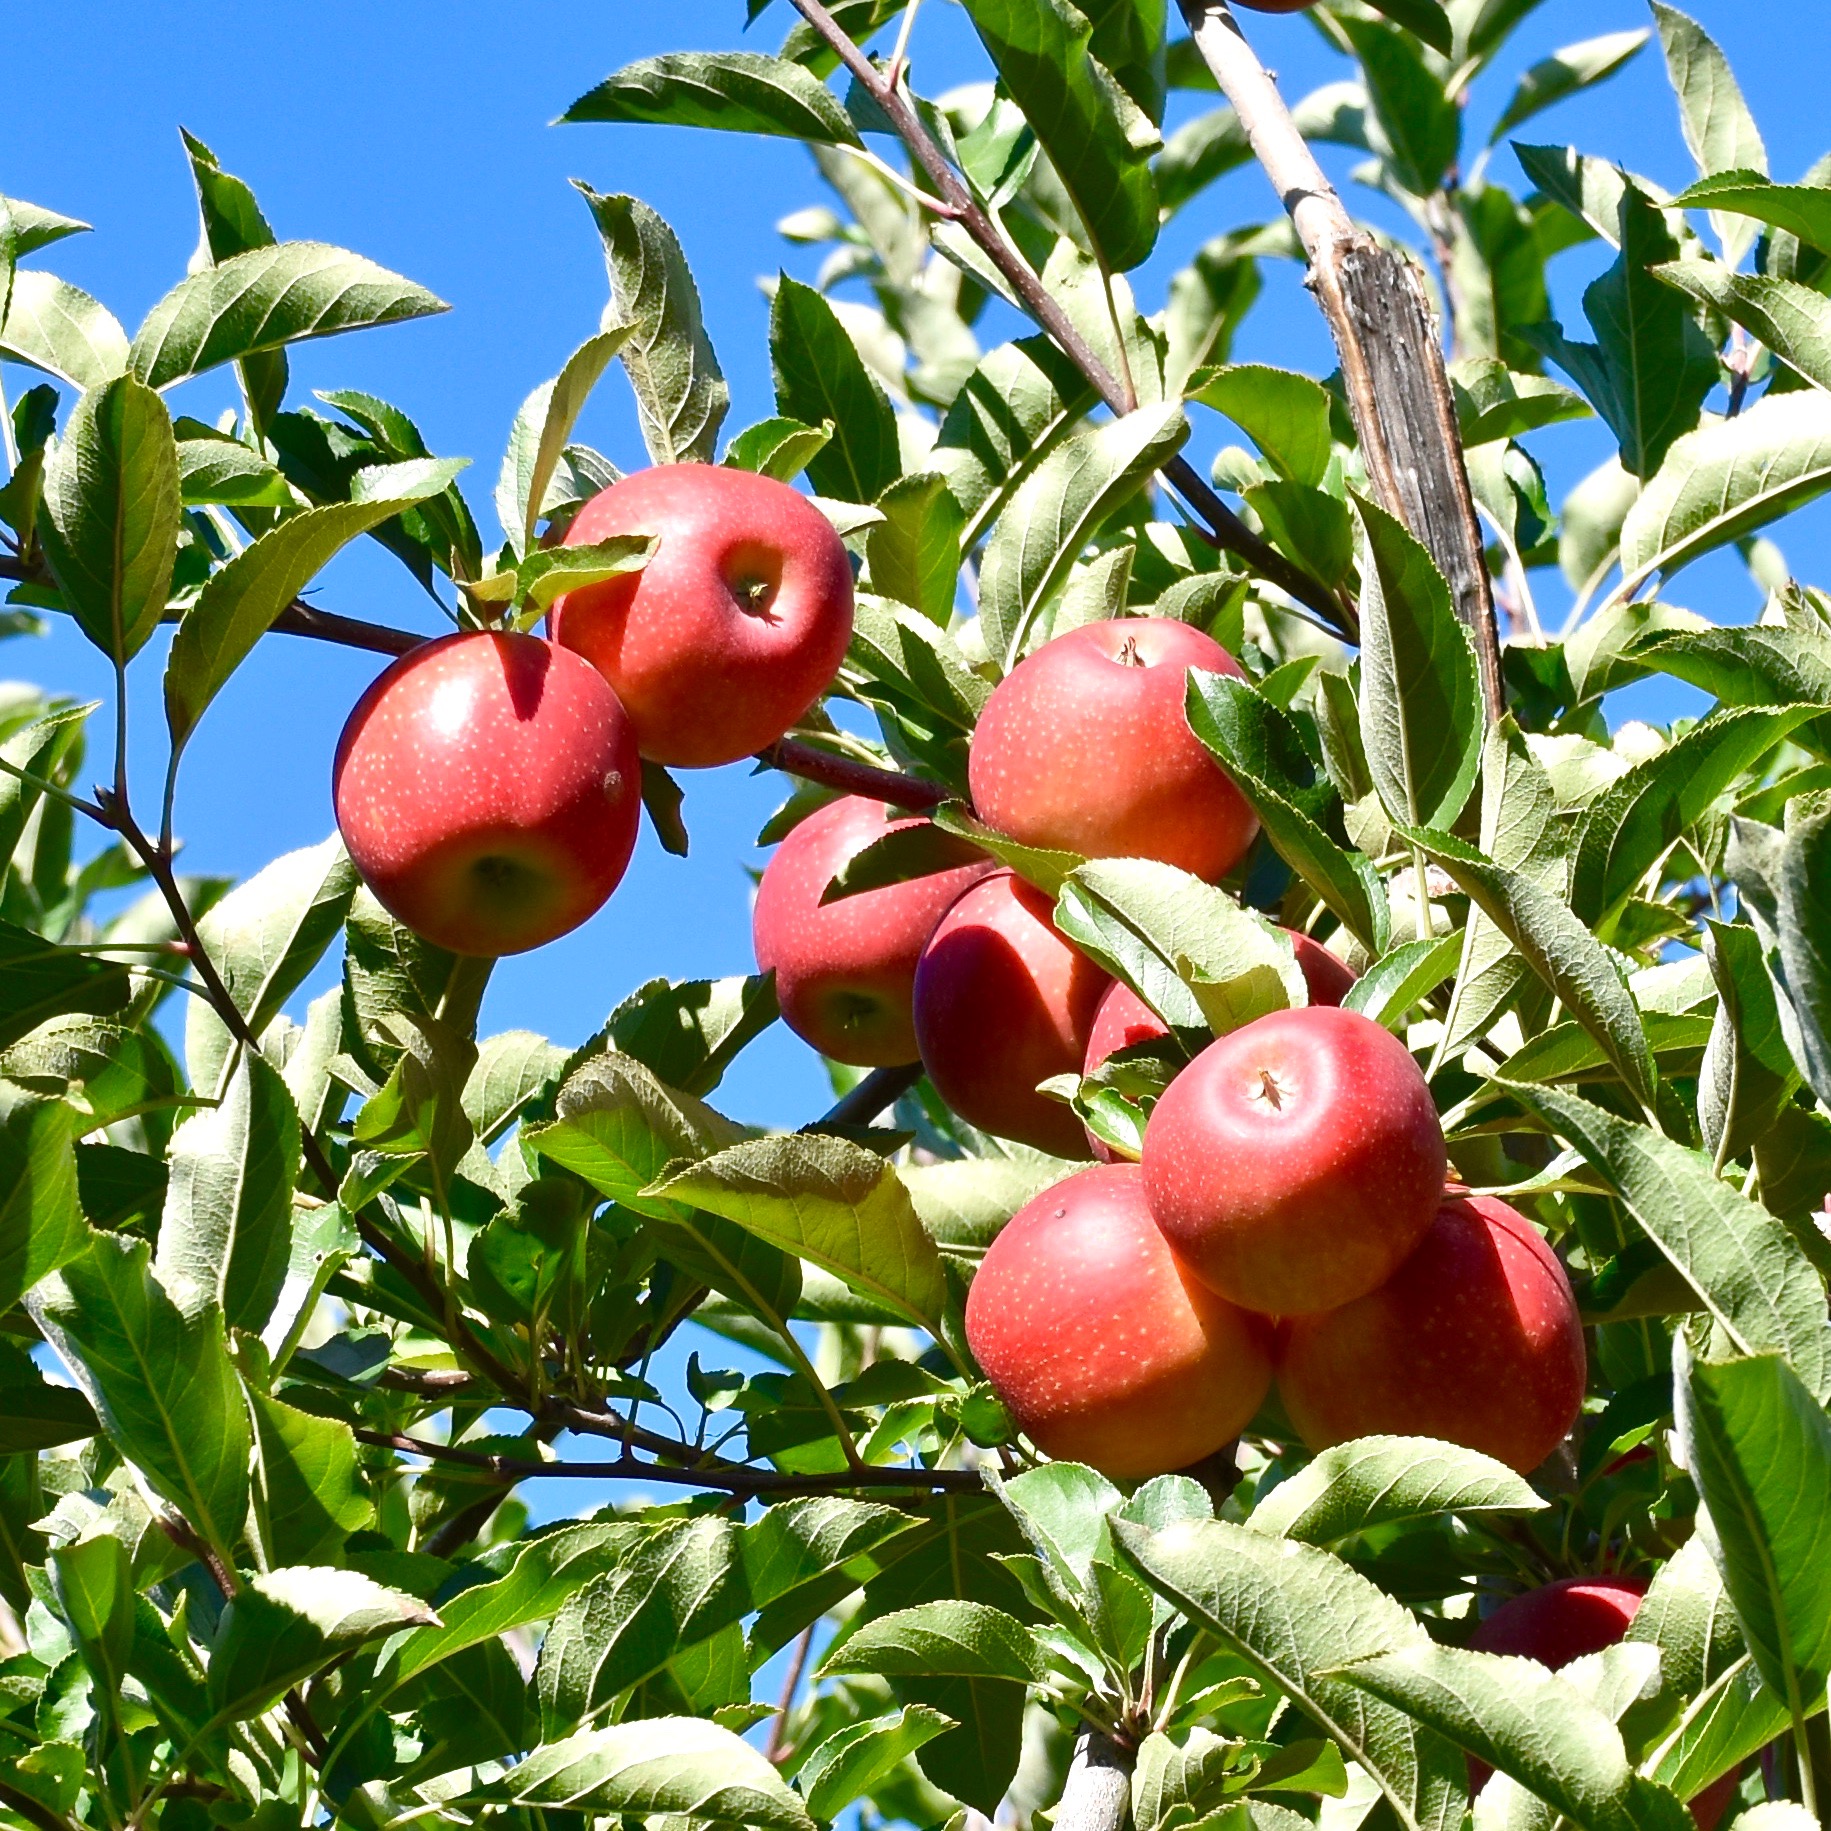
The air was crisp; the sky, a brilliant blue. The familiar breeziness of fall was in the air, but the warm sun made you want to linger and forget all about being chilly. So on the first official day of fall our family joined some new friends for what felt like a great Northern right of passage: apple picking. We packed up our car with movies and snacks and headed out to an orchard in nearby Indiana.
The orchard had acres of trees and there was a dazzling array of apples in more varieties then we even knew existed. Since we were naive to this new tradition we allowed our girls to pick as many apples as their large bags could hold, so in the end we came home with nineteen pounds of apples. However, I must admit that there is nothing like the taste of a freshly picked apple.
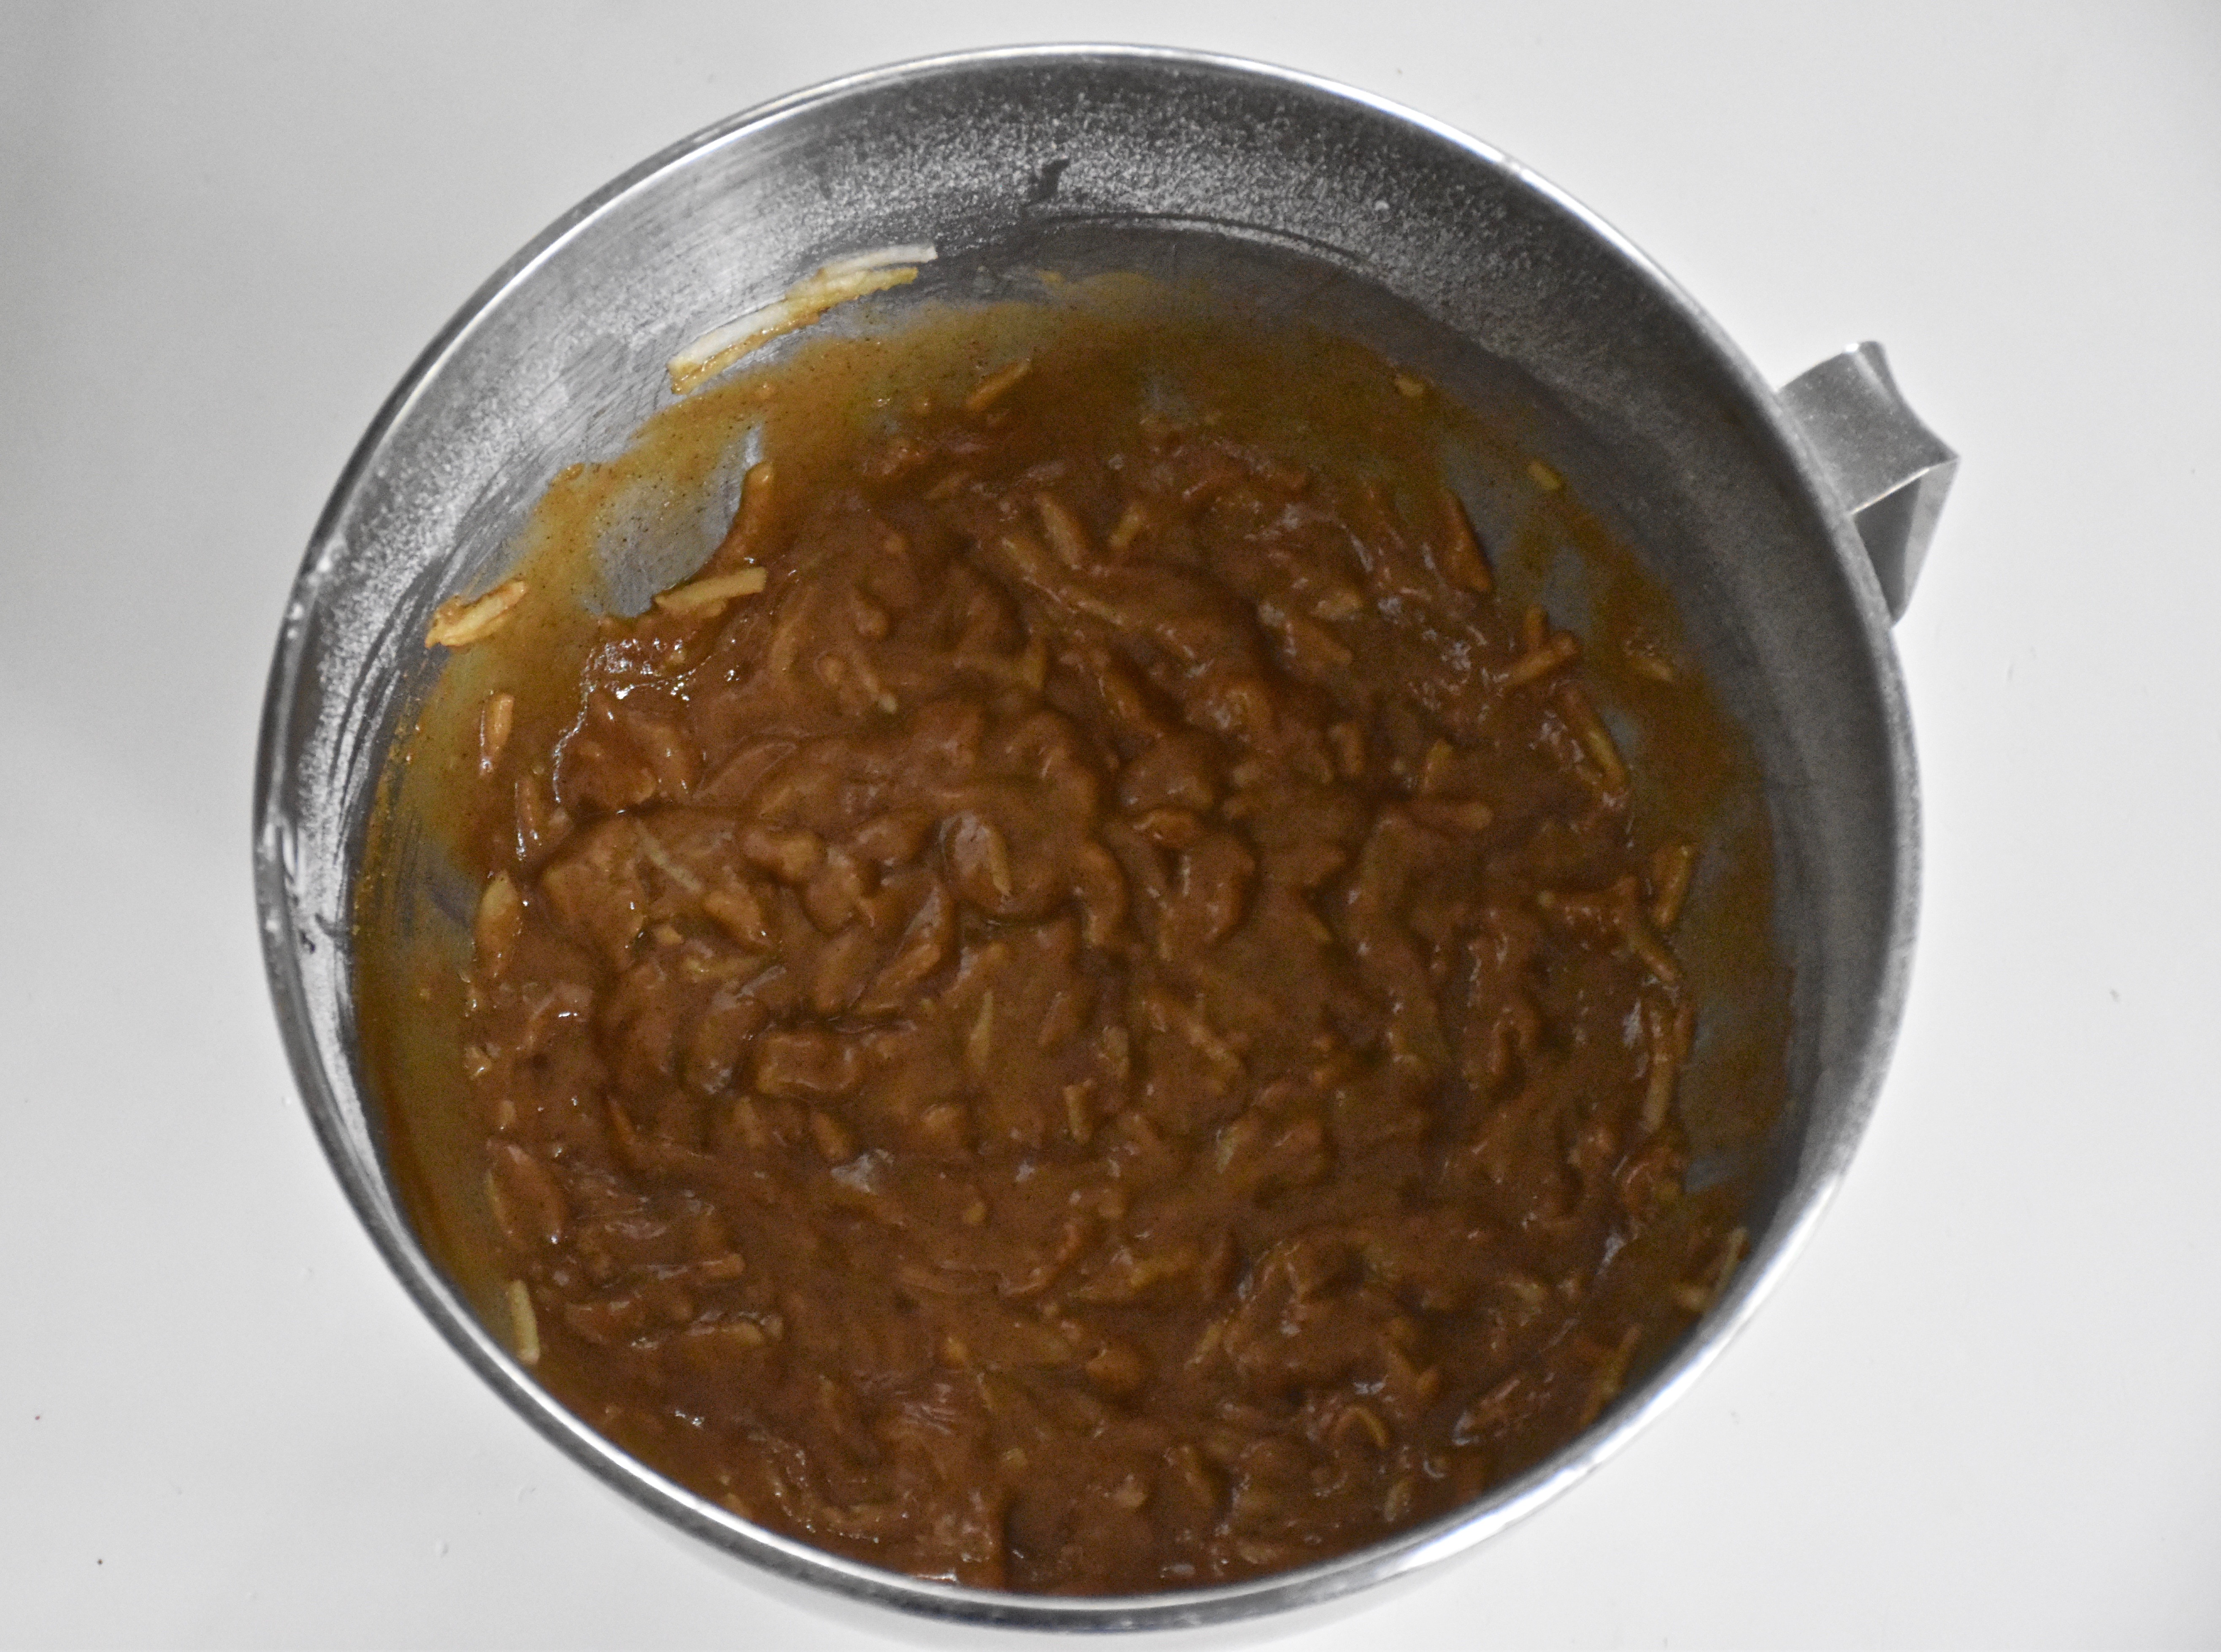
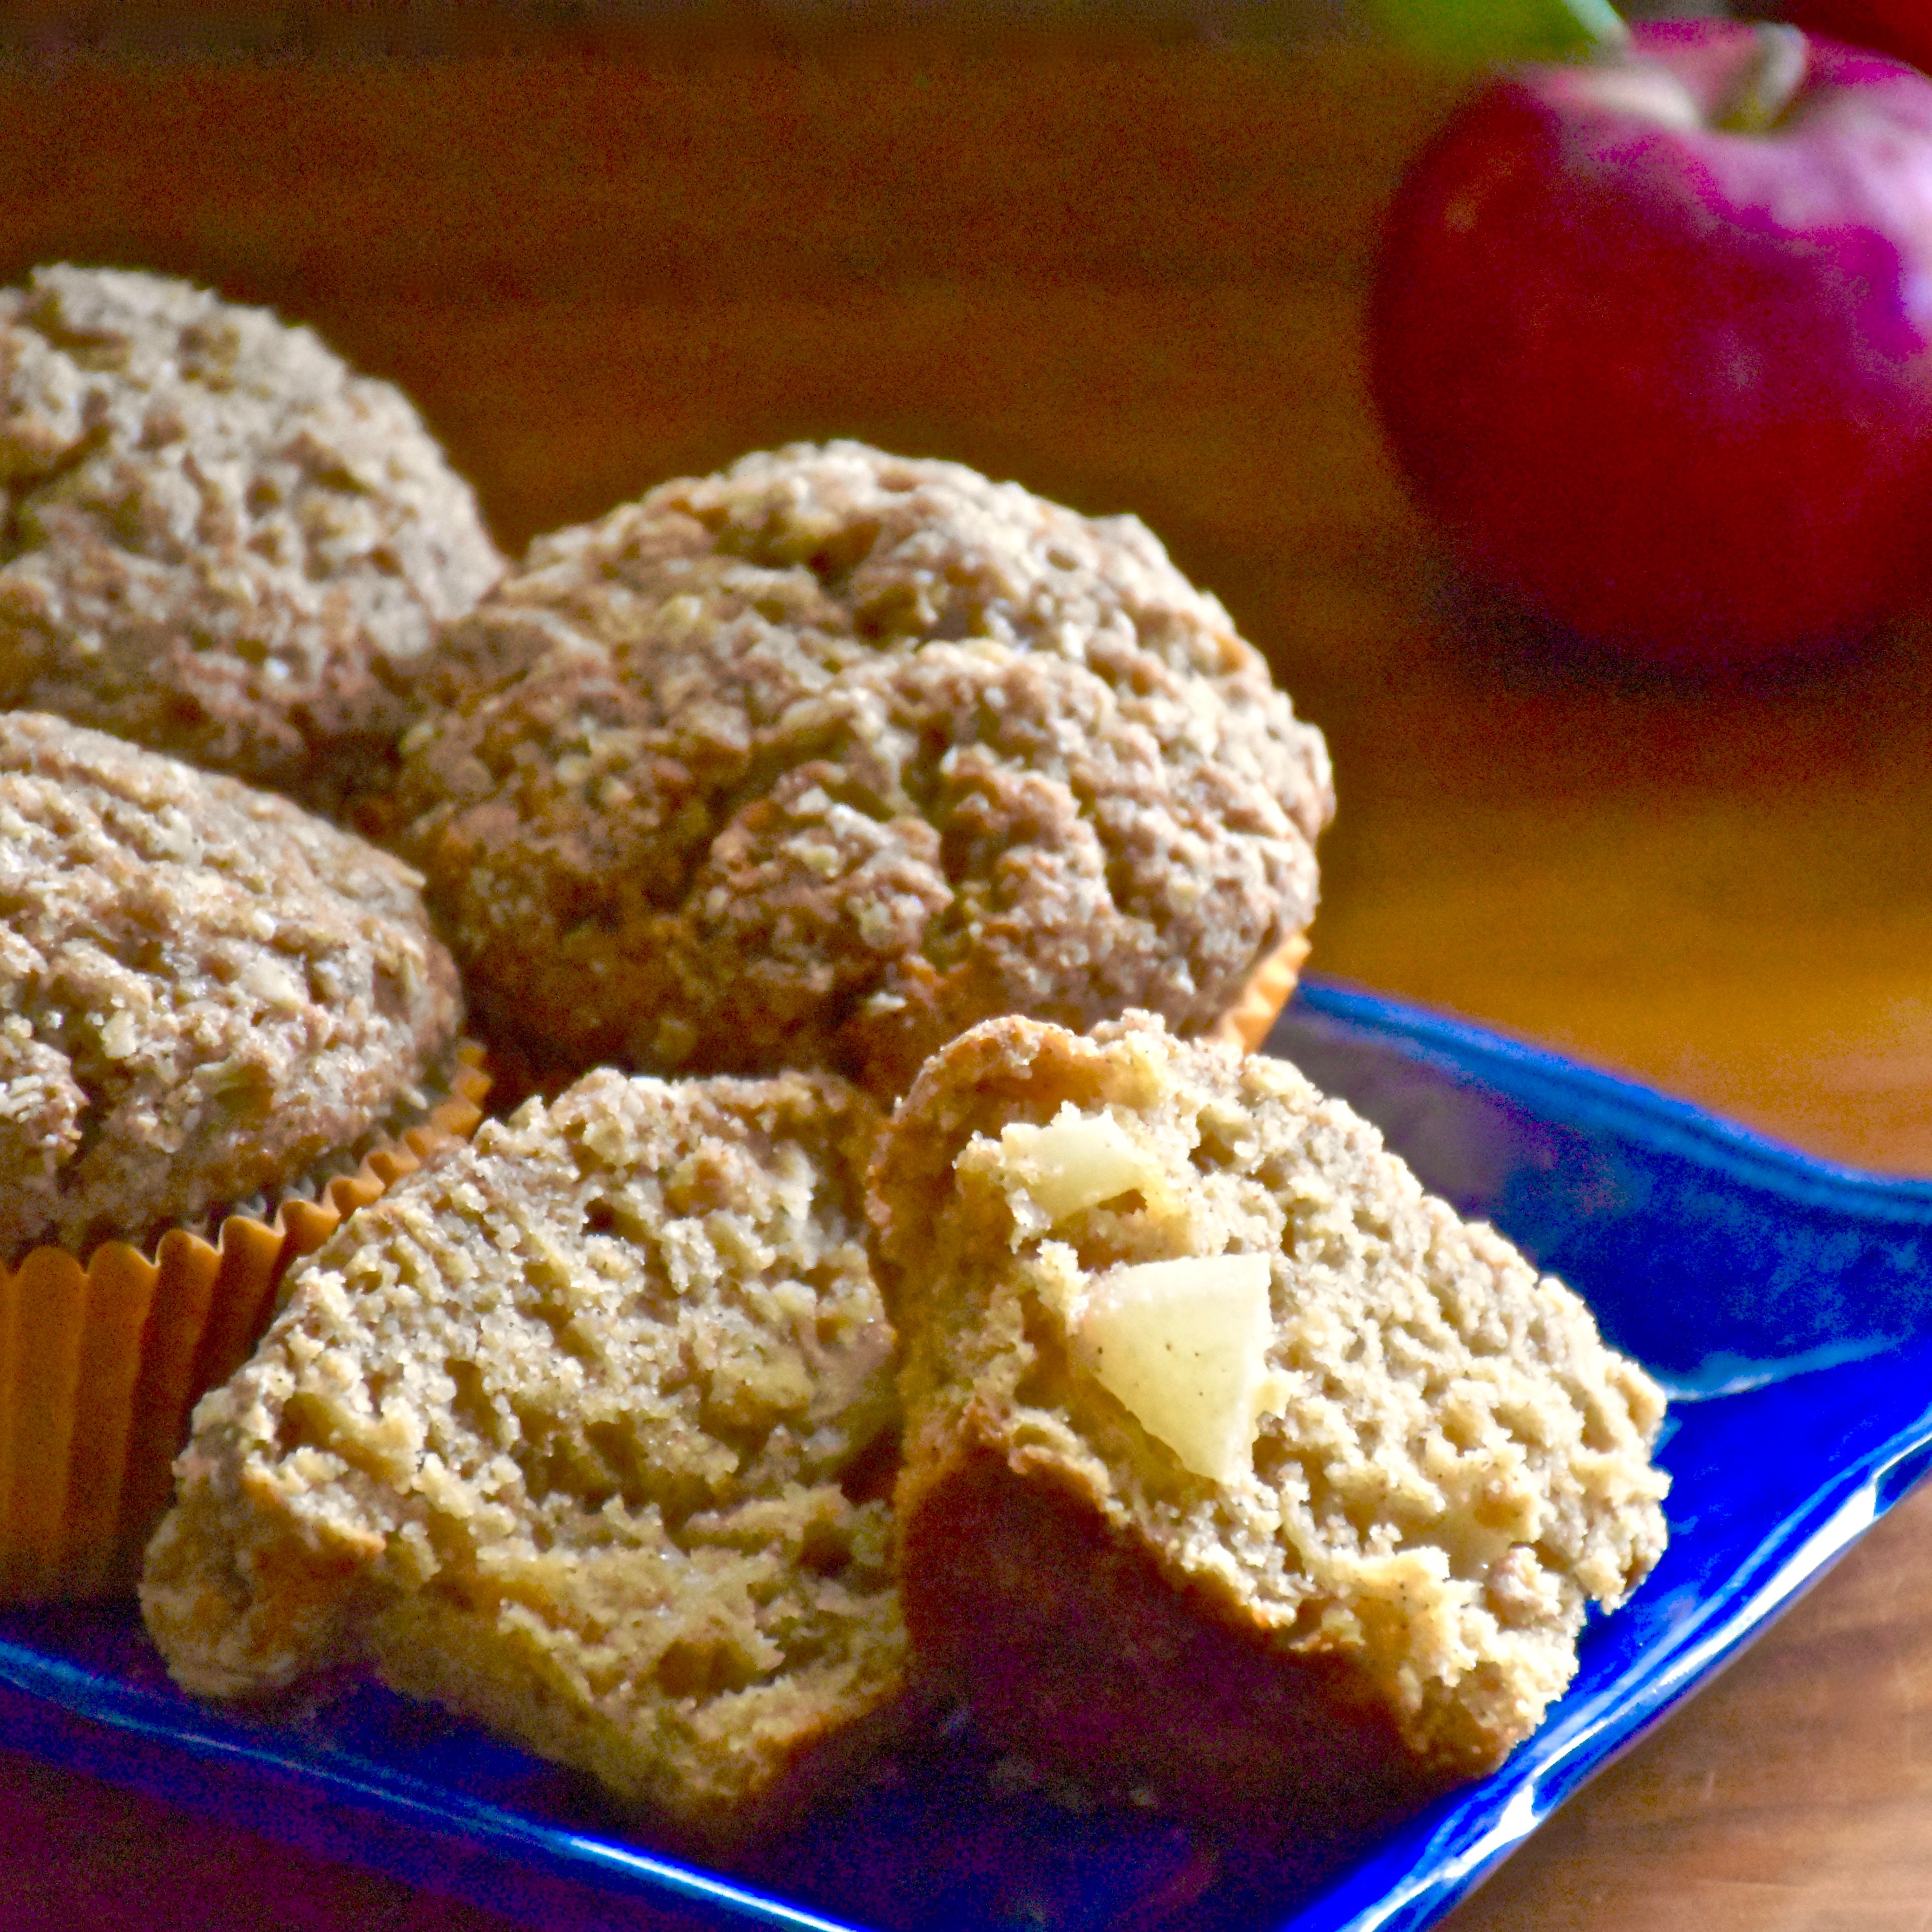
So we currently have a large basket of apples in our kitchen and we are now eating, baking and cooking our way through them. If you too have been apple picking or just want a taste of fall then I have a recipe to share with you. I love the taste of gingerbread and apples so this week I have been baking batches of apple ginger muffins to create just the right recipe. These apple streusel muffins are filled with sweet cinnamon apples and topped with a crispy oat and brown sugar streusel. They are absolutely delicious!
Apple Streusel Muffins -Makes 12 muffins
1 1/2 cup apples (about 3 small apples), peeled cored and grated
1 small apple or 1 rounded 1/2 cup of apples peeled and diced
2 cups flour
1 cup sugar
1 1/2 teaspoon baking powder
1/4 teaspoon salt
1 1/2 teaspoon cinnamon
1/2 teaspoon allspice
1/2 teaspoon ground ginger
1/2 cup of oil
2 tablespoons molases
2 eggs
1/4 cup of sour cream
Preheat your oven to 375 degrees.
First prepare your apples. I used a mix of sweet Gala apples and Jonathan apples which a have a touch tartness to them, but you could use all Gala apples or your favorite. I peeled my apples and then cut them off the core in four segments. Since my apples were smaller it took three apples grated to make 1 1/2 cups. I used my food processor to make the grating quick and easy. Then I peeled and diced my remaining apple into small pieces. Then set your apples aside and work on the muffin batter.
Next in a large bowl of your mixer mix together your dry ingredients including your flour,sugar, baking powder and spices. Then in a small bowl or measuring cup mix together the wet ingredients including the oil, eggs and molasses. Pour the oil mixture into your dry ingredients and mix on medium low speed until the batter just comes together. Then mix in your grated apples and sour cream until they are well mixed. Finally, carefully fold in your diced apples with a rubber spatula or spoon.
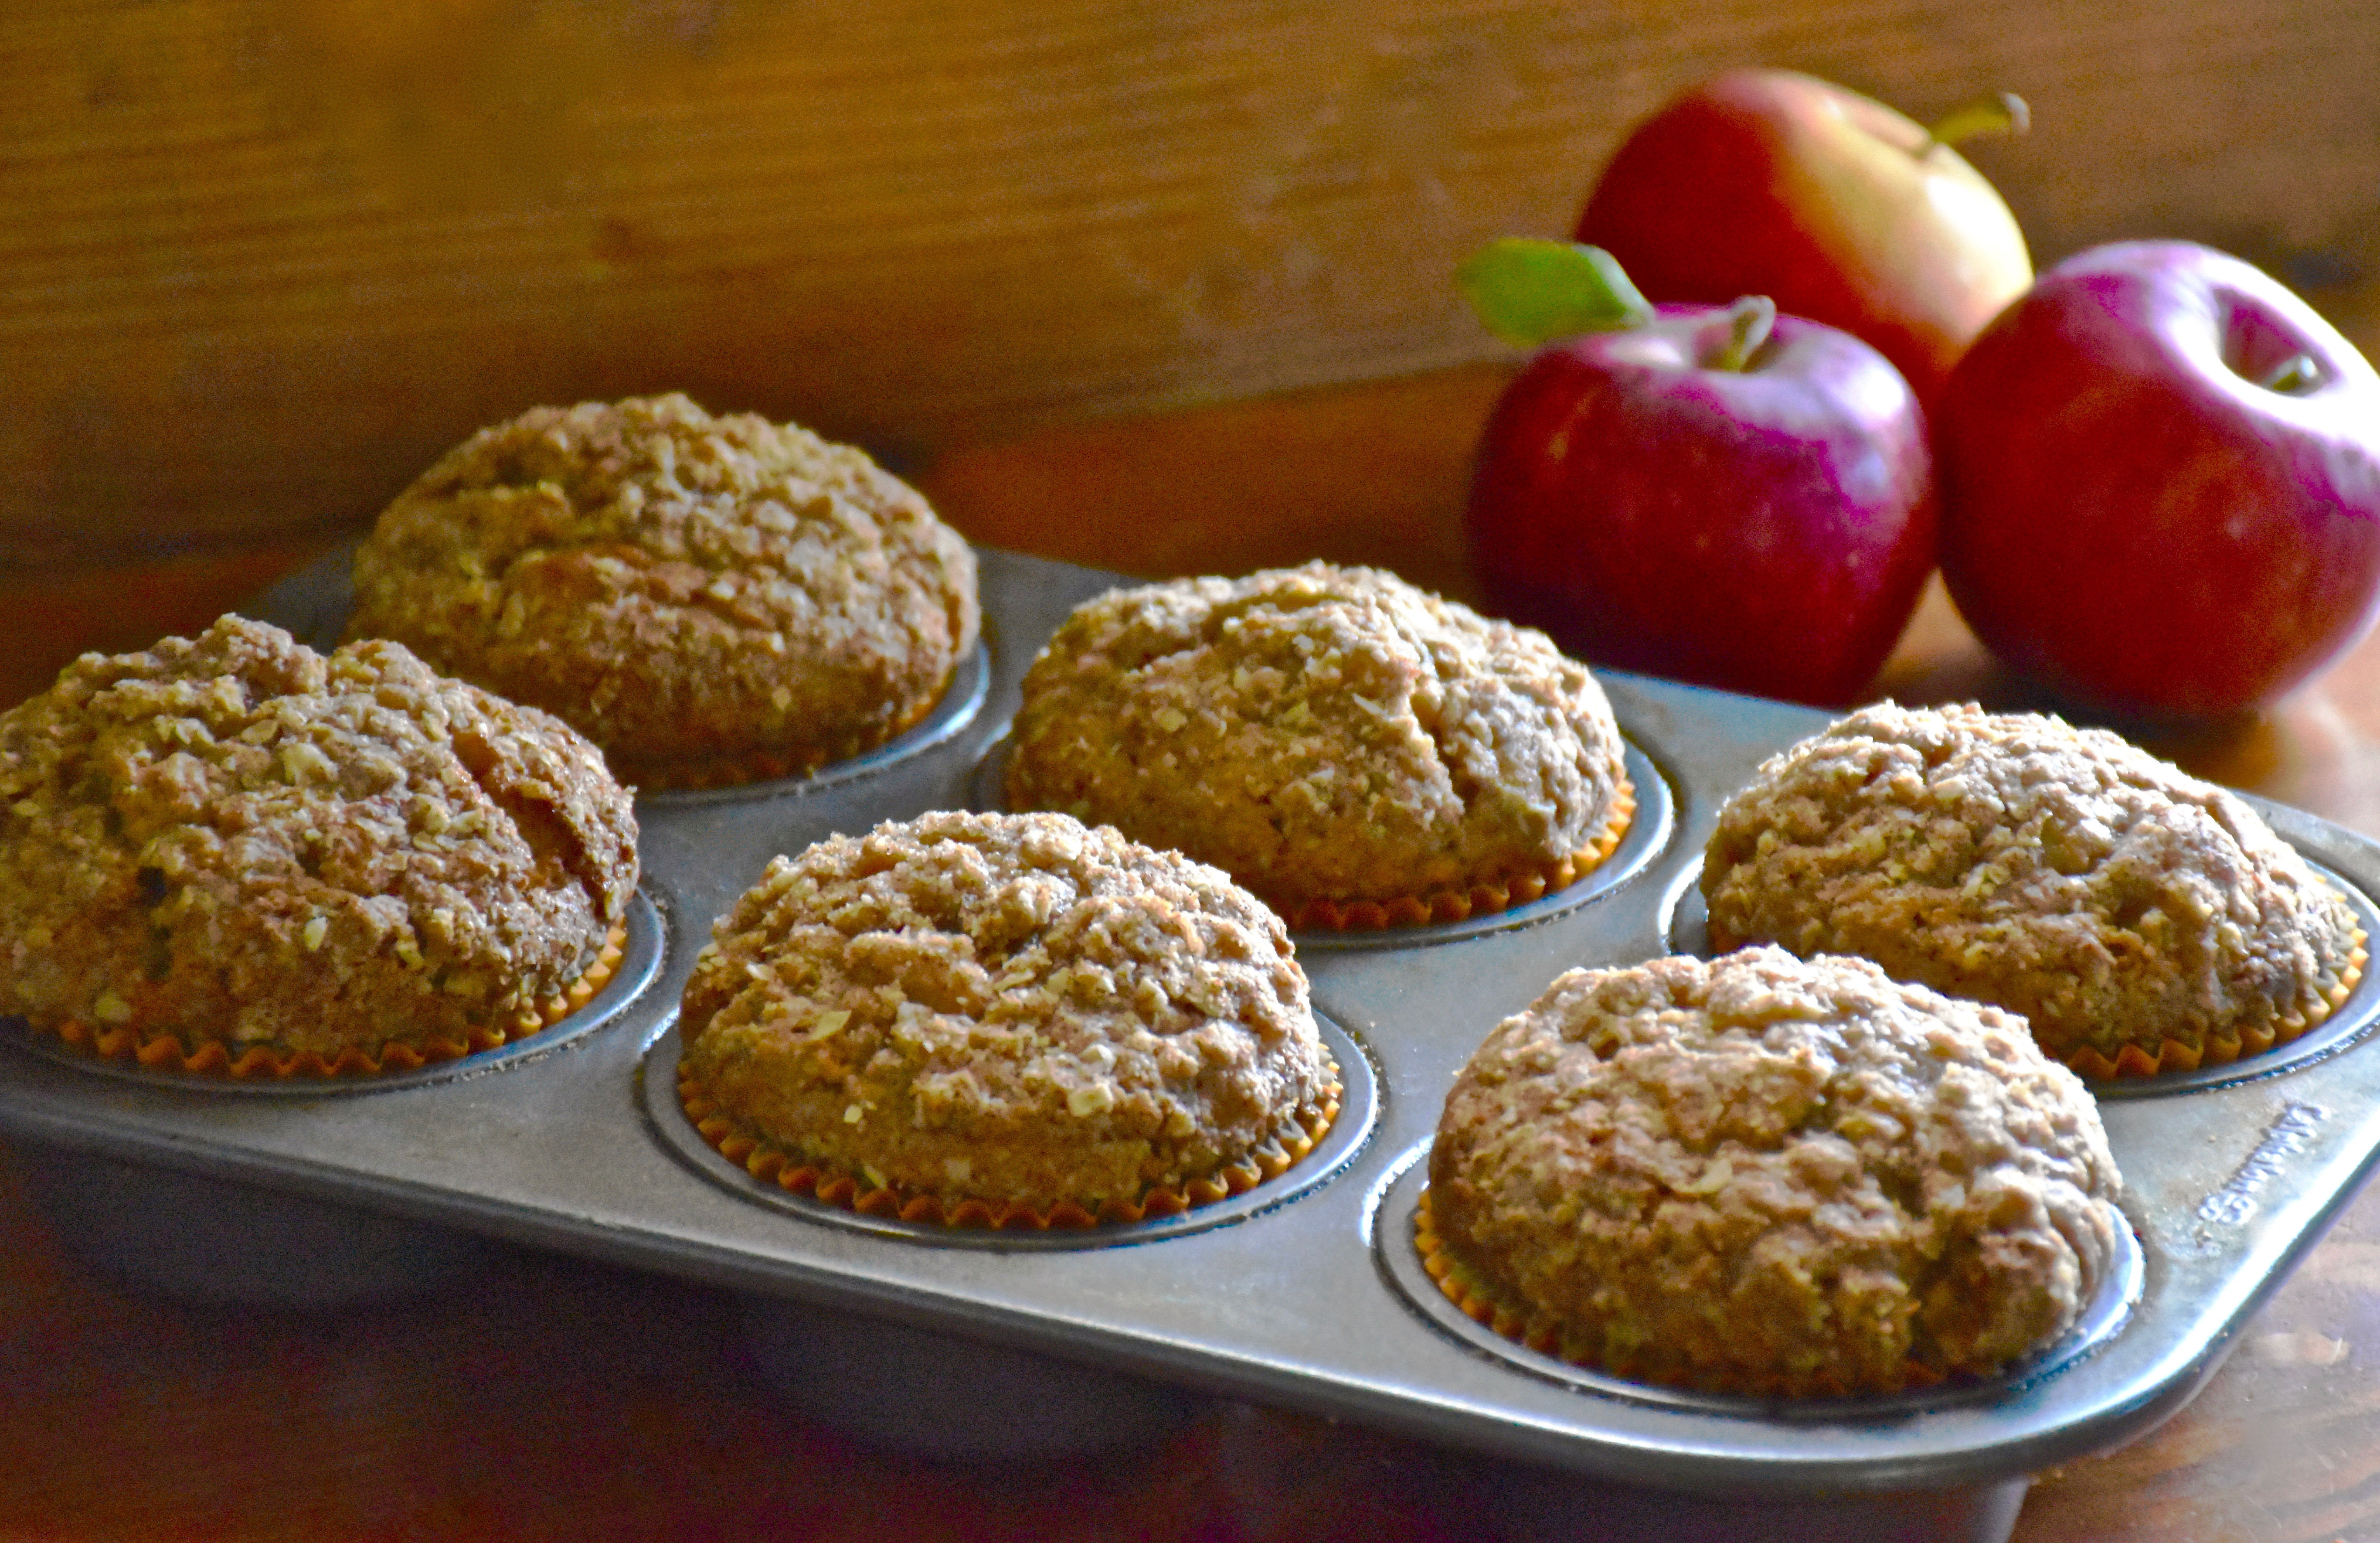
Then prepare your standard muffin tins with baking papers or cups. Once you have those ready, carefully spoon about 3 tablespoons of batter into each muffin cup. I use a large ice cream or cookie scoop to make quick and even scoops. Finally, make your oat and brown sugar streusel topping (see recipe below) and sprinkle a tablespoon on each muffin top before you bake them.
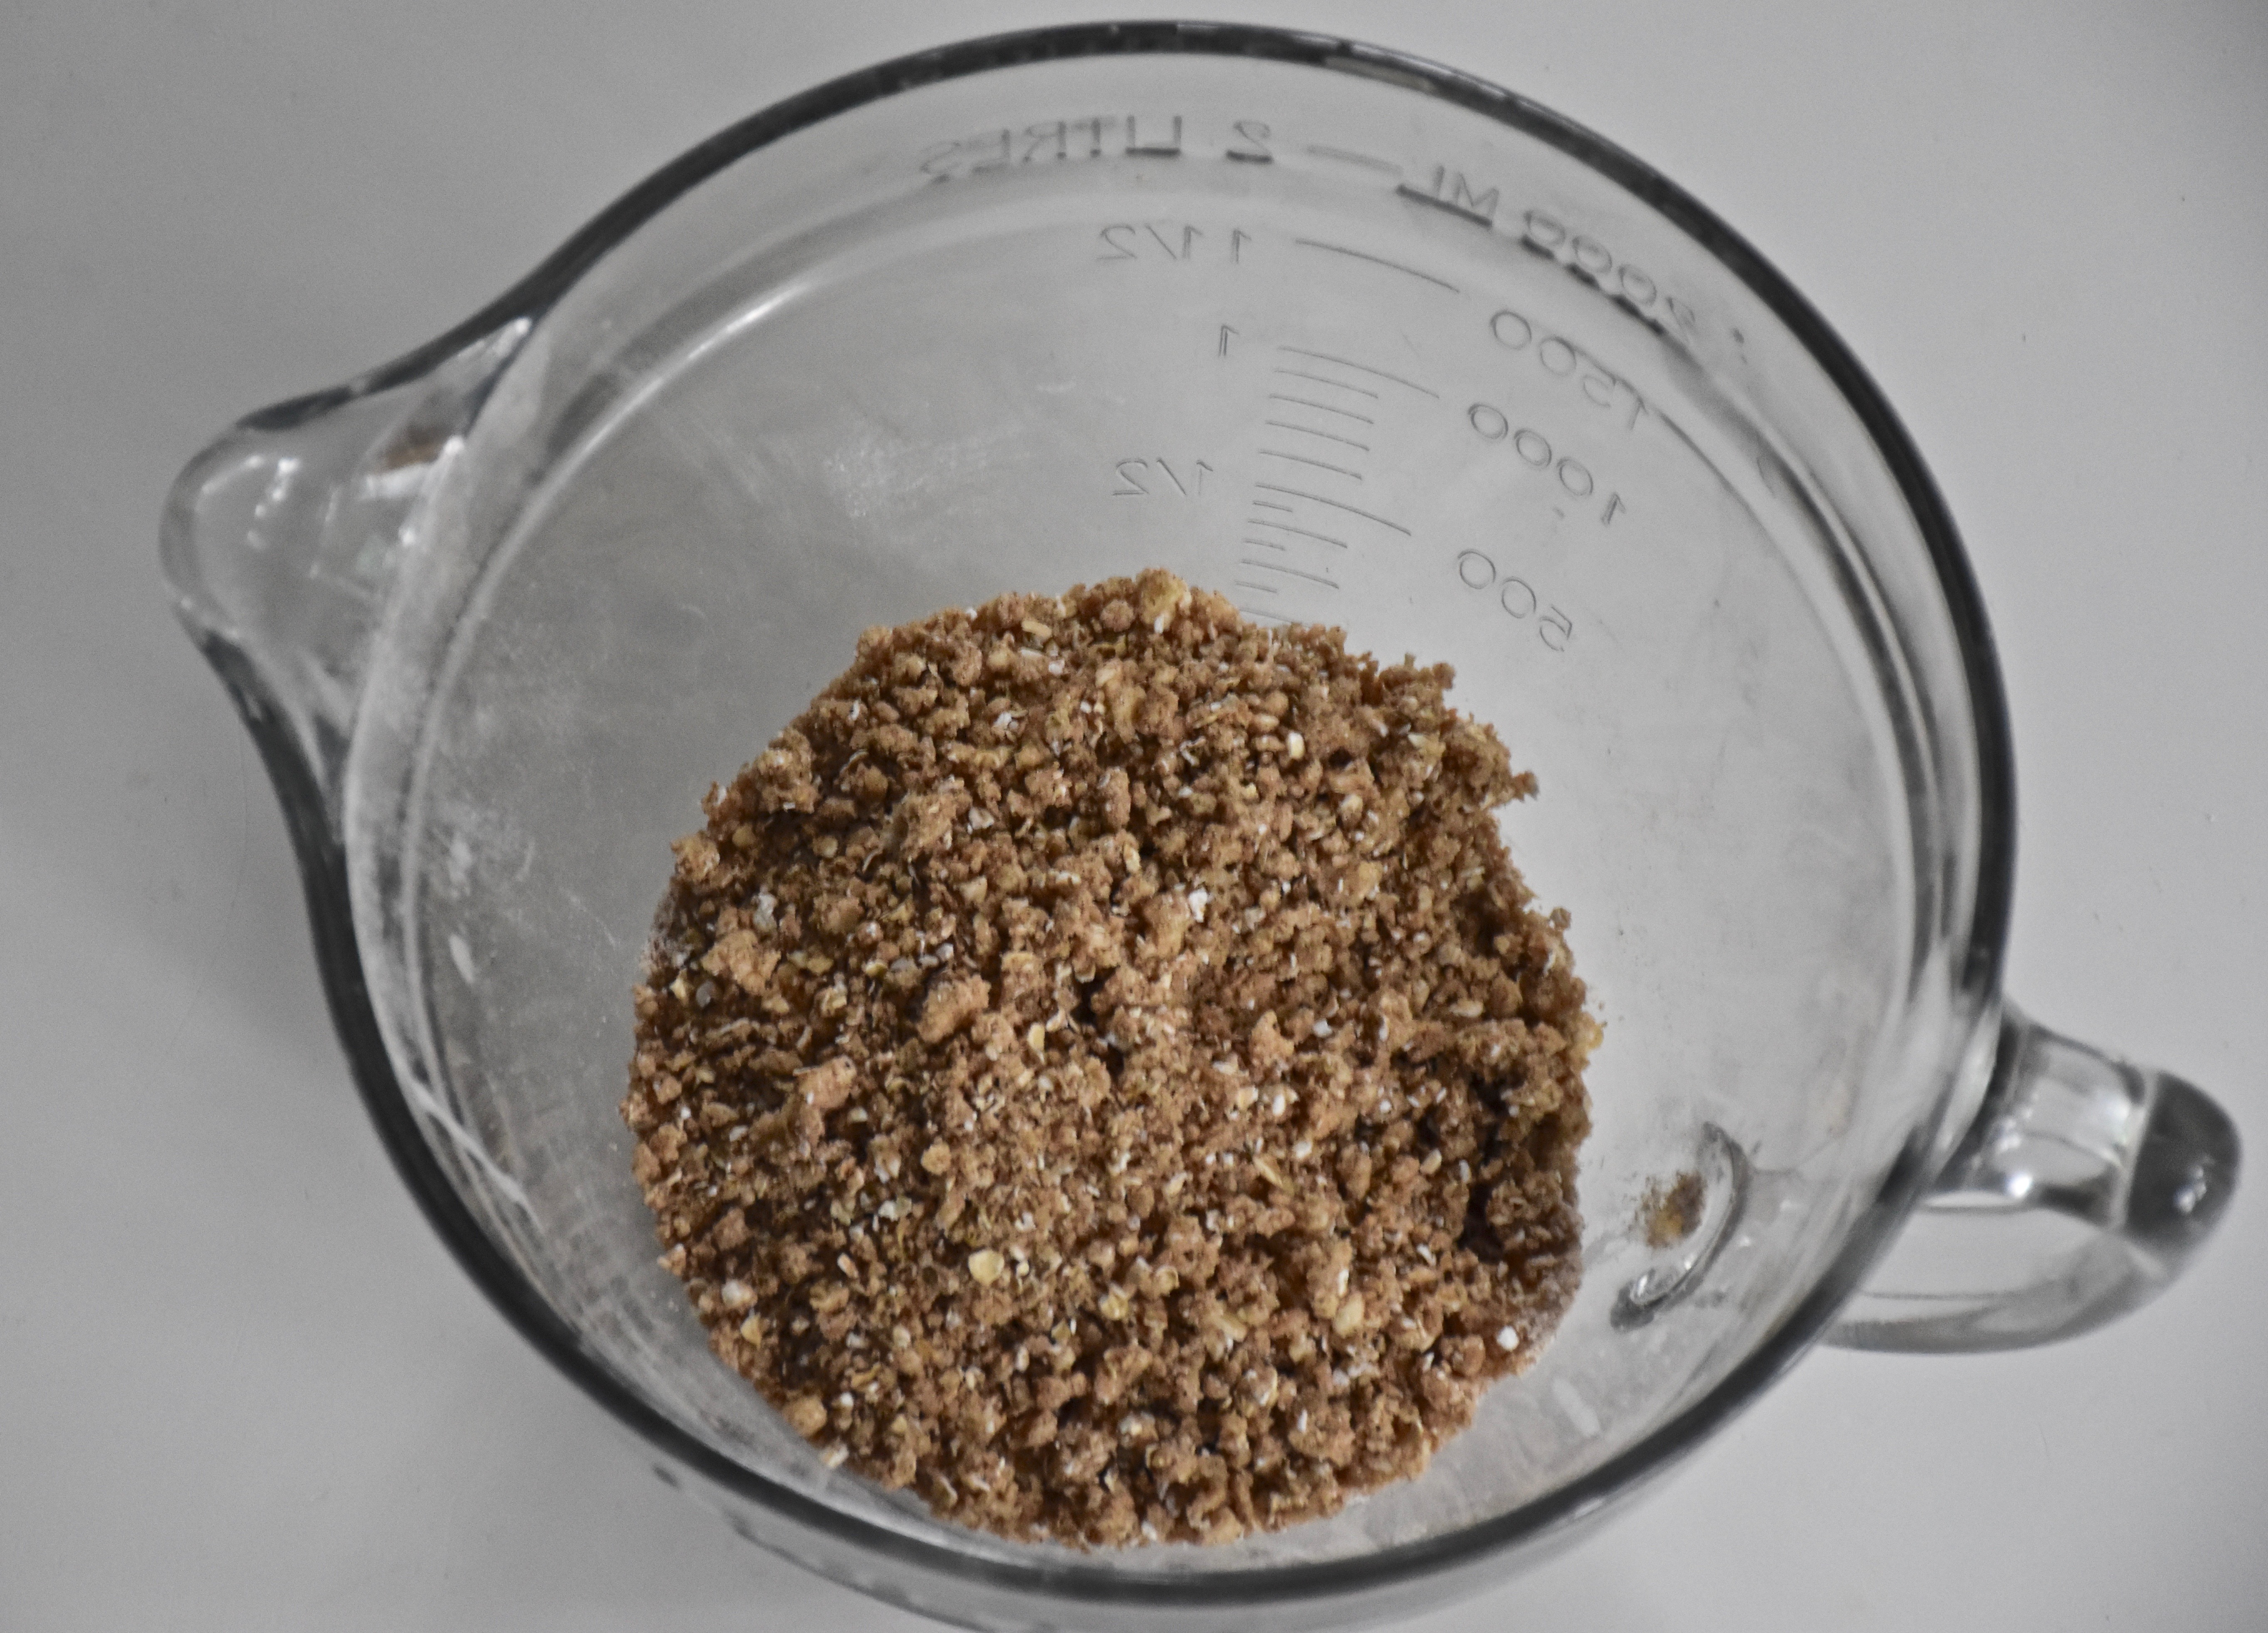
Oat and Brown Sugar Streusel
1/4 cup quick oatmeal oats
1/4 cup light brown sugar
1/4 cup flour
1 teaspoon cinnamon
4 tablespoons of cold butter, cut into small pieces
In a medium sized bowl blend together your oats, brown sugar, flour and cinnamon. Then with your fingers, a pastry blender or a food processor cut or lightly knead in your cold butter. You want to get a fine but crumbly mixture.
Then sprinkle about a tablespoon of your streusel topping on each muffin before you bake them. I had just a little of the mixture left over.
Bake your muffins at 375 degrees for 20 minutes.
The ginger and spice from the muffins will fill your kitchen with the most delicious smell. I baked a batch before I picked my daughters up from school and the moment they walked in the back door they want to know what I had in the kitchen. Admittedly, it’s a little work grating and chopping the apples, but it is completely worth it. Because no baking mix could compare with the taste of the freshly grated apples that almost melt in the batter as it bakes and the taste of sweet apple bits in every bite.
I am savoring the sunshine and these beautiful fall days. These apple muffins and a cup of coffee or tea are a wonderful way to start the morning. There is something about the rich spiciness of the molasses and ginger with the sweetness of the apples that make this recipe just a little different that your ordinary muffin. The muffins have disappeared quickly in our house, so I hope you enjoy them as much as we have. Happy baking my friends!
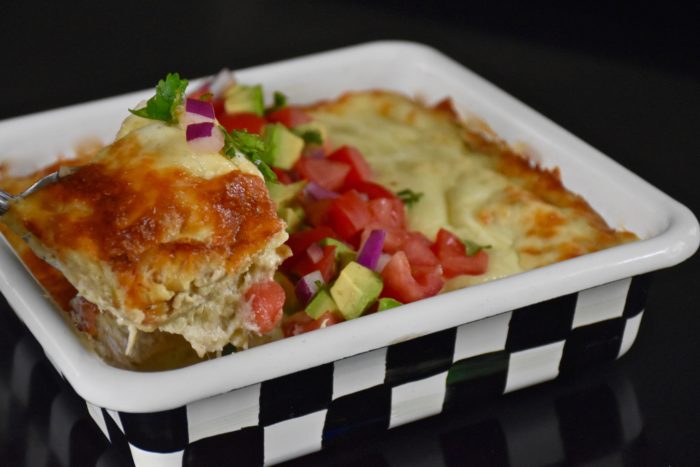
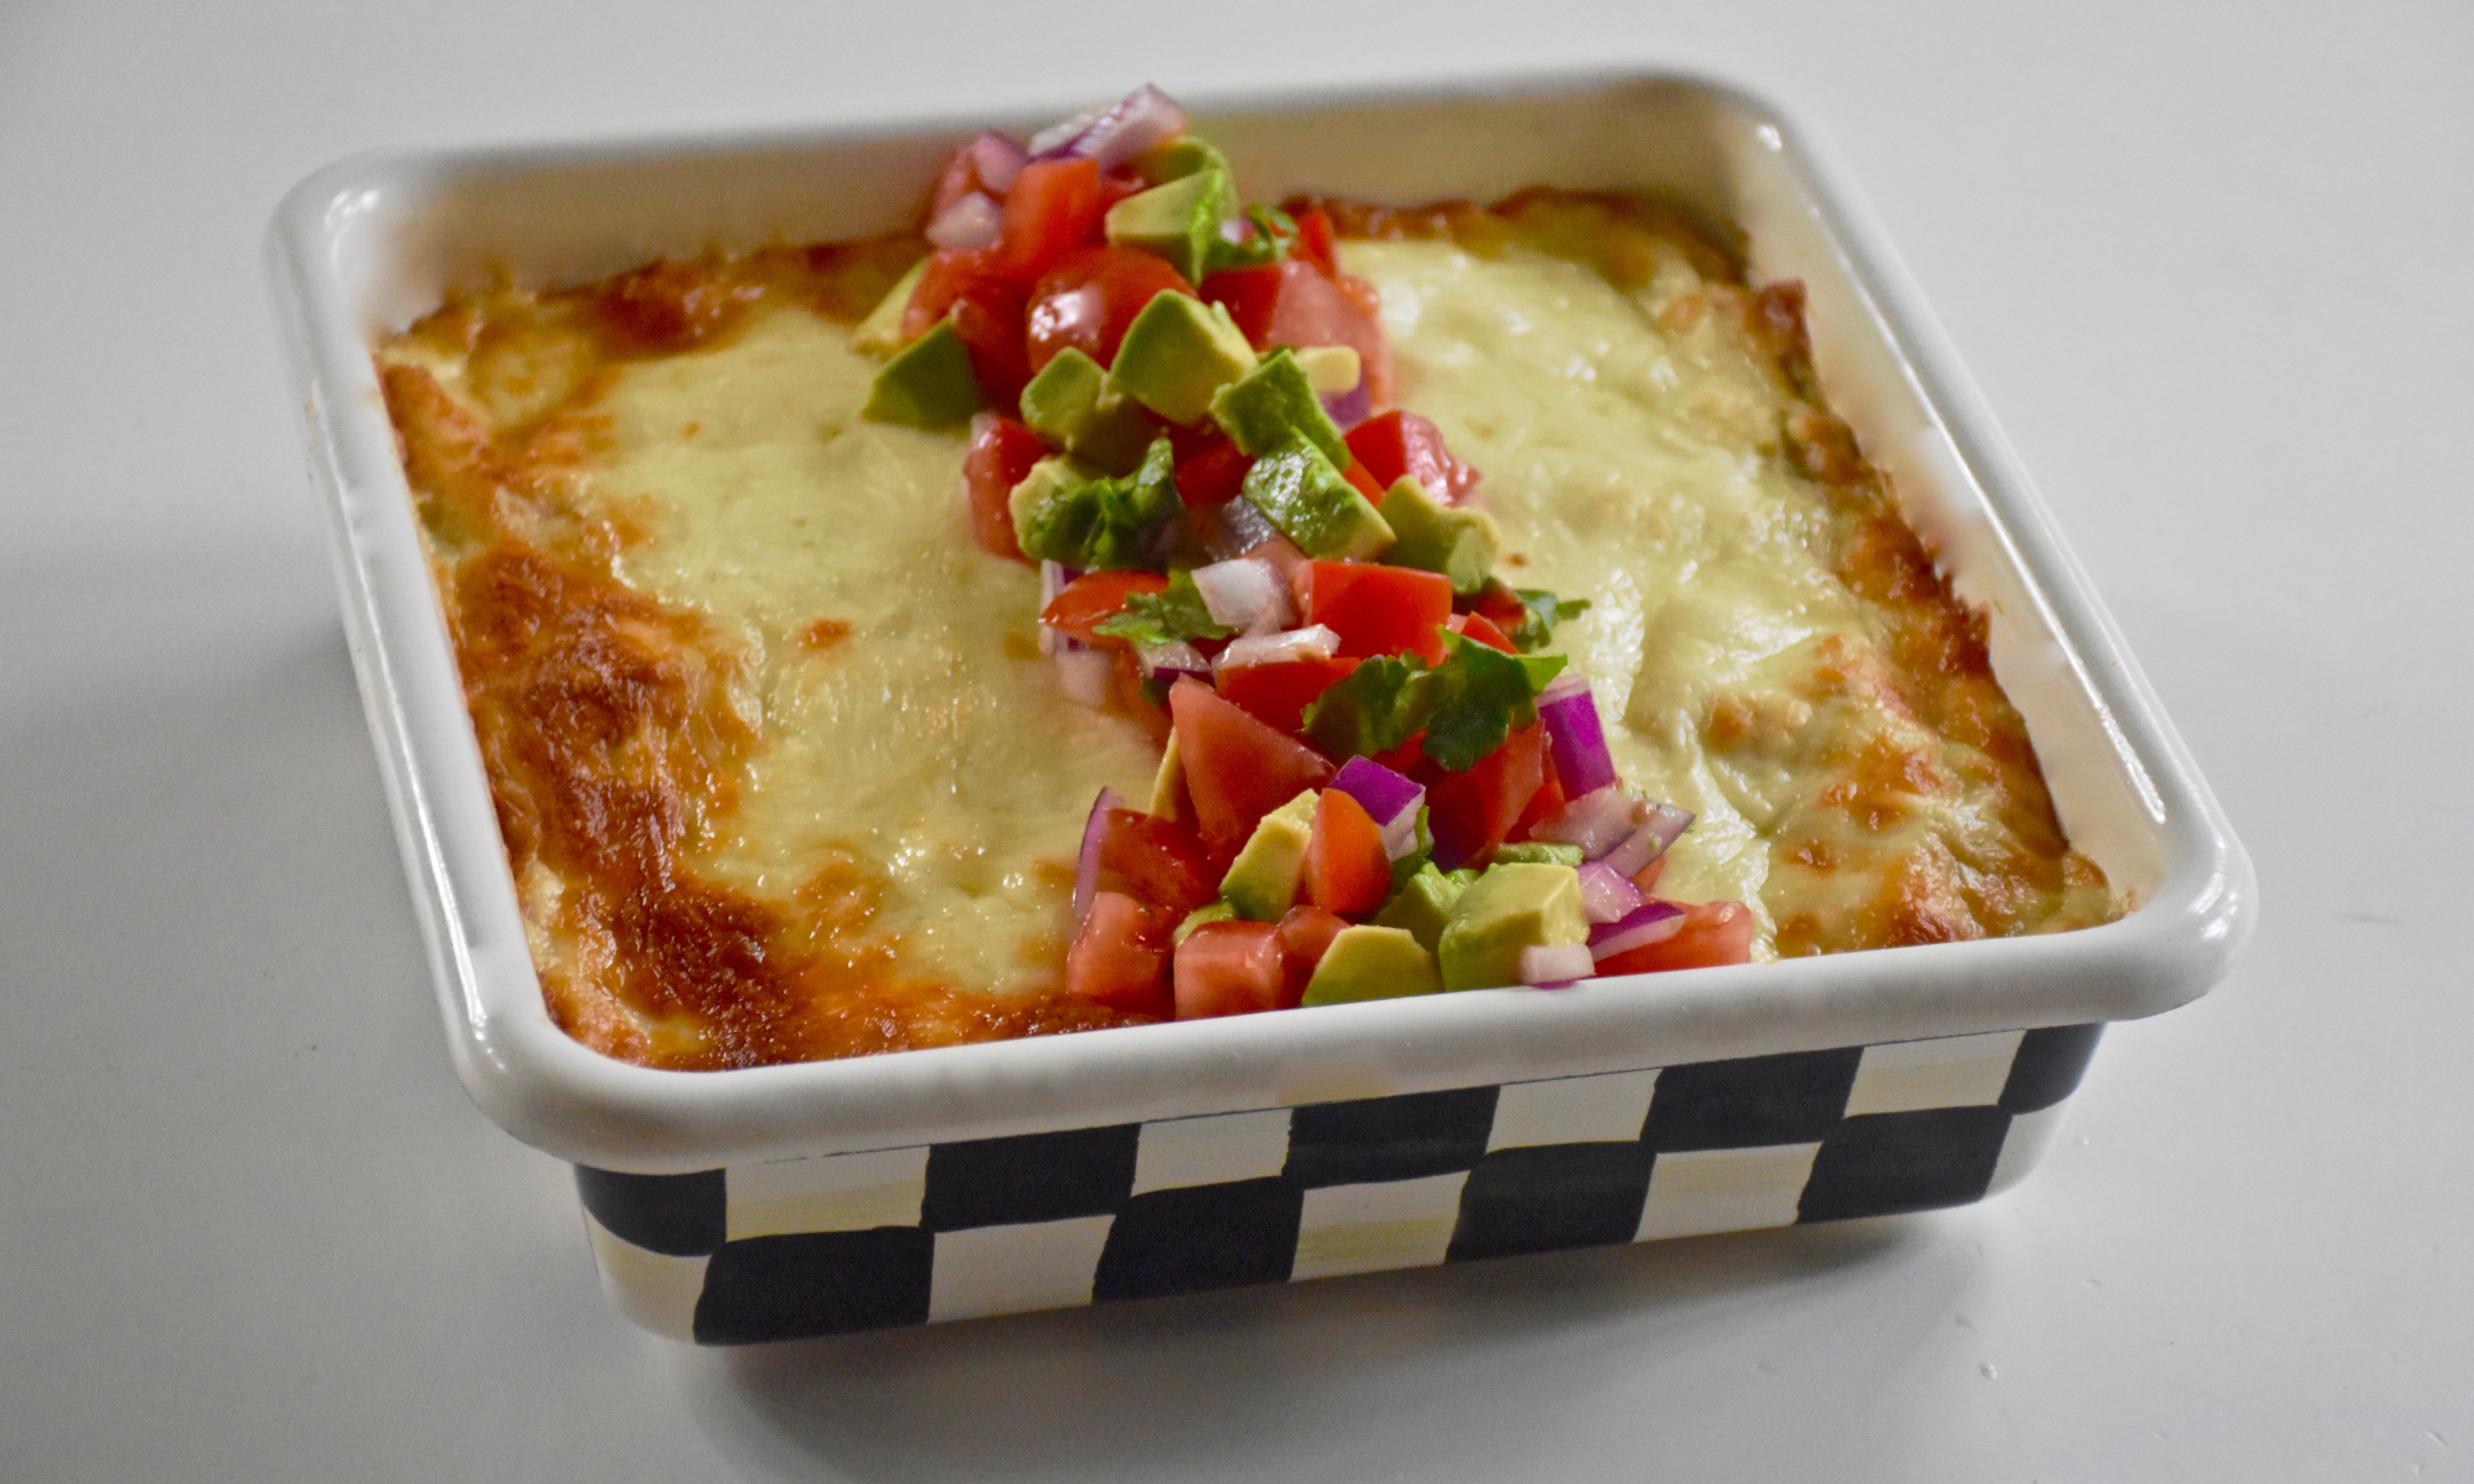
One of the dishes I miss most from home is green chili and sour cream enchiladas. Although we have certainly found some good Mexican food in Chicago I have yet to find a restaurant that serves this classic Texas dish. So what’s a girl to do? When I have the time I like to make enchiladas from scratch, but sometimes I want something a bit quicker for a weeknight meal. So this casserole is one of my favorite comfort foods made easy enough to enjoy any night.
Green Chili and Chicken Enchilada Casserole – Serves 6
1/2 cup of yellow onion, chopped
1 tablespoon butter
1 1/2 cups of sour cream
1 can (10.5 oz) cream of chicken soup
1/2 cup tomatillo salsa
1 teaspoon cumin
1/2 teaspoon kosher salt
2 cups of shredded rotisserie chicken
3 cups shredded Monterey jack cheese, divided
10 corn tortillas (fajita sized)
Preheat your oven to 350 degrees.
Next chop your onion and cook it in a small skillet with a tablespoon of butter. Cook your onions until they turn translucent and soft.
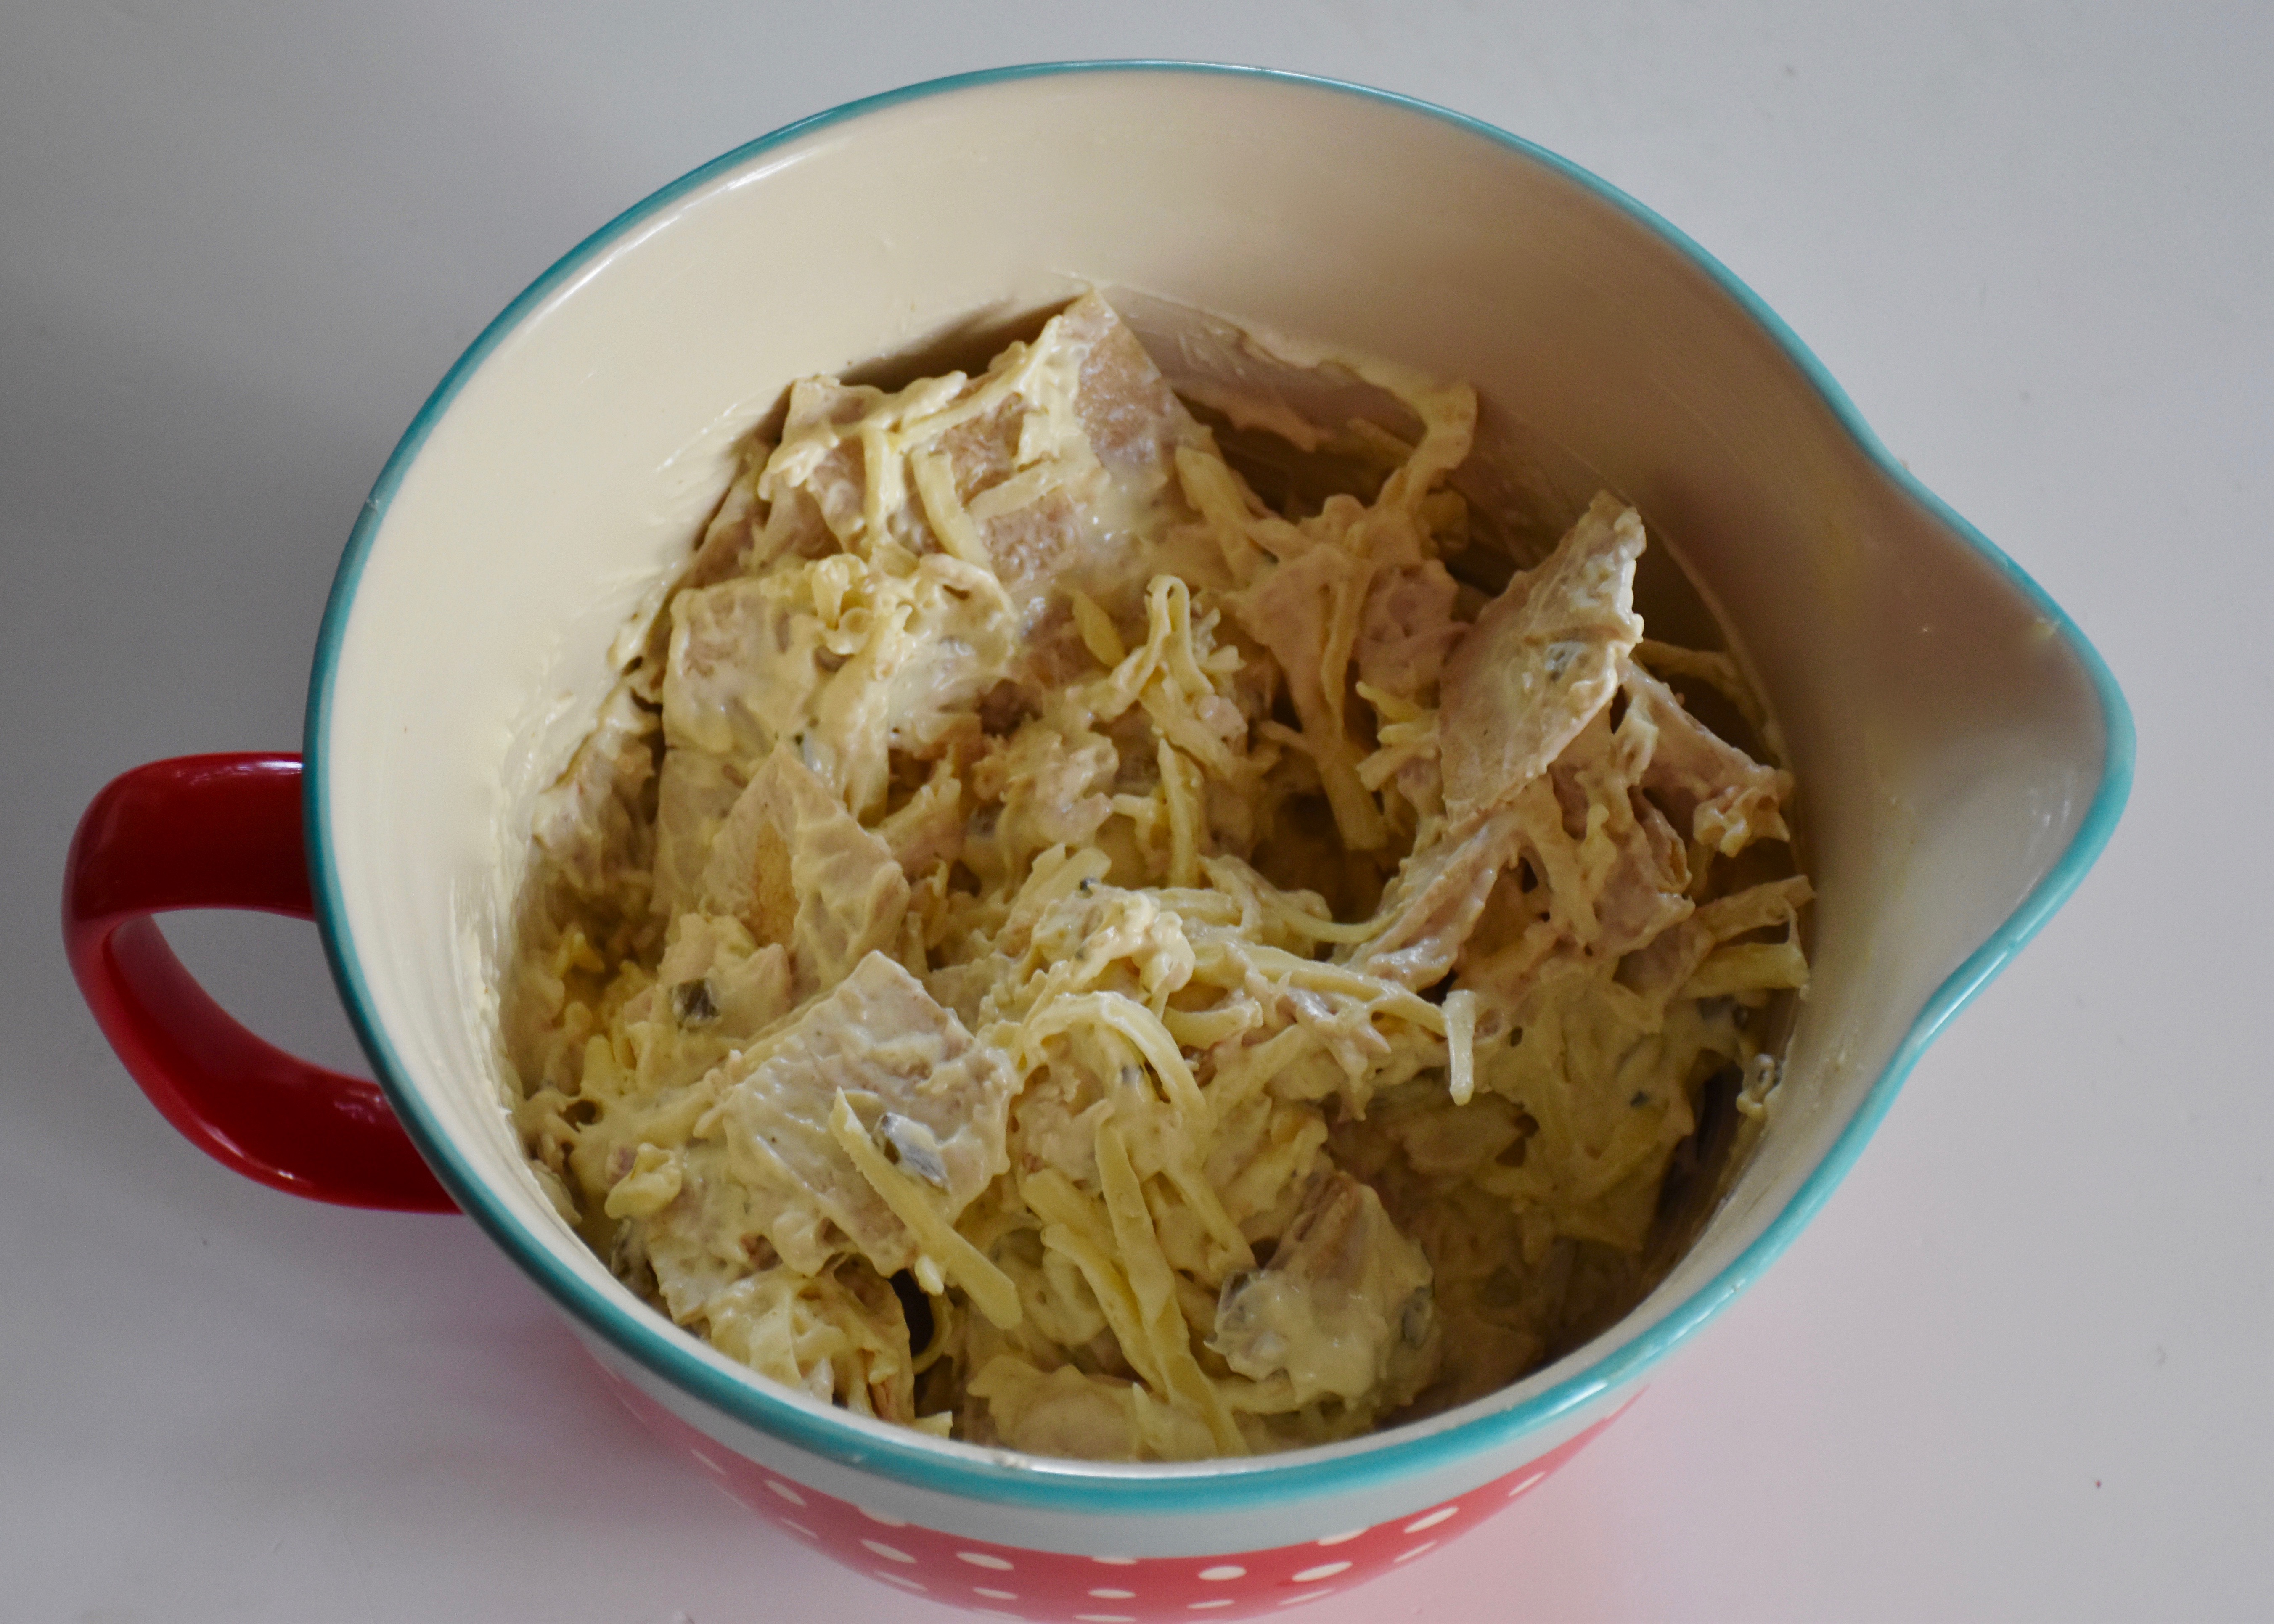
Next in a large mixing bowl mix together your cooked onions, sour cream, cream of chicken soup, and green tomatillo salsa. I like the La Victoria brand which has a good flavor, but is not quite as spicy as some of the other commercial tomatillos salsas. You can use your favorite. I try to keep the chili heat index under control for my family and little ones.
Next add in your cumin, salt, shredded chicken and a cup of your Monterey jack cheese.
Finally cut your tortillas into small bite sized pieces. I like to cut mine into quarters lengthwise and then cut them so I have about 12 bites sized pieces from each tortilla.
Add your tortillas into your sour cream and salsa mixture making sure they get coated and mixed in well.
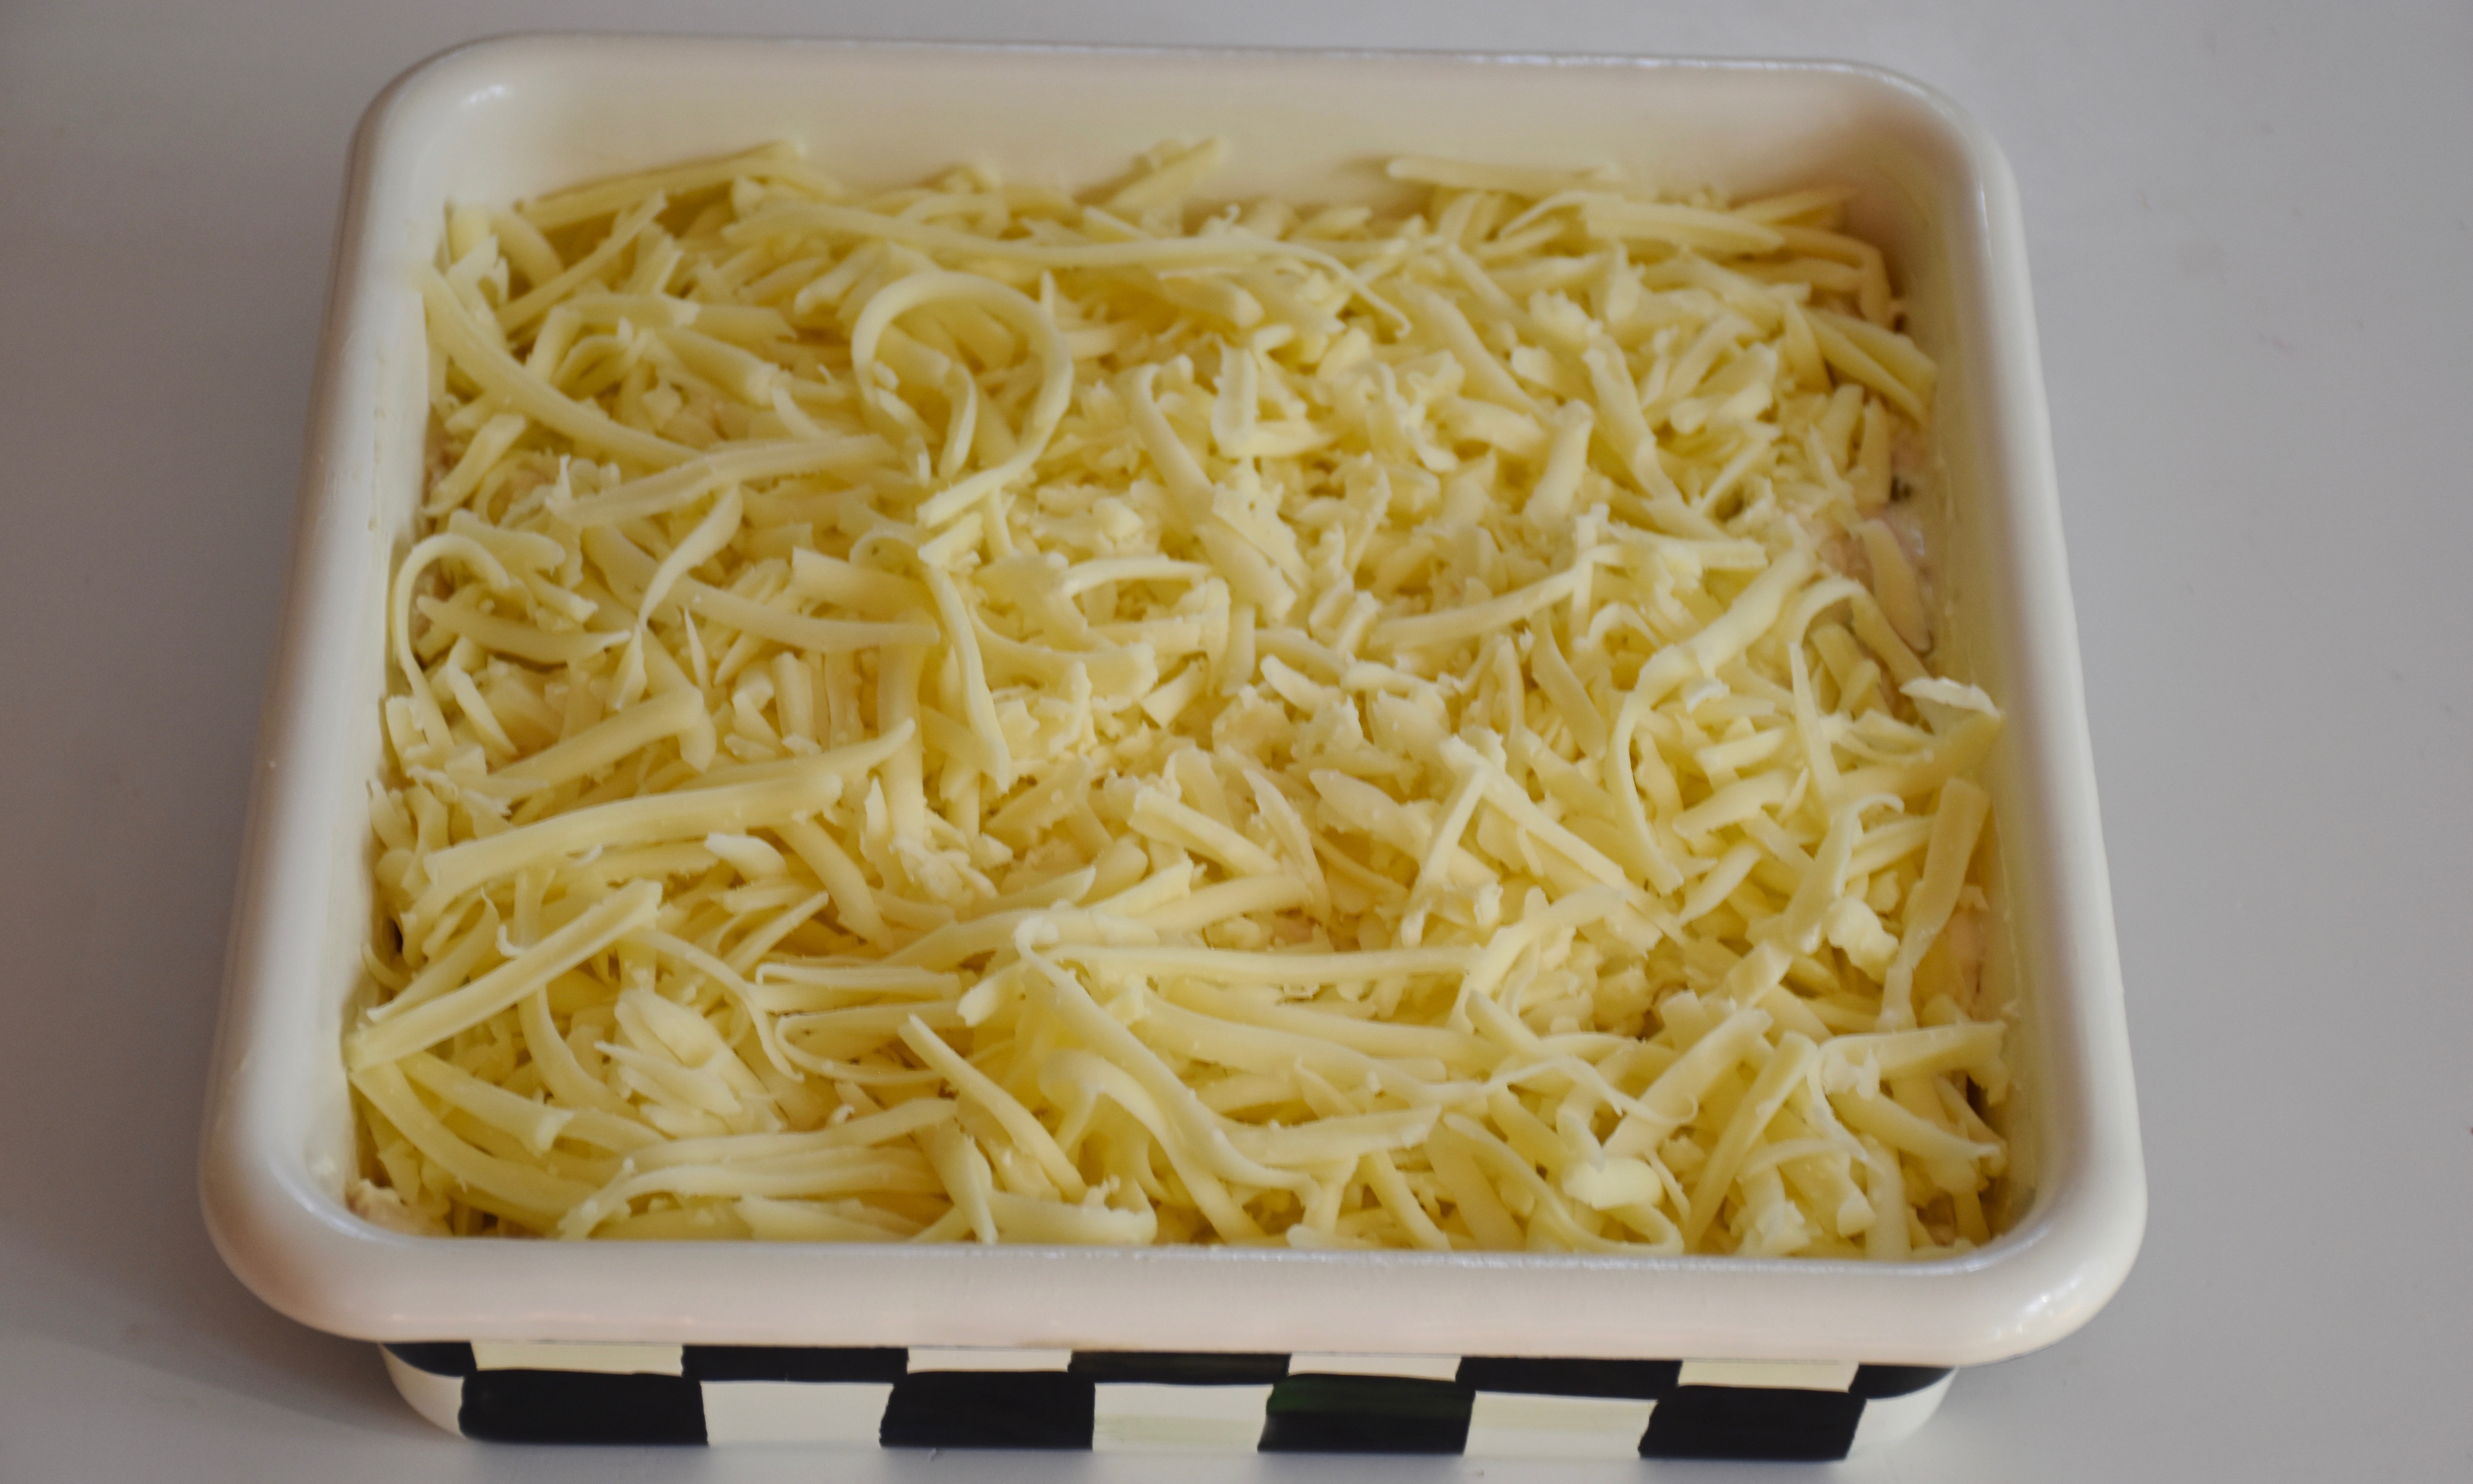
Then spread your tortilla mixture evenly into the bottom of your greased 8×8 inch baking pan. Then evenly sprinkle the remaining two cups of cheese on top and bake for 20 to 25 minutes until the cheese is gold and bubbly.
This is also one of those dishes that you can make ahead and have waiting for you in your fridge. Just add an extra 15 to 20 minutes to the baking time if it has been refrigerated.
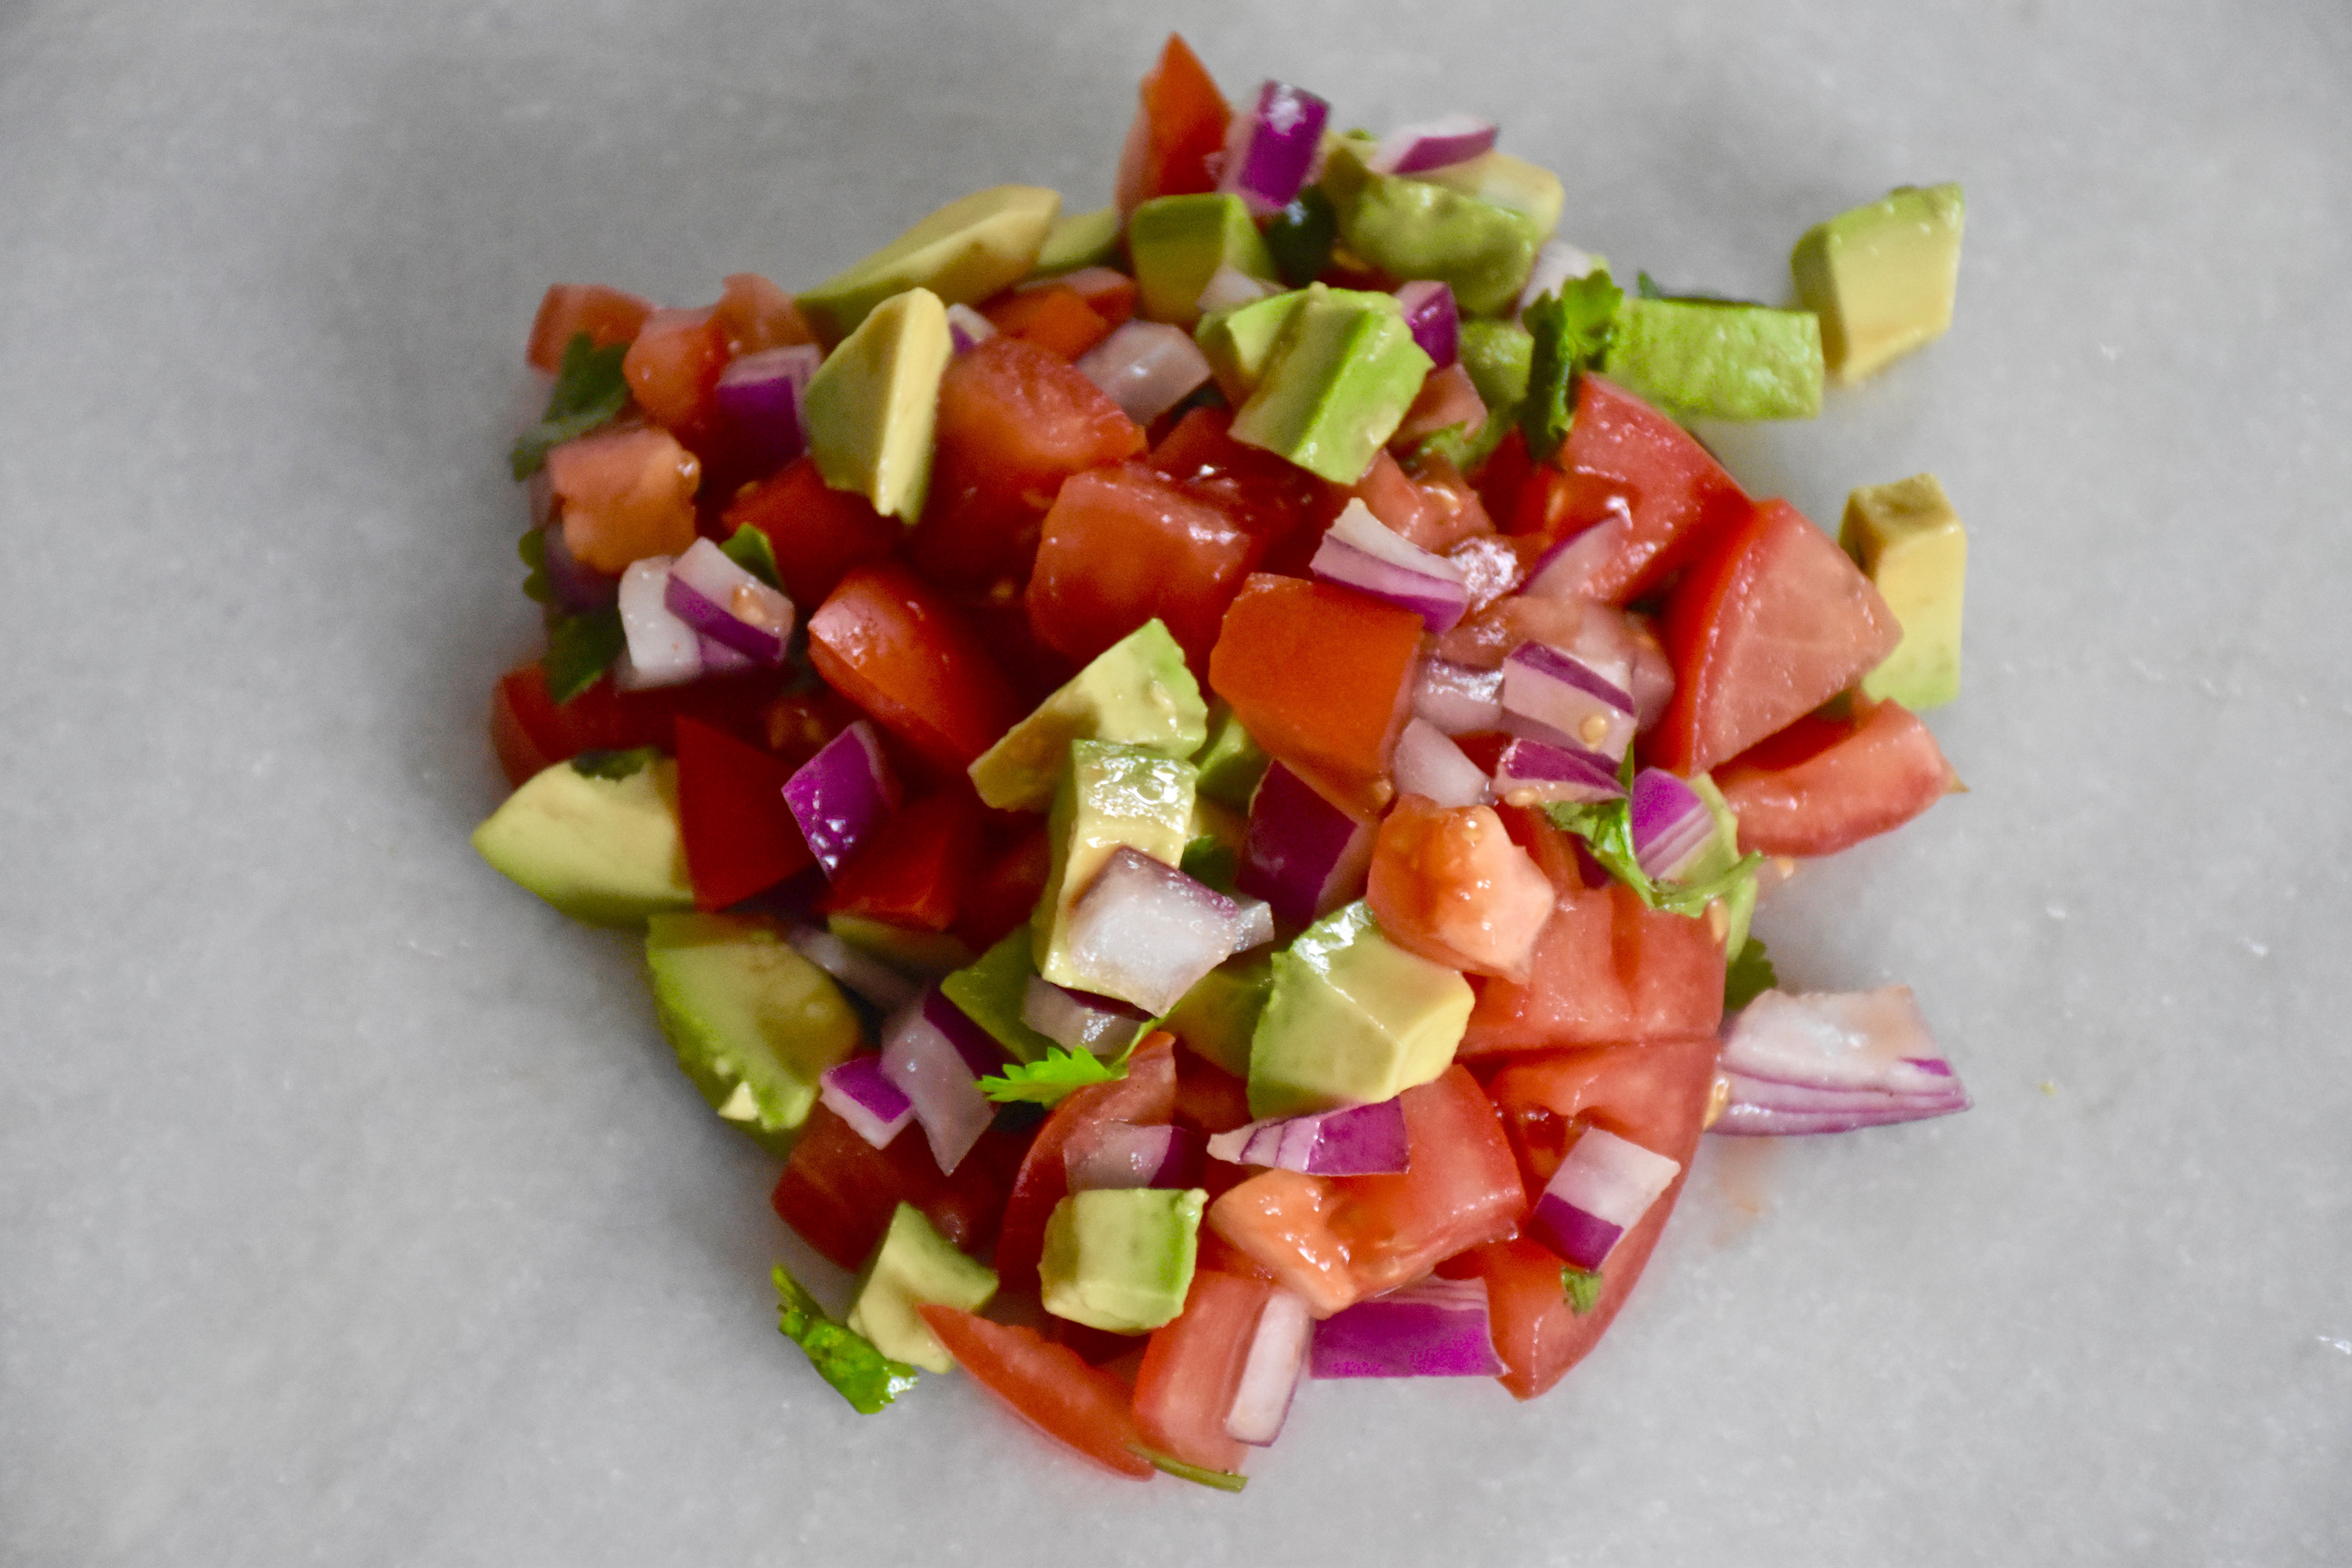
While your enchilada casserole is cooking you can make a little fresh pico de gallo as a topping or to serve on the side.
Avocado Pico de Gallo
1/2 cup of tomatoes chopped
3 tablespoons of red onion finely chopped
1/2 cup of avocado chopped
1 tablespoon of cilantro chopped
1/2 of a lime, juiced
1/2 teaspoon kosher salt
Mix together your pico de gallo and either serve it on top or sometimes I like to serve it on some shredded lettuce as a side.
Food has the unique ability to take you places. It can allow you to travel great distances to try new flavors or go back to a time gone by. However, I have come to appreciate that sometimes the best dishes are the ones that take you home and let you share a small piece of that with others. This isn’t a fancy recipe, but oh the cheesy green chili goodness! I hope you enjoy this taste of Texas as much we do.
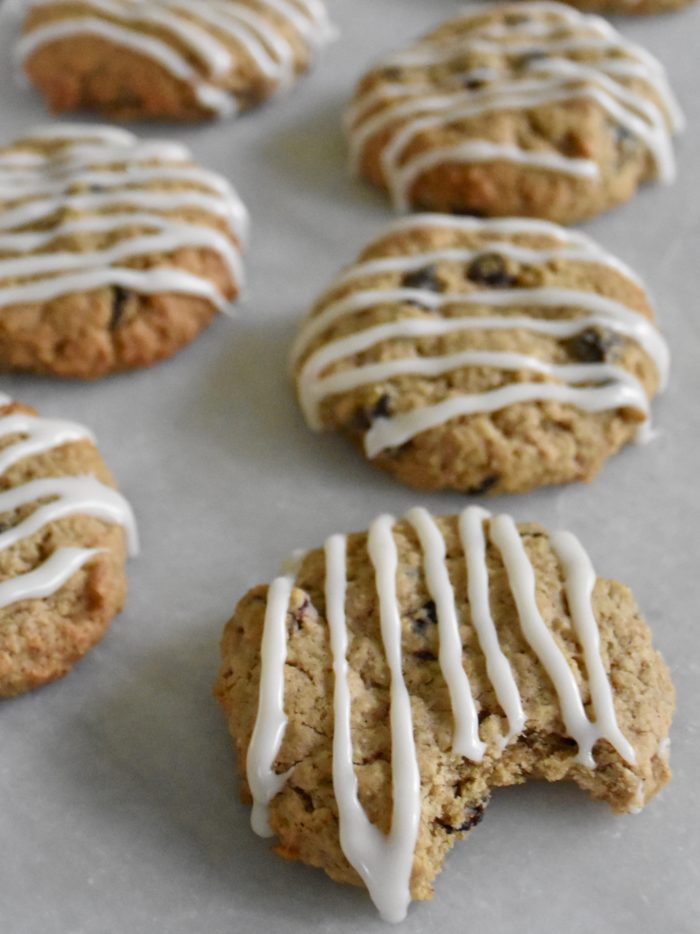
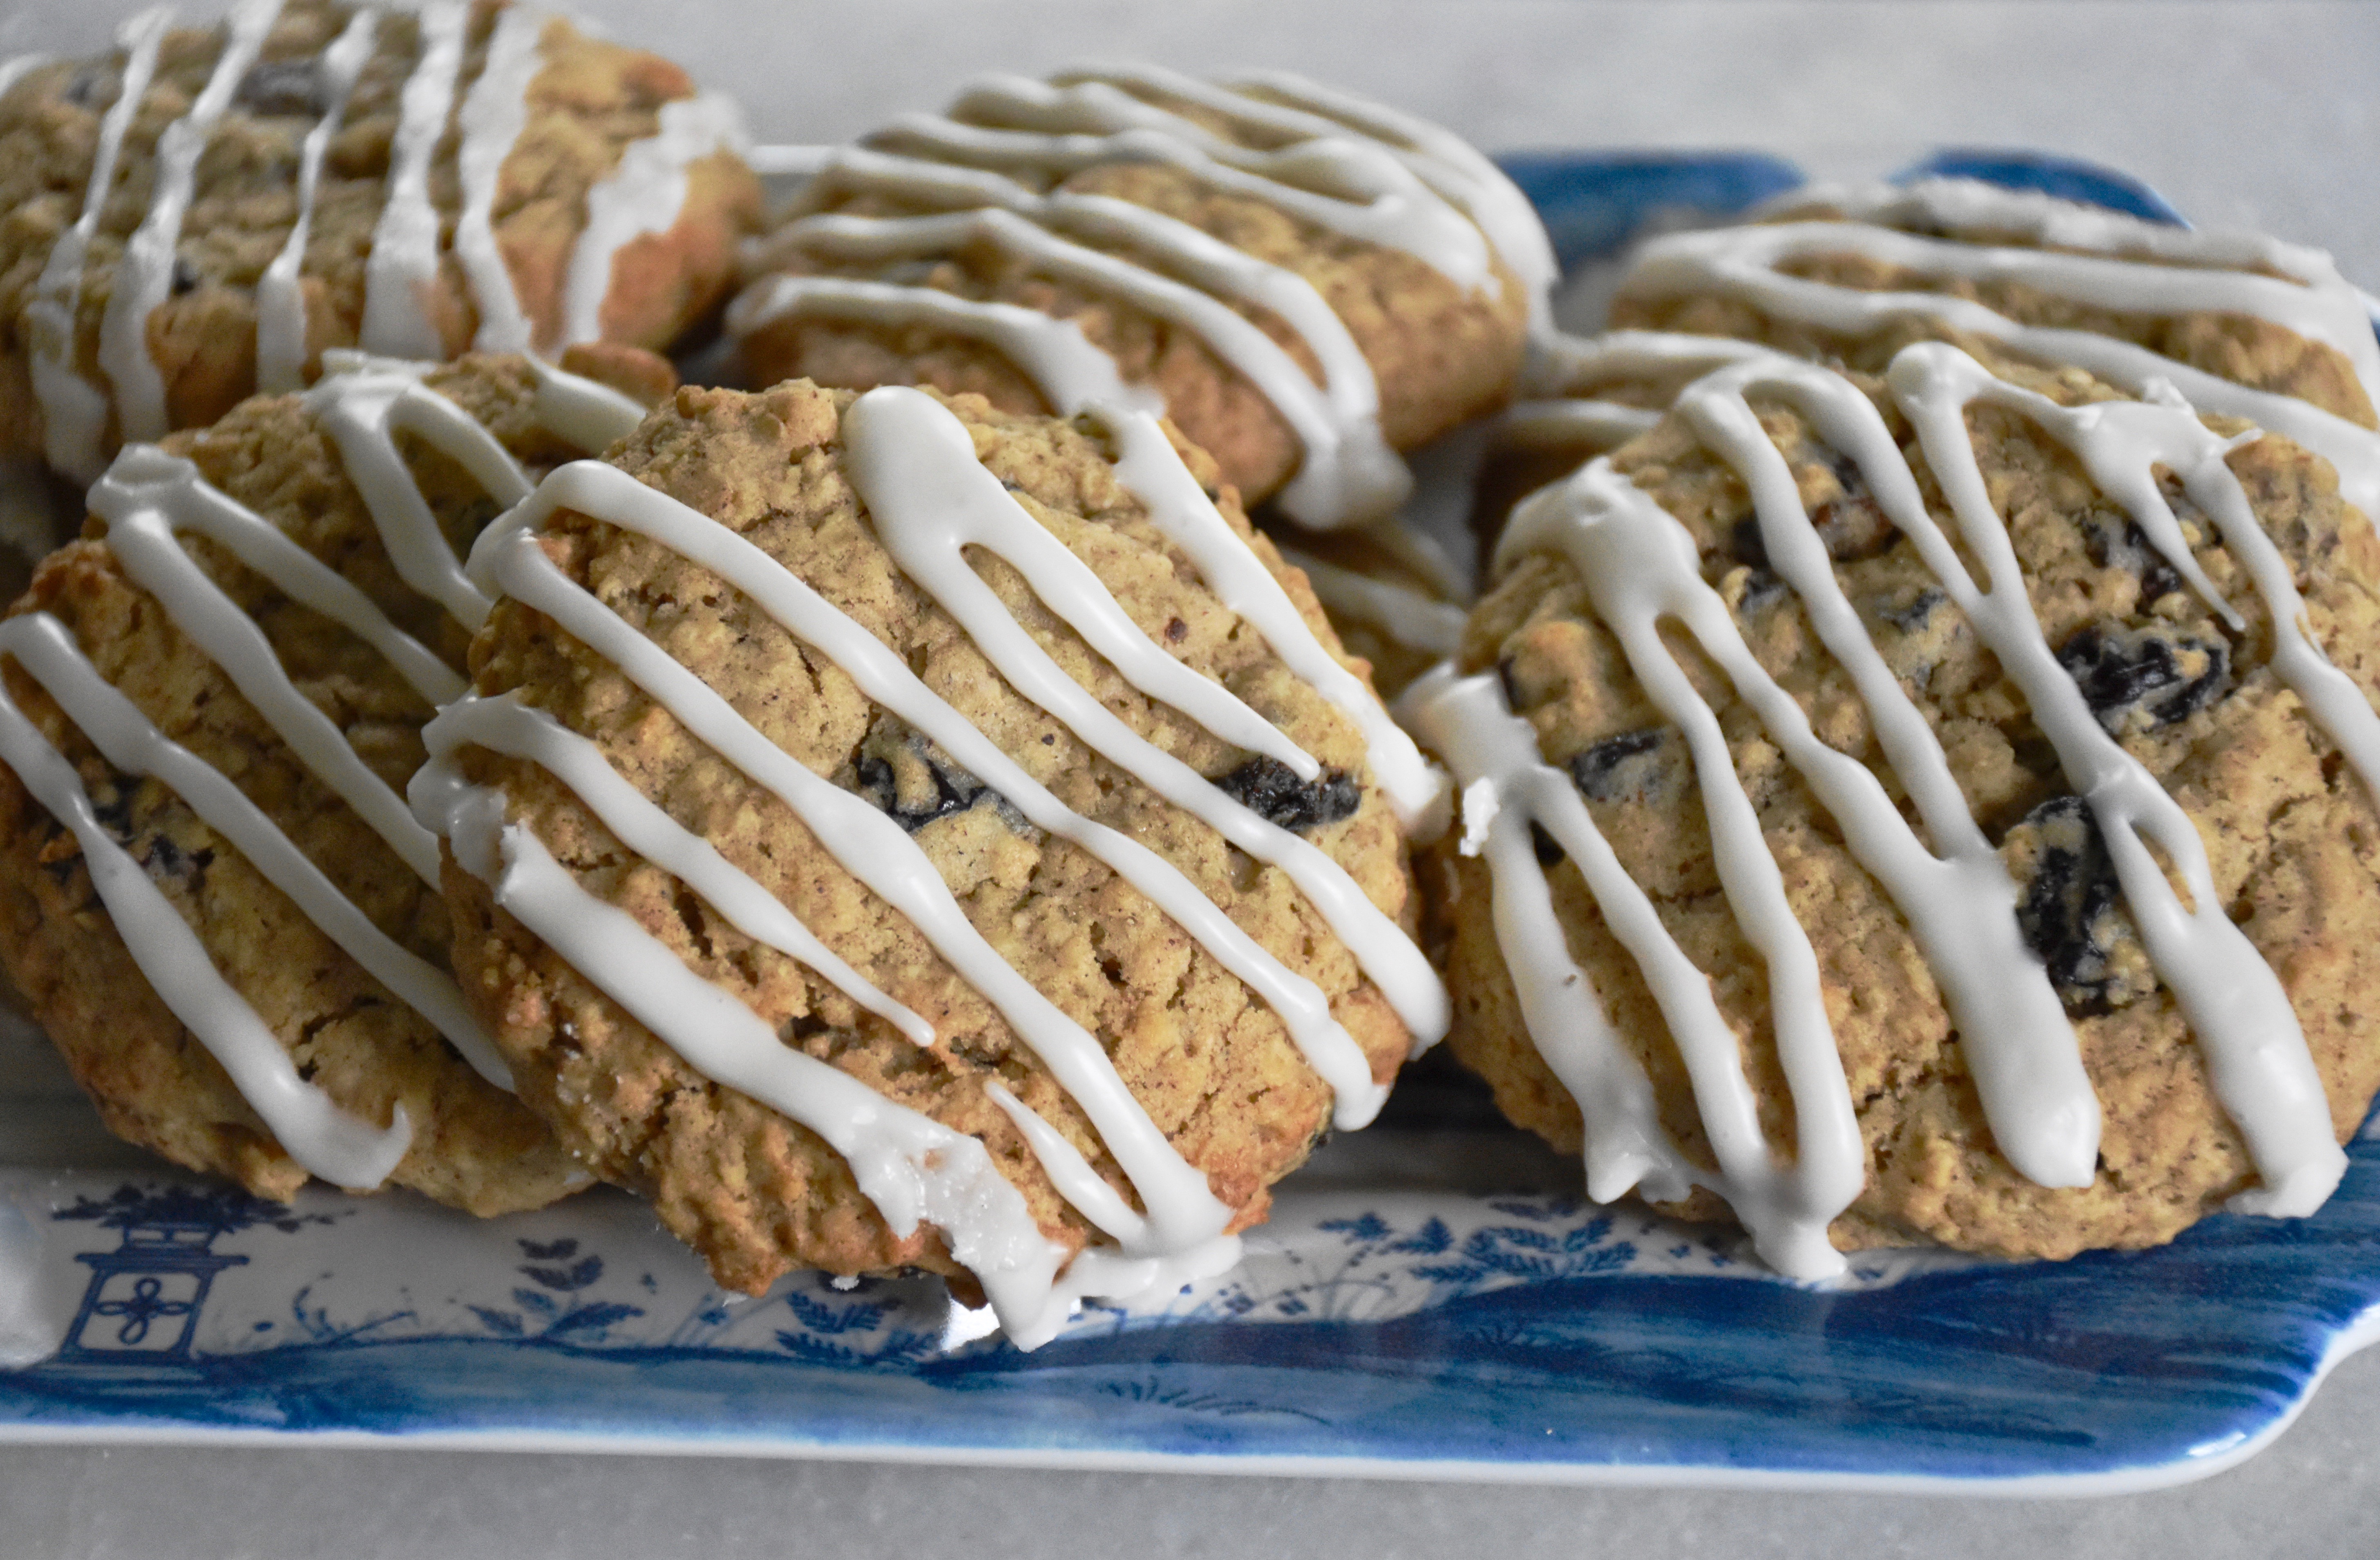
These oatmeal raisin spice cookies will have your house smelling like fall and the holidays as they bake and once you taste them it will be nearly impossible to eat just one. The cinnamon, allspice and applesauce gives them a delicious spicy flavor and the butter and brown sugar create a chewy, but moist cookie. My husband had to ask me to hide the leftover cookies, because they are so good that you will want one for breakfast or just because you walked in the kitchen. I have been working on perfecting this oatmeal cookie for the past year and countless batches later I think I have just the right recipe that will be a family favorite for years to come.
Oatmeal Raisin Spice Cookies (Makes 14 Cookies)
1/2 cup (1 stick) butter, leave out at room temprature for at least an hour
1 cup brown sugar
1 large egg
1/4 cup applesauce
1 teaspoon vanilla
1 teaspoon cinnamon
1/4 teaspoon allspice
1/4 teaspoon nutmeg
1/2 teaspoon baking powder
1/2 teaspoon baking soda
1/4 teaspoon of salt
1 3/4 cup of flour
1 cup quick cook oatmeal
1 cup of raisins (not a raisin fan then I have tried these cookies without the raisins and they were were still good oatmeal cookies)
Preheat your oven to 350 degrees
First in the bowl of your mixer mix together or cream your butter and sugar at a medium high speed until they are well blended and the texture is light and fluffy. Next mix in your egg, applesauce and vanilla. Then add in your dry ingredients including your spices, baking powder, baking soda, salt oatmeal and flour. Blend on low speed until just incorporated. Finally add in your raisins.
Then I like to use a cookie or cream scoop to make sure my cookies are all even in size. For these cookies I used a larger scoop that holds three tablespoons of cookie dough. Then take your ball of dough and flatten it slightly so it looks like a little disc or mini hockey puck.
Bake your cookies for 12 minutes or adjust as needed because every oven is a little different. You will know they are done when you see the tops of the cookies crackle evenly and they will just barely turn golden on the edges. I find cookies bake better when I bake just one pan at a time in my oven.
Leave them on your pans to cool and then once they are cool you can drizzle them with the vanilla icing.
Vanilla Drizzle Icing
1 cup powder sugar
1 teaspoon of vanilla
1 tablespoon water
In a small bowl mix together your powdered sugar, vanilla and water. Then place your icing in a pastry bag and cut a small hole to evenly drizzle your icing on the cookies or if you don’t have a pastry bag then use a ziplock bag and cut a small hole in the corner to make your own pastry bag.
The best part about this recipe is that it is easy to bake, which makes it a great recipe to make with kids. Crisp on the outside but chewy and soft in the center these cookies will have you at first bite.