
The creamy sweet taste of homemade frosting is simply the best. It’s what has my girls hovering in the kitchen waiting and begging to get a spoonful or two. But, if you have ever set out to decorate a traditional round birthday cake that sweet delicious frosting can begin to feel like its suddenly not your friend once it comes time to frost those sides of your cake.
Even celebrated pastry chef Christina Tosi stopped frosting the sides of her cakes. After spending hours in culinary school trying to achieve the perfect cake, she said it felt more like “pottery class” than cake decorating. I have certainly had my own moments trying to get those darn sides just right, but I still love frosting. Although I do like making “naked” cakes without frosting the sides, there is still something so pretty and delicious about a frosted cake. So over the years I have learned a few tips and tricks that make decorating those sides much easier.
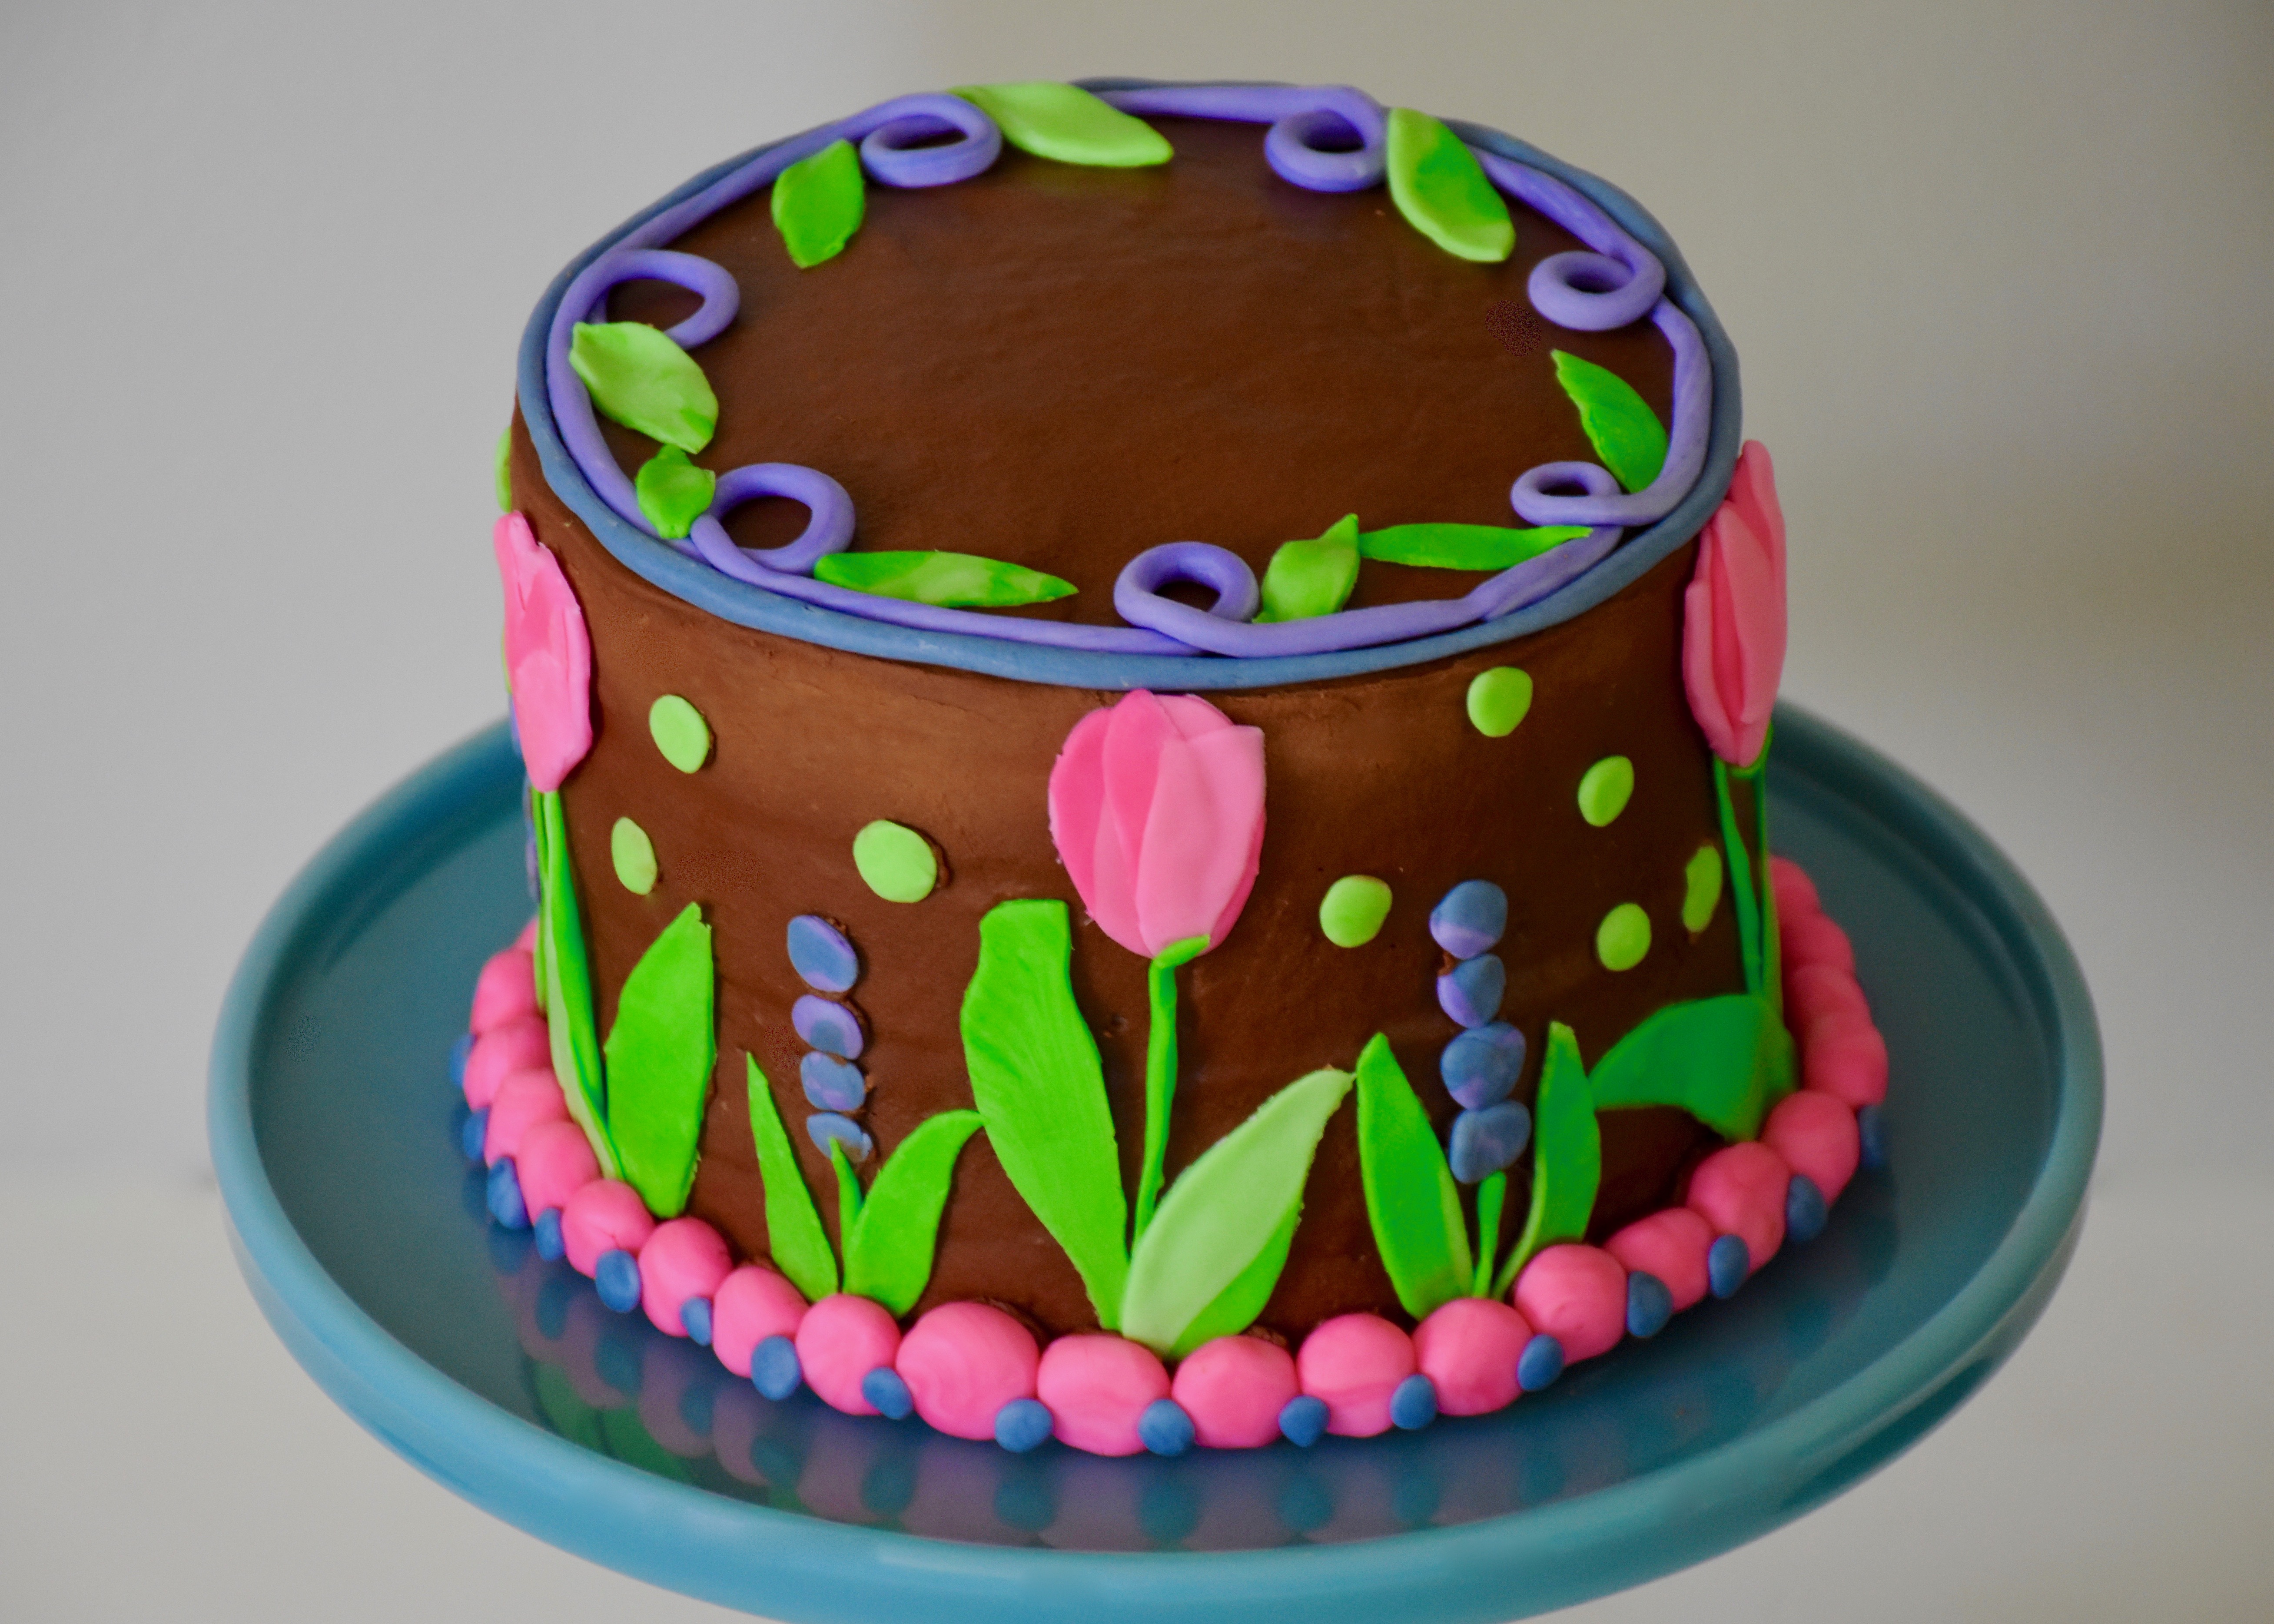
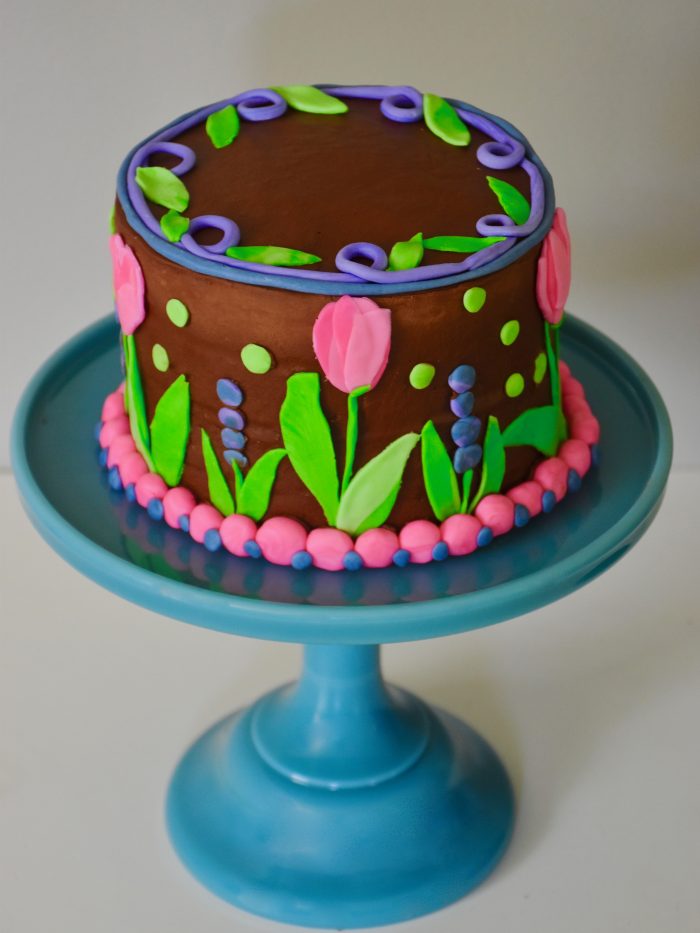
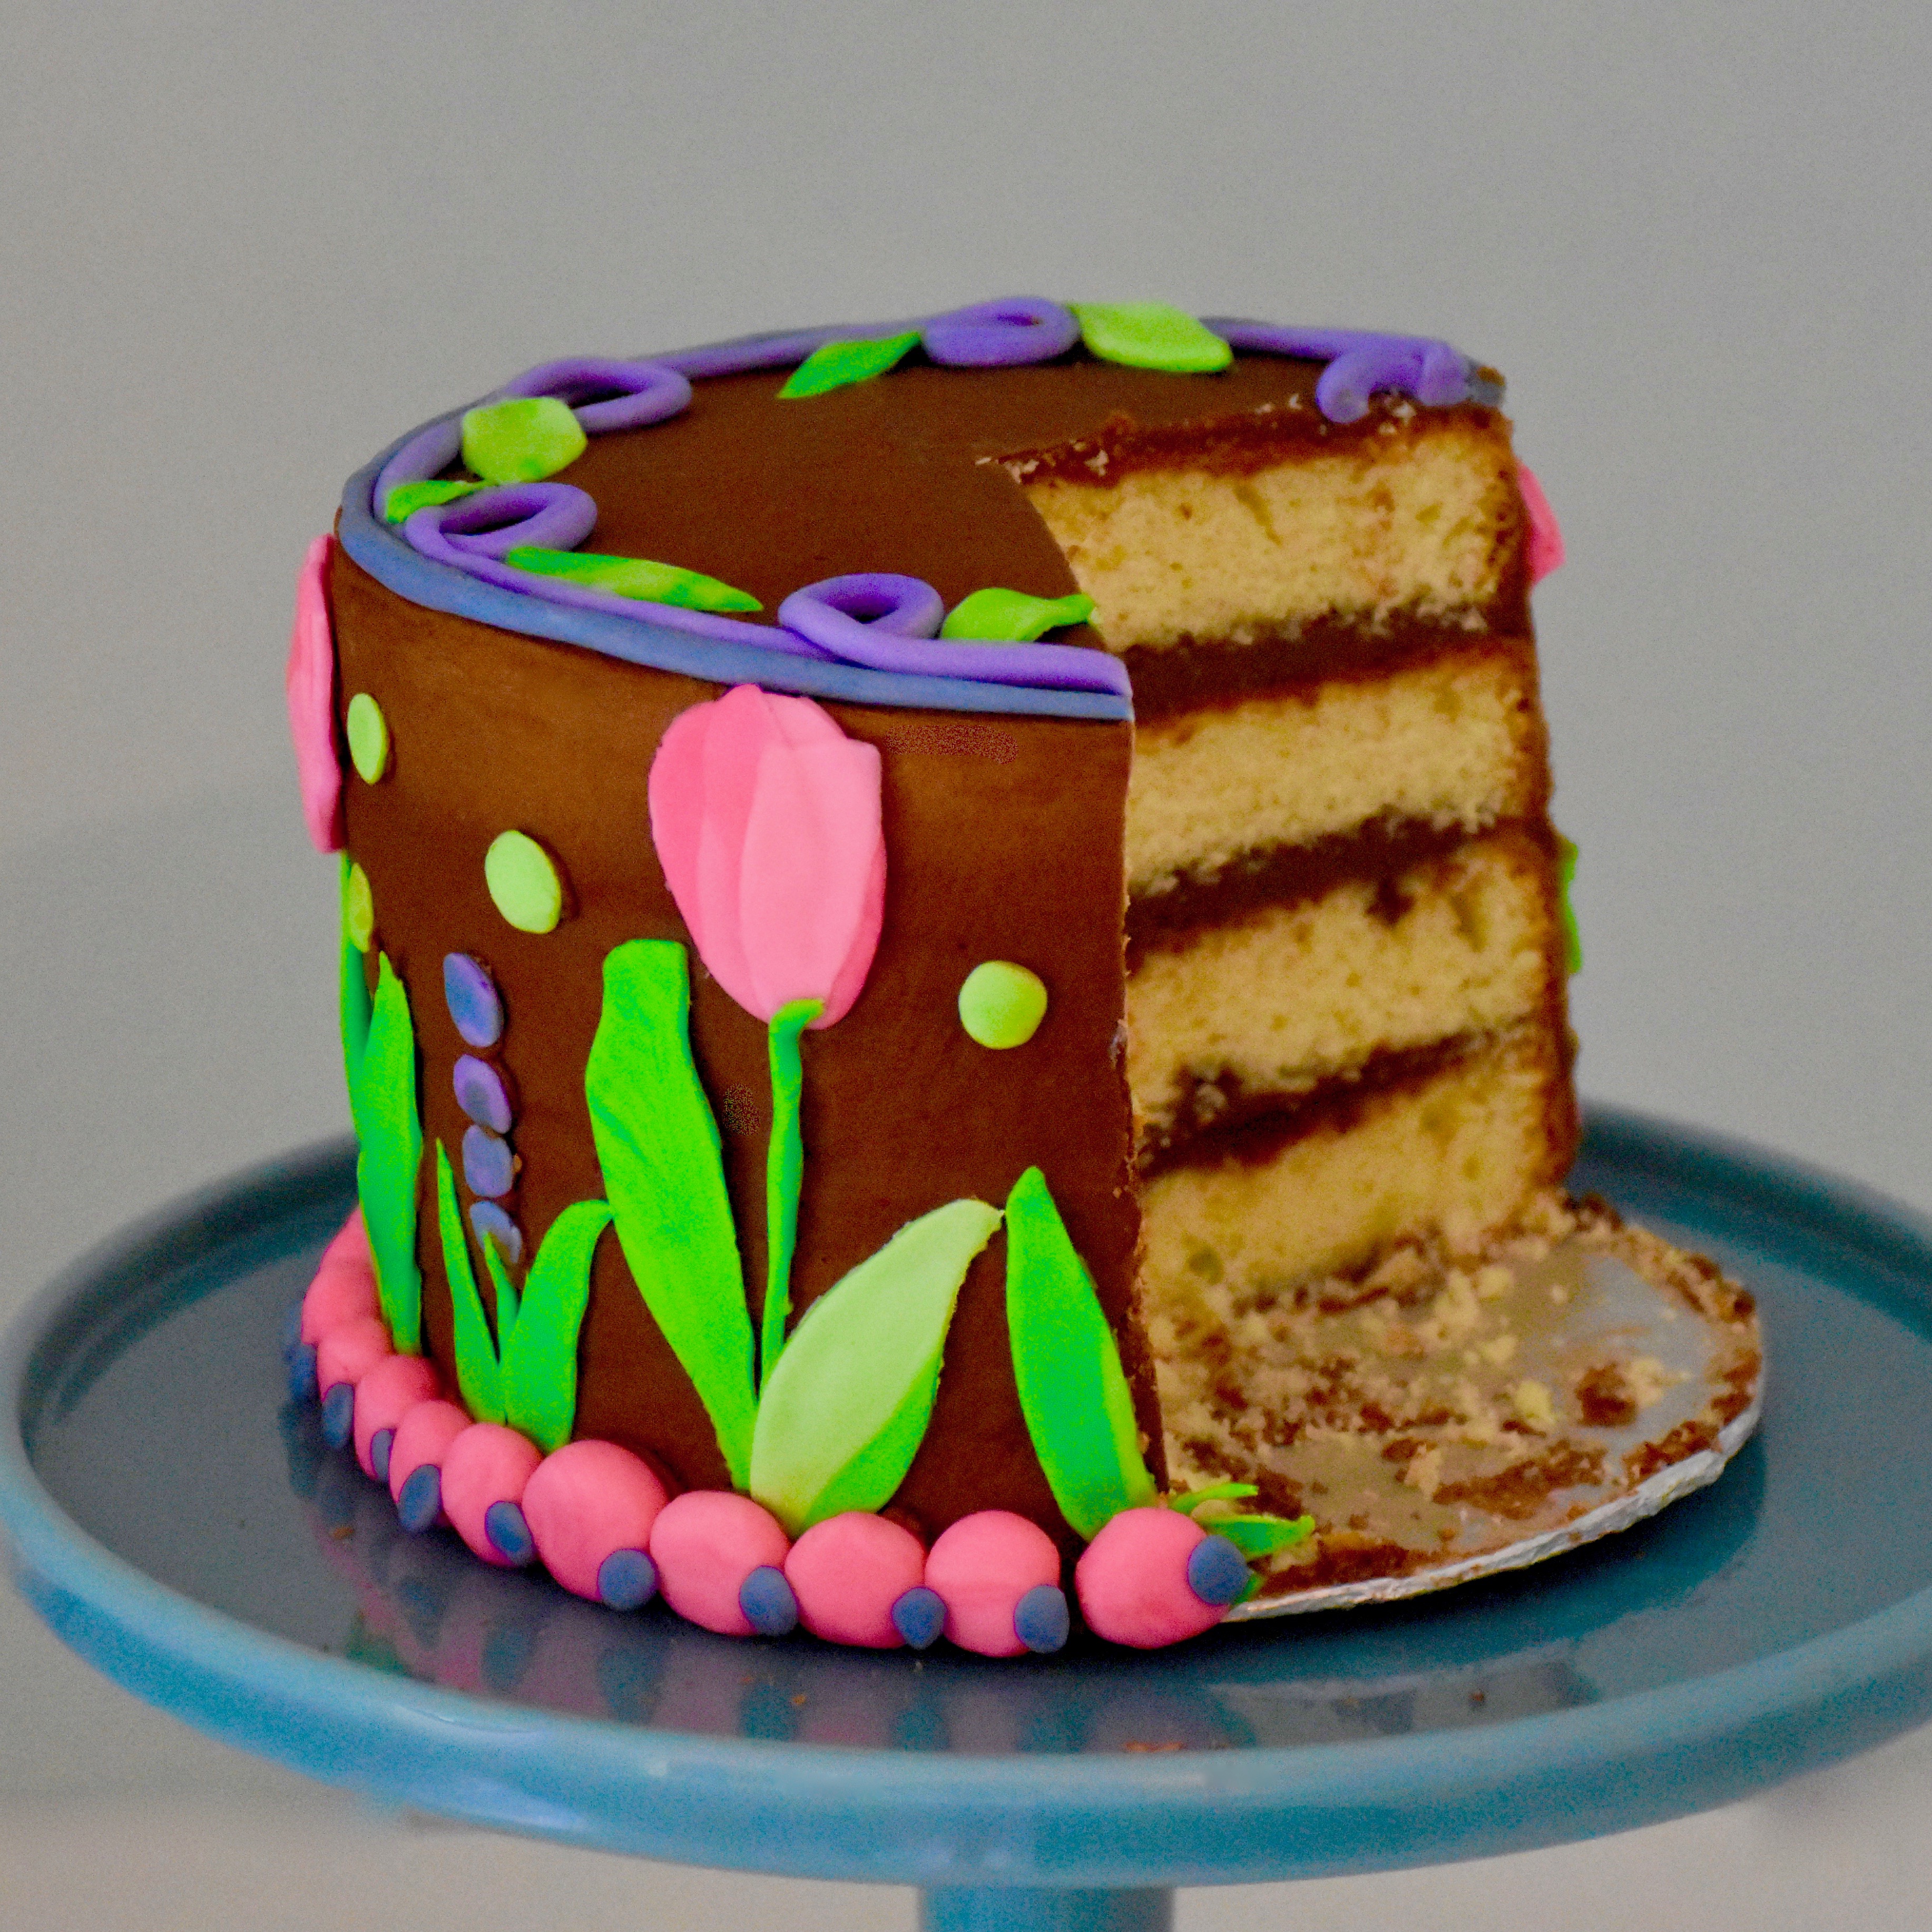
This tulip cake was something I baked recently for my birthday. Instead of letting the sides of this four layer cake feel like an afterthought I made them the feature of the cake. Why should the top of the cake be the only part that gets decorated? I added fondant cutouts that were inspired by mosaic art and my garden.
So what’s the secret to smooth cake sides? The answer is Viva paper towels and making sure you get your cake layers evenly stacked.
Once my cake has cooled I trim off any unevenness on the top of each layer using a serrated knife. Then I stack them with frosting in-between ending with the flat bottom side of the cake as my top layer. If it’s a tall cake then I make sure it stays stable by using paper lollypop sticks as dowels. You can find these thick paper like dowels at any craft store in the cake or candy aisle. They are easy to cut, food safe and they will keep you layers from shifting on you. The key is to cut them at least a quarter inch shorter than your cake so you can frost over them easily.
Then once you get a final thick layer of frosting as even as you can manage let your cake chill in your fridge for about 10 minutes. Then you can take it out and press the sides of your frosting smooth using a Viva paper towel. Viva’s have a smooth cloth like finish unlike other brands, so when it comes to cakes only Vivas will do.
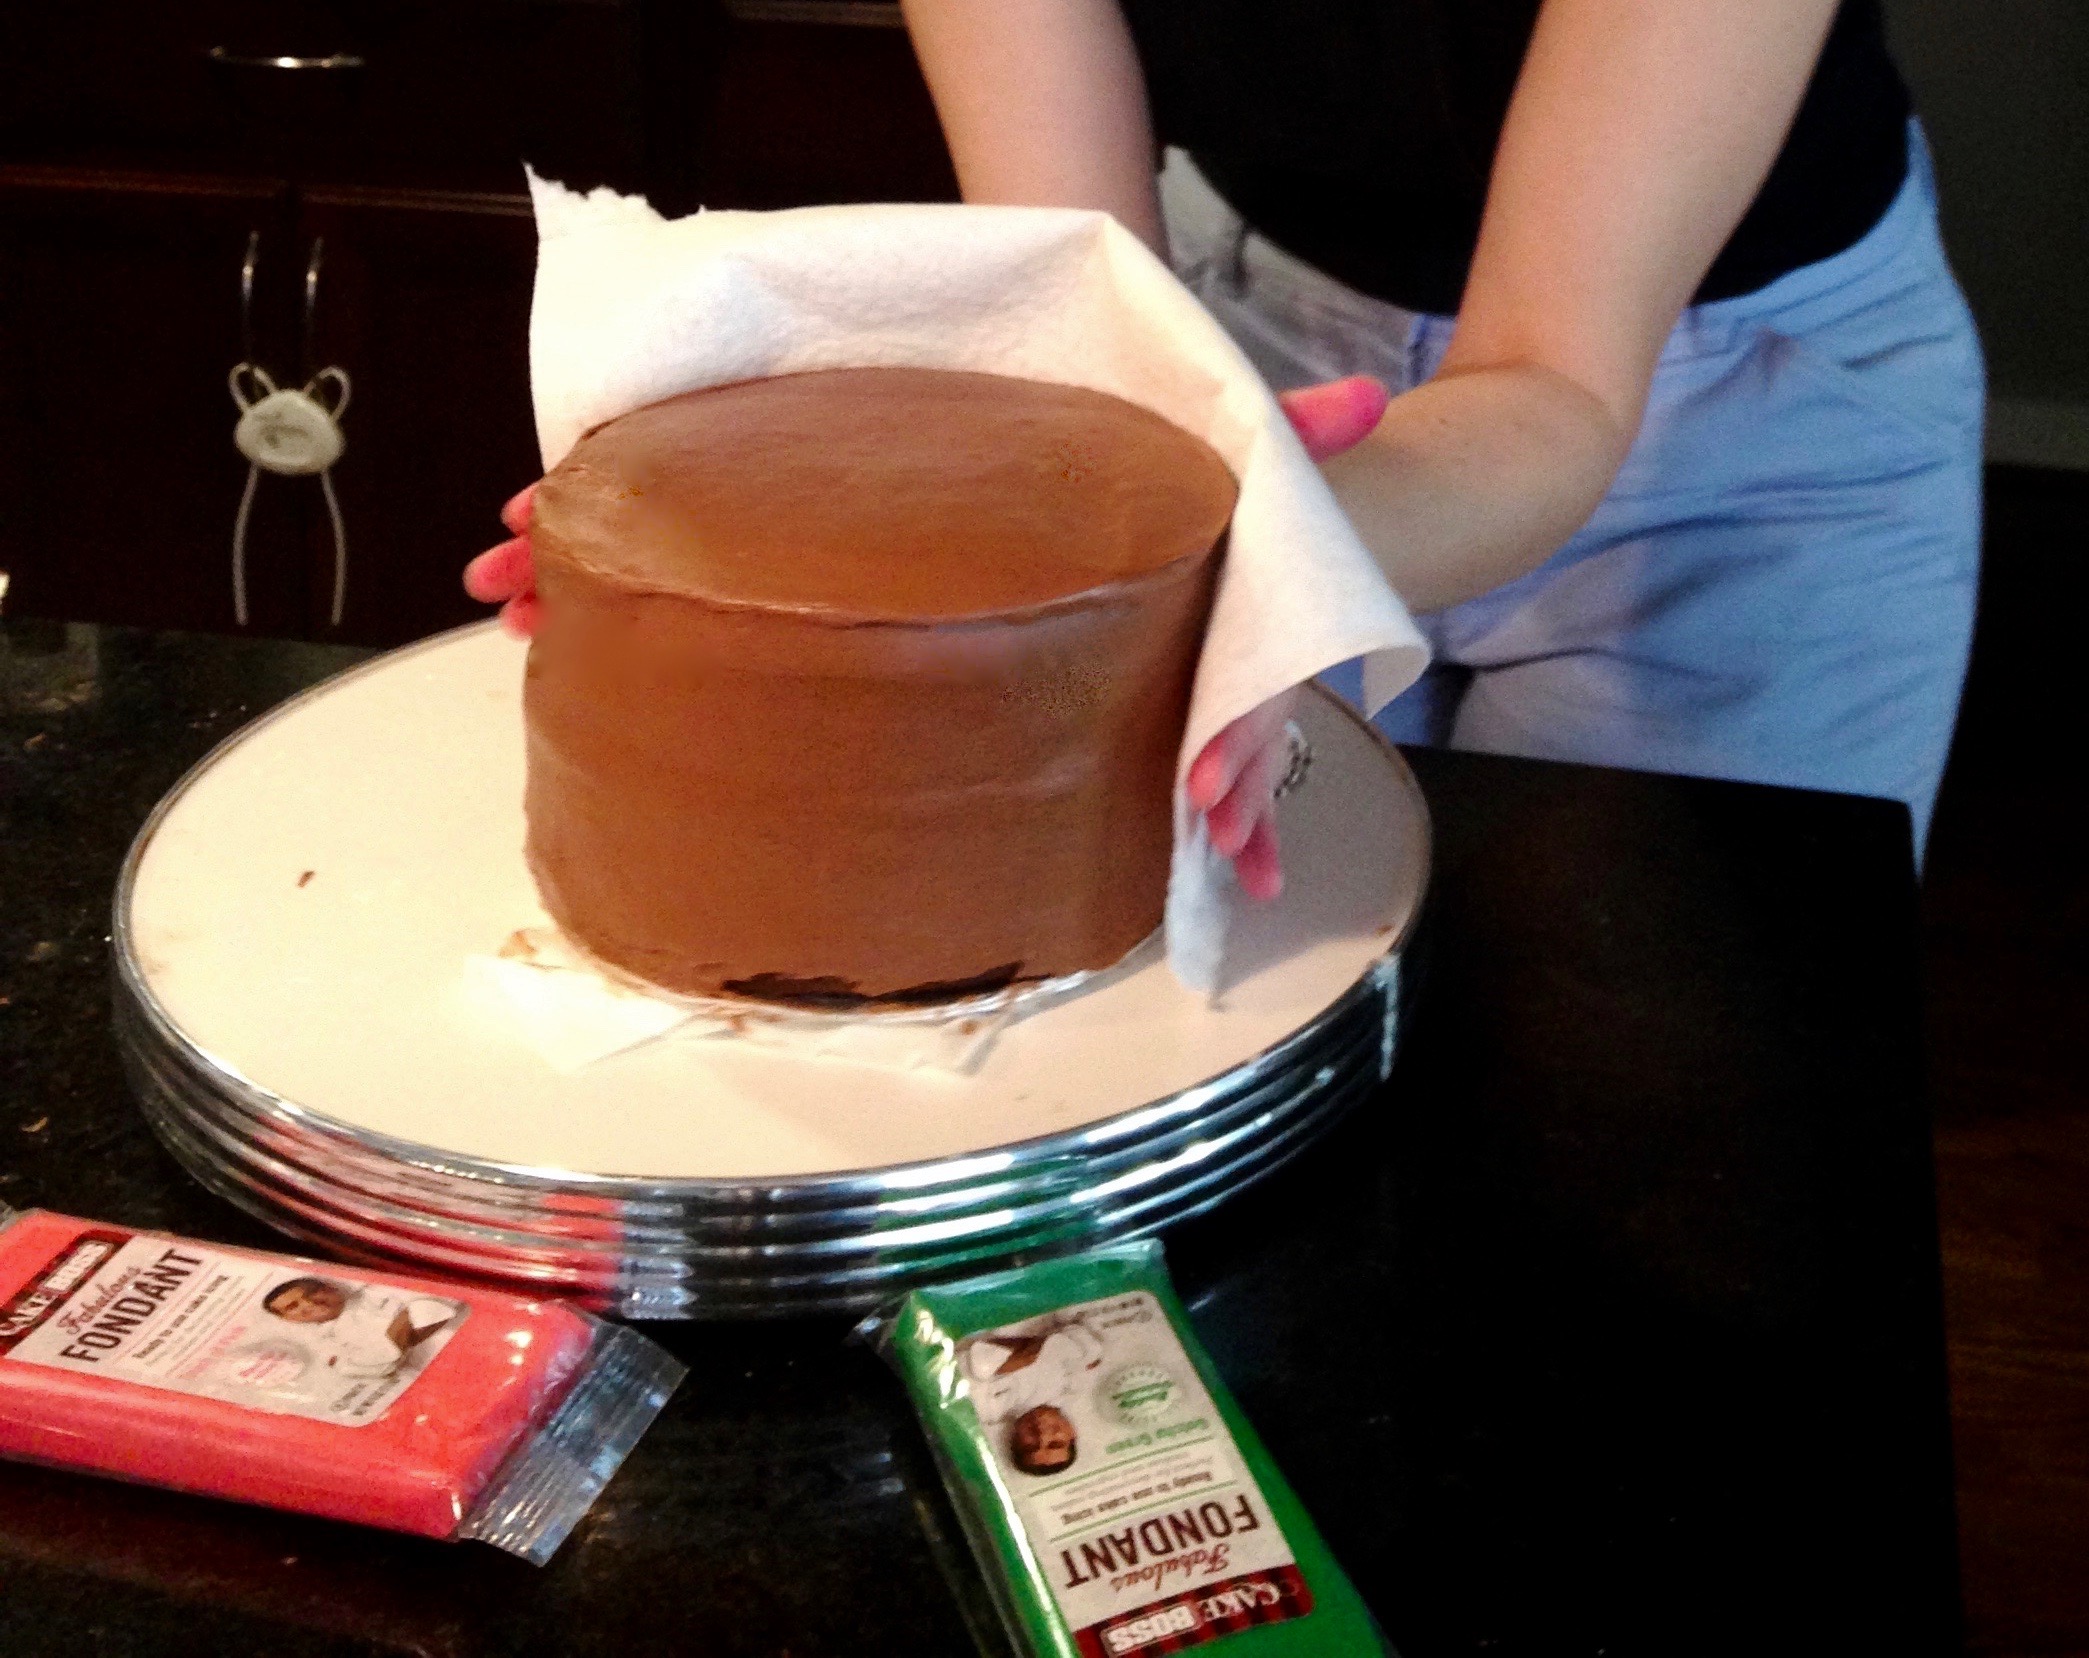
Here is a picture of me using this trick on a birthday cake I made for my daughter. If you have any stubborn spots especially on the top you can also heat your knife or separated spatula with hot water. Once the metal is hot quickly wipe it dry and the watch as the heat helps smooth your frosting.
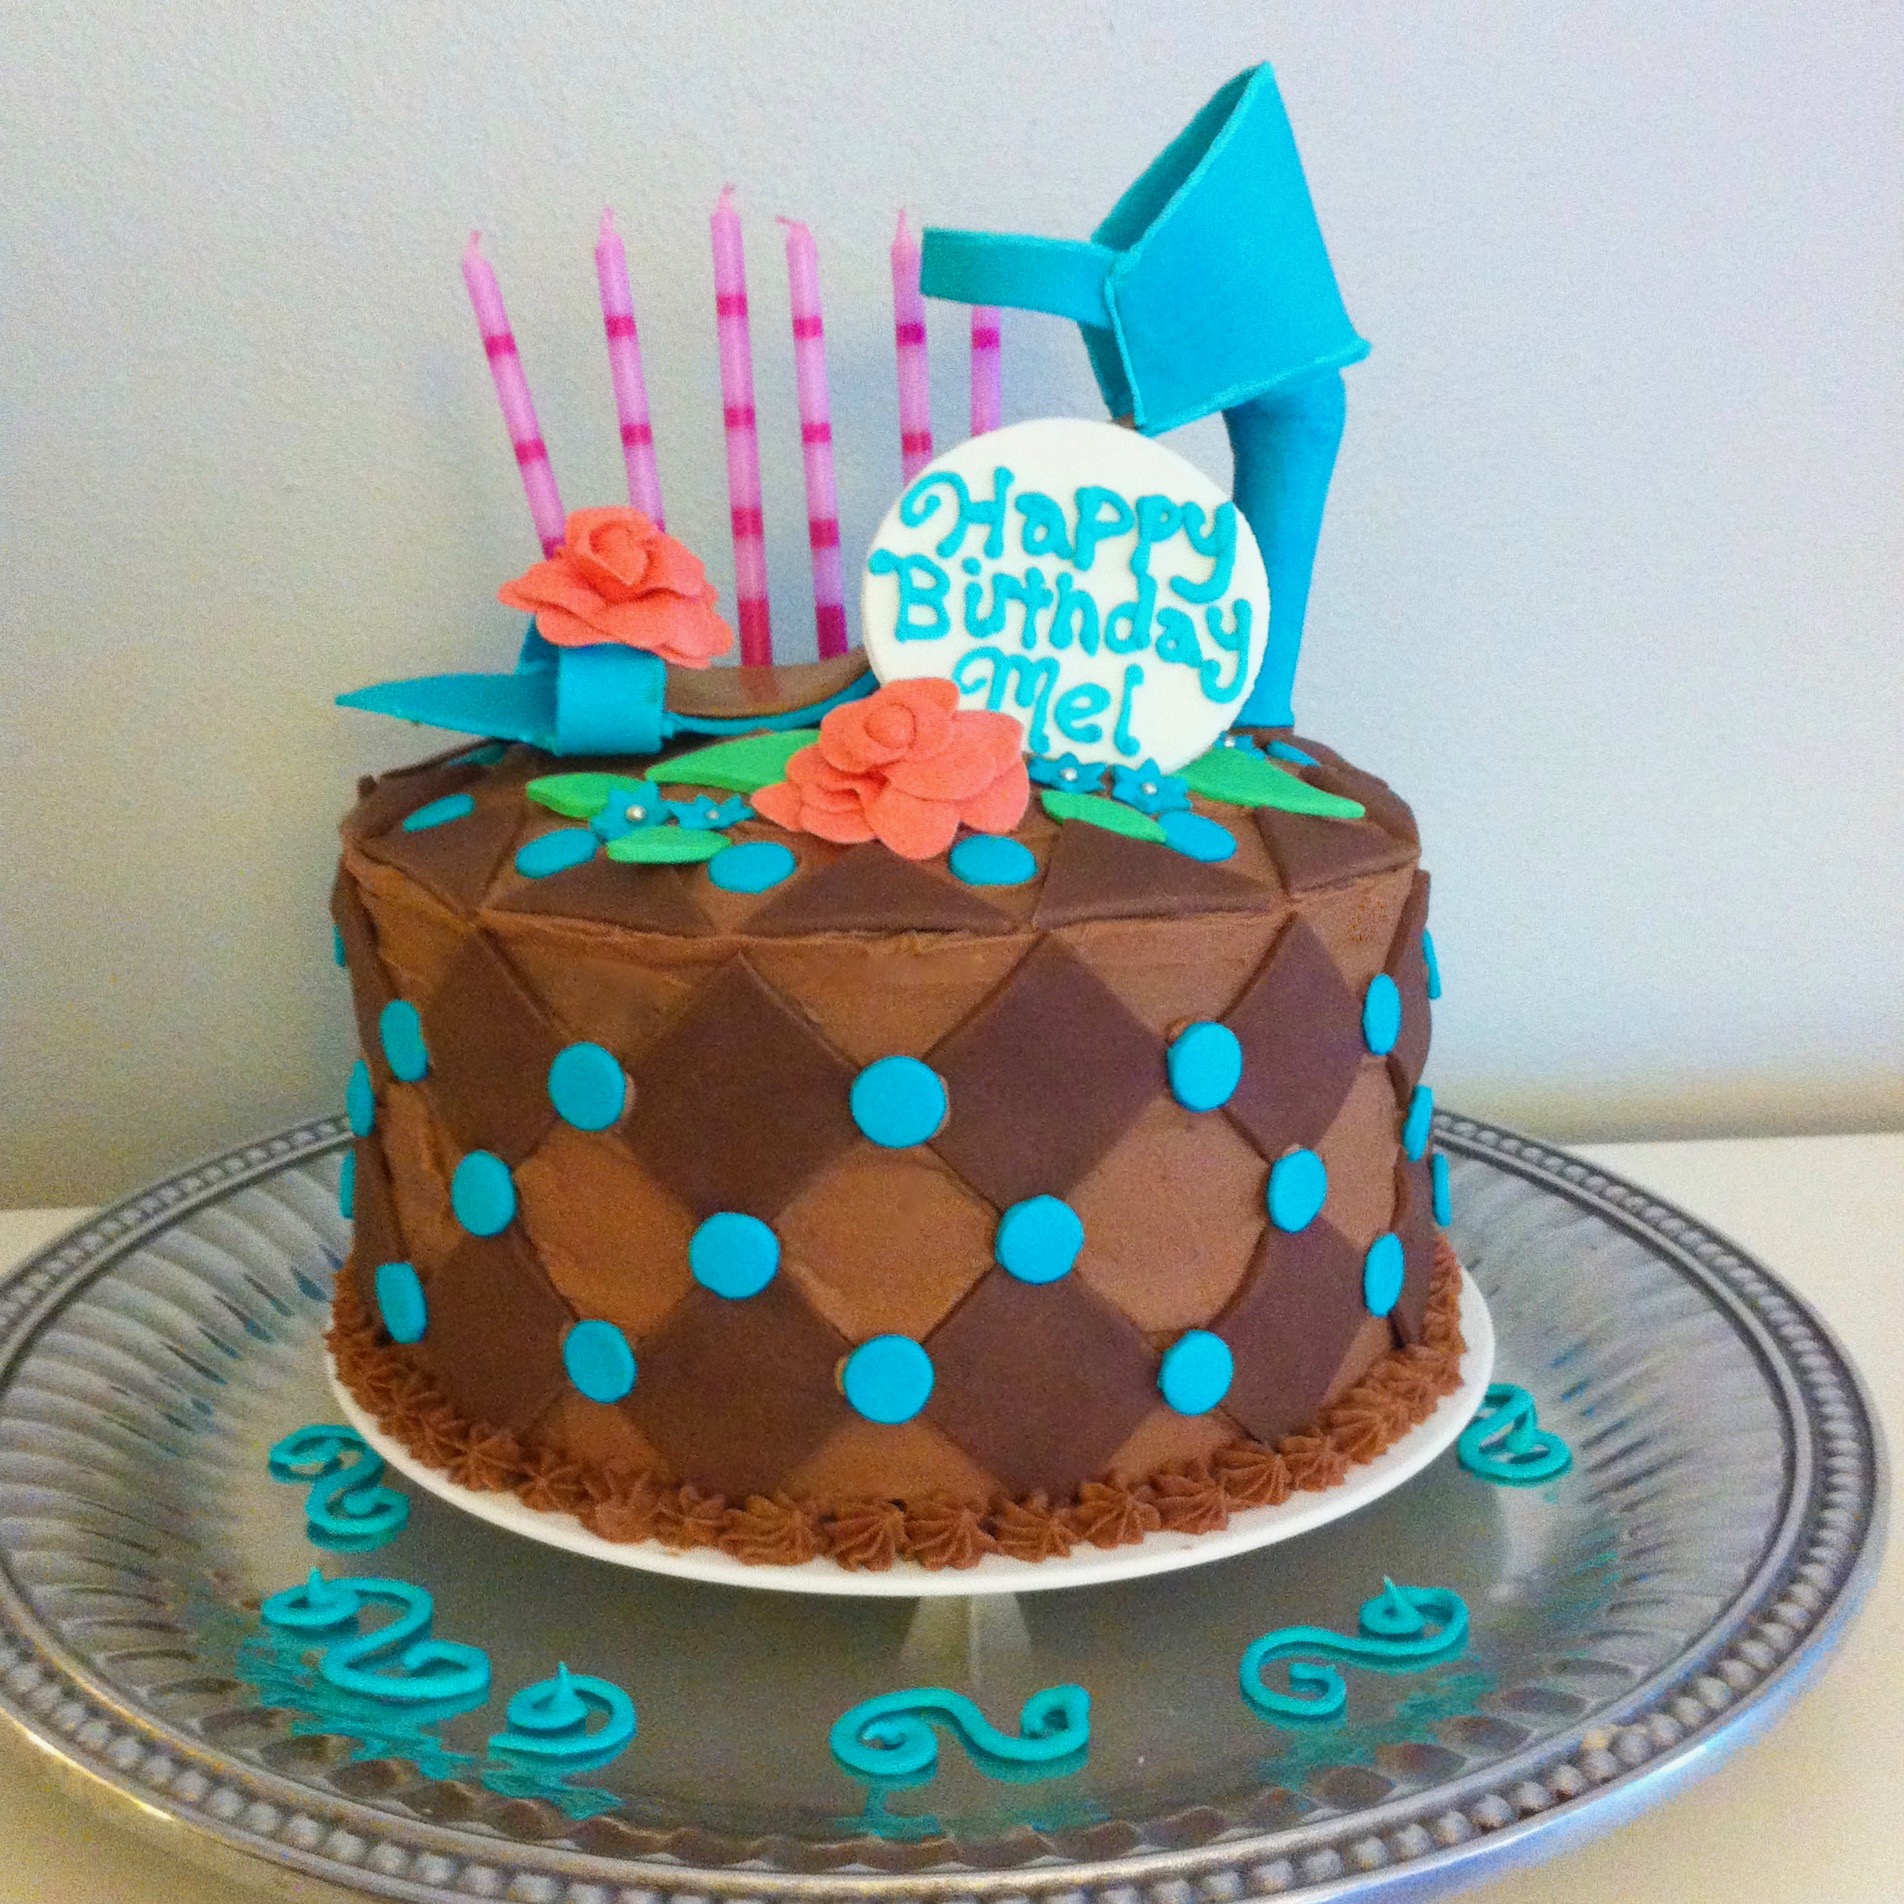
Then any other imperfections can be covered with fun fondant cut outs. Pre-made and even pre-colored fondant is easy to find so add your own artistic touch to the sides of your cake. I happen to be a fan of polka dots. I used different sized spice bottle tops to cut these dots above.
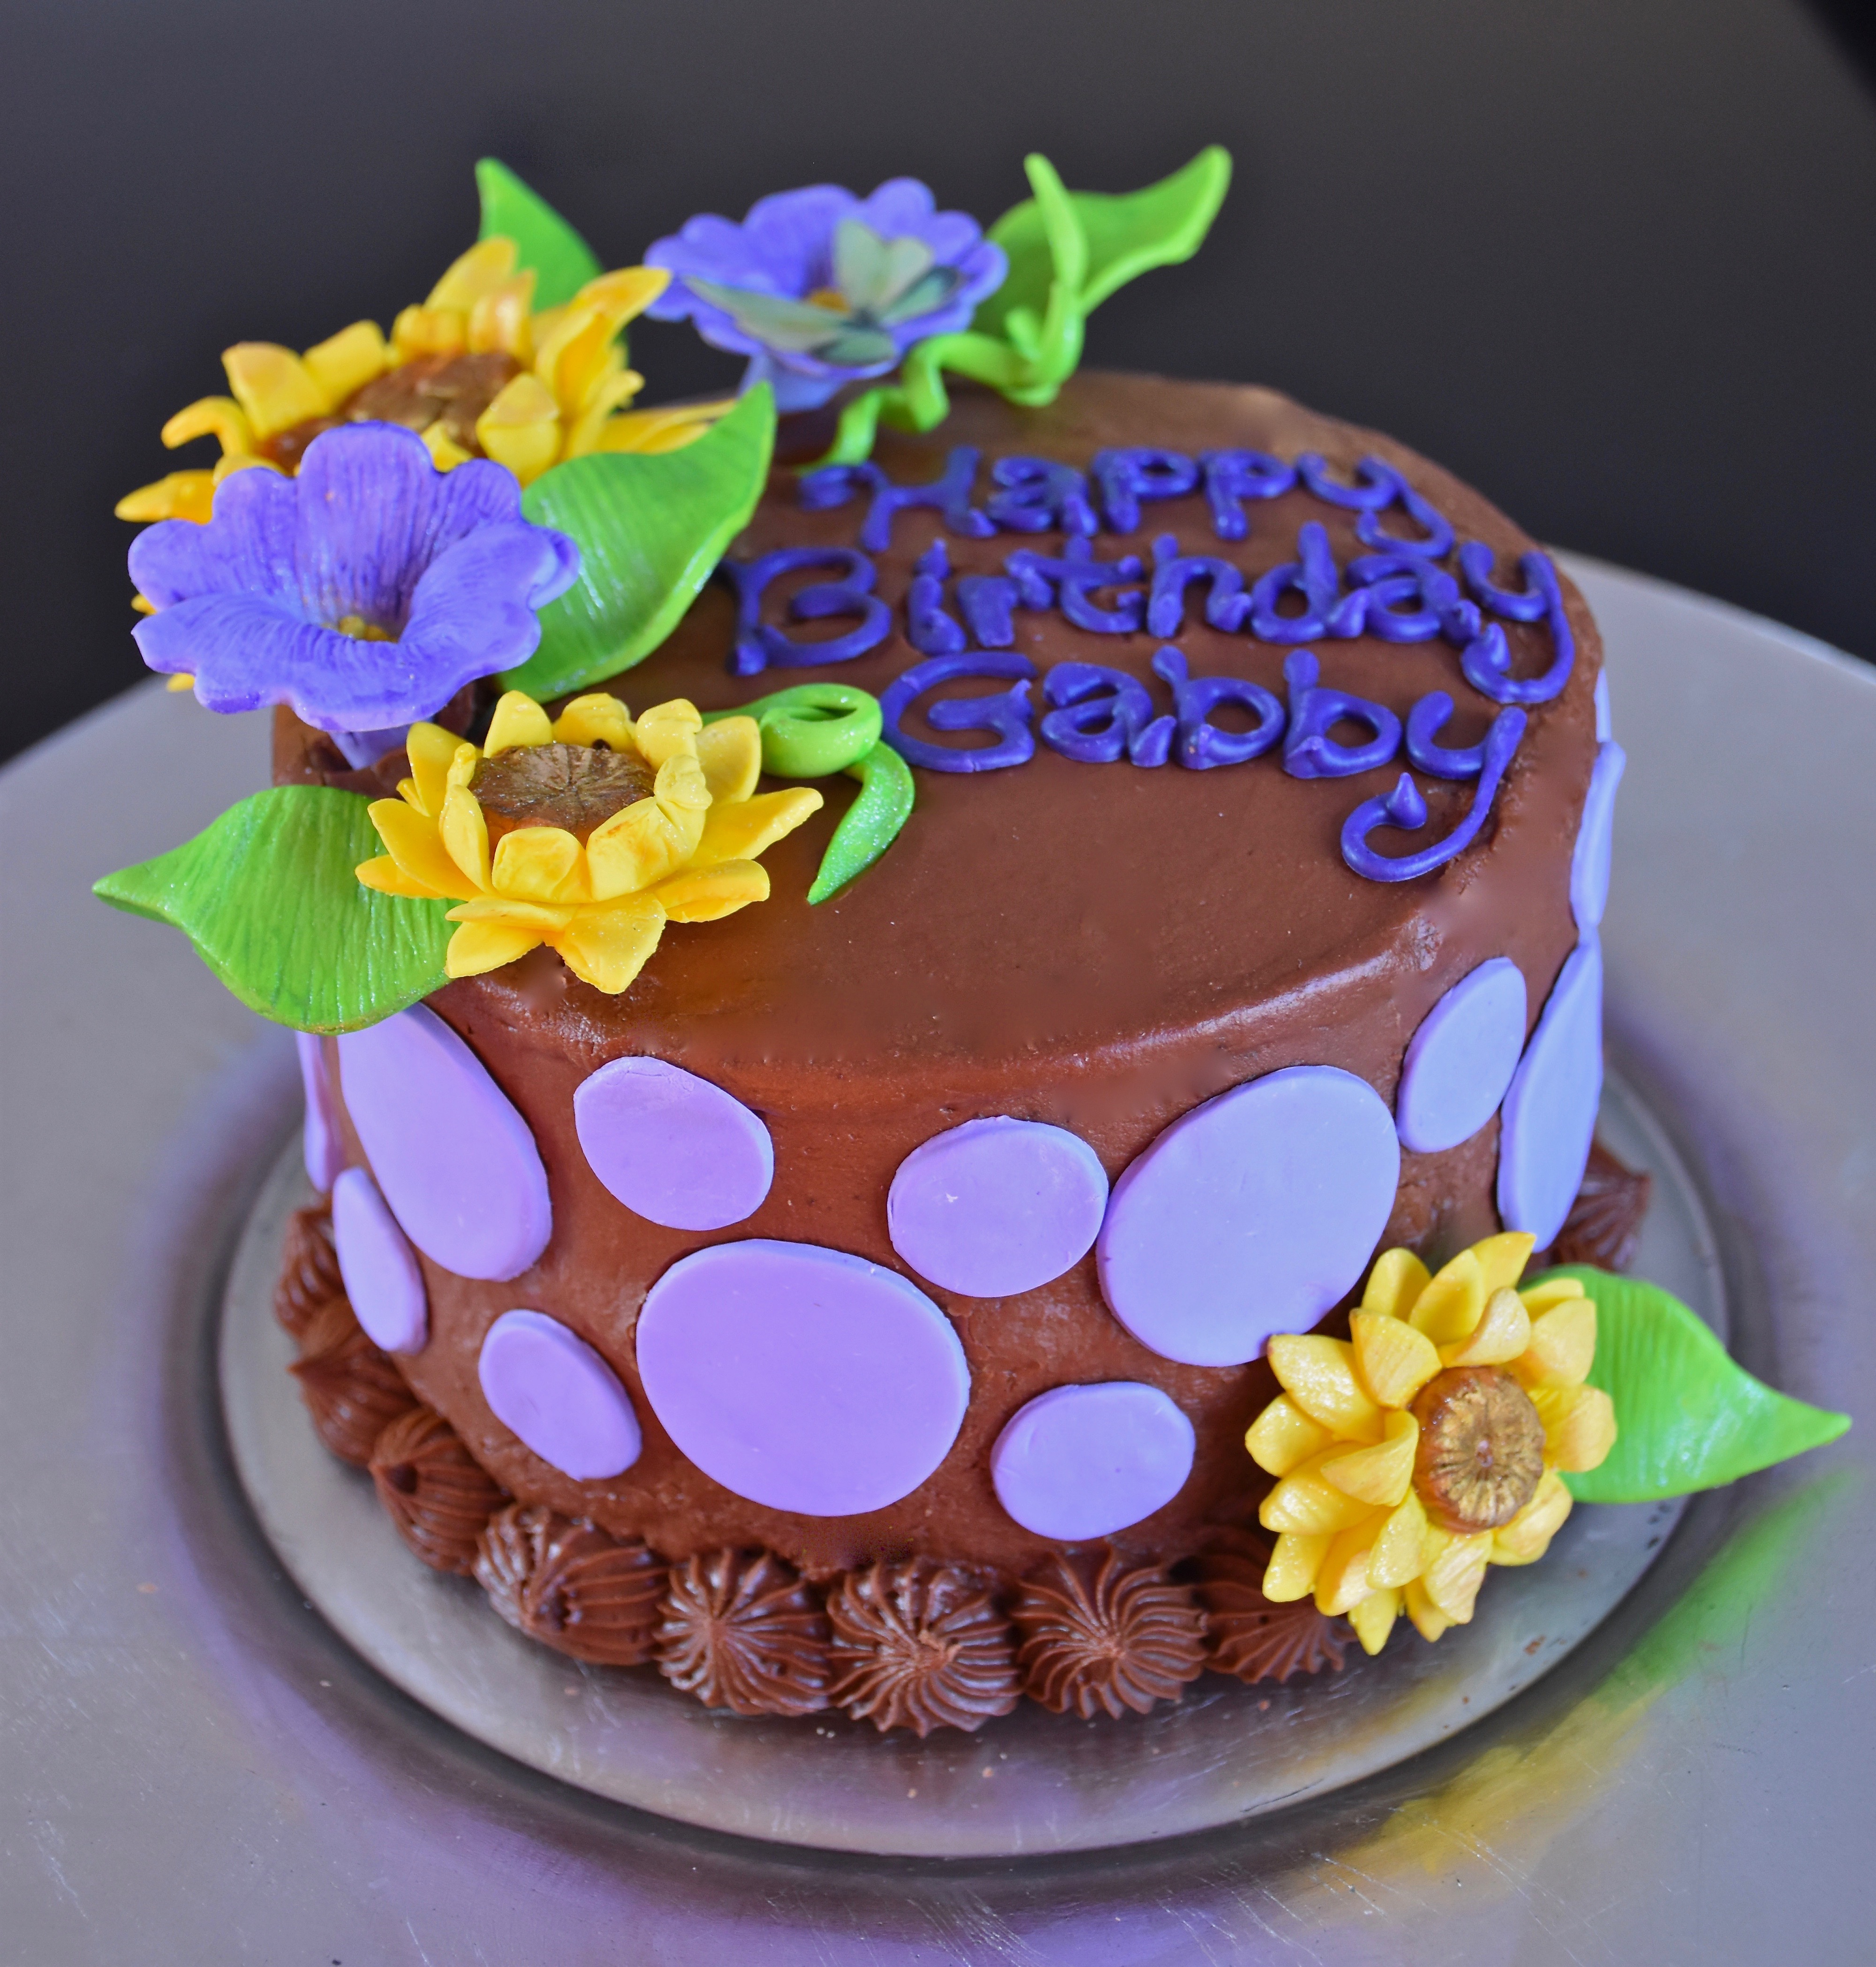
Another pattern I love is squares cut and placed on an angle to look like a harlequin or argyle pattern.
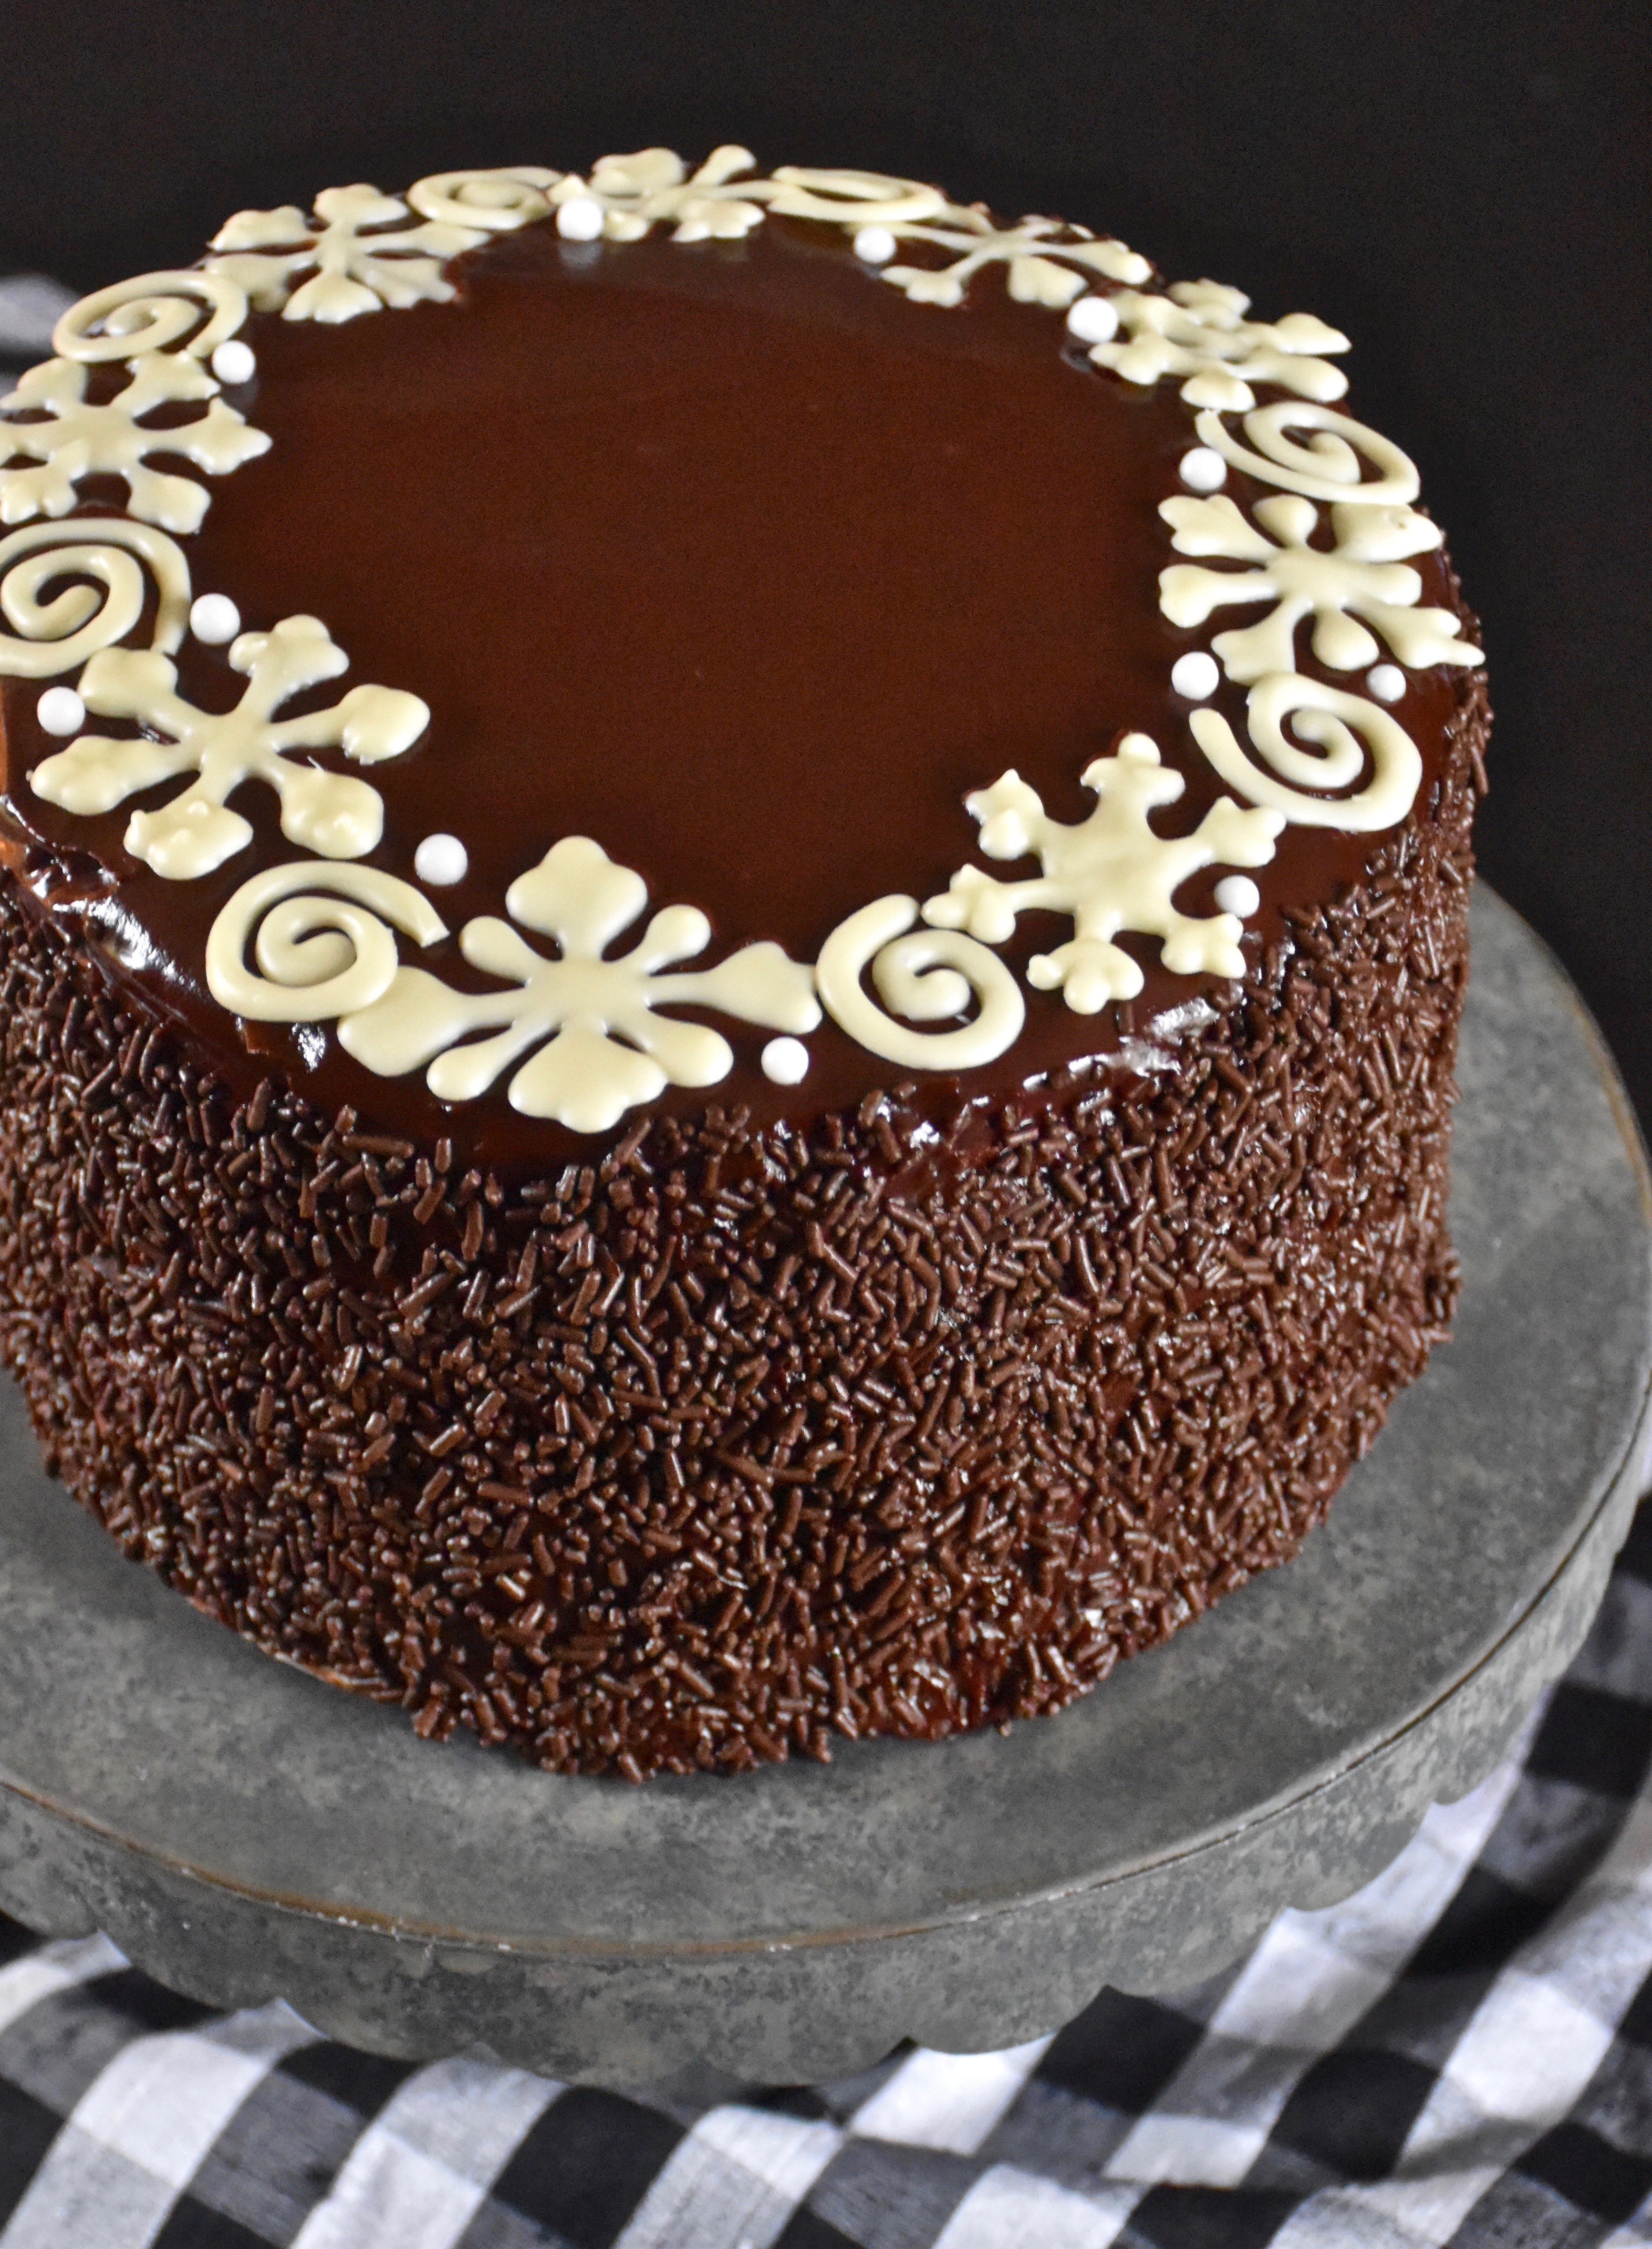
If fondant is more effort than you have time for then use sprinkles, shaved chocolate, finely chopped nuts or crushed candy.
They add a layer of flavor and texture, while dressing up those tricky cake sides. Because the best part of any homemade cake is eating it. Buttercream is too delicious to let a little thing like those sides of the cake get in the way.
So bring on the buttercream because your frosting skills don’t have to be perfect to make a pretty cake.